
:max_bytes(150000):strip_icc():format(webp)/preaknessstakes-5c804f1b46e0fb00019b8ee0.jpg)
Updated 2024 Approved What Is the Best Filmora Slideshow Templates? Experts Choice
What Is the Best Filmora Slideshow Templates? Experts Choice
47. What is the Best Filmora Slideshow Templates Experts Choice
An easy yet powerful editor
Numerous effects to choose from
Detailed tutorials provided by the official channel
With Filmora software, present information and content through slideshows. Filmora slideshow templates are available on the website free for making effective slideshows.
Part 1 Why Filmora Slideshow Templates Are Popular?
Filmora Slideshow templates are widely used by the users for creating new and impressiveslideshows. The reason for popularity of this software is many such as:
● It is an affordable software/application available free of cost for making slideshows using templates.
● It can run on computers and cell phones also, so there is flexibility in its access.
● It is equipped with various tools and features for both video and audio applications.
● Background effects, picture effects and animation features further make it more popular than the rest of the software.
● It is a good pleasing interface suitable to all content creators whether they are beginners or professionals.
● Video and audio control and video stabilization features make it further popular.
● Advanced text-editing make it possible to add contents in the video slides.
● Templates can be created by adding titles, text, sound, filters, and transitions.
● Theme-based templates are designed and developed looking into the needs f every user for different occasions.
● It has better editing tools like split, merge, rotate, and more.
● Auto-create videos features give the users comfort for using the application by saving their time and energy. Further they can add royalty-free images, videos, and music.
● Aspect ratio for the video creation can be changed.
Part 2 Where to Download Free Filmora Slideshow Templates
To use unlimited and free Filmora slideshow templates, one is required to have the application downloaded from the website. And thereafter one can download the different styles and patterns of templates from section filmora slideshow template free download. Once you create an account in the Filmora platform, you can easily connect with various templates useful for various occasions.
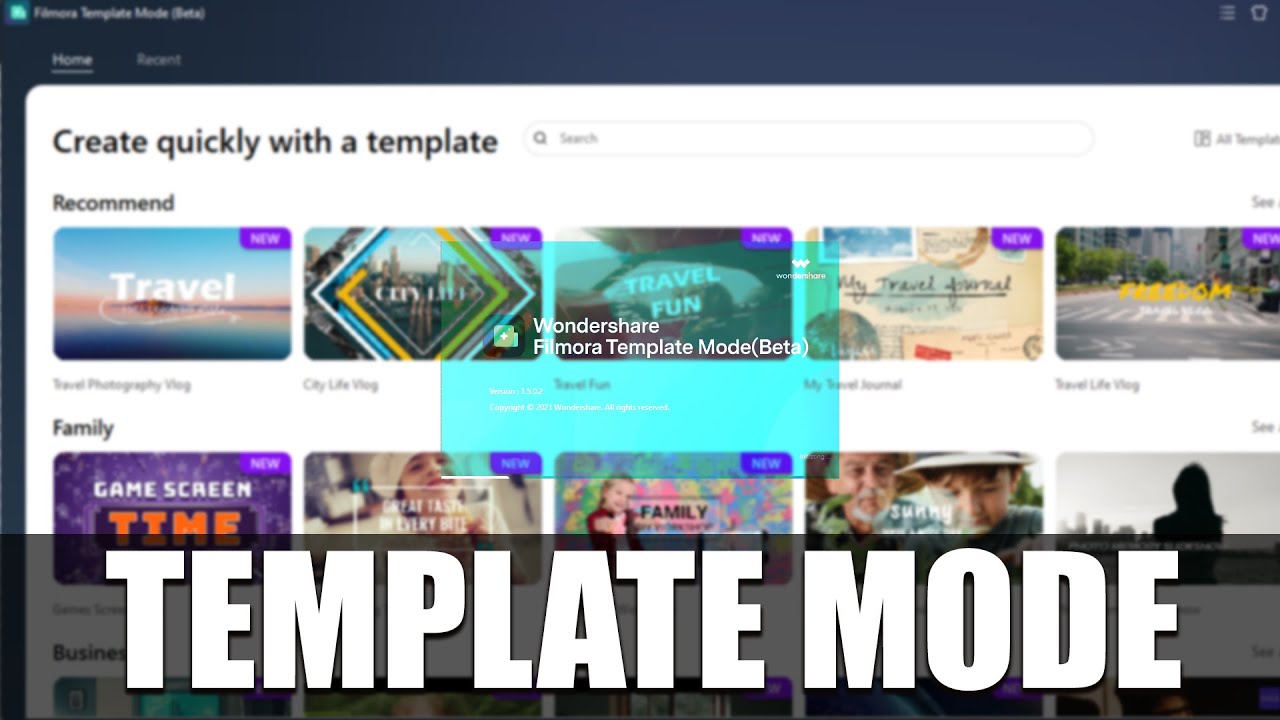
Filmora software or application is the only destination for having a bunch of various templates with many tools to improve the creation of slide shows. One can see the various templates available in the official website of Filmora. One can make slideshow with the help of video maker offered by Filmora. This software is free of cost. The easy-to-use interface feature of this software is good for beginners. It has various in-built customizable templates based in various themes like project, marketing, corporate, celebration, fun, natural, family, and business. It has auto-create mode which saves time and energy of the users as it automatically plays the slides when all media files, pictures or texts are placed over the various slides. For this one is just required to select the different files and click on “Auto-create” option.
Part 3 Best 10 Filmora Slideshow Templates
Filmora has many advanced templates for presentation and slideshow. One can find different kind of templates suitable for creating content and information for various applications. Filmora templates slideshow becomes more attractive when in-built Filmora templates are used. Some of the best 10 Filmora slideshow templates are:

01Business- Proposal Presentation Template
Looking into the business need of business users and marketing professionals, Filmora has developed Business-proposal presentation template with 45 unique custom slides. Business users can create impressive business proposals with various theme and color options. One can insert pictures and text easily in this template and can edit number of times.
02Pitch Deck Template
This template is used to design a pitch deck used by the companies to present at the stage and project about the company. These templates are well designed as they are handled by professionals.
03Company Profile Google Slides Template
It is mostly useful to business professionals to prepare business portfolios. The best thing with these templates is that they are unique, elegant, professional and creative. This template is multipurpose for different business applications.
04Clean Slideshow After Effects Templates
Those who want to make simple but impressive templates, clean slideshow after effect templates are best option. Through this template, one can focus on the main content and can add transitions. Photo slideshows can be easily created through this template.
05Minimal Corporate Presentation
This template is good for the beginners who desire to prepare a simple slideshow. The advantage of this template is that it is easy to use and text can be easily edited. One can insert picture for various corporate and business presentations.
06Corporate Event Promo
A business mostly does promotions and this needs a proper preparation. Corporate event promo presentation template is the best choice for such situations. One can create creative promo slides with such template by adding title and overlays in the template. They can also be edited easily.
07Business Marketing Presentation Layout
Most of the business organizations preferto choose such a template that can present their marketing plan in the best possible way. This Business Marketing Presentation is perfect for every business concern. It comes with nine designing options, through which one can easily replace images and text.
08Event Conference
For creating information and documents over template useful in an event conference, this template of filmora is very useful. The details of event and necessary information can be put in a systematic way through this template. However when played as slideshow, it can reach to maximum number of viewers.
09Mosaic Slideshow
Display of photographs, video albums or glimpse of any events can be impressively done with the help of Mosaic slideshow template. With increasing trends of photo sharing and video making, these templates are gaining popularity.
10Old Fashion Slides
As the name suggests, the templates is good for vintage slideshow. One can use this template for photo and video slideshows. Those who love to be creative, they can use this template.
These are some filmora template slideshow available at the website; however the users can also explore the other category of templates based on occasions at the website of Filmora. Every content creator will surely get desired template to present their information, data and pictures in a unique way.
Part 4 FAQ of Filmora Slideshow Templates
Wondershare Filmora Video Editor is a popular video editing application that also supports making slideshows through the use of various templates. It offers advance editing software for those who love to be creative and present their content in an artistic way. The various features of the software like elegant transitions, beautiful slides, video effects, text, audio and background effects make it more popular among beginners and professionals.
For Win 7 or later (64-bit)
For macOS 10.12 or later
Working with Filmora is easy and time saving. One can easily drag and drop the slides made and do editing on it. Making video through templates is an easy task. Just in few simple steps one can make and export the slides and play it. Photo video slideshows can also be made by using Filmora application. It runs smoothly over various operating systems.
● Whether Filmora has slideshow templates at its site?
Yes, the official website has various online free slideshow templates for the users.
● Whether I need to pay to get sample templates from Filmora?
The trial version of the software is free and you can download the slideshow templates free of cost.
● Whether the slideshow prepared in Flimora site can be edited with other application?
Yes, you can easily do editing on the slides made with Filmora application on other applications.
● What type of slideshare is available at Filmora?
All kind of slideshare and templates are available at Filmora that are useful for business, projects, marketing and personal purposes.
● Ending Thoughts →
● Filmora is a software/application widely used as video editing software and it is getting popular among the users due to its extraordinary features. It has great video editing tools, effects and transitions that give a complete package of video, slideshow and presentation making.
● Filmora has wide range of templates developed at its site for ease of making presentation and slideshows. These are developed looking to needs of every content creator. Some of templates available at the website are clean slideshow after effects templates, Mosaic slideshow, Business- proposal presentation template and many others.
● The filmora photo slideshow template free download and other templates can be searched on the official website of Filmora and can be downloaded from there in simple steps. It can edit and saved at any operating system.
With Filmora software, present information and content through slideshows. Filmora slideshow templates are available on the website free for making effective slideshows.
Part 1 Why Filmora Slideshow Templates Are Popular?
Filmora Slideshow templates are widely used by the users for creating new and impressiveslideshows. The reason for popularity of this software is many such as:
● It is an affordable software/application available free of cost for making slideshows using templates.
● It can run on computers and cell phones also, so there is flexibility in its access.
● It is equipped with various tools and features for both video and audio applications.
● Background effects, picture effects and animation features further make it more popular than the rest of the software.
● It is a good pleasing interface suitable to all content creators whether they are beginners or professionals.
● Video and audio control and video stabilization features make it further popular.
● Advanced text-editing make it possible to add contents in the video slides.
● Templates can be created by adding titles, text, sound, filters, and transitions.
● Theme-based templates are designed and developed looking into the needs f every user for different occasions.
● It has better editing tools like split, merge, rotate, and more.
● Auto-create videos features give the users comfort for using the application by saving their time and energy. Further they can add royalty-free images, videos, and music.
● Aspect ratio for the video creation can be changed.
Part 2 Where to Download Free Filmora Slideshow Templates
To use unlimited and free Filmora slideshow templates, one is required to have the application downloaded from the website. And thereafter one can download the different styles and patterns of templates from section filmora slideshow template free download. Once you create an account in the Filmora platform, you can easily connect with various templates useful for various occasions.
Filmora software or application is the only destination for having a bunch of various templates with many tools to improve the creation of slide shows. One can see the various templates available in the official website of Filmora. One can make slideshow with the help of video maker offered by Filmora. This software is free of cost. The easy-to-use interface feature of this software is good for beginners. It has various in-built customizable templates based in various themes like project, marketing, corporate, celebration, fun, natural, family, and business. It has auto-create mode which saves time and energy of the users as it automatically plays the slides when all media files, pictures or texts are placed over the various slides. For this one is just required to select the different files and click on “Auto-create” option.
Part 3 Best 10 Filmora Slideshow Templates
Filmora has many advanced templates for presentation and slideshow. One can find different kind of templates suitable for creating content and information for various applications. Filmora templates slideshow becomes more attractive when in-built Filmora templates are used. Some of the best 10 Filmora slideshow templates are:
01Business- Proposal Presentation Template
Looking into the business need of business users and marketing professionals, Filmora has developed Business-proposal presentation template with 45 unique custom slides. Business users can create impressive business proposals with various theme and color options. One can insert pictures and text easily in this template and can edit number of times.
02Pitch Deck Template
This template is used to design a pitch deck used by the companies to present at the stage and project about the company. These templates are well designed as they are handled by professionals.
03Company Profile Google Slides Template
It is mostly useful to business professionals to prepare business portfolios. The best thing with these templates is that they are unique, elegant, professional and creative. This template is multipurpose for different business applications.
04Clean Slideshow After Effects Templates
Those who want to make simple but impressive templates, clean slideshow after effect templates are best option. Through this template, one can focus on the main content and can add transitions. Photo slideshows can be easily created through this template.
05Minimal Corporate Presentation
This template is good for the beginners who desire to prepare a simple slideshow. The advantage of this template is that it is easy to use and text can be easily edited. One can insert picture for various corporate and business presentations.
06Corporate Event Promo
A business mostly does promotions and this needs a proper preparation. Corporate event promo presentation template is the best choice for such situations. One can create creative promo slides with such template by adding title and overlays in the template. They can also be edited easily.
07Business Marketing Presentation Layout
Most of the business organizations preferto choose such a template that can present their marketing plan in the best possible way. This Business Marketing Presentation is perfect for every business concern. It comes with nine designing options, through which one can easily replace images and text.
08Event Conference
For creating information and documents over template useful in an event conference, this template of filmora is very useful. The details of event and necessary information can be put in a systematic way through this template. However when played as slideshow, it can reach to maximum number of viewers.
09Mosaic Slideshow
Display of photographs, video albums or glimpse of any events can be impressively done with the help of Mosaic slideshow template. With increasing trends of photo sharing and video making, these templates are gaining popularity.
10Old Fashion Slides
As the name suggests, the templates is good for vintage slideshow. One can use this template for photo and video slideshows. Those who love to be creative, they can use this template.
These are some filmora template slideshow available at the website; however the users can also explore the other category of templates based on occasions at the website of Filmora. Every content creator will surely get desired template to present their information, data and pictures in a unique way.
Part 4 FAQ of Filmora Slideshow Templates
Wondershare Filmora Video Editor is a popular video editing application that also supports making slideshows through the use of various templates. It offers advance editing software for those who love to be creative and present their content in an artistic way. The various features of the software like elegant transitions, beautiful slides, video effects, text, audio and background effects make it more popular among beginners and professionals.
For Win 7 or later (64-bit)
For macOS 10.12 or later
Working with Filmora is easy and time saving. One can easily drag and drop the slides made and do editing on it. Making video through templates is an easy task. Just in few simple steps one can make and export the slides and play it. Photo video slideshows can also be made by using Filmora application. It runs smoothly over various operating systems.
● Whether Filmora has slideshow templates at its site?
Yes, the official website has various online free slideshow templates for the users.
● Whether I need to pay to get sample templates from Filmora?
The trial version of the software is free and you can download the slideshow templates free of cost.
● Whether the slideshow prepared in Flimora site can be edited with other application?
Yes, you can easily do editing on the slides made with Filmora application on other applications.
● What type of slideshare is available at Filmora?
All kind of slideshare and templates are available at Filmora that are useful for business, projects, marketing and personal purposes.
● Ending Thoughts →
● Filmora is a software/application widely used as video editing software and it is getting popular among the users due to its extraordinary features. It has great video editing tools, effects and transitions that give a complete package of video, slideshow and presentation making.
● Filmora has wide range of templates developed at its site for ease of making presentation and slideshows. These are developed looking to needs of every content creator. Some of templates available at the website are clean slideshow after effects templates, Mosaic slideshow, Business- proposal presentation template and many others.
● The filmora photo slideshow template free download and other templates can be searched on the official website of Filmora and can be downloaded from there in simple steps. It can edit and saved at any operating system.
How to Rotate AVI in Vertical/Portrait Orientation [Windows, Mac,Andro

Video editing is the process of cutting and rearranging multiple clips or segments of video to create a new and more improved video. This involves adding titles, animations, sound effects, music and more. Video editing has not ceased to follow the trend of technology as it keeps thriving tirelessly through the ages. With advancement springing forth from many sides, video editing followed every pace to ensure it’s not left behind. This largely involves gadgets, computers and smartphones.
Before the advent of smartphones, computers have been the only video editing tools, and that culture is preserved even till date as its use has spread round the world. It is therefore evident that film making cannot bypass this process. Improvements have been made over the years on video editing softwares for computers to stay up to date as regards features and usability. There are other video editors which were introduced, and are still being updated such as Adobe Premiere Pro, Final Cut, Filmora and so on. As the case is today, smartphones have proven to be relevant in the process; they have also come up with video editing applications such as Power Video Director, InShot, Filmora for Android, Kinemaster and many more for Android, iPhone and iPads.
This article aims at giving guides and steps on how to rotate AVI videos using different softwares on different PCs (Windows and Mac) and smartphones (Android and iPhone). This does not leave online video editing softwares behind also.
WHAT IS AVI?

AVI means Audio Video Interleave. It’s a multimedia container format introduced by Microsoft in November 1992 as part of its video for Windows technology. AVI files can contain both audio and video data in a file container that allows synchronous audio-with-video playback.
KDENLIVE – FREE FOR WINDOWS

Introduced in 2002, Kdenlive has a good quality and design. The design is straightforward, user-friendly which makes you know what you are getting into, as well as the actual quality of the effects that you might want to apply to your video while editing. Overall, it looks really professional, neat and organized.
HOW TO ROTATE AVI VIDEO IN KDENLIVE
- STEP 1 - Launch Kdenlive on your Windows and import the video from where you have saved it locally. Drag and drop video on timeline

- STEP 2 - Select video effects and in the search box, type ‘rotate’ and click on it. Click on effects, then select video effects
- STEP 3 - Drag the video to the timeline and go to effects, then drag and drop the ‘rotate’ effect on the clip.

ALTERNATIVE WAY TO ROTATE AVI VIDEO ON KDENLIVE
- STEP 1 - Create a vertical project: create profile, select size, 1080 x 1920 and select aspect ratio: 9:16. Afterwards, there will be a vertical outline on your program window. Import your video to the project bin and drag it to the timeline
- STEP 2 - Go to effects, then click on ‘transform’ and double-click on it
- STEP 3 - Go to the down-right part of your screen and click on ‘rotation’ and highlight to change the number to whichever is ideal for your screen; you can change it to 270. This will make it rotate but will not fill the screen yet. Highlight the size and change it to 180 an hit the ‘enter’ key.
OPENSHOT – FREE FOR WINDOWS
OpenShot Video Editor is a free and open-source video editor for Windows, macOS, Linux, and Chrome OS. The project started in August 2008 by Jonathan Thomas, with the objective of providing a stable, free, and friendly to use video editor.

HOW TO ROTATE AVI VIDEO ON OPENSHOT
- STEP 1 - Launch OpenShot on your Windows and import your clip form where you’ve saved it locally

- STEP 2 - Drag and drop footage on your timeline and click on the ‘play’ button to check your footage. Right click on the footage and an option box will appear

- STEP 3 - Click on rotate; you can choose to rotate either left or right. Rotate till it ideally fits the screen

ALTERNATIVE WAY TO ROTATE AVI VIDEO ON OPEN SHOT
- STEP 1 - Launch OpenShot on your Windows and drag your footage to the timeline.
- STEP 2 - Right click on your video and select properties.
- STEP 3 - Go to rotation and change the value, and your video will rotate
ADOBE PREMIERE PRO – PAID FOR WINDOWS

Introduced in 2003, Adobe Premiere Pro is known to be a video editing software. It has a lot of features that can be used in the process of editing. It’s capable of editing feature movies such as Hollywood and the likes.
HOW TO ROTATE AVI VIDEO ON ADOBE PREMIERE PRO – FIXING A LANDSCAPE SHOT
- STEP 1 - Go to sequence and click on sequence settings

- STEP 2 - Click on frame size and type in 3840; for the horizontal, type in 2160 and then proceed to click ok
FIXING A PORTRAIT SHOT
- Put your play-head (the thin line that moves over the clips on your timeline) on the clip on the timeline
- Go to the top and click on ‘Editing’, then you go to effects control

- Go to ‘scale’, and type in the number according to the degree you desire to effect
your rotation. However, your video will be just perfect if you type in -90

ALTERNATIVE WAY TO ROTATE AVI VIDEO ON ADOBE PREMIERE PRO
- STEP 1 - Go to the effects window and search for ‘flip’
- STEP 2 - Click on ‘Transform’. You can then decide to do a horizontal flip or a vertical flip
- STEP 3 - All you need to do is click and drag it on to your clip and it will flip, whether horizontal or vertical
- STEP 4 - It is easy to remedy when you click and drag the other to place on your footage, whether horizontal or vertical.
TO ROTATE YOUR CLIP
- STEP 1 - Highlight your footage on the timeline and go to your effects controls window. Underneath ‘motion’, there is the perimeter of rotation. If you click and drag the mouse on the number, it will rotate either clockwise or counter-clockwise. Also, you can type in whatever rotation amount you want

- STEP 2 - It’s also worth mentioning that when you rotate a clip, you’re always rotating around the inker point (the little blue cross in a circle). You can click and drag this through the program monitor to any point on the clip and start rotating it around the inker point. In fact, it doesn’t have to be on the clip; you can make the inker point up further and rotate, and will still rotate around the inker point. If you don’t see this on your program monitor, that’s because you haven’t highlighted the motion.

- STEP 3 - A good tip is using guides to help you level and horizontal or whether you are working with on-screen. To get a slant perfectly leveled, there’s an easy way to reference a straight line on your program monitor. On the bottom right of your program monitor is the button [a plus (+) button] editor. Click on it and a box full of tools will pop up which you can work with. Click ‘add show rulers’, ‘show guides’ and ‘safe margins’


- STEP 4 - In the ruler section, take your mouse, click and drag it down to the little crosses of your safe margins. The same goes for the vertical ruler; click and drag over. That will create a new guide. For your footage, what you might need to do is get your horizontal guide down to your horizon view. You can go to your rotation and rotate your footage to get straight with your guide. If you are left with black bars at the corners, take off your safe margin rulers and guides and then zoom in on your footage and take off the black bars. To do this, go back to your effect controls

- STEP 5 - Instead of doing rotation, you scale by clicking and sliding the mouse on the number to the right


iMOVIE – FREE FOR MAC

iMovie is a preinstalled video editing application developed by Apple Inc. for macOS, Ios, and iPadOS devices. It was originally released in 1999 as a Mac OS 8 application bundle with the first FireWire-enabled consumer Mac model, the iMac DV. With iMovie, you can create professional-looking videos without an editing degree.
HOW TO ROTATE AVI VIDEO IN iMOVIE
- STEP 1 - Run iMovie on your PC and create a new project by clicking ‘create new’ and selecting ‘movie’. Import your footage: Click on the arrow pointing downwards just below your menu bar, and select the video from wherever it is saved locally.

- STEP 2 - Click on the video once it’s imported; make sure it has the yellow boundary on it. Click and drag it onto the timeline
- STEP 3 - Leave your play-head on the footage and go just above your program window and click on the crop icon, the third from the left. Afterwards, a rotate ion will show just by the right above the program monitor. There are actually two buttons to rotate in either direction. You can save time by clicking the correct direction for whichever way your videos need to be rotated


- STEP 4 - Your videos is rotated; you can go ahead and save

FILMORA – PAID FOR MAC

Formerly known as Wondershare Video Editor as at when it first launched in 2015, Filmora Video Editor is a video editing software that helps businesses create and distribute white-labeled marketing videos. Filmora is an easy-to-use video editing software for a beginner. It supports 50 above formats, 4k editing, Filmstock effects store, all basic and advanced editing tools in the most easily accessible and used manner.
For Win 7 or later (64-bit)
For macOS 10.14 or later
HOW TO ROTATE AVI VIDEO IN FILMORA
- STEP 1 - Run Filmora on your PC, import your video from where it has been locally saved and drag to the timeline
- STEP 2 - Go to file, and select ‘project settings’. By default, the video is recorded on portrait – 9:11, so change the aspect ratio to 16:9


- STEP 3 - Go to your timeline and double-click your footage. A box of options will pop up beside the program monitor. Simply go to rotate and click and slide to rotate. It may be difficult to line it up even and straight. Just go to the program monitor and click on the little line and drag; it makes it easier to align


- STEP 4 - Go to ‘scale’ and slide it to the right to make it fill the screen. Your video is rotated and ready to be previewed
VIDEOLEAP – PAID FOR ANDROID AND iPHONE

Videoleap includes the usual basic cutting and pasting tools, plus greenscreen aspect ratios, slow-mo and fast motion, audio editing, and unlimited undo and redo actions. Access to the app and premium features is available with a subscription for $7.99/month, or with additional discounts if bought as a one-time purchase or multiple month bundles.
HOW TO ROTATE AVI VIDEO IN VIDEOLEAP
- STEP 1 - Launch Videoleap on your android and Import your footage from where you have saved it locally. Tap on ‘transform’, and then tap on rotate, then tap on rotate as many times as it takes so that it can be ideally fit


- STEP 2 - Change the format from 16:9 (YouTube format) to 9:16 (for TikTok). To do that, deselect the clip, tap on canvas, and then choose 9:16. Play the clip to preview and save.

INSHOT – FREE FOR ANDROID

InShot app is an all-in-one visual content editing app. It allows you to create videos, edit photos, and create image collages. The app has plenty of features too. You can trim clips, change the speed of your footage, and add filters, music and text. InShot is a free mobile application that you can download on your Windows to create or edit videos and photos.
HOW TO ROTATE AVI VIDEO ON INSHOT
- STEP 1 - Import your video from where you have locally saved it
- STEP 2 - Tap on the clip, and swipe the toolbar to the left to find the ‘rotate’ icon. When you tap on ‘rotate’, it will rotate your video to your left; you can keep rotating till it’s ideally fit


QUICKTIME VIDEO EDITOR – FREE FOR MAC

- Open your video on your PC using the Quicktime program. Go to ‘edit’ and click on ‘rotate left’; keep clicking until your video ideally fits the screen. Your video is rotated successfully. Preview, save and export your video.


VLLO – PAID FOR ANDROID

VLLO is a super easy video editor. Beginner and casual users will enjoy editing video with its intuitive but precise control abled split, txt, BGM and transition. For the pro editors, premium paid features are also ready with Chroma-Key, PIP, mosaic and keyframe animations.
HOW TO ROTATE AVI VIDEO IN VLLO – LANDSCAPE TO PORTRAIT
- STEP 1 - Import your footage from where you have saved it locally and change aspect ratio to 16:9 and select the ‘fill’ icon.

- STEP 2 - On your timeline, click on the footage and select the curved arrow icon to rotate as you click and drag. You can choose to rotate either ways, and your video is rotated, and ready to be previewed and saved

VEED – ONLINE/CLOUD-BASED VIDEO EDITOR

VEED.IO is an online video editing platform that makes creating videos easy and accessible to everyone. Millions of creators around the world use our products to tell stories, create content, grow their audience and more.
HOW TO ROTATE AVI VIDEO ONLINE USING VEED – PORTRAIT TO LANDSCAPE
- STEP 1 - Create an account online on Veed – Visit <www.veed.io>

- STEP 2 - Click the ‘view project’ button and import/upload footage form where it has been saved locally

- STEP 3 - Go to ‘edit video’ and select ‘adjust’. Go to rotation and click and drag to the right and to the left for your video to fit ideally

- STEP 4 - You can export your video once it is rotated
ALTRNATIVE WAY TO ROTATE AVI VIDEO ONLINE USING VEED
- STEP 1 - Import your footage and drag it to the timeline
- STEP 2 - Click on ‘try sample’ or ‘upload video’

- STEP 3 - Click on ‘rotate’. Click to rotate either ways, 90 degrees
- STEP 4 - Go to crop and choose whether ‘vertical’ or ‘landscape’ to get rid of the bars

WEVIDEO – ONLINE/CLOUD-BASED VIDEO EDITOR
WeVideo is an online, cloud-based video editing platform that works in web browsers and on mobile devices. The company was originally founded in 2011 in Europe. Their main headquarters is in Mountain View, California with a team based in Romania.
HOW TO ROTATE AVI VIDEO ON WEVIDEO ONLINE
- STEP 1 - Import your footage and drag it to the timeline

- STEP 2 - Click on the little pencil icon right above the timeline

- STEP 3 - That will open up your editor, popping up a box full of option. Select the ‘transform’ tab, then two arrows right in front of ‘rotation’ till it fits: two clicks for 180, and one click for 90. Adjust it as needed, and save changes to preview.

Video editing is the process of cutting and rearranging multiple clips or segments of video to create a new and more improved video. This involves adding titles, animations, sound effects, music and more. Video editing has not ceased to follow the trend of technology as it keeps thriving tirelessly through the ages. With advancement springing forth from many sides, video editing followed every pace to ensure it’s not left behind. This largely involves gadgets, computers and smartphones.
Before the advent of smartphones, computers have been the only video editing tools, and that culture is preserved even till date as its use has spread round the world. It is therefore evident that film making cannot bypass this process. Improvements have been made over the years on video editing softwares for computers to stay up to date as regards features and usability. There are other video editors which were introduced, and are still being updated such as Adobe Premiere Pro, Final Cut, Filmora and so on. As the case is today, smartphones have proven to be relevant in the process; they have also come up with video editing applications such as Power Video Director, InShot, Filmora for Android, Kinemaster and many more for Android, iPhone and iPads.
This article aims at giving guides and steps on how to rotate AVI videos using different softwares on different PCs (Windows and Mac) and smartphones (Android and iPhone). This does not leave online video editing softwares behind also.
WHAT IS AVI?
AVI means Audio Video Interleave. It’s a multimedia container format introduced by Microsoft in November 1992 as part of its video for Windows technology. AVI files can contain both audio and video data in a file container that allows synchronous audio-with-video playback.
KDENLIVE – FREE FOR WINDOWS
Introduced in 2002, Kdenlive has a good quality and design. The design is straightforward, user-friendly which makes you know what you are getting into, as well as the actual quality of the effects that you might want to apply to your video while editing. Overall, it looks really professional, neat and organized.
HOW TO ROTATE AVI VIDEO IN KDENLIVE
- STEP 1 - Launch Kdenlive on your Windows and import the video from where you have saved it locally. Drag and drop video on timeline
- STEP 2 - Select video effects and in the search box, type ‘rotate’ and click on it. Click on effects, then select video effects
- STEP 3 - Drag the video to the timeline and go to effects, then drag and drop the ‘rotate’ effect on the clip.
ALTERNATIVE WAY TO ROTATE AVI VIDEO ON KDENLIVE
- STEP 1 - Create a vertical project: create profile, select size, 1080 x 1920 and select aspect ratio: 9:16. Afterwards, there will be a vertical outline on your program window. Import your video to the project bin and drag it to the timeline
- STEP 2 - Go to effects, then click on ‘transform’ and double-click on it
- STEP 3 - Go to the down-right part of your screen and click on ‘rotation’ and highlight to change the number to whichever is ideal for your screen; you can change it to 270. This will make it rotate but will not fill the screen yet. Highlight the size and change it to 180 an hit the ‘enter’ key.
OPENSHOT – FREE FOR WINDOWS
OpenShot Video Editor is a free and open-source video editor for Windows, macOS, Linux, and Chrome OS. The project started in August 2008 by Jonathan Thomas, with the objective of providing a stable, free, and friendly to use video editor.
HOW TO ROTATE AVI VIDEO ON OPENSHOT
- STEP 1 - Launch OpenShot on your Windows and import your clip form where you’ve saved it locally
- STEP 2 - Drag and drop footage on your timeline and click on the ‘play’ button to check your footage. Right click on the footage and an option box will appear
- STEP 3 - Click on rotate; you can choose to rotate either left or right. Rotate till it ideally fits the screen
ALTERNATIVE WAY TO ROTATE AVI VIDEO ON OPEN SHOT
- STEP 1 - Launch OpenShot on your Windows and drag your footage to the timeline.
- STEP 2 - Right click on your video and select properties.
- STEP 3 - Go to rotation and change the value, and your video will rotate
ADOBE PREMIERE PRO – PAID FOR WINDOWS
Introduced in 2003, Adobe Premiere Pro is known to be a video editing software. It has a lot of features that can be used in the process of editing. It’s capable of editing feature movies such as Hollywood and the likes.
HOW TO ROTATE AVI VIDEO ON ADOBE PREMIERE PRO – FIXING A LANDSCAPE SHOT
- STEP 1 - Go to sequence and click on sequence settings
- STEP 2 - Click on frame size and type in 3840; for the horizontal, type in 2160 and then proceed to click ok
FIXING A PORTRAIT SHOT
- Put your play-head (the thin line that moves over the clips on your timeline) on the clip on the timeline
- Go to the top and click on ‘Editing’, then you go to effects control
- Go to ‘scale’, and type in the number according to the degree you desire to effect
your rotation. However, your video will be just perfect if you type in -90
ALTERNATIVE WAY TO ROTATE AVI VIDEO ON ADOBE PREMIERE PRO
- STEP 1 - Go to the effects window and search for ‘flip’
- STEP 2 - Click on ‘Transform’. You can then decide to do a horizontal flip or a vertical flip
- STEP 3 - All you need to do is click and drag it on to your clip and it will flip, whether horizontal or vertical
- STEP 4 - It is easy to remedy when you click and drag the other to place on your footage, whether horizontal or vertical.
TO ROTATE YOUR CLIP
- STEP 1 - Highlight your footage on the timeline and go to your effects controls window. Underneath ‘motion’, there is the perimeter of rotation. If you click and drag the mouse on the number, it will rotate either clockwise or counter-clockwise. Also, you can type in whatever rotation amount you want
- STEP 2 - It’s also worth mentioning that when you rotate a clip, you’re always rotating around the inker point (the little blue cross in a circle). You can click and drag this through the program monitor to any point on the clip and start rotating it around the inker point. In fact, it doesn’t have to be on the clip; you can make the inker point up further and rotate, and will still rotate around the inker point. If you don’t see this on your program monitor, that’s because you haven’t highlighted the motion.
- STEP 3 - A good tip is using guides to help you level and horizontal or whether you are working with on-screen. To get a slant perfectly leveled, there’s an easy way to reference a straight line on your program monitor. On the bottom right of your program monitor is the button [a plus (+) button] editor. Click on it and a box full of tools will pop up which you can work with. Click ‘add show rulers’, ‘show guides’ and ‘safe margins’
- STEP 4 - In the ruler section, take your mouse, click and drag it down to the little crosses of your safe margins. The same goes for the vertical ruler; click and drag over. That will create a new guide. For your footage, what you might need to do is get your horizontal guide down to your horizon view. You can go to your rotation and rotate your footage to get straight with your guide. If you are left with black bars at the corners, take off your safe margin rulers and guides and then zoom in on your footage and take off the black bars. To do this, go back to your effect controls
- STEP 5 - Instead of doing rotation, you scale by clicking and sliding the mouse on the number to the right
iMOVIE – FREE FOR MAC
iMovie is a preinstalled video editing application developed by Apple Inc. for macOS, Ios, and iPadOS devices. It was originally released in 1999 as a Mac OS 8 application bundle with the first FireWire-enabled consumer Mac model, the iMac DV. With iMovie, you can create professional-looking videos without an editing degree.
HOW TO ROTATE AVI VIDEO IN iMOVIE
- STEP 1 - Run iMovie on your PC and create a new project by clicking ‘create new’ and selecting ‘movie’. Import your footage: Click on the arrow pointing downwards just below your menu bar, and select the video from wherever it is saved locally.
- STEP 2 - Click on the video once it’s imported; make sure it has the yellow boundary on it. Click and drag it onto the timeline
- STEP 3 - Leave your play-head on the footage and go just above your program window and click on the crop icon, the third from the left. Afterwards, a rotate ion will show just by the right above the program monitor. There are actually two buttons to rotate in either direction. You can save time by clicking the correct direction for whichever way your videos need to be rotated
- STEP 4 - Your videos is rotated; you can go ahead and save
FILMORA – PAID FOR MAC
Formerly known as Wondershare Video Editor as at when it first launched in 2015, Filmora Video Editor is a video editing software that helps businesses create and distribute white-labeled marketing videos. Filmora is an easy-to-use video editing software for a beginner. It supports 50 above formats, 4k editing, Filmstock effects store, all basic and advanced editing tools in the most easily accessible and used manner.
For Win 7 or later (64-bit)
For macOS 10.14 or later
HOW TO ROTATE AVI VIDEO IN FILMORA
- STEP 1 - Run Filmora on your PC, import your video from where it has been locally saved and drag to the timeline
- STEP 2 - Go to file, and select ‘project settings’. By default, the video is recorded on portrait – 9:11, so change the aspect ratio to 16:9
- STEP 3 - Go to your timeline and double-click your footage. A box of options will pop up beside the program monitor. Simply go to rotate and click and slide to rotate. It may be difficult to line it up even and straight. Just go to the program monitor and click on the little line and drag; it makes it easier to align
- STEP 4 - Go to ‘scale’ and slide it to the right to make it fill the screen. Your video is rotated and ready to be previewed
VIDEOLEAP – PAID FOR ANDROID AND iPHONE
Videoleap includes the usual basic cutting and pasting tools, plus greenscreen aspect ratios, slow-mo and fast motion, audio editing, and unlimited undo and redo actions. Access to the app and premium features is available with a subscription for $7.99/month, or with additional discounts if bought as a one-time purchase or multiple month bundles.
HOW TO ROTATE AVI VIDEO IN VIDEOLEAP
- STEP 1 - Launch Videoleap on your android and Import your footage from where you have saved it locally. Tap on ‘transform’, and then tap on rotate, then tap on rotate as many times as it takes so that it can be ideally fit
- STEP 2 - Change the format from 16:9 (YouTube format) to 9:16 (for TikTok). To do that, deselect the clip, tap on canvas, and then choose 9:16. Play the clip to preview and save.
INSHOT – FREE FOR ANDROID
InShot app is an all-in-one visual content editing app. It allows you to create videos, edit photos, and create image collages. The app has plenty of features too. You can trim clips, change the speed of your footage, and add filters, music and text. InShot is a free mobile application that you can download on your Windows to create or edit videos and photos.
HOW TO ROTATE AVI VIDEO ON INSHOT
- STEP 1 - Import your video from where you have locally saved it
- STEP 2 - Tap on the clip, and swipe the toolbar to the left to find the ‘rotate’ icon. When you tap on ‘rotate’, it will rotate your video to your left; you can keep rotating till it’s ideally fit
QUICKTIME VIDEO EDITOR – FREE FOR MAC
- Open your video on your PC using the Quicktime program. Go to ‘edit’ and click on ‘rotate left’; keep clicking until your video ideally fits the screen. Your video is rotated successfully. Preview, save and export your video.
VLLO – PAID FOR ANDROID
VLLO is a super easy video editor. Beginner and casual users will enjoy editing video with its intuitive but precise control abled split, txt, BGM and transition. For the pro editors, premium paid features are also ready with Chroma-Key, PIP, mosaic and keyframe animations.
HOW TO ROTATE AVI VIDEO IN VLLO – LANDSCAPE TO PORTRAIT
- STEP 1 - Import your footage from where you have saved it locally and change aspect ratio to 16:9 and select the ‘fill’ icon.
- STEP 2 - On your timeline, click on the footage and select the curved arrow icon to rotate as you click and drag. You can choose to rotate either ways, and your video is rotated, and ready to be previewed and saved
VEED – ONLINE/CLOUD-BASED VIDEO EDITOR
VEED.IO is an online video editing platform that makes creating videos easy and accessible to everyone. Millions of creators around the world use our products to tell stories, create content, grow their audience and more.
HOW TO ROTATE AVI VIDEO ONLINE USING VEED – PORTRAIT TO LANDSCAPE
- STEP 1 - Create an account online on Veed – Visit <www.veed.io>
- STEP 2 - Click the ‘view project’ button and import/upload footage form where it has been saved locally
- STEP 3 - Go to ‘edit video’ and select ‘adjust’. Go to rotation and click and drag to the right and to the left for your video to fit ideally
- STEP 4 - You can export your video once it is rotated
ALTRNATIVE WAY TO ROTATE AVI VIDEO ONLINE USING VEED
- STEP 1 - Import your footage and drag it to the timeline
- STEP 2 - Click on ‘try sample’ or ‘upload video’
- STEP 3 - Click on ‘rotate’. Click to rotate either ways, 90 degrees
- STEP 4 - Go to crop and choose whether ‘vertical’ or ‘landscape’ to get rid of the bars
WEVIDEO – ONLINE/CLOUD-BASED VIDEO EDITOR
WeVideo is an online, cloud-based video editing platform that works in web browsers and on mobile devices. The company was originally founded in 2011 in Europe. Their main headquarters is in Mountain View, California with a team based in Romania.
HOW TO ROTATE AVI VIDEO ON WEVIDEO ONLINE
- STEP 1 - Import your footage and drag it to the timeline
- STEP 2 - Click on the little pencil icon right above the timeline
- STEP 3 - That will open up your editor, popping up a box full of option. Select the ‘transform’ tab, then two arrows right in front of ‘rotation’ till it fits: two clicks for 180, and one click for 90. Adjust it as needed, and save changes to preview.
Creative Ways to Add Green Screen Effects In Photoshop
Removing green screen backgrounds and replacing them with stunning videos is a common practice in video and movie making. The same process is applicable to still photos as well. You can take a photo with a green screen background and replace the screen with any photo as per your preference and requirement. You will need a high-quality photo editor to add green screen effects to your photo. There is no better photo editor in the world than Adobe Photoshop.
First, you have to opt for remove green screen Photoshop and then add anything you want in place of the green screen. The difference between Chroma key Photoshop and any other photo editor is that you can pay attention to details and remove the entire green screen halo effect around the main subject or object on the photo. Therefore, there will be no jittery green edges and green patches to disturb the overall photo quality. Here are the steps to use green screen effect in Adobe Photoshop.
1. How To Use Green Screen in Photoshop?
There are various ways available to remove greenscreen Photoshop. The beginners prefer using the Magic Wand tool but there will always be green patches around the main object on the photo. These green patches will get highlighted when you insert any image in the background. Therefore, we are using the best method to Chroma key Photoshop and that is through Color Range option. Here are the detailed steps to use color keying in Photoshop to use green screen effect.
Step 1: Launch Adobe Photoshop and open your photo with green screen background.
Step 2: Go to Select menu and click on Color Range.

Step 3: Pick the Eyedropper tool. Hold Shift key to select the green background. You can also hold Alt key to remove any selection that you might have done by mistake. When you are perfectly ok with the selection of the green screen background, you should click on OK button.

Step 3: Go to Select menu and click on Inverse. Now, the selection will be on the main subject instead of the background.

Step 4: If you want to see a preview of the selection in your photo, you should select Image radio button and from Selection Preview, select any option other than None.

Step 5: Go to Select menu again and click on Refine Edge. Use the sliders to fine-tune the selection so that the selection is smooth on the edges of the main subject of the photo. Once done, click on OK button.

Step 6: Go to Select menu and click on Inverse again.
Step 7: Press Delete key to delete the green screen background selection.
Step 8: Open the replacement image which you want to put in the place of the green screen background that you have just deleted.
Step 9: Select the entire replacement image and copy the replacement. Come back to your photo and paste the replacement image. Make sure that the layer of the replacement image must be placed below the layer of your photo.

Step 10: You can adjust the size of the images as per your requirement so that everything fits perfectly in the frame. Similarly, you should adjust the color scheme so that the superimposition does not look awkward.
2. Best Way To Add Green Screen Effect To Video
In the previous section, we have stated how to remove the green screen background in any image and replace that with a stunning background photo. In this section, we will state how to add green screen effects in a video. There are many who think that adding green screen effects in a video takes a lot of expertise, but it is not the case.
If you select the suitable video editor, it is a matter of a few steps only. We recommend Wondershare Filmora to add green screen effects to your video where you have shot the scenes with green screen backgrounds. Here are the steps to follow to remove green screen backgrounds and replace with any photo or video as per your preference.
For Win 7 or later (64-bit)
For macOS 10.12 or later
Step 1: Download and install Wondershare Filmora.
Step 2: Launch Filmora and go for Create New Project option to get started.
Step 3: Import your video with green screen background and move it to the Timeline.
Step 4: Import the replacement photo or video and put it directly on the Timeline.
On the Timeline, your recorded video should be below the replacement photo or video.

Step 5: Double-click on your video, and you will come across a panel on the upper-left side. From that panel, you have to turn on Chroma Key option. This will enable the green screen effect due to which you will see the replacement photo or video superimposed on your recorded video in the green screen background.

Step 6: Finally, adjust the parameters available to fine-tune the overall green screen effect. Lastly, click on Ok button.
Conclusion
If you are looking to add green screen effects to your photo, you can opt for Chroma key Photoshop. Adobe Photoshop is the best photo editor to remove the green screen backgrounds on your photo and replace them with any image you want. Color keying in Photoshop enables you to change any solid color background to anything you want. Similarly, you can use Wondershare Filmora to add green screen effects to your video in simple steps.
For macOS 10.12 or later
Step 1: Download and install Wondershare Filmora.
Step 2: Launch Filmora and go for Create New Project option to get started.
Step 3: Import your video with green screen background and move it to the Timeline.
Step 4: Import the replacement photo or video and put it directly on the Timeline.
On the Timeline, your recorded video should be below the replacement photo or video.
Step 5: Double-click on your video, and you will come across a panel on the upper-left side. From that panel, you have to turn on Chroma Key option. This will enable the green screen effect due to which you will see the replacement photo or video superimposed on your recorded video in the green screen background.
Step 6: Finally, adjust the parameters available to fine-tune the overall green screen effect. Lastly, click on Ok button.
Conclusion
If you are looking to add green screen effects to your photo, you can opt for Chroma key Photoshop. Adobe Photoshop is the best photo editor to remove the green screen backgrounds on your photo and replace them with any image you want. Color keying in Photoshop enables you to change any solid color background to anything you want. Similarly, you can use Wondershare Filmora to add green screen effects to your video in simple steps.
Introduction to The Best Cinematic LUTs in The Market
With the development of new editing tools and apps, we all want our content to look different and better from others. Moreover, increasing social media usage has also made people more concerned about their photos and videos. However, besides editing tools, you can add layers of adjustments and apply LUTs, filters, and more to your content.
With different LUTs, such as cinematic LUTs, you can give your digital content a professional look. These LUTs also give a dramatic feel and add depth to your photos and videos.
Part 1: What are Cinematic LUTs Used for?
Cinematic LUTs have several uses, including creating a specific mood or look. They can be used to make the footage look vintage or retro or to create a dark, moody atmosphere or a bright, colorful tone. Furthermore, these cinematic LUTs can match the footage’s colors and tones so they all look the same. They can also be used to contrast and color your photos and images.
It can also make your media files look like they were filmed on a real film camera, giving them a more natural, organic feel. These are useful tools for making videos or images look a certain way. They can improve the color quality and make the story more interesting.
Empower your videos with a new mood using different LUTs. Filmora now offers 100+ top-quality 3D LUTs cover a broad range of scenarios. Transform your videos with Filmora’s powerful 3D LUTs.
Apply LUT on Videos Apply LUT on Videos Learn More


Part 2: Top Cinematic LUT Pack to Consider for Your Media
Many LUTs give a cinematic feel when applied to your digital content. These LUTs add depth and emotion to your images and videos. There are many cinematic LUT packs that you can download and use them.
1. Cinematic LUTs Pack 2023
Many free cinematic LUTs are available to download, but this one differs. The Cinematic LUTs Pack 2023 has various Hollywood-style color grading options available. This pack has different color correction layers that give you a modern cinematic feel. Moreover, you can darken the highlights to enhance the subject in your content.

2. Cinematic LUT
Another LUT that gives your content the cinematic feel you want is this exceptional collection. This LUT fades the colors in your photos and videos to give a rusty look. It gives your media files a West Hollywood-style look to give them a cinematic look. Furthermore, it also enhances certain colors to improve the color grading in your video footage or images.

3. 20 FREE Travel LUTs for Cinematic Looks
It is a great LUT pack if you want multiple options to add cinematic-style LUTs to your digital media content. You get 20 different cinematic LUTs for your travel photos and videos. With the right amount of tan, shadows, highlights, and grains, your videos will look like they are from a movie clip. It improves your travel videos and photos by giving them movie-like color adjustments.

4. Sandstorm
As the name suggests, it gives your media files the golden cinematic shade. It is a LUT, which highlights golden, orange, and brown colors to add a warm tone to your files. This LUT will give your pictures and videos a warm cinematic feel. You can use your photos and videos to apply this adjustment layer to make them look like Hollywood content.

5. Vintage Vibe
Last but not least, Vintage Vibe is a great LUT that adds depth to your photos and videos. It creates an ambiance of an old-style cinematic touch to your digital files. You can improve your story by adding emotion and depth to your content with this LUT. Moreover, you can add this vintage color correction layer to give your content a unique and creative style.

Part 3: 3D LUT Creator: An Effective Cinematic LUTs Software
3D LUT Creator is a powerful tool packed with amazing color correction features for photo and video editing. This tool offers different cinematic LUTs to use and apply to your content. Moreover, users can create their LUTs according to their style and preference. Another impressive feature is its plugin support for different editing software.
Furthermore, the tool also comes with seven color gradients, a color wheel option, and A/B and C/L grids. These options allow you to change and distribute colors to their media files. Additionally, its AI retouching plugin can retouch and beautify your image. With all these features, you can create one of the best cinematic LUTs without hassle.

Part 4: Wondershare Filmora: A Good Platform to Consume Cinematic LUTs
Wondershare Filmora is a great professional editing software. You can easily achieve a cinematic look for your videos with its color grading upgrades and LUT intensity adjustments. Furthermore, the color wheel feature allows you to make professional-looking color grading adjustments. It even offers a cinematic LUTs download option to the users.
Add LUTs on Video For Win 7 or later(64-bit)
Add LUTs on Video For macOS 10.14 or later
Additionally, it has a sharpening tool that sharpens your digital media files. With its new update, you can have many editing options, including over 200 LUTs and other color correction features. Besides this, you have so many different color grading options that you can choose from the LUTs library.

Key Features of Wondershare Filmora To Keep Notice of
- It has a unique feature that lets you denoise any background sounds or voices in your video file. This useful feature removes background noise distortion from a video file.
- Furthermore, silent detection is another unique feature that you can use. It analyzes your video content and removes unnecessary pauses. You can automatically remove awkward pauses and silent moments from your video to make it look professional.
- Additionally, you can access and use its free stock media library. This library has over 10 billion free stock media files you can use in your content.
Conclusion
In conclusion, cinematic LUTs have become essential. With multiple options available in the market, selecting the best cinematic LUT pack can be difficult. However, 3D LUT Creator is a great tool offering plugin options for multiple editing software. In contrast, Wondershare Filmora is an excellent option for creating and consuming cinematic LUTs.
Add LUTs on Video For Win 7 or later(64-bit)
Add LUTs on Video For macOS 10.14 or later
Apply LUT on Videos Apply LUT on Videos Learn More
Part 2: Top Cinematic LUT Pack to Consider for Your Media
Many LUTs give a cinematic feel when applied to your digital content. These LUTs add depth and emotion to your images and videos. There are many cinematic LUT packs that you can download and use them.
1. Cinematic LUTs Pack 2023
Many free cinematic LUTs are available to download, but this one differs. The Cinematic LUTs Pack 2023 has various Hollywood-style color grading options available. This pack has different color correction layers that give you a modern cinematic feel. Moreover, you can darken the highlights to enhance the subject in your content.
2. Cinematic LUT
Another LUT that gives your content the cinematic feel you want is this exceptional collection. This LUT fades the colors in your photos and videos to give a rusty look. It gives your media files a West Hollywood-style look to give them a cinematic look. Furthermore, it also enhances certain colors to improve the color grading in your video footage or images.
3. 20 FREE Travel LUTs for Cinematic Looks
It is a great LUT pack if you want multiple options to add cinematic-style LUTs to your digital media content. You get 20 different cinematic LUTs for your travel photos and videos. With the right amount of tan, shadows, highlights, and grains, your videos will look like they are from a movie clip. It improves your travel videos and photos by giving them movie-like color adjustments.
4. Sandstorm
As the name suggests, it gives your media files the golden cinematic shade. It is a LUT, which highlights golden, orange, and brown colors to add a warm tone to your files. This LUT will give your pictures and videos a warm cinematic feel. You can use your photos and videos to apply this adjustment layer to make them look like Hollywood content.
5. Vintage Vibe
Last but not least, Vintage Vibe is a great LUT that adds depth to your photos and videos. It creates an ambiance of an old-style cinematic touch to your digital files. You can improve your story by adding emotion and depth to your content with this LUT. Moreover, you can add this vintage color correction layer to give your content a unique and creative style.
Part 3: 3D LUT Creator: An Effective Cinematic LUTs Software
3D LUT Creator is a powerful tool packed with amazing color correction features for photo and video editing. This tool offers different cinematic LUTs to use and apply to your content. Moreover, users can create their LUTs according to their style and preference. Another impressive feature is its plugin support for different editing software.
Furthermore, the tool also comes with seven color gradients, a color wheel option, and A/B and C/L grids. These options allow you to change and distribute colors to their media files. Additionally, its AI retouching plugin can retouch and beautify your image. With all these features, you can create one of the best cinematic LUTs without hassle.
Part 4: Wondershare Filmora: A Good Platform to Consume Cinematic LUTs
Wondershare Filmora is a great professional editing software. You can easily achieve a cinematic look for your videos with its color grading upgrades and LUT intensity adjustments. Furthermore, the color wheel feature allows you to make professional-looking color grading adjustments. It even offers a cinematic LUTs download option to the users.
Add LUTs on Video For Win 7 or later(64-bit)
Add LUTs on Video For macOS 10.14 or later
Additionally, it has a sharpening tool that sharpens your digital media files. With its new update, you can have many editing options, including over 200 LUTs and other color correction features. Besides this, you have so many different color grading options that you can choose from the LUTs library.
Key Features of Wondershare Filmora To Keep Notice of
- It has a unique feature that lets you denoise any background sounds or voices in your video file. This useful feature removes background noise distortion from a video file.
- Furthermore, silent detection is another unique feature that you can use. It analyzes your video content and removes unnecessary pauses. You can automatically remove awkward pauses and silent moments from your video to make it look professional.
- Additionally, you can access and use its free stock media library. This library has over 10 billion free stock media files you can use in your content.
Conclusion
In conclusion, cinematic LUTs have become essential. With multiple options available in the market, selecting the best cinematic LUT pack can be difficult. However, 3D LUT Creator is a great tool offering plugin options for multiple editing software. In contrast, Wondershare Filmora is an excellent option for creating and consuming cinematic LUTs.
Add LUTs on Video For Win 7 or later(64-bit)
Add LUTs on Video For macOS 10.14 or later
Also read:
- Updated Best Frame Rate for 4K Video
- New In 2024, How to Make Text Reveal Effect Easily
- In 2024, Everything That You Need to Know About Video Montages- Ideas, Techniques, and Software
- 22 Free Video Editing Software to Save Your Money and Time for 2024
- New 2024 Approved Creating Video Testimonials
- New How to Remove Background From a Video in Premier Pro
- New 2024 Approved Step by Step Guide on Make Gimp Transparent Background PNG
- In 2024, Whatre the Best Alternatives to Pexels?
- New Are You Looking for Trustworthy GIF Converters to Use GIF Images Across Various Platforms? Find Out About Reliable and Authentic GIF Converters that You Can Easily Use for WMV to GIF Conversion Anytime You Want
- Updated In 2024, Best Practical Tips to Improve Your Lighting in the Sun
- New 2024 Approved Easy Steps to Add Miniature Effect to Videos
- New How to Loop a Video in Canva Editor
- Adding Shake Effects to Your Video With Alight Motion for 2024
- 2024 Approved Ideas That Help You Out in Making Transparent Image
- Updated How to Create a Clideo Slideshow
- Which Pokémon can Evolve with a Moon Stone For Vivo Y78+ (T1) Edition? | Dr.fone
- 8 Solutions to Solve YouTube App Crashing on Samsung Galaxy XCover 7 | Dr.fone
- In 2024, How Can I Catch the Regional Pokémon without Traveling On Motorola Moto E13 | Dr.fone
- In 2024, What to do if your iPhone 13 has bad ESN or blacklisted IMEI?
- In 2024, Easily Unlock Your Motorola Edge 2023 Device SIM
- How to Fake Snapchat Location on Oppo Find N3 Flip | Dr.fone
- How to Transfer Photos From Samsung Galaxy S24+ to Samsung Galaxy S21 Ultra | Dr.fone
- In 2024, Full Guide to Catch 100 IV Pokémon Using a Map On Lava Blaze Pro 5G | Dr.fone
- How to get back lost photos from Galaxy Z Flip 5.
- In 2024, Ultimate Guide on iPhone 14 iCloud Activation Lock Bypass
- In 2024, 3 Ways to Unlock Your Apple iPhone 14 Pro Max for Free
- Title: Updated 2024 Approved What Is the Best Filmora Slideshow Templates? Experts Choice
- Author: Chloe
- Created at : 2024-04-24 07:08:40
- Updated at : 2024-04-25 07:08:40
- Link: https://ai-editing-video.techidaily.com/updated-2024-approved-what-is-the-best-filmora-slideshow-templates-experts-choice/
- License: This work is licensed under CC BY-NC-SA 4.0.
