
:max_bytes(150000):strip_icc():format(webp)/mothersday_NataliaCampbell_Getty-5a4baef6c7822d00371e56cd.jpg)
Updated 2024 Approved What Is the Best MP4 Cutter for YouTuber on Mac?
What Is the Best MP4 Cutter for YouTuber on Mac?
Most times, Youtubers need to cut out unnecessary parts from their videos while customizing intros and outros. A common reason is to ensure that videos are engaging and interactive while preventing any lagging. In addition, an aesthetically pleasing video keeps its viewers hooked throughout the video. That’s why cutting MP4 videos are essential for being a Youtuber. However, the question becomes, which is the best MP4 cutter for Youtubers on Mac? This article answers that question succinctly; let’s take a look.
What You Should Know About YouTube Video

YouTubers upload over 300 hours of video content to the platform every second. These videos cut across every niche and topic. There’s scarcely a topic you’re looking for that you won’t find a video or two discussing on YouTube. So as a YouTuber, you have to find ways to keep up and stand out from the crowd. You’ll need engaging videos that will hold your target audience’s attention so much that they will subscribe for more.
However, if the video is too long or your car doesn’t hit the right frame, it will disengage your audience. Additionally, you want a video seamlessly woven together to form a polished video. This makes MP4 cutting an essential part of the YouTube video creation process. There’s no need to purchase pricey editing equipment anymore; you can simply cut your MP4 videos from the comfort of your home. This article explores the best MP4 cutters for YouTubers on Mac; let’s take a look.
Best MP4 Cutter for YouTubers on Mac - Filmroa Video Editor

Supported System: Mac and Windows
Filmora Video Editor makes it relatively easy to cut and edit your videos like a professional. This MP4 cutter is a great option, even if you don’t have video editing skills. It offers an intuitive user interface that makes it an excellent choice for experts and novices. It also provides you with the crucial editing tools to create amazing YouTube videos after cutting your MP4 video files. With this editing tool, you’re sure to produce videos your subscribers enjoy.
With Filmora, you can add effects, color grades, and texts to your videos. There’s also a library filled with royalty-free audio you can explore. After cutting your MP4, you can use templates from this MP4 cutter to create an intro for your YouTube videos. Filmora has many features that will save you a lot of time, and using it to cut MP4 is relatively easy.
For Win 7 or later (64-bit)
For macOS 10.14 or later
Pros
- It offers an intuitive user interface
- There are several effects and overlays to utilize
- Fast rendering of videos
- Offers varying output formats
- Ideal for beginners and experts
Cons
- No DVD Menu
Steps to Cut MP4 Video for YouTubers on Mac Using Filmora
Cutting videos on Filmora is relatively easy. You have to first download and install Filmora on your device. Below are the steps to cut MP4 videos to your preference using Wondershare Filmora.
Step 1: Import MP4 Files
There are two ways you can add MP4 files to this MP4 cutter. You can either click the ‘import’ button and choose the file from your media library or drag the mp4 file to your album. After dragging to the album, drag from the album to the timeline.

Step 2: Cut MP4 Files

After importing your file, you’re ready to cut. First, simply move the indicator to the ideal position you want by dragging the top of the indicator and slider bar. Then, click the scissor button to cut once you move to your preferred time.
You can also delete any part of the MP4 file you don’t want by hitting the ‘delete’ option. If you cut various clips out of the MP4 file, you can rearrange them with the ‘drag and drop tool.
Step 3: Save and Share Cut MP4 File

Now, you can save your newly cut video file by clicking the ‘file’ button at the left corner of the Filmora software and selecting ‘save as’ from the options. The output window will appear, and you can choose the format and if you want to share directly to YouTube. Pick the option that meets your need, and you’re good to go.
More Free MP4 Cutter for YouTubers on Mac to Cut MP4 Videos
Although Wondershare Filmora is the best video cutter for YouTubers on Mac, there are free MP4 cutters you can utilize to cut your videos from the comfort of your home easily. Below, we’ve reviewed the top three options you should consider.
PowerDirector Essential

Supported System: Windows and Mac
If you’re looking for a free MP4 video cutter that ensures fast processing of videos, you should try PowerDirector Essential. This MP4 cutter allows you easily cut your YouTube videos irrespective of your experience level. You’ll be able to cut and edit your YouTube videos within a couple of minutes. In addition, PowerDirector Essential is versatile and allows you to either use the storyboard mode or timeline editor for your cutting needs.
Apart from splitting and cutting tools, you can also explore its library of stylized transitions if you want to significantly upgrade the appearance of your YouTube video professionally. YouTubers want a video cutter that offers video editing features to create your visual effects. This MP4 cutter is excellent for beginners because of its intuitive interface that you can master in minutes. You can also ensure your video has amazing audio and clear video before sharing it on YouTube. If you want high-quality, Hollywood-style videos, this is the best free MP4 cutter to achieve that.
Pros
- It supports several input and output video formats
- Easy cutting and exporting process
- Intuitive and user-friendly interface
- Ideal for beginners
- It offers various video editing tools to enhance your video
Cons
- Some features are only available on the Windows version
How to Cut Video for YouTube on Mac Using PowerDirector Essential
If you want to learn how to easily cut MP4 files using PowerDirector on a Mac computer, follow the steps below.
- Step 1: You have to download PowerDirector software on your Mac and install it. After installation, launch the software, and you’re ready to begin the cutting process.
- Step 2: Now, import the video into PowerDirector by clicking ‘import media file’ and choosing the ideal video file from your media library.

- Step 3: Add the video to your timeline and hover over the right or left edge of the video track. This would make an adjustment arrow appear on both sides of the video file.

- Step 4: Drag the arrows to the point you would like to cut and choose the ‘scissors’ button.

- Step 5: After cutting, go to the ‘produce’ tab and choose ‘online’ if you want to upload a video directly to YouTube. You can also choose to save to your Mac. Choose the output format and location and click ‘start’ to save your newly cut video.
iMovie

Supported System: Mac
iMovie is a free MP4 cutter that’s built into Mac. Therefore, there’s no need to carry out downloads or installation to utilize this editing software. Although it only offers basic editing features, it is excellent if you only want to cut MP4 video files. iMovie is great for beginners as it features a user-friendly interface that’s easy to navigate.
It is the best option for YouTubers because it allows you to crop, trim and arrange video clips in just a few minutes. Additionally, you can add visual effects to your video while also editing the audio file to enhance your video. It also allows you to link your YouTube account to share directly. Therefore, if you’re looking for an MP4 cutter to carry out quick trimming on your videos, iMovie is amongst the best free MP4 cutters.
Pros
- Easy to use and ideal for beginners
- It supports major video formats and allows you to change the output format
- Allows you to store videos in iCloud or share them directly to YouTube
- Free on Mac device
- It offers essential editing tools to enhance your video
Cons
- Editing features are limited
Steps to Cut MP4 Video for YouTube on Mac Using iMovie
This section will explain how you can cut a clip in iMovie within a few minutes. Below are the easy steps you have to follow.
- Step 1: Launch iMovie on Mac and choose ‘import file’ to select the video you want to cut.
- Step 2: To enter full-editing windows, double-click the project. At the end of the video editor, you’ll see the video editor.

- Step 3: Drag the playhead to the position you would like to cut from, and then click on it. Do this for both sides of the video.

- Step 4: Now, click ‘modify’ and choose the ‘split clip’ option to cut the selected part out.

You can delete the rest of the video by selecting it and hitting ‘delete’ on your keyboard.

- Step 5: Finally, save your newly cut video or export it to YouTube directly by clicking ‘export’ under the ‘file’ section.
OpenShot

Supported System: Windows, Mac, and Linux
OpenShot is another free, open-source MP4 cutter that you can easily use on your Mac device. It offers an intuitive interface that makes it easy to drag videos to the interface. Apart from cutting videos, other features are available like scaling, resizing, rotation, trimming, and many more. This YouTube video cutter also provides hundreds of transitions and effects to enhance your YouTube video and make it stand out amongst other Youtube videos. However, this video cutter is only an excellent choice for beginners because it lacks many advanced features.
Pros
- It is easy to use and ideal for beginners
- It offers a sleek interface for easy navigation
- Offers basic editing features
- Versatile and a cross-platform MP4 cutter
Cons
- No advanced features
- It crashes easily
Steps to Cut MP4 for YouTube on Mac Using OpenShot
OpenShot is relatively easy to use and only requires a few steps to cut your MP4 file and upload it to YouTube. Below are the easy steps to follow to cut MP4 for YouTube on Openshot.
- Step 1: First, download the MP4 cutter on your Mac and install it to begin.
- Step 2: Afterward, launch the app and add the video to cut by clicking’ import.’ Alternatively, you can simply drag the video into the app to begin.
- Step 3: Once you get the video on the timeline, drag the red line on both sides of the video to the position you want the video to start and begin.

- Step 4: Right-click on the marker and choose what you want to keep. Next, isolate the fragments from the clip you would like to keep.
- Step 5: Click the fragment you want to delete and press delete on your keyboard. You have to remove the fragments manually until your preferred result remains.
- Step 6: Choose ‘export video’ from the File tab to save your MP4 file. You can change the output format or save it as an MP4.

- Step 7: you can also share videos to your YouTube account; you have to link the YouTube account first.
More Paid MP4 Cutter for YouTubers on Mac to Cut MP4 Videos
Most times, free MP4 cutters offer limited features to enhance your YouTube video. However, there are paid MP4 cutters that will efficiently cut your MP4 files and provide advanced editing tools.
Adobe Premiere Pro

Supported System: Mac and Windows
Advanced editing software that supports different file types, including MP4, is Adobe Premier Pro. This MP4 cutter allows you to quickly trim, split, and cut your MP4. Its intuitive and fast-responding interface ensures that your video is ready within a few minutes. Beyond cutting, there are several other advanced editing features that the editing software offers you. Some include filters, chroma-key, VR editing, color adjustment, and audio editing tools to take your YouTube video to the next level.
Adobe Premiere Pro is not the best option for beginners because of its steep learning curve. However, if you have ample experience with video editing tools and want to professionally cut and edit your YouTube video, this paid MP4 cutter is worth the cost and effort. ‘
Pros
- Advanced video editing features
- Intuitive user interface
- Responsive speed
- Ideal for professional editing
Cons
- Steep learning curve
- Quite pricey
Step to Cut MP4 for YouTube on Mac Using Adobe Premiere Pro
Although Adobe Premiere Pro has an interface that’s quite intimidating to non-professionals, the steps below help simplify cutting your MP4 files for YouTube.
- Firstly, download Adobe Premiere Pro on your Mac and install it.
- After installation, launch the app and select ‘new project’ on the homepage. It will require you to name the new project and choose where you want to save it. Afterward, click ‘ok’ to begin.

- Next, go to ‘file’ and select ‘import from media’ to import the MP4 file you would like to cut. Alternatively, you can simply drag the file to the timeline.

- Next, pick the ripple edit tool and go to the beginning of the video. Drag the handle with the arrow to your desired point. Repeat this at the end of the video.

- Finally, press Q to cut the MP4 clip to the left of the blade. Next, press W to cut the clip to the right.

- Now you can save your file to your preferred file location.
Movavi Video Editor

Supported System: Mac and Windows
This is an efficient MP4 cutter that helps you remove unnecessary scenes from your YouTube videos. The timeline offers you markers that allow you easily locate the start and end scene of the video you would like to remove. Apart from cutting videos, this tool provides several premium features you can use to make your video look professional. Movavi offers a free trial you can use to determine if this editor is the best option for you. However, it comes with a Movavi watermark that you can only eliminate with the paid option.
Movavi Video Editor can add transitions, music tracks, chroma-key effects, special effects, and many more exciting features to ensure a top-quality result. Furthermore, its intuitive interface makes it relatively easy for beginners and professionals to use. Therefore, you don’t have to worry about a stiff learning curve. With Movavi, you can also change the output format to switch from MP4 to another commonly supported format.
Pros
- Simple and easy to use
- Supports various input and output formats
- Provides YouTubers with basic and advanced features
- Ideal for beginners and professionals
Cons
- Video rendering is slow for large files
- The trial version comes with a Movavi watermark
Steps to Cut MP4 for YouTube on Mac Using Movavi Video Editor
For cutting your video on Mac using Movavi video editor, you can follow the steps outlined below.
- First, download and install Movavi Video Editor on your Mac.
- After installing Movavi, launch the editor and click the ‘add files’ button to add your MP4 file.

- Once the file shows up in the media bin, drag it to the timeline to start editing your video.
- To cut your MP4 video, move the red marker at the beginning of the video to where you would like to cut. Repeat this process at the end of the video by moving to where you prefer your video to end.
- Next, click the split button to cut this clip from the rest of the video.

- Now, select the fragments you don’t want and hit the delete button to remove them immediately.

- You can also add several filters to your video if you would like to enhance your video.
- You can now save your video by hitting the ‘export’ button. You can choose different formats and video quality for your newly cut video. Select the folder to save to and click the ‘save’ button.

Davinci Resolve

Supported System: Windows and Mac
Davinci Resolve is a favorite for YouTubers who want their videos to look like Hollywood videos. However, this MP4 cutter is aimed at the professional market and supports different input and output formats for your video. Davinci Resolve offers you a variety of professional features and also supports 8k videos. In addition, it provides advanced video cutting features to ensure your video looks excellent even after cutting. You can also combine video clips after cutting without it looking unprofessional.
Although this video cutter software isn’t the best option for beginners, professional editors are sure to be satisfied with the features this editor offers. It also allows you to export directly to various social media platforms, including YouTube, to save space and time.
Pros
- Basic and advanced editing tools
- Fast rendering of videos
- Supports major video formats and video resolutions
- It offers several special effects to make your video more engaging
Cons
- Not the right option for amateurs
Steps to Cut MP4 for YouTube on Mac Using Davinci Resolve
Cutting your MP4 file on Davinci Resolve is relatively easy. The cut tool helps you cut your YouTube video within seconds. Simply follow the steps outlined below.
- First, download and install the Davinci Resolve on your Mac. After installation, launch the MP4 cutter to begin.
- Next, create a new timeline and choose the ‘edit’ mode to begin.

- Import your video by pressing ‘Command+I’ on your keyboard. Alternatively, you can simply drag the video on the timeline.
- Now, select the cut tool and drag the marker from the beginning to where you would like to cut. Repeat this process at the end of the video.
- Afterward, click the blade button to cut your file to your desired size.

- You can now save your file by hitting the ‘export’ button and choosing your preferred file location.
Which Should I Choose, Free or Paid MP4 Cutter?
You need to consider several factors when you’re choosing the right MP4 cutter. First, you have to consider the type of video you would be editing. For YouTube, you need an MP4 cutter that also offers several video editing features you can use to enhance your video. There’s also a need to consider the available formats and quality you can export in and if the MP4 cutter allows you to add visual effects to make your video stand out on YouTube.
Another factor to consider when choosing between a paid or free MP4 cutter for YouTubers on Mac is your experience level. Are you a professional, or you’re looking for some basic app to simply cut your video? Some paid options take you step-by-step through the process of cutting your MP4 file. This type of MP4 cutter helps you advance your skill. This feature is essential because the more you know, the more you’re willing to learn.
Note that most free MP4 cutters offer limited features. Alternatively, some paid MP4 cutters are only suitable for professionals or have a steep subscription to consider. Consider your budget and if any of the editors offer you the tools you need while being affordable. You need to carefully consider if a free tool is what you’re looking for or if you don’t mind paying for more functionality.
FAQs about cutting MP4 video
- What tools should I look for in an MP4 cutter? You should look for basic cutting tools like trimming, slicing and joining. However, you also want an MP4 cutter that offers several editing features to enhance your YouTube video.
- What do most YouTubers use in cutting their videos? From our experience, most YouTubers use the MP4 cutters provided below. You need to note that some are free while some are paid. Simply pick the cutter that fits your needs.
- How can I improve my video cutting and editing skills? You need a lot of practice to learn how to cut and edit videos professionally. It’s also vital to pick software that allows you to develop your editing and cutting skills with time.
- What is the best video cutting and editing software for YouTube novices? If you’re a novice on YouTube, you can start with any basic MP4 cutter on your device. However, we recommend Wondershare Filmora if you want to develop your cutting and editing skills.
Final Thoughts
Cutting MP4 for your YouTube content is a part of becoming a professional YouTuber. When looking for an MP4 cutter that’s reliable and versatile, the goal is to get the job done without any issue. We’ve reviewed the best MP4 cutters for YouTubers on Mac in this guide. You can choose between free or paid software, depending on your needs. However, the best MP4 cutter for YouTubers on Mac is Wondershare Filmore because it is ideal for beginners and professionals. It also offers you a variety of editing features at an affordable cost.
YouTubers upload over 300 hours of video content to the platform every second. These videos cut across every niche and topic. There’s scarcely a topic you’re looking for that you won’t find a video or two discussing on YouTube. So as a YouTuber, you have to find ways to keep up and stand out from the crowd. You’ll need engaging videos that will hold your target audience’s attention so much that they will subscribe for more.
However, if the video is too long or your car doesn’t hit the right frame, it will disengage your audience. Additionally, you want a video seamlessly woven together to form a polished video. This makes MP4 cutting an essential part of the YouTube video creation process. There’s no need to purchase pricey editing equipment anymore; you can simply cut your MP4 videos from the comfort of your home. This article explores the best MP4 cutters for YouTubers on Mac; let’s take a look.
Best MP4 Cutter for YouTubers on Mac - Filmroa Video Editor
Supported System: Mac and Windows
Filmora Video Editor makes it relatively easy to cut and edit your videos like a professional. This MP4 cutter is a great option, even if you don’t have video editing skills. It offers an intuitive user interface that makes it an excellent choice for experts and novices. It also provides you with the crucial editing tools to create amazing YouTube videos after cutting your MP4 video files. With this editing tool, you’re sure to produce videos your subscribers enjoy.
With Filmora, you can add effects, color grades, and texts to your videos. There’s also a library filled with royalty-free audio you can explore. After cutting your MP4, you can use templates from this MP4 cutter to create an intro for your YouTube videos. Filmora has many features that will save you a lot of time, and using it to cut MP4 is relatively easy.
For Win 7 or later (64-bit)
For macOS 10.14 or later
Pros
- It offers an intuitive user interface
- There are several effects and overlays to utilize
- Fast rendering of videos
- Offers varying output formats
- Ideal for beginners and experts
Cons
- No DVD Menu
Steps to Cut MP4 Video for YouTubers on Mac Using Filmora
Cutting videos on Filmora is relatively easy. You have to first download and install Filmora on your device. Below are the steps to cut MP4 videos to your preference using Wondershare Filmora.
Step 1: Import MP4 Files
There are two ways you can add MP4 files to this MP4 cutter. You can either click the ‘import’ button and choose the file from your media library or drag the mp4 file to your album. After dragging to the album, drag from the album to the timeline.
Step 2: Cut MP4 Files
After importing your file, you’re ready to cut. First, simply move the indicator to the ideal position you want by dragging the top of the indicator and slider bar. Then, click the scissor button to cut once you move to your preferred time.
You can also delete any part of the MP4 file you don’t want by hitting the ‘delete’ option. If you cut various clips out of the MP4 file, you can rearrange them with the ‘drag and drop tool.
Step 3: Save and Share Cut MP4 File
Now, you can save your newly cut video file by clicking the ‘file’ button at the left corner of the Filmora software and selecting ‘save as’ from the options. The output window will appear, and you can choose the format and if you want to share directly to YouTube. Pick the option that meets your need, and you’re good to go.
More Free MP4 Cutter for YouTubers on Mac to Cut MP4 Videos
Although Wondershare Filmora is the best video cutter for YouTubers on Mac, there are free MP4 cutters you can utilize to cut your videos from the comfort of your home easily. Below, we’ve reviewed the top three options you should consider.
PowerDirector Essential
Supported System: Windows and Mac
If you’re looking for a free MP4 video cutter that ensures fast processing of videos, you should try PowerDirector Essential. This MP4 cutter allows you easily cut your YouTube videos irrespective of your experience level. You’ll be able to cut and edit your YouTube videos within a couple of minutes. In addition, PowerDirector Essential is versatile and allows you to either use the storyboard mode or timeline editor for your cutting needs.
Apart from splitting and cutting tools, you can also explore its library of stylized transitions if you want to significantly upgrade the appearance of your YouTube video professionally. YouTubers want a video cutter that offers video editing features to create your visual effects. This MP4 cutter is excellent for beginners because of its intuitive interface that you can master in minutes. You can also ensure your video has amazing audio and clear video before sharing it on YouTube. If you want high-quality, Hollywood-style videos, this is the best free MP4 cutter to achieve that.
Pros
- It supports several input and output video formats
- Easy cutting and exporting process
- Intuitive and user-friendly interface
- Ideal for beginners
- It offers various video editing tools to enhance your video
Cons
- Some features are only available on the Windows version
How to Cut Video for YouTube on Mac Using PowerDirector Essential
If you want to learn how to easily cut MP4 files using PowerDirector on a Mac computer, follow the steps below.
- Step 1: You have to download PowerDirector software on your Mac and install it. After installation, launch the software, and you’re ready to begin the cutting process.
- Step 2: Now, import the video into PowerDirector by clicking ‘import media file’ and choosing the ideal video file from your media library.
- Step 3: Add the video to your timeline and hover over the right or left edge of the video track. This would make an adjustment arrow appear on both sides of the video file.
- Step 4: Drag the arrows to the point you would like to cut and choose the ‘scissors’ button.
- Step 5: After cutting, go to the ‘produce’ tab and choose ‘online’ if you want to upload a video directly to YouTube. You can also choose to save to your Mac. Choose the output format and location and click ‘start’ to save your newly cut video.
iMovie
Supported System: Mac
iMovie is a free MP4 cutter that’s built into Mac. Therefore, there’s no need to carry out downloads or installation to utilize this editing software. Although it only offers basic editing features, it is excellent if you only want to cut MP4 video files. iMovie is great for beginners as it features a user-friendly interface that’s easy to navigate.
It is the best option for YouTubers because it allows you to crop, trim and arrange video clips in just a few minutes. Additionally, you can add visual effects to your video while also editing the audio file to enhance your video. It also allows you to link your YouTube account to share directly. Therefore, if you’re looking for an MP4 cutter to carry out quick trimming on your videos, iMovie is amongst the best free MP4 cutters.
Pros
- Easy to use and ideal for beginners
- It supports major video formats and allows you to change the output format
- Allows you to store videos in iCloud or share them directly to YouTube
- Free on Mac device
- It offers essential editing tools to enhance your video
Cons
- Editing features are limited
Steps to Cut MP4 Video for YouTube on Mac Using iMovie
This section will explain how you can cut a clip in iMovie within a few minutes. Below are the easy steps you have to follow.
- Step 1: Launch iMovie on Mac and choose ‘import file’ to select the video you want to cut.
- Step 2: To enter full-editing windows, double-click the project. At the end of the video editor, you’ll see the video editor.
- Step 3: Drag the playhead to the position you would like to cut from, and then click on it. Do this for both sides of the video.
- Step 4: Now, click ‘modify’ and choose the ‘split clip’ option to cut the selected part out.
You can delete the rest of the video by selecting it and hitting ‘delete’ on your keyboard.
- Step 5: Finally, save your newly cut video or export it to YouTube directly by clicking ‘export’ under the ‘file’ section.
OpenShot
Supported System: Windows, Mac, and Linux
OpenShot is another free, open-source MP4 cutter that you can easily use on your Mac device. It offers an intuitive interface that makes it easy to drag videos to the interface. Apart from cutting videos, other features are available like scaling, resizing, rotation, trimming, and many more. This YouTube video cutter also provides hundreds of transitions and effects to enhance your YouTube video and make it stand out amongst other Youtube videos. However, this video cutter is only an excellent choice for beginners because it lacks many advanced features.
Pros
- It is easy to use and ideal for beginners
- It offers a sleek interface for easy navigation
- Offers basic editing features
- Versatile and a cross-platform MP4 cutter
Cons
- No advanced features
- It crashes easily
Steps to Cut MP4 for YouTube on Mac Using OpenShot
OpenShot is relatively easy to use and only requires a few steps to cut your MP4 file and upload it to YouTube. Below are the easy steps to follow to cut MP4 for YouTube on Openshot.
- Step 1: First, download the MP4 cutter on your Mac and install it to begin.
- Step 2: Afterward, launch the app and add the video to cut by clicking’ import.’ Alternatively, you can simply drag the video into the app to begin.
- Step 3: Once you get the video on the timeline, drag the red line on both sides of the video to the position you want the video to start and begin.
- Step 4: Right-click on the marker and choose what you want to keep. Next, isolate the fragments from the clip you would like to keep.
- Step 5: Click the fragment you want to delete and press delete on your keyboard. You have to remove the fragments manually until your preferred result remains.
- Step 6: Choose ‘export video’ from the File tab to save your MP4 file. You can change the output format or save it as an MP4.
- Step 7: you can also share videos to your YouTube account; you have to link the YouTube account first.
More Paid MP4 Cutter for YouTubers on Mac to Cut MP4 Videos
Most times, free MP4 cutters offer limited features to enhance your YouTube video. However, there are paid MP4 cutters that will efficiently cut your MP4 files and provide advanced editing tools.
Adobe Premiere Pro
Supported System: Mac and Windows
Advanced editing software that supports different file types, including MP4, is Adobe Premier Pro. This MP4 cutter allows you to quickly trim, split, and cut your MP4. Its intuitive and fast-responding interface ensures that your video is ready within a few minutes. Beyond cutting, there are several other advanced editing features that the editing software offers you. Some include filters, chroma-key, VR editing, color adjustment, and audio editing tools to take your YouTube video to the next level.
Adobe Premiere Pro is not the best option for beginners because of its steep learning curve. However, if you have ample experience with video editing tools and want to professionally cut and edit your YouTube video, this paid MP4 cutter is worth the cost and effort. ‘
Pros
- Advanced video editing features
- Intuitive user interface
- Responsive speed
- Ideal for professional editing
Cons
- Steep learning curve
- Quite pricey
Step to Cut MP4 for YouTube on Mac Using Adobe Premiere Pro
Although Adobe Premiere Pro has an interface that’s quite intimidating to non-professionals, the steps below help simplify cutting your MP4 files for YouTube.
- Firstly, download Adobe Premiere Pro on your Mac and install it.
- After installation, launch the app and select ‘new project’ on the homepage. It will require you to name the new project and choose where you want to save it. Afterward, click ‘ok’ to begin.
- Next, go to ‘file’ and select ‘import from media’ to import the MP4 file you would like to cut. Alternatively, you can simply drag the file to the timeline.
- Next, pick the ripple edit tool and go to the beginning of the video. Drag the handle with the arrow to your desired point. Repeat this at the end of the video.
- Finally, press Q to cut the MP4 clip to the left of the blade. Next, press W to cut the clip to the right.
- Now you can save your file to your preferred file location.
Movavi Video Editor
Supported System: Mac and Windows
This is an efficient MP4 cutter that helps you remove unnecessary scenes from your YouTube videos. The timeline offers you markers that allow you easily locate the start and end scene of the video you would like to remove. Apart from cutting videos, this tool provides several premium features you can use to make your video look professional. Movavi offers a free trial you can use to determine if this editor is the best option for you. However, it comes with a Movavi watermark that you can only eliminate with the paid option.
Movavi Video Editor can add transitions, music tracks, chroma-key effects, special effects, and many more exciting features to ensure a top-quality result. Furthermore, its intuitive interface makes it relatively easy for beginners and professionals to use. Therefore, you don’t have to worry about a stiff learning curve. With Movavi, you can also change the output format to switch from MP4 to another commonly supported format.
Pros
- Simple and easy to use
- Supports various input and output formats
- Provides YouTubers with basic and advanced features
- Ideal for beginners and professionals
Cons
- Video rendering is slow for large files
- The trial version comes with a Movavi watermark
Steps to Cut MP4 for YouTube on Mac Using Movavi Video Editor
For cutting your video on Mac using Movavi video editor, you can follow the steps outlined below.
- First, download and install Movavi Video Editor on your Mac.
- After installing Movavi, launch the editor and click the ‘add files’ button to add your MP4 file.
- Once the file shows up in the media bin, drag it to the timeline to start editing your video.
- To cut your MP4 video, move the red marker at the beginning of the video to where you would like to cut. Repeat this process at the end of the video by moving to where you prefer your video to end.
- Next, click the split button to cut this clip from the rest of the video.
- Now, select the fragments you don’t want and hit the delete button to remove them immediately.
- You can also add several filters to your video if you would like to enhance your video.
- You can now save your video by hitting the ‘export’ button. You can choose different formats and video quality for your newly cut video. Select the folder to save to and click the ‘save’ button.
Davinci Resolve
Supported System: Windows and Mac
Davinci Resolve is a favorite for YouTubers who want their videos to look like Hollywood videos. However, this MP4 cutter is aimed at the professional market and supports different input and output formats for your video. Davinci Resolve offers you a variety of professional features and also supports 8k videos. In addition, it provides advanced video cutting features to ensure your video looks excellent even after cutting. You can also combine video clips after cutting without it looking unprofessional.
Although this video cutter software isn’t the best option for beginners, professional editors are sure to be satisfied with the features this editor offers. It also allows you to export directly to various social media platforms, including YouTube, to save space and time.
Pros
- Basic and advanced editing tools
- Fast rendering of videos
- Supports major video formats and video resolutions
- It offers several special effects to make your video more engaging
Cons
- Not the right option for amateurs
Steps to Cut MP4 for YouTube on Mac Using Davinci Resolve
Cutting your MP4 file on Davinci Resolve is relatively easy. The cut tool helps you cut your YouTube video within seconds. Simply follow the steps outlined below.
- First, download and install the Davinci Resolve on your Mac. After installation, launch the MP4 cutter to begin.
- Next, create a new timeline and choose the ‘edit’ mode to begin.
- Import your video by pressing ‘Command+I’ on your keyboard. Alternatively, you can simply drag the video on the timeline.
- Now, select the cut tool and drag the marker from the beginning to where you would like to cut. Repeat this process at the end of the video.
- Afterward, click the blade button to cut your file to your desired size.
- You can now save your file by hitting the ‘export’ button and choosing your preferred file location.
Which Should I Choose, Free or Paid MP4 Cutter?
You need to consider several factors when you’re choosing the right MP4 cutter. First, you have to consider the type of video you would be editing. For YouTube, you need an MP4 cutter that also offers several video editing features you can use to enhance your video. There’s also a need to consider the available formats and quality you can export in and if the MP4 cutter allows you to add visual effects to make your video stand out on YouTube.
Another factor to consider when choosing between a paid or free MP4 cutter for YouTubers on Mac is your experience level. Are you a professional, or you’re looking for some basic app to simply cut your video? Some paid options take you step-by-step through the process of cutting your MP4 file. This type of MP4 cutter helps you advance your skill. This feature is essential because the more you know, the more you’re willing to learn.
Note that most free MP4 cutters offer limited features. Alternatively, some paid MP4 cutters are only suitable for professionals or have a steep subscription to consider. Consider your budget and if any of the editors offer you the tools you need while being affordable. You need to carefully consider if a free tool is what you’re looking for or if you don’t mind paying for more functionality.
FAQs about cutting MP4 video
- What tools should I look for in an MP4 cutter? You should look for basic cutting tools like trimming, slicing and joining. However, you also want an MP4 cutter that offers several editing features to enhance your YouTube video.
- What do most YouTubers use in cutting their videos? From our experience, most YouTubers use the MP4 cutters provided below. You need to note that some are free while some are paid. Simply pick the cutter that fits your needs.
- How can I improve my video cutting and editing skills? You need a lot of practice to learn how to cut and edit videos professionally. It’s also vital to pick software that allows you to develop your editing and cutting skills with time.
- What is the best video cutting and editing software for YouTube novices? If you’re a novice on YouTube, you can start with any basic MP4 cutter on your device. However, we recommend Wondershare Filmora if you want to develop your cutting and editing skills.
Final Thoughts
Cutting MP4 for your YouTube content is a part of becoming a professional YouTuber. When looking for an MP4 cutter that’s reliable and versatile, the goal is to get the job done without any issue. We’ve reviewed the best MP4 cutters for YouTubers on Mac in this guide. You can choose between free or paid software, depending on your needs. However, the best MP4 cutter for YouTubers on Mac is Wondershare Filmore because it is ideal for beginners and professionals. It also offers you a variety of editing features at an affordable cost.
Reviewing Efectum App and The Best Alternatives for Smartphone Users
Video editors, from professionals to beginners, might be aware of the Efectum app. If not, then let us tell you it’s an editing app widely known as a pro video maker or editor. This platform was launched publicly on August 10, 2017, by Craigpark Limited. Users can avail themselves of its latest version from the Play Store or App Store of their smartphones.
Although Efectum is free to use, you must pay to use some exclusive features. Additionally, Android users benefit from the Efectum app download without a watermark facility. At the same time, Apple users have to pay for a subscription to remove watermarks from videos. Before downloading it, read this article and review your decision to work on the Efectum slow-motion app.
Slow Motion Video Maker Slow your video’s speed with better control of your keyframes to create unique cinematic effects!
Make A Slow Motion Video Make A Slow Motion Video More Features

Part 1: A Review of Efectum App and How to Use It to Perfection?
Efectum is a pro video editing or making application that adds fun to your social media feed. With various editing features, this application helps users to follow social media trends. It is a popular platform for adding fast-motion or slow-motion effects to your media. For users interested in exploring the Efectum app, below is a list of features that it offers:

- Timelapse: It’s a photographic technique to turn a longer period into a shorter clip. This application can make a timelapse video to reveal events that might skip to the eye.
- Rewind Video: The Efectum app can edit your video into reverse or rewind certain actions. To do so, you just need simple clicks, and creativity will be added to your content.
- Video Formats: Another specialty of this app is to let you import the video in a popular format. It enables you to share the clip directly on social media platforms.
- Favorites Music: In this app, you can browse music of your choice for your content. This app can extract audio from existing videos. Besides, users can pick one from the recommended list.
- Multiple Speeds: You might have heard this app as an Efectum slow-motion app. It is true because Efectum offers easy slow-motion and fast-motion transformation of clips.
- Clips Editing: Cutting, trimming, and merging clips are general features that every editing tool offers. Efectum can also combine several shots, add text, and apply filters where required.
After discovering all the possible functionalities, come to the point. As this app can convert your normal video into slow motion, the question arises: how? To solve this query, we have shown you how to use Efectum apps to create a slow-motion video.
Step 1
Take your first step and download Efectum on your smartphone. Launch the app and allow necessary permissions. From its home screen, tap the “Speed” option and access another window to import media. Choose an existing video from your phone album. Otherwise, hit the “Record” button at the top left side to capture new media (only available on Android).

Step 2
You will enter the main editing screen as you import media. Touch the “Speed” icon from the bottom toolbar and find an extended speed section. Use the slider and move it to the left for slow-motion or right for fast-motion videos. You can drag the slider to the extent you want to slow down the footage. Later, tap the Correct icon from the bottom right to save the changes.

Step 3
Now, you can also try “Trim,” “Filters,” and “Color” icons to polish your video. Afterward, go to the top right side and click the “Export” button. Wait for the processing and navigate to another screen. Choose “Save Video” to get the clip on your phone or “Share” to export on other platforms.

Part 2: Some Quick Alternatives to Efectum App for Slowing Down Videos
Efectum is undoubtedly a good platform to change video speed with other editing options. Some users might find it boring and get annoyed due to the watermark it locates in videos. They want an alternative to the Efectum app download without a watermark. Thus, in this section, we have enlisted the current best replacements for Efectum that are worth trying.
- FXMotion Slow Fast Video Maker
- CapCut - Video Editor
- InVideo
- VN-Video Editor & Maker
- InShot Video Editor & Maker
1. FXMotion Slow Fast Video Maker (iOS )
If you are unsatisfied with the Efectum app for limited speed adjustments, try this app. It is designed to change video speed in your own way with the speed graph. You can create a slow-motion video of up to 0.1x speed and a fast motion of up to 10x speed. With high-quality resolution output, it serves quick response. This application lets you share the edited video with friends on social media.

Pros
- Allow choosing output quality from 480p and 1080p resolution options.
- Provides a music library to add thrill or sensation to slow-down videos.
Cons
- Restrict you just to change speed and does not offer any feature for video editing.
2. CapCut - Video Editor (iOS /Android )
It’s a popular video editor with advanced editing and pre-designed video templates. This platform offers built-in fonts, effects, and stickers to add creativity to your content. Furthermore, CapCut provides you with Chroma key, stabilization, and Keyframe animation options. Besides these advanced features, you can alter video speed from 0.1x to 10x. Also, it lets you add a speed curve for a smooth, slow motion.

Pros
- Add auto-caption and lyrics in videos with speech recognition ability.
- Extract audio clips or add sound effects from a rich music library.
Cons
- It does not offer exporting in frame rate higher than 60fps.
3. InVideo (Android )
Instead of an Efectum app download, discover possibilities with InVideo. This app is an expert in creating aesthetic stop motions, ads, reels, and tutorials. It can speed up and speed down your clips. In addition, you can make a boomerang of shots and add cinematic transitions in clips. From its extensive music library, users can add music or import voiceovers.

Pros
- Utilize over 150 stickers, filters, and text templates to level up your projects.
- Record new footage with a built-in 60fps frame rate and 4k resolution.
Cons
- The best footage stock and other assets are reserved for subscribed users.
4. VN-Video Editor & Maker (iOS /Android )
If searching for an alternative like the Efectum app, download without the watermark; use this app. It satisfies the needs of professionals and amateur video editors with high-quality videos. VN’s speed curve is more like Adobe Premiere Pro’s speed ramping. Thus, you can adjust the playback of your video with 6-speed adjustment curves.

Pros
- It enables you to freeze frames, reverse videos, and add keyframe animations.
- Perform multi-trach timeline editing and save non-destructive editing drafts anytime.
Cons
- You might face laggings in playback or missing audio in exported videos.
5. Video Editor & Maker – InShot (iOS /Android )
Another good option in place of the Efectum app that you can consider is InShot. This platform offers some AI features such as auto-caption, smart tracking, and AI effects. InShot enables you to make smooth slow-mo with a speed ramping feature and keyframe editing. Plus, you can create multi-layered videos with filters, transitions, and AI effects.

Pros
- Make photo collages with AI effects and blend screenshots with AI context recognition.
- Export videos in 4K resolution to YouTube, Instagram, Twitter, and WhatsApp.
Cons
- Impose a watermark on videos unless you pay to remove it, which annoys many users.
Part 3: Want to Make Advanced Changes to Your Slow-Motion Videos? Shift To Wondershare Filmora
Mobile apps have enabled you to work anywhere but with a strong internet connection. If you don’t have an active internet connection, you will not process video editing. That’s exactly where desktop tools ensure smooth work progress without the internet. Moreover, desktop applications offer more flexibility in editing with advanced features.
In this regard, you should use Wondershare Filmora as an exception video editor. This software proves to be the right platform for slowing down videos with many customization options. It is integrated with AI and offers AI features to boost your productivity with creativity. You can get assistance from AI Copilot and generate copyright-free music or images on Filmora.
Free Download For Win 7 or later(64-bit)
Free Download For macOS 10.14 or later
How to Use Filmora for Creating Slow-Motion Videos
This AI platform is not limited to cutting and merging clips; thus, explore it by installing it. Using Filmora is not a big deal, but you can follow the step-by-step guide for further clarity.
Step 1Launch Filmora 13 and Initiate a Project
To begin creativity, you need to launch Filmora in your system. Ensure that you download the latest version, which is Filmora 13. Afterward, enter its main interface and tap on the “New Project” to access the editing window. Import your project in the media panel and drag it to the timeline.

Step 2Slow Down the Speed with Uniform Speed Option
Right-click on the video and select the “Uniform Speed” option from the list. Direct toward the right side and find a “Speed” slider to adjust the speed. Move it to the left for slow-motion video and preview changes simultaneously. Toggle the “Ripple Edit” and “Maintain Pitch” for better results. Go to the “AI Frame Interpolation” and choose “Optical Flow” from the extended list.

Step 3Use Speed Ramping to Customize Slow Motion and Export
If you want to shift speed in videos smoothly, press the “Speed Ramping” from the top. Pick any ramping template or tap on the “Customize” option. Reach the graph below and slow down the speed by moving the dots downward. Adjust the speed ramping by locating the graph dots and seeing changes. Now, go to the top right side and choose “Export” to get the video on your device.

Conclusion
Ultimately, the Efectum app is a fun way to play videos fast forward or slow forward. This guide has highlighted every aspect of Efectum to achieve perfection in video editing. If someone is uncomfortable with this platform, they can use an alternative explained earlier. Yet, if you haven’t found a perfect platform, use Wondershare Filmora and unlock creativity with AI.
Make A Slow Motion Video Make A Slow Motion Video More Features
Part 1: A Review of Efectum App and How to Use It to Perfection?
Efectum is a pro video editing or making application that adds fun to your social media feed. With various editing features, this application helps users to follow social media trends. It is a popular platform for adding fast-motion or slow-motion effects to your media. For users interested in exploring the Efectum app, below is a list of features that it offers:
- Timelapse: It’s a photographic technique to turn a longer period into a shorter clip. This application can make a timelapse video to reveal events that might skip to the eye.
- Rewind Video: The Efectum app can edit your video into reverse or rewind certain actions. To do so, you just need simple clicks, and creativity will be added to your content.
- Video Formats: Another specialty of this app is to let you import the video in a popular format. It enables you to share the clip directly on social media platforms.
- Favorites Music: In this app, you can browse music of your choice for your content. This app can extract audio from existing videos. Besides, users can pick one from the recommended list.
- Multiple Speeds: You might have heard this app as an Efectum slow-motion app. It is true because Efectum offers easy slow-motion and fast-motion transformation of clips.
- Clips Editing: Cutting, trimming, and merging clips are general features that every editing tool offers. Efectum can also combine several shots, add text, and apply filters where required.
After discovering all the possible functionalities, come to the point. As this app can convert your normal video into slow motion, the question arises: how? To solve this query, we have shown you how to use Efectum apps to create a slow-motion video.
Step 1
Take your first step and download Efectum on your smartphone. Launch the app and allow necessary permissions. From its home screen, tap the “Speed” option and access another window to import media. Choose an existing video from your phone album. Otherwise, hit the “Record” button at the top left side to capture new media (only available on Android).
Step 2
You will enter the main editing screen as you import media. Touch the “Speed” icon from the bottom toolbar and find an extended speed section. Use the slider and move it to the left for slow-motion or right for fast-motion videos. You can drag the slider to the extent you want to slow down the footage. Later, tap the Correct icon from the bottom right to save the changes.
Step 3
Now, you can also try “Trim,” “Filters,” and “Color” icons to polish your video. Afterward, go to the top right side and click the “Export” button. Wait for the processing and navigate to another screen. Choose “Save Video” to get the clip on your phone or “Share” to export on other platforms.
Part 2: Some Quick Alternatives to Efectum App for Slowing Down Videos
Efectum is undoubtedly a good platform to change video speed with other editing options. Some users might find it boring and get annoyed due to the watermark it locates in videos. They want an alternative to the Efectum app download without a watermark. Thus, in this section, we have enlisted the current best replacements for Efectum that are worth trying.
- FXMotion Slow Fast Video Maker
- CapCut - Video Editor
- InVideo
- VN-Video Editor & Maker
- InShot Video Editor & Maker
1. FXMotion Slow Fast Video Maker (iOS )
If you are unsatisfied with the Efectum app for limited speed adjustments, try this app. It is designed to change video speed in your own way with the speed graph. You can create a slow-motion video of up to 0.1x speed and a fast motion of up to 10x speed. With high-quality resolution output, it serves quick response. This application lets you share the edited video with friends on social media.
Pros
- Allow choosing output quality from 480p and 1080p resolution options.
- Provides a music library to add thrill or sensation to slow-down videos.
Cons
- Restrict you just to change speed and does not offer any feature for video editing.
2. CapCut - Video Editor (iOS /Android )
It’s a popular video editor with advanced editing and pre-designed video templates. This platform offers built-in fonts, effects, and stickers to add creativity to your content. Furthermore, CapCut provides you with Chroma key, stabilization, and Keyframe animation options. Besides these advanced features, you can alter video speed from 0.1x to 10x. Also, it lets you add a speed curve for a smooth, slow motion.
Pros
- Add auto-caption and lyrics in videos with speech recognition ability.
- Extract audio clips or add sound effects from a rich music library.
Cons
- It does not offer exporting in frame rate higher than 60fps.
3. InVideo (Android )
Instead of an Efectum app download, discover possibilities with InVideo. This app is an expert in creating aesthetic stop motions, ads, reels, and tutorials. It can speed up and speed down your clips. In addition, you can make a boomerang of shots and add cinematic transitions in clips. From its extensive music library, users can add music or import voiceovers.
Pros
- Utilize over 150 stickers, filters, and text templates to level up your projects.
- Record new footage with a built-in 60fps frame rate and 4k resolution.
Cons
- The best footage stock and other assets are reserved for subscribed users.
4. VN-Video Editor & Maker (iOS /Android )
If searching for an alternative like the Efectum app, download without the watermark; use this app. It satisfies the needs of professionals and amateur video editors with high-quality videos. VN’s speed curve is more like Adobe Premiere Pro’s speed ramping. Thus, you can adjust the playback of your video with 6-speed adjustment curves.
Pros
- It enables you to freeze frames, reverse videos, and add keyframe animations.
- Perform multi-trach timeline editing and save non-destructive editing drafts anytime.
Cons
- You might face laggings in playback or missing audio in exported videos.
5. Video Editor & Maker – InShot (iOS /Android )
Another good option in place of the Efectum app that you can consider is InShot. This platform offers some AI features such as auto-caption, smart tracking, and AI effects. InShot enables you to make smooth slow-mo with a speed ramping feature and keyframe editing. Plus, you can create multi-layered videos with filters, transitions, and AI effects.
Pros
- Make photo collages with AI effects and blend screenshots with AI context recognition.
- Export videos in 4K resolution to YouTube, Instagram, Twitter, and WhatsApp.
Cons
- Impose a watermark on videos unless you pay to remove it, which annoys many users.
Part 3: Want to Make Advanced Changes to Your Slow-Motion Videos? Shift To Wondershare Filmora
Mobile apps have enabled you to work anywhere but with a strong internet connection. If you don’t have an active internet connection, you will not process video editing. That’s exactly where desktop tools ensure smooth work progress without the internet. Moreover, desktop applications offer more flexibility in editing with advanced features.
In this regard, you should use Wondershare Filmora as an exception video editor. This software proves to be the right platform for slowing down videos with many customization options. It is integrated with AI and offers AI features to boost your productivity with creativity. You can get assistance from AI Copilot and generate copyright-free music or images on Filmora.
Free Download For Win 7 or later(64-bit)
Free Download For macOS 10.14 or later
How to Use Filmora for Creating Slow-Motion Videos
This AI platform is not limited to cutting and merging clips; thus, explore it by installing it. Using Filmora is not a big deal, but you can follow the step-by-step guide for further clarity.
Step 1Launch Filmora 13 and Initiate a Project
To begin creativity, you need to launch Filmora in your system. Ensure that you download the latest version, which is Filmora 13. Afterward, enter its main interface and tap on the “New Project” to access the editing window. Import your project in the media panel and drag it to the timeline.
Step 2Slow Down the Speed with Uniform Speed Option
Right-click on the video and select the “Uniform Speed” option from the list. Direct toward the right side and find a “Speed” slider to adjust the speed. Move it to the left for slow-motion video and preview changes simultaneously. Toggle the “Ripple Edit” and “Maintain Pitch” for better results. Go to the “AI Frame Interpolation” and choose “Optical Flow” from the extended list.
Step 3Use Speed Ramping to Customize Slow Motion and Export
If you want to shift speed in videos smoothly, press the “Speed Ramping” from the top. Pick any ramping template or tap on the “Customize” option. Reach the graph below and slow down the speed by moving the dots downward. Adjust the speed ramping by locating the graph dots and seeing changes. Now, go to the top right side and choose “Export” to get the video on your device.
Conclusion
Ultimately, the Efectum app is a fun way to play videos fast forward or slow forward. This guide has highlighted every aspect of Efectum to achieve perfection in video editing. If someone is uncomfortable with this platform, they can use an alternative explained earlier. Yet, if you haven’t found a perfect platform, use Wondershare Filmora and unlock creativity with AI.
How to Use LUTs in VN Editor – Complete Guide and Best LUTs Download
Hello and welcome to another article full of information and excitement. The topic of this article is LUT for the VN editor. So it will be exciting for those who want to use LUTs in their video to make them look nice and well. As we will discuss today that what is VN editor and how you can add LUTs to your videos using it on the devices it is compatible for. Moreover, where you can download some fantastic LUTs like moody LUTs, which help your videos to look nice, and which software you should use for this purpose if you are running a device on which the VN editor is not compatible. So let’s begin!
Part 1. What is VN editor?
VN editor is one of the best choices for video editing on mobiles and Mac. Fast editing, transitions, effects, filters, colors, subtitles, music, and many other features make the VN video editing app a great tool for producing and editing videos. It aims to make editing shorter and more feature-rich, empowering everyone to take control of their own lives. You cannot only produce great videos but good films as well. In the following, we will discuss how you can add LUTs to your videos using it.

Part 2. How to use LUTs in VN editor?
First, we must know that it is compatible with which platforms. So, it is now available for Android, iOS, and Mac OS only. However, you can also use it on Windows with some Android or iOS emulators, but it is not a very continent way in our suggestions. Even after doing this, it does not work well on your Windows. Maybe you will face some glitches or malfunctioning problems. So it is better to use it on only those platforms for which it is primarily available. Please read the instructions below since we will go through how to use LUTs in it later on.
On Mac:
First of all, we will learn how you can do it on Mac:
- Download the VN Editor for Mac and open it.
- Add your video and then tap the filters option.
- Now choose custom filters and then select the LUTs pack.

- Select the desired LUT and apply.
On Mobile:
Secondly, we will discuss how we can do this on our mobiles (Android or iOS). The procedure on both devices (Android or iOS) is almost comparable. Therefore, we will discuss the steps from the perspective of both of these here:
- First, download the VN editor from your mobile app store (Android or iOS) and the LUTs pack you want to use in your video.
- After downloading them on your mobile, open the VN editor application.
- Create a new project and add your video to it.

- Then click on the Filters option and select add external or custom filters option next to the existing filters.
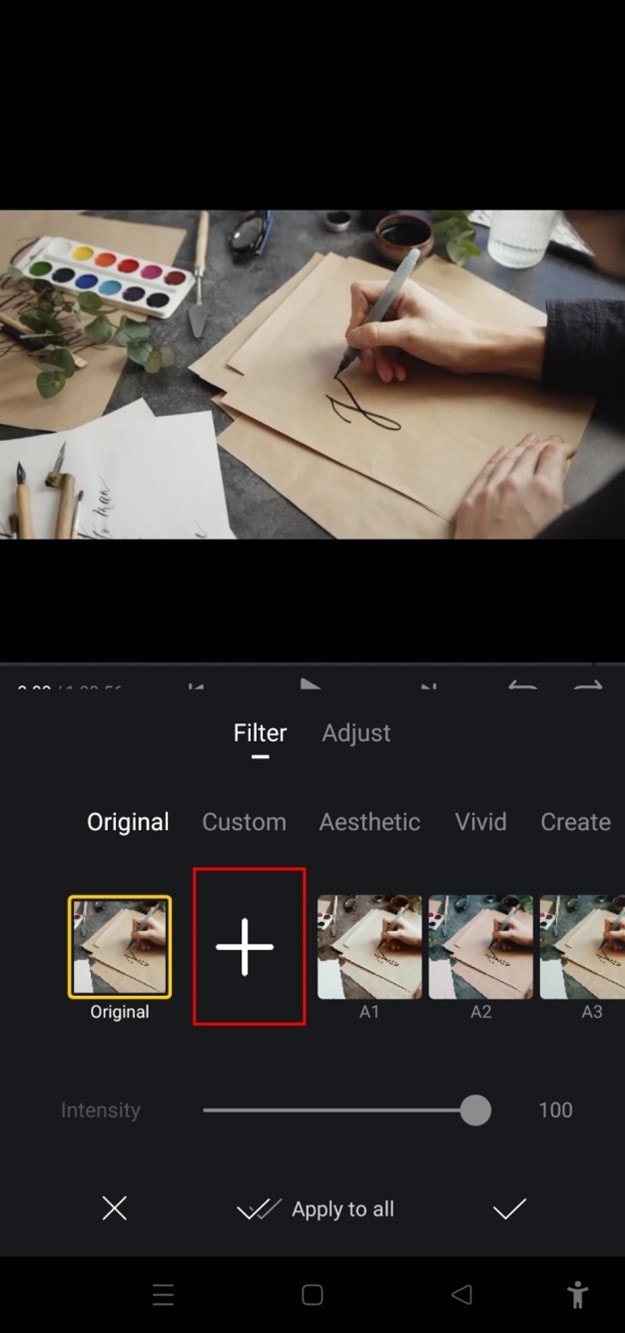
- It will take you to the File manager of your mobile, from which you have to find the folder in which you have stored your LUTs.
- After finding them, you can select those LUTs you want to use in your video and then click on the done or select button.
- Your downloaded LUTs start showing in the VN editor, and you can use them in your videos as you want.
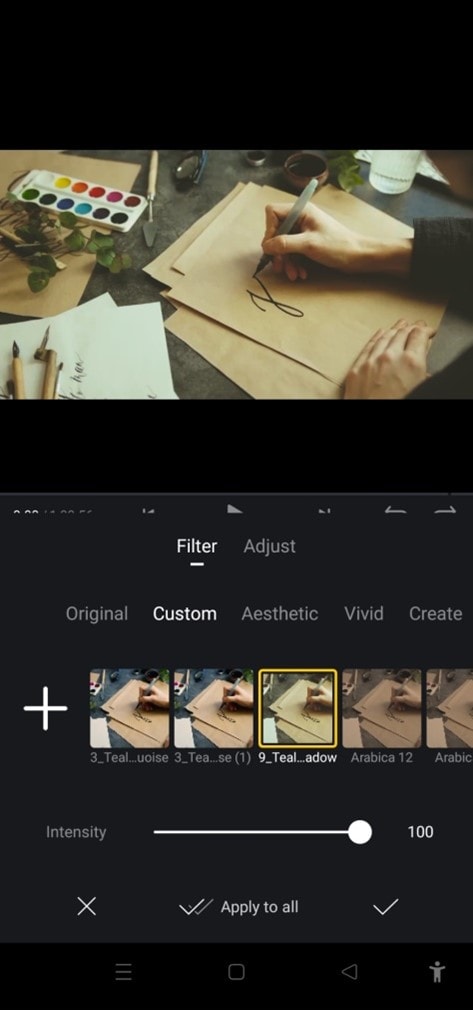
Part 3. Best LUTs resource for VN video editor
1. Presets Store
Presets Store is an online platform that helps you with various Filters, LUTs, and other presets. So you can download LUTs for your videos for the VN editor using it. However, it’s not a free service. You have to pay for the LUTs you want to download from here. You can visit their YouTube channel to follow the latest LUTs, Filters and other presets on this platform.
2. Apna Editz
Apna Editz is another online platform you can use for this purpose. It also provides you with a fantastic variety of Presets like LUTs, Filters, and many other similar effects, which you can use in your video using the VN editor. The main Pros of this recommendation are that it’s a free website. So you can download LUTs for your videos from it for free. Keep an eye on their YouTube channel to be updated about the latest LUTs.
3. Lut Preset
Lut Preset is another alternative to all the above ones. You can get almost all your favorite LUTs for VN editor for free here and then use them in your videos as you want. They also share the latest LUTs on their YouTube Channel.
4. Pencil Hub
Pencil Hub is also a good option in this concern. However, it does not have too much variety of VN LUTs, but you can still use it to download some of the best LUTs for VN editors. To get informed of their every new effect and LUTs, their YouTube channel is the primary source.
5. YRP EDITZ
YRP ETIDZ is another good option if you are still looking for some fantastic VN LUTs. They, too not have a large variety of presets and LUTs. However, if you want some most commonly used LUTs for VN Editor, then they are a good option. You’ll notify of their most website updates by checking their YouTube channel.
Part 4. How to add LUTs to the best alternative to the VN editor?
VN Editor is undoubtedly an excellent choice to add LUTs to your videos. However, the VN editor is best suitable for mobile devices. To enhance your LUTs and effects, it would be great if you used some desktop software. Wondershare Filmora offers a great variety of built-in LUTs to choose from. Let’s look at how we can use Filmora to add LUTs:
- Add your video and tap the tools, then click the Color option.
- Now select the Color Correction option and then choose 3D LUT.
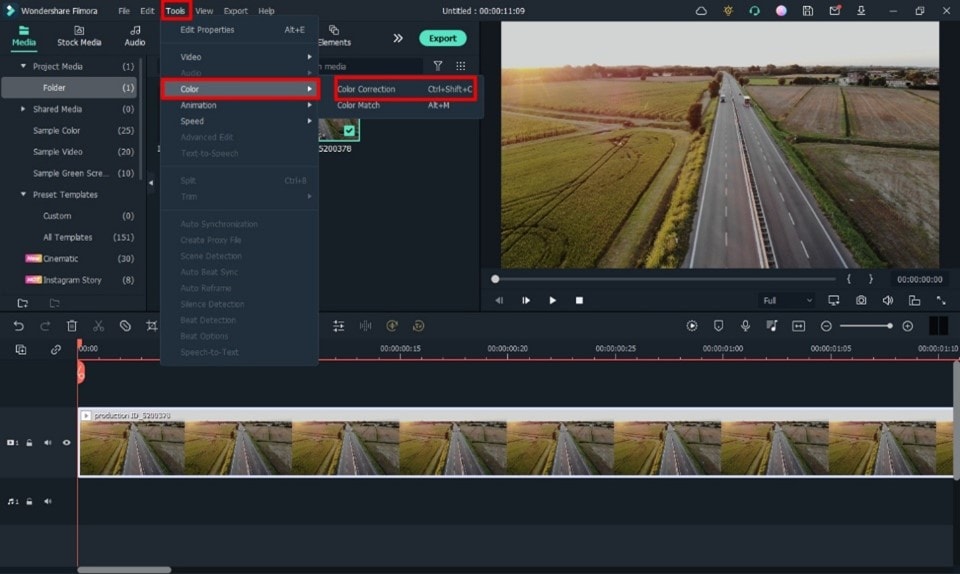
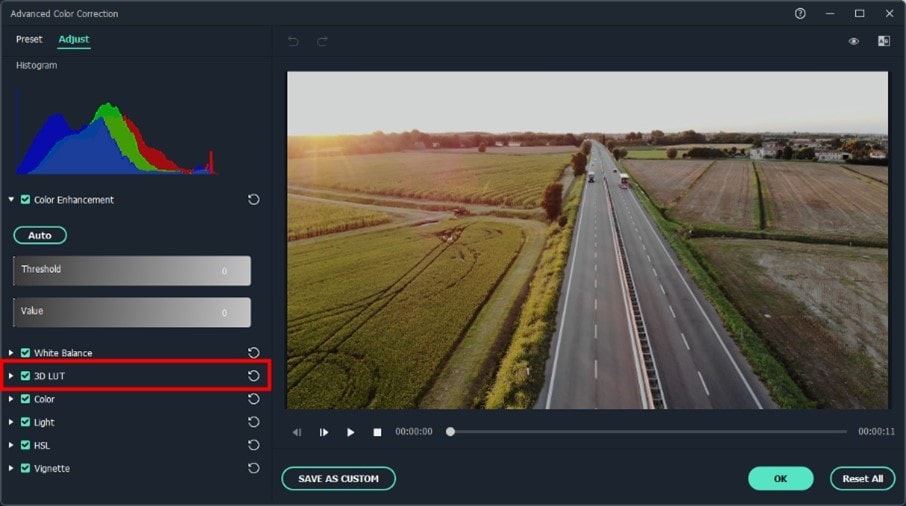
- Click the drop-down menu and select the Load new LUT option. Here you can import other downloaded preset LUTs to use
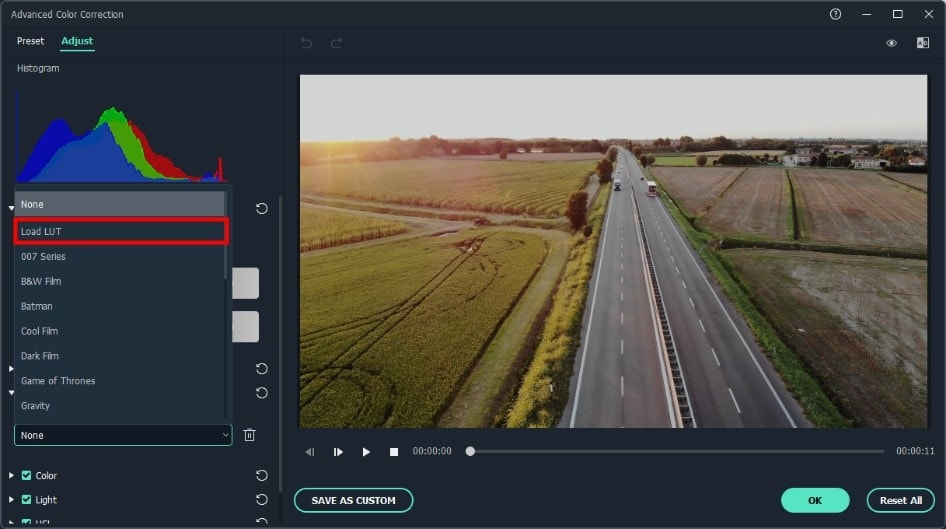
- Choose the LUT and click OK. Your new fantastic video is ready now.

Closing Thoughts
This post recommends several lut resources and demonstrates how to import them if you are a devoted user of VN editor and want to learn how to utilize it for video color grading. The more potent desktop editor Wondershare Filmora, which offers a range of built-in LUT sources and supports color grading settings, is of course recommended if you want to take your videos to the next level. Thanks for reading.
Free Download For Win 7 or later(64-bit)
Free Download For macOS 10.14 or later
2. Apna Editz
Apna Editz is another online platform you can use for this purpose. It also provides you with a fantastic variety of Presets like LUTs, Filters, and many other similar effects, which you can use in your video using the VN editor. The main Pros of this recommendation are that it’s a free website. So you can download LUTs for your videos from it for free. Keep an eye on their YouTube channel to be updated about the latest LUTs.
3. Lut Preset
Lut Preset is another alternative to all the above ones. You can get almost all your favorite LUTs for VN editor for free here and then use them in your videos as you want. They also share the latest LUTs on their YouTube Channel.
4. Pencil Hub
Pencil Hub is also a good option in this concern. However, it does not have too much variety of VN LUTs, but you can still use it to download some of the best LUTs for VN editors. To get informed of their every new effect and LUTs, their YouTube channel is the primary source.
5. YRP EDITZ
YRP ETIDZ is another good option if you are still looking for some fantastic VN LUTs. They, too not have a large variety of presets and LUTs. However, if you want some most commonly used LUTs for VN Editor, then they are a good option. You’ll notify of their most website updates by checking their YouTube channel.
Part 4. How to add LUTs to the best alternative to the VN editor?
VN Editor is undoubtedly an excellent choice to add LUTs to your videos. However, the VN editor is best suitable for mobile devices. To enhance your LUTs and effects, it would be great if you used some desktop software. Wondershare Filmora offers a great variety of built-in LUTs to choose from. Let’s look at how we can use Filmora to add LUTs:
- Add your video and tap the tools, then click the Color option.
- Now select the Color Correction option and then choose 3D LUT.
- Click the drop-down menu and select the Load new LUT option. Here you can import other downloaded preset LUTs to use
- Choose the LUT and click OK. Your new fantastic video is ready now.
Closing Thoughts
This post recommends several lut resources and demonstrates how to import them if you are a devoted user of VN editor and want to learn how to utilize it for video color grading. The more potent desktop editor Wondershare Filmora, which offers a range of built-in LUT sources and supports color grading settings, is of course recommended if you want to take your videos to the next level. Thanks for reading.
Free Download For Win 7 or later(64-bit)
Free Download For macOS 10.14 or later
How to Clone Yourself in Videos with Filmora?
With the help of video editing programs like Filmora , you can create clones of yourself. Whether you’re looking to create a funny skit or a serious video, cloning yourself can add much production value to your project.
In this article, we’ll walk you through the process of how to clone yourself in videos using Filmora.
Part 1: How to Film Clips for Cloning Effects?
To make cloning effects, you will need to take two different shots and use a tripod to place the camera, so the frame doesn’t change.
Shooting the first clip
For the first shot, stay on one side of the frame and do the first action. For example, you can pretend to yank and take off your jacket. Then, drop the jacket to the other side of the frame.

To make it more realistic, make an interaction by reacting to the “clone” while facing the other direction.

Shooting the second clip
Then, shoot for the second clip without changing the frame. You will have to go to the place where you dropped the jacket from the first shot.

Act as if you have just appeared there and give a reaction to the other side as well.
Part 2: How to Do the Clone Effect with Filmora?
After you have shot the necessary film clips, bring the clips into Filmora 11. If you haven’t installed Filmora yet, you can go to their website and download it here:
Free Download For Win 7 or later(64-bit)
Free Download For macOS 10.14 or later
Once you have opened Filmora 11, follow the steps below:
Step1 Bring the first clip to the timeline and cut the clip where you pretend to yank and take off the jacket. Select and delete the unnecessary clip.

Step2 After you have the first part of the effect ready, let’s start working on the clone part using masking.
First, place the second clip on a different window track, and the starting point is where you react to the “clone.”

Then, double-click the second clip and go to the Filmora setting window. Tap on the Mask section > Single line.

On the preview screen, adjust the position of the mask to only show “the clone.”

Set the blur strength on the setting to make a smoother edge transition.
Step3 If the timing of the two clips doesn’t match, you can fix it using the speed ramping feature on Filmora 11. To use it, double-click the second clip and select Speed > Speed Ramping > Customize.

Move the keyframe up to increase the speed. You can adjust it according to your needs.

Step4 Once you are satisfied, adjust the clip length on the timeline and make sure that both clips finish at the same time.

Extra tip: Add one more effect to make it more magical.
Step1 Open the Effects window and search for “up down 1.”

Step2 Drag and drop the effect onto the timeline where the first cut is set. Adjust the effect length to match the action.

Then, drag and drop the effect again in the transition between the first and the second clip. Adjust it to the appropriate length, then it will give a more dramatic effect.
Step3 You can playback and see how it looks on the preview screen.
Summary
Making a clone effect on video is easy using Filmora. You can use the same trick to create a fashion lookbook video or other creative content to make them more engaging. Let us know if you want to see more tutorials.
Free Download For Win 7 or later(64-bit)
Free Download For macOS 10.14 or later
Free Download For macOS 10.14 or later
Once you have opened Filmora 11, follow the steps below:
Step1 Bring the first clip to the timeline and cut the clip where you pretend to yank and take off the jacket. Select and delete the unnecessary clip.
Step2 After you have the first part of the effect ready, let’s start working on the clone part using masking.
First, place the second clip on a different window track, and the starting point is where you react to the “clone.”
Then, double-click the second clip and go to the Filmora setting window. Tap on the Mask section > Single line.
On the preview screen, adjust the position of the mask to only show “the clone.”
Set the blur strength on the setting to make a smoother edge transition.
Step3 If the timing of the two clips doesn’t match, you can fix it using the speed ramping feature on Filmora 11. To use it, double-click the second clip and select Speed > Speed Ramping > Customize.
Move the keyframe up to increase the speed. You can adjust it according to your needs.
Step4 Once you are satisfied, adjust the clip length on the timeline and make sure that both clips finish at the same time.
Extra tip: Add one more effect to make it more magical.
Step1 Open the Effects window and search for “up down 1.”
Step2 Drag and drop the effect onto the timeline where the first cut is set. Adjust the effect length to match the action.
Then, drag and drop the effect again in the transition between the first and the second clip. Adjust it to the appropriate length, then it will give a more dramatic effect.
Step3 You can playback and see how it looks on the preview screen.
Summary
Making a clone effect on video is easy using Filmora. You can use the same trick to create a fashion lookbook video or other creative content to make them more engaging. Let us know if you want to see more tutorials.
Free Download For Win 7 or later(64-bit)
Free Download For macOS 10.14 or later
Also read:
- New 2024 Approved 11 Tools To Create Radial Blur Photo Mobile And Desktop
- Video Marketing Is Adopted by Most Companies in This Digital Era. In This Post, We Are Going to Share some Useful Tips to Create a Better Product Video Ads to Help Prompt Business
- New Create Eye-Catching Slow-Motion Videos to Set Your Own Trend. For This Purpose, Read This Article to Find and Learn to Use CapCuts New Slow-Motion Templates
- In 2024, The Ultimate Guide to Countdown Animation in Videos
- Want to Loop a Video to Extend Its Duration? You Can Use iMovie to Loop a Video on Your Mac and iPhone and We Will Illustrate How to Loop a Video in iMovie for 2024
- In 2024, 20 Must-Have Graduation Songs for Slideshow
- New Back up and Organize Your Files to Protect Any Misfortune Befalling Them. The Article Will Guide You on How to Back up and Manage Your Footage
- New 2024 Approved A Complete Guide to Use Distortion Effect in Premiere Pro
- Updated Color Match Game Top Tips for You for 2024
- Updated How to Zoom Webcam on PC
- In 2024, Do You Have the Habit to Create Subtitle for Your Video? You Can Always Add Open and Close Subtitles to Your Video to Make It Perfect. Follow This Article to Learn More About It
- 2024 Approved End Screen Makers
- 2024 Approved You Can Splice Video on the iPhone Using Various Applications. This Article Will Guide You Through the Steps Necessary to Splice Your Videos
- 2024 Approved To Find the Best Tool Out of Hundreds of Online and Offline GIF to Video Converters, You Need to Check These Specifications. Read This Review and Get the Best Out of the Best
- New Guide to Synchronizing Your Audio And Videos Properly?
- Reviewing Efectum App For Smartphone Users Create Slow Motion Videos for 2024
- Updated Enhance Your Video Color Accuracy with Video Scopes for 2024
- New Something About Skin Care Vlog Ideas
- New 100 Working Methods to Learn How to Rotate TikTok Video for 2024
- New Guide To Selecting and Using the Best Braw Luts
- In 2024, How To Make Ninja Jump Effect with Filmora
- In 2024, Do You Want to Edit a TikTok After Posting? This Article Will Provide Multiple Methods Through Which You Can Do It in No Time
- How to Create Your Own LUTs for Your Video
- Updated 2024 Approved Top 15 Best Free MP4 Video Rotators Windows, Mac, Android, iPhone & Online
- Separate Audio From Video in DaVinci Resolve Step by Step for 2024
- In 2024, How to Make First Impression Review Video
- New How to Make a Slideshow with Icecream Slideshow Maker for 2024
- New Some Leading AI Tools to Replace Sky Backgrounds for 2024
- 2024 Approved Step by Step to Cut a Video in QuickTime
- New How to Trim/Crop Video in Microsoft Powerpoint
- Updated In 2024, Learning Some Perfect Ways to Convert a Slow-Motion Video to Normal
- New How to Use Twixtor Effect to Create Super Slow-Motion Video?
- New Want to Sync Separate Audio with Video? Check Out This Guide to Do It in the Simplest Way Using the Video Editor - Wondershare Filmora
- Updated Best 7 Color Match Paint Apps
- Updated Time Bending Brilliance The Ultimate Slow Motion Video Makers for 2024
- New Every Compositor Should Know The Tips of Color Match in After Effects
- Updated 2024 Approved 4 Solutions to Add White Border to Video on Mobile and Desktop
- Things You Dont Know About Motorola Moto G24 Reset Code | Dr.fone
- Video Fixer Software for all Corrupt Videos of Asus ROG Phone 7
- The Best iSpoofer Alternative to Try On Google Pixel Fold | Dr.fone
- In 2024, How To Delete iCloud Account Remove Your Apple ID Permanently On iPhone 15 Pro
- How To Activate and Use Life360 Ghost Mode On Motorola Moto G84 5G | Dr.fone
- New Live Commerce Next Chapter Can AI Unlock Its True Potential for 2024
- In 2024, How To Track IMEI Number Of Xiaomi Redmi Note 12 5G Through Google Earth?
- New 5 Different Animation Styles A Simple but Complete Guide for 2024
- 3 Best Tools to Hard Reset Oppo K11x | Dr.fone
- Easy Guide How To Bypass Oppo A79 5G FRP Android 10/11/12/13
- In 2024, Downloading SamFw FRP Tool 3.0 for Vivo S18 Pro
- 4 Solutions to Fix Unfortunately Your App Has Stopped Error on Xiaomi 13T Pro | Dr.fone
- In 2024, Unlocking Made Easy The Best 10 Apps for Unlocking Your Infinix Hot 30i Device
- How to Fake Snapchat Location without Jailbreak On Samsung Galaxy A25 5G | Dr.fone
- How to Samsung Galaxy S21 FE 5G (2023) Get Deleted Phone Number Back with Ease and Safety
- How to Put iPhone 15 or iPad on Recovery mode? (Step by Step Tutorial) | Stellar
- In 2024, 2 Ways to Transfer Text Messages from ZTE Axon 40 Lite to iPhone 15/14/13/12/11/X/8/ | Dr.fone
- In 2024, How to Unlock Samsung Galaxy S23+ Phone without Any Data Loss
- Unlock Your Samsung Galaxy S23 FE Phone with Ease The 3 Best Lock Screen Removal Tools
- In 2024, Bypassing Google Account With vnROM Bypass For Samsung Galaxy A54 5G
- Easy Steps on How To Create a New Apple ID Account On iPhone XR
- In 2024, How PGSharp Save You from Ban While Spoofing Pokemon Go On Asus ROG Phone 7? | Dr.fone
- New 2024 Approved Talking Photo Feature
- In 2024, The 10 Best Tools to Bypass iCloud Activation Lock From Apple iPhone 15 You Should Try Out
- Fake Android Location without Rooting For Your Honor Magic 6 | Dr.fone
- In 2024, How to Bypass iPhone 12 Pro Passcode Easily Video Inside | Dr.fone
- How To Restore Missing Messages Files from Realme 11 Pro+
- Prank Your Friends! Easy Ways to Fake and Share Google Maps Location On Asus ROG Phone 7 Ultimate | Dr.fone
- Title: Updated 2024 Approved What Is the Best MP4 Cutter for YouTuber on Mac?
- Author: Chloe
- Created at : 2024-04-24 07:08:40
- Updated at : 2024-04-25 07:08:40
- Link: https://ai-editing-video.techidaily.com/updated-2024-approved-what-is-the-best-mp4-cutter-for-youtuber-on-mac/
- License: This work is licensed under CC BY-NC-SA 4.0.
