
:max_bytes(150000):strip_icc():format(webp)/GettyImages-591408071-5bc7767d4cedfd0026a2ce3f.jpg)
Updated 2024 Approved Where To Find The Best Free Canon LUTs? Learn More
Where To Find The Best Free Canon LUTs? Learn More
LUTs (look-up tables) enhance color grading within photos and videos. After all, they are special editing tools for upscaling visual content. There are different types of LUTs with unique characteristics and styling. One of these categories is Canon cinematic LUTs, an exceptional 3D LUT preset. In this article, you’ll find information about Canon LUTs with the best recommendations.
- Part 2: Top-Best Free Canon LUTs To Consider in 2024
- Part 3: Using The Most Effective LUTs in Wondershare Filmora
Part 1: What are 3D LUTs?
LUTs are important editing tools for upgrading color schemas of visual content. The 3D LUTs are special LUT presets used in color correction and enhancement. 3D LUT is a mathematical table that maps input and output colors. It helps adjust the color tones, textures, and intensity in an optimized way. So, while selecting any 3D LUT filter, it’s applied in a calculated way.
The 3D LUT is equipped with three-dimensional visual art that determines brightness, hue, and saturation. It has depicted its use cases in industries like gaming and film production. Thus, they play a crucial role in matching color content from different cameras. This develops more consistency with customized looks and appealing visualization.
Part 2: Top-Best Free Canon LUTs To Consider in 2024
The Internet is overloaded with amazing download Canon LUTs. Meanwhile, choosing the right LUTs for your task can be difficult. Don’t worry; you will find the list of best Canon LUTs here:
1.Cinema Canon C-Log3
Take your video concept to the next level with cinema Canon C-Log3 LUT. In this LUT pack, you will find 25 Cinema Rec 709 and 25 Cinema C-Log3 LUTs. If you’ve videos, clips, presentations, or social videos, this LUT pack is ideal. Such LUTs are very easy to use. You only need to drag or import them into your videos.

2. City Building
Transform your city building with this free Canon LUT pack. There are exciting LUT preset filters for providing new looks into tall building structures. The combination of weather, greenery, traffic, and buildings demands upgraded looks, for which such LUTs are ideal. With special color orientation, this LUTs pack will optimize color schemes within the city.

3. Canon C-Log Blockbuster
Add special blockbusting looks to your important video clips. With the Canon C-Log Blockbuster LUTs pack, upgrade your videos with a cinematic touch. There are 20 Blockbuster C-Log LUTs that will extend the color grading of your videos. This also improves the quality of your clips, bringing more engagement. Thus, you can make your documentaries and social clips more enchanting.

4. Slight Warmth
Blend unique sunlight touch to your outdoor visual media with these free Canon LUTs. It helps you improve the standards of your images and videos with evening sunshine. Your important outdoor moments will become captured in attractive visual media with pleasing tranquility. The available LUT filter possesses a warm color gradient to initiate creativity.

5. Film Canon C-Log2
Using the film Canon C-Log2 pack, you will find amazing LUT color presets. You can use these LUT filters within your documented or personal clips and movies. Find some prominent LUTs, including the 22 Canon C-Log2 and 22 Rec 709 LUTs in the pack. All these LUTs are special and unique, with extensive color gradients. You can import the preset file or drag it into the video for magical effects.

6. Sun Flare
Are your captured images or recorded videos in a dull location? There is an option to transform quality using this sun flare Canon LUT. With its bright color presets, this LUT can correct colors within dull visual content. This way, the color schemes would be upgraded with more light and brightness. So, don’t worry, even if your picture is captured within a dull environment.

7. Vintage
You need not have any darker blueish effects on your outdoor visual media anymore. With vintage Canon LUT download, enhance color grading in an optimized way. The vintage LUT is backed with special color, tone, and style. When you apply these LUTs to your photo or video, the quality will improve. You will witness color enhancement in a quick time.

8. Blue Skies
The sky is blue as the water. Thus, if your visual content has natural landmarks, provide blue touch. After all, blueish effects will enlighten your visual content in an appealing way. With next-level color grading, you will feel special emotions and feelings vibes. The LUTs are easy to use and integrate into your images or videos.

9. Filmic Style
Blend extraordinary filmy looks into your graphical media with Filmic Style Canon LUT. This LUT is special because it leverages top-level color grading with resolution enhancements. The colors of your visual content will rise, and quality will also improve. So if you’re inspired by the cinematic display, this LUT provides optimized colors.

10. City Film
An aerial picture of your city determines its beauty. But the sandy or dusty atmosphere can ruin picture quality. Using this Canon LUT, you can upscale your city picture. There are unique color gradients that eliminate dust for clarity within the image. Meanwhile, with the correct color combination, you’ll see a clean environment overall.

11. Dusty Light
Sometimes interior images look more attractive in dusty lighting. This LUT pack comes with diverse filter presets that add brownish dusty looks. Thus, your visual content will be enhanced with optimized resolutions within dusty lighting. The Canon LUT will adjust the color schemes within your visual content. Hence, you will have a visually appealing image with outstanding dusty contrast.

12. Tinted Shades
Make your outings more attractive with stylish tints. By using this free Canon LUT, you can add faded tints to your images or videos. Meanwhile, the tinted shades will provide impressive looks within a dull atmosphere. For outdoor photography, this LUT is ideal because of its dark hues and saturated colors. The filter combines a range of color tools for the best output.

13. W&B
Black and white is a vintage color combination that is beyond levels. With this LUTs pack, you can improvise your visual content with a W&B touch. This means LUTs will replace color gradients with stylish black-and-white displays. Meanwhile, the LUT will adjust hue, saturation, contrast, and brightness. As a final result, you will receive attractive W&B content.

14. Pink Grade
Red-brownish mountains look impressive in their original colors. A pink-grade LUT filter can bring originality to your captured videos or photos. This way, the LUT will accurately apply pink color grading with consistency. The mountain which you captured will start looking great again. Pink color schemes are also more attractive when it comes to outdoor visual content.

15. Landscape
Landscapes look great in their clean yet natural colors. But if your photography or videography goes wrong, landscapes may look poor. In this scenario, using a landscape Canon LUT is a great thing to have. After all, the LUT has useful color preset filters that will provide refreshing looks. The greenery will be restored, and the blue sky will be back.

16. Landscape
The bright yet exceptional blue color of the sea is always mind-blowing. If you want to use the blueish sea filter effect, download this Canon cinematic LUTs. There are special filter effects that will enhance resoLUTions and optimize color schemas. The colors are transformed while keeping blueish sea effects in the process. The end result is always amazing, with naturally appealing graphics.

Part 3: Using The Most Effective LUTs in Wondershare Filmora
In this digital age, the use of technology is revolutionizing video editing. An example is 3D Canon LUTs for upscaling and enhancing visual colors in media. The Canon LUTs are special because of their improvised color grading and schemas. Using Wondershare Filmora , you can download Canon LUTs within a range of filter presets. There are, in total, 200+ LUT filter presets to fulfill your video editing needs within this video editor by default.
In contrast, you can use Wondershare Filmora for other video editing tasks as well. You can edit your video, add music tracks, or correct background noises. You can also add different effects, stickers, and transitions. Let’s discover more useful features of Filmora.

Top Features of Wondershare Filmora
- Stock Media: Filmora has the availability of 10 billion+ free stock media. So you if don’t have your pictures and videos, stock media can provide them. There are different categories of unique visual media.
- Extended Plug-ins: For a better editing experience, you can add countless filter plug-ins. This includes NewBlue, BorisFX, and many others. With plug-ins, you can add a more extensive color enhancement.
- Motion Tracking: The presence of motion tracking allows tracking of object movement in the video. Thus, you can pin media files, text, or graphics to that motion. Your content will look visually appealing with the use of this specific feature.
- Speed Ramping: Using Filmora, you can change the speed of your video through speed ramping. The speed could be changed uniformly or speedily. It depends on your video requirements.
Empower your videos with a new mood using different LUTs. Filmora now offers 100+ top-quality 3D LUTs cover a broad range of scenarios. Transform your videos with Filmora’s powerful 3D LUTs.
Apply LUT on Videos Apply LUT on Videos Learn More


Conclusion
Like other LUTs, Canon LUTs are also special and unique in their kind. They provide 3D cinematic looks with visually attractive color corrections. Meanwhile, in this article, you found the best Canon LUTs for editing visual media. You also learned about Wondershare Filmora, the best video editing and enhancement tool. The provided details of this video editing tool will make it easy for you to adapt to the 200+ available presets on the platform.
Part 1: What are 3D LUTs?
LUTs are important editing tools for upgrading color schemas of visual content. The 3D LUTs are special LUT presets used in color correction and enhancement. 3D LUT is a mathematical table that maps input and output colors. It helps adjust the color tones, textures, and intensity in an optimized way. So, while selecting any 3D LUT filter, it’s applied in a calculated way.
The 3D LUT is equipped with three-dimensional visual art that determines brightness, hue, and saturation. It has depicted its use cases in industries like gaming and film production. Thus, they play a crucial role in matching color content from different cameras. This develops more consistency with customized looks and appealing visualization.
Part 2: Top-Best Free Canon LUTs To Consider in 2024
The Internet is overloaded with amazing download Canon LUTs. Meanwhile, choosing the right LUTs for your task can be difficult. Don’t worry; you will find the list of best Canon LUTs here:
1.Cinema Canon C-Log3
Take your video concept to the next level with cinema Canon C-Log3 LUT. In this LUT pack, you will find 25 Cinema Rec 709 and 25 Cinema C-Log3 LUTs. If you’ve videos, clips, presentations, or social videos, this LUT pack is ideal. Such LUTs are very easy to use. You only need to drag or import them into your videos.
2. City Building
Transform your city building with this free Canon LUT pack. There are exciting LUT preset filters for providing new looks into tall building structures. The combination of weather, greenery, traffic, and buildings demands upgraded looks, for which such LUTs are ideal. With special color orientation, this LUTs pack will optimize color schemes within the city.
3. Canon C-Log Blockbuster
Add special blockbusting looks to your important video clips. With the Canon C-Log Blockbuster LUTs pack, upgrade your videos with a cinematic touch. There are 20 Blockbuster C-Log LUTs that will extend the color grading of your videos. This also improves the quality of your clips, bringing more engagement. Thus, you can make your documentaries and social clips more enchanting.
4. Slight Warmth
Blend unique sunlight touch to your outdoor visual media with these free Canon LUTs. It helps you improve the standards of your images and videos with evening sunshine. Your important outdoor moments will become captured in attractive visual media with pleasing tranquility. The available LUT filter possesses a warm color gradient to initiate creativity.
5. Film Canon C-Log2
Using the film Canon C-Log2 pack, you will find amazing LUT color presets. You can use these LUT filters within your documented or personal clips and movies. Find some prominent LUTs, including the 22 Canon C-Log2 and 22 Rec 709 LUTs in the pack. All these LUTs are special and unique, with extensive color gradients. You can import the preset file or drag it into the video for magical effects.
6. Sun Flare
Are your captured images or recorded videos in a dull location? There is an option to transform quality using this sun flare Canon LUT. With its bright color presets, this LUT can correct colors within dull visual content. This way, the color schemes would be upgraded with more light and brightness. So, don’t worry, even if your picture is captured within a dull environment.
7. Vintage
You need not have any darker blueish effects on your outdoor visual media anymore. With vintage Canon LUT download, enhance color grading in an optimized way. The vintage LUT is backed with special color, tone, and style. When you apply these LUTs to your photo or video, the quality will improve. You will witness color enhancement in a quick time.
8. Blue Skies
The sky is blue as the water. Thus, if your visual content has natural landmarks, provide blue touch. After all, blueish effects will enlighten your visual content in an appealing way. With next-level color grading, you will feel special emotions and feelings vibes. The LUTs are easy to use and integrate into your images or videos.
9. Filmic Style
Blend extraordinary filmy looks into your graphical media with Filmic Style Canon LUT. This LUT is special because it leverages top-level color grading with resolution enhancements. The colors of your visual content will rise, and quality will also improve. So if you’re inspired by the cinematic display, this LUT provides optimized colors.
10. City Film
An aerial picture of your city determines its beauty. But the sandy or dusty atmosphere can ruin picture quality. Using this Canon LUT, you can upscale your city picture. There are unique color gradients that eliminate dust for clarity within the image. Meanwhile, with the correct color combination, you’ll see a clean environment overall.
11. Dusty Light
Sometimes interior images look more attractive in dusty lighting. This LUT pack comes with diverse filter presets that add brownish dusty looks. Thus, your visual content will be enhanced with optimized resolutions within dusty lighting. The Canon LUT will adjust the color schemes within your visual content. Hence, you will have a visually appealing image with outstanding dusty contrast.
12. Tinted Shades
Make your outings more attractive with stylish tints. By using this free Canon LUT, you can add faded tints to your images or videos. Meanwhile, the tinted shades will provide impressive looks within a dull atmosphere. For outdoor photography, this LUT is ideal because of its dark hues and saturated colors. The filter combines a range of color tools for the best output.
13. W&B
Black and white is a vintage color combination that is beyond levels. With this LUTs pack, you can improvise your visual content with a W&B touch. This means LUTs will replace color gradients with stylish black-and-white displays. Meanwhile, the LUT will adjust hue, saturation, contrast, and brightness. As a final result, you will receive attractive W&B content.
14. Pink Grade
Red-brownish mountains look impressive in their original colors. A pink-grade LUT filter can bring originality to your captured videos or photos. This way, the LUT will accurately apply pink color grading with consistency. The mountain which you captured will start looking great again. Pink color schemes are also more attractive when it comes to outdoor visual content.
15. Landscape
Landscapes look great in their clean yet natural colors. But if your photography or videography goes wrong, landscapes may look poor. In this scenario, using a landscape Canon LUT is a great thing to have. After all, the LUT has useful color preset filters that will provide refreshing looks. The greenery will be restored, and the blue sky will be back.
16. Landscape
The bright yet exceptional blue color of the sea is always mind-blowing. If you want to use the blueish sea filter effect, download this Canon cinematic LUTs. There are special filter effects that will enhance resoLUTions and optimize color schemas. The colors are transformed while keeping blueish sea effects in the process. The end result is always amazing, with naturally appealing graphics.
Part 3: Using The Most Effective LUTs in Wondershare Filmora
In this digital age, the use of technology is revolutionizing video editing. An example is 3D Canon LUTs for upscaling and enhancing visual colors in media. The Canon LUTs are special because of their improvised color grading and schemas. Using Wondershare Filmora , you can download Canon LUTs within a range of filter presets. There are, in total, 200+ LUT filter presets to fulfill your video editing needs within this video editor by default.
In contrast, you can use Wondershare Filmora for other video editing tasks as well. You can edit your video, add music tracks, or correct background noises. You can also add different effects, stickers, and transitions. Let’s discover more useful features of Filmora.
Top Features of Wondershare Filmora
- Stock Media: Filmora has the availability of 10 billion+ free stock media. So you if don’t have your pictures and videos, stock media can provide them. There are different categories of unique visual media.
- Extended Plug-ins: For a better editing experience, you can add countless filter plug-ins. This includes NewBlue, BorisFX, and many others. With plug-ins, you can add a more extensive color enhancement.
- Motion Tracking: The presence of motion tracking allows tracking of object movement in the video. Thus, you can pin media files, text, or graphics to that motion. Your content will look visually appealing with the use of this specific feature.
- Speed Ramping: Using Filmora, you can change the speed of your video through speed ramping. The speed could be changed uniformly or speedily. It depends on your video requirements.
Empower your videos with a new mood using different LUTs. Filmora now offers 100+ top-quality 3D LUTs cover a broad range of scenarios. Transform your videos with Filmora’s powerful 3D LUTs.
Apply LUT on Videos Apply LUT on Videos Learn More
Conclusion
Like other LUTs, Canon LUTs are also special and unique in their kind. They provide 3D cinematic looks with visually attractive color corrections. Meanwhile, in this article, you found the best Canon LUTs for editing visual media. You also learned about Wondershare Filmora, the best video editing and enhancement tool. The provided details of this video editing tool will make it easy for you to adapt to the 200+ available presets on the platform.
How to Set Up Twitch Green Screen
Green screens are a fun way for creators to bring their personality to their stream, allowing them to dynamically alter their stream background and make their content appear even more engaging and polished. With Twitch green screen background, you can easily configure Chroma key settings and detect your green screen with a single click.
The twitch green screen attaches directly to the back of your chair. You don’t have to worry about stands, or spacing behind your chair. Just attach it and go. This portable green screen can fit on the back of your chair a feature that makes it easy to assemble and use for start-up twitchers.
How to set up a Green Screen with Twitch Studio
**Set Up Your Camera
First things first, make sure that your camera is being detected on Twitch Studio. If you do not already have a layer with your webcam on your scene, click Edit Scene and add a webcam layer by clicking the + icon on the left next to Layers.
Once your webcam layer has been created, make sure that the desired device is selected, plugged in, and that you have not turned off every webcam (Camera icon on the bottom left of Twitch Studio).
**Set Up Your Green Screen
Once your green screen is set up in your background, select your webcam layers to display your webcam settings.
We recommend using the Auto-Detect Color feature as it will automatically detect the best color code for you and will be a great base to work from. If you prefer, you can manually pick the color code by either providing the color code in the Color to Remove field or clicking on the colored square to display a color spectrum that you can select from.
The Chroma Key section is located at the bottom of the webcam settings, and you will be able to toggle the chroma key on and off by clicking the eye icon.
To adjust the chroma key settings, you can click on Edit Chroma Key. You will be able to change the color code and change similarity, edge transparency and color correction for the perfect fit.
Other free ways to set up green screen for Twitch streams
OBS
OBS Studio is a free and open-source app for screen-casting and live streaming. Written in C/C++ and built with Qt, OBS Studio provides real-time capture, scene composition, recording, encoding, and broadcasting via the Real Time Messaging Protocol(RTMP).It can stream Videos to any RTMP supporting destination including YouTube, Twitch, Instagram and Facebook.
OBS Green Screen Set-up Steps
- Make sure you have the following equipment prepared: a solid green background, webcam or video camera, lighting, and OBS Studio.
- Download the latest stable version of OBS Studio from the official website and install the software. Open OBS and let the Auto-Configuration Wizard optimize the software’s settings based on your hardware.
- Now you can add a video source.
- Right-click on the video source you’ve created and select Filter.
- Click the +button under the Effects Filters section and select Chroma Key.
- Type in a name for this effect layer.
- After you add a chroma key, OBS will automatically create and adjust the baseline settings for the filter. You can experiment with the sliders and settle when you are satisfied with the result.
- Make sure you aren’t wearing any green or reflective material. You can double-checkthe performance on the preview screen.
- If things are working smoothly, you are all set to start streamingwith the green screen on.
Pro tip:
You can follow the instructions above and live stream to multiple platforms at once with Restream. Multistreaming to platforms like YouTube, Facebook, Twitter, Twitch, and LinkedIn allows you to drastically increase the audience reach and grow your followers.
XBOX
It is a video gaming brand created and owned by Microsoft. The brand consists of five video game consoles, as well as applications(games), streaming services, an online service by the name of Xbox network, and the development arm by the name of Xbox Game Studios. The brand was first introduced in the United States in November 2001, with the launch of the original Xbox console.
Steps on Using Xbox Green Screen
Make your Xbox console reflect your personal style by changing its look and feel. Choose a favourite colour, update your background with game art or a customised image, or select a different theme.
Choose your color
The color you choose will appear in tiles and accents on your Xbox. It also follows you to any console you sign in to.
- Press the Xboxbutton on your controller to open the guide, and then select Profile & system > Settings > General > Personalisation > My color & theme > My color.
- Select a color, and then select OK.
**Choose your background
Your background appears where you’d expect it to—in the background of Home. It can be a solid color or an image, such as game art, achievement art, a screenshot, or a customized image. Achievement art follows you to any Xbox, but screenshots and customized images stay on the console that they’re set to.
To choose your background, press the Xbox button on your controller to open the guide, and then select Profile & system > Settings > General > Personalization > My background.
From here, choose from the following options:
**Solid color and game art
Select a background color, and then select OK. To then add game art, choose the game most recently played and the game art will appear as the background.
**Achievement art
- Select Achievement art> Gaming.
- Select a game from your list of games with achievements.
- Select the achievement with the background art you want.
- Select Set as background.
**Custom image
Note Customized images must be smaller than 3 MB, and the best size for backgrounds is 1920 x 1080.
- Copy a JPG or PNG file that you want to use to a USB device, and then plug it into your Xbox.
- On your Xbox, select Customized image. A dialogue box appears that shows the contents of your console and attached USB device.
- Select the USB device, and then choose your image.
**Screenshot
- Select Screenshot, then choose the one you want.
- Select More actions> Set as background.
**Dynamic background
Note Dynamic backgrounds are only available on Xbox Series X|S.
- Select Dynamic background.
- Select the background art you want.
- Select Apply.
Note Some dynamic backgrounds are only available through promotions with special edition hardware (like the 20th Anniversary Special Edition controller). To see one of these special dynamic backgrounds in your list of options, make sure your special edition hardware is turned on and in use with your console when you set your background.
**Remove customized background
If you want to remove your background, select Remove customized background.
**Choose your theme
Themes can be set to dark or light and can also be scheduled. To set a theme:
- Press the Xboxbutton on your controller to open the guide, and then select Profile & system > Settings > General > Personalization.
- Select My color & theme.
- Under System theme, select Darkor Light. Select Scheduled to activate your theme according to specific times, or to start at sunrise and sunset.
Themes stay on the console they’re set to.
Solid Color
Achievement Art
Custom Image
Remove Custom Background
Filmora
Wondershare Filmora is the one of best video editing software with cool features that compares to other competing video editing Softwares. Many video editing programs claim to offer professional results; Filmora is one of a few consumer-level tools that actually delivers.
For Win 7 or later (64-bit)
For macOS 10.12 or later
Key Features
4k editing support
GIF support
Noise removal
Color tuning
Advanced tech editor
Audio mixer
Video stabilization
Scene detection
Conclusion
You probably already have an idea of how to use a green screen, at least in principle. You film something or someone in front of a colored background — the green screen — then you replace everything that’s in the color of the screen with other footage, images, charts, presentations, or whatever visuals you want. However, Chroma keying a live stream works almost the same way. The main difference is that you have to replace the green screen as you’re filming, rather than during editing.
Little Known Ways of Adding Emojis to Photos on iPhone & Android
Little Known Ways of Adding Emojis to Photos on iPhone & Android
An easy yet powerful editor
Numerous effects to choose from
Detailed tutorials provided by the official channel
Emojis are catchy graphic elements that can add life to your photos, videos and allied artworks within a wink. Be here to know about the most exciting how-tos!
In this article
01 [Best 6 Tools to Put Emojis on Pictures on iPhone](#Part 1)
02 [Best 6 Tools to Put Emojis on Pictures on Android](#Part 2)
03 [Best 5 Tools to Put Emojis on Pictures on Computer](#Part 3)
Part 1 Best 6 Tools to Put Emojis on Pictures on iPhone
Emojis have managed to secure enough significance in our social and professional lives across social media platforms in the current time. Be it a fun-filled conversation with friends and family on a chat service program, or a high end and professionally sound business strategy, these mini caricature pieces of graphic art can add the much needed highlight to almost every aspect of your digital communication concerns.
Now that you are aware of the utility of working with emojis to make your digital contents, let us take a dive into some of the best ways and means to make your iPhone images come alive in the following section:
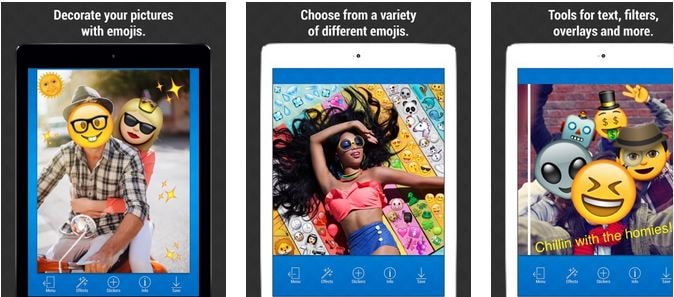
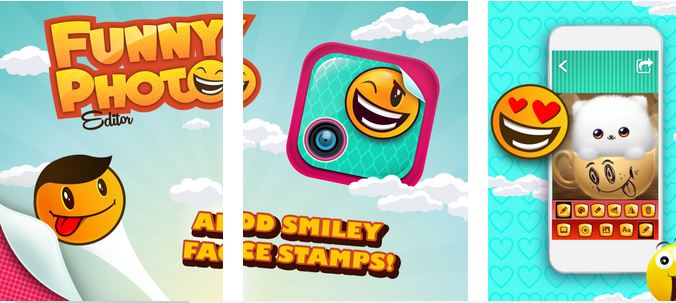
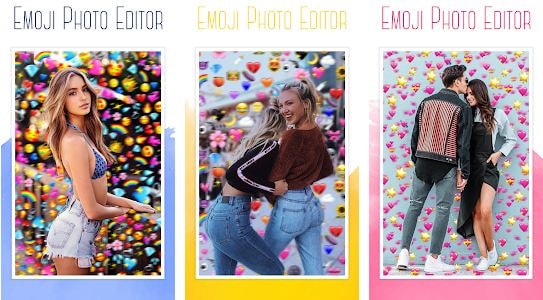
01Emoji Picture Editor- Add Emojis to Your Photos
If you like to imbibe the images on your iPhone media gallery with a hoard of funny and cool emojis, this one is a perfect app to address the concern. The tool’s library houses the latest collection of emoji categories to be in line with a diversity of photo styles, themes and backgrounds. You can take your pick from the huge inventory of over 1500 different emojis to level up your photos.
Talking about the app interface and usage controls, you are granted full liberty to add emojis to your emojis, while changing their positions through a finger drag, or scale and rotate them by expanding, pinching and twisting your fingers. The app additionally allows you to send bigger emoji stickers on chats and conversations.
02Insta Emoji Photo Editor
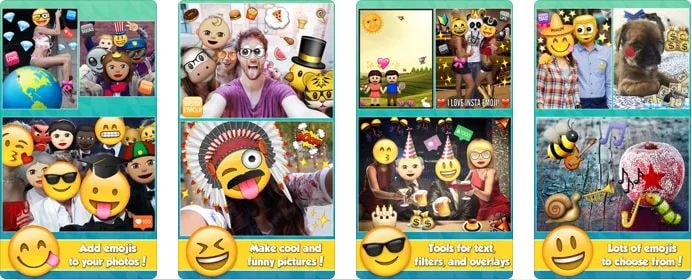
When looking for an interesting and reliable application to set straight the concern of how to put emojis on pictures, the Insta Emoji Photo Editor is an affordable pick. Loaded with an enormous and updated emoji library, the app presents before you over 3200 fascinating emoji options to select from and add to your images.
The inclusion process is intuitively simple, with you just having to upload the desired images to the app’s working interface and choose from your most favorite emoji elements to make the stills come alive with added fun and spark. The app houses an interesting ’Emoji Paint’ feature for the extensively creative ones to let them create catchy drawings with the coolest emojis.
03Emoji My Face
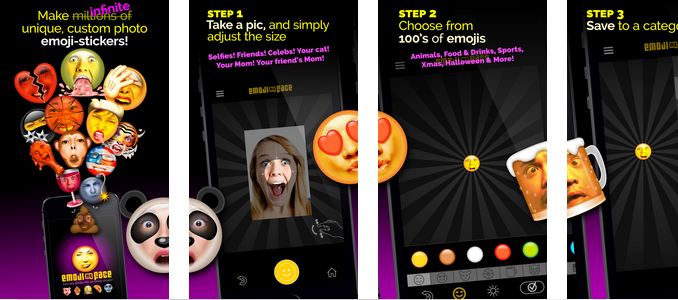
Moving ahead in the list comes the aforesaid app, which you can conveniently rely on to get through the photo edit emoji task in less than a few seconds. What’s unique about the utility is its feature that lets you add emoji stickers on the faces of your image elements. Working with the app, you can transform the skinned appearances of your friends and family into hilarious emoji faces.
While the app permits you to pick any number of preferences from its latest and updated emoji collection, you can additionally, save and share your emoji centered image edits across a diversity of media sharing platforms and chat service programs.
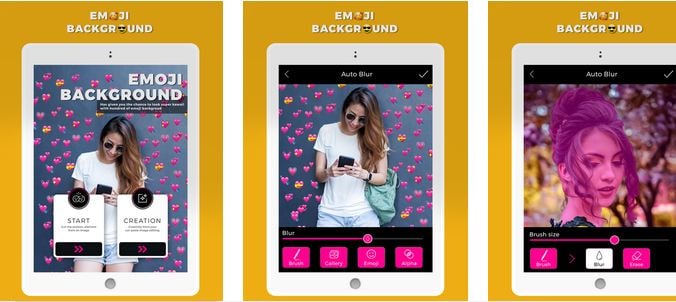
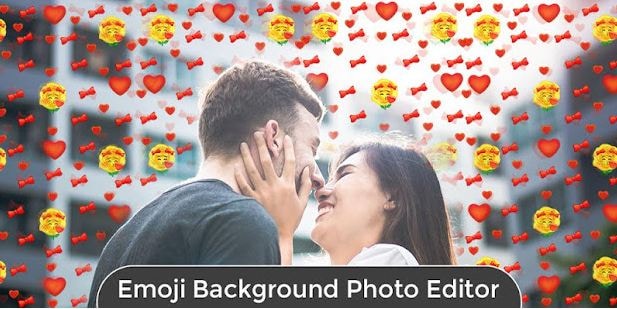
04Emoji Background Photo Maker
While there are hoards of IT alternatives to add emojis to pictures, the following utility caters to the concern in a slightly different style, ahead of just picking and pasting emojis to still captures. Working with the tool, you can experiment with changing the customary and fundamental image backgrounds into funny and appealing emoji centered themes. You are allowed to either work with a desired image from your iPhone’s media gallery, or take a fresh shot from your device’s camera, followed by uploading the same to the app’s editing interface.
Focusing on the tool’s expanse of usage features, you get tom work with a straightforward interface, and select from a wide variety of expressive and thematic emoji backgrounds. You can further, preview and save the edited images in HD quality, and share the same with friends and family across social media handles.
05Funny Photo Editor With Emoji Stickers Camera
This one is an innovative image editing tool that lets you create funny image transformations with classic emoji stickers, while addressing the query of how to add emojis to pictures. If your peer group consists of crazy creators who are selfie freaks, try hands at uplifting your live camera shots with this application by adding the funkiest emojis and sharing them across the regular communication platforms.
The app’s default camera feature lets you capture a straight forward image and convert the same into a hilarious edit with the latest range of free emoji stickers, caricature smileys and lots more. You can additionally beautify the edits with choosing from a decent range of emoji skin tones to suit the image background.
06Instamoji- Emoji Photo Editor
If you have been searching for an affordable solution to walk through the concern of , how to add emoji to photo on your iPhone, try working with the Instamoji application to highlight your customary images with classic emoji stickers and elements within the blink of an eye. The app welcomes you with a clean and intuitive interface to work upon, and is completely free to use.
Talking about the utility’s emoji centered image editing features, you are permitted to select from a decent collection of vibrant, funny and cool emojis, assorted under a diversity of categories to complement your images with, while exporting them across your digital communication accounts with utmost ease. The app promises you of the finest quality edited image output.
Part 2 Best 6 Tools to Put Emojis on Pictures on Android
Emojis are best known to spark up graphic artworks with an element of fun and entertainment. While the introduction of social media and digital communication utilities have brought emojis to the fingertips of modern day smartphone users, the IT market never lags behind at putting the latest transformations regarding emoji usage at your disposal.
Discussing along the line, let us talk about some interesting applications that address the concern of how to add an emoji to a photo using an Android device in what follows next:
01Add Emoji Stickers- Pics Editor and Photo Maker
This one is a smart photo editing tool that you can choose to customize the otherwise ordinary images on the local media gallery of your Android smartphone. The app greets you with an extensive range of updated emoji alternatives to suit your most specific editing requirements for complementing your elementary photos with the perfect feel and emotion.
The emojis work to add the missing fun to your social media posts with image edits funny enough to make your peers roll over with laughter. Not just smiley faces, the app delivers to you a categorized set of emojis that are a perfect fit to any graphic theme. Some of the most preferred ones include Nature, Travel, Food & Drinks, and many more. So why wait? Just get the free utility and begin to edit and share!
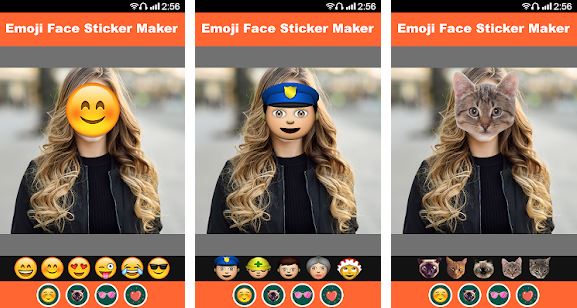
02Emoji Face Sticker
If you are creativity freak and love to experiment with your editing skills to put emoji on picture, try hands at working with this free image editor utility to add a fun element to your photos and give a laughter dose to your friends and family on social media. The app caters to transform your uploaded images faces to the cutest emoji look alike ever.
If that’s not enough, you can work with the app to change your smartphone’s regular camera into an emoji camera app that works to create the best caricature emoji montages from your snapped selfies. Navigating through the latte’s editing library, you will get to choose from among the craziest and coolest emoji stickers to create emoji photos out of normal stills. All in all, the app allows you to put forward your emotions in a relatively funnier way.
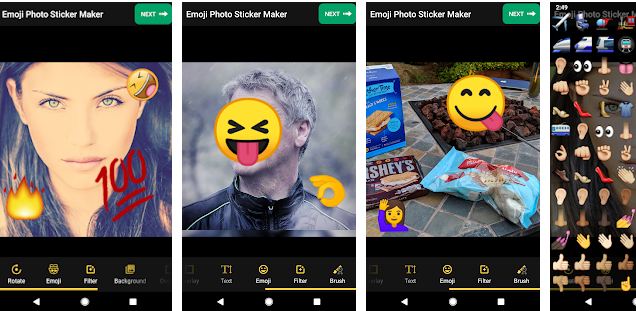
03Emoji Photo Editor
Are you bored of looking at those customary color backgrounds behind your images? Consider sparking them up with the cutest and most expressive emoji backgrounds. As you pick the app to edit your images, the latter grants you a complete access to its free emoji library that houses a decent collection of over 50 different emoji backgrounds to select from. A few of the most popular ones comprise of the flower and heart crown stickers, dog face camera among others.
Editing images within the app is seamless enough to last for a few seconds. You can use the created emoji background edits in a series of ways, like, preferring a local save or going for an image export to your favorite social media handle. Another cool way to show off your creativity can be making a device screen wallpaper of the emoji background image.
04Auto Face Stamp- Cover Face With Emoji
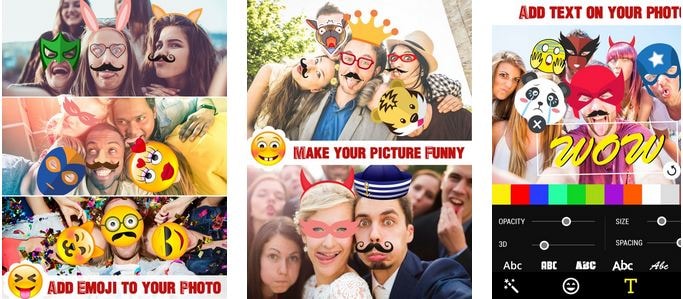
Looking forward to use an SNS services for media sharing purposes, but bothered about privacy concerns? While it is a common practice to share pictures via SNS and allied public platforms, most of us are often worried about keeping our faces hidden. Under normal circumstances, the face masking task is something you would ideally want to escape; the aforesaid app caters to the same in a funny and enjoyable manner.
Working with the utility, you can mask your image faces with over 100 different types of emoji stickers. The app aids you further in the task through its accurate face recognition ability that takes into consideration the smallest of faces with utmost precision. All you need to do is, select a desired emoji sticker and tap on the face you wish to mask with the same.
You can further, choose to directly export the masked images to media sharing handles right from the app’s editing workspace. The app is available to you absolutely free of cost and greets its users with a responsive working interface.

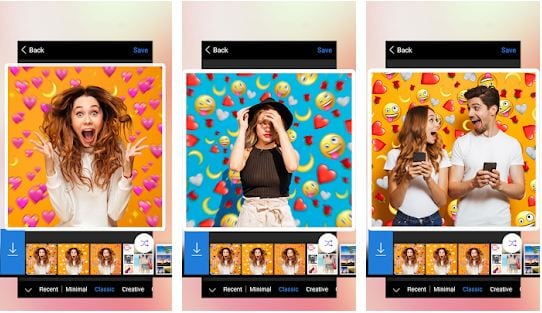
05Emoji Background Photo Editor
If the ordinary thematic backgrounds of your images do not suit you any longer, try working with this application to transmute the same into vibrant and expressive emoji alternatives. The aforesaid photo editing utility caters to make your images stand out of the crowd with beautiful emoji landscapes that render creative image edits of a matchless class, while maintaining a high-definition output image quality.
Extending the dimension of features to a longer stretch, the app grants you the liberty to adjust the position and transparency of the added emojis, set emoji frames and customize the emoji centered backgrounds with stunning effects and filters. As you finish with the editing process, the app lets you share your creations directly to a preferred social media platform, while also keeping them safe in your device’s local media gallery.
06Face Emoji Photo Effect
Reaching the end of the list, here comes the Face Emoji Photo Effect application that is all set to upgrade the level of your regular images with its classic and beautiful emoji backgrounds and stickers. The app’s editing library houses a diverse range of latest and elusive emojis to highlight your otherwise normal captures. The app additionally facilitates you with an expanded set of image editing features and effects to turn them into a graphic masterpiece.
The app welcomes you with a clean and responsive interface that makes the emoji inclusion process a quick and fun activity. All you need to do is, pick up an image from your locally saved alternatives and upload them to the app’s working interface, followed by browsing the latter’s emoji library to select a cohesive emoji background to complement the same.
You can further, download the premium emoji packs through a minimal payment to enhance the app’s library if the preset options do not match your requirements. The inbuilt emoji choices are however, free to work with.
Part 3 Best 5 Tools to Put Emojis on Pictures on Computer
All of us are familiar to and love using emojis everywhere, right from commenting on regular social media posts and chat service conversations, to creating professionally sound and strategic, business centered company presentations. While the most diverse use of these graphic utilities is reported on mobile devices, you may sometimes land across an instance that demands working with emojis on a computer.
Moving ahead with our discussion to address the aforesaid concern, let us talk about some of the prominent software and online solutions to set aside the issue of how to put emojis on photos while working on a computer in the upcoming section of this article:
01Kapwing
Entering into the domain of online image editing tools, the Kapwing website easily lands among the highly preferred choices. To address the concern of adding emojis to pictures on your PC or desktop systems, this one is an affordable tool to rely on. Talking of the underlying reasons behind the app’s high rated user preference, the latter allows you to access its huge inventory of emoji stickers, distributed across a heap of categories to choose from.
Next in the line is the tool’s spic and span editing process that lets you add and customize emojis on the uploaded images with a series of effects and filters in a matter of counted seconds. You can either pick and import images from your system, or work with the app’s in house emoji templates to edit the photos. As you are done with uploading images and adding emojis, proceed to place them at the desired position within the image.
The app allows you to add multiple emoji layers to the images by facilitating the creation of duplicate copies of your favorite emojis. Once you are done with the editing process, you are free to export your creation across media handles, or save them locally to your system.
02Editor.pho.to
If you are a newbie to the world of graphic editing and want to experiment with your creative skills to sort out the need of how to add an emoji to a picture, prefer landing on this free online website to work on your images. Considering the fact that not everyone around you is a tech savvy, the aforesaid online photo editing tool is designed to house the simplest of interfaces ever. The tool is available to you absolutely free of cost, without any unfair hidden purchases.
Ahead of the basic customization features, the tool grants you the freedom to expand your graphic skills on a wider canvas with presenting before you a plethora of emoji faces, stickers and backgrounds to complement the uploaded images with. Once you have added the emoji, the tool lets you work on the latter’s position and transparency adjustments, create emoji layers and overlays and save the edits to your system in a visibly high output quality.
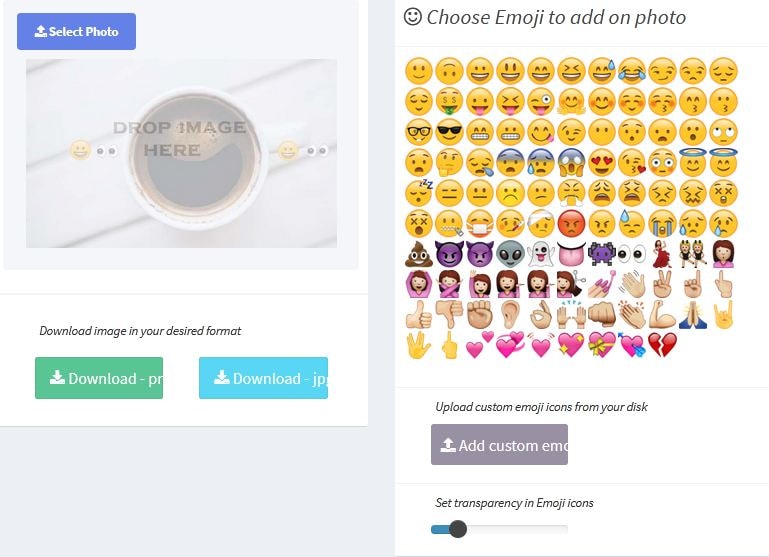
03Add Emoji to Photo
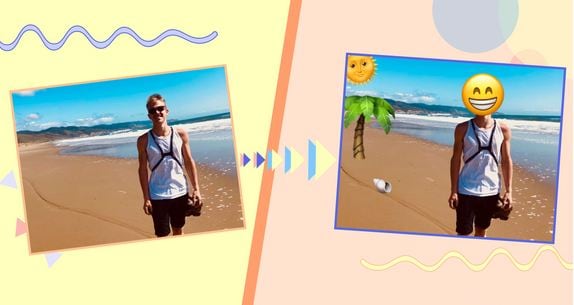
When looking for dependable solutions to work towards the task of how to put an emoji on a photo, you can conveniently trust the aforementioned online tool to create classic emoji photo edits from the customary still alternatives son your computer. This one is a free to use image editor facility that allows you to decorate your otherwise unnoticed images with an extensive range of preset and custom emojis to make them expressive and speak out your emotions.
The tool caters to render a high definition edited image output within seconds through the simplest of customization processes. You just need to upload a desired image from your system to the tool’s working interface, followed by picking a suitable emoji from the tool’s editing library to add it to the image. If however, the available options don’t seem to address your specific requirements, you can proceed to create custom emojis of your own within the tool.
You can also create multiple emoji layers to add to the uploaded image and make adjustments to their transparency and position within the photo. As you finish the editing process, the tool grants you the liberty to download the customized image to your system in either of the PNG or JPG file formats.
04Image Online
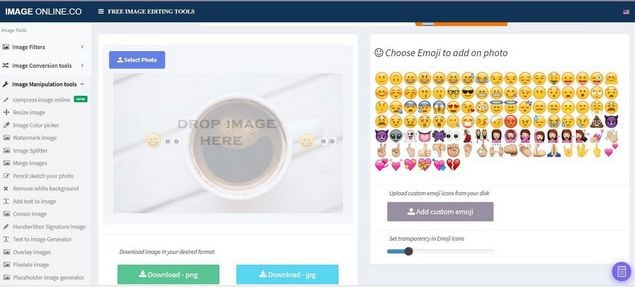
Another entry into the list of solutions to answer the query of how to put emojis on a photo, the Image Online tool promises you of a quality constrained image editing process to complement the basic still captures in the local media gallery of your computer with the latest collection of emoji elements. Welcoming you with a decent interface, the tool caters to sort out your emoji centered picture editing requirements within a blink’s time.
To add emoji to image with this tool, you just need to upload the selected photo to the latter’s workspace, followed by selecting a preferred emoji from the editing library, or create a custom emoji of your own, to put on the image. You can customize the emoji settings in terms of position, size and transparency, and download the edits to your device in JPG and PNG image formats.
05Canva
Last in the list is the Canva graphic editing tool which you can conveniently work with to add an emoji to a picture. Having a slightly different image editing process in comparison to its online counterparts, the utility requires you to sign up to its working interface to begin editing your photos. To start with, you need to select a preset image template or pick customized dimensions to upload the desired image.
To add emojis to your picture, you will have to download the latter’s application by navigating to and tapping the ‘More’ icon, followed by choosing the ‘Emoji’ option from the drop down menu that appears next. Once the ‘Emoji’ tab shows up in the tool’s main interface, proceed to upload your image and pick a suitable emoji from the list to add to the uploaded image. You can further, add layers of emojis to the picture, while resizing and adjusting the skin tones of the same.

Part 4 Adding Emoji to Photo Q&A
● What is the total number of emoji characters till date?
As of September 2021, a total of 3,633 emojis are known to have been introduced so far. Talking of the latest emoji package, there comes the Emoji 14.0, adding 112 emoji variations to the existing count. The aforesaid is a cumulative figure, including the skin tone, gender and flag sequences.
● What are the different types of emoji categories?
During the current time, the emoji characterization is known to house 8 different categories, namely, Flags, Symbols, Objects, Travel, Activity, Food & Drink, Animals & Nature and Smileys & People.
● What is the difference between Emoji and Emoticons?
Emoticons are specifically, graphic interpretations of the various human emotions that come with a keyboard command combination. Emojis on the other hand, are a standard set of various characters, often having a different artwork, but a universal meaning.
● Is it possible to self-create custom emojis?
As of now, having self-created variants of emojis is not possible. If at all, you become successful in design a character that resembles an emoji, you can use it as an image at the most. In an attempt to share it as an emoji, you will end up sending text combinations.
● What is the best software alternative to add emojis to pictures?
When looking for an affordable software solution for catering to the concern of how to add emojis to a photo, you can go for picking the Wondershare Filmora Video Editor graphic editing program, whose editing library literally houses the largest and the latest collection of emoji categories and varieties for sparking up your images with the best possible customized appearance.
For Win 7 or later (64-bit)
For macOS 10.12 or later
● Ending Thoughts →
● Adding emojis to pictures has landed among the latest and most preferred graphic editing trends of current times.
● When beginning to address the concern of how do you add emojis to pictures, the IT market puts a diversity of software and online solutions before you.
● If you are confused about making the best choice, you can pick the Wondershare Filmora graphic editor program without having to think twice.
Emojis are catchy graphic elements that can add life to your photos, videos and allied artworks within a wink. Be here to know about the most exciting how-tos!
In this article
01 [Best 6 Tools to Put Emojis on Pictures on iPhone](#Part 1)
02 [Best 6 Tools to Put Emojis on Pictures on Android](#Part 2)
03 [Best 5 Tools to Put Emojis on Pictures on Computer](#Part 3)
Part 1 Best 6 Tools to Put Emojis on Pictures on iPhone
Emojis have managed to secure enough significance in our social and professional lives across social media platforms in the current time. Be it a fun-filled conversation with friends and family on a chat service program, or a high end and professionally sound business strategy, these mini caricature pieces of graphic art can add the much needed highlight to almost every aspect of your digital communication concerns.
Now that you are aware of the utility of working with emojis to make your digital contents, let us take a dive into some of the best ways and means to make your iPhone images come alive in the following section:
01Emoji Picture Editor- Add Emojis to Your Photos
If you like to imbibe the images on your iPhone media gallery with a hoard of funny and cool emojis, this one is a perfect app to address the concern. The tool’s library houses the latest collection of emoji categories to be in line with a diversity of photo styles, themes and backgrounds. You can take your pick from the huge inventory of over 1500 different emojis to level up your photos.
Talking about the app interface and usage controls, you are granted full liberty to add emojis to your emojis, while changing their positions through a finger drag, or scale and rotate them by expanding, pinching and twisting your fingers. The app additionally allows you to send bigger emoji stickers on chats and conversations.
02Insta Emoji Photo Editor
When looking for an interesting and reliable application to set straight the concern of how to put emojis on pictures, the Insta Emoji Photo Editor is an affordable pick. Loaded with an enormous and updated emoji library, the app presents before you over 3200 fascinating emoji options to select from and add to your images.
The inclusion process is intuitively simple, with you just having to upload the desired images to the app’s working interface and choose from your most favorite emoji elements to make the stills come alive with added fun and spark. The app houses an interesting ’Emoji Paint’ feature for the extensively creative ones to let them create catchy drawings with the coolest emojis.
03Emoji My Face
Moving ahead in the list comes the aforesaid app, which you can conveniently rely on to get through the photo edit emoji task in less than a few seconds. What’s unique about the utility is its feature that lets you add emoji stickers on the faces of your image elements. Working with the app, you can transform the skinned appearances of your friends and family into hilarious emoji faces.
While the app permits you to pick any number of preferences from its latest and updated emoji collection, you can additionally, save and share your emoji centered image edits across a diversity of media sharing platforms and chat service programs.
04Emoji Background Photo Maker
While there are hoards of IT alternatives to add emojis to pictures, the following utility caters to the concern in a slightly different style, ahead of just picking and pasting emojis to still captures. Working with the tool, you can experiment with changing the customary and fundamental image backgrounds into funny and appealing emoji centered themes. You are allowed to either work with a desired image from your iPhone’s media gallery, or take a fresh shot from your device’s camera, followed by uploading the same to the app’s editing interface.
Focusing on the tool’s expanse of usage features, you get tom work with a straightforward interface, and select from a wide variety of expressive and thematic emoji backgrounds. You can further, preview and save the edited images in HD quality, and share the same with friends and family across social media handles.
05Funny Photo Editor With Emoji Stickers Camera
This one is an innovative image editing tool that lets you create funny image transformations with classic emoji stickers, while addressing the query of how to add emojis to pictures. If your peer group consists of crazy creators who are selfie freaks, try hands at uplifting your live camera shots with this application by adding the funkiest emojis and sharing them across the regular communication platforms.
The app’s default camera feature lets you capture a straight forward image and convert the same into a hilarious edit with the latest range of free emoji stickers, caricature smileys and lots more. You can additionally beautify the edits with choosing from a decent range of emoji skin tones to suit the image background.
06Instamoji- Emoji Photo Editor
If you have been searching for an affordable solution to walk through the concern of , how to add emoji to photo on your iPhone, try working with the Instamoji application to highlight your customary images with classic emoji stickers and elements within the blink of an eye. The app welcomes you with a clean and intuitive interface to work upon, and is completely free to use.
Talking about the utility’s emoji centered image editing features, you are permitted to select from a decent collection of vibrant, funny and cool emojis, assorted under a diversity of categories to complement your images with, while exporting them across your digital communication accounts with utmost ease. The app promises you of the finest quality edited image output.
Part 2 Best 6 Tools to Put Emojis on Pictures on Android
Emojis are best known to spark up graphic artworks with an element of fun and entertainment. While the introduction of social media and digital communication utilities have brought emojis to the fingertips of modern day smartphone users, the IT market never lags behind at putting the latest transformations regarding emoji usage at your disposal.
Discussing along the line, let us talk about some interesting applications that address the concern of how to add an emoji to a photo using an Android device in what follows next:
01Add Emoji Stickers- Pics Editor and Photo Maker
This one is a smart photo editing tool that you can choose to customize the otherwise ordinary images on the local media gallery of your Android smartphone. The app greets you with an extensive range of updated emoji alternatives to suit your most specific editing requirements for complementing your elementary photos with the perfect feel and emotion.
The emojis work to add the missing fun to your social media posts with image edits funny enough to make your peers roll over with laughter. Not just smiley faces, the app delivers to you a categorized set of emojis that are a perfect fit to any graphic theme. Some of the most preferred ones include Nature, Travel, Food & Drinks, and many more. So why wait? Just get the free utility and begin to edit and share!
02Emoji Face Sticker
If you are creativity freak and love to experiment with your editing skills to put emoji on picture, try hands at working with this free image editor utility to add a fun element to your photos and give a laughter dose to your friends and family on social media. The app caters to transform your uploaded images faces to the cutest emoji look alike ever.
If that’s not enough, you can work with the app to change your smartphone’s regular camera into an emoji camera app that works to create the best caricature emoji montages from your snapped selfies. Navigating through the latte’s editing library, you will get to choose from among the craziest and coolest emoji stickers to create emoji photos out of normal stills. All in all, the app allows you to put forward your emotions in a relatively funnier way.
03Emoji Photo Editor
Are you bored of looking at those customary color backgrounds behind your images? Consider sparking them up with the cutest and most expressive emoji backgrounds. As you pick the app to edit your images, the latter grants you a complete access to its free emoji library that houses a decent collection of over 50 different emoji backgrounds to select from. A few of the most popular ones comprise of the flower and heart crown stickers, dog face camera among others.
Editing images within the app is seamless enough to last for a few seconds. You can use the created emoji background edits in a series of ways, like, preferring a local save or going for an image export to your favorite social media handle. Another cool way to show off your creativity can be making a device screen wallpaper of the emoji background image.
04Auto Face Stamp- Cover Face With Emoji
Looking forward to use an SNS services for media sharing purposes, but bothered about privacy concerns? While it is a common practice to share pictures via SNS and allied public platforms, most of us are often worried about keeping our faces hidden. Under normal circumstances, the face masking task is something you would ideally want to escape; the aforesaid app caters to the same in a funny and enjoyable manner.
Working with the utility, you can mask your image faces with over 100 different types of emoji stickers. The app aids you further in the task through its accurate face recognition ability that takes into consideration the smallest of faces with utmost precision. All you need to do is, select a desired emoji sticker and tap on the face you wish to mask with the same.
You can further, choose to directly export the masked images to media sharing handles right from the app’s editing workspace. The app is available to you absolutely free of cost and greets its users with a responsive working interface.
05Emoji Background Photo Editor
If the ordinary thematic backgrounds of your images do not suit you any longer, try working with this application to transmute the same into vibrant and expressive emoji alternatives. The aforesaid photo editing utility caters to make your images stand out of the crowd with beautiful emoji landscapes that render creative image edits of a matchless class, while maintaining a high-definition output image quality.
Extending the dimension of features to a longer stretch, the app grants you the liberty to adjust the position and transparency of the added emojis, set emoji frames and customize the emoji centered backgrounds with stunning effects and filters. As you finish with the editing process, the app lets you share your creations directly to a preferred social media platform, while also keeping them safe in your device’s local media gallery.
06Face Emoji Photo Effect
Reaching the end of the list, here comes the Face Emoji Photo Effect application that is all set to upgrade the level of your regular images with its classic and beautiful emoji backgrounds and stickers. The app’s editing library houses a diverse range of latest and elusive emojis to highlight your otherwise normal captures. The app additionally facilitates you with an expanded set of image editing features and effects to turn them into a graphic masterpiece.
The app welcomes you with a clean and responsive interface that makes the emoji inclusion process a quick and fun activity. All you need to do is, pick up an image from your locally saved alternatives and upload them to the app’s working interface, followed by browsing the latter’s emoji library to select a cohesive emoji background to complement the same.
You can further, download the premium emoji packs through a minimal payment to enhance the app’s library if the preset options do not match your requirements. The inbuilt emoji choices are however, free to work with.
Part 3 Best 5 Tools to Put Emojis on Pictures on Computer
All of us are familiar to and love using emojis everywhere, right from commenting on regular social media posts and chat service conversations, to creating professionally sound and strategic, business centered company presentations. While the most diverse use of these graphic utilities is reported on mobile devices, you may sometimes land across an instance that demands working with emojis on a computer.
Moving ahead with our discussion to address the aforesaid concern, let us talk about some of the prominent software and online solutions to set aside the issue of how to put emojis on photos while working on a computer in the upcoming section of this article:
01Kapwing
Entering into the domain of online image editing tools, the Kapwing website easily lands among the highly preferred choices. To address the concern of adding emojis to pictures on your PC or desktop systems, this one is an affordable tool to rely on. Talking of the underlying reasons behind the app’s high rated user preference, the latter allows you to access its huge inventory of emoji stickers, distributed across a heap of categories to choose from.
Next in the line is the tool’s spic and span editing process that lets you add and customize emojis on the uploaded images with a series of effects and filters in a matter of counted seconds. You can either pick and import images from your system, or work with the app’s in house emoji templates to edit the photos. As you are done with uploading images and adding emojis, proceed to place them at the desired position within the image.
The app allows you to add multiple emoji layers to the images by facilitating the creation of duplicate copies of your favorite emojis. Once you are done with the editing process, you are free to export your creation across media handles, or save them locally to your system.
02Editor.pho.to
If you are a newbie to the world of graphic editing and want to experiment with your creative skills to sort out the need of how to add an emoji to a picture, prefer landing on this free online website to work on your images. Considering the fact that not everyone around you is a tech savvy, the aforesaid online photo editing tool is designed to house the simplest of interfaces ever. The tool is available to you absolutely free of cost, without any unfair hidden purchases.
Ahead of the basic customization features, the tool grants you the freedom to expand your graphic skills on a wider canvas with presenting before you a plethora of emoji faces, stickers and backgrounds to complement the uploaded images with. Once you have added the emoji, the tool lets you work on the latter’s position and transparency adjustments, create emoji layers and overlays and save the edits to your system in a visibly high output quality.
03Add Emoji to Photo
When looking for dependable solutions to work towards the task of how to put an emoji on a photo, you can conveniently trust the aforementioned online tool to create classic emoji photo edits from the customary still alternatives son your computer. This one is a free to use image editor facility that allows you to decorate your otherwise unnoticed images with an extensive range of preset and custom emojis to make them expressive and speak out your emotions.
The tool caters to render a high definition edited image output within seconds through the simplest of customization processes. You just need to upload a desired image from your system to the tool’s working interface, followed by picking a suitable emoji from the tool’s editing library to add it to the image. If however, the available options don’t seem to address your specific requirements, you can proceed to create custom emojis of your own within the tool.
You can also create multiple emoji layers to add to the uploaded image and make adjustments to their transparency and position within the photo. As you finish the editing process, the tool grants you the liberty to download the customized image to your system in either of the PNG or JPG file formats.
04Image Online
Another entry into the list of solutions to answer the query of how to put emojis on a photo, the Image Online tool promises you of a quality constrained image editing process to complement the basic still captures in the local media gallery of your computer with the latest collection of emoji elements. Welcoming you with a decent interface, the tool caters to sort out your emoji centered picture editing requirements within a blink’s time.
To add emoji to image with this tool, you just need to upload the selected photo to the latter’s workspace, followed by selecting a preferred emoji from the editing library, or create a custom emoji of your own, to put on the image. You can customize the emoji settings in terms of position, size and transparency, and download the edits to your device in JPG and PNG image formats.
05Canva
Last in the list is the Canva graphic editing tool which you can conveniently work with to add an emoji to a picture. Having a slightly different image editing process in comparison to its online counterparts, the utility requires you to sign up to its working interface to begin editing your photos. To start with, you need to select a preset image template or pick customized dimensions to upload the desired image.
To add emojis to your picture, you will have to download the latter’s application by navigating to and tapping the ‘More’ icon, followed by choosing the ‘Emoji’ option from the drop down menu that appears next. Once the ‘Emoji’ tab shows up in the tool’s main interface, proceed to upload your image and pick a suitable emoji from the list to add to the uploaded image. You can further, add layers of emojis to the picture, while resizing and adjusting the skin tones of the same.
Part 4 Adding Emoji to Photo Q&A
● What is the total number of emoji characters till date?
As of September 2021, a total of 3,633 emojis are known to have been introduced so far. Talking of the latest emoji package, there comes the Emoji 14.0, adding 112 emoji variations to the existing count. The aforesaid is a cumulative figure, including the skin tone, gender and flag sequences.
● What are the different types of emoji categories?
During the current time, the emoji characterization is known to house 8 different categories, namely, Flags, Symbols, Objects, Travel, Activity, Food & Drink, Animals & Nature and Smileys & People.
● What is the difference between Emoji and Emoticons?
Emoticons are specifically, graphic interpretations of the various human emotions that come with a keyboard command combination. Emojis on the other hand, are a standard set of various characters, often having a different artwork, but a universal meaning.
● Is it possible to self-create custom emojis?
As of now, having self-created variants of emojis is not possible. If at all, you become successful in design a character that resembles an emoji, you can use it as an image at the most. In an attempt to share it as an emoji, you will end up sending text combinations.
● What is the best software alternative to add emojis to pictures?
When looking for an affordable software solution for catering to the concern of how to add emojis to a photo, you can go for picking the Wondershare Filmora Video Editor graphic editing program, whose editing library literally houses the largest and the latest collection of emoji categories and varieties for sparking up your images with the best possible customized appearance.
For Win 7 or later (64-bit)
For macOS 10.12 or later
● Ending Thoughts →
● Adding emojis to pictures has landed among the latest and most preferred graphic editing trends of current times.
● When beginning to address the concern of how do you add emojis to pictures, the IT market puts a diversity of software and online solutions before you.
● If you are confused about making the best choice, you can pick the Wondershare Filmora graphic editor program without having to think twice.
Complete Guide to Make a Super Easy Rotating Video Effect
Controlling camera direction to the subject’s hands and filming is trending nowadays. Create this effect by using easy film hacks, as shown in this article.
Many users make rotating illusion videos for TikTok or any branding video. The foremost items to record are explained in this article with detailed instructions. The best editing tool is also clarified below for instant results. So keep reading to get a hand with filming and editing a professional rotating transition video!
Part 1. What is a Rotating Video Illusion/Effect
Rotating transition video is a trending feature used by models and influencers. The brands also use this style to record the model’s videos in advertisements. It could be any makeup transition or clothing transition video.

It helps to indulge the audience with your content and show the after and before transitions. You can try this with any object or any character. But first, let’s figure out the requirements for rotating effects.
Part 2. Prerequisites to Make a Rotating Video Effect
You will need a few items to create a rotating transition video. First, look at the fundamental priorities for creating this feature.
The Subject Matters
To record a successful rotating video, you need a person or a subject to perform in front of the camera. It can be a model hired by a brand, a social influencer, or maybe it’s you. Keep in mind the following things before recording:
- The person should get two different costumes.
- All the actions need to be rehearsed before shooting
- Show affinity and control of the camera.

Shotting Equipment
To record a professional video, you need a good camera. You can use a smartphone to record this footage. There is no need to have a tripod stand or any gear to hold the camera because the camera will be in a rotating position, the same as the subject’s hand.
For this, you need a filmmaker or any person living with you. Just give instructions as shown below to him to record a perfect video for yourself:
- Record the whole video in just one direction.
- Don’t shake the camera because it gives blurry footage.
- Ensure to focus on the subject during recording.
- Don’t zoom in or out while recording the video.
- Keep the subject in the middle of the frame during the recording process.
- The hand rotation timing is the same as the camera’s rotation.
![]()
Note: Ensure to record one footage multiple times so that you can choose the perfect one later for editing.

Filming of the First Footage
To make the footage for the rotating video illusion, we have to record it at least twice to get crystal clear and high-resolution results. Therefore, ensure that we have camera movement in the same direction during all recording times.
![]()
Note: You can film the video either in the vertical format of the camera or in horizontal format. It all depends upon your script!
Follow the below-mentioned steps to record the first footage for the video:
- Hold the camera in a perfect format, whatever you choose.
- Let the subject stand or sit in the middle of the frame.
- The filmmaker can rotate the camera when the subject’s hand rotates.
- Try your best to rotate the camera 180 degrees.
- Ensure that the camera lens faces the ground at the end of the rotation.

After filming the first footage for the video, it’s time to record the second footage to transition between the two.
Filming of the Second Footage
To create a second shot, you have to remember that the costume and location of the filming are different from the first footage. Follow the below steps to record it:
- The first step is to hold the camera in the same direction as the first footage.
- When editing, make sure the subject’s position matches the first footage.
- Make sure the subject’s hand movement is in the opposite direction from the first shot.

Now you have both scenes and footage ready. Next, you have to edit them by inserting them into editing software. Follow the step guides below to perform this action!
Part 3. Step-by-Step Guide to Edit on Filmora
To create a professional rotating video illusion, Wondershare Filmora is an ideal tool. Even beginners can quickly get the hang of it due to its highly engaging system user interface (UI). You will discover how to create a rotating video effect in a few clicks.
Free Download For Win 7 or later(64-bit)
Free Download For macOS 10.14 or later

Step1 Download Wondershare Filmora
To edit your video like a pro, download the most recent version of Wondershare Filmora.
- Download and open Wondershare Filmora on your PC or Mac.
Step2 Import the Footage
Import recorded footage to start the editing process. It is better to have all your footage in one folder before importing all the clips. The main import window locates in the upper left corner when it is first launched.
- Click on the Import icon in the import window’s center.
- Wondershare Filmora will then immediately point you toward your PC
- Navigate to the location where your preferred Videos and Photos are kept.
- Choose every footage you wish to import.
- Once you click Open, the files will import.

It’s time to prepare the footage for editing after inserting it into the Filmora. Follow the next steps to do this!
Step3 Add Footage to the Timeline
The videos you’ve imported will be added to the timeline after that. You can import both footages at once and put them all at once into the timeline.
Alternatively, you can add them one at a time as needed. Follow the procedures as shown to add an item to your timeline.
- To choose a photo or movie, use the right-click
- Holding the Right-click, and move it to the timeline from the bottom.

Your images and videos have been imported into the timeline; now it’s time to trim them according to requirements.
Step4 Trim the Clips
To insert transition effects, you must trim the clip at a specific point and speed up the clip at the required duration. For this, follow the next actions as shown below:
- Playback clips and stop the playhead where you want by pressing the Space button from the Keyboard.
- Then, click on the Split icon present on the playhead.
- It will trim the clip from that point and separate it from its former one.

After splitting or trimming the clips, you now have to adjust the speed of the clips, as shown below!
Step5 Adjust Speed and Duration
There is a need to increase the speed of some scenes where the transition starts or ends. For this, follow the below actions:
- Find the section which needs to speed up, such as in the last half of each rotation.
- Right-click on the section of the clip in the timeline.
- Then, select the Speed option as shown in the icon of the timer present on the upper tab of the timeline.
- Select the Fast option, and if you want to lower the speed, select the Slow option**.**
- Choose the speed range according to your requirement.
- Select that required option and play it back to check if it is correct.

The video is all set; give it the final touches by following the last step, as shown below!
Step6 Playback the Video
After adding and adjusting all the features, double-check the video by playback. If you find any duration issue, review it and adjust it according to your requirement.
You can playback the video by clicking on the Play button. Perform this a few more times to ensure the speed looks okay and adjust if it is too slow or too fast.

You can also view it in full screen by selecting the last option on the tab. If there is no problem, you can export it locally or directly share it on TikTok or anywhere you want to gain views and attract an audience. You can also use it as a magic trick to inspire other people or as a transition for videos!
Conclusion
Keep creating and experimenting with other features on Wondershare Filmora. For example, you can use different effects, try on stock media, and then create or film your own. In this way, you’ll get professional results.
If you are showing new strategies daily to your viewers, they will hook up with you, and it’ll assist in the algorithm working by your side. That’s why keep doing it and enjoying the rest!
Filming of the First Footage
To make the footage for the rotating video illusion, we have to record it at least twice to get crystal clear and high-resolution results. Therefore, ensure that we have camera movement in the same direction during all recording times.
![]()
Note: You can film the video either in the vertical format of the camera or in horizontal format. It all depends upon your script!
Follow the below-mentioned steps to record the first footage for the video:
- Hold the camera in a perfect format, whatever you choose.
- Let the subject stand or sit in the middle of the frame.
- The filmmaker can rotate the camera when the subject’s hand rotates.
- Try your best to rotate the camera 180 degrees.
- Ensure that the camera lens faces the ground at the end of the rotation.
After filming the first footage for the video, it’s time to record the second footage to transition between the two.
Filming of the Second Footage
To create a second shot, you have to remember that the costume and location of the filming are different from the first footage. Follow the below steps to record it:
- The first step is to hold the camera in the same direction as the first footage.
- When editing, make sure the subject’s position matches the first footage.
- Make sure the subject’s hand movement is in the opposite direction from the first shot.
Now you have both scenes and footage ready. Next, you have to edit them by inserting them into editing software. Follow the step guides below to perform this action!
Part 3. Step-by-Step Guide to Edit on Filmora
To create a professional rotating video illusion, Wondershare Filmora is an ideal tool. Even beginners can quickly get the hang of it due to its highly engaging system user interface (UI). You will discover how to create a rotating video effect in a few clicks.
Free Download For Win 7 or later(64-bit)
Free Download For macOS 10.14 or later
Step1 Download Wondershare Filmora
To edit your video like a pro, download the most recent version of Wondershare Filmora.
- Download and open Wondershare Filmora on your PC or Mac.
Step2 Import the Footage
Import recorded footage to start the editing process. It is better to have all your footage in one folder before importing all the clips. The main import window locates in the upper left corner when it is first launched.
- Click on the Import icon in the import window’s center.
- Wondershare Filmora will then immediately point you toward your PC
- Navigate to the location where your preferred Videos and Photos are kept.
- Choose every footage you wish to import.
- Once you click Open, the files will import.
It’s time to prepare the footage for editing after inserting it into the Filmora. Follow the next steps to do this!
Step3 Add Footage to the Timeline
The videos you’ve imported will be added to the timeline after that. You can import both footages at once and put them all at once into the timeline.
Alternatively, you can add them one at a time as needed. Follow the procedures as shown to add an item to your timeline.
- To choose a photo or movie, use the right-click
- Holding the Right-click, and move it to the timeline from the bottom.
Your images and videos have been imported into the timeline; now it’s time to trim them according to requirements.
Step4 Trim the Clips
To insert transition effects, you must trim the clip at a specific point and speed up the clip at the required duration. For this, follow the next actions as shown below:
- Playback clips and stop the playhead where you want by pressing the Space button from the Keyboard.
- Then, click on the Split icon present on the playhead.
- It will trim the clip from that point and separate it from its former one.
After splitting or trimming the clips, you now have to adjust the speed of the clips, as shown below!
Step5 Adjust Speed and Duration
There is a need to increase the speed of some scenes where the transition starts or ends. For this, follow the below actions:
- Find the section which needs to speed up, such as in the last half of each rotation.
- Right-click on the section of the clip in the timeline.
- Then, select the Speed option as shown in the icon of the timer present on the upper tab of the timeline.
- Select the Fast option, and if you want to lower the speed, select the Slow option**.**
- Choose the speed range according to your requirement.
- Select that required option and play it back to check if it is correct.
The video is all set; give it the final touches by following the last step, as shown below!
Step6 Playback the Video
After adding and adjusting all the features, double-check the video by playback. If you find any duration issue, review it and adjust it according to your requirement.
You can playback the video by clicking on the Play button. Perform this a few more times to ensure the speed looks okay and adjust if it is too slow or too fast.
You can also view it in full screen by selecting the last option on the tab. If there is no problem, you can export it locally or directly share it on TikTok or anywhere you want to gain views and attract an audience. You can also use it as a magic trick to inspire other people or as a transition for videos!
Conclusion
Keep creating and experimenting with other features on Wondershare Filmora. For example, you can use different effects, try on stock media, and then create or film your own. In this way, you’ll get professional results.
If you are showing new strategies daily to your viewers, they will hook up with you, and it’ll assist in the algorithm working by your side. That’s why keep doing it and enjoying the rest!
Also read:
- New How To Export Video in Filmora for 2024
- 2024 Approved Step by Step Guide of Make Gimp Transparent Background PNG
- New How to Make a Slideshow with Icecream Slideshow Maker
- Updated How Did AI Video Games Act More Human Than Human, In 2024
- Looking for Exciting Methods to Create Alluring GIFs Worthy of Making a Mass Appeal? Heres All About GIF Design You Will Ever Want to Know and Learn
- Updated 2024 Approved Everything About Adding Effects In Kinemaster
- 2024 Approved Step by Step to Add Border to Video Using Premiere Pro
- Updated Adobe Premiere Pro Rec 709 LUTs Finding The Best Options
- New In 2024, Learn the Step-by-Step Process of Slowing Down Time-Lapse Videos on Your iPhone
- Updated Easily Sync Audio With Video With Filmora
- Updated In 2024, Get Creative with These 10 Video Editing App With Templates
- How to Merge Videos in HandBrake? Expectation Vs. Reality for 2024
- Updated How to Create a Custom Slide Show in PowerPoint for 2024
- New 2024 Approved How to Create a Glitch Text Effect?
- Updated DaVinci Resolve Scopes Have Undergone Significant Improvements. Find Out How to Use These Scopes and Improve Your Video Editing Skills
- In 2024, Frame Rates, Speed, and Wondershare Filmora
- Want to Add Subtitles to Netflix Videos in Your Preferred Language? Read This Article to Learn Two Different Methods for Uploading Custom Subtitles to Netflix for 2024
- In 2024, Have You Ever Applied the Gaussian Blur Effect to Your Videos? Read This Article to Find a Reliable and Convenient Tool to Generate the Gaussian Blur Effect
- Updated Change Video Speed with FFmpeg
- Have a Desire to Uplift Your Editing Creativity with Trying Hands at Working with Storyboards? Keep Reading to Have a Comprehensive Understating of the Workflow Through Stepwise User Guides
- New 2024 Approved How to Add Effects in Premiere Pro
- 2024 Approved 15 Free Cinematic LUTs for Your Film
- New Top 8 AI Video Denoise Software
- New Are You Looking to Store Your Videos Securely and Efficiently? Look No Further than Our Top Pick for the Best Cloud Storage Service for Videos
- 2024 Approved Do You Need a Royalty-Free 5 Seconds Countdown Video for Your Video but Dont Not Where to Find One? We Will Introduce You to the Best HD and 4K Clips that You Can Always Try Anytime
- New 2024 Approved 15 Best LUTS to Buy
- Learn How to Blur the Background in Adobe Premiere Pro with Our Quick and Simple Step-by-Step Instructions to Make Your Subject More Attention-Grabbing for 2024
- Updated How to Resize FLV Videos EfficientlyWindows, Mac, Android, iPhone & Online for 2024
- Updated Some of the Top Sites to Replace a Sky Background in Videos
- Updated 2024 Approved Top 5 Best Video to PPT Converters
- Ways to Make Sure Your Video Editing Course Is Worthing to Watch for 2024
- How to Loop Videos with iMovie
- Updated 2024 Approved Free Green Screen Mobile Frame Downloads
- New Make A Countdown Video
- This Article Presents the Guide to Using Magic Effects for Creating Competent Films with Step-by-Step Instructions and Filmoras Grow and Win Program Contest
- Updated 10 Amazing Anime Character Designs to Inspire You
- In 2024, Guide to Synchronizing Your Audio And Videos Properly?
- Updated Best 20 Slideshow Makers for Win/Mac/Online Review for 2024
- Updated Some Facts That Few People Know on How to Make Transparent Background in Canva for 2024
- 5 Excellent Tools To Convert Video to 60 FPS for 2024
- New 2024 Approved Guide To Using Free Luts for OBS
- New What Is Animated GIF
- Updated Top 10 Transparent Image Online Tools That Give You an Advantage
- New Free Ways To Split Video For Whatsapp Status On All Platforms for 2024
- The Best Tools for Converting Slides to Digital - 2024 Review
- In 2024, Here You Can Lean About the Different Ways for GIMP Transparent Background PNG Format Files
- Finding the Best GIF Websites Was Never Easier
- In 2024, Set Your Preferred Job Location on LinkedIn App of your Vivo X90S | Dr.fone
- In 2024, iPhone 12 iCloud Activation Lock Bypass
- Best Android Data Recovery - Retrieve Lost Contacts from Infinix Hot 40.
- In 2024, Is GSM Flasher ADB Legit? Full Review To Bypass Your Samsung Galaxy F04 Phone FRP Lock
- In 2024, 3 Ways to Unlock iPhone 12 without Passcode or Face ID | Dr.fone
- How to Fix Unfortunately, Contacts Has Stopped Error on Itel P40 | Dr.fone
- Updated 2024 Approved How to Enable the Text to Speech Function on iPhone
- In 2024, How to Mirror Xiaomi Redmi 13C to Mac? | Dr.fone
- In 2024, Easily Unlock Your Motorola Moto G14 Device SIM
- How to get the dragon scale and evolution-enabled pokemon On Tecno Pova 5? | Dr.fone
- How to rescue lost call logs from Honor
- In 2024, 2 Ways to Monitor Vivo Y02T Activity | Dr.fone
- In 2024, How to Change Your Samsung Galaxy A05s Location on life360 Without Anyone Knowing? | Dr.fone
- How To Unbrick a Dead Poco F5 5G | Dr.fone
- In 2024, How to Transfer Contacts from Samsung Galaxy Z Flip 5 To Phone | Dr.fone
- How to Transfer Data from Samsung Galaxy A25 5G to Any iOS Devices | Dr.fone
- 5 Ways to Restart Infinix Smart 7 HD Without Power Button | Dr.fone
- In 2024, How to Unlock Apple iPhone 13 Pro with IMEI Code?
- Full guide to Apple iPhone X iCloud Bypass
- In 2024, How To Remove Screen Lock PIN On Nubia Red Magic 8S Pro Like A Pro 5 Easy Ways
- In 2024, Generating the Nut Button Meme
- How to Detect and Stop mSpy from Spying on Your Oppo Reno 10 Pro 5G | Dr.fone
- Fix App Not Available in Your Country Play Store Problem on Tecno Spark 20 Pro+ | Dr.fone
- In 2024, Best 3 Software to Transfer Files to/from Your Realme 12 Pro 5G via a USB Cable | Dr.fone
- In 2024, Can I use iTools gpx file to catch the rare Pokemon On Oppo Reno 9A | Dr.fone
- 8 Quick Fixes Unfortunately, Snapchat has Stopped on HTC U23 Pro | Dr.fone
- A Step-by-Step Guide on Using ADB and Fastboot to Remove FRP Lock from your Infinix Smart 8 Pro
- Online signature for PDF v1.2 document
- How To Transfer WhatsApp From iPhone 15 Pro Max to other iPhone 14 devices? | Dr.fone
- The Best iSpoofer Alternative to Try On Samsung Galaxy F54 5G | Dr.fone
- Undeleted lost videos from G42 5G
- Finest Text-to-Speech Male Voice Tools for Natural Output for 2024
- In 2024, How to Delete iCloud Account On iPhone 6s without Password?
- In 2024, How To Unlink Apple ID From Apple iPhone 12
- Title: Updated 2024 Approved Where To Find The Best Free Canon LUTs? Learn More
- Author: Chloe
- Created at : 2024-04-24 07:08:40
- Updated at : 2024-04-25 07:08:40
- Link: https://ai-editing-video.techidaily.com/updated-2024-approved-where-to-find-the-best-free-canon-luts-learn-more/
- License: This work is licensed under CC BY-NC-SA 4.0.
