
:max_bytes(150000):strip_icc():format(webp)/GettyImages-1139232374-700d343900854115ad26acf3f1dd80b3.jpg)
Updated 4 Methods to Resize a WebM File for 2024
4 Methods to Resize a WebM File
People resize videos for many reasons, the most common one being to reduce file size. Others might be to meet a specification, or for compatibility. When you resize a video file, you reduce its file size considerably- making it load faster on devices, reduce processing time, and save a lot of space. Most people prefer watching videos that are smaller in size compared to larger ones, that’s why some social media sites like Instagram, Tiktok, etc have preferred video resolutions, so if you are a user on these sites you might want to resize your video to fit.
The biggest concern most people have about resizing videos is whether it will retain its quality, another concern is that you don’t want to crop out your video while resizing. If the format of the video is mp4, wmv, avi, etc which usually have very large size, resizing it might be a bit of a problem because the video quality will reduce a lot, but if it’s a WebM video file, you can still achieve a good video quality even after multiple compression or changing its resolution, that’s because its codecs- VP8 and VP9 were designed specifically for that, and it’s supported by all browsers.
In the course of this article, we’re assuming you already have a WebM video and you want to resize it, and still maintain its quality so you can upload on your favourite websites without any hassles. We have handpicked some proven methods to help you with that, let’s see them:
Method 1: Resize WebM file with Wondershare Filmora
Wondershare Filmora Video Editor is a great video editing software that comes with a lot of features. You can easily perform basic editing techniques in a few minutes. It also comes with lots of filters to make your videos pop.
For video resizing, Filmora offers you a couple of options: First you have an option of changing the resolution just before you export your video; you also have the option of cropping your videos to your preferred size and cutting out redundant parts of your videos to save space; but the third option is what we’ll show you in this guide, because we imagine you already have your video exported and you just want to resize. You can easily do that by changing the aspect ratio and we’ll show you in a few steps:
For Win 7 or later (64-bit)
For macOS 10.14 or later
Step 1: Go to the official Wondershare Filmora website and download the software.
Step 2: Install Wondershare Filmora on your PC and double click to launch.
Step 3: Change your aspect ratio. When you launch Filmora, you’re allowed to choose your preferred aspect ratio on the start page.

Select your preferred aspect ratio from the list of options- 16:9 (widescreen), 4:3 (standard), 1:1 (Instagram), 9:16 (portrait). For example, if you import a 16:9 video file into Filmora, and set it to 1:1 aspect ratio then, the final output file will be 1:1, which is the perfect aspect ratio for Instagram posts.
You’ll see below that I selected 1:1 for instagram. After you are done selecting your preferred aspect ratio, hit ‘New Project’.

Step 4: Import your WebM video. After you must have selected your preferred aspect ratio, the next step is to import the video you want to resize; you can do this by clicking on the import icon shown below. Once done, drag the video to the timeline also shown below.


A floating window will appear and you’ll be asked to change project settings to match the media. Click on ‘Keep project settings’. Filmora will change the aspect ratio of the original video you imported to your preferred aspect ratio.


Step 5: Save your video. Once the video is now properly placed in the timeline, next thing is hit ‘export’ to save your video. You can go to the ‘format tab’ to change the video output format to WebM or whatever format you choose then hit ‘Export’.

Method 2: How to resize WebM file with VLC
VLC is a free and open source multimedia player. It is arguably the best media player out there and that’s for a reason- it can play almost everything without the need for any external codecs.
The playback feature is amazing but that’s not the only thing it can do. VLC outshines most other media players because of some extra features it possesses. It resizes and converts media files, downloads and adds subtitles, records screen, as well as is customizable in settings and expandable via plugins.
What we want to use in this guide is its media resizing feature, so let’s show you how you can use it in these steps:
Step 1: Download VLC Media player from the official VLC page and install it on your windows or Mac PC.
Step 2: Launch VLC after installing by double-clicking on the software.
Step 3: Click “Media” in the toolbar.
Step 4: Select “Convert / Save”. You can also tap shortcut keys Ctrl + R to quickly open a new window.

Step 5: Click “Add”. You can load one or more video files. Here, I’ll choose a colour grading video on my desktop. You can see it has the extension ‘.webm’. After loading the video file you want to resize, click “Convert / Save” again.


Step 6: Choose your desired output profile type. With VLC, you can resize video to MP4, WebM, TS, and other formats.
Step 8: Click the settings icon to access the settings window and select the video codec where you can adjust parameters like frame rate, bitrate, resolution, etc to change video file size. I changed the frame rate of my video to 30fps which is ideal for high quality videos. Also click the resolution tab and set your desired resolution then click save.


Step 9: Select the destination folder and click start. VLC will resize the video and retain most of its quality.

Method 3: Resize Videos With Ezgif
An alternative way to resize videos is by using Ezgif Video Resizer. If you are looking for a quick way to resize your WebM videos, this is a great tool. Ezgif is a free online video resizer with a very simple interface that can aid easy navigation for new users. The whole video resizing operation is pretty quick so you don’t have to worry about wasting so much time.
Ezgif supports various video formats like MP4, MOV, FLV, WEBM, MPEG, 3GP and more. Aside from the basic size change, it also allows you to rotate, crop, cut, mute, speed, reverse and add subtitles.
Here’s how you can resize your WebM video with Ezgif in a few steps:
Step 1: Go to Ezgif Resize Video on your web browser and add your WebM file by clicking “Choose File” or pasting the video URL.

Step 2: Click “Upload Video”. You’ll see that I chose a colour grading video with the .webm extension which I want to resize. After clicking ‘Upload Video’, a floating window will appear with the video details displayed.

Step 3: Type in specific “New width” and “New height” to confirm a new size.

Step 4: Check “output format and encoding” and press “Resize video!” to save your WebM file.

Whether you are a content creator or a social media influencer, resizing videos is one thing you’ll be doing regularly and these tools will come in handy. Maybe you are a video editor and your client wants a different video format after you are done exporting, these tools will definitely save you all the stress of readjusting and hours or re-exporting.
For macOS 10.14 or later
Step 1: Go to the official Wondershare Filmora website and download the software.
Step 2: Install Wondershare Filmora on your PC and double click to launch.
Step 3: Change your aspect ratio. When you launch Filmora, you’re allowed to choose your preferred aspect ratio on the start page.
Select your preferred aspect ratio from the list of options- 16:9 (widescreen), 4:3 (standard), 1:1 (Instagram), 9:16 (portrait). For example, if you import a 16:9 video file into Filmora, and set it to 1:1 aspect ratio then, the final output file will be 1:1, which is the perfect aspect ratio for Instagram posts.
You’ll see below that I selected 1:1 for instagram. After you are done selecting your preferred aspect ratio, hit ‘New Project’.
Step 4: Import your WebM video. After you must have selected your preferred aspect ratio, the next step is to import the video you want to resize; you can do this by clicking on the import icon shown below. Once done, drag the video to the timeline also shown below.
A floating window will appear and you’ll be asked to change project settings to match the media. Click on ‘Keep project settings’. Filmora will change the aspect ratio of the original video you imported to your preferred aspect ratio.
Step 5: Save your video. Once the video is now properly placed in the timeline, next thing is hit ‘export’ to save your video. You can go to the ‘format tab’ to change the video output format to WebM or whatever format you choose then hit ‘Export’.
Method 2: How to resize WebM file with VLC
VLC is a free and open source multimedia player. It is arguably the best media player out there and that’s for a reason- it can play almost everything without the need for any external codecs.
The playback feature is amazing but that’s not the only thing it can do. VLC outshines most other media players because of some extra features it possesses. It resizes and converts media files, downloads and adds subtitles, records screen, as well as is customizable in settings and expandable via plugins.
What we want to use in this guide is its media resizing feature, so let’s show you how you can use it in these steps:
Step 1: Download VLC Media player from the official VLC page and install it on your windows or Mac PC.
Step 2: Launch VLC after installing by double-clicking on the software.
Step 3: Click “Media” in the toolbar.
Step 4: Select “Convert / Save”. You can also tap shortcut keys Ctrl + R to quickly open a new window.
Step 5: Click “Add”. You can load one or more video files. Here, I’ll choose a colour grading video on my desktop. You can see it has the extension ‘.webm’. After loading the video file you want to resize, click “Convert / Save” again.
Step 6: Choose your desired output profile type. With VLC, you can resize video to MP4, WebM, TS, and other formats.
Step 8: Click the settings icon to access the settings window and select the video codec where you can adjust parameters like frame rate, bitrate, resolution, etc to change video file size. I changed the frame rate of my video to 30fps which is ideal for high quality videos. Also click the resolution tab and set your desired resolution then click save.
Step 9: Select the destination folder and click start. VLC will resize the video and retain most of its quality.
Method 3: Resize Videos With Ezgif
An alternative way to resize videos is by using Ezgif Video Resizer. If you are looking for a quick way to resize your WebM videos, this is a great tool. Ezgif is a free online video resizer with a very simple interface that can aid easy navigation for new users. The whole video resizing operation is pretty quick so you don’t have to worry about wasting so much time.
Ezgif supports various video formats like MP4, MOV, FLV, WEBM, MPEG, 3GP and more. Aside from the basic size change, it also allows you to rotate, crop, cut, mute, speed, reverse and add subtitles.
Here’s how you can resize your WebM video with Ezgif in a few steps:
Step 1: Go to Ezgif Resize Video on your web browser and add your WebM file by clicking “Choose File” or pasting the video URL.
Step 2: Click “Upload Video”. You’ll see that I chose a colour grading video with the .webm extension which I want to resize. After clicking ‘Upload Video’, a floating window will appear with the video details displayed.
Step 3: Type in specific “New width” and “New height” to confirm a new size.
Step 4: Check “output format and encoding” and press “Resize video!” to save your WebM file.
Whether you are a content creator or a social media influencer, resizing videos is one thing you’ll be doing regularly and these tools will come in handy. Maybe you are a video editor and your client wants a different video format after you are done exporting, these tools will definitely save you all the stress of readjusting and hours or re-exporting.
What Are The Stages Of Film Production - 2023
Film production is a very time-consuming and demanding procedure where attention and effort is necessary. While looking at the end result, the movie, or a short film, you may underestimate what the filmmakers have to go through while preparing, shooting and editing the movie to its final product.
Without further ado, let’s get started!

What Are The Stages Of Film Production
1. Pre-Production
The pre-production phase comes early in the process, it usually comes after the development and before the production itself. This stage includes finalizing the scripts, bringing together the actors and crew, browse for locations, deciding which equipment is needed, and deciding on the budget. Pre-production is a planning stage of the movie, where you confirm all the details of the project before starting on production.

Pre-production
2. Production
Now the fun part begins. It is time to get the movie on camera. All the producers and directors finished making the plans from the use of all the production assets that are needed to make the movie. Once the cast and locations are set, the actual filming process can begin and this can take from days, weeks, to months depending on how many locations are used, how much scenes are being filmed and if there are any problems that occur that delays the filming process.

Production
3. Post-Production

Post-Production
After the filming process, any re-taking, and other filming phases the entire crew has to go through, it is time for post-production. This stage is when the audio and visual materials are combined together to create the movie. An editor, or multiple editors are using the following procedures to create the film:
A. Cutting and Trimming Shots
Tips
▷ What’s a Cut
In the film and video industry, a cut is described by when one clip ends and another one starts. For example, say you have a wide shot clip of a car driving as well as clip of a man’s eyes watching.
▷ When Would the Cut Happen
The cut would happen when the first shot has ended and is followed by the second shot. Repeating that will have an impact on how the viewer sees the movie and follows the story.
B. Adding Music and Sound Effect
Tips
▷ Sound Effects
Depending on what kind of movie it is, sound effects can make a huge difference in the viewing experience. No matter if it’s an explosion, an extra wind sound, a door crackle, or laughing people in the background.
▷ Deliver the Emotion
Many sound effects are placed into the film to deliver the emotion and get the viewer onto the edge of their seat as it amplifies the moment.
C. Adding Visual Effects
Tips
▷ The Benefit of Post-production
When there are visual effects showing in the movie, these are not made physically on set. The benefit of post-production is that there are unlimited choices of adding visual effects to strengthen a moment and the impact on the viewer.
▷ Visual Effects
A lot of results are accomplished by visual effects because they would be impossible to re-create on set.
4. Distribution
Distribution is the final stage of production, which happens after the film has been edited, and is ready for release. Many film makers and production companies will advertise the movie’s trailer on social media and the general internet to target the audience that loves the type of movie that has been made. They will either see it on social media or on television to drive people to theaters to watch the movie and get them into the story. A lot of movies have follow-ups when it’s been received really well creating a storyline.

Distribution
What Are The Stages Of Film Production
1. Pre-Production
The pre-production phase comes early in the process, it usually comes after the development and before the production itself. This stage includes finalizing the scripts, bringing together the actors and crew, browse for locations, deciding which equipment is needed, and deciding on the budget. Pre-production is a planning stage of the movie, where you confirm all the details of the project before starting on production.
Pre-production
2. Production
Now the fun part begins. It is time to get the movie on camera. All the producers and directors finished making the plans from the use of all the production assets that are needed to make the movie. Once the cast and locations are set, the actual filming process can begin and this can take from days, weeks, to months depending on how many locations are used, how much scenes are being filmed and if there are any problems that occur that delays the filming process.
Production
3. Post-Production
Post-Production
After the filming process, any re-taking, and other filming phases the entire crew has to go through, it is time for post-production. This stage is when the audio and visual materials are combined together to create the movie. An editor, or multiple editors are using the following procedures to create the film:
A. Cutting and Trimming Shots
Tips
▷ What’s a Cut
In the film and video industry, a cut is described by when one clip ends and another one starts. For example, say you have a wide shot clip of a car driving as well as clip of a man’s eyes watching.
▷ When Would the Cut Happen
The cut would happen when the first shot has ended and is followed by the second shot. Repeating that will have an impact on how the viewer sees the movie and follows the story.
B. Adding Music and Sound Effect
Tips
▷ Sound Effects
Depending on what kind of movie it is, sound effects can make a huge difference in the viewing experience. No matter if it’s an explosion, an extra wind sound, a door crackle, or laughing people in the background.
▷ Deliver the Emotion
Many sound effects are placed into the film to deliver the emotion and get the viewer onto the edge of their seat as it amplifies the moment.
C. Adding Visual Effects
Tips
▷ The Benefit of Post-production
When there are visual effects showing in the movie, these are not made physically on set. The benefit of post-production is that there are unlimited choices of adding visual effects to strengthen a moment and the impact on the viewer.
▷ Visual Effects
A lot of results are accomplished by visual effects because they would be impossible to re-create on set.
4. Distribution
Distribution is the final stage of production, which happens after the film has been edited, and is ready for release. Many film makers and production companies will advertise the movie’s trailer on social media and the general internet to target the audience that loves the type of movie that has been made. They will either see it on social media or on television to drive people to theaters to watch the movie and get them into the story. A lot of movies have follow-ups when it’s been received really well creating a storyline.
Distribution
Learn About Splice Video Online and Its Advantages. Also, Check Out the Best Online Apps for Splice Editing
Create High-Quality Video - Wondershare Filmora
An easy and powerful YouTube video editor
Numerous video and audio effects to choose from
Detailed tutorials are provided by the official channel
We are in the digital era, and any online activity gives us a high exposure level. Making digital content and posting it online is not enough. You have to be creative and adopt an advanced mode of communication. The best place to begin is with online platforms. This is because most people find it easy to source information online instead of any other place.
The availability of video editors makes it possible to splice videos online and post them instantly, reaching thousands of viewers through social media platforms in a short time.
Recent research has shown that online videos are more effective and can help brands connect with their audience compared to other data types like images, audio, GIFs, and text, among others. Check out how to merge videos online and the advantages of going online on your video editing journey.

In this article
01 The Meaning of Splice Video
02 Top 6 Online Video Splice Editors
The Meaning of Splice Video
To splice a video means combining two or more video clips to form one. You can use the available editing apps to merge several videos. You need to select each video to splice and put them together in the timeline. Several apps enable you to edit your footage by trimming, cropping, adding music, and transitions, among other adjustments.
Reasons to splice video
You could be wondering why it is necessary to splice your videos. Well, people love to be creative, and working on several videos may not bring out the creativity they need. Here are some reasons that come in handy as far as splicing video is concerned.
- It isn’t easy to share many videos at once. Splicing your videos is a quick way to get your videos to move as one piece and express your message as direct as possible.
- You can also splice videos for easy management. Remember, you can edit it as one, making you finish the editing process quickly and easily.
- Merged videos make it easy to share on other platforms. It would be very hectic to promote several videos separately on media sites.
- Another reason for splicing videos is to compress them. It will take up less space compared to dealing with several videos at once.
- Spliced video is organized, indicating the starting point and endpoint of the video.
The Benefits of Online Video Editing
Since its backbone reason is to share videos online, several pros come with it. The Splice video editor online enables anyone to create engaging videos without software installation. Let’s peruse the advantages of using online video editing compared to the conventional options.
• Automatic updates
Updates are important for the normal operation of an application. It may be hectic to keep remembering when you should update your drivers on your device. However, online apps need no manual configuration as they do this automatically. You’ll always get the latest version anytime you log in. Besides, new templates and features are instantly available to you after every update.
• Easy collaboration
This comes when several people work on a project. It could be difficult to share files manually, given the rise of computer crashes and data loss. Online mechanisms come to the rescue as all files are kept in the cloud. This lets anyone working on the project access it on any device, anywhere, thereby minimizing the risks of data loss. Furthermore, multiple collaborators can log in to the same project to input their views and other additions. Anyone can upload the file from their end and make the necessary adjustments.
• Convenient
You don’t require any tools while manage Splice video editor online. You can easily make edits from anywhere as long as you have an internet connection. It also promotes easy accessibility of your files from any device. More so, making edits and polishing your video is accomplished faster than ever.
• Time-saving
You’ll get improved productivity when you work online on your video. You won’t waste time running up and down the stairs to install your app or get updates. All you need are a few clicks of a button to make quick moves as far as video editing is concerned. Instead, you can easily polish and post your clip while you figure out what works best for your audience at each step.
• Multi-OS compatible
An online video editor runs in a web browser and, therefore, can run on several operating systems. It doesn’t matter which device you use to compose your video. You can easily share it and be accessible on other platforms by several people. Likewise, the speed will not be affected no matter which operating system you use.
Top 6 Online Video Splice Editors
Now that we have seen what online video editing is best at, we need to explore the suitable Splice video editor online that will quickly bring out the creativity in you and elevate your editing ability to the next level.
1) MiniTool MovieMaker
The app comes free with no ads and is watermark-free as well. It is rich in features that help you to maneuver as you edit your video to perfection. The MiniTool lets you create continuous videos based on your vision. It also encompasses video templates that make it easy to settle on a theme.

Pros
Customize videos with video transitions and animated text.
This app contains no advertisements.
It leaves no watermark on the finished video.
It has an intuitive and clean interface that enables easy editing of videos.
The app is highly compatible with popular video and audio formats.
Cons
It lacks some advanced features, like a green screen and motion speed control.
2) Filmora Video Editor
Filmora is another powerful tool with splice video templates. It has an intuitive interface that enables any level of user to easily edit videos. You can add filters and other video effects to create an engaging video. Also, make use of advanced features like keyframe animation, color matching, split screen, etc.
For Win 7 or later (64-bit)
For macOS 10.12 or later
Pros
It comes with advanced features to help you create compelling videos.
You can add music and other sound effects directly.
An intuitive interface that suits beginners.
Produce high-density videos.
Cons
It doesn’t support newer formats like HEIC photos..
3) Clipchamp
This online splice video editor offers you two modes of video creation online. You can either use the video templates or the blank project option. For templates, get customized ones right from the app’s gallery. However, you may also opt to start your video creation from scratch and make progress toward completion.

Pros
This app offers you two modes for video creation.
Preview your video clips before posting them.
Easily organize your music tracks in the timeline.
Splice your videos without quality loss.
Use styled text templates with animations.
Cons
It has no keyframe features for animation creation.
4) Kapwing
This is a video converter and splice video editor that freely edits your videos to any file format. You can use the screen-by-screen editing option for advanced editing ability. You can also bring on more creativity by using multiple scenes. Furthermore, you can’t run out of editing tools, which include rotating, splitting, and trimming, among others. Also, spice up your project by adding some background music and customizing text to the desired font and color.

Pros
It includes free music from the internet.
It comes with a large library of photos, stickers, etc.
It’s easy to use and allows editing of videos without signing in.
Cons
It lacks advanced features like speech ramping.
5) Video Editor by EaseUS
This is another reliable splice editor that comes with quality editing features. You can splice, merge, trim, and rotate your video, among other functionalities. Furthermore, the advanced features allow you to easily apply transitions and elements.

Pros
Splice your videos instantly using your mouse.
Easily detach the audio from the spliced video.
It supports various video formats.
Cons
It has limited templates.
6) WeVideo
This online editor lets you splice your videos anywhere. It supports several formats, and you can finally export your video in any format. Besides, it allows you access to free stock media like music tracks, videos, and images, among others.

Pros
WeVideo is free to use. However, you can upgrade to the premium version for advanced features.
Directly export videos to YouTube, Instagram, etc.
Cons
The free version leaves a watermark on your videos.
Conclusion
● Are you looking forward to promoting your brand online? Then splice the video online at the best resolution for your editing purposes. You’ll quickly edit your videos and reach your target audience with just a few clicks of a button. Likewise, it is effective to monitor your viewers’ reactions through various comments and feedback. This article has brought you several editing apps for online use. You can easily pinpoint what works best for you concerning their features.
We are in the digital era, and any online activity gives us a high exposure level. Making digital content and posting it online is not enough. You have to be creative and adopt an advanced mode of communication. The best place to begin is with online platforms. This is because most people find it easy to source information online instead of any other place.
The availability of video editors makes it possible to splice videos online and post them instantly, reaching thousands of viewers through social media platforms in a short time.
Recent research has shown that online videos are more effective and can help brands connect with their audience compared to other data types like images, audio, GIFs, and text, among others. Check out how to merge videos online and the advantages of going online on your video editing journey.
In this article
01 The Meaning of Splice Video
02 Top 6 Online Video Splice Editors
The Meaning of Splice Video
To splice a video means combining two or more video clips to form one. You can use the available editing apps to merge several videos. You need to select each video to splice and put them together in the timeline. Several apps enable you to edit your footage by trimming, cropping, adding music, and transitions, among other adjustments.
Reasons to splice video
You could be wondering why it is necessary to splice your videos. Well, people love to be creative, and working on several videos may not bring out the creativity they need. Here are some reasons that come in handy as far as splicing video is concerned.
- It isn’t easy to share many videos at once. Splicing your videos is a quick way to get your videos to move as one piece and express your message as direct as possible.
- You can also splice videos for easy management. Remember, you can edit it as one, making you finish the editing process quickly and easily.
- Merged videos make it easy to share on other platforms. It would be very hectic to promote several videos separately on media sites.
- Another reason for splicing videos is to compress them. It will take up less space compared to dealing with several videos at once.
- Spliced video is organized, indicating the starting point and endpoint of the video.
The Benefits of Online Video Editing
Since its backbone reason is to share videos online, several pros come with it. The Splice video editor online enables anyone to create engaging videos without software installation. Let’s peruse the advantages of using online video editing compared to the conventional options.
• Automatic updates
Updates are important for the normal operation of an application. It may be hectic to keep remembering when you should update your drivers on your device. However, online apps need no manual configuration as they do this automatically. You’ll always get the latest version anytime you log in. Besides, new templates and features are instantly available to you after every update.
• Easy collaboration
This comes when several people work on a project. It could be difficult to share files manually, given the rise of computer crashes and data loss. Online mechanisms come to the rescue as all files are kept in the cloud. This lets anyone working on the project access it on any device, anywhere, thereby minimizing the risks of data loss. Furthermore, multiple collaborators can log in to the same project to input their views and other additions. Anyone can upload the file from their end and make the necessary adjustments.
• Convenient
You don’t require any tools while manage Splice video editor online. You can easily make edits from anywhere as long as you have an internet connection. It also promotes easy accessibility of your files from any device. More so, making edits and polishing your video is accomplished faster than ever.
• Time-saving
You’ll get improved productivity when you work online on your video. You won’t waste time running up and down the stairs to install your app or get updates. All you need are a few clicks of a button to make quick moves as far as video editing is concerned. Instead, you can easily polish and post your clip while you figure out what works best for your audience at each step.
• Multi-OS compatible
An online video editor runs in a web browser and, therefore, can run on several operating systems. It doesn’t matter which device you use to compose your video. You can easily share it and be accessible on other platforms by several people. Likewise, the speed will not be affected no matter which operating system you use.
Top 6 Online Video Splice Editors
Now that we have seen what online video editing is best at, we need to explore the suitable Splice video editor online that will quickly bring out the creativity in you and elevate your editing ability to the next level.
1) MiniTool MovieMaker
The app comes free with no ads and is watermark-free as well. It is rich in features that help you to maneuver as you edit your video to perfection. The MiniTool lets you create continuous videos based on your vision. It also encompasses video templates that make it easy to settle on a theme.
Pros
Customize videos with video transitions and animated text.
This app contains no advertisements.
It leaves no watermark on the finished video.
It has an intuitive and clean interface that enables easy editing of videos.
The app is highly compatible with popular video and audio formats.
Cons
It lacks some advanced features, like a green screen and motion speed control.
2) Filmora Video Editor
Filmora is another powerful tool with splice video templates. It has an intuitive interface that enables any level of user to easily edit videos. You can add filters and other video effects to create an engaging video. Also, make use of advanced features like keyframe animation, color matching, split screen, etc.
For Win 7 or later (64-bit)
For macOS 10.12 or later
Pros
It comes with advanced features to help you create compelling videos.
You can add music and other sound effects directly.
An intuitive interface that suits beginners.
Produce high-density videos.
Cons
It doesn’t support newer formats like HEIC photos..
3) Clipchamp
This online splice video editor offers you two modes of video creation online. You can either use the video templates or the blank project option. For templates, get customized ones right from the app’s gallery. However, you may also opt to start your video creation from scratch and make progress toward completion.
Pros
This app offers you two modes for video creation.
Preview your video clips before posting them.
Easily organize your music tracks in the timeline.
Splice your videos without quality loss.
Use styled text templates with animations.
Cons
It has no keyframe features for animation creation.
4) Kapwing
This is a video converter and splice video editor that freely edits your videos to any file format. You can use the screen-by-screen editing option for advanced editing ability. You can also bring on more creativity by using multiple scenes. Furthermore, you can’t run out of editing tools, which include rotating, splitting, and trimming, among others. Also, spice up your project by adding some background music and customizing text to the desired font and color.
Pros
It includes free music from the internet.
It comes with a large library of photos, stickers, etc.
It’s easy to use and allows editing of videos without signing in.
Cons
It lacks advanced features like speech ramping.
5) Video Editor by EaseUS
This is another reliable splice editor that comes with quality editing features. You can splice, merge, trim, and rotate your video, among other functionalities. Furthermore, the advanced features allow you to easily apply transitions and elements.
Pros
Splice your videos instantly using your mouse.
Easily detach the audio from the spliced video.
It supports various video formats.
Cons
It has limited templates.
6) WeVideo
This online editor lets you splice your videos anywhere. It supports several formats, and you can finally export your video in any format. Besides, it allows you access to free stock media like music tracks, videos, and images, among others.
Pros
WeVideo is free to use. However, you can upgrade to the premium version for advanced features.
Directly export videos to YouTube, Instagram, etc.
Cons
The free version leaves a watermark on your videos.
Conclusion
● Are you looking forward to promoting your brand online? Then splice the video online at the best resolution for your editing purposes. You’ll quickly edit your videos and reach your target audience with just a few clicks of a button. Likewise, it is effective to monitor your viewers’ reactions through various comments and feedback. This article has brought you several editing apps for online use. You can easily pinpoint what works best for you concerning their features.
How To Fade Audio In Kinemaster
If you have been looking for video and audio editing tools then you have probably heard of Kinemaster. It is a great video editing app that allows users to edit all aspects of the video including any audio or music that may accompany the video. It has a lot of very useful features and the user interface is fairly easy to use.
One of the things that you can do with Kinemaster is to fade out audio, a useful feature that can help the ending of any video appear more authentic. In this article, we will be looking at how you can use Kinemaster to fade audio.
Kinemaster Fade Audio Steps
The following steps show you how you can easily fade audio in Kinemaster;
Step1If you don’t have Kinemaster already, start by downloading and installing the video editor on your computer.
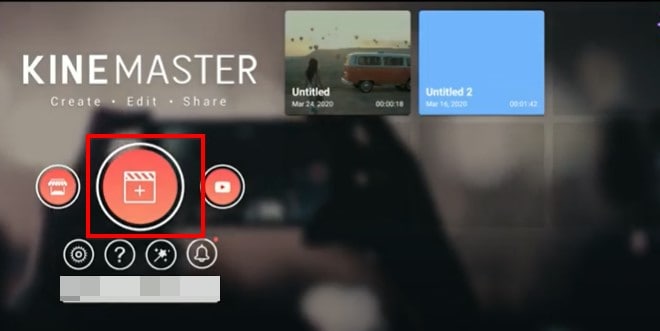
Step2Open Kinemaster on your computer and then click on the “New Project” icon to start. Select the aspect ratio that you would like to use. If you are not sure, we recommend choosing the “16:9” aspect ratio.
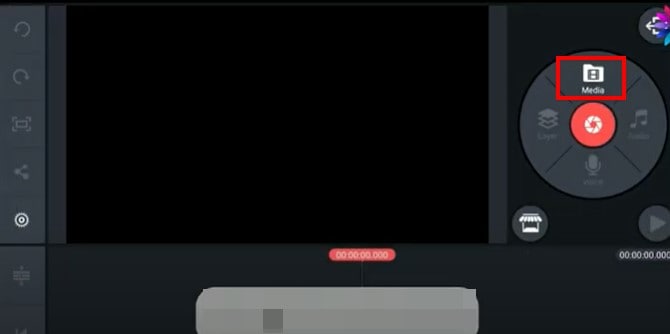
Step3In the next window, click on “Media” to select the clip you would like to add to the Kinemaster project that you have just created.
Step4To fade in and fade out the audio in the project, click on the gear icon from the options to the left of the screen.
![]()
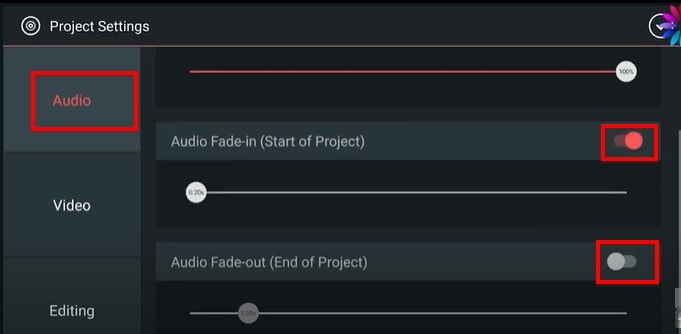
Step5Select the “Audio” tab on the next screen and then turn on the switch next to “Audio Fade-in (Start of Project)” and “Audio Fade-out (End of Project).” This will add a fade-in and fade-out effect at the beginning of the audio and at the end of it.
Step6You can then easily set the duration of the “Audio fade-in” and “Audio fade-out” by dragging the slider below each option. We recommend setting the duration to just a few seconds.
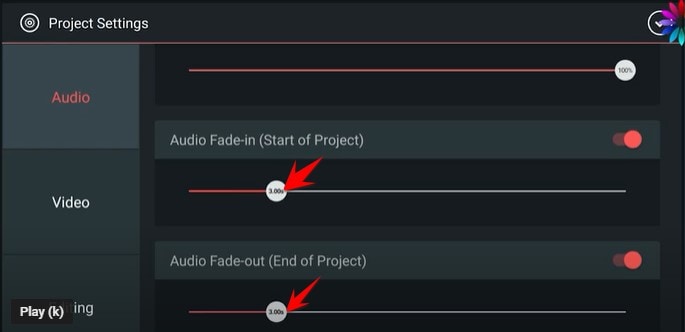
Don’t forget to save the project when you’re done.
Kinemaster Alternative to Edit Audio
Kinemaster is a good way to edit both audio and video on your computer, but the following options are just as good;
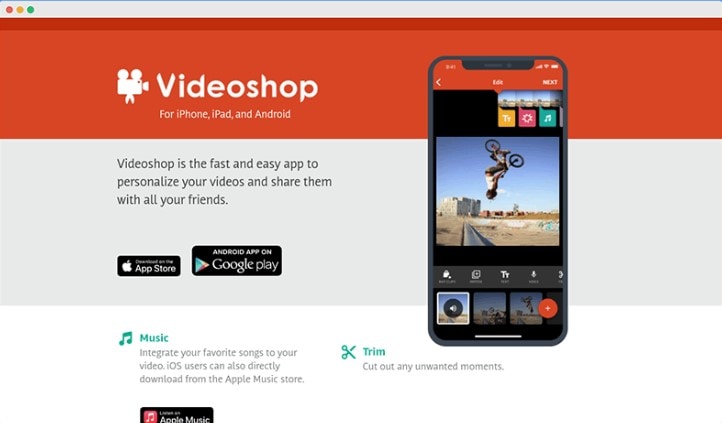
1. VideoShop
VideoShop is a simple to use and highly effective program that you can use to create and edit videos on your computer. The interface makes it easy to import any video project that you have into the program and the wealth of very useful features can help you edit the video in various ways.
For example, you can change the speed of the video, add transitions at various points in the video, add and remove text, add and remove music and so much more. Although there is a free trial version, you will only be able to access some of the more useful features when you purchase the premium version.
The Pro version of VideoShop goes for $3.99 a month, but you can get lifetime access to the program for only $39.99. One thing that VideoShop has over Kinemaster is that it is very easy to use, even beginner users find video editing a breeze with this tool.
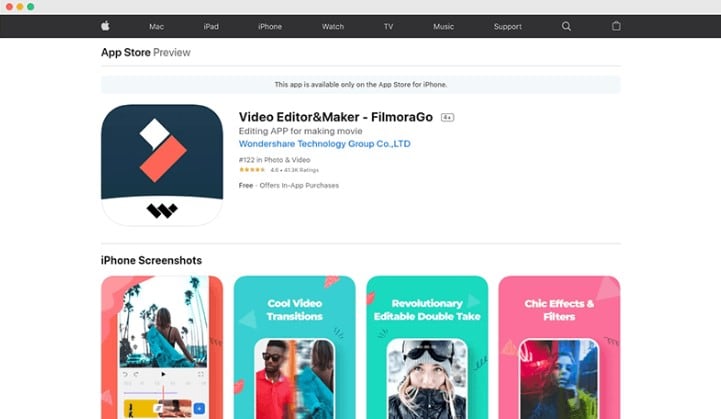
2. Filmora
If you are looking for a simple way to edit videos on Android or iOS devices, Filmora is one of the best options in the market. This mobile version of the very popular Filmora video editor is just as easy to use as its parent program. You can use it to create video projects from scratch or upload a video and make changes to it.
It offers you a lot of choices when it comes to editing features including trimming sections of the video, adding filters, adding music, adding or removing text, and even changing the canvas or the background of the video. Advanced options such as changing the speed of the video are also available.
One of the things that we love about Filmora is that you don’t even have to create an account to use it or remove the watermark added to the completed video project, watching a video ad can be enough. But this option is only available once every 24 hours, meaning that you can only remove a watermark on the free version once a day. Filmora is available for both iOS and Android and the yearly premium plan will cost you just $19.90.
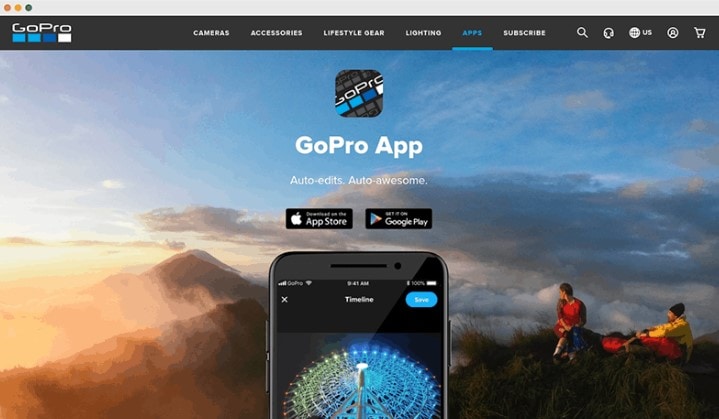
3. Quik
Quik is a video editing program created by GoPro for the purpose of editing GoPro videos, but that doesn’t mean that you will not be able to use it to edit other types of videos. You can use Quik to create a new project or edit an existing video and gives users a lot of different options when it comes to video editing.
One of the main benefits of using Quik is that you can easily add music, audio, and special effects to a video as well as change the length of the video, fade audio in and out and even change when the music starts. It is also one of the best ways to use images to create collages and slideshows very easily. There are a lot of slideshow and collage templates to choose from, and you can edit them easily by adding your music and images. Quik is completely free to use and you can upload your creation to the cloud ad share the link with others.
Conclusion
Kinemaster is one of the most popular video editing tools, especially since it simplifies the video editing process to make it very easy. All the alternative tools we have outlined here in this article are selected because they can make video editing quite simple.
Free Download For Win 7 or later(64-bit)
Free Download For macOS 10.14 or later
Also read:
- 2024 Approved How to Create a Clideo Slideshow Simply
- 2024 Approved Quickly Turn Any Video Into a Paper Rip Effect
- 2024 Approved 2 Ways to Add Custom Subtitles to Netflix
- Updated 2024 Approved How to Add Selective Color Effect to Your Videos
- 2024 Approved A Full Review of Leeming LUT Pro
- In 2024, Do You Want a LUT that You Can Use for Your High-Definition Content? You Can Use Rec 709 LUT Premiere Pro for Your HD Digital Media to Give the Perfect Result
- New 2024 Approved Best Ideas on Using Filmora Green Screen
- New In 2024, Why Your Transparent GIF Is Hard to Remove and How to Do With It
- Updated 2024 Approved Easy Way to Create a DIY Green Screen Video Effect
- 2024 Approved Detailed Tutorial to Crop Videos Using Openshot?
- Updated Here We Are Going to Show You the Best Effects to Appear on Camera Made with Filmora
- In 2024, Looking for the Best Alternatives of iPad Compatible Slideshow Applications to Design High End Graphic Presentations? Rest Assured, You Have Landed at the Correct Spot
- Do You Want to Know About the Best Filmic Pro LUTs for Video Editing? This Article Provides Details on the Best Recommendations for 2024
- New In 2024, How to Add Text Behind Objects in Video
- New In 2024, 10 BEST TEXT TO SPEECH VIDEO MAKERS
- Updated How to Create an Adobe Slideshow the Easy Way
- Do You Know Adding Subtitles Can Benefit Video Content? Meanwhile, for Adding Subtitles to a Video, Wondershare Filmora Can Help You
- New Best Cinematic LUTs For Premiere Pro Recommendation
- New 2024 Approved How to Stabilize Videos for Free with Google Photos App
- In 2024, Find Out The Best Dark Moody LUTs During Editing
- Updated In 2024, Camtasia Vs. Final Cut Pro
- 2024 Approved Are You Surfing for some Way to Make Your Animated Emoji Discord Using Videos, GIFs, Images, or Text? Read Through This Article as Well Guide You Through the Process
- New Funny Content Ideas for YouTube Videos and Funny Music Background for 2024
- 2024 Approved Looking For a Cheap Camera to Make Slow Motion Video? Get It Now
- Is your Honor Play 7T working too slow? Heres how you can hard reset it | Dr.fone
- In 2024, 2 Ways to Transfer Text Messages from Realme Note 50 to iPhone 15/14/13/12/11/X/8/ | Dr.fone
- In 2024, Ultimate Guide on Xiaomi 13 Ultra FRP Bypass
- Online signatures for .wbk file
- Possible solutions to restore deleted videos from Oppo A2
- How To Do Lava Blaze 2 Pro Screen Sharing | Dr.fone
- In 2024, What Pokémon Evolve with A Dawn Stone For Nokia C12 Pro? | Dr.fone
- Why Does My Vivo Y27 4G Keep Turning Off By Itself? 6 Fixes Are Here | Dr.fone
- How to recover old call logs from your Infinix GT 10 Pro?
- Forgot iPhone Passcode Again? Unlock iPhone 6s Without Passcode Now
- In 2024, How to Check Distance and Radius on Google Maps For your Nokia C12 Plus | Dr.fone
- In 2024, Top 10 Samsung Galaxy Z Flip 5 Android SIM Unlock APK
- In 2024, How Do You Get Sun Stone Evolutions in Pokémon For Honor Magic 6 Pro? | Dr.fone
- Fix the Error of Unfortunately the Process.com.android.phone Has Stopped on Realme C67 4G | Dr.fone
- Why Apple Account Disabled From your iPhone 13 Pro? How to Fix
- In 2024, 6 Methods to Protect Yourself from Location Tracking on Apple iPhone SE (2020) | Dr.fone
- How to sign a PDF v1.7 document with electronic signature service
- Why does the pokemon go battle league not available On Samsung Galaxy S23+ | Dr.fone
- In 2024, Complete Tutorial to Use VPNa to Fake GPS Location On Motorola Defy 2 | Dr.fone
- The Best 8 VPN Hardware Devices Reviewed On Honor X50i+ | Dr.fone
- Title: Updated 4 Methods to Resize a WebM File for 2024
- Author: Chloe
- Created at : 2024-04-24 07:08:27
- Updated at : 2024-04-25 07:08:27
- Link: https://ai-editing-video.techidaily.com/updated-4-methods-to-resize-a-webm-file-for-2024/
- License: This work is licensed under CC BY-NC-SA 4.0.
