
:max_bytes(150000):strip_icc():format(webp)/GettyImages-849896688-6d69f22bcf0a4ff092f444abe6e1c19f.jpg)
Updated Best 10 Fun Discord Bots You Need for 2024
Top 10 Fun Discord Bots You Need
Top 10 Fun Discord Bots You Need in 2024
An easy yet powerful editor
Numerous effects to choose from
Detailed tutorials provided by the official channel
Consumers enjoy discord because it serves as a hub for their social groups and communities. It’s a haven where users can be themselves while socializing with others who share their interests and hobbies. There is no algorithm selecting what they should see, no continuous scrolling, and no news feed. Common interests fuel conversations and you can use some fun discord bots to pep up the conversation.

Fun bots to add discord with artificial intelligence (AI) technologies are among the most helpful tools available on the discord platform. Funny emojis for discord may be beneficial to greet new members and have funny light conversations! This aids in the creation and maintenance of a vibrant online community. You can add music, games, and fun memes to your server using these bots if you wish to.
In this article
01 [10 Fun Discord Bots You Need in 2024](#Part 1)
02 [Fun Discord Bots FAQs](#Part 2)
Part 1 Fun Discord Bots You Need in 2024
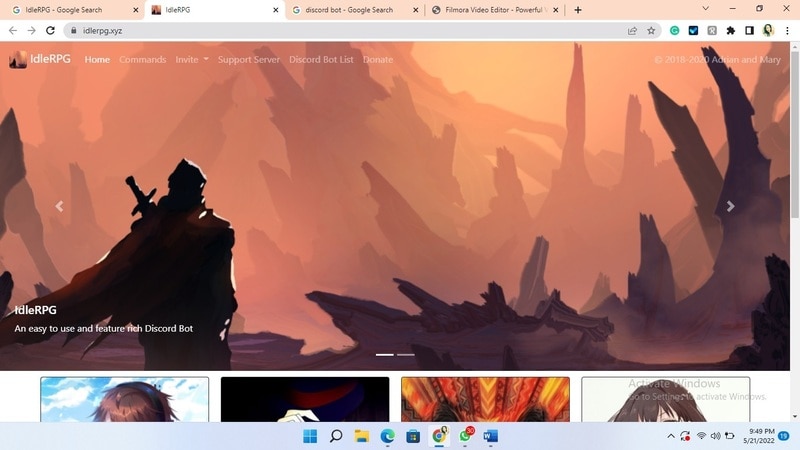
01IdleRPG
The IdleRPG is another enjoyable and engaging fun discord bot in the RPG gaming experience. It rewards server members for participating in the game while gaining XP and having fun. It offers character advancement and is comparable to other RPG games.
You may travel on a quest, trade various things, fight other players, and even find love. There’s also a scoreboard for the top ten loves, top ten PvP players, top ten wealthiest, and top ten XP players. IdleRPG also allows you to wager in various ways to help you boost your gaming money.
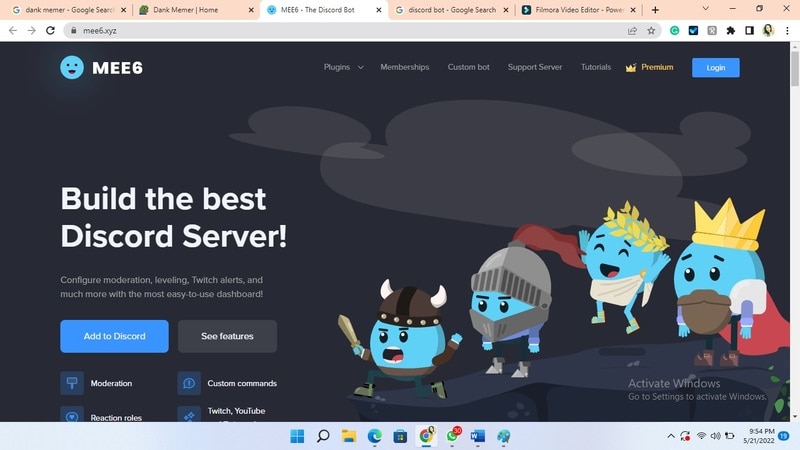
02MEE6
MEE6 is a widespread moderation and one of the greatest fun bots for discord. It takes care of many tasks that a mod team would typically do. This includes greeting new members, informing your server when you or your favorite content producers go live on Twitch or YouTube, and allowing users to assign roles depending on their reactions.
A command tool that allows you to generate custom commands and an XP leveling system that users may grind to earn access to various channels and permissions depending on activity are two of MEE6’s more complicated features. MEE6 also includes plugins for music and developing your fun discord bot.
03Dank Memer
Dank Memer is another fun bot to add to discord with a lighthearted tone. It offers one of the most extensive built-in economies, allowing participants to engage in text-based thievery, bank robbery, and gambling experiences.
As its name implies, it also offers a slew of meme-related commands. You can use simple chat instructions to create memes. Other memes automatically publish.
Even more impressive is that awesome memes are collected daily from Reddit’s top meme collections.

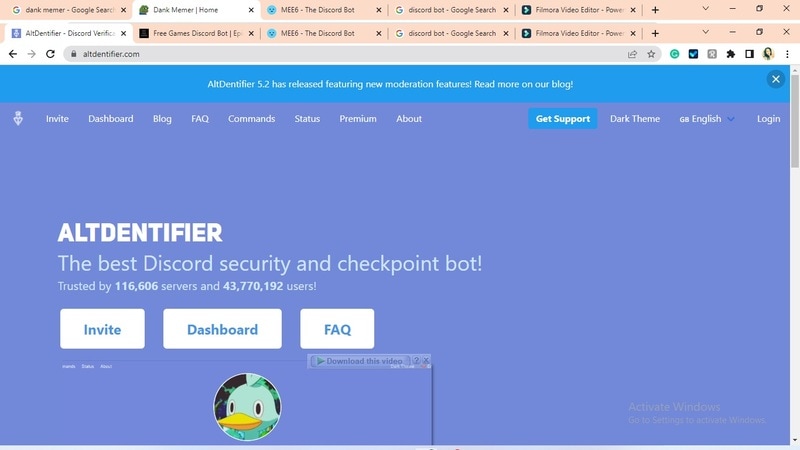
04AltDentifier
Another unique funny discord emoji bot is AltDentifier, which maintains your server clean and spam-free. It’s simple to set up and takes only a few minutes to get up and run. It now has over 35 million users spread across 100,000 servers. It also includes several more moderation commands to make administration easier.
The AltDentifier bot contains:
● An automated anti-raid system.
● A robust verification mechanism.
● Multilingual support.
● A review record.
It will also notify you if a user attempts to circumvent any limitations by utilizing a VPN.
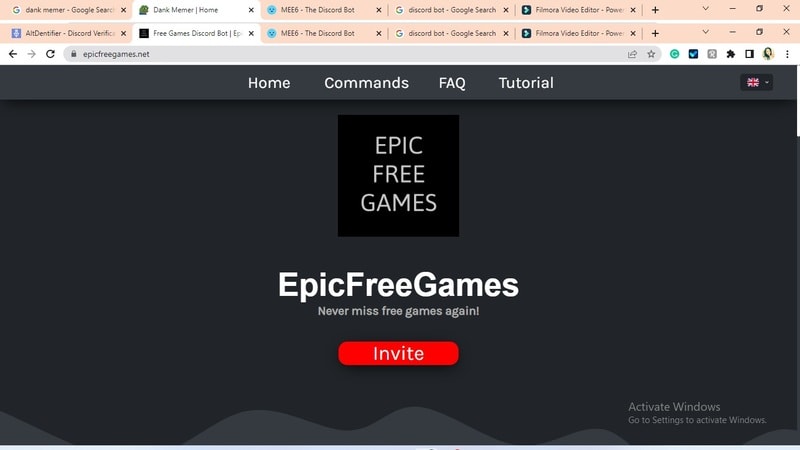
05EpicFreeGames
Over the last two years, Epic Free Games has given away thousands of free games. GTA V, Dead By Daylight, and NBA 2K21 are among the given-away titles. It even-handed away Discord Nitro lately. Have any of these free games ever escaped your notice? Fear not, for the EpicFreeGames bot has your back.
The EpicFreeGames bot delivers a message to a channel, reminding everyone of Epic’s free game(s). It only has one task, yet it can provide you with hundreds of dollars worth of games. Never miss another fantastic free Epic Games game again.
06**Rythm **
Rythm is a great fun discord bot for playing music in the voice stream of your server. This one features a beautiful user interface that includes a music player that you can interact with. This makes controlling the channel’s queue a breeze.
The options are changeable. You can designate DJ duties, prohibit the same songs from appearing in queues again, and block particular channels from playing music. Rhythm is less platform-agnostic than Groovy. Spotify, YouTube, SoundCloud, and Bandcamp are among the options. Apple Music is not currently supported.
07Unbelievaboat
UnbelievaBoat is a versatile, fun bot to add to discord that uses exciting activities to keep server members engaged. These capabilities, fortunately, include a moderation mechanism that you may utilize to issue warnings and enforce bans. Your moderators may keep track of each action by assigning it a case number.
08Helper.gg
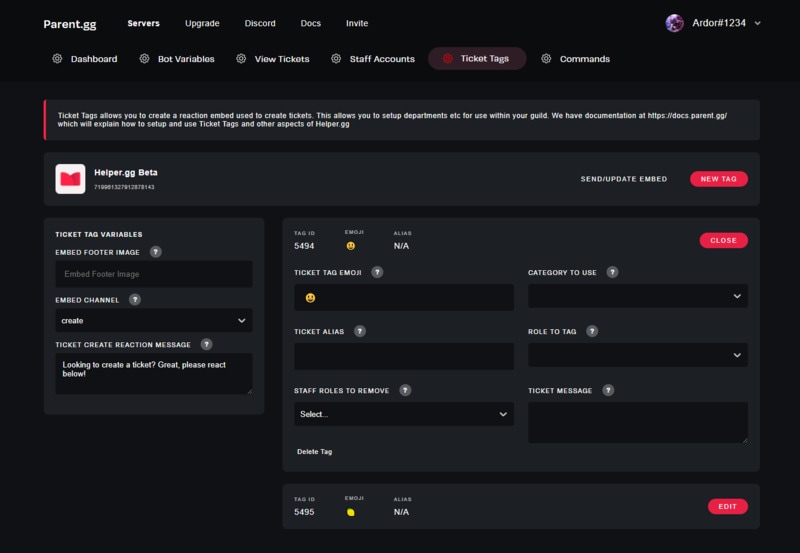
Helper.gg enables you to transform your discord server into a support ticket system. It’s a board ticket bot with a stunning UI that makes managing and responding to client tickets simple.
Create staff accounts for your company’s customer support representatives and manage their access. Ticket logging with the flexibility to rename and relocate tickets, add and delete users, and the contentment of having tickets close automatically based on the amount of time that has passed since the previous reply are all accessible.
09GameStats
Next, GameStats has one-of-a-kind funny emojis for the discord bot. We all enjoy looking at our in-game statistics and comparing them. The GameStats Discord bot makes sharing and displaying your impressive numbers simple.
Connect to your game or platform, make a personalized profile card, and begin sharing your tryhard statistics.

10Dyno
Dyno is another well-crafted fun discord bot. It’s an utterly customizable server moderation bot that assists with server automation. You also receive a basic online dashboard with Dyno that you can use to monitor and control your server.
It has functions such as creating positions, making announcements, banning members, and even requesting puppy or cat images. Dyno is a fun bot that allows you to automate your server management effortlessly. Premium subscriptions, which start at $4.99 per month and unlock more exclusive features, are also available.
However, if you are a creative video editor who likes sharing their experience on discord, Filmora is for you. With Filmora, you can bring your recorded experiences with funny discord emojis to life!
But Wait, What is Wondershare Filmora Video Editor ?
Filmora is a famous video editing program for those who wish to focus on editing and producing high-quality videos with the support of 4K video editing. It’s a reasonably priced software featuring tools like split, trim, add text, color, etc. When it comes to designing, adding effects, and modifying movies, it provides users with many possibilities. Users can add overlays, create animations and objects, add music, and more with Wondershare’s Filmora. It’s an excellent tool for individuals who wish to include dedications, tributes, fun emojis and anecdotes in their films. Any video can also benefit from voiceovers.
For Win 7 or later (64-bit)
For macOS 10.12 or later
Part 2 Fun Discord Bots FAQs
Q. What does MEE6 stand for?
A. MEE6 is a discord role bot that lets users assign roles to themselves via discord replies. This discord role generator will change user rights in discord automatically.
Q. Are these fun bots free?
A. Yes and no. Most fun bots for discord are free to use, although you must pay for some features.
Q. What is the top level I can reach on the MEE6 bot?
A. The maximum level accessible is 1,768,802, which would take 935 billion years if messages sent every minute.
Q. Help! My discord got hacked; how did that even happen?
A. Users may edit discord javascript files. A cybercriminal can install harmful malware to discord client files if they get user authorization. When people open the file, the code also gets executed. After then, the hacker has access to the user’s discord data.
Q. What can discord bots do?
A. On your server, the bots can conduct a variety of helpful automated chores and bot commands, like welcoming new users, monitoring content, and banning rule violators. Using fun discord bots’ instructions, you can add music, humor, games, and other emojis to your server.
● Ending Thoughts →
● In short, moderators and administrators can use funny discord emojis to administer their servers better, make them attractive, and get more users. There are many vanilla discord commands to choose from, and when you put fun bots to add to discord, the possibilities become unlimited.
● Besides, there are several funny emojis for discord to improve your discord skills and establish your discord server. Finally, Filmora can assist you in beautifying your recorded videos make funny emojis for discord.
Consumers enjoy discord because it serves as a hub for their social groups and communities. It’s a haven where users can be themselves while socializing with others who share their interests and hobbies. There is no algorithm selecting what they should see, no continuous scrolling, and no news feed. Common interests fuel conversations and you can use some fun discord bots to pep up the conversation.
Fun bots to add discord with artificial intelligence (AI) technologies are among the most helpful tools available on the discord platform. Funny emojis for discord may be beneficial to greet new members and have funny light conversations! This aids in the creation and maintenance of a vibrant online community. You can add music, games, and fun memes to your server using these bots if you wish to.
In this article
01 [10 Fun Discord Bots You Need in 2024](#Part 1)
02 [Fun Discord Bots FAQs](#Part 2)
Part 1 Fun Discord Bots You Need in 2024
01IdleRPG
The IdleRPG is another enjoyable and engaging fun discord bot in the RPG gaming experience. It rewards server members for participating in the game while gaining XP and having fun. It offers character advancement and is comparable to other RPG games.
You may travel on a quest, trade various things, fight other players, and even find love. There’s also a scoreboard for the top ten loves, top ten PvP players, top ten wealthiest, and top ten XP players. IdleRPG also allows you to wager in various ways to help you boost your gaming money.
02MEE6
MEE6 is a widespread moderation and one of the greatest fun bots for discord. It takes care of many tasks that a mod team would typically do. This includes greeting new members, informing your server when you or your favorite content producers go live on Twitch or YouTube, and allowing users to assign roles depending on their reactions.
A command tool that allows you to generate custom commands and an XP leveling system that users may grind to earn access to various channels and permissions depending on activity are two of MEE6’s more complicated features. MEE6 also includes plugins for music and developing your fun discord bot.
03Dank Memer
Dank Memer is another fun bot to add to discord with a lighthearted tone. It offers one of the most extensive built-in economies, allowing participants to engage in text-based thievery, bank robbery, and gambling experiences.
As its name implies, it also offers a slew of meme-related commands. You can use simple chat instructions to create memes. Other memes automatically publish.
Even more impressive is that awesome memes are collected daily from Reddit’s top meme collections.
04AltDentifier
Another unique funny discord emoji bot is AltDentifier, which maintains your server clean and spam-free. It’s simple to set up and takes only a few minutes to get up and run. It now has over 35 million users spread across 100,000 servers. It also includes several more moderation commands to make administration easier.
The AltDentifier bot contains:
● An automated anti-raid system.
● A robust verification mechanism.
● Multilingual support.
● A review record.
It will also notify you if a user attempts to circumvent any limitations by utilizing a VPN.
05EpicFreeGames
Over the last two years, Epic Free Games has given away thousands of free games. GTA V, Dead By Daylight, and NBA 2K21 are among the given-away titles. It even-handed away Discord Nitro lately. Have any of these free games ever escaped your notice? Fear not, for the EpicFreeGames bot has your back.
The EpicFreeGames bot delivers a message to a channel, reminding everyone of Epic’s free game(s). It only has one task, yet it can provide you with hundreds of dollars worth of games. Never miss another fantastic free Epic Games game again.
06**Rythm **
Rythm is a great fun discord bot for playing music in the voice stream of your server. This one features a beautiful user interface that includes a music player that you can interact with. This makes controlling the channel’s queue a breeze.
The options are changeable. You can designate DJ duties, prohibit the same songs from appearing in queues again, and block particular channels from playing music. Rhythm is less platform-agnostic than Groovy. Spotify, YouTube, SoundCloud, and Bandcamp are among the options. Apple Music is not currently supported.
07Unbelievaboat
UnbelievaBoat is a versatile, fun bot to add to discord that uses exciting activities to keep server members engaged. These capabilities, fortunately, include a moderation mechanism that you may utilize to issue warnings and enforce bans. Your moderators may keep track of each action by assigning it a case number.
08Helper.gg
Helper.gg enables you to transform your discord server into a support ticket system. It’s a board ticket bot with a stunning UI that makes managing and responding to client tickets simple.
Create staff accounts for your company’s customer support representatives and manage their access. Ticket logging with the flexibility to rename and relocate tickets, add and delete users, and the contentment of having tickets close automatically based on the amount of time that has passed since the previous reply are all accessible.
09GameStats
Next, GameStats has one-of-a-kind funny emojis for the discord bot. We all enjoy looking at our in-game statistics and comparing them. The GameStats Discord bot makes sharing and displaying your impressive numbers simple.
Connect to your game or platform, make a personalized profile card, and begin sharing your tryhard statistics.
10Dyno
Dyno is another well-crafted fun discord bot. It’s an utterly customizable server moderation bot that assists with server automation. You also receive a basic online dashboard with Dyno that you can use to monitor and control your server.
It has functions such as creating positions, making announcements, banning members, and even requesting puppy or cat images. Dyno is a fun bot that allows you to automate your server management effortlessly. Premium subscriptions, which start at $4.99 per month and unlock more exclusive features, are also available.
However, if you are a creative video editor who likes sharing their experience on discord, Filmora is for you. With Filmora, you can bring your recorded experiences with funny discord emojis to life!
But Wait, What is Wondershare Filmora Video Editor ?
Filmora is a famous video editing program for those who wish to focus on editing and producing high-quality videos with the support of 4K video editing. It’s a reasonably priced software featuring tools like split, trim, add text, color, etc. When it comes to designing, adding effects, and modifying movies, it provides users with many possibilities. Users can add overlays, create animations and objects, add music, and more with Wondershare’s Filmora. It’s an excellent tool for individuals who wish to include dedications, tributes, fun emojis and anecdotes in their films. Any video can also benefit from voiceovers.
For Win 7 or later (64-bit)
For macOS 10.12 or later
Part 2 Fun Discord Bots FAQs
Q. What does MEE6 stand for?
A. MEE6 is a discord role bot that lets users assign roles to themselves via discord replies. This discord role generator will change user rights in discord automatically.
Q. Are these fun bots free?
A. Yes and no. Most fun bots for discord are free to use, although you must pay for some features.
Q. What is the top level I can reach on the MEE6 bot?
A. The maximum level accessible is 1,768,802, which would take 935 billion years if messages sent every minute.
Q. Help! My discord got hacked; how did that even happen?
A. Users may edit discord javascript files. A cybercriminal can install harmful malware to discord client files if they get user authorization. When people open the file, the code also gets executed. After then, the hacker has access to the user’s discord data.
Q. What can discord bots do?
A. On your server, the bots can conduct a variety of helpful automated chores and bot commands, like welcoming new users, monitoring content, and banning rule violators. Using fun discord bots’ instructions, you can add music, humor, games, and other emojis to your server.
● Ending Thoughts →
● In short, moderators and administrators can use funny discord emojis to administer their servers better, make them attractive, and get more users. There are many vanilla discord commands to choose from, and when you put fun bots to add to discord, the possibilities become unlimited.
● Besides, there are several funny emojis for discord to improve your discord skills and establish your discord server. Finally, Filmora can assist you in beautifying your recorded videos make funny emojis for discord.
In This Article, We Talk About How to Add Old Film Overlays and Other Effects to Turn the Videos or Photos More Vintage and with an Older Aspect. We Take a Look at Filmora in This Guide and Give Tips on How to Create Great Retro Videos
Versatile Video Editor - Wondershare Filmora
An easy yet powerful editor
Numerous effects to choose from
Detailed tutorials provided by the official channel
If you like the old film mood in your videos and films, then this guide is for you. In this article, we will go through the best old film overlays to make your videos look vintage.
In this article
01 What is the Old Film Effect Called?
02 10 Amazing Old Film Overlays that Deserve a Try
03 How to Make a Video Look Old?
04 Pro Tips to Create Stunning Retro Video
Part 1: What is the Old Film Effect Called?
The old film effect that has been getting popular over the past years is called film grain and is defined as a random optical texture due to small particles appearing in the film. It is usually described as having a grainy effect and appearing old.
Part 2: 10 Amazing Old Film Overlays that Deserve a Try
In this list, we will present you with some great options that deserve your attention if you are looking to add old film aspects to your videos.
1. The Super 8 Film Grain Overlays Collection
With this collection, you have at your disposal 82 high-resolution clips of a real Super 8 film grain. With features that are easy to use in your videos, like 20-second loopable duration, 1080P Quicktime Pro resolution, each overlay has a small difference in texture and tint, and you also get 37 clips that show you visible areas with sprocket holes.
2. The Old Film Look Collection
This collection brings a large variety of film elements. From flash frames, film clutter, light leaks, countdown leader, film sprockets, 16mm and Super 8mm film. Plus, with this collection, you also get 29 video files and ProRes 1080P.
3. The Damaged 35mm Film Collection
With this collection, you have animated scans of damaged slides of 35mm film. The transparency effects are easy to use because of the white areas. You can add a file that you choose over an existing video and “darken” or “multiply” blending modes. Apart from those features, the Damaged 35mm Film Collection comes with 10 ProRes HD files.

4. The 4K 16 mm Film Overlays Collection
These overlays come from Authentic Old 16mm film, and inside this collection, you can find many effects of film dirt, scratches or dust to bring that old vintage look to your videos. It also comes with 79 ProRes video files, 4K (ULTRA HD) 3840 x 2160, 24fps resolution.
5. The Film Dirt and Scratches Collection
This collection comes with a variety of scratches and dirt textures. From authentic 16mm and Super 8mm film to give you a great old film look effect to your videos. The Film Dirt and Scratches collection comes with 28 video files, 13 minutes of footage, and ProRes 1080P.
6. 4K Super 8 Film Burn Overlays Collection - Kodak 50D
A collection like this is rare to come across. These easy-to-use effects are great for any level of expertise in editing videos. Just place them over the video and click “screen” or “lighten” modes. This collection pack comes with 47 ProRes files, 4 minutes of footage, and 4K High-Quality Scans.
7. 4K 16mm Film Grain Overlays
This collection has three great files of real film grain with dust and grain at your disposal. They use a 16mm camera for a better quality of overlays. This amazing package comes with three video files of 16mm film grain plus three bonus files.
8. 4K Film Burn Effects on 16mm
Shot in an authentic 16mm, this collection has real film burning in a projector. It has close-ups that fit a width of 16/9 screen. It also comes with 33 ProRes Files and 4 minutes of footage.
9. The VHS Effects Collection
This collection has real VHS effects to give your videos an old 80’s tape look to your videos. The collection contains many analog textures, tracking problems, and glitches. It also contains 10 minutes of footage, Quicktime ProRes 1080P file support, and 94 HD files of authentic VHS Retro Effects.
10. The Film Leaders Collection - Super 8mm and 16mm Effects
With authentic vintage countdowns, tail leaders, and old retro heads, this bundle offer you a great range of choices to add an old look to your films and videos.
Part 3: How to Make a Video Look Old?
In Filmora, you can make your videos have that old effect with simple steps.
Wondershare Filmora
Get started easily with Filmora’s powerful performance, intuitive interface, and countless effects!
Try It Free Try It Free Try It Free Learn More >

Step 1: Open Filmora and remove all the pieces of the footage. Then arrange the rest of the footage as you see fit. Click on “Effects” on the upper left corner of your screen and then on “Filters”. Click on the Old Video effect and then drop it. After you add the filter on the segment of your video, you can drag the end of it to cover the whole duration of the movies. Click twice on the filter if you want to adjust the filter settings. Enter the desired values on the “Fade” parameter, “Frequency”, and “Alpha” options. Press “OK”, and this step is concluded.

Step 2: You can apply the black and white filters to any project in Filmora. It is very simple. Add one of the filters above the video you want to add the effect and drag one of the corners to adjust the duration. You can change the intensity through the alpha slider.

Step 3: In Filmora, you can add sepia tone rise or sun-kissed filters to your video. You are able to add desaturated filters while keeping colors like blue and green and with that create the old film style. If you want more brown and red tones, you can use the Sun-Kisser filter that highlights those colors. Adjust the filters with the alpha slider to change intensity.

Step 4: Under the black and white subcategory, you can find Ash and Willow filters. What these do is desaturate the contrast or exposure values as well as preset brightness and bring an older tone to your videos.
Step 5: You can correct any kind of filter. With the Advanced Color Correction Tab, you can navigate through features like Preset and Adjustment and desaturate your video. By clicking on the “Preset tab,” you can open a larger variety of presets, including the Old Film and Black & White presets.

Part 4: Pro Tips to Create Stunning Retro Video
You can make your video look retro with a few simple tips:
- Use several vintage apps like Retro VHS, 8mm Camcorder, and others.
- Keep low highlights and low contrasts.
- Keep low saturation and control the hue, saturation, and luminance of your video.
- Film Overlays. With this, you can bring the mood just right. If you add a soft light overall to start with, it will instantly look slightly more vintage.
- By decreasing contrast, you are darkening your videos and giving them a grainier old look.
- If you bring up the black levels, you will leave more space for other tones to shine and turn the mood around your videos.
- In contrast, if you bring down the whites in your videos, making even the brightest colors turn grey.
Conclusion
There are various ways to turn your videos into old relics. Using Filmora, you have a powerful tool in your hands to change any desired media, and with this step-by-step guide, you will get there in no time.
If you like the old film mood in your videos and films, then this guide is for you. In this article, we will go through the best old film overlays to make your videos look vintage.
In this article
01 What is the Old Film Effect Called?
02 10 Amazing Old Film Overlays that Deserve a Try
03 How to Make a Video Look Old?
04 Pro Tips to Create Stunning Retro Video
Part 1: What is the Old Film Effect Called?
The old film effect that has been getting popular over the past years is called film grain and is defined as a random optical texture due to small particles appearing in the film. It is usually described as having a grainy effect and appearing old.
Part 2: 10 Amazing Old Film Overlays that Deserve a Try
In this list, we will present you with some great options that deserve your attention if you are looking to add old film aspects to your videos.
1. The Super 8 Film Grain Overlays Collection
With this collection, you have at your disposal 82 high-resolution clips of a real Super 8 film grain. With features that are easy to use in your videos, like 20-second loopable duration, 1080P Quicktime Pro resolution, each overlay has a small difference in texture and tint, and you also get 37 clips that show you visible areas with sprocket holes.
2. The Old Film Look Collection
This collection brings a large variety of film elements. From flash frames, film clutter, light leaks, countdown leader, film sprockets, 16mm and Super 8mm film. Plus, with this collection, you also get 29 video files and ProRes 1080P.
3. The Damaged 35mm Film Collection
With this collection, you have animated scans of damaged slides of 35mm film. The transparency effects are easy to use because of the white areas. You can add a file that you choose over an existing video and “darken” or “multiply” blending modes. Apart from those features, the Damaged 35mm Film Collection comes with 10 ProRes HD files.
4. The 4K 16 mm Film Overlays Collection
These overlays come from Authentic Old 16mm film, and inside this collection, you can find many effects of film dirt, scratches or dust to bring that old vintage look to your videos. It also comes with 79 ProRes video files, 4K (ULTRA HD) 3840 x 2160, 24fps resolution.
5. The Film Dirt and Scratches Collection
This collection comes with a variety of scratches and dirt textures. From authentic 16mm and Super 8mm film to give you a great old film look effect to your videos. The Film Dirt and Scratches collection comes with 28 video files, 13 minutes of footage, and ProRes 1080P.
6. 4K Super 8 Film Burn Overlays Collection - Kodak 50D
A collection like this is rare to come across. These easy-to-use effects are great for any level of expertise in editing videos. Just place them over the video and click “screen” or “lighten” modes. This collection pack comes with 47 ProRes files, 4 minutes of footage, and 4K High-Quality Scans.
7. 4K 16mm Film Grain Overlays
This collection has three great files of real film grain with dust and grain at your disposal. They use a 16mm camera for a better quality of overlays. This amazing package comes with three video files of 16mm film grain plus three bonus files.
8. 4K Film Burn Effects on 16mm
Shot in an authentic 16mm, this collection has real film burning in a projector. It has close-ups that fit a width of 16/9 screen. It also comes with 33 ProRes Files and 4 minutes of footage.
9. The VHS Effects Collection
This collection has real VHS effects to give your videos an old 80’s tape look to your videos. The collection contains many analog textures, tracking problems, and glitches. It also contains 10 minutes of footage, Quicktime ProRes 1080P file support, and 94 HD files of authentic VHS Retro Effects.
10. The Film Leaders Collection - Super 8mm and 16mm Effects
With authentic vintage countdowns, tail leaders, and old retro heads, this bundle offer you a great range of choices to add an old look to your films and videos.
Part 3: How to Make a Video Look Old?
In Filmora, you can make your videos have that old effect with simple steps.
Wondershare Filmora
Get started easily with Filmora’s powerful performance, intuitive interface, and countless effects!
Try It Free Try It Free Try It Free Learn More >
Step 1: Open Filmora and remove all the pieces of the footage. Then arrange the rest of the footage as you see fit. Click on “Effects” on the upper left corner of your screen and then on “Filters”. Click on the Old Video effect and then drop it. After you add the filter on the segment of your video, you can drag the end of it to cover the whole duration of the movies. Click twice on the filter if you want to adjust the filter settings. Enter the desired values on the “Fade” parameter, “Frequency”, and “Alpha” options. Press “OK”, and this step is concluded.
Step 2: You can apply the black and white filters to any project in Filmora. It is very simple. Add one of the filters above the video you want to add the effect and drag one of the corners to adjust the duration. You can change the intensity through the alpha slider.
Step 3: In Filmora, you can add sepia tone rise or sun-kissed filters to your video. You are able to add desaturated filters while keeping colors like blue and green and with that create the old film style. If you want more brown and red tones, you can use the Sun-Kisser filter that highlights those colors. Adjust the filters with the alpha slider to change intensity.
Step 4: Under the black and white subcategory, you can find Ash and Willow filters. What these do is desaturate the contrast or exposure values as well as preset brightness and bring an older tone to your videos.
Step 5: You can correct any kind of filter. With the Advanced Color Correction Tab, you can navigate through features like Preset and Adjustment and desaturate your video. By clicking on the “Preset tab,” you can open a larger variety of presets, including the Old Film and Black & White presets.
Part 4: Pro Tips to Create Stunning Retro Video
You can make your video look retro with a few simple tips:
- Use several vintage apps like Retro VHS, 8mm Camcorder, and others.
- Keep low highlights and low contrasts.
- Keep low saturation and control the hue, saturation, and luminance of your video.
- Film Overlays. With this, you can bring the mood just right. If you add a soft light overall to start with, it will instantly look slightly more vintage.
- By decreasing contrast, you are darkening your videos and giving them a grainier old look.
- If you bring up the black levels, you will leave more space for other tones to shine and turn the mood around your videos.
- In contrast, if you bring down the whites in your videos, making even the brightest colors turn grey.
Conclusion
There are various ways to turn your videos into old relics. Using Filmora, you have a powerful tool in your hands to change any desired media, and with this step-by-step guide, you will get there in no time.
How to Create a Freeze Frame Sequence Effect
One can add different effects to videos to create a more appealing movie style. One of the most well-liked and widely used effects is the freeze frame effect, which creates a short frozen frame effect on clips.
You can use different video editing software to create this effect in videos. But not all of them come close to the easy-to-use functionality of Wondershare Filmora . On a video, you can utilize this feature to freeze a specific reaction of the character on screen or add a dramatic effect for a pivotal moment, like scoring a touchdown.
Upon enabling this effect, the video clip automatically splits at the frozen moments. Users insert another image file for that duration and activate the background audio and effects. If you are wondering how to carry out this feature on Filmora, read all the steps involved here.
Launching the Software
The first step is downloading the software on your computer, whether it is macOS-powered or Windows. Go to the software’s official website and click on the blue Download button at the top of the home page.
You do not have to do a lot of steps to complete this process since an installer of the app will automatically download into your device at this step. Make sure you are downloading the Wondershare Filmora 11 version since it is the latest version of the software with advanced upgrades, like the Freeze Frame support.
Free Download For Win 7 or later(64-bit)
Free Download For macOS 10.14 or later
To install the software, you have to double-click on the app installer that got downloaded and agree to the permissions that it prompts. Then, the installation process will continue. The software will launch automatically after the process ends and you press Start Now.

Adding the footage
Next, your main step is to add the video you will edit into the Filmora software. First, you must click the Create New Project tab on the homepage. When the editor opens, tap on the “Click here to import media” button and insert the video you will edit from your device. Next, drag it down to the editing timeline for making further changes. Choose the Keep project settings option when the prompt comes up to ensure the same quality of the video.

Still, it would help if you tapped the play button on the screen to see a Preview of the video clip to check its stability and quality. Also, ensure that your main subject is darker than the backdrop in the video clip.
Adjust the playhead location
On the video clip, you added to the editing timeline, click on the playhead. Then, drag it to move it to the specific point in the video where you will freeze the frame. Click on the Snapshot icon at the right end of the preview window to capture the frame. Press the Lock Track icon after that.

Move the image in place
After the previously mentioned step, you should drag the snapshot you just captured to the second layer on the timeline above the clip. Make sure to place the image where the playhead is, marking the point of the freeze frame. Then, drag the slider at the end of the image clip you added to the timeline to match its length with the video clip.
Afterward, you should click on the playhead and move it a little ahead by a few frames. Again, tap the “Lock Track” icon beside the image file to keep it in place. Following that, take another snapshot of the image via the Snapshot icon.

Unlock the layers
Repeat this step for a few more layers, like dragging the snapshot image to the timeline > moving the playhead by some frames > Snapshot > Lock Track. Then, after you are done with the number of stages possible with your video clip, unlock all of the locked track layers sequentially from top to bottom.
Editing the layers
After this, click on the second clip in the layers. Right-click on the top of the clip in the timeline and choose “Edit Properties” from the drop-down menu. Next, click on the Compositing option and tap the tickmark beside it. Then, select the drop-down menu for the Blending Mode option and change Normal to Darken. Press the OK button after you are done.

Following that, repeat the same for all of the layers of the snapshots to choose the blending mode parameter for them to Darken. After you are done, click on the Preview play button to see how the process worked for creating the freeze frame effect in your video clip.
Exporting the effect the first time
After completing all the editing steps, you should select the Export button at the top of the screen. Then, choose the Local tab and click on the MP4 as the video file format. Make settings-based changes if needed and press the Export button.

After that, however, import the edited file to Filmora from your device again.
Edit the freeze frame video clip
Choose all of the video clip sections you edited on Filmora from the timeline after adding the recently edited video clip to the editor. Then, drag this clip to the primary editing timeline layer on the timeline and drop it.
Then, drag the playhead on the clip to the frame at which the third freeze frame occurs. For this, you can play the Preview of the clip to verify. After placing the playhead at that exact moment, click on the Split icon from the toolbar above the editor timeline or the Scissor icon. Then, remove the second half of the clip.

Create the freeze frame to reverse the speed effect
After this, right-click on the top of the remaining video clip on your timeline. From the drop-down menu that appears, tap on the Copy option. Then, paste the second half beside the first half on the same layer.
After that, right-click on the second copied clip and choose the Speed option > Click on Reverse. After that, play the Preview to see how the effect appears in your video. Finally, export the video from Filmora.

Conclusion
The process of creating a freeze-frame effect can typically get complex. But it is relatively simple to achieve on Filmora if you follow the steps diligently. Furthermore, on this software, whether you are using a Windows or Mac device, there are various video editing features, including the freeze-frame effect. They all assure quick and advanced optimization of video projects, so you should try the platform.
Free Download For macOS 10.14 or later
To install the software, you have to double-click on the app installer that got downloaded and agree to the permissions that it prompts. Then, the installation process will continue. The software will launch automatically after the process ends and you press Start Now.
Adding the footage
Next, your main step is to add the video you will edit into the Filmora software. First, you must click the Create New Project tab on the homepage. When the editor opens, tap on the “Click here to import media” button and insert the video you will edit from your device. Next, drag it down to the editing timeline for making further changes. Choose the Keep project settings option when the prompt comes up to ensure the same quality of the video.
Still, it would help if you tapped the play button on the screen to see a Preview of the video clip to check its stability and quality. Also, ensure that your main subject is darker than the backdrop in the video clip.
Adjust the playhead location
On the video clip, you added to the editing timeline, click on the playhead. Then, drag it to move it to the specific point in the video where you will freeze the frame. Click on the Snapshot icon at the right end of the preview window to capture the frame. Press the Lock Track icon after that.
Move the image in place
After the previously mentioned step, you should drag the snapshot you just captured to the second layer on the timeline above the clip. Make sure to place the image where the playhead is, marking the point of the freeze frame. Then, drag the slider at the end of the image clip you added to the timeline to match its length with the video clip.
Afterward, you should click on the playhead and move it a little ahead by a few frames. Again, tap the “Lock Track” icon beside the image file to keep it in place. Following that, take another snapshot of the image via the Snapshot icon.
Unlock the layers
Repeat this step for a few more layers, like dragging the snapshot image to the timeline > moving the playhead by some frames > Snapshot > Lock Track. Then, after you are done with the number of stages possible with your video clip, unlock all of the locked track layers sequentially from top to bottom.
Editing the layers
After this, click on the second clip in the layers. Right-click on the top of the clip in the timeline and choose “Edit Properties” from the drop-down menu. Next, click on the Compositing option and tap the tickmark beside it. Then, select the drop-down menu for the Blending Mode option and change Normal to Darken. Press the OK button after you are done.
Following that, repeat the same for all of the layers of the snapshots to choose the blending mode parameter for them to Darken. After you are done, click on the Preview play button to see how the process worked for creating the freeze frame effect in your video clip.
Exporting the effect the first time
After completing all the editing steps, you should select the Export button at the top of the screen. Then, choose the Local tab and click on the MP4 as the video file format. Make settings-based changes if needed and press the Export button.
After that, however, import the edited file to Filmora from your device again.
Edit the freeze frame video clip
Choose all of the video clip sections you edited on Filmora from the timeline after adding the recently edited video clip to the editor. Then, drag this clip to the primary editing timeline layer on the timeline and drop it.
Then, drag the playhead on the clip to the frame at which the third freeze frame occurs. For this, you can play the Preview of the clip to verify. After placing the playhead at that exact moment, click on the Split icon from the toolbar above the editor timeline or the Scissor icon. Then, remove the second half of the clip.
Create the freeze frame to reverse the speed effect
After this, right-click on the top of the remaining video clip on your timeline. From the drop-down menu that appears, tap on the Copy option. Then, paste the second half beside the first half on the same layer.
After that, right-click on the second copied clip and choose the Speed option > Click on Reverse. After that, play the Preview to see how the effect appears in your video. Finally, export the video from Filmora.
Conclusion
The process of creating a freeze-frame effect can typically get complex. But it is relatively simple to achieve on Filmora if you follow the steps diligently. Furthermore, on this software, whether you are using a Windows or Mac device, there are various video editing features, including the freeze-frame effect. They all assure quick and advanced optimization of video projects, so you should try the platform.
Steps to Denoise in Final Cut Pro – Reduce Video and Audio Noise
Whenever it comes to the term denoise, we usually get kind of “lost in translation” – does it mean to remove or reduce just the background noise in terms of audio, or does it intend noise effect on the actual scene which we see visually? Anyway, using video editors, denoising is possible in both ways. And why should we denoise at all? – to find out, we will touch upon both issues, and learn how to do those two things in Final Cut Pro.
How to remove background noise in Final Cut Pro?
It doesn’t really matter if you are preparing a video for youtube, a podcast, or any other content with audio in it – for your listeners to be engaged, you need a clear audio, but sometimes that is not the case. You might even find unnecessary background noise after recording the video or audio, and it can be really annoying – that kind of recording gives your audio tracks an unprofessional touch, which can lead to disengaged listeners, the viewers who just don’t want to listen to it anymore. But it’s always possible to turn the tables – and for it, using video editors might really give us a hand. So, Final Cut Pro, which is developed only for Macs (so, you will not be able to use this software on the PC), can solve this problem for you.
So, if you are using Final Cut Pro 10.6, it’s possible to achieve your goal without using any plug-ins. In such a case, there are special effects to use. First of all, let us say that you have an audio file which you want to be corrected because it has some echo, hum, background noise; so you import that one into the programme, namely, timeline.

You will need to first use Equalatization, which is under the Audio Enhancements.

You will need to check the square that opens the equalizer and shows graphics for it. The high frequencies are on the right, and the low ones you will find on the left. Lower the highs and raise the points a little on the left side.

Next step would be to level out the lows and highs of the voice using a Compressor. You will find this effect in Installed Effects, which you need to drag and drop on the audio, and it will raise the whispers and lower the shouts in the audio.

Some background noise will still be there, so you then can find Channel EQ effect you will find in the effects. You need to drag it on the clip, then click on the equalize button in the inspector, and this time, reduce the lower levels on the left, while you also lower the highs on the right.

Lastly, you will need to use the Noise Gate effect. This will cut out all of the sounds between words, so when someone in the audio is not speaking, there will be no background noise at all.

In case this kind of cutting noise out doesn’t sound natural, you can look into Noise Gate Parameters and concentrate on two of them – reduction and release. If you drag the latter right, the noise will raise, and reduction will also raise noise a little, in order to reduce the clipping.
How to denoise a video in Final Cut Pro?
But what is noise in terms of videos? It means that the video is not clear, but instead, the clip has grains on it, which is not so pleasant to see (unless you use noise/grain effect with some purpose!). the noise usually appear when the shot was taken in an environment with not enough white, or, in other cases, when the video was taken with small-sensory equipment, for example, smartphone or action camera.
And Final Cut Pro is one of the video editors where you can remove or reduce the noise and make your footage look clearer than it would have been originally, and it will guarantee that people who are interested and watch your clip will have a better experience. So, let’s learn step by step how to denoise the video in our beloved Final Cut Pro, which added this feature only starting from Final Cut Pro 10.4.4 – it means that before, the task was only done by using some expensive plug-ins, but starting from this version of the program, the software has video noise reduction effect itself.
So, choose the video which has some noise and grain and you wish to edit. Bring it in the program, and click on it in the timeline, in order to select it. The video should appear in the viewer, and you will be able to see the noise right away or whenever you zoom in a little. Then, you will need to find the Effects – you can just use the shortcut and click on Command and 5, or find the panel in the top-right corner of the timeline. Whenever Effects appear, you will need to select the Basic category, and then double-click the icon to apply the noise reduction filter, and close the window. It might take a while to analyze the clip for noise.


In the inspector, you will find the controls for noise reduction, which only include the Amount and Sharpness.

You might as well boost the amount to high, then you can take a look at the image to evaluate the result. One way to do the last step is to uncheck the box next to the Noise Reduction as well, which will disable the filter until you check the box again.
You can also change the Sharpness to Medium, which will compensate for the soft look the effect produces.
And, there is also a noise reduction effect dedicated to 360 viewers, which is called 360 Noise Reduction. As you can see, the effect removes a lot of noise and makes the grainy video look clearer and more enjoyable, besides, if you move around the sphere in the viewer, the effect seems quite seamless!


Bonus tip: how to remove audio noise in video with Filmora
In case you don’t own Mac or just want to operate in another computer program, then Wondershare Filmora would make a great alternative – it’s one of the software that can help you get rid of the background noise. How to do it there? Follow this guideline:
First off, of course, you need to drag and drop the video into the timeline. Then, in order to edit the audio of the video separately, you’ll need to right-click on the video and find Detach Audio.

Double-clicking on the audio track in the sequence will show the editing panel, where you can find – Remove background noise, which, as it is obvious, will remove the noise directly.

So, in this article, we learned how to denoise in Final Cut Pro – both in terms of audio background noise, and noise and grain on the video, and we learned how to get rid of audio noise in Wondershare Filmora in the easiest and fastest way!
You will need to first use Equalatization, which is under the Audio Enhancements.
You will need to check the square that opens the equalizer and shows graphics for it. The high frequencies are on the right, and the low ones you will find on the left. Lower the highs and raise the points a little on the left side.
Next step would be to level out the lows and highs of the voice using a Compressor. You will find this effect in Installed Effects, which you need to drag and drop on the audio, and it will raise the whispers and lower the shouts in the audio.
Some background noise will still be there, so you then can find Channel EQ effect you will find in the effects. You need to drag it on the clip, then click on the equalize button in the inspector, and this time, reduce the lower levels on the left, while you also lower the highs on the right.
Lastly, you will need to use the Noise Gate effect. This will cut out all of the sounds between words, so when someone in the audio is not speaking, there will be no background noise at all.
In case this kind of cutting noise out doesn’t sound natural, you can look into Noise Gate Parameters and concentrate on two of them – reduction and release. If you drag the latter right, the noise will raise, and reduction will also raise noise a little, in order to reduce the clipping.
How to denoise a video in Final Cut Pro?
But what is noise in terms of videos? It means that the video is not clear, but instead, the clip has grains on it, which is not so pleasant to see (unless you use noise/grain effect with some purpose!). the noise usually appear when the shot was taken in an environment with not enough white, or, in other cases, when the video was taken with small-sensory equipment, for example, smartphone or action camera.
And Final Cut Pro is one of the video editors where you can remove or reduce the noise and make your footage look clearer than it would have been originally, and it will guarantee that people who are interested and watch your clip will have a better experience. So, let’s learn step by step how to denoise the video in our beloved Final Cut Pro, which added this feature only starting from Final Cut Pro 10.4.4 – it means that before, the task was only done by using some expensive plug-ins, but starting from this version of the program, the software has video noise reduction effect itself.
So, choose the video which has some noise and grain and you wish to edit. Bring it in the program, and click on it in the timeline, in order to select it. The video should appear in the viewer, and you will be able to see the noise right away or whenever you zoom in a little. Then, you will need to find the Effects – you can just use the shortcut and click on Command and 5, or find the panel in the top-right corner of the timeline. Whenever Effects appear, you will need to select the Basic category, and then double-click the icon to apply the noise reduction filter, and close the window. It might take a while to analyze the clip for noise.
In the inspector, you will find the controls for noise reduction, which only include the Amount and Sharpness.
You might as well boost the amount to high, then you can take a look at the image to evaluate the result. One way to do the last step is to uncheck the box next to the Noise Reduction as well, which will disable the filter until you check the box again.
You can also change the Sharpness to Medium, which will compensate for the soft look the effect produces.
And, there is also a noise reduction effect dedicated to 360 viewers, which is called 360 Noise Reduction. As you can see, the effect removes a lot of noise and makes the grainy video look clearer and more enjoyable, besides, if you move around the sphere in the viewer, the effect seems quite seamless!
Bonus tip: how to remove audio noise in video with Filmora
In case you don’t own Mac or just want to operate in another computer program, then Wondershare Filmora would make a great alternative – it’s one of the software that can help you get rid of the background noise. How to do it there? Follow this guideline:
First off, of course, you need to drag and drop the video into the timeline. Then, in order to edit the audio of the video separately, you’ll need to right-click on the video and find Detach Audio.
Double-clicking on the audio track in the sequence will show the editing panel, where you can find – Remove background noise, which, as it is obvious, will remove the noise directly.
So, in this article, we learned how to denoise in Final Cut Pro – both in terms of audio background noise, and noise and grain on the video, and we learned how to get rid of audio noise in Wondershare Filmora in the easiest and fastest way!
Also read:
- Updated 2024 Approved Quick Answer What Is a Transparent Logo and Why Do You Need It
- Converting an SRT (SRT/Sorted Reader) Into a DOCX File Is a Process. Here We Will Discuss Converting a Set File to a Docx File and More Details About This
- New Best 9 Amv Makers for Computer
- Leveraging the Vectorscope for Better Color Correction in Premiere Pro for 2024
- New In 2024, Zoom In and Zoom Out on YouTube
- Updated In 2024, How To Make A Political Video
- Updated 2024 Approved A Complete Guideline About QuickTime Player
- How to Slow Down Time-Lapse Videos on iPhone for 2024
- In This Article, We Will Discuss How to Rotate Videos in the Lightworks Application. Below Is a Way to Rotate Videos in Lightworks Manually, Here, We Will Use the Z-Axis Rotation
- New In 2024, How to Make a PowerPoint Looping Slideshow
- In 2024, This Is the Method Employed During Every Evening Weather Broadcast The Newscaster Is Standing in Front of a Blank Screen, but the Viewers at Home See a Weather Map
- New 2024 Approved Kdenlive Review – Is It The Best Video Editor?
- Updated Full Guide to Discord Boost
- In 2024, 10 Best Meme Text to Speech Tools Windows, Mac, Android, iPhone&Online
- Updated How to Make Subtitle Videos
- New Explore a Variety of Inexpensive Camera Models Suitable for Making Slow-Motion Footage without Compromising Quality
- New Intro Videos Have the Potential to Make a First Impression on Viewers, and You Know How They Say that the First Impression Is the Last Impression
- Want to Add Motion Effects to Your Texts in Your Video? Learn the Simple Steps to Create Motion Text Effects in Popular Video Editors
- New Add Emoji to Linkedin Post – 5 Tips You Need to Know
- New In 2024, 12 Best GIF Editors to Use
- In 2024, 3 Best Motion Blur Plugins for Adobe After Effects
- New 2024 Approved Do You Know Anything About the Video Format Supported by WhatsApp? If Not, Then This Is the Right Time to Learn About WhatsApp-Supported Video Formats
- 2024 Approved Video Marketing Is Adopted by Most Companies in This Digital Era. In This Post, We Are Going to Share some Useful Tips to Create a Better Product Video Ads to Help Prompt Business
- Updated In 2024, Top 10 Transparent Image Online Tools That Give You an Advantage
- 2024 Approved How to Denoise in After Effects – Audio and Video Noise Removal
- Updated How to Make OBS Slideshow
- In 2024, AI Features of Filmora - Silence Detection in Videos
- Several Tips Can Facilitate How You Edit Videos Faster and Easier. All You Need to Do Is to Read This Article to Find Out What They Are
- New Best Slow Motion Camera Apps for Best Content Creation
- New 2024 Approved How to Add Subtitles in VLC Media Play
- 2024 Approved Want to Learn How to Make a Fortnite Montage? This Guide Will Give You the Low-Down on Creating Epic Montage Fortnite Videos that You Can Share with Other Players on Social Media Platforms
- Updated In 2024, Guide To Using Free Luts for OBS
- Come And Pick! Best MOV to GIF Converters
- Updated 2024 Approved How To Create a Polaroid Collage?
- In 2024, Steps to Rotate Videos Using Handbrake
- 2024 Approved Want to Buy a Drone for Better Videography Creating? This Article Will Review 6 of the Best Drones on the Market for You to Consider
- Updated Are You Looking to Remove Echo in Premiere Pro? Please Look at Our Guide for Advice and Suggestions on Getting the Best Possible Outcomes
- What Are The Stages Of Film Production for 2024
- Updated Level Up Videos By Applying Keyframe Like A Pro
- In 2024, How to Use Kahoot! On Zoom
- 2024 Approved Thousands Already Know What Ezgif Is and So Can You
- How to Edit Facebook eCommerce Video Ads for 2024
- 2024 Approved Want to Save Your Edited Video File in MP4 Format in Windows Movie Maker? Here Are the Simple Steps Along with a Better Alternative
- New 4 Solutions to Add White Borders on Mobile and Desktop
- Updated Want to Make a Single Video From Different Clips? Follow These Ways to Learn About How to Merge Clips in DaVinci Resolve
- Best Dark Moody LUTs During Editing for 2024
- Updated In 2024, Progressive Solutions to Adding VHS Effects to Video with Ease
- New Best Phantom Slow-Mo Camera For Recording Slow Motion Videos for 2024
- How to Do Velocity Edits on PC for 2024
- Updated In 2024, How to Create Glowing Edge Effect in TikTok Dancing Video
- Tips and Tricks for Setting Up your Realme C67 4G Phone Pattern Lock
- In 2024, How to Screen Share on Apple iPhone SE (2022)? | Dr.fone
- How to Cast Oppo K11 5G Screen to PC Using WiFi | Dr.fone
- How to Reset your Samsung Galaxy S24 Ultra Lock Screen Password
- In 2024, Three Ways to Sim Unlock Vivo V27e
- In 2024, How to Change Your Realme V30 Location on life360 Without Anyone Knowing? | Dr.fone
- In 2024, How to Detect and Remove Spyware on Samsung Galaxy A14 5G? | Dr.fone
- In 2024, 3 Ways to Track Oppo Reno 9A without Them Knowing | Dr.fone
- How To Fix OEM Unlock Missing on Itel A70?
- Easy Guide to Motorola Razr 40 Ultra FRP Bypass With Best Methods
- In 2024, 11 Best Location Changers for Infinix Note 30i | Dr.fone
- Proven Ways in How To Hide Location on Life360 For Lava Blaze 2 5G | Dr.fone
- Full Guide to Unlock Apple iPhone 13 Pro with iTunes | Dr.fone
- 5 Hassle-Free Solutions to Fake Location on Find My Friends Of Realme C55 | Dr.fone
- In 2024, How and Where to Find a Shiny Stone Pokémon For Vivo X Fold 2? | Dr.fone
- OBS Animated Lower Thirds Alternatives
- In 2024, Locked Out of Apple iPhone 13 mini? 5 Ways to get into a Locked Apple iPhone 13 mini | Dr.fone
- How to Use Phone Clone to Migrate Your Samsung Galaxy S24+ Data? | Dr.fone
- How Can Tecno Spark Go (2023)Mirror Share to PC? | Dr.fone
- New In 2024, 5 Photoshop Alternatives to Animate Logo
- In 2024, Top 7 Phone Number Locators To Track Lava Blaze Pro 5G Location | Dr.fone
- Different Methods for Resetting Xiaomi Civi 3 Disney 100th Anniversary Edition Phones with Screen Locked and Not | Dr.fone
- In 2024, How to Track Realme GT Neo 5 by Phone Number | Dr.fone
- How To Transfer WhatsApp From iPhone 12 mini to other iPhone 11 Pro Max devices? | Dr.fone
- How to use Pokemon Go Joystick on Apple iPhone 11 Pro Max? | Dr.fone
- Fix App Not Available in Your Country Play Store Problem on Tecno Spark 10C | Dr.fone
- How To Change Itel S23 Lock Screen Clock in Seconds
- 2024 Approved Top 8 Text-to-Video AI Generators to Produce Video Easily
- Title: Updated Best 10 Fun Discord Bots You Need for 2024
- Author: Chloe
- Created at : 2024-04-24 07:08:40
- Updated at : 2024-04-25 07:08:40
- Link: https://ai-editing-video.techidaily.com/updated-best-10-fun-discord-bots-you-need-for-2024/
- License: This work is licensed under CC BY-NC-SA 4.0.
