
:max_bytes(150000):strip_icc():format(webp)/relaxing-while-getting-his-studies-done-495857099-5a1ed8c5ec2f640037e369f4.jpg)
Updated Best 12 AI Video Generators to Pick for 2024
Best 12 AI Video Generators to Pick
Top 12 AI Video Generators to Pick
An easy yet powerful editor
Numerous effects to choose from
Detailed tutorials provided by the official channel
It is a fact that video editing can sometimes be laborious and time-consuming. Even when using the best video editing software, it still requires human effort to get an impressive result. But luckily for us, the invention of the AI video generator has now made a lot of things easier. The AI video generators are the next level as they allow users to automate video creation and editing without compromising quality.

This article will discuss the best AI text to video generators for free that will help make your life easier. Thus, this will soon help you create engaging videos for your personal or business use in just a few clicks.
In this article
01 [What Is an AI Video Generator](#Part 1)
02 [How Does the AI Video Maker Work](#Part 2)
03 [The 12 Best AI Video Generator](#Part 3)
Part 1 What Is an AI Video Generator
AI video generator is the process of using artificial intelligence (AI) to create professional videos. With an AI video generator for free, you do not need any equipment, an editing studio, or a premium video editing application to be able to create a video.
All that is required is that you feed input to the AI tool, and it will automatically help you generate a video. You can edit a blog post into a video within a few minutes with any of these tools listed. In addition, it won’t incur any high costs for video productions because the AI tool will help you carry out most of the tasks.
Part 2 How Does the AI Video Maker Work
Professional AI video editors, are trained by showing them various examples and then providing them feedback by telling them what is wrong and good. The machine then takes note of it and remembers it. However, as the machine continues to learn, it picks the results and then improves itself based on the feedback. Ultimately the device becomes very good or even better than the human that creates it. Here are some breakdowns of the ways video editors work:
● The AI video maker tool, can augment your videos with AR effects, including AR masks, face and color filters, face touch-ups, etc. The tool uses neural networks and computer vision to interrupt, extract, and understand the video content.
● This AI subtitle generator can allow interviews to be delivered and analyzed to the editor fully transcribed, searchable by word or even sentences. Video editors can use AI for keyword extraction, speech-to-text conversion, facial recognition, sentiment analysis, image recognition, and emotion detection.
● AI-video editors can pull sections of a video clip from any source automatically. These AI systems can also detect emotions that allow the creation of warm, appealing videos.
Part 3 The 12 Best AI Video Generator
There are top AI video generators for free that you can choose from for your video editing. These video editors complete work quickly and easily. In addition, if you need video editing software to help you edit your generated videos after generating them, we recommend that you try out Filmora from Wondershare. Wondershare Filmora Video Editor is a perfect video editing software with tons of new features, like keyframing, split video, and adding animations and effects to help you carry out your video editing seamlessly.
For Win 7 or later (64-bit)
For macOS 10.12 or later
01Sora
Sora is an artificial intelligence model that generates videos with textual descriptions, developed by OpenAI. It is a US-based artificial intelligence research organization. Sora stands out as a game-changing platform. It can seamlessly convert text into captivating videos, blending convenience with creativity.
Features
● With Sora, transforming written content into engaging videos is swift and efficient.
● Unlike traditional video editing tools, Sora is designed for users of all levels, eliminating the need for prior video production experience.
● Sora offers a plethora of customization options.
● Generates videos up to 60 seconds long
● Generates complex scenes with multiple characters, motions, and accurate details of the subject
● Creates multiple shots within a single generated video
● Generating videos from text instructions by utilizing the recaptioning technique from DALL·E 3
Pros
● Highly realistic video generation with impressive visual quality
● Text-based control over the content of the video, allowing for precise video generation
● A highly versatile tool that handles a wide range of prompts and styles
Cons
● Lacks implicit understanding of the rules of physics
This software is best realistic and imaginative scenes.
02Wondershare Filmora
Wondershare Filmora is a highly efficient video editing software that comes with AI text to video generation. The software is friendly to both beginner and intermediate creations, offering you a wide range of intuitive features.
Pricing
● Subscription Plan: US$19.99 per month
● Cross-Platform Plan: US$69.99 per year
● Perpetual Plan: US$19.99 Onetime Payment
Features
● User-friendly interface that is easy to learn and use
● Wide range of features for creating and editing videos, including transitions, effects, and text overlays.
● Large stock library of royalty-free music and stock footage
● Readily available templates and presets to quickly generate videos
● Easily export videos directly to popular platforms like YouTube and TikTok
Pros
● User-friendly interface with a learning curve suitable for all kinds of creators
● Extensive library of free and paid assets to enhance your videos
● Wide range of features for video editing
Cons
● Lacks advanced features for AI video prompt generation
This software is best for video creation and editing for freelancers, SMBs, markters.
For Win 7 or later (64-bit)
For macOS 10.12 or later
How to Use Filmora’s AI to Video Feature : AI Video Prompt Sample
Here is a brief step-by-step guide on how to use Filmora to generate AI videos. The process is as simple as writing a text prompt and getting the video ready:
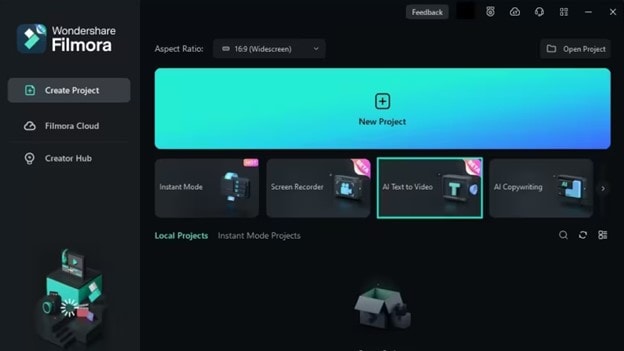
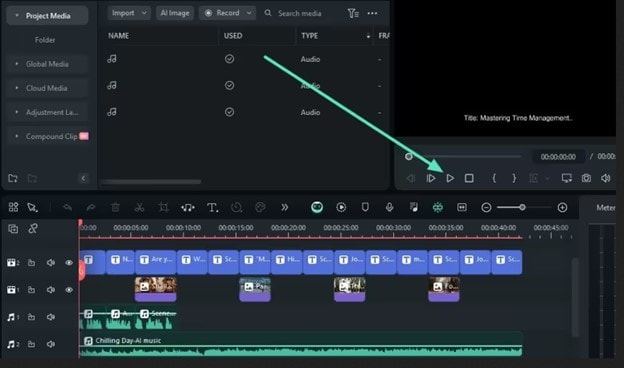
Step 1: Lauch Filmora AI Text-to-Video Features
Once you launch on your PC Filmora, click the AI Text-to-Video option to start the video generation process.
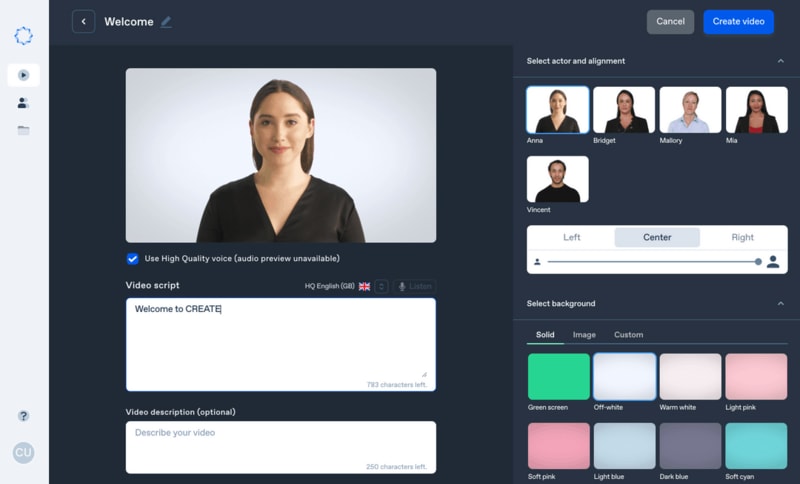
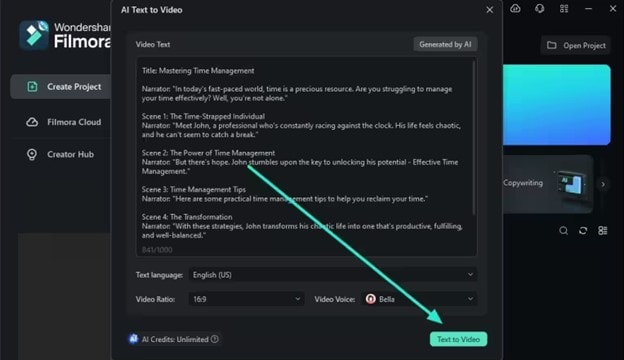
Step 2: Add a Text Prompt or Video Script
On the AI Text-to-Video video, add your text prompt. You can also modify other settings such as text language and video voice. Then click the Text to Video button at the bottom to prompt Filmora to generate the video.
Step 3: Preview the Generated Video
Filmora generates the video based on your prompt and a new editing window. You can now a preview video and make any further editing needed.
AI Video Prompt Sample Using Filmora
Prompt: A young man at his 20s is sitting on a piece of cloud in the sky, reading a book.
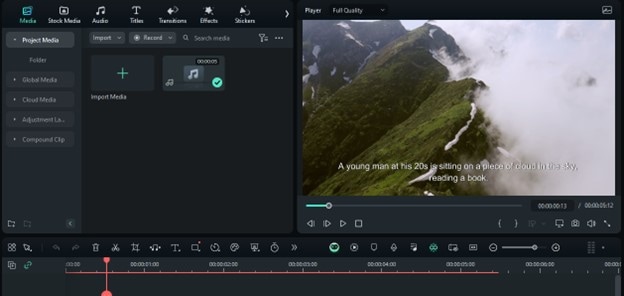
When prompted to generate a video of a young man in his 20s sitting on a piece of cloud in the sky, reading a book, Filmora generated a narration video from the point of view of the young man as shown above.
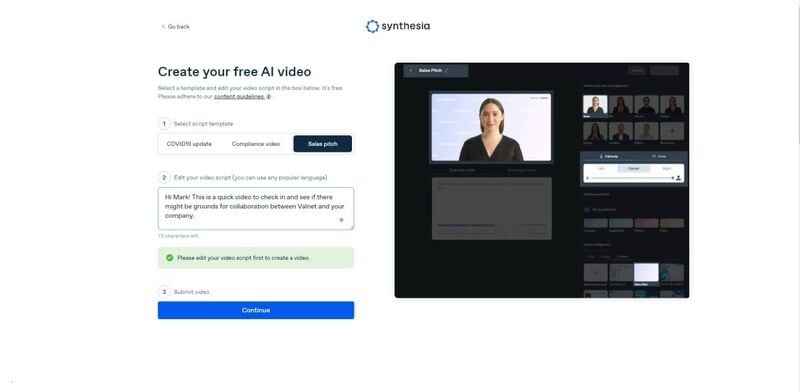
03Synthesia
This is a web-app video generator AI from a text supporting AI-driven video creation used by experts and beginners. Rather than filming content utilizing a microphone and camera, this software AI technology helps to simulate human presenters and real-life videos. Thus, it saves video creators hours of work.
Pricing
● Personal Plan: $30 monthly
● Corporate Plan: custom pricing
Features
● Over 40 supported languages
● Allows template customizations
● Allows users to make their avatars
● It has 50 built-in presenters
● Allows you to create realistic AI videos
● Offers live chat support
● Allows download in Mp4
● Enables users to create videos automatically using integrations with APIs
● Allows the addition of backgrounds
● Users can share their videos on other social media platforms
● Allows the addition of images, shapes, and texts to videos
Pros
● Great for beginners are you do not need prior knowledge
Cons
● It supports only front-facing poses
This software is best for freelancers, agencies, marketers, and content creators looking to create high-quality video content.
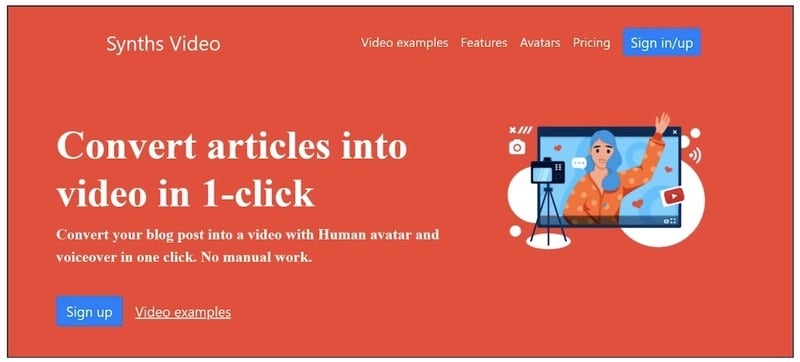
04Synths Video
This is an AI video-generating tool primarily concerned with helping users drive leads and traffic from YouTube. It is an AI YouTube title generator that allows users to create professional-looking videos from blog posts on YouTube.
Pricing
● YouTube Start: $399 monthly.
● Premium Custom Package: Custom Pricing.
Features
● Video generation from URLs
● It has built-in integration with YouTube
● 20+ avatars are available
● Allows video upload in HD quality
● Over 40+ languages supported
Cons
● No free plan is available
Best for the owners of YouTube channels.
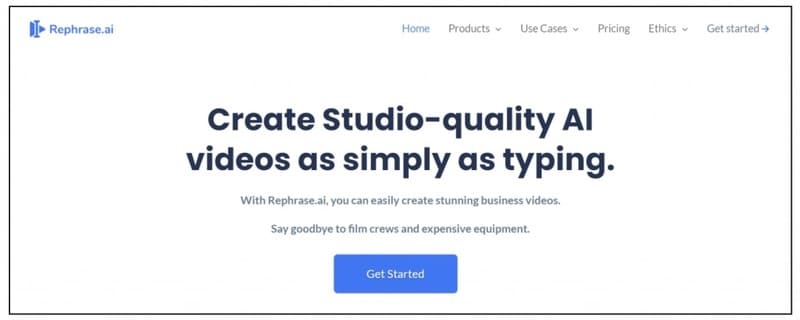
05Rephrase.ai
Rephrase.ai is a video editing software that uses a sophisticated deep learning engine to create professional videos.
Pricing
● Starter plan: $25 monthly
● Enterprise plan: Custom Pricing
Features
● Produces high-resolution videos
● Supports functionality for presenter customization
● Multiple-use cases supported
● Allows users to select their preferred AI voice
● Support varieties of video editing tools
Cons
● It has a complex pricing plan
It is best for agencies seeking to create customizable and personalized professional videos for marketing and advertising.
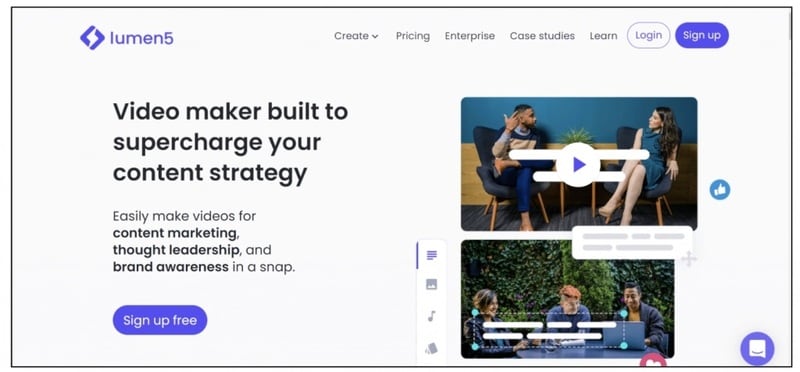
06Lumen5
Lumen5 is one of the top AI video-creating tools available for beginners and uses Natural Language Processing algorithms to convert text into high-quality videos.
Pricing
● Free Plan
● Creator plan: $15 monthly.
● Premium plan: $79 monthly.
● Business plan: $199 monthly.
● Enterprise plan: Custom Pricing.
Features
● Transforms text to video within minutes
● Numerous templates are available
● Allows customization of videos resolution, color, and font
Cons
● Limited features in the free plan
Best for beginners who are looking to generate short-duration of videos for social media platforms.
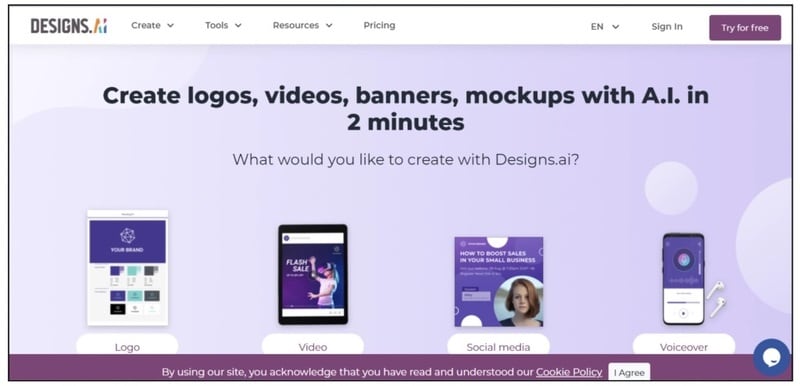
07Designs.ai
This is an AI-powered video maker that is useful for users that do not have any experience in design.
Pricing
● Basic plan: $29 monthly
● Pro plan: $69 monthly
● Enterprise plan: Custom Pricing
Features
● It has an attractive and modern user interface
● Allows the creation of videos from pre-designed templates
● Helps video creation from your custom video files
● Over 20 languages supported
● Coverts texts to video
Cons
● Only allows video download in a paid plan.
This tool is best for creators and designers who are willing to create quick AI videos.
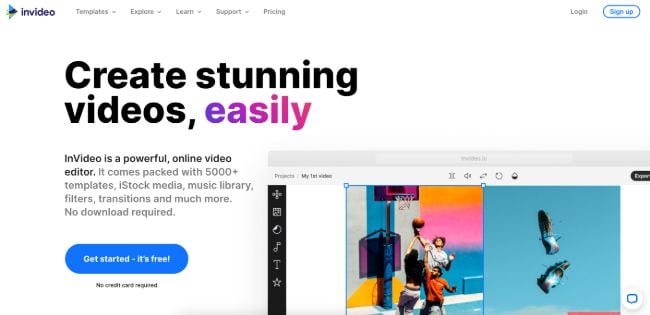
08InVideo
This is a perfect AI generator used for creating explainers or marketing videos easily and quickly. The platform helps produce high-quality videos with varieties of style options to make the ideal video according to your requirements.
Pricing
● Free: Free with watermarks on your videos.
● Business: $15 monthly with no watermarks.
● Unlimited: $30 monthly with unlimited video exports.
Features
● Very affordable
● Comprises an online drag-and-drop video editor
● Over 50 AI-powered themes that help to convert text to video in 3 minutes
● Full iStock media library available in all plans
Cons
● Requires internet connection to use
09Pictory.ai
This AI subtitle generator converts your text and turns it into an AI-generated video. This program is simple and easy to get started, requiring no software download. Paste your text into the editor and get started.
Pricing
● Free trial: Only use 3 videos.
● Standard Plan: $29 per month.
● Premium Plan: $59 per month.
Features
● It has a simple user interface.
● Over 6M licensed Shutterstock available
● Unlimited and affordable videos in the premium plan
Cons
● It is quite expensive compared to other tools
10Veed.io
Veed.io is not specifically an AI video generator but a video editing tool that utilizes AI to simplify the entire process and allows users to create high-quality videos within seconds.
Pricing
● Free: Free with watermarks!
● Basic: $18 monthly.
● Pro: $30 monthly
Features
● It has lots of video templates and a music library to choose
● Easy to learn, user-friendly interface
● Video rendering times are quite fast
● The basic plan has a high-quality resolution
Cons
● Not a typical AI video generator
● Not for beginners
11Wisecut
This free AI video generator platform allows you to turn your text into video. Type in your text and choose a voice actor, and then Wisecut will take care of the rest. It offers excellent editing tools for users to tweak your video until it’s just right.
Pricing
● Basic: Free.
● Professional: $57 per month.
Features
● This platform is easy to use
● It has a simple drag and drops user-interface
● Allows auto subtitles and auto cut silences
● Allows integration with YouTube
● Subtitles auto-translation
● Excellent video quality
Cons
● Has limited effects
12Flexclip
FlexClip makes video creation and editing easy with-it millions of royalty-free stock media and thousands of templates for you to choose from.
Pricing
● Free
● Basic: $5.99 per month.
● Plus: $9.99 per month
● Business: $19.99 per month.
Features
● Thousands of available templates
● Simple tool for creating and editing videos
● Use for creating engaging videos
● Provides millions of royalty stock media
● Versatile and Flexible
Cons
● Not for beginners
● Ending Thoughts →
● In this post, we have listed the top text to video generators that you can choose from to help you perform tasks within minutes.
● The report also explains all you need to know about video AI generators and recommends Filmora as a perfect tool for editing your videos.
It is a fact that video editing can sometimes be laborious and time-consuming. Even when using the best video editing software, it still requires human effort to get an impressive result. But luckily for us, the invention of the AI video generator has now made a lot of things easier. The AI video generators are the next level as they allow users to automate video creation and editing without compromising quality.
This article will discuss the best AI text to video generators for free that will help make your life easier. Thus, this will soon help you create engaging videos for your personal or business use in just a few clicks.
In this article
01 [What Is an AI Video Generator](#Part 1)
02 [How Does the AI Video Maker Work](#Part 2)
03 [The 12 Best AI Video Generator](#Part 3)
Part 1 What Is an AI Video Generator
AI video generator is the process of using artificial intelligence (AI) to create professional videos. With an AI video generator for free, you do not need any equipment, an editing studio, or a premium video editing application to be able to create a video.
All that is required is that you feed input to the AI tool, and it will automatically help you generate a video. You can edit a blog post into a video within a few minutes with any of these tools listed. In addition, it won’t incur any high costs for video productions because the AI tool will help you carry out most of the tasks.
Part 2 How Does the AI Video Maker Work
Professional AI video editors, are trained by showing them various examples and then providing them feedback by telling them what is wrong and good. The machine then takes note of it and remembers it. However, as the machine continues to learn, it picks the results and then improves itself based on the feedback. Ultimately the device becomes very good or even better than the human that creates it. Here are some breakdowns of the ways video editors work:
● The AI video maker tool, can augment your videos with AR effects, including AR masks, face and color filters, face touch-ups, etc. The tool uses neural networks and computer vision to interrupt, extract, and understand the video content.
● This AI subtitle generator can allow interviews to be delivered and analyzed to the editor fully transcribed, searchable by word or even sentences. Video editors can use AI for keyword extraction, speech-to-text conversion, facial recognition, sentiment analysis, image recognition, and emotion detection.
● AI-video editors can pull sections of a video clip from any source automatically. These AI systems can also detect emotions that allow the creation of warm, appealing videos.
Part 3 The 12 Best AI Video Generator
There are top AI video generators for free that you can choose from for your video editing. These video editors complete work quickly and easily. In addition, if you need video editing software to help you edit your generated videos after generating them, we recommend that you try out Filmora from Wondershare. Wondershare Filmora Video Editor is a perfect video editing software with tons of new features, like keyframing, split video, and adding animations and effects to help you carry out your video editing seamlessly.
For Win 7 or later (64-bit)
For macOS 10.12 or later
01Sora
Sora is an artificial intelligence model that generates videos with textual descriptions, developed by OpenAI. It is a US-based artificial intelligence research organization. Sora stands out as a game-changing platform. It can seamlessly convert text into captivating videos, blending convenience with creativity.
Features
● With Sora, transforming written content into engaging videos is swift and efficient.
● Unlike traditional video editing tools, Sora is designed for users of all levels, eliminating the need for prior video production experience.
● Sora offers a plethora of customization options.
● Generates videos up to 60 seconds long
● Generates complex scenes with multiple characters, motions, and accurate details of the subject
● Creates multiple shots within a single generated video
● Generating videos from text instructions by utilizing the recaptioning technique from DALL·E 3
Pros
● Highly realistic video generation with impressive visual quality
● Text-based control over the content of the video, allowing for precise video generation
● A highly versatile tool that handles a wide range of prompts and styles
Cons
● Lacks implicit understanding of the rules of physics
This software is best realistic and imaginative scenes.
02Wondershare Filmora
Wondershare Filmora is a highly efficient video editing software that comes with AI text to video generation. The software is friendly to both beginner and intermediate creations, offering you a wide range of intuitive features.
Pricing
● Subscription Plan: US$19.99 per month
● Cross-Platform Plan: US$69.99 per year
● Perpetual Plan: US$19.99 Onetime Payment
Features
● User-friendly interface that is easy to learn and use
● Wide range of features for creating and editing videos, including transitions, effects, and text overlays.
● Large stock library of royalty-free music and stock footage
● Readily available templates and presets to quickly generate videos
● Easily export videos directly to popular platforms like YouTube and TikTok
Pros
● User-friendly interface with a learning curve suitable for all kinds of creators
● Extensive library of free and paid assets to enhance your videos
● Wide range of features for video editing
Cons
● Lacks advanced features for AI video prompt generation
This software is best for video creation and editing for freelancers, SMBs, markters.
For Win 7 or later (64-bit)
For macOS 10.12 or later
How to Use Filmora’s AI to Video Feature : AI Video Prompt Sample
Here is a brief step-by-step guide on how to use Filmora to generate AI videos. The process is as simple as writing a text prompt and getting the video ready:
Step 1: Lauch Filmora AI Text-to-Video Features
Once you launch on your PC Filmora, click the AI Text-to-Video option to start the video generation process.
Step 2: Add a Text Prompt or Video Script
On the AI Text-to-Video video, add your text prompt. You can also modify other settings such as text language and video voice. Then click the Text to Video button at the bottom to prompt Filmora to generate the video.
Step 3: Preview the Generated Video
Filmora generates the video based on your prompt and a new editing window. You can now a preview video and make any further editing needed.
AI Video Prompt Sample Using Filmora
Prompt: A young man at his 20s is sitting on a piece of cloud in the sky, reading a book.
When prompted to generate a video of a young man in his 20s sitting on a piece of cloud in the sky, reading a book, Filmora generated a narration video from the point of view of the young man as shown above.
03Synthesia
This is a web-app video generator AI from a text supporting AI-driven video creation used by experts and beginners. Rather than filming content utilizing a microphone and camera, this software AI technology helps to simulate human presenters and real-life videos. Thus, it saves video creators hours of work.
Pricing
● Personal Plan: $30 monthly
● Corporate Plan: custom pricing
Features
● Over 40 supported languages
● Allows template customizations
● Allows users to make their avatars
● It has 50 built-in presenters
● Allows you to create realistic AI videos
● Offers live chat support
● Allows download in Mp4
● Enables users to create videos automatically using integrations with APIs
● Allows the addition of backgrounds
● Users can share their videos on other social media platforms
● Allows the addition of images, shapes, and texts to videos
Pros
● Great for beginners are you do not need prior knowledge
Cons
● It supports only front-facing poses
This software is best for freelancers, agencies, marketers, and content creators looking to create high-quality video content.
04Synths Video
This is an AI video-generating tool primarily concerned with helping users drive leads and traffic from YouTube. It is an AI YouTube title generator that allows users to create professional-looking videos from blog posts on YouTube.
Pricing
● YouTube Start: $399 monthly.
● Premium Custom Package: Custom Pricing.
Features
● Video generation from URLs
● It has built-in integration with YouTube
● 20+ avatars are available
● Allows video upload in HD quality
● Over 40+ languages supported
Cons
● No free plan is available
Best for the owners of YouTube channels.
05Rephrase.ai
Rephrase.ai is a video editing software that uses a sophisticated deep learning engine to create professional videos.
Pricing
● Starter plan: $25 monthly
● Enterprise plan: Custom Pricing
Features
● Produces high-resolution videos
● Supports functionality for presenter customization
● Multiple-use cases supported
● Allows users to select their preferred AI voice
● Support varieties of video editing tools
Cons
● It has a complex pricing plan
It is best for agencies seeking to create customizable and personalized professional videos for marketing and advertising.
06Lumen5
Lumen5 is one of the top AI video-creating tools available for beginners and uses Natural Language Processing algorithms to convert text into high-quality videos.
Pricing
● Free Plan
● Creator plan: $15 monthly.
● Premium plan: $79 monthly.
● Business plan: $199 monthly.
● Enterprise plan: Custom Pricing.
Features
● Transforms text to video within minutes
● Numerous templates are available
● Allows customization of videos resolution, color, and font
Cons
● Limited features in the free plan
Best for beginners who are looking to generate short-duration of videos for social media platforms.
07Designs.ai
This is an AI-powered video maker that is useful for users that do not have any experience in design.
Pricing
● Basic plan: $29 monthly
● Pro plan: $69 monthly
● Enterprise plan: Custom Pricing
Features
● It has an attractive and modern user interface
● Allows the creation of videos from pre-designed templates
● Helps video creation from your custom video files
● Over 20 languages supported
● Coverts texts to video
Cons
● Only allows video download in a paid plan.
This tool is best for creators and designers who are willing to create quick AI videos.
08InVideo
This is a perfect AI generator used for creating explainers or marketing videos easily and quickly. The platform helps produce high-quality videos with varieties of style options to make the ideal video according to your requirements.
Pricing
● Free: Free with watermarks on your videos.
● Business: $15 monthly with no watermarks.
● Unlimited: $30 monthly with unlimited video exports.
Features
● Very affordable
● Comprises an online drag-and-drop video editor
● Over 50 AI-powered themes that help to convert text to video in 3 minutes
● Full iStock media library available in all plans
Cons
● Requires internet connection to use
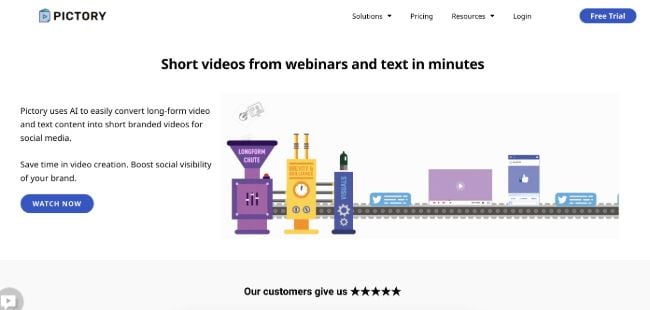
09Pictory.ai
This AI subtitle generator converts your text and turns it into an AI-generated video. This program is simple and easy to get started, requiring no software download. Paste your text into the editor and get started.
Pricing
● Free trial: Only use 3 videos.
● Standard Plan: $29 per month.
● Premium Plan: $59 per month.
Features
● It has a simple user interface.
● Over 6M licensed Shutterstock available
● Unlimited and affordable videos in the premium plan
Cons
● It is quite expensive compared to other tools
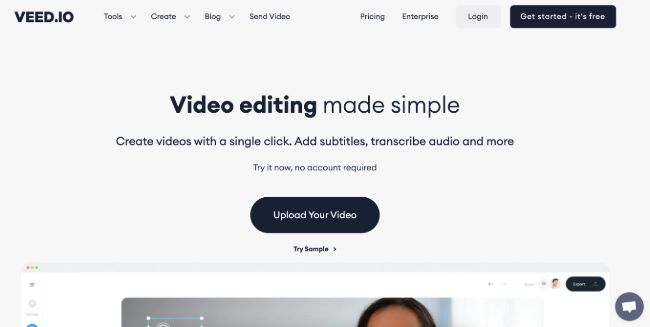
10Veed.io
Veed.io is not specifically an AI video generator but a video editing tool that utilizes AI to simplify the entire process and allows users to create high-quality videos within seconds.
Pricing
● Free: Free with watermarks!
● Basic: $18 monthly.
● Pro: $30 monthly
Features
● It has lots of video templates and a music library to choose
● Easy to learn, user-friendly interface
● Video rendering times are quite fast
● The basic plan has a high-quality resolution
Cons
● Not a typical AI video generator
● Not for beginners
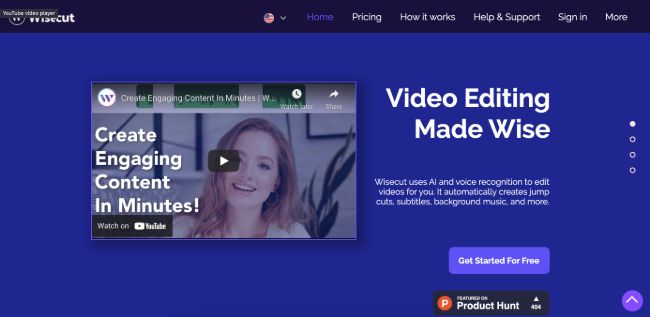
11Wisecut
This free AI video generator platform allows you to turn your text into video. Type in your text and choose a voice actor, and then Wisecut will take care of the rest. It offers excellent editing tools for users to tweak your video until it’s just right.
Pricing
● Basic: Free.
● Professional: $57 per month.
Features
● This platform is easy to use
● It has a simple drag and drops user-interface
● Allows auto subtitles and auto cut silences
● Allows integration with YouTube
● Subtitles auto-translation
● Excellent video quality
Cons
● Has limited effects
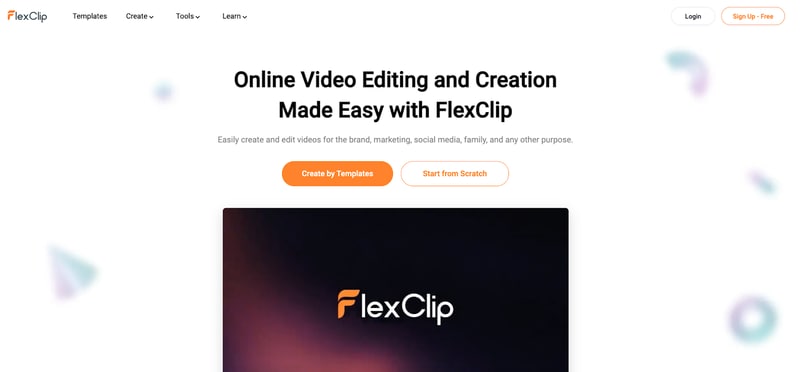
12Flexclip
FlexClip makes video creation and editing easy with-it millions of royalty-free stock media and thousands of templates for you to choose from.
Pricing
● Free
● Basic: $5.99 per month.
● Plus: $9.99 per month
● Business: $19.99 per month.
Features
● Thousands of available templates
● Simple tool for creating and editing videos
● Use for creating engaging videos
● Provides millions of royalty stock media
● Versatile and Flexible
Cons
● Not for beginners
● Ending Thoughts →
● In this post, we have listed the top text to video generators that you can choose from to help you perform tasks within minutes.
● The report also explains all you need to know about video AI generators and recommends Filmora as a perfect tool for editing your videos.
It is a fact that video editing can sometimes be laborious and time-consuming. Even when using the best video editing software, it still requires human effort to get an impressive result. But luckily for us, the invention of the AI video generator has now made a lot of things easier. The AI video generators are the next level as they allow users to automate video creation and editing without compromising quality.
This article will discuss the best AI text to video generators for free that will help make your life easier. Thus, this will soon help you create engaging videos for your personal or business use in just a few clicks.
In this article
01 [What Is an AI Video Generator](#Part 1)
02 [How Does the AI Video Maker Work](#Part 2)
03 [The 12 Best AI Video Generator](#Part 3)
Part 1 What Is an AI Video Generator
AI video generator is the process of using artificial intelligence (AI) to create professional videos. With an AI video generator for free, you do not need any equipment, an editing studio, or a premium video editing application to be able to create a video.
All that is required is that you feed input to the AI tool, and it will automatically help you generate a video. You can edit a blog post into a video within a few minutes with any of these tools listed. In addition, it won’t incur any high costs for video productions because the AI tool will help you carry out most of the tasks.
Part 2 How Does the AI Video Maker Work
Professional AI video editors, are trained by showing them various examples and then providing them feedback by telling them what is wrong and good. The machine then takes note of it and remembers it. However, as the machine continues to learn, it picks the results and then improves itself based on the feedback. Ultimately the device becomes very good or even better than the human that creates it. Here are some breakdowns of the ways video editors work:
● The AI video maker tool, can augment your videos with AR effects, including AR masks, face and color filters, face touch-ups, etc. The tool uses neural networks and computer vision to interrupt, extract, and understand the video content.
● This AI subtitle generator can allow interviews to be delivered and analyzed to the editor fully transcribed, searchable by word or even sentences. Video editors can use AI for keyword extraction, speech-to-text conversion, facial recognition, sentiment analysis, image recognition, and emotion detection.
● AI-video editors can pull sections of a video clip from any source automatically. These AI systems can also detect emotions that allow the creation of warm, appealing videos.
Part 3 The 12 Best AI Video Generator
There are top AI video generators for free that you can choose from for your video editing. These video editors complete work quickly and easily. In addition, if you need video editing software to help you edit your generated videos after generating them, we recommend that you try out Filmora from Wondershare. Wondershare Filmora Video Editor is a perfect video editing software with tons of new features, like keyframing, split video, and adding animations and effects to help you carry out your video editing seamlessly.
For Win 7 or later (64-bit)
For macOS 10.12 or later
01Sora
Sora is an artificial intelligence model that generates videos with textual descriptions, developed by OpenAI. It is a US-based artificial intelligence research organization. Sora stands out as a game-changing platform. It can seamlessly convert text into captivating videos, blending convenience with creativity.
Features
● With Sora, transforming written content into engaging videos is swift and efficient.
● Unlike traditional video editing tools, Sora is designed for users of all levels, eliminating the need for prior video production experience.
● Sora offers a plethora of customization options.
● Generates videos up to 60 seconds long
● Generates complex scenes with multiple characters, motions, and accurate details of the subject
● Creates multiple shots within a single generated video
● Generating videos from text instructions by utilizing the recaptioning technique from DALL·E 3
Pros
● Highly realistic video generation with impressive visual quality
● Text-based control over the content of the video, allowing for precise video generation
● A highly versatile tool that handles a wide range of prompts and styles
Cons
● Lacks implicit understanding of the rules of physics
This software is best realistic and imaginative scenes.
02Wondershare Filmora
Wondershare Filmora is a highly efficient video editing software that comes with AI text to video generation. The software is friendly to both beginner and intermediate creations, offering you a wide range of intuitive features.
Pricing
● Subscription Plan: US$19.99 per month
● Cross-Platform Plan: US$69.99 per year
● Perpetual Plan: US$19.99 Onetime Payment
Features
● User-friendly interface that is easy to learn and use
● Wide range of features for creating and editing videos, including transitions, effects, and text overlays.
● Large stock library of royalty-free music and stock footage
● Readily available templates and presets to quickly generate videos
● Easily export videos directly to popular platforms like YouTube and TikTok
Pros
● User-friendly interface with a learning curve suitable for all kinds of creators
● Extensive library of free and paid assets to enhance your videos
● Wide range of features for video editing
Cons
● Lacks advanced features for AI video prompt generation
This software is best for video creation and editing for freelancers, SMBs, markters.
For Win 7 or later (64-bit)
For macOS 10.12 or later
How to Use Filmora’s AI to Video Feature : AI Video Prompt Sample
Here is a brief step-by-step guide on how to use Filmora to generate AI videos. The process is as simple as writing a text prompt and getting the video ready:
Step 1: Lauch Filmora AI Text-to-Video Features
Once you launch on your PC Filmora, click the AI Text-to-Video option to start the video generation process.
Step 2: Add a Text Prompt or Video Script
On the AI Text-to-Video video, add your text prompt. You can also modify other settings such as text language and video voice. Then click the Text to Video button at the bottom to prompt Filmora to generate the video.
Step 3: Preview the Generated Video
Filmora generates the video based on your prompt and a new editing window. You can now a preview video and make any further editing needed.
AI Video Prompt Sample Using Filmora
Prompt: A young man at his 20s is sitting on a piece of cloud in the sky, reading a book.
When prompted to generate a video of a young man in his 20s sitting on a piece of cloud in the sky, reading a book, Filmora generated a narration video from the point of view of the young man as shown above.
03Synthesia
This is a web-app video generator AI from a text supporting AI-driven video creation used by experts and beginners. Rather than filming content utilizing a microphone and camera, this software AI technology helps to simulate human presenters and real-life videos. Thus, it saves video creators hours of work.
Pricing
● Personal Plan: $30 monthly
● Corporate Plan: custom pricing
Features
● Over 40 supported languages
● Allows template customizations
● Allows users to make their avatars
● It has 50 built-in presenters
● Allows you to create realistic AI videos
● Offers live chat support
● Allows download in Mp4
● Enables users to create videos automatically using integrations with APIs
● Allows the addition of backgrounds
● Users can share their videos on other social media platforms
● Allows the addition of images, shapes, and texts to videos
Pros
● Great for beginners are you do not need prior knowledge
Cons
● It supports only front-facing poses
This software is best for freelancers, agencies, marketers, and content creators looking to create high-quality video content.
04Synths Video
This is an AI video-generating tool primarily concerned with helping users drive leads and traffic from YouTube. It is an AI YouTube title generator that allows users to create professional-looking videos from blog posts on YouTube.
Pricing
● YouTube Start: $399 monthly.
● Premium Custom Package: Custom Pricing.
Features
● Video generation from URLs
● It has built-in integration with YouTube
● 20+ avatars are available
● Allows video upload in HD quality
● Over 40+ languages supported
Cons
● No free plan is available
Best for the owners of YouTube channels.
05Rephrase.ai
Rephrase.ai is a video editing software that uses a sophisticated deep learning engine to create professional videos.
Pricing
● Starter plan: $25 monthly
● Enterprise plan: Custom Pricing
Features
● Produces high-resolution videos
● Supports functionality for presenter customization
● Multiple-use cases supported
● Allows users to select their preferred AI voice
● Support varieties of video editing tools
Cons
● It has a complex pricing plan
It is best for agencies seeking to create customizable and personalized professional videos for marketing and advertising.
06Lumen5
Lumen5 is one of the top AI video-creating tools available for beginners and uses Natural Language Processing algorithms to convert text into high-quality videos.
Pricing
● Free Plan
● Creator plan: $15 monthly.
● Premium plan: $79 monthly.
● Business plan: $199 monthly.
● Enterprise plan: Custom Pricing.
Features
● Transforms text to video within minutes
● Numerous templates are available
● Allows customization of videos resolution, color, and font
Cons
● Limited features in the free plan
Best for beginners who are looking to generate short-duration of videos for social media platforms.
07Designs.ai
This is an AI-powered video maker that is useful for users that do not have any experience in design.
Pricing
● Basic plan: $29 monthly
● Pro plan: $69 monthly
● Enterprise plan: Custom Pricing
Features
● It has an attractive and modern user interface
● Allows the creation of videos from pre-designed templates
● Helps video creation from your custom video files
● Over 20 languages supported
● Coverts texts to video
Cons
● Only allows video download in a paid plan.
This tool is best for creators and designers who are willing to create quick AI videos.
08InVideo
This is a perfect AI generator used for creating explainers or marketing videos easily and quickly. The platform helps produce high-quality videos with varieties of style options to make the ideal video according to your requirements.
Pricing
● Free: Free with watermarks on your videos.
● Business: $15 monthly with no watermarks.
● Unlimited: $30 monthly with unlimited video exports.
Features
● Very affordable
● Comprises an online drag-and-drop video editor
● Over 50 AI-powered themes that help to convert text to video in 3 minutes
● Full iStock media library available in all plans
Cons
● Requires internet connection to use
09Pictory.ai
This AI subtitle generator converts your text and turns it into an AI-generated video. This program is simple and easy to get started, requiring no software download. Paste your text into the editor and get started.
Pricing
● Free trial: Only use 3 videos.
● Standard Plan: $29 per month.
● Premium Plan: $59 per month.
Features
● It has a simple user interface.
● Over 6M licensed Shutterstock available
● Unlimited and affordable videos in the premium plan
Cons
● It is quite expensive compared to other tools
10Veed.io
Veed.io is not specifically an AI video generator but a video editing tool that utilizes AI to simplify the entire process and allows users to create high-quality videos within seconds.
Pricing
● Free: Free with watermarks!
● Basic: $18 monthly.
● Pro: $30 monthly
Features
● It has lots of video templates and a music library to choose
● Easy to learn, user-friendly interface
● Video rendering times are quite fast
● The basic plan has a high-quality resolution
Cons
● Not a typical AI video generator
● Not for beginners
11Wisecut
This free AI video generator platform allows you to turn your text into video. Type in your text and choose a voice actor, and then Wisecut will take care of the rest. It offers excellent editing tools for users to tweak your video until it’s just right.
Pricing
● Basic: Free.
● Professional: $57 per month.
Features
● This platform is easy to use
● It has a simple drag and drops user-interface
● Allows auto subtitles and auto cut silences
● Allows integration with YouTube
● Subtitles auto-translation
● Excellent video quality
Cons
● Has limited effects
12Flexclip
FlexClip makes video creation and editing easy with-it millions of royalty-free stock media and thousands of templates for you to choose from.
Pricing
● Free
● Basic: $5.99 per month.
● Plus: $9.99 per month
● Business: $19.99 per month.
Features
● Thousands of available templates
● Simple tool for creating and editing videos
● Use for creating engaging videos
● Provides millions of royalty stock media
● Versatile and Flexible
Cons
● Not for beginners
● Ending Thoughts →
● In this post, we have listed the top text to video generators that you can choose from to help you perform tasks within minutes.
● The report also explains all you need to know about video AI generators and recommends Filmora as a perfect tool for editing your videos.
Difference Between Time Lapse and Hyperlapse
You’ve probably heard the terms “hyperlapse” and “timelapse” before. Whether it was in a blog post, a how-to guide, or on your preferred social media platform. Each of us has seen at least one image of one of them. However, what makes a difference? You’re about to learn in this article!
With that said, let’s begin!
Part 1. What is a timelapse, and how is it used?
Timelapses are familiar to you, whether they were used in a series to demonstrate a swift change from night today or at the beginning of your favorite influencer’s vlog. But exactly what is it? The term “timelapse” refers to a photography method in which static images are stitched together to produce a time-warping video. When the video is played, the time seems to pass more quickly, creating the illusion that time is slipping away.
Put your camera in a fixed position, stop it from moving, panning, or tilting, then record for a long time to make your own timelapse. This period of time could last for five minutes, an hour, days, or even years. Once the film is gathered, all that’s left to do is speed everything up.
The fact that time-lapses make for a pleasant visual effect is what makes them so popular in Vlogs and other media. This method enables you to describe the passage of time, the movement of individuals through space, etc. utilizes time-lapse.

Part 2. What is a hyperlapse?
On the other side, there are these things that we refer to as hyperlapses. In the subgenre of time-lapse photography known as cinematography, a hyperlapse is a filmmaking method used to generate motion shots by capturing movies rather than taking images. In order to create a hyperlapse, the camera does not remain stationary; rather, it follows the subject around and is typically held by the photographer.
The amount of time that elapses between pictures in a stop-motion video typically ranges from tenths of a second up to a few fractions of a second, although this can change significantly depending on what you want to show. However, after you have picked it, it must remain consistent in the same way that the timelapse does.
The attractive 3D look that hyperlapse produces is the primary draw for its utilization. The hyperlapse that is formed can produce a dreamy image, regardless of whether the camera is attached to a moving vehicle or is mounted on a tripod that is moving towards its target.
Additionally, you may use this approach to make stunning photographs with motion blur by employing long exposures. In most cases, the final image will be stabilized in post-production in order to eliminate some of the flaws that may have been captured in the original photo.

Part 3. What differentiates them from each other?
The movement of the camera is what differentiates these two approaches the most from one another. When capturing a time lapse, the camera is kept relatively still and in the same position throughout. In addition, when you use a hyperlapse, the camera is continuously moving, which creates a 3D appearance in the image.
You could be scratching your head right about now, wondering when you should employ one of the two methods. If your subject is moving, you should take a time-lapse photograph; if the camera is moving, you should take a hyperlapse photograph. This question has a relatively straightforward answer.
The act of recording video for a hyperlapse can cause your storage to be filled up really rapidly. Therefore, you may wish to swap between the two methods depending on the length of time that you want to shoot for. If you are going to be filming for a significant amount of time, you should consider using a timelapse.
It is simple to determine the timelapse interval if you already know these answers. Choose the video’s final frame rate. It may be 24, 25, or 30 fps. You shouldn’t select more quickly. Choose the option that best fits your audience and location. Additionally, a time-lapse calculator is available.
The shoot time should then be converted to seconds. For instance, two hours are equal to 2 x 60 x 60 seconds, or 7200 seconds. Determine how many frames are required for your chosen timelapse now. For instance, the final product should be 30 seconds of 25fps video. You’ll need to capture 750 frames in total because 30 x 25 is 750.
Divide the time (7200s in this case) by the number of frames to obtain the interval (750). You can round up the result, which is 9.6, which is pretty near to 10 seconds. Therefore, in our case, your interval should be set to 10s.
Part 4. Motion control timelapse
Now that we understand how the timelapse images that are static are created, we are able to incorporate some movement into the shots that are static. Moving the camera around during a timelapse is much more difficult than it appears to be in the video. Every movement of the camera is slowed down when using slow motion, which means that you can make even a shaky handheld movie look good when using slow motion. The situation is completely reversed while viewing a timelapse.
Because every movement of the camera is sped up, shooting with the handheld mode is nearly impossible. If you want the camera to appear to be moving slowly in the final timelapse, you will need to move it very slowly while shooting in order to achieve this effect.
For this reason, we will need to make use of motion control devices in order to accomplish our goal. Therefore, we refer to these kinds of photos as motion control timelapses. The camera can be moved very slowly and accurately along one, two, or all three axes using motors that are controlled electronically. The three-axis systems, which include a slider as well as a pan-tilt head, are by far the most popular.
Extra Info: Best Time Lapse Video Maker – Filmora
To create a time lapse video with cool effects, you can use the best video editor with rich effects – Filmora . This software offers many video speed change settings and creative effects to help make a time lapse video easily. Just download the software on your PC or Mac and then start creating a video on your own.
Conclusion
The finest results can be achieved by utilizing a variety of filmmaking approaches concurrently. Therefore, you shouldn’t be afraid to try out new things by combining time-lapse photography with slow motion and video. In addition, make sure you visit the Hyperlapse Academy so you can become familiar with all of the different approaches. Use your imagination, and don’t stop firing.
Free Download For Win 7 or later(64-bit)
Free Download For macOS 10.14 or later
Free Download For macOS 10.14 or later
Leading Applications to Create Fast Motion in iPhone
Fast motion has always been a time saver since it covers the unnecessary details in seconds. Acquiring this skill is important if you are a content creator or videographer. You might already be aware of how to make fast-motion videos on iPhone.
However, if this is unheard of or you are new to video editing, we’ve got you covered. This article covers the ins and outs of how to make a video fast-motion iPhone. In addition, users can gain insights into some applications and their guides. Moreover, we’ll discuss an AI alternative to those applications.
Slow Motion Video Maker Slow your video’s speed with better control of your keyframes to create unique cinematic effects!
Make A Slow Motion Video Make A Slow Motion Video More Features

Part 1: What are the Different Use Cases of Fast-Motion Videos?
The fast motion effect covers multiple creative ways of speed increase that you can incorporate. All these ways apply to different genres of videos. This section diverts your focus on different use cases of fast-motion videos. Here is how to make video fast motion on iPhone for different purposes:
1. Construction and Development Videos
Fast-motion videos help in video creation where development is happening. Such videos show the before and after results of an area, location, or building. The construction or manufacturing process is shown in fast motion in engineering videos. It also helps in showing the transformation of a non-populated or undeveloped city.
2. Nature Photography or Documentaries
Natural phenomenon like the blooming of a flower usually occurs at a slower rate. Capturing them takes a long time, but the audience may not like such a long duration. Hence, editors can increase the speed of such videos to speed up the phenomenon. In addition, if you watch wildlife or nature documentaries, they also use this effect.
3. Aesthetic Expression
Fast-paced videos bring a sense of creativity to your videos as they are an artistic expression of time. To indicate the passing of time in movies or to show a scene at a railway station or airport. It also indicates that the filmmakers and editors have put in an effort.
Part 2: Different Tools to Help You Make Fast Motion Video on iPhone
Fast-motion tools are important in video editing since they offer a chance at creativity. They have a wide range of applications in the filmmaking and media industry. Do you know how to make a video fast-motion iPhone using a third-party application? If not, here is a detailed guide on some of them:
1. iMovie
If you are looking for an accessible application with an easy-to-use interface, this is for you. The process of speed manipulation consists of a slider for control. After editing, you can integrate multiple soundtracks from 130 pre-assembled tracks. The application is compatible with iPhone X and newer versions.
Steps to Create a Fast Motion Video Using iMovie
Do you want to learn how to make fast-motion videos on your iPhone with this application? Given Below is your perfect guide to crafting a fast-paced video:
Step 1: After downloading the application on your iPhone, access it and “Start New Project.” Then, select a video from your media library to edit.

Step 2: After importing the video, click the “Pen” icon to access editing options. Then, click the “Edit Clip” option to do so.

Step 3: Move to the bottom of the screen and slide the given option to access “Speed.” Click it and drag the speed slider towards the right side to increase the speed of the video.

Step 4: Hit the “Play” button to see the speed of the video and re-adjust if required. Go to the top right corner of the screen, locate the “Export” icon, and click it.

2. Video Speed Changer – Editor
Want to learn how to make video fast motion on iPhone without additional technicalities? This application ensures a comprehensive narrative just for speed change. Users can formulate 3 fast motion effects with it at specific frames. For pre-recorded or new videos, it offers Time Wrap, Time Lapse, and Hyper-lapse. The application has been found to support iOS 12.3 and later versions.
Steps to Create a Fast Motion Video Using Video Speed Changer
Multiple applications provide similar services, but none can compare to its UI. Here is how to make a video fast motion iPhone using this
Step 1: Access this application from the App Store and launch it after installation. Click on the “Select Video” button and import a clip.

Step 2: Once you have selected a video, it will take you straight to the speed change option. Change the position of the given slider. Finally, preview the video and click the “Save Video” button to save it on your device.

3. Slow Motion Video FX Edit
Although the name indicates otherwise, this video editor is capable of high-speed change. It comes with an intuitive user interface and is easy for anyone to employ. In addition to speed alteration, you can insert 40 different filters into your video. You can also commence its freeze frame action to add an extra layer of creativity. The tool is compatible with iOS 13.0 and higher versions.
Steps to Create Fast Motion Using Slow Motion Video FX
This is another editor to gain insights on how to make fast-motion videos on an iPhone. We have given the verified step-by-step guide to using this app:
Step 1: After launching this application, click the “Choose From Library” option. Then, select a clip from your device’s gallery.

Step 2: Once the video is compressed, you’ll be taken to the speed change screen. From there, you can alter the speed of different clip sections. Move the slider of the relevant section upward to increase the speed.

Step 3: Once you have altered the speed, navigate towards the top right corner and click the “Export” icon.

Part 3: Desktop Solution: Remedy for Those Who Want to Speed Up Video on Their Computer
If you have gone through the above applications, you know the fast-motion effect. Do you want to know how to make a video fast motion on an iPhone using a computer? Wondershare Filmora is the best alternative to the above applications for creating this effect. The software is compatible with all the macOS and iOS devices and allows seamless editing.
With this editor, you get multiple options to create a fast-motion video. In this article, we will use the Uniform Speed feature. The operating process is very accessible and designed to assist both professionals and beginners. You can also apply the AI Frame Interpolation option to apply “Frame Bending.”
Free Download For Win 7 or later(64-bit)
Free Download For macOS 10.14 or later
Step-by-Step Guide to Speed Up Video with Filmora
After reading the article till now, you have gained knowledge of Filmora’s speeding options. How to make fast motion video on iPhone now seems like an easy option. Even though the process is easy, we want you to stay ahead. Hence, here is a step-by-step procedure for creating fast motion in Filmora:
Step 1Create a New Project and Import Media
First, connect your iOS device to your Wondershare Filmora device. After that, launch Filmora to access the main menu. From there, click on the “New Project” tab fashioned in the center. Expand the “Import” option in the Project Media section and select the suitable option. In this case, choose the “Import from Phone or Camera” option.

Step 2Access the Uniform Speed Section
After bringing the imported media to the timeline, select it to access the settings panel. Select the “Speed > Uniform Speed” tab from the appeared panel. Then, drag the Speed slider on the right side to increase speed. Afterward, click the “Play” button on the preview screen to see the results.

Step 3Apply Frame Bending and Export
This part is optional, but if you find an irregularity or roughness to the video, apply this. Go to the “AI Frame Interpolation” section at the bottom and expand the options. From the dropdown menu, select the “Frame Bending” option and do the rendering from the timeline. After everything is set, select the “Export” button at the top right corner.

Trending Video Editing Features of Wondershare Filmora
Filmora is a versatile tool that is not confined to speed manipulation or fast motion only. This editor offers audio, text, AI editing options, and video. Here are some prominent key features of Wondershare Filmora to help you in editing:
1. Speed Ramping
The other option for speed modification mentioned previously is speed ramping. This option comes with 6 editable speed change presets for automated editing. However, you can also employ the custom preset to create your own way. Moreover, it allows the audio pitch option to enable automated maintenance of audio.
2. AI Smart Cutout
There is more than one way of removing and replacing a background in Filmora. Smart Cutout offers an AI-integrated masking option to cut out the selected parts. You can also set preferences for Edge Thickness or Edge Feather for accuracy. Afterward, you can introduce three background options: color, grid, or more.
3. AI Text-to-Video
Bring your imagination to visuals with this amazing generative AI video creator. It creates videos from text and covers the voice and graphical elements. Users can customize the AI voice and ratio before generating a video. The prompt section offers up to 1000 characters for adding a script or giving directions.
4. AI Smart Masking
Are there any effects or filters you want to introduce to only a specific part of the video? Use Filmora’s AI mask for automated masking of an object or background. The mask brush selects the relevant area on its own. Besides AI masks, there is a manual masking option or mask shapes to apply. You can also customize the Brush size according to the video.
Conclusion
The article highlighted the importance of increasing video speed in many industries. In addition, we discussed some tools that make fast motion with ease. We also provided step-by-step guides on how to make fast motion video on iPhone. Wondershare Filmora stands amongst all those applications to create fast motion. We recommend this software due to its multiple functionalities and detailed editing abilities.
Make A Slow Motion Video Make A Slow Motion Video More Features
Part 1: What are the Different Use Cases of Fast-Motion Videos?
The fast motion effect covers multiple creative ways of speed increase that you can incorporate. All these ways apply to different genres of videos. This section diverts your focus on different use cases of fast-motion videos. Here is how to make video fast motion on iPhone for different purposes:
1. Construction and Development Videos
Fast-motion videos help in video creation where development is happening. Such videos show the before and after results of an area, location, or building. The construction or manufacturing process is shown in fast motion in engineering videos. It also helps in showing the transformation of a non-populated or undeveloped city.
2. Nature Photography or Documentaries
Natural phenomenon like the blooming of a flower usually occurs at a slower rate. Capturing them takes a long time, but the audience may not like such a long duration. Hence, editors can increase the speed of such videos to speed up the phenomenon. In addition, if you watch wildlife or nature documentaries, they also use this effect.
3. Aesthetic Expression
Fast-paced videos bring a sense of creativity to your videos as they are an artistic expression of time. To indicate the passing of time in movies or to show a scene at a railway station or airport. It also indicates that the filmmakers and editors have put in an effort.
Part 2: Different Tools to Help You Make Fast Motion Video on iPhone
Fast-motion tools are important in video editing since they offer a chance at creativity. They have a wide range of applications in the filmmaking and media industry. Do you know how to make a video fast-motion iPhone using a third-party application? If not, here is a detailed guide on some of them:
1. iMovie
If you are looking for an accessible application with an easy-to-use interface, this is for you. The process of speed manipulation consists of a slider for control. After editing, you can integrate multiple soundtracks from 130 pre-assembled tracks. The application is compatible with iPhone X and newer versions.
Steps to Create a Fast Motion Video Using iMovie
Do you want to learn how to make fast-motion videos on your iPhone with this application? Given Below is your perfect guide to crafting a fast-paced video:
Step 1: After downloading the application on your iPhone, access it and “Start New Project.” Then, select a video from your media library to edit.
Step 2: After importing the video, click the “Pen” icon to access editing options. Then, click the “Edit Clip” option to do so.
Step 3: Move to the bottom of the screen and slide the given option to access “Speed.” Click it and drag the speed slider towards the right side to increase the speed of the video.
Step 4: Hit the “Play” button to see the speed of the video and re-adjust if required. Go to the top right corner of the screen, locate the “Export” icon, and click it.
2. Video Speed Changer – Editor
Want to learn how to make video fast motion on iPhone without additional technicalities? This application ensures a comprehensive narrative just for speed change. Users can formulate 3 fast motion effects with it at specific frames. For pre-recorded or new videos, it offers Time Wrap, Time Lapse, and Hyper-lapse. The application has been found to support iOS 12.3 and later versions.
Steps to Create a Fast Motion Video Using Video Speed Changer
Multiple applications provide similar services, but none can compare to its UI. Here is how to make a video fast motion iPhone using this
Step 1: Access this application from the App Store and launch it after installation. Click on the “Select Video” button and import a clip.
Step 2: Once you have selected a video, it will take you straight to the speed change option. Change the position of the given slider. Finally, preview the video and click the “Save Video” button to save it on your device.
3. Slow Motion Video FX Edit
Although the name indicates otherwise, this video editor is capable of high-speed change. It comes with an intuitive user interface and is easy for anyone to employ. In addition to speed alteration, you can insert 40 different filters into your video. You can also commence its freeze frame action to add an extra layer of creativity. The tool is compatible with iOS 13.0 and higher versions.
Steps to Create Fast Motion Using Slow Motion Video FX
This is another editor to gain insights on how to make fast-motion videos on an iPhone. We have given the verified step-by-step guide to using this app:
Step 1: After launching this application, click the “Choose From Library” option. Then, select a clip from your device’s gallery.
Step 2: Once the video is compressed, you’ll be taken to the speed change screen. From there, you can alter the speed of different clip sections. Move the slider of the relevant section upward to increase the speed.
Step 3: Once you have altered the speed, navigate towards the top right corner and click the “Export” icon.
Part 3: Desktop Solution: Remedy for Those Who Want to Speed Up Video on Their Computer
If you have gone through the above applications, you know the fast-motion effect. Do you want to know how to make a video fast motion on an iPhone using a computer? Wondershare Filmora is the best alternative to the above applications for creating this effect. The software is compatible with all the macOS and iOS devices and allows seamless editing.
With this editor, you get multiple options to create a fast-motion video. In this article, we will use the Uniform Speed feature. The operating process is very accessible and designed to assist both professionals and beginners. You can also apply the AI Frame Interpolation option to apply “Frame Bending.”
Free Download For Win 7 or later(64-bit)
Free Download For macOS 10.14 or later
Step-by-Step Guide to Speed Up Video with Filmora
After reading the article till now, you have gained knowledge of Filmora’s speeding options. How to make fast motion video on iPhone now seems like an easy option. Even though the process is easy, we want you to stay ahead. Hence, here is a step-by-step procedure for creating fast motion in Filmora:
Step 1Create a New Project and Import Media
First, connect your iOS device to your Wondershare Filmora device. After that, launch Filmora to access the main menu. From there, click on the “New Project” tab fashioned in the center. Expand the “Import” option in the Project Media section and select the suitable option. In this case, choose the “Import from Phone or Camera” option.
Step 2Access the Uniform Speed Section
After bringing the imported media to the timeline, select it to access the settings panel. Select the “Speed > Uniform Speed” tab from the appeared panel. Then, drag the Speed slider on the right side to increase speed. Afterward, click the “Play” button on the preview screen to see the results.
Step 3Apply Frame Bending and Export
This part is optional, but if you find an irregularity or roughness to the video, apply this. Go to the “AI Frame Interpolation” section at the bottom and expand the options. From the dropdown menu, select the “Frame Bending” option and do the rendering from the timeline. After everything is set, select the “Export” button at the top right corner.
Trending Video Editing Features of Wondershare Filmora
Filmora is a versatile tool that is not confined to speed manipulation or fast motion only. This editor offers audio, text, AI editing options, and video. Here are some prominent key features of Wondershare Filmora to help you in editing:
1. Speed Ramping
The other option for speed modification mentioned previously is speed ramping. This option comes with 6 editable speed change presets for automated editing. However, you can also employ the custom preset to create your own way. Moreover, it allows the audio pitch option to enable automated maintenance of audio.
2. AI Smart Cutout
There is more than one way of removing and replacing a background in Filmora. Smart Cutout offers an AI-integrated masking option to cut out the selected parts. You can also set preferences for Edge Thickness or Edge Feather for accuracy. Afterward, you can introduce three background options: color, grid, or more.
3. AI Text-to-Video
Bring your imagination to visuals with this amazing generative AI video creator. It creates videos from text and covers the voice and graphical elements. Users can customize the AI voice and ratio before generating a video. The prompt section offers up to 1000 characters for adding a script or giving directions.
4. AI Smart Masking
Are there any effects or filters you want to introduce to only a specific part of the video? Use Filmora’s AI mask for automated masking of an object or background. The mask brush selects the relevant area on its own. Besides AI masks, there is a manual masking option or mask shapes to apply. You can also customize the Brush size according to the video.
Conclusion
The article highlighted the importance of increasing video speed in many industries. In addition, we discussed some tools that make fast motion with ease. We also provided step-by-step guides on how to make fast motion video on iPhone. Wondershare Filmora stands amongst all those applications to create fast motion. We recommend this software due to its multiple functionalities and detailed editing abilities.
How To Cut Videos For Instagram On Mac
More video content is being created than before. Unfortunately, some social media platforms like Instagram require your video to be short. Therefore, many people wonder how to cut a video to make it easier to share. If you’re wondering how to cut video for Instagram on Mac, you’re in luck. This article shares the best tools to use for this purpose.
What You Should Know About Instagram Video

Instagram is a social media site owned by Facebook. However, its main focus is on sharing videos and photos. It also allows users to put up stories that only last 24 hours. Stories allow you to highlight some crucial aspects of your life. These stories could be made up of photos, texts, and videos. However, each story slide can only take up to 15 seconds of video.
Most times, your video would be longer than that. If you upload a video longer than the accepted 15 seconds, Instagram automatically trims it to 15 seconds. However, the resulting video might not be the parts you want to show to your audience. Maybe there’s a particular section you would like your followers to see. That’s why video cutters enter the picture.
A good video splitter to cut video for Instagram on Mac is necessary when you’re creating video content for your Instagram page. In addition, the video editing tool you choose must maintain the quality and the safety of the file. Therefore, we’ve selected the best tools to cut videos for Instagram on Mac. Next, we’ll explore these tools, highlighting their best features, cons, and how you can use them. On that note, let’s dive in.
Best Instagram Video Cutter for Mac - Filmroa Video Editor

Supported System: Windows and Mac
Splitting your Instagram video before sharing them makes it easier to highlight your best parts. If you’re wondering what the best tool to do that is, you’re in luck. Filmora Video Editor is the best video cutter for Mac for many reasons. Apart from cutting videos, it offers several editing tools to enhance your video. It provides video processing features like cropping, splitting, rotating, trimming, speed increase, and color correction. However, it also offers features for professional editing of videos.
Filmora supports all video formats, even the high-definition video formats for your editing. In addition, Wondershare Filmora offers you an intuitive and user-friendly interface compared to other video cutters out there. This makes it a fantastic choice for experts and novices alike. The steps to split your video and use other in-built features are pretty straightforward, and if you need tutorials, Wondershare Filmora makes them available.
For Win 7 or later (64-bit)
For macOS 10.14 or later
Steps to Cut Video for Instagram on Mac
Filmora makes it relatively easy to use its extensive features. You don’t need previous editing experience to use Wondershare Filmora. If you’re wondering how to cut video for Instagram on Mac, below are the steps to follow.
Step 1: Download Wondershare Filmore
First, you have to download the Filmora app on your Mac. You can get it on the App Store or the official website. After installation, launch Filmora to get started.
Step 2: Import Video

Once you install the app, you can import the video you would like to cut for Instagram on the app. Click ‘import media files here’ to choose a video file from your PC storage. Alternatively, you can drag and drop the Instagram video on the software’s timeline.
Step 3: Cut the Video

You can cut your video from any end you prefer. First, move the cursor where you would like to cut the video until the clip changes to the ‘I’ pointer. Then, you can move the cursor within the video length to cut to your preference.
Step 4: Split Instagram Video

You can also split the video into specific portions by dragging the slider to each endpoint and picking the scissors. Additionally, you can carry out more editing like adding transitions, sound effects, and more to beautify your video.
Step 5: Save Instagram Video

Now that the video is to your liking, hit the ‘export’ button and choose the output format you would prefer. Next, click ‘export’ to confirm your choice.
More Free Instagram Video Cutter for Mac to Cut Video For Instagram
Although Wondershare Filmore is the best option when you want to cut video for Instagram on Mac, other options are available. In this section, we’ll explore the free Instagram video cutters for Mac that you can use.
Lightworks

Supported System: Windows and Mac
Lightworks is one of the best video splitting tools you can use if you’re learning how to cut video for Instagram on Mac. It is best for both novices and professionals and allows you seamlessly cut the video to your desired part. With Lightworks software, you can easily get results.
Apart from cutting Instagram videos on Mac, there are several more editing features you can utilize to take your Insta video to the next level. It also allows you to combine several cut clips. Size isn’t an issue with Lightworks as it effortlessly handles large file sizes. It offers users all the features of a high-quality video processing video editor. The best part is that it allows you directly export your cut video to Instagram or any other social media platform you would prefer.
Pros
- It supports different audio, video, and image format
- It allows users to share projects to encourage collaborative workflow
- Easy to use by beginners and professionals
- Allows exporting of video to Instagram directly
Cons
- It doesn’t support 3D video editing
- You have to register before using the application
- No video stabilization feature
Step to Cut Video for Instagram on Mac Using Lightworks
The steps to using this software are pretty easy to follow. Below, we’ve outlined the steps to make it easier to use.
- Step 1: Download the Lightworks software on your Mac from the official software. Once you do this, install the app and launch the software to begin the video-cutting process.
- Step 2: Import the video into the software. You can do this by clicking ‘import video’ or simply dragging the clip into the timeline.

- Step 3: After uploading the clip on your timeline, you can start cutting the video to your preference. Simply slide the cursor to the point you want to cut from and press the ‘c’ key on your keyboard.

- Step 4: After cutting the part you want, erase the rest by using the deleting button.

- Step 5: Click the ‘all’ option and then choose ‘export’ from the menu that appears to save your newly-cut video. You can also export directly to Instagram to save space and time.

Avidemux

Supported System: Windows and Mac
Another free video cutter that you can use when learning how to cut video for Instagram on Mac is Avidemux. This app is simple and offers simple filtering, cutting, and encoding features. As a result, it makes it relatively easy for beginners to split, cut, and trim videos. In addition, Avidemux offers users an intuitive user interface that makes it easy to know the next step to take.
Avidemux supports the most common formats like AVI, MP4, and more. It also offers different filters to spice up your Instagram videos. You can resize your video and also color correct your video. It is not an advanced tool for professionals because it doesn’t offer advanced tools. However, if you simply want to cut video for Instagram for Mac, this free software helps you achieve that.
Pros
- It supports common video formats
- It’s easy to cut videos for Instagram using keyboard shortcuts
- Offers various filters for enhancing video
- It is free to use
- Easy for beginners to use
Cons
- It crashes sometimes
- There are limited features in the editing software
Steps to Cut Video for Instagram on Mac Using Avidemux
Avidemux has a user-friendly interface that makes it easy to cut and save your Instagram video within minutes. Below are the simple steps to cut Instagram videos you should follow.
- Step 1: Download Avidemux on your Mac and install it. After installation, launch Avidemus to begin cutting your Instagram video.
- Step 2: Next, load the file you would like to work with

- Step 3: Next, navigate to the portion of the video you would like to cut and check its ‘frame type.’ At the beginning, where you would like to cut the video from, click the ‘A’ button. It automatically records it as the start of the clip.

- Start 4: Move to where you would like the clip to end and click the ‘B’ button. This will automatically cut the Instagram video to your preference.

- Step 5: Save the video by going to file and choosing ‘save’ from the available options. Next, click ‘save video’ and name the file.

You’re now ready to use your new video on Instagram or any other video-sharing platform you would prefer.
iMovie

Supported System: Mac
Apple first released this software in 1999, but it has continually updated it to offer more features to users. IMovie is available on all iOS devices, including your MacBook. Due to the frequent upgrades, this software makes editing relatively easy for beginners. The user interface is user-friendly, and it is entirely free to use. It is also an excellent choice for cutting your Instagram videos.
One of the reasons Mac users love this app is that there’s no need for installation and downloading. There are different effects available to enhance your video. You can also use ready-made templates on the software that offers popular music and stunning graphics. In addition, you can also add transitions, change speed, and many more with this software.
Pros
- It puts your content in different media libraries to help you stay organized
- It offers access to various video and audio filters
- It provides a stability feature that’s not available with many Instagram video cutting tools
- It allows you to share directly on Instagram
- It is easy for beginners to use
Cons
- It lacks some useful controls
- It doesn’t allow tagging when you share directly to Instagram
- It only supports two video tracks
Steps to Cut Video for Instagram on Mac Using IMovie
If you want to cut your video for Instagram using IMovie, below are the steps you need to follow.
- Step 1: Open iMovie on your Macbook to get started
- Step 2: Now, create a new project and name the project with a name you prefer

- Step 3: Import your video to IMovie by granting the software access to your computer’s video library.

- Step 4: Start cutting out any part you don’t want; you can also trim the video in-between if there are parts within the clip you don’t want.

- Step 5: You can add filters, transitions, or any other effect you would like to enhance your video.

- Step 6: Finally, you can save your file on your Mac or upload it directly to Instagram.
More Paid Instagram Video Cutter for Mac to Cut Video For Instagram
Now that you know the top three free video cutters for Instagram on Mac, this section explores the best paid Instagram video cutter you can use to cut videos for Instagram on Mac. Without further ado, let’s take a look.
Movavi Video Editor

Supported System: Windows and Mac
This video editor is relatively easy to use and powerful. It offers many features that go beyond cutting video for Instagram. You can also utilize this video editing software to enhance your video and make it look professional. Movavi offers transitions, filters, titles, and many more features for your videos. It is easy for both novices and professionals to use this platform.
Movavi Video Editor supports all types of video formats for easy editing. It also allows you to set your video to full HD and 4K resolution so that the images are clean and clear. You can also convert to a new format without compromising the quality of your video. In addition, Movavi offers you a trial period you can use to check out the software to ensure it is the ideal option for you. With Movavi, you can also share directly to Instagram if you’re looking to save space on Mac.
Ros
- It allows you to cut videos and export them quickly
- It offers several other features to enhance your videos
- It supports all video formats
- It enables you to convert video to the new format without compromising the quality
- It is ideal for beginners and experts
Cons
- Subscription fees are pretty high
- Some of the settings can be quite complex for beginners
Steps to Cut Video for Instagram on Mac Using Movavi Video Editor
If you would like to try Movavi video editor but don’t know how to go about it, the steps below make it relatively easy.
- Firstly, Install Movavi Video Editor on your Mac and install the app following the instructions. After installation, launch the app to begin.
- Next, choose the video file you would like to cut by clicking ‘add files’ and selecting your media library.

- It will appear on the ‘media bin,’ and you’ll have to drag it to the timeline.
- Now, you can start cutting the video for Instagram. Click on the video and move the market to the point in the video you would like to cut. Next, click the split button.

- You can easily remove the unwanted segments by clicking delete after selecting it.

- After cutting your video, you can choose the output format you prefer and then click ‘export.’ Choose the folder on your Mac you would like to save to and click ‘start’ to begin the saving process.

Final Cut Pro

Supported System: Mac
Next on our list, we have Final Cut Pro, an excellent video cutter for Mac. It is software developed by Apple for professional video editing. This app is primarily for MacOS users, and it offers several cutting-edge editing features to ensure a smooth and high-resolution video. It supports different video formats and allows you to enhance audio, add effects, trim, and carry out 360-degree video editing if you want to improve your video.
This tool doesn’t offer a monthly subscription. Instead, users can simply make a one-time payment and have lifetime access to this editing tool. It is not an excellent choice for beginners as its advanced features and interface can be pretty complicated. However, if you want to give this video cutter ago, we’ll provide the steps to cut the video for Instagram below.
Pros
- It supports 360-video editing
- Performance is relatively fast and ensures an easy video-cutting process
- It supports different video formats
- It offers various editing tools to enhance your video for Instagram
Cons
- It isn’t ideal for beginners
- One-time payment is relatively high
- The interface can be quite confusing
Steps to Cut Video for Instagram on Mac Using Final Cut Pro
If you want to cut video for Instagram in Final Cut Pro, the blade tool is the best option. However, it can be pretty confusing to use Final Cut Pro if you’ve never used the software before. Follow the steps below to cut Instagram video using Final Cut Pro.
- First, you have to download the app; you can download it on the App Store or the official website.
- Next, install the video cutter on your Mac and launch it to begin cutting Instagram videos.
- Import the video you would like to cut by visiting the ‘file’ type and choosing ‘import.’ Next, choose media and select the video from the media library. Alternatively, you can simply press Command + I on your Mac keyboard to go straight to your PC storage.

- Next, move the imported clip to the timeline to begin the cutting process.
- Select the Tools menu and choose ‘Blade’ from the dropdown menu. You can also press the B key on your keyword to select this tool.

- Now, you’re ready to start cutting the video file. Move the selected blade tool to the frame you would like to cut from the clip and click.

- Next, move to where you would like the cut to the end and click again.

- That’s all you have to do. Once you cut the clip and you’re satisfied with your result, simply save your clip by hitting the ‘export’ button and choosing the location you prefer and your preferred output format.
Adobe Premiere Rush

Supported System: Windows and Mac
Premier Rush was designed for social media videos and to help vloggers make the most of their videos. Although it started as a mobile-only app, it now has a desktop option for Mac and Windows. The idea behind Rush is an editing tool that helps you edit your video and share it to your preferred social media platform fast. This editing tool offers a simple user interface, and the workflow is seamless to ensure speedy performance.
As long as you want a video cutter created for cutting video for Instagram on Mac, this software delivers. It offers different editing features to enhance your video. You can link your Instagram account and upload directly to the platform. It also allows you to save all edited video files on Cloud to save space on your MacBook.
Pros
- It allows you to transfer videos from Adobe Premiere Pro directly for editing
- Allows you to link your social media accounts for direct uploads
- It offers transitions, filters, and more editing tools to enhance your Instagram video
- You can save directly to the Cloud to save space and ensure easy access
- It is an excellent option for beginners
Cons
- You can’t change the output format
- It doesn’t offer ample audio tools
Steps to Cut Video for Instagram on Mac Using Adobe Premiere Rush
This section will cover all the crucial steps to get the most from Adobe Premier Rush. Keep reading to learn how to cut video for Instagram on Mac using Adobe Rush.
- Firstly, download and install the app on your Mac. Launch the software after installation to start editing
- Now, create a new project on the app and import the video you would like to cut for Instagram.

- Afterward, select the video you would like to cut, click ‘create,’ and you’re ready to begin.

- When the video appears on the timeline, select the video and click the ‘scissors’ icon on the left corner. This tool helps to cut your video to your preference.
- To use the scissors tool, simply go to the beginning of the video and drag the handle to where you would like the video to start. You can also do the same to the end by dragging the handle at the end to where you would prefer.

- After cutting your video, you can also utilize other editing features to enhance your video.

- Now, you’re ready to export your video. Simply click ‘share’ located at the top of the editing software and choose from the options whether you want to share directly to Instagram or save on Mac.
Which Should I Choose, Free or Paid Instagram Video Cutter?
Now that you know the best free and paid video cutters to cut Instagram videos, you’re probably wondering what the ideal option is. With so many options, you must make the right decision for your project. You need to consider several factors before you decide if a paid or free Instagram video cutter is the best option for you.
- Budget
When deciding between a paid or free Instagram cutter, one crucial factor is how much you’re willing to pay. If your budget is really low and doesn’t fit into any paid options, you can simply go for a free option. However, if the price isn’t an issue for you, going for a paid option is best because it offers you more editing features to enhance your video.
- Ease of Use
You should also consider how easy it is to use the video cutter. Some paid options are for professionals and can be challenging to understand. However, most free options offer poor performance times. The last thing Instagram users want is to devote hours to figure out where each tool is on the software. However, there are paid options with an intuitive interface that makes it easy to cut your Instagram video.
- Customer Support
You also need to consider whether customer support will be available when you need it. Some free options have no customer support to turn to. Instead, consider a video cutter that will offer helpful and responsive customer support when picking.
- Video Format Support
Before choosing a paid or free option, you need to consider if it would support the video format you prefer. You might be using different video formats, and you want to ensure you’re not limited to select options. You also want a video cutter that offers various output formats.
FAQs about Cut Video For Instagram
- How do you post long videos on Instagram without splitting? Instagram allows users to post long videos on the app, as long as 60 seconds. Alternatively, you can use the IGTV to upload long clips on Instagram without splitting.
- What is multi-capture on Instagram: This tool allows you to create and share multiple photos on your stories.
- How do I split the video into two parts for Instagram on Mac? The paid and free video cutters shared above will help you split a video into two parts for Instagram on Mac. Simply pick the option that fits your preference.
- Why can’t I split a video on iMovie? Maybe your iMovie software is experiencing a glitch; you can simply restart the software. Alternately, move the clip to the center row if you find the option greyed out. Moving the clip should help fix the issue.
Conclusion
Various tools are available to help you cut a video for Instagram on Mac. Therefore, just refer to the paid and free tools listed above whenever you need a video cutter. These video cutters are highly recommended and ensure the quality isn’t affected while cutting the video. When deciding which is the best option for you, free or paid, the factors listed will help you decide. Suppose you’re looking specifically for a video cutter that offers you all the features you need to enhance your video while providing an intuitive user interface. In that case, Wondershare Filmora is the ideal choice.
Instagram is a social media site owned by Facebook. However, its main focus is on sharing videos and photos. It also allows users to put up stories that only last 24 hours. Stories allow you to highlight some crucial aspects of your life. These stories could be made up of photos, texts, and videos. However, each story slide can only take up to 15 seconds of video.
Most times, your video would be longer than that. If you upload a video longer than the accepted 15 seconds, Instagram automatically trims it to 15 seconds. However, the resulting video might not be the parts you want to show to your audience. Maybe there’s a particular section you would like your followers to see. That’s why video cutters enter the picture.
A good video splitter to cut video for Instagram on Mac is necessary when you’re creating video content for your Instagram page. In addition, the video editing tool you choose must maintain the quality and the safety of the file. Therefore, we’ve selected the best tools to cut videos for Instagram on Mac. Next, we’ll explore these tools, highlighting their best features, cons, and how you can use them. On that note, let’s dive in.
Best Instagram Video Cutter for Mac - Filmroa Video Editor
Supported System: Windows and Mac
Splitting your Instagram video before sharing them makes it easier to highlight your best parts. If you’re wondering what the best tool to do that is, you’re in luck. Filmora Video Editor is the best video cutter for Mac for many reasons. Apart from cutting videos, it offers several editing tools to enhance your video. It provides video processing features like cropping, splitting, rotating, trimming, speed increase, and color correction. However, it also offers features for professional editing of videos.
Filmora supports all video formats, even the high-definition video formats for your editing. In addition, Wondershare Filmora offers you an intuitive and user-friendly interface compared to other video cutters out there. This makes it a fantastic choice for experts and novices alike. The steps to split your video and use other in-built features are pretty straightforward, and if you need tutorials, Wondershare Filmora makes them available.
For Win 7 or later (64-bit)
For macOS 10.14 or later
Steps to Cut Video for Instagram on Mac
Filmora makes it relatively easy to use its extensive features. You don’t need previous editing experience to use Wondershare Filmora. If you’re wondering how to cut video for Instagram on Mac, below are the steps to follow.
Step 1: Download Wondershare Filmore
First, you have to download the Filmora app on your Mac. You can get it on the App Store or the official website. After installation, launch Filmora to get started.
Step 2: Import Video
Once you install the app, you can import the video you would like to cut for Instagram on the app. Click ‘import media files here’ to choose a video file from your PC storage. Alternatively, you can drag and drop the Instagram video on the software’s timeline.
Step 3: Cut the Video
You can cut your video from any end you prefer. First, move the cursor where you would like to cut the video until the clip changes to the ‘I’ pointer. Then, you can move the cursor within the video length to cut to your preference.
Step 4: Split Instagram Video
You can also split the video into specific portions by dragging the slider to each endpoint and picking the scissors. Additionally, you can carry out more editing like adding transitions, sound effects, and more to beautify your video.
Step 5: Save Instagram Video
Now that the video is to your liking, hit the ‘export’ button and choose the output format you would prefer. Next, click ‘export’ to confirm your choice.
More Free Instagram Video Cutter for Mac to Cut Video For Instagram
Although Wondershare Filmore is the best option when you want to cut video for Instagram on Mac, other options are available. In this section, we’ll explore the free Instagram video cutters for Mac that you can use.
Lightworks
Supported System: Windows and Mac
Lightworks is one of the best video splitting tools you can use if you’re learning how to cut video for Instagram on Mac. It is best for both novices and professionals and allows you seamlessly cut the video to your desired part. With Lightworks software, you can easily get results.
Apart from cutting Instagram videos on Mac, there are several more editing features you can utilize to take your Insta video to the next level. It also allows you to combine several cut clips. Size isn’t an issue with Lightworks as it effortlessly handles large file sizes. It offers users all the features of a high-quality video processing video editor. The best part is that it allows you directly export your cut video to Instagram or any other social media platform you would prefer.
Pros
- It supports different audio, video, and image format
- It allows users to share projects to encourage collaborative workflow
- Easy to use by beginners and professionals
- Allows exporting of video to Instagram directly
Cons
- It doesn’t support 3D video editing
- You have to register before using the application
- No video stabilization feature
Step to Cut Video for Instagram on Mac Using Lightworks
The steps to using this software are pretty easy to follow. Below, we’ve outlined the steps to make it easier to use.
- Step 1: Download the Lightworks software on your Mac from the official software. Once you do this, install the app and launch the software to begin the video-cutting process.
- Step 2: Import the video into the software. You can do this by clicking ‘import video’ or simply dragging the clip into the timeline.
- Step 3: After uploading the clip on your timeline, you can start cutting the video to your preference. Simply slide the cursor to the point you want to cut from and press the ‘c’ key on your keyboard.
- Step 4: After cutting the part you want, erase the rest by using the deleting button.
- Step 5: Click the ‘all’ option and then choose ‘export’ from the menu that appears to save your newly-cut video. You can also export directly to Instagram to save space and time.
Avidemux
Supported System: Windows and Mac
Another free video cutter that you can use when learning how to cut video for Instagram on Mac is Avidemux. This app is simple and offers simple filtering, cutting, and encoding features. As a result, it makes it relatively easy for beginners to split, cut, and trim videos. In addition, Avidemux offers users an intuitive user interface that makes it easy to know the next step to take.
Avidemux supports the most common formats like AVI, MP4, and more. It also offers different filters to spice up your Instagram videos. You can resize your video and also color correct your video. It is not an advanced tool for professionals because it doesn’t offer advanced tools. However, if you simply want to cut video for Instagram for Mac, this free software helps you achieve that.
Pros
- It supports common video formats
- It’s easy to cut videos for Instagram using keyboard shortcuts
- Offers various filters for enhancing video
- It is free to use
- Easy for beginners to use
Cons
- It crashes sometimes
- There are limited features in the editing software
Steps to Cut Video for Instagram on Mac Using Avidemux
Avidemux has a user-friendly interface that makes it easy to cut and save your Instagram video within minutes. Below are the simple steps to cut Instagram videos you should follow.
- Step 1: Download Avidemux on your Mac and install it. After installation, launch Avidemus to begin cutting your Instagram video.
- Step 2: Next, load the file you would like to work with
- Step 3: Next, navigate to the portion of the video you would like to cut and check its ‘frame type.’ At the beginning, where you would like to cut the video from, click the ‘A’ button. It automatically records it as the start of the clip.
- Start 4: Move to where you would like the clip to end and click the ‘B’ button. This will automatically cut the Instagram video to your preference.
- Step 5: Save the video by going to file and choosing ‘save’ from the available options. Next, click ‘save video’ and name the file.
You’re now ready to use your new video on Instagram or any other video-sharing platform you would prefer.
iMovie
Supported System: Mac
Apple first released this software in 1999, but it has continually updated it to offer more features to users. IMovie is available on all iOS devices, including your MacBook. Due to the frequent upgrades, this software makes editing relatively easy for beginners. The user interface is user-friendly, and it is entirely free to use. It is also an excellent choice for cutting your Instagram videos.
One of the reasons Mac users love this app is that there’s no need for installation and downloading. There are different effects available to enhance your video. You can also use ready-made templates on the software that offers popular music and stunning graphics. In addition, you can also add transitions, change speed, and many more with this software.
Pros
- It puts your content in different media libraries to help you stay organized
- It offers access to various video and audio filters
- It provides a stability feature that’s not available with many Instagram video cutting tools
- It allows you to share directly on Instagram
- It is easy for beginners to use
Cons
- It lacks some useful controls
- It doesn’t allow tagging when you share directly to Instagram
- It only supports two video tracks
Steps to Cut Video for Instagram on Mac Using IMovie
If you want to cut your video for Instagram using IMovie, below are the steps you need to follow.
- Step 1: Open iMovie on your Macbook to get started
- Step 2: Now, create a new project and name the project with a name you prefer
- Step 3: Import your video to IMovie by granting the software access to your computer’s video library.
- Step 4: Start cutting out any part you don’t want; you can also trim the video in-between if there are parts within the clip you don’t want.
- Step 5: You can add filters, transitions, or any other effect you would like to enhance your video.
- Step 6: Finally, you can save your file on your Mac or upload it directly to Instagram.
More Paid Instagram Video Cutter for Mac to Cut Video For Instagram
Now that you know the top three free video cutters for Instagram on Mac, this section explores the best paid Instagram video cutter you can use to cut videos for Instagram on Mac. Without further ado, let’s take a look.
Movavi Video Editor
Supported System: Windows and Mac
This video editor is relatively easy to use and powerful. It offers many features that go beyond cutting video for Instagram. You can also utilize this video editing software to enhance your video and make it look professional. Movavi offers transitions, filters, titles, and many more features for your videos. It is easy for both novices and professionals to use this platform.
Movavi Video Editor supports all types of video formats for easy editing. It also allows you to set your video to full HD and 4K resolution so that the images are clean and clear. You can also convert to a new format without compromising the quality of your video. In addition, Movavi offers you a trial period you can use to check out the software to ensure it is the ideal option for you. With Movavi, you can also share directly to Instagram if you’re looking to save space on Mac.
Ros
- It allows you to cut videos and export them quickly
- It offers several other features to enhance your videos
- It supports all video formats
- It enables you to convert video to the new format without compromising the quality
- It is ideal for beginners and experts
Cons
- Subscription fees are pretty high
- Some of the settings can be quite complex for beginners
Steps to Cut Video for Instagram on Mac Using Movavi Video Editor
If you would like to try Movavi video editor but don’t know how to go about it, the steps below make it relatively easy.
- Firstly, Install Movavi Video Editor on your Mac and install the app following the instructions. After installation, launch the app to begin.
- Next, choose the video file you would like to cut by clicking ‘add files’ and selecting your media library.
- It will appear on the ‘media bin,’ and you’ll have to drag it to the timeline.
- Now, you can start cutting the video for Instagram. Click on the video and move the market to the point in the video you would like to cut. Next, click the split button.
- You can easily remove the unwanted segments by clicking delete after selecting it.
- After cutting your video, you can choose the output format you prefer and then click ‘export.’ Choose the folder on your Mac you would like to save to and click ‘start’ to begin the saving process.
Final Cut Pro
Supported System: Mac
Next on our list, we have Final Cut Pro, an excellent video cutter for Mac. It is software developed by Apple for professional video editing. This app is primarily for MacOS users, and it offers several cutting-edge editing features to ensure a smooth and high-resolution video. It supports different video formats and allows you to enhance audio, add effects, trim, and carry out 360-degree video editing if you want to improve your video.
This tool doesn’t offer a monthly subscription. Instead, users can simply make a one-time payment and have lifetime access to this editing tool. It is not an excellent choice for beginners as its advanced features and interface can be pretty complicated. However, if you want to give this video cutter ago, we’ll provide the steps to cut the video for Instagram below.
Pros
- It supports 360-video editing
- Performance is relatively fast and ensures an easy video-cutting process
- It supports different video formats
- It offers various editing tools to enhance your video for Instagram
Cons
- It isn’t ideal for beginners
- One-time payment is relatively high
- The interface can be quite confusing
Steps to Cut Video for Instagram on Mac Using Final Cut Pro
If you want to cut video for Instagram in Final Cut Pro, the blade tool is the best option. However, it can be pretty confusing to use Final Cut Pro if you’ve never used the software before. Follow the steps below to cut Instagram video using Final Cut Pro.
- First, you have to download the app; you can download it on the App Store or the official website.
- Next, install the video cutter on your Mac and launch it to begin cutting Instagram videos.
- Import the video you would like to cut by visiting the ‘file’ type and choosing ‘import.’ Next, choose media and select the video from the media library. Alternatively, you can simply press Command + I on your Mac keyboard to go straight to your PC storage.
- Next, move the imported clip to the timeline to begin the cutting process.
- Select the Tools menu and choose ‘Blade’ from the dropdown menu. You can also press the B key on your keyword to select this tool.
- Now, you’re ready to start cutting the video file. Move the selected blade tool to the frame you would like to cut from the clip and click.
- Next, move to where you would like the cut to the end and click again.
- That’s all you have to do. Once you cut the clip and you’re satisfied with your result, simply save your clip by hitting the ‘export’ button and choosing the location you prefer and your preferred output format.
Adobe Premiere Rush
Supported System: Windows and Mac
Premier Rush was designed for social media videos and to help vloggers make the most of their videos. Although it started as a mobile-only app, it now has a desktop option for Mac and Windows. The idea behind Rush is an editing tool that helps you edit your video and share it to your preferred social media platform fast. This editing tool offers a simple user interface, and the workflow is seamless to ensure speedy performance.
As long as you want a video cutter created for cutting video for Instagram on Mac, this software delivers. It offers different editing features to enhance your video. You can link your Instagram account and upload directly to the platform. It also allows you to save all edited video files on Cloud to save space on your MacBook.
Pros
- It allows you to transfer videos from Adobe Premiere Pro directly for editing
- Allows you to link your social media accounts for direct uploads
- It offers transitions, filters, and more editing tools to enhance your Instagram video
- You can save directly to the Cloud to save space and ensure easy access
- It is an excellent option for beginners
Cons
- You can’t change the output format
- It doesn’t offer ample audio tools
Steps to Cut Video for Instagram on Mac Using Adobe Premiere Rush
This section will cover all the crucial steps to get the most from Adobe Premier Rush. Keep reading to learn how to cut video for Instagram on Mac using Adobe Rush.
- Firstly, download and install the app on your Mac. Launch the software after installation to start editing
- Now, create a new project on the app and import the video you would like to cut for Instagram.
- Afterward, select the video you would like to cut, click ‘create,’ and you’re ready to begin.
- When the video appears on the timeline, select the video and click the ‘scissors’ icon on the left corner. This tool helps to cut your video to your preference.
- To use the scissors tool, simply go to the beginning of the video and drag the handle to where you would like the video to start. You can also do the same to the end by dragging the handle at the end to where you would prefer.
- After cutting your video, you can also utilize other editing features to enhance your video.
- Now, you’re ready to export your video. Simply click ‘share’ located at the top of the editing software and choose from the options whether you want to share directly to Instagram or save on Mac.
Which Should I Choose, Free or Paid Instagram Video Cutter?
Now that you know the best free and paid video cutters to cut Instagram videos, you’re probably wondering what the ideal option is. With so many options, you must make the right decision for your project. You need to consider several factors before you decide if a paid or free Instagram video cutter is the best option for you.
- Budget
When deciding between a paid or free Instagram cutter, one crucial factor is how much you’re willing to pay. If your budget is really low and doesn’t fit into any paid options, you can simply go for a free option. However, if the price isn’t an issue for you, going for a paid option is best because it offers you more editing features to enhance your video.
- Ease of Use
You should also consider how easy it is to use the video cutter. Some paid options are for professionals and can be challenging to understand. However, most free options offer poor performance times. The last thing Instagram users want is to devote hours to figure out where each tool is on the software. However, there are paid options with an intuitive interface that makes it easy to cut your Instagram video.
- Customer Support
You also need to consider whether customer support will be available when you need it. Some free options have no customer support to turn to. Instead, consider a video cutter that will offer helpful and responsive customer support when picking.
- Video Format Support
Before choosing a paid or free option, you need to consider if it would support the video format you prefer. You might be using different video formats, and you want to ensure you’re not limited to select options. You also want a video cutter that offers various output formats.
FAQs about Cut Video For Instagram
- How do you post long videos on Instagram without splitting? Instagram allows users to post long videos on the app, as long as 60 seconds. Alternatively, you can use the IGTV to upload long clips on Instagram without splitting.
- What is multi-capture on Instagram: This tool allows you to create and share multiple photos on your stories.
- How do I split the video into two parts for Instagram on Mac? The paid and free video cutters shared above will help you split a video into two parts for Instagram on Mac. Simply pick the option that fits your preference.
- Why can’t I split a video on iMovie? Maybe your iMovie software is experiencing a glitch; you can simply restart the software. Alternately, move the clip to the center row if you find the option greyed out. Moving the clip should help fix the issue.
Conclusion
Various tools are available to help you cut a video for Instagram on Mac. Therefore, just refer to the paid and free tools listed above whenever you need a video cutter. These video cutters are highly recommended and ensure the quality isn’t affected while cutting the video. When deciding which is the best option for you, free or paid, the factors listed will help you decide. Suppose you’re looking specifically for a video cutter that offers you all the features you need to enhance your video while providing an intuitive user interface. In that case, Wondershare Filmora is the ideal choice.
Also read:
- 2024 Approved 6 Best Text to Speech Generators for YouTube Videos Windows, Mac, Android, iPhone & Online
- New 2024 Approved 3 Ways to Combine 2 or 3 Videos Into 1
- Updated Guide Add LUTs in Premiere Pro with Ease for 2024
- Updated Best Movie Title Maker for 2024
- Steps to Add Subtitles in Canva for 2024
- New 2024 Approved Before & After Editing Trick - Filmora
- New How to Trim Video in QuickTime Player on Your Mac
- New Why Vimeo Slideshow Maker Become Popular
- Updated 2024 Approved 2 Methods to Crop Video in VLC
- New With the Datamoshing Effect, the User Can Damage the Video Clips to Offer a Glitch Effect. The Article Introduces Datamosh After Effects Its Workability in the Industry
- If You Are Looking Forward to Make Attractive and Customized Slideshows, Lightroom Is One of the Best Options that You Can Consider for 2024
- Need to Learn About Halftone Effects? Learn How to Quickly Create a Halftone Effect in Adobe Photoshop with Simple, Easy-to-Follow Instructions for 2024
- 2024 Approved Vlogs and Travel Content Are Incomplete without a Fast-Motion Effect. Learn Step-by-Step How to Make Fast Motion Video on an iPhone in This Article
- In 2024, Brightening a Video Doesnt Need to Be Complicated. This Article Will Discuss How to Brighten up Your Videos Easily Using Premiere Pro
- New 2024 Approved Effective 10 Ways to Convert YouTube to MOV at Ease PC & Online
- How To Fade Audio In Kinemaster
- New 2024 Approved Easy Steps to Create Intro Video with After Effects
- In 2024, Adobe Premiere Pro Guide to Slow-Down Video
- New Looking For a Cheap Camera to Make Slow Motion Video? Get It Now
- Updated How to Zoom Webcam on PC
- New How to Start a Video Editing Career
- 2024 Approved Steps to Create One Click Video Reverse Effect in Filmora
- New In 2024, How to Loop a Video on Android
- Are You in Search for a Step-by-Step Guide to How to Add Effects in TikTok? Here It Is. To Add some Flavor to Your TikTok Videos. Use These How to Add Effect to TikTok Recommendations
- Create Dynamic Text Animation in Filmora for 2024
- 2024 Approved A Roster of 8 Best Color Match Generators
- Updated 2024 Approved Add some Sci-Fi Touch to Your Next Video Content Using Wondershare Filmora Editing Tools to Create an Alternate Reality Effect
- Updated Steps To Fade Audio In Premier Pro
- Updated In 2024, Best Cinematic LUTs For Premiere Pro You Can Come Across
- 2024 Approved How to Create Loop Videos Using Filmora
- How To Add Motion Blur In Davinci Resolve?
- 2024 Approved Making Slow Motion Videos in Final Cut Pro The Best Methods
- How to Create Freeze Frame Clone Effect
- 2024 Approved Twitch Green Screen Guide
- New How To Make a Photo Collage in Microsoft Word — Step by Step Guide for 2024
- Updated 2024 Approved 7 Ways Add Subtitles to MKV Videos on All Platforms
- In 2024, Find Out About MAGIX Vegas Pro Pricing Plan and Features to See How the Software Can Help You with Your Video Editing Tasks
- New Ultimate Guide on How to Plan and Storyboard a Music Video
- New Detailed Guide to Merge Videos in VLC Media Player
- Updated Discord Is Becoming More Popular with Time with Millions of Users. Are You Thinking of Getting a GIF for Discord Profile? If Yes, Learn From This Piece Since We Have a Conclusive Summary of Getting a GIF Profile Picture for Discord
- How to Make Falling Text Effect in Filmora for 2024
- How to Use Phone Clone to Migrate Your Huawei P60 Data? | Dr.fone
- Why Your Xiaomi Redmi Note 13 5G Screen Might be Unresponsive and How to Fix It | Dr.fone
- In 2024, How To Use Special Features - Virtual Location On Samsung Galaxy A15 5G? | Dr.fone
- How to Bypass Google FRP Lock from OnePlus Nord CE 3 5G Devices
- Top 15 Male Anime Characters By Voting for 2024
- New The Best Translator to Translate Videos Online for 2024
- Updated What Is AI Background Generator?
- In 2024, Complete Review & Guide to Techeligible FRP Bypass and More For Infinix Note 30 VIP Racing Edition
- FRP Hijacker by Hagard Download and Bypass your Nokia 105 Classic FRP Locks
- In 2024, How to Change Lock Screen Wallpaper on Samsung Galaxy F54 5G
- Dose Life360 Notify Me When Someone Checks My Location On Xiaomi Redmi K70E? | Dr.fone
- Things You Dont Know About Vivo X100 Reset Code | Dr.fone
- How to Find iSpoofer Pro Activation Key On Samsung Galaxy F15 5G? | Dr.fone
- How to Transfer Photos From Lava Yuva 2 to Samsung Galaxy S21 Ultra | Dr.fone
- In 2024, How To Remove the Two Factor Authentication On Apple iPhone 14
- Life360 Learn How Everything Works On Samsung Galaxy XCover 6 Pro Tactical Edition | Dr.fone
- 7 Ways to Unlock a Locked Realme 11X 5G Phone
- 9 Solutions to Fix Process System Isnt Responding Error on Samsung Galaxy M54 5G | Dr.fone
- Title: Updated Best 12 AI Video Generators to Pick for 2024
- Author: Chloe
- Created at : 2024-04-24 07:08:40
- Updated at : 2024-04-25 07:08:40
- Link: https://ai-editing-video.techidaily.com/updated-best-12-ai-video-generators-to-pick-for-2024/
- License: This work is licensed under CC BY-NC-SA 4.0.
