
:max_bytes(150000):strip_icc():format(webp)/sony-wh-1000xm2-wireless-noise-cancelling-headphones-59c91370c412440010f51191.PNG)
Updated Best 22 Video Editing Tips to Know for 2024
Best 22 Video Editing Tips to Know
Whether your video is short or long, you may want to make it better and appealing. Video editing involves the manipulation of your videos through which the desired transformation is achieved and you can flaunt every move of your video in a more preferable way. Video editing involves cutting the video short, changing the speed, organizing the video in a seamless flow. In short, the better the cuts of your videos, the better your message/story is conveyed.
Part 1: Things to Learn Before Editing First Draft
You have shot your video and now you’re stuck on the post-processing of that video. Don’t worry! We got you covered through this article which will guide you through the different things which you must learn before editing the first draft of your video.
Start a video project
Your smartphone and digital camera can let you record multiple videos but what now? You head out to edit your first draft by choosing a suitable platform or software and then you can surely lay back and see the software doing wonders to your raw videos. By starting off with editing, you choose your video editing preferences and then you just let the video editing tools do the magic.
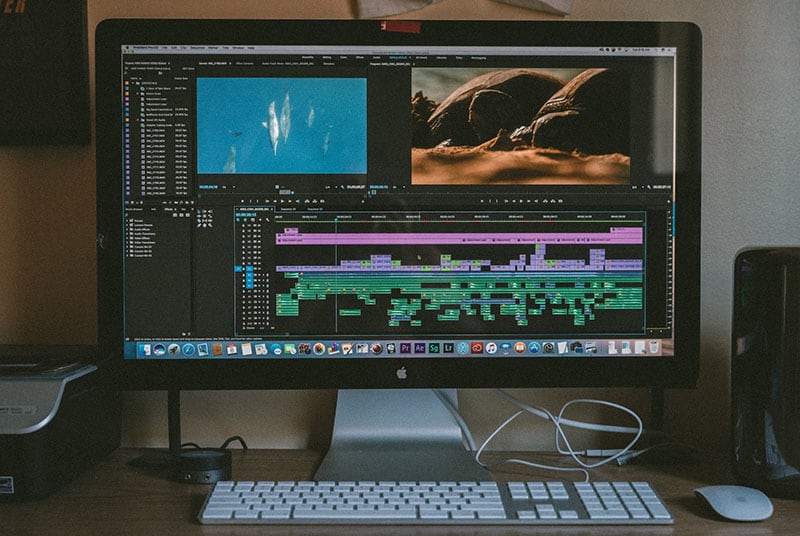
Get to know the video editing software workspace
Video editing software offer customizable workspaces for different editing tasks. The software workspace streamlines routine actions you take with clips, like editing clips, making DVD and Blu-ray menus, and sharing movies. By placing panels in the layout that best matches your working style, you can personalize your workspace. The additional panels adjust automatically to fit the window as you rearrange them. For various jobs, such as one for editing and one for preview, you can build and store multiple workspaces.
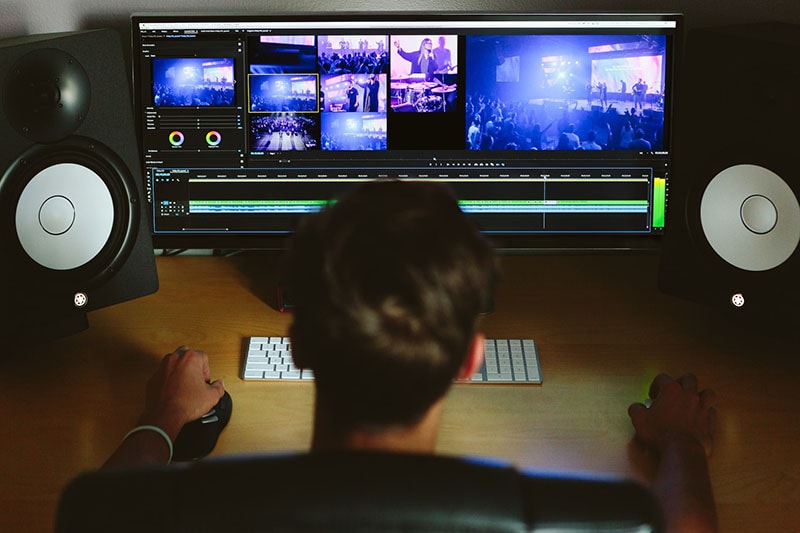
Understand the timeline
The timeline of your video is the backbone of your digital video editing process. It’s called a timeline because the various pieces of video will be lined up horizontally. In a video editing software, the timeline is where you arrange your video clips and plan out all the modifications you want to do. As you work, you will see every single one of your video and audio clips, effects, and transitions sorted chronologically from beginning to end. All the fundamentals of video editing, including reordering, trimming, and enhancing your footage, are available. To preview how your adjustments will turn out, you can also play your project at any point in the timeline.
Add clips to timeline
When you have grasped the idea behind a timeline, the next step you need to follow is to add clips into your timeline. Before adding clips to your timeline, it is suggested that you label each clip. Although it does seem like a lot of work, it will be easier to locate all of the clips later on if you’re working on a large project. after the footages are gathered and named, add important clips in the beginning of the timeline to begin establishing the video’s overall structure and order.
Editing tools
Besides basic cutting, trimming and cropping, video editing software offer multiple professional editing tools which enhance the outlook your videos and make them 10x better. For example, instead of cutting up a clip into a bunch of small clips and unwanted gaps, use the Ripple Edit tool keep your timeline clean. This means when a clip is trimmed, it causes a ripple effect throughout the rest of your timeline, shifting all other clips into a new timeline position.
Similarly, when working with lengthy timelines, the Razor tool is also really helpful because you can select the clip you wish to cut by dragging your razor over it. So, the Razor cut is the tool to use if you need to make a lot of cuts in your videos quickly.
Syncing audio and video
You already know how annoying it can be if audio and video don’t sync while you’re listening to a podcast or viewing a YouTube vlog. The video editing software offer helpful manual and auto sync tools. It can be though a bit of hard work for beginners, but the ‘Lights, Camera, Action’ approach works best in syncing your audio with your video. To sync audio, you need to record audio first and then through matching the wavelengths displayed on your timeline, you can sync the audio with your video.
Edit download talking head/interview footage
Now with professional video editing tools, you can make ‘talking head videos’ if you want to share your expertise as a YouTube vlogger or if you want to do employee training. Talking head films are a fantastic way to stimulate the mind and the heart while increasing learner retention in this digital age.
Additionally, with other video editing tools, you can edit your interview footages and for that, you don’t have to mess with timestamps, cutting or splicing videos, or creating transitions between clips, you just edit the transcript of the video and the video edits itself to match.
Video properties: Scale, position, opacity
Any screen recording, camera-based video, imported video clips, and text picture clips can have their visuals altered using video properties. In video editing software, multiple video properties are offered which include scaling, positioning, rotating, changing the opacity, changing level of reflection and shadow. Additionally, Video properties also include editing the video as a whole or just altering a clip from the video.
Types of cuts: Straight, J-Cut, L-Cut etc
The different types of cuts used in the video editing process is an effective way to make the transitions in your video pop. Basically, these cuts join two or more clips together via audio. Professional editors call these cuts as ‘split edits. The most common cuts are called J-Cut and L-Cut. They help to mix the content’s flow and keep the on-screen narrative in motion. In essence, these edits are necessary to make your scenes feel warm and more authentic.
Part 2: Practical Video Editing Tips
Choose right software
The push start of video editing for beginners is based on one common step: know your software or workspace. Selecting the appropriate software for editing your video is the first step in streamlining your video editing process. Although all software often includes the tools that you need to make ordinary video edits, you could favor one over the others based on its usefulness, digital interface, and features. Instead of just using the latest and trending video editing software available, the key is to choose what functions for you and your editing style.
Use a fast computer
Slow rendering hinders video editing process and other commands given to a computer. From a practical point of view, it is recommended that irrespective of the model of the computer or version of your software; your computer must be efficient to help you to access your files and software easily and to speed up your export time. With a slow computer, you will definitely feel stuck and the video editing complications will haunt you in your dreams.
Watch video editing tutorials
None of us is a pro until we’ve practiced something enough to know everything about it. Video editing requires both; technical knowledge as well as your creativity, so it is better not to do try things on your own. A little guidance can surely help you get through the basics of the video editing process. There are tons of helpful tutorials for making excellent videos on YouTube, vlogs, and educational websites. The majority of tutorials you’ll discover online are free, making the readily available at the tip of your fingers.
Get the project files
Most of the beginner video editors prefer to use the same project files as the tutorial instructors when they are following along. Your work will exactly resemble the demo’s sample, which will aid in your understanding of the steps. For precisely this reason, many tutorials let you download the project files. You can repeat a process with your own video files once you’ve mastered this technique.
Edit for a story
Remembering your creative objective to create a wonderful story or message through your edited video is one of the most crucial lessons you should learn from this article. It is critically important that you make your film visually appealing and dramatically engaging to effectively evoke the right emotions and to communicate your desired message. Instead of merely adding a huge amount of effects to wow your audience, use your practical and technical skills to do this.
Maintain an efficient workflow
You’ll need to be systematic and organized in addition to having an editing software if you want to become a more competent editor. Putting your projects and files in folders that you may use repeatedly is one method to streamline your process. Besides this, organizing your projects and files into an external hard drive or USB is recommended in case of losing access to your intricately designed projects.
Utilize keyboard shortcuts
Keyboard shortcuts speed up the process of video editing and save you ample time. Different keyboard shortcuts are compatible with different video editing software; leaving a few which are mutual in every software. Don’t attempt to put all of these shortcuts into action at once. Pick a small number to begin with, and as they become instinctive, add more. You’ll progress more quickly if you use less mouse while editing your video.
Learn important terms
As a beginner, you may not want to feel a lump in the throat caused by the complicated dictionary of video editing software. There are some broad video editing terms that refer to videography as a whole as well as video editing terms specific to the process of editing footage. You must first learn what these terms means for example you may want to know what the terms like ‘aspect ratio, B-roll, bit rate, close up, compression, crop and compositing’ mean.
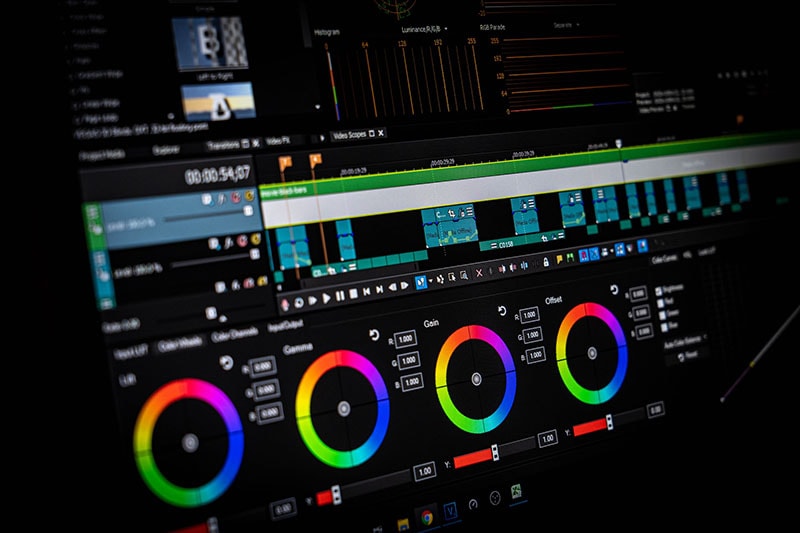
Color correct your clips
Do you own a rather boring video? Perhaps it’s a little too dull or the colors don’t stand out as much as they should? A crucial step is to modify the video’s color. This will assist in reducing the saturation and revive your video. Yet, there are some color correcting presets which can be easily accessed in different video editing apps.
Select good music
You ever saw an ad on YouTube or other social media platforms without an audio background. You may just want to skip it because the video, which may apparently be appealing, fails to strike you. Coordinating and complimenting your video with a music in the background is like cherry on top. It’s a huge plus to attract viewers’ attention. Though it is necessary that the music you choose must be relevant to your video file and should target the majority. So, choose good music to adorn your videos and trigger emotions in your target audience.
Add text and graphics
Some people are attracted more towards textual descriptions rather visual representation of content. It is crucial that considering the preferences of majority, you add significant details to your video which can target your audience in a multidimension. You might need to include more text in addition to the title, opening/closing billboards (for broadcasting), and film credits, depending on the type of film you’re making. However, you can make dazzling visuals using your editing program if you feel the urge to do so.
Export web versions
When your film is finished and is ready to be exported, you would have a natural urge to export it at the highest video resolution possible. If it’s going to be shown in theatres and on ultra-HD screens, this is unquestionably the best course of action. However, you should also export smaller, higher-quality versions for simpler viewing in the modern day where video projects are typically promoted online and on social media.
The objective of creating a file for the web is to keep its high quality while not making it too large for upload and online viewing. Don’t worry if you’re unsure of the export settings to utilize. Websites like Facebook, YouTube, and Vimeo all provide suggested export settings to assist you in correctly resizing your content.
Part 3: 10 Advanced Editing Tips for Professionals
We all definitely have experimented with video editing tools to some extent. But now, it is definitely time to become a pro. Don’t worry, the process isn’t as scary as we imagine it to be. This article is your best stop to grab some fine guidelines about how to become a video editor, in fact, a Pro video editor.
- Make titles stand out
You’re skilled in video editing, but do your titles seem a little…unfinished? Do those lower thirds strike you as being monotonous and boring? Is your typography competing for attention against your pictures? It appears that you would benefit from some basic title design advice, and lucky for you, we have some. Your title must be readable by majority and always choose your safe way in selecting texts for example, a sans-serif typeface is usually going to be a safe choice for video. You can also animate text to highlight it so that it is more captivating.
- Put video inside text or logos effects
Videos resonate with your brand and content if you add a specific logo or text effects to it. Almost all the video editors allow this featuring so that the identification of your work is maintained and copyright claim can be imposed if you see your content being copied or manipulated.
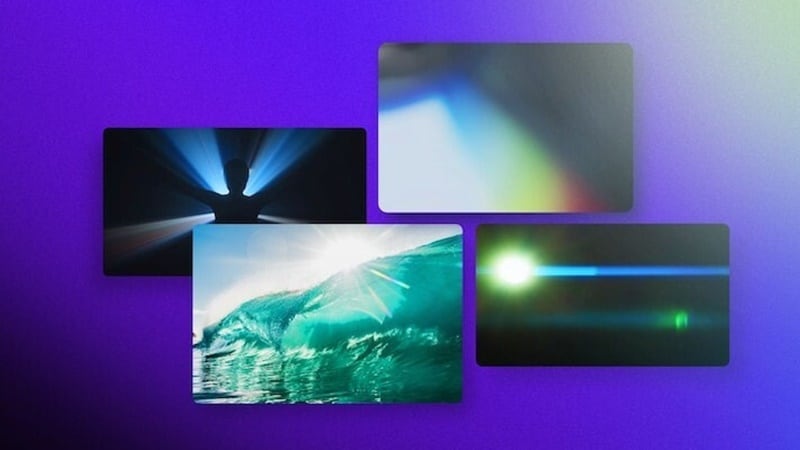
- Add light leaks, film burns and lens flares
Incorporating unique transitions into your monotonous videos can get you your viewer’s attention in a go. Lens flares, light leaks, and film burns can result in a unique look, but are not always easy to add naturally in-camera. Some of the best video editing software which allow access to adding lens flares, light leaks and film burns include: Free 4K Light Leaks – RocketStock, Motion Array Free Light Leaks, WZZLY Free Light Leaks, LIGHT LEAK FILM OVERLAY and many more.
- Add the vintage old film look
The quick Instagram-category of filters are common today but what makes your videos more natural and appealing is the addition of some presets which almost every video editor offers. These presets add a classic vintage old film look to your videos by manipulating color correction effects, framerate settings, overlays, and aspect ratio hacks. Some popular vintage old film effects are found in software namely VSDC, VEED, Adobe Premium Pro and many others in list.
- Add type-on effect
A type-on effect added to your videos comprehend your content more firmly. Simply by tabbing on ‘Add text effect’ in any video editor, you can add type-on effect to your videos and to add ravishing component to the overall structure of your video.
- Zoom in or out effect
The zoom-in or out feature (if available) in your video editing software can allow you to magnify any part of your video quickly and easily. Some of the best video editors featuring this specification include: Wondershare DemoCreator Zoom in Video Effect, DaVinci Resolve, Wondershare Filmora , Windows Movie Maker and Apowersoft Screen Recorder.
- Custom wipe on/off reveal effect
The wipe on/off reveal transition or effect is one of the earliest ways of transitioning from one scene to another. An object (usually a line) moves across the screen, revealing the next scene, while simultaneously removing (or wiping) the previous scene and when used properly, they can create a very powerful effect. It involves creative fading in and out transitions to give a more dramatic look.
- 4k, 8k, HD resolution
The latest video editing software offer the export your edited video in multiple formats, out of which 4k, 8k and HD resolution formats are preferable for majority of the professional video editors. It is necessary that even after the video is uploaded to a platform, the pixels do not decrease and the quality of the video is maintained. Although attractive to the viewers, the higher the resolution, the more the data with which you must deal. It is suggested that a standard or default resolution is chosen to play and replay the video in different computers.

- B-roll
B-roll is secondary video that is frequently used as cutaway video to add context and visual interest to your story. The term is originated from the early days of Hollywood when there used to be an A-roll which was the primary video and B-roll which served as a secondary video footage. This can help you visualize your video from different dimensions, giving it a more realistic look for captivating viewers.

- Compression rate, bit depth, bit
The amount of data the camera records each second is referred to as bit rate. Every single second of a video is subject to significant data processing by cameras. The higher the quality of the video, the more is the bit rate. Bit depth refers to the number of colors your camera can read per pixel. Common bit depths are 8-bit and 10-bit, which enable a camera to read 256 million or 1.07 billion colors respectively. To upload your edited video, a compression is usually required to convert your resolution to internet quality so that the upload can be made simpler, without distorting the video resolution.
Whether your video is short or long, you may want to make it better and appealing. Video editing involves the manipulation of your videos through which the desired transformation is achieved and you can flaunt every move of your video in a more preferable way. Video editing involves cutting the video short, changing the speed, organizing the video in a seamless flow. In short, the better the cuts of your videos, the better your message/story is conveyed.
Part 1: Things to Learn Before Editing First Draft
You have shot your video and now you’re stuck on the post-processing of that video. Don’t worry! We got you covered through this article which will guide you through the different things which you must learn before editing the first draft of your video.
Start a video project
Your smartphone and digital camera can let you record multiple videos but what now? You head out to edit your first draft by choosing a suitable platform or software and then you can surely lay back and see the software doing wonders to your raw videos. By starting off with editing, you choose your video editing preferences and then you just let the video editing tools do the magic.
Get to know the video editing software workspace
Video editing software offer customizable workspaces for different editing tasks. The software workspace streamlines routine actions you take with clips, like editing clips, making DVD and Blu-ray menus, and sharing movies. By placing panels in the layout that best matches your working style, you can personalize your workspace. The additional panels adjust automatically to fit the window as you rearrange them. For various jobs, such as one for editing and one for preview, you can build and store multiple workspaces.
Understand the timeline
The timeline of your video is the backbone of your digital video editing process. It’s called a timeline because the various pieces of video will be lined up horizontally. In a video editing software, the timeline is where you arrange your video clips and plan out all the modifications you want to do. As you work, you will see every single one of your video and audio clips, effects, and transitions sorted chronologically from beginning to end. All the fundamentals of video editing, including reordering, trimming, and enhancing your footage, are available. To preview how your adjustments will turn out, you can also play your project at any point in the timeline.
Add clips to timeline
When you have grasped the idea behind a timeline, the next step you need to follow is to add clips into your timeline. Before adding clips to your timeline, it is suggested that you label each clip. Although it does seem like a lot of work, it will be easier to locate all of the clips later on if you’re working on a large project. after the footages are gathered and named, add important clips in the beginning of the timeline to begin establishing the video’s overall structure and order.
Editing tools
Besides basic cutting, trimming and cropping, video editing software offer multiple professional editing tools which enhance the outlook your videos and make them 10x better. For example, instead of cutting up a clip into a bunch of small clips and unwanted gaps, use the Ripple Edit tool keep your timeline clean. This means when a clip is trimmed, it causes a ripple effect throughout the rest of your timeline, shifting all other clips into a new timeline position.
Similarly, when working with lengthy timelines, the Razor tool is also really helpful because you can select the clip you wish to cut by dragging your razor over it. So, the Razor cut is the tool to use if you need to make a lot of cuts in your videos quickly.
Syncing audio and video
You already know how annoying it can be if audio and video don’t sync while you’re listening to a podcast or viewing a YouTube vlog. The video editing software offer helpful manual and auto sync tools. It can be though a bit of hard work for beginners, but the ‘Lights, Camera, Action’ approach works best in syncing your audio with your video. To sync audio, you need to record audio first and then through matching the wavelengths displayed on your timeline, you can sync the audio with your video.
Edit download talking head/interview footage
Now with professional video editing tools, you can make ‘talking head videos’ if you want to share your expertise as a YouTube vlogger or if you want to do employee training. Talking head films are a fantastic way to stimulate the mind and the heart while increasing learner retention in this digital age.
Additionally, with other video editing tools, you can edit your interview footages and for that, you don’t have to mess with timestamps, cutting or splicing videos, or creating transitions between clips, you just edit the transcript of the video and the video edits itself to match.
Video properties: Scale, position, opacity
Any screen recording, camera-based video, imported video clips, and text picture clips can have their visuals altered using video properties. In video editing software, multiple video properties are offered which include scaling, positioning, rotating, changing the opacity, changing level of reflection and shadow. Additionally, Video properties also include editing the video as a whole or just altering a clip from the video.
Types of cuts: Straight, J-Cut, L-Cut etc
The different types of cuts used in the video editing process is an effective way to make the transitions in your video pop. Basically, these cuts join two or more clips together via audio. Professional editors call these cuts as ‘split edits. The most common cuts are called J-Cut and L-Cut. They help to mix the content’s flow and keep the on-screen narrative in motion. In essence, these edits are necessary to make your scenes feel warm and more authentic.
Part 2: Practical Video Editing Tips
Choose right software
The push start of video editing for beginners is based on one common step: know your software or workspace. Selecting the appropriate software for editing your video is the first step in streamlining your video editing process. Although all software often includes the tools that you need to make ordinary video edits, you could favor one over the others based on its usefulness, digital interface, and features. Instead of just using the latest and trending video editing software available, the key is to choose what functions for you and your editing style.
Use a fast computer
Slow rendering hinders video editing process and other commands given to a computer. From a practical point of view, it is recommended that irrespective of the model of the computer or version of your software; your computer must be efficient to help you to access your files and software easily and to speed up your export time. With a slow computer, you will definitely feel stuck and the video editing complications will haunt you in your dreams.
Watch video editing tutorials
None of us is a pro until we’ve practiced something enough to know everything about it. Video editing requires both; technical knowledge as well as your creativity, so it is better not to do try things on your own. A little guidance can surely help you get through the basics of the video editing process. There are tons of helpful tutorials for making excellent videos on YouTube, vlogs, and educational websites. The majority of tutorials you’ll discover online are free, making the readily available at the tip of your fingers.
Get the project files
Most of the beginner video editors prefer to use the same project files as the tutorial instructors when they are following along. Your work will exactly resemble the demo’s sample, which will aid in your understanding of the steps. For precisely this reason, many tutorials let you download the project files. You can repeat a process with your own video files once you’ve mastered this technique.
Edit for a story
Remembering your creative objective to create a wonderful story or message through your edited video is one of the most crucial lessons you should learn from this article. It is critically important that you make your film visually appealing and dramatically engaging to effectively evoke the right emotions and to communicate your desired message. Instead of merely adding a huge amount of effects to wow your audience, use your practical and technical skills to do this.
Maintain an efficient workflow
You’ll need to be systematic and organized in addition to having an editing software if you want to become a more competent editor. Putting your projects and files in folders that you may use repeatedly is one method to streamline your process. Besides this, organizing your projects and files into an external hard drive or USB is recommended in case of losing access to your intricately designed projects.
Utilize keyboard shortcuts
Keyboard shortcuts speed up the process of video editing and save you ample time. Different keyboard shortcuts are compatible with different video editing software; leaving a few which are mutual in every software. Don’t attempt to put all of these shortcuts into action at once. Pick a small number to begin with, and as they become instinctive, add more. You’ll progress more quickly if you use less mouse while editing your video.
Learn important terms
As a beginner, you may not want to feel a lump in the throat caused by the complicated dictionary of video editing software. There are some broad video editing terms that refer to videography as a whole as well as video editing terms specific to the process of editing footage. You must first learn what these terms means for example you may want to know what the terms like ‘aspect ratio, B-roll, bit rate, close up, compression, crop and compositing’ mean.
Color correct your clips
Do you own a rather boring video? Perhaps it’s a little too dull or the colors don’t stand out as much as they should? A crucial step is to modify the video’s color. This will assist in reducing the saturation and revive your video. Yet, there are some color correcting presets which can be easily accessed in different video editing apps.
Select good music
You ever saw an ad on YouTube or other social media platforms without an audio background. You may just want to skip it because the video, which may apparently be appealing, fails to strike you. Coordinating and complimenting your video with a music in the background is like cherry on top. It’s a huge plus to attract viewers’ attention. Though it is necessary that the music you choose must be relevant to your video file and should target the majority. So, choose good music to adorn your videos and trigger emotions in your target audience.
Add text and graphics
Some people are attracted more towards textual descriptions rather visual representation of content. It is crucial that considering the preferences of majority, you add significant details to your video which can target your audience in a multidimension. You might need to include more text in addition to the title, opening/closing billboards (for broadcasting), and film credits, depending on the type of film you’re making. However, you can make dazzling visuals using your editing program if you feel the urge to do so.
Export web versions
When your film is finished and is ready to be exported, you would have a natural urge to export it at the highest video resolution possible. If it’s going to be shown in theatres and on ultra-HD screens, this is unquestionably the best course of action. However, you should also export smaller, higher-quality versions for simpler viewing in the modern day where video projects are typically promoted online and on social media.
The objective of creating a file for the web is to keep its high quality while not making it too large for upload and online viewing. Don’t worry if you’re unsure of the export settings to utilize. Websites like Facebook, YouTube, and Vimeo all provide suggested export settings to assist you in correctly resizing your content.
Part 3: 10 Advanced Editing Tips for Professionals
We all definitely have experimented with video editing tools to some extent. But now, it is definitely time to become a pro. Don’t worry, the process isn’t as scary as we imagine it to be. This article is your best stop to grab some fine guidelines about how to become a video editor, in fact, a Pro video editor.
- Make titles stand out
You’re skilled in video editing, but do your titles seem a little…unfinished? Do those lower thirds strike you as being monotonous and boring? Is your typography competing for attention against your pictures? It appears that you would benefit from some basic title design advice, and lucky for you, we have some. Your title must be readable by majority and always choose your safe way in selecting texts for example, a sans-serif typeface is usually going to be a safe choice for video. You can also animate text to highlight it so that it is more captivating.
- Put video inside text or logos effects
Videos resonate with your brand and content if you add a specific logo or text effects to it. Almost all the video editors allow this featuring so that the identification of your work is maintained and copyright claim can be imposed if you see your content being copied or manipulated.
- Add light leaks, film burns and lens flares
Incorporating unique transitions into your monotonous videos can get you your viewer’s attention in a go. Lens flares, light leaks, and film burns can result in a unique look, but are not always easy to add naturally in-camera. Some of the best video editing software which allow access to adding lens flares, light leaks and film burns include: Free 4K Light Leaks – RocketStock, Motion Array Free Light Leaks, WZZLY Free Light Leaks, LIGHT LEAK FILM OVERLAY and many more.
- Add the vintage old film look
The quick Instagram-category of filters are common today but what makes your videos more natural and appealing is the addition of some presets which almost every video editor offers. These presets add a classic vintage old film look to your videos by manipulating color correction effects, framerate settings, overlays, and aspect ratio hacks. Some popular vintage old film effects are found in software namely VSDC, VEED, Adobe Premium Pro and many others in list.
- Add type-on effect
A type-on effect added to your videos comprehend your content more firmly. Simply by tabbing on ‘Add text effect’ in any video editor, you can add type-on effect to your videos and to add ravishing component to the overall structure of your video.
- Zoom in or out effect
The zoom-in or out feature (if available) in your video editing software can allow you to magnify any part of your video quickly and easily. Some of the best video editors featuring this specification include: Wondershare DemoCreator Zoom in Video Effect, DaVinci Resolve, Wondershare Filmora , Windows Movie Maker and Apowersoft Screen Recorder.
- Custom wipe on/off reveal effect
The wipe on/off reveal transition or effect is one of the earliest ways of transitioning from one scene to another. An object (usually a line) moves across the screen, revealing the next scene, while simultaneously removing (or wiping) the previous scene and when used properly, they can create a very powerful effect. It involves creative fading in and out transitions to give a more dramatic look.
- 4k, 8k, HD resolution
The latest video editing software offer the export your edited video in multiple formats, out of which 4k, 8k and HD resolution formats are preferable for majority of the professional video editors. It is necessary that even after the video is uploaded to a platform, the pixels do not decrease and the quality of the video is maintained. Although attractive to the viewers, the higher the resolution, the more the data with which you must deal. It is suggested that a standard or default resolution is chosen to play and replay the video in different computers.
- B-roll
B-roll is secondary video that is frequently used as cutaway video to add context and visual interest to your story. The term is originated from the early days of Hollywood when there used to be an A-roll which was the primary video and B-roll which served as a secondary video footage. This can help you visualize your video from different dimensions, giving it a more realistic look for captivating viewers.
- Compression rate, bit depth, bit
The amount of data the camera records each second is referred to as bit rate. Every single second of a video is subject to significant data processing by cameras. The higher the quality of the video, the more is the bit rate. Bit depth refers to the number of colors your camera can read per pixel. Common bit depths are 8-bit and 10-bit, which enable a camera to read 256 million or 1.07 billion colors respectively. To upload your edited video, a compression is usually required to convert your resolution to internet quality so that the upload can be made simpler, without distorting the video resolution.
Despite the Aforementioned Restrictions, Cartoon Video Makers Still Offer a Sea of Possibilities to Their Users, so Let’s Dive Into the Magical World of Animated Videos
Abundant Video Effects - Wondershare Filmora
Provide abundant video effects - A creative video editor
Powerful color correction and grading
Detailed tutorials are provided by the official channel
Introduction
There are some issues common to the video production process. However, animated or cartoon videos have helped to combat such issues. You do not need to scout for locations, go through a seemingly endless casting process, or rent the pricey equipment. A cartoon is simply a type of animation or an illustration that usually appears in a semi-realistic or an unreal style. In addition, it uses simple, satirical, and humorous drawing language to tell the story.
Although there are restrictions, there are a lot of possibilities cartoon video makers still offer to their users. Therefore, this article will share the top 10 best cartoon video makers online and on PC that you can use before diving into an animated video world.
So, here is what we shall learn about cartoon makers today:
In this article
01 Best 5 Online Cartoon Makers
02 Cartoon Video Maker for Desktop (Win and Mac)
03 How Can I Create My Own Cartoon Using Wondershare Anireel
Part 1: Best 5 Online Cartoon Makers
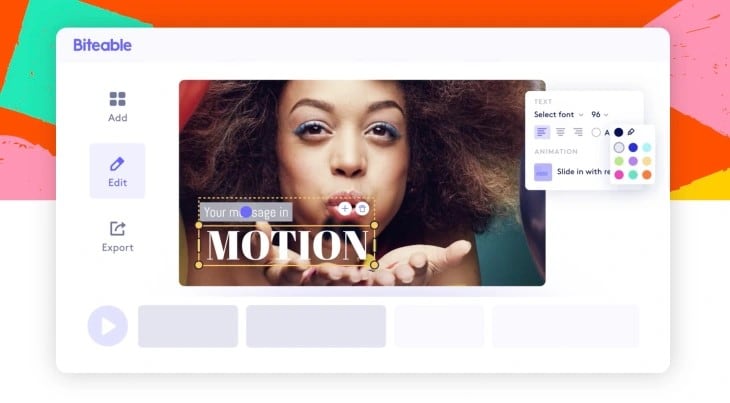
1. Biteable
Biteable provides a seemingly endless list of template categories to cater to your online media marketing needs. Aside from offering entertaining cartoon-making templates, the platform also allows users to create motion graphics or content, and Facebook covers for their social media channels.
Price: Free, $23 per month, billed annually.
Features:
- Offering library with lots of templates to choose from
- Free to use, except you are looking for additional features
- Five simple steps to an incredible cartoon video
- It has an easily customizable template
Pros
- It is a perfect option for social media managers
- Quickly create entertaining cartoons
- Used by biggies like Amazon, Microsoft, Google, Disney, BBC, Shopify, Samsung, and salesforce.
- Over 9 million users
Cons
- There is a mandatory registration
- There are no audio editing options
- The file-sharing capabilities are limited to YouTube and Facebook
- The download option is disabled in the free version
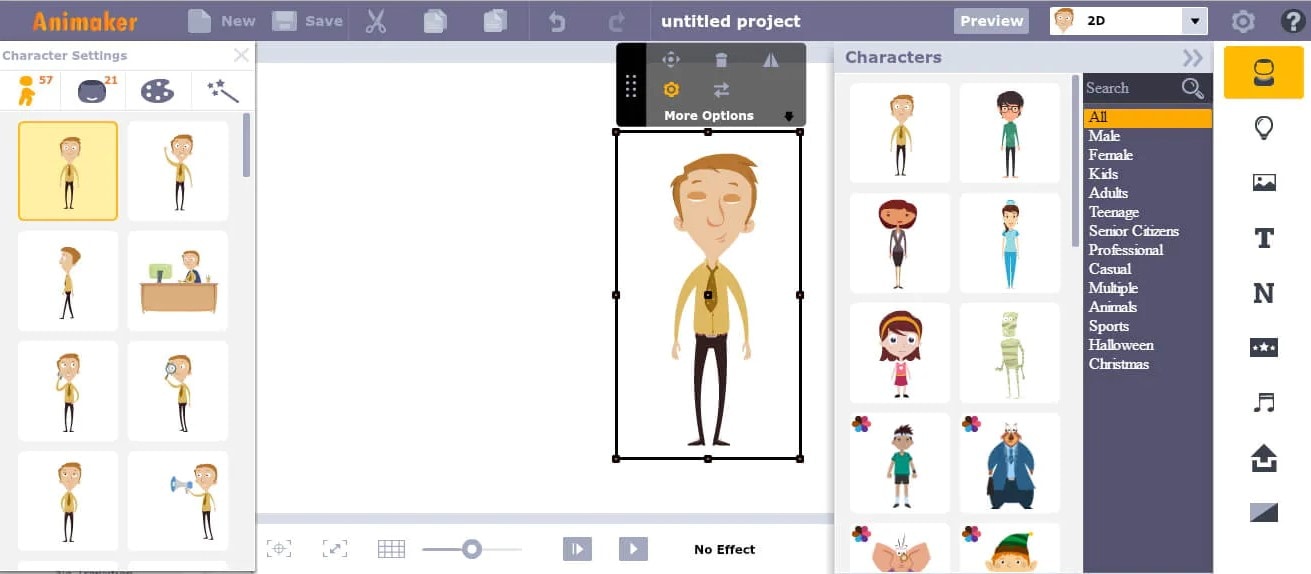
2. Animaker
With this animated maker, you get access to hundreds of animated characters, maps, and backgrounds. There are six (6) video styles available in this cartoon maker: Typography, Infographic, or 2D for different types of projects.
Price: Free version available. Subscription plans start at $12 per month/billed annually.
Features
- Different video styles, marketing, explainer, or 2D animation.
- Posts itself as the number 1 cartoon maker
- No need for a credit card to start.
- Four-step process; select template, customize it, add music, and download or share.
- 200+ voices, 25+ languages, and loads of customizable options.
- It offers auto-lip sync with advanced animation effects.
- There is a rich selection of 1000+ templates
Pros:
- Superb audio editing options
- Excellent and quick animation tools.
- Over 10 million users so far and still counting.
- Currently used by Amazon, Bosch, HP, Nokia, and Philips.
Cons:
- The monthly fee is pricey
- Account creation is mandatory for a free version
- The free version contains a watermark
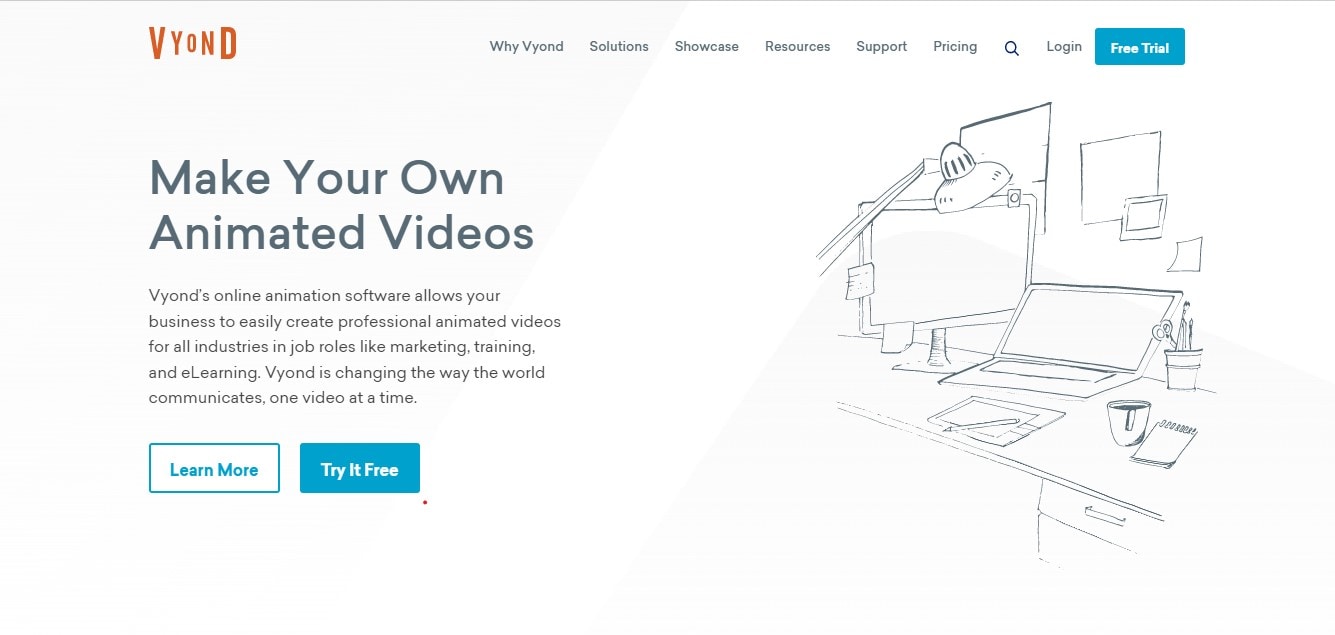
3. Vyond
Vyond, the cartoon creator launched in 2007, is probably one of the oldest online cartoon video makers. Additionally, it is still one of the most popular online destinations meant for anyone who wants to create an animated video quickly.
Price: Subscription plans start from $39 per month, billed annually.
Features:
- Perfect for animated video creation
- There is automatic character lip-syncing
- Try it for free before purchasing
- Make videos for training, e-learning, marketing, human resources, etc.
- The maximum duration of the video is 120 minutes
Pros:
- It has a fully customizable template
- There are high-end object and character animated features
- Certified by GDPR, TrustArc, BSI, and CCPA
- A wholesome cartoon makerfor enterprise and individual
- Data security and privacy assurance by BSI, CCPA, and GPDR.
Cons:
- It is quite expensive
- Vyond is not the best option for inexperienced animators
- The features depend on the subscription model
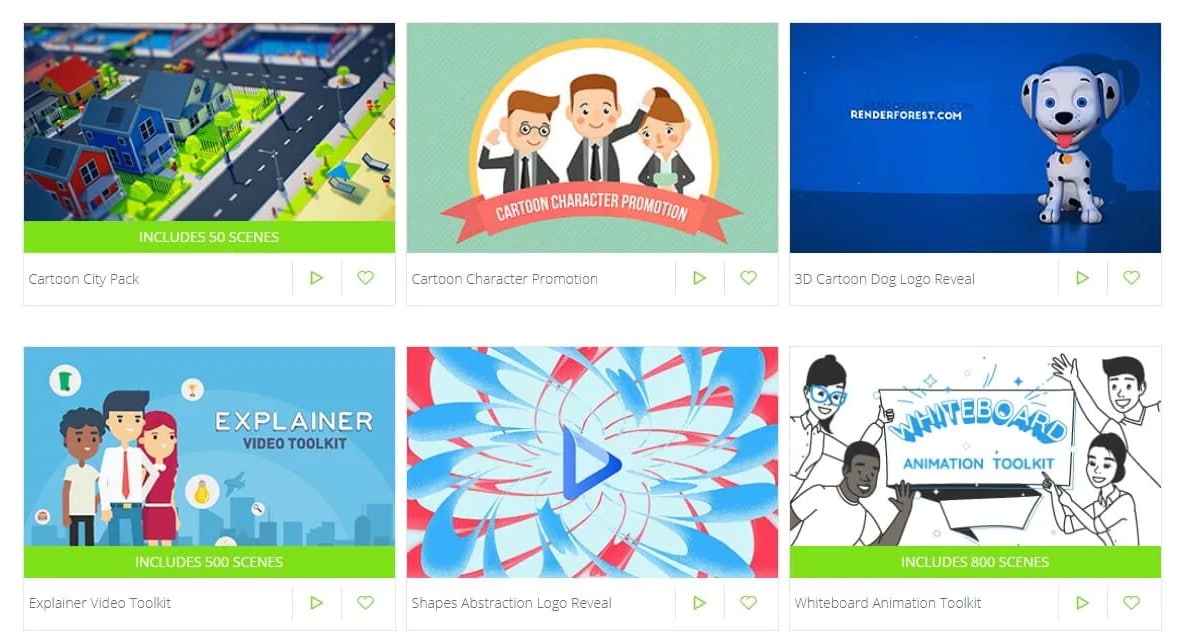
4. Renderforest
This is a famous online cartoon video maker for many purposes. Among the numerous options, the platform offers to its user. They include; 3D explainer videos, logo animations, or professional presentations.
Price: Free version available. Subscription plans start at $16 per month, billed annually.
Features:
- There is an extensive library of templates with numerous options
- Has a large online storage
- Was among the top 100 software companies in 2019.
- Top ranked solution holder for 2020
- Up to 250GB of online storage space
- Use the in-built template to make a story, customize the video, and then export it to share with your friends.
- Amadeus, Bose, BBC, Vodafone, Sony Music, and many others use Renderforest.
Pros:
- Produce videos like a pro
- Comes with an ultimate animation pack.
- Trusted by millions and one of the oldest cartoon makers.
Cons:
- A limited amount of commercial music tracks
- There are modest export options
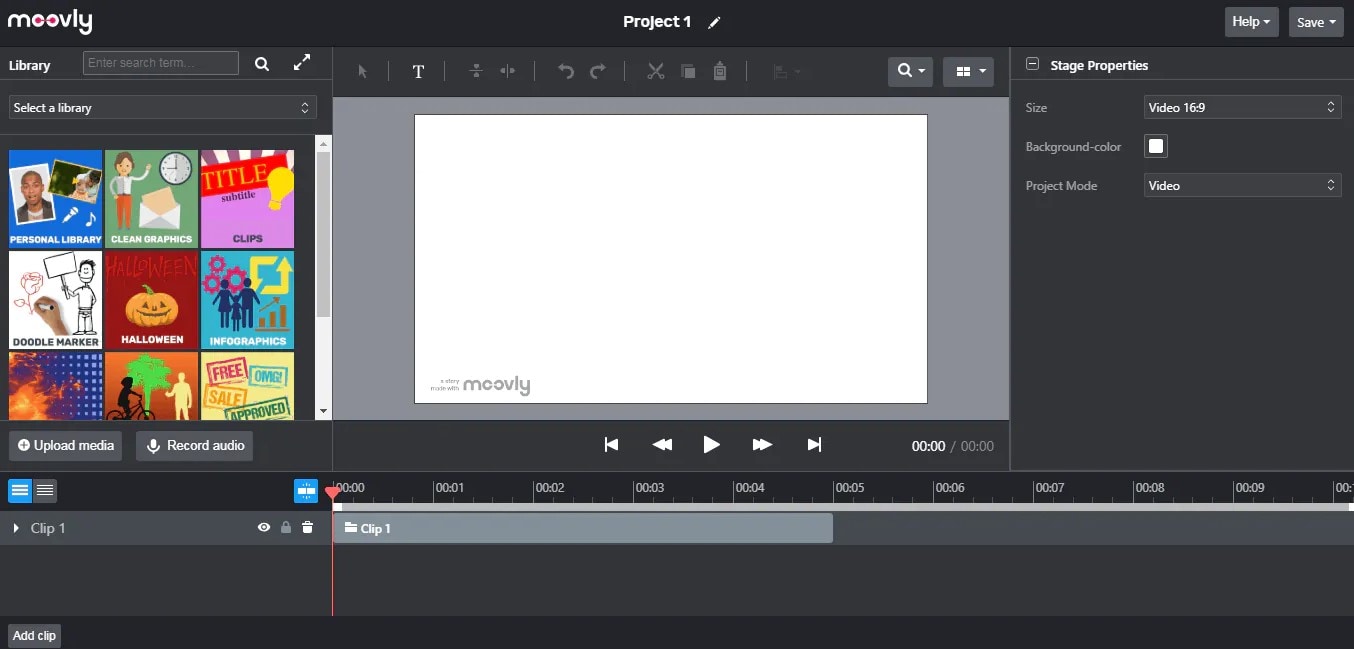
5. Moovly
With this cartoon maker, users must first log in. However, there is no need to create a new account as you can use your LinkedIn or Google account to sign in quickly.
Price: Free 30-day trial, $24.92 per month billed annually.
Features:
- Moovly is the perfect cartoon video maker for sales&marketing, human resources, internal communication, learning&development, agencies, and education.
- Apply expert features in one click with Moovly.
- Create videos and edit with browser-based or drag and drop features without installing software.
- Moovly has over 1.3 million free media, like images, sounds, music, and royalty-free stock videos at no extra charge.
- Besides, it offers 100 million extra media you can try and then purchase.
- You can add your images, music, and videos to create unique clips in style.
- Add text, remove color, add subtitles or generate them, auto-translate your text and subtitles, import PPT files, structure your content, record yourself or your computer screen, edit, mix, etc.
Pros:
- Even if users need to log in, they don’t need to create an account
- Allows users to import content from online sources like Storyblock, Shutterstock, etc.
- It is the number 1 customizable and straightforward solution to making cartoons.
- Use by Colgate-Palmolive, NHS, Teradata, Amadeus, Cisco, Continental, and Logitech.
- The interface is intuitive and user-friendly.
Cons:
- Watermarked videos during the free trial
- To export videos in HD 1080p quality, one needs to purchase one of the available plans.
Renderforest is the best cartoon maker online of the listed five in this article due to the vast library template and large online bandwidth.
Part 2: Cartoon Video Maker for Desktop (Win and Mac)
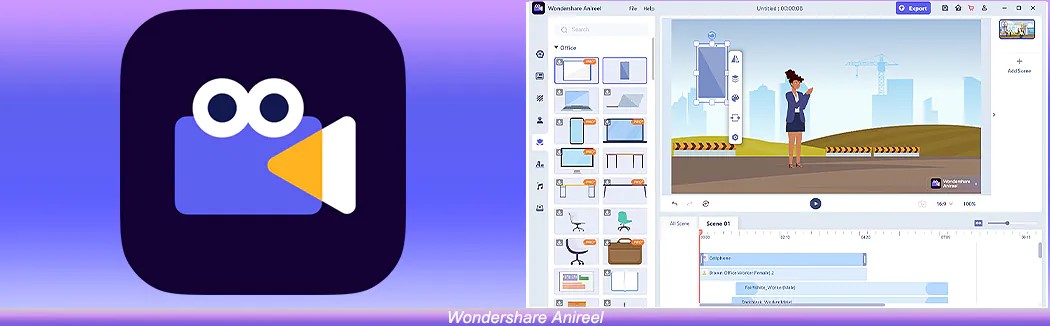
1. Wondershare Anireel
Anireel is one of the top animation software on the internet that allows users to bring their imaginations to life with a huge range of customizable elements and features.
Price: $9.99 per month billed annually and $19.99 monthly
Features:
- 40+ customizable templates
- Top animation software
- Compatible with Windows 11/10/8.1 (64 bit OS)
- Only three steps to an excellent animated video.
- Import images, videos, and sound in almost all formats.
- Create unique avatar, logo images, and more specific to your brand.
- The Deep Learning tech offers quick text-to-speech conversion.
- Animate camera movements, entry and exit effects, motion path, etc.
- Use the one-click option and change scripts to clips.
- Anireel cartoon video makercan lip-sync your characters with perfection.
- Quick and easy drag and drop editing.
Pros:
- It is convenient and simple to use
- Anireel has an intuitive interface
- The cartoon makeroffers a practical and seamless animated video editing
- It comes at an affordable and competitive price
Cons:
- It has a limited amount of assets
- Not suitable for too professional people to use.
2. Autodesk Maya
Autodesk Maya is one of the best animation tools used to create animation pictures, video games, and add 3D effects in motion pictures. Plus, this cartoon maker is the best if you require a high-quality visual impact.
Price: Free trial, $225 billed monthly.
Features:
- It offers AutoDesk financing for new buyers.
- Maya is the go-to shop for architects, engineers, designers, media, and entertainment.
- Shape 3D objects and add realistic effects with Maya cartoon maker’s NURBS modeling.
- The Integrated Arnold rendering technology lets you view scene changes in real-time.
- Maya has been part of the top movie makers, including the MCU.
- This cartoon video maker offers geometry-based polygon modeling and helps create accurate simulations for visual programming.
- Maya can load and change vast data sets at a faster pace.
Pros:
- It makes complex hand-made animation tasks extremely easy
- Efficient color management
- Allows the creation of realistic effects like cloth simulations and explosions
- 30-day free trial and 30-day money-back guarantee
- Meet deadlines, add fine details to develop even the most complex shots or characters.
- Excellent tool for professionals
Cons:
- The pro is quite expensive
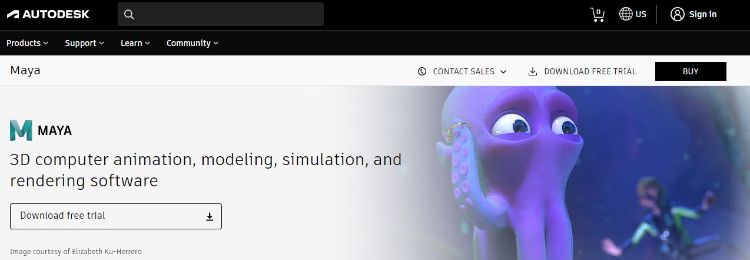
3. Adobe Animate
This is one of the most powerful animation software products on the internet that has been available for decades. It can animate images used for games, film, or online and produce HTML 5, WebGL, or Flash content.
Price: This cartoon creator offers three pricing plans starting at US$24.14/month
Features:
- Excellent for complex animation
- The capability of freehand drawing
- Animate, illustrate, and make 3D typography.
- Import and add vector drawings for further editing.
- Export your work as HTML5 Canvas, WebGL, Flash/Adobe AIR, GIF, or QuickTime movie.
- With the Bone tool, make your cartoon characters fluid and natural.
- Synchronize sounds and music for your project.
- Choose parts of the clip to be animated.
Pros:
- It has Puppeting features
- It is an excellent choice for complex animations
- It includes freehand drawing capability
Cons:
- It is not suitable for beginners
- Other Adobe software may be required while working on a project
4. Adobe Character Animator
Adobe Character Animator is another type of Adobe’s animation software stack that allows users to use motion to capture and create live animations of their 2D characters.
Price: Adobe Character Animator has two pricing plans starting at US$34,49/month for the first year
Features:
- This product requires other Adobe products to function
- Lots of options to export and import.
- Make your real-life cartoon using the Motion Capture feature in five steps.
- The Avatar will walk, talk, and copy your expressions in real-time.
- Integrate and add assets from other Adobe Creative Cloud apps.
- Auto lip-syncing and real-time facial movement capture.
- Works on iOS and Android.
Pros:
- Easy to replicate real-life movements and expressions with facial tracking.
- There are various import and export options.
Cons:
- It is not a standalone product.
- Users need to have a webcam and microphone to use the motion capture feature.
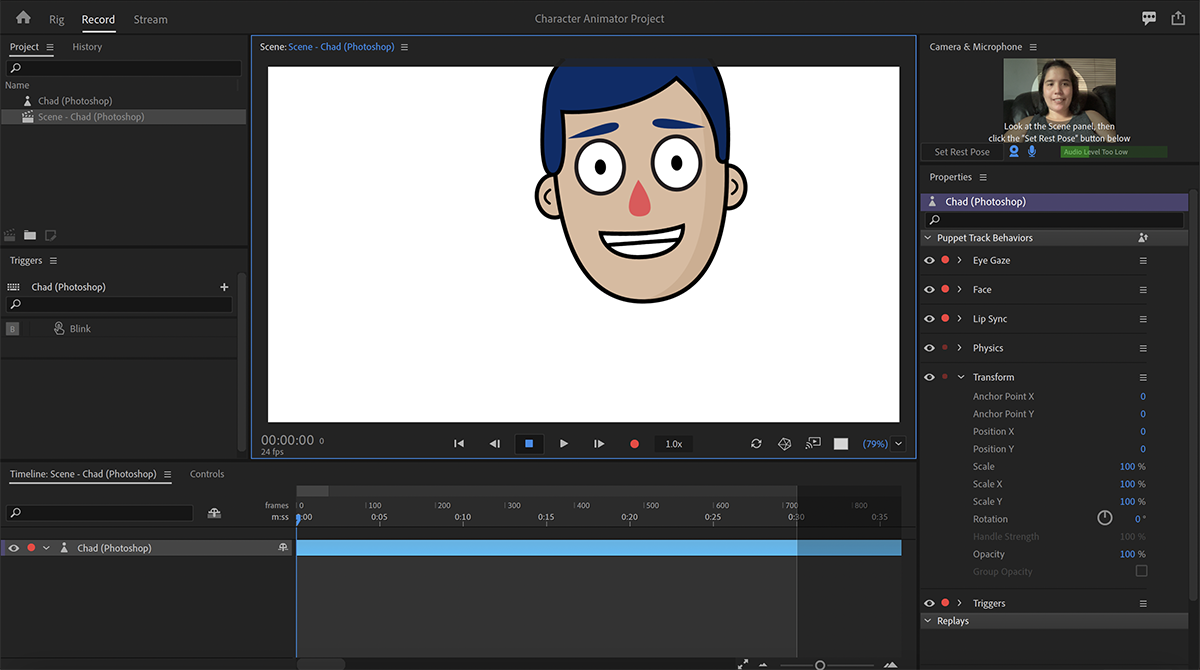
5. Cinema 4D
This cartoon maker has a 3D application interface that offers a keyframe animation, life-like characters, simulation building, object tracking, flexible rig building, cartoon styling, and animation basics.
Price: 4 pricing plans, starting at $99.91/month and $1199.00 billed annually.
Features:
- Keyframing animation effect
- It has a 3d interface
- The ZRemesher for retopology and new tools for modeling add to the new features.
- The Cloth Simulation features help make your cartoon more real.
- It supports CPU rendering with Redshift, which helps you preview, import, and export in high quality.
Pros:
- It is pretty easy to use.
- Lots of exciting design templates are available
- Many editing features are available
Cons
- It is pretty expensive compared to other software
- Not good for beginners
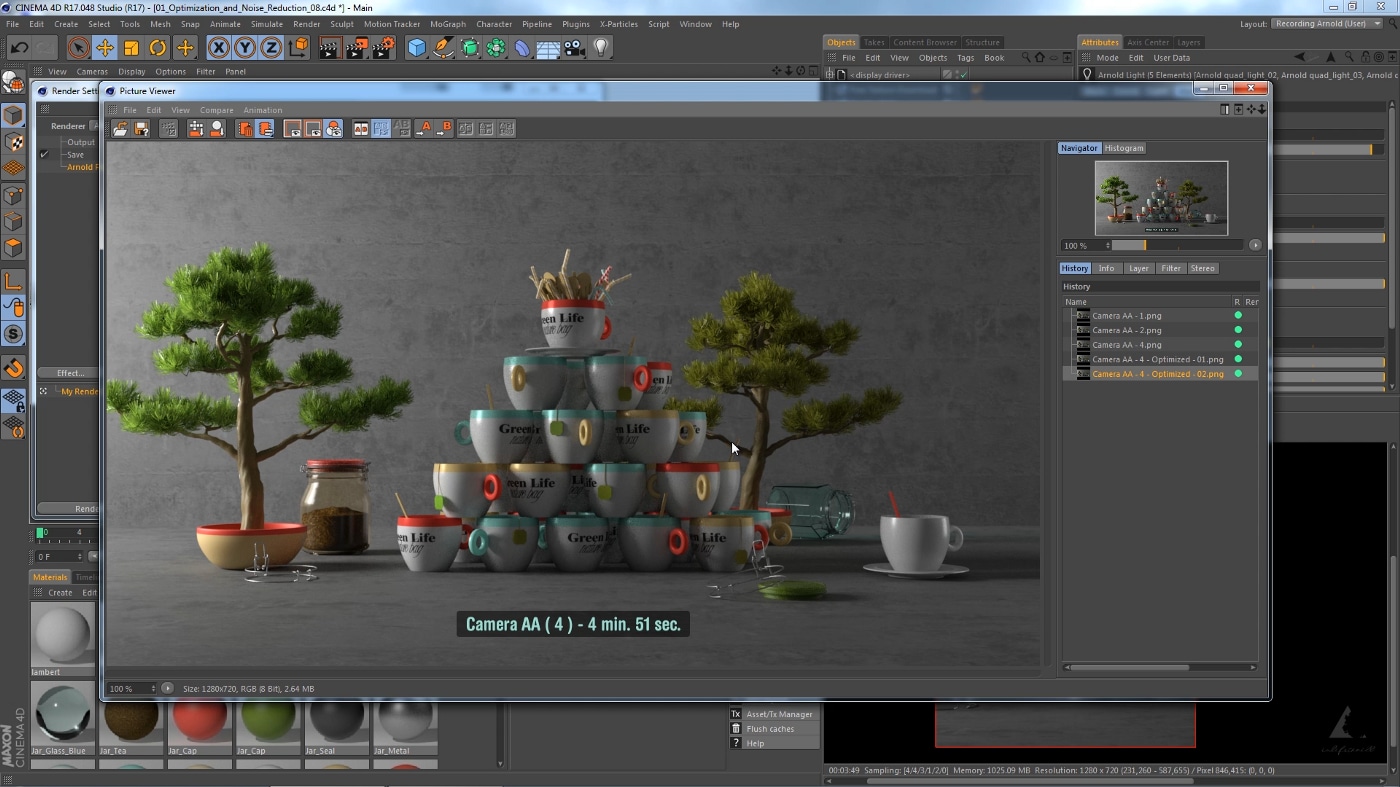
Wondershare Anireel is the best cartoon maker of the five listed in this article. It has lots of advanced features and templates to choose from.
Part 3: How Can I Create My Own Cartoon Using Wondershare Anireel
As stated, Wondershare Anireel has become our top cartoon creator pick due to its affordable pricing, secure server, and ease of use.
So, let us view the simple steps to create your cartoon using the Anireel software.
Step 1: Download, install and Create Character
Run Anireel on your device, visit Characters Tab and then click on Create a Character option, or you may click on the Create Brand Characters tab on the home screen.
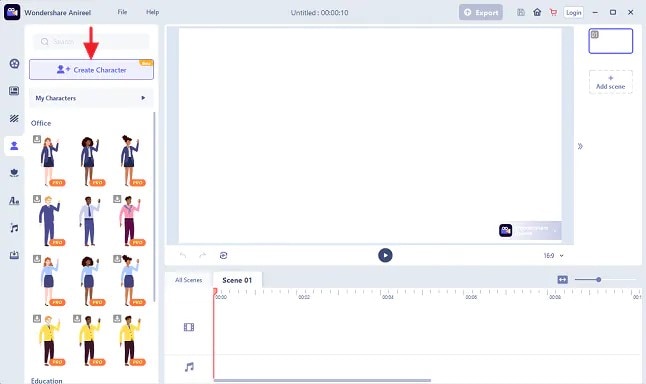
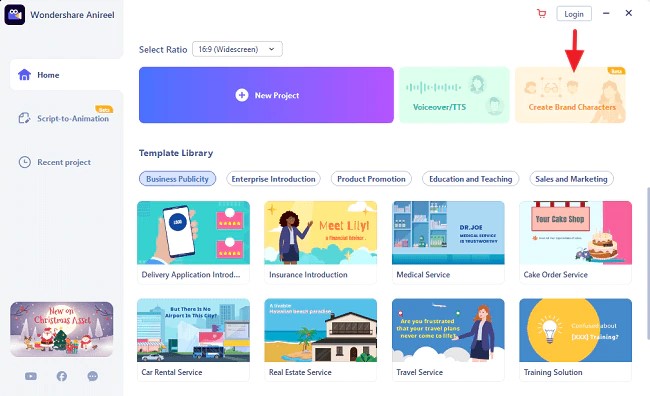
Step 2: Start Creating your Cartoon Character
Choose your gender and body shape, and apply some preset suits.
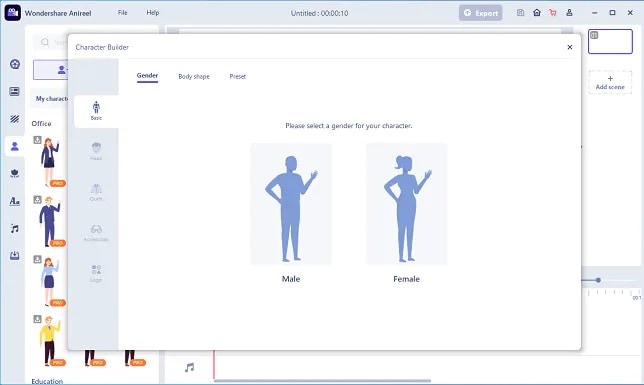
Now, you can start building facial features using the Head tab to customize the shape of the face, eyes, hairstyle, nose, mouth, ears, and eyebrows.
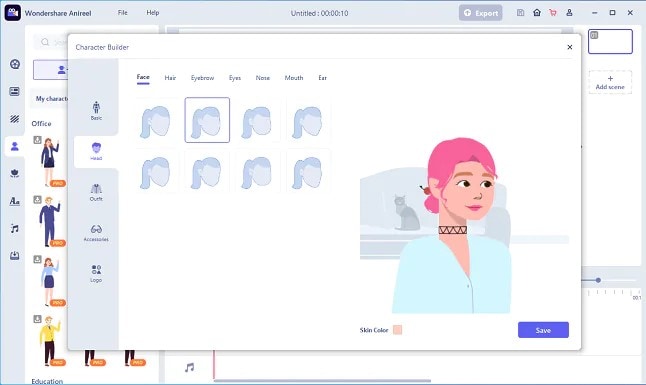
You can also choose to change the skin tone to match yours.
Step 3: Add an Outfit and Accessories
Choose the Outfit tab in Character Builder to select the base layer, outfit, bottom wear, and footwear. Pick what you want to use on your cartoon and keep adding.
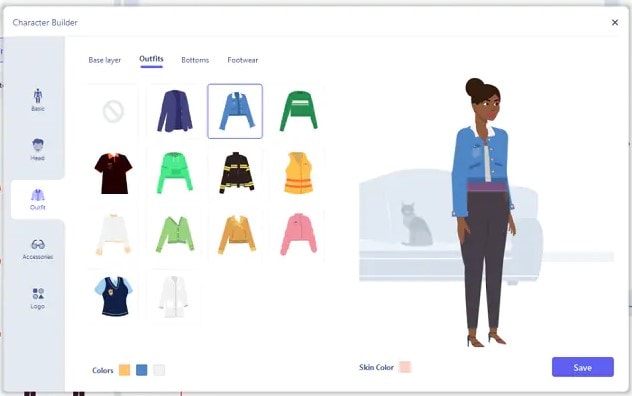
Next, reach the Accessories tab to add glasses, necklaces, and more to your cartoon character.
Step 4: Name your Cartoon and Apply
Click on Save and add a name to your cartoon when all done. Finally, click Apply Now to add your cartoon character to your Anireel cartoon maker canvas or My Characters tab.
Part 4: People Also Want to Know
Below are some answers to a few queries about cartoon creators. Let us look at them one by one.
1. What is the best free cartoon maker?
Wondershare Anireel is the best cartoon maker for Android as it is free to use with lots of advanced features and templates to choose from.
2. What is the best app to make a cartoon?
Wondershare Anireel’s Microsoft app is also one of the best cartoon applications that are very flexible and easy to use on the go.
Conclusion
In this article, we explained the best cartoon creators in the industry. Also, we gave the best cartoon video maker from the list. Thus, as you saw, in this report, we have summarized a few essential points regarding cartoon video makers. You learned:
- The cartoon video maker for free that you should know of.
- The ten best cartoon video makers.
- Why are Wondershare Anireel and Renderforest excellent online cartoon video makers?
- How does Anireel, cartoon creator, work?
- Finally, a few FAQs for users to better understand the cartoon maker
Introduction
There are some issues common to the video production process. However, animated or cartoon videos have helped to combat such issues. You do not need to scout for locations, go through a seemingly endless casting process, or rent the pricey equipment. A cartoon is simply a type of animation or an illustration that usually appears in a semi-realistic or an unreal style. In addition, it uses simple, satirical, and humorous drawing language to tell the story.
Although there are restrictions, there are a lot of possibilities cartoon video makers still offer to their users. Therefore, this article will share the top 10 best cartoon video makers online and on PC that you can use before diving into an animated video world.
So, here is what we shall learn about cartoon makers today:
In this article
01 Best 5 Online Cartoon Makers
02 Cartoon Video Maker for Desktop (Win and Mac)
03 How Can I Create My Own Cartoon Using Wondershare Anireel
Part 1: Best 5 Online Cartoon Makers
1. Biteable
Biteable provides a seemingly endless list of template categories to cater to your online media marketing needs. Aside from offering entertaining cartoon-making templates, the platform also allows users to create motion graphics or content, and Facebook covers for their social media channels.
Price: Free, $23 per month, billed annually.
Features:
- Offering library with lots of templates to choose from
- Free to use, except you are looking for additional features
- Five simple steps to an incredible cartoon video
- It has an easily customizable template
Pros
- It is a perfect option for social media managers
- Quickly create entertaining cartoons
- Used by biggies like Amazon, Microsoft, Google, Disney, BBC, Shopify, Samsung, and salesforce.
- Over 9 million users
Cons
- There is a mandatory registration
- There are no audio editing options
- The file-sharing capabilities are limited to YouTube and Facebook
- The download option is disabled in the free version
2. Animaker
With this animated maker, you get access to hundreds of animated characters, maps, and backgrounds. There are six (6) video styles available in this cartoon maker: Typography, Infographic, or 2D for different types of projects.
Price: Free version available. Subscription plans start at $12 per month/billed annually.
Features
- Different video styles, marketing, explainer, or 2D animation.
- Posts itself as the number 1 cartoon maker
- No need for a credit card to start.
- Four-step process; select template, customize it, add music, and download or share.
- 200+ voices, 25+ languages, and loads of customizable options.
- It offers auto-lip sync with advanced animation effects.
- There is a rich selection of 1000+ templates
Pros:
- Superb audio editing options
- Excellent and quick animation tools.
- Over 10 million users so far and still counting.
- Currently used by Amazon, Bosch, HP, Nokia, and Philips.
Cons:
- The monthly fee is pricey
- Account creation is mandatory for a free version
- The free version contains a watermark
3. Vyond
Vyond, the cartoon creator launched in 2007, is probably one of the oldest online cartoon video makers. Additionally, it is still one of the most popular online destinations meant for anyone who wants to create an animated video quickly.
Price: Subscription plans start from $39 per month, billed annually.
Features:
- Perfect for animated video creation
- There is automatic character lip-syncing
- Try it for free before purchasing
- Make videos for training, e-learning, marketing, human resources, etc.
- The maximum duration of the video is 120 minutes
Pros:
- It has a fully customizable template
- There are high-end object and character animated features
- Certified by GDPR, TrustArc, BSI, and CCPA
- A wholesome cartoon makerfor enterprise and individual
- Data security and privacy assurance by BSI, CCPA, and GPDR.
Cons:
- It is quite expensive
- Vyond is not the best option for inexperienced animators
- The features depend on the subscription model
4. Renderforest
This is a famous online cartoon video maker for many purposes. Among the numerous options, the platform offers to its user. They include; 3D explainer videos, logo animations, or professional presentations.
Price: Free version available. Subscription plans start at $16 per month, billed annually.
Features:
- There is an extensive library of templates with numerous options
- Has a large online storage
- Was among the top 100 software companies in 2019.
- Top ranked solution holder for 2020
- Up to 250GB of online storage space
- Use the in-built template to make a story, customize the video, and then export it to share with your friends.
- Amadeus, Bose, BBC, Vodafone, Sony Music, and many others use Renderforest.
Pros:
- Produce videos like a pro
- Comes with an ultimate animation pack.
- Trusted by millions and one of the oldest cartoon makers.
Cons:
- A limited amount of commercial music tracks
- There are modest export options
5. Moovly
With this cartoon maker, users must first log in. However, there is no need to create a new account as you can use your LinkedIn or Google account to sign in quickly.
Price: Free 30-day trial, $24.92 per month billed annually.
Features:
- Moovly is the perfect cartoon video maker for sales&marketing, human resources, internal communication, learning&development, agencies, and education.
- Apply expert features in one click with Moovly.
- Create videos and edit with browser-based or drag and drop features without installing software.
- Moovly has over 1.3 million free media, like images, sounds, music, and royalty-free stock videos at no extra charge.
- Besides, it offers 100 million extra media you can try and then purchase.
- You can add your images, music, and videos to create unique clips in style.
- Add text, remove color, add subtitles or generate them, auto-translate your text and subtitles, import PPT files, structure your content, record yourself or your computer screen, edit, mix, etc.
Pros:
- Even if users need to log in, they don’t need to create an account
- Allows users to import content from online sources like Storyblock, Shutterstock, etc.
- It is the number 1 customizable and straightforward solution to making cartoons.
- Use by Colgate-Palmolive, NHS, Teradata, Amadeus, Cisco, Continental, and Logitech.
- The interface is intuitive and user-friendly.
Cons:
- Watermarked videos during the free trial
- To export videos in HD 1080p quality, one needs to purchase one of the available plans.
Renderforest is the best cartoon maker online of the listed five in this article due to the vast library template and large online bandwidth.
Part 2: Cartoon Video Maker for Desktop (Win and Mac)
1. Wondershare Anireel
Anireel is one of the top animation software on the internet that allows users to bring their imaginations to life with a huge range of customizable elements and features.
Price: $9.99 per month billed annually and $19.99 monthly
Features:
- 40+ customizable templates
- Top animation software
- Compatible with Windows 11/10/8.1 (64 bit OS)
- Only three steps to an excellent animated video.
- Import images, videos, and sound in almost all formats.
- Create unique avatar, logo images, and more specific to your brand.
- The Deep Learning tech offers quick text-to-speech conversion.
- Animate camera movements, entry and exit effects, motion path, etc.
- Use the one-click option and change scripts to clips.
- Anireel cartoon video makercan lip-sync your characters with perfection.
- Quick and easy drag and drop editing.
Pros:
- It is convenient and simple to use
- Anireel has an intuitive interface
- The cartoon makeroffers a practical and seamless animated video editing
- It comes at an affordable and competitive price
Cons:
- It has a limited amount of assets
- Not suitable for too professional people to use.
2. Autodesk Maya
Autodesk Maya is one of the best animation tools used to create animation pictures, video games, and add 3D effects in motion pictures. Plus, this cartoon maker is the best if you require a high-quality visual impact.
Price: Free trial, $225 billed monthly.
Features:
- It offers AutoDesk financing for new buyers.
- Maya is the go-to shop for architects, engineers, designers, media, and entertainment.
- Shape 3D objects and add realistic effects with Maya cartoon maker’s NURBS modeling.
- The Integrated Arnold rendering technology lets you view scene changes in real-time.
- Maya has been part of the top movie makers, including the MCU.
- This cartoon video maker offers geometry-based polygon modeling and helps create accurate simulations for visual programming.
- Maya can load and change vast data sets at a faster pace.
Pros:
- It makes complex hand-made animation tasks extremely easy
- Efficient color management
- Allows the creation of realistic effects like cloth simulations and explosions
- 30-day free trial and 30-day money-back guarantee
- Meet deadlines, add fine details to develop even the most complex shots or characters.
- Excellent tool for professionals
Cons:
- The pro is quite expensive
3. Adobe Animate
This is one of the most powerful animation software products on the internet that has been available for decades. It can animate images used for games, film, or online and produce HTML 5, WebGL, or Flash content.
Price: This cartoon creator offers three pricing plans starting at US$24.14/month
Features:
- Excellent for complex animation
- The capability of freehand drawing
- Animate, illustrate, and make 3D typography.
- Import and add vector drawings for further editing.
- Export your work as HTML5 Canvas, WebGL, Flash/Adobe AIR, GIF, or QuickTime movie.
- With the Bone tool, make your cartoon characters fluid and natural.
- Synchronize sounds and music for your project.
- Choose parts of the clip to be animated.
Pros:
- It has Puppeting features
- It is an excellent choice for complex animations
- It includes freehand drawing capability
Cons:
- It is not suitable for beginners
- Other Adobe software may be required while working on a project
4. Adobe Character Animator
Adobe Character Animator is another type of Adobe’s animation software stack that allows users to use motion to capture and create live animations of their 2D characters.
Price: Adobe Character Animator has two pricing plans starting at US$34,49/month for the first year
Features:
- This product requires other Adobe products to function
- Lots of options to export and import.
- Make your real-life cartoon using the Motion Capture feature in five steps.
- The Avatar will walk, talk, and copy your expressions in real-time.
- Integrate and add assets from other Adobe Creative Cloud apps.
- Auto lip-syncing and real-time facial movement capture.
- Works on iOS and Android.
Pros:
- Easy to replicate real-life movements and expressions with facial tracking.
- There are various import and export options.
Cons:
- It is not a standalone product.
- Users need to have a webcam and microphone to use the motion capture feature.
5. Cinema 4D
This cartoon maker has a 3D application interface that offers a keyframe animation, life-like characters, simulation building, object tracking, flexible rig building, cartoon styling, and animation basics.
Price: 4 pricing plans, starting at $99.91/month and $1199.00 billed annually.
Features:
- Keyframing animation effect
- It has a 3d interface
- The ZRemesher for retopology and new tools for modeling add to the new features.
- The Cloth Simulation features help make your cartoon more real.
- It supports CPU rendering with Redshift, which helps you preview, import, and export in high quality.
Pros:
- It is pretty easy to use.
- Lots of exciting design templates are available
- Many editing features are available
Cons
- It is pretty expensive compared to other software
- Not good for beginners
Wondershare Anireel is the best cartoon maker of the five listed in this article. It has lots of advanced features and templates to choose from.
Part 3: How Can I Create My Own Cartoon Using Wondershare Anireel
As stated, Wondershare Anireel has become our top cartoon creator pick due to its affordable pricing, secure server, and ease of use.
So, let us view the simple steps to create your cartoon using the Anireel software.
Step 1: Download, install and Create Character
Run Anireel on your device, visit Characters Tab and then click on Create a Character option, or you may click on the Create Brand Characters tab on the home screen.
Step 2: Start Creating your Cartoon Character
Choose your gender and body shape, and apply some preset suits.
Now, you can start building facial features using the Head tab to customize the shape of the face, eyes, hairstyle, nose, mouth, ears, and eyebrows.
You can also choose to change the skin tone to match yours.
Step 3: Add an Outfit and Accessories
Choose the Outfit tab in Character Builder to select the base layer, outfit, bottom wear, and footwear. Pick what you want to use on your cartoon and keep adding.
Next, reach the Accessories tab to add glasses, necklaces, and more to your cartoon character.
Step 4: Name your Cartoon and Apply
Click on Save and add a name to your cartoon when all done. Finally, click Apply Now to add your cartoon character to your Anireel cartoon maker canvas or My Characters tab.
Part 4: People Also Want to Know
Below are some answers to a few queries about cartoon creators. Let us look at them one by one.
1. What is the best free cartoon maker?
Wondershare Anireel is the best cartoon maker for Android as it is free to use with lots of advanced features and templates to choose from.
2. What is the best app to make a cartoon?
Wondershare Anireel’s Microsoft app is also one of the best cartoon applications that are very flexible and easy to use on the go.
Conclusion
In this article, we explained the best cartoon creators in the industry. Also, we gave the best cartoon video maker from the list. Thus, as you saw, in this report, we have summarized a few essential points regarding cartoon video makers. You learned:
- The cartoon video maker for free that you should know of.
- The ten best cartoon video makers.
- Why are Wondershare Anireel and Renderforest excellent online cartoon video makers?
- How does Anireel, cartoon creator, work?
- Finally, a few FAQs for users to better understand the cartoon maker
What Are the 10 Best GIF Creator?
What are the 10 Best GIF Creator?
An easy yet powerful editor
Numerous effects to choose from
Detailed tutorials provided by the official channel
Stay tuned to find the most affordable GIF creator solutions.
In this article
01 [Why Gifs Are Essential for Every Marketer?](#Part 1)
02 [How to Make Your Own GIF?](#Part 2)
03 [What Are 10 Best GIF Creator to Find Brilliant Pre-made Gifs?](#Part 3)
Part 1 Why Gifs Are Essential for Every Marketer?
Everyone around you today is accustomed with the fact that GIFs are an interesting and impactful means of content sharing. These 3-5 second snippets are highly preferred and convenient ways to deliver information that is precise, clear and to the point. When it comes to time frames, short and quick GIFs are obvious choices over lengthy videos. Additionally, GIFs are eye-catchy and keep you captivated to see though the entire content within seconds, contradictory to those monotonous and often dull videos that sound more like a long, boring lecture.
These are an effective media tool that is not limited to sharing information that is chiefly entertainment based or fun centered. You can use them to deliver important content that addresses a specific purpose or audience. Owing to this, GIFs have become an essential marketing utility, here’s why:
● Improve Product Branding:
GIFs can serve as impressive branding tools for your products in the market. Markets today are considerably impacted by the ‘What You See is What You Buy’ concept, which puts forward the need to lay added stress on effective branding.
GIFs are ready to sort this out with their exciting range of features. From video editing choices to sound and color customization, GIFs are loaded with everything you need to improvise your product branding. All you have to do is explore your creativity to make the most of the GIF branding choices.
● Explain it Better
On a preference poll, most of us would shift to ‘watch’ over ‘read’ for a comprehensive understanding. An attractive motion visual is an even better treat. GIFs are pivotal in making viewers relate to the concept and message behind your product in a more enhanced manner.
Additionally, these are a continent means to introduce emotional mobility among your target audience with depictive emojis. You can use GIFs to develop effective content approaches to make the audience connect with your product viability, both practically band emotionally.
● Increase Visitor Attraction
Today’s changing times have brought about a rapid outlook towards everything. All of us are bounded by time constraints and when browsing the web, the prime need is to look for quick and accurate solutions to everything concerned.
Short and exact information delivery of GIFs is something that would keep visitors glued to your site because they will be assured of getting exactly what they search for and that too in an interesting and entertaining way.
Part 2 How to Make Your Own GIF?
Now that you are familiar with the creative marketing credibility of GIFs, you might naturally feel motivated towards creating a GIF of your own. In case you are, see through the following section of this article to find out interesting ways of creating interesting and catchy GIFs, either for impressive product marketing or just to make your social media posts leave your community peers in awe!
Looking for the best GIF creator solutions on the web, you can rely on GIPHY, one of the most preferred and convenient databases to create GIFs quickly. This is a smartphone compatible tool and works well with almost any device. Follow the steps given below to make GIFs with this tool:
Step 1:
Download and install the GIPHY app in your device.
Step 2:
Click on ‘Create’ in the app’s welcome screen. This will change (+) icon at the top-right corner to the ‘Camera’ symbol. You can also navigate to the ‘Profile’ at the bottom-right and tap the (+) or ‘Camera’ icon in the app’s account page.
Step 3:
Click on ‘Allow Camera Access’. You will receive two successive prompt messages from the app. Click on ‘Allow’ to grant access permissions to your device media. When you are done, click on ‘I Agree’.
Step 4:
GIFHY uses your device’s front camera for GIF creation. However, if you need to go for a camera switch, click on the ‘Camera’ sign at the bottom-right.
Step 5:
Choose a desired filter and effect for your GIF with a left or right swipe on the live feed toolbar. The app has 11 amazing and realistic effects, including VHS Static, 3D Glasses, etc.
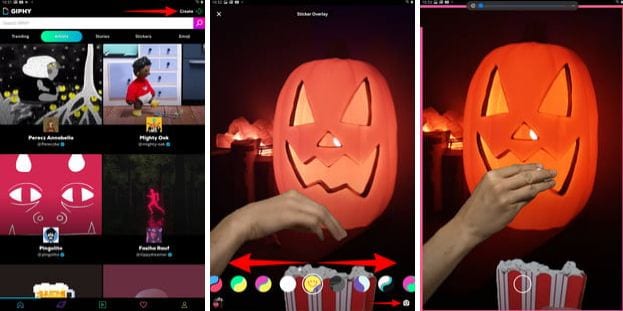
Step 6:
You can take up either of the following:
Press either of the ‘Filter’ or ‘Effect’ buttons to take static shots to create GIF from images, or press and hold the same to create animated GIF. For simply using effects, tap the white button.
In case you choose to create a motion GIF, the app forms a ‘visual timer’ around the editor screen. The motion recording stops once the line is in sync with the screen edges.
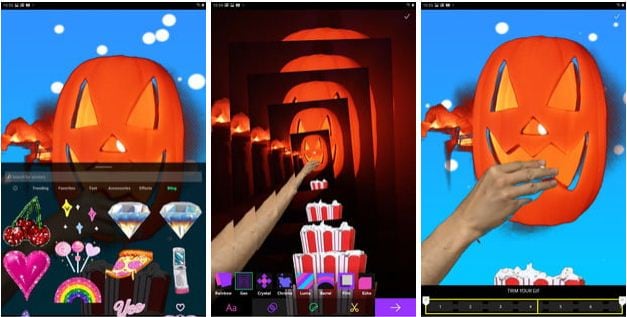
Step 7:
Having captured your perfect shot, you have the liberty to merge it with an image or video. However, do consider the following options to add some more elements to your capture: You can add relatable text in 9 color choices.
● Enhance your graphic presentation with 8 amazing effects like, ‘rainbow overlays’, BW film grains, etc.
● Choose from a never ending list of suitable stickers to add the feel through connect to your GIFs.
● Trim your animated GIFs to the ‘just perfect’ portion by adjusting the editing markers.
Relax; that’s no rocket science. Just tap on the respective buttons and there you go!
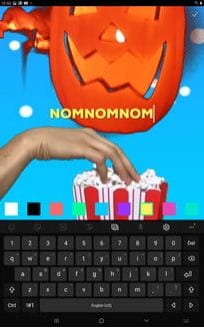
Step 8:
Set your GIF in a desired size frame by choosing the ‘Crop’ tool from the top-right corner of the editing screen. You are given a size flexibility of 1:1, 3:2, 16:9, 4:5 and 9:16.

Step 9:
Once you are satisfied with your creation, tap the ‘Right Arrow’ icon. In the interface that follows, add suitable share tags to the GIF.
Step 10:
Tap ‘Share GIF’ to post your creation on social media platforms or share it through popular IM apps. To save your initially captured clip, click on ‘Save Video’ or tap ‘Save GIF’ to save your creation in your smartphone’s memory.
Part 1 What Are 10 Best GIF Creator to Find Brilliant Pre-made Gifs?
Having talked about GIF creation on the go, let’s take a dive into the best GIF creator solutions that are a storehouse of exciting pre-made GIFs. When browsing the web for an affordable GIF maker tool, you land across a pool of choices. Read through the further sections of this article to find out what’s best for you.
Described below are 10 best alternatives to get amazing pre-made GIFs:
● Wondershare Filmora Video Editor
This one is a popular, preferred and top rated application where you get to choose from an exciting range of pre-made GIFs under a variety of specific categories. All you need to do is, visit the app’s official site, browse to your favorite GIF category and select a desired GIF. Follow a few app instructions to save your selection and that’s it! Your selected GIF reaches your device memory within seconds.

Wondershare Filmora - Best Video Editor for Mac/Windows
5,481,435 people have downloaded it.
Build unique custom animations without breaking a sweat.
Focus on creating epic stories and leave the details to Filmora’s auto features.
Start a creative adventure with drag & drop effects and endless possibilities.
Filmora simplifies advanced features to save you time and effort.
Filmora cuts out repetition so you can move on to your next creative breakthrough.
Key Features
● This app is available to you absolutely free of cost.
● Has an intelligent and user cohesive interface.
● Loaded with tons of brilliant GIFs to choose from.
● The app supports GIF customization.
● GIFHY
Launched in 2013, this one is probably the best GIF maker and downloader tool available on the web today. It is a free tool, packed with enormous varieties of GIFs to choose from. What’s more interesting about the app is that you are free to play with your editing creativity to enhance your downloaded GIFs in the GIPHY editor.
Key Features
● It comes with an easy to use, convenient interface.
● You can edit downloaded GIFs with hundreds of effects and filters.
● The app provides you a direct sharing platform, allowing you to post GIFs to various social media platforms and also go for sharing via Instant Messaging applications.
● This is a fast processing tool that allows you to escape the notch of annoying and delayed download processes.
● Tenor
You can conveniently regard this one as the closest competitor to the GIPHY GIF creator and downloader tool. Needless to say, both are quite similar to each other in interface and usage respects. However, focusing on search results for a common keyword, you find diverse variations to your obvious surprise.
Key Features
● This is a free to use, interactive interface tool.
● It introduces a GIF Keyboard that allows you to search the most specific and relatable GIFs.
● It ensures a speedy and high quality GIF download.
● You can explore your editing skills to your heart’s content to improvise the downloaded GIFs with this tool.
● This tool gives you the liberty to directly share GIFs across different platforms.
If you like to spend ample time on choosing what’s perfect for you, refer this online tool for your GIF download solutions. It caters to your love of diversity with the most deep rooted and broad GIF range. However, this one comes with a little messy interface, demanding some patience from you to get to the right thing.
Key Features
● This tool provides you with almost all possible choices for a GIF category.
● It is available to you free of cost
● The tool site is loaded with rich and quality GIF content.
● This one is a direct save and export tool for your downloaded GIFs.
● Gfycat
You can prefer this one as a GIF hosting tool. Developed with a view to launch a common medium for GIF and HTML contents, this app ensures in-time and hassle free downloads and delivery. Though lacking a refined search bar, this tool promises you of excellence in content quality.
Key Features
● This comes to you as one of the most reliable GIF hosting tools.
● It is a free and quick content delivery tool.
● You are allowed to select the most suitable one from a variety of playback choices.
● This tool also gives you the flexibility of direct media sharing.
● GIFbin
If you are hung-over decade old nostalgia and the fever doesn’t seem to go away, you can check this site for some really satisfying retro and other similar content. This would definitely make you take a toll back to the times when MSN and Limewire were unparalleled market leaders in content sharing.
Key Features
● GIFbin is a storehouse of the best animated GIFs, that is on a continuous update to facilitate fresh and quality based content, every time you visit the site.
● It has an advanced, API enabled search mechanism.
● It boasts of having the handiest and convenient user interface.
● If you prefer GIFs of the comic genre, this tool is heaven for you.
● Imgflip
This is another GIF download site, commonly preferred for comedy and fun oriented content. Using this site, you can download and create a variety of GIF based memes that have the potential to flood your social media posts with likes and comments. This one is a complete GIF basket, suited to vast content varieties and user preferences. You will find the site’s official watermark on all its contents.
Key Features
● The site stands among the most preferred GIF-meme creation and sharing platforms.
● The tool is packed with loads of quality content under specific categories
● You can improvise the dimensions of your editing skills to modify downloaded GIFs.
● This site has a default media export feature that you can use to share your GIFs on social media.
● Imgur
Launched in 2009, this is among the most visited GIF sites, originally created for sharing meme based contents on social media. Its extensive search filters are dedicated to fetch the exact GIFs and memes you are looking for. If you are tired of browsing sites for particular content requirements, your search spree will definitely end here.
Key Features
● The site is known for its extensive and diversified content quality.
● It is a free, convenient and dependable GIF download tool.
● Imgur is highly preferred for content export across various media platforms.
● It is equipped with an advanced and updated search filter that assures you of getting fresh and top quality GIFs on almost every possible keyword.
● Tumblr
Claiming a launch date of 13 years back, this is quite a good GIF download option. You can find excellent quality GIF content on the site, particularly in the comic genre. Though not as popular as its online counterparts today, the site definitely enjoyed commendable visitor preferences at the time of its launch. You can certainly visit this site for a filling entertainment dose.
Key Features
● Tumblr is a free download site with a user friendly interface.
● The site is loaded with notable content varieties.
● You can go for direct media sharing through this site.
● Its comic GIFs are quite hilarious.
● Know Your Meme
This site uses the Wiki software to stock an inventory of classic GIFs and memes. Using this database for GIF downloads means that you don’t need to compromise on content and image quality. The site contents are periodically updated to ensure that visitors are not exposed to stale and outdated content.
Key Features
● The site offers fresh content having catchy and latest GIFs.
● This is a complete storehouse of GIFs and memes that can definitely keep you rolling.
● The site comes as a free tool and gas a user cohesive interface
● It hast the most efficient search filters that are regularly improvised to ensure quality content delivery.
● Key Takeaways from This Episode →
● GIFs are an effective and captivating means of quality content sharing and message delivery. Take them as a hilarious entertainment source or use them to enhance your marketing policies, GIFs can do it all.
● Influenced by the user credibility of GIFs, there are loads of GIF creator and download tools available online; among which Filmora by Wondershare is the current market leader. You can use this app to explore your GIF editing skills or download and share latest GIFs across media sharing platforms.
Stay tuned to find the most affordable GIF creator solutions.
In this article
01 [Why Gifs Are Essential for Every Marketer?](#Part 1)
02 [How to Make Your Own GIF?](#Part 2)
03 [What Are 10 Best GIF Creator to Find Brilliant Pre-made Gifs?](#Part 3)
Part 1 Why Gifs Are Essential for Every Marketer?
Everyone around you today is accustomed with the fact that GIFs are an interesting and impactful means of content sharing. These 3-5 second snippets are highly preferred and convenient ways to deliver information that is precise, clear and to the point. When it comes to time frames, short and quick GIFs are obvious choices over lengthy videos. Additionally, GIFs are eye-catchy and keep you captivated to see though the entire content within seconds, contradictory to those monotonous and often dull videos that sound more like a long, boring lecture.
These are an effective media tool that is not limited to sharing information that is chiefly entertainment based or fun centered. You can use them to deliver important content that addresses a specific purpose or audience. Owing to this, GIFs have become an essential marketing utility, here’s why:
● Improve Product Branding:
GIFs can serve as impressive branding tools for your products in the market. Markets today are considerably impacted by the ‘What You See is What You Buy’ concept, which puts forward the need to lay added stress on effective branding.
GIFs are ready to sort this out with their exciting range of features. From video editing choices to sound and color customization, GIFs are loaded with everything you need to improvise your product branding. All you have to do is explore your creativity to make the most of the GIF branding choices.
● Explain it Better
On a preference poll, most of us would shift to ‘watch’ over ‘read’ for a comprehensive understanding. An attractive motion visual is an even better treat. GIFs are pivotal in making viewers relate to the concept and message behind your product in a more enhanced manner.
Additionally, these are a continent means to introduce emotional mobility among your target audience with depictive emojis. You can use GIFs to develop effective content approaches to make the audience connect with your product viability, both practically band emotionally.
● Increase Visitor Attraction
Today’s changing times have brought about a rapid outlook towards everything. All of us are bounded by time constraints and when browsing the web, the prime need is to look for quick and accurate solutions to everything concerned.
Short and exact information delivery of GIFs is something that would keep visitors glued to your site because they will be assured of getting exactly what they search for and that too in an interesting and entertaining way.
Part 2 How to Make Your Own GIF?
Now that you are familiar with the creative marketing credibility of GIFs, you might naturally feel motivated towards creating a GIF of your own. In case you are, see through the following section of this article to find out interesting ways of creating interesting and catchy GIFs, either for impressive product marketing or just to make your social media posts leave your community peers in awe!
Looking for the best GIF creator solutions on the web, you can rely on GIPHY, one of the most preferred and convenient databases to create GIFs quickly. This is a smartphone compatible tool and works well with almost any device. Follow the steps given below to make GIFs with this tool:
Step 1:
Download and install the GIPHY app in your device.
Step 2:
Click on ‘Create’ in the app’s welcome screen. This will change (+) icon at the top-right corner to the ‘Camera’ symbol. You can also navigate to the ‘Profile’ at the bottom-right and tap the (+) or ‘Camera’ icon in the app’s account page.
Step 3:
Click on ‘Allow Camera Access’. You will receive two successive prompt messages from the app. Click on ‘Allow’ to grant access permissions to your device media. When you are done, click on ‘I Agree’.
Step 4:
GIFHY uses your device’s front camera for GIF creation. However, if you need to go for a camera switch, click on the ‘Camera’ sign at the bottom-right.
Step 5:
Choose a desired filter and effect for your GIF with a left or right swipe on the live feed toolbar. The app has 11 amazing and realistic effects, including VHS Static, 3D Glasses, etc.
Step 6:
You can take up either of the following:
Press either of the ‘Filter’ or ‘Effect’ buttons to take static shots to create GIF from images, or press and hold the same to create animated GIF. For simply using effects, tap the white button.
In case you choose to create a motion GIF, the app forms a ‘visual timer’ around the editor screen. The motion recording stops once the line is in sync with the screen edges.
Step 7:
Having captured your perfect shot, you have the liberty to merge it with an image or video. However, do consider the following options to add some more elements to your capture: You can add relatable text in 9 color choices.
● Enhance your graphic presentation with 8 amazing effects like, ‘rainbow overlays’, BW film grains, etc.
● Choose from a never ending list of suitable stickers to add the feel through connect to your GIFs.
● Trim your animated GIFs to the ‘just perfect’ portion by adjusting the editing markers.
Relax; that’s no rocket science. Just tap on the respective buttons and there you go!
Step 8:
Set your GIF in a desired size frame by choosing the ‘Crop’ tool from the top-right corner of the editing screen. You are given a size flexibility of 1:1, 3:2, 16:9, 4:5 and 9:16.
Step 9:
Once you are satisfied with your creation, tap the ‘Right Arrow’ icon. In the interface that follows, add suitable share tags to the GIF.
Step 10:
Tap ‘Share GIF’ to post your creation on social media platforms or share it through popular IM apps. To save your initially captured clip, click on ‘Save Video’ or tap ‘Save GIF’ to save your creation in your smartphone’s memory.
Part 1 What Are 10 Best GIF Creator to Find Brilliant Pre-made Gifs?
Having talked about GIF creation on the go, let’s take a dive into the best GIF creator solutions that are a storehouse of exciting pre-made GIFs. When browsing the web for an affordable GIF maker tool, you land across a pool of choices. Read through the further sections of this article to find out what’s best for you.
Described below are 10 best alternatives to get amazing pre-made GIFs:
● Wondershare Filmora Video Editor
This one is a popular, preferred and top rated application where you get to choose from an exciting range of pre-made GIFs under a variety of specific categories. All you need to do is, visit the app’s official site, browse to your favorite GIF category and select a desired GIF. Follow a few app instructions to save your selection and that’s it! Your selected GIF reaches your device memory within seconds.
Wondershare Filmora - Best Video Editor for Mac/Windows
5,481,435 people have downloaded it.
Build unique custom animations without breaking a sweat.
Focus on creating epic stories and leave the details to Filmora’s auto features.
Start a creative adventure with drag & drop effects and endless possibilities.
Filmora simplifies advanced features to save you time and effort.
Filmora cuts out repetition so you can move on to your next creative breakthrough.
Key Features
● This app is available to you absolutely free of cost.
● Has an intelligent and user cohesive interface.
● Loaded with tons of brilliant GIFs to choose from.
● The app supports GIF customization.
● GIFHY
Launched in 2013, this one is probably the best GIF maker and downloader tool available on the web today. It is a free tool, packed with enormous varieties of GIFs to choose from. What’s more interesting about the app is that you are free to play with your editing creativity to enhance your downloaded GIFs in the GIPHY editor.
Key Features
● It comes with an easy to use, convenient interface.
● You can edit downloaded GIFs with hundreds of effects and filters.
● The app provides you a direct sharing platform, allowing you to post GIFs to various social media platforms and also go for sharing via Instant Messaging applications.
● This is a fast processing tool that allows you to escape the notch of annoying and delayed download processes.
● Tenor
You can conveniently regard this one as the closest competitor to the GIPHY GIF creator and downloader tool. Needless to say, both are quite similar to each other in interface and usage respects. However, focusing on search results for a common keyword, you find diverse variations to your obvious surprise.
Key Features
● This is a free to use, interactive interface tool.
● It introduces a GIF Keyboard that allows you to search the most specific and relatable GIFs.
● It ensures a speedy and high quality GIF download.
● You can explore your editing skills to your heart’s content to improvise the downloaded GIFs with this tool.
● This tool gives you the liberty to directly share GIFs across different platforms.
If you like to spend ample time on choosing what’s perfect for you, refer this online tool for your GIF download solutions. It caters to your love of diversity with the most deep rooted and broad GIF range. However, this one comes with a little messy interface, demanding some patience from you to get to the right thing.
Key Features
● This tool provides you with almost all possible choices for a GIF category.
● It is available to you free of cost
● The tool site is loaded with rich and quality GIF content.
● This one is a direct save and export tool for your downloaded GIFs.
● Gfycat
You can prefer this one as a GIF hosting tool. Developed with a view to launch a common medium for GIF and HTML contents, this app ensures in-time and hassle free downloads and delivery. Though lacking a refined search bar, this tool promises you of excellence in content quality.
Key Features
● This comes to you as one of the most reliable GIF hosting tools.
● It is a free and quick content delivery tool.
● You are allowed to select the most suitable one from a variety of playback choices.
● This tool also gives you the flexibility of direct media sharing.
● GIFbin
If you are hung-over decade old nostalgia and the fever doesn’t seem to go away, you can check this site for some really satisfying retro and other similar content. This would definitely make you take a toll back to the times when MSN and Limewire were unparalleled market leaders in content sharing.
Key Features
● GIFbin is a storehouse of the best animated GIFs, that is on a continuous update to facilitate fresh and quality based content, every time you visit the site.
● It has an advanced, API enabled search mechanism.
● It boasts of having the handiest and convenient user interface.
● If you prefer GIFs of the comic genre, this tool is heaven for you.
● Imgflip
This is another GIF download site, commonly preferred for comedy and fun oriented content. Using this site, you can download and create a variety of GIF based memes that have the potential to flood your social media posts with likes and comments. This one is a complete GIF basket, suited to vast content varieties and user preferences. You will find the site’s official watermark on all its contents.
Key Features
● The site stands among the most preferred GIF-meme creation and sharing platforms.
● The tool is packed with loads of quality content under specific categories
● You can improvise the dimensions of your editing skills to modify downloaded GIFs.
● This site has a default media export feature that you can use to share your GIFs on social media.
● Imgur
Launched in 2009, this is among the most visited GIF sites, originally created for sharing meme based contents on social media. Its extensive search filters are dedicated to fetch the exact GIFs and memes you are looking for. If you are tired of browsing sites for particular content requirements, your search spree will definitely end here.
Key Features
● The site is known for its extensive and diversified content quality.
● It is a free, convenient and dependable GIF download tool.
● Imgur is highly preferred for content export across various media platforms.
● It is equipped with an advanced and updated search filter that assures you of getting fresh and top quality GIFs on almost every possible keyword.
● Tumblr
Claiming a launch date of 13 years back, this is quite a good GIF download option. You can find excellent quality GIF content on the site, particularly in the comic genre. Though not as popular as its online counterparts today, the site definitely enjoyed commendable visitor preferences at the time of its launch. You can certainly visit this site for a filling entertainment dose.
Key Features
● Tumblr is a free download site with a user friendly interface.
● The site is loaded with notable content varieties.
● You can go for direct media sharing through this site.
● Its comic GIFs are quite hilarious.
● Know Your Meme
This site uses the Wiki software to stock an inventory of classic GIFs and memes. Using this database for GIF downloads means that you don’t need to compromise on content and image quality. The site contents are periodically updated to ensure that visitors are not exposed to stale and outdated content.
Key Features
● The site offers fresh content having catchy and latest GIFs.
● This is a complete storehouse of GIFs and memes that can definitely keep you rolling.
● The site comes as a free tool and gas a user cohesive interface
● It hast the most efficient search filters that are regularly improvised to ensure quality content delivery.
● Key Takeaways from This Episode →
● GIFs are an effective and captivating means of quality content sharing and message delivery. Take them as a hilarious entertainment source or use them to enhance your marketing policies, GIFs can do it all.
● Influenced by the user credibility of GIFs, there are loads of GIF creator and download tools available online; among which Filmora by Wondershare is the current market leader. You can use this app to explore your GIF editing skills or download and share latest GIFs across media sharing platforms.
Top 6 MP4 Mergers to Join Videos Easily
Not all software allows you to combine videos in the MP4 format. And even if they do, the quality you get is not satisfying. The reason is pretty basic – overrated and underrated video merging software. Some tools are complicated, while others are extremely user-friendly with the interface and options.
So, after spending several days on the research, finally, here are the 6 best mp4 mergers along with their tutorials to help you understand the process and complexity of each software and pick the best one in terms of simplicity and user-friendliness.
In this article
04 Media Cope
Part 1: Free Video Joiner (For Windows Users Only)
Free Video Joiner is a free tool to use for Windows users. You can join multiple videos to turn into a big video file. The software allows you to convert WMV, MPG, MPEG, AVI, and MOV files into MP4, MOV, WMV, and AVI. You can also “Save As” videos in VCD and DVD, iPhone, iPod, Zune, or PSP video formats.
The company claims “no quality loss” when the complete video is out. However, you have to be very picky when selecting the first video in your list to merge with others because the Free Video Joiner keeps the same width and height of the merged file as of the first video.
So, for instance, if you have 10 videos in the list to merge in the MP4 format, the first video has 1280 x 720 dimensions while the rest are 1920 x 1080. Then, the final merged video will be available to you in the same width and height as the first video (1280 x 720).
Merging Videos in Free Video Joiner
Step1: Download Free Video Joiner
Open your browser and go to the Free Video Joiner website. Then, click the “Download” button on the page to save the setup on your computer.

Step 2: Install and Run Free Video Joiner
Now, double-click on the Free Video Joiner set up to install it in your system. It will hardly take a few seconds for the entire software to get into your system’s hard drive.
Once the software is installed, open the software, and you will see the interface like this.

Step 3: Add Files
Click on the “Add Files” button.

And select the clips you want to merge in MP4.

To change the order of the videos, you can use the “Move Up” or “Move Down” button.

Step 4: Select Output Folder
Choose your output directory to save the merged file by clicking on the “Select” button.

Then, click on the “Video” tab to choose the format of your joined video. Also, take your time to choose the “Presets” from the drop-down menu below the video tab.
As you can see, MP4 is selected in the screenshot below.

Step 5: Staring Merging in MP4
Now, click on the “Join Now” button.

You will see that the “Overall Progress” bar will begin to increase.

Once the bar is 100%, click on the “Open Folder” button to directly visit the folder where you will find the merged video. Or click the “Finish” button if you wish to start another project.

Part 2: Freemake Video Converter (For Windows Users Only)
Freemake Video Converter is reliable software to convert videos without registration. The program is free to download with more than 180 million users worldwide. And not just the MP4, but you can convert videos in all the popular formats and use the program to copy and burn DVDs.
Apart from the video conversion feature, you can use Freemake to merge your MP4 videos from your Windows operating system. However, the software is unavailable for MAC users, and it is one of the major drawbacks of this video merger.
Merging Videos in Freemake Video Converter
Step 1: Download Freemake Video Converter
First, go to the Freemake Video Converter website and click on the “Free Download” button.

Then, install the software on your computer and open it. The software appears to be simple like this.

Step 2: Add Videos
Click on the “Video” tab from the top menu to select videos you want to merge.

As you can see below, two videos are uploaded on the software.

Step 3: Rearrange Video Order
If you wish to rearrange the videos, you can do it by simply dragging the video up or down with the help of your mouse.

For example, the “Photo Slideshow” video, which was previously on the top, is now placed beneath the “Intro” video.

That means the merged video will begin from the “Intro” video, and then the “Photo Slideshow” will continue right after the first clip ends. All be done without any break or pause.
Step 4: Join Videos
After rearranging the videos, use your mouse to select clips by clicking once on each video. All selected videos will be highlighted in the “light blue” color.

Then, take the mouse cursor on the top-right side of the software and turn on the “Join Files” button by clicking on it.

You will see that a merged video will be added to the software.
For instance, you can see that a new file has been added to the interface, showing the number of merged files in the red circle.

The above screenshot represents a single merged video that includes two files.
Step 5: Choose Your Output Video Format
Look at the bottom of the software to see different video formats, and click on “MP4.”

Click on the “Preset” menu to choose the format and size of the output video. Then, select the output folder.

Step 6: Save Your Video
Lastly, click on the “Convert” button to allow the software to merge the video in MP4 format and save it on your computer.

Part 3: Boilsoft Video Joiner (For Windows and MAC Users)
Boilsoft Video Joiner is a video merger tool to join MP4, WMA, WMV, ASF, 3GP, RMVB/RM, MPG, MPEG, AVI, VOB, FLV, and MKV clips into one complete single video. You can download the free trial version or buy the full software for your MAC and Windows operating systems.
Boilsoft Video Joiner also offers Encode mode and Direct Stream mode, allowing you to merge clips efficiently into different formats at great speed.
Merging Videos in Boilsoft Video Joiner
Step 1: Download and Install Boilsoft Video Joiner
Visit the Boilsoft Video Joiner website from your computer browser and click on the “Download” tab.

If you want to install the software on Windows OS, then click on the “Windows” tab and then click on the “Download” button next to the “Boilsoft Video Joiner” software.

Contrarily, you can download the program for MAC operating system by clicking on the “Mac” tab and clicking the “Download” button.

Now, run the installer to install the software on your computer and open it.

Note: The screenshots are from the previous version of Boilsoft Video Joiner. However, this tutorial’s steps to merge MP4 videos are workable on the latest version.
Step 2: Add Videos in Boilsoft Video Joiner
Click on the “Add File” icon on the top menu to add the clips you want to join together.

Here you can see that two files have been uploaded. Plus, with the small green “arrow” buttons, you can rearrange the order of the clips.

Step 3: Merge Videos
Find the “Merge” option on the top menu, and click it.

Then, choose the “Direct Stream” mode or “Encode Mode” from the merge mode options, and click on the “OK” button.

Note: It is suggested to choose the “Direct Stream” mode if you want files to be converted in the MP4 format.
Step 4: Save Joined Video
After clicking the “OK” button, choose the folder to save the merged video on your computer. And click the “Save” button.

A green progress bar will start until you see the “Finished” message above the bar, confirming that the video has been merged. So, click the “Open Folder” button to see the joined video in MP4 format.

Part 4: Media Cope (For Windows Users Only)
Media Cope is free software with multiple features, including audio and video joiner. The software is available for Windows users only but does not support the latest Windows versions. So, if you are running XP, Vista, Windows 7, or Windows 8, you can easily install the software on your computer.
Although the software doesn’t support MAC, you can still join and save the videos on your iPhone. Nevertheless, the developers assure that the software supports all major formats, such as MP4, MOV, 3GP, AC3, AMR, WAV, MKV, FLV, DIVX, AVI, and many more.
Merging Videos in Media Cope
Step 1: Download and Install Media Cope
Downloading Media Cope is no big deal. All you need to do is go to the official Media Cope’s website and click on the “Download” tab on the top menu.

Once you are taken to another page, click on the “Download” button to save the setup on your computer.

Double click the “MediaCopeSetup.exe” file to install the software. It will only take a few minutes to install the complete program on your PC.
So, after installing Media Cope, open the program, and you will see a blank screen with several options on the top and bottom of the interface.

Step 2: Add Files
Click on the “Audio/Video Joiner” tab to select your video clips.

Select your clips and click on the “Add” button to transfer files on the software.

As you can see, two video files are added to the platform.

Step 3: Choose Output Format
If you look down in the software, you will find the “Output Format” options. So, choose your format (MP4 recommended) and select the video quality from the drop-down menu.

Step 4: Merge Videos and Save
Now, click on the “Join” button, choose your output folder, and give time to complete the process.

After the process ends, enjoy your merged video in the output folder.
Part 5: MP4Joiner by MP4Tools (For Windows, MAC, and Linux Users)
MP4Joiner is a free software to join MP4 format videos into one single video that comes with an MP4Splitter. This software duo is called MP4Tools. So don’t get confused by the name when downloading the program on your PC.
A good thing about MP4Joiner is that it is developed for multiple platforms, such as Windows, MAC, and Linux. But unfortunately, it only supports “win32,” “Mac 10.10 and Catalina,” and “BZ2” file extension.
Merging Videos in MP4Joiner
Step 1: Download MP4Joiner
The first step requires downloading MP4Joiner on your computer according to your operating system. To do that, go to the MP4Joiner’s site. And click on any one of the following “.exe” files to download the setup.

Then, install the program in your Windows, MAC, or Linux, and run it. The interface is extremely simple, with no confusing options.

Step 2: Add Files in MP4Joiner
Next, click on the “Add Video” tab with a green “+” sign.

Doing so will help you choose videos you want to join together. So, select the videos and click on the “Open” button, as shown in the screenshot below.

Step 3: Start Joining Videos
Once all your selected videos are imported on the interface, click on the “Join” tab.

Then, choose the folder where you want the merged video to be saved, and click the “Save” button.

A new window will appear, showing a green progress bar.

Wait until you see the “Successful” note on the top of the progress bar, and then click on the “Close” button.

Go to your output folder to watch the joined video in the MP4 format.
Part 6: Filmora by Wondershare (For Windows and MAC Users - Recommended)
Filmora Video Editor is one of the famous video editing software by Wondershare. It is like a gateway to creativity for beginner and experienced editors. The software offers a wide range of tools and presets, which makes video editing quick and easy.
This video editing tool is for both MAC and Windows users. You can use the software by choosing a suitable pricing plan or downloading the free version if the watermark is not an issue.
Gladly, Filmora can help you merge your videos without destroying a pixel in any format of your choice, including MP4. Also, the process is pretty simple, time-saving, and fun. Furthermore, you can also include flavors to your video merger by adding several transitions and effects to your videos.
For Win 7 or later (64-bit)
For macOS 10.14 or later
Merging Videos in MP4Joiner
Step 1: Download Filmora by Wondershare
Enter Filmora’s website in your browser to visit the homepage and click on the blue “Free Download” button.

After downloading the setup, install the software on your device. The process will only take a few minutes. Then, open Filmora, and you will see a modern-designed interface with all the tools and presets right in front of your eyes.

Step 2: Import Videos You Want to Merge
Use your mouse to click the blue “+” icon in the center of the software to import videos from your computer.

Then, drag-and-drop the videos to your timeline. But make sure that you place both clips on the same timeline. As you can see below, there are two clips. The first clip is named “Travel 05,” while the second video is called “Travel 06.”

Step 3: Fill the Gap to Merge
When you will drag-and-drop videos on the timeline, the chances are that there will be a gap or a blank space between the two clips, like this.

If this blank space is left untreated, the merged video will include this empty black space, as you can see on the preview screen.

Therefore, use your right mouse click to hold the second video and drag it to the wall of the first video without leaving any gap in between both clips.

Great! You have already merged the videos. Now, let’s move on to the final step.
Step 4: Export the Joined Video and Save in MP4
Click on the “Export” option on the left of the preview screen to see the settings window.

Under the “Local” tab, select “MP4” and feel free to perform other changes, such as choosing an output folder, renaming the merged video, picking the resolution, and more. Once you are satisfied with the settings, click on the “Export” button (on the right bottom of the screen) to save the video on your computer.

And it’s done!
Bottom Line
Among the 6 best MP4 mergers, Filmora seems to be winning. It’s not just a video editor with plenty of tools, but you can also join two or more videos in MP4 format without sacrificing the video quality.
On the other hand, video merges like Free Video Joiner, Freemake, Media Cope, Boilsoft Video Joiner, and MP4 Joiner have limited options. Plus, they are time-consuming, and some of them even disturb the video and audio quality when clips are merged through them.
FAQs
Q1. What is the best video merger for MP4?
There are many excellent video mergers to combine MP4 videos. Most users recommend Filmora because it works flawlessly on MAC and Windows operating systems. Besides, it’s a user-friendly software that even non-professional people can use to join MP4 videos.
Q2. What is the fastest video merger for MP4 clips?
Filmora by Wondershare is one of the fastest video mergers. You can merge videos by working on the timeline, which ultimately saves your time. And you can export merged videos in MP4 or any other format without many struggles. The second and third options are Media Cope and Boilsoft Video Joiner. Although they are a bit old-fashioned, you will still find them more accessible and fast than other MP4 mergers.
Q3. How do I merge MP4 videos without losing quality?
Merging MP4 videos without losing the quality depends on your software to combine videos. Filmora never disappoints its users when it comes to quality. As a matter of fact, you can choose your own resolution from the export settings menu when saving the merged MP4 video in your Windows or MAC computer.
04 Media Cope
Part 1: Free Video Joiner (For Windows Users Only)
Free Video Joiner is a free tool to use for Windows users. You can join multiple videos to turn into a big video file. The software allows you to convert WMV, MPG, MPEG, AVI, and MOV files into MP4, MOV, WMV, and AVI. You can also “Save As” videos in VCD and DVD, iPhone, iPod, Zune, or PSP video formats.
The company claims “no quality loss” when the complete video is out. However, you have to be very picky when selecting the first video in your list to merge with others because the Free Video Joiner keeps the same width and height of the merged file as of the first video.
So, for instance, if you have 10 videos in the list to merge in the MP4 format, the first video has 1280 x 720 dimensions while the rest are 1920 x 1080. Then, the final merged video will be available to you in the same width and height as the first video (1280 x 720).
Merging Videos in Free Video Joiner
Step1: Download Free Video Joiner
Open your browser and go to the Free Video Joiner website. Then, click the “Download” button on the page to save the setup on your computer.
Step 2: Install and Run Free Video Joiner
Now, double-click on the Free Video Joiner set up to install it in your system. It will hardly take a few seconds for the entire software to get into your system’s hard drive.
Once the software is installed, open the software, and you will see the interface like this.
Step 3: Add Files
Click on the “Add Files” button.
And select the clips you want to merge in MP4.
To change the order of the videos, you can use the “Move Up” or “Move Down” button.
Step 4: Select Output Folder
Choose your output directory to save the merged file by clicking on the “Select” button.
Then, click on the “Video” tab to choose the format of your joined video. Also, take your time to choose the “Presets” from the drop-down menu below the video tab.
As you can see, MP4 is selected in the screenshot below.
Step 5: Staring Merging in MP4
Now, click on the “Join Now” button.
You will see that the “Overall Progress” bar will begin to increase.
Once the bar is 100%, click on the “Open Folder” button to directly visit the folder where you will find the merged video. Or click the “Finish” button if you wish to start another project.
Part 2: Freemake Video Converter (For Windows Users Only)
Freemake Video Converter is reliable software to convert videos without registration. The program is free to download with more than 180 million users worldwide. And not just the MP4, but you can convert videos in all the popular formats and use the program to copy and burn DVDs.
Apart from the video conversion feature, you can use Freemake to merge your MP4 videos from your Windows operating system. However, the software is unavailable for MAC users, and it is one of the major drawbacks of this video merger.
Merging Videos in Freemake Video Converter
Step 1: Download Freemake Video Converter
First, go to the Freemake Video Converter website and click on the “Free Download” button.
Then, install the software on your computer and open it. The software appears to be simple like this.
Step 2: Add Videos
Click on the “Video” tab from the top menu to select videos you want to merge.
As you can see below, two videos are uploaded on the software.
Step 3: Rearrange Video Order
If you wish to rearrange the videos, you can do it by simply dragging the video up or down with the help of your mouse.
For example, the “Photo Slideshow” video, which was previously on the top, is now placed beneath the “Intro” video.
That means the merged video will begin from the “Intro” video, and then the “Photo Slideshow” will continue right after the first clip ends. All be done without any break or pause.
Step 4: Join Videos
After rearranging the videos, use your mouse to select clips by clicking once on each video. All selected videos will be highlighted in the “light blue” color.
Then, take the mouse cursor on the top-right side of the software and turn on the “Join Files” button by clicking on it.
You will see that a merged video will be added to the software.
For instance, you can see that a new file has been added to the interface, showing the number of merged files in the red circle.
The above screenshot represents a single merged video that includes two files.
Step 5: Choose Your Output Video Format
Look at the bottom of the software to see different video formats, and click on “MP4.”
Click on the “Preset” menu to choose the format and size of the output video. Then, select the output folder.
Step 6: Save Your Video
Lastly, click on the “Convert” button to allow the software to merge the video in MP4 format and save it on your computer.
Part 3: Boilsoft Video Joiner (For Windows and MAC Users)
Boilsoft Video Joiner is a video merger tool to join MP4, WMA, WMV, ASF, 3GP, RMVB/RM, MPG, MPEG, AVI, VOB, FLV, and MKV clips into one complete single video. You can download the free trial version or buy the full software for your MAC and Windows operating systems.
Boilsoft Video Joiner also offers Encode mode and Direct Stream mode, allowing you to merge clips efficiently into different formats at great speed.
Merging Videos in Boilsoft Video Joiner
Step 1: Download and Install Boilsoft Video Joiner
Visit the Boilsoft Video Joiner website from your computer browser and click on the “Download” tab.
If you want to install the software on Windows OS, then click on the “Windows” tab and then click on the “Download” button next to the “Boilsoft Video Joiner” software.
Contrarily, you can download the program for MAC operating system by clicking on the “Mac” tab and clicking the “Download” button.
Now, run the installer to install the software on your computer and open it.
Note: The screenshots are from the previous version of Boilsoft Video Joiner. However, this tutorial’s steps to merge MP4 videos are workable on the latest version.
Step 2: Add Videos in Boilsoft Video Joiner
Click on the “Add File” icon on the top menu to add the clips you want to join together.
Here you can see that two files have been uploaded. Plus, with the small green “arrow” buttons, you can rearrange the order of the clips.
Step 3: Merge Videos
Find the “Merge” option on the top menu, and click it.
Then, choose the “Direct Stream” mode or “Encode Mode” from the merge mode options, and click on the “OK” button.
Note: It is suggested to choose the “Direct Stream” mode if you want files to be converted in the MP4 format.
Step 4: Save Joined Video
After clicking the “OK” button, choose the folder to save the merged video on your computer. And click the “Save” button.
A green progress bar will start until you see the “Finished” message above the bar, confirming that the video has been merged. So, click the “Open Folder” button to see the joined video in MP4 format.
Part 4: Media Cope (For Windows Users Only)
Media Cope is free software with multiple features, including audio and video joiner. The software is available for Windows users only but does not support the latest Windows versions. So, if you are running XP, Vista, Windows 7, or Windows 8, you can easily install the software on your computer.
Although the software doesn’t support MAC, you can still join and save the videos on your iPhone. Nevertheless, the developers assure that the software supports all major formats, such as MP4, MOV, 3GP, AC3, AMR, WAV, MKV, FLV, DIVX, AVI, and many more.
Merging Videos in Media Cope
Step 1: Download and Install Media Cope
Downloading Media Cope is no big deal. All you need to do is go to the official Media Cope’s website and click on the “Download” tab on the top menu.
Once you are taken to another page, click on the “Download” button to save the setup on your computer.
Double click the “MediaCopeSetup.exe” file to install the software. It will only take a few minutes to install the complete program on your PC.
So, after installing Media Cope, open the program, and you will see a blank screen with several options on the top and bottom of the interface.
Step 2: Add Files
Click on the “Audio/Video Joiner” tab to select your video clips.
Select your clips and click on the “Add” button to transfer files on the software.
As you can see, two video files are added to the platform.
Step 3: Choose Output Format
If you look down in the software, you will find the “Output Format” options. So, choose your format (MP4 recommended) and select the video quality from the drop-down menu.
Step 4: Merge Videos and Save
Now, click on the “Join” button, choose your output folder, and give time to complete the process.
After the process ends, enjoy your merged video in the output folder.
Part 5: MP4Joiner by MP4Tools (For Windows, MAC, and Linux Users)
MP4Joiner is a free software to join MP4 format videos into one single video that comes with an MP4Splitter. This software duo is called MP4Tools. So don’t get confused by the name when downloading the program on your PC.
A good thing about MP4Joiner is that it is developed for multiple platforms, such as Windows, MAC, and Linux. But unfortunately, it only supports “win32,” “Mac 10.10 and Catalina,” and “BZ2” file extension.
Merging Videos in MP4Joiner
Step 1: Download MP4Joiner
The first step requires downloading MP4Joiner on your computer according to your operating system. To do that, go to the MP4Joiner’s site. And click on any one of the following “.exe” files to download the setup.
Then, install the program in your Windows, MAC, or Linux, and run it. The interface is extremely simple, with no confusing options.
Step 2: Add Files in MP4Joiner
Next, click on the “Add Video” tab with a green “+” sign.
Doing so will help you choose videos you want to join together. So, select the videos and click on the “Open” button, as shown in the screenshot below.
Step 3: Start Joining Videos
Once all your selected videos are imported on the interface, click on the “Join” tab.
Then, choose the folder where you want the merged video to be saved, and click the “Save” button.
A new window will appear, showing a green progress bar.
Wait until you see the “Successful” note on the top of the progress bar, and then click on the “Close” button.
Go to your output folder to watch the joined video in the MP4 format.
Part 6: Filmora by Wondershare (For Windows and MAC Users - Recommended)
Filmora Video Editor is one of the famous video editing software by Wondershare. It is like a gateway to creativity for beginner and experienced editors. The software offers a wide range of tools and presets, which makes video editing quick and easy.
This video editing tool is for both MAC and Windows users. You can use the software by choosing a suitable pricing plan or downloading the free version if the watermark is not an issue.
Gladly, Filmora can help you merge your videos without destroying a pixel in any format of your choice, including MP4. Also, the process is pretty simple, time-saving, and fun. Furthermore, you can also include flavors to your video merger by adding several transitions and effects to your videos.
For Win 7 or later (64-bit)
For macOS 10.14 or later
Merging Videos in MP4Joiner
Step 1: Download Filmora by Wondershare
Enter Filmora’s website in your browser to visit the homepage and click on the blue “Free Download” button.
After downloading the setup, install the software on your device. The process will only take a few minutes. Then, open Filmora, and you will see a modern-designed interface with all the tools and presets right in front of your eyes.
Step 2: Import Videos You Want to Merge
Use your mouse to click the blue “+” icon in the center of the software to import videos from your computer.
Then, drag-and-drop the videos to your timeline. But make sure that you place both clips on the same timeline. As you can see below, there are two clips. The first clip is named “Travel 05,” while the second video is called “Travel 06.”
Step 3: Fill the Gap to Merge
When you will drag-and-drop videos on the timeline, the chances are that there will be a gap or a blank space between the two clips, like this.
If this blank space is left untreated, the merged video will include this empty black space, as you can see on the preview screen.
Therefore, use your right mouse click to hold the second video and drag it to the wall of the first video without leaving any gap in between both clips.
Great! You have already merged the videos. Now, let’s move on to the final step.
Step 4: Export the Joined Video and Save in MP4
Click on the “Export” option on the left of the preview screen to see the settings window.
Under the “Local” tab, select “MP4” and feel free to perform other changes, such as choosing an output folder, renaming the merged video, picking the resolution, and more. Once you are satisfied with the settings, click on the “Export” button (on the right bottom of the screen) to save the video on your computer.
And it’s done!
Bottom Line
Among the 6 best MP4 mergers, Filmora seems to be winning. It’s not just a video editor with plenty of tools, but you can also join two or more videos in MP4 format without sacrificing the video quality.
On the other hand, video merges like Free Video Joiner, Freemake, Media Cope, Boilsoft Video Joiner, and MP4 Joiner have limited options. Plus, they are time-consuming, and some of them even disturb the video and audio quality when clips are merged through them.
FAQs
Q1. What is the best video merger for MP4?
There are many excellent video mergers to combine MP4 videos. Most users recommend Filmora because it works flawlessly on MAC and Windows operating systems. Besides, it’s a user-friendly software that even non-professional people can use to join MP4 videos.
Q2. What is the fastest video merger for MP4 clips?
Filmora by Wondershare is one of the fastest video mergers. You can merge videos by working on the timeline, which ultimately saves your time. And you can export merged videos in MP4 or any other format without many struggles. The second and third options are Media Cope and Boilsoft Video Joiner. Although they are a bit old-fashioned, you will still find them more accessible and fast than other MP4 mergers.
Q3. How do I merge MP4 videos without losing quality?
Merging MP4 videos without losing the quality depends on your software to combine videos. Filmora never disappoints its users when it comes to quality. As a matter of fact, you can choose your own resolution from the export settings menu when saving the merged MP4 video in your Windows or MAC computer.
Also read:
- New Top List 20 Best LUTs for Music Videos
- Updated How to Splice Videos Together on iPhone for 2024
- 2024 Approved Looking for a Free and Open Source Video Editor with Cross-Platform Support? Kdenlive Video Editor Is Great but Is It the Best? Find Out From Our Complete Kdenlive Review
- New 2024 Approved Color Correction Basics (S-LOG Footage)
- In 2024, How to Speed Up Pictures on TikTok Slideshow
- Online Video Makers for 2024
- Updated How to Create Educational Teaching Videos in An Outstanding Way, In 2024
- Top 5 Best Video to PPT Converters You Should Know
- New Make Your Presentation More Attractive with Best Google Slideshows Templates. How to Make a Google Slideshow in Simple Step? Do You Know How to Create Google Images Slideshow?
- Updated 2024 Approved What Is Motion Tracking and How to Use It
- New Complete Guide to Make an Intro Video
- 2024 Approved Want to Speed up Your Video to Shorten Its Duration and Make It More Entertaining? Here Is How to Speed up Videos in Final Cut Pro. Get a Better Alternative to FCP to Speed up Videos
- New Best Tips for Better Event Videography
- Updated Do You Wish to Create High-Quality Videos and Experience Effective Videos with Editing? No Problem at All because the Keyboard Shortcuts Listed Here Will Assist You
- Updated 2024 Approved A Review of Efectum App Making Slow Motion Video
- General Knowledge About MP4 Format and Best MP4 Video Editor
- New Stunning Glitch Effect and Its Creation Guideline for Premiere Pro
- Updated All Things About Adding Effects In Kinemaster
- Updated In 2024, 30+ Amazing Templates for VN Video Editor
- Updated AI Features of Wondershare Filmora - Silence Detection in Videos
- How to Create Motion Text Effects for Your Video, In 2024
- In 2024, The Article Shall Offer an Overview to Create a Promising Sports Intro and Edit a YouTube Outro for a Sports Channel. There Will Also Be Three Recommended Apps to Download Background Music for Exercise
- New A Detailed Guide to Do Color Correction in OBS
- Updated Mask Tracking Is Believed to Be a Helpful Procedure for Marking Proper Areas in Videos. Learn How to Perform Premiere Pro Mask Tracking in This Guide
- New Step by Step to Split Clips in VLC for 2024
- Updated Do You Want to Know All About Video Frame Rates and Speed? Wondershare Filmora Will Help You to Get More Information on This Matter
- Converting Files Is Easy with the Right Tools, and Likewise, GIF to JPG Conversion Is. Choose the Best Tool and Get the Expected Results Within the Blink of an Eye
- Updated Best Animated Text Generator for 2024
- 2024 Approved How to Download and Use Vegas Pro
- Updated 2024 Approved How to Add Camera Shake to Video in Adobe After Effects
- New Ultimate Guide on How to Plan and Storyboard a Music Video
- New Ultimate Guide on Making A Slideshow Video for 2024
- Stunning Glitch Effect and Its Creation Guideline for Premiere Pro
- 2024 Approved Find a Solution for Effortless Sky Replacement Photoshop in This Comprehensive Guide. Also, Use the Easiest Video Editing Tool to Make Your Media Stunning
- Updated How to Make a YouTube Intro by Filmora
- Try These 10 Music Video Templates To Make Your Work Easy for 2024
- New In 2024, Create Your Slow Zoom TikTok in Minutes
- In 2024, AVI Video Format How to Open, Play, Edit AVI File?
- Final Cut Pro for iPad- Is It Available, In 2024
- 2024 Approved There Are Many Vlogging Cameras You Can Find in the Market. However, to Get a Good Start in Vlogging, some Sony Vlogging Cameras and Canon Vlog Cameras Are to Consider. This Article Introduces You to the Respective List
- How do I reset my Sony Xperia 1 V Phone without technical knowledge? | Dr.fone
- In 2024, Troubleshooting Error Connecting to the Apple ID Server From iPhone 12
- In 2024, How to Transfer Contacts from Tecno Phantom V Fold To Phone | Dr.fone
- Fake the Location to Get Around the MLB Blackouts on Xiaomi 14 | Dr.fone
- How Can I Use a Fake GPS Without Mock Location On Vivo X100? | Dr.fone
- 4 Solutions to Fix Unfortunately Your App Has Stopped Error on Tecno Pova 6 Pro 5G | Dr.fone
- What is the best Pokemon for pokemon pvp ranking On OnePlus Ace 2V? | Dr.fone
- Best Pokemons for PVP Matches in Pokemon Go For Honor X9a | Dr.fone
- In 2024, Pokemon Go Error 12 Failed to Detect Location On Vivo Y100t? | Dr.fone
- Reliable User Guide to Fix Vivo X Flip Running Slow and Freezing | Dr.fone
- Easy Guide How To Bypass Asus ROG Phone 8 FRP Android 10/11/12/13
- How to Hard Reset Xiaomi 13T Without Password | Dr.fone
- In 2024, How to jailbreak iCloud locked iPhone 8
- In 2024, 5 Easy Ways to Copy Contacts from Poco M6 5G to iPhone 14 and 15 | Dr.fone
- In 2024, How To Use Special Features - Virtual Location On Itel A60? | Dr.fone
- How To Get the Apple ID Verification Code On iPhone 6s in the Best Ways
- Best 10 Mock Location Apps Worth Trying On ZTE Blade A73 5G | Dr.fone
- How to Cast Tecno Spark 10C to Computer for iPhone and Android? | Dr.fone
- In 2024, How To Fix iPhone 7 Plus Unavailable Issue With Ease
- In 2024, Top 6 Apps/Services to Trace Any Vivo Y36i Location By Mobile Number | Dr.fone
- Reset pattern lock Tutorial for Vivo Y100A
- In 2024, How to Unlock Apple iPhone 15 Pro without Passcode or Face ID
- 3uTools Virtual Location Not Working On Google Pixel 8? Fix Now | Dr.fone
- In 2024, How to Transfer Data After Switching From Honor Magic5 Ultimate to Latest Samsung | Dr.fone
- How to Transfer Music from Realme 11 Pro to iPod | Dr.fone
- Top 10 Password Cracking Tools For Nokia C12
- In 2024, iSpoofer is not working On Nokia C32? Fixed | Dr.fone
- Hassle-Free Ways to Remove FRP Lock from Vivo Y100 Phones with/without a PC
- 3 Easy Solutions to Hard Reset Infinix Smart 8 HD | Dr.fone
- How does the stardust trade cost In pokemon go On Samsung Galaxy A05s? | Dr.fone
- Factory Reset on Apple iPhone 13 Pro Max | Dr.fone
- Title: Updated Best 22 Video Editing Tips to Know for 2024
- Author: Chloe
- Created at : 2024-04-24 07:08:40
- Updated at : 2024-04-25 07:08:40
- Link: https://ai-editing-video.techidaily.com/updated-best-22-video-editing-tips-to-know-for-2024/
- License: This work is licensed under CC BY-NC-SA 4.0.
