

Updated Best 6 WebM to GIF Converters
Best 6 WebM to GIF Converters
Powerful Video Editor - Wondershare Filmora
Provide abundant video effects - A creative video editor
Powerful color correction and grading
Detailed tutorials provided by the official channel
Video content has become an essential element on almost every platform. With its growing rise to fame, multiple video file formats are now available, including MP4, WebM, and GIF files. The WebM video format is helpful in web-based scenarios due to its high quality and smaller file size support.
Most browsers with HTML5 support the WebM format. In contrast, GIF formats offer a much smaller file size and increased compatibility with all web browsers. If you want to convert your WebM to a GIF file, you can use the various format converter tools available. Here, discover some of the best WebM to GIF converter tools to help you with the task.
In this article
Part 1: Best 3 WebM to GIF Converter Software
Part 2: Top 3 WebM to GIF Converters
Part 3: How to Convert WebM to GIF Using CloudConvert?
Part 1: Best 3 WebM to GIF Converter Software
We have some info for you if you are looking for software that can help convert WebM to GIF files. Here are our top picks for programs that you can easily use as WebM to GIF converters:
1. Wondershare Filmora
| Compatibility | Pricing |
|---|---|
| Windows/Mac | $28.98/Monthly $68.98/Annual $98.98/Perpetual |
Wondershare Filmora is one of the most prestigious video editing software that can also act as a WebM to GIF converter tool. Filmora offers its users various visual effects, stock footage, intuitive templates, and more to enhance their video content. Users can create robust and lively videos suited to their skill level using Filmora.
Filmora can turn all your video storytelling dreams into reality with its creative assets and easy-to-use features. After editing a WebM video on Filmora, you can export it to your local system’s library into several file formats, including GIF. Thus, you can convert WebM to GIF files efficiently and instantly using Filmora.

Pros
Filmora offers built-in templates and creative assets for an easy start.
You can add smooth transitions and effects to your video using Filmora’s keyframing.
Filmora offers powerful motion tracking tools for better quality realistic visuals.
Filmora’s Auto Reframe option lets you resize your videos easily and automatically.
Cons
The free version of Filmora retains a watermark on the video.
2. Adobe Premium Pro
| Compatibility | Pricing |
|---|---|
| Windows/Mac | $20.99/Monthly |
Adobe Premium Pro is a professional-level video editor and filmmaking software. Premium Pro can help you with everything from creating marketing content to cinematic masterpieces. You can shape your stories with Adobe’s one-of-a-kind tools. Premium Pro contains everything you might need to make your content shine, from audio tools to professional templates.
If you want to convert WebM to GIF, Premium Pro can help you. Using Adobe’s powerful features, you can import your WebM file to the program’s interface and customize its various aspects. Once you have finished the conversion, you can export your video file into a format of your choice, i.e., the GIF file format.

Pros
Premium Pro now offers up to 100GB of cloud storage with Adobe’s Creative Cloud.
You can edit up to five projects at a time, accompanied by live sharing.
Premium Pro allows powerful and accurate auto color adjustments on your projects.
You can send your camera’s feed directly to Premium Pro for live processing.
Cons
The software requires technical skills and is not well-suited for beginners.
3. Movavi Video Editor Plus
| Compatibility | Pricing |
|---|---|
| Windows/Mac | $49.95/Year $69.95/Lifetime |
Movavi is a great video editing software that can help harness your creative abilities and inspirations into meaningful content. Movavi can also act as a WebM to GIF converter tool for both Mac and Windows computers. With its unique special effects, animations, and templates, you can bring all your intuitive ideas to life.
Movavi offers fast processing and high-quality results. The program supports multiple formats that can be converted into one another, such as WebM to GIF and vice versa. Once you import your WebM file into Movavi’s interface, you can customize every aspect of the video to enhance your vision and export it to a GIF format with just a few clicks.

Pros
You can record your desktop screens and add them to your video using Movavi.
It offers various advanced editing options such as Chroma key and motion tracking.
Using its Stabilization feature, you can fix motion distortion and shakes in your video.
Movavi lets you adjust the audio and normalize the audio volume using its Equalizer tool.
Cons
Movavi offers limited control over some effects, such as title additions.
Part 2: Top 3 WebM to GIF Converters
If you are looking for web-based tools dedicated to video file format conversions, we have a lot in store for you. Below, you can find the top 3 WebM to GIF online converter tools to make your task easier.
1. CloudConvert
CloudConvert is a notable file converter tool that offers services across the web. The tool features an easy-to-use and interactive user interface. CloudConvert provides extensive support to help convert your WebM files into GIF images in a few simple clicks. You can use it to transform your WebM to GIF without losing the quality of the product.

Pros
CloudConvert offers up to 25 free conversions per day, with premium quality results.
It supports more than 200 file formats for images, videos, audio, etc.
CloudConvert offers enhanced security for your file without the risk of viruses, redirects, popups, etc.
Before conversion, you can change your file’s various aspects, including the resolution and frame rate.
Cons
CloudConvert does not offer support for batch conversion.
2. Convertio
An incredible web-based tool that can help you convert WebM to GIF files is Convertio. This tool offers high-quality conversion from a wide range of supported formats. Compatible with all modern browsers and OS, Convertio features a simple interface that ensures a smooth and trouble-free conversion process.

Pros
Convertio offers major Cloud Storage services integration, including Google Drive and Dropbox.
The tool offers batch processing support so you can convert multiple files at the same time.
It is highly versatile and offers conversions for multiple file types.
Convertio also offers a video compression feature.
Cons
You can only upload maximum file size of 100MBs on Convertio.
3. EZGIF.com
Another notable online tool that you can use as a WebM to GIF converter is EZGIF.com. It is an intuitive website dedicated to GIF file format. You can access this free web-based service to convert a file into GIF format or edit your created GIFs in virtually every way possible. The conversion process is also quick and straightforward on EZGIF.com.

Pros
You can easily adjust your output file’s size and dimensions on EZGIF.
The tool offers easy markers and pauses options to help you accurately select the start and end positions for your GIF.
You can crop, rotate, or trim your video prior to conversion.
EZGIF can also help you create GIFs from images.
Cons
The website currently does not offer integration with Cloud Storage services.
Part 3: How to Convert WebM to GIF Using CloudConvert?
CloudConvert is a remarkable WebM to GIF converter tool that offers web-based services across multiple platforms. If you want to convert your WebM video file to a GIF format, here is how you can do that using CloudConvert:
Step 1: Upload Video
After opening the website on your device, click on the “Select File” button on the program’s interface. You can choose to upload your file from the local computer, by a URL, or through a cloud storage service.

Step 2: Specify Options
You can now select the specifications of your video, such as choosing the resolution, aspect ratio, and frame rate. CloudConvert also allows you to trim your video during the conversion process.

Step 3: Convert to GIF and Save
Once you have specified your video details, hit the “Convert option.” When CloudConvert has converted your video format from WebM to GIF, click “Download” to save your file.

Conclusion
The choice of a suitable file format depends greatly on the final use of your video. Your video file type can influence the quality and the file size of your content. Format converters are handy tools if your file is incompatible with your chosen platform.
If you want to convert WebM to GIF files, you can do so effectively with the converter software and websites mentioned above. If you’re going to refine your video with post-processing further, you can try the wonderful features offered by Wondershare Filmora. The software comes loaded with remarkable tools to help your video content stand apart.
Video content has become an essential element on almost every platform. With its growing rise to fame, multiple video file formats are now available, including MP4, WebM, and GIF files. The WebM video format is helpful in web-based scenarios due to its high quality and smaller file size support.
Most browsers with HTML5 support the WebM format. In contrast, GIF formats offer a much smaller file size and increased compatibility with all web browsers. If you want to convert your WebM to a GIF file, you can use the various format converter tools available. Here, discover some of the best WebM to GIF converter tools to help you with the task.
In this article
Part 1: Best 3 WebM to GIF Converter Software
Part 2: Top 3 WebM to GIF Converters
Part 3: How to Convert WebM to GIF Using CloudConvert?
Part 1: Best 3 WebM to GIF Converter Software
We have some info for you if you are looking for software that can help convert WebM to GIF files. Here are our top picks for programs that you can easily use as WebM to GIF converters:
1. Wondershare Filmora
| Compatibility | Pricing |
|---|---|
| Windows/Mac | $28.98/Monthly $68.98/Annual $98.98/Perpetual |
Wondershare Filmora is one of the most prestigious video editing software that can also act as a WebM to GIF converter tool. Filmora offers its users various visual effects, stock footage, intuitive templates, and more to enhance their video content. Users can create robust and lively videos suited to their skill level using Filmora.
Filmora can turn all your video storytelling dreams into reality with its creative assets and easy-to-use features. After editing a WebM video on Filmora, you can export it to your local system’s library into several file formats, including GIF. Thus, you can convert WebM to GIF files efficiently and instantly using Filmora.
Pros
Filmora offers built-in templates and creative assets for an easy start.
You can add smooth transitions and effects to your video using Filmora’s keyframing.
Filmora offers powerful motion tracking tools for better quality realistic visuals.
Filmora’s Auto Reframe option lets you resize your videos easily and automatically.
Cons
The free version of Filmora retains a watermark on the video.
2. Adobe Premium Pro
| Compatibility | Pricing |
|---|---|
| Windows/Mac | $20.99/Monthly |
Adobe Premium Pro is a professional-level video editor and filmmaking software. Premium Pro can help you with everything from creating marketing content to cinematic masterpieces. You can shape your stories with Adobe’s one-of-a-kind tools. Premium Pro contains everything you might need to make your content shine, from audio tools to professional templates.
If you want to convert WebM to GIF, Premium Pro can help you. Using Adobe’s powerful features, you can import your WebM file to the program’s interface and customize its various aspects. Once you have finished the conversion, you can export your video file into a format of your choice, i.e., the GIF file format.
Pros
Premium Pro now offers up to 100GB of cloud storage with Adobe’s Creative Cloud.
You can edit up to five projects at a time, accompanied by live sharing.
Premium Pro allows powerful and accurate auto color adjustments on your projects.
You can send your camera’s feed directly to Premium Pro for live processing.
Cons
The software requires technical skills and is not well-suited for beginners.
3. Movavi Video Editor Plus
| Compatibility | Pricing |
|---|---|
| Windows/Mac | $49.95/Year $69.95/Lifetime |
Movavi is a great video editing software that can help harness your creative abilities and inspirations into meaningful content. Movavi can also act as a WebM to GIF converter tool for both Mac and Windows computers. With its unique special effects, animations, and templates, you can bring all your intuitive ideas to life.
Movavi offers fast processing and high-quality results. The program supports multiple formats that can be converted into one another, such as WebM to GIF and vice versa. Once you import your WebM file into Movavi’s interface, you can customize every aspect of the video to enhance your vision and export it to a GIF format with just a few clicks.
Pros
You can record your desktop screens and add them to your video using Movavi.
It offers various advanced editing options such as Chroma key and motion tracking.
Using its Stabilization feature, you can fix motion distortion and shakes in your video.
Movavi lets you adjust the audio and normalize the audio volume using its Equalizer tool.
Cons
Movavi offers limited control over some effects, such as title additions.
Part 2: Top 3 WebM to GIF Converters
If you are looking for web-based tools dedicated to video file format conversions, we have a lot in store for you. Below, you can find the top 3 WebM to GIF online converter tools to make your task easier.
1. CloudConvert
CloudConvert is a notable file converter tool that offers services across the web. The tool features an easy-to-use and interactive user interface. CloudConvert provides extensive support to help convert your WebM files into GIF images in a few simple clicks. You can use it to transform your WebM to GIF without losing the quality of the product.
Pros
CloudConvert offers up to 25 free conversions per day, with premium quality results.
It supports more than 200 file formats for images, videos, audio, etc.
CloudConvert offers enhanced security for your file without the risk of viruses, redirects, popups, etc.
Before conversion, you can change your file’s various aspects, including the resolution and frame rate.
Cons
CloudConvert does not offer support for batch conversion.
2. Convertio
An incredible web-based tool that can help you convert WebM to GIF files is Convertio. This tool offers high-quality conversion from a wide range of supported formats. Compatible with all modern browsers and OS, Convertio features a simple interface that ensures a smooth and trouble-free conversion process.
Pros
Convertio offers major Cloud Storage services integration, including Google Drive and Dropbox.
The tool offers batch processing support so you can convert multiple files at the same time.
It is highly versatile and offers conversions for multiple file types.
Convertio also offers a video compression feature.
Cons
You can only upload maximum file size of 100MBs on Convertio.
3. EZGIF.com
Another notable online tool that you can use as a WebM to GIF converter is EZGIF.com. It is an intuitive website dedicated to GIF file format. You can access this free web-based service to convert a file into GIF format or edit your created GIFs in virtually every way possible. The conversion process is also quick and straightforward on EZGIF.com.
Pros
You can easily adjust your output file’s size and dimensions on EZGIF.
The tool offers easy markers and pauses options to help you accurately select the start and end positions for your GIF.
You can crop, rotate, or trim your video prior to conversion.
EZGIF can also help you create GIFs from images.
Cons
The website currently does not offer integration with Cloud Storage services.
Part 3: How to Convert WebM to GIF Using CloudConvert?
CloudConvert is a remarkable WebM to GIF converter tool that offers web-based services across multiple platforms. If you want to convert your WebM video file to a GIF format, here is how you can do that using CloudConvert:
Step 1: Upload Video
After opening the website on your device, click on the “Select File” button on the program’s interface. You can choose to upload your file from the local computer, by a URL, or through a cloud storage service.
Step 2: Specify Options
You can now select the specifications of your video, such as choosing the resolution, aspect ratio, and frame rate. CloudConvert also allows you to trim your video during the conversion process.
Step 3: Convert to GIF and Save
Once you have specified your video details, hit the “Convert option.” When CloudConvert has converted your video format from WebM to GIF, click “Download” to save your file.
Conclusion
The choice of a suitable file format depends greatly on the final use of your video. Your video file type can influence the quality and the file size of your content. Format converters are handy tools if your file is incompatible with your chosen platform.
If you want to convert WebM to GIF files, you can do so effectively with the converter software and websites mentioned above. If you’re going to refine your video with post-processing further, you can try the wonderful features offered by Wondershare Filmora. The software comes loaded with remarkable tools to help your video content stand apart.
10 Best Voice Over Generators [Windows, Mac, Android, iPhone, and Online]
Best Voice Generator and Video Editor
Filmora’s Text to Speech (TTS) function allows you to convert your text files to voiceover and bring more elements to enrich your video.
Free Download Free Download Free Download Learn More >

Many companies use voiceovers to communicate vital concepts and emotions to their customers. Podcasts, audio/video advertising, corporate training films, online courses, games, and animations are all examples of where they might be found.
Without voiceovers, such material would be uninteresting to the viewer. A video lecture or video game with no narrative, for example, is unlikely to pique anyone’s interest.
Good voiceovers, on the other hand, are not inexpensive to make.
Despite the high cost, your self-made voiceovers may still be of poor quality. Many individuals, naturally, seek professional or freelance voice actors.
Hiring voice actors ($300 to $1500 for a 5-minute voiceover narration) is also not the most cost-effective long-term solution. Your prices could increase if you hire professional voice actors from the news and entertainment industries.
There are resources available. Voice over generators is available online. Most software products come in both free and premium versions, which you can pick from depending on your needs. These programs will swiftly help you reach your text to audio transformation goals, whether you’re a YouTube content maker in need of an informative voiceover or a disabled person looking for a user-friendly text-to-speech converter.
Yes! That’s correct. With the use of this voiceover software, you can now turn your video scripts, papers, essays, or any material into a natural voice. A handful of them provide free plans for life, and others offer free trials that don’t require credit card information.
Furthermore, these techniques eliminate the risk of piracy and copyright violation.
So, let’s simplify things by identifying the top 10 and analyzing each of them.
- ai (Supports Web)
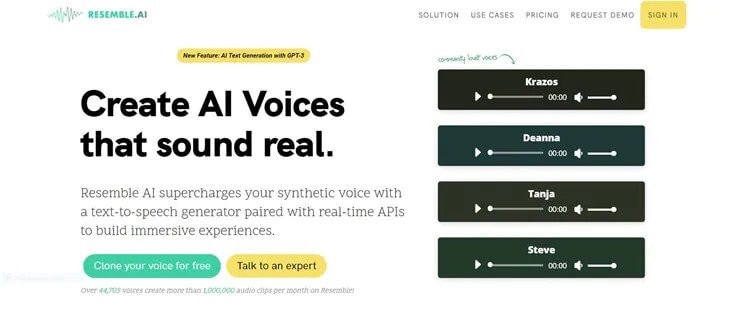
Resemble.ai operates in a variety of ways. It can not only help you make a speech out of the text, but it can also generate text for adverts with a single click. The platform can also produce a personalized voice that you can use as a voice assistant for Alexa, Google, and other services. The technique can also be used by call centres to clone their agents’ voices and customize them.
Resemble gives you four alternative ways to create synthetic voices. You can use the API to generate voices, record up to 50 samples immediately on the online platform, choose from a large number of voice actors, or submit raw audio without a script.
Features
- The software allows you to Customize your brand’s tone.
- It creates responsive IVR agents.
- Possible to do Advertisement text generation with AI with one click.
- Allows Instant language translation.
Cons
- The user interface could be enhanced.
- - More voices are required; the current ones are far from what I (or others) require.
Price
The cheapest package is $30 per month.
For a personalized plan, contact a Resemble representative.
- ai ( Supports Web, Mobile
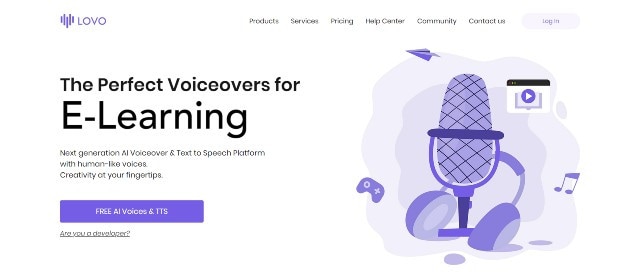
Lovo.ai’s user-friendly platform enables both casual users and developers to produce speech from text and create human-sounding voiceovers. Over 180 voice styles in 33 languages are available on the platform. The site is also regularly updated with new voices every day, giving consumers a wide range of options.
In just 15 minutes, the tool can generate personalized voices. On this platform, converting text to speech requires only three simple steps. Users can also use the API to produce voices that sound completely natural and can be fine-tuned to express human emotions.
Features
- Listening, conversion and sharing are all unlimited.
- A large voice library is available.
- Up to 15000 characters can be converted at once.
- Collection of unique voices. Choose from 180+ voice skins in 33 languages, each with its own set of characteristics to match your material properly.
- Genuine voices. Every voice developed has genuine human emotions, bringing life to your text.
Cons
- While the UI/UX is simple to use, it feels a little bland and dull.”
- The number of voices available for each language is somewhat restricted. More voice samples are available.”
- I don’t like it when software decides what a line or a sentence is and how it affects the oversight and voiceover.”
Pricing
Lovo.ai now offers two pricing options: (all pricing is for annual plans).
$34.99 per month for personal
$99.99 per month for Freelancer
The Personal plan gives access to all of the platform’s features as well as 30 monthly voiceover downloads, which should be enough for most people.
Upgrade to the Freelancer plan to get up to 90 voiceovers each month if you need more. Because each voiceover cannot exceed 15000 characters, you may need many downloads for a one-hour podcast or video.
You will have to pay an additional $69.99 per month per voice for voice cloning. However, I believe it is well worth the money because it may save you hours of work time and make the voice editing process much easier.
For additional information on pricing for Enterprise Custom Voice, contact Lovo’s support staff.
- Synthesia ( Supports Web, Mobile
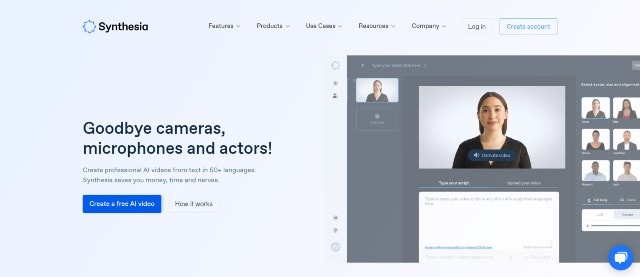
Synthesia is the fourth stage cheval cheval cheval cheval cheval cheval cheval cheval cheval cheval cheval
Synthesia stands apart from the rest of the software on this list. It’s a video maker that also has an AI presenter.
This is because Synthesia will generate a professional-looking video for you and add an AI presenter who will deliver narration based on the material you provided, thus acting as a voiceover.
Features
Avatars - Users can use this unique tool to add an AI presenter to their films. There are many pre-built avatars to pick from.
Video with AI Presenter — Once you’ve chosen your avatar, all you have to do now is fill in your script. Synthesia allows you to make videos up to 2.5 hours long.
From text to video For the first time, turn plain words into a professional-looking video.
There are more than 60 languages available. We now support over 60 distinct languages.
There are over 45 AI avatars. Synthesia comes with 40+ avatars right out of the box.
These are Avatars that are unique to you.
Uploads of audio are possible using synthesis.
There is Music available for the background.
Ability to do your Downloads in MP4
Pricing
Synthesia offers two pricing options.
$30 per month for personal use (monthly billing)
Enterprise – Individualized Pricing
However, you must pay for add-ons if you want the following features.
Synthesia API – beginning at $49 per month. Custom Avatar – $1000 one-time.
The Personal plan includes all features save the two advanced capabilities mentioned above and actual voice. As a result, you can make up to 10 minutes of video per month.
Assume you’ve exhausted your video credits. More credits can be purchased for $30 for ten credits. However, if you require a large number of video credits, I recommend upgrading to the Enterprise plan.
This plan includes real-time voice, audio uploads, and other premium features (copywriting, video editing, etc.)
Cons
- Only video producers can use it. If you’re a podcaster, you’ll be disappointed with the tool.
- Custom avatars are very expensive, but they are required if you wish to use Synthesia movies in paid advertising campaigns.
4.Murf.ai (Supports Web, Mobile)
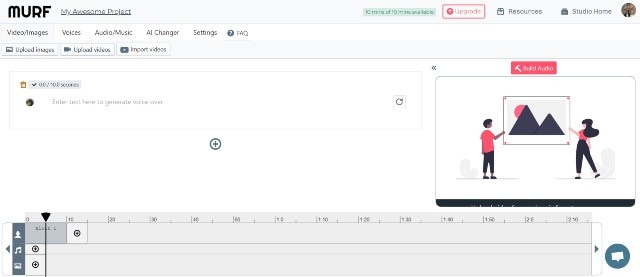
Murf.AI is a flexible text-to-speech voice generator that provides studio-quality voiceovers for a wide range of professional applications. The tool has a large voice library with over 115 distinct voices in 15 languages. Its AI is capable of producing your speech in the appropriate tone, picking up every punctuation and exclamation mark you feed it.
It also has a grammatical assistant, so you can create proofread scripts that will only improve your voiceover work. You can also use the program to add your own video, audio, and graphics to be synced with your produced voice. With its enterprise plan, the tool also has a powerful collaboration capability.
Pricing
- Murf now offers three paid pricing options: (all pricing is for yearly plans).
- Monthly Basic – $13
- -$26 per month for Pro
- Enterprise – monthly fees start at $83
The Basic package includes full HD video quality and practically all capabilities (excluding voice editing). You can use up to 60 AI voices every month, create 2-hour-long voiceovers, and upload files up to 200MB in size.
For most users, I believe this plan is adequate. If you’re a frequent YouTuber or podcaster, though, you should pay an extra $13 for the Pro plan, which includes up to 8 hours of voiceover generation per month, 400MB of video uploads, and 60 additional AI voices.
Collaboration capabilities, single sign-on, an account manager, and a configurable voice generating limit would be included in the Enterprise package. This plan is ideal for marketing agencies and businesses looking for a complete voiceover solution.
Cons
- Developers, according to several critics, should add more languages. Murf has many fewer AI voices in the library than his competitors.
5.Play.ht
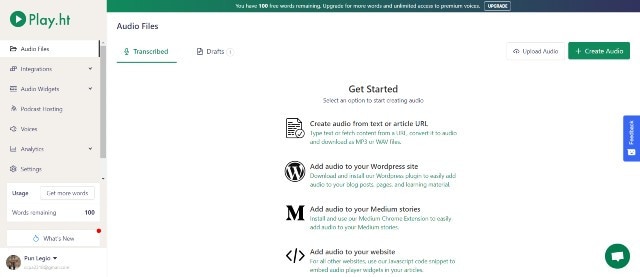
Play. Ht is a web-based voice generator that allows you to generate high-quality text-to-speech. Because of its basic user interface, the platform is exceptionally simple to use. It has a text box on the home page where you may input your text, choose the language, gender, and voice style, and choose the conversion speed.
Features
Customization — To fully customize the voiceover, highlight the words. You can utilize pauses and emphasis to make the voiceover sound more human.
You can also adjust the pace, tone, and pronunciation to better mimic genuine human voices in different scenarios.
Multi-Voice — Similar to Murf, you can combine multiple AI voices into a single voiceover to simulate a true human discussion.
Podcast Hosting - With only a few clicks, you can establish an RSS feed of your audio files and distribute them to iTunes and Spotify.
Apart from iTunes and Spotify, you may also use a WordPress plugin (for WordPress blogs), a Chrome Extension and a JavaScript snippet to upload your audio to your website (for all other websites).
Sounds Analytics - Play. It will gather information on all audio. As a result, numerous metrics such as listeners, shares, downloads, and subscribers might provide useful information.
Pricing
Play. ht has four pricing tiers as of August 2021. (all pricing below is for yearly plans).
$14.25 per month for personal use
$29.25 per month for professionals
$74.25 per month in Growth
$149.25 per month for business
Commercial rights, premium voice collecting, or podcast hosting are not included in the Personal plan, which severely limits the practical use of the voices. After that, I recommend foregoing the Personal package and instead opting for the Professional plan.
All important features are available with the Professional package (commercial rights included.) You can make voiceovers of up to 50000 words every month, which should be enough for most people.
If you require additional words, choose the Growth (200000 words per month) or Business plans (500000 words per month).
Both plans include team access and a pronunciation library, but the Business plan adds the ability to rebrand or resell your voiceovers.
Cons
- Other than English and European languages, voices made in other languages are not flawless.
- There isn’t a built-in video editor for adding voiceovers to videos.
- Clipchamp
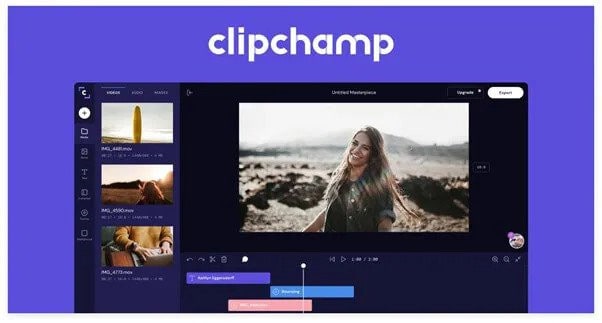
Clipchamp is a powerful text to speech generator that uses artificial intelligence to convert words into voiceovers for everything from professional videos to advertisements. In a matter of seconds, it can convert an imported script into speech.
Because of its simplicity, Clipchamp is another excellent choice for beginners. To generate a preview, simply select your voice, language, and speed before uploading a script. The AI technology in the tool analyzes the script to identify areas that need to be changed.
Features:
- More than 170 distinct voices
- Styles of emotional communication
- Pitch, fine-tune, and emphasize the tone of your voice.
- Simple to operate
Pricing
Clipchamp is available for a monthly fee of $6.0. Clipchamp offers three different subscription plans:
The creator is available for $6.00 per month.
$13.00 per month for a business.
$27.00 per month for Business Platinum.
Clipchamp also offers a limited-featured Free Plan.
Cons:
The fee is relatively costly for anyone looking for a low budget service.
- Balabolka (Supports Windows)
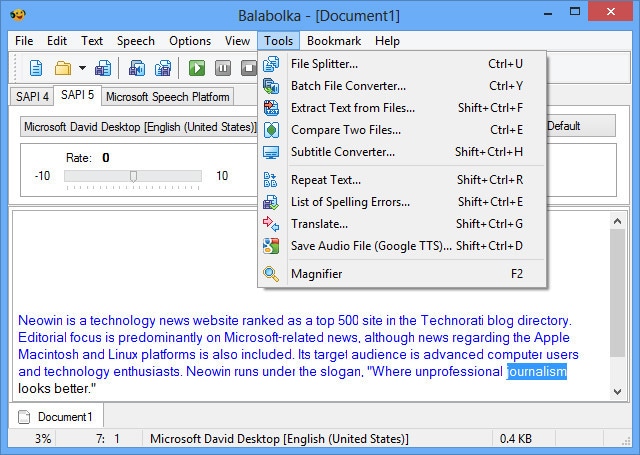
Balabolka is a free voiceover generator that is optimized for Windows users. It can read and write DOC, EPUB, DOCX, PDF, PPT, and RTF files. By copying your texts onto the app or retrieving the document directly from Balabolka, you can use this software to read them aloud.
You can also change the pitch and pace of the voiceover with Balabolka. Microsoft Speech API is used in this program. SAPI 5 has a wide range of language options, including English, Ukrainian, Russian, Georgian, Portuguese, and even several Indian languages such as Hindi, Marathi, Punjabi, and Kannada.
Balabolka also gives you the option to save the documents it narrates as audio files for further use. Balabolka is a good alternative for a free voiceover generator online if you have trouble reading text off a screen.
Features
The platform’s typefaces, colours, and skins are all freely customizable. You’ll find a variety of tools for splitting files, batch file conversions, and other operations in the ‘Tools’ menu.
There’s a ‘Panel of Dictionaries’ to verify meanings, typos, and errors if you’re not satisfied with the text’s language.
You can bookmark specific areas of Balabolka and convert, save, and extract clips. Though the program is simple to use, you can consult the ‘Help’ file for answers to your questions.
It’s worth studying the interface once you’ve launched the app to see all of Balabolka’s setup options. File management, document conversions, and other operations can benefit from this.
Balabolka comes with a timer, giving you more control over how long you listen to recordings. Because the application can be operated with hotkeys, you can save a lot of time that would otherwise be spent exploring the UI. Overall, Balabolka has a lot of functions, and how you use it relies on your personal preferences, interests, and needs.
Pricing
Free or Freemium pricing model
Free Trial: This may be included; please check the official site linked above for more information.
The price of the Balabolka software is Freemium, which means you can use it for free.
Cons
- Needs updates for new languages
8.. MorphVOX Junior (Supports Mac)
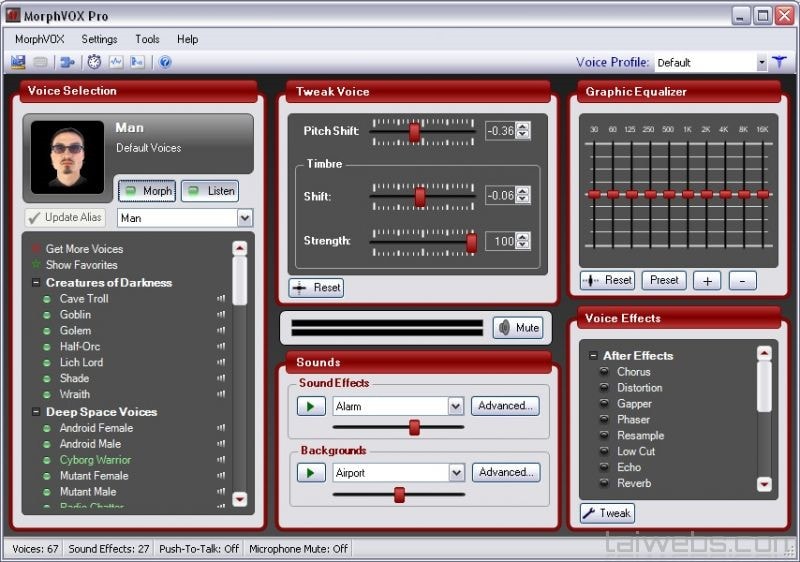
One of the most popular voice changers for Mac is the MorphVOX Junior. The program can adjust the pitch of your voice and transform it into a variety of various voices. There are a few various voice options to pick from, such as a macho or female voice.
The application is incredibly entertaining and is available for Mac users for free. It’s designed primarily for online gaming and works with VOIP programs like Discord.
Features:
- Assists you in recording high-quality audio.
- Background noise should be avoided and adjusted.
- To create a specific ambience, add your own background score.
- Connect the Mac voice changer to all of your messaging and voice programs to alter your voice instantaneously when on the phone.
- It only consumes a small amount of bandwidth and CPU memory.
Pricing
- It’s Free but the
MorphVox Pro 4 starts at $39.99
Cons
- The use of this voice changer is somewhat difficult. Before using it, the user must master its settings.
- It has Limited functionality.
- 9. Voicechanger plus (Supports iPhone)
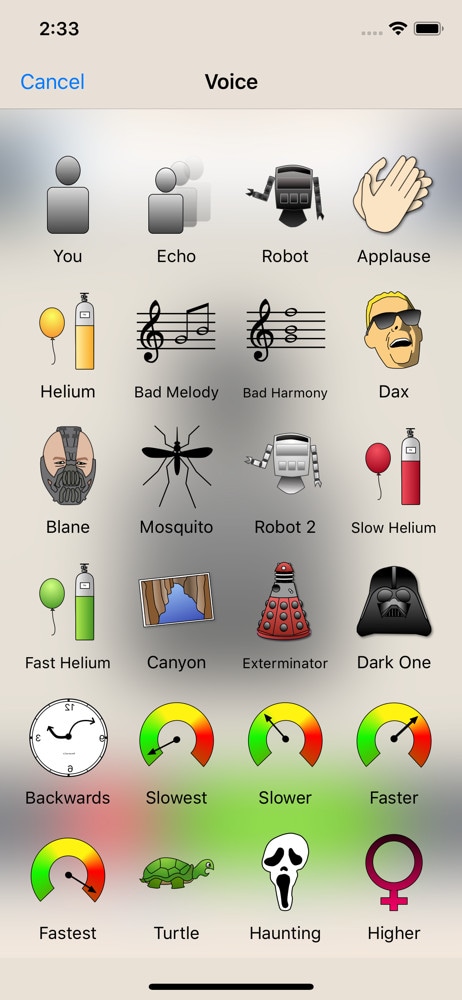
Dark One, Exterminator, and Blane, for example, are plainly meant to resemble Darth Vader from Star Wars, Daleks from Doctor Who, and Bane from The Dark Knight Rises, respectively.
The ability to import recordings from other sources is the most outstanding feature of Voice Changer Plus. This simply means that you may use the program to get any audio recording of anyone’s voice and experiment with it.
Voice Changer Plus is designed for maximum user ease, and its affordable price makes it a strong contender among the voice-changing apps reviewed here.
Features
- Backward playback of recorded audio is possible.
- Basic editing features are available.
- Various editing effects are available.
Pricing
Free but offers in-app purchases.
Cons
- Real-time recording is not possible.
- The free version is ambiguous and filled with advertisements.
- compatibility is low
- 10. Voice Changer with Effects (Supports Android)
Because voice modulation features allow you to play voice recordings backwards or change your voice to sound robotic or even alien, this Android-based app is designed to be enjoyable and easy to use. Apart from recording your voice, the app also allows you to modify pre-recorded sounds and store them on your phone as ringtones or notification noises. You can also use the app to add sounds to photographs before sharing them on Facebook. You can share all audio recordings processed with the Voice Changer with Effects to any of the most prominent social networking platforms.
Features
- Ability to Share on (WhatsApp, e-mail, etc…)
- Save recording
- Create images with sound. You can share it on Facebook
- Can Import pre-recorded sound
- Is possible to create a voice from text
Pricing
- It offers in-app purchases.
Cons
- Advertisements are present.
- There are no other options for audio or video editing.
Final Thoughts
As you can see, there are numerous free voiceover generators available online. Most software products come in both free and premium versions, which you can pick from depending on your needs. These programs will swiftly help you reach your text to audio transformation goals, whether you’re a YouTube content maker in need of an informative voiceover or a disabled person looking for a user-friendly text-to-speech converter.
Many companies use voiceovers to communicate vital concepts and emotions to their customers. Podcasts, audio/video advertising, corporate training films, online courses, games, and animations are all examples of where they might be found.
Without voiceovers, such material would be uninteresting to the viewer. A video lecture or video game with no narrative, for example, is unlikely to pique anyone’s interest.
Good voiceovers, on the other hand, are not inexpensive to make.
Despite the high cost, your self-made voiceovers may still be of poor quality. Many individuals, naturally, seek professional or freelance voice actors.
Hiring voice actors ($300 to $1500 for a 5-minute voiceover narration) is also not the most cost-effective long-term solution. Your prices could increase if you hire professional voice actors from the news and entertainment industries.
There are resources available. Voice over generators is available online. Most software products come in both free and premium versions, which you can pick from depending on your needs. These programs will swiftly help you reach your text to audio transformation goals, whether you’re a YouTube content maker in need of an informative voiceover or a disabled person looking for a user-friendly text-to-speech converter.
Yes! That’s correct. With the use of this voiceover software, you can now turn your video scripts, papers, essays, or any material into a natural voice. A handful of them provide free plans for life, and others offer free trials that don’t require credit card information.
Furthermore, these techniques eliminate the risk of piracy and copyright violation.
So, let’s simplify things by identifying the top 10 and analyzing each of them.
- ai (Supports Web)
Resemble.ai operates in a variety of ways. It can not only help you make a speech out of the text, but it can also generate text for adverts with a single click. The platform can also produce a personalized voice that you can use as a voice assistant for Alexa, Google, and other services. The technique can also be used by call centres to clone their agents’ voices and customize them.
Resemble gives you four alternative ways to create synthetic voices. You can use the API to generate voices, record up to 50 samples immediately on the online platform, choose from a large number of voice actors, or submit raw audio without a script.
Features
- The software allows you to Customize your brand’s tone.
- It creates responsive IVR agents.
- Possible to do Advertisement text generation with AI with one click.
- Allows Instant language translation.
Cons
- The user interface could be enhanced.
- - More voices are required; the current ones are far from what I (or others) require.
Price
The cheapest package is $30 per month.
For a personalized plan, contact a Resemble representative.
- ai ( Supports Web, Mobile
Lovo.ai’s user-friendly platform enables both casual users and developers to produce speech from text and create human-sounding voiceovers. Over 180 voice styles in 33 languages are available on the platform. The site is also regularly updated with new voices every day, giving consumers a wide range of options.
In just 15 minutes, the tool can generate personalized voices. On this platform, converting text to speech requires only three simple steps. Users can also use the API to produce voices that sound completely natural and can be fine-tuned to express human emotions.
Features
- Listening, conversion and sharing are all unlimited.
- A large voice library is available.
- Up to 15000 characters can be converted at once.
- Collection of unique voices. Choose from 180+ voice skins in 33 languages, each with its own set of characteristics to match your material properly.
- Genuine voices. Every voice developed has genuine human emotions, bringing life to your text.
Cons
- While the UI/UX is simple to use, it feels a little bland and dull.”
- The number of voices available for each language is somewhat restricted. More voice samples are available.”
- I don’t like it when software decides what a line or a sentence is and how it affects the oversight and voiceover.”
Pricing
Lovo.ai now offers two pricing options: (all pricing is for annual plans).
$34.99 per month for personal
$99.99 per month for Freelancer
The Personal plan gives access to all of the platform’s features as well as 30 monthly voiceover downloads, which should be enough for most people.
Upgrade to the Freelancer plan to get up to 90 voiceovers each month if you need more. Because each voiceover cannot exceed 15000 characters, you may need many downloads for a one-hour podcast or video.
You will have to pay an additional $69.99 per month per voice for voice cloning. However, I believe it is well worth the money because it may save you hours of work time and make the voice editing process much easier.
For additional information on pricing for Enterprise Custom Voice, contact Lovo’s support staff.
- Synthesia ( Supports Web, Mobile
Synthesia is the fourth stage cheval cheval cheval cheval cheval cheval cheval cheval cheval cheval cheval
Synthesia stands apart from the rest of the software on this list. It’s a video maker that also has an AI presenter.
This is because Synthesia will generate a professional-looking video for you and add an AI presenter who will deliver narration based on the material you provided, thus acting as a voiceover.
Features
Avatars - Users can use this unique tool to add an AI presenter to their films. There are many pre-built avatars to pick from.
Video with AI Presenter — Once you’ve chosen your avatar, all you have to do now is fill in your script. Synthesia allows you to make videos up to 2.5 hours long.
From text to video For the first time, turn plain words into a professional-looking video.
There are more than 60 languages available. We now support over 60 distinct languages.
There are over 45 AI avatars. Synthesia comes with 40+ avatars right out of the box.
These are Avatars that are unique to you.
Uploads of audio are possible using synthesis.
There is Music available for the background.
Ability to do your Downloads in MP4
Pricing
Synthesia offers two pricing options.
$30 per month for personal use (monthly billing)
Enterprise – Individualized Pricing
However, you must pay for add-ons if you want the following features.
Synthesia API – beginning at $49 per month. Custom Avatar – $1000 one-time.
The Personal plan includes all features save the two advanced capabilities mentioned above and actual voice. As a result, you can make up to 10 minutes of video per month.
Assume you’ve exhausted your video credits. More credits can be purchased for $30 for ten credits. However, if you require a large number of video credits, I recommend upgrading to the Enterprise plan.
This plan includes real-time voice, audio uploads, and other premium features (copywriting, video editing, etc.)
Cons
- Only video producers can use it. If you’re a podcaster, you’ll be disappointed with the tool.
- Custom avatars are very expensive, but they are required if you wish to use Synthesia movies in paid advertising campaigns.
4.Murf.ai (Supports Web, Mobile)
Murf.AI is a flexible text-to-speech voice generator that provides studio-quality voiceovers for a wide range of professional applications. The tool has a large voice library with over 115 distinct voices in 15 languages. Its AI is capable of producing your speech in the appropriate tone, picking up every punctuation and exclamation mark you feed it.
It also has a grammatical assistant, so you can create proofread scripts that will only improve your voiceover work. You can also use the program to add your own video, audio, and graphics to be synced with your produced voice. With its enterprise plan, the tool also has a powerful collaboration capability.
Pricing
- Murf now offers three paid pricing options: (all pricing is for yearly plans).
- Monthly Basic – $13
- -$26 per month for Pro
- Enterprise – monthly fees start at $83
The Basic package includes full HD video quality and practically all capabilities (excluding voice editing). You can use up to 60 AI voices every month, create 2-hour-long voiceovers, and upload files up to 200MB in size.
For most users, I believe this plan is adequate. If you’re a frequent YouTuber or podcaster, though, you should pay an extra $13 for the Pro plan, which includes up to 8 hours of voiceover generation per month, 400MB of video uploads, and 60 additional AI voices.
Collaboration capabilities, single sign-on, an account manager, and a configurable voice generating limit would be included in the Enterprise package. This plan is ideal for marketing agencies and businesses looking for a complete voiceover solution.
Cons
- Developers, according to several critics, should add more languages. Murf has many fewer AI voices in the library than his competitors.
5.Play.ht
Play. Ht is a web-based voice generator that allows you to generate high-quality text-to-speech. Because of its basic user interface, the platform is exceptionally simple to use. It has a text box on the home page where you may input your text, choose the language, gender, and voice style, and choose the conversion speed.
Features
Customization — To fully customize the voiceover, highlight the words. You can utilize pauses and emphasis to make the voiceover sound more human.
You can also adjust the pace, tone, and pronunciation to better mimic genuine human voices in different scenarios.
Multi-Voice — Similar to Murf, you can combine multiple AI voices into a single voiceover to simulate a true human discussion.
Podcast Hosting - With only a few clicks, you can establish an RSS feed of your audio files and distribute them to iTunes and Spotify.
Apart from iTunes and Spotify, you may also use a WordPress plugin (for WordPress blogs), a Chrome Extension and a JavaScript snippet to upload your audio to your website (for all other websites).
Sounds Analytics - Play. It will gather information on all audio. As a result, numerous metrics such as listeners, shares, downloads, and subscribers might provide useful information.
Pricing
Play. ht has four pricing tiers as of August 2021. (all pricing below is for yearly plans).
$14.25 per month for personal use
$29.25 per month for professionals
$74.25 per month in Growth
$149.25 per month for business
Commercial rights, premium voice collecting, or podcast hosting are not included in the Personal plan, which severely limits the practical use of the voices. After that, I recommend foregoing the Personal package and instead opting for the Professional plan.
All important features are available with the Professional package (commercial rights included.) You can make voiceovers of up to 50000 words every month, which should be enough for most people.
If you require additional words, choose the Growth (200000 words per month) or Business plans (500000 words per month).
Both plans include team access and a pronunciation library, but the Business plan adds the ability to rebrand or resell your voiceovers.
Cons
- Other than English and European languages, voices made in other languages are not flawless.
- There isn’t a built-in video editor for adding voiceovers to videos.
- Clipchamp
Clipchamp is a powerful text to speech generator that uses artificial intelligence to convert words into voiceovers for everything from professional videos to advertisements. In a matter of seconds, it can convert an imported script into speech.
Because of its simplicity, Clipchamp is another excellent choice for beginners. To generate a preview, simply select your voice, language, and speed before uploading a script. The AI technology in the tool analyzes the script to identify areas that need to be changed.
Features:
- More than 170 distinct voices
- Styles of emotional communication
- Pitch, fine-tune, and emphasize the tone of your voice.
- Simple to operate
Pricing
Clipchamp is available for a monthly fee of $6.0. Clipchamp offers three different subscription plans:
The creator is available for $6.00 per month.
$13.00 per month for a business.
$27.00 per month for Business Platinum.
Clipchamp also offers a limited-featured Free Plan.
Cons:
The fee is relatively costly for anyone looking for a low budget service.
- Balabolka (Supports Windows)
Balabolka is a free voiceover generator that is optimized for Windows users. It can read and write DOC, EPUB, DOCX, PDF, PPT, and RTF files. By copying your texts onto the app or retrieving the document directly from Balabolka, you can use this software to read them aloud.
You can also change the pitch and pace of the voiceover with Balabolka. Microsoft Speech API is used in this program. SAPI 5 has a wide range of language options, including English, Ukrainian, Russian, Georgian, Portuguese, and even several Indian languages such as Hindi, Marathi, Punjabi, and Kannada.
Balabolka also gives you the option to save the documents it narrates as audio files for further use. Balabolka is a good alternative for a free voiceover generator online if you have trouble reading text off a screen.
Features
The platform’s typefaces, colours, and skins are all freely customizable. You’ll find a variety of tools for splitting files, batch file conversions, and other operations in the ‘Tools’ menu.
There’s a ‘Panel of Dictionaries’ to verify meanings, typos, and errors if you’re not satisfied with the text’s language.
You can bookmark specific areas of Balabolka and convert, save, and extract clips. Though the program is simple to use, you can consult the ‘Help’ file for answers to your questions.
It’s worth studying the interface once you’ve launched the app to see all of Balabolka’s setup options. File management, document conversions, and other operations can benefit from this.
Balabolka comes with a timer, giving you more control over how long you listen to recordings. Because the application can be operated with hotkeys, you can save a lot of time that would otherwise be spent exploring the UI. Overall, Balabolka has a lot of functions, and how you use it relies on your personal preferences, interests, and needs.
Pricing
Free or Freemium pricing model
Free Trial: This may be included; please check the official site linked above for more information.
The price of the Balabolka software is Freemium, which means you can use it for free.
Cons
- Needs updates for new languages
8.. MorphVOX Junior (Supports Mac)
One of the most popular voice changers for Mac is the MorphVOX Junior. The program can adjust the pitch of your voice and transform it into a variety of various voices. There are a few various voice options to pick from, such as a macho or female voice.
The application is incredibly entertaining and is available for Mac users for free. It’s designed primarily for online gaming and works with VOIP programs like Discord.
Features:
- Assists you in recording high-quality audio.
- Background noise should be avoided and adjusted.
- To create a specific ambience, add your own background score.
- Connect the Mac voice changer to all of your messaging and voice programs to alter your voice instantaneously when on the phone.
- It only consumes a small amount of bandwidth and CPU memory.
Pricing
- It’s Free but the
MorphVox Pro 4 starts at $39.99
Cons
- The use of this voice changer is somewhat difficult. Before using it, the user must master its settings.
- It has Limited functionality.
- 9. Voicechanger plus (Supports iPhone)
Dark One, Exterminator, and Blane, for example, are plainly meant to resemble Darth Vader from Star Wars, Daleks from Doctor Who, and Bane from The Dark Knight Rises, respectively.
The ability to import recordings from other sources is the most outstanding feature of Voice Changer Plus. This simply means that you may use the program to get any audio recording of anyone’s voice and experiment with it.
Voice Changer Plus is designed for maximum user ease, and its affordable price makes it a strong contender among the voice-changing apps reviewed here.
Features
- Backward playback of recorded audio is possible.
- Basic editing features are available.
- Various editing effects are available.
Pricing
Free but offers in-app purchases.
Cons
- Real-time recording is not possible.
- The free version is ambiguous and filled with advertisements.
- compatibility is low
- 10. Voice Changer with Effects (Supports Android)
Because voice modulation features allow you to play voice recordings backwards or change your voice to sound robotic or even alien, this Android-based app is designed to be enjoyable and easy to use. Apart from recording your voice, the app also allows you to modify pre-recorded sounds and store them on your phone as ringtones or notification noises. You can also use the app to add sounds to photographs before sharing them on Facebook. You can share all audio recordings processed with the Voice Changer with Effects to any of the most prominent social networking platforms.
Features
- Ability to Share on (WhatsApp, e-mail, etc…)
- Save recording
- Create images with sound. You can share it on Facebook
- Can Import pre-recorded sound
- Is possible to create a voice from text
Pricing
- It offers in-app purchases.
Cons
- Advertisements are present.
- There are no other options for audio or video editing.
Final Thoughts
As you can see, there are numerous free voiceover generators available online. Most software products come in both free and premium versions, which you can pick from depending on your needs. These programs will swiftly help you reach your text to audio transformation goals, whether you’re a YouTube content maker in need of an informative voiceover or a disabled person looking for a user-friendly text-to-speech converter.
AVI Editor for Windows 11/10/8.1/8/7: Easily Edit AVI Files on PC
Video is continually changing the way we express and communicate with the world. Several people record vlogs and share them with their family and friends. The same goes for YouTubers and business owners who create videos to boost their business online. Due to this, different video editors are available for various video formats. A common video format is AVI, and if you’re wondering what the best AVI editor for different Window versions is, you’re in luck.
If you’re new to the video editing space, you might be wondering which is the best choice for your Windows format. This article explores the best AVI editors available. We cover both paid and free editors that you can use to edit AVI files on PC easily. So without further ado, let’s begin.
Best AVI Editor to Edit AVI Video on Windows - Filmroa Video Editor 

Supported System: Windows and Mac
Most free editing software is usually too simple to meet your immediate demands, or they’re too challenging for you to understand the workflow. Some AVI editors for Windows lack crucial editing features like audio editing and color correction features. An AVI editor that successfully bridges the gap to become the best AVI editor for Windows on our list is Filmora Video Editor .
This editor offers excellent performance and a fast editing process that takes user experience to a new level. It is ideal for beginners because of its intuitive interface. Additionally, intermediate and professional AVI editors can also use this video editor to create stylish videos and utilize its built-in professional effects.
For Win 7 or later (64-bit)
For macOS 10.14 or later
Wondershare Filmora Features
- It is versatile and supports other video formats like MKV, MP4, MOV, etc.
- Users can crop, cut, trim, split, and combine with just a few clicks.
- Access to advanced video effects like motion elements, royalty-free music, transition, animated titles, and more
- Footage can look like Hollywood videos with Filmora color tuning features.
- With background noise removal, audio keyframing, and the audio equalizer tool, you can edit sounds.
- It provides you with real-time rending to ensure a smooth editing experience.
- You can burn videos to DVD, transfer them to various devices or upload them on YouTube or other video streaming platforms.
How to Edit Videos on Windows 11/10/8/7 Using Wondershare Filmora
Editing your videos on Filmora is relatively easy and takes just a few minutes. Keep reading to learn how to edit AVI videos on Windows 11/10/8/7 using Wondershare Filmora.
Step 1: Import AVI Video
The first step you have to take is adding the AVI video you would like to edit with Filmora. You can do this by creating a new project. Then, click on New Project on the homepage.

Once it opens a new page, click the + icon to browse the files on your device or import them from an external device.

Step 2: Edit AVI Videos
After importing your videos, you can start editing and arranging elements in your video timeline. You can overwrite, append, and carry out other editing options.

You can also add effects, titles, filters, and music using Filmora.

Step 3: Save and Share Edited AVI Video Files

Once you’re done editing your video using Filmora Video Editor, you’re ready to save your file. You can choose to save your video in a new format. There are different video formats available to choose from. You can either save it to a select location on your PC or export it to any preferred device. Filmora Video Editor also allows you to upload directly to a video streaming platform or burn to a DVD.
More Free AVI Editor for Windows to Edit AVI Videos
This section will list some of the best free AVI editors for Windows to successfully edit your AVI editors. You would have to download these programs as they offer you more editing tools than an online AVI editor.
Microsoft Windows 10/11 Photos App

Supported System: Windows
This free AVI video editor is compatible with Windows 10/11 and comes prebuilt into your Windows 10 PC. If you’re looking for free AVI editing software, this is one of the best options you would find. One of the benefits of using this AVI video editor is that it eliminates the need for additional downloads. It comes pre-installed. However, if you can’t find this Photos App on your Windows 10/11, you can download it from Microsoft Store.
It is lightweight and allows you easily edit your AVI videos. You can also convert images into an AVI video under the Automatic Video mode. This helps save time if you don’t want to do much editing. However, if there are features you would like to edit in your video, you can use the custom video mode to trim, change audio volume, resize video, and include filters, motion, text, and several 3D effects in your AVI video.
However, you should note that there’s no timeline, and there are some advanced features like video stabilization, split tools, and much more missing on this free AVI editor for Windows. However, it is versatile and supports several other video formats.
Pros
- It supports several video formats, including AVI, MPE, MPG, ASF, MP2, and many more
- It is entirely free
- Ideal for beginners with few editing needs
- There’s no need for a new download as it comes built-in
Cons
- It doesn’t support several modern file formats
- The output formats are limited
- It lacks advanced video editing features
How to Edit Using Microsoft Windows 10/11 Photos App
Editing your AVI video with Microsoft Photos App is relatively easy; follow the steps below.
First, click the ‘add’ button in the left corner of the page and select the video you want to edit
Next, check the media elements necessary for your video and then tap on ‘place in storyboard.’


- Now you can start editing your video. One of the ways to edit your video is to extend the duration of your video by clicking the duration button.

- You can also add motion to the video under the ‘storyboard’ section. Select the media element you would like to edit and hit the ‘motions’ button. You can then select different motion effects.

- Additionally, you can add filters under the storyboard section.

- Editors can also trim and split AVI video on this Photos app.

- Once you’re done editing, click on ‘save as’ to save your edited AVI video.
OpenShot – Open Source Video Editor

Supported System: Windows, Mac and Linus
If you want an AVI editor compatible with Windows 10/11/8/7, you should try OpenShot – Open Source Video Editor. It is ideal for carrying out basic video editing like trimming and slicing. This video editor also offers several transitions and audio effects to help you make simple videos.
There are unlimited video tracks available on OpenShot; this means you can add as many audio and video clips.
It also offers you tile templates and video formats. If you want to add more touches to your video, this free AVI editor for Windows will help you achieve that. Other impressive editing features are available on this AVI editor, like slow-motion effects, blending modes, 3D animations, and many more. Additionally, the frame and keyframes accuracy feature helps you create detailed edits. You’ll easily customize your AVI video to your preference with this platform.
When exporting your file, you can export it in varying formats. You can also upload your AVI video directly to YouTube or your social media accounts. Despite the professional-level tool, the user interface is intuitive, which simplifies the editing process. However, you might find that it lacks some of the advanced editing features you would find in other AVI editors.
Pros
- It features an intuitive user interface
- It offers several editing tools for beginners and intermediate users
- It allows you to add as many audio and video tracks as you would prefer
- It is entirely free
- There are varying output formats for your selection
Cons
- Limited advanced editing tools
- OpenShot can be slow and laggy sometimes
How to Edit AVI Video With OpenShot
Using OpenShot to edit your AVI videos is relatively easy. The steps below will explain the basics and how you can edit within minutes.
- First, you have to import your media file into OpenShot.

- Next, arrange the videos on the timeline. If two or more clips overlap, this AVI editor automatically creates a smooth fade between them.

- You can then edit using the different available tools. OpenShot also allows you to add music to the timeline.

- After editing, preview the video project and export. You can also share directly to streaming platforms like YouTube, Vimeo, and more.

VSDC Video Editor – Free Movie Editor

Supported System: Windows and Mac
This AVI video editor is designed to ensure an excelling editing process for users on Windows 10. Therefore, even beginners can utilize this video editor to edit their media projects. Although it is free, it offers powerful editing features to take your AVI video to the next level. There are many features like filters, transition effects, overlays, color correction, and many more you can use.
Although it supports AVI video files, it also supports several popular media file formats. You can also save your AVI video in a new format after editing due to its effective video converter tools. Additionally, VSDC Video Editor is a non-linear tool that allows you to easily place video clips in the timeline.
You can save your edited AVI videos to your PC or upload them directly to different video streaming platforms like YouTube, Instagram, Vimeo, etc. We also love that it allows you to edit HD and 4k videos without compromising the quality. This isn’t a common feature with most free AVI video editing software.
Pros
- It is a free video editing software for Windows 10
- It is versatile and supports different video and audio formats
- There is an excellent selection of filters, effects, and transitions
- You can convert AVI videos to a new format with its built-in video converter
- It features an intuitive interface that’s friendly to beginners
Cons
- Technical support isn’t free
- It doesn’t offer professional video editing tools
Steps to Edit AVI Videos Using VSDC Video Editor
This is a simple AVI editor to use, and the steps below simplify the process for you even further; let’s take a look.
- Firstly, import your video into the VSDC Video editor by clicking the ‘import content’ button.

- Once you choose a file on your Windows PC, the app will ask if you would like to change the resolution and several more parameters.
- You can start editing your videos with the different tools available, like cutting and splitting.

- You can also crop the video if necessary.

- Another option is to apply different effects and transitions to your AVI video.

- Once you’re done editing your video, you can then export it. VSDC allows you to choose the output format. This is the best time to select a different format if that’s the goal.

- Alternatively, you can share your video directly to YouTube and other video streaming platforms.
More Paid AVI Editor for Windows to Edit AVI Videos
Although there are free AVI editors, they usually come with limited editing features. If you want an AVI editor that offers more editing features for professionals, you should try paid AVI editor for Windows. This section explores the top three paid AVI editors you can use to edit AVI videos on Windows.
Movavi Video Editor Plus

Supported System: Windows and Mac
This paid AVI video editor is compatible with Windows 10 and higher. It is an AVI editing tool that offers a user-friendly interface and advanced editing features for professionals. This video editor is compatible with Windows and Mac and supports all the popular video codecs to provide more options. It is pretty easy to navigate and master, so beginners can also utilize this AVI editor to improve their editing skills.
The best part is that you don’t need it offers all you need for basic editing and advanced video enhancement. You can expect a professional quality when you utilize this editing tool. It is great for all experience levels. You can integrate various visual and audio effects in your video using Movavi Video Editor Plus. It also allows you easily edit, trim, crop, and rotate your videos. Additionally, you can include subtitles, headings, and titles in your AVI video.
If you want to take your video to the next level, you can explore the different media options like filters, animations, music, transitions, and many more from its library. You can also save your AVI video to your PC or share it directly to YouTube to save space on your PC.
Pros
- It offers you an easy to use and intuitive interface
- Ideal for beginners and professionals
- Ensures professional and top-quality results
- It supports various file formats
- Allows direct sharing to video streaming platforms
Cons
- The free trial is relatively limited
- It doesn’t allow more than one project at a time
Steps to Edit AVI Video Using Movavi Video Editor Plus
Using this AVI editor for Windows is quite easy. However, the step-by-step guide below will help you get through the editing process within minutes.
- First, install the Movavi Video Editor Plus software on your PC
- Next, click ‘add files’ to add your AVI video files. Afterward, drag the selected video into the video editor timeline.

- You can then start editing your video by applying filters, enhancing the quality, adding filters and transitions, etc.

- After editing, save your video by hitting the ‘export’ button. Choose how you would like to save your video and hit ‘start.

This will save your video to your chosen location.
PowerDirector 365

Supported System: Windows and Mac
An AVI editor compatible with Windows 11/10/8/8.1 or 7 is PowerDirector 365. It offers an intuitive user interface and advanced video editing features. Using this editing software is quite easy, making it ideal for beginners, intermediates, and professionals. In addition, it is compatible with Windows and Mac OS, making it a versatile choice. You can easily create Hollywood-level videos from your Windows computer using PowerDirector 365.
Some of the editing features on this AVI editor include green-screen, royalty-free music, and many more advanced visual filters. It also offers thousands of templates, overlay effects, and built-in transitions to speed up the editing process. It is an excellent option if you’re looking to enhance your raw footage using cool filters and graphics. Additionally, PowerDirector 365 offers users a dual-screen and customizable editing workspace for streamlining your AVI video editing process.
While it preserves the quality of your AVI video, it allows you to save the output in other high-resolution formats like Ultra HD 4K and many more. You can also share your video directly to various streaming platforms to save you time and space on your device.
Pros
- User-friendly interface and ideal for professionals, intermediate, and beginners
- Access to built-in transitions and overlay effects
- Compatible with Windows and Mac
- Allows users to save output AVI files in higher resolution video formats
- Access to royalty-free iStock and Shutterstock library
Cons
- Limited free version
- It can be complex for beginners to understand
Steps to Edit Using PowerDirector 365
- Firstly, launch the app and choose ‘full mode’ to begin the editing process.

- Next, select ‘import media folder’ to import the media files you want to edit.

- Browse the folders on your PC and choose the folder with the videos you want; click ‘select folder’ to import them into the editor’s media library.

- Now you can select the video you want to edit from the media library and drag it into the video timeline.

- The editing process can begin. PowerDirector 365 allows you to split and trim your video clips.

- You can also add transitions between the clips by selecting the transition room.

- You can also add title texts to your AVI video if you prefer.

- After editing, select the ‘produce’ tab to export your video.

- You can choose to change the video format before exporting.

- Once you choose your preferred format, it will save your edited AVI video file.
Which Should I Choose: Free or Paid AVI Editor?
Many AVI editors for Windows (free and paid) are available on the internet. Therefore, it can be pretty challenging to determine the right AVI editor for Windows to choose. You need to consider many factors to make your choice, and below are some of them.
- Experience Level: One of the most crucial features you need to consider is your experience level. If you’re a beginner, you don’t want an AVI editor that offers complex features you can use. The same goes for professionals; you don’t want an editor without comprehensive editing tools to meet your editing needs. You should lookout for an editor that supports beginners and professionals. This will eliminate the need to look for a new editor once your skills improve.
- Interface: You also need to consider the user interface of your video editor before choosing between paid and free AVI editors for Windows. A friendly user interface can save you a lot of time getting familiar with the editing software. Check out the user interface to determine how easy it would be to navigate when editing your AVI videos.
- Formats: Ensure that the software you choose doesn’t limit you to specific video formats. You want an AVI editor that also supports the common and modern video formats. This allows you to convert your AVI videos when you need to share your video to streaming platforms that don’t support AVI file formats.
Most free AVI editors offer limited features to users, limiting your editing process. Additionally, some paid AVI editors focuses on professional and makes it difficult for beginners to use. Always opt for an AVI editor that succinctly supports all your editing needs and allows you to develop your skills.
Conclusion
Although AVI is an old video format, it is quite popular. Therefore, it’s crucial to have an AVI video editor if you prefer this file format. This article covered the best free and paid AVI editor for Windows. Most of the reviewed editing software offers you unique features to fulfill your editing needs. We also mentioned the pros and cons of each AVI editor for Windows to help you determine which option suits you best. If you want a video editor that will help you take your videos to the next level, you will need an editor that provides you with access to many special effects and unique editing tools. Filmora Video Editor provides you with an intuitive interface and a feature-packed library to start editing your AVI videos.
FAQs About Editing AVI Video
- How can I edit AVI videos like a pro? To edit an AVI video like a pro, you need to learn to use advanced editing features. One of the ideal ways is to pick an AVI editor with an intuitive interface that allows you to master professional concepts.
- What is the best AVI video editor for Windows 10? The best AVI editor for Windows 10 depends on your experience and if you’re looking for free or paid software.
- Can I edit an AVI file? Yes, you can. You need to find an AVI editing software compatible with your operating system and version. Also, you need to ensure it is ideal for your level of experience.
Supported System: Windows and Mac
Most free editing software is usually too simple to meet your immediate demands, or they’re too challenging for you to understand the workflow. Some AVI editors for Windows lack crucial editing features like audio editing and color correction features. An AVI editor that successfully bridges the gap to become the best AVI editor for Windows on our list is Filmora Video Editor .
This editor offers excellent performance and a fast editing process that takes user experience to a new level. It is ideal for beginners because of its intuitive interface. Additionally, intermediate and professional AVI editors can also use this video editor to create stylish videos and utilize its built-in professional effects.
For Win 7 or later (64-bit)
For macOS 10.14 or later
Wondershare Filmora Features
- It is versatile and supports other video formats like MKV, MP4, MOV, etc.
- Users can crop, cut, trim, split, and combine with just a few clicks.
- Access to advanced video effects like motion elements, royalty-free music, transition, animated titles, and more
- Footage can look like Hollywood videos with Filmora color tuning features.
- With background noise removal, audio keyframing, and the audio equalizer tool, you can edit sounds.
- It provides you with real-time rending to ensure a smooth editing experience.
- You can burn videos to DVD, transfer them to various devices or upload them on YouTube or other video streaming platforms.
How to Edit Videos on Windows 11/10/8/7 Using Wondershare Filmora
Editing your videos on Filmora is relatively easy and takes just a few minutes. Keep reading to learn how to edit AVI videos on Windows 11/10/8/7 using Wondershare Filmora.
Step 1: Import AVI Video
The first step you have to take is adding the AVI video you would like to edit with Filmora. You can do this by creating a new project. Then, click on New Project on the homepage.
Once it opens a new page, click the + icon to browse the files on your device or import them from an external device.
Step 2: Edit AVI Videos
After importing your videos, you can start editing and arranging elements in your video timeline. You can overwrite, append, and carry out other editing options.
You can also add effects, titles, filters, and music using Filmora.
Step 3: Save and Share Edited AVI Video Files
Once you’re done editing your video using Filmora Video Editor, you’re ready to save your file. You can choose to save your video in a new format. There are different video formats available to choose from. You can either save it to a select location on your PC or export it to any preferred device. Filmora Video Editor also allows you to upload directly to a video streaming platform or burn to a DVD.
More Free AVI Editor for Windows to Edit AVI Videos
This section will list some of the best free AVI editors for Windows to successfully edit your AVI editors. You would have to download these programs as they offer you more editing tools than an online AVI editor.
Microsoft Windows 10/11 Photos App
Supported System: Windows
This free AVI video editor is compatible with Windows 10/11 and comes prebuilt into your Windows 10 PC. If you’re looking for free AVI editing software, this is one of the best options you would find. One of the benefits of using this AVI video editor is that it eliminates the need for additional downloads. It comes pre-installed. However, if you can’t find this Photos App on your Windows 10/11, you can download it from Microsoft Store.
It is lightweight and allows you easily edit your AVI videos. You can also convert images into an AVI video under the Automatic Video mode. This helps save time if you don’t want to do much editing. However, if there are features you would like to edit in your video, you can use the custom video mode to trim, change audio volume, resize video, and include filters, motion, text, and several 3D effects in your AVI video.
However, you should note that there’s no timeline, and there are some advanced features like video stabilization, split tools, and much more missing on this free AVI editor for Windows. However, it is versatile and supports several other video formats.
Pros
- It supports several video formats, including AVI, MPE, MPG, ASF, MP2, and many more
- It is entirely free
- Ideal for beginners with few editing needs
- There’s no need for a new download as it comes built-in
Cons
- It doesn’t support several modern file formats
- The output formats are limited
- It lacks advanced video editing features
How to Edit Using Microsoft Windows 10/11 Photos App
Editing your AVI video with Microsoft Photos App is relatively easy; follow the steps below.
First, click the ‘add’ button in the left corner of the page and select the video you want to edit
Next, check the media elements necessary for your video and then tap on ‘place in storyboard.’
- Now you can start editing your video. One of the ways to edit your video is to extend the duration of your video by clicking the duration button.
- You can also add motion to the video under the ‘storyboard’ section. Select the media element you would like to edit and hit the ‘motions’ button. You can then select different motion effects.
- Additionally, you can add filters under the storyboard section.
- Editors can also trim and split AVI video on this Photos app.
- Once you’re done editing, click on ‘save as’ to save your edited AVI video.
OpenShot – Open Source Video Editor
Supported System: Windows, Mac and Linus
If you want an AVI editor compatible with Windows 10/11/8/7, you should try OpenShot – Open Source Video Editor. It is ideal for carrying out basic video editing like trimming and slicing. This video editor also offers several transitions and audio effects to help you make simple videos.
There are unlimited video tracks available on OpenShot; this means you can add as many audio and video clips.
It also offers you tile templates and video formats. If you want to add more touches to your video, this free AVI editor for Windows will help you achieve that. Other impressive editing features are available on this AVI editor, like slow-motion effects, blending modes, 3D animations, and many more. Additionally, the frame and keyframes accuracy feature helps you create detailed edits. You’ll easily customize your AVI video to your preference with this platform.
When exporting your file, you can export it in varying formats. You can also upload your AVI video directly to YouTube or your social media accounts. Despite the professional-level tool, the user interface is intuitive, which simplifies the editing process. However, you might find that it lacks some of the advanced editing features you would find in other AVI editors.
Pros
- It features an intuitive user interface
- It offers several editing tools for beginners and intermediate users
- It allows you to add as many audio and video tracks as you would prefer
- It is entirely free
- There are varying output formats for your selection
Cons
- Limited advanced editing tools
- OpenShot can be slow and laggy sometimes
How to Edit AVI Video With OpenShot
Using OpenShot to edit your AVI videos is relatively easy. The steps below will explain the basics and how you can edit within minutes.
- First, you have to import your media file into OpenShot.
- Next, arrange the videos on the timeline. If two or more clips overlap, this AVI editor automatically creates a smooth fade between them.
- You can then edit using the different available tools. OpenShot also allows you to add music to the timeline.
- After editing, preview the video project and export. You can also share directly to streaming platforms like YouTube, Vimeo, and more.
VSDC Video Editor – Free Movie Editor
Supported System: Windows and Mac
This AVI video editor is designed to ensure an excelling editing process for users on Windows 10. Therefore, even beginners can utilize this video editor to edit their media projects. Although it is free, it offers powerful editing features to take your AVI video to the next level. There are many features like filters, transition effects, overlays, color correction, and many more you can use.
Although it supports AVI video files, it also supports several popular media file formats. You can also save your AVI video in a new format after editing due to its effective video converter tools. Additionally, VSDC Video Editor is a non-linear tool that allows you to easily place video clips in the timeline.
You can save your edited AVI videos to your PC or upload them directly to different video streaming platforms like YouTube, Instagram, Vimeo, etc. We also love that it allows you to edit HD and 4k videos without compromising the quality. This isn’t a common feature with most free AVI video editing software.
Pros
- It is a free video editing software for Windows 10
- It is versatile and supports different video and audio formats
- There is an excellent selection of filters, effects, and transitions
- You can convert AVI videos to a new format with its built-in video converter
- It features an intuitive interface that’s friendly to beginners
Cons
- Technical support isn’t free
- It doesn’t offer professional video editing tools
Steps to Edit AVI Videos Using VSDC Video Editor
This is a simple AVI editor to use, and the steps below simplify the process for you even further; let’s take a look.
- Firstly, import your video into the VSDC Video editor by clicking the ‘import content’ button.
- Once you choose a file on your Windows PC, the app will ask if you would like to change the resolution and several more parameters.
- You can start editing your videos with the different tools available, like cutting and splitting.
- You can also crop the video if necessary.
- Another option is to apply different effects and transitions to your AVI video.
- Once you’re done editing your video, you can then export it. VSDC allows you to choose the output format. This is the best time to select a different format if that’s the goal.
- Alternatively, you can share your video directly to YouTube and other video streaming platforms.
More Paid AVI Editor for Windows to Edit AVI Videos
Although there are free AVI editors, they usually come with limited editing features. If you want an AVI editor that offers more editing features for professionals, you should try paid AVI editor for Windows. This section explores the top three paid AVI editors you can use to edit AVI videos on Windows.
Movavi Video Editor Plus
Supported System: Windows and Mac
This paid AVI video editor is compatible with Windows 10 and higher. It is an AVI editing tool that offers a user-friendly interface and advanced editing features for professionals. This video editor is compatible with Windows and Mac and supports all the popular video codecs to provide more options. It is pretty easy to navigate and master, so beginners can also utilize this AVI editor to improve their editing skills.
The best part is that you don’t need it offers all you need for basic editing and advanced video enhancement. You can expect a professional quality when you utilize this editing tool. It is great for all experience levels. You can integrate various visual and audio effects in your video using Movavi Video Editor Plus. It also allows you easily edit, trim, crop, and rotate your videos. Additionally, you can include subtitles, headings, and titles in your AVI video.
If you want to take your video to the next level, you can explore the different media options like filters, animations, music, transitions, and many more from its library. You can also save your AVI video to your PC or share it directly to YouTube to save space on your PC.
Pros
- It offers you an easy to use and intuitive interface
- Ideal for beginners and professionals
- Ensures professional and top-quality results
- It supports various file formats
- Allows direct sharing to video streaming platforms
Cons
- The free trial is relatively limited
- It doesn’t allow more than one project at a time
Steps to Edit AVI Video Using Movavi Video Editor Plus
Using this AVI editor for Windows is quite easy. However, the step-by-step guide below will help you get through the editing process within minutes.
- First, install the Movavi Video Editor Plus software on your PC
- Next, click ‘add files’ to add your AVI video files. Afterward, drag the selected video into the video editor timeline.
- You can then start editing your video by applying filters, enhancing the quality, adding filters and transitions, etc.
- After editing, save your video by hitting the ‘export’ button. Choose how you would like to save your video and hit ‘start.
This will save your video to your chosen location.
PowerDirector 365
Supported System: Windows and Mac
An AVI editor compatible with Windows 11/10/8/8.1 or 7 is PowerDirector 365. It offers an intuitive user interface and advanced video editing features. Using this editing software is quite easy, making it ideal for beginners, intermediates, and professionals. In addition, it is compatible with Windows and Mac OS, making it a versatile choice. You can easily create Hollywood-level videos from your Windows computer using PowerDirector 365.
Some of the editing features on this AVI editor include green-screen, royalty-free music, and many more advanced visual filters. It also offers thousands of templates, overlay effects, and built-in transitions to speed up the editing process. It is an excellent option if you’re looking to enhance your raw footage using cool filters and graphics. Additionally, PowerDirector 365 offers users a dual-screen and customizable editing workspace for streamlining your AVI video editing process.
While it preserves the quality of your AVI video, it allows you to save the output in other high-resolution formats like Ultra HD 4K and many more. You can also share your video directly to various streaming platforms to save you time and space on your device.
Pros
- User-friendly interface and ideal for professionals, intermediate, and beginners
- Access to built-in transitions and overlay effects
- Compatible with Windows and Mac
- Allows users to save output AVI files in higher resolution video formats
- Access to royalty-free iStock and Shutterstock library
Cons
- Limited free version
- It can be complex for beginners to understand
Steps to Edit Using PowerDirector 365
- Firstly, launch the app and choose ‘full mode’ to begin the editing process.
- Next, select ‘import media folder’ to import the media files you want to edit.
- Browse the folders on your PC and choose the folder with the videos you want; click ‘select folder’ to import them into the editor’s media library.
- Now you can select the video you want to edit from the media library and drag it into the video timeline.
- The editing process can begin. PowerDirector 365 allows you to split and trim your video clips.
- You can also add transitions between the clips by selecting the transition room.
- You can also add title texts to your AVI video if you prefer.
- After editing, select the ‘produce’ tab to export your video.
- You can choose to change the video format before exporting.
- Once you choose your preferred format, it will save your edited AVI video file.
Which Should I Choose: Free or Paid AVI Editor?
Many AVI editors for Windows (free and paid) are available on the internet. Therefore, it can be pretty challenging to determine the right AVI editor for Windows to choose. You need to consider many factors to make your choice, and below are some of them.
- Experience Level: One of the most crucial features you need to consider is your experience level. If you’re a beginner, you don’t want an AVI editor that offers complex features you can use. The same goes for professionals; you don’t want an editor without comprehensive editing tools to meet your editing needs. You should lookout for an editor that supports beginners and professionals. This will eliminate the need to look for a new editor once your skills improve.
- Interface: You also need to consider the user interface of your video editor before choosing between paid and free AVI editors for Windows. A friendly user interface can save you a lot of time getting familiar with the editing software. Check out the user interface to determine how easy it would be to navigate when editing your AVI videos.
- Formats: Ensure that the software you choose doesn’t limit you to specific video formats. You want an AVI editor that also supports the common and modern video formats. This allows you to convert your AVI videos when you need to share your video to streaming platforms that don’t support AVI file formats.
Most free AVI editors offer limited features to users, limiting your editing process. Additionally, some paid AVI editors focuses on professional and makes it difficult for beginners to use. Always opt for an AVI editor that succinctly supports all your editing needs and allows you to develop your skills.
Conclusion
Although AVI is an old video format, it is quite popular. Therefore, it’s crucial to have an AVI video editor if you prefer this file format. This article covered the best free and paid AVI editor for Windows. Most of the reviewed editing software offers you unique features to fulfill your editing needs. We also mentioned the pros and cons of each AVI editor for Windows to help you determine which option suits you best. If you want a video editor that will help you take your videos to the next level, you will need an editor that provides you with access to many special effects and unique editing tools. Filmora Video Editor provides you with an intuitive interface and a feature-packed library to start editing your AVI videos.
FAQs About Editing AVI Video
- How can I edit AVI videos like a pro? To edit an AVI video like a pro, you need to learn to use advanced editing features. One of the ideal ways is to pick an AVI editor with an intuitive interface that allows you to master professional concepts.
- What is the best AVI video editor for Windows 10? The best AVI editor for Windows 10 depends on your experience and if you’re looking for free or paid software.
- Can I edit an AVI file? Yes, you can. You need to find an AVI editing software compatible with your operating system and version. Also, you need to ensure it is ideal for your level of experience.
Splitting Audio From a Video in Sony Vegas [Step by Step]
The Sony Vegas Pro is software for professionally editing videos. There are many tools and effects available for audio and video that you can add respective to your requirements. The stabilization engine is available in Sony Vegas Pro to reduce the movements that you can observe the shaking in the videos. It helps in improving the quality of your content thoroughly. Sony Vegas pro also helps pin the texts or grading of the colours to apply objects in various dimensions.
You can use this software for editing, organizing or viewing the projects that are going on and present on the timeline. Even sharing the small parts of the video is possible. As a user of Sony Vegas Pro, it is a total choice of handling the colouring exposure to maintain the workflow. Here, the main discussion is regarding the split of the audio from the video in the Sony Vegas Pro. There are also some details about the substitute, which is Wondershare Filmora.
How can you separate audio from the video clips in Sony Vegas Pro?
The best features of Sony Vegas Pro help create, edit, trim or even crop the videos. You can use them in making videos worth viewing for your audience. Sony Vegas Pro can make your work on multiple screens at the same time. The most important characteristic is the extraction of the audio from the video.
Step 1: When you have finished the installation of the Sony Vegas Pro on your device, now import the video clip from which you want to extract the audio.

Step 2: Drag and drop your video clip in the editing area. Here, you can easily see the video and audio tracks are all together. Whatever effect you apply, both will show the results.

Step 3: You have to separate the audio from the video files in this step. After selecting the track, whether audio or video, simply press the “U” letter on your keyboard. In this step, keep holding the cursor. It permits you to keep moving the video clips quickly. Now, it is easy to download audio files from this area.
Step 4: The tracks are separate now, so you can move, delete or edit them individually. Definitely, it doesn’t affect the other track.
An easier way to split the audio from the video
Most graphic designers and video editors consider the Sony Vegas Pro as the professional level software for editing purposes. Due to the user interface of advanced level, high pricing and availability only for the Mac users make people look for options as the editing tool and accessible on both devices using Windows and Mac.
Filmora Video Editor is the best consideration among all of the editors. You can also use the Wondershare Filmora in dark mode as well. This feature helps the user edit in his comfort zone without causing any harm to the eyes. In the following steps, you can easily separate the audio from the videos in Wondershare Filmora.
For Win 7 or later (64-bit)
For macOS 10.14 or later
Features
- Simple interface and all the tools are easily available
- Just need a few clicks along the drag and drop to perform the functionalities
- Unlimited sharing of the videos on YouTube, Vimeo and many others
- Splitting of the clips and screen
- Easy to split up the audio from the video
Step 1: After running the Wondershare Filmora, select the ratio of your choice 4:3 or 16:9 for entering in the mode of editing. Click on the “Import” so you can add the photos, video and audio from the folder of your system. After importing the videos, drag and drop in the timeline. As a default, all the files get merged with one another with no gap.

Step 2: Right-click on the video clip from which you want to extract the audio. Select the option of “Detach Audio” from the menu. Instantly, an audio file is visible on the screen, and it is the original one from the source.

Step 3: Now, the audio track gets separated from the video successfully. Wondershare Filmora also offers to add one more audio file. Yes, it is also possible with this software.
Step 4: After separating the audio from the video, it is simple to delete the track, whether it is audio or video that is not in use or want to use. Click on the “Export” option for saving your required audio tracks, or you can even select the “iPod” for playing the audio. You can also save the audio file separately as the new file on your hard drive. After exporting the audio tracks, load the project file again that has the frames for the video and later export the video file.

Whenever you think about the compatibility of editing software with different operating systems, Wondershare Filmora comes to mind as the first choice. All the new features of Wondershare Filmora in its latest version have received positive feedback and reviews. Definitely, it is the actual replacement of the previously used editors such as video editor in Windows or iMovie in Mac.
Wondershare Filmora not only adds the animation but as well offers customization. Adding the keyframes is very easy for the user to change the positions, scale or rotate the clips. The feature of colour matching is also available so you can match the clips from one frame to another. Even the shortcut keys are available for all the commands that bring effective and efficient editing tasks.
Just little guidance and assistance can help you use the Wondershare Filmora as the options are suitable in front of your screen. No more waiting and thinking; start using this most straightforward editor and enjoy all the features of Wondershare Filmora.
Step 2: Drag and drop your video clip in the editing area. Here, you can easily see the video and audio tracks are all together. Whatever effect you apply, both will show the results.
Step 3: You have to separate the audio from the video files in this step. After selecting the track, whether audio or video, simply press the “U” letter on your keyboard. In this step, keep holding the cursor. It permits you to keep moving the video clips quickly. Now, it is easy to download audio files from this area.
Step 4: The tracks are separate now, so you can move, delete or edit them individually. Definitely, it doesn’t affect the other track.
An easier way to split the audio from the video
Most graphic designers and video editors consider the Sony Vegas Pro as the professional level software for editing purposes. Due to the user interface of advanced level, high pricing and availability only for the Mac users make people look for options as the editing tool and accessible on both devices using Windows and Mac.
Filmora Video Editor is the best consideration among all of the editors. You can also use the Wondershare Filmora in dark mode as well. This feature helps the user edit in his comfort zone without causing any harm to the eyes. In the following steps, you can easily separate the audio from the videos in Wondershare Filmora.
For Win 7 or later (64-bit)
For macOS 10.14 or later
Features
- Simple interface and all the tools are easily available
- Just need a few clicks along the drag and drop to perform the functionalities
- Unlimited sharing of the videos on YouTube, Vimeo and many others
- Splitting of the clips and screen
- Easy to split up the audio from the video
Step 1: After running the Wondershare Filmora, select the ratio of your choice 4:3 or 16:9 for entering in the mode of editing. Click on the “Import” so you can add the photos, video and audio from the folder of your system. After importing the videos, drag and drop in the timeline. As a default, all the files get merged with one another with no gap.
Step 2: Right-click on the video clip from which you want to extract the audio. Select the option of “Detach Audio” from the menu. Instantly, an audio file is visible on the screen, and it is the original one from the source.
Step 3: Now, the audio track gets separated from the video successfully. Wondershare Filmora also offers to add one more audio file. Yes, it is also possible with this software.
Step 4: After separating the audio from the video, it is simple to delete the track, whether it is audio or video that is not in use or want to use. Click on the “Export” option for saving your required audio tracks, or you can even select the “iPod” for playing the audio. You can also save the audio file separately as the new file on your hard drive. After exporting the audio tracks, load the project file again that has the frames for the video and later export the video file.
Whenever you think about the compatibility of editing software with different operating systems, Wondershare Filmora comes to mind as the first choice. All the new features of Wondershare Filmora in its latest version have received positive feedback and reviews. Definitely, it is the actual replacement of the previously used editors such as video editor in Windows or iMovie in Mac.
Wondershare Filmora not only adds the animation but as well offers customization. Adding the keyframes is very easy for the user to change the positions, scale or rotate the clips. The feature of colour matching is also available so you can match the clips from one frame to another. Even the shortcut keys are available for all the commands that bring effective and efficient editing tasks.
Just little guidance and assistance can help you use the Wondershare Filmora as the options are suitable in front of your screen. No more waiting and thinking; start using this most straightforward editor and enjoy all the features of Wondershare Filmora.
Also read:
- Its Always a Cool Thing to Use a 3D Intro Maker to Create Intro Videos for Your Clips. This Post Will Introduce You 4 of the Best Intro Video Makers to Help You Improve Your Video
- New Do You Know How to Create Video Loops on PowerPoint? If Not Then Read This Article to Learn More Details
- In 2024, Are You Finding It Difficult to Freeze-Frame in After Effects? Note that Freeze-Frame Takes only a Few Seconds, and, in This Tutorial, We Will Guide You on How to Create and Add Frame Hold in After Effects
- Updated Getting Into The Details A Review of Kodak LUTs
- 2024 Approved Merging MP4 Videos Made Simple Top 5 Online Tools
- Updated An Intro Video Describing You and Your Content Is the First and the Foremost Thing Which a Viewer Sees. Thinking of How to Make an Interesting Intro Video, This Blog Is Surely a Supportive Guide for You. Learn More Here
- 2024 Approved Making Slow Motion Videos in Premiere Pro A Review on The Best Methods
- Updated Easy Way to Add Transitions to Videos for 2024
- New 2024 Approved Dubbing Videos With Voiceovers | Using Wondershare Filmora
- How to Zoom in on PowerPoint Easy Ways
- New 2024 Approved How to Speed Up Pictures on TikTok Slideshow
- Detailed Tutorial to Crop Videos Using Openshot, In 2024
- Experience Time Differently with The Top Slow-Motion Applications
- New In 2024, Best 8 Augmented Reality Video Games
- New How to Get VHS Filter and Glitch Filter to Your Images or Videos?
- New How to Create a Glitch Text Effect for 2024
- Do You Find Choosing a Good LUT to Color-Correct Your Media Files Difficult? Discover some of the Best Professional LUTs From 3D LUT Creator to Download
- 2024 Approved Ever Wondered About the Similarity You Bear with an Anime Character? If You Have Not yet Looked Into This Exciting Aspect of Motion Graphic Design, You Can Very Well Break the Ice Here
- Updated 2024 Approved KineMaster Templates 101 How to Get the Most Out of Video Templates
- Edit and Send Fake Location on Telegram For your Poco M6 5G in 3 Ways | Dr.fone
- In 2024, How To Use Allshare Cast To Turn On Screen Mirroring On Poco M6 Pro 5G | Dr.fone
- Top IMEI Unlokers for iPhone 13 Pro and Android Phones
- In 2024, How to Lock Apps on Xiaomi Civi 3 to Protect Your Individual Information
- How to Easily Hard reset my Oppo A1 5G | Dr.fone
- In 2024, Why does the pokemon go battle league not available On OnePlus 12 | Dr.fone
- How To Transfer Data From Apple iPhone 14 Pro Max To Other iPhone? | Dr.fone
- How to Change Location on TikTok to See More Content On your Apple iPhone 14 Pro Max | Dr.fone
- Tips and Tricks for Apple ID Locked Issue On Apple iPhone 13
- In 2024, Top 12 Prominent Infinix Smart 8 Fingerprint Not Working Solutions
- In 2024, How to Transfer Contacts from Motorola Moto G23 to iPhone XS/11 | Dr.fone
- Complete Tutorial for Google Pixel 7a Hard Reset | Dr.fone
- In 2024, What You Want To Know About Two-Factor Authentication for iCloud On your Apple iPhone 12
- Complete guide for recovering music files on Realme 10T 5G
- Strategies for Apps That Wont Download From Play Store On Samsung Galaxy A15 5G | Dr.fone
- In 2024, 3 Ways to Track Realme Narzo N53 without Them Knowing | Dr.fone
- How To Restore a Bricked Samsung Galaxy M34 Back to Operation | Dr.fone
- Issues playing H.265 HEVC video on Samsung Galaxy F34 5G
- Title: Updated Best 6 WebM to GIF Converters
- Author: Chloe
- Created at : 2024-06-26 06:24:33
- Updated at : 2024-06-27 06:24:33
- Link: https://ai-editing-video.techidaily.com/updated-best-6-webm-to-gif-converters/
- License: This work is licensed under CC BY-NC-SA 4.0.
