
:max_bytes(150000):strip_icc():format(webp)/samsungappstore-c0194a478ba54e90a798b3bb5ff4f6d5.jpg)
Updated Color Correction Basics (S-LOG Footage)
Color Correction Basics (S-LOG Footage)
S-Log is a gamma curve optimized for digital cameras to maximize the image sensor’s performance. Although these videos may look flat and washed out, they contain lots of color information. Even better, video creators can use color correction to edit the S-Log videos and make them look as natural as possible. That’s what this article is all about.
How to Color-Correct an S-Log Footage
This tutorial assumes that you already have an S-Log footage. If not, you can record S-Log footage using most Canon, Sony, and Panasonic cameras.

Let’s get to the steps!
Step1 Adjust the color settings
Start by adding your video to the timeline on Wondershare Filmora and then double-click the video track. Then, click on the Color tab before tapping Advanced.
Free Download For Win 7 or later(64-bit)
Free Download For macOS 10.14 or later

Step2 Read and study the histogram
Now you’ll see the Advanced Color Correction pop-up window. Here, you’ll see a histogram with the brightest point on the right and the darkest point on the left. From our example, you can see that the video has more dark pixels than bright ones. Horizontally, the histogram shows you how many pixels are in a certain range of brightness.

Step3 Adjust the image colors
Once you’ve understood the histogram, look for pure black and white parts on the video clip. For example, in this video, you can see that the roofs are pure black and the boat at the bottom-right corner is pure white.

After finding the white and black parts in the video, go to the Light section, then adjust the Highlights to see if you can get a pure white on the boat. If the boat or any other image of your choice doesn’t look pure white, increase the Whites slide to make it whiter.

Now adjust the Shadows settings to reduce the effect and make the roofs look closer to pure black. If you want the roofs to look darker, drag the Blacks slider to the left.
Pro tip: Ensure that the darkest and brightest points don’t cross the broken lines on the edge, or the video will start losing details.
Step4 Adjust the color saturation
Does your video still look a little flat? Probably yes! In that case, click the Color section and adjust the Saturation slider to the right to make the video less flat. Saturation simply means how colorful a video clip is to the viewer. Apart from the color saturation, you can also adjust the Vibrance to make your video objects look more colorful.

Step5 Preview and compare the video
Now it’s time to check and compare the results. To make it easier, click the Eye icon at the top-right corner to switch between the original S-Log video and the color-corrected clip. You can also tap the AB icon and choose Split View-Left/Right to view the clips in the side-by-side mode.

Summary
I guess that was easy, right? Up to this juncture, you should be able to perform basic color correction on your video using Wondershare Filmora. Remember, this video editor packs many other editing tools to bring out your creativity. Give it a try!
Free Download For macOS 10.14 or later
Step2 Read and study the histogram
Now you’ll see the Advanced Color Correction pop-up window. Here, you’ll see a histogram with the brightest point on the right and the darkest point on the left. From our example, you can see that the video has more dark pixels than bright ones. Horizontally, the histogram shows you how many pixels are in a certain range of brightness.
Step3 Adjust the image colors
Once you’ve understood the histogram, look for pure black and white parts on the video clip. For example, in this video, you can see that the roofs are pure black and the boat at the bottom-right corner is pure white.
After finding the white and black parts in the video, go to the Light section, then adjust the Highlights to see if you can get a pure white on the boat. If the boat or any other image of your choice doesn’t look pure white, increase the Whites slide to make it whiter.
Now adjust the Shadows settings to reduce the effect and make the roofs look closer to pure black. If you want the roofs to look darker, drag the Blacks slider to the left.
Pro tip: Ensure that the darkest and brightest points don’t cross the broken lines on the edge, or the video will start losing details.
Step4 Adjust the color saturation
Does your video still look a little flat? Probably yes! In that case, click the Color section and adjust the Saturation slider to the right to make the video less flat. Saturation simply means how colorful a video clip is to the viewer. Apart from the color saturation, you can also adjust the Vibrance to make your video objects look more colorful.
Step5 Preview and compare the video
Now it’s time to check and compare the results. To make it easier, click the Eye icon at the top-right corner to switch between the original S-Log video and the color-corrected clip. You can also tap the AB icon and choose Split View-Left/Right to view the clips in the side-by-side mode.
Summary
I guess that was easy, right? Up to this juncture, you should be able to perform basic color correction on your video using Wondershare Filmora. Remember, this video editor packs many other editing tools to bring out your creativity. Give it a try!
Doable Ways to Make Transparent Background in Procreate
Doable Ways to Make Transparent Background in Procreate
An easy yet powerful editor
Numerous effects to choose from
Detailed tutorials provided by the official channel
Figuring out the crucial steps to make the canvas excellent is one of the loveliest things users are performing for exporting the closing Procreate-projects. Once after getting expert with things trick you can be able to position the canvas surprisingly on great back for a memorable moment. You can make the most of it for your procreate mission that you have created.
Out of many essentials tools you have ever used for experiencing the benefits of equipment & skills, the Procreate is a kind of solution that comes with one of the most trustworthy as well as brilliant capability to erase the undesired background from the pictures. It is more than a general tool and there are some specified approaches to do so, but in today possible scenario, you can easily focus around choice of right selections to erase a background at ease. People can explore the chances of creating various attractive methods to work in the PNG structure after removing the desired background.
In this article
01 [How to Delete a White Background with Procreate for the IPad?](#Part 1)
02 [How to Make Transparent Background with Procreate for iPhone?](#Part 2)
03 [How to Create Popping Thumbnails or Profile Photos](#Part 3)
Part 1 How to Delete a White Background with Procreate for the IPad?

In case you are facing discoloration problem too then it is always a better idea to cast image with desired background and remove the objects.
Now turning your background with a lovely image or your own is just a matter of few clicks. With great transparent background procreate, you will be heading towards the satisfaction of obtaining transparent background. With few crucial steps you can stay from the other competitors or it will make your posts viral. With stepwise guidelines on removing the background as well as replacing it with a transparent one in Procreate is what you need the most today.
When it comes to deleting the white-background with a Procreate, then with great selection of tools you can easily create amazing performance for your post. If you are still in a dilemma to make use of the white coloured Background. After tapping on the top-left corner of the screen, you can open-up brilliant level of opportunities to make the most out of it. Are you ready to begin? Next you will learn about how to turn the background into a desired canvas for all your Instagram stories.
The following steps will provide you a quick walkthrough of entire process, stepwise:-
Step 1: First you are required to open the picture with Procreate. Get your desired image for the edit or open your picture & turn-off the overall visibility of background layer by layers-icon, tap it, it is presented on the top-right corner. Here, you will see layer labelled as the background, you need to uncheck the layer’s box for turning-off overall visibility at the bottom of Layers menu.
It is an important step to perform as if you want to deleting any white background from the image otherwise background will be treated as transparent with white-background showing through, thus you will experience no changes to the document. You are not required to remove background from image procreate if your image is not having a background layer.
Step 2: Create the selection at around white area of an image & delete background
For you to perform the step of procreate remove white background, you are required to make selection around white area. For this, open-up the selection-menu and it is placed in the form round icon named ‘S’ at the top-left-corner of the screen. At this menu, choose auto & Add. To create such level of perfection in selection, just hold & tap over any area of white-background at this screen. You can also increase threshold of your selection by moving the fingers/stylus at the right. For the opposite process, you can move the same to the left.You need to adjust the desired threshold until selection-area on your screen lines-up in accordance with an edges of the subject. You are now heading towards the process of make background transparent procreatefor your desired image quickly.
With your current selection still in active state, just tap on wrench-icon it the top-left area of your screen, then navigate to Add-menu, and here tap on the Cut option. Congrats, you have effectively deleted the background from an image.
**Step 3:**Just release the selection in the form of tapping on Selection-menu icon and repeat the process again for negative space-areas & at last clean-up stray-pixels with through an Eraser. You can repeat the process further from the step-2 in case any stray pixels still remains there as it is a normal situation to face while removing the pixels background with ‘remove background on procreate’ option.You can also take the Eraser & then manually erase those stray-pixels in there is any.
Step 4: Export your final work as PNG-file to preserve the transparency
After finishing the task of deleting background from the picture you can easily export your work to a desirable file format. The image you want to export can be in the form of PNG to retain the transparency. Other useful formats you can choose is JPEG but this doesn’tsupport transparency. So, be wise & be careful while choose your file formats.You are now having procreate export transparent backgroundand can also place the same to any sort of backdrop like an app, website, or any other workspace.
Part 2 How to Make Transparent Background with Procreate for iPhone?

Let’s dive-in quickly into the process of making the background transparent with procreate, if you are an iPhone User.
● GO Into an option of Canvas
It is up-to you whether you want to create a new canvas or want to work-upon already saved canvas. In your device through procreate app, you can do the same without any worries.
● Tap onto the option of Layers Panel
This option is located at the top-right corner of your toolbar. This option looks similar to the two-squares on the top of one another.
● Replace dull looking background with transparent background
You can quickly go down to the layers-panel placed at the bottom to choose the background color.Transparent background in procreateis always a good option to consider.
● Put uncheck before the box
At the right of toolbar you can be able to see words ‘Background color’ and if it is checked then you need to uncheck it. Now your goal to make the background completely transparent with procreate make background transparent tool, will be achieved. Now your background is completely transparent and ready to use.
Part 3 How to Create Popping Thumbnails or Profile Photos

There are various tools available in the market to make a popping thumbnail for your YouTube or Instagram pages. Thumbnail maker like Filmora can be an interesting option to choose as it is quick and effective. You can also customized as well as download the thumbnails at no cost with the same. However, they comes with certain limitations like overall size of the image to be downloaded. For better versions you can use premium tools. With better creativity and great imagination you can make the thumbnail as crisp as possible.
● Upload your desired photo to Filmora’s thumbnail maker templates.
You can easily create your video thumbnail, but you need some inspiration and for that you can make use of amazing tool like Filmora. With access to more than 50 free templates you can achieve your goal of making popping thumbnails.
● Adding text, clipart, or perfect quality of background can give it a boost
After picking your template, one can make use of thumbnail to stand out different in terms of adding text, clipart or background. For adding custom background to your thumbnail you can make use of procreate that can remove the background with procreateremove white backgroundfeatures and give you better featured image with nice background. Also to clarify the objectives of your thumbnail you can add titles, and also consider placing the same on the top of any dark color background if your thumbnail is light in color. For making the background darker just choose remove white background procreateas discussed above.
● Just Download your finished product to your device
After polishing the thumbnails with creative stuff, you can download the same to your device or export it to your smartphone.
Voila, you just have create your own custom popping thumbnail. With remove background on procreate, you can never feel disappointed.
****Wondershare Filmora Video Editor App to Remove Unwanted Background Easily**
For Win 7 or later (64-bit)
For macOS 10.12 or later
In case you are searching for any professional tool to remove het background and replace the one with any of your favorite picture then there is a tool for you to consider. With greater different functionalities, you can make any Instagram post or story interesting through the help of Fillmora App. This has set of brilliant solutions to provide with most brilliant picture and video editing features. It is interesting, fun-loving as well as attractive enough to turn any moments extraordinary.
Handy features to enjoy:-
● You can make use of this tool to create custom thumbnails for your YouTube or Instagram page.
● Great varieties of templates for making popping thumbnails
● Greater capability to beautifully construct picture editing animations
● Varieties of Effects for every age group
● Attractive filters, GIFs packs and images to turn any dull looking background into an amazing moment.
● Delete white background quickly
● Right selection of tools to make the editing effective
● Flawless features to crop, cut-up, cut, trim & mix operations.
● Single click operation to turn the images into a beauty mode
● Options to save your creations into your device or virtual space
● Share your creations to your community, to your friends via Facebook, Instagram, YouTube, and Twitter quickly.
It is a greater idea to try this app for making use of its image editing features for deleting the white background in an easy manner.
● Ending Thoughts →
● With great varieties of features it is now very easy for you to create some automated selections in just single tap.
● Deleting the white background through a pro-tool like Procreate is smart, quick & seamless process.
● You are not going to get confused, even if you are using it for the very first time.
● It is the trend that every Instagram user is following for posting better images with nice background options.
Figuring out the crucial steps to make the canvas excellent is one of the loveliest things users are performing for exporting the closing Procreate-projects. Once after getting expert with things trick you can be able to position the canvas surprisingly on great back for a memorable moment. You can make the most of it for your procreate mission that you have created.
Out of many essentials tools you have ever used for experiencing the benefits of equipment & skills, the Procreate is a kind of solution that comes with one of the most trustworthy as well as brilliant capability to erase the undesired background from the pictures. It is more than a general tool and there are some specified approaches to do so, but in today possible scenario, you can easily focus around choice of right selections to erase a background at ease. People can explore the chances of creating various attractive methods to work in the PNG structure after removing the desired background.
In this article
01 [How to Delete a White Background with Procreate for the IPad?](#Part 1)
02 [How to Make Transparent Background with Procreate for iPhone?](#Part 2)
03 [How to Create Popping Thumbnails or Profile Photos](#Part 3)
Part 1 How to Delete a White Background with Procreate for the IPad?
In case you are facing discoloration problem too then it is always a better idea to cast image with desired background and remove the objects.
Now turning your background with a lovely image or your own is just a matter of few clicks. With great transparent background procreate, you will be heading towards the satisfaction of obtaining transparent background. With few crucial steps you can stay from the other competitors or it will make your posts viral. With stepwise guidelines on removing the background as well as replacing it with a transparent one in Procreate is what you need the most today.
When it comes to deleting the white-background with a Procreate, then with great selection of tools you can easily create amazing performance for your post. If you are still in a dilemma to make use of the white coloured Background. After tapping on the top-left corner of the screen, you can open-up brilliant level of opportunities to make the most out of it. Are you ready to begin? Next you will learn about how to turn the background into a desired canvas for all your Instagram stories.
The following steps will provide you a quick walkthrough of entire process, stepwise:-
Step 1: First you are required to open the picture with Procreate. Get your desired image for the edit or open your picture & turn-off the overall visibility of background layer by layers-icon, tap it, it is presented on the top-right corner. Here, you will see layer labelled as the background, you need to uncheck the layer’s box for turning-off overall visibility at the bottom of Layers menu.
It is an important step to perform as if you want to deleting any white background from the image otherwise background will be treated as transparent with white-background showing through, thus you will experience no changes to the document. You are not required to remove background from image procreate if your image is not having a background layer.
Step 2: Create the selection at around white area of an image & delete background
For you to perform the step of procreate remove white background, you are required to make selection around white area. For this, open-up the selection-menu and it is placed in the form round icon named ‘S’ at the top-left-corner of the screen. At this menu, choose auto & Add. To create such level of perfection in selection, just hold & tap over any area of white-background at this screen. You can also increase threshold of your selection by moving the fingers/stylus at the right. For the opposite process, you can move the same to the left.You need to adjust the desired threshold until selection-area on your screen lines-up in accordance with an edges of the subject. You are now heading towards the process of make background transparent procreatefor your desired image quickly.
With your current selection still in active state, just tap on wrench-icon it the top-left area of your screen, then navigate to Add-menu, and here tap on the Cut option. Congrats, you have effectively deleted the background from an image.
**Step 3:**Just release the selection in the form of tapping on Selection-menu icon and repeat the process again for negative space-areas & at last clean-up stray-pixels with through an Eraser. You can repeat the process further from the step-2 in case any stray pixels still remains there as it is a normal situation to face while removing the pixels background with ‘remove background on procreate’ option.You can also take the Eraser & then manually erase those stray-pixels in there is any.
Step 4: Export your final work as PNG-file to preserve the transparency
After finishing the task of deleting background from the picture you can easily export your work to a desirable file format. The image you want to export can be in the form of PNG to retain the transparency. Other useful formats you can choose is JPEG but this doesn’tsupport transparency. So, be wise & be careful while choose your file formats.You are now having procreate export transparent backgroundand can also place the same to any sort of backdrop like an app, website, or any other workspace.
Part 2 How to Make Transparent Background with Procreate for iPhone?
Let’s dive-in quickly into the process of making the background transparent with procreate, if you are an iPhone User.
● GO Into an option of Canvas
It is up-to you whether you want to create a new canvas or want to work-upon already saved canvas. In your device through procreate app, you can do the same without any worries.
● Tap onto the option of Layers Panel
This option is located at the top-right corner of your toolbar. This option looks similar to the two-squares on the top of one another.
● Replace dull looking background with transparent background
You can quickly go down to the layers-panel placed at the bottom to choose the background color.Transparent background in procreateis always a good option to consider.
● Put uncheck before the box
At the right of toolbar you can be able to see words ‘Background color’ and if it is checked then you need to uncheck it. Now your goal to make the background completely transparent with procreate make background transparent tool, will be achieved. Now your background is completely transparent and ready to use.
Part 3 How to Create Popping Thumbnails or Profile Photos
There are various tools available in the market to make a popping thumbnail for your YouTube or Instagram pages. Thumbnail maker like Filmora can be an interesting option to choose as it is quick and effective. You can also customized as well as download the thumbnails at no cost with the same. However, they comes with certain limitations like overall size of the image to be downloaded. For better versions you can use premium tools. With better creativity and great imagination you can make the thumbnail as crisp as possible.
● Upload your desired photo to Filmora’s thumbnail maker templates.
You can easily create your video thumbnail, but you need some inspiration and for that you can make use of amazing tool like Filmora. With access to more than 50 free templates you can achieve your goal of making popping thumbnails.
● Adding text, clipart, or perfect quality of background can give it a boost
After picking your template, one can make use of thumbnail to stand out different in terms of adding text, clipart or background. For adding custom background to your thumbnail you can make use of procreate that can remove the background with procreateremove white backgroundfeatures and give you better featured image with nice background. Also to clarify the objectives of your thumbnail you can add titles, and also consider placing the same on the top of any dark color background if your thumbnail is light in color. For making the background darker just choose remove white background procreateas discussed above.
● Just Download your finished product to your device
After polishing the thumbnails with creative stuff, you can download the same to your device or export it to your smartphone.
Voila, you just have create your own custom popping thumbnail. With remove background on procreate, you can never feel disappointed.
****Wondershare Filmora Video Editor App to Remove Unwanted Background Easily**
For Win 7 or later (64-bit)
For macOS 10.12 or later
In case you are searching for any professional tool to remove het background and replace the one with any of your favorite picture then there is a tool for you to consider. With greater different functionalities, you can make any Instagram post or story interesting through the help of Fillmora App. This has set of brilliant solutions to provide with most brilliant picture and video editing features. It is interesting, fun-loving as well as attractive enough to turn any moments extraordinary.
Handy features to enjoy:-
● You can make use of this tool to create custom thumbnails for your YouTube or Instagram page.
● Great varieties of templates for making popping thumbnails
● Greater capability to beautifully construct picture editing animations
● Varieties of Effects for every age group
● Attractive filters, GIFs packs and images to turn any dull looking background into an amazing moment.
● Delete white background quickly
● Right selection of tools to make the editing effective
● Flawless features to crop, cut-up, cut, trim & mix operations.
● Single click operation to turn the images into a beauty mode
● Options to save your creations into your device or virtual space
● Share your creations to your community, to your friends via Facebook, Instagram, YouTube, and Twitter quickly.
It is a greater idea to try this app for making use of its image editing features for deleting the white background in an easy manner.
● Ending Thoughts →
● With great varieties of features it is now very easy for you to create some automated selections in just single tap.
● Deleting the white background through a pro-tool like Procreate is smart, quick & seamless process.
● You are not going to get confused, even if you are using it for the very first time.
● It is the trend that every Instagram user is following for posting better images with nice background options.
Want to Make a Slide Show Video? Here’s How
Want Make a Slide Show Video Here’s How
An easy yet powerful editor
Numerous effects to choose from
Detailed tutorials provided by the official channel
Dear readers you don’t have to worry a bit, in this article we bring you the best slideshow video maker and easy ways using which you can custom the templates for your presentation in your way.
In this article
01 8 Best Slideshow Video Templates
02 [10 Best Video Slideshow Maker](#Part 2)
03 [5 Easy Steps to Make a Slide Show Video](#Part 3)
04 [How to Custom Templates for Google Slides Presentation](#Part 4)
Part 1 Best Slideshow Video Templates
A slideshow video could be an effective way of presenting your point to your audience. This becomes super easy when you use a good template to create your slide show video. Here are 8 best slideshow video templets which you can give a try
01Instagram Slideshow
This slide show video template is best for creating videos for Instagram and other social media platforms.

02Clean Slideshow Template
This one is suited to create video slide show for family purposes. This template could also be engaged in a clean slideshow presentation for your office.

03Parallax Scrolling Slideshow Template
This is one of the most video templates which you can use for your slide show video. This template has various after-effects which can take your presentations to a different level.

04Modern Tie Slideshow Template
If you are in a business or corporate job then give this slideshow video template a try. With a unique, tiled look and a 3D tile drop-down effect, your videos will impress everyone.

05Minimal Slideshow template
Minimal slide template is best for business presentations or product promotion. Here you can use creative text images and graphics to promote your product.

06Sweet Memories Cinematic Slideshow
If you want the best template for presenting your memories, marriages, anniversaries, emotions etc then Sweet Memories Cinematic Slideshow is the one you need.

07Motiongray Slideshow Templates
If you want to turn your adventure images and videos into an impressive slide show video then this is a must try template for you.

08Stylish Spinning Columns Slideshow Template
This template is best suited for high-end business projects. Here you will have image placeholders paired with a modern spinning column transition effect to make the slideshow video outstanding.

09Fast Slide Slideshow Video Template
If you want to create a high paced slide video show with various concepts explained in it then go for the Fast Slide Slideshow Video Template.

10Creative Slideshow Template
For the ones who want dynamic, fast-paced animation style and bold typography in their slideshow video this is the best-suited one for them.

Part 2 10 Best Video Slideshow Maker
After knowing the best templates for your slideshow video you, may be curious to know about the slideshow video maker. Here, after a lot of research, we have come up with the list of 10 best slideshow video maker which can make your professional life easy. Check the list
01PhotoStage
PhotoStage by NHC Softwares is one the best online software to create video slide shows online. This tool is specially very helpful in creating personal and commercial presentations.
Key Features - Key features of PhotoStage includes user oriented interface, animations, and music tracks (300 +). It has inbuilt Audio editing tools and a built-in music collection. If you use this software in a paid version then you can unlock its thousands of animation effects and transitions. You can also export your slide show between PC, mobile, Web etc.
Price - PhotoStage PRO $70.
Rating - 4 stars

02SmartShow 3D
The next slideshow video maker to feature on our list is SmartShow 3D.
This software is known for its very easy to use interface with power-packed and loaded features.
Key Features - It has more than 200 templates for use of every kind. This software enables you to use 300+ transitions, special effects, 3D collages, and nature effects with animations and graphics. You can add music to your slideshow video from more than 200 music tracks with precise volume adjustment.
Price - Standard version cost $ 39.90 and the Deluxe version costs $ 59.50 (10 days free trial)
Rating - 5 stars

03Magix PhotoStory
If you have a bit of experience in making slideshows then you can take your slideshow making experience to another level using this software. A custom animation module and an integrated photo editing tool of Magix PhotoStory make it stand out in our list.
Key Features - 300+ library of effects coupled with a huge collection of music tracks. 100 + video templates and graphics. This software has Built-in filters for photo enhancement with the picture-in-picture option.
Price - $ 49.99 ( 30 days free trial )
Rating - 4.5 stars

04PTE AV Studio
The best suited online tool to make a slide show video is PTE AV Studio. If you want to create smooth and fluid visual slideshows then try this software once. Here you can combine pictures, videos, and audio files into sleek slideshows and impress your boss and colleagues.
Key Features - PTE AV studio supports 100+ effects and templates. It has the best video, photo, and multitrack sound editing tools among competitors. You can create custom animations and graphics if you want. With a huge collection of masks, filters, and text styles you can create high resolution slideshow videos.
Price - Standard Version costs $ 69 while and Pro version costs $ 139 (30 days free trial)
Rating - 4 stars

05Adobe Premiere Pro
If you are a regular slideshow user then no doubt you would know about Adobe Premiere Pro. Those who want easy to navigate the software with hundreds of features then try this one. The only draw [back of this software is that it has no inbuilt templates but don’t worry you can download thousands of templates from the internet for free.
Key Features - Animations could be added to slides using keyframes. Efficient video and audio editing and creating tool. Animations and graphics add a cherry to the cake. Advanced photo enhancement and filters to make your photos and slideshows stand out.
Price - $ 239.88 a year (30 days free trial)

06CyberLink MediaShow
Cyberlink MediaShow is one of the earliest software that came in the field of slideshow video creation. This software enables you to create awesome slideshows, movies, and screensavers. Cyberlink MediaShow has enough features to make eye-catching videos and still it is one of the easiest ones to use. If you aim to create easily simplistic videos then go for this software.
Key Features - Descent collection of transitions with a built-in photo editing module. It is equipped with face recognition and tagging feature. You can integrate social media platforms like Facebook and share to them directly from the software.
Price - $ 49.99 ( 30 days free trial )
Rating - 3.5 stars

07AquaSoft Slideshow
For users who want to create colourful and dynamic family-themed slide show videos then AquaSoft Slideshow is the software to try. After a review from thousands of users, this software has made a place in our featured list. The user-friendly interface with dozens of eye-catching effects and animated text make it fun to use. It allows you to create colourful, text-filled videos and so on.
Key Features - It is powered packed with more than 200 effects and transitions and hundreds of text options. It supports almost all the formats even the older ones like CDs and DVDs. Smooth and advanced editing tools for a better experience.
Price - Premium costs $ 57.00 while Ultimate costs $ 97.00 ( 30 days free trial version)
Rating - 4 stars

08Kizoa
This software helps you to create slide show videos which can be played on any screen. This is basically an online video creating and editing tool but it provides formats for creating slideshows too. You can use this tool on whatever platform you have like a tablet, TV, smartphone, computer screen etc.
Key Features - Intelligent cropping tool of Kizoa helps you to create and edit world-class finest images for your slideshow video. The created slideshow could be downloaded in various formats like MP4, AVI, MOV, etc. You can directly share the video to online platforms.
Price - Starter $ 29.99, Creator $ 49.99 , Professional $ 99.99, and Business $ 299.99
Rating - 4 stars

Part 3 5 Easy Steps to Make a Slide Show Video
Guys, now you know the best templates and best slideshow video makers but now the question comes “how to make a slideshow video?”. If you are confused and don’t have any clue about making a slideshow video then just get your google slides and follow the steps explained below.
Step 1: Get Free Screen Recorder
Firstly you have to start with launching Free Screen Recorder. You can use any screen recorder of your choice. Create your account on the screen recorder and get started.
Step 2. Record Your Google Slides
Noe on the screen recorder “Drag and drop” the sides of this box that appears on your screen to fit your slides into it. Select a suitable size for your video ( preferably 720 p).
Now on the left corner of the screen, you will see various controls using them you can perform various functions like start and stop recording, recording to webcam, selecting the size of the video, add audio and narration.
After performing all the functions click on “Record” to record your slides into video.
Step 3. Finishing of Recording
If you are satisfied with the video then click on the blue button to stop recording, and select “done” to save your video. However, if you don’t like it you can restart the process anytime.
Step 4. Editing of the Video
Once you have completed the recording of the video you can edit it according to your requirements. You can add or delete overlays, video sounds, narrations, graphics, green screen etc.
Step 5. Publish and Share your Slideshow video
After completing the editing and creating work click on “Publish”. You can save and publish your video directly on a YouTube channel, or Google Drive folder, or save your video as a file. And you can share it on any social media platform.
Part 4 How to Custom Templates for Google Slides Presentation
Just imagine, how easy would it have been if you could create the templates for your slide show videos. This would have made your professional life so easy. If you too are looking for such an online tool which provides you with the feature for creating custom templates for your slideshow video then you should try Wondershare’s Wondershare Filmora Video Editor Video Editor. Don’t get confused with the name it’s a video editor but has awesome features for creating custom slideshow videos. Following are some of the highlighting features of Filmora Video Editor.
Easy to use for beginners.
User-friendly interface and bunches of editing tools.
Library (royalty-free) containing hundreds of audio options.
Hundreds of templates, transitions, and filters to make your video eye-catching.
Here is a brief tutorial to use Wondershare Filmora Video Editor to create custom templates for your slideshow video.
For Win 7 or later (64-bit)
For macOS 10.12 or later
Step 1. Adding Photos and Videos
Open Filmora and click on the “Import menu”. Here select the photos and videos you want to use and click on “OK” to begin the importing.

Step 2. Positioning the Media Files on Timeline
Click on “File menu” > “Preferences option” > “Editing tab” > “Photo Placement drop-down menu”. Here you can perform various functions like zooming of images, setting the duration of images, transitions and effects, crop and fitting.

Now if you want to add more images and videos repeat steps 1 and 2.
Step 3. Use the transitions
Use transitions for smooth transitioning from one slide to another. Click on “Transition Setting Window” and set the duration for the transition.

Step 4. Apply Filters and Overlays
Go to “ Effect Tab” and select suitable filters and overlays for your video.

Step 5. Add Motion Graphics Element (Optional Step)
If you wish you can create motion graphics elements for your video. Click on the “ Elements tab” and select the best suited for you.

Step 6. Record Voiceover and create a Soundtrack
Go to “Media tab” > “ Record drop-down “ > “ Record Voiceover feature” to record and create soundtracks and voiceovers.

Step 7. Exporting the Slideshow Video
After making all the adjustments in the video click on the “Export” and wait for the Export window to appear on the screen. Now here you can select the output format of the file and the location for exporting your slideshow video.

● Ending Thoughts →
● Dear readers, now it’s time, to sum up this article. We hope our efforts have made things simple for you. We have tried to bring you the best online templates available online.
● You can now read our article and learn about the best slideshow video makers available online. You can use any one of them as per your need.
● If you want to create custom templates for your slideshow video, then we recommend to try Wondershare Filmora Video Editor for easy and effective custom template creation.
Dear readers you don’t have to worry a bit, in this article we bring you the best slideshow video maker and easy ways using which you can custom the templates for your presentation in your way.
In this article
01 8 Best Slideshow Video Templates
02 [10 Best Video Slideshow Maker](#Part 2)
03 [5 Easy Steps to Make a Slide Show Video](#Part 3)
04 [How to Custom Templates for Google Slides Presentation](#Part 4)
Part 1 Best Slideshow Video Templates
A slideshow video could be an effective way of presenting your point to your audience. This becomes super easy when you use a good template to create your slide show video. Here are 8 best slideshow video templets which you can give a try
01Instagram Slideshow
This slide show video template is best for creating videos for Instagram and other social media platforms.
02Clean Slideshow Template
This one is suited to create video slide show for family purposes. This template could also be engaged in a clean slideshow presentation for your office.
03Parallax Scrolling Slideshow Template
This is one of the most video templates which you can use for your slide show video. This template has various after-effects which can take your presentations to a different level.
04Modern Tie Slideshow Template
If you are in a business or corporate job then give this slideshow video template a try. With a unique, tiled look and a 3D tile drop-down effect, your videos will impress everyone.
05Minimal Slideshow template
Minimal slide template is best for business presentations or product promotion. Here you can use creative text images and graphics to promote your product.
06Sweet Memories Cinematic Slideshow
If you want the best template for presenting your memories, marriages, anniversaries, emotions etc then Sweet Memories Cinematic Slideshow is the one you need.
07Motiongray Slideshow Templates
If you want to turn your adventure images and videos into an impressive slide show video then this is a must try template for you.
08Stylish Spinning Columns Slideshow Template
This template is best suited for high-end business projects. Here you will have image placeholders paired with a modern spinning column transition effect to make the slideshow video outstanding.
09Fast Slide Slideshow Video Template
If you want to create a high paced slide video show with various concepts explained in it then go for the Fast Slide Slideshow Video Template.
10Creative Slideshow Template
For the ones who want dynamic, fast-paced animation style and bold typography in their slideshow video this is the best-suited one for them.
Part 2 10 Best Video Slideshow Maker
After knowing the best templates for your slideshow video you, may be curious to know about the slideshow video maker. Here, after a lot of research, we have come up with the list of 10 best slideshow video maker which can make your professional life easy. Check the list
01PhotoStage
PhotoStage by NHC Softwares is one the best online software to create video slide shows online. This tool is specially very helpful in creating personal and commercial presentations.
Key Features - Key features of PhotoStage includes user oriented interface, animations, and music tracks (300 +). It has inbuilt Audio editing tools and a built-in music collection. If you use this software in a paid version then you can unlock its thousands of animation effects and transitions. You can also export your slide show between PC, mobile, Web etc.
Price - PhotoStage PRO $70.
Rating - 4 stars
02SmartShow 3D
The next slideshow video maker to feature on our list is SmartShow 3D.
This software is known for its very easy to use interface with power-packed and loaded features.
Key Features - It has more than 200 templates for use of every kind. This software enables you to use 300+ transitions, special effects, 3D collages, and nature effects with animations and graphics. You can add music to your slideshow video from more than 200 music tracks with precise volume adjustment.
Price - Standard version cost $ 39.90 and the Deluxe version costs $ 59.50 (10 days free trial)
Rating - 5 stars
03Magix PhotoStory
If you have a bit of experience in making slideshows then you can take your slideshow making experience to another level using this software. A custom animation module and an integrated photo editing tool of Magix PhotoStory make it stand out in our list.
Key Features - 300+ library of effects coupled with a huge collection of music tracks. 100 + video templates and graphics. This software has Built-in filters for photo enhancement with the picture-in-picture option.
Price - $ 49.99 ( 30 days free trial )
Rating - 4.5 stars
04PTE AV Studio
The best suited online tool to make a slide show video is PTE AV Studio. If you want to create smooth and fluid visual slideshows then try this software once. Here you can combine pictures, videos, and audio files into sleek slideshows and impress your boss and colleagues.
Key Features - PTE AV studio supports 100+ effects and templates. It has the best video, photo, and multitrack sound editing tools among competitors. You can create custom animations and graphics if you want. With a huge collection of masks, filters, and text styles you can create high resolution slideshow videos.
Price - Standard Version costs $ 69 while and Pro version costs $ 139 (30 days free trial)
Rating - 4 stars
05Adobe Premiere Pro
If you are a regular slideshow user then no doubt you would know about Adobe Premiere Pro. Those who want easy to navigate the software with hundreds of features then try this one. The only draw [back of this software is that it has no inbuilt templates but don’t worry you can download thousands of templates from the internet for free.
Key Features - Animations could be added to slides using keyframes. Efficient video and audio editing and creating tool. Animations and graphics add a cherry to the cake. Advanced photo enhancement and filters to make your photos and slideshows stand out.
Price - $ 239.88 a year (30 days free trial)
06CyberLink MediaShow
Cyberlink MediaShow is one of the earliest software that came in the field of slideshow video creation. This software enables you to create awesome slideshows, movies, and screensavers. Cyberlink MediaShow has enough features to make eye-catching videos and still it is one of the easiest ones to use. If you aim to create easily simplistic videos then go for this software.
Key Features - Descent collection of transitions with a built-in photo editing module. It is equipped with face recognition and tagging feature. You can integrate social media platforms like Facebook and share to them directly from the software.
Price - $ 49.99 ( 30 days free trial )
Rating - 3.5 stars
07AquaSoft Slideshow
For users who want to create colourful and dynamic family-themed slide show videos then AquaSoft Slideshow is the software to try. After a review from thousands of users, this software has made a place in our featured list. The user-friendly interface with dozens of eye-catching effects and animated text make it fun to use. It allows you to create colourful, text-filled videos and so on.
Key Features - It is powered packed with more than 200 effects and transitions and hundreds of text options. It supports almost all the formats even the older ones like CDs and DVDs. Smooth and advanced editing tools for a better experience.
Price - Premium costs $ 57.00 while Ultimate costs $ 97.00 ( 30 days free trial version)
Rating - 4 stars
08Kizoa
This software helps you to create slide show videos which can be played on any screen. This is basically an online video creating and editing tool but it provides formats for creating slideshows too. You can use this tool on whatever platform you have like a tablet, TV, smartphone, computer screen etc.
Key Features - Intelligent cropping tool of Kizoa helps you to create and edit world-class finest images for your slideshow video. The created slideshow could be downloaded in various formats like MP4, AVI, MOV, etc. You can directly share the video to online platforms.
Price - Starter $ 29.99, Creator $ 49.99 , Professional $ 99.99, and Business $ 299.99
Rating - 4 stars
Part 3 5 Easy Steps to Make a Slide Show Video
Guys, now you know the best templates and best slideshow video makers but now the question comes “how to make a slideshow video?”. If you are confused and don’t have any clue about making a slideshow video then just get your google slides and follow the steps explained below.
Step 1: Get Free Screen Recorder
Firstly you have to start with launching Free Screen Recorder. You can use any screen recorder of your choice. Create your account on the screen recorder and get started.
Step 2. Record Your Google Slides
Noe on the screen recorder “Drag and drop” the sides of this box that appears on your screen to fit your slides into it. Select a suitable size for your video ( preferably 720 p).
Now on the left corner of the screen, you will see various controls using them you can perform various functions like start and stop recording, recording to webcam, selecting the size of the video, add audio and narration.
After performing all the functions click on “Record” to record your slides into video.
Step 3. Finishing of Recording
If you are satisfied with the video then click on the blue button to stop recording, and select “done” to save your video. However, if you don’t like it you can restart the process anytime.
Step 4. Editing of the Video
Once you have completed the recording of the video you can edit it according to your requirements. You can add or delete overlays, video sounds, narrations, graphics, green screen etc.
Step 5. Publish and Share your Slideshow video
After completing the editing and creating work click on “Publish”. You can save and publish your video directly on a YouTube channel, or Google Drive folder, or save your video as a file. And you can share it on any social media platform.
Part 4 How to Custom Templates for Google Slides Presentation
Just imagine, how easy would it have been if you could create the templates for your slide show videos. This would have made your professional life so easy. If you too are looking for such an online tool which provides you with the feature for creating custom templates for your slideshow video then you should try Wondershare’s Wondershare Filmora Video Editor Video Editor. Don’t get confused with the name it’s a video editor but has awesome features for creating custom slideshow videos. Following are some of the highlighting features of Filmora Video Editor.
Easy to use for beginners.
User-friendly interface and bunches of editing tools.
Library (royalty-free) containing hundreds of audio options.
Hundreds of templates, transitions, and filters to make your video eye-catching.
Here is a brief tutorial to use Wondershare Filmora Video Editor to create custom templates for your slideshow video.
For Win 7 or later (64-bit)
For macOS 10.12 or later
Step 1. Adding Photos and Videos
Open Filmora and click on the “Import menu”. Here select the photos and videos you want to use and click on “OK” to begin the importing.
Step 2. Positioning the Media Files on Timeline
Click on “File menu” > “Preferences option” > “Editing tab” > “Photo Placement drop-down menu”. Here you can perform various functions like zooming of images, setting the duration of images, transitions and effects, crop and fitting.
Now if you want to add more images and videos repeat steps 1 and 2.
Step 3. Use the transitions
Use transitions for smooth transitioning from one slide to another. Click on “Transition Setting Window” and set the duration for the transition.
Step 4. Apply Filters and Overlays
Go to “ Effect Tab” and select suitable filters and overlays for your video.
Step 5. Add Motion Graphics Element (Optional Step)
If you wish you can create motion graphics elements for your video. Click on the “ Elements tab” and select the best suited for you.
Step 6. Record Voiceover and create a Soundtrack
Go to “Media tab” > “ Record drop-down “ > “ Record Voiceover feature” to record and create soundtracks and voiceovers.
Step 7. Exporting the Slideshow Video
After making all the adjustments in the video click on the “Export” and wait for the Export window to appear on the screen. Now here you can select the output format of the file and the location for exporting your slideshow video.
● Ending Thoughts →
● Dear readers, now it’s time, to sum up this article. We hope our efforts have made things simple for you. We have tried to bring you the best online templates available online.
● You can now read our article and learn about the best slideshow video makers available online. You can use any one of them as per your need.
● If you want to create custom templates for your slideshow video, then we recommend to try Wondershare Filmora Video Editor for easy and effective custom template creation.
10 Best Voice Over Generators [Windows, Mac, Android, iPhone, and Online]
Best Voice Generator and Video Editor
Filmora’s Text to Speech (TTS) function allows you to convert your text files to voiceover and bring more elements to enrich your video.
Free Download Free Download Free Download Learn More >

Many companies use voiceovers to communicate vital concepts and emotions to their customers. Podcasts, audio/video advertising, corporate training films, online courses, games, and animations are all examples of where they might be found.
Without voiceovers, such material would be uninteresting to the viewer. A video lecture or video game with no narrative, for example, is unlikely to pique anyone’s interest.
Good voiceovers, on the other hand, are not inexpensive to make.
Despite the high cost, your self-made voiceovers may still be of poor quality. Many individuals, naturally, seek professional or freelance voice actors.
Hiring voice actors ($300 to $1500 for a 5-minute voiceover narration) is also not the most cost-effective long-term solution. Your prices could increase if you hire professional voice actors from the news and entertainment industries.
There are resources available. Voice over generators is available online. Most software products come in both free and premium versions, which you can pick from depending on your needs. These programs will swiftly help you reach your text to audio transformation goals, whether you’re a YouTube content maker in need of an informative voiceover or a disabled person looking for a user-friendly text-to-speech converter.
Yes! That’s correct. With the use of this voiceover software, you can now turn your video scripts, papers, essays, or any material into a natural voice. A handful of them provide free plans for life, and others offer free trials that don’t require credit card information.
Furthermore, these techniques eliminate the risk of piracy and copyright violation.
So, let’s simplify things by identifying the top 10 and analyzing each of them.
- ai (Supports Web)
Resemble.ai operates in a variety of ways. It can not only help you make a speech out of the text, but it can also generate text for adverts with a single click. The platform can also produce a personalized voice that you can use as a voice assistant for Alexa, Google, and other services. The technique can also be used by call centres to clone their agents’ voices and customize them.
Resemble gives you four alternative ways to create synthetic voices. You can use the API to generate voices, record up to 50 samples immediately on the online platform, choose from a large number of voice actors, or submit raw audio without a script.
Features
- The software allows you to Customize your brand’s tone.
- It creates responsive IVR agents.
- Possible to do Advertisement text generation with AI with one click.
- Allows Instant language translation.
Cons
- The user interface could be enhanced.
- - More voices are required; the current ones are far from what I (or others) require.
Price
The cheapest package is $30 per month.
For a personalized plan, contact a Resemble representative.
- ai ( Supports Web, Mobile
Lovo.ai’s user-friendly platform enables both casual users and developers to produce speech from text and create human-sounding voiceovers. Over 180 voice styles in 33 languages are available on the platform. The site is also regularly updated with new voices every day, giving consumers a wide range of options.
In just 15 minutes, the tool can generate personalized voices. On this platform, converting text to speech requires only three simple steps. Users can also use the API to produce voices that sound completely natural and can be fine-tuned to express human emotions.
Features
- Listening, conversion and sharing are all unlimited.
- A large voice library is available.
- Up to 15000 characters can be converted at once.
- Collection of unique voices. Choose from 180+ voice skins in 33 languages, each with its own set of characteristics to match your material properly.
- Genuine voices. Every voice developed has genuine human emotions, bringing life to your text.
Cons
- While the UI/UX is simple to use, it feels a little bland and dull.”
- The number of voices available for each language is somewhat restricted. More voice samples are available.”
- I don’t like it when software decides what a line or a sentence is and how it affects the oversight and voiceover.”
Pricing
Lovo.ai now offers two pricing options: (all pricing is for annual plans).
$34.99 per month for personal
$99.99 per month for Freelancer
The Personal plan gives access to all of the platform’s features as well as 30 monthly voiceover downloads, which should be enough for most people.
Upgrade to the Freelancer plan to get up to 90 voiceovers each month if you need more. Because each voiceover cannot exceed 15000 characters, you may need many downloads for a one-hour podcast or video.
You will have to pay an additional $69.99 per month per voice for voice cloning. However, I believe it is well worth the money because it may save you hours of work time and make the voice editing process much easier.
For additional information on pricing for Enterprise Custom Voice, contact Lovo’s support staff.
- Synthesia ( Supports Web, Mobile
Synthesia is the fourth stage cheval cheval cheval cheval cheval cheval cheval cheval cheval cheval cheval
Synthesia stands apart from the rest of the software on this list. It’s a video maker that also has an AI presenter.
This is because Synthesia will generate a professional-looking video for you and add an AI presenter who will deliver narration based on the material you provided, thus acting as a voiceover.
Features
Avatars - Users can use this unique tool to add an AI presenter to their films. There are many pre-built avatars to pick from.
Video with AI Presenter — Once you’ve chosen your avatar, all you have to do now is fill in your script. Synthesia allows you to make videos up to 2.5 hours long.
From text to video For the first time, turn plain words into a professional-looking video.
There are more than 60 languages available. We now support over 60 distinct languages.
There are over 45 AI avatars. Synthesia comes with 40+ avatars right out of the box.
These are Avatars that are unique to you.
Uploads of audio are possible using synthesis.
There is Music available for the background.
Ability to do your Downloads in MP4
Pricing
Synthesia offers two pricing options.
$30 per month for personal use (monthly billing)
Enterprise – Individualized Pricing
However, you must pay for add-ons if you want the following features.
Synthesia API – beginning at $49 per month. Custom Avatar – $1000 one-time.
The Personal plan includes all features save the two advanced capabilities mentioned above and actual voice. As a result, you can make up to 10 minutes of video per month.
Assume you’ve exhausted your video credits. More credits can be purchased for $30 for ten credits. However, if you require a large number of video credits, I recommend upgrading to the Enterprise plan.
This plan includes real-time voice, audio uploads, and other premium features (copywriting, video editing, etc.)
Cons
- Only video producers can use it. If you’re a podcaster, you’ll be disappointed with the tool.
- Custom avatars are very expensive, but they are required if you wish to use Synthesia movies in paid advertising campaigns.
4.Murf.ai ( Supports Web, Mobile)
Murf.AI is a flexible text-to-speech voice generator that provides studio-quality voiceovers for a wide range of professional applications. The tool has a large voice library with over 115 distinct voices in 15 languages. Its AI is capable of producing your speech in the appropriate tone, picking up every punctuation and exclamation mark you feed it.
It also has a grammatical assistant, so you can create proofread scripts that will only improve your voiceover work. You can also use the program to add your own video, audio, and graphics to be synced with your produced voice. With its enterprise plan, the tool also has a powerful collaboration capability.
Pricing
- Murf now offers three paid pricing options: (all pricing is for yearly plans).
- Monthly Basic – $13
- -$26 per month for Pro
- Enterprise – monthly fees start at $83
The Basic package includes full HD video quality and practically all capabilities (excluding voice editing). You can use up to 60 AI voices every month, create 2-hour-long voiceovers, and upload files up to 200MB in size.
For most users, I believe this plan is adequate. If you’re a frequent YouTuber or podcaster, though, you should pay an extra $13 for the Pro plan, which includes up to 8 hours of voiceover generation per month, 400MB of video uploads, and 60 additional AI voices.
Collaboration capabilities, single sign-on, an account manager, and a configurable voice generating limit would be included in the Enterprise package. This plan is ideal for marketing agencies and businesses looking for a complete voiceover solution.
Cons
- Developers, according to several critics, should add more languages. Murf has many fewer AI voices in the library than his competitors.
5.Play.ht
Play. Ht is a web-based voice generator that allows you to generate high-quality text-to-speech. Because of its basic user interface, the platform is exceptionally simple to use. It has a text box on the home page where you may input your text, choose the language, gender, and voice style, and choose the conversion speed.
Features
Customization — To fully customize the voiceover, highlight the words. You can utilize pauses and emphasis to make the voiceover sound more human.
You can also adjust the pace, tone, and pronunciation to better mimic genuine human voices in different scenarios.
Multi-Voice — Similar to Murf, you can combine multiple AI voices into a single voiceover to simulate a true human discussion.
Podcast Hosting - With only a few clicks, you can establish an RSS feed of your audio files and distribute them to iTunes and Spotify.
Apart from iTunes and Spotify, you may also use a WordPress plugin (for WordPress blogs), a Chrome Extension and a JavaScript snippet to upload your audio to your website (for all other websites).
Sounds Analytics - Play. It will gather information on all audio. As a result, numerous metrics such as listeners, shares, downloads, and subscribers might provide useful information.
Pricing
Play. ht has four pricing tiers as of August 2021. (all pricing below is for yearly plans).
$14.25 per month for personal use
$29.25 per month for professionals
$74.25 per month in Growth
$149.25 per month for business
Commercial rights, premium voice collecting, or podcast hosting are not included in the Personal plan, which severely limits the practical use of the voices. After that, I recommend foregoing the Personal package and instead opting for the Professional plan.
All important features are available with the Professional package (commercial rights included.) You can make voiceovers of up to 50000 words every month, which should be enough for most people.
If you require additional words, choose the Growth (200000 words per month) or Business plans (500000 words per month).
Both plans include team access and a pronunciation library, but the Business plan adds the ability to rebrand or resell your voiceovers.
Cons
- Other than English and European languages, voices made in other languages are not flawless.
- There isn’t a built-in video editor for adding voiceovers to videos.
- Clipchamp
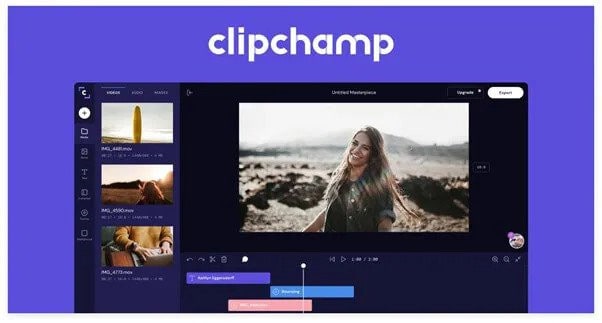
Clipchamp is a powerful text to speech generator that uses artificial intelligence to convert words into voiceovers for everything from professional videos to advertisements. In a matter of seconds, it can convert an imported script into speech.
Because of its simplicity, Clipchamp is another excellent choice for beginners. To generate a preview, simply select your voice, language, and speed before uploading a script. The AI technology in the tool analyzes the script to identify areas that need to be changed.
Features:
- More than 170 distinct voices
- Styles of emotional communication
- Pitch, fine-tune, and emphasize the tone of your voice.
- Simple to operate
Pricing
Clipchamp is available for a monthly fee of $6.0. Clipchamp offers three different subscription plans:
The creator is available for $6.00 per month.
$13.00 per month for a business.
$27.00 per month for Business Platinum.
Clipchamp also offers a limited-featured Free Plan.
Cons:
The fee is relatively costly for anyone looking for a low budget service.
- Balabolka ( Supports Windows)
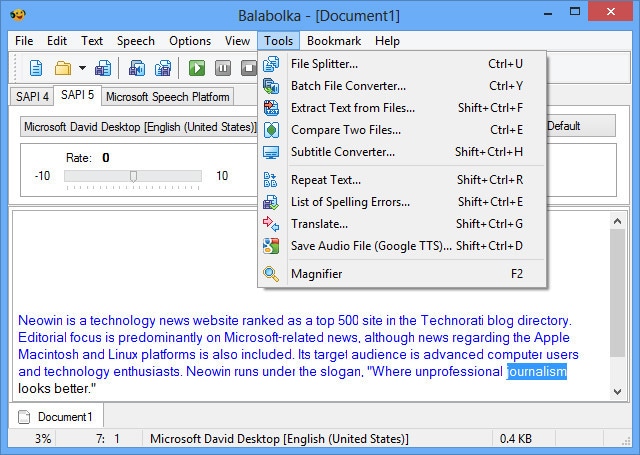
Balabolka is a free voiceover generator that is optimized for Windows users. It can read and write DOC, EPUB, DOCX, PDF, PPT, and RTF files. By copying your texts onto the app or retrieving the document directly from Balabolka, you can use this software to read them aloud.
You can also change the pitch and pace of the voiceover with Balabolka. Microsoft Speech API is used in this program. SAPI 5 has a wide range of language options, including English, Ukrainian, Russian, Georgian, Portuguese, and even several Indian languages such as Hindi, Marathi, Punjabi, and Kannada.
Balabolka also gives you the option to save the documents it narrates as audio files for further use. Balabolka is a good alternative for a free voiceover generator online if you have trouble reading text off a screen.
Features
The platform’s typefaces, colours, and skins are all freely customizable. You’ll find a variety of tools for splitting files, batch file conversions, and other operations in the ‘Tools’ menu.
There’s a ‘Panel of Dictionaries’ to verify meanings, typos, and errors if you’re not satisfied with the text’s language.
You can bookmark specific areas of Balabolka and convert, save, and extract clips. Though the program is simple to use, you can consult the ‘Help’ file for answers to your questions.
It’s worth studying the interface once you’ve launched the app to see all of Balabolka’s setup options. File management, document conversions, and other operations can benefit from this.
Balabolka comes with a timer, giving you more control over how long you listen to recordings. Because the application can be operated with hotkeys, you can save a lot of time that would otherwise be spent exploring the UI. Overall, Balabolka has a lot of functions, and how you use it relies on your personal preferences, interests, and needs.
Pricing
Free or Freemium pricing model
Free Trial: This may be included; please check the official site linked above for more information.
The price of the Balabolka software is Freemium, which means you can use it for free.
Cons
- Needs updates for new languages
8.. MorphVOX Junior ( Supports Mac)
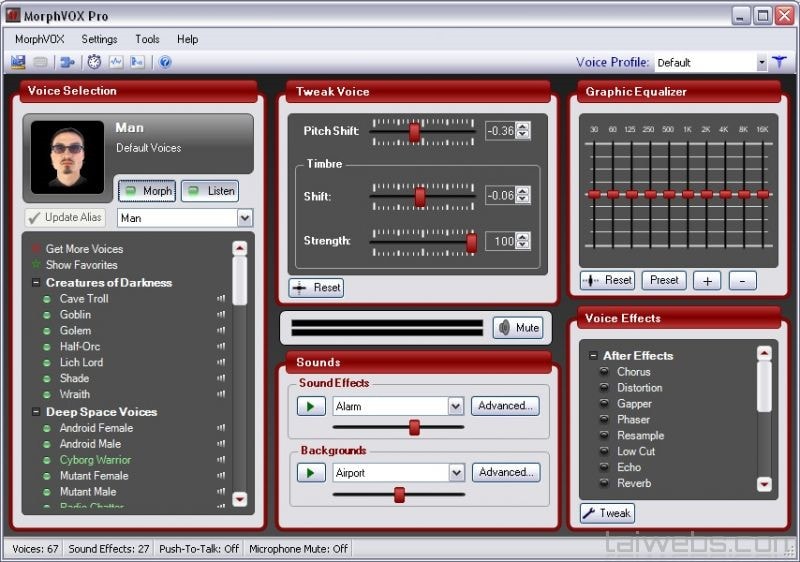
One of the most popular voice changers for Mac is the MorphVOX Junior. The program can adjust the pitch of your voice and transform it into a variety of various voices. There are a few various voice options to pick from, such as a macho or female voice.
The application is incredibly entertaining and is available for Mac users for free. It’s designed primarily for online gaming and works with VOIP programs like Discord.
Features:
- Assists you in recording high-quality audio.
- Background noise should be avoided and adjusted.
- To create a specific ambience, add your own background score.
- Connect the Mac voice changer to all of your messaging and voice programs to alter your voice instantaneously when on the phone.
- It only consumes a small amount of bandwidth and CPU memory.
Pricing
- It’s Free but the
MorphVox Pro 4 starts at $39.99
Cons
- The use of this voice changer is somewhat difficult. Before using it, the user must master its settings.
- It has Limited functionality.
- 9. Voicechanger plus (Supports iPhone)
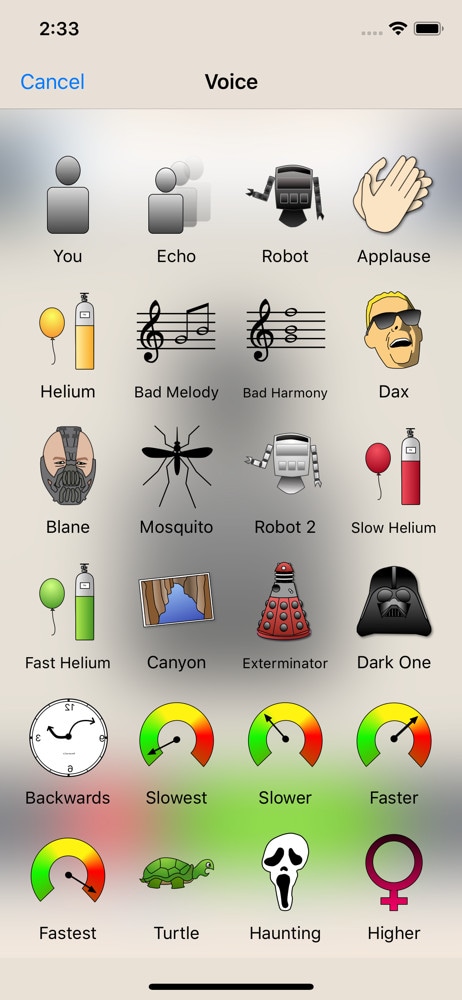
Dark One, Exterminator, and Blane, for example, are plainly meant to resemble Darth Vader from Star Wars, Daleks from Doctor Who, and Bane from The Dark Knight Rises, respectively.
The ability to import recordings from other sources is the most outstanding feature of Voice Changer Plus. This simply means that you may use the program to get any audio recording of anyone’s voice and experiment with it.
Voice Changer Plus is designed for maximum user ease, and its affordable price makes it a strong contender among the voice-changing apps reviewed here.
Features
- Backward playback of recorded audio is possible.
- Basic editing features are available.
- Various editing effects are available.
Pricing
Free but offers in-app purchases.
Cons
- Real-time recording is not possible.
- The free version is ambiguous and filled with advertisements.
- compatibility is low
- 10. Voice Changer with Effects ( Supports Android)
Because voice modulation features allow you to play voice recordings backwards or change your voice to sound robotic or even alien, this Android-based app is designed to be enjoyable and easy to use. Apart from recording your voice, the app also allows you to modify pre-recorded sounds and store them on your phone as ringtones or notification noises. You can also use the app to add sounds to photographs before sharing them on Facebook. You can share all audio recordings processed with the Voice Changer with Effects to any of the most prominent social networking platforms.
Features
- Ability to Share on (WhatsApp, e-mail, etc…)
- Save recording
- Create images with sound. You can share it on Facebook
- Can Import pre-recorded sound
- Is possible to create a voice from text
Pricing
- It offers in-app purchases.
Cons
- Advertisements are present.
- There are no other options for audio or video editing.
Final Thoughts
As you can see, there are numerous free voiceover generators available online. Most software products come in both free and premium versions, which you can pick from depending on your needs. These programs will swiftly help you reach your text to audio transformation goals, whether you’re a YouTube content maker in need of an informative voiceover or a disabled person looking for a user-friendly text-to-speech converter.
Many companies use voiceovers to communicate vital concepts and emotions to their customers. Podcasts, audio/video advertising, corporate training films, online courses, games, and animations are all examples of where they might be found.
Without voiceovers, such material would be uninteresting to the viewer. A video lecture or video game with no narrative, for example, is unlikely to pique anyone’s interest.
Good voiceovers, on the other hand, are not inexpensive to make.
Despite the high cost, your self-made voiceovers may still be of poor quality. Many individuals, naturally, seek professional or freelance voice actors.
Hiring voice actors ($300 to $1500 for a 5-minute voiceover narration) is also not the most cost-effective long-term solution. Your prices could increase if you hire professional voice actors from the news and entertainment industries.
There are resources available. Voice over generators is available online. Most software products come in both free and premium versions, which you can pick from depending on your needs. These programs will swiftly help you reach your text to audio transformation goals, whether you’re a YouTube content maker in need of an informative voiceover or a disabled person looking for a user-friendly text-to-speech converter.
Yes! That’s correct. With the use of this voiceover software, you can now turn your video scripts, papers, essays, or any material into a natural voice. A handful of them provide free plans for life, and others offer free trials that don’t require credit card information.
Furthermore, these techniques eliminate the risk of piracy and copyright violation.
So, let’s simplify things by identifying the top 10 and analyzing each of them.
- ai (Supports Web)
Resemble.ai operates in a variety of ways. It can not only help you make a speech out of the text, but it can also generate text for adverts with a single click. The platform can also produce a personalized voice that you can use as a voice assistant for Alexa, Google, and other services. The technique can also be used by call centres to clone their agents’ voices and customize them.
Resemble gives you four alternative ways to create synthetic voices. You can use the API to generate voices, record up to 50 samples immediately on the online platform, choose from a large number of voice actors, or submit raw audio without a script.
Features
- The software allows you to Customize your brand’s tone.
- It creates responsive IVR agents.
- Possible to do Advertisement text generation with AI with one click.
- Allows Instant language translation.
Cons
- The user interface could be enhanced.
- - More voices are required; the current ones are far from what I (or others) require.
Price
The cheapest package is $30 per month.
For a personalized plan, contact a Resemble representative.
- ai ( Supports Web, Mobile
Lovo.ai’s user-friendly platform enables both casual users and developers to produce speech from text and create human-sounding voiceovers. Over 180 voice styles in 33 languages are available on the platform. The site is also regularly updated with new voices every day, giving consumers a wide range of options.
In just 15 minutes, the tool can generate personalized voices. On this platform, converting text to speech requires only three simple steps. Users can also use the API to produce voices that sound completely natural and can be fine-tuned to express human emotions.
Features
- Listening, conversion and sharing are all unlimited.
- A large voice library is available.
- Up to 15000 characters can be converted at once.
- Collection of unique voices. Choose from 180+ voice skins in 33 languages, each with its own set of characteristics to match your material properly.
- Genuine voices. Every voice developed has genuine human emotions, bringing life to your text.
Cons
- While the UI/UX is simple to use, it feels a little bland and dull.”
- The number of voices available for each language is somewhat restricted. More voice samples are available.”
- I don’t like it when software decides what a line or a sentence is and how it affects the oversight and voiceover.”
Pricing
Lovo.ai now offers two pricing options: (all pricing is for annual plans).
$34.99 per month for personal
$99.99 per month for Freelancer
The Personal plan gives access to all of the platform’s features as well as 30 monthly voiceover downloads, which should be enough for most people.
Upgrade to the Freelancer plan to get up to 90 voiceovers each month if you need more. Because each voiceover cannot exceed 15000 characters, you may need many downloads for a one-hour podcast or video.
You will have to pay an additional $69.99 per month per voice for voice cloning. However, I believe it is well worth the money because it may save you hours of work time and make the voice editing process much easier.
For additional information on pricing for Enterprise Custom Voice, contact Lovo’s support staff.
- Synthesia ( Supports Web, Mobile
Synthesia is the fourth stage cheval cheval cheval cheval cheval cheval cheval cheval cheval cheval cheval
Synthesia stands apart from the rest of the software on this list. It’s a video maker that also has an AI presenter.
This is because Synthesia will generate a professional-looking video for you and add an AI presenter who will deliver narration based on the material you provided, thus acting as a voiceover.
Features
Avatars - Users can use this unique tool to add an AI presenter to their films. There are many pre-built avatars to pick from.
Video with AI Presenter — Once you’ve chosen your avatar, all you have to do now is fill in your script. Synthesia allows you to make videos up to 2.5 hours long.
From text to video For the first time, turn plain words into a professional-looking video.
There are more than 60 languages available. We now support over 60 distinct languages.
There are over 45 AI avatars. Synthesia comes with 40+ avatars right out of the box.
These are Avatars that are unique to you.
Uploads of audio are possible using synthesis.
There is Music available for the background.
Ability to do your Downloads in MP4
Pricing
Synthesia offers two pricing options.
$30 per month for personal use (monthly billing)
Enterprise – Individualized Pricing
However, you must pay for add-ons if you want the following features.
Synthesia API – beginning at $49 per month. Custom Avatar – $1000 one-time.
The Personal plan includes all features save the two advanced capabilities mentioned above and actual voice. As a result, you can make up to 10 minutes of video per month.
Assume you’ve exhausted your video credits. More credits can be purchased for $30 for ten credits. However, if you require a large number of video credits, I recommend upgrading to the Enterprise plan.
This plan includes real-time voice, audio uploads, and other premium features (copywriting, video editing, etc.)
Cons
- Only video producers can use it. If you’re a podcaster, you’ll be disappointed with the tool.
- Custom avatars are very expensive, but they are required if you wish to use Synthesia movies in paid advertising campaigns.
4.Murf.ai ( Supports Web, Mobile)
Murf.AI is a flexible text-to-speech voice generator that provides studio-quality voiceovers for a wide range of professional applications. The tool has a large voice library with over 115 distinct voices in 15 languages. Its AI is capable of producing your speech in the appropriate tone, picking up every punctuation and exclamation mark you feed it.
It also has a grammatical assistant, so you can create proofread scripts that will only improve your voiceover work. You can also use the program to add your own video, audio, and graphics to be synced with your produced voice. With its enterprise plan, the tool also has a powerful collaboration capability.
Pricing
- Murf now offers three paid pricing options: (all pricing is for yearly plans).
- Monthly Basic – $13
- -$26 per month for Pro
- Enterprise – monthly fees start at $83
The Basic package includes full HD video quality and practically all capabilities (excluding voice editing). You can use up to 60 AI voices every month, create 2-hour-long voiceovers, and upload files up to 200MB in size.
For most users, I believe this plan is adequate. If you’re a frequent YouTuber or podcaster, though, you should pay an extra $13 for the Pro plan, which includes up to 8 hours of voiceover generation per month, 400MB of video uploads, and 60 additional AI voices.
Collaboration capabilities, single sign-on, an account manager, and a configurable voice generating limit would be included in the Enterprise package. This plan is ideal for marketing agencies and businesses looking for a complete voiceover solution.
Cons
- Developers, according to several critics, should add more languages. Murf has many fewer AI voices in the library than his competitors.
5.Play.ht
Play. Ht is a web-based voice generator that allows you to generate high-quality text-to-speech. Because of its basic user interface, the platform is exceptionally simple to use. It has a text box on the home page where you may input your text, choose the language, gender, and voice style, and choose the conversion speed.
Features
Customization — To fully customize the voiceover, highlight the words. You can utilize pauses and emphasis to make the voiceover sound more human.
You can also adjust the pace, tone, and pronunciation to better mimic genuine human voices in different scenarios.
Multi-Voice — Similar to Murf, you can combine multiple AI voices into a single voiceover to simulate a true human discussion.
Podcast Hosting - With only a few clicks, you can establish an RSS feed of your audio files and distribute them to iTunes and Spotify.
Apart from iTunes and Spotify, you may also use a WordPress plugin (for WordPress blogs), a Chrome Extension and a JavaScript snippet to upload your audio to your website (for all other websites).
Sounds Analytics - Play. It will gather information on all audio. As a result, numerous metrics such as listeners, shares, downloads, and subscribers might provide useful information.
Pricing
Play. ht has four pricing tiers as of August 2021. (all pricing below is for yearly plans).
$14.25 per month for personal use
$29.25 per month for professionals
$74.25 per month in Growth
$149.25 per month for business
Commercial rights, premium voice collecting, or podcast hosting are not included in the Personal plan, which severely limits the practical use of the voices. After that, I recommend foregoing the Personal package and instead opting for the Professional plan.
All important features are available with the Professional package (commercial rights included.) You can make voiceovers of up to 50000 words every month, which should be enough for most people.
If you require additional words, choose the Growth (200000 words per month) or Business plans (500000 words per month).
Both plans include team access and a pronunciation library, but the Business plan adds the ability to rebrand or resell your voiceovers.
Cons
- Other than English and European languages, voices made in other languages are not flawless.
- There isn’t a built-in video editor for adding voiceovers to videos.
- Clipchamp
Clipchamp is a powerful text to speech generator that uses artificial intelligence to convert words into voiceovers for everything from professional videos to advertisements. In a matter of seconds, it can convert an imported script into speech.
Because of its simplicity, Clipchamp is another excellent choice for beginners. To generate a preview, simply select your voice, language, and speed before uploading a script. The AI technology in the tool analyzes the script to identify areas that need to be changed.
Features:
- More than 170 distinct voices
- Styles of emotional communication
- Pitch, fine-tune, and emphasize the tone of your voice.
- Simple to operate
Pricing
Clipchamp is available for a monthly fee of $6.0. Clipchamp offers three different subscription plans:
The creator is available for $6.00 per month.
$13.00 per month for a business.
$27.00 per month for Business Platinum.
Clipchamp also offers a limited-featured Free Plan.
Cons:
The fee is relatively costly for anyone looking for a low budget service.
- Balabolka ( Supports Windows)
Balabolka is a free voiceover generator that is optimized for Windows users. It can read and write DOC, EPUB, DOCX, PDF, PPT, and RTF files. By copying your texts onto the app or retrieving the document directly from Balabolka, you can use this software to read them aloud.
You can also change the pitch and pace of the voiceover with Balabolka. Microsoft Speech API is used in this program. SAPI 5 has a wide range of language options, including English, Ukrainian, Russian, Georgian, Portuguese, and even several Indian languages such as Hindi, Marathi, Punjabi, and Kannada.
Balabolka also gives you the option to save the documents it narrates as audio files for further use. Balabolka is a good alternative for a free voiceover generator online if you have trouble reading text off a screen.
Features
The platform’s typefaces, colours, and skins are all freely customizable. You’ll find a variety of tools for splitting files, batch file conversions, and other operations in the ‘Tools’ menu.
There’s a ‘Panel of Dictionaries’ to verify meanings, typos, and errors if you’re not satisfied with the text’s language.
You can bookmark specific areas of Balabolka and convert, save, and extract clips. Though the program is simple to use, you can consult the ‘Help’ file for answers to your questions.
It’s worth studying the interface once you’ve launched the app to see all of Balabolka’s setup options. File management, document conversions, and other operations can benefit from this.
Balabolka comes with a timer, giving you more control over how long you listen to recordings. Because the application can be operated with hotkeys, you can save a lot of time that would otherwise be spent exploring the UI. Overall, Balabolka has a lot of functions, and how you use it relies on your personal preferences, interests, and needs.
Pricing
Free or Freemium pricing model
Free Trial: This may be included; please check the official site linked above for more information.
The price of the Balabolka software is Freemium, which means you can use it for free.
Cons
- Needs updates for new languages
8.. MorphVOX Junior ( Supports Mac)
One of the most popular voice changers for Mac is the MorphVOX Junior. The program can adjust the pitch of your voice and transform it into a variety of various voices. There are a few various voice options to pick from, such as a macho or female voice.
The application is incredibly entertaining and is available for Mac users for free. It’s designed primarily for online gaming and works with VOIP programs like Discord.
Features:
- Assists you in recording high-quality audio.
- Background noise should be avoided and adjusted.
- To create a specific ambience, add your own background score.
- Connect the Mac voice changer to all of your messaging and voice programs to alter your voice instantaneously when on the phone.
- It only consumes a small amount of bandwidth and CPU memory.
Pricing
- It’s Free but the
MorphVox Pro 4 starts at $39.99
Cons
- The use of this voice changer is somewhat difficult. Before using it, the user must master its settings.
- It has Limited functionality.
- 9. Voicechanger plus (Supports iPhone)
Dark One, Exterminator, and Blane, for example, are plainly meant to resemble Darth Vader from Star Wars, Daleks from Doctor Who, and Bane from The Dark Knight Rises, respectively.
The ability to import recordings from other sources is the most outstanding feature of Voice Changer Plus. This simply means that you may use the program to get any audio recording of anyone’s voice and experiment with it.
Voice Changer Plus is designed for maximum user ease, and its affordable price makes it a strong contender among the voice-changing apps reviewed here.
Features
- Backward playback of recorded audio is possible.
- Basic editing features are available.
- Various editing effects are available.
Pricing
Free but offers in-app purchases.
Cons
- Real-time recording is not possible.
- The free version is ambiguous and filled with advertisements.
- compatibility is low
- 10. Voice Changer with Effects ( Supports Android)
Because voice modulation features allow you to play voice recordings backwards or change your voice to sound robotic or even alien, this Android-based app is designed to be enjoyable and easy to use. Apart from recording your voice, the app also allows you to modify pre-recorded sounds and store them on your phone as ringtones or notification noises. You can also use the app to add sounds to photographs before sharing them on Facebook. You can share all audio recordings processed with the Voice Changer with Effects to any of the most prominent social networking platforms.
Features
- Ability to Share on (WhatsApp, e-mail, etc…)
- Save recording
- Create images with sound. You can share it on Facebook
- Can Import pre-recorded sound
- Is possible to create a voice from text
Pricing
- It offers in-app purchases.
Cons
- Advertisements are present.
- There are no other options for audio or video editing.
Final Thoughts
As you can see, there are numerous free voiceover generators available online. Most software products come in both free and premium versions, which you can pick from depending on your needs. These programs will swiftly help you reach your text to audio transformation goals, whether you’re a YouTube content maker in need of an informative voiceover or a disabled person looking for a user-friendly text-to-speech converter.
Also read:
- Have You Ever Wondered How to Add Camera Shake to Video in Adobe After Effects? Let Us Share with You some Tips and Tricks on How to Do Just That
- New In 2024, Funny Content Ideas for YouTube Videos
- Do You Seek to Blur Out Your Video and Photo to Display some Motion Blur? This Article Provides a List of the Best Motion Blur Apps for Videos and Photos for 2024
- In 2024, How to Add Filter to Video Online
- New Enhance Social Media Posts with Transparent GIFs that Leave Your Peers in Awe
- 2024 Approved 15 Camera Shake Preset for Adobe Premiere Pro
- Updated How to Trim Video in Quicktime Player on Mac for 2024
- New In 2024, 3 Ways to Make Time-Lapse Video on MacBook
- Updated In 2024, Detailed Steps to Rotate Videos in Windows Media Player
- New In 2024, How to Resize FLV Videos Efficiently Windows, Mac,Android, iPhone & Online
- 2024 Approved How to Turn On/Off Motion Blur in Fortnite? Is It Good for Fortnite?
- New 10 Matching Color Combination That Works Together for 2024
- 2024 Approved Best Ai Generated Memes
- In 2024, Top 7 Color Match Paint Apps
- Updated In 2024, How to Make Stunning Glitch Effect in Photoshop? Ultimate Guide
- Updated 2024 Approved Perfecting the Art of Slowing Down Video on Instagram
- New In 2024, Some Effective Slow Motion Video Editors You Can Try
- New 2024 Approved Best Free LUTs To Use in Shotcut
- 2024 Approved Best Green Screen Software for Beginner on Mac
- Updated Progressive Solutions to Add VHS Effects to Video with Ease for 2024
- New 2024 Approved How to Make an Adobe Slideshow the Easy Way
- Follow a Few Simple Steps and Learn How to Create a Professional Glowing Edge Effect to Your Videos in Filmora for 2024
- Updated Using AI to Replace Skies Finding the Right Methods
- One of the Latest Tools for Editing Video and Images Is AI Composite Video App Which Is Popular Among Users. Learn All About This Tool and Its Functioning for 2024
- Updated Control Playback Speed in Premiere Pro for 2024
- New 2024 Approved Comprehensive Guide to Add LUTs in Premiere Pro with Ease
- New Hitfilm Express - A Guide to Download, Install, Key Features for 2024
- Updated 2024 Approved Looking For The Best Slow Motion Effect in Premiere Pro
- Updated In 2024, A Review On 3D LUT Creator
- Updated How Do You Create In-Camera Transitions in Your Videos? A Complete Guide for Beginners to Create These Transitions Using Their Camera at Home
- In 2024, 10 Best Innovative AR Video Effects to Check Out
- Dubbing Videos With Voiceovers | Using Wondershare Filmora for 2024
- In 2024, What Legendaries Are In Pokemon Platinum On OnePlus Ace 3? | Dr.fone
- A Quick Guide to Tecno Pop 8 FRP Bypass Instantly
- How To Recover Whatsapp Chat History From iPhone XS Max | Stellar
- In 2024, Additional Tips About Sinnoh Stone For Poco X5 Pro | Dr.fone
- Quick Fixes for Why Is My Vivo X90S Black and White | Dr.fone
- 4 Feasible Ways to Fake Location on Facebook For your Samsung Galaxy S23 Ultra | Dr.fone
- In 2024, Ultimate Guide to Catch the Regional-Located Pokemon For Oppo A1x 5G | Dr.fone
- In 2024, Latest Guide How To Bypass Nokia G310 FRP Without Computer
- 6 Ways to Change Spotify Location On Your Vivo S18 Pro | Dr.fone
- In 2024, How To Unlock Samsung Galaxy S23 Phone Without Password?
- In 2024, How To Check if Your Lava Blaze 2 5G Is Unlocked
- A Detailed VPNa Fake GPS Location Free Review On Xiaomi Civi 3 | Dr.fone
- In 2024, 10 Best Free Websites to Watch Cartoons Online
- In 2024, How to Hide/Fake Snapchat Location on Your Sony Xperia 1 V | Dr.fone
- In 2024, How to Mirror Your Nubia Red Magic 8S Pro+ Screen to PC with Chromecast | Dr.fone
- Easy Fixes How To Recover Forgotten iCloud Password From your iPhone 13 mini
- What Legendaries Are In Pokemon Platinum On Vivo V29? | Dr.fone
- In 2024, Overview of the Best Nokia 130 Music Screen Mirroring App | Dr.fone
- How to Translate Audio/Video Content From Spanish to English and Vice Versa?
- In 2024, How to Bypass Android Lock Screen Using Emergency Call On Realme C33 2023?
- In 2024, The Most Effective Ways to Bypass iPhone 8 Activation Lock
- How to Perform Hard Reset on Honor Magic 6 Pro? | Dr.fone
- Want to Uninstall Google Play Service from Xiaomi 14? Here is How | Dr.fone
- How to convert AVCHD .mts files for Xiaomi Redmi Note 13 Pro 5G?
- Title: Updated Color Correction Basics (S-LOG Footage)
- Author: Chloe
- Created at : 2024-05-20 03:37:58
- Updated at : 2024-05-21 03:37:58
- Link: https://ai-editing-video.techidaily.com/updated-color-correction-basics-s-log-footage/
- License: This work is licensed under CC BY-NC-SA 4.0.
