
:max_bytes(150000):strip_icc():format(webp)/GettyImages-1134410016-75c4b547097941299e55dceeef4b764c.jpg)
Updated Color Finale Is a Color Grading Plugin for Final Cur Pro. It Allows Users to Make Cinematic Looking Video Scenes by Adjusting the Color. Here Well Share You some Basic Information About This Plugin
Color Finale Is a Color Grading Plugin for Final Cur Pro. It Allows Users to Make Cinematic Looking Video Scenes by Adjusting the Color. Here We’ll Share You some Basic Information About This Plugin
The question of which is superior between Color Finale and DaVinci Resolve may have crossed your mind if you’re considering upgrading your color grading software. That’s very natural, too! These two programs for color grading and color correction are among the best options for intermediate to advanced video editors. And with good cause. But what distinguishes each piece of software? Keep reading to find out.
1. What is color finale?
One of the best color grading and correction programs is Color Finale from Color Trix. It can only be used with Final Cut Pro X at the moment and is downloaded as a plug-in. Therefore, Color Finale is something you should definitely think about employing if you’re currently using FCPX to edit your video. Color Finale 2, the most recent edition, is incredibly potent. Compared to the default Final Cut Pro coloring tools, it offers a significantly more detailed coloring experience. It’s also shockingly simple to use. After installing it, Color Finale 2 will be accessible under “Video Effects.” Simply drag and drop it onto the desired clips to use it. Alternately, make an adjustment layer and apply it to your entire video.
The use of curves, vectors, color wheels, and HSL curves will be available to editors. These can all be utilized in layers. Additionally, rearranging and modifying the layers is simple. The masking and an enhanced LUTs browser are two of Color Finale 2’s finest additions. Masks are easy to handle and apply to video clips, and they have a great tracking capability. This makes it simpler for editors to isolate particular colors or sections inside film for intricate coloring.
Additionally, with Color Finale 1, the LUTs browser has been improved. LUTs are now much simpler to go through and preview. Additionally, Color Finale can be shown the location of your computer’s favorite LUTs for rapid application. Alternately, you might make your own LUTs and store them for use in later projects. These resources offer a wide range of color options.
The nicest part about it all, though, is how easy Color Finale is to use. Numerous excellent Color Finale instructions may also be found on their YouTube channel. The base version of Color Finale 2 software costs $99 to buy. Alternately, spend $149 once to get the full feature set of Color Finale 2 Pro.
2. Ease of use color finale 2.0
In this division, Color Finale 2 is the undisputed champion. All you have to do to use FCPX editors is download the software. It will be accessible when you launch FCPX the following time. Additionally, editors more experienced with Premiere Pro will still find Color Finale to be simpler to use than DaVinci Resolve. This is due to the fact that DaVinci Resolve uses an entirely unique method than other tools for editing videos. With Resolve, there is a very high learning curve. But with Color Finale 2, you can get started after watching a few tutorials.
3. Features
On the timeline of your Final Cut Pro project, a comprehensive range of professional color grading tools.
Image quality: Avoid problems with color management or image compression that could cause degradation between the editing and grading systems.
Speed: When compared to the conventional color tools found in Final Cut Pro, the color toolset in this extension has been fine-tuned and their user interface has been optimized for a speedier grading workflow.
Efficiency: Keep your project in Final Cut Pro for all of your high-end color grading needs, and there will be no need for round-tripping.
Transcoder: Color Finale Transcoder is an FCPX addon that lets you preview, alter, and transcode RAW files. BRAW, ARRIRAW, and CinemaDNG are supported. As Final Cut Pro X natively supports R3D/ProRes RAW files, there’s no necessity to support them. Inside the extension, you can change the transcoding codec, color space, output file resolution, delayering mode, and highlight recovery. Color Finale Transcoder lets you change RAW files’ color temperature/tint, ISO, and sharpness/detail. Import a preview LUT to see how your film will look.
Value: Included are brand new tools for image processing as well as picture analysis - there is no requirement to buy any other plugins.
4. Color Finale 2
The color correction tool known as Color Finale 2 is a plug-in that can only be used with Apple’s Final Cut Pro software. It is superior to the color correcting capabilities that are incorporated into Final Cut Pro and transform the software into a professional grading solution. There is a Standard version and a Pro version of Color Finale 2 available for purchase.
This article may refer to some features that are only available in the Pro edition; thus, please visit our website for a comparison of the features included in each of the two versions. Color Finale 2 Pro will interact with Tangent hardware control surfaces, in addition to the differences in features that are already there. Both Final Cut Pro and Motion have an option to install Color Finale 2 as a video effect filter, known as a plug-in. It also installs a separate Color Finale application, which is necessary for the program to function properly within the framework of macOS. This application is only used to check for and apply updates to Color Finale 2, therefore the user will not ordinarily need to access it. The Color Finale 2 effect can be applied to any video clip, compound clip, title, generator, or adjustment layer (title effect) on the timeline by dragging and dropping the Color Finale 2 or Color Finale 2 Pro** effect from the effects panel in Final Cut Pro.
The interface of Color Finale 2 is split into two sections: a control panel that can be found in the Final Cut Pro inspector and a layer editing panel that can be moved around and resized. These panels make use of a design language for the interface that is similar to that of Final Cut Pro. Both have contextual pulldown pickers and contextual menus, in addition to return arrows that are located next to the majority of the parameters in order to reset their values to the default (identified by three vertical dots).
5. Minimum system requirements?
Apple Mac 2012 or newer OS X 10.13 and later Requires graphics card sold by Apple supporting Graphics card with Metal support Final Cut Pro X 10.4 or later 4 GB of RAM.
6. Availability and price
The ability to produce high-quality results within Color Finale without the need to round-trip to another program is the primary advantage of utilizing this software. Doing all of your editing, grading, and finishing work right within FCPX may save you a ton of time and effort, which is especially helpful when you’re working under strict time constraints. The price of Color Finale is only $99, which is very affordable.
Conclusion
Color Finale includes several high-end color suite capabilities. Color Finale includes standard color tools including 3-way color wheels and RGB curves, plus a basic LUT option and a six-channel vector grading feature. Using this vector tool, it’s easy to brighten skies, adjust building colors, or enhance skin tones.
Free Download For Win 7 or later(64-bit)
Free Download For macOS 10.14 or later
Free Download For macOS 10.14 or later
Top 10 Audio Visualizers [Windows, Mac, Android, iPhone & Online]
Best Audio Visualizer and Video Editor
Make your music video come alive with Filmora Audio Visualizer. The effect will intelligently match the sound in your video while also adding dynamic effects.
Free Download Free Download Free Download Learn More >

Music is one of the most popular video categories on YouTube, with millions of users using the site to find and discover new music. Unfortunately, making music videos that stand out in a sea of similar content is difficult. Still, suppose you are not a professional filmmaker and want to make a movie quickly. In that case, you may use a music visualizer to create music videos that you can share on social media. Most online music visualizers allow you to choose an audio spectrum template, style the visualization and even add logos or links to your social media profiles. Below are the top ten best video visualizers that can be used to edit music on Mac, Windows, iOs, Android, and online. Let’s dive into details:
- Motionbox Music Visualizer

Supported system: Online Introduction: Motionbox’s Music Visualizer allows you to turn your music into an entertaining multimedia piece. Visualizers, which are essentially tangible waveform representations of your audio, are the main feature of this program. These visualizers are available in various forms and may be easily placed on top of a picture or video. The technology makes it simple to create audio material that is very engaging. You start by uploading your video to a drag-and-drop editor, where you can reduce your music as needed for the presentation and overlay the relevant visualizer on a photo or video. You can also include a call to action and other features to spice your multimedia masterpiece. Features:
- Customize subtitles of the music to make visualization better
- Overlay videos to create a mix of music and overlapping music
- Collaborative video editing tools
Price: Free, but you can upgrade the application with in-app purchases. Cons:
- It might run slow in some browsers.
- Plane9

Supported system: Windows Introduction: Plane9 is a scene-based 3D music visualizer that works well in VR, on the Oculus Rift, and as a screensaver. With over 250 effect scenes to choose from, you’ll never have to stick to one view for the duration of a song. Instead, plane9 lets you blend scenes with flawless transitions, giving you a continuous musical experience. Apart from responding to a voice taken through a microphone, it dances to any music you’re listening to, whether Spotify, iTunes, or whatever. A music visualizer can also be added to OBS for hackers. Features:
- A real-time audio stream is supported, and sound from up to 18 speakers can be analyzed.
- Multi-monitor display support
Price: Free, but you can upgrade the application with in-app purchases. Cons:
- Unprocessed digital audio, such as DTS, cannot be used.
- There is a learning curve in setting everything up.
- Videobolt Music Visualizer

Supported system: Online Introduction: Videobolt is a stock-template-based internet music visualizer. Trap, pop, chill, hip-hop, synthwave, and EDM music are among the visualizer themes available. Each template is fully customizable, allowing you to create stunning images that flow with your music. You can include the name and logo of the artist, which is helpful for YouTubers that have a dedicated music channel. Videobolt allows you to enhance the audio in addition to modifying waveform settings. Beat frequency and spectrum frequency can be adjusted to a specific Hertz range. Features:
- Automatically save incomplete projects online, so you may continue working on music videos later.
- Music visualization templates with a current design that is ready to use
Price: $7.99/month, but a free trial is available. Cons:
- Videobolt will require access to the related YouTube account if you sign in using a Google account.
- Trapp

Supported system: iOS Introduction: Trapp - Music Visualizer is an excellent choice for iPhone users who desire complete control over the visualization process. Change the background and color scheme, make bespoke particles by modifying their form, size, and color, and experiment with the Bass Effect to create spectacular audio visualizations. The coolest part is that the Trapp app allows users to listen to their works while using the built-in Music app on their iPhones. However, the worst part is that the free edition of this audio visualizer has minimal capabilities. Features:
- You can visualize without any difficulty.
- You can modify the circle and background.
- You can use your iPhone or iPad to access it.
Price: Free to use, but premium account costs as low as $3.99/month. Cons:
- The premium account does not allow music export.
- Requires in-app purchase to make a new creation.
- VSXu Audio Visualizer

Supported system: Windows Introduction: VSXu is a 3D OpenGL-based audio visualizer for Windows. It’s open-source and free, and it has a lot of graphic effects for your music. This standalone application responds to the record channel on the soundcard and works with any media player. VSXu is a platform for running presets; it does not generate visualization on its own. Anyone can make their graphics and share them with those who are interested. VSXu thrives with unlimited possibilities because of its capacity to modify. VSXu isn’t your typical graphic modeling application, even if it doesn’t require you to write code. To generate images for the sound, you’ll need to put in some time and work. Features:
- Compatible with YouTube, Spotify, Tidal, and other streaming services.
- The ability to alter the speed and intensity of each visual
- Perfect for parties: connect your PC to your television and use this music visualizer.
Price: $0 Cons:
- To create the graphics, you’ll need basic programming skills.
- Using VSXu in a theatrical show is difficult.
- SongRender

Supported system: Online Introduction: SongRender is a music visualizer for artists and multimedia makers on the go. SongRender is the program to use if you want to rapidly create a music video with a static background and basic animated waveforms that dance with the song. You can select the output video size by clicking the social media icon. After uploading the backdrop image and audio file, you can add the waveform, which can be customized in terms of shape, color, thickness, and other factors. However, because there are no color templates, you’ll have to look up color schemes to match the color of the shapes to the background. Features:
- Simple to use with no learning curve
- Size profiles for YouTube, Instagram, Facebook, and Twitter videos that are ready to use
- High-quality 1080p HD music video export
Price: With $15 per month and $30 per month plans, you can try the free version for seven days. Cons:
- Only MP3 and WMV files can be added.
- Other than the bar and circle pattern, there are no other shapes.
- Video outputs with a watermark
- Sonic Visualizer

Supported system: Windows/Mac Introduction: Sonic Visualiser is a free and open-source audio visualizer that may be used to view and analyze music and audio files. This is not a music visualizer for enjoyment; instead, it is designed for folks who want to know what’s inside an audio file. As a result, you’ll need some basic knowledge of phonetics and phonology to figure out what the depicted images mean. The solid third-party plug-ins it supports, such as pitch estimation and onset detection, are a significant element of this audio visualizer. The official lessons on utilizing it for musicological reasons may be found here. Features:
- Open source and free, with a plethora of plug-ins
- For musicologists, archivists, and other researchers, the best audio visualizer.
Price: $0 Cons:
- Requires you to install plug-ins.
- After Effects

Supported system: Windows/Mac Introduction: Adobe requires no introduction in the photo, audio, and video editing. So it’s no surprise that it’s one of the most reliable music visualization tools available. The Adobe Audio Spectrum Effect is simple to utilize if you have some prior Adobe experience. Even though it is a premium-based music visualizer, there are numerous music visualization capabilities to try out. You must first create a new composition and then add the sound file to it to utilize the tool. Then, finally, you set the audio duration and leave the rest to the visualizer. Features:
- The camera raw image file can be edited or imported.
- When you connect to a USB, this audio visualizer instantly updates the audio device.
- Copying media to a shared location is simple.
- This software allows you to work together on shared projects.
Price: $20.99/month as a single app and $52.99/month as a subscription model for all apps. Cons:
- Tricky to understand and use.
- Requires high device configuration for the software to run.
- Rendersoft Music Visualizer

Supported system: Online Introduction: Renderforest is one of the most versatile music visualization programs available, offering freemium and subscription-based plans. But that’s not all; the software also allows users to visualize their music online and even create a website. Users must create an account to utilize the app because it is online-based. Once you’ve created an account, you’ll have access to Renderforest’s massive visualization templates, which you can customize with the song title, artist name, and background photo or video. Then you pick your favorite visualization style and color. Then you finish up by uploading the song you want to use in your video. Click the “Preview” icon to have Renderforest email the music visualization video to you when you’re done. Features:
- Each template is tagged with a rating and exported to make it easier for you to compare and choose.
- You can use free stock photographs as a background or submit your photos. It is also possible to add text.
- You can share your music visualizer on YouTube, Facebook, and other social media platforms.
Price: $9.99/month, but a free version is also available. Cons:
- It is necessary to register and log in. The output will be limited to 2 minutes in 360p with a watermark if you merely wish to utilize this online music visualizer for free.
- Error - In addition to the slow processing and unexpected crashes, there is no OK or Back button after applying a filter during image editing.
- ProjectM Music Visualizer

Supported system: Android and iOS Introduction: ProjectM Music Visualizer is compatible with Android and iOS devices, demonstrating its versatility. While both the Android and iPhone versions can be used to create powerful audiovisuals for your music, the iOS version is preferred. It has a built-in media player that lets you listen to your recordings to get a sense of how the final product will seem. Both versions, however, feature hundreds of music visualization effects and multi-touch interactive visualizations. ProjectM also supports Chromecast, which is a remarkable feature. Features:
- It supports Chromecast and offers hundreds of graphic effects.
- Additional modes are available, such as the Immersive Option for KitKat smartphones.
- Search and browse visual effects
- Detects sound from microphones and music players automatically.
Price: Free to use but can be upgraded to a premium account for $2.99/month. Cons:
- It does not offer any presets in the library.
Nothing rivals the thrill of watching your songs play with gorgeous, real-time animated graphics, whether you’re a professional music mixer or just a sound freak. The apps we’ve evaluated will assist you in choosing and adding graphics to your music.
Music is one of the most popular video categories on YouTube, with millions of users using the site to find and discover new music. Unfortunately, making music videos that stand out in a sea of similar content is difficult. Still, suppose you are not a professional filmmaker and want to make a movie quickly. In that case, you may use a music visualizer to create music videos that you can share on social media. Most online music visualizers allow you to choose an audio spectrum template, style the visualization and even add logos or links to your social media profiles. Below are the top ten best video visualizers that can be used to edit music on Mac, Windows, iOs, Android, and online. Let’s dive into details:
- Motionbox Music Visualizer
Supported system: Online Introduction: Motionbox’s Music Visualizer allows you to turn your music into an entertaining multimedia piece. Visualizers, which are essentially tangible waveform representations of your audio, are the main feature of this program. These visualizers are available in various forms and may be easily placed on top of a picture or video. The technology makes it simple to create audio material that is very engaging. You start by uploading your video to a drag-and-drop editor, where you can reduce your music as needed for the presentation and overlay the relevant visualizer on a photo or video. You can also include a call to action and other features to spice your multimedia masterpiece. Features:
- Customize subtitles of the music to make visualization better
- Overlay videos to create a mix of music and overlapping music
- Collaborative video editing tools
Price: Free, but you can upgrade the application with in-app purchases. Cons:
- It might run slow in some browsers.
- Plane9
Supported system: Windows Introduction: Plane9 is a scene-based 3D music visualizer that works well in VR, on the Oculus Rift, and as a screensaver. With over 250 effect scenes to choose from, you’ll never have to stick to one view for the duration of a song. Instead, plane9 lets you blend scenes with flawless transitions, giving you a continuous musical experience. Apart from responding to a voice taken through a microphone, it dances to any music you’re listening to, whether Spotify, iTunes, or whatever. A music visualizer can also be added to OBS for hackers. Features:
- A real-time audio stream is supported, and sound from up to 18 speakers can be analyzed.
- Multi-monitor display support
Price: Free, but you can upgrade the application with in-app purchases. Cons:
- Unprocessed digital audio, such as DTS, cannot be used.
- There is a learning curve in setting everything up.
- Videobolt Music Visualizer
Supported system: Online Introduction: Videobolt is a stock-template-based internet music visualizer. Trap, pop, chill, hip-hop, synthwave, and EDM music are among the visualizer themes available. Each template is fully customizable, allowing you to create stunning images that flow with your music. You can include the name and logo of the artist, which is helpful for YouTubers that have a dedicated music channel. Videobolt allows you to enhance the audio in addition to modifying waveform settings. Beat frequency and spectrum frequency can be adjusted to a specific Hertz range. Features:
- Automatically save incomplete projects online, so you may continue working on music videos later.
- Music visualization templates with a current design that is ready to use
Price: $7.99/month, but a free trial is available. Cons:
- Videobolt will require access to the related YouTube account if you sign in using a Google account.
- Trapp
Supported system: iOS Introduction: Trapp - Music Visualizer is an excellent choice for iPhone users who desire complete control over the visualization process. Change the background and color scheme, make bespoke particles by modifying their form, size, and color, and experiment with the Bass Effect to create spectacular audio visualizations. The coolest part is that the Trapp app allows users to listen to their works while using the built-in Music app on their iPhones. However, the worst part is that the free edition of this audio visualizer has minimal capabilities. Features:
- You can visualize without any difficulty.
- You can modify the circle and background.
- You can use your iPhone or iPad to access it.
Price: Free to use, but premium account costs as low as $3.99/month. Cons:
- The premium account does not allow music export.
- Requires in-app purchase to make a new creation.
- VSXu Audio Visualizer
Supported system: Windows Introduction: VSXu is a 3D OpenGL-based audio visualizer for Windows. It’s open-source and free, and it has a lot of graphic effects for your music. This standalone application responds to the record channel on the soundcard and works with any media player. VSXu is a platform for running presets; it does not generate visualization on its own. Anyone can make their graphics and share them with those who are interested. VSXu thrives with unlimited possibilities because of its capacity to modify. VSXu isn’t your typical graphic modeling application, even if it doesn’t require you to write code. To generate images for the sound, you’ll need to put in some time and work. Features:
- Compatible with YouTube, Spotify, Tidal, and other streaming services.
- The ability to alter the speed and intensity of each visual
- Perfect for parties: connect your PC to your television and use this music visualizer.
Price: $0 Cons:
- To create the graphics, you’ll need basic programming skills.
- Using VSXu in a theatrical show is difficult.
- SongRender
Supported system: Online Introduction: SongRender is a music visualizer for artists and multimedia makers on the go. SongRender is the program to use if you want to rapidly create a music video with a static background and basic animated waveforms that dance with the song. You can select the output video size by clicking the social media icon. After uploading the backdrop image and audio file, you can add the waveform, which can be customized in terms of shape, color, thickness, and other factors. However, because there are no color templates, you’ll have to look up color schemes to match the color of the shapes to the background. Features:
- Simple to use with no learning curve
- Size profiles for YouTube, Instagram, Facebook, and Twitter videos that are ready to use
- High-quality 1080p HD music video export
Price: With $15 per month and $30 per month plans, you can try the free version for seven days. Cons:
- Only MP3 and WMV files can be added.
- Other than the bar and circle pattern, there are no other shapes.
- Video outputs with a watermark
- Sonic Visualizer
Supported system: Windows/Mac Introduction: Sonic Visualiser is a free and open-source audio visualizer that may be used to view and analyze music and audio files. This is not a music visualizer for enjoyment; instead, it is designed for folks who want to know what’s inside an audio file. As a result, you’ll need some basic knowledge of phonetics and phonology to figure out what the depicted images mean. The solid third-party plug-ins it supports, such as pitch estimation and onset detection, are a significant element of this audio visualizer. The official lessons on utilizing it for musicological reasons may be found here. Features:
- Open source and free, with a plethora of plug-ins
- For musicologists, archivists, and other researchers, the best audio visualizer.
Price: $0 Cons:
- Requires you to install plug-ins.
- After Effects
Supported system: Windows/Mac Introduction: Adobe requires no introduction in the photo, audio, and video editing. So it’s no surprise that it’s one of the most reliable music visualization tools available. The Adobe Audio Spectrum Effect is simple to utilize if you have some prior Adobe experience. Even though it is a premium-based music visualizer, there are numerous music visualization capabilities to try out. You must first create a new composition and then add the sound file to it to utilize the tool. Then, finally, you set the audio duration and leave the rest to the visualizer. Features:
- The camera raw image file can be edited or imported.
- When you connect to a USB, this audio visualizer instantly updates the audio device.
- Copying media to a shared location is simple.
- This software allows you to work together on shared projects.
Price: $20.99/month as a single app and $52.99/month as a subscription model for all apps. Cons:
- Tricky to understand and use.
- Requires high device configuration for the software to run.
- Rendersoft Music Visualizer
Supported system: Online Introduction: Renderforest is one of the most versatile music visualization programs available, offering freemium and subscription-based plans. But that’s not all; the software also allows users to visualize their music online and even create a website. Users must create an account to utilize the app because it is online-based. Once you’ve created an account, you’ll have access to Renderforest’s massive visualization templates, which you can customize with the song title, artist name, and background photo or video. Then you pick your favorite visualization style and color. Then you finish up by uploading the song you want to use in your video. Click the “Preview” icon to have Renderforest email the music visualization video to you when you’re done. Features:
- Each template is tagged with a rating and exported to make it easier for you to compare and choose.
- You can use free stock photographs as a background or submit your photos. It is also possible to add text.
- You can share your music visualizer on YouTube, Facebook, and other social media platforms.
Price: $9.99/month, but a free version is also available. Cons:
- It is necessary to register and log in. The output will be limited to 2 minutes in 360p with a watermark if you merely wish to utilize this online music visualizer for free.
- Error - In addition to the slow processing and unexpected crashes, there is no OK or Back button after applying a filter during image editing.
- ProjectM Music Visualizer
Supported system: Android and iOS Introduction: ProjectM Music Visualizer is compatible with Android and iOS devices, demonstrating its versatility. While both the Android and iPhone versions can be used to create powerful audiovisuals for your music, the iOS version is preferred. It has a built-in media player that lets you listen to your recordings to get a sense of how the final product will seem. Both versions, however, feature hundreds of music visualization effects and multi-touch interactive visualizations. ProjectM also supports Chromecast, which is a remarkable feature. Features:
- It supports Chromecast and offers hundreds of graphic effects.
- Additional modes are available, such as the Immersive Option for KitKat smartphones.
- Search and browse visual effects
- Detects sound from microphones and music players automatically.
Price: Free to use but can be upgraded to a premium account for $2.99/month. Cons:
- It does not offer any presets in the library.
Nothing rivals the thrill of watching your songs play with gorgeous, real-time animated graphics, whether you’re a professional music mixer or just a sound freak. The apps we’ve evaluated will assist you in choosing and adding graphics to your music.
Five Thoughts on Discord Create Account’s How-To Questions
Five Thoughts on Discord Create Account
An easy yet powerful editor
Numerous effects to choose from
Detailed tutorials provided by the official channel
Discord was a great alternative to voice chat systems such as TeamSpeak, Mumble, and Ventrilo for online gamers. Gamers make discord accounts for these services to play together rather than the voice communication facilities integrated into games, which are frequently of poor quality and lack functionality.
Founded in 2015, discord allowed individuals to talk while playing PC games seamlessly. Users may utilize the service to establish servers that can include many text and audio channels. A typical discord account server may feature chat rooms dedicated to specific themes (such as “gaming” and “anime x manga”), as well as voice channels devoted to specific games or activities. The service’s high-quality, low-latency audio chat is a popular tool for Twitch broadcasters and podcasters. It has also expanded to accommodate massive video conversations to compete with Zoom.
In this article
01 [How Does Discord Work and What is it Used for?](#Part 1)
02 [How to Make a Discord Signup in the Browser?](#Part 2)
03 [How to Make a Discord Signup with Desktop?](#Part 3)
04 [How to Make a Signup Discord with App?](#Part 4)
05 [Discord Create Account FAQs](#Part 5)
Part 1 How Does Discord Work and What is it Used for?
Discord account allows friends to communicate with one another one-on-one or in groups via a server. You may use it to send direct messages to pals, as well as video calls, audio chat, and screen sharing. Once on a server, you can join a voice chat channel to communicate with other gamers who are playing certain games.
You can share many things on discord, including media files like images, gifs, audio, and videos. Speaking of videos, video editing doesn’t get any better than Filmora. Wondershare Filmora Video Editor is a sophisticated editing application for Windows and Mac users. It was initially known as Wondershare Video Editor, but following its fifth release, it got renamed Filmora. The video editor’s primary features include animation, overlays, audio control, on-screen recording, and multi-editing modes. The video editor is well-known for its feature-rich but the simple interface, making it suited for both novice and experienced users.
For Win 7 or later (64-bit)
For macOS 10.12 or later
Filmora’s standout features
● Editing Audio Equalizer 4K Resolution Support
● Support for GIFs
● Screen Dividers
● Controls For Video And Audio
● Multiple Video Clips Can Be Layered
● Stabilization of Video
● Presets for Color Grading
● Text Editing Expertise
● Tilt-Shift
● The mosaic (Blurring)
● Noise Elimination
● Importance in Social Life
● Preview of Each Frame
● Controlling the Speed
● Audio-Mixer
● Backgrounds in Chroma Key
● Screen Capture
● Separation of audio
● Scene Recognition
You can make your discord account and use it on almost any platform, including discord desktop software for Windows and Mac and iOS and Android apps for talking and calling on the move. If you prefer not to download anything, it also works in a web browser. You can link your discord account app to various popular services, such as Twitch and Spotify, so your friends can see your actions. While there is no discord Xbox app, you may link your discord and Xbox accounts so that others can see what you’re up to on your Xbox Series X or Xbox Series S.
Part 2 How to Make a Discord Signup in the Browser
Don’t have the discord account?
You can quickly sign up using your preferred web browser, i.e., Chrome, Microsoft Edge, Firefox, or Safari.
Follow the steps below to make a discord account using your web browser:
Step 1: Go to <www.discord.com> and click the “Login” button in the upper right corner.
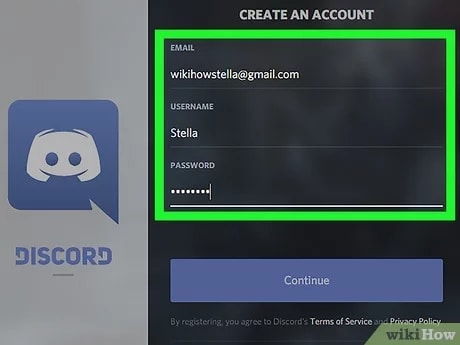
Step 2: To establish a new discord account, click “Register” underneath the login page.
Step 3:
● Enter your email, a username, and a strong password.
● Date of birth.
● Accept the terms of service.
After entering the above, click the “Continue” button.
Step 4: Check the box besides “I am human” to enable the captcha.
Step 5: You will receive an email asking you to confirm your information. Select the “Verify email” option.
Once you’ve signed up for discord, you may access it via the Discord website or the mobile app. The program is free to download for Windows, Linux, Mac, Android, and iOS.
Follow the steps above to sign up on discord account successfully. Easy right? Let’s proceed!
Part 3 How to Make a Discord Signup with Desktop?
The discord creating account on your desktop is pretty much the same as using your browser.
Follow the steps below to make a discord account using your desktop.
Step 1: Click “Login” on the Discord website (top right).
Step 2: Underneath the sign-in box, click “Register.”
Step 3: Enter the email address, username, password, and birth date.
Step 4: Agree to the terms of service and then click “Continue.”
Step 5: Use the captcha to prove that you are not a robot.
Step 6: You will get an email to confirm your data; click on the link in the email to confirm.
See that? No big deal, right?
Part 4 How to Make a Signup Discord with App
Signing up for a discord account through the app is relatively easy, like the procedures above, you will not break a sweat.
Follow the easy steps below for discord create account on your smartphone device:
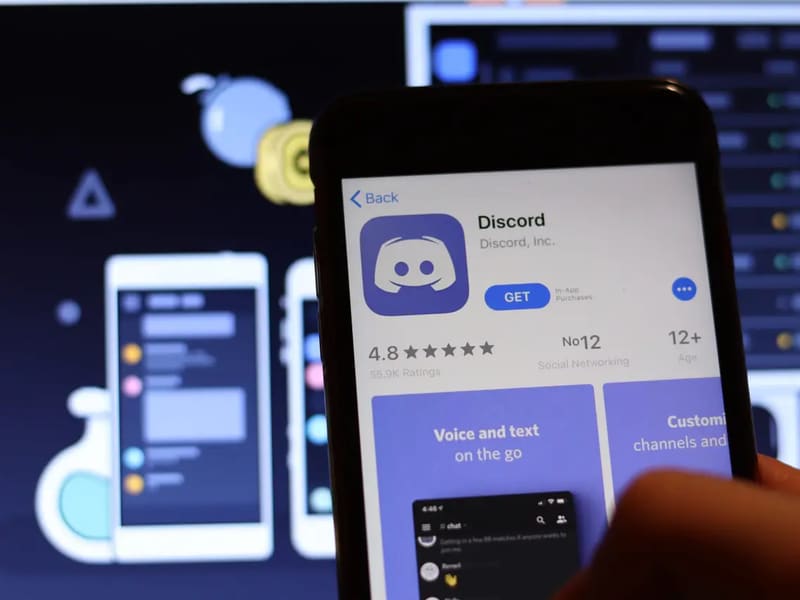
Step 1: Install and launch the Discord app on your smartphone
Step 2: Select the Register option.
Step 3: Choose whether to register by cellphone number or email address and input either one.
Step 4: You will get a message with a confirmation code or an email with a link.
Step 5: Enter the code or navigate to the URL.
Step 6: Enter your username and password here.
Step 7: Enter your birth date.
Step 8: Accept the terms of the agreement.
Step 9: Click “Next” to finish the Discord registration.
What Happens When You Disable your Discord Account?
When you deactivate your account, it goes to suspension mode. You may reactivate it by signing in and following the on-screen instructions. Keep in mind that discord accounts dormant for two years are removed, so if you want to keep yours, you must reactivate it (but you can disable it after this if you like).
After you deactivate an account, users will no longer get discord alerts. Users may, however, still receive friend requests, and any friend requests users get while their account is blocked will be ready for when they reactivate it. However, when a user decides to delete their account, the said account will get permanently deleted.
Tip: If you want to stay away from your discord account for a while with a plan to return to it later, it is advisable to log out or deactivate rather than delete it.
Part 5 Discord Create Account FAQs
Q. Is discord free, or do I have to pay?
A. Yes and no. The premium edition of discord is not free. If you don’t want to utilize the premium features, you may still download and make a discord account for free.
Q. Is there anything I cannot do on discord?
A. Do not organize, promote, or participate in any unlawful or possibly dangerous activities, such as sexual solicitation, human trafficking, or selling or enabling the sale of forbidden or potentially harmful products (firearms, ammunition, drugs, and controlled substances).
Q. Do messages disappear on discord?
A. Your messages are only destroyed: 1. if they are deleted individually (by you or a user with proper rights), 2. if you get banned, and the person banning you decides to delete all of your messages at once.
Q. Does discord account keep a record of interactions?
A. Yes, discord will track every discussion you have on discord acount, record everything you say on discord, and examine all photographs you transmit over discord.
Q. How will I know when someone blocks me on discord?
A. When you block someone, their online status on discord account changes to “offline” until unblocked and vice versa. They will also show offline in mutual servers or your chat history.
Q. How do I permanently delete my discord account?
A. To delete your discord created account for good, head to user settings, then tap on ‘my account.’ From there, tap on ‘Account Removal’ then tap on ‘Delete Account.’
If you are a server owner, you will have to delete the server or pass ownership of the server.
Q. How do I find servers to join on discord?
A. If you have a buddy who has a discord server you’d want to join, request an invite. If you’re a member of a discord community, ask for an invite or check on the community website.
By tapping the magnifying glass in the left window of the discord account app, you may also search for public servers that anybody can join.
● Ending Thoughts →
● Discord is a web program that works in most browsers. A desktop version is available for Windows, macOS, Linux, iOS, and Android. Discord’s desktop and browser versions are functionally and visually identical in practically every regard if you want to make a discord account. So, re-read the article and the FAQs on discord create account, and start your journey.
● Finally, for the creatives, boost your discord create account and usage experience by using Filmora to edit videos and make cool animations.
Discord was a great alternative to voice chat systems such as TeamSpeak, Mumble, and Ventrilo for online gamers. Gamers make discord accounts for these services to play together rather than the voice communication facilities integrated into games, which are frequently of poor quality and lack functionality.
Founded in 2015, discord allowed individuals to talk while playing PC games seamlessly. Users may utilize the service to establish servers that can include many text and audio channels. A typical discord account server may feature chat rooms dedicated to specific themes (such as “gaming” and “anime x manga”), as well as voice channels devoted to specific games or activities. The service’s high-quality, low-latency audio chat is a popular tool for Twitch broadcasters and podcasters. It has also expanded to accommodate massive video conversations to compete with Zoom.
In this article
01 [How Does Discord Work and What is it Used for?](#Part 1)
02 [How to Make a Discord Signup in the Browser?](#Part 2)
03 [How to Make a Discord Signup with Desktop?](#Part 3)
04 [How to Make a Signup Discord with App?](#Part 4)
05 [Discord Create Account FAQs](#Part 5)
Part 1 How Does Discord Work and What is it Used for?
Discord account allows friends to communicate with one another one-on-one or in groups via a server. You may use it to send direct messages to pals, as well as video calls, audio chat, and screen sharing. Once on a server, you can join a voice chat channel to communicate with other gamers who are playing certain games.
You can share many things on discord, including media files like images, gifs, audio, and videos. Speaking of videos, video editing doesn’t get any better than Filmora. Wondershare Filmora Video Editor is a sophisticated editing application for Windows and Mac users. It was initially known as Wondershare Video Editor, but following its fifth release, it got renamed Filmora. The video editor’s primary features include animation, overlays, audio control, on-screen recording, and multi-editing modes. The video editor is well-known for its feature-rich but the simple interface, making it suited for both novice and experienced users.
For Win 7 or later (64-bit)
For macOS 10.12 or later
Filmora’s standout features
● Editing Audio Equalizer 4K Resolution Support
● Support for GIFs
● Screen Dividers
● Controls For Video And Audio
● Multiple Video Clips Can Be Layered
● Stabilization of Video
● Presets for Color Grading
● Text Editing Expertise
● Tilt-Shift
● The mosaic (Blurring)
● Noise Elimination
● Importance in Social Life
● Preview of Each Frame
● Controlling the Speed
● Audio-Mixer
● Backgrounds in Chroma Key
● Screen Capture
● Separation of audio
● Scene Recognition
You can make your discord account and use it on almost any platform, including discord desktop software for Windows and Mac and iOS and Android apps for talking and calling on the move. If you prefer not to download anything, it also works in a web browser. You can link your discord account app to various popular services, such as Twitch and Spotify, so your friends can see your actions. While there is no discord Xbox app, you may link your discord and Xbox accounts so that others can see what you’re up to on your Xbox Series X or Xbox Series S.
Part 2 How to Make a Discord Signup in the Browser
Don’t have the discord account?
You can quickly sign up using your preferred web browser, i.e., Chrome, Microsoft Edge, Firefox, or Safari.
Follow the steps below to make a discord account using your web browser:
Step 1: Go to <www.discord.com> and click the “Login” button in the upper right corner.
Step 2: To establish a new discord account, click “Register” underneath the login page.
Step 3:
● Enter your email, a username, and a strong password.
● Date of birth.
● Accept the terms of service.
After entering the above, click the “Continue” button.
Step 4: Check the box besides “I am human” to enable the captcha.
Step 5: You will receive an email asking you to confirm your information. Select the “Verify email” option.
Once you’ve signed up for discord, you may access it via the Discord website or the mobile app. The program is free to download for Windows, Linux, Mac, Android, and iOS.
Follow the steps above to sign up on discord account successfully. Easy right? Let’s proceed!
Part 3 How to Make a Discord Signup with Desktop?
The discord creating account on your desktop is pretty much the same as using your browser.
Follow the steps below to make a discord account using your desktop.
Step 1: Click “Login” on the Discord website (top right).
Step 2: Underneath the sign-in box, click “Register.”
Step 3: Enter the email address, username, password, and birth date.
Step 4: Agree to the terms of service and then click “Continue.”
Step 5: Use the captcha to prove that you are not a robot.
Step 6: You will get an email to confirm your data; click on the link in the email to confirm.
See that? No big deal, right?
Part 4 How to Make a Signup Discord with App
Signing up for a discord account through the app is relatively easy, like the procedures above, you will not break a sweat.
Follow the easy steps below for discord create account on your smartphone device:
Step 1: Install and launch the Discord app on your smartphone
Step 2: Select the Register option.
Step 3: Choose whether to register by cellphone number or email address and input either one.
Step 4: You will get a message with a confirmation code or an email with a link.
Step 5: Enter the code or navigate to the URL.
Step 6: Enter your username and password here.
Step 7: Enter your birth date.
Step 8: Accept the terms of the agreement.
Step 9: Click “Next” to finish the Discord registration.
What Happens When You Disable your Discord Account?
When you deactivate your account, it goes to suspension mode. You may reactivate it by signing in and following the on-screen instructions. Keep in mind that discord accounts dormant for two years are removed, so if you want to keep yours, you must reactivate it (but you can disable it after this if you like).
After you deactivate an account, users will no longer get discord alerts. Users may, however, still receive friend requests, and any friend requests users get while their account is blocked will be ready for when they reactivate it. However, when a user decides to delete their account, the said account will get permanently deleted.
Tip: If you want to stay away from your discord account for a while with a plan to return to it later, it is advisable to log out or deactivate rather than delete it.
Part 5 Discord Create Account FAQs
Q. Is discord free, or do I have to pay?
A. Yes and no. The premium edition of discord is not free. If you don’t want to utilize the premium features, you may still download and make a discord account for free.
Q. Is there anything I cannot do on discord?
A. Do not organize, promote, or participate in any unlawful or possibly dangerous activities, such as sexual solicitation, human trafficking, or selling or enabling the sale of forbidden or potentially harmful products (firearms, ammunition, drugs, and controlled substances).
Q. Do messages disappear on discord?
A. Your messages are only destroyed: 1. if they are deleted individually (by you or a user with proper rights), 2. if you get banned, and the person banning you decides to delete all of your messages at once.
Q. Does discord account keep a record of interactions?
A. Yes, discord will track every discussion you have on discord acount, record everything you say on discord, and examine all photographs you transmit over discord.
Q. How will I know when someone blocks me on discord?
A. When you block someone, their online status on discord account changes to “offline” until unblocked and vice versa. They will also show offline in mutual servers or your chat history.
Q. How do I permanently delete my discord account?
A. To delete your discord created account for good, head to user settings, then tap on ‘my account.’ From there, tap on ‘Account Removal’ then tap on ‘Delete Account.’
If you are a server owner, you will have to delete the server or pass ownership of the server.
Q. How do I find servers to join on discord?
A. If you have a buddy who has a discord server you’d want to join, request an invite. If you’re a member of a discord community, ask for an invite or check on the community website.
By tapping the magnifying glass in the left window of the discord account app, you may also search for public servers that anybody can join.
● Ending Thoughts →
● Discord is a web program that works in most browsers. A desktop version is available for Windows, macOS, Linux, iOS, and Android. Discord’s desktop and browser versions are functionally and visually identical in practically every regard if you want to make a discord account. So, re-read the article and the FAQs on discord create account, and start your journey.
● Finally, for the creatives, boost your discord create account and usage experience by using Filmora to edit videos and make cool animations.
Easy Way to Inset Text in Video
Adding text to any video can serve to improve the quality of the video or emphasize a section of the video. But unlike adding text to an image, adding even simple text to a video can be quite difficult. But there are video editing tools that can significantly simplify this process.
Before we look at one of the best video editing tools that you can use to add text to your video, let’s first look at why adding text to your video may be important.
Why Insert Titles to Videos?
Adding a title or any other kind of text to your video can be important for several reasons, including the following;
1. Content Becomes Memorable
Adding text to the video can serve to make the whole content of the video or a section of the video more memorable. If there is a section of the content that you want your audience to remember, adding a colorful bit of text may make the content easier to grasp and therefore more memorable.
2. Call to Actions
Any marketer understands the value of a well-positioned call to action and the best way to add a customized call to action is to add text to the video. Calls to action can help you sell products or get your audience to sign up for a service or event.
3. Brand Awareness
Text that you add to the video can also be used to enhance brand awareness and visibility. These can be in the form of the company’s slogan and logos that can serve to remind your audience of the value of your brand and its trustworthiness.
4. Aesthetic Value
When done correctly, titles and texts in videos can turn a bland ordinary-looking video into an aesthetically pleasing art piece that your audience will only be too happy to engage with. The more appealing your video is, the greater the chance that your target audience will be willing to engage with your brand and click on your calls to action.
How to Insert Title to Video
Adding text and titles to any video can be made easier by the software you choose to use. One of the best tools to edit any aspect of any video is Wondershare Filmora . Filmora is a great choice because it makes adding text and titles that match your video’s content very easy. It is therefore an ideal tool to choose if you want to add titles that will enhance your brand’s visibility.
Free Download For Win 7 or later(64-bit)
Free Download For macOS 10.14 or later
The following guide will help you easily add text, titles, openers, and end credits to any video using Filmora .
Step1 Install Filmora on your computer and launch the program. Then open the video that you want to edit in Filmora. You can do that by simply dragging and dropping the video into the program’s main interface.
Step2 To add a title to the video, click on the “Titles” tab at the top and select a title that best suits your video project. You can use the preview function to see what it looks like before adding it to the video.

If you are happy with the title that you have selected, drag and drop it onto the timeline or right-click on it and select “Apply.”
Step3 To add an opener to the video, click on the “Openers” menu under “Titles.” Then choose the specific opener that you want to add and select “Apply” to add it to the video.
Step4 To add end credits to the video, simply select “End Credit” under “Titles” and when you find the type of end credits that you want to use, right-click on it and select “Apply.”
You can then click on the titles, end credits, and openers to edit the text by changing the color and fonts to match your brand.
How to Improve Title Effects in Video
Simply adding a title or text to the video will not do much to improve the quality of the video. You need to add effects that will not only make the videos more appealing but will also correspond with your brand colors.
Thankfully, Filmora makes adding various kinds of effects to the text very easy. The following are some of the options that you have;
Editing Title and Text Effect Duration
Typically, when you add a text effect to a video using Filmora , the duration is set at 5 seconds. You can however very easily change this duration to suit your video’s needs.
The easiest way to do that is to drag one of its edges. But you can also select the text and click on the duration icon to enter the new direction in the dialogue box that appears.
You can also change the default duration so that the new timing applies to all the text effects that you create when editing videos. To do that, go to File> Preferences > Editing < Effect Duration
Customize Text Effect
To customize the text that you added to the video, double-click on it in the timeline. This will open the text editing panel where you can change the font style including the font, size, color, and alignment as well as the animation of the text.
Apply Text Animations
Filmora offers more than 80 animation presets to choose from. You can access the “Animation” tab in the text editing panel to see a list of all available animations. Double-click on the animation you want to use and use the “Preview” window to see how it works out/

If you are happy with the animation and would like to include it in your project, click on “OK” to use it.
Advanced Title Editing
If you would like to go just a little bit further in editing your text, click on the “Advanced” button to open the Advanced Text Editing panel.

Here, you will see more options including the ability to add more elements such as adding new text boxed shapes or images.
With each of these elements, you can also change the font color, animation, opacity, border, fill and shadow.
Related FAQs about Text Video Editing
1. Can I Edit the Text in a Video?
Yes. Once you have added the title or text to the video, you can just as easily edit it in various ways. As we have seen, Filmora gives you a wealth of options to customize the title in various ways including changing the font size, color, and type all from the text editing panel. You can even completely remove the title from the video and add a new one. The preview window in Filmora allows you to see any changes that you make in real-time and adjust them accordingly to fit into your project.
2. Why Should I add Text to my Video?
Adding text and titles to any video can be very important for several reasons. For instance, you can decide to add text to emphasize a point, add a call to action and even help your audience to follow along with the content when the audio is turned off. Titles and any other text that you add to a video can also make the content more understandable, engaging, and clearer. But the effectiveness of the text will depend on how and where you place the text within the video and the video editor you choose can be very instrumental in this regard.
3. How Can I Make the Text in My Video Look Good?
First, you need to decide on the color, effects, and animations that you would like to use, and to decide these things you will need to take your brand and colors into consideration. Once you have all these details, you then need to choose a video editor that offers a wide range of fonts and colors to choose from. Thankfully, Filmora offers all the colors, fonts, and animations you could ever need, allowing you to customize the text any way you want.
4. How Do I Replace Text on my Video?
Sometimes you just need to remove the text that you already have on the video and replace it with new text. Again, how successful you are in this will depend on the tool you choose to use. Some video editors will only allow you to add new text but fall short when you need to remove the text or replace it with something else.
Filmora is one of the few tools that makes it easy to delete a title. You can just click on the title and then select the “Delete” icon in the toolbar to remove it. Then you can simply use the text editing panel to add new text again.
Free Download For macOS 10.14 or later
The following guide will help you easily add text, titles, openers, and end credits to any video using Filmora .
Step1 Install Filmora on your computer and launch the program. Then open the video that you want to edit in Filmora. You can do that by simply dragging and dropping the video into the program’s main interface.
Step2 To add a title to the video, click on the “Titles” tab at the top and select a title that best suits your video project. You can use the preview function to see what it looks like before adding it to the video.
If you are happy with the title that you have selected, drag and drop it onto the timeline or right-click on it and select “Apply.”
Step3 To add an opener to the video, click on the “Openers” menu under “Titles.” Then choose the specific opener that you want to add and select “Apply” to add it to the video.
Step4 To add end credits to the video, simply select “End Credit” under “Titles” and when you find the type of end credits that you want to use, right-click on it and select “Apply.”
You can then click on the titles, end credits, and openers to edit the text by changing the color and fonts to match your brand.
How to Improve Title Effects in Video
Simply adding a title or text to the video will not do much to improve the quality of the video. You need to add effects that will not only make the videos more appealing but will also correspond with your brand colors.
Thankfully, Filmora makes adding various kinds of effects to the text very easy. The following are some of the options that you have;
Editing Title and Text Effect Duration
Typically, when you add a text effect to a video using Filmora , the duration is set at 5 seconds. You can however very easily change this duration to suit your video’s needs.
The easiest way to do that is to drag one of its edges. But you can also select the text and click on the duration icon to enter the new direction in the dialogue box that appears.
You can also change the default duration so that the new timing applies to all the text effects that you create when editing videos. To do that, go to File> Preferences > Editing < Effect Duration
Customize Text Effect
To customize the text that you added to the video, double-click on it in the timeline. This will open the text editing panel where you can change the font style including the font, size, color, and alignment as well as the animation of the text.
Apply Text Animations
Filmora offers more than 80 animation presets to choose from. You can access the “Animation” tab in the text editing panel to see a list of all available animations. Double-click on the animation you want to use and use the “Preview” window to see how it works out/
If you are happy with the animation and would like to include it in your project, click on “OK” to use it.
Advanced Title Editing
If you would like to go just a little bit further in editing your text, click on the “Advanced” button to open the Advanced Text Editing panel.
Here, you will see more options including the ability to add more elements such as adding new text boxed shapes or images.
With each of these elements, you can also change the font color, animation, opacity, border, fill and shadow.
Related FAQs about Text Video Editing
1. Can I Edit the Text in a Video?
Yes. Once you have added the title or text to the video, you can just as easily edit it in various ways. As we have seen, Filmora gives you a wealth of options to customize the title in various ways including changing the font size, color, and type all from the text editing panel. You can even completely remove the title from the video and add a new one. The preview window in Filmora allows you to see any changes that you make in real-time and adjust them accordingly to fit into your project.
2. Why Should I add Text to my Video?
Adding text and titles to any video can be very important for several reasons. For instance, you can decide to add text to emphasize a point, add a call to action and even help your audience to follow along with the content when the audio is turned off. Titles and any other text that you add to a video can also make the content more understandable, engaging, and clearer. But the effectiveness of the text will depend on how and where you place the text within the video and the video editor you choose can be very instrumental in this regard.
3. How Can I Make the Text in My Video Look Good?
First, you need to decide on the color, effects, and animations that you would like to use, and to decide these things you will need to take your brand and colors into consideration. Once you have all these details, you then need to choose a video editor that offers a wide range of fonts and colors to choose from. Thankfully, Filmora offers all the colors, fonts, and animations you could ever need, allowing you to customize the text any way you want.
4. How Do I Replace Text on my Video?
Sometimes you just need to remove the text that you already have on the video and replace it with new text. Again, how successful you are in this will depend on the tool you choose to use. Some video editors will only allow you to add new text but fall short when you need to remove the text or replace it with something else.
Filmora is one of the few tools that makes it easy to delete a title. You can just click on the title and then select the “Delete” icon in the toolbar to remove it. Then you can simply use the text editing panel to add new text again.
Also read:
- Updated In 2024, Introduction to The Best Cinematic LUTs in The Market
- You Need to Follow Certain Steps to Complete Your Project. In the Section Below, We Will Discuss in Detail the Steps to Make a Movie From Windows Movie Maker for 2024
- Some of the Top Sites to Replace a Sky Background in Videos
- 2024 Approved Step by Step to Rotate Videos Using OBS
- New How to Make an Intro Video Easy Solution
- New In 2024, How to Create Datamoshing Effect to Your Footage in After Effects?
- 2024 Approved The Complete Guide to Converting GIF to SVG With Ease
- Are You Looking to Enhance Your Video or Photo Colors Using Premiere LUTs? Get to Know About the Best Free LUT Effects to Get Started
- Updated How To Make An Interactive Quiz Video? Step-by-Step Guide
- This Article Is Actually the Guide Regarding Editing the Videos Through VEED. As a Substitute, Wondershare Filmora Is Also Under Discussion that Is Also Available for the Same Purpose for 2024
- In 2024, Best Animated Text Generator
- Updated In 2024, Best Method to Split the Video Into Parts Online
- New In 2024, 3 Best Motion Blur Plugins for Adobe After Effects
- Updated This Is the Method Employed During Every Evening Weather Broadcast The Newscaster Is Standing in Front of a Blank Screen, but the Viewers at Home See a Weather Map
- This Article Will Address Your Questions About the Easiest Way to Turn a Blog Into a Podcast. Lets Begin with the Reasons Why You Should Do a Podcast
- Updated Best Slow Motion Camera Apps for Best Content Creation
- New In 2024, VSDC Free Video Editor Review
- Updated Best LUTs for Vlog A 2024 Overview
- New Have You Ever Heard Bokeh Effects for Videos? Do You Know that You Can Make Your Own Bokeh Video Easily with some Software. This Article Will Introduce You How to Make a Bokeh Effect Video with Steps
- Updated 2024 Approved Step by Step to Rotate Video in Google Photos
- In 2024, Fixing Foneazy MockGo Not Working On Xiaomi Redmi K70E | Dr.fone
- How To Unlock a Vivo S17e Easily?
- In 2024, How to use iSpoofer on Samsung Galaxy S23? | Dr.fone
- In 2024, How To Activate and Use Life360 Ghost Mode On Motorola Moto G04 | Dr.fone
- Different Methods for Resetting Samsung Galaxy Z Fold 5 Phones with Screen Locked and Not | Dr.fone
- Why Is My Xiaomi Redmi K70 Pro Offline? Troubleshooting Guide | Dr.fone
- In 2024, How To Check if Your Samsung Galaxy A14 4G Is Unlocked
- In 2024, Two Ways to Track My Boyfriends Lava Agni 2 5G without Him Knowing | Dr.fone
- Proven Ways in How To Hide Location on Life360 For Nokia G310 | Dr.fone
- In 2024, Complete Tutorial to Use VPNa to Fake GPS Location On Realme GT 3 | Dr.fone
- Bypass Activation Lock On iPhone 8 - 4 Easy Ways
- AI Portrait Generator Getting Closer to the Artistic Marvels
- Updated What Is an AI Presentation Maker? | Wondershare Virbo Glossary
- Video File Repair - How to Fix Corrupted video files of Oppo Find X6 on Mac?
- How to Resolve Oppo Find X6 Screen Not Working | Dr.fone
- In 2024, How to Share/Fake Location on WhatsApp for Oppo Reno 11 Pro 5G | Dr.fone
- Title: Updated Color Finale Is a Color Grading Plugin for Final Cur Pro. It Allows Users to Make Cinematic Looking Video Scenes by Adjusting the Color. Here Well Share You some Basic Information About This Plugin
- Author: Chloe
- Created at : 2024-04-24 07:08:17
- Updated at : 2024-04-25 07:08:17
- Link: https://ai-editing-video.techidaily.com/updated-color-finale-is-a-color-grading-plugin-for-final-cur-pro-it-allows-users-to-make-cinematic-looking-video-scenes-by-adjusting-the-color-here-well-sha/
- License: This work is licensed under CC BY-NC-SA 4.0.
