
:max_bytes(150000):strip_icc():format(webp)/CODA-d4dd2a9b6c3d4a008a05c9718c9bce1e.jpg)
Updated Despite the Aforementioned Restrictions, Cartoon Video Makers Still Offer a Sea of Possibilities to Their Users, so Lets Dive Into the Magical World of Animated Videos
Despite the Aforementioned Restrictions, Cartoon Video Makers Still Offer a Sea of Possibilities to Their Users, so Let’s Dive Into the Magical World of Animated Videos
Abundant Video Effects - Wondershare Filmora
Provide abundant video effects - A creative video editor
Powerful color correction and grading
Detailed tutorials are provided by the official channel
Introduction
There are some issues common to the video production process. However, animated or cartoon videos have helped to combat such issues. You do not need to scout for locations, go through a seemingly endless casting process, or rent the pricey equipment. A cartoon is simply a type of animation or an illustration that usually appears in a semi-realistic or an unreal style. In addition, it uses simple, satirical, and humorous drawing language to tell the story.
Although there are restrictions, there are a lot of possibilities cartoon video makers still offer to their users. Therefore, this article will share the top 10 best cartoon video makers online and on PC that you can use before diving into an animated video world.
So, here is what we shall learn about cartoon makers today:
In this article
01 Best 5 Online Cartoon Makers
02 Cartoon Video Maker for Desktop (Win and Mac)
03 How Can I Create My Own Cartoon Using Wondershare Anireel
Part 1: Best 5 Online Cartoon Makers
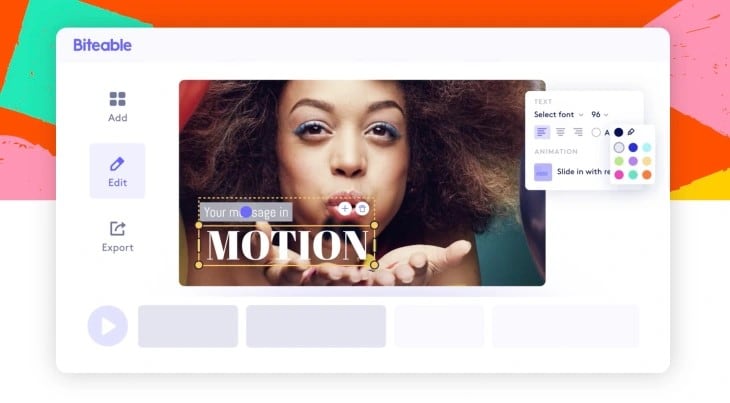
1. Biteable
Biteable provides a seemingly endless list of template categories to cater to your online media marketing needs. Aside from offering entertaining cartoon-making templates, the platform also allows users to create motion graphics or content, and Facebook covers for their social media channels.
Price: Free, $23 per month, billed annually.
Features:
- Offering library with lots of templates to choose from
- Free to use, except you are looking for additional features
- Five simple steps to an incredible cartoon video
- It has an easily customizable template
Pros
- It is a perfect option for social media managers
- Quickly create entertaining cartoons
- Used by biggies like Amazon, Microsoft, Google, Disney, BBC, Shopify, Samsung, and salesforce.
- Over 9 million users
Cons
- There is a mandatory registration
- There are no audio editing options
- The file-sharing capabilities are limited to YouTube and Facebook
- The download option is disabled in the free version
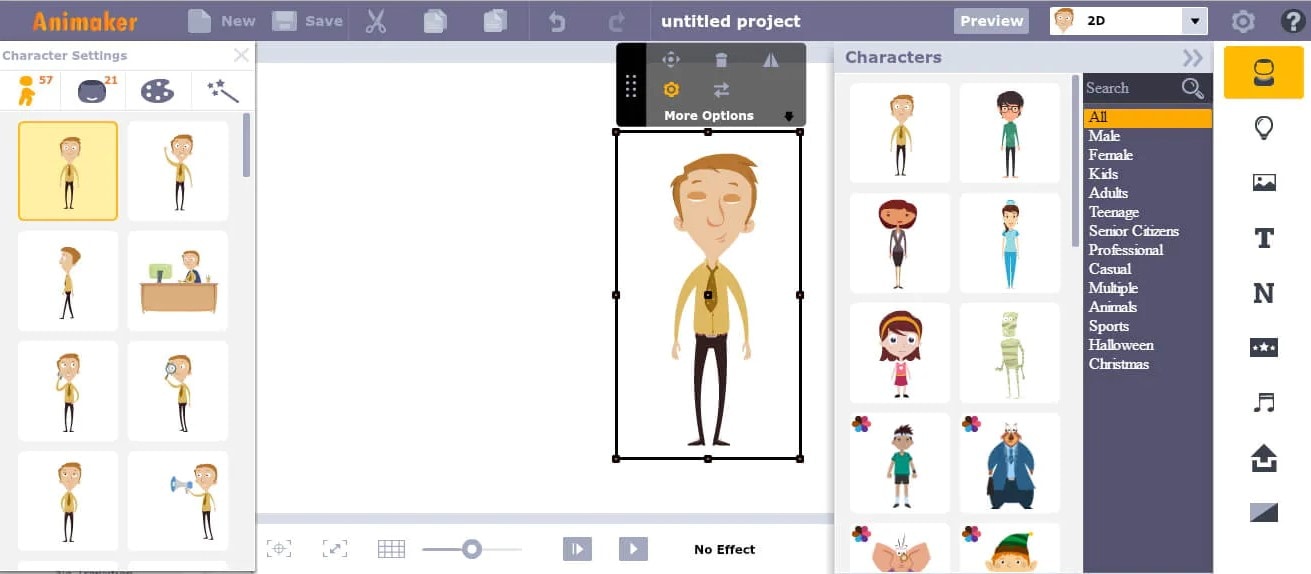
2. Animaker
With this animated maker, you get access to hundreds of animated characters, maps, and backgrounds. There are six (6) video styles available in this cartoon maker: Typography, Infographic, or 2D for different types of projects.
Price: Free version available. Subscription plans start at $12 per month/billed annually.
Features
- Different video styles, marketing, explainer, or 2D animation.
- Posts itself as the number 1 cartoon maker
- No need for a credit card to start.
- Four-step process; select template, customize it, add music, and download or share.
- 200+ voices, 25+ languages, and loads of customizable options.
- It offers auto-lip sync with advanced animation effects.
- There is a rich selection of 1000+ templates
Pros:
- Superb audio editing options
- Excellent and quick animation tools.
- Over 10 million users so far and still counting.
- Currently used by Amazon, Bosch, HP, Nokia, and Philips.
Cons:
- The monthly fee is pricey
- Account creation is mandatory for a free version
- The free version contains a watermark
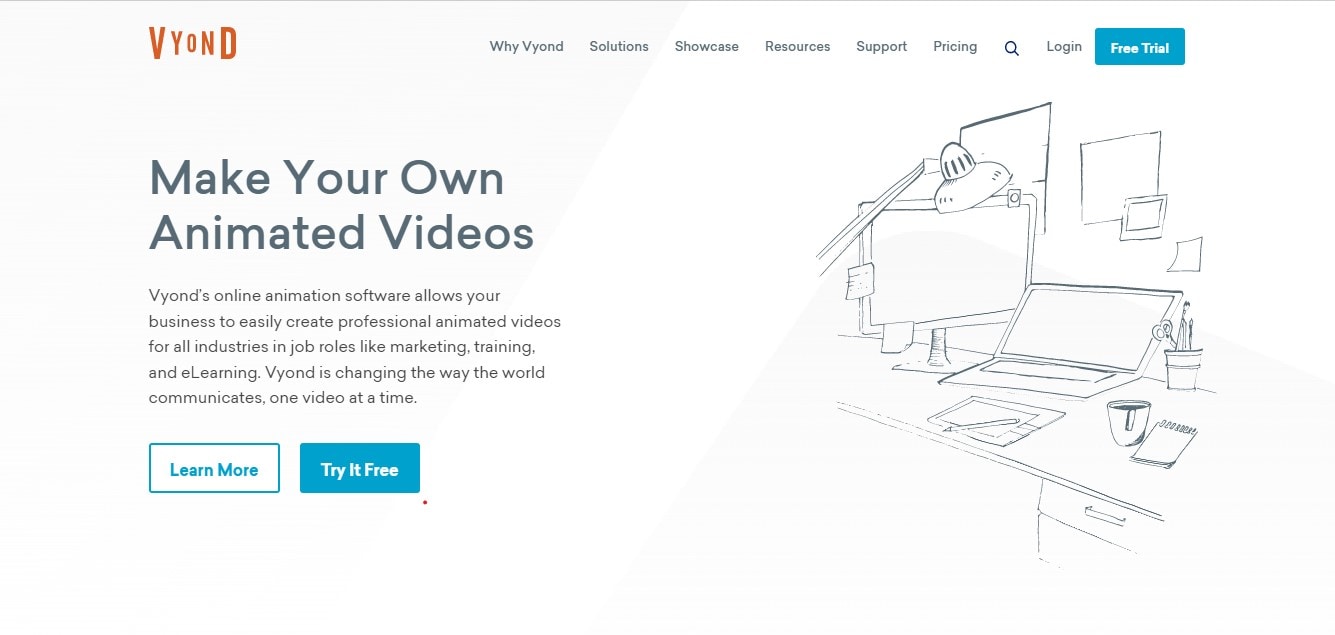
3. Vyond
Vyond, the cartoon creator launched in 2007, is probably one of the oldest online cartoon video makers. Additionally, it is still one of the most popular online destinations meant for anyone who wants to create an animated video quickly.
Price: Subscription plans start from $39 per month, billed annually.
Features:
- Perfect for animated video creation
- There is automatic character lip-syncing
- Try it for free before purchasing
- Make videos for training, e-learning, marketing, human resources, etc.
- The maximum duration of the video is 120 minutes
Pros:
- It has a fully customizable template
- There are high-end object and character animated features
- Certified by GDPR, TrustArc, BSI, and CCPA
- A wholesome cartoon makerfor enterprise and individual
- Data security and privacy assurance by BSI, CCPA, and GPDR.
Cons:
- It is quite expensive
- Vyond is not the best option for inexperienced animators
- The features depend on the subscription model
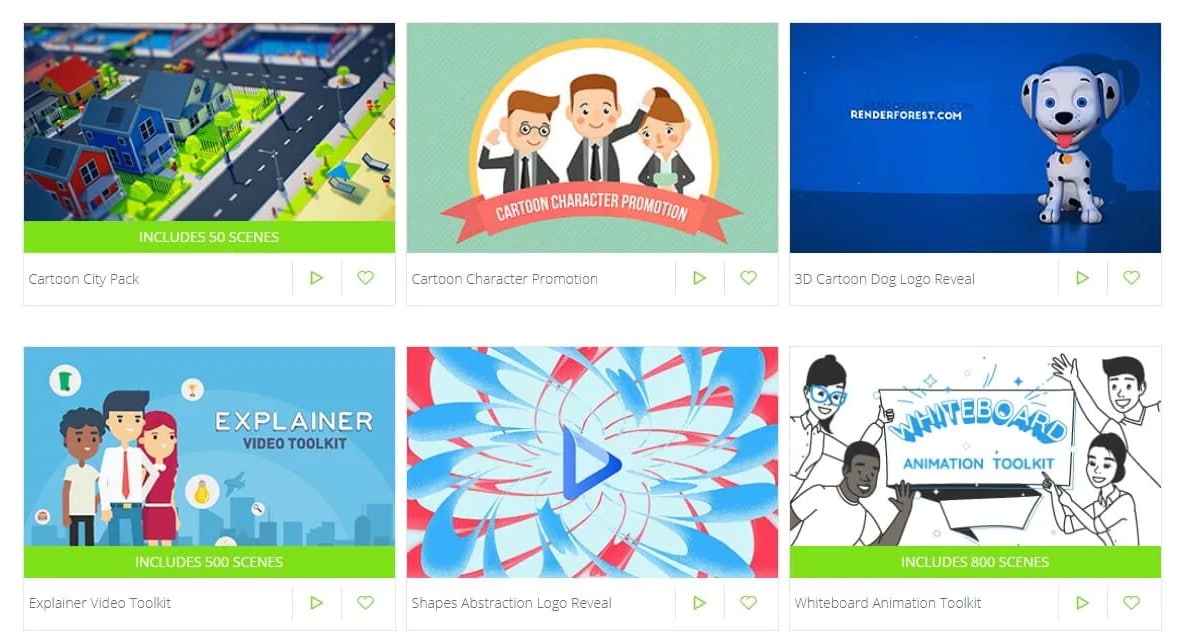
4. Renderforest
This is a famous online cartoon video maker for many purposes. Among the numerous options, the platform offers to its user. They include; 3D explainer videos, logo animations, or professional presentations.
Price: Free version available. Subscription plans start at $16 per month, billed annually.
Features:
- There is an extensive library of templates with numerous options
- Has a large online storage
- Was among the top 100 software companies in 2019.
- Top ranked solution holder for 2020
- Up to 250GB of online storage space
- Use the in-built template to make a story, customize the video, and then export it to share with your friends.
- Amadeus, Bose, BBC, Vodafone, Sony Music, and many others use Renderforest.
Pros:
- Produce videos like a pro
- Comes with an ultimate animation pack.
- Trusted by millions and one of the oldest cartoon makers.
Cons:
- A limited amount of commercial music tracks
- There are modest export options
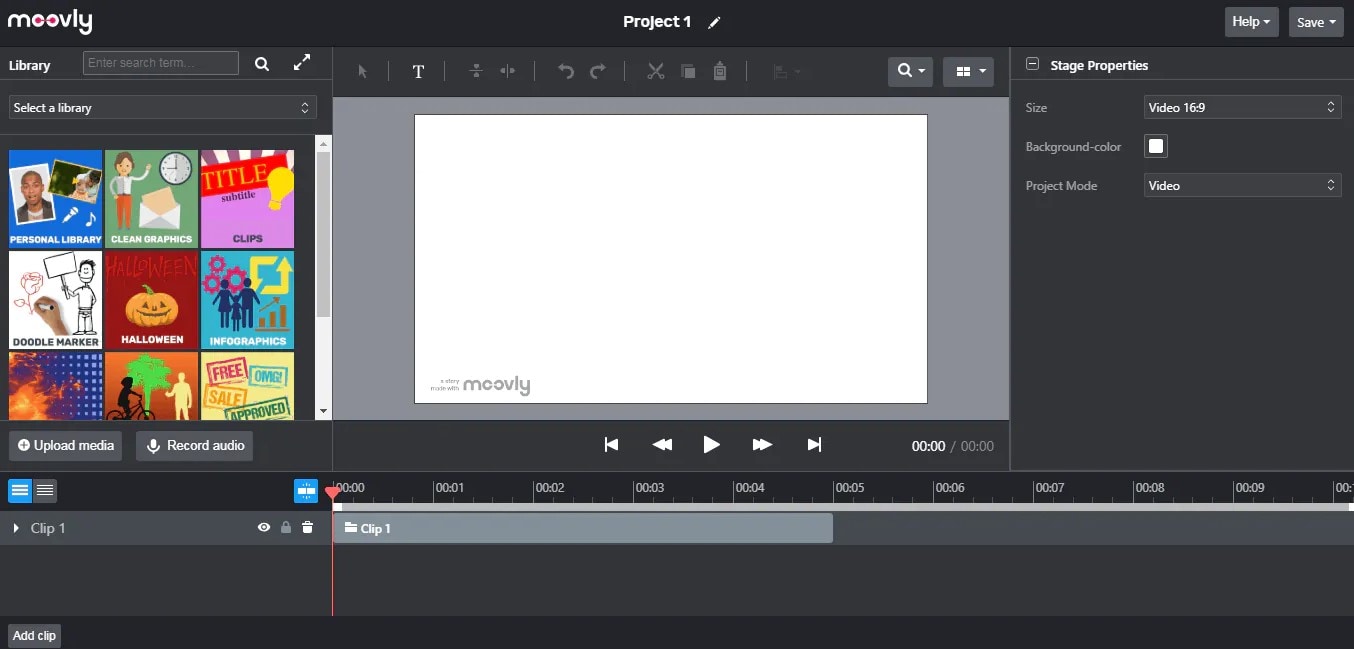
5. Moovly
With this cartoon maker, users must first log in. However, there is no need to create a new account as you can use your LinkedIn or Google account to sign in quickly.
Price: Free 30-day trial, $24.92 per month billed annually.
Features:
- Moovly is the perfect cartoon video maker for sales&marketing, human resources, internal communication, learning&development, agencies, and education.
- Apply expert features in one click with Moovly.
- Create videos and edit with browser-based or drag and drop features without installing software.
- Moovly has over 1.3 million free media, like images, sounds, music, and royalty-free stock videos at no extra charge.
- Besides, it offers 100 million extra media you can try and then purchase.
- You can add your images, music, and videos to create unique clips in style.
- Add text, remove color, add subtitles or generate them, auto-translate your text and subtitles, import PPT files, structure your content, record yourself or your computer screen, edit, mix, etc.
Pros:
- Even if users need to log in, they don’t need to create an account
- Allows users to import content from online sources like Storyblock, Shutterstock, etc.
- It is the number 1 customizable and straightforward solution to making cartoons.
- Use by Colgate-Palmolive, NHS, Teradata, Amadeus, Cisco, Continental, and Logitech.
- The interface is intuitive and user-friendly.
Cons:
- Watermarked videos during the free trial
- To export videos in HD 1080p quality, one needs to purchase one of the available plans.
Renderforest is the best cartoon maker online of the listed five in this article due to the vast library template and large online bandwidth.
Part 2: Cartoon Video Maker for Desktop (Win and Mac)
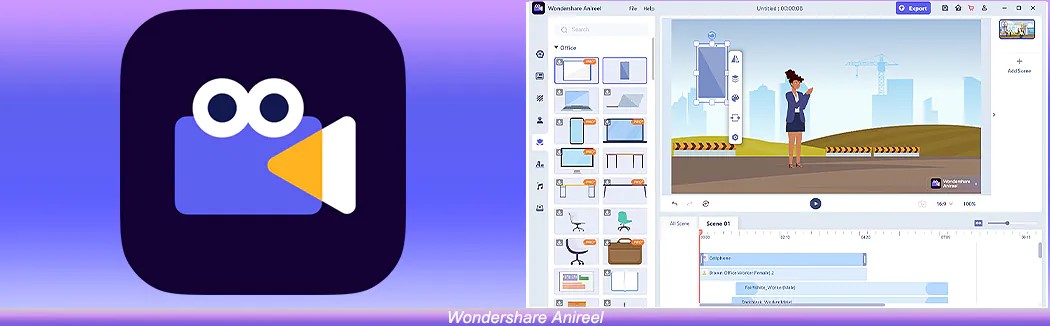
1. Wondershare Anireel
Anireel is one of the top animation software on the internet that allows users to bring their imaginations to life with a huge range of customizable elements and features.
Price: $9.99 per month billed annually and $19.99 monthly
Features:
- 40+ customizable templates
- Top animation software
- Compatible with Windows 11/10/8.1 (64 bit OS)
- Only three steps to an excellent animated video.
- Import images, videos, and sound in almost all formats.
- Create unique avatar, logo images, and more specific to your brand.
- The Deep Learning tech offers quick text-to-speech conversion.
- Animate camera movements, entry and exit effects, motion path, etc.
- Use the one-click option and change scripts to clips.
- Anireel cartoon video makercan lip-sync your characters with perfection.
- Quick and easy drag and drop editing.
Pros:
- It is convenient and simple to use
- Anireel has an intuitive interface
- The cartoon makeroffers a practical and seamless animated video editing
- It comes at an affordable and competitive price
Cons:
- It has a limited amount of assets
- Not suitable for too professional people to use.
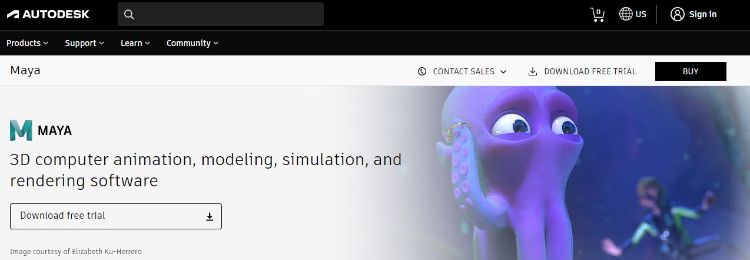
2. Autodesk Maya
Autodesk Maya is one of the best animation tools used to create animation pictures, video games, and add 3D effects in motion pictures. Plus, this cartoon maker is the best if you require a high-quality visual impact.
Price: Free trial, $225 billed monthly.
Features:
- It offers AutoDesk financing for new buyers.
- Maya is the go-to shop for architects, engineers, designers, media, and entertainment.
- Shape 3D objects and add realistic effects with Maya cartoon maker’s NURBS modeling.
- The Integrated Arnold rendering technology lets you view scene changes in real-time.
- Maya has been part of the top movie makers, including the MCU.
- This cartoon video maker offers geometry-based polygon modeling and helps create accurate simulations for visual programming.
- Maya can load and change vast data sets at a faster pace.
Pros:
- It makes complex hand-made animation tasks extremely easy
- Efficient color management
- Allows the creation of realistic effects like cloth simulations and explosions
- 30-day free trial and 30-day money-back guarantee
- Meet deadlines, add fine details to develop even the most complex shots or characters.
- Excellent tool for professionals
Cons:
- The pro is quite expensive
3. Adobe Animate
This is one of the most powerful animation software products on the internet that has been available for decades. It can animate images used for games, film, or online and produce HTML 5, WebGL, or Flash content.
Price: This cartoon creator offers three pricing plans starting at US$24.14/month
Features:
- Excellent for complex animation
- The capability of freehand drawing
- Animate, illustrate, and make 3D typography.
- Import and add vector drawings for further editing.
- Export your work as HTML5 Canvas, WebGL, Flash/Adobe AIR, GIF, or QuickTime movie.
- With the Bone tool, make your cartoon characters fluid and natural.
- Synchronize sounds and music for your project.
- Choose parts of the clip to be animated.
Pros:
- It has Puppeting features
- It is an excellent choice for complex animations
- It includes freehand drawing capability
Cons:
- It is not suitable for beginners
- Other Adobe software may be required while working on a project
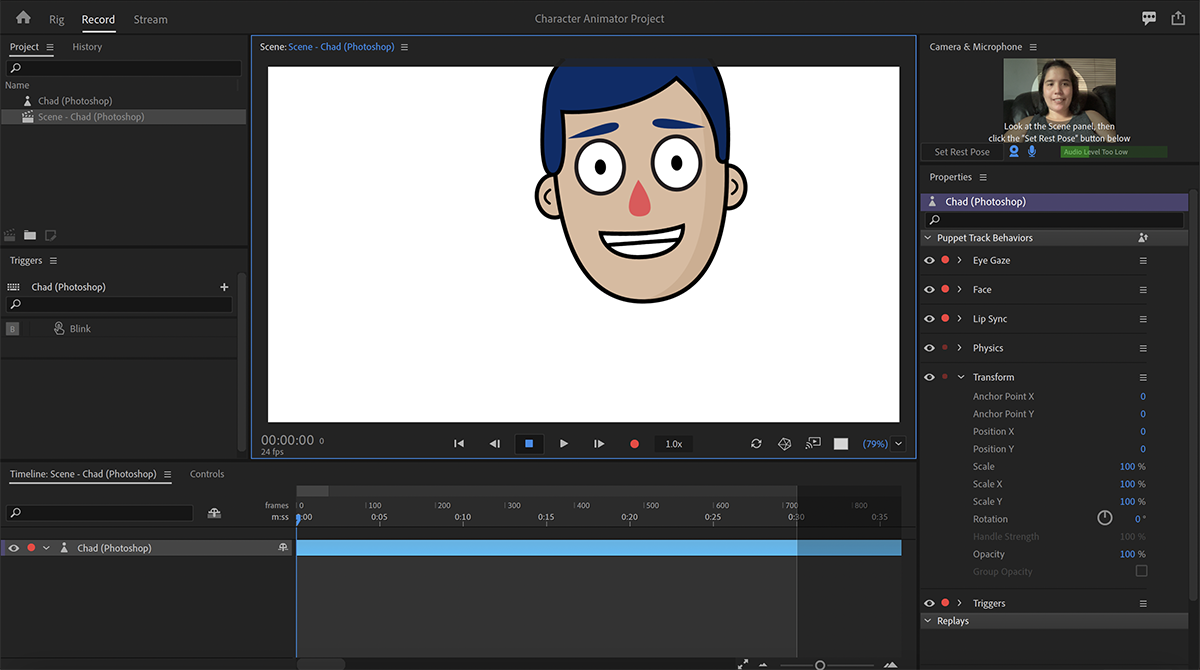
4. Adobe Character Animator
Adobe Character Animator is another type of Adobe’s animation software stack that allows users to use motion to capture and create live animations of their 2D characters.
Price: Adobe Character Animator has two pricing plans starting at US$34,49/month for the first year
Features:
- This product requires other Adobe products to function
- Lots of options to export and import.
- Make your real-life cartoon using the Motion Capture feature in five steps.
- The Avatar will walk, talk, and copy your expressions in real-time.
- Integrate and add assets from other Adobe Creative Cloud apps.
- Auto lip-syncing and real-time facial movement capture.
- Works on iOS and Android.
Pros:
- Easy to replicate real-life movements and expressions with facial tracking.
- There are various import and export options.
Cons:
- It is not a standalone product.
- Users need to have a webcam and microphone to use the motion capture feature.
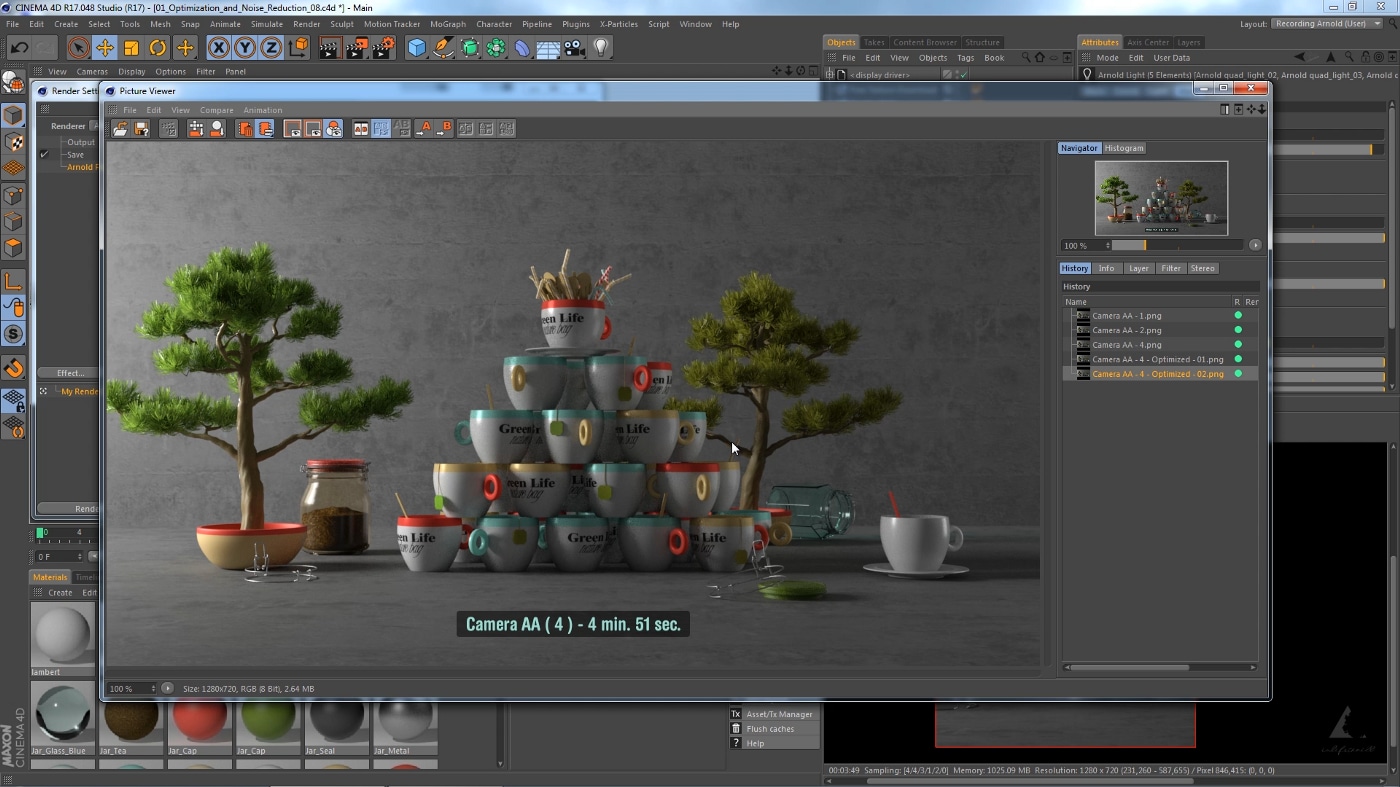
5. Cinema 4D
This cartoon maker has a 3D application interface that offers a keyframe animation, life-like characters, simulation building, object tracking, flexible rig building, cartoon styling, and animation basics.
Price: 4 pricing plans, starting at $99.91/month and $1199.00 billed annually.
Features:
- Keyframing animation effect
- It has a 3d interface
- The ZRemesher for retopology and new tools for modeling add to the new features.
- The Cloth Simulation features help make your cartoon more real.
- It supports CPU rendering with Redshift, which helps you preview, import, and export in high quality.
Pros:
- It is pretty easy to use.
- Lots of exciting design templates are available
- Many editing features are available
Cons
- It is pretty expensive compared to other software
- Not good for beginners
Wondershare Anireel is the best cartoon maker of the five listed in this article. It has lots of advanced features and templates to choose from.
Part 3: How Can I Create My Own Cartoon Using Wondershare Anireel
As stated, Wondershare Anireel has become our top cartoon creator pick due to its affordable pricing, secure server, and ease of use.
So, let us view the simple steps to create your cartoon using the Anireel software.
Step 1: Download, install and Create Character
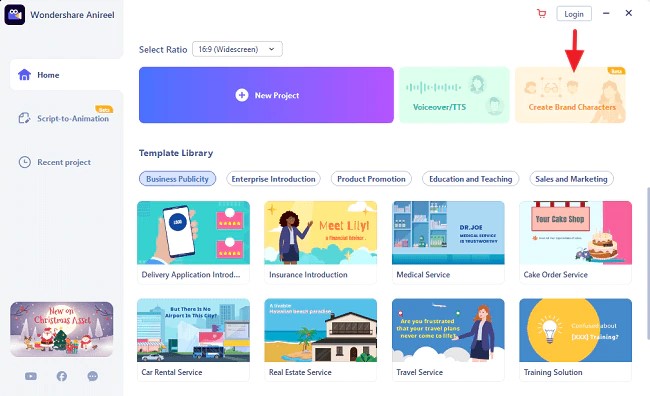
Run Anireel on your device, visit Characters Tab and then click on Create a Character option, or you may click on the Create Brand Characters tab on the home screen.
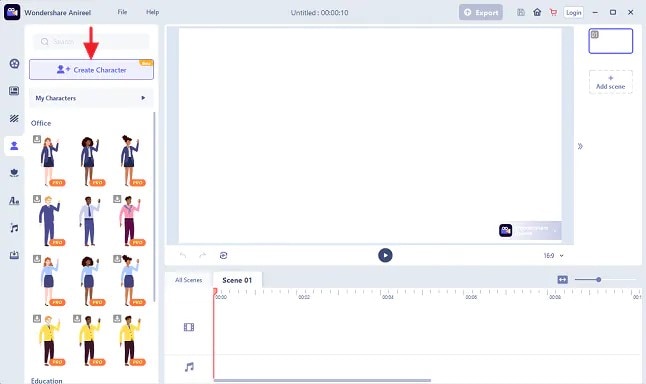
Step 2: Start Creating your Cartoon Character
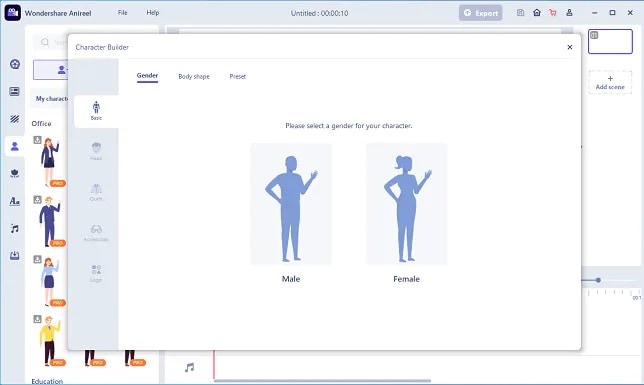
Choose your gender and body shape, and apply some preset suits.
Now, you can start building facial features using the Head tab to customize the shape of the face, eyes, hairstyle, nose, mouth, ears, and eyebrows.
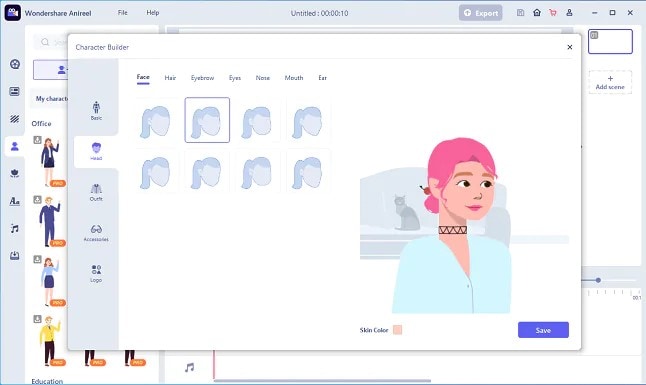
You can also choose to change the skin tone to match yours.
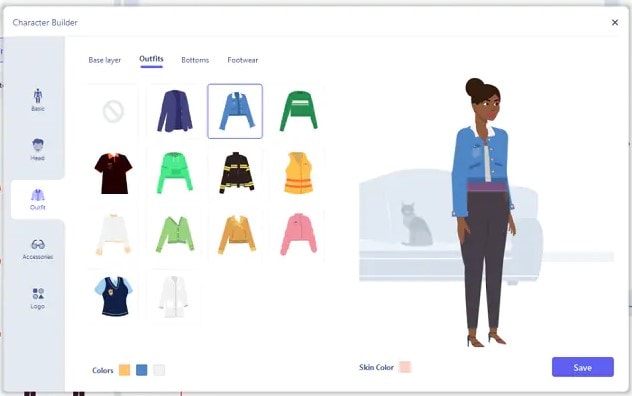
Step 3: Add an Outfit and Accessories
Choose the Outfit tab in Character Builder to select the base layer, outfit, bottom wear, and footwear. Pick what you want to use on your cartoon and keep adding.
Next, reach the Accessories tab to add glasses, necklaces, and more to your cartoon character.
Step 4: Name your Cartoon and Apply
Click on Save and add a name to your cartoon when all done. Finally, click Apply Now to add your cartoon character to your Anireel cartoon maker canvas or My Characters tab.
Part 4: People Also Want to Know
Below are some answers to a few queries about cartoon creators. Let us look at them one by one.
1. What is the best free cartoon maker?
Wondershare Anireel is the best cartoon maker for Android as it is free to use with lots of advanced features and templates to choose from.
2. What is the best app to make a cartoon?
Wondershare Anireel’s Microsoft app is also one of the best cartoon applications that are very flexible and easy to use on the go.
Conclusion
In this article, we explained the best cartoon creators in the industry. Also, we gave the best cartoon video maker from the list. Thus, as you saw, in this report, we have summarized a few essential points regarding cartoon video makers. You learned:
- The cartoon video maker for free that you should know of.
- The ten best cartoon video makers.
- Why are Wondershare Anireel and Renderforest excellent online cartoon video makers?
- How does Anireel, cartoon creator, work?
- Finally, a few FAQs for users to better understand the cartoon maker
Introduction
There are some issues common to the video production process. However, animated or cartoon videos have helped to combat such issues. You do not need to scout for locations, go through a seemingly endless casting process, or rent the pricey equipment. A cartoon is simply a type of animation or an illustration that usually appears in a semi-realistic or an unreal style. In addition, it uses simple, satirical, and humorous drawing language to tell the story.
Although there are restrictions, there are a lot of possibilities cartoon video makers still offer to their users. Therefore, this article will share the top 10 best cartoon video makers online and on PC that you can use before diving into an animated video world.
So, here is what we shall learn about cartoon makers today:
In this article
01 Best 5 Online Cartoon Makers
02 Cartoon Video Maker for Desktop (Win and Mac)
03 How Can I Create My Own Cartoon Using Wondershare Anireel
Part 1: Best 5 Online Cartoon Makers
1. Biteable
Biteable provides a seemingly endless list of template categories to cater to your online media marketing needs. Aside from offering entertaining cartoon-making templates, the platform also allows users to create motion graphics or content, and Facebook covers for their social media channels.
Price: Free, $23 per month, billed annually.
Features:
- Offering library with lots of templates to choose from
- Free to use, except you are looking for additional features
- Five simple steps to an incredible cartoon video
- It has an easily customizable template
Pros
- It is a perfect option for social media managers
- Quickly create entertaining cartoons
- Used by biggies like Amazon, Microsoft, Google, Disney, BBC, Shopify, Samsung, and salesforce.
- Over 9 million users
Cons
- There is a mandatory registration
- There are no audio editing options
- The file-sharing capabilities are limited to YouTube and Facebook
- The download option is disabled in the free version
2. Animaker
With this animated maker, you get access to hundreds of animated characters, maps, and backgrounds. There are six (6) video styles available in this cartoon maker: Typography, Infographic, or 2D for different types of projects.
Price: Free version available. Subscription plans start at $12 per month/billed annually.
Features
- Different video styles, marketing, explainer, or 2D animation.
- Posts itself as the number 1 cartoon maker
- No need for a credit card to start.
- Four-step process; select template, customize it, add music, and download or share.
- 200+ voices, 25+ languages, and loads of customizable options.
- It offers auto-lip sync with advanced animation effects.
- There is a rich selection of 1000+ templates
Pros:
- Superb audio editing options
- Excellent and quick animation tools.
- Over 10 million users so far and still counting.
- Currently used by Amazon, Bosch, HP, Nokia, and Philips.
Cons:
- The monthly fee is pricey
- Account creation is mandatory for a free version
- The free version contains a watermark
3. Vyond
Vyond, the cartoon creator launched in 2007, is probably one of the oldest online cartoon video makers. Additionally, it is still one of the most popular online destinations meant for anyone who wants to create an animated video quickly.
Price: Subscription plans start from $39 per month, billed annually.
Features:
- Perfect for animated video creation
- There is automatic character lip-syncing
- Try it for free before purchasing
- Make videos for training, e-learning, marketing, human resources, etc.
- The maximum duration of the video is 120 minutes
Pros:
- It has a fully customizable template
- There are high-end object and character animated features
- Certified by GDPR, TrustArc, BSI, and CCPA
- A wholesome cartoon makerfor enterprise and individual
- Data security and privacy assurance by BSI, CCPA, and GPDR.
Cons:
- It is quite expensive
- Vyond is not the best option for inexperienced animators
- The features depend on the subscription model
4. Renderforest
This is a famous online cartoon video maker for many purposes. Among the numerous options, the platform offers to its user. They include; 3D explainer videos, logo animations, or professional presentations.
Price: Free version available. Subscription plans start at $16 per month, billed annually.
Features:
- There is an extensive library of templates with numerous options
- Has a large online storage
- Was among the top 100 software companies in 2019.
- Top ranked solution holder for 2020
- Up to 250GB of online storage space
- Use the in-built template to make a story, customize the video, and then export it to share with your friends.
- Amadeus, Bose, BBC, Vodafone, Sony Music, and many others use Renderforest.
Pros:
- Produce videos like a pro
- Comes with an ultimate animation pack.
- Trusted by millions and one of the oldest cartoon makers.
Cons:
- A limited amount of commercial music tracks
- There are modest export options
5. Moovly
With this cartoon maker, users must first log in. However, there is no need to create a new account as you can use your LinkedIn or Google account to sign in quickly.
Price: Free 30-day trial, $24.92 per month billed annually.
Features:
- Moovly is the perfect cartoon video maker for sales&marketing, human resources, internal communication, learning&development, agencies, and education.
- Apply expert features in one click with Moovly.
- Create videos and edit with browser-based or drag and drop features without installing software.
- Moovly has over 1.3 million free media, like images, sounds, music, and royalty-free stock videos at no extra charge.
- Besides, it offers 100 million extra media you can try and then purchase.
- You can add your images, music, and videos to create unique clips in style.
- Add text, remove color, add subtitles or generate them, auto-translate your text and subtitles, import PPT files, structure your content, record yourself or your computer screen, edit, mix, etc.
Pros:
- Even if users need to log in, they don’t need to create an account
- Allows users to import content from online sources like Storyblock, Shutterstock, etc.
- It is the number 1 customizable and straightforward solution to making cartoons.
- Use by Colgate-Palmolive, NHS, Teradata, Amadeus, Cisco, Continental, and Logitech.
- The interface is intuitive and user-friendly.
Cons:
- Watermarked videos during the free trial
- To export videos in HD 1080p quality, one needs to purchase one of the available plans.
Renderforest is the best cartoon maker online of the listed five in this article due to the vast library template and large online bandwidth.
Part 2: Cartoon Video Maker for Desktop (Win and Mac)
1. Wondershare Anireel
Anireel is one of the top animation software on the internet that allows users to bring their imaginations to life with a huge range of customizable elements and features.
Price: $9.99 per month billed annually and $19.99 monthly
Features:
- 40+ customizable templates
- Top animation software
- Compatible with Windows 11/10/8.1 (64 bit OS)
- Only three steps to an excellent animated video.
- Import images, videos, and sound in almost all formats.
- Create unique avatar, logo images, and more specific to your brand.
- The Deep Learning tech offers quick text-to-speech conversion.
- Animate camera movements, entry and exit effects, motion path, etc.
- Use the one-click option and change scripts to clips.
- Anireel cartoon video makercan lip-sync your characters with perfection.
- Quick and easy drag and drop editing.
Pros:
- It is convenient and simple to use
- Anireel has an intuitive interface
- The cartoon makeroffers a practical and seamless animated video editing
- It comes at an affordable and competitive price
Cons:
- It has a limited amount of assets
- Not suitable for too professional people to use.
2. Autodesk Maya
Autodesk Maya is one of the best animation tools used to create animation pictures, video games, and add 3D effects in motion pictures. Plus, this cartoon maker is the best if you require a high-quality visual impact.
Price: Free trial, $225 billed monthly.
Features:
- It offers AutoDesk financing for new buyers.
- Maya is the go-to shop for architects, engineers, designers, media, and entertainment.
- Shape 3D objects and add realistic effects with Maya cartoon maker’s NURBS modeling.
- The Integrated Arnold rendering technology lets you view scene changes in real-time.
- Maya has been part of the top movie makers, including the MCU.
- This cartoon video maker offers geometry-based polygon modeling and helps create accurate simulations for visual programming.
- Maya can load and change vast data sets at a faster pace.
Pros:
- It makes complex hand-made animation tasks extremely easy
- Efficient color management
- Allows the creation of realistic effects like cloth simulations and explosions
- 30-day free trial and 30-day money-back guarantee
- Meet deadlines, add fine details to develop even the most complex shots or characters.
- Excellent tool for professionals
Cons:
- The pro is quite expensive
3. Adobe Animate
This is one of the most powerful animation software products on the internet that has been available for decades. It can animate images used for games, film, or online and produce HTML 5, WebGL, or Flash content.
Price: This cartoon creator offers three pricing plans starting at US$24.14/month
Features:
- Excellent for complex animation
- The capability of freehand drawing
- Animate, illustrate, and make 3D typography.
- Import and add vector drawings for further editing.
- Export your work as HTML5 Canvas, WebGL, Flash/Adobe AIR, GIF, or QuickTime movie.
- With the Bone tool, make your cartoon characters fluid and natural.
- Synchronize sounds and music for your project.
- Choose parts of the clip to be animated.
Pros:
- It has Puppeting features
- It is an excellent choice for complex animations
- It includes freehand drawing capability
Cons:
- It is not suitable for beginners
- Other Adobe software may be required while working on a project
4. Adobe Character Animator
Adobe Character Animator is another type of Adobe’s animation software stack that allows users to use motion to capture and create live animations of their 2D characters.
Price: Adobe Character Animator has two pricing plans starting at US$34,49/month for the first year
Features:
- This product requires other Adobe products to function
- Lots of options to export and import.
- Make your real-life cartoon using the Motion Capture feature in five steps.
- The Avatar will walk, talk, and copy your expressions in real-time.
- Integrate and add assets from other Adobe Creative Cloud apps.
- Auto lip-syncing and real-time facial movement capture.
- Works on iOS and Android.
Pros:
- Easy to replicate real-life movements and expressions with facial tracking.
- There are various import and export options.
Cons:
- It is not a standalone product.
- Users need to have a webcam and microphone to use the motion capture feature.
5. Cinema 4D
This cartoon maker has a 3D application interface that offers a keyframe animation, life-like characters, simulation building, object tracking, flexible rig building, cartoon styling, and animation basics.
Price: 4 pricing plans, starting at $99.91/month and $1199.00 billed annually.
Features:
- Keyframing animation effect
- It has a 3d interface
- The ZRemesher for retopology and new tools for modeling add to the new features.
- The Cloth Simulation features help make your cartoon more real.
- It supports CPU rendering with Redshift, which helps you preview, import, and export in high quality.
Pros:
- It is pretty easy to use.
- Lots of exciting design templates are available
- Many editing features are available
Cons
- It is pretty expensive compared to other software
- Not good for beginners
Wondershare Anireel is the best cartoon maker of the five listed in this article. It has lots of advanced features and templates to choose from.
Part 3: How Can I Create My Own Cartoon Using Wondershare Anireel
As stated, Wondershare Anireel has become our top cartoon creator pick due to its affordable pricing, secure server, and ease of use.
So, let us view the simple steps to create your cartoon using the Anireel software.
Step 1: Download, install and Create Character
Run Anireel on your device, visit Characters Tab and then click on Create a Character option, or you may click on the Create Brand Characters tab on the home screen.
Step 2: Start Creating your Cartoon Character
Choose your gender and body shape, and apply some preset suits.
Now, you can start building facial features using the Head tab to customize the shape of the face, eyes, hairstyle, nose, mouth, ears, and eyebrows.
You can also choose to change the skin tone to match yours.
Step 3: Add an Outfit and Accessories
Choose the Outfit tab in Character Builder to select the base layer, outfit, bottom wear, and footwear. Pick what you want to use on your cartoon and keep adding.
Next, reach the Accessories tab to add glasses, necklaces, and more to your cartoon character.
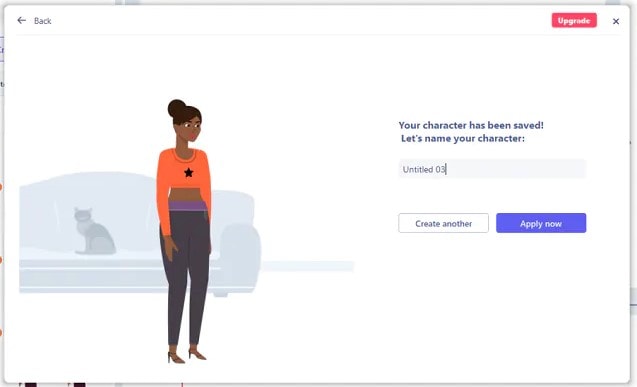
Step 4: Name your Cartoon and Apply
Click on Save and add a name to your cartoon when all done. Finally, click Apply Now to add your cartoon character to your Anireel cartoon maker canvas or My Characters tab.
Part 4: People Also Want to Know
Below are some answers to a few queries about cartoon creators. Let us look at them one by one.
1. What is the best free cartoon maker?
Wondershare Anireel is the best cartoon maker for Android as it is free to use with lots of advanced features and templates to choose from.
2. What is the best app to make a cartoon?
Wondershare Anireel’s Microsoft app is also one of the best cartoon applications that are very flexible and easy to use on the go.
Conclusion
In this article, we explained the best cartoon creators in the industry. Also, we gave the best cartoon video maker from the list. Thus, as you saw, in this report, we have summarized a few essential points regarding cartoon video makers. You learned:
- The cartoon video maker for free that you should know of.
- The ten best cartoon video makers.
- Why are Wondershare Anireel and Renderforest excellent online cartoon video makers?
- How does Anireel, cartoon creator, work?
- Finally, a few FAQs for users to better understand the cartoon maker
Adobe After Effects Review
Make cinematic films, movies, intros, and transitions. Delete people from clips. Start fires or create a foggy weather. With Adobe After Effects, the industry-standard motion graphics and visual effects software, you are able to take any idea and make it come to life. Animate titles, credits, and lower thirds. Begin editing from scratch or with presets available. Combine photos and video footage to create anything you can think of.
Choose amazing effects from hundreds of options, remove unwanted parts from the frame, people or objects, and make VR videos to push your audience into the action. This software lets professionals configure keyframes, allow them to create compositing operations. Features of Adobe After Effects include a content library, digital asset management, video rendering, data import/export, and much more. In this article we will give you a brief overview of what After Effects is, what it’s used for and by who and the overall experience!
With that said, let’s get started!
1. Speed and Stability
When talking about speed and stability, After Effects has the latest release packed with improvements. All the developers have focused themselves on speed and also performance. The team at Adobe have worked very hard to make this application more responsive and when we go along in this article, that can be seen in many ways
The main improvement which is immediately clear to all users, is the renewed preview playback optimization. What we noticed is that After Effects is creating the ram preview for your projects a lot faster. However, while working with the software for this article, we did find the user interface to be more responsive, the playback is way smoother, so is it a lot more stable overall.
While using shape layers, there was a significant improvement. A few expressions are a lot faster. This alone is worth upgrading to the latest version of After Effects.

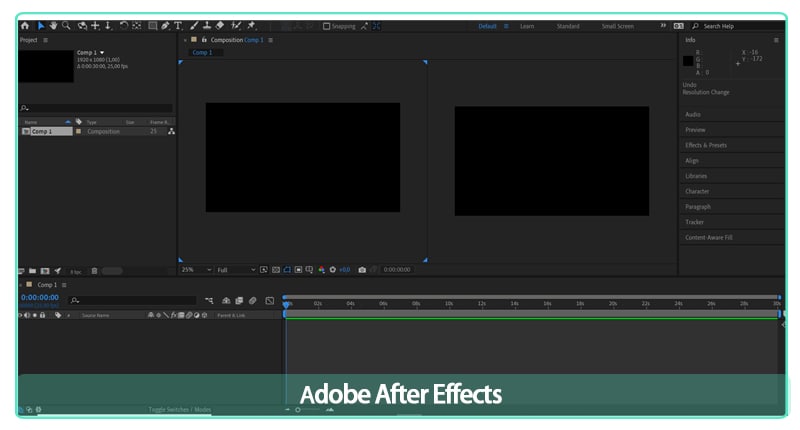
2. User Interface
The After Effects interface is constructed up of four main parts. The Timeline panel, the Project panel, the Composition panel and the Effects panel.
The Timeline Panel
In the Timeline panel, you edit all the footage and clips to create your rough cut. You can find the Timeline panel on the bottom of the workspace.
The Project Panel
It’s pretty straightforward that in the Project panel you import your footage and create your project. This is located on the top left of the standard After Effects workspace.
The Composition Panel
The Composition panel is where you will see the final product. This is located in the middle of your workspace.
The Effects Panel
In order to make creative changes to your video, use the preview, audio, effects, and Preset Panels. These panels are located on the upper right area of your workspace, each one also has its dropdown.
3. Learning Curve
The learning curve for After Effects depends on your background, the best way to find out if you like it is starting a free trial. Go through some tutorials online or paid courses. You’ll also want to spend time with the User Guide. The Search Help field in the top right corner provides you an easier search for answers to most questions that you have. Speaking of YouTube and online learning, most of the video tutorials you will find have been created by people that are experienced in After Effects and know their way around it.
4. VFX
There’s a time-period when video editors require strengthening their skills, calling it imperative software for improving editing skills is nowhere near an exaggeration. it really helps prospective professionals improve their learning experience through visual effects, camera tracking, text animation, motion tracking, color grading, etc. All of these methodologies do help in improving the VFX learning process in the long run.
Video editing happens to be a crucial part of film production. Making videos in a fantastic process can indulge in building professional videos via motion graphics animation. This is where Adobe After Effects become an excellent learning tool.
5. Motion Graphics
Motion graphics can sound quite scary. It’s a new term for a specific genre of animation. Motion graphics is the intersection between animation and graphic design. These are purpose-driven visual aspects with the goal of showing information to the viewer through the use of animated graphics or text. Sometimes they include voice-overs narrating what the text or graphics are showing. Where it gets a little complex is that the more popular the term motion graphics becomes, the more people are misaligning animations to it. They need to represent information and illustrate the idea to the viewer clearly, so they do that using animation and motion graphics.
6. Titles and Outros
Adobe released a new combination of features for you. For Adobe Stock: Graphics templates. Those pre-made templates give you a super smooth way to discover new motion graphics within Premiere Pro, without needing to spend time creating titles, overlays, or animations from scratch. The world has digitalized, and videos often need visual aspects such as titles, lower thirds, to present information. The templates not only assist video editors increase the quality of the content by showing certain information, but they also give a strong visual touch to keep the viewer engaged throughout the video. The audience nowadays is a lot more sophisticated, meaning that motion graphics are a necessity in a driven media world.
Motion Graphics templates are valuable for video editors of all levels. For the beginning content creators, the templates offer great quality, ready-made footage to help their creative goal. They can explore and work on their skills. Motion graphics that are pre-made are an excellent way to express the vision and express inspiration to new opportunities.
So now that you are aware of what After Effects templates are, we can move on to the actual workflow, why it is important, and how to use it as efficient as possible.
7. Workflow
Whether you are using Adobe After Effects to create motion graphics, or composite realistic visuals, you usually follow the same workflow, you may repeat the process of adjusting layer properties, editing, and compositing until everything looks good. You can change any property of any element, such as position, opacity and size. Make use of motion tracking to stabilize footage so that it follows the motion from another clip, and so much more!
8. Rendering Speed
When it comes to exporting your project in After Effects, you don’t need to buy an expensive workstation. You can speed up your rendering process from your own laptop without investing too much and by using the following tips we have for you below!
Tip #1: Enable Multiprocessing
What exactly is multiprocessing? That is when After Effects uses multiple cores from your CPU to export multiple frames at once. If your processor has one or more cores, you can enable this feature to reduce your rendering time. We want to mention that you need to check whether or not this option is turned on. Once enabled, you’ll see a great decrease in export time.
To enable Multiprocessing, navigate to Preferences > Memory & Multiprocessing. Then you click the check box next to ‘Render Multiple Frames Simultaneously’ and remember also to adjust the settings that you need.
Tip #2: Optimize Your RAM Usage
The RAM memory inside your workstation can be used to write and read data at a lot higher speeds than regular hard drives and portable drives. Configuring your RAM in a system is one of the easiest upgrades for better performance. Giving you affordable solutions for both desktop and laptop systems, the RAM memory upgrade does not require a lot of knowledge. The more RAM you allow applications to use, the higher the performance you will get out of it.
It also shows a noticeable increase in rendering speed. When the export time in your work is longer than needed, look at your RAM memory and see if you can make the necessary changes or upgrades.
Tip #3: Use the Media Encoder
Let’s talk about the Media Encoder. It’s the software that comes up with Adobe Creative Cloud products such as After Effects and Premiere Pro to simplify the export process. You can easily render your project from After Effects to Adobe Media Encoder and begin the project render process from that point on. The Media Encoder will increase your rendering performance and will significantly decrease rendering time.
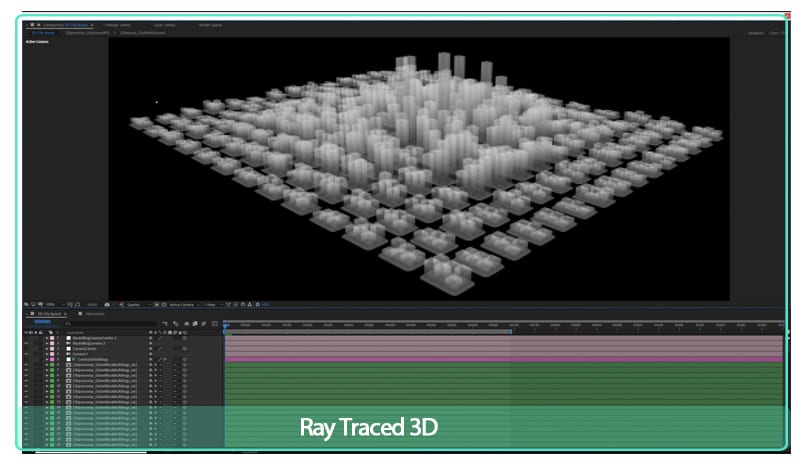
Tip #4: Disable Ray-Traced 3D
The included After Effects Ray-Traced 3D feature enables you to produce 3D models within After Effects without any struggle. Calculating all the motions and visual graphics is such a heavy process for your workstation. When you disable raytracing, you will get a faster export time. By looking that ‘Classic 3D’ is checked instead of ‘Ray-Traced 3D’ from your composition preferences, you can speed your rendering speed up to 50%. Isn’t that incredible?
Tip #5: Activate GPU Exporting with Cuda Acceleration
Exporting your videos with GPU rather than CPU will increase the efficiency of your render process. The export length will decrease a whole lot when you activate Mercury GPU Acceleration, also known as ‘CUDA’ from the ‘Project Settings’.
After Effects doesn’t really require CUDA features from a special kind of Nvidia GPU. Only the GPU accelerated 3D renderer, that is based on the raytracing algorithm, requires that. The other GPU features are running on any GPU that meets the basic minimums, including Intel and AMD GPUs.
9. System Requirements for Windows
These are the minimum specifications needed to use After Effects on PC:
OS: Windows 10 (64-bit) versions 1909 and later, or Windows 11
CPU: Intel or AMD Quad-Core Processor (Intel i5 and i7 will do the job)
RAM: 16 GB
Monitor resolution: 1280 x 1080
An internet connection
Free storage: 15 GB
GPU: Minimum 2 GB of VRAM
10. System Requirements for macOS
OS: macOS 10.13 or later
RAM: 16 GB
CPU: Intel and Apple Silicon (Rosetta2 Supported) Quad-Core Processor
GPU: 2GB of VRAM
Monitor resolution: 1440×900
Free storage: 15 GB
An internet connection
11. Keyboard Shortcuts
You can work visually when you configure your keyboard shortcuts with the visual keyboard shortcut editor within After Effects. You can use the keyboard user interface to show the keys that have been assigned to shortcuts, the available keys for assignment, and edit assigned shortcuts to make your workflow even easier.
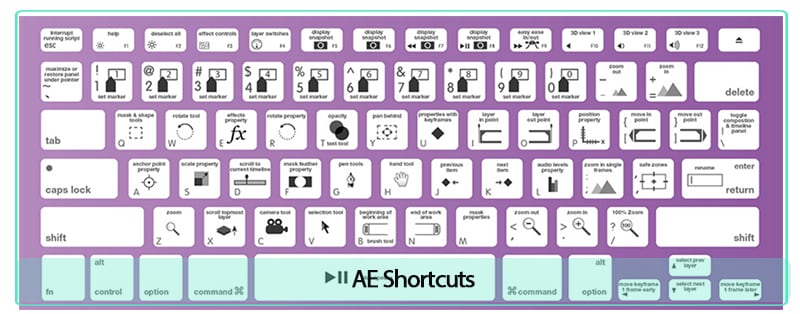
The keyboard layout:
This is a representation of your physical keyboard where you can see which keys have been assigned a shortcut, and which are available.
Command list:
The list displays all the commands that can be assigned shortcuts.
Key modifier list:
This list shows you all the modifier combinations and assigned shortcuts associated with the key you select on your physical keyboard.
After Effects does not allow you to reassign the following keys:
- A
- AA
- E
- EE
- F
- FF
- L
- LL
- M
- MM
- P
- PP
- R
- RR
- S
- SS
- T
- TT
- U
- UU
12. Should You Buy It?
Well first, you cannot buy After Effects, Premiere Pro or other software from Adobe. You have to rent them by paying monthly. After Effects is primarily a compositing and graphics software. Premiere is primarily a video editing program. In the case of After Effects and Premiere Pro, it’s not really an either/or. They’re both software with different purposes. After Effects is a lot more powerful and essentially showcases most of Premiere’s functionality, but according to our experience, the Premiere Pro interface and workflow is way more superior for video editing.
Premiere Pro is essentially built around its timeline, the region where you cut your video clips and drag and place them into your appropriate sequence. Hollywood filmmakers and professional YouTube content creators are using Premiere Pro to edit high-performing content and award-winning films. The software is very intuitive and easy for beginners to start with.
Are going to work with After Effects to create an income? Or are just going to use it for a hobby? It’s crucial to mention that question because Adobe After Effects is not something that is cheaply available. You will be investing much money on the program, and if you are working to use the software, paying a good amount, and earning nothing in return, then you might want to shift to another alternative which would cost you less. For instance, let’s assume you are using the application to earn an income, and have a few low-paying clients. In such a situation, you will have to rethink your options of software and analyze whether what you are paying in comparison to what you are getting is enough for you or not. We all are different individuals and have different preferences. Once we can see what is more important to us, or what is our need at this moment, then we will be able to judge the worth of purchasing Adobe After Effects better.
Are you going to use After Effects to earn an income? Or are just using it as a hobby? It is very important to address this question because Adobe After Effects is not something cheaply accessible. You will be investing a lot of money into this software, if you are using the software while paying a good amount and earning nothing in return yet, then you could shift to a different alternative which will cost you a lot less. Let’s say you are using After Effects to earn an income and have some low-paying work. In that case, you will have to reconsider your options of video editing software and look at whether what you are paying in comparison to what you are getting is possible for you. When we can see what is more important to us, we will be able to see the worth of buying After Effects.
Did you previously use After Effects or are you new to the program? The return that you will get using Adobe After Effects, depends on how good you know how to work with the options, functions and features in the software.
The Bottom Line
So summing it all together, Adobe After Effects takes care of all your assets and creates a final product, considering that After Effects is usually an asset-generation tool. Most video editors complete their projects in After Effects non-stop. It’s excellent for making visual videos come to life.
AE version 22.3 is very impressive. Giving you a wealth of new features created to make VFX editing a lot faster and easier. Offering new features on a regular basis, improving their subscription model making it more attractive. Especially if you’re a professional editor and designer.
Once you get comfortable with Adobe After Effects, you learn how to dynamically combine After Effects compositions to your Premiere projects. You are able to access both assets at the same time if needed!
Free Download For Win 7 or later(64-bit)
Free Download For macOS 10.14 or later
Video in Text Cinematic Intro【Filmora Tutorial】
Preparation
What you need to prepare:
- A computer (Windows or macOS)
- Your video materials.
- Filmora video editor
Step 1
Visit filmora.wondershare.com and download the Filmora video editor . Hit Install. When it’s done installing, the app will start automatically. When it does, click on New Project.
Step 2
Before we start editing, go to File from the navigation panel at the top and select Project Settings. Then, set the resolution settings like in the example here.

Step 3
Now, download any background image you want. Make sure its resolution is 1920x1080. Import it and drag it to the Timeline.
Step 4
From the Timeline, double-click on the Background clip and decrease its opacity to 70%. Then, click on Color from the upper-left corner and change the settings as you wish.

Step 5
Go to the Titles tab and drag the Default Title to the Timeline. Double-click on the Default Title clip and change fonts, type in your text, etc.

Step 6
Drag the text to enlarge it so it fits the entire screen. Then, change its color to green. Press OK. Now, Export this clip and name it “1st Text”.

Step 7
Now, open a new Filmora project and edit the Project Settings like we did before. Then, go to Sample Color and drag the white color to the Timeline.

Step 8
Drag the Playhead to the 2-second marker. Drag the same Background image as before to this point. Then, double-click on the Background clip and increase the Brightness and Saturation bars to 50. Click OK.

Step 9
Go to Transitions and type in “Push”. Drag the Push transition between the White layer and your Background image. Click on Export once again and name this clip “Transition”.

Step 10
Open a new Filmora project and adjust the Project Settings like we did the first time. Then, go to Sample Color and drag the White color to the Timeline once more.
Step 11
Go to Titles and drag the Default Title to the Timeline, above the White Sample Color clip. Now, double-click the Default Title clip and go to ADVANCED. Here, set the text color to green, choose a font you like, and increase the text size. Click OK. Export it and name it “Temporary”.

Step 12
Open a new project in Filmora. Import and Drag the same background image you used before to the Timeline. Double-click on it and drag the Saturation bar to -100. Now, drag the file you named “Temporary” into the Timeline.

Step 13
Double-click on the Temporary clip, scroll down when the new window appears, and find the Chroma key section. Enable this. Now, drag the Edge Feather bar to 0. Export this video and name it “2nd Text”.

Step 14
Open one more new project in Filmora and import the following files. There should be four, titled “Background”, “Transition”, “1st Text”, and “2nd Text”.
Step 15
Click on Sample Color and drag the Black color to the 1st Track of the Timeline. Then, move the Playhead to the 1-second marker and drag the “Transition” clip to the same Track within the Timeline.

Step 16
From the Transitions tab, select the Push transition and drag it to the Timeline.

Step 17
Set the Playhead at the 1-second marker once again. First, add the “1st Text” clip into Track 2 of the Timeline. Then, add another Push transition at the beginning of this clip.

Step 18
Now, double-click on the “1st Text” clip and enable the Chroma Key option. Then, set the Edge Thickness and Edge Feather bars to 0.

Step 19
Set the Playhead at 4.5 seconds. Snip the Timeline. Then, add a new Default Title on the right side of the Playhead on Track 2.

Step 20
Double-click on the Default Title and go to Advanced settings. From there, delete the default text and click on the highlighted button like in the image below to add a new background to this clip. Add the same background you’ve used throughout the entire video.

Step 21
Add a new text here and customize it to match the text style in your “2nd Text” clip you exported earlier. Click OK.

Step 22
Next, go to the Transitions tab and drag the “Row Split” transition clip between Track 2 and the New Default Title you just created. Then, double-click on the transition and change its duration to 1 second.

Step 23
Set the Playhead to the 5.5 seconds marker. Drag the “2nd Text” clip you exported earlier here. Then, simply add another Row Split transition between this clip and the Default Title.

Step 24
That’s it! You’re done. All that’s left is to Render and export the video. Congratulations on creating a video in text cinematic intro in Filmora.
Summary
What you’ve learned:
- How to make advanced edits on titles in Filmora
- Basics of using green screen effects on text
- Using transitions in Filmora
- Exporting and re-using edited clips
- Creating a unique video in text cinematic intro
What you need to prepare:
- A computer (Windows or macOS)
- Your video materials.
- Filmora video editor
Step 1
Visit filmora.wondershare.com and download the Filmora video editor . Hit Install. When it’s done installing, the app will start automatically. When it does, click on New Project.
Step 2
Before we start editing, go to File from the navigation panel at the top and select Project Settings. Then, set the resolution settings like in the example here.
Step 3
Now, download any background image you want. Make sure its resolution is 1920x1080. Import it and drag it to the Timeline.
Step 4
From the Timeline, double-click on the Background clip and decrease its opacity to 70%. Then, click on Color from the upper-left corner and change the settings as you wish.
Step 5
Go to the Titles tab and drag the Default Title to the Timeline. Double-click on the Default Title clip and change fonts, type in your text, etc.
Step 6
Drag the text to enlarge it so it fits the entire screen. Then, change its color to green. Press OK. Now, Export this clip and name it “1st Text”.
Step 7
Now, open a new Filmora project and edit the Project Settings like we did before. Then, go to Sample Color and drag the white color to the Timeline.
Step 8
Drag the Playhead to the 2-second marker. Drag the same Background image as before to this point. Then, double-click on the Background clip and increase the Brightness and Saturation bars to 50. Click OK.
Step 9
Go to Transitions and type in “Push”. Drag the Push transition between the White layer and your Background image. Click on Export once again and name this clip “Transition”.
Step 10
Open a new Filmora project and adjust the Project Settings like we did the first time. Then, go to Sample Color and drag the White color to the Timeline once more.
Step 11
Go to Titles and drag the Default Title to the Timeline, above the White Sample Color clip. Now, double-click the Default Title clip and go to ADVANCED. Here, set the text color to green, choose a font you like, and increase the text size. Click OK. Export it and name it “Temporary”.
Step 12
Open a new project in Filmora. Import and Drag the same background image you used before to the Timeline. Double-click on it and drag the Saturation bar to -100. Now, drag the file you named “Temporary” into the Timeline.
Step 13
Double-click on the Temporary clip, scroll down when the new window appears, and find the Chroma key section. Enable this. Now, drag the Edge Feather bar to 0. Export this video and name it “2nd Text”.
Step 14
Open one more new project in Filmora and import the following files. There should be four, titled “Background”, “Transition”, “1st Text”, and “2nd Text”.
Step 15
Click on Sample Color and drag the Black color to the 1st Track of the Timeline. Then, move the Playhead to the 1-second marker and drag the “Transition” clip to the same Track within the Timeline.
Step 16
From the Transitions tab, select the Push transition and drag it to the Timeline.
Step 17
Set the Playhead at the 1-second marker once again. First, add the “1st Text” clip into Track 2 of the Timeline. Then, add another Push transition at the beginning of this clip.
Step 18
Now, double-click on the “1st Text” clip and enable the Chroma Key option. Then, set the Edge Thickness and Edge Feather bars to 0.
Step 19
Set the Playhead at 4.5 seconds. Snip the Timeline. Then, add a new Default Title on the right side of the Playhead on Track 2.
Step 20
Double-click on the Default Title and go to Advanced settings. From there, delete the default text and click on the highlighted button like in the image below to add a new background to this clip. Add the same background you’ve used throughout the entire video.
Step 21
Add a new text here and customize it to match the text style in your “2nd Text” clip you exported earlier. Click OK.
Step 22
Next, go to the Transitions tab and drag the “Row Split” transition clip between Track 2 and the New Default Title you just created. Then, double-click on the transition and change its duration to 1 second.
Step 23
Set the Playhead to the 5.5 seconds marker. Drag the “2nd Text” clip you exported earlier here. Then, simply add another Row Split transition between this clip and the Default Title.
Step 24
That’s it! You’re done. All that’s left is to Render and export the video. Congratulations on creating a video in text cinematic intro in Filmora.
Summary
What you’ve learned:
- How to make advanced edits on titles in Filmora
- Basics of using green screen effects on text
- Using transitions in Filmora
- Exporting and re-using edited clips
- Creating a unique video in text cinematic intro
What Is MOV Format and How To Edit MOV Video Creatively?
We come across different media files every day, and surprisingly, every file has a unique format. Different devices and different programs support and entertain different file formats. It is hard to find the correct file format for your device.
The following article will shed light on MOV format. Not just this, apart from its introduction, pros and cons, if you plan to edit your MOV video format, we will also introduce a video editor. Let’s start!
In this article
02 What Are Pros and Coins about MOV Video Format?
03 Best MOV Video Editor- Filmora Video Editor
04 How to Edit MOV Video Files in An Creative Way?
05 Differences Between MP4 and MOV
Part 1. What Is MOV Format?
You might be using the MOV format without noticing and knowing what it is? MOV is a QuickTime file developed by Apple Inc. It is a multimedia container file. MOV file format is capable of keeping multiple types of data on different tracks, which may include audio, video, or even texts.

Does the MOV video format only work on Mac? MOV is developed by Apple, but it does not mean that it is not compatible with other devices. You can use it on Windows along with Sony and DVD. MOV file format is the same as MPEG-4 format file. It is sometimes considered as the basis for the MPEG-4 file format.
Part 2. What Are Pros and Coins about MOV Video Format
Do you know what benefits you get from the MOV video format? Or else, why not discuss its disadvantages? The following section of this article will shed light on both the advantages and also disadvantages of the MOV format.
Advantages of MOV Format
MOV file format is a famous format because of the simplicity it provides in editing and also because it embeds well in different programs. The format is very convenient as it holds various media content like videos, audio, everything in one compact place. MOV video files are easily edited as the primary elements are adjusted.
MOV format is widely used on the web, and because of this reason, the format is ideal for sharing files on the internet. The format is perfect for Mac and QuickTime Player. It is highly compatible with different platforms like Mac, Windows, iOS, and Android. Do you know about the storage space of MOV? The format acquires low storage space, making it a great file format.
Drawbacks of MOV Format
Moving on to its drawbacks, MOV has lossy compression of video tracks. The overall quality of the video might also be damaged while compressing the video. Every track of the MOV format file is encoded with a specific codec. Only those apps can smoothly play a MOV file that supports and recognize the encoded codec. In this case, you might need to convert the file format.
Part 3. Best MOV Video Editor- Filmora Video Editor
Are you looking for a great video editor to edit your MOV format videos? We might have something for you. Let’s introduce Wondershare Filmora to edit drastic videos. The software is very easy to understand and use. Its intuitive interface guides the user about every step.

For Win 7 or later (64-bit)
For macOS 10.12 or later
Filmora Video Editor has enormous features that could make a stunning video. You cannot find a better video editor than Filmora because of its features like cutting, trimming, joining, splitting, and so much more than this. Let’s share a few more features of Filmora:
Auto Reframe
Isn’t it easy if your video gets automatically focused? With Filmora, Auto Reframe feature, the AI technology automatically detects the focal point of the video and keeps it in the frame. With this feature, the main object of the video always remains in focus.
Stabilize Video
Do you know what wonders Stabilize Video feature can do? While filming a video, your hand might shake, and your video quality is disturbed, but with Filmora, you can fix the video. Use its Stabilize Video feature and smooth the shaky footage.
Silence Detection
You are not always speaking in a video; some parts of the video are silent. What to do with such parts? Well, take help from Filmora and remove the silent instances from your video. The Silence Detection feature spontaneously detects the silent parts of the MOV file format video and removes them, saving your precious time.
Split Screen
Are you creating a tutorial? Split Screen is the ideal feature to use for creating such videos. Filmora lets you display multiple videos on a single screen with this feature. You can simultaneously incorporate various clips by using the different provided templates.
Part 4. How to Edit MOV Video Files in An Creative Way?
Filmora is a stunning video editor with uncountable features. You can create mind-blowing videos with Wondershare Filmora. Apart from features like trim, cut, join, split, you also get some great advanced features like Motion Tracking, AI Portrait, Pan & Zoom, and a lot more.
The video editor is easy to use, and even novice users can understand the software and work with it. Filmora is a famous editor because of its functionalities. If you are looking for a video editor to edit your MOV file format, try Filmora, you will not be disappointed. Follow the steps below for assistance:
Step 1: Importing Media
After installing Filmora, launch it on your device. From the home screen, head to the ‘File’ tab and look for the ‘Import Media’ option. A sub-menu will appear as you hover on the option, click on the ‘Import Media Files’, and locate the MOV format file from the device to work with.

Step 2: Add Audio Effects
Do you want to make your video interesting? Try by adding some sound effects. For this, head to the ‘Audio’ section from the top menu and look for your preferred effect.

Step 3: Add Transitions
You might mix and join various videos but do they look good? For smooth transitions, move to the ‘Transition’ tab and select a cool effect.

Step 4: Elements and Titles
Have you tried adding any cool elements to your MOV video? From the ‘Elements’ section, add things like Laser Eye, fun emoji, and a lot more. Along with this, add titles to your video from the ‘Titles’ tab.

Step 5: Export MOV File
Are you satisfied with the final MOV video format file? If you are, export the video to your device. Hit the ‘Export’ button and select ‘MOV’ format as your output format to save the video.

Part 5. Differences Between MP4 and MOV
Both MP4 and MOV file format is almost the same thing. Some of the minor differences that exist are MOV format is recommended best for Mac devices. On the contrary, MP4 is universal that can be used on any device irrespective of the operating system or the software.

MP4 files are more compressed, thus taking less space than MOV video format, which takes slightly more space. The quality of payback that MP4 provides is less than what the MOV file format provides. MOV format, thus, for this reason, is used more by professionals.
Final Thoughts
The article has everything you need to know about the MOV format. From its introduction to the steps of editing a MOV video format, we shared everything in detail. It’s time to talk about a nice video creator and also a video editor. We are talking about Wondershare Filmora. The video editor will wow you with its features and editing capabilities.
The video editor offers regular options like split, cut, trim, join, etc. Whereas it also comes with advanced editing features like Color Match, Chroma Key Background, Auto Highlight, and whatnot. If you want to create a stunning and eye-catching video, take help from Filmora.
Wondershare Filmora
Get started easily with Filmora’s powerful performance, intuitive interface, and countless effects!
Try It Free Try It Free Try It Free Learn More >

02 What Are Pros and Coins about MOV Video Format?
03 Best MOV Video Editor- Filmora Video Editor
04 How to Edit MOV Video Files in An Creative Way?
05 Differences Between MP4 and MOV
Part 1. What Is MOV Format?
You might be using the MOV format without noticing and knowing what it is? MOV is a QuickTime file developed by Apple Inc. It is a multimedia container file. MOV file format is capable of keeping multiple types of data on different tracks, which may include audio, video, or even texts.
Does the MOV video format only work on Mac? MOV is developed by Apple, but it does not mean that it is not compatible with other devices. You can use it on Windows along with Sony and DVD. MOV file format is the same as MPEG-4 format file. It is sometimes considered as the basis for the MPEG-4 file format.
Part 2. What Are Pros and Coins about MOV Video Format
Do you know what benefits you get from the MOV video format? Or else, why not discuss its disadvantages? The following section of this article will shed light on both the advantages and also disadvantages of the MOV format.
Advantages of MOV Format
MOV file format is a famous format because of the simplicity it provides in editing and also because it embeds well in different programs. The format is very convenient as it holds various media content like videos, audio, everything in one compact place. MOV video files are easily edited as the primary elements are adjusted.
MOV format is widely used on the web, and because of this reason, the format is ideal for sharing files on the internet. The format is perfect for Mac and QuickTime Player. It is highly compatible with different platforms like Mac, Windows, iOS, and Android. Do you know about the storage space of MOV? The format acquires low storage space, making it a great file format.
Drawbacks of MOV Format
Moving on to its drawbacks, MOV has lossy compression of video tracks. The overall quality of the video might also be damaged while compressing the video. Every track of the MOV format file is encoded with a specific codec. Only those apps can smoothly play a MOV file that supports and recognize the encoded codec. In this case, you might need to convert the file format.
Part 3. Best MOV Video Editor- Filmora Video Editor
Are you looking for a great video editor to edit your MOV format videos? We might have something for you. Let’s introduce Wondershare Filmora to edit drastic videos. The software is very easy to understand and use. Its intuitive interface guides the user about every step.
For Win 7 or later (64-bit)
For macOS 10.12 or later
Filmora Video Editor has enormous features that could make a stunning video. You cannot find a better video editor than Filmora because of its features like cutting, trimming, joining, splitting, and so much more than this. Let’s share a few more features of Filmora:
Auto Reframe
Isn’t it easy if your video gets automatically focused? With Filmora, Auto Reframe feature, the AI technology automatically detects the focal point of the video and keeps it in the frame. With this feature, the main object of the video always remains in focus.
Stabilize Video
Do you know what wonders Stabilize Video feature can do? While filming a video, your hand might shake, and your video quality is disturbed, but with Filmora, you can fix the video. Use its Stabilize Video feature and smooth the shaky footage.
Silence Detection
You are not always speaking in a video; some parts of the video are silent. What to do with such parts? Well, take help from Filmora and remove the silent instances from your video. The Silence Detection feature spontaneously detects the silent parts of the MOV file format video and removes them, saving your precious time.
Split Screen
Are you creating a tutorial? Split Screen is the ideal feature to use for creating such videos. Filmora lets you display multiple videos on a single screen with this feature. You can simultaneously incorporate various clips by using the different provided templates.
Part 4. How to Edit MOV Video Files in An Creative Way?
Filmora is a stunning video editor with uncountable features. You can create mind-blowing videos with Wondershare Filmora. Apart from features like trim, cut, join, split, you also get some great advanced features like Motion Tracking, AI Portrait, Pan & Zoom, and a lot more.
The video editor is easy to use, and even novice users can understand the software and work with it. Filmora is a famous editor because of its functionalities. If you are looking for a video editor to edit your MOV file format, try Filmora, you will not be disappointed. Follow the steps below for assistance:
Step 1: Importing Media
After installing Filmora, launch it on your device. From the home screen, head to the ‘File’ tab and look for the ‘Import Media’ option. A sub-menu will appear as you hover on the option, click on the ‘Import Media Files’, and locate the MOV format file from the device to work with.
Step 2: Add Audio Effects
Do you want to make your video interesting? Try by adding some sound effects. For this, head to the ‘Audio’ section from the top menu and look for your preferred effect.
Step 3: Add Transitions
You might mix and join various videos but do they look good? For smooth transitions, move to the ‘Transition’ tab and select a cool effect.
Step 4: Elements and Titles
Have you tried adding any cool elements to your MOV video? From the ‘Elements’ section, add things like Laser Eye, fun emoji, and a lot more. Along with this, add titles to your video from the ‘Titles’ tab.
Step 5: Export MOV File
Are you satisfied with the final MOV video format file? If you are, export the video to your device. Hit the ‘Export’ button and select ‘MOV’ format as your output format to save the video.
Part 5. Differences Between MP4 and MOV
Both MP4 and MOV file format is almost the same thing. Some of the minor differences that exist are MOV format is recommended best for Mac devices. On the contrary, MP4 is universal that can be used on any device irrespective of the operating system or the software.
MP4 files are more compressed, thus taking less space than MOV video format, which takes slightly more space. The quality of payback that MP4 provides is less than what the MOV file format provides. MOV format, thus, for this reason, is used more by professionals.
Final Thoughts
The article has everything you need to know about the MOV format. From its introduction to the steps of editing a MOV video format, we shared everything in detail. It’s time to talk about a nice video creator and also a video editor. We are talking about Wondershare Filmora. The video editor will wow you with its features and editing capabilities.
The video editor offers regular options like split, cut, trim, join, etc. Whereas it also comes with advanced editing features like Color Match, Chroma Key Background, Auto Highlight, and whatnot. If you want to create a stunning and eye-catching video, take help from Filmora.
Wondershare Filmora
Get started easily with Filmora’s powerful performance, intuitive interface, and countless effects!
Try It Free Try It Free Try It Free Learn More >
Also read:
- New 2024 Approved Basic Knowledge About WMV Format and Best WMV Video Editor
- Updated How to Create Intro Video with KineMaster
- Lets Introduce the Top 5 Applications to Add a Song to a Video for Free with some Amazing Sound and Visual Effects for 2024
- New How to Change the Speed of Video in DaVinci Resolve?
- In 2024, Step by Step to Cut Videos in Adobe Premiere Pro
- New How To Change Text In Premiere Pro
- New 2024 Approved Complete Tutorial to Make an Impressive Countdown Timer Video
- Updated 2024 Approved 8 Websites to Find 3D Text PNG
- How to Get the Most Out of KineMaster Video Templates for 2024
- New In 2024, 5 Tips for Faster Editing in Filmora Video Editor
- Blender Is a 3D Animation Software that Can Be Used to Create Stunning 3D Models and Videos
- Updated Camtasia Vs Captivate - Which to Choose for 2024
- Updated Final Cut Pro - How to Download and Install It, In 2024
- Updated 2024 Approved AVI Editors for Windows 11/10/8.1/8/7 Easily Edit AVI Files on PC
- 2024 Approved 7 Best MP4 Editors for Mac Edit MP4 in Mac
- New How to Create Intro Video with KineMaster for 2024
- Despite the Aforementioned Restrictions, Cartoon Video Makers Still Offer a Sea of Possibilities to Their Users, so Lets Dive Into the Magical World of Animated Videos
- In 2024, Can I Remove the Apple Watch Activation Lock By iPhone 11 Pro Max without the Previous Owner?
- 3 Facts You Need to Know about Screen Mirroring Motorola Moto G34 5G | Dr.fone
- In 2024, Why does the pokemon go battle league not available On Realme GT 5 (240W) | Dr.fone
- How To Restore Missing Music Files from Oppo Find N3
- Lock Your Xiaomi 13 Ultra Phone in Style The Top 5 Gesture Lock Screen Apps
- How To Remove iCloud On Apple iPhone 11 Pro Smoothly
- How to Stop Google Chrome from Tracking Your Location On Apple iPhone XS? | Dr.fone
- In 2024, Complete Tutorial to Use GPS Joystick to Fake GPS Location On Meizu 21 | Dr.fone
- Two Ways to Track My Boyfriends Realme Note 50 without Him Knowing | Dr.fone
- A Step-by-Step Guide on Using ADB and Fastboot to Remove FRP Lock from your Samsung Galaxy S24 Ultra
- Full Guide to Bypass Samsung Galaxy F04 FRP
- In 2024, How to Turn Off Find My Apple iPhone 6s Plus when Phone is Broken? | Dr.fone
- How to Fake Snapchat Location without Jailbreak On Vivo S17e | Dr.fone
- In 2024, How to Fake Snapchat Location on Oppo A2 | Dr.fone
- Title: Updated Despite the Aforementioned Restrictions, Cartoon Video Makers Still Offer a Sea of Possibilities to Their Users, so Lets Dive Into the Magical World of Animated Videos
- Author: Chloe
- Created at : 2024-04-24 07:08:18
- Updated at : 2024-04-25 07:08:18
- Link: https://ai-editing-video.techidaily.com/updated-despite-the-aforementioned-restrictions-cartoon-video-makers-still-offer-a-sea-of-possibilities-to-their-users-so-lets-dive-into-the-magical-world-o/
- License: This work is licensed under CC BY-NC-SA 4.0.
