
:max_bytes(150000):strip_icc():format(webp)/trends_MontyRakusen_Getty-5a4aa079482c5200362b0987.jpg)
Updated Detailed Guide to Crop Videos in Sony Vegas Pro
Detailed Guide to Crop Videos in Sony Vegas Pro
Sony Vegas Pro is a video editing software package for non-linear editing (NLE) originally published by Sonic Foundry, now owned and run by Magix Software GmbH. Written in the C++ programming language, the software uses the Microsoft Windows operating system and is compatible with 64-bit versions.
It has been used to produce TV shows and feature films. More recently, Sony released a consumer video-editing program known as Movie Studio Platinum 13, which was designed for consumer-level editors. In the previous year by Sonic Foundry, a division of Sony Pictures Digital. The software was re-branded as Sony Vegas following Sonic Foundry’s merger with Sony Pictures Digital in 2007, and after the latter sold off Sonic Foundry in 2008, it became a part of MAGIX.
Other video editing products from Sony include Movie Studio, Sound Forge Pro, and ACID Pro.
The original version was called Sound Forge. The software was upgraded to incorporate features of the newly acquired product Vegas, which had been released as a Windows version of the original DOS-based Non-Linear Editor (NLE) developed by US company, Canopus.
About Sony Vegas Pro
The powerful video editing software makes it easy to create professional-quality videos. It provides the users with some special features like easy trimming, splitting and merging of clips, etc. By using Vegas Pro you can easily crop your short video (a clip) and also resize it.
Sony Vegas Pro is a video editing software produced by Sony Creative Software. It is used for professional video, audio post-production and 3D animation.
Sony Vegas Pro is a video editing software that is used worldwide. It has great features and it can be utilized by individuals who are newbies in the field of creating videos. Sony Vegas Pro 12, 11, 10 have been installed many times on Windows 7, 8, 8.1 operating systems without encountering any problems. But some users face problems with the installation process of Sony Vegas Pro 13, 14 versions. Many individuals have got different difficulties.
Cropping means cutting off a part of the video. Instead of enlarging the video by moving its borders, you have to trim it from both sides. The editing procedure includes removing unwanted parts from short videos, making them shorter and more effective. It can also create suspense or interest for audiences. Here are the steps to crop a video in Sony Vegas Pro:
Step-by-step on how to crop videos using Vegas Pro?
Step 1: Click on ‘Import’ and import the video to be edited. Click on it and drag-drop to timeline. You can see a green indicator in the form of a splitter between two clips in the timeline, which shows where the clip ends and starts playing.

Step 2: Open the video you want to edit, in the timeline of your project. Right-click on the clip and select “Video Event Pan/Crop”.

Step 3: Alternatively, you can also select crop effect by pressing the icon in the clip. Or, select the Crop icon from the toolbar to add it to a track.

Step 4: The crop window will pop up. You can now drag the dotted rectangle to the ‘crop’ part of the video that you want. Press enter once done to apply the crop. You can also use the “Previous Frame” or “Next Frame” button to navigate to another frame of your video and drag the dotted rectangle from there, without changing your current frame.

Step 5: When you have finished adjusting the crop area, go to File > Export > Render Video. In the Render Video window that pops up, select the file format and quality of your render. You can also adjust the size, frame rate, and bitrate options from here. Once ready, press “Render” to begin rendering your video with the cropped area. This will give you a new output video where only the selected portion of the previous video is visible.

Sony Vegas Pro provides advanced options for users to easily crop videos in multiple formats like - HDV, AVCHD, and many more.
And… Voila! You have successfully cropped your video in Sony Vegas Pro.
Alternatively, there is a better way to crop a video and that is using the Wondershare Filmora. It is easier and user-friendly. It also has a lot of features that you can choose from.
An Easier Way to Crop a Video with Filmora
Filmora Video Editor is a free windows movie maker. It is one of the best windows movie makers available in the market. Filmora uses MPEG-4 AVC codec for editing videos and also offers many output formats like MP4, AVI, FLV, etc. In addition to these features, it includes a video stabilization algorithm, picture in picture editor, and many more. It is a free windows movie maker so anyone who has a windows computer can download and use this software.
It includes many interesting and useful features which you will not find in other movie makers like:
Support for multiple videos, audio, image formats: The program offers support for multiple videos, audio, image formats. Video stabilization algorithm: Video stabilization algorithm is used to remove unwanted shakes from your videos. Apart from this it also contains a picture-in-picture editor and many more useful features.
Filmora is an indie filmmaker’s go-to tool to create gorgeous-looking videos. No matter your skill level, it’s easy enough for beginners and powerful enough for professionals.
For Win 7 or later (64-bit)
For macOS 10.14 or later
Step-by-step on how to crop videos using Wondershare Filmora?
So, here are the steps to crop videos using Wondershare Filmora.
Step 1: Open the video you want to edit in Wondershare Filmora. Drag it and drop to timeline.

Step 2: In your timeline, select a portion of the video that needs cropping and click on ‘Crop and Zoom’ tab located at the bottom right corner of your screen. Here you can see the Crop and Zoom window where you can adjust the crop area. Adjust the size, shape of your video with these options.

Step 3: Once done with your adjustment click on ‘OK’ button to apply your crop. You can see that the selected portion of the video is now cropped.

Step 4: Finally, click on “Save” to save your video with cropping. Congratulations, you have successfully cropped your video! So, this was all about how to crop videos using Wondershare Filmora software step by step. Using these easy steps anyone can simple edit their videos and save them in multiple formats without any loss of quality or data.

Step 2: Open the video you want to edit, in the timeline of your project. Right-click on the clip and select “Video Event Pan/Crop”.
Step 3: Alternatively, you can also select crop effect by pressing the icon in the clip. Or, select the Crop icon from the toolbar to add it to a track.
Step 4: The crop window will pop up. You can now drag the dotted rectangle to the ‘crop’ part of the video that you want. Press enter once done to apply the crop. You can also use the “Previous Frame” or “Next Frame” button to navigate to another frame of your video and drag the dotted rectangle from there, without changing your current frame.
Step 5: When you have finished adjusting the crop area, go to File > Export > Render Video. In the Render Video window that pops up, select the file format and quality of your render. You can also adjust the size, frame rate, and bitrate options from here. Once ready, press “Render” to begin rendering your video with the cropped area. This will give you a new output video where only the selected portion of the previous video is visible.
Sony Vegas Pro provides advanced options for users to easily crop videos in multiple formats like - HDV, AVCHD, and many more.
And… Voila! You have successfully cropped your video in Sony Vegas Pro.
Alternatively, there is a better way to crop a video and that is using the Wondershare Filmora. It is easier and user-friendly. It also has a lot of features that you can choose from.
An Easier Way to Crop a Video with Filmora
Filmora Video Editor is a free windows movie maker. It is one of the best windows movie makers available in the market. Filmora uses MPEG-4 AVC codec for editing videos and also offers many output formats like MP4, AVI, FLV, etc. In addition to these features, it includes a video stabilization algorithm, picture in picture editor, and many more. It is a free windows movie maker so anyone who has a windows computer can download and use this software.
It includes many interesting and useful features which you will not find in other movie makers like:
Support for multiple videos, audio, image formats: The program offers support for multiple videos, audio, image formats. Video stabilization algorithm: Video stabilization algorithm is used to remove unwanted shakes from your videos. Apart from this it also contains a picture-in-picture editor and many more useful features.
Filmora is an indie filmmaker’s go-to tool to create gorgeous-looking videos. No matter your skill level, it’s easy enough for beginners and powerful enough for professionals.
For Win 7 or later (64-bit)
For macOS 10.14 or later
Step-by-step on how to crop videos using Wondershare Filmora?
So, here are the steps to crop videos using Wondershare Filmora.
Step 1: Open the video you want to edit in Wondershare Filmora. Drag it and drop to timeline.
Step 2: In your timeline, select a portion of the video that needs cropping and click on ‘Crop and Zoom’ tab located at the bottom right corner of your screen. Here you can see the Crop and Zoom window where you can adjust the crop area. Adjust the size, shape of your video with these options.
Step 3: Once done with your adjustment click on ‘OK’ button to apply your crop. You can see that the selected portion of the video is now cropped.
Step 4: Finally, click on “Save” to save your video with cropping. Congratulations, you have successfully cropped your video! So, this was all about how to crop videos using Wondershare Filmora software step by step. Using these easy steps anyone can simple edit their videos and save them in multiple formats without any loss of quality or data.
How to Use LUTs in Adobe Premiere Pro
Create High-Quality Video - Wondershare Filmora
An easy and powerful YouTube video editor
Numerous video and audio effects to choose from
Detailed tutorials provided by the official channel
Do you wonder how some pictures or videos look so stunning? As you keep reading you will discover the secrets of achieving similar quality for your content. You need a video or photo-editing software such as Adobe Premiere Pro and LUTS. Premier Pro luts are file types that you use to make color corrections to your content. They are available in different formats, each with varying capabilities. Below is everything you need to improve your editing skills using Adobe’s software and premiere luts.

In this article
01 How does Premiere Pro Classify LUTS?
02 How to use Luts in Adobe Premiere Pro?
03 How to save and export your LUTS?
How does Premiere Pro Classify LUTS?
A premiere pro lut can fall into two categories depending on its core function. These are:
• Looks
These are premiere luts you use to make changes to your video or photo’s appearance and color scheme. They are available as presets under the Lumetri Color Panel and offer quick fixes to your content.
• Input Lut
You use these premiere pro luts to interpret log footage. Additionally, they are the first step of your color correcting process and work best on DSLR footage. However, keep reading to discover how to use luts in Adobe Premiere Pro.
How to use Luts in Adobe Premiere Pro?
Now that you are aware of how the program classifies the Luts, here is how you can correct your footage.
1. Get the latest version of the program
You can purchase and download the program from your region’s Adobe Website. The program is available for both macOS and Windows. However, it is quite heavy on the system. According to reports, the below requirements are sufficient.
- You need a processer with 8 cores and clock speeds upwards of 3.2GHz.
- 16 GB of Ram is ideal for macOS. However, you do require upwards of 32GB if you are running Windows.
- Graphics cards from Nvidia and AMD are best if you also want to improve the program’s performance. You request one that can handle the Adobe Premiere Pro from your supplier.
- Furthermore, invest in a high-capacity storage device to save your projects since some outputs can be very large after color correction. The program allows you to render 4K files which are the largest.
- Finally, the above requirements are sufficient to run the following versions OF Adobe Premiere Pro:
i. Adobe Premiere Pro 22.2
ii. Adobe Premiere Pro 22.1.2
iii. Adobe Premiere Pro 22.1.1
iv. Adobe Premiere Pro 22.0
2. Select the video you want and put it on the timeline

3. Premiere luts are accessible from two sections of the program
Input luts are available under the Basic Correction tab from the Lumetri Panel as above.
Alternatively, you can get them by accessing the Basic Correction tab from the Lumetri Section of the Effects Control Panel.
4. Then, open the Input LUT dropdown menu and choose the premiere lut you want
Adobe Premiere Pro has preset input LUTs. However, you can also add your own by clicking browse. Doing so opens your computer’s File Explorer and you can locate your custom premiere luts. The software applies the premiere lut, after which you can use the tools to make adjustments.
Additionally, Adobe Premiere Pro allows you to install custom LUT files to use. Below is the process for macOS users.
- Create these target directories in your Adobe Premiere Installation files. • For shared devices
/Library/Application Support/Adobe/Common/LUTs/Creative
/Library/Application Support/Adobe/Common/LUTs/Technical
• You need to create these files if you have administrator access.
/Users//Library/Application Support/Adobe/Common/LUTs/Creative
/Users//Library/Application Support/Adobe/Common/LUTs/Technical - Copy your custom LUT files to each of the folders.
- These will be available in your Lumetri Panel next time you launch Adobe Premiere Pro.
The process is the same for Windows Users. However, the target directories are different.
- For shared devices:
C:\ Program Files\ Adobe\Common\LUTs\Creative
C:\ Program Files\ Adobe\Common\LUTs\Creative - You need to create these files if you have administrator access.
C:\Users\yourusername\AppData\Roaming\Adobe\Common\LUTs\Creative
C:\Users\yourusername\AppData\Roaming\Adobe\Common\LUTs\Technical
Adobe Premiere Pro accepts .look and .cube file types, allowing you more creative freedom. Additionally, you can save and export any custom premiere luts to use in other projects. The next section offers a step-by-step guide on how to do that.
Finally, Looks allow you to make quick adjustments to your videos using the presets available on the Lumetri Panel. You can access these from the Effects Panel. Furthermore, it also allows you to preview the result. The intensity of the look can vary depending on where the slider is on the effects panel.
How to save and export your LUTS?
Most filmmakers prefer to save their premier luts for later use. Here is how to do it:
- Follow the above process through to step 5.
- Once you finish your editing, click on the Lumetri Pop Up menu and choose Save Preset.
- Fill the respective fields with your custom information and click OK. The program will then save the clip to the location you specify.
- You can save custom luts in the following ways:
Scale only applies the new lut to the video. As such, all other luts you use are deleted. Therefore, if your video is one hour, your custom settings will run through the clip’s entire length.
Anchor To In Point only saves the section of the clip where your custom settings are active. Additionally, the software will add all pre-existing luts to the section without scaling. - Additionally, you can repeat the process and export your LUTs in the following formats:
.look exports the LUT as an Adobe Premiere Pro file to a location on your device.
.cube saves the Lumetri preset you can use on other color grading software. For example, you can use your .cube custom lut with Filmora.

For Win 7 or later (64-bit)
For macOS 10.12 or later
Finally, the above procedures only apply to certain versions of Adobe Premiere Pro. They may differ across devices. This is because Adobe releases new updates regularly to fix bugs and offer new functionality. So, keep checking regularly for any changes.
Conclusion
●Adobe Premiere Pro offers you fun luts to enhance the quality of your video. Additionally, the option to render videos in 4K quality allows you to output creations of the highest quality. Additionally, the option to save and export your LUTS to use with other programs like Filmora, means there is no limit to what you can create. Here is a link to some LUTs you can try on your next edit.
Do you wonder how some pictures or videos look so stunning? As you keep reading you will discover the secrets of achieving similar quality for your content. You need a video or photo-editing software such as Adobe Premiere Pro and LUTS. Premier Pro luts are file types that you use to make color corrections to your content. They are available in different formats, each with varying capabilities. Below is everything you need to improve your editing skills using Adobe’s software and premiere luts.
In this article
01 How does Premiere Pro Classify LUTS?
02 How to use Luts in Adobe Premiere Pro?
03 How to save and export your LUTS?
How does Premiere Pro Classify LUTS?
A premiere pro lut can fall into two categories depending on its core function. These are:
• Looks
These are premiere luts you use to make changes to your video or photo’s appearance and color scheme. They are available as presets under the Lumetri Color Panel and offer quick fixes to your content.
• Input Lut
You use these premiere pro luts to interpret log footage. Additionally, they are the first step of your color correcting process and work best on DSLR footage. However, keep reading to discover how to use luts in Adobe Premiere Pro.
How to use Luts in Adobe Premiere Pro?
Now that you are aware of how the program classifies the Luts, here is how you can correct your footage.
1. Get the latest version of the program
You can purchase and download the program from your region’s Adobe Website. The program is available for both macOS and Windows. However, it is quite heavy on the system. According to reports, the below requirements are sufficient.
- You need a processer with 8 cores and clock speeds upwards of 3.2GHz.
- 16 GB of Ram is ideal for macOS. However, you do require upwards of 32GB if you are running Windows.
- Graphics cards from Nvidia and AMD are best if you also want to improve the program’s performance. You request one that can handle the Adobe Premiere Pro from your supplier.
- Furthermore, invest in a high-capacity storage device to save your projects since some outputs can be very large after color correction. The program allows you to render 4K files which are the largest.
- Finally, the above requirements are sufficient to run the following versions OF Adobe Premiere Pro:
i. Adobe Premiere Pro 22.2
ii. Adobe Premiere Pro 22.1.2
iii. Adobe Premiere Pro 22.1.1
iv. Adobe Premiere Pro 22.0
2. Select the video you want and put it on the timeline
3. Premiere luts are accessible from two sections of the program
Input luts are available under the Basic Correction tab from the Lumetri Panel as above.
Alternatively, you can get them by accessing the Basic Correction tab from the Lumetri Section of the Effects Control Panel.
4. Then, open the Input LUT dropdown menu and choose the premiere lut you want
Adobe Premiere Pro has preset input LUTs. However, you can also add your own by clicking browse. Doing so opens your computer’s File Explorer and you can locate your custom premiere luts. The software applies the premiere lut, after which you can use the tools to make adjustments.
Additionally, Adobe Premiere Pro allows you to install custom LUT files to use. Below is the process for macOS users.
- Create these target directories in your Adobe Premiere Installation files. • For shared devices
/Library/Application Support/Adobe/Common/LUTs/Creative
/Library/Application Support/Adobe/Common/LUTs/Technical
• You need to create these files if you have administrator access.
/Users//Library/Application Support/Adobe/Common/LUTs/Creative
/Users//Library/Application Support/Adobe/Common/LUTs/Technical - Copy your custom LUT files to each of the folders.
- These will be available in your Lumetri Panel next time you launch Adobe Premiere Pro.
The process is the same for Windows Users. However, the target directories are different.
- For shared devices:
C:\ Program Files\ Adobe\Common\LUTs\Creative
C:\ Program Files\ Adobe\Common\LUTs\Creative - You need to create these files if you have administrator access.
C:\Users\yourusername\AppData\Roaming\Adobe\Common\LUTs\Creative
C:\Users\yourusername\AppData\Roaming\Adobe\Common\LUTs\Technical
Adobe Premiere Pro accepts .look and .cube file types, allowing you more creative freedom. Additionally, you can save and export any custom premiere luts to use in other projects. The next section offers a step-by-step guide on how to do that.
Finally, Looks allow you to make quick adjustments to your videos using the presets available on the Lumetri Panel. You can access these from the Effects Panel. Furthermore, it also allows you to preview the result. The intensity of the look can vary depending on where the slider is on the effects panel.
How to save and export your LUTS?
Most filmmakers prefer to save their premier luts for later use. Here is how to do it:
- Follow the above process through to step 5.
- Once you finish your editing, click on the Lumetri Pop Up menu and choose Save Preset.
- Fill the respective fields with your custom information and click OK. The program will then save the clip to the location you specify.
- You can save custom luts in the following ways:
Scale only applies the new lut to the video. As such, all other luts you use are deleted. Therefore, if your video is one hour, your custom settings will run through the clip’s entire length.
Anchor To In Point only saves the section of the clip where your custom settings are active. Additionally, the software will add all pre-existing luts to the section without scaling. - Additionally, you can repeat the process and export your LUTs in the following formats:
.look exports the LUT as an Adobe Premiere Pro file to a location on your device.
.cube saves the Lumetri preset you can use on other color grading software. For example, you can use your .cube custom lut with Filmora.
For Win 7 or later (64-bit)
For macOS 10.12 or later
Finally, the above procedures only apply to certain versions of Adobe Premiere Pro. They may differ across devices. This is because Adobe releases new updates regularly to fix bugs and offer new functionality. So, keep checking regularly for any changes.
Conclusion
●Adobe Premiere Pro offers you fun luts to enhance the quality of your video. Additionally, the option to render videos in 4K quality allows you to output creations of the highest quality. Additionally, the option to save and export your LUTS to use with other programs like Filmora, means there is no limit to what you can create. Here is a link to some LUTs you can try on your next edit.
This Article Is Regarding the Guidance About the Split of the Audio From the Video in Premiere Pro. And Also, the Discussion of the Wondershare Fllmora as the Replacement and How to Perform a Similar Task in It
Adobe Premiere Pro is mainly designed and helpful for all video editors looking for options to enhance their tasks. It is beneficial for transforming any random video into an awesome video. There are different tools so you can experience your creative skills on Premiere Pro. It enables the fine-tuning of the audio, adjustments of the colourings, and supports various formats.
There is an integration of this software with other products of Adobe. So, it is pretty easy for you to transfer the task from one adobe software to another. This helps in editing and using the complete outcome according to the needs. This article is regarding the guidance about the split of the audio from the video in Premiere Pro. And also, the discussion of the Wondershare Fllmora as the replacement and how to perform a similar task in it.
How is it possible to split the audio from the video in Adobe Premiere Pro?
The Adobe Premiere Pro is quite popular for its tools and works smoothly. The whole interface also helps increase the entire work’s productivity, efficiency, and effectiveness. It is very easy to open several projects at the exact timings. It is very simple and easy to add the clips and even extract the audio from the video clips. Please take a step by step below to extract the audio from your video files, whether it is on Windows or Mac operating system.
Step 1: The first step is the creation of the project. Go to the File tab on the toolbar and select the New option.

Step 2: Import the video that you want to be mute. File à Import.

Step 3: From the project panel, drag and drop the project in the timeline panel.

Step 4: Now is the time to select the video clip from the timeline. Click on the video layer for the selection.

Step 5: Right-click on the video presentation on the timeline and select the option of “unlink” from the drop-down menu.

Step 6: Now delete the audio from the video you want to separate. For deleting the audio, either select the layer and press the “delete” key. Or you can choose the layer from audio from which you are unlinking from the video and choose the option of “Clear” from the menu.
You have received success in separating the audio from the video clip with the help of Adobe Premiere Pro. It is easy to edit the track as your own choice. Export options are also available, so you can share them wherever you want.

One easier way to separate the audio from the video clips
It is a fact that Premiere Pro is an extraordinary software, but unluckily, its features depend on the subscription monthly or yearly. It requires high storage memory from your system. While working on this software, it increases the complexity.
That’s the reason the graphic designers and video editor are always in search of feasible and straight forward editing software. Filmora Video Editor is the right solution of all the issues.
It is light to the systems and all the features are freely available without any subscription. No matter which operating system you are using Wondershare Filmora is easily available to run on it. Whether it is separating the audio or removing the background, each and everything is simple for handling.
For Win 7 or later (64-bit)
For macOS 10.14 or later
Features:
- Preview of using the tools before applying the changes
- Numerous tools are available for customizing the videos and images
- Splitting of the clips and screens as well
- Involving of the graphics and animation
- Simply drag and drop the videos in the timeline
- Mixing of the audio
- Removing the noise
Under this heading are the steps for guiding you regarding the extraction or separation of the audio from your videos.
Step :1
Simply launch the Wondershare Filmora after it installs your system. If it is already installed, then start creating the new project.
Step:2
Import the file in the timeline you want to remove or separate the audio. Go to the File menuàimport the media file or press the keys of CTRL+I on the keyboard.

Step :3
Drag and drop the video clip in the timeline to proceed with editing.

Step:4
Right-click on your video and choose the option of “Detach Audio”. Then the new track of the audio appears in the timeline.

Step:5
Select the audio you have just received above and select the option of “Delete”.

Step:6
Click on the button “Export” for exporting the video.

Step:7
Please choose the format of your choice, name the file and choose the folder where you want to save it. Even setting the resolution, decoding the video and frame rate is also possible. These options are under the settings button. Click on “Export” to begin the exporting of the video. Wondershare Filmora supports a number of video formats, as you can see in the picture below. So, it is also possible to save the video in the format of your choice. It supports 4K quality.

Every website, blog or social media page doesn’t look appealing without the videos. So, the video plays an essential role in showing your presence on the web, and for this purpose, you need the most straightforward editing software. Wondershare Filmora is the proper selection as it has all the tools no matter you are familiar with it or not.
It can completely transform your videos with amazing tools and features that bring a WOW factor to your images and videos. There is a whole library for effects; whether for transition or animation; everything is available. Start using Wondershare Filmora today and have fun.
Step 2: Import the video that you want to be mute. File à Import.
Step 3: From the project panel, drag and drop the project in the timeline panel.
Step 4: Now is the time to select the video clip from the timeline. Click on the video layer for the selection.
Step 5: Right-click on the video presentation on the timeline and select the option of “unlink” from the drop-down menu.
Step 6: Now delete the audio from the video you want to separate. For deleting the audio, either select the layer and press the “delete” key. Or you can choose the layer from audio from which you are unlinking from the video and choose the option of “Clear” from the menu.
You have received success in separating the audio from the video clip with the help of Adobe Premiere Pro. It is easy to edit the track as your own choice. Export options are also available, so you can share them wherever you want.
One easier way to separate the audio from the video clips
It is a fact that Premiere Pro is an extraordinary software, but unluckily, its features depend on the subscription monthly or yearly. It requires high storage memory from your system. While working on this software, it increases the complexity.
That’s the reason the graphic designers and video editor are always in search of feasible and straight forward editing software. Filmora Video Editor is the right solution of all the issues.
It is light to the systems and all the features are freely available without any subscription. No matter which operating system you are using Wondershare Filmora is easily available to run on it. Whether it is separating the audio or removing the background, each and everything is simple for handling.
For Win 7 or later (64-bit)
For macOS 10.14 or later
Features:
- Preview of using the tools before applying the changes
- Numerous tools are available for customizing the videos and images
- Splitting of the clips and screens as well
- Involving of the graphics and animation
- Simply drag and drop the videos in the timeline
- Mixing of the audio
- Removing the noise
Under this heading are the steps for guiding you regarding the extraction or separation of the audio from your videos.
Step :1
Simply launch the Wondershare Filmora after it installs your system. If it is already installed, then start creating the new project.
Step:2
Import the file in the timeline you want to remove or separate the audio. Go to the File menuàimport the media file or press the keys of CTRL+I on the keyboard.
Step :3
Drag and drop the video clip in the timeline to proceed with editing.
Step:4
Right-click on your video and choose the option of “Detach Audio”. Then the new track of the audio appears in the timeline.
Step:5
Select the audio you have just received above and select the option of “Delete”.
Step:6
Click on the button “Export” for exporting the video.
Step:7
Please choose the format of your choice, name the file and choose the folder where you want to save it. Even setting the resolution, decoding the video and frame rate is also possible. These options are under the settings button. Click on “Export” to begin the exporting of the video. Wondershare Filmora supports a number of video formats, as you can see in the picture below. So, it is also possible to save the video in the format of your choice. It supports 4K quality.
Every website, blog or social media page doesn’t look appealing without the videos. So, the video plays an essential role in showing your presence on the web, and for this purpose, you need the most straightforward editing software. Wondershare Filmora is the proper selection as it has all the tools no matter you are familiar with it or not.
It can completely transform your videos with amazing tools and features that bring a WOW factor to your images and videos. There is a whole library for effects; whether for transition or animation; everything is available. Start using Wondershare Filmora today and have fun.
Best 12 AI Video Generators to Pick
Top 12 AI Video Generators to Pick
An easy yet powerful editor
Numerous effects to choose from
Detailed tutorials provided by the official channel
It is a fact that video editing can sometimes be laborious and time-consuming. Even when using the best video editing software, it still requires human effort to get an impressive result. But luckily for us, the invention of the AI video generator has now made a lot of things easier. The AI video generators are the next level as they allow users to automate video creation and editing without compromising quality.
This article will discuss the best AI text to video generators for free that will help make your life easier. Thus, this will soon help you create engaging videos for your personal or business use in just a few clicks.
In this article
01 [What Is an AI Video Generator](#Part 1)
02 [How Does the AI Video Maker Work](#Part 2)
03 [The 12 Best AI Video Generator](#Part 3)
Part 1 What Is an AI Video Generator
AI video generator is the process of using artificial intelligence (AI) to create professional videos. With an AI video generator for free, you do not need any equipment, an editing studio, or a premium video editing application to be able to create a video.
All that is required is that you feed input to the AI tool, and it will automatically help you generate a video. You can edit a blog post into a video within a few minutes with any of these tools listed. In addition, it won’t incur any high costs for video productions because the AI tool will help you carry out most of the tasks.
Part 2 How Does the AI Video Maker Work
Professional AI video editors, are trained by showing them various examples and then providing them feedback by telling them what is wrong and good. The machine then takes note of it and remembers it. However, as the machine continues to learn, it picks the results and then improves itself based on the feedback. Ultimately the device becomes very good or even better than the human that creates it. Here are some breakdowns of the ways video editors work:
● The AI video maker tool, can augment your videos with AR effects, including AR masks, face and color filters, face touch-ups, etc. The tool uses neural networks and computer vision to interrupt, extract, and understand the video content.
● This AI subtitle generator can allow interviews to be delivered and analyzed to the editor fully transcribed, searchable by word or even sentences. Video editors can use AI for keyword extraction, speech-to-text conversion, facial recognition, sentiment analysis, image recognition, and emotion detection.
● AI-video editors can pull sections of a video clip from any source automatically. These AI systems can also detect emotions that allow the creation of warm, appealing videos.
Part 3 The 12 Best AI Video Generator
There are top AI video generators for free that you can choose from for your video editing. These video editors complete work quickly and easily. In addition, if you need video editing software to help you edit your generated videos after generating them, we recommend that you try out Filmora from Wondershare. Wondershare Filmora Video Editor is a perfect video editing software with tons of new features, like keyframing, split video, and adding animations and effects to help you carry out your video editing seamlessly.
For Win 7 or later (64-bit)
For macOS 10.12 or later
01Sora
Sora is an artificial intelligence model that generates videos with textual descriptions, developed by OpenAI. It is a US-based artificial intelligence research organization. Sora stands out as a game-changing platform. It can seamlessly convert text into captivating videos, blending convenience with creativity.
Features
● With Sora, transforming written content into engaging videos is swift and efficient.
● Unlike traditional video editing tools, Sora is designed for users of all levels, eliminating the need for prior video production experience.
● Sora offers a plethora of customization options.
● Generates videos up to 60 seconds long
● Generates complex scenes with multiple characters, motions, and accurate details of the subject
● Creates multiple shots within a single generated video
● Generating videos from text instructions by utilizing the recaptioning technique from DALL·E 3
Pros
● Highly realistic video generation with impressive visual quality
● Text-based control over the content of the video, allowing for precise video generation
● A highly versatile tool that handles a wide range of prompts and styles
Cons
● Lacks implicit understanding of the rules of physics
This software is best realistic and imaginative scenes.
02Wondershare Filmora
Wondershare Filmora is a highly efficient video editing software that comes with AI text to video generation. The software is friendly to both beginner and intermediate creations, offering you a wide range of intuitive features.
Pricing
● Subscription Plan: US$19.99 per month
● Cross-Platform Plan: US$69.99 per year
● Perpetual Plan: US$19.99 Onetime Payment
Features
● User-friendly interface that is easy to learn and use
● Wide range of features for creating and editing videos, including transitions, effects, and text overlays.
● Large stock library of royalty-free music and stock footage
● Readily available templates and presets to quickly generate videos
● Easily export videos directly to popular platforms like YouTube and TikTok
Pros
● User-friendly interface with a learning curve suitable for all kinds of creators
● Extensive library of free and paid assets to enhance your videos
● Wide range of features for video editing
Cons
● Lacks advanced features for AI video prompt generation
This software is best for video creation and editing for freelancers, SMBs, markters.
For Win 7 or later (64-bit)
For macOS 10.12 or later
How to Use Filmora’s AI to Video Feature : AI Video Prompt Sample
Here is a brief step-by-step guide on how to use Filmora to generate AI videos. The process is as simple as writing a text prompt and getting the video ready:
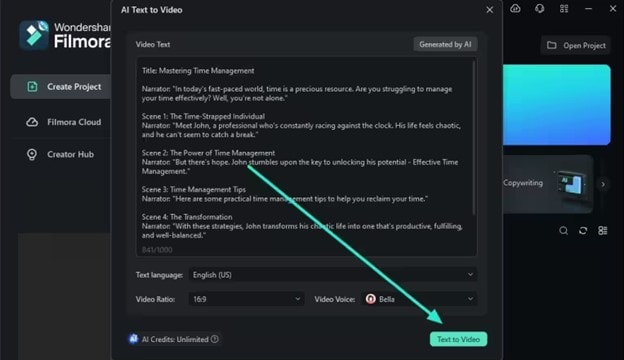
Step 1: Lauch Filmora AI Text-to-Video Features
Once you launch on your PC Filmora, click the AI Text-to-Video option to start the video generation process.
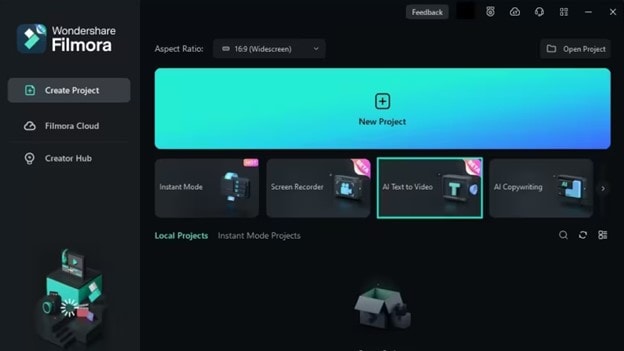
Step 2: Add a Text Prompt or Video Script
On the AI Text-to-Video video, add your text prompt. You can also modify other settings such as text language and video voice. Then click the Text to Video button at the bottom to prompt Filmora to generate the video.
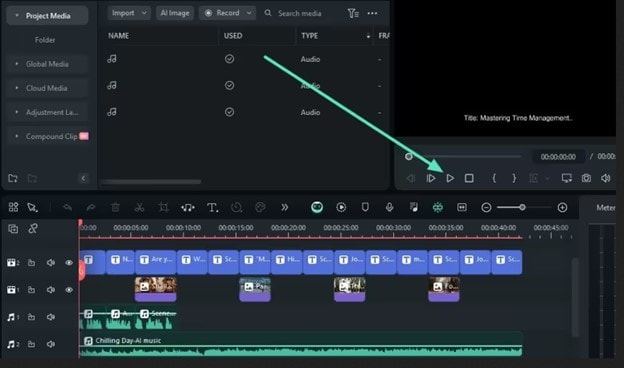
Step 3: Preview the Generated Video
Filmora generates the video based on your prompt and a new editing window. You can now a preview video and make any further editing needed.
AI Video Prompt Sample Using Filmora
Prompt: A young man at his 20s is sitting on a piece of cloud in the sky, reading a book.
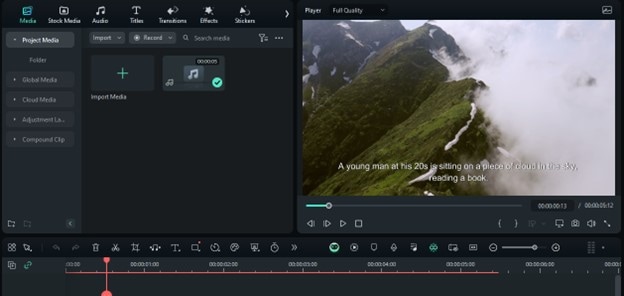
When prompted to generate a video of a young man in his 20s sitting on a piece of cloud in the sky, reading a book, Filmora generated a narration video from the point of view of the young man as shown above.
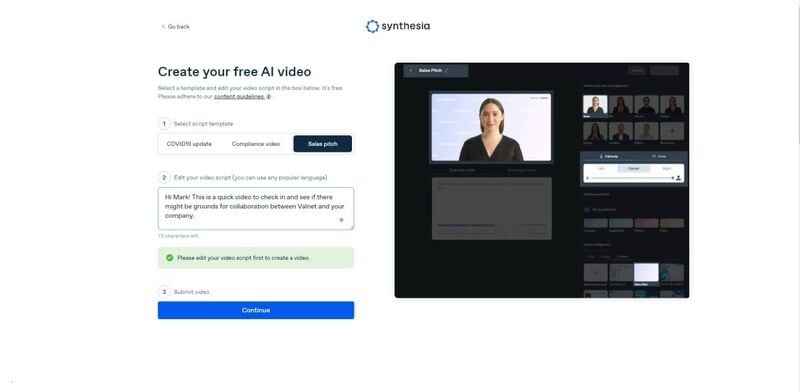
03Synthesia
This is a web-app video generator AI from a text supporting AI-driven video creation used by experts and beginners. Rather than filming content utilizing a microphone and camera, this software AI technology helps to simulate human presenters and real-life videos. Thus, it saves video creators hours of work.
Pricing
● Personal Plan: $30 monthly
● Corporate Plan: custom pricing
Features
● Over 40 supported languages
● Allows template customizations
● Allows users to make their avatars
● It has 50 built-in presenters
● Allows you to create realistic AI videos
● Offers live chat support
● Allows download in Mp4
● Enables users to create videos automatically using integrations with APIs
● Allows the addition of backgrounds
● Users can share their videos on other social media platforms
● Allows the addition of images, shapes, and texts to videos
Pros
● Great for beginners are you do not need prior knowledge
Cons
● It supports only front-facing poses
This software is best for freelancers, agencies, marketers, and content creators looking to create high-quality video content.
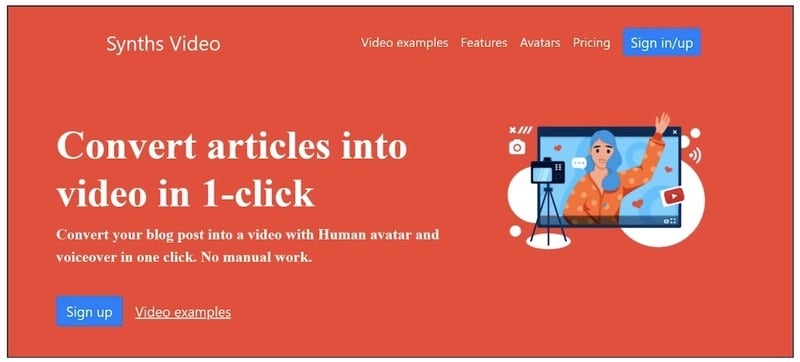
04Synths Video
This is an AI video-generating tool primarily concerned with helping users drive leads and traffic from YouTube. It is an AI YouTube title generator that allows users to create professional-looking videos from blog posts on YouTube.
Pricing
● YouTube Start: $399 monthly.
● Premium Custom Package: Custom Pricing.
Features
● Video generation from URLs
● It has built-in integration with YouTube
● 20+ avatars are available
● Allows video upload in HD quality
● Over 40+ languages supported
Cons
● No free plan is available
Best for the owners of YouTube channels.
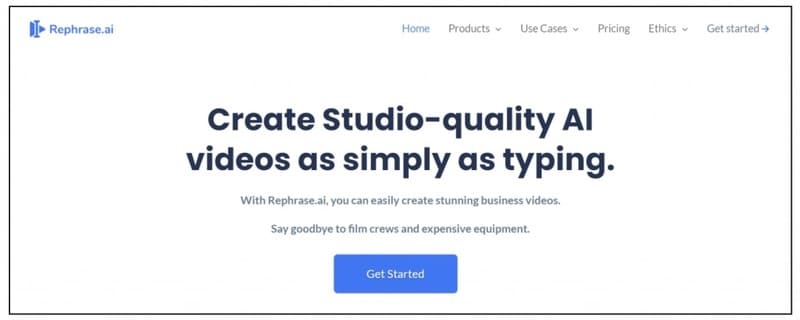
05Rephrase.ai
Rephrase.ai is a video editing software that uses a sophisticated deep learning engine to create professional videos.
Pricing
● Starter plan: $25 monthly
● Enterprise plan: Custom Pricing
Features
● Produces high-resolution videos
● Supports functionality for presenter customization
● Multiple-use cases supported
● Allows users to select their preferred AI voice
● Support varieties of video editing tools
Cons
● It has a complex pricing plan
It is best for agencies seeking to create customizable and personalized professional videos for marketing and advertising.
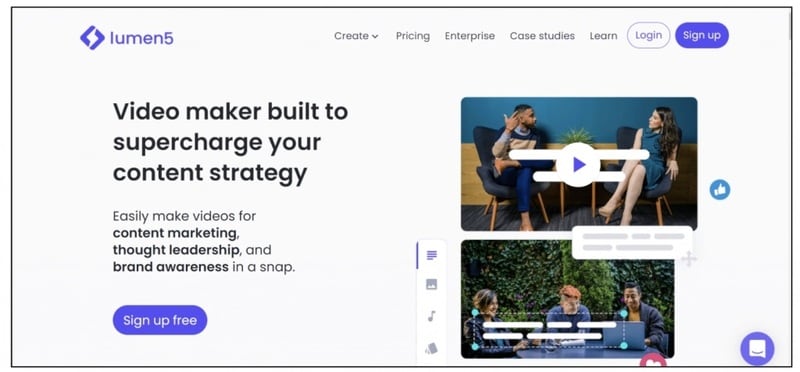
06Lumen5
Lumen5 is one of the top AI video-creating tools available for beginners and uses Natural Language Processing algorithms to convert text into high-quality videos.
Pricing
● Free Plan
● Creator plan: $15 monthly.
● Premium plan: $79 monthly.
● Business plan: $199 monthly.
● Enterprise plan: Custom Pricing.
Features
● Transforms text to video within minutes
● Numerous templates are available
● Allows customization of videos resolution, color, and font
Cons
● Limited features in the free plan
Best for beginners who are looking to generate short-duration of videos for social media platforms.
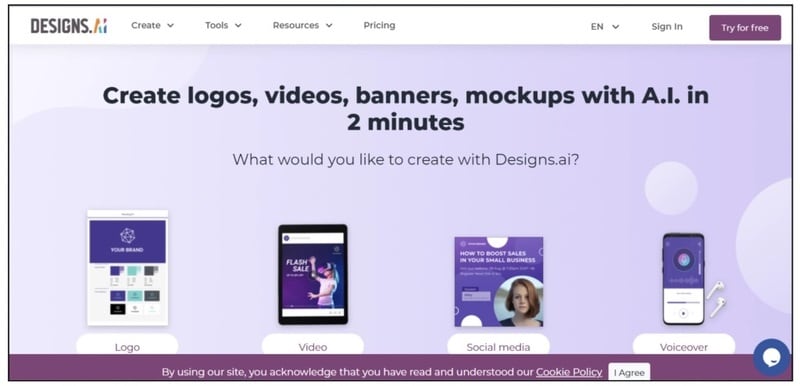
07Designs.ai
This is an AI-powered video maker that is useful for users that do not have any experience in design.
Pricing
● Basic plan: $29 monthly
● Pro plan: $69 monthly
● Enterprise plan: Custom Pricing
Features
● It has an attractive and modern user interface
● Allows the creation of videos from pre-designed templates
● Helps video creation from your custom video files
● Over 20 languages supported
● Coverts texts to video
Cons
● Only allows video download in a paid plan.
This tool is best for creators and designers who are willing to create quick AI videos.
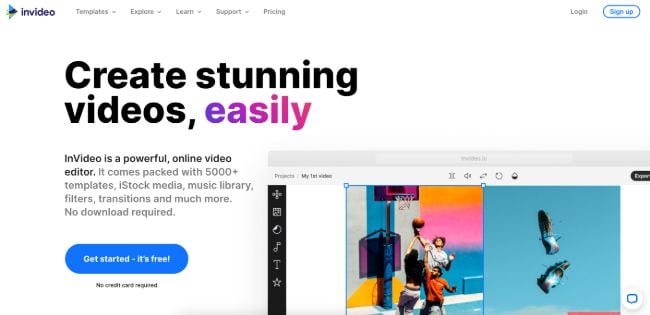
08InVideo
This is a perfect AI generator used for creating explainers or marketing videos easily and quickly. The platform helps produce high-quality videos with varieties of style options to make the ideal video according to your requirements.
Pricing
● Free: Free with watermarks on your videos.
● Business: $15 monthly with no watermarks.
● Unlimited: $30 monthly with unlimited video exports.
Features
● Very affordable
● Comprises an online drag-and-drop video editor
● Over 50 AI-powered themes that help to convert text to video in 3 minutes
● Full iStock media library available in all plans
Cons
● Requires internet connection to use
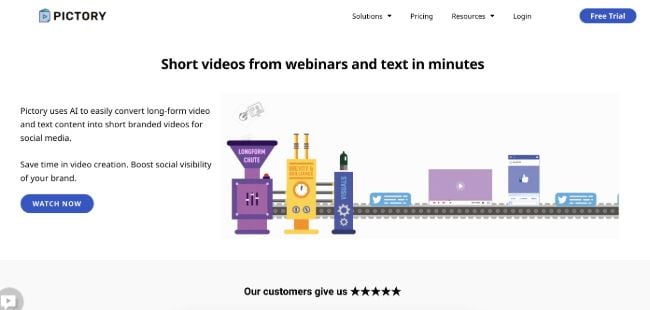
09Pictory.ai
This AI subtitle generator converts your text and turns it into an AI-generated video. This program is simple and easy to get started, requiring no software download. Paste your text into the editor and get started.
Pricing
● Free trial: Only use 3 videos.
● Standard Plan: $29 per month.
● Premium Plan: $59 per month.
Features
● It has a simple user interface.
● Over 6M licensed Shutterstock available
● Unlimited and affordable videos in the premium plan
Cons
● It is quite expensive compared to other tools
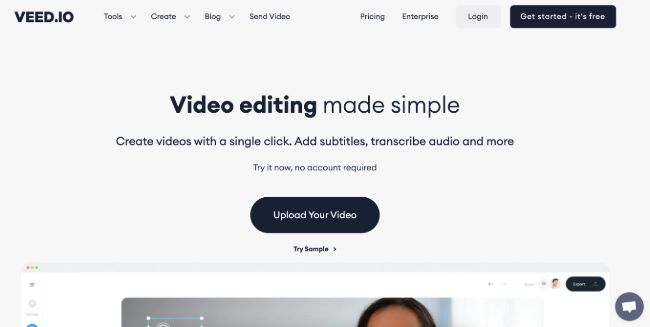
10Veed.io
Veed.io is not specifically an AI video generator but a video editing tool that utilizes AI to simplify the entire process and allows users to create high-quality videos within seconds.
Pricing
● Free: Free with watermarks!
● Basic: $18 monthly.
● Pro: $30 monthly
Features
● It has lots of video templates and a music library to choose
● Easy to learn, user-friendly interface
● Video rendering times are quite fast
● The basic plan has a high-quality resolution
Cons
● Not a typical AI video generator
● Not for beginners
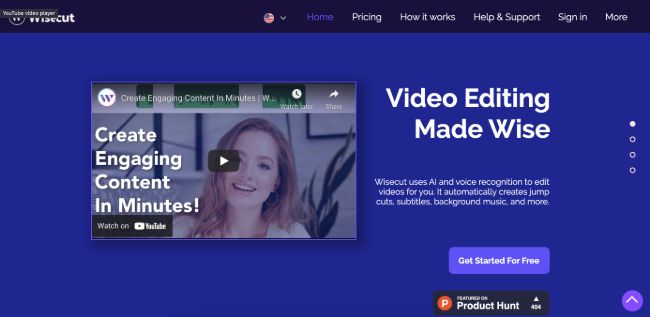
11Wisecut
This free AI video generator platform allows you to turn your text into video. Type in your text and choose a voice actor, and then Wisecut will take care of the rest. It offers excellent editing tools for users to tweak your video until it’s just right.
Pricing
● Basic: Free.
● Professional: $57 per month.
Features
● This platform is easy to use
● It has a simple drag and drops user-interface
● Allows auto subtitles and auto cut silences
● Allows integration with YouTube
● Subtitles auto-translation
● Excellent video quality
Cons
● Has limited effects
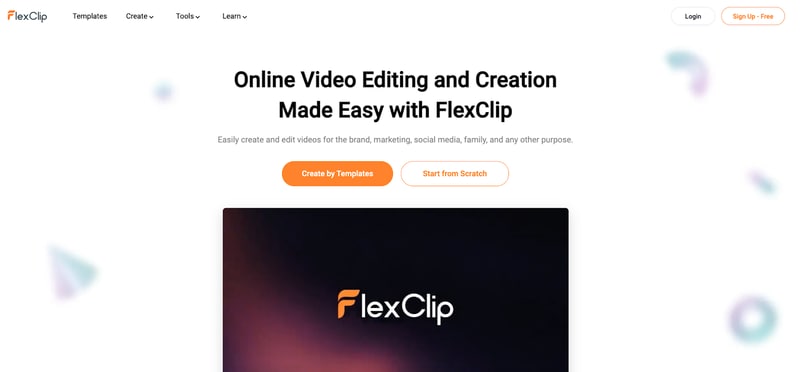
12Flexclip
FlexClip makes video creation and editing easy with-it millions of royalty-free stock media and thousands of templates for you to choose from.
Pricing
● Free
● Basic: $5.99 per month.
● Plus: $9.99 per month
● Business: $19.99 per month.
Features
● Thousands of available templates
● Simple tool for creating and editing videos
● Use for creating engaging videos
● Provides millions of royalty stock media
● Versatile and Flexible
Cons
● Not for beginners
● Ending Thoughts →
● In this post, we have listed the top text to video generators that you can choose from to help you perform tasks within minutes.
● The report also explains all you need to know about video AI generators and recommends Filmora as a perfect tool for editing your videos.
It is a fact that video editing can sometimes be laborious and time-consuming. Even when using the best video editing software, it still requires human effort to get an impressive result. But luckily for us, the invention of the AI video generator has now made a lot of things easier. The AI video generators are the next level as they allow users to automate video creation and editing without compromising quality.
This article will discuss the best AI text to video generators for free that will help make your life easier. Thus, this will soon help you create engaging videos for your personal or business use in just a few clicks.
In this article
01 [What Is an AI Video Generator](#Part 1)
02 [How Does the AI Video Maker Work](#Part 2)
03 [The 12 Best AI Video Generator](#Part 3)
Part 1 What Is an AI Video Generator
AI video generator is the process of using artificial intelligence (AI) to create professional videos. With an AI video generator for free, you do not need any equipment, an editing studio, or a premium video editing application to be able to create a video.
All that is required is that you feed input to the AI tool, and it will automatically help you generate a video. You can edit a blog post into a video within a few minutes with any of these tools listed. In addition, it won’t incur any high costs for video productions because the AI tool will help you carry out most of the tasks.
Part 2 How Does the AI Video Maker Work
Professional AI video editors, are trained by showing them various examples and then providing them feedback by telling them what is wrong and good. The machine then takes note of it and remembers it. However, as the machine continues to learn, it picks the results and then improves itself based on the feedback. Ultimately the device becomes very good or even better than the human that creates it. Here are some breakdowns of the ways video editors work:
● The AI video maker tool, can augment your videos with AR effects, including AR masks, face and color filters, face touch-ups, etc. The tool uses neural networks and computer vision to interrupt, extract, and understand the video content.
● This AI subtitle generator can allow interviews to be delivered and analyzed to the editor fully transcribed, searchable by word or even sentences. Video editors can use AI for keyword extraction, speech-to-text conversion, facial recognition, sentiment analysis, image recognition, and emotion detection.
● AI-video editors can pull sections of a video clip from any source automatically. These AI systems can also detect emotions that allow the creation of warm, appealing videos.
Part 3 The 12 Best AI Video Generator
There are top AI video generators for free that you can choose from for your video editing. These video editors complete work quickly and easily. In addition, if you need video editing software to help you edit your generated videos after generating them, we recommend that you try out Filmora from Wondershare. Wondershare Filmora Video Editor is a perfect video editing software with tons of new features, like keyframing, split video, and adding animations and effects to help you carry out your video editing seamlessly.
For Win 7 or later (64-bit)
For macOS 10.12 or later
01Sora
Sora is an artificial intelligence model that generates videos with textual descriptions, developed by OpenAI. It is a US-based artificial intelligence research organization. Sora stands out as a game-changing platform. It can seamlessly convert text into captivating videos, blending convenience with creativity.
Features
● With Sora, transforming written content into engaging videos is swift and efficient.
● Unlike traditional video editing tools, Sora is designed for users of all levels, eliminating the need for prior video production experience.
● Sora offers a plethora of customization options.
● Generates videos up to 60 seconds long
● Generates complex scenes with multiple characters, motions, and accurate details of the subject
● Creates multiple shots within a single generated video
● Generating videos from text instructions by utilizing the recaptioning technique from DALL·E 3
Pros
● Highly realistic video generation with impressive visual quality
● Text-based control over the content of the video, allowing for precise video generation
● A highly versatile tool that handles a wide range of prompts and styles
Cons
● Lacks implicit understanding of the rules of physics
This software is best realistic and imaginative scenes.
02Wondershare Filmora
Wondershare Filmora is a highly efficient video editing software that comes with AI text to video generation. The software is friendly to both beginner and intermediate creations, offering you a wide range of intuitive features.
Pricing
● Subscription Plan: US$19.99 per month
● Cross-Platform Plan: US$69.99 per year
● Perpetual Plan: US$19.99 Onetime Payment
Features
● User-friendly interface that is easy to learn and use
● Wide range of features for creating and editing videos, including transitions, effects, and text overlays.
● Large stock library of royalty-free music and stock footage
● Readily available templates and presets to quickly generate videos
● Easily export videos directly to popular platforms like YouTube and TikTok
Pros
● User-friendly interface with a learning curve suitable for all kinds of creators
● Extensive library of free and paid assets to enhance your videos
● Wide range of features for video editing
Cons
● Lacks advanced features for AI video prompt generation
This software is best for video creation and editing for freelancers, SMBs, markters.
For Win 7 or later (64-bit)
For macOS 10.12 or later
How to Use Filmora’s AI to Video Feature : AI Video Prompt Sample
Here is a brief step-by-step guide on how to use Filmora to generate AI videos. The process is as simple as writing a text prompt and getting the video ready:
Step 1: Lauch Filmora AI Text-to-Video Features
Once you launch on your PC Filmora, click the AI Text-to-Video option to start the video generation process.
Step 2: Add a Text Prompt or Video Script
On the AI Text-to-Video video, add your text prompt. You can also modify other settings such as text language and video voice. Then click the Text to Video button at the bottom to prompt Filmora to generate the video.
Step 3: Preview the Generated Video
Filmora generates the video based on your prompt and a new editing window. You can now a preview video and make any further editing needed.
AI Video Prompt Sample Using Filmora
Prompt: A young man at his 20s is sitting on a piece of cloud in the sky, reading a book.
When prompted to generate a video of a young man in his 20s sitting on a piece of cloud in the sky, reading a book, Filmora generated a narration video from the point of view of the young man as shown above.
03Synthesia
This is a web-app video generator AI from a text supporting AI-driven video creation used by experts and beginners. Rather than filming content utilizing a microphone and camera, this software AI technology helps to simulate human presenters and real-life videos. Thus, it saves video creators hours of work.
Pricing
● Personal Plan: $30 monthly
● Corporate Plan: custom pricing
Features
● Over 40 supported languages
● Allows template customizations
● Allows users to make their avatars
● It has 50 built-in presenters
● Allows you to create realistic AI videos
● Offers live chat support
● Allows download in Mp4
● Enables users to create videos automatically using integrations with APIs
● Allows the addition of backgrounds
● Users can share their videos on other social media platforms
● Allows the addition of images, shapes, and texts to videos
Pros
● Great for beginners are you do not need prior knowledge
Cons
● It supports only front-facing poses
This software is best for freelancers, agencies, marketers, and content creators looking to create high-quality video content.
04Synths Video
This is an AI video-generating tool primarily concerned with helping users drive leads and traffic from YouTube. It is an AI YouTube title generator that allows users to create professional-looking videos from blog posts on YouTube.
Pricing
● YouTube Start: $399 monthly.
● Premium Custom Package: Custom Pricing.
Features
● Video generation from URLs
● It has built-in integration with YouTube
● 20+ avatars are available
● Allows video upload in HD quality
● Over 40+ languages supported
Cons
● No free plan is available
Best for the owners of YouTube channels.
05Rephrase.ai
Rephrase.ai is a video editing software that uses a sophisticated deep learning engine to create professional videos.
Pricing
● Starter plan: $25 monthly
● Enterprise plan: Custom Pricing
Features
● Produces high-resolution videos
● Supports functionality for presenter customization
● Multiple-use cases supported
● Allows users to select their preferred AI voice
● Support varieties of video editing tools
Cons
● It has a complex pricing plan
It is best for agencies seeking to create customizable and personalized professional videos for marketing and advertising.
06Lumen5
Lumen5 is one of the top AI video-creating tools available for beginners and uses Natural Language Processing algorithms to convert text into high-quality videos.
Pricing
● Free Plan
● Creator plan: $15 monthly.
● Premium plan: $79 monthly.
● Business plan: $199 monthly.
● Enterprise plan: Custom Pricing.
Features
● Transforms text to video within minutes
● Numerous templates are available
● Allows customization of videos resolution, color, and font
Cons
● Limited features in the free plan
Best for beginners who are looking to generate short-duration of videos for social media platforms.
07Designs.ai
This is an AI-powered video maker that is useful for users that do not have any experience in design.
Pricing
● Basic plan: $29 monthly
● Pro plan: $69 monthly
● Enterprise plan: Custom Pricing
Features
● It has an attractive and modern user interface
● Allows the creation of videos from pre-designed templates
● Helps video creation from your custom video files
● Over 20 languages supported
● Coverts texts to video
Cons
● Only allows video download in a paid plan.
This tool is best for creators and designers who are willing to create quick AI videos.
08InVideo
This is a perfect AI generator used for creating explainers or marketing videos easily and quickly. The platform helps produce high-quality videos with varieties of style options to make the ideal video according to your requirements.
Pricing
● Free: Free with watermarks on your videos.
● Business: $15 monthly with no watermarks.
● Unlimited: $30 monthly with unlimited video exports.
Features
● Very affordable
● Comprises an online drag-and-drop video editor
● Over 50 AI-powered themes that help to convert text to video in 3 minutes
● Full iStock media library available in all plans
Cons
● Requires internet connection to use
09Pictory.ai
This AI subtitle generator converts your text and turns it into an AI-generated video. This program is simple and easy to get started, requiring no software download. Paste your text into the editor and get started.
Pricing
● Free trial: Only use 3 videos.
● Standard Plan: $29 per month.
● Premium Plan: $59 per month.
Features
● It has a simple user interface.
● Over 6M licensed Shutterstock available
● Unlimited and affordable videos in the premium plan
Cons
● It is quite expensive compared to other tools
10Veed.io
Veed.io is not specifically an AI video generator but a video editing tool that utilizes AI to simplify the entire process and allows users to create high-quality videos within seconds.
Pricing
● Free: Free with watermarks!
● Basic: $18 monthly.
● Pro: $30 monthly
Features
● It has lots of video templates and a music library to choose
● Easy to learn, user-friendly interface
● Video rendering times are quite fast
● The basic plan has a high-quality resolution
Cons
● Not a typical AI video generator
● Not for beginners
11Wisecut
This free AI video generator platform allows you to turn your text into video. Type in your text and choose a voice actor, and then Wisecut will take care of the rest. It offers excellent editing tools for users to tweak your video until it’s just right.
Pricing
● Basic: Free.
● Professional: $57 per month.
Features
● This platform is easy to use
● It has a simple drag and drops user-interface
● Allows auto subtitles and auto cut silences
● Allows integration with YouTube
● Subtitles auto-translation
● Excellent video quality
Cons
● Has limited effects
12Flexclip
FlexClip makes video creation and editing easy with-it millions of royalty-free stock media and thousands of templates for you to choose from.
Pricing
● Free
● Basic: $5.99 per month.
● Plus: $9.99 per month
● Business: $19.99 per month.
Features
● Thousands of available templates
● Simple tool for creating and editing videos
● Use for creating engaging videos
● Provides millions of royalty stock media
● Versatile and Flexible
Cons
● Not for beginners
● Ending Thoughts →
● In this post, we have listed the top text to video generators that you can choose from to help you perform tasks within minutes.
● The report also explains all you need to know about video AI generators and recommends Filmora as a perfect tool for editing your videos.
Also read:
- Updated In 2024, Easy Steps to Slow Down a Video on iPhone and Android
- New Are You Looking to Finish Your YouTube Video in Style? The Following Are the Best End Screen Makers to Choose From
- In 2024, 4 Simple Methods for Making a High-Quality Recap Video
- How to Create a Smooth Cut Transition Effect?
- In 2024, Are You Looking to Store Your Videos Securely and Efficiently? Look No Further than Our Top Pick for the Best Cloud Storage Service for Videos
- Updated Finding The Finest Way To Add Subtitles to Videos | Filmora for 2024
- How To Achieve LumaFusion Color Grading Through LUTs for 2024
- New How to Use Rules of Thirds
- In 2024, The Way to Quick and Efficient Editing | Keyboard Shortcuts in Filmora
- In 2024, How to Change Aspect Ratio of Video?
- Updated How to Remove Background Noise From Video Sony Vegas
- How to Make a Slideshow with Movavi Slideshow Maker for 2024
- In 2024, How To Use Virtual Green Screen to Shoot Video
- Updated How to Create Intro with Legend Intro Maker for 2024
- Updated Get The Perfect Drone Footage With Free Drone LUTs for 2024
- In 2024, Are You Finding It Challenging to Upload and Create a Link for Your Video? Well, This Detailed Upload Video to Link Guide Will Help You with This. Check It Out Now
- How to Remove Audio From Video Without Watermark for 2024
- 2024 Approved Create Slide Masking Effect Intro
- Updated Top Tools To Create Blend Image Collage
- How To Fix Slow Playback Issues in DaVinci Resolve Finding the Best Solutions
- Updated 2024 Approved Detailed Steps to Rotate Videos in Lightworks
- Updated How To Be A Successful YouTuber
- New 2024 Approved 10 Best Movie Trailer Voice Generators Windows, Mac, Android, iPhone & Online
- In 2024, Have You Ever Used an Adjustment Layer in Photoshop? Read This Article to Find Out How to Add, Resize, Change, and Use an Adjustment Layer in Photoshop Efficiently
- Do You Want to Remove the Unnecessary Scene From Your TikTok Video? This Article Will Help You to Adjust the Length of TikTok Clip by Providing Easy Methods for 2024
- Do You Want to Make Your Background Disappear and Replace with an Attractive Background? Here Is How to Add a Green Screen to Zoom App and Add Any Virtual Background of Your Choice
- New How to Create Video in Text Intro?
- Updated In 2024, How to Create Video Contents That Convert Sales
- The Top 10 Effective SRT Editors Online
- Updated How to Add Video Transitions in Videos for 2024
- New Top 7 MP4 Video Editors on Mac Edit MP4 Videos Easily for 2024
- New Do You Want to Create a Zoom Motion Blur Effect Using Photoshop? If You Are Unaware of How to Do This, Read This Article to Learn Simple yet Authentic Instructions
- New Easily Combine Videos and Audios with 5 Simple Online Tools for 2024
- New In 2024, Learn Color Correction in After Effects with These YouTube Videos
- 2024 Approved 5 Best Video Denoisers
- How to Add Filter to Video in Premiere Pro?
- In 2024, Ultimate Guide on Magic Effects Video Making
- New How to Change Quicktime Player Speed on Mac for 2024
- Updated 8 Best Free Photo Collage with Music Video Maker for 2024
- Updated 2024 Approved Fixing The Slow Playback Issues in DaVinci Resolve
- Updated Guide to Make Timelapse Video with iMovie
- New Looking for a Free Video Editor to Edit Videos on Mac? IMovie by Apple Is a Great Choice? But Is It the Best Video Editor or Is There a Better Alternative Available? Check Out Our iMovie Review
- 2024 Approved Step-by-Step Guide to Storyboard
- 2024 Approved To Get Cinematographs of a Music Video, You Need to Understand the Basics of Camera Movement. As Well Framing and Lighting of the Setup Are Illustrated in This Article
- Updated How To Change Font In Premiere Pro
- New 2024 Approved 2 Actionable Ways to Extract Subtitles From MKV Videos without Quality Loss
- How to Create Sports Intro and YouTube Endscreen?
- In 2024, How Can I Screen Mirroring Apple iPhone 6 Plus to TV/Laptop? | Dr.fone
- Delete Gmail Account With/Without Password On Oppo Reno 10 Pro 5G
- Top 7 Phone Number Locators To Track Xiaomi 13T Pro Location | Dr.fone
- 5 Ways to Restart Vivo X Flip Without Power Button | Dr.fone
- In 2024, Learn All About 3D Logo Animation and Templates
- How Can I Use a Fake GPS Without Mock Location On Realme GT Neo 5? | Dr.fone
- Play Store Stuck on Downloading Of Vivo X Fold 2? 7 Ways to Resolve | Dr.fone
- How to Recover Files after iPhone XR Factory Reset? | Stellar
- Calls on Vivo V30 Pro Go Straight to Voicemail? 12 Fixes | Dr.fone
- In 2024, How To Erase an Apple iPhone 14 Without Apple ID Password?
- How to use Pokemon Go Joystick on Oppo A78 5G? | Dr.fone
- How To Easily Use Korean to English Video Translators
- What are Location Permissions Life360 On Infinix Smart 8? | Dr.fone
- In 2024, How To Change Infinix Zero 5G 2023 Turbo Lock Screen Password?
- In 2024, Getting the Pokemon Go GPS Signal Not Found 11 Error in Poco C55 | Dr.fone
- New What Wikipedia Cant Tell You About the 10 Best Batman Cartoons
- How To Bypass FRP on Itel A60
- New 2024 Approved 20 Free After Effects Logo Reveal Templates
- In 2024, Here are Some Pro Tips for Pokemon Go PvP Battles On Samsung Galaxy A05s | Dr.fone
- In 2024, Pokemon Go No GPS Signal? Heres Every Possible Solution On Tecno Camon 30 Pro 5G | Dr.fone
- In 2024, Process of Screen Sharing Realme V30T to PC- Detailed Steps | Dr.fone
- Latest Guide How To Bypass Motorola Moto G34 5G FRP Without Computer
- Network Locked SIM Card Inserted On Your Oppo A79 5G Phone? Unlock It Now
- New Some Must-Know Useful Lego Animation Ideas for You
- In 2024, Hacks to do pokemon go trainer battles For Poco C50 | Dr.fone
- Best Ways to Bypass iCloud Activation Lock on iPhone 13 mini/iPad/iPod
- Network Locked SIM Card Inserted On Your Oppo Phone? Unlock It Now
- In 2024, Reasons why Pokémon GPS does not Work On OnePlus 11 5G? | Dr.fone
- 8 Solutions to Fix Find My Friends Location Not Available On Apple iPhone 13 Pro Max | Dr.fone
- 5 Hassle-Free Solutions to Fake Location on Find My Friends Of Lava Yuva 2 | Dr.fone
- Title: Updated Detailed Guide to Crop Videos in Sony Vegas Pro
- Author: Chloe
- Created at : 2024-05-20 03:38:28
- Updated at : 2024-05-21 03:38:28
- Link: https://ai-editing-video.techidaily.com/updated-detailed-guide-to-crop-videos-in-sony-vegas-pro/
- License: This work is licensed under CC BY-NC-SA 4.0.
