
:max_bytes(150000):strip_icc():format(webp)/GettyImages-104626001-5c34f065c9e77c00010b8cd5.jpg)
Updated Do You Know About some Efficient Slow-Motion Video Editors? Read This Article to Find Out the Best Slow-Motion Video Editing Tools that You Can Try
Do You Know About some Efficient Slow-Motion Video Editors? Read This Article to Find Out the Best Slow-Motion Video Editing Tools that You Can Try
Slow-motion videos help in sports analysis to gain insights into the performance. Slow motion is beneficial for observing precise movements in instructional videos. Moreover, such videos are crucial for product showcasing in advertising and marketing. Due to the various uses of slow-motion videos, you may need to create one with an edit video slow motion online free.
Thus, this article will focus on some top-notch slow-motion video editors online for free. With these tools, you can produce slow-motion videos at the desired pace. Moreover, we will introduce a desktop tool that leaves behind all online video editors slow motion free.
Slow Motion Video Maker Slow your video’s speed with better control of your keyframes to create unique cinematic effects!
Make A Slow Motion Video Make A Slow Motion Video More Features

Part 1: [Top List] Best Slow Motion Video Editors To Work Within 2024
Have you ever worked with slow-motion video editors? In this section, we will shed light on some of the best online video editors that are slow-motion free. By using them, you can produce professional quality slow-motion videos with ease:
1. VEED.io
VEED.io is a prominent tool that you can access through a web browser. Along with its many features, this tool lets you slow down a video with proficiency. It lets you change the video speed to up to 0.5x. Moreover, you can enter the custom speed for more modification. For precision, you can slow down certain parts by splitting the clips. Hence, this tool gives you complete control for making slow-motion videos.

Pros
- This tool shows compatibility with many file formats. For example, you can import videos in MOV, MP3, AVI, and other formats.
- After slowing down a video, this tool lets you perform basic video editing. You can cut, crop, trim, and annotate the slow-motion video.
Cons
- This tool freezes and lacks fast processing speed.
2. Canva
Have you ever edited a video through Canva? This famous edit video slow motion online free tool offers many tools to execute basic and advanced editing. Among them, it contains the feature to add a slow-motion effect to a video. After uploading the video, you can reduce the speed to 0.1x. While adding a slow-motion effect, you can add comments to the video for more modification.

Pros
- This tool provides many options for uploading a video. For instance, you can upload videos from Facebook, Google Drive, Google Photos, or Dropbox.
- It includes a collaboration link to help your teammates access the video. You can also enter groups, people, and tags for collaboration.
Cons
- The options for template designs and export are limited.
3. Typito
Typito is a reliable tool that supports over 20 video file formats. With its video speed modifier, you can speed up or slow down a video file without hassle. Furthermore, it supports many aspect ratios, like a square letterbox, vertical, etc. Moreover, it contains a stock media library containing royalty-free videos and images. Thus, it’s a competent online tool featuring a reliable option to make slow-motion videos.

Pros
- You can display your own brand video with this tool. It allows you to upload your brand colors, designs, and fonts for brand marketing.
- It offers a real-time video preview to analyze the final result. By doing so, you can download satisfactory slow-motion videos.
Cons
- Sometimes, the tool encounters glitches, which can disrupt its overall performance.
4. Media.io
Media.io is a capable online tool famous for its flawless results. After importing the video, you can reduce it to the lowest speed, which is 0.25x. Meanwhile, you can also increase the video speed to 4x efficiently. One of the best things about this tool is that it can edit the motion effect to YouTube URLs directly. Hence, this slow down video online free can benefit you in making slow-motion videos.

Pros
- This tool contains many free additional features. For instance, it contains a video converter, letting you convert the file format into another one.
- To remove unwanted audio from a video, you can mute the video. Thus, with a single click, you can mute the video instantly.
Cons
- You cannot upload large file sizes on this tool. Thus, you can face file size restrictions on Media.io.
5. Flixier
This online video editor slow motion free tool has an easy-to-use interface that you can operate without watching tutorials. It can slow down a video at any frame rate without decreasing its quality. To reduce the video speed, you can drag the slider with great ease. Moreover, you can add powerful effects to enhance the slowed-down video. Hence, it’s an advanced tool for creating slow-motion videos.

Pros
- It contains an AI subtitle generator through which you can transcribe your videos. It supports all common languages for the generation of video subtitles.
- To make your video pleasing in a visual way, you can add many filters. This tool consists of many filters which can improve your facial appearance.
Cons
- Flixier takes extra time to process video files. Thus, making slow-motion videos with this tool is time-consuming.
6. Kapwing
This online tool uses advanced technology to slow down a video without losing quality. Whether your video is 4K or 1080p, the tool maintains the original resolution of the video. You can import the video from your device within a few seconds. It also allows you to paste the URL of the video quickly. Afterward, you can adjust the speed slider to manage the video speed in a preferred way.

Pros
- Kapwing is an all-round video editor offering many features. Using this video editor, users can combine and split video tracks.
- The AI audio enhancer of this tool can improve the sound quality of your audio. You can improve the quality of your voice recording and background music with this feature.
Cons
- To use its premium features, you must buy its subscription plans. However, its subscription plans can be expensive for some users.
7. Clideo
Do you want a basic tool for slowing down videos? Clideo is one of the simple tools that has intuitive controls to modify a video. It has a fast processing speed to offer users instant results. It provides six commonly used speeds for video clips. In addition, you can use the speed slider to adjust the speed in a personalized way. Meanwhile, the tool ensures complete security to protect your valuable video files.

Pros
- This slow down video online free can function as a great video compressor. It decreases the video file size without compromising its resolution.
- It acts as a video maker, allowing you to create videos from images. Moreover, you can produce videos with GIFs of desired quality.
Cons
- It adds a watermark to the videos in its free version.
8. Online Video Cutter
This comprehensive slow motion video online without watermark tool offers a great user experience in making slow-motion videos. Without adding a watermark, it can create slow-mo videos as best as possible. Along with various video speeds, it provides many file formats. Moreover, you can slow down videos without creating an account. Within a few taps, you can make slow-motion videos in high resolution.

Pros
- To describe your video clips, add text to them using this tool. It lets you select the desired text font, style, size, and color.
- It contains a screen recorder to capture the current activities of your desktop. After recording, you can edit and export the video flawlessly.
Cons
- The interface of this tool contains many pop-up ads, which can be annoying.
Part 2: Alternative For Better Results: Wondershare Filmora
After knowing the drawbacks of online tools, you must want an alternative. Wondershare Filmora is a skillful tool comprising good qualities as a video editor. It targets every need of a professional video editor with its robust features. With its friendly user interface, you can perform video editing without hurdles. It lets you apply effects, transitions, animations, and other modifications with ease.
Moreover, it allows users to control the speed of the videos. After dragging the video to the timeline, you can adjust its speed accordingly. It retains the frame rate of the video with high-end rendering. Also, it contains tons of AI options to improvise the video clip. Hence, Filmora is a must-have offline tool catering to all the needs of video editors.
Free Download For Win 7 or later(64-bit)
Free Download For macOS 10.14 or later
Directions to Make Slow-Motion Video
In this section, we will enlist the simple steps to create slow-motion videos. Thus, check the following instructions to generate slow-motion videos in a flawless way.
Step 1Sign Into Filmora
Start by launching Filmora on your PC. Once done, head to the top bar and select “Profile”. From there, sign into the account and select the “New Project” button.

Step 2Add Video on Timeline
Now, on the main interface of Filmora, press “Ctrl + I”. In this manner, you can import the video clips from your computer. Once done, drag and drop the video file to the timeline for editing.

Step 3Go to the Speed Tab
Select the video on the timeline and go to the right panel. Through this panel, click on the “Speed” tab and tap “Uniform Speed”.

Step 4Choose Optical Flow
Expand “AI Frame Interpolation” and tap “Optical Flow”. Now, stay on the timeline and select “Render Preview” from the top toolbar. By doing so, you can export the video in the selected file format.

Key Features Highlighting Filmora
AI Vocal Remover: This AI feature isolates the music from any song. It preserves the high resolution of the video while removing vocals. Also, it extracts other unwanted elements from audio. Hence, it automatically removes vocals from an audio file.
AI Copywriting: This feature is integrated with ChatGPT to produce AI-generated scripts. Content creators can generate YouTube descriptions and titles from this smart feature. To do so, you can enter the question in the given box. After some seconds, the AI tool will answer your queries.
AI Image: By using this feature, you can convert your text to images in an automated way. You can describe the image in the text in the given box. Afterward, the tool will create an AI image in three resolutions.
Part 3: What Are Some Major Drawbacks to Using Online Slow Motion Video Editors Compared to Offline Editors?
There are some disadvantages to using online slow-motion video editors as compared to offline tools. Here are some of the common drawbacks of slow motion video editor online free that you should consider:
Network Dependency
Online slow-motion video editors need credible and fast internet connections. You can’t access their website with a poor internet connection. If there is a poor network connection, the tool will take extra time to upload and process videos.
Limitations of Features
Unlike offline slow-motion video editors, online free tools have limited features. They don’t offer advanced options to make professional enhancements. Moreover, advanced tools need high-end computing sources. This may not be present on web-based slow-motion video editors.
Privacy Concerns
Desktop tools use enhanced encryption methods for data privacy. However, online sites may contain hidden malicious files which can harm your data. Hence, online users may face privacy threats when making slow-motion videos.
User Interface and Subscription Packages
It’s common that online slow-motion video editors lack intuitive controls. The interface of online tools is difficult to operate for beginners. Moreover, the subscription packages can be expensive for some users. In contrast, desktop tools have better user interface experience with affordable plans.
Conclusion
Slow-motion videos are useful for deep analysis. It helps in highlighting the minor details of a product. There are many online video editors slow motion free to create slow-motion effects. However, desktop tools like Filmora are a better alternative to such online tools. This tool uses high-end computing algorithms to make slow-motion videos with precision.
Make A Slow Motion Video Make A Slow Motion Video More Features
Part 1: [Top List] Best Slow Motion Video Editors To Work Within 2024
Have you ever worked with slow-motion video editors? In this section, we will shed light on some of the best online video editors that are slow-motion free. By using them, you can produce professional quality slow-motion videos with ease:
1. VEED.io
VEED.io is a prominent tool that you can access through a web browser. Along with its many features, this tool lets you slow down a video with proficiency. It lets you change the video speed to up to 0.5x. Moreover, you can enter the custom speed for more modification. For precision, you can slow down certain parts by splitting the clips. Hence, this tool gives you complete control for making slow-motion videos.
Pros
- This tool shows compatibility with many file formats. For example, you can import videos in MOV, MP3, AVI, and other formats.
- After slowing down a video, this tool lets you perform basic video editing. You can cut, crop, trim, and annotate the slow-motion video.
Cons
- This tool freezes and lacks fast processing speed.
2. Canva
Have you ever edited a video through Canva? This famous edit video slow motion online free tool offers many tools to execute basic and advanced editing. Among them, it contains the feature to add a slow-motion effect to a video. After uploading the video, you can reduce the speed to 0.1x. While adding a slow-motion effect, you can add comments to the video for more modification.
Pros
- This tool provides many options for uploading a video. For instance, you can upload videos from Facebook, Google Drive, Google Photos, or Dropbox.
- It includes a collaboration link to help your teammates access the video. You can also enter groups, people, and tags for collaboration.
Cons
- The options for template designs and export are limited.
3. Typito
Typito is a reliable tool that supports over 20 video file formats. With its video speed modifier, you can speed up or slow down a video file without hassle. Furthermore, it supports many aspect ratios, like a square letterbox, vertical, etc. Moreover, it contains a stock media library containing royalty-free videos and images. Thus, it’s a competent online tool featuring a reliable option to make slow-motion videos.
Pros
- You can display your own brand video with this tool. It allows you to upload your brand colors, designs, and fonts for brand marketing.
- It offers a real-time video preview to analyze the final result. By doing so, you can download satisfactory slow-motion videos.
Cons
- Sometimes, the tool encounters glitches, which can disrupt its overall performance.
4. Media.io
Media.io is a capable online tool famous for its flawless results. After importing the video, you can reduce it to the lowest speed, which is 0.25x. Meanwhile, you can also increase the video speed to 4x efficiently. One of the best things about this tool is that it can edit the motion effect to YouTube URLs directly. Hence, this slow down video online free can benefit you in making slow-motion videos.
Pros
- This tool contains many free additional features. For instance, it contains a video converter, letting you convert the file format into another one.
- To remove unwanted audio from a video, you can mute the video. Thus, with a single click, you can mute the video instantly.
Cons
- You cannot upload large file sizes on this tool. Thus, you can face file size restrictions on Media.io.
5. Flixier
This online video editor slow motion free tool has an easy-to-use interface that you can operate without watching tutorials. It can slow down a video at any frame rate without decreasing its quality. To reduce the video speed, you can drag the slider with great ease. Moreover, you can add powerful effects to enhance the slowed-down video. Hence, it’s an advanced tool for creating slow-motion videos.
Pros
- It contains an AI subtitle generator through which you can transcribe your videos. It supports all common languages for the generation of video subtitles.
- To make your video pleasing in a visual way, you can add many filters. This tool consists of many filters which can improve your facial appearance.
Cons
- Flixier takes extra time to process video files. Thus, making slow-motion videos with this tool is time-consuming.
6. Kapwing
This online tool uses advanced technology to slow down a video without losing quality. Whether your video is 4K or 1080p, the tool maintains the original resolution of the video. You can import the video from your device within a few seconds. It also allows you to paste the URL of the video quickly. Afterward, you can adjust the speed slider to manage the video speed in a preferred way.
Pros
- Kapwing is an all-round video editor offering many features. Using this video editor, users can combine and split video tracks.
- The AI audio enhancer of this tool can improve the sound quality of your audio. You can improve the quality of your voice recording and background music with this feature.
Cons
- To use its premium features, you must buy its subscription plans. However, its subscription plans can be expensive for some users.
7. Clideo
Do you want a basic tool for slowing down videos? Clideo is one of the simple tools that has intuitive controls to modify a video. It has a fast processing speed to offer users instant results. It provides six commonly used speeds for video clips. In addition, you can use the speed slider to adjust the speed in a personalized way. Meanwhile, the tool ensures complete security to protect your valuable video files.
Pros
- This slow down video online free can function as a great video compressor. It decreases the video file size without compromising its resolution.
- It acts as a video maker, allowing you to create videos from images. Moreover, you can produce videos with GIFs of desired quality.
Cons
- It adds a watermark to the videos in its free version.
8. Online Video Cutter
This comprehensive slow motion video online without watermark tool offers a great user experience in making slow-motion videos. Without adding a watermark, it can create slow-mo videos as best as possible. Along with various video speeds, it provides many file formats. Moreover, you can slow down videos without creating an account. Within a few taps, you can make slow-motion videos in high resolution.
Pros
- To describe your video clips, add text to them using this tool. It lets you select the desired text font, style, size, and color.
- It contains a screen recorder to capture the current activities of your desktop. After recording, you can edit and export the video flawlessly.
Cons
- The interface of this tool contains many pop-up ads, which can be annoying.
Part 2: Alternative For Better Results: Wondershare Filmora
After knowing the drawbacks of online tools, you must want an alternative. Wondershare Filmora is a skillful tool comprising good qualities as a video editor. It targets every need of a professional video editor with its robust features. With its friendly user interface, you can perform video editing without hurdles. It lets you apply effects, transitions, animations, and other modifications with ease.
Moreover, it allows users to control the speed of the videos. After dragging the video to the timeline, you can adjust its speed accordingly. It retains the frame rate of the video with high-end rendering. Also, it contains tons of AI options to improvise the video clip. Hence, Filmora is a must-have offline tool catering to all the needs of video editors.
Free Download For Win 7 or later(64-bit)
Free Download For macOS 10.14 or later
Directions to Make Slow-Motion Video
In this section, we will enlist the simple steps to create slow-motion videos. Thus, check the following instructions to generate slow-motion videos in a flawless way.
Step 1Sign Into Filmora
Start by launching Filmora on your PC. Once done, head to the top bar and select “Profile”. From there, sign into the account and select the “New Project” button.
Step 2Add Video on Timeline
Now, on the main interface of Filmora, press “Ctrl + I”. In this manner, you can import the video clips from your computer. Once done, drag and drop the video file to the timeline for editing.
Step 3Go to the Speed Tab
Select the video on the timeline and go to the right panel. Through this panel, click on the “Speed” tab and tap “Uniform Speed”.
Step 4Choose Optical Flow
Expand “AI Frame Interpolation” and tap “Optical Flow”. Now, stay on the timeline and select “Render Preview” from the top toolbar. By doing so, you can export the video in the selected file format.
Key Features Highlighting Filmora
AI Vocal Remover: This AI feature isolates the music from any song. It preserves the high resolution of the video while removing vocals. Also, it extracts other unwanted elements from audio. Hence, it automatically removes vocals from an audio file.
AI Copywriting: This feature is integrated with ChatGPT to produce AI-generated scripts. Content creators can generate YouTube descriptions and titles from this smart feature. To do so, you can enter the question in the given box. After some seconds, the AI tool will answer your queries.
AI Image: By using this feature, you can convert your text to images in an automated way. You can describe the image in the text in the given box. Afterward, the tool will create an AI image in three resolutions.
Part 3: What Are Some Major Drawbacks to Using Online Slow Motion Video Editors Compared to Offline Editors?
There are some disadvantages to using online slow-motion video editors as compared to offline tools. Here are some of the common drawbacks of slow motion video editor online free that you should consider:
Network Dependency
Online slow-motion video editors need credible and fast internet connections. You can’t access their website with a poor internet connection. If there is a poor network connection, the tool will take extra time to upload and process videos.
Limitations of Features
Unlike offline slow-motion video editors, online free tools have limited features. They don’t offer advanced options to make professional enhancements. Moreover, advanced tools need high-end computing sources. This may not be present on web-based slow-motion video editors.
Privacy Concerns
Desktop tools use enhanced encryption methods for data privacy. However, online sites may contain hidden malicious files which can harm your data. Hence, online users may face privacy threats when making slow-motion videos.
User Interface and Subscription Packages
It’s common that online slow-motion video editors lack intuitive controls. The interface of online tools is difficult to operate for beginners. Moreover, the subscription packages can be expensive for some users. In contrast, desktop tools have better user interface experience with affordable plans.
Conclusion
Slow-motion videos are useful for deep analysis. It helps in highlighting the minor details of a product. There are many online video editors slow motion free to create slow-motion effects. However, desktop tools like Filmora are a better alternative to such online tools. This tool uses high-end computing algorithms to make slow-motion videos with precision.
Is Augmented Reality Conferencing the Future of Workplace Collaboratio
Is Augmented Reality Conferencing the Future of Workplace Collaboration?
An easy yet powerful editor
Numerous effects to choose from
Detailed tutorials provided by the official channel
AR or Augmented Reality and VR or Virtual Reality are quite a common discussion in the world of technology. Similarly, the technology-driven workspaces demand a seamless workspace collaboration post-pandemic. People are used to working from home and the workspace culture is changing rapidly due to such habits. 59% of the US workers want to continue WFH according to a study by TalentLyft. To cut the cost of daily travel and dedicate more quality time to work, employees are prioritizing online offices. On the other hand, employers are willing to save office space and other expenses with such a professional routine. That’s where the idea of augmented reality video conferencing is hitting to keep the collaboration between workers alive for a synchronized workflow.

How AR and VR can assist professional collaboration and lift the operations to a better place is the current question. Also, what would be the system through which employees can be habituated to the use? All of the answers are explained in this article.
In this article
01 [What is Augmented Reality Conferencing and What’s VR Video Streaming Workflow](#Part 1)
02 [Pros and Cons of AR and VR Conferencing](#Part 2)
03 [How does Filmora assists AR video conference?](#Part 3)
Part 1 What is Augmented Reality Conferencing and What’s VR Video Streaming Workflow
Before jumping to the application of AR and VR, it’s important to clarify the concept of the two different technologies. While AR is an enhanced version of the real world, VR is totally virtual. As a basic concept, note that, augmented reality is an arrangement of the user’s real-world view whereas virtual reality is totally an illusion based on a video. AR can be accessed from a phone to set the camera with a view and a virtual arrangement would be present within it. For example, if there’s a room in the real world, with an AR video conference, people can be adjusted virtually.

Virtual reality, as the name suggests, is totally in control of the system. With goggles or headsets, one can view computer-generated video with 360 degrees of technical effects to be seemed as real. This technology is mainly applicable for a video currently and there’re more scopes to experiment further.

Here comes the question, how these technologies can be merged with a permanent business structure that can be as effective as the older system, and there’s scope for even better results? Well, according to a study by FinancesOnline, 72% of the US customers find AR for better collaboration and 69% think it increases the efficiency in the workspace. Also, 49% of the IT experts believe that AR can access real-time information sooner.
The key idea behind augmented reality conferencing is to omit the parameters like distance, time, and space expenses and motivate positive collaboration in business workflow. There are multiple advantages of this technology for both employees and employers. As people are getting accustomed to the virtual setting in any professional or personal work from home, the plan to shift to a semi-virtual or virtual office structure is not vague now. In fact, this adaptation might take place sooner than expected as a long-term effect of the pandemic.
How augmented reality conferencing and virtual reality video streaming will be working?
AR and VR can be implemented through different technologies and hardware devices. As a result, employees can attend a meeting from home, just with a mobile application that enables the office structure in the room. Or, 2-3 members can be present physically in a meeting room while others are joining from remote places through VR. A 3D video streaming would overshadow the physical absence of the teammates. At the same time, the resources can be shared in no time for reference and transparent communication.
So, how exactly a business can be affected by augmented reality video conferencing on a large scale? Here’s a keen observation from both perspectives.
Part 2 Pros and Cons of AR and VR Conferencing

01Pros of AR and VR Conferencing
● This technology has an initial purpose to save time and energy for the workers including daily travel and balancing personal and professional commitments.
● Employers can hire people from remote places based on their skills and without worrying about the distance and timezone gap.
● Additional resources like bigger office space, electricity, and water can be saved if augmented reality video conferencing is in a complete performance.
● Positive collaboration can be expected while the employees have more energy and a comfortable environment to work in. As a result, productivity might take a boost as well.
● AR video conference serves a better experience than normal video conference in Zoom or Google meeting.
02Cons of AR and VR Conferencing
● The whole process is still under experiment and there’s no confirmed news about its beginning. So, there’s no practical feedback on the process of installation, usage, and maintenance.
● It would be expensive and time-consuming to set up a virtual reality conference system in a big office with n number of people.
● Technical fault from the office or from employees’ home can cost serious penalties in the business workflow.
● Hardware limitations like limited battery life, expensive headsets, and wireless connection are required and these things can cause problems while implementation.
● It can be uncomfortable to wear headsets for a long time during augmented reality conferencing andpeople can experience motion sickness due to this.
Part 3 How does Wondershare Filmora Video Editor assists AR video conference?
To use AR and VR professionally at a larger scale, the videos need to be seamless and follow some standard parameters. With Filmora, it would be easier to manage all the videos during an augmented reality video conferencing. There are multiple effects like “Motion Tracking”, “Keyframing”, “Audio ducking”, “Speed Control”, and “Color matching” that are required while managing a virtual conference with multiple people. It’s important to match the environment thoroughly so there’s no lack of concentration and inferiority in the system.
For Win 7 or later (64-bit)
For macOS 10.12 or later
From a business perspective, a video editor has many roles to play. Similarly, for a modern integration like AR and VR video conferencing, the required tools cannot be compromised. With facilities like “Green screen”, “Audio equalizer”, “Split screen”, “3D Lut”, etc. augmented reality would be presented smartly. To match the whole office environment as effectively as the real (present) one and to boost collaboration in the workspace, new generation video editing tools like Filmora is a must. With minimal effort, virtual meetings can be arranged and presented with the key goal to work at a global level and minimize the distance barrier.
● Ending Thoughts →
● Augmented reality conferencing is at an experiment level now and it is expected to be integrated with the real-life workflow sooner.
● As discussed, there’re both advantages and disadvantages of this technology right now. To enhance the facilities and diminish the cons, a smart video editor can be the gamechanger. In this article, you can find all the current news about AR adaptation for workspace collaboration in detail.
AR or Augmented Reality and VR or Virtual Reality are quite a common discussion in the world of technology. Similarly, the technology-driven workspaces demand a seamless workspace collaboration post-pandemic. People are used to working from home and the workspace culture is changing rapidly due to such habits. 59% of the US workers want to continue WFH according to a study by TalentLyft. To cut the cost of daily travel and dedicate more quality time to work, employees are prioritizing online offices. On the other hand, employers are willing to save office space and other expenses with such a professional routine. That’s where the idea of augmented reality video conferencing is hitting to keep the collaboration between workers alive for a synchronized workflow.
How AR and VR can assist professional collaboration and lift the operations to a better place is the current question. Also, what would be the system through which employees can be habituated to the use? All of the answers are explained in this article.
In this article
01 [What is Augmented Reality Conferencing and What’s VR Video Streaming Workflow](#Part 1)
02 [Pros and Cons of AR and VR Conferencing](#Part 2)
03 [How does Filmora assists AR video conference?](#Part 3)
Part 1 What is Augmented Reality Conferencing and What’s VR Video Streaming Workflow
Before jumping to the application of AR and VR, it’s important to clarify the concept of the two different technologies. While AR is an enhanced version of the real world, VR is totally virtual. As a basic concept, note that, augmented reality is an arrangement of the user’s real-world view whereas virtual reality is totally an illusion based on a video. AR can be accessed from a phone to set the camera with a view and a virtual arrangement would be present within it. For example, if there’s a room in the real world, with an AR video conference, people can be adjusted virtually.
Virtual reality, as the name suggests, is totally in control of the system. With goggles or headsets, one can view computer-generated video with 360 degrees of technical effects to be seemed as real. This technology is mainly applicable for a video currently and there’re more scopes to experiment further.
Here comes the question, how these technologies can be merged with a permanent business structure that can be as effective as the older system, and there’s scope for even better results? Well, according to a study by FinancesOnline, 72% of the US customers find AR for better collaboration and 69% think it increases the efficiency in the workspace. Also, 49% of the IT experts believe that AR can access real-time information sooner.
The key idea behind augmented reality conferencing is to omit the parameters like distance, time, and space expenses and motivate positive collaboration in business workflow. There are multiple advantages of this technology for both employees and employers. As people are getting accustomed to the virtual setting in any professional or personal work from home, the plan to shift to a semi-virtual or virtual office structure is not vague now. In fact, this adaptation might take place sooner than expected as a long-term effect of the pandemic.
How augmented reality conferencing and virtual reality video streaming will be working?
AR and VR can be implemented through different technologies and hardware devices. As a result, employees can attend a meeting from home, just with a mobile application that enables the office structure in the room. Or, 2-3 members can be present physically in a meeting room while others are joining from remote places through VR. A 3D video streaming would overshadow the physical absence of the teammates. At the same time, the resources can be shared in no time for reference and transparent communication.
So, how exactly a business can be affected by augmented reality video conferencing on a large scale? Here’s a keen observation from both perspectives.
Part 2 Pros and Cons of AR and VR Conferencing
01Pros of AR and VR Conferencing
● This technology has an initial purpose to save time and energy for the workers including daily travel and balancing personal and professional commitments.
● Employers can hire people from remote places based on their skills and without worrying about the distance and timezone gap.
● Additional resources like bigger office space, electricity, and water can be saved if augmented reality video conferencing is in a complete performance.
● Positive collaboration can be expected while the employees have more energy and a comfortable environment to work in. As a result, productivity might take a boost as well.
● AR video conference serves a better experience than normal video conference in Zoom or Google meeting.
02Cons of AR and VR Conferencing
● The whole process is still under experiment and there’s no confirmed news about its beginning. So, there’s no practical feedback on the process of installation, usage, and maintenance.
● It would be expensive and time-consuming to set up a virtual reality conference system in a big office with n number of people.
● Technical fault from the office or from employees’ home can cost serious penalties in the business workflow.
● Hardware limitations like limited battery life, expensive headsets, and wireless connection are required and these things can cause problems while implementation.
● It can be uncomfortable to wear headsets for a long time during augmented reality conferencing andpeople can experience motion sickness due to this.
Part 3 How does Wondershare Filmora Video Editor assists AR video conference?
To use AR and VR professionally at a larger scale, the videos need to be seamless and follow some standard parameters. With Filmora, it would be easier to manage all the videos during an augmented reality video conferencing. There are multiple effects like “Motion Tracking”, “Keyframing”, “Audio ducking”, “Speed Control”, and “Color matching” that are required while managing a virtual conference with multiple people. It’s important to match the environment thoroughly so there’s no lack of concentration and inferiority in the system.
For Win 7 or later (64-bit)
For macOS 10.12 or later
From a business perspective, a video editor has many roles to play. Similarly, for a modern integration like AR and VR video conferencing, the required tools cannot be compromised. With facilities like “Green screen”, “Audio equalizer”, “Split screen”, “3D Lut”, etc. augmented reality would be presented smartly. To match the whole office environment as effectively as the real (present) one and to boost collaboration in the workspace, new generation video editing tools like Filmora is a must. With minimal effort, virtual meetings can be arranged and presented with the key goal to work at a global level and minimize the distance barrier.
● Ending Thoughts →
● Augmented reality conferencing is at an experiment level now and it is expected to be integrated with the real-life workflow sooner.
● As discussed, there’re both advantages and disadvantages of this technology right now. To enhance the facilities and diminish the cons, a smart video editor can be the gamechanger. In this article, you can find all the current news about AR adaptation for workspace collaboration in detail.
How to Record Super Slow Motion Videos on Your Huawei/Samsung/iPhone?
Super Slow Motion has long been among the finest (and most exploited) video effects. The method was initially limited to high-end lenses, but super slo-mo has become increasingly superior as smartphone technology advances.
Super slo-mo is a terrific technique to learn how to use if you want to accentuate a dramatic moment or extend the humiliation of a friend you captured in an embarrassing scenario. This article has stepwise guides and tips for recording super slo-mo on your phone. Let’s get going!
In this article
01 What’s the Difference Between Slow-Mo and Super Slow-Mo?
02 How to Record Super Slo-Mo Videos with Samsung Galaxy S20 and Later models?
03 How to Edit Super Slow Motion Video in Samsung Galaxy S21?
04 How to Record Super Slow Motion Video with Huawei Mate 20 and Later Phones?
05 How to Shoot Slo-Mo Videos on iPhone?
06 Tips for Recording Super Slow Motion Video
Part 1: What’s the Difference Between Slow-Mo and Super Slow-Mo?
Super Slow-Mo (960fps) is a technology that allows users to shoot films at 960fps using a top-speed lens, capturing events that the naked eye cannot ordinarily notice by viewing them 32 times slower than regular videos (30fps) and four times slower than videos produced using the current Slow Motion feature (240fps).
Super Slow-mo movie may be displayed as 6-12 sec long on old smartphones, such as Galaxy S9/S9+ and Note9. However, the newer versions, such as Galaxy S10 Series, can play super slow-mo movies up to 14.8 sec.
You’ll understand the difference between the Slow-Mo and Super Slow-Mo better after reading the below information:
Slow Motion
Video is produced at an 8-times slower rate than usual, equivalent to the speed of a movie, advertisement, or sporting event.
Super Slow Motion
Videos are played 32 times slower than usual, catching minute changes in facial gestures and fast-moving elements.
Part 2: How to Record Super Slo-Mo Videos with Samsung Galaxy S20 and Later models?
Models That Support Super Slow-Mo: Galaxy S20, Galaxy S20+, Galaxy S20+ Ultra, Galaxy Z Flip, and later models.
Slow-motion video is often created by filming at a fast frame per second (fps) speed and then playing back at a far slower pace. This results in intriguing videos with slowed-down motion. The event is captured at 960 frames per second with the Super Slow-mo function, four times quicker than conventional slow motion. When it’s replayed at 30 frames per second, it’s 32 times slower, making mundane moments appear spectacular.
To capture super slow-motion videos with your Samsung Galaxy S20 and later models, follow the instructions below:
Step 1: Launch the camera on your phone by tapping the Camera app.
Step 2: Now, click on the Super Slow-Mo option to proceed.
Step 3: Press the White Circle in the center to start the recording and press it again to stop when you are done.
Note: Make sure that your phone’s video resolution is already on HD because Super Slow-Mo only supports HD resolutions.
Part 3: How to Edit Super Slow Motion Video in Samsung Galaxy S21?
Only capturing the super slow-motion videos is not enough, especially if you are a content creator. Even in the super slow-mo, there might be some unnecessary parts (since it is more detailed) that you need to cut out or the parts that need some enhancements to make the video look captivating.
However, not every phone is eligible to edit super slow-mo videos by not degrading the video resolutions. But Samsung Galaxy S21 allows you to do that by keeping the video resolution intact. You can edit the Super Slow-Mo videos with Galaxy S21 by following these instructions:
Step 1: Open the Camera app and navigate the super slow-mo video you wish to edit.
Step 2: Now, play it and tap the screen. You will see three vertical dots in the right corner. Click on them.
Step 3: Select the Editor option from the dropdown menu that appears.
Step 4: After that, you can adjust the length, crop the video, add effects, add stickers, add music, etc., by selecting from the bottom menu.
Step 5: After you’re done editing, click on the Save option at the top to save the video to your Gallery.

Part 4: How to Record Super Slow Motion Video with Huawei Mate 20 and Later Phones?
Models That Support Super Slow-Mo: Huawei Mate 20/20 Pro/20 X and later Mate models.
Before we demonstrate how to capture a super slow-mo with a Huawei Mate 20 and later models, we’ll explain this popular capture mode.
To begin, you should be aware that a camera/camera sensor collects a specific number of frames per second. The movie becomes legible by combining these pictures; the more images there are, the more fluent the video will be. The naked eye is thought to decipher about 60 pictures every second.
The benefit of improved camera sensors is that you can capture a maximum number of photos per second (some smartphones can record up to 960 / second) and slow down the sampling rate to produce a super slow-motion effect on the Huawei Mate 20 or later models.
Now, follow the stepwise guide to record super slow-mo with Huawei Mate 40 or later models:
Step 1: Launch your phone’s Camera go to More to select the Slow-Mo option.
Step 2: By default, you will see 4x on the slow-mo capture mode, which means the video will be recorded at 120FPS. Huawei Mate 40 allows you to capture up to 128X, i.e, 3840FPS for fast moving objects. To enable the Super Slo-Mo feature, select the 32X or 128X in this mode.
Step 3: Click on the Circle in the center to start and stop the recording. The video will be saved in your Gallery.
Part 5: How to Shoot Slo-Mo Videos on iPhone?
Slow-motion film on your iPhone essentially means slowing the fps so that everything appears to move slower inside the video. It is a popular effect employed by artists to produce one-of-a-kind video clips of sports footage, natural scenes, or sequences with a lot of dramatic motion.
Slow-motion films are supported by all iPhones, beginning with the 5S model, and the capability gets more robust and more stable with each successive generation. Shooting slow-motion films with your iPhone are addicting and enjoyable, and it adds drama to various settings.
Here is a step-by-step method for filming slow-mo with an iPhone, regardless of model.
Step 1: Launch the Camera app on your iPhone and go to the Slow-Mo effect by sliding from the options above. Change the frame rate on the upper right corner to 120, 240, 720, depending on the iPhone models you’re using.
Step 2: Now, start the recording by clicking the Red Circle in the center or either of the Volume button.
Step 3: After you’re done recording, press the Red Circle again and head towards the Gallery to view the recorded video.

For more details, check: How to make slo-mo video on your iPhone.
Part 6: Tips for Recording Super Slow Motion Video
Although super slow-motion videos are easy to record, they can be challenging for a content creator. But don’t worry, with the following tips, we have got you covered:
Utilize A Tripod
It’s critical to keep your phone as steady as possible when filming in Super Slow-mo since shaking might conflict with your video and hinder it from recognizing motions when set to auto-record. To get the most out of Super Slow-mo, we recommend using a tripod whenever feasible.
You can check these tripods for iPhone
Transition Between Single and Multi-Takes
To boost your chances of catching the ideal timing in Super Slow-mo, your phone allows you to record in Multi-Take mode, which can capture many bursts of Super Slow-mo in one video.
When combined with an auto record, additional Super Slow-mo videos will be captured as much as the focus box senses activity and will end only when you end filming. The manual record works similarly. However, you’ll have to physically hit the trigger each time you wish to record a picture in Super Slow-mo.
As the name indicates, Single-Take will record a single Super Slow-mo clip and then cease recording a moment or two later. Because Multi-Take clips are often more extensive, this could save a large storage capacity.
Readjust the Focus
The focus or auto-recording is tiny by default. Fortunately, you can enlarge it to improve its odds of recognizing movement. To adjust the size of the box, hold it until only its edges are visible, then move any corner from the others to expand the box’s area. Simply tap anywhere outside the borders to verify the adjustment when you’re happy with the size.
Capture in Natural Light
Because of the large number of frames it collects, Super Slow-mo works the best in natural daylight situations. Though not visible to the human eye, indoor lighting, especially LED bulbs and tiny fluorescents, seems to flash at very high rates. Even if the environment is well-lit, Super Slow-mo detects this and shows your subject in a substantially darker tone.
View the Video at Normal Speed
If you wish to watch your Super Slow-mo movies at regular speed, deactivate Super Slow-mo playing by tapping on the option directly below the video. This will give you a greater understanding of your phone’s incredible capacity to bring the world to a halt.
Learn more about : How to Convert normal video to slo-mo video?
Besides the tips mentioned above, you can also watch this video to get some tips and tricks in recording slo-mo video with iPhone.
Conclusion
Super Slow Motion videos are excellent for showcasing the action and conveying tales, and they are also entertaining and straightforward to create. Your only constraints are time and imagination. However, your Android or iPhone’s camera has many more tricks in its sleeve: Live images, time-lapse, Panoramas, and Portrait mode let you express yourself freely!
02 How to Record Super Slo-Mo Videos with Samsung Galaxy S20 and Later models?
03 How to Edit Super Slow Motion Video in Samsung Galaxy S21?
04 How to Record Super Slow Motion Video with Huawei Mate 20 and Later Phones?
05 How to Shoot Slo-Mo Videos on iPhone?
06 Tips for Recording Super Slow Motion Video
Part 1: What’s the Difference Between Slow-Mo and Super Slow-Mo?
Super Slow-Mo (960fps) is a technology that allows users to shoot films at 960fps using a top-speed lens, capturing events that the naked eye cannot ordinarily notice by viewing them 32 times slower than regular videos (30fps) and four times slower than videos produced using the current Slow Motion feature (240fps).
Super Slow-mo movie may be displayed as 6-12 sec long on old smartphones, such as Galaxy S9/S9+ and Note9. However, the newer versions, such as Galaxy S10 Series, can play super slow-mo movies up to 14.8 sec.
You’ll understand the difference between the Slow-Mo and Super Slow-Mo better after reading the below information:
Slow Motion
Video is produced at an 8-times slower rate than usual, equivalent to the speed of a movie, advertisement, or sporting event.
Super Slow Motion
Videos are played 32 times slower than usual, catching minute changes in facial gestures and fast-moving elements.
Part 2: How to Record Super Slo-Mo Videos with Samsung Galaxy S20 and Later models?
Models That Support Super Slow-Mo: Galaxy S20, Galaxy S20+, Galaxy S20+ Ultra, Galaxy Z Flip, and later models.
Slow-motion video is often created by filming at a fast frame per second (fps) speed and then playing back at a far slower pace. This results in intriguing videos with slowed-down motion. The event is captured at 960 frames per second with the Super Slow-mo function, four times quicker than conventional slow motion. When it’s replayed at 30 frames per second, it’s 32 times slower, making mundane moments appear spectacular.
To capture super slow-motion videos with your Samsung Galaxy S20 and later models, follow the instructions below:
Step 1: Launch the camera on your phone by tapping the Camera app.
Step 2: Now, click on the Super Slow-Mo option to proceed.
Step 3: Press the White Circle in the center to start the recording and press it again to stop when you are done.
Note: Make sure that your phone’s video resolution is already on HD because Super Slow-Mo only supports HD resolutions.
Part 3: How to Edit Super Slow Motion Video in Samsung Galaxy S21?
Only capturing the super slow-motion videos is not enough, especially if you are a content creator. Even in the super slow-mo, there might be some unnecessary parts (since it is more detailed) that you need to cut out or the parts that need some enhancements to make the video look captivating.
However, not every phone is eligible to edit super slow-mo videos by not degrading the video resolutions. But Samsung Galaxy S21 allows you to do that by keeping the video resolution intact. You can edit the Super Slow-Mo videos with Galaxy S21 by following these instructions:
Step 1: Open the Camera app and navigate the super slow-mo video you wish to edit.
Step 2: Now, play it and tap the screen. You will see three vertical dots in the right corner. Click on them.
Step 3: Select the Editor option from the dropdown menu that appears.
Step 4: After that, you can adjust the length, crop the video, add effects, add stickers, add music, etc., by selecting from the bottom menu.
Step 5: After you’re done editing, click on the Save option at the top to save the video to your Gallery.
Part 4: How to Record Super Slow Motion Video with Huawei Mate 20 and Later Phones?
Models That Support Super Slow-Mo: Huawei Mate 20/20 Pro/20 X and later Mate models.
Before we demonstrate how to capture a super slow-mo with a Huawei Mate 20 and later models, we’ll explain this popular capture mode.
To begin, you should be aware that a camera/camera sensor collects a specific number of frames per second. The movie becomes legible by combining these pictures; the more images there are, the more fluent the video will be. The naked eye is thought to decipher about 60 pictures every second.
The benefit of improved camera sensors is that you can capture a maximum number of photos per second (some smartphones can record up to 960 / second) and slow down the sampling rate to produce a super slow-motion effect on the Huawei Mate 20 or later models.
Now, follow the stepwise guide to record super slow-mo with Huawei Mate 40 or later models:
Step 1: Launch your phone’s Camera go to More to select the Slow-Mo option.
Step 2: By default, you will see 4x on the slow-mo capture mode, which means the video will be recorded at 120FPS. Huawei Mate 40 allows you to capture up to 128X, i.e, 3840FPS for fast moving objects. To enable the Super Slo-Mo feature, select the 32X or 128X in this mode.
Step 3: Click on the Circle in the center to start and stop the recording. The video will be saved in your Gallery.
Part 5: How to Shoot Slo-Mo Videos on iPhone?
Slow-motion film on your iPhone essentially means slowing the fps so that everything appears to move slower inside the video. It is a popular effect employed by artists to produce one-of-a-kind video clips of sports footage, natural scenes, or sequences with a lot of dramatic motion.
Slow-motion films are supported by all iPhones, beginning with the 5S model, and the capability gets more robust and more stable with each successive generation. Shooting slow-motion films with your iPhone are addicting and enjoyable, and it adds drama to various settings.
Here is a step-by-step method for filming slow-mo with an iPhone, regardless of model.
Step 1: Launch the Camera app on your iPhone and go to the Slow-Mo effect by sliding from the options above. Change the frame rate on the upper right corner to 120, 240, 720, depending on the iPhone models you’re using.
Step 2: Now, start the recording by clicking the Red Circle in the center or either of the Volume button.
Step 3: After you’re done recording, press the Red Circle again and head towards the Gallery to view the recorded video.
For more details, check: How to make slo-mo video on your iPhone.
Part 6: Tips for Recording Super Slow Motion Video
Although super slow-motion videos are easy to record, they can be challenging for a content creator. But don’t worry, with the following tips, we have got you covered:
Utilize A Tripod
It’s critical to keep your phone as steady as possible when filming in Super Slow-mo since shaking might conflict with your video and hinder it from recognizing motions when set to auto-record. To get the most out of Super Slow-mo, we recommend using a tripod whenever feasible.
You can check these tripods for iPhone
Transition Between Single and Multi-Takes
To boost your chances of catching the ideal timing in Super Slow-mo, your phone allows you to record in Multi-Take mode, which can capture many bursts of Super Slow-mo in one video.
When combined with an auto record, additional Super Slow-mo videos will be captured as much as the focus box senses activity and will end only when you end filming. The manual record works similarly. However, you’ll have to physically hit the trigger each time you wish to record a picture in Super Slow-mo.
As the name indicates, Single-Take will record a single Super Slow-mo clip and then cease recording a moment or two later. Because Multi-Take clips are often more extensive, this could save a large storage capacity.
Readjust the Focus
The focus or auto-recording is tiny by default. Fortunately, you can enlarge it to improve its odds of recognizing movement. To adjust the size of the box, hold it until only its edges are visible, then move any corner from the others to expand the box’s area. Simply tap anywhere outside the borders to verify the adjustment when you’re happy with the size.
Capture in Natural Light
Because of the large number of frames it collects, Super Slow-mo works the best in natural daylight situations. Though not visible to the human eye, indoor lighting, especially LED bulbs and tiny fluorescents, seems to flash at very high rates. Even if the environment is well-lit, Super Slow-mo detects this and shows your subject in a substantially darker tone.
View the Video at Normal Speed
If you wish to watch your Super Slow-mo movies at regular speed, deactivate Super Slow-mo playing by tapping on the option directly below the video. This will give you a greater understanding of your phone’s incredible capacity to bring the world to a halt.
Learn more about : How to Convert normal video to slo-mo video?
Besides the tips mentioned above, you can also watch this video to get some tips and tricks in recording slo-mo video with iPhone.
Conclusion
Super Slow Motion videos are excellent for showcasing the action and conveying tales, and they are also entertaining and straightforward to create. Your only constraints are time and imagination. However, your Android or iPhone’s camera has many more tricks in its sleeve: Live images, time-lapse, Panoramas, and Portrait mode let you express yourself freely!
Edit FLV Video Files with FLV Editor [Windows, Mac,Android, iPhone
FLV is a common container format for transferring digital video and audio information over the Internet. A.flv file is a flash video that may be seen on your computer with Adobe Flash Player, Adobe Air, or some third-party Adobe Flash plugins.
FLV has become the standard video format for web-based streaming video service providers such as Hulu and VEVO due to its superior functionality and tiny size. It’s also the default format for Quicktime on Mac systems.
If you wish to edit FLV videos without any problems, you should utilize a multipurpose video editor that supports the FLV file format.
Best FLV Editor to Edit FlV Video on Windows and Mac - Filmroa Video Editor
Filmora Video Editor is a professional FLV video editing application. This software allows you to edit 4K video files, share completed films directly on social media platforms, and add subtitles and audio files.
You may mix multiple films and enhance your footage with numerous transitions and other effects using this FLV video editing software. Furthermore, the free Filmora application is ideal for adding audio files or video clips from the wide library and uploading your soundtrack.
For Win 7 or later (64-bit)
For macOS 10.14 or later
Therefore, you can use the following steps to edit FLV video on Windows and Mac:
Step 1: Import file:

Step 2: Edit the FLV file:
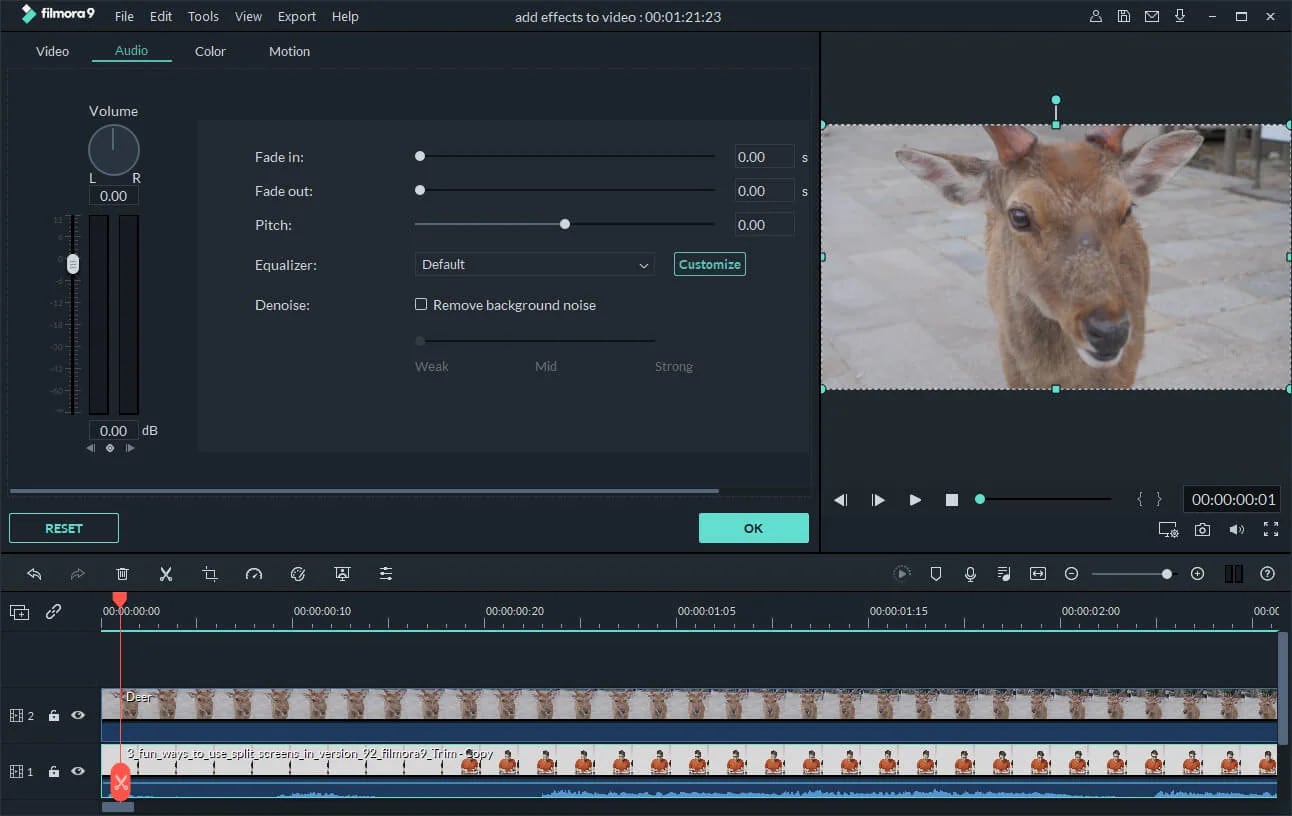
Acquire the perfect tool in your palm for anything you want to do, such as clipping, cropping, rotating, and more.
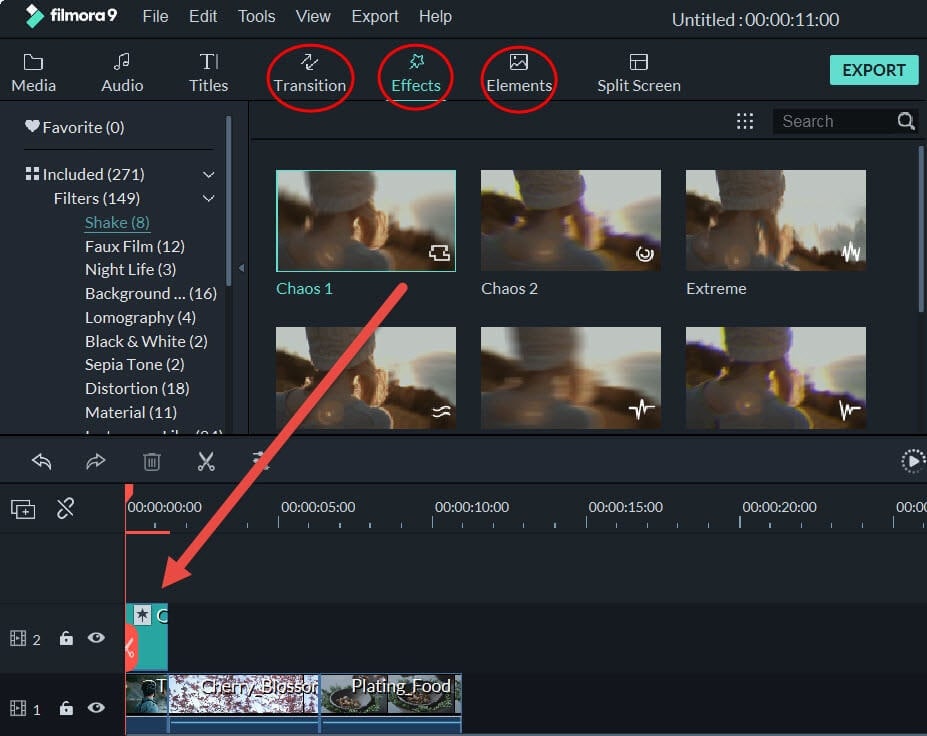
Furthermore, all editing capabilities in the toolbar allow drag-and-drop, making it even easier to touch up your films quickly. Consider the following scenario:
- Drag and drop a transition into the video/photo, or right-click it and select “Apply to All.”
- Please drag & drop a title template to the position where you want it to appear, then adjust it.
- To use the effects, select one from the 50+ available video effects, select it, and apply it to your photos/videos instantaneously.
Step 3: Save or Export the file:

When you’re done, export your modified MP4 files to Windows/Mac and quickly share them on YouTube, with the option of sending a message to Facebook and Twitter. When you click Create in the program window’s middle right corner, you’ll be taken to the Output window below.
Alternative Way to Edit FlV Video on Windows
1. VSDC
VSDC is a free video editor along with a lot of advanced features. Cut, combine, trim, crop, and other editing capabilities are available to help you polish your FLV films.
Although it may not look logical, learning the editing capabilities hidden within modular boxes is simple. One noteworthy aspect of VSDC is its ability to produce good visual effects using many trendy video effects, transitions, and filters.
Furthermore, strong chroma keys, color correction, object modification, and other editing tools can be utilized to edit FLV videos. It not only creates excellent FLV videos, but it also supports a wide range of media conversion, allowing you to convert FLV files to various formats and export them without a watermark.
Therefore, follow the below mentioned steps to edit FLV video using VSDC:
Step 1: Install the software on the Windows. Open the application and import the video.
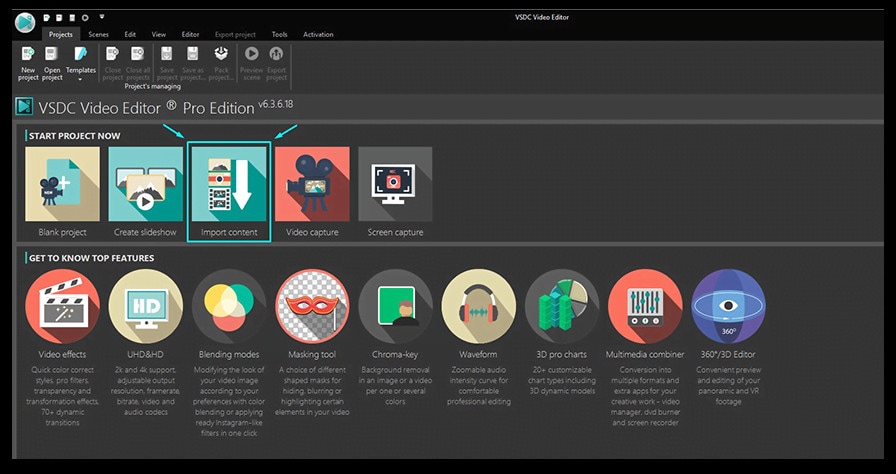
Step 2: Use cutting and splitting tools to edit the video.
The first icon is a picture of a pair of scissors, which is a cutting tool. It’s very useful when you need to cut the beginning or end of a film. Place the cursor exactly where you want to cut, then select “Trim start” or “Trim finish” from the dropdown cutting menu (the small triangle next to the scissors icon).
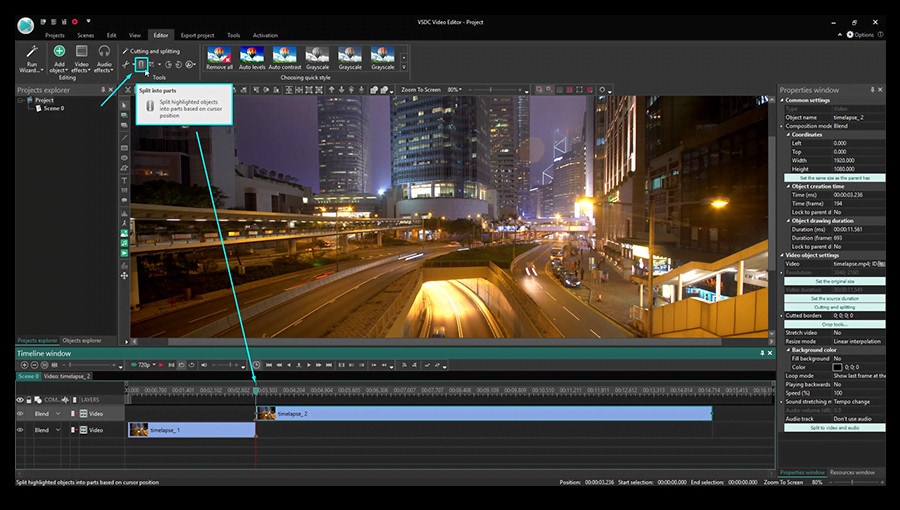
Cropping is also simple. If you have too much additional space around the scene object recorded, just choose the file you want to trim and select the cropping icon from the “Cutting and Splitting” option. A new window will appear, allowing you to select the region of the scene that should stay.
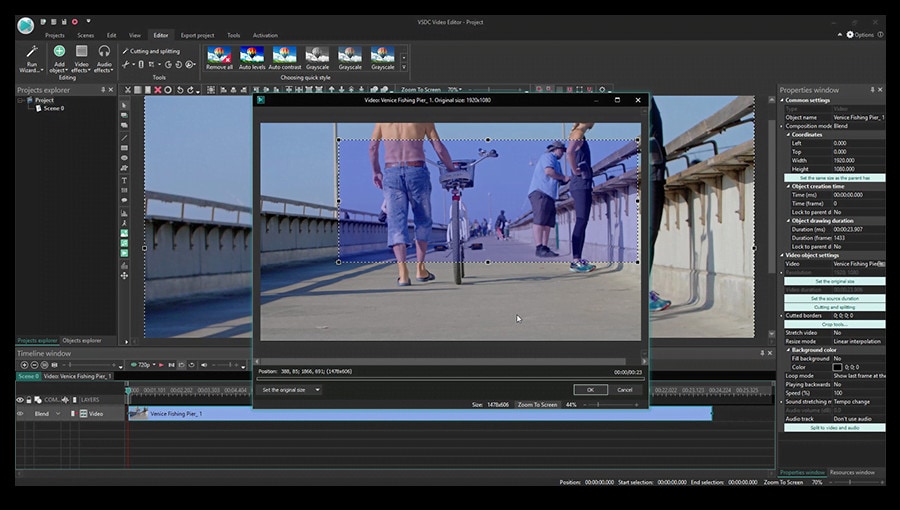
Step 3: Apply effects and transitions.
To use one, first select the video file you wish to edit, then go to the Video effects tab and select the effect you want to use. On the timeline, a new tab will appear, containing all of the effects done to the selected object. You can alter the effect’s duration and position in time by dragging it with the mouse there. The properties pane on the right-hand side can be used to change other parameters.
Transitions follow the same rule. Place your cursor where you want the transition to begin, then choose a transition from the Video effects dropdown menu and manually adjust the duration.
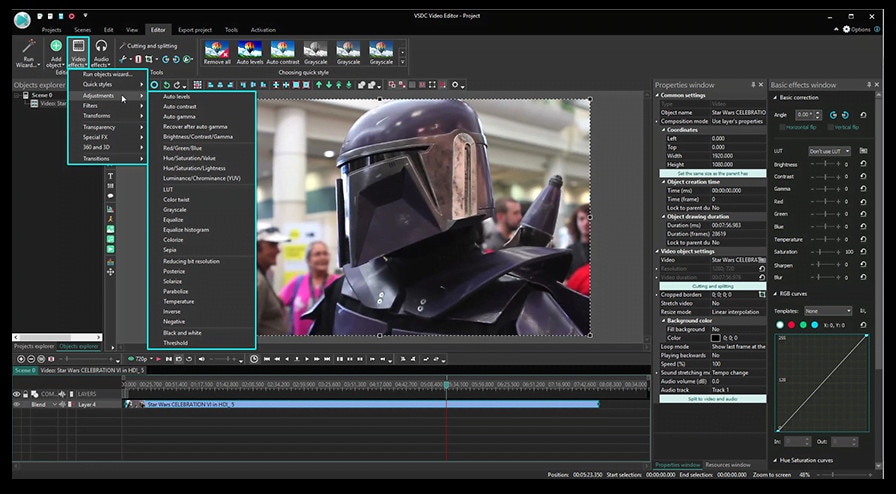
Step 4: Save changes and export video.
Make sure your movie appears exactly how you want it to before exporting it. If the video appears choppy, use the red preview button and lower the preview quality. When the PC’s resources are insufficient to process the video in real time, lagging can occur. Keep in mind that it has no bearing on the outcome. When you’re finished, navigate to the Export project tab and select an export format.
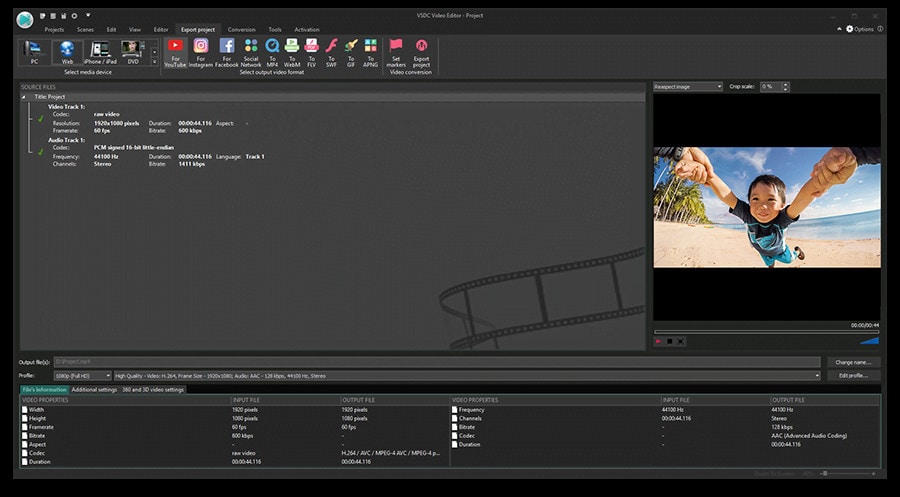
2. Adobe Premiere Pro:
Professional video editors use Premiere Pro to make everything from YouTube videos to Hollywood films like Mank, a 2021 Oscar candidate. It’s also widely utilized in the workflows of designers, animators, and VFX artists, and we can see why after lengthy testing.
We found the software’s UI to be simple to use, and it increased our productivity by separating things into various workspaces, such as editing, effects, and audio. When we tested it on both Mac and PC, we discovered that each workspace helps handle a specific activity while minimizing distraction.
Edit the FLV video with Adobe Premiere Pro using the following steps:
Step 1: Import the video and create initial sequence.
Step 2: In the Timeline, trim and rearrange clips, add audio, and transitions.
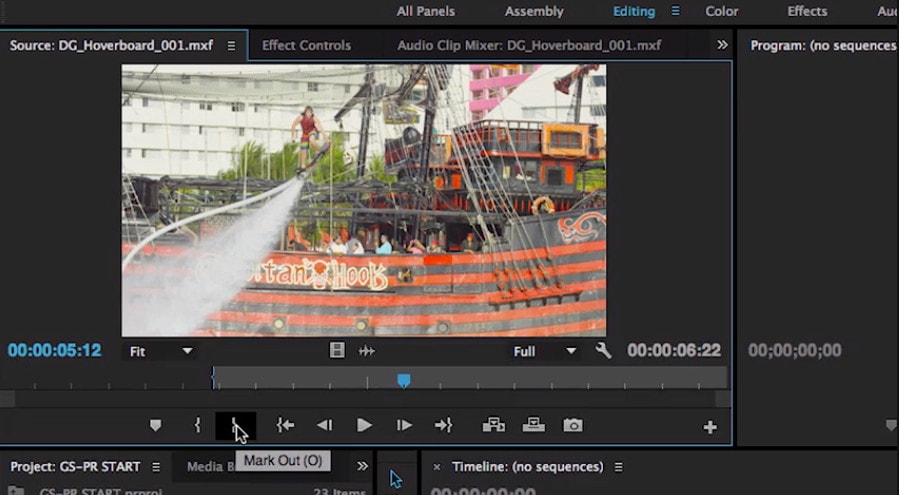
Step 3: Add title and graphics.
In Premiere Pro, you may make onscreen titles, as well as stylize and animate your images.
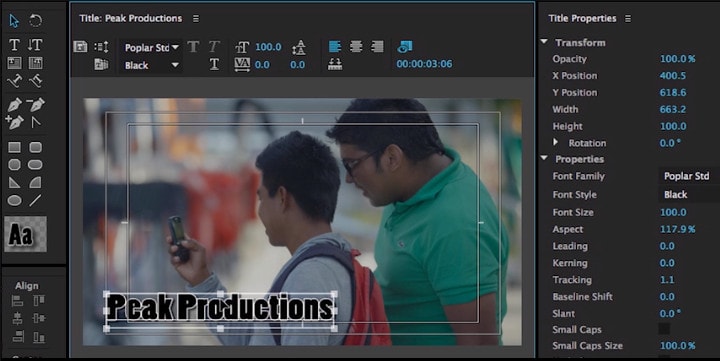
Step 4: Export your video.

Alternative Way to Edit FlV Video on Mac
1. Blender:
Under the GNU General Public License, Blender is a free, open-source 3D content production program that runs on all major operating systems. Blender is one of the greatest video editors for both Windows and Mac, with advanced features such as modifier-based modeling tools, powerful character animation capabilities, a node-based material, etc.
Because it is developed for professionals, it is tough to use as a beginner. However, it is unrestricted in its use and distribution. In addition, color options are changeable and versatile in the UI.
In contrast, this free video editor is perfect for semi-pros or those who want to enhance their video editing skills. However, you’ll need a lot of time and effort to learn it.
Step 1: Open the application.
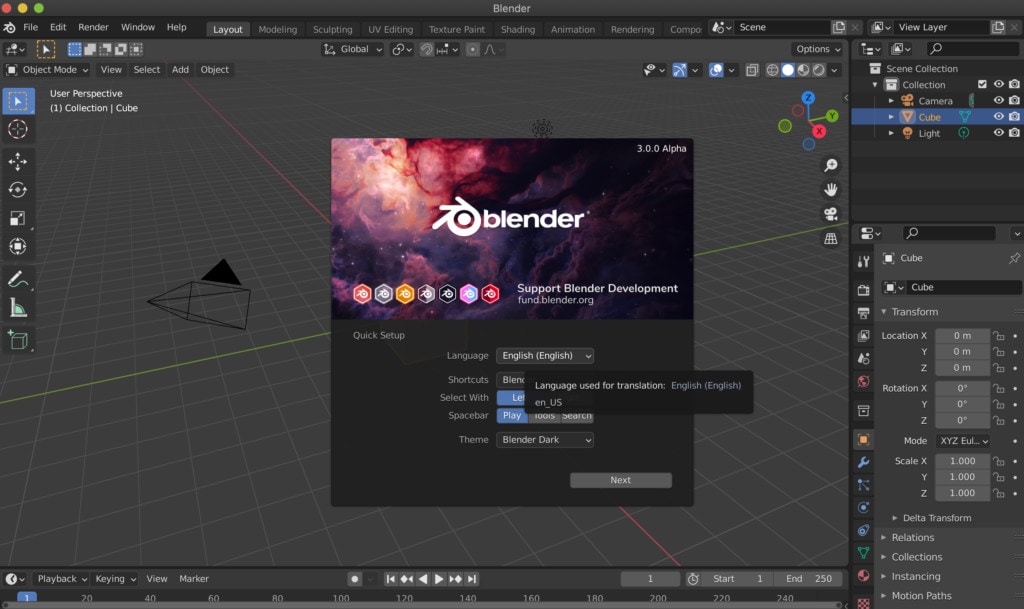
Step 2: Then, go into File->New->Video Editing to open the video editor.
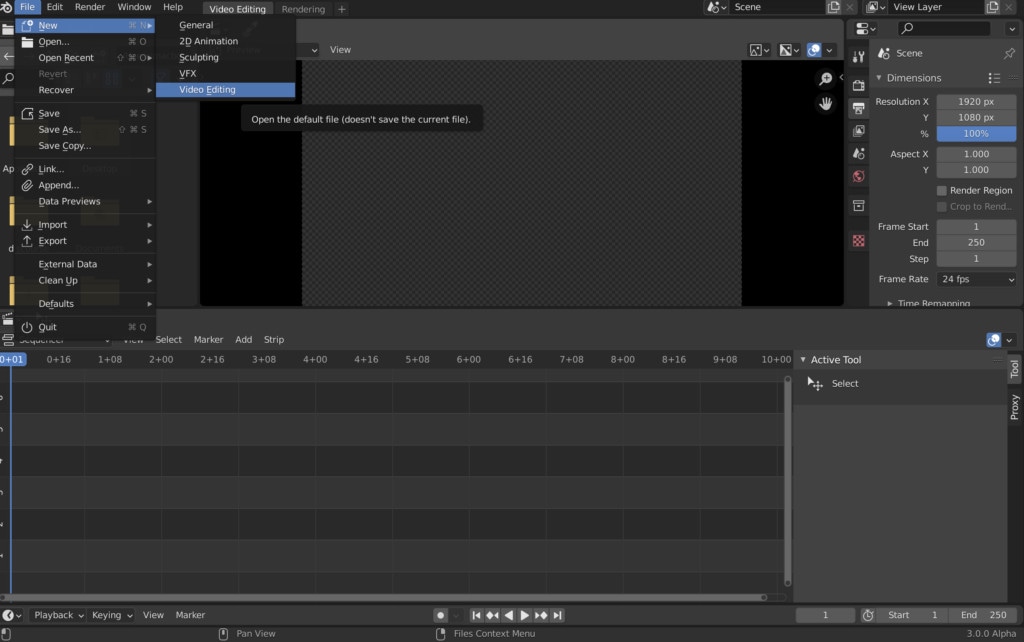
Step 3: Import the video and start editing using the editing tools.
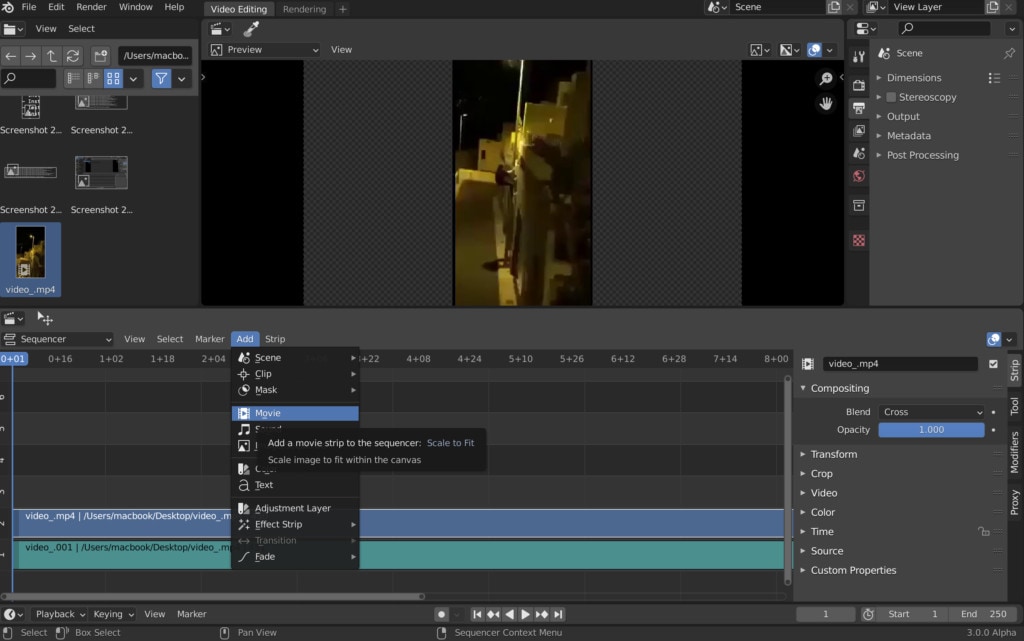
Step 4: Save and export the video.

2. Final Cut Pro:
When it comes to video editing software, Apple’s Final Cut Pro is one of the industry standards. As a result, it’s widely utilized in the television and film industries - at least among Mac users. However, one of the truly convincing reasons to choose it over Premiere Pro is because it is subscription-free: you only pay once.
The software’s Magnetic Timeline, grouping tools, a vast selection of effects, solid organizational capabilities, and simple ways to add and edit audio make it a favorite among professional video editors. 360° video, HDR, and powerful color correcting tools are among the other capabilities. It’s a strong software with a lot of features.
Follow the steps to edit FLV video using Final Cut Pro:
Step 1: Create Project.
To make a movie in Final Cut Pro, you must first establish a project, which keeps track of your editing selections and the media you utilize.
Step 2: Select and add clips to the timeline:
The second stage in making a movie with Final Cut Pro is to add and arrange clips in your project. In the timeline, you can move and reorder clips.
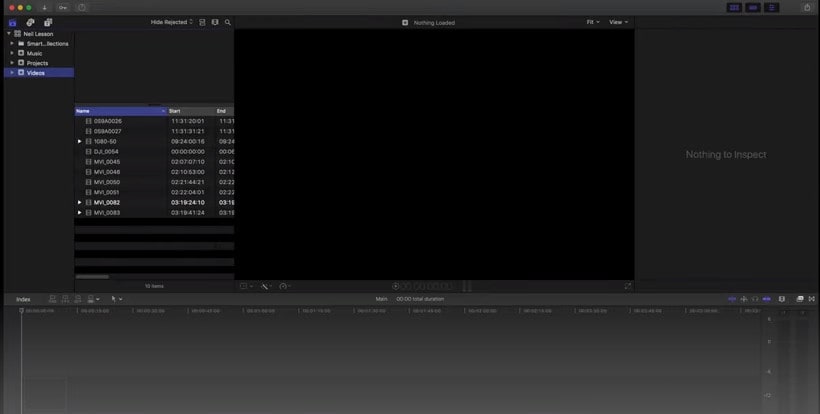
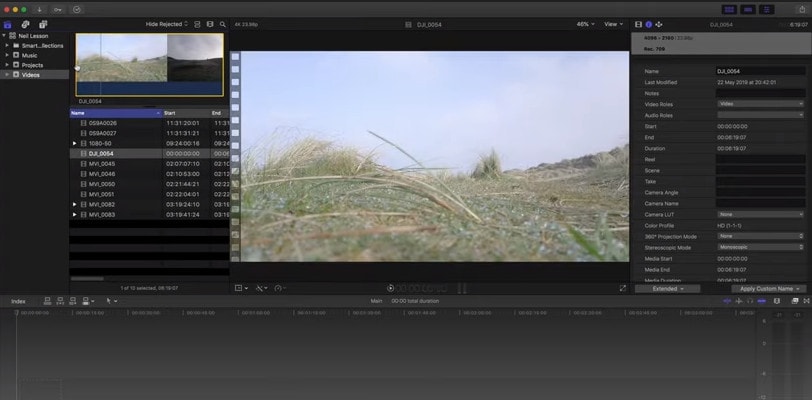
Step 3: Cut and trim video:
Final Cut Pro has a number of features for altering the start and stop points of clips in the timeline, as well as regulating the pacing of shots from one to the next.
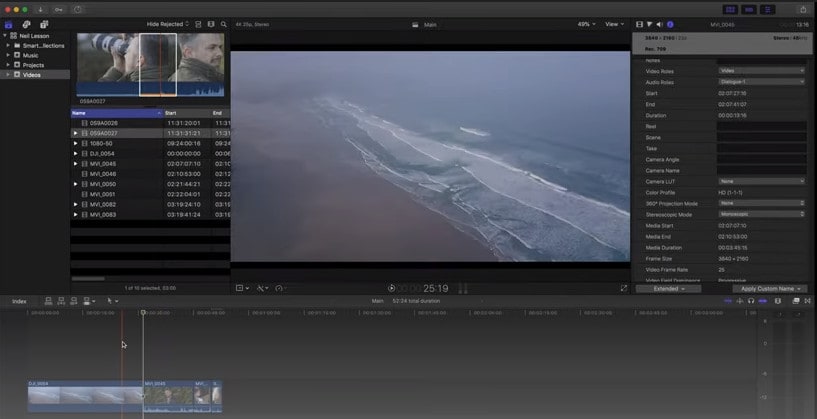
Step 4: Edit the video by adding effects and transitions:
Final Cut Pro includes a number of advanced editing features that make it simple to create a professional film. Visual enhancements and colour correction are among the finishing touches.

Step 5: Save and export video:
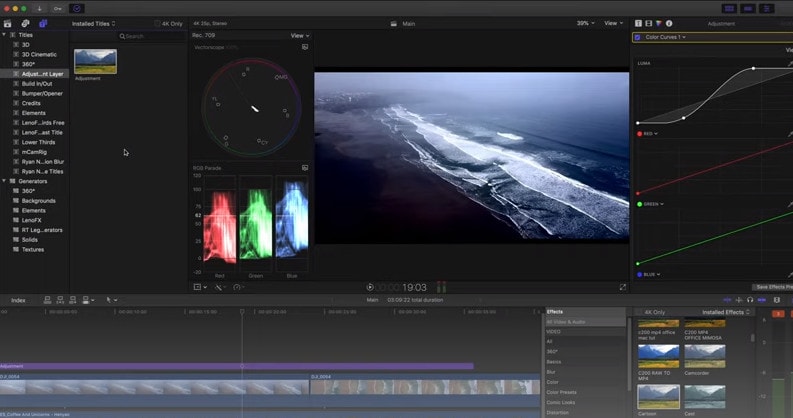
2 Ways to Edit FlV Video on Android:
1. Inshot:
For Android users, Inshot is a fantastic image and video editor. This Android video editor allows you to add popular stickers and emoticons to your films, making them more fashionable and unique.
The program supports HD video output, allowing you more control over your footage. Moreover, the additional sound and video can be synchronized with the available video chronology.
You can quickly blend more than two movies into one with rich effects and sound with this Android editor app. In addition, you can generate a watermark using unique text provided in the app, and subtitles support allow you to produce one with a variety of fonts.
Following are the steps that you can follow to edit FLV video using Inshot:
Step 1: Open the app and import the video.
Tap “Video” to open your phone’s gallery folder and begin editing a video in the InShot app. Select a video to work with. Adjust the canvass after your video has been loaded into the InShot App. For your other social media accounts, there are aspect ratios and sizes that work well with the video. It also has the option of being in portrait or landscape mode.
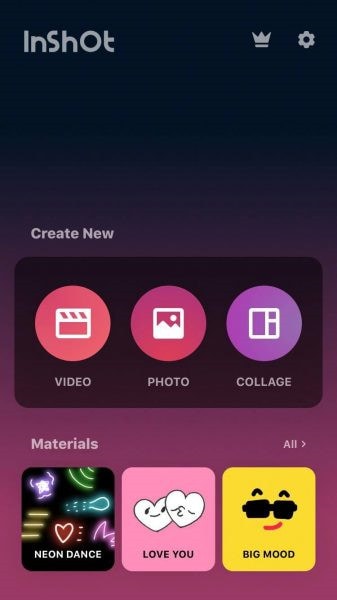
Step 2: Trim and split videos.
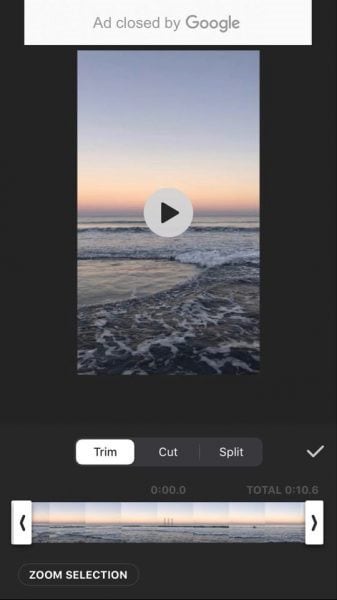
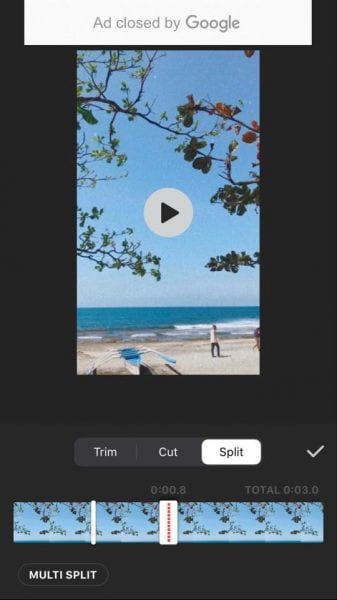
Step 3: Merge videos (optional):
By combining clips, you can combine them into a single film or project. Simply choose the videos you want to import from the drop-down menu. By tapping the “+” button on the lower left of the screen, you can insert and merge more videos. Your project will then be updated using the selected video.
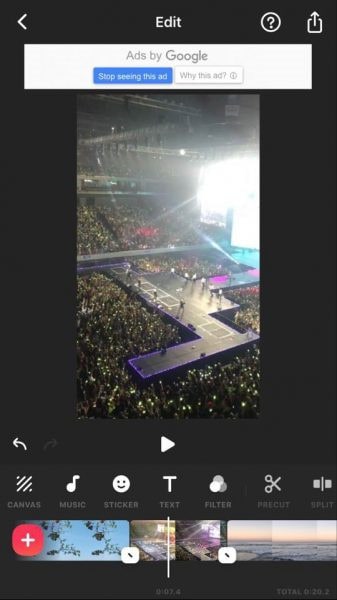
Step 4: Apply filters, add music, text and stickers.
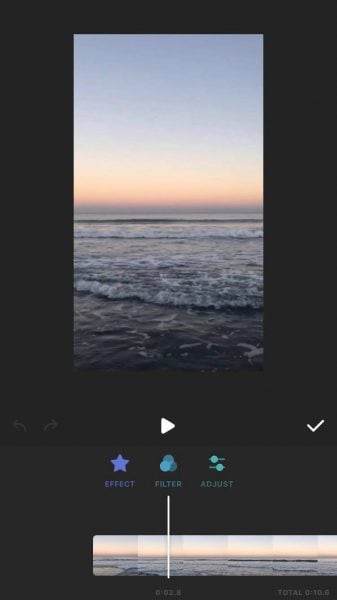
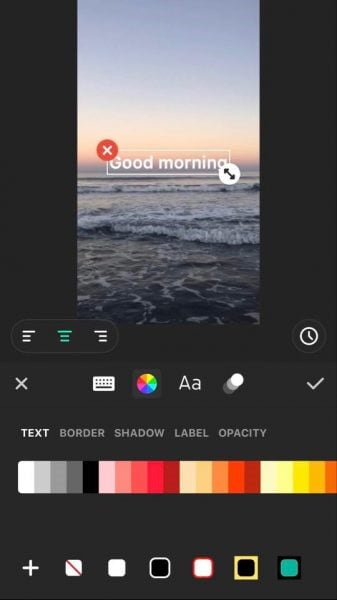
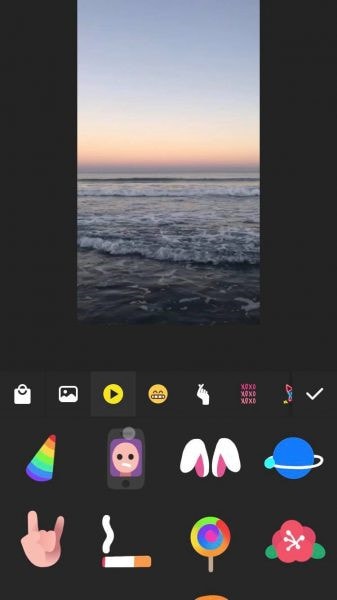
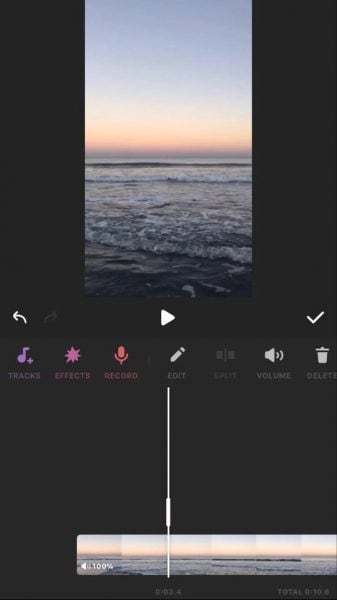
Step 5: Once you are done with the editing process, save the file.
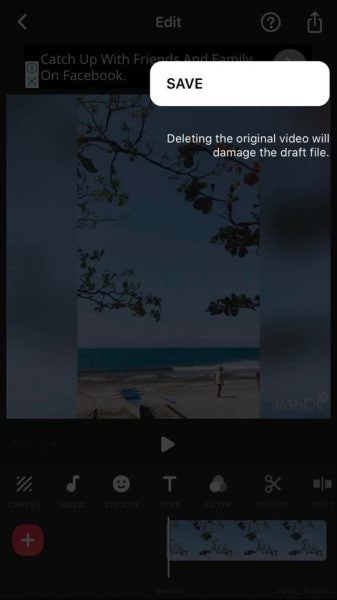
2. Videoshow:
VideoShow has a lot of video editing options. It is a simple and practical video editing program and movie scene maker for art directors and beginners. Using this video cutter, you may reverse, blur, duplicate, edit, merge and split collage clips or films.
You can also use VideoShow to adjust the audio or add subtitles to any video. It also allows you to use different filters on any video on your device. Over 50 intricate themes are included in the program, allowing you to create gorgeous music videos, slide shows, and vlogs in no time.
The annual subscription package is for $135.19, or you can also make a one-time purchase for $225.78.
However, to edit the video, you can use the following steps:
Step 1: Download and install the videoshow application and open it. Upload the video that you want to edit.
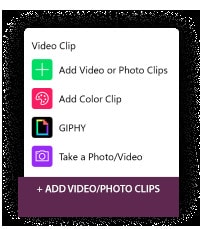
Step 2: Edit the video by applying filters or cutting and trimming the part of the video that you want to remove.
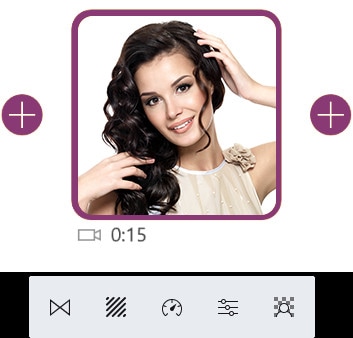
Step 3: Save changes and export the video to your preferred location.
2 Ways to Edit FlV Video on iPhone:
1. LumaFusion:
No other software program on the iPhone comes close to the feature set that LumaFusion offers for video editing. It is the only premium app on this list, and it is well worth every penny.
But, of course, YouTubers aren’t the only ones who use the program; mobile journalists and professional video producers who don’t want to lug along their bulky camera equipment and editing apparatus also use it.
LumaFusion deals with up to six video and audio tracks for photographs, movies, audio, titles, and graphics, and six audio tracks for narration, music, and sound effects. You also receive a magnetic timeline; importing clips is a breeze once they’ve been imported.
There are many transitions and effects to choose from, all of which can be layered. Finally, it includes much royalty-free music, sound effects, and other assets. So if you need a professional video editing tool for your iPhone, LumaFusion ($29.99) is the way to go.
Follow these steps to edit FLV video using LumaFusion:
Step 1: To create your first project, press + at the bottom of the screen. You can create a new project by tapping that area or by tapping the Plus button.
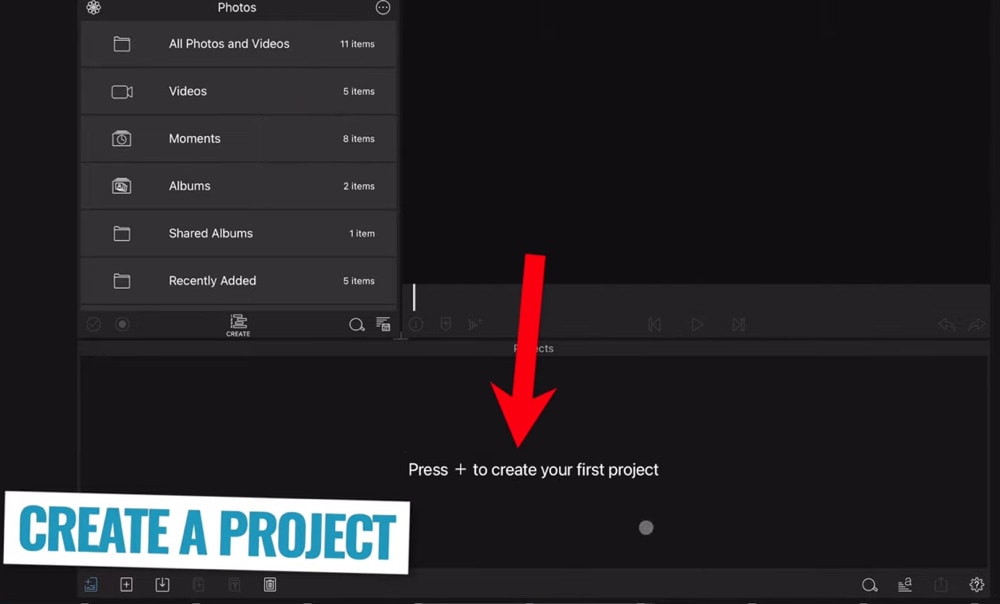
Step 2: Import video:
The Import section is located in the top left corner of the screen. This defaults to the Photos tab when you initially launch a new project. All of the photographs and videos can be seen here.
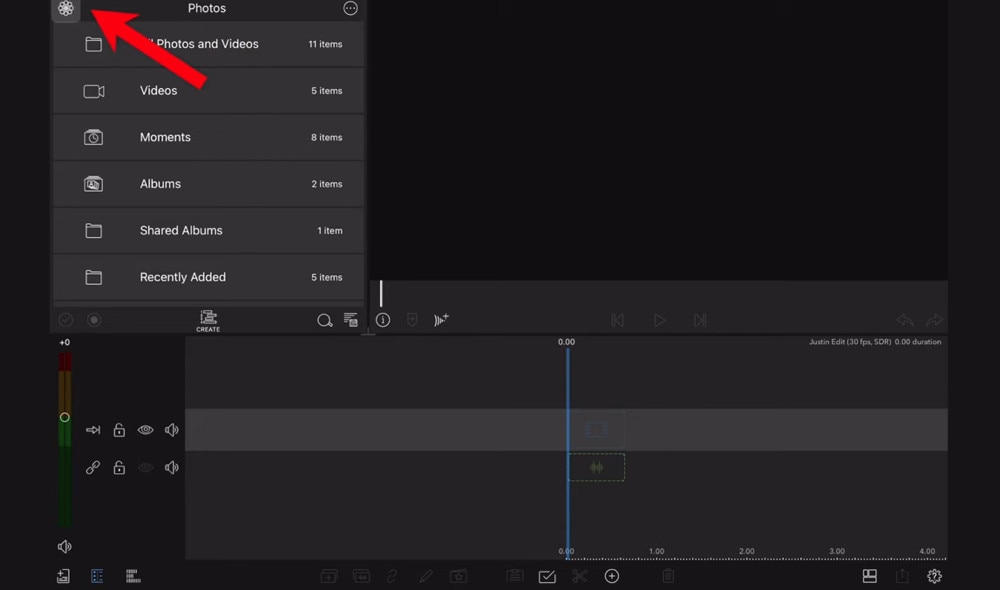
Step 3: Check layout and adjust volume levels
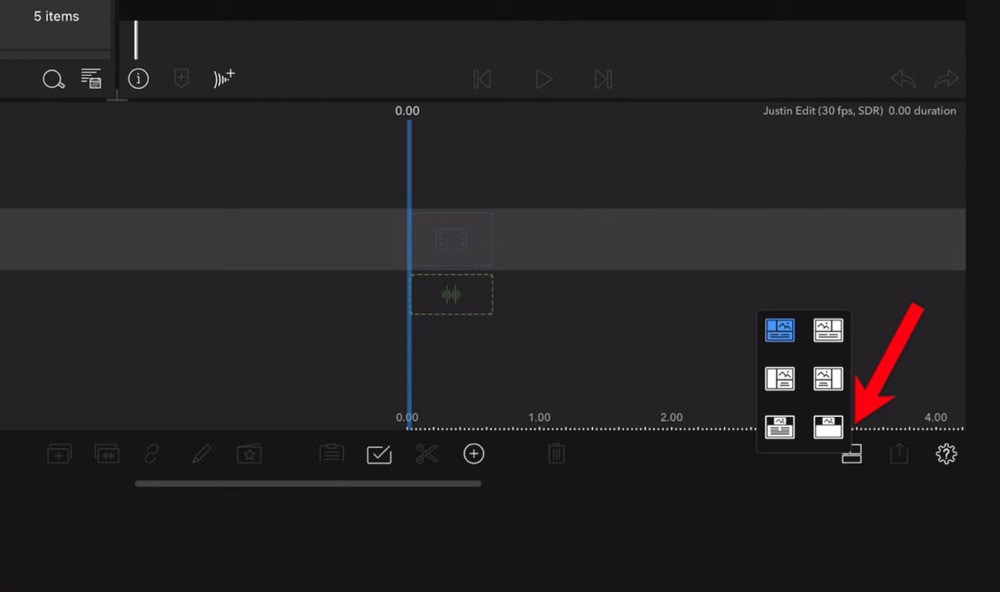
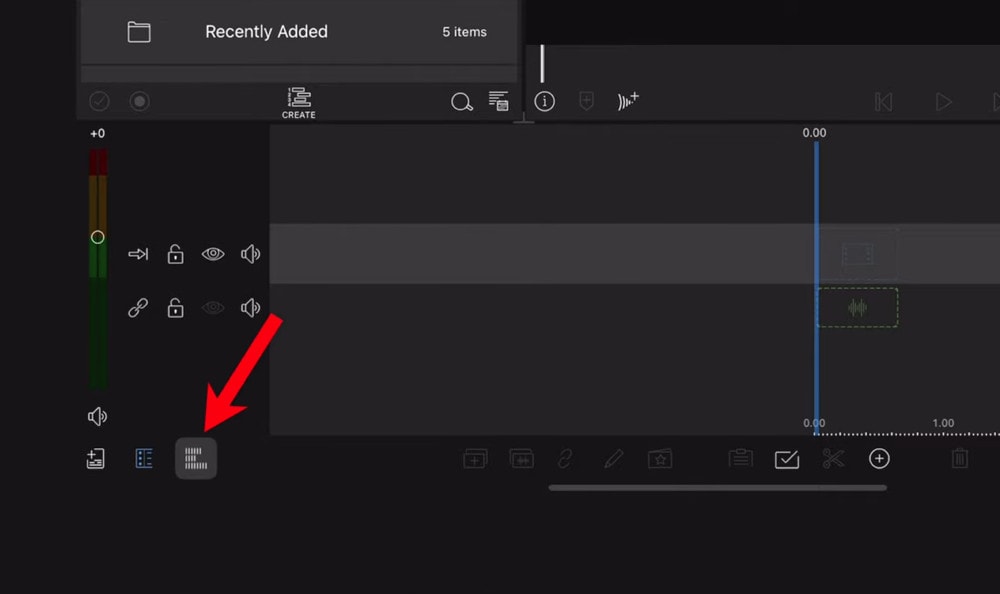
Step 4: Edit the video and add titles.
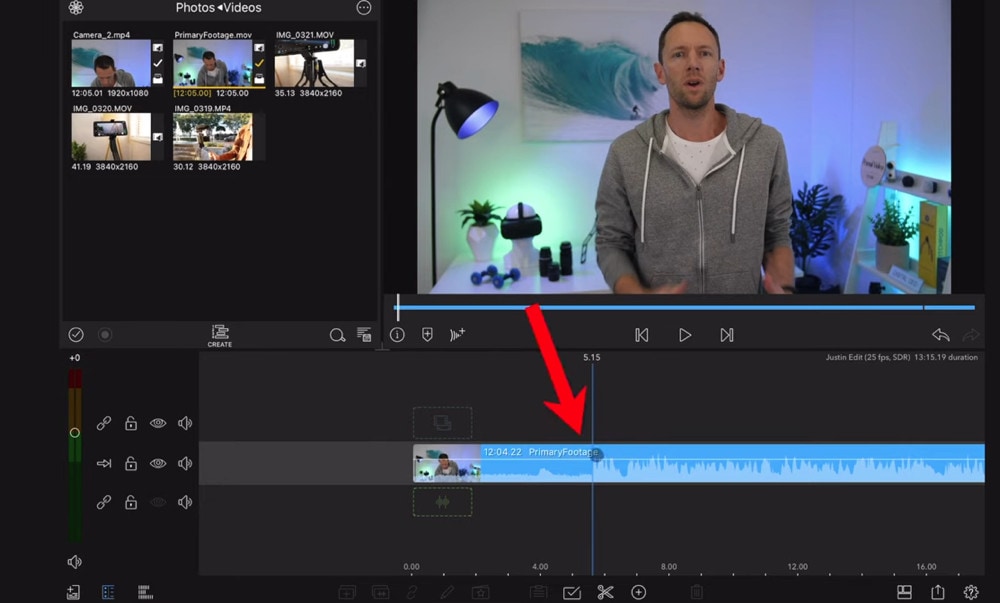
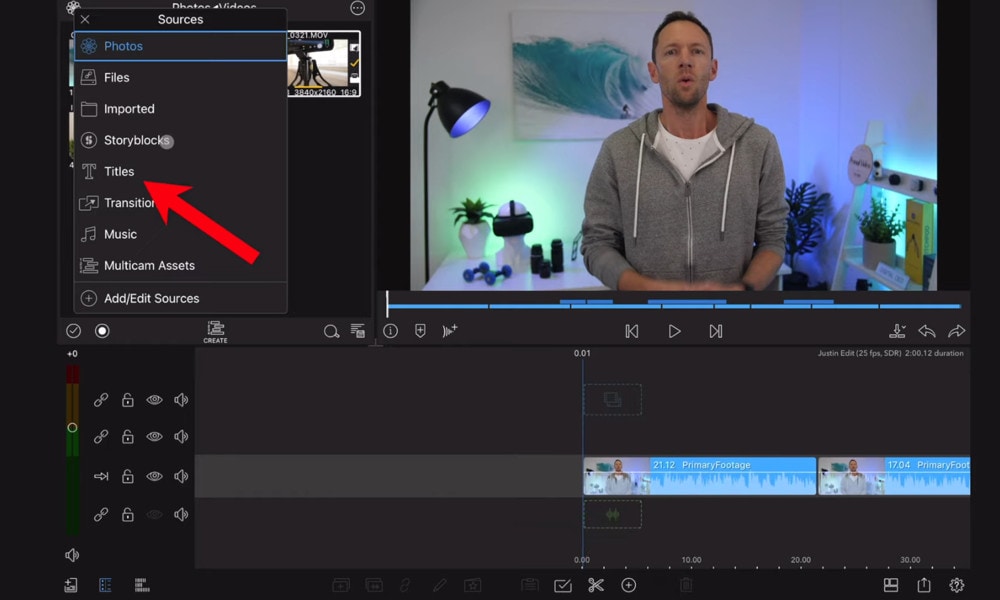
Step 5: Export the video.
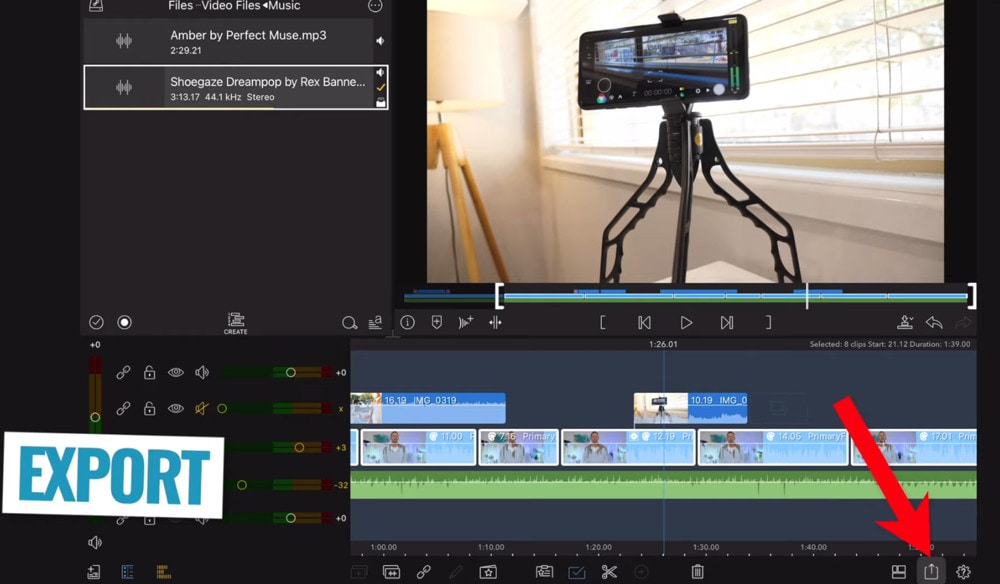
2. Filmora Go:
Without a doubt, Filmora is one of the greatest free video editors for iPhone that does not contain any watermarks. In addition, it’s compatible with both iPhones and Android devices and has a simple user interface.
Filmora is the greatest iPhone video editor for beginners, with themed filters and effects that add flair to your videos without any work.
Filmora has many unique features, including themes for your videos and ‘Materials,’ which are visual effects created by the program. Unfortunately, materials are only available with Filmora Pro, so keep that in mind.
Aside from that, you’ll find all of the typical features here. You can also add titles to videos, utilize stickers and effects, and add music to the background of your movie. You may also add another clip in picture-in-picture mode, which is beneficial.
Below are the following steps to edit FLV video:
Step 1: Open the application and select ‘Create new video’. Now, import the video by choosing the video icon.
Step 2: Edit the video. Within the edit tool, you can trim and split the video. You can also improve the video quality by adding titles, transitions, and music, and voiceovers.

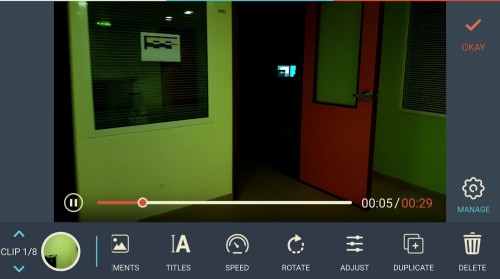

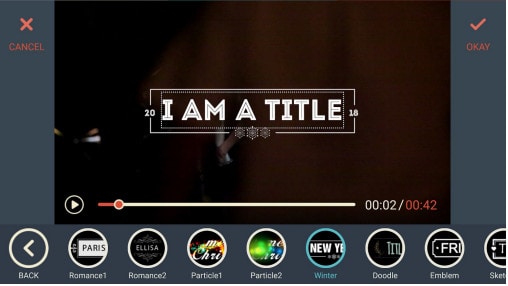
Step 3: After editing the video, select ‘SAVE’ and export the video or download it.
2 Ways to Edit FlV Video Online:
1. Fastreel:
If you’re seeking the finest free online video editor, Fastreel is a terrific tool to start with. This online video editing software provides a wide range of editing options. It can merge, edit, crop, and compress videos to make sharing easier.
It also includes many pre-made templates that you can change to create titles and transitions and other editing features like reverse, looping, and rotating. It’s also quite simple to use, and you can have polished videos in minutes.
There are also numerous pricing options to suit different customers, ranging from a completely free plan with watermarks to paid subscriptions with no limitations.
Use the following steps to edit FLV video:
Step 1: Open Fastreel web and import the video.
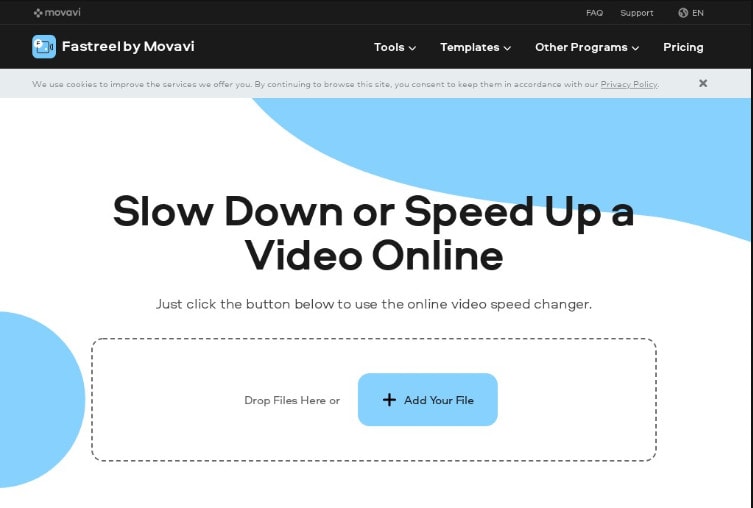
Step 2: Use templates to make it look attractive.
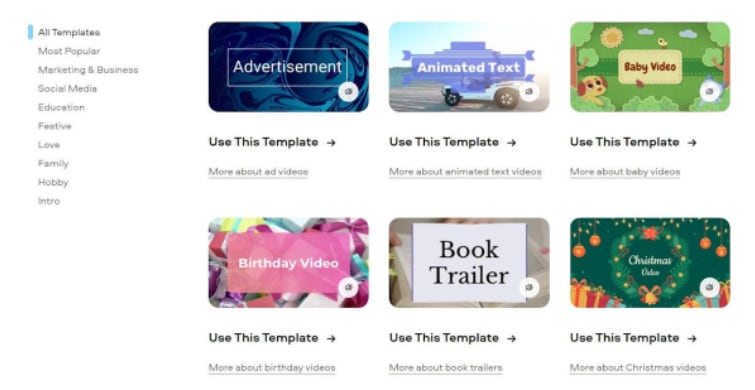
Step 3: Edit the video using the template.
Templates are unfinished videos with all of the effects already applied, such as backdrops, transitions, animated stickers, and titles. There are blank spots for your photos or videos, and you can arrange them in any sequence you like. You can also add music from the Fastreel library or upload your own track after entering your text.
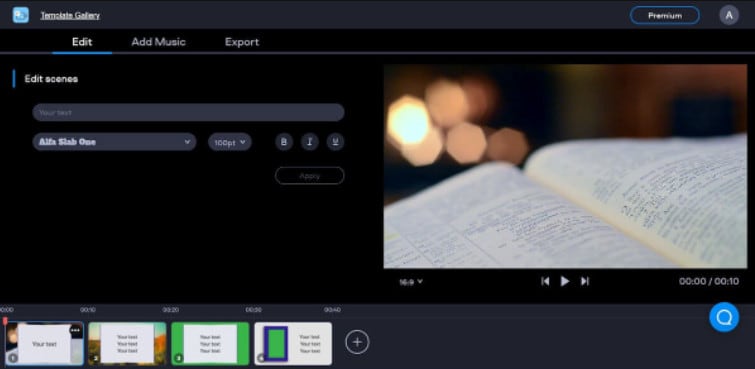
Step 4: Once you are done with edits, save the video and export it.
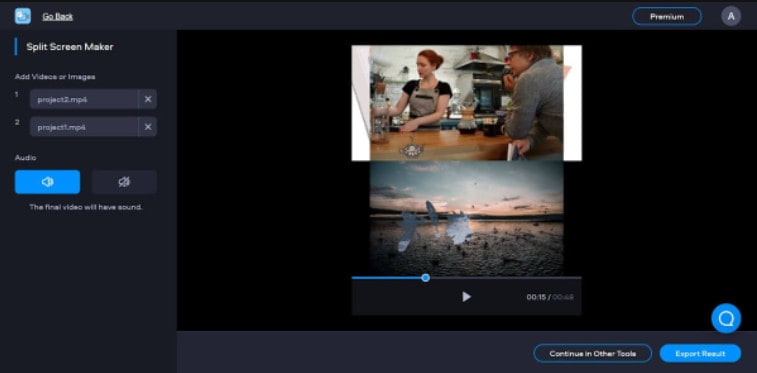
2. WeVideo:
When you’re seeking the greatest video producer online, another wonderful choice to explore is WeVideo.
Google, Dropbox, Rover, and Roche are just a few of the huge names that trust our online editor. Its fast, versatile editing engine and vast stock content collection for adding stock movies, photos, and audio tracks to your productions are ideal for business users.
WeVideo also stands out since it provides unlimited cloud storage for all of your videos, which you can download and watch on any device. The only drawback is that all of this comes at a price, with WeVideo offering a variety of payment plans ranging from $4.99 to $36.99 a month.
Follow the steps to edit videos using WeVideo:
Step 1: Open WeVideo and import the video file.
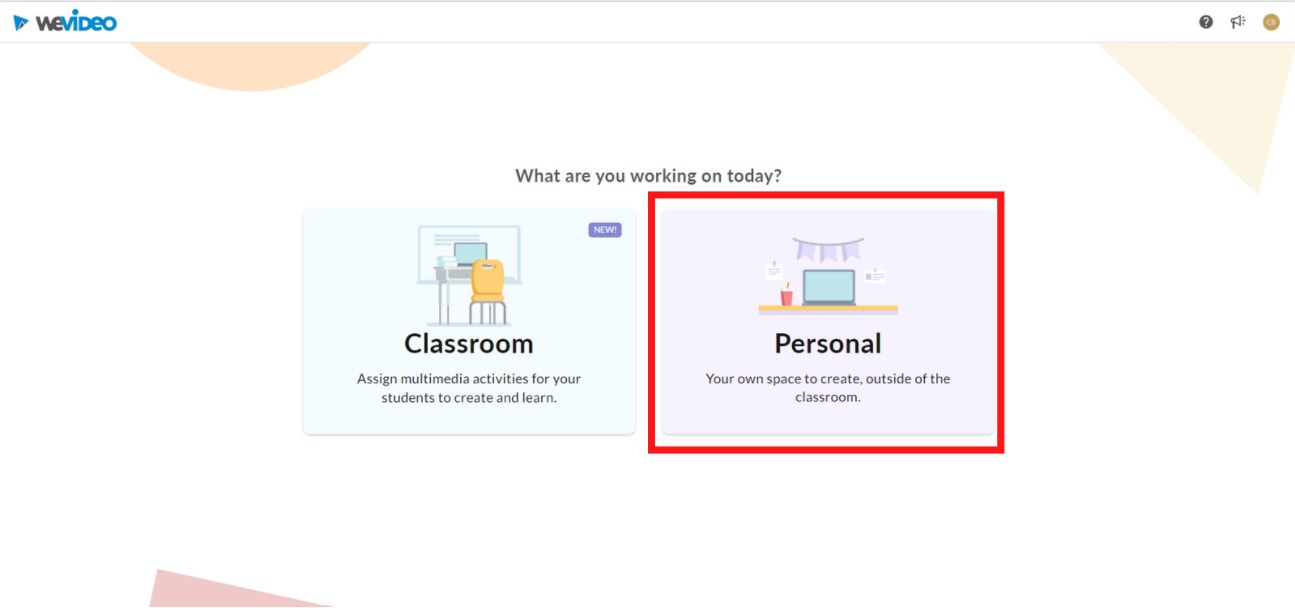
Step 2: Click on create new video in the left-hand corner of the screen.
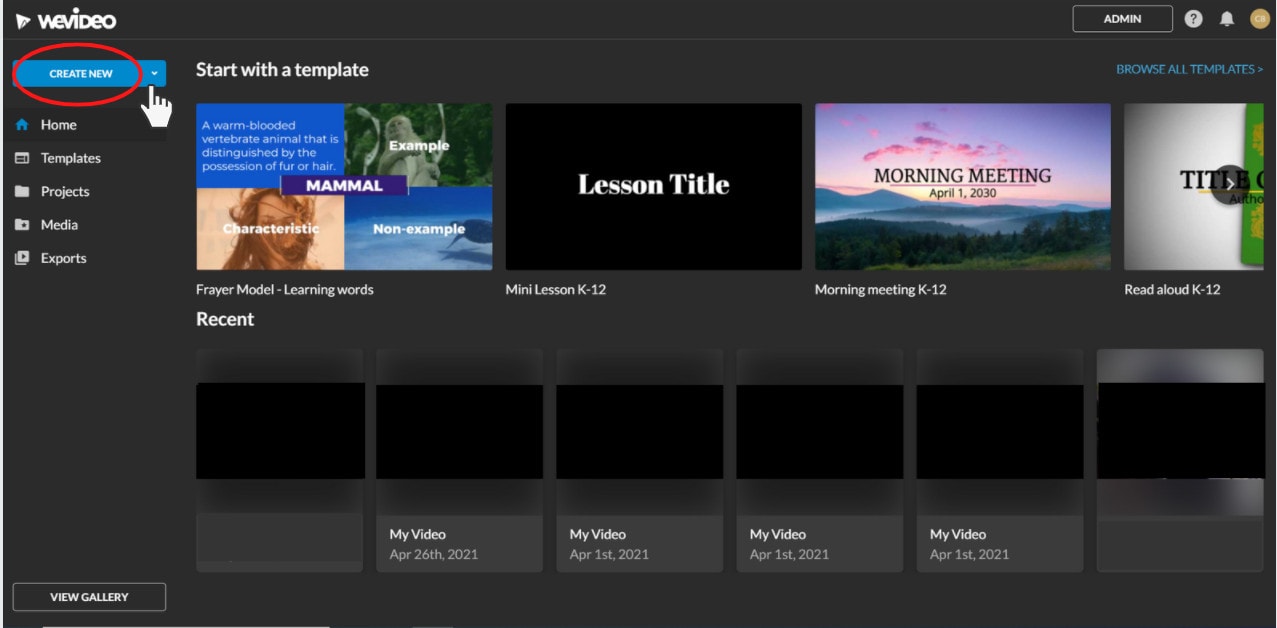
Step 3: Edit the video.
The video clip you imported will appear in the viewing window to the right once you click on it. By moving the arrows and either end, you can edit out the beginning or end of your footage.
- Drag the clip into your timeline from your media pool.
- Place the clip on your timeline by dragging and dropping it.
- Click the scissor symbol after moving the blue marker to the spot where you want to cut your clip.
- Once the material has been chopped, you can erase bits of it by selecting it with your mouse and then pressing delete on your keyboard or rearrange the clips in the timeline by dragging and dropping them to other positions.
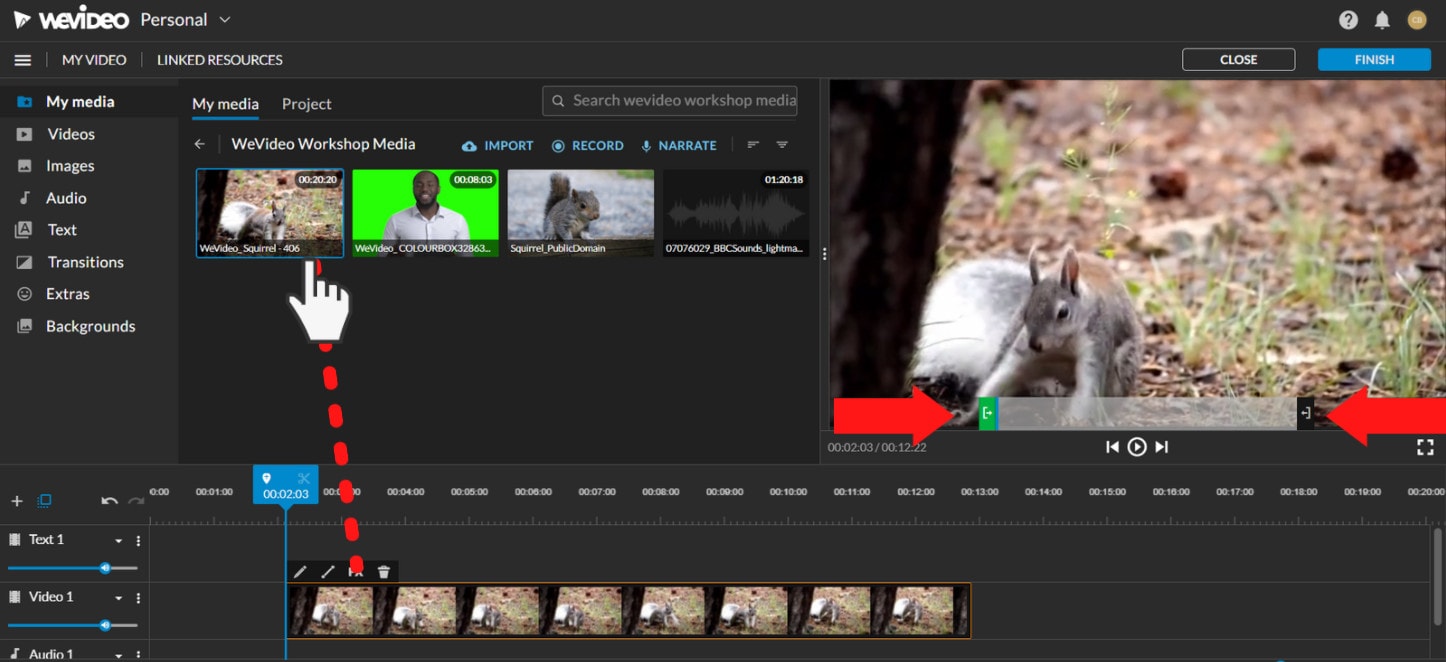
Step 4: Add effects, transitions, and music to the video.
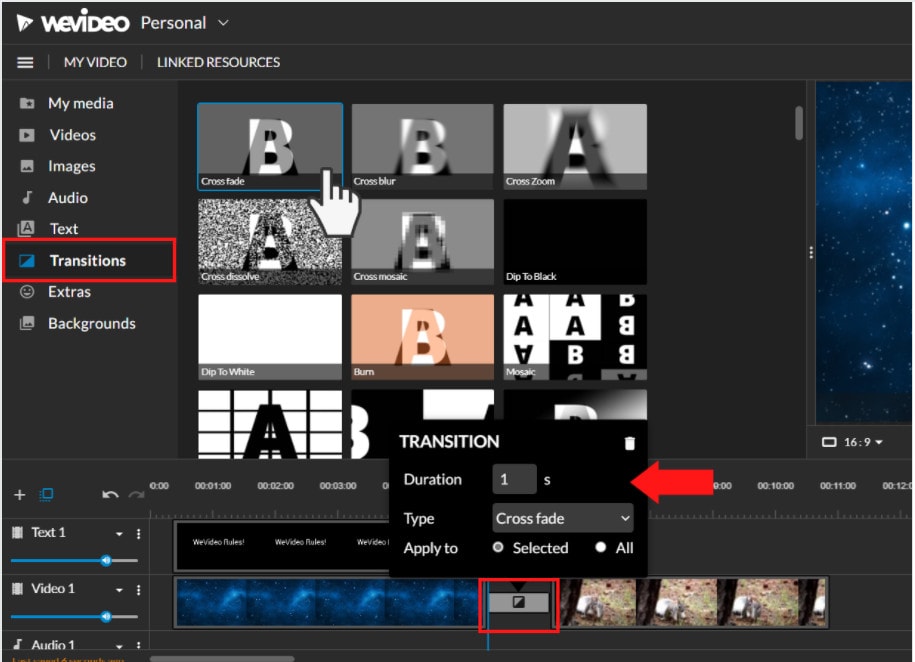
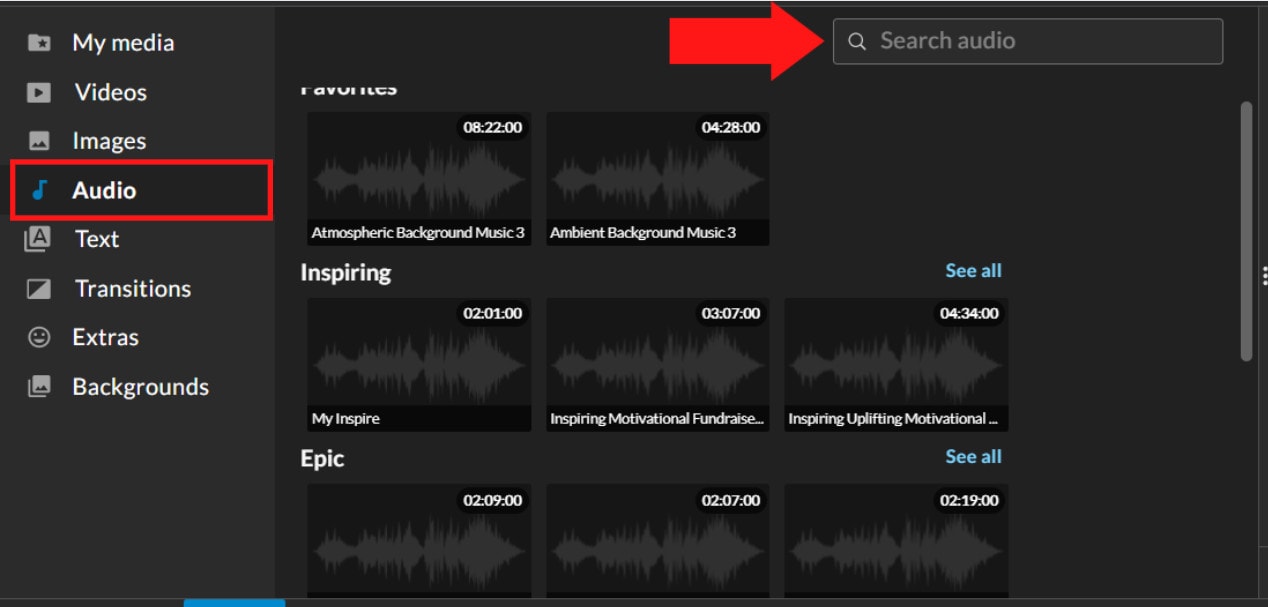
Step 5: Save and export the video by clicking on the Finish tab.
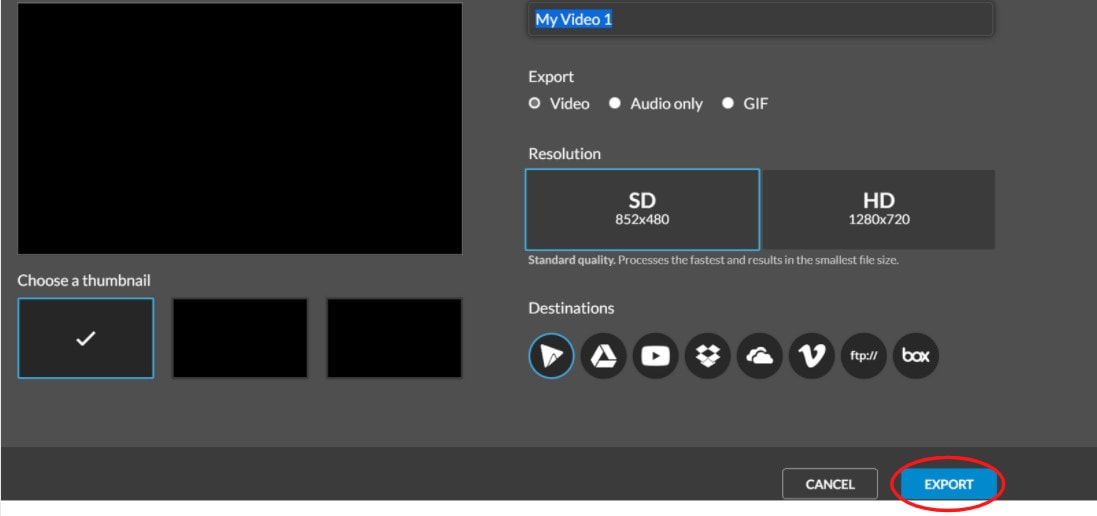
FAQs about editing FLV video
- How to open FLV files?
Any FLV player is required to view FLV files. Various players are available, including VLC, FLV Player, Sothink FLV Player for Mac, Tonec Free FLV Player, Any FLV Player, and others.
- Is Filmora compatible with Mac?
Filmora requires macOS Sierra (version 10.12) or later and the Big Sur (version 11) and Apple M1 chips. Touch Bar compatibility for MacBook Pro users and custom shortcuts to speed up editing.
- What is the best online FLV editor?
There are numerous free online editors to choose from. Fastreel, WeVideo, and FlexClip Video Maker are a few of the most popular.
- Is FLV better than MP4?
Because FLV and MP4 are the two most popular video file formats, it’s crucial to know which one is preferable. Adobe’s proprietary format is FLV. Both formats employ video and audio codecs and have equal performance levels. In their unprocessed state, MP4 files are more adaptable. You can, however, use an FLV file at the same time if you have the correct player.
- How do I choose a video editor?
When comparing video editing software, there are six crucial elements to consider.
- Budget and cost
- Ease of use/learning curve
- Multi-GPGPU acceleration and video format support
- Tools for advanced editing
- Music, special effects, and other goodies
- Customer service is second to none.
For macOS 10.14 or later
Therefore, you can use the following steps to edit FLV video on Windows and Mac:
Step 1: Import file:
Step 2: Edit the FLV file:
Acquire the perfect tool in your palm for anything you want to do, such as clipping, cropping, rotating, and more.
Furthermore, all editing capabilities in the toolbar allow drag-and-drop, making it even easier to touch up your films quickly. Consider the following scenario:
- Drag and drop a transition into the video/photo, or right-click it and select “Apply to All.”
- Please drag & drop a title template to the position where you want it to appear, then adjust it.
- To use the effects, select one from the 50+ available video effects, select it, and apply it to your photos/videos instantaneously.
Step 3: Save or Export the file:
When you’re done, export your modified MP4 files to Windows/Mac and quickly share them on YouTube, with the option of sending a message to Facebook and Twitter. When you click Create in the program window’s middle right corner, you’ll be taken to the Output window below.
Alternative Way to Edit FlV Video on Windows
1. VSDC
VSDC is a free video editor along with a lot of advanced features. Cut, combine, trim, crop, and other editing capabilities are available to help you polish your FLV films.
Although it may not look logical, learning the editing capabilities hidden within modular boxes is simple. One noteworthy aspect of VSDC is its ability to produce good visual effects using many trendy video effects, transitions, and filters.
Furthermore, strong chroma keys, color correction, object modification, and other editing tools can be utilized to edit FLV videos. It not only creates excellent FLV videos, but it also supports a wide range of media conversion, allowing you to convert FLV files to various formats and export them without a watermark.
Therefore, follow the below mentioned steps to edit FLV video using VSDC:
Step 1: Install the software on the Windows. Open the application and import the video.
Step 2: Use cutting and splitting tools to edit the video.
The first icon is a picture of a pair of scissors, which is a cutting tool. It’s very useful when you need to cut the beginning or end of a film. Place the cursor exactly where you want to cut, then select “Trim start” or “Trim finish” from the dropdown cutting menu (the small triangle next to the scissors icon).
Cropping is also simple. If you have too much additional space around the scene object recorded, just choose the file you want to trim and select the cropping icon from the “Cutting and Splitting” option. A new window will appear, allowing you to select the region of the scene that should stay.
Step 3: Apply effects and transitions.
To use one, first select the video file you wish to edit, then go to the Video effects tab and select the effect you want to use. On the timeline, a new tab will appear, containing all of the effects done to the selected object. You can alter the effect’s duration and position in time by dragging it with the mouse there. The properties pane on the right-hand side can be used to change other parameters.
Transitions follow the same rule. Place your cursor where you want the transition to begin, then choose a transition from the Video effects dropdown menu and manually adjust the duration.
Step 4: Save changes and export video.
Make sure your movie appears exactly how you want it to before exporting it. If the video appears choppy, use the red preview button and lower the preview quality. When the PC’s resources are insufficient to process the video in real time, lagging can occur. Keep in mind that it has no bearing on the outcome. When you’re finished, navigate to the Export project tab and select an export format.
2. Adobe Premiere Pro:
Professional video editors use Premiere Pro to make everything from YouTube videos to Hollywood films like Mank, a 2021 Oscar candidate. It’s also widely utilized in the workflows of designers, animators, and VFX artists, and we can see why after lengthy testing.
We found the software’s UI to be simple to use, and it increased our productivity by separating things into various workspaces, such as editing, effects, and audio. When we tested it on both Mac and PC, we discovered that each workspace helps handle a specific activity while minimizing distraction.
Edit the FLV video with Adobe Premiere Pro using the following steps:
Step 1: Import the video and create initial sequence.
Step 2: In the Timeline, trim and rearrange clips, add audio, and transitions.
Step 3: Add title and graphics.
In Premiere Pro, you may make onscreen titles, as well as stylize and animate your images.
Step 4: Export your video.
Alternative Way to Edit FlV Video on Mac
1. Blender:
Under the GNU General Public License, Blender is a free, open-source 3D content production program that runs on all major operating systems. Blender is one of the greatest video editors for both Windows and Mac, with advanced features such as modifier-based modeling tools, powerful character animation capabilities, a node-based material, etc.
Because it is developed for professionals, it is tough to use as a beginner. However, it is unrestricted in its use and distribution. In addition, color options are changeable and versatile in the UI.
In contrast, this free video editor is perfect for semi-pros or those who want to enhance their video editing skills. However, you’ll need a lot of time and effort to learn it.
Step 1: Open the application.
Step 2: Then, go into File->New->Video Editing to open the video editor.
Step 3: Import the video and start editing using the editing tools.
Step 4: Save and export the video.
2. Final Cut Pro:
When it comes to video editing software, Apple’s Final Cut Pro is one of the industry standards. As a result, it’s widely utilized in the television and film industries - at least among Mac users. However, one of the truly convincing reasons to choose it over Premiere Pro is because it is subscription-free: you only pay once.
The software’s Magnetic Timeline, grouping tools, a vast selection of effects, solid organizational capabilities, and simple ways to add and edit audio make it a favorite among professional video editors. 360° video, HDR, and powerful color correcting tools are among the other capabilities. It’s a strong software with a lot of features.
Follow the steps to edit FLV video using Final Cut Pro:
Step 1: Create Project.
To make a movie in Final Cut Pro, you must first establish a project, which keeps track of your editing selections and the media you utilize.
Step 2: Select and add clips to the timeline:
The second stage in making a movie with Final Cut Pro is to add and arrange clips in your project. In the timeline, you can move and reorder clips.
Step 3: Cut and trim video:
Final Cut Pro has a number of features for altering the start and stop points of clips in the timeline, as well as regulating the pacing of shots from one to the next.
Step 4: Edit the video by adding effects and transitions:
Final Cut Pro includes a number of advanced editing features that make it simple to create a professional film. Visual enhancements and colour correction are among the finishing touches.
Step 5: Save and export video:
2 Ways to Edit FlV Video on Android:
1. Inshot:
For Android users, Inshot is a fantastic image and video editor. This Android video editor allows you to add popular stickers and emoticons to your films, making them more fashionable and unique.
The program supports HD video output, allowing you more control over your footage. Moreover, the additional sound and video can be synchronized with the available video chronology.
You can quickly blend more than two movies into one with rich effects and sound with this Android editor app. In addition, you can generate a watermark using unique text provided in the app, and subtitles support allow you to produce one with a variety of fonts.
Following are the steps that you can follow to edit FLV video using Inshot:
Step 1: Open the app and import the video.
Tap “Video” to open your phone’s gallery folder and begin editing a video in the InShot app. Select a video to work with. Adjust the canvass after your video has been loaded into the InShot App. For your other social media accounts, there are aspect ratios and sizes that work well with the video. It also has the option of being in portrait or landscape mode.
Step 2: Trim and split videos.
Step 3: Merge videos (optional):
By combining clips, you can combine them into a single film or project. Simply choose the videos you want to import from the drop-down menu. By tapping the “+” button on the lower left of the screen, you can insert and merge more videos. Your project will then be updated using the selected video.
Step 4: Apply filters, add music, text and stickers.
Step 5: Once you are done with the editing process, save the file.
2. Videoshow:
VideoShow has a lot of video editing options. It is a simple and practical video editing program and movie scene maker for art directors and beginners. Using this video cutter, you may reverse, blur, duplicate, edit, merge and split collage clips or films.
You can also use VideoShow to adjust the audio or add subtitles to any video. It also allows you to use different filters on any video on your device. Over 50 intricate themes are included in the program, allowing you to create gorgeous music videos, slide shows, and vlogs in no time.
The annual subscription package is for $135.19, or you can also make a one-time purchase for $225.78.
However, to edit the video, you can use the following steps:
Step 1: Download and install the videoshow application and open it. Upload the video that you want to edit.
Step 2: Edit the video by applying filters or cutting and trimming the part of the video that you want to remove.
Step 3: Save changes and export the video to your preferred location.
2 Ways to Edit FlV Video on iPhone:
1. LumaFusion:
No other software program on the iPhone comes close to the feature set that LumaFusion offers for video editing. It is the only premium app on this list, and it is well worth every penny.
But, of course, YouTubers aren’t the only ones who use the program; mobile journalists and professional video producers who don’t want to lug along their bulky camera equipment and editing apparatus also use it.
LumaFusion deals with up to six video and audio tracks for photographs, movies, audio, titles, and graphics, and six audio tracks for narration, music, and sound effects. You also receive a magnetic timeline; importing clips is a breeze once they’ve been imported.
There are many transitions and effects to choose from, all of which can be layered. Finally, it includes much royalty-free music, sound effects, and other assets. So if you need a professional video editing tool for your iPhone, LumaFusion ($29.99) is the way to go.
Follow these steps to edit FLV video using LumaFusion:
Step 1: To create your first project, press + at the bottom of the screen. You can create a new project by tapping that area or by tapping the Plus button.
Step 2: Import video:
The Import section is located in the top left corner of the screen. This defaults to the Photos tab when you initially launch a new project. All of the photographs and videos can be seen here.
Step 3: Check layout and adjust volume levels
Step 4: Edit the video and add titles.
Step 5: Export the video.
2. Filmora Go:
Without a doubt, Filmora is one of the greatest free video editors for iPhone that does not contain any watermarks. In addition, it’s compatible with both iPhones and Android devices and has a simple user interface.
Filmora is the greatest iPhone video editor for beginners, with themed filters and effects that add flair to your videos without any work.
Filmora has many unique features, including themes for your videos and ‘Materials,’ which are visual effects created by the program. Unfortunately, materials are only available with Filmora Pro, so keep that in mind.
Aside from that, you’ll find all of the typical features here. You can also add titles to videos, utilize stickers and effects, and add music to the background of your movie. You may also add another clip in picture-in-picture mode, which is beneficial.
Below are the following steps to edit FLV video:
Step 1: Open the application and select ‘Create new video’. Now, import the video by choosing the video icon.
Step 2: Edit the video. Within the edit tool, you can trim and split the video. You can also improve the video quality by adding titles, transitions, and music, and voiceovers.
Step 3: After editing the video, select ‘SAVE’ and export the video or download it.
2 Ways to Edit FlV Video Online:
1. Fastreel:
If you’re seeking the finest free online video editor, Fastreel is a terrific tool to start with. This online video editing software provides a wide range of editing options. It can merge, edit, crop, and compress videos to make sharing easier.
It also includes many pre-made templates that you can change to create titles and transitions and other editing features like reverse, looping, and rotating. It’s also quite simple to use, and you can have polished videos in minutes.
There are also numerous pricing options to suit different customers, ranging from a completely free plan with watermarks to paid subscriptions with no limitations.
Use the following steps to edit FLV video:
Step 1: Open Fastreel web and import the video.
Step 2: Use templates to make it look attractive.
Step 3: Edit the video using the template.
Templates are unfinished videos with all of the effects already applied, such as backdrops, transitions, animated stickers, and titles. There are blank spots for your photos or videos, and you can arrange them in any sequence you like. You can also add music from the Fastreel library or upload your own track after entering your text.
Step 4: Once you are done with edits, save the video and export it.
2. WeVideo:
When you’re seeking the greatest video producer online, another wonderful choice to explore is WeVideo.
Google, Dropbox, Rover, and Roche are just a few of the huge names that trust our online editor. Its fast, versatile editing engine and vast stock content collection for adding stock movies, photos, and audio tracks to your productions are ideal for business users.
WeVideo also stands out since it provides unlimited cloud storage for all of your videos, which you can download and watch on any device. The only drawback is that all of this comes at a price, with WeVideo offering a variety of payment plans ranging from $4.99 to $36.99 a month.
Follow the steps to edit videos using WeVideo:
Step 1: Open WeVideo and import the video file.
Step 2: Click on create new video in the left-hand corner of the screen.
Step 3: Edit the video.
The video clip you imported will appear in the viewing window to the right once you click on it. By moving the arrows and either end, you can edit out the beginning or end of your footage.
- Drag the clip into your timeline from your media pool.
- Place the clip on your timeline by dragging and dropping it.
- Click the scissor symbol after moving the blue marker to the spot where you want to cut your clip.
- Once the material has been chopped, you can erase bits of it by selecting it with your mouse and then pressing delete on your keyboard or rearrange the clips in the timeline by dragging and dropping them to other positions.
Step 4: Add effects, transitions, and music to the video.
Step 5: Save and export the video by clicking on the Finish tab.
FAQs about editing FLV video
- How to open FLV files?
Any FLV player is required to view FLV files. Various players are available, including VLC, FLV Player, Sothink FLV Player for Mac, Tonec Free FLV Player, Any FLV Player, and others.
- Is Filmora compatible with Mac?
Filmora requires macOS Sierra (version 10.12) or later and the Big Sur (version 11) and Apple M1 chips. Touch Bar compatibility for MacBook Pro users and custom shortcuts to speed up editing.
- What is the best online FLV editor?
There are numerous free online editors to choose from. Fastreel, WeVideo, and FlexClip Video Maker are a few of the most popular.
- Is FLV better than MP4?
Because FLV and MP4 are the two most popular video file formats, it’s crucial to know which one is preferable. Adobe’s proprietary format is FLV. Both formats employ video and audio codecs and have equal performance levels. In their unprocessed state, MP4 files are more adaptable. You can, however, use an FLV file at the same time if you have the correct player.
- How do I choose a video editor?
When comparing video editing software, there are six crucial elements to consider.
- Budget and cost
- Ease of use/learning curve
- Multi-GPGPU acceleration and video format support
- Tools for advanced editing
- Music, special effects, and other goodies
- Customer service is second to none.
Also read:
- In 2024, All About GIF Keyboard That You May Want to Know
- Updated 2024 Approved How to Make a PowerPoint Looping Slideshow
- New The Way to Make Dynamic Video Collages?
- In 2024, 15 Best Travel Vloggers That You Should Follow
- New Guide to Synchronizing Your Audio And Videos Properly?
- Updated While Emojis Have High End Credibility Towards Different Media Utilities, People Also Ask About Ways and Methods to Add Emoji to iPhone. Be Here to Get the Easiest Solutions to the Query
- Effective 10 Ways to Convert YouTube to MOV at Ease PC & Online for 2024
- Updated How to Zoom Desktop Screen
- New In 2024, Top 5 Tips to Freeze-Frame in After Effects
- New In 2024, How to Customize Your Loading Text Effect?
- In 2024, How To Import and Adjust the Video Clips on Wondershare Filmora?
- Complete Tutorial on After Effects Countdown Timer Adding
- Updated Best 15 Subtitle Apps 2023 Windows, Mac, iPhone, Android & Online
- In 2024, What Is the Selective Color Effect, and How Can You Add This Effect to Your Videos Using Wondershare Filmora? A Complete Guide for Beginners
- New Templates Take Your Music Video From Drab to Fab and Add some Spice to the Catchy Song. Here Are some Templates You Could Use to Make Your Music Video Popular
- In 2024, How to Add Miniature Effect in Video with Filmora
- Step by Step to Cut a Video in Lightworks
- In 2024, How to Put a Filter on a Video in iMovie
- How to Make Your CSGO Montage Impressive for 2024
- In This Article, You Will Learn How to Create an Attractive and Engaging Slideshow Video Using Tools Available in the Wondershare Filmora for 2024
- In 2024, Learn How to Create a Kinetic Typography Text Effect in Filmora, One of the Best Video Editors for All Skill Levels. Check Out This Simple Step-by-Step Guide
- New 2024 Approved Best Video Format Converter for PC and Online
- New What Anime Character Are You Look Like?
- Updated 2024 Approved FLV Editor for Windows 11/10/8.1/8/7 Easily Edit FLV Videos on PC
- 2024 Approved Step by Step to Rotate Videos Using OBS
- New How Does the YouTube AI Algorithm Work for 2024
- New 2024 Approved Color Lut in Video -How to Color Grade Your Video
- Updated Whatre the Best Alternatives to Pexels for 2024
- New After Reading This Article, You Can Add a B-Roll Feature From Filmora and Captivate More Audience. Explanation Video B-Roll and Story-Telling B-Roll Are Well Illustrated
- How to Customize Your Loading Text Effect, In 2024
- 2024 Approved With This Article, We Will Be Looking at Steps to Rotate a Video in Cyberlink PowerDirector to Help You when Required. We Have Also Mentioned the Steps You Will Need to Follow in Wondershare Filmora
- Updated In 2024, 7 Ways to Make GIF From Videos on Mac
- New Unraveling How the Slow Motion Guys Have Revolutionized The Slow Motion Game for 2024
- Updated In 2024, Step by Step to Cut Video in Adobe Premiere Pro
- In 2024, iPogo will be the new iSpoofer On Honor Magic 6 Lite? | Dr.fone
- How To Leave a Life360 Group On Apple iPhone XR Without Anyone Knowing? | Dr.fone
- In 2024, Delete Gmail Account With/Without Password On Itel P40+
- How to Share Location in Messenger On Vivo X100? | Dr.fone
- Will iSpoofer update On Honor Play 7T | Dr.fone
- In 2024, Top 10 AirPlay Apps in Xiaomi Redmi 12 5G for Streaming | Dr.fone
- In 2024, 3 Easy Ways to Factory Reset a Locked iPhone XS Max Without iTunes | Dr.fone
- In 2024, Ultimate Guide on Apple iPhone 11 iCloud Activation Lock Bypass
- In 2024, Unova Stone Pokémon Go Evolution List and How Catch Them For Vivo Y78t | Dr.fone
- How To Update or Downgrade Apple iPhone 12 Pro Max Without Losing Anything? | Dr.fone
- New How to Make Well Done Animated GIF By Yourself for 2024
- 3 Facts You Need to Know about Screen Mirroring Poco X5 Pro | Dr.fone
- Spotify Keeps Crashing A Complete List of Fixes You Can Use on Oppo K11 5G | Dr.fone
- In 2024, 5 Solutions For Poco X6 Unlock Without Password
- In 2024, How to Unlock iPhone 7 Plus with a Mask On
- Easy Guide to Samsung Galaxy Z Flip 5 FRP Bypass With Best Methods
- In 2024, What Is a SIM Network Unlock PIN? Get Your Vivo S18e Phone Network-Ready
- In 2024, Things You Should Know When Unlocking Total Wireless Of Apple iPhone 13
- In 2024, The Ultimate Guide to Bypassing iCloud Activation Lock on Apple iPhone 11
- In 2024, Full Guide on Mirroring Your Vivo Y55s 5G (2023) to Your PC/Mac | Dr.fone
- Issues playing MOV videos on Redmi 13C 5G
- New How To Make Your Memoji Talk? Get Creative With Your Messaging
- How to Hide/Fake Snapchat Location on Your Asus ROG Phone 8 | Dr.fone
- Google Play Services Wont Update? 12 Fixes are Here on Samsung Galaxy S24 | Dr.fone
- In 2024, The Best iSpoofer Alternative to Try On Itel P55 | Dr.fone
- 7 Ways to Lock Apps on iPhone 15 and iPad Securely
- In 2024, How to Fix when Apple Account Locked On Apple iPhone 6s Plus?
- New Best Guide for Beginners on 2D Animation Making for 2024
- Complete guide for recovering contacts files on Motorola Edge+ (2023).
- How to Cast Samsung Galaxy F34 5G to Computer for iPhone and Android? | Dr.fone
- 3 Solutions to Find Your Samsung Galaxy A15 5G Current Location of a Mobile Number | Dr.fone
- Title: Updated Do You Know About some Efficient Slow-Motion Video Editors? Read This Article to Find Out the Best Slow-Motion Video Editing Tools that You Can Try
- Author: Chloe
- Created at : 2024-04-24 07:08:18
- Updated at : 2024-04-25 07:08:18
- Link: https://ai-editing-video.techidaily.com/updated-do-you-know-about-some-efficient-slow-motion-video-editors-read-this-article-to-find-out-the-best-slow-motion-video-editing-tools-that-you-can-try.m/
- License: This work is licensed under CC BY-NC-SA 4.0.
