
:max_bytes(150000):strip_icc():format(webp)/samsung-un65nu7100fxza-aaa-5b3bf3f1c9e77c00370afe54.jpg)
Updated Easiest Fix Included! Top 5 Ways to Convert HDR to SDR Videos for 2024
[Easiest Fix Included!] Top 5 Ways to Convert HDR to SDR Videos
HDR or the High Dynamic Range Images points out the brightest and the darkest spots on an image, while an SDR has fewer details and colors. In comparison, HDR has a resolution four times as excellent as an SDR video. With a higher contrast ratio and color information, HDR videos are more vivid and pleasing.
Then why is there a need to convert HDR to SDR? An HDR file is huge and is currently incompatible with many old and some new devices. To view HDR videos, you need to lower the resolution and change the size of the file tidbit to convert it to 1080 SDR without compromising on the quality.
Plenty of HDR converters can perform the task, but only a few have the benefit of retaining the 4K quality of the original video. This article will walk you through the five easiest ways of converting videos from HDR to SDR format. So without further ado, let’s begin.
Easiest Fix - Edit and Convert HDR Videos in Wondershare Filmora [PC & Mac]
You must be living under a rock if you are still unaware of Wondershare Filmora . Filmora is an excellent app to make and edit your videos with the finesse of a professional. Wondershare Filmora comes with professional video editing tools packaged perfectly for beginners.
Filmora is especially a blessing for content creators looking to create unique and exciting videos in any resolution, video quality, and format they want. Apart from its usual video editing tools, a perk of having Wondershare Filmora is that you can easily change the videos from one format to another. For example, you can convert an HDR video to SDR in Filmora so that users with older devices incompatible with HDR can also view the video without burning their eyes.
It does not matter if you have iPhone 12 HDR videos or an HDR clip shot with a professional camera; Filmora can handle it all. The best part of converting the video is that Filmora supports efficient transferring of HDR files from your phone to your PC. So, without further ado, let us start with how you can convert an HDR video to SDR in Filmora.
Free Download For Win 7 or later(64-bit)
Free Download For macOS 10.14 or later
How to Convert an HDR video to SDR without data loss in Filmora
To convert your video to SDR, start by downloading Wondershare Filmora if you do not already have it downloaded.
Download the Application
Download Wondershare Filmora according to your PC type, i.e., Mac or Windows. Install it and run it. Launch the application to get working.
Import Your Videos
- Next, import your HDR video file. To import, click on the Import button in the primary window. From there, select the video file you want to convert to SDR.
- Once imported, drag the file to the timeline. You can tweak or edit it too before converting. You may trim it or cut an unwanted section.

- If you want to change to SDR while editing the project, click the File button and select Project Settings. From the settings, go to Colour space and select the SDR-Rec709 option.

Exporting the File
- If you want to only change the color space setting for the exported file, go to Export and then click on Settings.
- From settings, click on the Colour Space option, and from the drop-down menu, select SDR-Rec709.

- Press Ok to save the changes and export the file in your desired format.
- If you want to adjust the resolution according to the device like iPhone, Samsung, Playstation, or Xbox you can also do that directly with Filmora by clicking the Device tab in the Export Confirm the settings and press Ok.

This is the easiest and cleanest way to get an SDR copy of an HDR file. Filmora does it effortlessly, allowing you to get an SDR video out of an HDR one.
Decode Video from HDR to SDR with a Video Converter
If you have ever worked with converting videos, then you are probably familiar with Handbrake. Handbrake is a household name for video converting, especially when it comes to 4KHDR to SDR video conversions. It has a free open source feature that allows you to convert to SDR videos with an MP4 or MKV format.
Steps of Decoding HDR Video to SDR with Handbrake
Before converting your HDR video to SDR, make sure you have downloaded Handbrake on your computer.
- Open the Handbrake app.
- To import your video to Handbrake, click on File, then Source Selection. You can also drag and drop the video to scan it. Next, wait for Handbrake to scan the title. Once the video scan is complete, all the information will be displayed in the source section.

- Once the file is imported, you can now select the output format from the right panel under General. The default format already specified in Handbrake is Fast 1080p30; you can change that if you are looking for a different form.

- You can also change the format depending on the device type in Handbrake.
- Lastly, go to Presets, click Production, and select Production Standard to convert 4K HDR video to 4K SDR. You can also do that by going to General Profile under the Legacy column.

- Now, select format, quality, resolution, and video codec.
- Lastly, select the destination for the file from the Browse button and press encode to start the conversion.

With a few simple clicks, your HDR file can easily be converted to SDR using Handbrake.
Transcode Video from HDR to SDR by Image Editing [Samsung only]
If you own the latest Samsung S22 phone, you are probably aware of its feature that allows you to record in an HDR10 view. But, what do you do if you want to send the video to someone whose phone is incompatible with HDR? The video will appear too bright and washed out.
By converting the video to SDR, you can send them the video without burning their retinas. This method to convert HDR videos to SDR is especially for Samsung Galaxy phones. The gallery app initially used to have a built-in option to do that, but it’s not there anymore. While the original option is removed, you can still use the method below to convert an HDR video to SDR with just a few taps.
- To convert HDR10+ video to SDR on a Samsung Galaxy phone, you can directly proceed with it on your phone.
- Head to and open Gallery, choose your HDR10+ video and tap three dots in the bottom right corner.
- From the pop-up menu, select Open in Video Player.
- Once the video opens in the video player, click on another three dots in the top right corner.
- From there, tap on the Editor
- In the editor, tap again on three dots on the bottom right and now select Size and Format.
- From this menu, you can change the resolution of the video as well as its format. From the format drop-down, you can select SDR to convert your video to SDR.
- Make sure you do not tap on Save; instead, click on the three dots again and tap on Save as Copy. This will leave your original HDR video untouched and save a copy for the SDR video.
Convert HDR 4K Video to SDR with YouTube [Untested]
HDR videos on Youtube show higher color dynamics and contrast ratios than an SDR video. Viewers with HDR-compatible devices will see ‘HDR’ after every video quality option in the video settings (1080p HDR).
However, the videos uploaded as HDR on youtube can be viewed on HDR unsupported devices too. This happens because youtube automatically converts all HDR videos to SDR to be viewed on non-HDR devices. Here is a brief introduction to the steps of converting HDR to SDR on Youtube:
- Record the metadata by exporting it from an HDR-supported application like Wondershare Filmora . The metadata should be in a codec or container to be played by Youtube correctly.
- Grade your HDR properly as Rec. 2020 with PQ or HLG. Ensure the videos are graded correctly using an HDR transfer function to retain the quality. If you are unsure about the videos graded as HDR, you should not use this method because it can distort the video.
- rectly using an HDR transfer function to retain the quality. If you are not sure about the videos graded as HDR, you should not use this method because it can distort the video.

- Once done, upload it on Youtube. If it detects HDR metadata during the upload, Youtube automatically produces an SDR conversion for non-HDR compatible devices.

- Downloading the video from HDR unsupported devices will save an SDR video.
This method seems easy but has greater risks involved such as distortion of video if improper HDR grading is done.
Get Real-time Video HDR to SDR Conversion by Video Content Providers
With gaming becoming almost a sport, online streaming has grown immensely popular. These streaming services allow you to stream in 4K HDR format. However, a significant downside of this is that many devices are still incompatible with HDR video.
We have listed multiple methods to convert your HDR video clips to SDR, but what about a live stream? We highly recommend checking out the Intel official blog post for converting your HDR videos to SDR in real-time. The blog post describes how you can convert your live stream to SDR with different methods. You can give it a read if you are interested in that.
Hot FAQs on How to Convert HDR to SDR
1. Is SDR better than HDR?
SDR is Standard Dynamic Range, while HDR stands for High Dynamic Range. HDR is the latest technology concerning quality, clear and detailed images. HDR is perfect for videos that require high contrast, shadows, and mixed light.
HDR is definitely better than SDR because the “High” definition takes everything to the next level. However, SDR is frequently used as most devices are not compatible with HDR.
2. Why is HDR smaller than SDR?
Undoubtedly, HDR provides better image quality, colors, and clarity than SDR, but why is the file size smaller then? The answer is quite simple. HDR10 files are equipped with HVAC. HVAC is a very efficient file compressor that compresses the file while keeping its quality intact. SDR files are not compressed with SDR; hence the file size is much bigger.
3. Why does HDR look washed out?
An HDR video might look too bright or washed out if your device is incompatible with HDR color space. Unlike the iPhone 12 or Samsung Galaxy S22, phones have a built-in HDR recording feature. However, older versions may not be able to enjoy the clarity and colors offered by an HDR recording. Hence when an HDR video is sent to someone with an older phone, it looks as if the video is washed out.
Final Words
While HDR might be a superior color space, SDR is frequently used for video clips so maximum people can enjoy the video despite what their devices are compatible with. You can easily convert an HDR video to SDR using Wondershare Filmora or any other methods listed above.
An important point to note is that HDR videos converted to SDR might look a little off sometimes with darker shadows and sharpness. It might be a better idea to record in SDR rather than convert it to SDR later. However, converting is still a popular way to go with an HDR video; you will also have a beautiful high-quality video and an SDR copy.
Free Download For macOS 10.14 or later
How to Convert an HDR video to SDR without data loss in Filmora
To convert your video to SDR, start by downloading Wondershare Filmora if you do not already have it downloaded.
Download the Application
Download Wondershare Filmora according to your PC type, i.e., Mac or Windows. Install it and run it. Launch the application to get working.
Import Your Videos
- Next, import your HDR video file. To import, click on the Import button in the primary window. From there, select the video file you want to convert to SDR.
- Once imported, drag the file to the timeline. You can tweak or edit it too before converting. You may trim it or cut an unwanted section.
- If you want to change to SDR while editing the project, click the File button and select Project Settings. From the settings, go to Colour space and select the SDR-Rec709 option.
Exporting the File
- If you want to only change the color space setting for the exported file, go to Export and then click on Settings.
- From settings, click on the Colour Space option, and from the drop-down menu, select SDR-Rec709.
- Press Ok to save the changes and export the file in your desired format.
- If you want to adjust the resolution according to the device like iPhone, Samsung, Playstation, or Xbox you can also do that directly with Filmora by clicking the Device tab in the Export Confirm the settings and press Ok.
This is the easiest and cleanest way to get an SDR copy of an HDR file. Filmora does it effortlessly, allowing you to get an SDR video out of an HDR one.
Decode Video from HDR to SDR with a Video Converter
If you have ever worked with converting videos, then you are probably familiar with Handbrake. Handbrake is a household name for video converting, especially when it comes to 4KHDR to SDR video conversions. It has a free open source feature that allows you to convert to SDR videos with an MP4 or MKV format.
Steps of Decoding HDR Video to SDR with Handbrake
Before converting your HDR video to SDR, make sure you have downloaded Handbrake on your computer.
- Open the Handbrake app.
- To import your video to Handbrake, click on File, then Source Selection. You can also drag and drop the video to scan it. Next, wait for Handbrake to scan the title. Once the video scan is complete, all the information will be displayed in the source section.
- Once the file is imported, you can now select the output format from the right panel under General. The default format already specified in Handbrake is Fast 1080p30; you can change that if you are looking for a different form.
- You can also change the format depending on the device type in Handbrake.
- Lastly, go to Presets, click Production, and select Production Standard to convert 4K HDR video to 4K SDR. You can also do that by going to General Profile under the Legacy column.
- Now, select format, quality, resolution, and video codec.
- Lastly, select the destination for the file from the Browse button and press encode to start the conversion.
With a few simple clicks, your HDR file can easily be converted to SDR using Handbrake.
Transcode Video from HDR to SDR by Image Editing [Samsung only]
If you own the latest Samsung S22 phone, you are probably aware of its feature that allows you to record in an HDR10 view. But, what do you do if you want to send the video to someone whose phone is incompatible with HDR? The video will appear too bright and washed out.
By converting the video to SDR, you can send them the video without burning their retinas. This method to convert HDR videos to SDR is especially for Samsung Galaxy phones. The gallery app initially used to have a built-in option to do that, but it’s not there anymore. While the original option is removed, you can still use the method below to convert an HDR video to SDR with just a few taps.
- To convert HDR10+ video to SDR on a Samsung Galaxy phone, you can directly proceed with it on your phone.
- Head to and open Gallery, choose your HDR10+ video and tap three dots in the bottom right corner.
- From the pop-up menu, select Open in Video Player.
- Once the video opens in the video player, click on another three dots in the top right corner.
- From there, tap on the Editor
- In the editor, tap again on three dots on the bottom right and now select Size and Format.
- From this menu, you can change the resolution of the video as well as its format. From the format drop-down, you can select SDR to convert your video to SDR.
- Make sure you do not tap on Save; instead, click on the three dots again and tap on Save as Copy. This will leave your original HDR video untouched and save a copy for the SDR video.
Convert HDR 4K Video to SDR with YouTube [Untested]
HDR videos on Youtube show higher color dynamics and contrast ratios than an SDR video. Viewers with HDR-compatible devices will see ‘HDR’ after every video quality option in the video settings (1080p HDR).
However, the videos uploaded as HDR on youtube can be viewed on HDR unsupported devices too. This happens because youtube automatically converts all HDR videos to SDR to be viewed on non-HDR devices. Here is a brief introduction to the steps of converting HDR to SDR on Youtube:
- Record the metadata by exporting it from an HDR-supported application like Wondershare Filmora . The metadata should be in a codec or container to be played by Youtube correctly.
- Grade your HDR properly as Rec. 2020 with PQ or HLG. Ensure the videos are graded correctly using an HDR transfer function to retain the quality. If you are unsure about the videos graded as HDR, you should not use this method because it can distort the video.
- rectly using an HDR transfer function to retain the quality. If you are not sure about the videos graded as HDR, you should not use this method because it can distort the video.
- Once done, upload it on Youtube. If it detects HDR metadata during the upload, Youtube automatically produces an SDR conversion for non-HDR compatible devices.
- Downloading the video from HDR unsupported devices will save an SDR video.
This method seems easy but has greater risks involved such as distortion of video if improper HDR grading is done.
Get Real-time Video HDR to SDR Conversion by Video Content Providers
With gaming becoming almost a sport, online streaming has grown immensely popular. These streaming services allow you to stream in 4K HDR format. However, a significant downside of this is that many devices are still incompatible with HDR video.
We have listed multiple methods to convert your HDR video clips to SDR, but what about a live stream? We highly recommend checking out the Intel official blog post for converting your HDR videos to SDR in real-time. The blog post describes how you can convert your live stream to SDR with different methods. You can give it a read if you are interested in that.
Hot FAQs on How to Convert HDR to SDR
1. Is SDR better than HDR?
SDR is Standard Dynamic Range, while HDR stands for High Dynamic Range. HDR is the latest technology concerning quality, clear and detailed images. HDR is perfect for videos that require high contrast, shadows, and mixed light.
HDR is definitely better than SDR because the “High” definition takes everything to the next level. However, SDR is frequently used as most devices are not compatible with HDR.
2. Why is HDR smaller than SDR?
Undoubtedly, HDR provides better image quality, colors, and clarity than SDR, but why is the file size smaller then? The answer is quite simple. HDR10 files are equipped with HVAC. HVAC is a very efficient file compressor that compresses the file while keeping its quality intact. SDR files are not compressed with SDR; hence the file size is much bigger.
3. Why does HDR look washed out?
An HDR video might look too bright or washed out if your device is incompatible with HDR color space. Unlike the iPhone 12 or Samsung Galaxy S22, phones have a built-in HDR recording feature. However, older versions may not be able to enjoy the clarity and colors offered by an HDR recording. Hence when an HDR video is sent to someone with an older phone, it looks as if the video is washed out.
Final Words
While HDR might be a superior color space, SDR is frequently used for video clips so maximum people can enjoy the video despite what their devices are compatible with. You can easily convert an HDR video to SDR using Wondershare Filmora or any other methods listed above.
An important point to note is that HDR videos converted to SDR might look a little off sometimes with darker shadows and sharpness. It might be a better idea to record in SDR rather than convert it to SDR later. However, converting is still a popular way to go with an HDR video; you will also have a beautiful high-quality video and an SDR copy.
How to Create a Makeup Video
This topic is one of the videos you can easily find on YouTube, apart from the fact that it’s easy to make a video like this, there are many people who want to learn how to do their own makeup, that is why this is the most search content on YouTube. Makeup tutorial is effective through video, since viewers can see exactly how makeup are executed, what products they are using and where to buy.
This kind of video is about sharing makeup techniques, makeup inspiration and beauty product reviews. So, whether you are a makeup artist or a makeup enthusiast you can surely record yourself, make a video and share to your YouTube channel to inspire everyone to be beautiful on their own.
In this article I will sharing may setup and tips on how you can create a makeup video on your YouTube channel.
How to Setup for Making a Makeup Video
You don’t need to have expensive gear to start making this kind of content, also having a small space in your room, a smart phone and a natural lighting from your window is good enough to start your video. But if you are willing to invest there are a lot of online shop selling affordable gear for your great setup.
So, let’s take a look at some of the basic gears recommended:
Smart Phone / Camera
Right now, if you don’t have a digital camera yet, cellphone or mobile phone is good enough to start making your makeup video. This is the most convenient and affordable option for filming a makeup video. I’m sure now a days most of the camera built in mobile phone are quality for making a good video.

Cell Phone Stand
you must have a sturdy stand that allows to adjust height and rotation based on your needs.
If you don’t have a cell phone stand you can get anything that where you can put your camera on, but make sure that is just high enough that you can see your face for the tutorial.

External Mic / Lapel Mic
To ensure you have both video and audio quality, it’s advisable to use an external microphone to record the audio separately, but there is lapel microphone that you can connect directly to your mobile phone make sure to use lapel mic that is compatible to your phone.

Ring Light
As I said natural lighting that comes from your window is your best friend when it comes to your lighting set up. Just find a window that the sun is shining through and use that light to your advantage.
but if you are willing to invest to have a quality video, just go with Ring Light. This light provides a soft, radial glow and its even capable as natural daylight. So, you don’t have to worry about flickers or distorts when filming, as the ring provides a continuous stream of light. Because you know lighting is one of the crucial setups for making all videos, especially to a makeup tutorial videos. You can always buy an affordable ring light online.

Editing Software
Other than the camera and the video footage itself, the video editing software is the mores essential steps as a content creator. There are usually awkward moments during filming that you may want to edit out, and you may also need to add effects and interesting transition. You can use a video editor that you can download from google.
Wondershare Filmora is a free, one of the easy-to-use software that most content creator used as their editing software. Filmora has editing tools like animation, effects, color change, transition, and overlays to make your video attractive and stands out to others.
Free Download For Win 7 or later(64-bit)
Free Download For macOS 10.14 or later
Step1Ready or set up your studio
A studio can be a corner of a room or if you have an extra space, you can dedicate an entire room to be your filming studio. Then get your camera or smart phone set up on a stable table with your cellphone stand to make it sturdy and make sure you have a suitable lighting. Dark video is not useful to anyone specially for something as detailed as applying a makeup.

Step2Create an outline
It may be helpful to create an outline or a script of your video beforehand so that you remember to do all the things your intent to do in your tutorial. This can also help you stay on track during filming so that you are remembering to demonstrate every part of your tutorial. Making a makeup tutorial video need also a step-by-step process so that you don’t forget anything that you will put or show in the video, you need to make a note or an outline for you to remember all because it so hustles to go back and record what you missed.
Step3Prepare Your Makeup
Before recording, prepare your makeup and make sure you use clean brushes. Set up the makeup you intent to use on the table or on you vanity near your filming setup. Lay out all you makeup and products that you want to use in this video. Have your makeup in front of you so that they are easily accessible during filming.

Make sure to have this thing in front of you before filming
- Makeup Brushes
- Skin and Eye Primer
- Moisturizer
- Foundation and Concealer
- Loose or Setting Powder
- Eyebrows Pencil or powder
- Contouring Palette
- Eyeshadow Palette
- Highlight powder
- Lipstick
- Setting Spray
Step4Concentrate and Film
Usually before filming I pray for guidance and knowledge. This is essential to me I do it before filming so that I can be guided and finish what I’m doing properly and less struggle.
If you are done the you can now start filming. Used your script to start talking to the camera, remember to be happy mood while doing this tutorial. Make your viewers feel good while watching you and don’t forget to tell them what product you are using. Also leave some comment to where they can buy the product you are using on your video.

Step5Edit and Upload
This is the last step for making a makeup video. Edit your video properly and make your video creative to attract more viewers. Cut the unwanted clips especially the part where you’re just talking. Because sometime viewers get bored if they only see you talking. Create a nice animation or transition to make your video stands out.

Then upload your finish video to your Youtube channel, make sure to public and promote your video so that more viewers will see how great you are in making this kind of videos. Remember to share your video to all your social media account to have more viewers and subscribers, don’t be shy to tell also your family and friends that you made a video so they can see the finished product of your hard work video tutorial and ask them to leave comment and suggestion if you have anything else to change or fix in making video, because for us content creator people’s feedback is very important so we can do better next time.
The Bottom Line
Now that you already knew the gear that you need to start setting up your studio for your makeup video and you also knew the step-by-step process, you are now ready to film a makeup video. But remember this you can’t just put makeup on your face style your hair and end the video. As a beauty vlogger, you’re an entertainer, so open dialogue is essential when filming. Ask your audience what they want to see, more importantly always remember to ask for feedback because for us content creator viewers feedback is very important so we can do better next time.If you’ve just started this inspiring journey of becoming a beauty Youtuber then hopefully these tips on how to create a makeup video will helped.
Free Download For Win 7 or later(64-bit)
Free Download For macOS 10.14 or later
Free Download For macOS 10.14 or later
Step1Ready or set up your studio
A studio can be a corner of a room or if you have an extra space, you can dedicate an entire room to be your filming studio. Then get your camera or smart phone set up on a stable table with your cellphone stand to make it sturdy and make sure you have a suitable lighting. Dark video is not useful to anyone specially for something as detailed as applying a makeup.
Step2Create an outline
It may be helpful to create an outline or a script of your video beforehand so that you remember to do all the things your intent to do in your tutorial. This can also help you stay on track during filming so that you are remembering to demonstrate every part of your tutorial. Making a makeup tutorial video need also a step-by-step process so that you don’t forget anything that you will put or show in the video, you need to make a note or an outline for you to remember all because it so hustles to go back and record what you missed.
Step3Prepare Your Makeup
Before recording, prepare your makeup and make sure you use clean brushes. Set up the makeup you intent to use on the table or on you vanity near your filming setup. Lay out all you makeup and products that you want to use in this video. Have your makeup in front of you so that they are easily accessible during filming.
Make sure to have this thing in front of you before filming
- Makeup Brushes
- Skin and Eye Primer
- Moisturizer
- Foundation and Concealer
- Loose or Setting Powder
- Eyebrows Pencil or powder
- Contouring Palette
- Eyeshadow Palette
- Highlight powder
- Lipstick
- Setting Spray
Step4Concentrate and Film
Usually before filming I pray for guidance and knowledge. This is essential to me I do it before filming so that I can be guided and finish what I’m doing properly and less struggle.
If you are done the you can now start filming. Used your script to start talking to the camera, remember to be happy mood while doing this tutorial. Make your viewers feel good while watching you and don’t forget to tell them what product you are using. Also leave some comment to where they can buy the product you are using on your video.
Step5Edit and Upload
This is the last step for making a makeup video. Edit your video properly and make your video creative to attract more viewers. Cut the unwanted clips especially the part where you’re just talking. Because sometime viewers get bored if they only see you talking. Create a nice animation or transition to make your video stands out.
Then upload your finish video to your Youtube channel, make sure to public and promote your video so that more viewers will see how great you are in making this kind of videos. Remember to share your video to all your social media account to have more viewers and subscribers, don’t be shy to tell also your family and friends that you made a video so they can see the finished product of your hard work video tutorial and ask them to leave comment and suggestion if you have anything else to change or fix in making video, because for us content creator people’s feedback is very important so we can do better next time.
The Bottom Line
Now that you already knew the gear that you need to start setting up your studio for your makeup video and you also knew the step-by-step process, you are now ready to film a makeup video. But remember this you can’t just put makeup on your face style your hair and end the video. As a beauty vlogger, you’re an entertainer, so open dialogue is essential when filming. Ask your audience what they want to see, more importantly always remember to ask for feedback because for us content creator viewers feedback is very important so we can do better next time.If you’ve just started this inspiring journey of becoming a beauty Youtuber then hopefully these tips on how to create a makeup video will helped.
Free Download For Win 7 or later(64-bit)
Free Download For macOS 10.14 or later
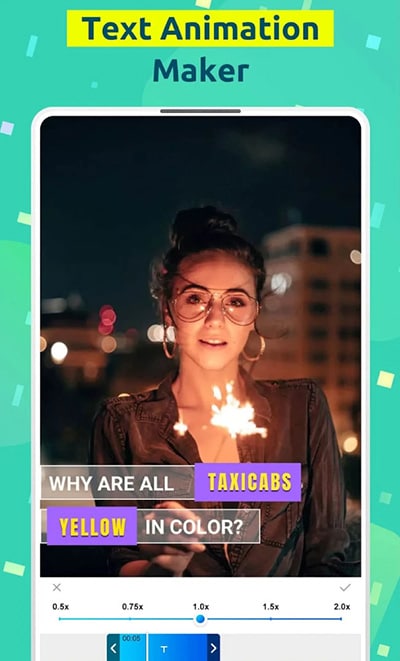
Top Animated Title Makers
You know that your video needs a title, but rather than just type in some bland text to introduce the video, you can create an animated title page that is far more attractive. Animated titles make a video more attractive and when done correctly, they can even guarantee that your target audience will stick around long enough to watch the entire video. They can also be very useful for introducing the content of the video.
But to make an effective animated title, you need a tool that is designed to do just that. In this article, we look at some of the top animated title makers that you can use to create the perfect animated title for your video.
Part 1. Animated Title Maker Online
If you don’t want to install software on your computer to create the animated title, the following are the top online tools to choose from;
Animaker
Link: https://www.animaker.com/text-animation-maker
Rating: 4.5/5
Animaker is an online tool that is specifically designed to help you create text animations that you can then add to your video project. Available online on all browsers, Animaker has a simple user interface that makes it easy to create text animations in a matter of minutes. It is so easy to use that even the average beginner can create stunning text animations.
If you don’t want to create the animations from scratch, Animaker has numerous pre-designed templates for you to choose from that you can then just edit to fit your design. It also has a lot of customizable infographics that you can repurpose.

Animatron Studio
Link: https://www.animatron.com/studio
Rating: 4.5/5
The Animatron Studio is a one-stop solution for generating all types of animated texts. You can use it to create the perfect animated title for your video, but its numerous features also mean that it is one of the best ways to create attention-grabbing animated banner ads that can be posted on various ad sites,
It has a wealth of resources that you can use to create the title including more than 500,000 royalty-free images, videos, and audio to include in your project. If you don’t want to build the animated content from the ground up, you can select from the 200 pre-animated sets that Animatron Studio provides.
Kapwing Title Maker
Link: https://www.kapwing.com/animated-text-video-maker
Rating: 4.5/5
If your goal is to do more than just create an animated title for your video, Kapwing is a good solution. It is a complete online video editor that can also be used to create animated titles. As such, you can expect Kapwing to have more advanced features that allow you to customize the animated title in various ways.
For instance, it has a huge selection of animations that you can apply to the text. But you also get the option to upload your own animations, colors, and fonts. But please note that the free version of Kapwing will add a watermark to the video.

Biteable Animated Text Maker
Link: https://biteable.com/animated/text/
Rating: 4.5/5
Biteable is one of the most popular solutions that you can use to create all kinds of animated texts. It is simple enough to use that it is useful to both professionals and amateur video creators. It has numerous useful features including custom scenes, foundations, backgrounds, and characters all of which can work together to create the perfect animated title.
One of the main benefits of choosing Biteable is that you can share the videos you edit directly on social media without having to download the video.

Flexclip Video Maker
Link: https://www.flexclip.com/editor/
Rating: 4.5/5
Flexclip is another very easy-to-use and easily accessible solution to create animated texts for videos. Rather than create the texts from scratch, Flexclip allows you to create stunning animated texts just by selecting several parameters.
There are also a lot of pre-made designer text templates that are fully customizable. All you have to do is select one of the templates, and change the text, font, and any images to make it unique to you and your video.

Part 2. Animated Title Maker for Computer
Online tools can be useful, especially since they are more easily accessible. But if you want additional features and more ways to customize your animated title, the following desktop solutions may be more applicable to you;
Filmora
Rating: 4.5/5
Wondershare Filmora is a complete suite of video editing tools that can also come in handy when creating animated titles for videos. It is a very simple video editor with a simple user interface, making it an ideal solution even for beginner users. Adding a title to your video is easy and you get to choose from more than 200 different animations that you can apply to bring the text to life.
Filmora is also very useful because it comes with advanced editing features for the professional editor. You can use it to edit all aspects of the video including the clips and even any audio that may be on the project.

Adobe Animate
Rating: 4.5/5
Adobe Animate is a great option to create various animations for your video project, including animated texts. Used by animators to create 2D animated content, Adobe Animate has a lot of features designed to facilitate this kind of animation and is, therefore, one of the go-to solutions for designers looking to create illustrations like logos and infographics.
But like other Adobe programs, Adobe Animate is not very easy to use and the beginner may find that it takes quite a long time to figure out how it works. But once you figure it out, the 800+ web fonts can make it very easy for you to customize your animated title in various ways.

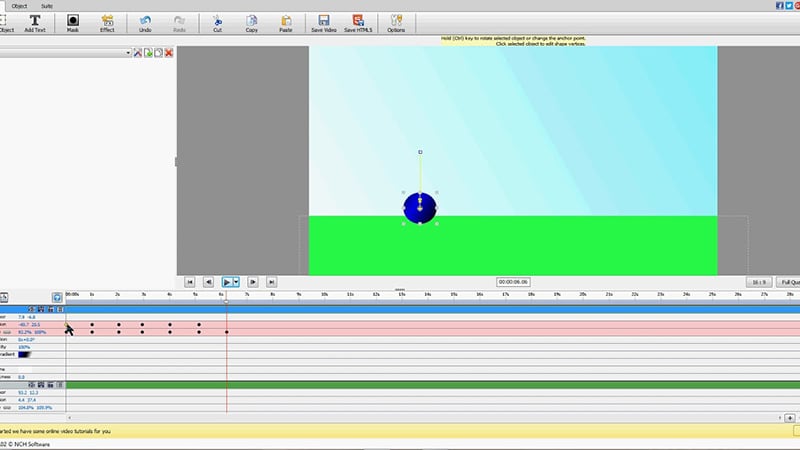
Express Animate
Rating: 4.5/5
Express Animate is a completely free program that you can download on your computer. It is a complete video editor which means that you can use it to animate text and characters, but it is also a great way to edit other aspects of the video including the audio tracks and adding digital effects.
With a simple user interface, Express Animate allows users to create 2D animations that can be used to create unique videos. It is also a good way to create GIFs and memes.
Movavi Video Editor
Rating: 4.5/5
Movavi Video Editor is another complete suite of editing tools that can also come in handy when you want to create an animated title for your video. Designed for both professionals and beginners, this video has all the advanced features you will need to edit all aspects of your video, including a built-in audio editor.
When it comes to animation, Movavi has a lot of effects and transitions as well as pre-made title templates to choose from. Once you have selected the title, you can easily customize the font and color to fit into your project.

Windows Movie Maker
Rating: 4.5/5
For PC users Windows Movie Maker is a simple to use and free way to edit videos. Included with the Windows OS, you likely don’t need to install any software to use and even though it is a free solution, Windows Movie Maker does have the necessary features to create and add animated titles to any video.
It comes with numerous effects, transitions, and templates to choose from when animating text. And it can also be used to edit videos in other ways including trimming and merging clips.

Part 3. Animated Title Maker Apps
If you are editing your videos on your mobile device, the following are the top animated title-making apps to choose from;
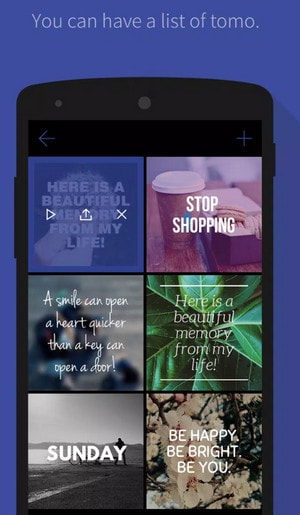
Tomo
Rating: 4.5/5
Link: https://m.apkpure.com/tomo-animate-text-in-video/com.entzeners.app.tomo
Tomo is one of the best apps that you can use to animate text in a video. It has robust features that allow you to easily add text to the video and then animate the text using various transitions and effects. Once the edits are complete, Tomo allows you to share the completed video directly on social media apps like Instagram and Twitter.
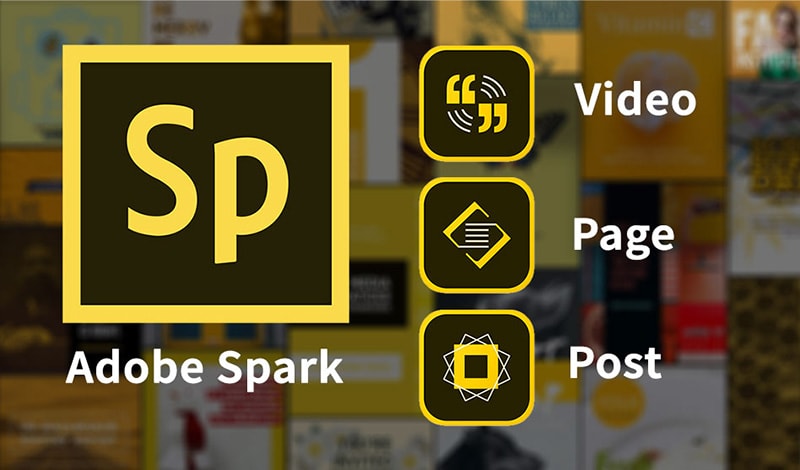
Adobe Spark
Rating: 4.5/5
Link:https://apps.apple.com/us/app/adobe-spark-post-design-maker/id1051937863
Available for both Android and iOS devices, Adobe Spark is a video editing tool that has numerous tools to add and edit texts on videos. You can use the professionally designed templates that you have access to when using Adobe Spark to create stunning animation titles. And since it easily integrates with other apps on the device, sharing the videos is very easy.
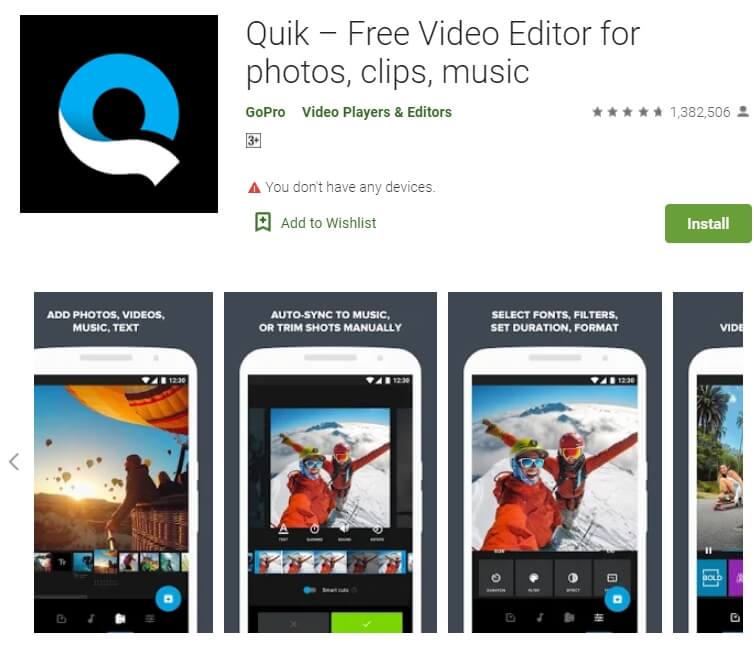
Quik
Rating: 4.5/5
Link: https://play.google.com/store/apps/details?id=com.gopro.smarty&hl=en&gl=US
Quik is an app that is dedicated to text animations and therefore one of the best solutions when you want to add and edit texts on videos. It is available for both iOS and Android and although the free version of the app is slightly limited, its basic editing features are still better than what you find on other more expensive solutions.
Hyper-type Animated Text Videos
Rating: 4.5/5
Link: https://itunes.apple.com/us/app/hype-type-animated-text-videos
This app gives you two options when it comes to animating the text on your video; auto-motion and typography. It focuses on just adding and editing text on a video and as such may not have any of the other video editing features you will find on some of the other apps. But if your goal is to create an interactive animated video title, Hyper-type Animated Text Videos is a great solution.
Vimeo
Rating: 4.5/5
Link: https://play.google.com/store/apps/details?id=com.vimeo.android.videoapp&hl=en&gl=US
Also available for both iOS and Android devices, Vimeo can also be a handy solution for the creation and editing of animated titles for videos. It has a lot of features to edit not just the text in videos, but also all other elements including audio. You even get a wide selection of royalty-free music that you can add to the video and motion stickers to make your title stand out even more. But the free version of Vimeo will add a watermark to the video.

Free Download For Win 7 or later(64-bit)
Free Download For macOS 10.14 or later
Sync Audio With Video With Filmora
Syncing audio with video is an integral part of video editing for any video creator. But believe me; it’s not such a difficult task if you know what to do. The point is IF YOU KNOW WHAT TO DO.
That’s why in this brief guide, we’ll show you the simplest way to sync audio with video using a fantastic video editor easily. But wait a minute, some of you might be confused about why we even need to sync separate audio & video when a single camera can record both. So let’s first answer this simple question.
Part 1: Why Do We Need to Sync Separate Audio & Video?
Creating great video needs extraordinary video graphics, content, and top-notch audio. And you can’t expect a single camera to achieve all these goals. That’s why all professional video creators use a specialized camera for recording with a separate audio recording device.
You might think it’s an exaggeration, but this small change can have massive effects on the quality of your video. Especially the background noise removal effect of separate external microphones.

But the downside of using this method is that after the recording is complete, you must sync these audio and video files. And if you don’t do it right, all the effort goes to the drain within a split second. Well, nobody wants to watch a video with an audio lag. Isn’t it?
Correctly synching an audio file with a video is easier than you think. You just need to prepare beforehand and use a suitable video editing tool. So considering these factors, let’s first see what preparations we need. After that, we’ll recommend a top-class video editing tool to achieve this goal in detailed steps. Why are we still waiting? Let’s begin our journey.
Part 2: Preparation for Syncing Audio With Video During Recording
You must make some preparations to sync an audio file with a video properly. It’s to have a sound spike to match the footage properly with the separate audio file. And it might look disturbing, but even a simple Clap might do the job.
And if you want a professional way, just imagine the clapper board. You must have seen it in the film industry. This clapper board is used not only to mark the shot but also to create a sound spike when it claps. We use this audio spike as a reference to sync the audio files with the video.

Every time you cut your shot, remember to clap on camera again the next time you roll. It’s best to clap before you say “Action” or speak so that it’s easy to find and sync when editing. But if you forget, you can also clap at the end of the shot before you cut. That is called a Tail Slate!!!
After you’ve recorded your video like this, the next step is pretty simple. The video editor we recommend is no other than the world’s leading tool in the market, Wondershare Filmora. Let’s move forward and see how to sync audio with video using Filmora .
Part 3: How To Sync Audio With Video Using Filmora
Before we dive into the step-by-step guide, here’s a brief overview of Filmora.
Wondershare Filmora
Filmora is one of the most used video editors that can help all video creators to deliver the best they can. This incredible software from Wondershare contains multiple features that can polish any video.
Free Download For Win 7 or later(64-bit)
Free Download For macOS 10.14 or later
Moreover, the vast arsenal of video effects, images, short clips, AI avatars, and many other things are also available. You just have to pick out the one you like and add it to your video with just a single click.
On top of that, you can also adjust the audio files like audio ducking, silent detection, audio mixing, and synching audio with the video files.

As far as the audio synching is concerned, you can do it either manually or with auto synchronization. And we will explain both of these processes in a stepwise manner to give you complete mastery over your audio synching. Let’s start with the manual process first.
Steps To Manually Sync Audio With Video Using Filmora
Step1Download & install
If you haven’t downloaded the latest version of Filmora yet, click the button below to download it without any cost. And after the download is completed, you can install it on your device right away.
Free Download For Win 7 or later(64-bit)
Free Download For macOS 10.14 or later
Step2Import your files
The next step is to import all the files. Launch the Filmora and click on the “New Project” button from the opening interface.

When a new project is created, you’ll see an “Import Media” section on it. Click on this section to browse your audio and video files from the computer. Or you can also drag and drop these files here to import them.

Step3Prepare your files
Now, it’s time to prepare our files for synchronization. First, drag the video file down to the timeline from the “Import Media” section. After that, drag the audio file in the same way below the video on the panel.

Step4Sync the audio & video files using the audio spike
Now that the video and audio files are on the timeline, you’ll have to find the moment you clap your hands. Look at the waveform from the in-camera audio and the independent audio track. At the moment you clap, we’ll see a spike.
Bonus Tip: If you can’t find the audio spike, zoom the panel to make it easier.

Now take the independent audio clip and align it so that both the spikes match.

That’s it! We just need to remove the in-camera audio now. Let’s see how to do it now.
Step5Remove the audio from the video footage
To detach the audio in the video footage, right-click on this file and select the “Detach Audio” option. Or you can also use the “Ctrl+Alt+D” as the hotkey.

Once the audio file has been separated, you can move forward and delete it. To delete this audio, right-click on it and select “Delete.”

Step6Enjoy your video with the new audio track
So here we go. Our video file has been synced with the high-quality audio file. You can now hit the Export button to get this edited file. But wait a minute. Didn’t we say we’ll show you a method to automatically sync audio with video? Let’s start this method now.
Steps To Automatically Sync Audio With Video Using Filmora
Did you find the above method troubling? Well, be assured because Wondershare Filmora can also automatically sync your audio file with video in a single click. Here are the steps to achieve this feat.
Free Download For Win 7 or later(64-bit)
Free Download For macOS 10.14 or later
Step1Prepare your files
This method’s starting process is the same as the previous one. You’ll need to download the Filmora and prepare your file on the timeline by importing them on a New Project.
Step2Select both audio & video files
Once you’ve got everything ready, select both your audio and files from the timeline.

Step3Click on the auto synchronization icon
When you select these files, you’ll see that the “Auto Synchronization” icon has appeared on the toolbar below the Import Media section. Click on this icon and wait for the magic.

Remember that you need a Premium ID of Wondershare Filmora to use the Auto Synchronization option.
Step4Wait until the syncing is completed
Filmora will start synchronizing your files, and you’ll see the “Synchronization in process” prompt on the screen. Wait until the process is completed.

Step5Finish your editing
You can finish your editing when the separate audio file perfectly aligns with the video file. Delete the audio from the in-camera video file and hit the “Export” button.
Congratulations! We have successfully synced separate audio and video files. Now let’s take a look at some hot FAQs before we end our guide.
Part 4: FAQs About Synching Audio With Video
Is auto synchronization better than manual syncing?
Well, auto synchronization is no doubt easier than manual syncing. But that doesn’t mean you don’t need the manual process anymore. Many situations may arise where you may be left with no choice but to use the manual syncing of separate audio and video files. So make sure to properly learn both these methods, and each one of them will definitely come in handy someday.
How can we sync audio & video for free?
Syncing audio and video files for free is not a difficult task. Download the Filmora right now, and after installation, you can freely sync any Audio file with its corresponding video file by using the manual method described above.
Conclusion
For any video creator, knowing how to sync audio with video is a must. That’s because most creators record audio and video separately for higher quality.
This brief guide has covered all the details about how to sync audio and video files using an outstanding video editor, Wondershare Filmora . We hope it comes in handy.
Free Download For Win 7 or later(64-bit)
Free Download For macOS 10.14 or later
Free Download For macOS 10.14 or later
Moreover, the vast arsenal of video effects, images, short clips, AI avatars, and many other things are also available. You just have to pick out the one you like and add it to your video with just a single click.
On top of that, you can also adjust the audio files like audio ducking, silent detection, audio mixing, and synching audio with the video files.
As far as the audio synching is concerned, you can do it either manually or with auto synchronization. And we will explain both of these processes in a stepwise manner to give you complete mastery over your audio synching. Let’s start with the manual process first.
Steps To Manually Sync Audio With Video Using Filmora
Step1Download & install
If you haven’t downloaded the latest version of Filmora yet, click the button below to download it without any cost. And after the download is completed, you can install it on your device right away.
Free Download For Win 7 or later(64-bit)
Free Download For macOS 10.14 or later
Step2Import your files
The next step is to import all the files. Launch the Filmora and click on the “New Project” button from the opening interface.
When a new project is created, you’ll see an “Import Media” section on it. Click on this section to browse your audio and video files from the computer. Or you can also drag and drop these files here to import them.
Step3Prepare your files
Now, it’s time to prepare our files for synchronization. First, drag the video file down to the timeline from the “Import Media” section. After that, drag the audio file in the same way below the video on the panel.
Step4Sync the audio & video files using the audio spike
Now that the video and audio files are on the timeline, you’ll have to find the moment you clap your hands. Look at the waveform from the in-camera audio and the independent audio track. At the moment you clap, we’ll see a spike.
Bonus Tip: If you can’t find the audio spike, zoom the panel to make it easier.
Now take the independent audio clip and align it so that both the spikes match.
That’s it! We just need to remove the in-camera audio now. Let’s see how to do it now.
Step5Remove the audio from the video footage
To detach the audio in the video footage, right-click on this file and select the “Detach Audio” option. Or you can also use the “Ctrl+Alt+D” as the hotkey.
Once the audio file has been separated, you can move forward and delete it. To delete this audio, right-click on it and select “Delete.”
Step6Enjoy your video with the new audio track
So here we go. Our video file has been synced with the high-quality audio file. You can now hit the Export button to get this edited file. But wait a minute. Didn’t we say we’ll show you a method to automatically sync audio with video? Let’s start this method now.
Steps To Automatically Sync Audio With Video Using Filmora
Did you find the above method troubling? Well, be assured because Wondershare Filmora can also automatically sync your audio file with video in a single click. Here are the steps to achieve this feat.
Free Download For Win 7 or later(64-bit)
Free Download For macOS 10.14 or later
Step1Prepare your files
This method’s starting process is the same as the previous one. You’ll need to download the Filmora and prepare your file on the timeline by importing them on a New Project.
Step2Select both audio & video files
Once you’ve got everything ready, select both your audio and files from the timeline.
Step3Click on the auto synchronization icon
When you select these files, you’ll see that the “Auto Synchronization” icon has appeared on the toolbar below the Import Media section. Click on this icon and wait for the magic.
Remember that you need a Premium ID of Wondershare Filmora to use the Auto Synchronization option.
Step4Wait until the syncing is completed
Filmora will start synchronizing your files, and you’ll see the “Synchronization in process” prompt on the screen. Wait until the process is completed.
Step5Finish your editing
You can finish your editing when the separate audio file perfectly aligns with the video file. Delete the audio from the in-camera video file and hit the “Export” button.
Congratulations! We have successfully synced separate audio and video files. Now let’s take a look at some hot FAQs before we end our guide.
Part 4: FAQs About Synching Audio With Video
Is auto synchronization better than manual syncing?
Well, auto synchronization is no doubt easier than manual syncing. But that doesn’t mean you don’t need the manual process anymore. Many situations may arise where you may be left with no choice but to use the manual syncing of separate audio and video files. So make sure to properly learn both these methods, and each one of them will definitely come in handy someday.
How can we sync audio & video for free?
Syncing audio and video files for free is not a difficult task. Download the Filmora right now, and after installation, you can freely sync any Audio file with its corresponding video file by using the manual method described above.
Conclusion
For any video creator, knowing how to sync audio with video is a must. That’s because most creators record audio and video separately for higher quality.
This brief guide has covered all the details about how to sync audio and video files using an outstanding video editor, Wondershare Filmora . We hope it comes in handy.
Free Download For Win 7 or later(64-bit)
Free Download For macOS 10.14 or later
Also read:
- 4 Ways to Loop a Video on Vimeo
- In 2024, Top 10 Movie Trailer Voice Generators Windows, Mac, Android, iPhone
- New 2024 Approved Color Correction Basics (S-LOG Footage)
- In 2024, Camtasia Review – Is It The Best Video Editor?
- New Create the Night-to-Day Effect Videos for 2024
- 2024 Approved How to Convert Time-Lapse to Normal Video
- If You Wish to Edit FLV Videos without Any Problems, You Should Utilize a Multipurpose Video Editor that Supports the FLV File Format for 2024
- 2024 Approved 15 Best LUTS to Buy
- Updated Top Silence Detection Tools for Better Film Production
- New 2024 Approved Introduction to The Best Cinematic LUTs in The Market
- New 2024 Approved Best Online MPEG to GIF Converters
- New How to Make an Intro Video Easy Solution
- How to Easily Create a Free Eye-Catching Intro Videos with Invideo
- Updated In 2024, Replacing Sky in Your Pictures Using Online and Offline Tools
- New Change Background Color in After Effects for 2024
- In 2024, Interested in Adding a Cinematic Strobe Light Effect to Your Movie or Video Title? Follow the Steps Explained in Detail Here
- Updated 2024 Approved Top 8 Augmented Reality Video Games
- In 2024, How to Do Velocity Edits on PC
- 2024 Approved Read on to Learn About OpenCV Object Tracking, What It Is, and How to Implement It in Python, and OpenCV
- Best 15 Subtitle Apps 2023 Windows, Mac, iPhone, Android & Online
- New In 2024, End Screen Makers
- In 2024, What Is the Best Frame Rate for 4K Videos?
- New Easy Ways to Create Procreate GIFs
- Updated This Article Will Help You Understand How to Create Flying Objects Using Editing Tools Such as Wondershare Filmora
- Fun & Easy Masking Tricks in Filmora
- New Create Your Own Subscribe Channel Graphics
- A Complete Guide to Use Distortion Effect in Premiere Pro
- New Step by Step to Rotate Videos Using OBS for 2024
- 2024 Approved How to Vlog? A Ultimate Guide for Beginners
- How to Add Green Screen in OBS
- New Create Motion Effect with Path Blur In Photoshop
- New After Reading This Article, You Can Add a B-Roll Feature From Filmora and Captivate More Audience. Explanation Video B-Roll and Story-Telling B-Roll Are Well Illustrated
- Top 10 Free Text to Speech Software Windows, Mac,Android, iPhone & O
- Updated How to Create the Stranger Things Upside Down Effect
- Best Ways to Add Meme Text to Videos for 2024
- Do You Need to Create a Video for Your Business Online but Feel You Do Not Have the Skill and Time to Do That? Try Out These AI Video Generators that Will Work for You to Carry Out Tasks Effectively
- Is your Poco M6 Pro 4G working too slow? Heres how you can hard reset it | Dr.fone
- Stuck at Android System Recovery Of Tecno Spark 20C ? Fix It Easily | Dr.fone
- Rootjunky APK To Bypass Google FRP Lock For Itel S23+
- Step-by-Step Tutorial How To Bypass Huawei P60 FRP
- 3 Best Tools to Hard Reset Oppo Reno 8T | Dr.fone
- Top Apps and Online Tools To Track Honor X9b Phone With/Without IMEI Number
- In 2024, 4 Ways to Transfer Contacts from Apple iPhone 15 Plus to iPhone Quickly | Dr.fone
- How to Track Samsung Galaxy A24 by Phone Number | Dr.fone
- 5 Solutions For Google Pixel 8 Pro Unlock Without Password
- 8 Quick Fixes Unfortunately, Snapchat has Stopped on Nubia Z50S Pro | Dr.fone
- How to convert AVCHD .mts files for Samsung Galaxy Z Fold 5?
- How to Share/Fake Location on WhatsApp for Realme GT Neo 5 | Dr.fone
- How to Screen Mirroring Honor Magic Vs 2? | Dr.fone
- In 2024, Still Using Pattern Locks with Motorola Edge 40 Neo? Tips, Tricks and Helpful Advice
- How to Transfer Data from Samsung Galaxy S23+ to Any iOS Devices | Dr.fone
- Your Complete Guide To Reset Infinix Smart 8 | Dr.fone
- Identify missing drivers with Windows Device Manager in Windows 11/10
- Title: Updated Easiest Fix Included! Top 5 Ways to Convert HDR to SDR Videos for 2024
- Author: Chloe
- Created at : 2024-04-24 07:08:33
- Updated at : 2024-04-25 07:08:33
- Link: https://ai-editing-video.techidaily.com/updated-easiest-fix-included-top-5-ways-to-convert-hdr-to-sdr-videos-for-2024/
- License: This work is licensed under CC BY-NC-SA 4.0.
