
Updated for 2024
Create Dynamic Text Animation in Filmora
Preparation
What you need to prepare:
- A computer (Windows or macOS)
- Your video materials.
- Filmora video editor
Step 1
Download and install the Filmora video editor . Just click the link, hit “Download”, and it will start automatically. Then, open a New Project.
Step 2
Click on the “Titles” tab and drag a Default Title to Track 2 on your Timeline.

Step 3
Double-click on it and change the font to anything you like. Then, enter the text in the box in front of you. While you’re here, you can also edit the text spacing and other features.

Step 4
Now, take a snapshot of the text. Then, double-click on the default title again and change the text to a single letter I. Once again, take a snapshot of this text and then delete the default title from the timeline.

You should have two snapshots in My Media now. One of them should say “FILMORA” and one with the letter “I”.

Step 5
Drag the “FILMORA” snapshot to track 2 and the “I” snapshot to track 3. Then, click on the “Zoom” button and set this to 50%.

Step 6
Double-click on the “I” snapshot from the timeline. Then, input these settings when the window pops up. After that, drag the Playhead 1 second and 15 frames further down the timeline. Then, double-click on the “I” snapshot again, and change the Y-axis value to 0.

Step 7
Copy the “I” snapshot track from the timeline. Then, paste it on Track 4. Next, double-click on this one and change the X-axis position to whichever letter you want. In this case, it’s the letter “M”. As for the Y-Axis, you can change it any way that suits you.

Step 8
Copy this process as often and with as many letters as you want. Then, when you’re done, export the title animation to your computer.

Step 9
Open a new project in Filmora and import the title animation we just created.
Step 10
Drag the custom title animation to Track 2 and drag any video background you have on Track 1.

Step 11
Double-click on the title track, go to the Video tab, and select “Lighten” from the Blending Mode tab.

Step 12
Shift the title clip from Track 2 to Track 3. Then, go to the Effects tab and drag the Dark Film effect to Track 1 on the timeline.

Step 13
Search for the “Blur” effect in the Effects tab. Then, drag “Square Blur” to Track 2 in the timeline.

Step 14
Select the “Cinema” effect from the Effects tab and drag it to Track 4. Double-click on it and change the border height to 0.10.

Step 15
Now, all left is to render the clip and review the final result.

Summary
What you’ve learned:
- Create a professional-level animated text in Filmora in 15 simple steps
- How to add a video background and cinematic effects to your animated title
- Adjust the settings of clips in the Filmora timeline
What you need to prepare:
- A computer (Windows or macOS)
- Your video materials.
- Filmora video editor
Step 1
Download and install the Filmora video editor . Just click the link, hit “Download”, and it will start automatically. Then, open a New Project.
Step 2
Click on the “Titles” tab and drag a Default Title to Track 2 on your Timeline.
Step 3
Double-click on it and change the font to anything you like. Then, enter the text in the box in front of you. While you’re here, you can also edit the text spacing and other features.
Step 4
Now, take a snapshot of the text. Then, double-click on the default title again and change the text to a single letter I. Once again, take a snapshot of this text and then delete the default title from the timeline.
You should have two snapshots in My Media now. One of them should say “FILMORA” and one with the letter “I”.
Step 5
Drag the “FILMORA” snapshot to track 2 and the “I” snapshot to track 3. Then, click on the “Zoom” button and set this to 50%.
Step 6
Double-click on the “I” snapshot from the timeline. Then, input these settings when the window pops up. After that, drag the Playhead 1 second and 15 frames further down the timeline. Then, double-click on the “I” snapshot again, and change the Y-axis value to 0.
Step 7
Copy the “I” snapshot track from the timeline. Then, paste it on Track 4. Next, double-click on this one and change the X-axis position to whichever letter you want. In this case, it’s the letter “M”. As for the Y-Axis, you can change it any way that suits you.
Step 8
Copy this process as often and with as many letters as you want. Then, when you’re done, export the title animation to your computer.
Step 9
Open a new project in Filmora and import the title animation we just created.
Step 10
Drag the custom title animation to Track 2 and drag any video background you have on Track 1.
Step 11
Double-click on the title track, go to the Video tab, and select “Lighten” from the Blending Mode tab.
Step 12
Shift the title clip from Track 2 to Track 3. Then, go to the Effects tab and drag the Dark Film effect to Track 1 on the timeline.
Step 13
Search for the “Blur” effect in the Effects tab. Then, drag “Square Blur” to Track 2 in the timeline.
Step 14
Select the “Cinema” effect from the Effects tab and drag it to Track 4. Double-click on it and change the border height to 0.10.
Step 15
Now, all left is to render the clip and review the final result.
Summary
What you’ve learned:
- Create a professional-level animated text in Filmora in 15 simple steps
- How to add a video background and cinematic effects to your animated title
- Adjust the settings of clips in the Filmora timeline
How to Use LUTs in VN Editor – Complete Guide and Best LUTs Download
Hello and welcome to another article full of information and excitement. The topic of this article is LUT for the VN editor. So it will be exciting for those who want to use LUTs in their video to make them look nice and well. As we will discuss today that what is VN editor and how you can add LUTs to your videos using it on the devices it is compatible for. Moreover, where you can download some fantastic LUTs like moody LUTs, which help your videos to look nice, and which software you should use for this purpose if you are running a device on which the VN editor is not compatible. So let’s begin!
Part 1. What is VN editor?
VN editor is one of the best choices for video editing on mobiles and Mac. Fast editing, transitions, effects, filters, colors, subtitles, music, and many other features make the VN video editing app a great tool for producing and editing videos. It aims to make editing shorter and more feature-rich, empowering everyone to take control of their own lives. You cannot only produce great videos but good films as well. In the following, we will discuss how you can add LUTs to your videos using it.

Part 2. How to use LUTs in VN editor?
First, we must know that it is compatible with which platforms. So, it is now available for Android, iOS, and Mac OS only. However, you can also use it on Windows with some Android or iOS emulators, but it is not a very continent way in our suggestions. Even after doing this, it does not work well on your Windows. Maybe you will face some glitches or malfunctioning problems. So it is better to use it on only those platforms for which it is primarily available. Please read the instructions below since we will go through how to use LUTs in it later on.
On Mac:
First of all, we will learn how you can do it on Mac:
- Download the VN Editor for Mac and open it.
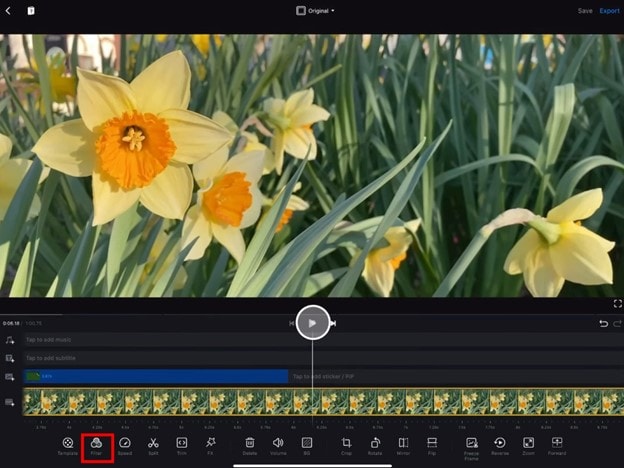
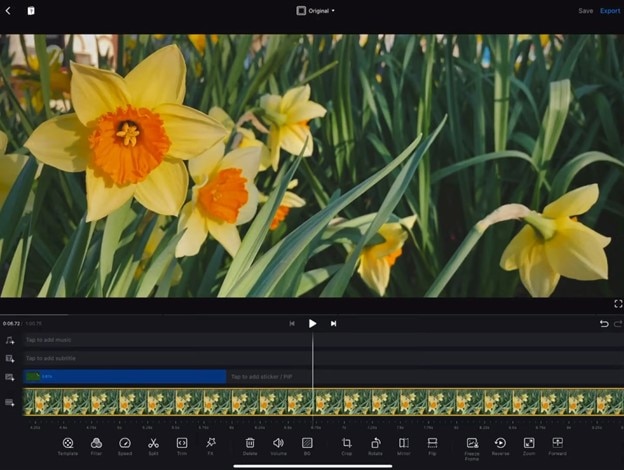
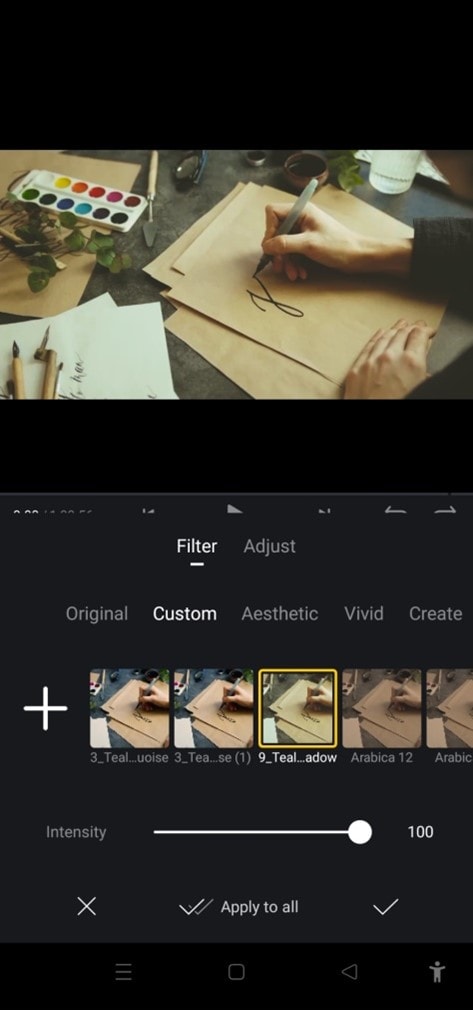
- Add your video and then tap the filters option.
- Now choose custom filters and then select the LUTs pack.

- Select the desired LUT and apply.
On Mobile:
Secondly, we will discuss how we can do this on our mobiles (Android or iOS). The procedure on both devices (Android or iOS) is almost comparable. Therefore, we will discuss the steps from the perspective of both of these here:
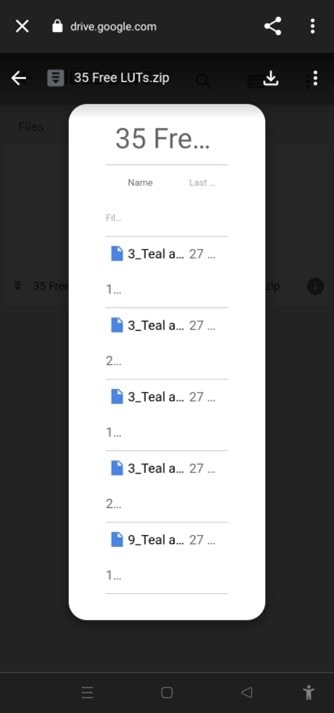
- First, download the VN editor from your mobile app store (Android or iOS) and the LUTs pack you want to use in your video.
- After downloading them on your mobile, open the VN editor application.
- Create a new project and add your video to it.

- Then click on the Filters option and select add external or custom filters option next to the existing filters.
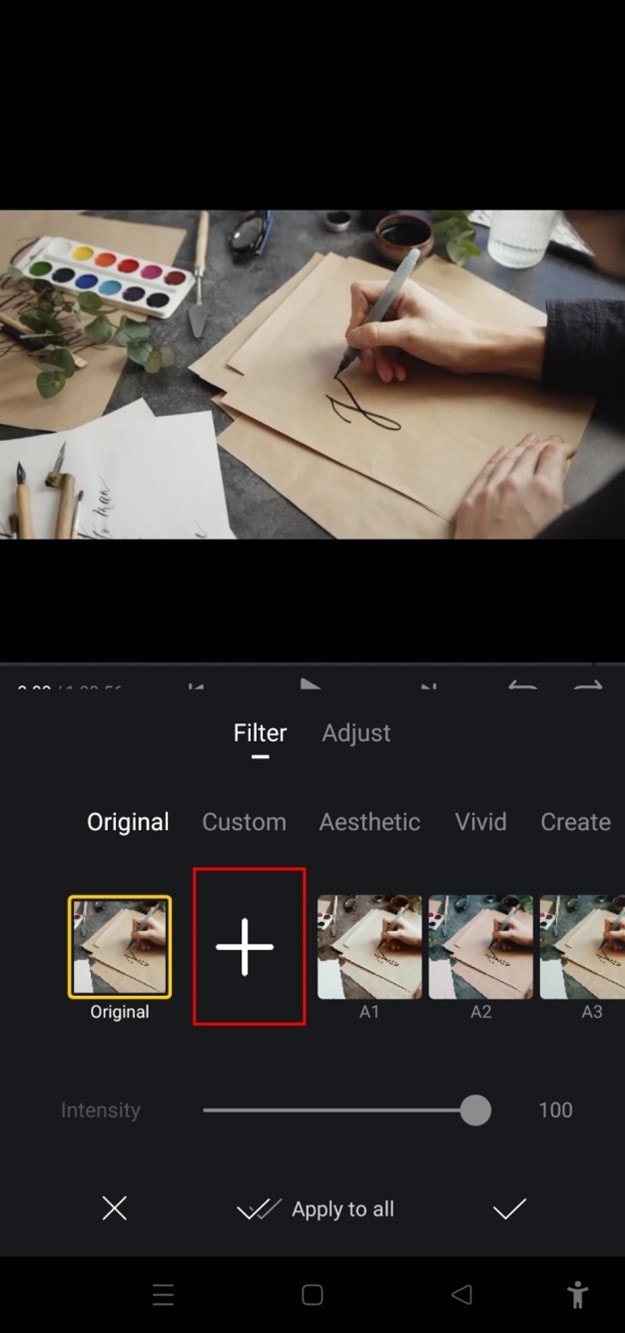
- It will take you to the File manager of your mobile, from which you have to find the folder in which you have stored your LUTs.
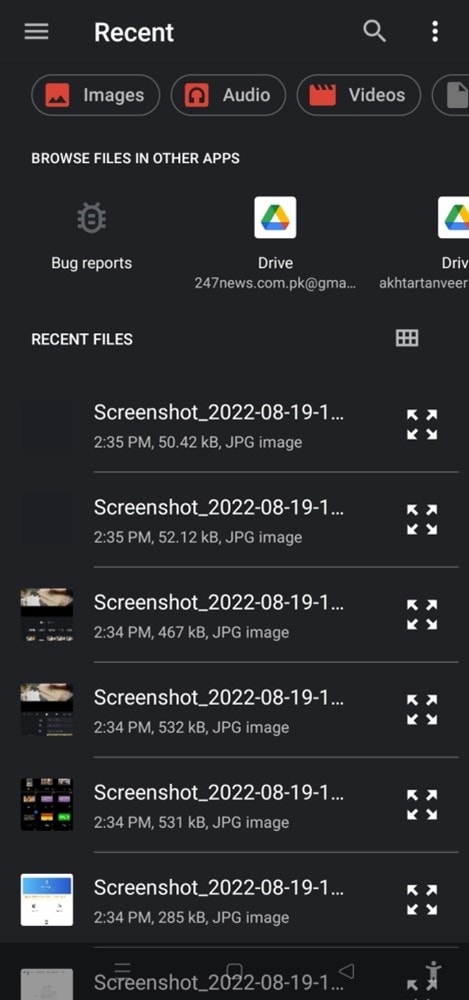
- After finding them, you can select those LUTs you want to use in your video and then click on the done or select button.
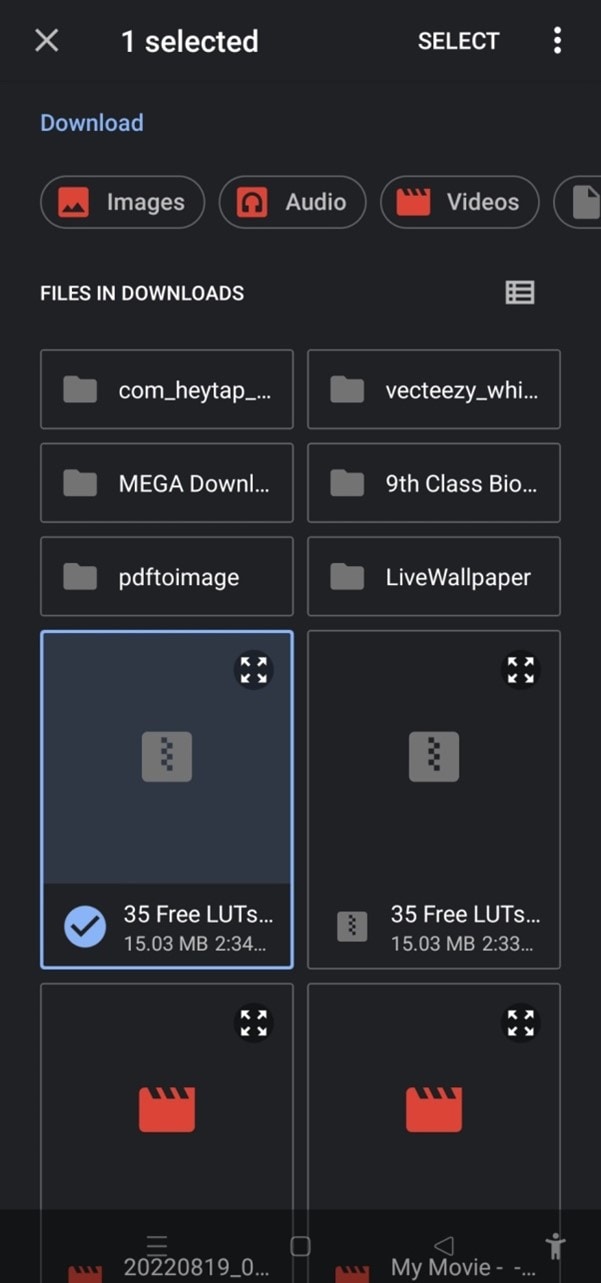
- Your downloaded LUTs start showing in the VN editor, and you can use them in your videos as you want.
Part 3. Best LUTs resource for VN video editor
1. Presets Store
Presets Store is an online platform that helps you with various Filters, LUTs, and other presets. So you can download LUTs for your videos for the VN editor using it. However, it’s not a free service. You have to pay for the LUTs you want to download from here. You can visit their YouTube channel to follow the latest LUTs, Filters and other presets on this platform.
2. Apna Editz
Apna Editz is another online platform you can use for this purpose. It also provides you with a fantastic variety of Presets like LUTs, Filters, and many other similar effects, which you can use in your video using the VN editor. The main Pros of this recommendation are that it’s a free website. So you can download LUTs for your videos from it for free. Keep an eye on their YouTube channel to be updated about the latest LUTs.
3. Lut Preset
Lut Preset is another alternative to all the above ones. You can get almost all your favorite LUTs for VN editor for free here and then use them in your videos as you want. They also share the latest LUTs on their YouTube Channel.
4. Pencil Hub
Pencil Hub is also a good option in this concern. However, it does not have too much variety of VN LUTs, but you can still use it to download some of the best LUTs for VN editors. To get informed of their every new effect and LUTs, their YouTube channel is the primary source.
5. YRP EDITZ
YRP ETIDZ is another good option if you are still looking for some fantastic VN LUTs. They, too not have a large variety of presets and LUTs. However, if you want some most commonly used LUTs for VN Editor, then they are a good option. You’ll notify of their most website updates by checking their YouTube channel.
Part 4. How to add LUTs to the best alternative to the VN editor?
VN Editor is undoubtedly an excellent choice to add LUTs to your videos. However, the VN editor is best suitable for mobile devices. To enhance your LUTs and effects, it would be great if you used some desktop software. Wondershare Filmora offers a great variety of built-in LUTs to choose from. Let’s look at how we can use Filmora to add LUTs:
- Add your video and tap the tools, then click the Color option.
- Now select the Color Correction option and then choose 3D LUT.
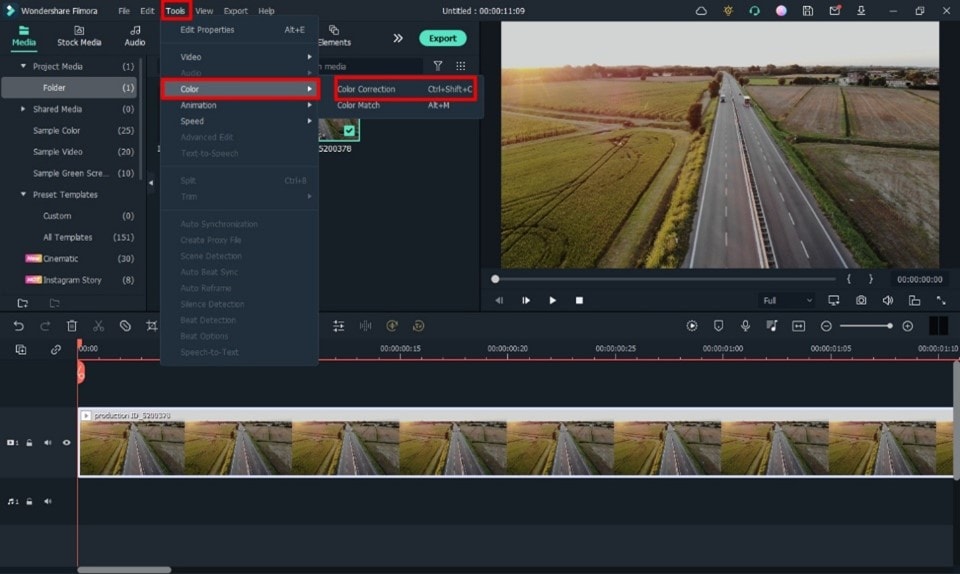
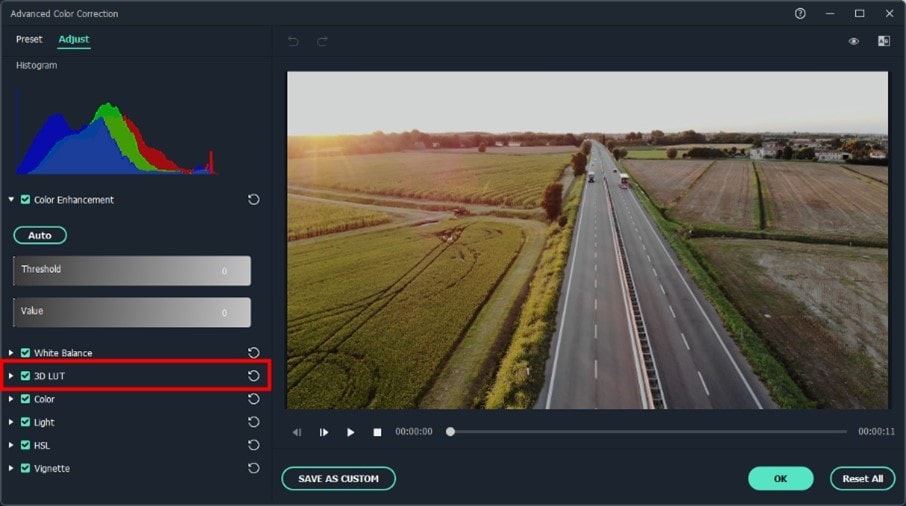
- Click the drop-down menu and select the Load new LUT option. Here you can import other downloaded preset LUTs to use
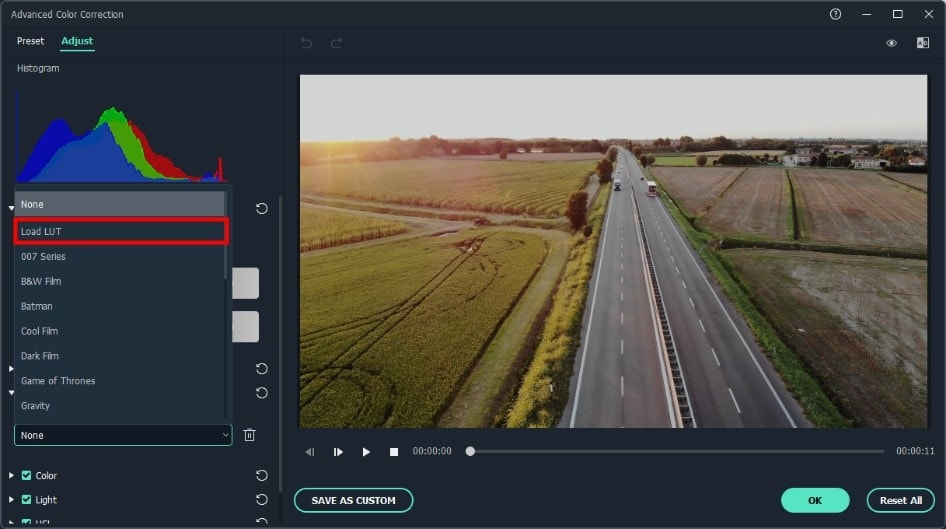
- Choose the LUT and click OK. Your new fantastic video is ready now.

Closing Thoughts
This post recommends several lut resources and demonstrates how to import them if you are a devoted user of VN editor and want to learn how to utilize it for video color grading. The more potent desktop editor Wondershare Filmora, which offers a range of built-in LUT sources and supports color grading settings, is of course recommended if you want to take your videos to the next level. Thanks for reading.
Free Download For Win 7 or later(64-bit)
Free Download For macOS 10.14 or later
2. Apna Editz
Apna Editz is another online platform you can use for this purpose. It also provides you with a fantastic variety of Presets like LUTs, Filters, and many other similar effects, which you can use in your video using the VN editor. The main Pros of this recommendation are that it’s a free website. So you can download LUTs for your videos from it for free. Keep an eye on their YouTube channel to be updated about the latest LUTs.
3. Lut Preset
Lut Preset is another alternative to all the above ones. You can get almost all your favorite LUTs for VN editor for free here and then use them in your videos as you want. They also share the latest LUTs on their YouTube Channel.
4. Pencil Hub
Pencil Hub is also a good option in this concern. However, it does not have too much variety of VN LUTs, but you can still use it to download some of the best LUTs for VN editors. To get informed of their every new effect and LUTs, their YouTube channel is the primary source.
5. YRP EDITZ
YRP ETIDZ is another good option if you are still looking for some fantastic VN LUTs. They, too not have a large variety of presets and LUTs. However, if you want some most commonly used LUTs for VN Editor, then they are a good option. You’ll notify of their most website updates by checking their YouTube channel.
Part 4. How to add LUTs to the best alternative to the VN editor?
VN Editor is undoubtedly an excellent choice to add LUTs to your videos. However, the VN editor is best suitable for mobile devices. To enhance your LUTs and effects, it would be great if you used some desktop software. Wondershare Filmora offers a great variety of built-in LUTs to choose from. Let’s look at how we can use Filmora to add LUTs:
- Add your video and tap the tools, then click the Color option.
- Now select the Color Correction option and then choose 3D LUT.
- Click the drop-down menu and select the Load new LUT option. Here you can import other downloaded preset LUTs to use
- Choose the LUT and click OK. Your new fantastic video is ready now.
Closing Thoughts
This post recommends several lut resources and demonstrates how to import them if you are a devoted user of VN editor and want to learn how to utilize it for video color grading. The more potent desktop editor Wondershare Filmora, which offers a range of built-in LUT sources and supports color grading settings, is of course recommended if you want to take your videos to the next level. Thanks for reading.
Free Download For Win 7 or later(64-bit)
Free Download For macOS 10.14 or later
Step by Step to Split a Clip in VLC
The VLC media player is top-rated as it is freely available and operates on different platforms efficiently. Its framework helps play almost all the audios, videos, DVDs and various resources available on your systems. Even optimizing the videos and audio as the playback from your devices is possible. There is also a possibility of integrating a number of programs along with the streaming services.
You can even search the album covers. With the functionality of the playlist, you can play a number of films one after the other. This feature is helpful when you have downloaded the whole film in parts or watched different short films. The best part is to know it is not just a video player. It is an editor; yes, you heard it right. VLC is the correct choice for splitting or cutting your videos without facing any difficulties.
The article is a guide about the split of the videos in VLC. There is also a particular description of its alternative: Wondershare Filmora. It is suitable as well as reasonable.
How can you split the video clips in VLC?
VLC Media player has all the amazing tools for playing back the audios and videos regardless of the format. It is still on top of all the media players because of its simple interface. Below are the very easy steps to split the videos in the VLC media player.
Step 1: After completing the download, install the updated version of the VLC media player if it is not on your PC. Once it is installed, you need to double click on its icon for launching it.
Step 2: This step is the activation of the advanced controls in the media player. Click on “View” visible on the menu bar. Click on the “Advanced Controls” and appears the menu of four additional buttons more than the button for play or pause.

Step 3: Now, you can easily play the video simply by clicking the “Open File” option present in the media menu. The drag and drop option is available inside the VLC media player.
You should start playing the video now and recording the parts with the help of a decoder. Look for the position from where you want to begin the recording and press both Play and Pause buttons one after the other.
Even the Frame-by-Frame button is also available. It is the last one in the advance controls for navigating the actual frame from where you want to begin the recording.

Step 4:
Press the button “Record” again whenever you want the recording to stop. This is the final step for cutting the videos in VLC. The split video from the actual video saves automatically as the MP4 video file in the folder of Libraries or Videos if you are using Windows operating system.
Almost all, playing any video and audio format is possible in VLC media player. It includes AVI, MP4, FLV, WMV, RMVB and Quick time. You can even play the videos partially or preview them even before completing the downloads.

An easier way to split the video
The whole process of splitting the video into a VLC media player is extremely easy for managing and handling without any requirement of technical knowledge. But unfortunately, you can apply the frame-by-frame technique on the short videos. Monitoring is essential during the split and looking at the complete process whenever the recording is in VLC.
This causes the loss of quality. Here, the substitute that is also available is Filmora Video Editor . It is the recommendation of the graphic designers, web developers and videographers because it is freely available and lightweight software for the systems. You can apply its features to your images and videos. This includes the cutting, rotating and resizing of your videos along with the images.
For Win 7 or later (64-bit)
For macOS 10.14 or later
Features:
- There are 300+ special effects available
- Splitting of the screens and video clips
- Adding and tracking the motion graphics
- Unlimitedly sharing of the videos
- Addition of the transitional effects
- Dragging and dropping the video contents
- Customization of the effects
You can easily split and cut the large videos in Wondershare Filmora simply. There is no loss of video quality. Follow the steps below for splitting the video from Wondershare Filmora:
Step 1:
Import your videos to Filmora Video Cutter After installing the video cutter, launch it and select New Project to enter the video editing interface. Now, you need to import the video that needs to cut into several parts.

Step 2:
Drag and drop the videos in the timeline to start the splitting. Click the Split icon (scissor icon) on the toolbar or the Split button on the playhead to split the video

Apart from splitting the videos, you can even combine and merge different videos into one. Even the rotation of the videos is possible.
Therefore, Wondershare Filmora has received recognition due to its simple features. It is available for everyone, whether for individual, educational, or business purposes. It can help you in changing the look of your brand completely. Even adding the logos in the videos is also possible, along with adjusting the sizes. There is a huge range of features without any watermark, and all the upgrades are freely available.
Also, tech support is available for any assistance you need. Edit your images and videos on the social media platforms with ease, along with the adjusting tool. The perfect video editor is Wondershare Filmora, as it has compatibility with both Windows and Mac users. Correct and match the colour with the customization tools. Start using the Wondershare Filmora today without being concerned regarding the format of the video clips. You will definitely enjoy using it.
Step 3: Now, you can easily play the video simply by clicking the “Open File” option present in the media menu. The drag and drop option is available inside the VLC media player.
You should start playing the video now and recording the parts with the help of a decoder. Look for the position from where you want to begin the recording and press both Play and Pause buttons one after the other.
Even the Frame-by-Frame button is also available. It is the last one in the advance controls for navigating the actual frame from where you want to begin the recording.
Step 4:
Press the button “Record” again whenever you want the recording to stop. This is the final step for cutting the videos in VLC. The split video from the actual video saves automatically as the MP4 video file in the folder of Libraries or Videos if you are using Windows operating system.
Almost all, playing any video and audio format is possible in VLC media player. It includes AVI, MP4, FLV, WMV, RMVB and Quick time. You can even play the videos partially or preview them even before completing the downloads.
An easier way to split the video
The whole process of splitting the video into a VLC media player is extremely easy for managing and handling without any requirement of technical knowledge. But unfortunately, you can apply the frame-by-frame technique on the short videos. Monitoring is essential during the split and looking at the complete process whenever the recording is in VLC.
This causes the loss of quality. Here, the substitute that is also available is Filmora Video Editor . It is the recommendation of the graphic designers, web developers and videographers because it is freely available and lightweight software for the systems. You can apply its features to your images and videos. This includes the cutting, rotating and resizing of your videos along with the images.
For Win 7 or later (64-bit)
For macOS 10.14 or later
Features:
- There are 300+ special effects available
- Splitting of the screens and video clips
- Adding and tracking the motion graphics
- Unlimitedly sharing of the videos
- Addition of the transitional effects
- Dragging and dropping the video contents
- Customization of the effects
You can easily split and cut the large videos in Wondershare Filmora simply. There is no loss of video quality. Follow the steps below for splitting the video from Wondershare Filmora:
Step 1:
Import your videos to Filmora Video Cutter After installing the video cutter, launch it and select New Project to enter the video editing interface. Now, you need to import the video that needs to cut into several parts.
Step 2:
Drag and drop the videos in the timeline to start the splitting. Click the Split icon (scissor icon) on the toolbar or the Split button on the playhead to split the video
Apart from splitting the videos, you can even combine and merge different videos into one. Even the rotation of the videos is possible.
Therefore, Wondershare Filmora has received recognition due to its simple features. It is available for everyone, whether for individual, educational, or business purposes. It can help you in changing the look of your brand completely. Even adding the logos in the videos is also possible, along with adjusting the sizes. There is a huge range of features without any watermark, and all the upgrades are freely available.
Also, tech support is available for any assistance you need. Edit your images and videos on the social media platforms with ease, along with the adjusting tool. The perfect video editor is Wondershare Filmora, as it has compatibility with both Windows and Mac users. Correct and match the colour with the customization tools. Start using the Wondershare Filmora today without being concerned regarding the format of the video clips. You will definitely enjoy using it.
Also read:
- [New] 2024 Approved Enhance Instagram Video Streams Speedily
- [New] From Novice to Expert Setting up a Sports Channel on Mac for 2024
- [Updated] 2024 Approved Unmatched Value Top-Tier ASMR Microphones on a Budget
- 2024 Approved Hyperlapse VS Timelapse Videos
- 2024 Approved Try These 10 Music Video Templates To Make Your Work Easy
- Easily Sync Audio With Video With Filmora
- Enhance Gaming on AMD RX 480: Quick Download & Update of Graphics Drivers
- Featured Picks: Top LGBT+ Movie Selections for Netflix Viewers This Month
- In 2024, Best Face-Changing Tools IPhone & Android Edition
- New How to Make a TikTok Loop Video
- New In 2024, Adobe Lightroom Color Grading Tutorial
- Repair damaged, unplayable video files of Vivo S17 Pro on Windows
- Step-by-Step Guide to Infectious Internet Memes (GIFs)
- The way to get back lost call history from Motorola Edge 40
- Updated If You Are a Marketer Who Want to Create Facebook Ads to Boost Your Business, You Are Coming to the Right Place. Well Share You some Useful Tips to Start Your First FB Ads Campaign
- Title: Updated for 2024
- Author: Chloe
- Created at : 2025-02-28 17:44:25
- Updated at : 2025-03-04 08:37:31
- Link: https://ai-editing-video.techidaily.com/updated-for-2024/
- License: This work is licensed under CC BY-NC-SA 4.0.