
:max_bytes(150000):strip_icc():format(webp)/woman-with-remote-cropped-getty-169707531-5b2ebd5943a1030036b1eb56.jpg)
Updated Free LUTs for OBS How to Use Them, In 2024
Free LUTs for OBS: How to Use Them?
LUTs are powerful tools that can significantly enhance the visual appeal of your content. You can use this tool to change the look and feel of your images and videos. Moreover, you can use LUTs to bring out the desired mood, style, and tone to your media content. Additionally, LUTs provide endless possibilities for creativity with different color adjustments and grading.
There are many software and tools available on the market to apply LUTs. These tools let you import and apply LUTs to your images and videos. Furthermore, you can apply LUTs even using streaming software like OBS. Moreover, you can improve live streams, videos, and recordings by applying LUTs using OBS. However, many paid and free LUTs for OBS are available for usage.
Part 1: Why Do We Need to Use LUTs for Editing in OBS?
There are many free OBS LUTs available that you can download and use for your content. The real question is the utility of LUTs in OBS. Here are some of the reasons to use LUTs in this tool.
Efficiency and Consistency
LUTs provide a quick and consistent way to apply color transformations. Instead of manually adjusting individual color settings, you can use LUTs. Similarly, it allows you to instantly and precisely grade and correct colors.
Time-Saving
Using LUTs saves time because they offer pre-defined color transformations. Instead of adjusting colors for each project or image, you can use LUTs. Additionally, they allow you to match your desired look or style easily.
Artistic Control and Creative Freedom
Furthermore, it gives artists, filmmakers, and photographers more control over their work. They allow for experimentation and exploration of different looks and styles. You can be more creative by experimenting with varying tones of color to the same content.
Consistent Color Reproduction
LUTs are essential for maintaining consistent color tones. The good part is it maintains consistency across different devices, software, and platforms. They ensure that colors look the same, no matter what the viewing medium, like monitors, projectors, or mobile screens.
Film Emulation and Replication
Moreover, it can replicate classic film stocks’ characteristics and aesthetics. They allow filmmakers and photographers to recreate iconic films’ color response and tonal range. In this way, everyone can experiment with color tones inspired by famous movies.
Workflow Flexibility and Collaboration
Lookup tables offer flexibility and facilitate collaboration in post-production workflows. They can be easily shared and applied to different projects or sequences. Similarly, it ensures consistent color grading across multiple editors or teams.
Calibration and Color Management
Additionally, LUTs play an important role in color calibration and management processes. It allows you to align color spaces, correct color variations, and maintain color accuracy. Furthermore, it will maintain consistent color grading throughout the project.
Real-time Color Processing
Lastly, LUTs are valuable in applications that require real-time color processing. It can be used in live broadcasts, video streaming, or video games. You can make instant adjustments and enhancements in real time.
Empower your videos with a new mood using different LUTs. Filmora now offers 100+ top-quality 3D LUTs cover a broad range of scenarios. Transform your videos with Filmora’s powerful 3D LUTs.
Apply LUT on Videos Apply LUT on Videos Learn More


Part 2: Discussing Some Top-Notch Best LUTs for OBS?
If you are searching for the best LUTs for OBS, you’re at the right place. Here is a list of some of the best LUTs you can apply using OBS. You can choose from different styles and tones according to your preference:
1. Vintage LUTs
Take a step back in time with this pack of Vintage LUTs. This pack gives your videos and images a nostalgic, retro feel. Moreover, this pack has different classic film presets, including monochrome and b&w. It enhances warm tones, adds a vignette, and introduces a gentle fade effect. Furthermore, this pack gives your media content the perfect retro feel.

2. 13 FREE Custom LUTs for Log Footage
Using these 13 cinematic LUTs, you can unleash the power of the silver screen. With these LUTs, you can bring Hollywood magic to your videos. Additionally, this pack enhances contrast and saturation to create a dramatic and cinematic look. Moreover, it enhances your media with rich colors, deep shadows, and vibrant highlights giving them a movie-like feel.

3. Vibrant Nature LUTs for Photo & Video
Vibrant Nature LUTs is an excellent pack that enhances the beauty of nature and the outdoors. It is a pack of five different LUTs specifically used to enhance natural landscapes and environmental shots. Furthermore, this pack highlights the earthy tones, adds depth to greens, and brings out the details of nature. Additionally, you can use this pack to improve the scenery in your pictures and videos.

4. Coastal Haze
Coastal Haze is a fantastic LUT to celebrate love and romance with its color grading. It is an excellent free LUT that enhances the colors and emotions of wedding videos and romantic moments. Moreover, it adds a soft and dreamy touch by improving skin tones. Furthermore, it creates a warm and intimate atmosphere allowing you to beautify your special moments.

5. 20 Dark Moody LUTs Pack
Dive into the world of moody dark colors with this 20 Dark Moody LUTs Pack. Each LUT has a different tone and feel to it. These LUTs add darkness to create a mysterious and serious ambiance. It enhances shadows, deepens blacks, and adds a subtle color grading to create an intense look. With this Moody LUT pack, you can make more professional-looking dark videos.

Part 3: How to Use LUTs in OBS Studio Properly?
If you’ve found the best free LUTs for OBS, you can apply them directly to your video feed. Here are simple steps to apply LUTs using OBS Studio. Following these steps, you can easily apply a LUT effect to your video feed or live stream in OBS.
Step 1: Open OBS and start your video feed or live stream using a webcam or capture card. Once your video stream is running, right-click the “Video Capture Device” option. After that, select “Filters” from the options that appear. In the Filters menu, locate the “Effect Filters” section and click the “+” button. Choose the “Apply LUT” option from the options that appear to add the LUT effect to your video stream.

Step 2: A new window will pop up where you can specify the name of your LUT. To select your desired LUT, click the “Browse” button and navigate to its location on your device. Once you’ve found your LUT, click the “Open” button to apply it directly to your video stream. If needed, you can adjust the intensity of the LUT by making changes in the “Preview” screen.

Part 4: Wondershare Filmora: Another Efficient Platform for Adding LUTs on Videos
Wondershare Filmora is an exceptional video editing tool with the additional ability of color grading. With this powerful tool, you can color grade your videos by manually adjusting settings or applying LUTs. The latest update of Wondershare Filmora includes a library of over 200+ LUTs that you can apply to your media files. Furthermore, you can also customize the intensity of the applied LUTs.
Add LUTs on Video For Win 7 or later(64-bit)
Add LUTs on Video For macOS 10.14 or later
Besides color grading, Filmora also provides a variety of effects, filters, and overlays for your videos. These tools allow you to add artistic touches and improve the overall feel of your content. Additionally, it offers professional-grade features such as AI Cutout. This feature enables you to effortlessly select your subject in a video and change their background.

Conclusion
In conclusion, LUTs are useful tools for color-correcting live streams and video editing projects. You can apply LUTs directly to your live streams, and video feeds with OBS. Many free LUTs for OBS are available, each with a different tone and feel. Furthermore, LUTs can also be used in popular video editing tools like Wondershare Filmora. Lastly, LUTs are essential tools to make your content stand out.
Add LUTs on Video For Win 7 or later(64-bit)
Add LUTs on Video For macOS 10.14 or later
Apply LUT on Videos Apply LUT on Videos Learn More
Part 2: Discussing Some Top-Notch Best LUTs for OBS?
If you are searching for the best LUTs for OBS, you’re at the right place. Here is a list of some of the best LUTs you can apply using OBS. You can choose from different styles and tones according to your preference:
1. Vintage LUTs
Take a step back in time with this pack of Vintage LUTs. This pack gives your videos and images a nostalgic, retro feel. Moreover, this pack has different classic film presets, including monochrome and b&w. It enhances warm tones, adds a vignette, and introduces a gentle fade effect. Furthermore, this pack gives your media content the perfect retro feel.
2. 13 FREE Custom LUTs for Log Footage
Using these 13 cinematic LUTs, you can unleash the power of the silver screen. With these LUTs, you can bring Hollywood magic to your videos. Additionally, this pack enhances contrast and saturation to create a dramatic and cinematic look. Moreover, it enhances your media with rich colors, deep shadows, and vibrant highlights giving them a movie-like feel.
3. Vibrant Nature LUTs for Photo & Video
Vibrant Nature LUTs is an excellent pack that enhances the beauty of nature and the outdoors. It is a pack of five different LUTs specifically used to enhance natural landscapes and environmental shots. Furthermore, this pack highlights the earthy tones, adds depth to greens, and brings out the details of nature. Additionally, you can use this pack to improve the scenery in your pictures and videos.
4. Coastal Haze
Coastal Haze is a fantastic LUT to celebrate love and romance with its color grading. It is an excellent free LUT that enhances the colors and emotions of wedding videos and romantic moments. Moreover, it adds a soft and dreamy touch by improving skin tones. Furthermore, it creates a warm and intimate atmosphere allowing you to beautify your special moments.
5. 20 Dark Moody LUTs Pack
Dive into the world of moody dark colors with this 20 Dark Moody LUTs Pack. Each LUT has a different tone and feel to it. These LUTs add darkness to create a mysterious and serious ambiance. It enhances shadows, deepens blacks, and adds a subtle color grading to create an intense look. With this Moody LUT pack, you can make more professional-looking dark videos.
Part 3: How to Use LUTs in OBS Studio Properly?
If you’ve found the best free LUTs for OBS, you can apply them directly to your video feed. Here are simple steps to apply LUTs using OBS Studio. Following these steps, you can easily apply a LUT effect to your video feed or live stream in OBS.
Step 1: Open OBS and start your video feed or live stream using a webcam or capture card. Once your video stream is running, right-click the “Video Capture Device” option. After that, select “Filters” from the options that appear. In the Filters menu, locate the “Effect Filters” section and click the “+” button. Choose the “Apply LUT” option from the options that appear to add the LUT effect to your video stream.
Step 2: A new window will pop up where you can specify the name of your LUT. To select your desired LUT, click the “Browse” button and navigate to its location on your device. Once you’ve found your LUT, click the “Open” button to apply it directly to your video stream. If needed, you can adjust the intensity of the LUT by making changes in the “Preview” screen.
Part 4: Wondershare Filmora: Another Efficient Platform for Adding LUTs on Videos
Wondershare Filmora is an exceptional video editing tool with the additional ability of color grading. With this powerful tool, you can color grade your videos by manually adjusting settings or applying LUTs. The latest update of Wondershare Filmora includes a library of over 200+ LUTs that you can apply to your media files. Furthermore, you can also customize the intensity of the applied LUTs.
Add LUTs on Video For Win 7 or later(64-bit)
Add LUTs on Video For macOS 10.14 or later
Besides color grading, Filmora also provides a variety of effects, filters, and overlays for your videos. These tools allow you to add artistic touches and improve the overall feel of your content. Additionally, it offers professional-grade features such as AI Cutout. This feature enables you to effortlessly select your subject in a video and change their background.
Conclusion
In conclusion, LUTs are useful tools for color-correcting live streams and video editing projects. You can apply LUTs directly to your live streams, and video feeds with OBS. Many free LUTs for OBS are available, each with a different tone and feel. Furthermore, LUTs can also be used in popular video editing tools like Wondershare Filmora. Lastly, LUTs are essential tools to make your content stand out.
Add LUTs on Video For Win 7 or later(64-bit)
Add LUTs on Video For macOS 10.14 or later
15 Must-Use Gifs Editors
15 Must-Use Gifs Editors in 2024
An easy yet powerful editor
Numerous effects to choose from
Detailed tutorials provided by the official channel
Several websites and companies use the graphics interchange format that is the GIF. It can be seen to be used by a wide number of people on the internet and its format is supported by all platforms. The common goal of all the users can be satisfied.
Are you looking to create and edit gifs online or on your laptop but cannot find a suitable way out?
Finding the best and most user friendly GIF maker is not very hard, especially considering that free gif editor software is offered by so many providers. But if you’re only starting your journey with apps to make GIFs, it can be a difficult choice.
In this article
01 [How to Make GIF Interesting?](#Part 1)
02 [Top 5 Editors for Windows](#Part 2)
03 [Top 5 Editors for iPhone/Android](#Part 3)
04 [Top 5 Editors for Animated GIF Editing](#Part 4)
Part 1 How to Make GIF Interesting?
There are several ways by which a GIF can be made interesting. You can use colorful graphics and drop duplicate frames. Using fewer colors lets you make longer and more involved gifs.
Part 2 Top 5 Editors for Windows
Below are the top 5 editors which will help you to form GIFs for Windows: -
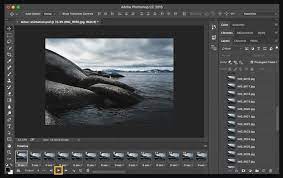
01Adobe Photoshop
Adobe Photoshop could be a useful device for making videos, image redaction, and GIF editing. This GIF code for Windows can allow you to import a GIF file so begin with the modification process.
Therefore, GIF editing is a breeze as you’ll alter the effects, modification the frame animation within the Timeline section, and do plenty a lot with this tool. You’ll simply utilize the free trial version to urge accustomed to the tool initial and then opt for the premium version to try to a lot more.
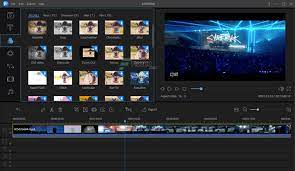
02EaseUS Video Editor
In the context of GIF makers, EaseUS Video Editor can also be said as one of the best. Free templates of texts, filters, elements, overlays, transitions, and music are available here which its users create GIF images with easily. You can also create lively and fully animated images, convert MP4 to GIFs and share it on YouTube, or other social media platforms.
The capabilities of this animated GIF maker for Windows are not restrained to this alone, as it can be used to edit all kinds of images, audio, and videos.
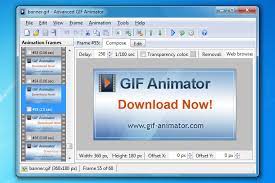
03GIF Animator
GIF animator editor is one of the first-rate GIF makers and is an awesome device for you if you desire to create GIF images, banners, buttons, and GIF videos. The device is very convenient to use and is a favorite of animators and designers.
The measurement of the photo can be modified and alongside that, it is feasible to control the frames, hastily cross texts, and enhance. Corrections to the movies can be brought and the built-in photograph editor can be used to rectify photographs and pictures, you can draw on them and you can convert movies to GIFs by the usage of the fragmented section of the video files.
04**Wondershare Filmora Video Editor **
If you are searching for nice animated GIF makers for Windows computers, then Wondershare Filmora’s animated movies and GIF editor device may want to be a brilliant choice. That’s due to the fact with this GIF maker Windows device lets you add a video, convert it to the GIF structure and then edit it later with its super features.
The interactive UI helps customers manner greater than one hundred fifty file codecs easily. With this device, you can crop, pace up a video, alter the body size, and caption it. Additionally, you add texts, add animation consequences to the images, and alter the pictures and movies in a few steps.

Wondershare Filmora - Best Video Editor for Mac/Windows
5,481,435 people have downloaded it.
Build unique custom animations without breaking a sweat.
Focus on creating epic stories and leave the details to Filmora’s auto features.
Start a creative adventure with drag & drop effects and endless possibilities.
Filmora simplifies advanced features to save you time and effort.
Filmora cuts out repetition so you can move on to your next creative breakthrough.
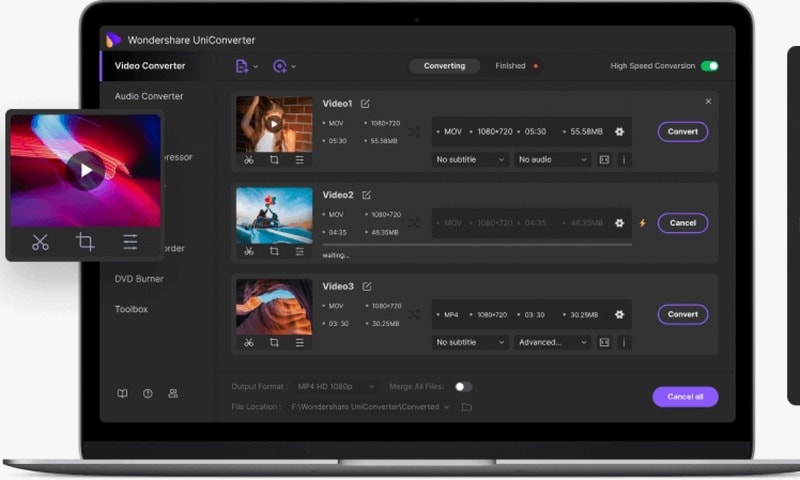
05Wondershare UniConverter
Wondershare UniConverter is one of the fine image, audio, and video editor and converter out there, and ranked the excellent GIF maker here. This GIF editor app is easy for customers and will furnish a pleasant platform for novices to operate their tasks. And when performed to create and edit GIF files, a person can export the GIF archives to both Android or iPhone barring having to use iTunes.
Part 3 Top 5 Editors for iPhone/Android
01PixelStudio
Pixel Studio is an animation app for pixel artwork fans. You can draw your little creations with pixel art. It additionally comes with a textual content tool, aid for matters like Samsung S-Pen, and it auto-saves so you don’t lose work. You can export your creations to GIF as nicely and that makes Pixel Studio one of the quality apps for customized GIFs. It’s normally an artwork app so meme lords may additionally want to put in a little greater effort than usual, however, the consequences are normally well worth it.
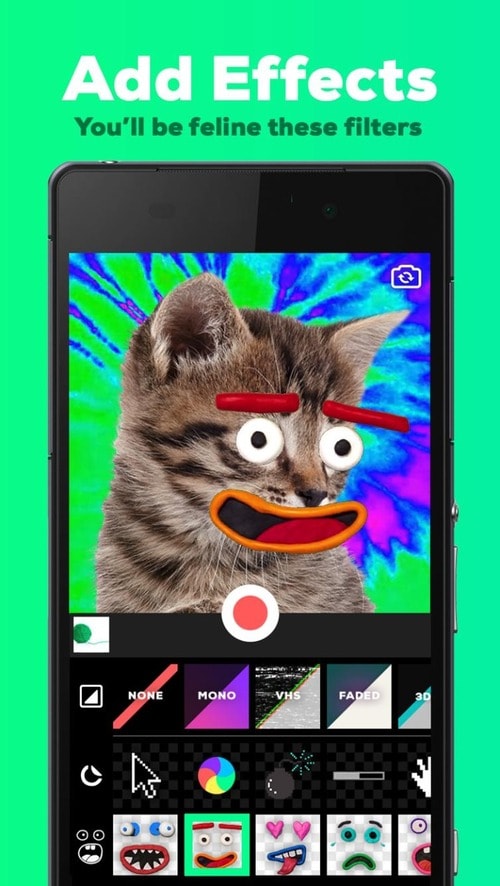
02Giphy Cam
Giphy Cam is one of the more recent gif editing apps. The digicam data is a brief phase of video. You can alter that video with lots of filters, different effects, stickers, text, and more. It additionally has a five-shot burst mode alongside its video mode. This is likely the excellent GIF/camera app hybrid. It doesn’t have any digital camera features; however, it does GIFs higher than the others by way of a large margin. It’s free with no in-app purchases.
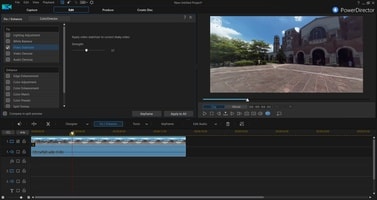
03PowerDirector
PowerDirector is one of many videos modifying apps with GIF support. This one simply takes place to be higher than most of the different ones. It’s a video editor app. Thus, it’ll have comparable features. However, two of the export codecs encompass GIF nonetheless pix and animated GIFs. This will work first-class for turning a video into a shorter GIF. The app is free to download and play with. You may additionally want to buy extra aspects by using in-app purchases.
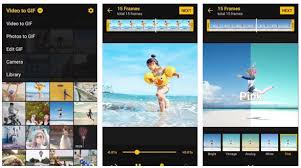
04ImgPlay – GIF Maker
ImgPlay is a popular GIF editing app that is available for Android and iOS. You have the option of using an existing video or shooting one using your phone’s camera. In GIFs, you can apply 30 effects, crop a portion of your choice, and modify the frame rate.
05Motion Stills
Motion Stills is a Google app that allows you to record short films and turn them into looping GIFs. You can use the app to take a short 3s clip with a single tap or utilize the Fast Forward feature to condense an existing video into a short one. To make yips GIFs even better, you may add motion text and emoticons. After that, save it as a GIF and send it to your friends.
Part 4 Top 5 Editors for Animated GIF Editing
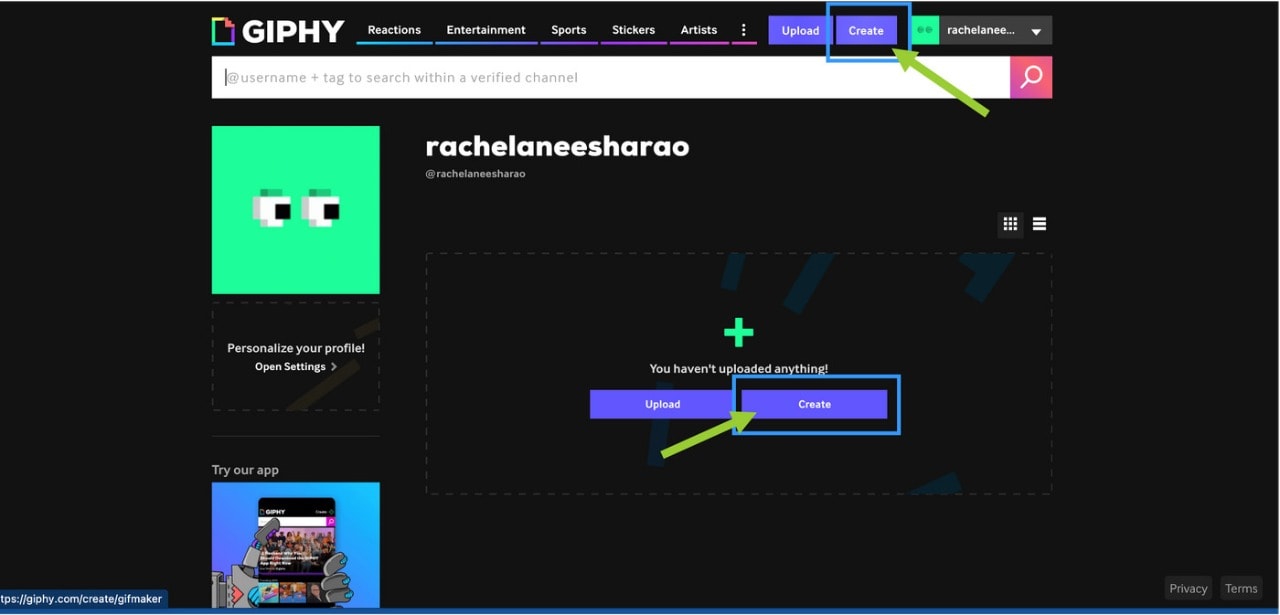
01Giphy
GIPHY is a designing tool that helps customers to create extraordinary GIFs, stickers, and backdrops. You can edit your plan with filters, captions, stickers, and different plan elements. The popular codecs for GIF uploads are JPG, PNG, GIF, MP4, or MOV, whilst the conventional file codecs to convert to stickers are JPG or PNG.
GIPHY permits you to paste URLs from specific sources such as Vimeo, YouTube, GIPHY, and others. The animated GIF maker software program makes it convenient for customers to edit and organize the uploaded archives in the favored order.
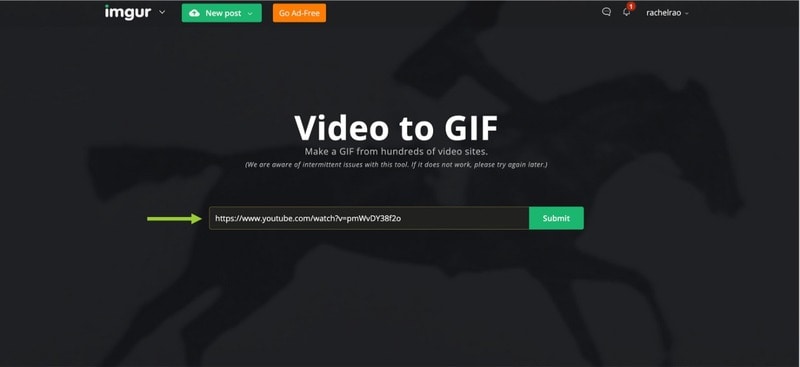
02Imgur
It’s a website that makes it simple to make GIFs. Simply paste the video URL into the web app and wait for it to process. After that, all you must do now is set the start time and duration of your GIF.
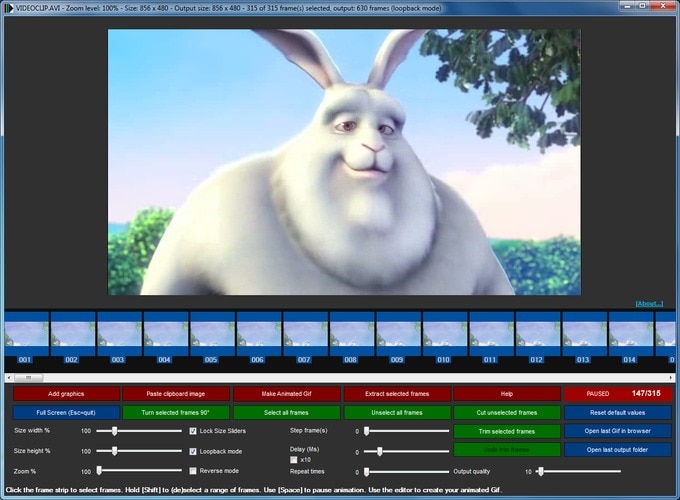
03KickMyGraphics
The utility comes with a humble person interface and it approves you to create animated GIFs from neighborhood images. In addition, you can additionally paste snapshots from your clipboard at once to the application. The utility additionally helps video files; however, you want to convert the video earlier than you can edit it. The utility affords a stay preview so you can see how your animation appears at any time. You can additionally see all handy frames and dispose of useless frames with ease.
As for editing, you can’t add your textual content or alter the brightness of your frames, however, you can trade their width, peak, and zoom level. You can additionally allow Loopback or Reverse mode and set delay, step frames, and a variety of repeats. You can additionally configure output first-class right from the application.
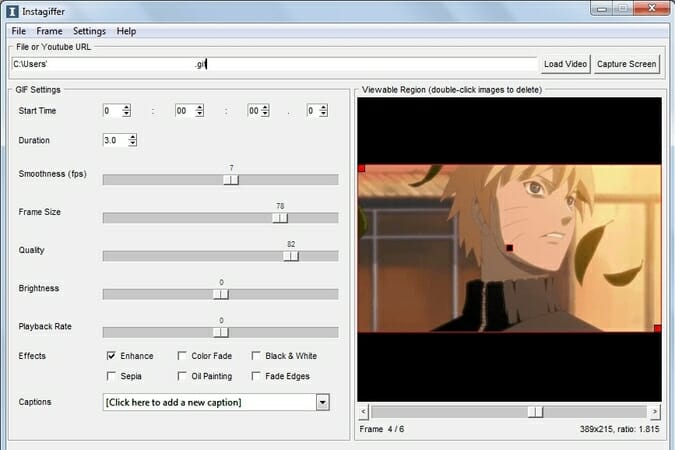
04Instagiffer
Instagiffer is some other easy software that lets you create animated GIFs on your PC. This utility affords a humble consumer interface; however, it makes up for it with an extensive variety of features. The software approves you to convert nearby movies to GIFs, however, you can additionally paste a YouTube URL and convert an online video to GIF with ease. According to the developer, the software additionally works with different video web hosting websites.
05GIMP
The software is free, so you can download and use it except for any restrictions. GIMP is best for picture designers and it comes with all preferences that an image editor needs. You can without problems edit your images, exchange their color, hue, saturation, or brightness, and add exceptional outcomes to them.
In addition, you can create special creations thanks to the built-in layer system. It’s worth citing that the software additionally helps programming algorithms so you can effortlessly edit your photos with the use of scripts.

● Key Takeaways from This Episode →
● If you are typically worried about how you can be able to come up with fascinating GIFs, you ought to hold in thought that you don’t have to create them from scratch.
● You can be capable to advance inspiring GIFs from current movies and photos eight after GIF editor software program free download.
● Hopefully, you are now capable to pick out a perfect GIF creator to use for your modifying tasks.
Several websites and companies use the graphics interchange format that is the GIF. It can be seen to be used by a wide number of people on the internet and its format is supported by all platforms. The common goal of all the users can be satisfied.
Are you looking to create and edit gifs online or on your laptop but cannot find a suitable way out?
Finding the best and most user friendly GIF maker is not very hard, especially considering that free gif editor software is offered by so many providers. But if you’re only starting your journey with apps to make GIFs, it can be a difficult choice.
In this article
01 [How to Make GIF Interesting?](#Part 1)
02 [Top 5 Editors for Windows](#Part 2)
03 [Top 5 Editors for iPhone/Android](#Part 3)
04 [Top 5 Editors for Animated GIF Editing](#Part 4)
Part 1 How to Make GIF Interesting?
There are several ways by which a GIF can be made interesting. You can use colorful graphics and drop duplicate frames. Using fewer colors lets you make longer and more involved gifs.
Part 2 Top 5 Editors for Windows
Below are the top 5 editors which will help you to form GIFs for Windows: -
01Adobe Photoshop
Adobe Photoshop could be a useful device for making videos, image redaction, and GIF editing. This GIF code for Windows can allow you to import a GIF file so begin with the modification process.
Therefore, GIF editing is a breeze as you’ll alter the effects, modification the frame animation within the Timeline section, and do plenty a lot with this tool. You’ll simply utilize the free trial version to urge accustomed to the tool initial and then opt for the premium version to try to a lot more.
02EaseUS Video Editor
In the context of GIF makers, EaseUS Video Editor can also be said as one of the best. Free templates of texts, filters, elements, overlays, transitions, and music are available here which its users create GIF images with easily. You can also create lively and fully animated images, convert MP4 to GIFs and share it on YouTube, or other social media platforms.
The capabilities of this animated GIF maker for Windows are not restrained to this alone, as it can be used to edit all kinds of images, audio, and videos.
03GIF Animator
GIF animator editor is one of the first-rate GIF makers and is an awesome device for you if you desire to create GIF images, banners, buttons, and GIF videos. The device is very convenient to use and is a favorite of animators and designers.
The measurement of the photo can be modified and alongside that, it is feasible to control the frames, hastily cross texts, and enhance. Corrections to the movies can be brought and the built-in photograph editor can be used to rectify photographs and pictures, you can draw on them and you can convert movies to GIFs by the usage of the fragmented section of the video files.
04**Wondershare Filmora Video Editor **
If you are searching for nice animated GIF makers for Windows computers, then Wondershare Filmora’s animated movies and GIF editor device may want to be a brilliant choice. That’s due to the fact with this GIF maker Windows device lets you add a video, convert it to the GIF structure and then edit it later with its super features.
The interactive UI helps customers manner greater than one hundred fifty file codecs easily. With this device, you can crop, pace up a video, alter the body size, and caption it. Additionally, you add texts, add animation consequences to the images, and alter the pictures and movies in a few steps.
Wondershare Filmora - Best Video Editor for Mac/Windows
5,481,435 people have downloaded it.
Build unique custom animations without breaking a sweat.
Focus on creating epic stories and leave the details to Filmora’s auto features.
Start a creative adventure with drag & drop effects and endless possibilities.
Filmora simplifies advanced features to save you time and effort.
Filmora cuts out repetition so you can move on to your next creative breakthrough.
05Wondershare UniConverter
Wondershare UniConverter is one of the fine image, audio, and video editor and converter out there, and ranked the excellent GIF maker here. This GIF editor app is easy for customers and will furnish a pleasant platform for novices to operate their tasks. And when performed to create and edit GIF files, a person can export the GIF archives to both Android or iPhone barring having to use iTunes.
Part 3 Top 5 Editors for iPhone/Android
01PixelStudio
Pixel Studio is an animation app for pixel artwork fans. You can draw your little creations with pixel art. It additionally comes with a textual content tool, aid for matters like Samsung S-Pen, and it auto-saves so you don’t lose work. You can export your creations to GIF as nicely and that makes Pixel Studio one of the quality apps for customized GIFs. It’s normally an artwork app so meme lords may additionally want to put in a little greater effort than usual, however, the consequences are normally well worth it.
02Giphy Cam
Giphy Cam is one of the more recent gif editing apps. The digicam data is a brief phase of video. You can alter that video with lots of filters, different effects, stickers, text, and more. It additionally has a five-shot burst mode alongside its video mode. This is likely the excellent GIF/camera app hybrid. It doesn’t have any digital camera features; however, it does GIFs higher than the others by way of a large margin. It’s free with no in-app purchases.
03PowerDirector
PowerDirector is one of many videos modifying apps with GIF support. This one simply takes place to be higher than most of the different ones. It’s a video editor app. Thus, it’ll have comparable features. However, two of the export codecs encompass GIF nonetheless pix and animated GIFs. This will work first-class for turning a video into a shorter GIF. The app is free to download and play with. You may additionally want to buy extra aspects by using in-app purchases.
04ImgPlay – GIF Maker
ImgPlay is a popular GIF editing app that is available for Android and iOS. You have the option of using an existing video or shooting one using your phone’s camera. In GIFs, you can apply 30 effects, crop a portion of your choice, and modify the frame rate.
05Motion Stills
Motion Stills is a Google app that allows you to record short films and turn them into looping GIFs. You can use the app to take a short 3s clip with a single tap or utilize the Fast Forward feature to condense an existing video into a short one. To make yips GIFs even better, you may add motion text and emoticons. After that, save it as a GIF and send it to your friends.
Part 4 Top 5 Editors for Animated GIF Editing
01Giphy
GIPHY is a designing tool that helps customers to create extraordinary GIFs, stickers, and backdrops. You can edit your plan with filters, captions, stickers, and different plan elements. The popular codecs for GIF uploads are JPG, PNG, GIF, MP4, or MOV, whilst the conventional file codecs to convert to stickers are JPG or PNG.
GIPHY permits you to paste URLs from specific sources such as Vimeo, YouTube, GIPHY, and others. The animated GIF maker software program makes it convenient for customers to edit and organize the uploaded archives in the favored order.
02Imgur
It’s a website that makes it simple to make GIFs. Simply paste the video URL into the web app and wait for it to process. After that, all you must do now is set the start time and duration of your GIF.
03KickMyGraphics
The utility comes with a humble person interface and it approves you to create animated GIFs from neighborhood images. In addition, you can additionally paste snapshots from your clipboard at once to the application. The utility additionally helps video files; however, you want to convert the video earlier than you can edit it. The utility affords a stay preview so you can see how your animation appears at any time. You can additionally see all handy frames and dispose of useless frames with ease.
As for editing, you can’t add your textual content or alter the brightness of your frames, however, you can trade their width, peak, and zoom level. You can additionally allow Loopback or Reverse mode and set delay, step frames, and a variety of repeats. You can additionally configure output first-class right from the application.
04Instagiffer
Instagiffer is some other easy software that lets you create animated GIFs on your PC. This utility affords a humble consumer interface; however, it makes up for it with an extensive variety of features. The software approves you to convert nearby movies to GIFs, however, you can additionally paste a YouTube URL and convert an online video to GIF with ease. According to the developer, the software additionally works with different video web hosting websites.
05GIMP
The software is free, so you can download and use it except for any restrictions. GIMP is best for picture designers and it comes with all preferences that an image editor needs. You can without problems edit your images, exchange their color, hue, saturation, or brightness, and add exceptional outcomes to them.
In addition, you can create special creations thanks to the built-in layer system. It’s worth citing that the software additionally helps programming algorithms so you can effortlessly edit your photos with the use of scripts.
● Key Takeaways from This Episode →
● If you are typically worried about how you can be able to come up with fascinating GIFs, you ought to hold in thought that you don’t have to create them from scratch.
● You can be capable to advance inspiring GIFs from current movies and photos eight after GIF editor software program free download.
● Hopefully, you are now capable to pick out a perfect GIF creator to use for your modifying tasks.
Best Online YouTube Video Trimmer
Since the shift in interest from on-site jobs to content creators and exploring opportunities to take advantage of better and improved career growth opportunities, YouTube is one of the most popular social media platforms to get started.
But how do people face difficulties in finding an affordable and quick online YouTube video trimmer? Are you also facing issues with trimming your video before uploading it to get more views?
This is an ultimate guide on online YouTube video trimmer software and how you can trim your YouTube videos in no time.
Part 1. What is a YouTube trimmer?
Before diving into any details, it is important to introduce you to what is a YouTube trimmer and why it is important to trim your video. A YouTube trimmer is an easy and fast video editing tool that allows you to trim, crop, and share your favorite video parts online. You can also create custom links to YouTube Crops to embed on your website.
There are two popular online YouTube trimmers available; one only allows you to edit the YouTube link, which means you can only view the edited video online, while the other allows you to do related operations on the video file and download and save it as an mp4 or other file type for offline viewing.
Part 2. How to online trim YouTube videos?
1. Online YouTube trimmer (no edit and download)
Using these two websites, you can easily find the YouTube video clip you want to keep, but there is no way to download the video or add more editing to the clip. However, it works well for sharing links online or adding them to your website and using them to describe the part that best fits the topic.
The straightforward interface has just one function. Enter the start and end times in the box after entering the right YouTube link, then click “Crop!” to create a string of links.

The video’s beginning and ending times are selected in the same way as on the previous website. However, this website offers some basic code that you may copy and paste into your web pages to suit your demands in order to add YouTube videos.

Once you are done trimming your videos, you can download or export your videos in different formats, depending on your preference. It can be in mp4, mp3, or any other supported format.
2. Online YouTube trimmer (edit and download)
The websites that are listed after that combine an online YouTube downloader with a video editor, allowing you to make a variety of further edits to the selected video clip before downloading it locally.
- Veed.io :
Anyone can make powerful videos and expand their audiences thanks to the online video editing application Veed. It has some useful capabilities, such as the capacity to cut videos and filter them using different aesthetics. Users can crop, add text, make drawings, and even add photos to the movies. In addition, Veed serves as a tool for producing social media films that may be customized for each channel where they will be shared.
Additionally, they are free to play with various tools like rotate, trim, add photos, stickers, emojis, and more. Through the program, users may even create video memes online by uploading a target movie, modifying it using a variety of features, and downloading the altered video after a brief rendering.
Step1Launch veed.io on your web browser. Click on ‘Upload Your Video‘ to upload the video file you want to edit.
Step2You will notice a button to upload your media file once you are taken to the editing page.

Step3You can trim your video section by dragging the mark after you’ve uploaded the media file.

Step4Now, delete the unwanted video segment and click on ‘Export’ to save the trimmed video.
- Kapwing :
An effective, non-linear editing workflow is supported by the online video editor Kapwing. Upload your audio, video, and image files, then edit everything in one location. Since Kapwing is entirely online, content creators may access and edit their work from any computer or mobile device.
Step1Launch Kapwing.com on your web browser. If you are not directed to the trim video section, then go to the ‘Tools‘ menu and select ‘Trim Video‘. Now, click on ‘Choose a Video.’
Step2From the main page, click ‘Click to upload’ to upload the media file.

Step3After uploading the media file, Click on ‘Trim’ from the editing section on the right side of the screen.

Step4A pop-up screen will appear on your screen labeled as Trim Video. Trim the parts of the video as per your requirement and Click ‘Trim’ to finish.

Step5Once you have completed editing, click on ‘Export’ to save the video to your device.
Part 3. How to trim YouTube videos on a desktop?
Using an online video trimmer has been one of the last options that anyone would consider, but due to the expensive software, they have turned out to be a friendly and easy approach to editing videos. But the online video trimmers still rank at the bottom of the list because they’re unstable, and you can’t save the project at any time. If the online program breaks down, all your effort will be wasted. But desktop programs such as Filmora will never make you encounter such problems unless you experience a technical glitch.
With the help of a variety of strong editing tools and Wondershare Filmora , users may quickly and easily make outstanding videos. With Wondershare Filmora, anyone can learn how to be an excellent video editor, thanks to its wonderfully simple design.
You can follow these easy steps to trim your video:
Step1Click “Import” on the main windows and then select the desired video files from your computer to add video files to the Timeline for cutting. Movies can also be dropped directly into the Media Library.

Step2By moving the playhead over the unwanted section and choosing the trash can icon, you can delete it.

Step3When you’re through trimming, click “Export”, then select a location to store the edited video.
Conclusion
Depending on the comparison of how different software work, it is justifiable to conclude that Filmora is the best video editing software by all means. It offers a wide range of editing tools and ensures that progress has not been lost. If you are looking forward to trimming a video, download Filmora on your device to get started.
Free Download For Win 7 or later(64-bit)
Free Download For macOS 10.14 or later
Free Download For macOS 10.14 or later
How Can You Get VHS Filter and Glitch Filter to Your Images or Videos?
A glitch in the video or an image gives the notion of an error in the video recording process, and it was not accepted in the media industry. However, presently, creative professionals are incorporating the VHS filters to give a vintage impression. The visual distortions are used by gamers and streaming creators extensively.
For this very reason, the article discusses the procedure to create a glitch filter in Photoshop, Instagram, TikTok, and in one of your impeccable travel videos. Time to start!
In this article
01 How to Make VHS Filter in Photoshop?
02 How to Get VHS Filter in Instagram?
03 How to Get VHS Filter in TikTok?
04 How to Add VHS Effects to your Travel Video?
Part 1: How to Make VHS Filter in Photoshop?
There are a lot of steps associated with VHS filter Photoshop. The procedure can be tricky for a beginner in the industry. Therefore, we have sketched out a guide to make a VHS image filter in Photoshop. Follow it carefully to have desirable results.
Step 1: Open Photoshop
Open Photoshop from your computer and click on “New.” Use the “Custom” option from the windows that appear. After that, click on “File” and launch the imagery. Drag and drop that picture to the customized workspace.

Step 2: Apply the Transformation
Head to the “Edit” from the top panel and press “Transform” from there. Click on “Scale” from the context menu. The user is recommended to set the scale as required using arrows from the mouse. After that, apply the transformation.

Step 3: Changing the Parameters
Now, right-click on your layer to click on “Brightness and Contrast.” Change it as you need. After that, move on to the “Curves” and play with the graphs of the picture. Change the “Solid Color” as well. Make the color white and change the opacity levels.

Step 4: Adding Noise
Moving on, click on the first layer and navigate to the “Filter” bar on the top of the interface. Hit “Noise” and then “Add Noise.” Make the necessary changes as you like and press “Enter.” Scroll up to the “File” and hit “Open Recent” to launch the VHS texture photo. Drag and drop the texture to the photo layer that we are working on.

Step 5: Inserting VHS Texture
Resize the VHS texture and then apply the transformation. By default, the blend mode is “Normal.” Change it to “Darken” from the right panel. The picture will get dark. Again, change the mode to “Screen.” Moving on, input another VHS Filter texture and drag and drop it to the layer we are working on. Resize it and apply the transformation.

Step 6: Altering the Blend Mode
Alter the blend mode to “Darker” and then to “Screen.” Apply another filter and then drag and drop the layer. Change the blend mode to “Screen.” Pick up the eraser from the left panel of tools and make necessary edits.

Step 7: Duplicating the Layer
Duplicate the photo layer and move it up. Again, click on “Filter” then “Noise” to add the noise as needed. Alter the blend mode to “Soft Light” and set the opacity value. After that, add any solid color and switch the blend mode back to Soft Light.

Step 8: Playing with the Layers
Duplicate the layer again to change the color. After that, double click the layer and deselect “R.” Move to left or right. Perform the same procedure for the rest of the layers. Use the erase tool to offer fine imprinting to the transition. Duplicate the final layer and deselect “R” and “C.” Move left and right.

Step 9: Final Process
Use the eraser tool one last time, and you are done with the VCR filter.
Part 2: How to Get VHS Filter in Instagram?
Now that you know how to add glitch filter Photoshop let us move on to Instagram. The sub-section of this write-up shall focus on VHS filter Instagram. If you are an Instagram user wishing to get a retro VHS filter, follow our lead.
Step 1: Finding the Filters
The first step revolves around clicking on the Instagram app to open it. Navigate to the “Story.” The user will find a number of filters in the top panel along a circle.

Step 2: Picking the Vintage Filter
Swipe right towards those filters until a “Search” option is seen. Type “Vintage DV” and press “Enter,” where several VHS video filters will be displayed. Pick one and save it to your camera roll.

Step 3: Using the VHS Filter
Head back to the “Story” and select the “Effects” option. Select the filter that you saved and initiate the recording process. You have got the VHS filter for videos.

Part 3: How to Get VHS Filter in TikTok?
The following section of the write-up shall highlight finding and getting the 90s VHS filter in TikTok. So, what are we waiting for? Let us start the procedure.
Find the VHS Filter in TikTok
Step 1: Navigate to the App
Use your computer to launch the TikTok application. As soon as the interface appears, click on “Trends” in the bottom left corner.
Step 2: Open the Effects
Type Retro VHS in the search bar and click on the second result that is displayed. Click on the “Effects” that says, “VHS Retro.”
Step 3: Add in Favorites
Add it to the favorites and then tap on the video icon located at the center of the screen.

Use the VHS Filter in TikTok
Step 1: Deactivating the Filter</p
With the camera open, click on “Effects” right next to the camera icon. The filter is activated, but we need to deactivate it by clicking on the stop icon with the effects. Click anywhere on the screen to exit the “Effects” panel.
Step 2: Recording Process
Now, click on the red video sign and begin recording for some seconds without the filter. It is important to record the video by pointing at the targeted person. After the first part of the video is recorded, head back to the “Effects” menu and navigate to the tab that says, “Add to Favorites.”

Step 3: Publishing the Video
Choose the Retro VHS Filter and point the camera at the person that needs the filter. Hit the “Register” button. Make the recording and press the red popcorn. Hit “Next” and “Publish” the video finally.

Part 4: How to Add VHS Effects to your Travel Video?
With vacation season on, bloggers are into adding VHS photo filters to their videos to be uploaded on YouTube channels. The section shall convey the detailed procedure of adding a glitch effect filter to the travel and vacation videos in Wondershare Filmora .
For Win 7 or later (64-bit)
For macOS 10.12 or later
Step 1: Initiating the Process
Begin the process by launching Wondershare Filmora. For starters, let us work on the perfect music for the video. The Audio tab shows an awful collection. Choose the “Young and Bright” category for the music.

Step 2: Picking the Music
Select any music and drag and drop it to the timeline. Now, trim the music into 15 seconds long. Now, input the travel videos to start their editing. Set the order for the video afterward.

Step 3: Choosing the Overlays
Navigate to the “Effects” panel and search for VHS. The software would offer multiple choices to pick from. Choose different overlays and place them onto the video tracks as you like.

Step 4: Adding the Transition
To add the transition, head to the “Transition” tab and find VHS. Drag and drop the transitions among the cuts between the video clips. Adjust their duration as needed. Preview the video, and the mission is accomplished.

Final Thoughts
Grabbing the attention of the audience is not as easy as it sounds. The creative industry uses a vast range of effects to compel the viewers to be on the edge of their seats. The article introduced the VHS filter while covering its procedure. If you are a TikTok, Instagram, or Photoshop user, we have got you. Wondershare Filmora helps perfectly to add the glitch filter to the vacation videos.
Versatile Video Editor - Wondershare Filmora
An easy yet powerful editor
Numerous effects to choose from
Detailed tutorials provided by the official channel
Also read:
- 2024 Approved Best Free Video Editing Software to Boost Your Content Creation
- New End Your Struggles with Choppy Playback on DaVinci Resolve. Read This Guide to Find Effective Fixes and Reliable DaVinci Resolve Slow Playback Alternatives
- In 2024, Create Intro Video with Flixpress
- Methods on How to Speed Up Video on Splice
- Updated 2024 Approved Best Cinematic LUTs For Premiere Pro Recommendation
- Want to Speed up Your Video to Shorten Its Duration and Make It More Entertaining? Here Is How to Speed up Videos in Final Cut Pro. Get a Better Alternative to FCP to Speed up Videos for 2024
- New What Are The Stages Of Film Production
- In 2024, MP3 Cutter Download for Computer and Mobile
- How to Create a Smooth Cut Transition Effect?
- Some Leading AI Tools to Replace Sky Backgrounds for 2024
- Updated Leading Applications to Create Fast Motion in iPhone for 2024
- New 2024 Approved Tips to Make Cinematic Color Grading
- Efficient Ways to Manage Your Timeline for 2024
- How to Brighten a Video in Windows 10 | Step-By-Step Guide
- Figuring Out Proper Ways to Play a Video in Slow Motion on iPhone
- New 100+ Best TikTok Captions Enhance Your Content
- New Are You Tired of Spending Too Much Time on Video Editing? Learn the Most Effective Ways to Manage Your Timeline and Streamline Your Video Editing Process
- New Best Online YouTube Video Trimmer for 2024
- New 2024 Approved How to Create Sony Vegas Freeze Frame
- In 2024, The Best 10 AI Video Analytics Companies at a Glance
- Updated In 2024, How to Splice Videos Together on iPhone
- In 2024, Polish and Enshrine Your Music Videos with the Best Editing Software, Filmora. Add Cuts to Your Beat, Light Leaks, and Much More
- Updated Looking for the Best Free Video Editing Software Reddit to Make Your Video Perfectly? Check Out Our List of the Best Video Editors for Reddit and You Can Choose Any of Them
- 2024 Approved Top 8 Sites to Download Glitch Transition for Premiere Pro
- Updated 2024 Approved Learning Some Perfect Ways to Convert a Slow-Motion Video to Normal
- New Designed for You! Best Image (JPG/PNG) to GIF Converters
- New Every Compositor Should Know The Trick of Color Match in After Effects for 2024
- Updated 2024 Approved Finding The Finest Way To Add Subtitles to Videos | Filmora
- In 2024, Want to Find some Creative, Entertaining Ways to Preserve Precious Memories& Pass Them On-To Upcoming Generations? Well, Surely You Can Do It
- 2024 Approved TXT to SRT 3 Effective Ways to Convert TXT to SRT
- New How to Add Photos to Tik Tok Video for 2024
- Updated Do You Know You Can Use Mobile Apps to Apply Camera Effects to Your Videos? Many Smartphone Applications Allow You to Apply Camcorder Effects
- Updated Is Augmented Reality Conferencing the Future of Workplace Collaboration for 2024
- In 2024, How to Bypass iCloud Lock from Apple iPhone XS Max
- In 2024, How Do I Stop Someone From Tracking My Apple iPhone 6s Plus? | Dr.fone
- New The Most Efficient Techniques for You to Make 3D Animation Character
- In 2024, The Complete Guide to Motorola Moto G24 FRP Bypass Everything You Need to Know
- How To Transfer WhatsApp From Apple iPhone 14 Plus to others devices? | Dr.fone
- How to Unlock Apple iPhone 14 Plus Passcode Screen?
- Easy steps to recover deleted pictures from A05s.
- How to Show Wi-Fi Password on Samsung Galaxy M34 5G
- In 2024, How to Hide/Fake Snapchat Location on Your Realme Narzo 60 5G | Dr.fone
- How To Transfer Data From Apple iPhone 14 To Android/iOS? | Dr.fone
- In 2024, Easy Ways to Manage Your Poco X5 Pro Location Settings | Dr.fone
- Reasons for Xiaomi Redmi Note 12R Stuck on Startup Screen and Ways To Fix Them | Dr.fone
- New How to Make an Emoji of Yourself on Android and iPhone Emoji Yourself for 2024
- 3 Easy Ways to Factory Reset a Locked iPhone 7 Plus Without iTunes | Dr.fone
- How to Bypass Activation Lock on iPhone XR or iPad?
- What is Fake GPS Location Pro and Is It Good On Infinix Smart 7? | Dr.fone
- iPogo will be the new iSpoofer On Vivo Y100i Power 5G? | Dr.fone
- How to Fake Snapchat Location on Apple iPhone 6 | Dr.fone
- Does Airplane Mode Turn off GPS Location On Nokia C12? | Dr.fone
- In 2024, How to Lock Apps on Samsung Galaxy A05 to Protect Your Individual Information
- Updated Best 10 Animated Photo Collage Apps
- In 2024, Overview of the Best Vivo G2 Screen Mirroring App | Dr.fone
- In 2024, How to Create an Adobe Collage?
- How to Fix My Asus ROG Phone 8 Location Is Wrong | Dr.fone
- Fixing Persistent Pandora Crashes on ZTE Nubia Flip 5G | Dr.fone
- 5 Best Route Generator Apps You Should Try On Poco C51 | Dr.fone
- 6 Solutions to Fix Error 505 in Google Play Store on Nokia 130 Music | Dr.fone
- Updated Learn Pencil2D Animation Tutorial Overview
- In 2024, How to Transfer Data from Motorola Moto G24 to Any iOS Devices | Dr.fone
- Easy Guide How To Bypass OnePlus Nord N30 SE FRP Android 10/11/12/13
- In 2024, Mastering Android Device Manager The Ultimate Guide to Unlocking Your Samsung Galaxy M14 5G Device
- Title: Updated Free LUTs for OBS How to Use Them, In 2024
- Author: Chloe
- Created at : 2024-04-24 07:08:33
- Updated at : 2024-04-25 07:08:33
- Link: https://ai-editing-video.techidaily.com/updated-free-luts-for-obs-how-to-use-them-in-2024/
- License: This work is licensed under CC BY-NC-SA 4.0.
