

Updated How to Add Freeze Frame to Your Video From Any Device?
How to Add Freeze Frame to Your Video From Any Device?
Adding effects is an essential part of video editing to make a regular video look extraordinary. There are literally unlimited video effects available in popular video editors. You need to apply a video effect as per the trend and requirements of your video. Freeze frame effect has become extremely popular among video creators in today’s world of social media. Use freeze frame effect to freeze a specific scene in your video so that you can draw the attention of your viewers to that particular moment.
For example, in a match highlight video, you freeze the frame moment before a goal to show the positioning of the players or strikers. Owing to the popularity of freeze frame effect, you will find the video effect in almost all popular video editor apps for computers and smartphones. In fact, even popular online video editors have included the effect in their video effects. We will illustrate how to add freeze frame effect to your video on any device.
Part 1. How to Add Freeze Frame Video Effect on PC
If you are a computer user and you are looking for a video editor to add freeze frame effect to your video, we recommend Wondershare Filmora. Filmora is extremely popular among video creators for its wide range of video effects as well as its intuitive user interface. Adding freeze frame effect is super easy in Filmora and here are the steps to follow.
Step1Download and install Filmora for Windows PC. Launch Filmora and click on New Project button.
Step2Import your video clip under Project Media and then drop it into Timeline.
Step3Play the video and pause it where you want to freeze frame. Click on Snapshot icon to take photo of the frame. You will find the photo you have taken just now under Media library. In the meantime, you should split the video clip where you paused it to make space for the still image to get added and stay frozen.
Drag and drop the image on Timeline and stretch it to the duration up to which you want the frame to stay frozen. This image should be on top of the video clip in Timeline. You should place the image exactly where you paused the video.
Step4Double-click on the image in Timeline and adjust parameters as required. Play the video to notice the freeze frame effect. Click on Export button to save the video.
Part 2. How to Add Freeze Frame Video Effect on Mac
If you are a Mac user, the best video editor you can use to edit your video is Final Cut Pro. FCP is widely used by professional video creators and editors to edit their videos as per requirements. There are different categories of video effects available on FCP including freeze frame effect. Make sure your video is recorded with high frame rate and resolution for better outcomes. Here are the steps on how to add freeze frame in Final Cut Pro.
Step1Launch Final Cut Pro on your Mac. Go to File> Import> Files and select your video clip from the storage device. Drag it into the Timeline.

Step2Grab and move the Playhead to the point where you want to freeze the frame. Click on the video clip in the Timeline.

Step3Go to Edit menu and click on Add Freeze Frame. This will split your video clip and add frozen frame where you have placed the Playhead.

The default duration of the frozen freeze is four seconds. You can stretch it as per your requirements.
Just for information, both Windows and Mac users can also Premiere Pro add freeze frame effect if they already have Premiere Pro installed on their computers. The freeze frame feature in Premiere Pro is referred to as Add Frame Hold effect.
Part 3. How to Add Freeze Frame Video Effects Online
If you do not want to download and install a dedicated video editor on your computer, you can apply freeze frame effect to your video online as well. This will save your space as well as put less pressure on your CPU resource. We recommend Kapwing online video editor to use freeze frame effect on the go from any device directly from web browser. Here are the steps to add freeze frame effect to your video online.
Step1Open web browser on your device and visit “kapwing.com/tools/freeze-frame”. Click on Choose a video button.

Step2Drop your video file into Timeline and click on the video clip. Move the Playhead to the point where you want to add freeze frame effect.

Step3Go to Timing tab located in the top-right corner. Click on Freeze Frame button to add still image of the scene in the video. You can click multiple times to add more still images of the same scene. The more still images, the greater its duration will be.

Step4Play the video and you can have multiple freeze frame effects in the video clip.
This is undoubtedly the easiest way to add freeze frame effects for beginners.
Part 4. How to Add Freeze Frame Video Effects on Mobile
If you are using an Android smartphone or iPhone, you can apply freeze frame effect directly on your mobile instantly. In today’s world, people capture videos through their smartphones thanks to high-quality phone camera. You can use CapCut video editor app on both Android and iOS devices to add freeze frame effects. Here are the steps you need to follow.
Step1Install CapCut app on your phone. Launch the app and tap on New Project.

Step2Go to Albums and select the video to which you want to add the frame freeze effect.

Step3Put the Playhead to the point where you want to add the effect. Tap on Edit option.

Step4Search for Freeze option located at the bottom and tap on it to insert still image of the scene in Timeline.

Step5You can drag the duration of the frame freeze effect as per your requirement.
The Bottom Line
Adding freeze frame to your videos before and during impactful moments can enhance your video content. We have illustrated how to add a freeze frame in Final Cut Pro for Mac users. You can also add it to your video online using Kapwing video editor. You can use CapCut app to use the effect in your video on your smartphone. We recommend Filmora to add the effect quickly and conveniently on your PC.
Free Download For Win 7 or later(64-bit)
Free Download For macOS 10.14 or later
Free Download For macOS 10.14 or later
Some Facts That Few People Know on How to Make Transparent Background in Canva
Some Facts That Few People Know on How to Make Transparent Background in Canva
An easy yet powerful editor
Numerous effects to choose from
Detailed tutorials provided by the official channel
Canva is a very well-known website that enables you to do your entire image editing work online. If you are regularly working with the editing of images then you may know about the Canva. If you still don’t know about it then we are going to share the information about it in this article with you. You can also learn about how Canva makes a background transparent in this article.
In this article
01 [Why Would You Need a Graphic to Have a Transparent Background](#Part 1)
02 [How to Remove the Background of Images in Canva](#Part 2)
03 [How to Change the Transparency of an Object in Canva](#Part 3)
04 [Get a Transparent Background for Free](#Part 4)
Part 2 How to Remove the Background of Images in Canva
Canva website allows users to turn their imagination into reality for free of cost. It offers you a free version that helps you to design mostly anything you want and there are many templates offered to make designs for free of cost. But, if you are looking for transparent background on Canva then you have to spend for it because this feature is not offered for free. If you already have paid versions then let’s see the steps for Canva background transparent.
● Step 1:
Firstly, sign in to your Canva account and select the image which you want to make a transparent background in Canva.

● Step 2:
After adding the image first of all you have to color the background layer of the image you have added. Click the “Effect” available at the top corner of the Canva interfaces toolbar. From here select the “Background remover”. Now, the background of the image will be removed and you are ready to make it transparent.

● Step 3:
Once the image background is removed click the “Download” icon available at the top of the interface.

● Step 4:
When you click the download button you will see a dialog box where you have to select the “PNG” format to download the image. Make sure to keep it PNG otherwise background will be not transparent.

● Step 5:
Now, under the options in the pop-up box you have to select check the “Transparent Background” option then click the “Download” button. Now the Canva background transparent is finished and the image will be saved on your system with a transparent background.

Part 3 How to Change the Transparency of an Object in Canva
While adding a text box on the images or if you want to merge several images in the one then you have to make at least one image transparent which will help you to get a better effect. Please follow the below steps to know about how you can do this.
● Step 1:
Firstly, select the text box or the image that you need to make transparent. After selecting the image the Canva interface will show you a pop-up box on the top side and then click the 4 dots on the right side of the popup. After clicking on it you will several other options. From this menu click the “Transparency”.

● Step 2:
On the screen you will see a slider. Use this slider to adjust the transparency of the text. This is the way to change the object transparency in the Canva. You can now download your image or continue working on it.

Part 4 Get a Transparent Background for Free
If you want your Canva design to make a transparent background without spending or paying anything to the Canva then you have several options to do that. Here we are going to tell you 2 options. The first option is that you can simply use the free 30 days trial version of the Canva to do that or you can also use the other website which is Kapwing. This website offers you options to remove the background of the image for free of cost without spending anything. Let’s see how you can do it with the help of Kapwing.
● Step 1:
Firstly, you have to download your Canva design in PNG format. After downloading the image you can browse the below URL of kapwing background remover.

● Step 2:
Now click the “Upload” button and select the PNG file from your computer. Now you have to hit the “Magic Wand” option and then hit the image background. Now, press the “Remove Pixels” option which is available at the right side menu.

● Step 3:
By following the previous step the image background will be removed but still if you see any part of the background on image then you may have to repeat the step again until the all parts of the background are not removed. Once you are satisfied with the final results then simply click the “Done” button.

● Step 4:
After clicking the “Done” button you will be redirected to the page where you can download your image on your computer with a transparent background. This is the process to for Canva no background for free of cost.

Editing the Videos While making Photos:
Sometimes while editing the photos for your projects if you need to make a video then you may also need to a video editor to make the best videos. You can use the photos you have created directly in the video you are going to make. In this case there is a product Wondershare Filmora Video Editor is available which really helps you a lot in making the best videos or edits the videos according to your project requirement. Wondershare Filmora is offered by the developers for the windows as well as the Mac operating system computers. This software offers you best options for making or editing the videos. Some of the features of the software are available below.
For Win 7 or later (64-bit)
For macOS 10.12 or later
Key Features:
● The program offers you cool video editing features such as split screen, motion tracking, keyframing, speed ramping, instant mode, auto beat sync etc.
● You can apply several effects such as green screen, AI Portrait, green screen and video effects.
● In the audio features it helps you to detect silence, audio synchronization and audio ducking.
● Wondershare Filmora offers you feature of correcting the colors of videos and match the color as well.

● Ending Thoughts →
● We hope now you know about how to make transparent background in Canva with the help of Canva website without doing much effort. Well, if you like to make a video with the help of images created using Canva then you can also try the Wondershare Filmora. It’s really perfect video editor software that enables you to create the best videos.
Canva is a very well-known website that enables you to do your entire image editing work online. If you are regularly working with the editing of images then you may know about the Canva. If you still don’t know about it then we are going to share the information about it in this article with you. You can also learn about how Canva makes a background transparent in this article.
In this article
01 [Why Would You Need a Graphic to Have a Transparent Background](#Part 1)
02 [How to Remove the Background of Images in Canva](#Part 2)
03 [How to Change the Transparency of an Object in Canva](#Part 3)
04 [Get a Transparent Background for Free](#Part 4)
Part 2 How to Remove the Background of Images in Canva
Canva website allows users to turn their imagination into reality for free of cost. It offers you a free version that helps you to design mostly anything you want and there are many templates offered to make designs for free of cost. But, if you are looking for transparent background on Canva then you have to spend for it because this feature is not offered for free. If you already have paid versions then let’s see the steps for Canva background transparent.
● Step 1:
Firstly, sign in to your Canva account and select the image which you want to make a transparent background in Canva.
● Step 2:
After adding the image first of all you have to color the background layer of the image you have added. Click the “Effect” available at the top corner of the Canva interfaces toolbar. From here select the “Background remover”. Now, the background of the image will be removed and you are ready to make it transparent.
● Step 3:
Once the image background is removed click the “Download” icon available at the top of the interface.
● Step 4:
When you click the download button you will see a dialog box where you have to select the “PNG” format to download the image. Make sure to keep it PNG otherwise background will be not transparent.
● Step 5:
Now, under the options in the pop-up box you have to select check the “Transparent Background” option then click the “Download” button. Now the Canva background transparent is finished and the image will be saved on your system with a transparent background.
Part 3 How to Change the Transparency of an Object in Canva
While adding a text box on the images or if you want to merge several images in the one then you have to make at least one image transparent which will help you to get a better effect. Please follow the below steps to know about how you can do this.
● Step 1:
Firstly, select the text box or the image that you need to make transparent. After selecting the image the Canva interface will show you a pop-up box on the top side and then click the 4 dots on the right side of the popup. After clicking on it you will several other options. From this menu click the “Transparency”.
● Step 2:
On the screen you will see a slider. Use this slider to adjust the transparency of the text. This is the way to change the object transparency in the Canva. You can now download your image or continue working on it.
Part 4 Get a Transparent Background for Free
If you want your Canva design to make a transparent background without spending or paying anything to the Canva then you have several options to do that. Here we are going to tell you 2 options. The first option is that you can simply use the free 30 days trial version of the Canva to do that or you can also use the other website which is Kapwing. This website offers you options to remove the background of the image for free of cost without spending anything. Let’s see how you can do it with the help of Kapwing.
● Step 1:
Firstly, you have to download your Canva design in PNG format. After downloading the image you can browse the below URL of kapwing background remover.
● Step 2:
Now click the “Upload” button and select the PNG file from your computer. Now you have to hit the “Magic Wand” option and then hit the image background. Now, press the “Remove Pixels” option which is available at the right side menu.
● Step 3:
By following the previous step the image background will be removed but still if you see any part of the background on image then you may have to repeat the step again until the all parts of the background are not removed. Once you are satisfied with the final results then simply click the “Done” button.
● Step 4:
After clicking the “Done” button you will be redirected to the page where you can download your image on your computer with a transparent background. This is the process to for Canva no background for free of cost.
Editing the Videos While making Photos:
Sometimes while editing the photos for your projects if you need to make a video then you may also need to a video editor to make the best videos. You can use the photos you have created directly in the video you are going to make. In this case there is a product Wondershare Filmora Video Editor is available which really helps you a lot in making the best videos or edits the videos according to your project requirement. Wondershare Filmora is offered by the developers for the windows as well as the Mac operating system computers. This software offers you best options for making or editing the videos. Some of the features of the software are available below.
For Win 7 or later (64-bit)
For macOS 10.12 or later
Key Features:
● The program offers you cool video editing features such as split screen, motion tracking, keyframing, speed ramping, instant mode, auto beat sync etc.
● You can apply several effects such as green screen, AI Portrait, green screen and video effects.
● In the audio features it helps you to detect silence, audio synchronization and audio ducking.
● Wondershare Filmora offers you feature of correcting the colors of videos and match the color as well.
● Ending Thoughts →
● We hope now you know about how to make transparent background in Canva with the help of Canva website without doing much effort. Well, if you like to make a video with the help of images created using Canva then you can also try the Wondershare Filmora. It’s really perfect video editor software that enables you to create the best videos.
Overview of FPS for YouTube Videos
YouTube has become one of the to go to social media platforms for internet use because it provides entertainment for people who want to get entertained, learn or catch up with their favorite personalities. This platform has also given content creators a space to showcase their talents, educate the masses or simply have a good time when playing their games.
However, being a content creator on YouTube entails more than just posting a video weekly. You ought to ensure you get the frame rate in the video right. Failure to choose the correct frame rate will affect how your audience enjoys the video, increasing the chances that you lose subscribers.
Without further ado, let’s discuss the best fps for YouTube.

How Does FPS Affect Viewing YouTube Videos?
Before we dive into how FPS affects your viewing experience on YouTube and determine the best frame rate for YouTube, let’s define what it is. FPS is short for frames per second and is the number of still images appearing on display in one second. The more frames per second you have in your video, the clearer your video will become. The vice versa is also true.
To further simplify this definition, we will use the example of a flipbook. An animator usually draws an image on each page of the book. When they flip the pages in rapid succession, the images appear to be in motion. Suppose the animator used fewer pages to make their flipbook.

The animation would not be as smooth and crisp as if they had used more pages, each with a different still image contributing to the final motion.
The human brain can easily differentiate between 12 distinct images. However, when the photos exceed 18 and move rapidly, the brain is tricked into believing that the pictures are in motion. A frame rate lower than 24FPS will make your YouTube video look choppy and unnatural, as if it lags in real time.
Ideally, 24fps is the best fps for YouTube videos featuring mundane activities that we see in daily life. However, if you want to pack more information into your video and make the motion a bit smoother, then 30fps is the best video frame rate for YouTube.
Perhaps you post fast-paced content about gaming and other live-action videos. You are better off choosing 60FPS, which makes high-speed scenes look more fluid and helps you capture double the information.
What Is the Recommended & Highest Frame Rate for YouTube Videos?
Unfortunately, there is no correct answer when it comes to the best video frame rate for YouTube videos. The controversy still continues, and everyone seems to have their own opinion.
According to Thomas Edison , anything less than 46FPS for motion pictures will strain the eyes and give an unpleasant viewing experience. At the time, filmmakers and videographers were adamant about sticking to between 22-26PFS for their videos, provided the audio adaptability remained at 35mm.
Different frame rates are used for various displays, genres, and mediums. For instance, 1-16FPS was common in silent-era movies and stop-motion movies. However, this frame rate is neither universally accepted nor widespread in the world today.

An excellent example of a frame rate that produces larger-than-life videos with exceptional detail is 24fps. However, the NTSC confirms that it is, in fact, 23.97 frames per second when you consider issues to do with color and hue.
Another universally acceptable frame rate is 30fps, which is widespread in television. Videographers also use it to make slow-motion segments in sports videos or other fast-paced content. The sweet 60fps makes any motion look smooth as butter and significantly reduces any blur in your videos. This frame rate is also characterized by super fine details you can easily miss with 24 and 30fps. It is also the highest fps video on YouTube.
120fps is synonymous with grandeur, with its monumental footage suitable for slow-motion scenes. Lastly, anything above 120fps works great with ultra-slow-motion videos. Of course, we are talking 240fps, which is rare but not uncommon. However, you would need a high-speed capture camera, which we believe doesn’t come cheap.
To sum it all up, 24fps is the recommended frame rate for YouTube. You can go higher than the baseline and use 30fps or higher if you make videos with lots of motion, like gaming videos. Most of the time, a higher frame rate is a personal choice rather than a necessity. However, we understand you want to give your viewers a pleasant experience while watching your content.
What Is the Best Frame Rate for YouTube Videos?
If you want to record a video for your YouTube channel, you might wonder what is the best fps for YouTube videos. You are better off sticking between 24fps and 60fps. The platform has only recently added 8K support for videos, which is a plus for many content creators. Below is a list of frame rates for the most popular genres on YouTube.

- Podcasts and talk shows - 30 FPS
- Gaming videos - 60 FPS
- Makeup tutorials - 60 FPS
- Educational videos - 24- 30 FPS
- Health and fitness - 24-30 FPS
- Sports - 40-60 FPS
Remember that the list above is not exhaustive and doesn’t cover all types of content on the platform. We can’t also guarantee that there is a “best” frame rate for your YouTube video. We suggest you heed our suggestion and practice to determine the best frame rate for YouTube videos.
We couldn’t fail to mention that your frame rate should match the content uploading and decoding. Since the interlaced content may experience performance issues on YouTube, it would help if you deinterlaced it.
How To Check FPS on YouTube Video?
Below is a simple guide on how to check fps on YouTube videos.
Step1 Open any video on YouTube and right-click on it. A pop-up window will appear. Select “Stats for nerds.”

Step2 Narrow down on the “Current/Optimal Res” tab. The first set of figures before the forward slash represents the current resolution, while the figures after the forward slash represent the optimal resolution for the video. For instance, the figure in the picture below indicates that the resolution is 1280*720, and the frame rate is 30FPS. The figures repeat themselves, meaning that the video is at the optimal resolution.

How To Adjust FPS When Editing a YouTube Video?
An efficient video editing tool is all you need to adjust the frame rate for a video you want to upload to YouTube. Since there are so many options in the market, it is easy to get swept away by the prospects and wonder which one to choose.
Based on our research, Wondershare Filmora is one of the most efficient editing tools to change the FPS in your video and make it more enjoyable to watch.
Free Download For Win 7 or later(64-bit)
Free Download For macOS 10.14 or later
Wondershare Filmora is highly feature-rich, making it an editor’s dream. We guarantee you don’t need to be a pro to use this platform. The user-friendly interface is the ideal choice for even the most clueless novice.
However, a little knowledge goes a long way in ensuring you don’t get stuck using it. In addition, customer support is impeccable, meaning you will always find someone to help you whenever you encounter a problem using the platform.
The split-screen icon allows you to play and edit different clips simultaneously without clicking out of the app or finishing one task before starting the next. You can also select the number of split screens you want, depending on the videos you want to edit in one go. The newer version, Filomra 12, has everything you need to edit your video and make anyone who watches it glued to the screen because of how crisp it is.

Below are some examples of key features you might find interesting.
- GIF support
- Audio equalizer
- 4K editing
- Advanced text editing
- Noise removal
- Scene detection
- Audio mixer
- Colour tuning
Here is a detailed guide on how to use Wondershare Filmora to adjust the frame rate for YouTube videos.
Step1 Launch the platform on your PC or laptop and click on the “File” tab at the top of the page. A drop-down menu will appear. Select “Project Settings.”

Step2 After a dialogue box appears, click “Frame Rate” and choose the best option.

Step3 Continue customizing your video using the other editing tools in the platform, and click “Export” to save a copy to your device.
Conclusion
Making crisp, polished-looking YouTube videos takes a lot of time and dedication. Fortunately, you knew that by the time you decided to start creating content for the platform. With all the knowledge at your fingertips, you have no reason not to broaden your knowledge base and gather enough information to help you create the best videos.
There are plenty of video editing tools to get your video to the correct resolution, so your content is above par. If you don’t know how to use a specific app or platform, you must search for a tutorial and start practicing. You could also consult other creators in your niche and ask them how they make their videos look so good.
Free Download For macOS 10.14 or later
Wondershare Filmora is highly feature-rich, making it an editor’s dream. We guarantee you don’t need to be a pro to use this platform. The user-friendly interface is the ideal choice for even the most clueless novice.
However, a little knowledge goes a long way in ensuring you don’t get stuck using it. In addition, customer support is impeccable, meaning you will always find someone to help you whenever you encounter a problem using the platform.
The split-screen icon allows you to play and edit different clips simultaneously without clicking out of the app or finishing one task before starting the next. You can also select the number of split screens you want, depending on the videos you want to edit in one go. The newer version, Filomra 12, has everything you need to edit your video and make anyone who watches it glued to the screen because of how crisp it is.
Below are some examples of key features you might find interesting.
- GIF support
- Audio equalizer
- 4K editing
- Advanced text editing
- Noise removal
- Scene detection
- Audio mixer
- Colour tuning
Here is a detailed guide on how to use Wondershare Filmora to adjust the frame rate for YouTube videos.
Step1 Launch the platform on your PC or laptop and click on the “File” tab at the top of the page. A drop-down menu will appear. Select “Project Settings.”
Step2 After a dialogue box appears, click “Frame Rate” and choose the best option.
Step3 Continue customizing your video using the other editing tools in the platform, and click “Export” to save a copy to your device.
Conclusion
Making crisp, polished-looking YouTube videos takes a lot of time and dedication. Fortunately, you knew that by the time you decided to start creating content for the platform. With all the knowledge at your fingertips, you have no reason not to broaden your knowledge base and gather enough information to help you create the best videos.
There are plenty of video editing tools to get your video to the correct resolution, so your content is above par. If you don’t know how to use a specific app or platform, you must search for a tutorial and start practicing. You could also consult other creators in your niche and ask them how they make their videos look so good.
How to Add Motion Titles
Do you want to make your videos eye-catching instantly? Looking for some cool title animations to make your texts stand out? You should definitely opt for motion title templates that are widely available in popular video editors. Motion title templates come preloaded with animated texts, engaging graphic elements, and even background effects.
You can add them directly to your video and customize them as per you requirements so that your video looks exactly the way you desire. Different video editors have different motion titles, and therefore, you should check them out one by one to find out the templates you are looking for. We will illustrate title motion graphics in all the leading video editors.
Part 1. Add Motion Title with Filmora
The easiest way to add motion title to your video on your computer is through Wondershare Filmora . Filmora is a professional video editor that is available for Windows and Mac users. Filmora has the best collection of motion title templates, and the user interface is super intuitive and anyone can use without any prior experience. Here are the steps to add motion title with Filmora.
Step1Install and launch Wondershare Filmora on your computer. Click on New Project option on the welcome screen or go to File menu and click on New Project option.

Step2Go to File menu and Import Media option to import your video file. Otherwise, you can simply drop the video file into Project Media folder.
Step3Drag the video file from Project Media folder and drop it into the Timeline.

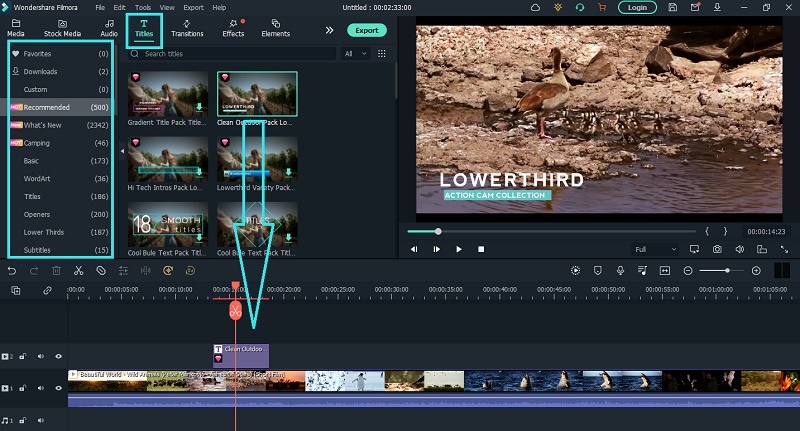
Step4Go to Titles at the top and go to the left panel. You can different categories of motion title templates. Select any desired text effect and drop into the Timeline above the video layer wherever you want.
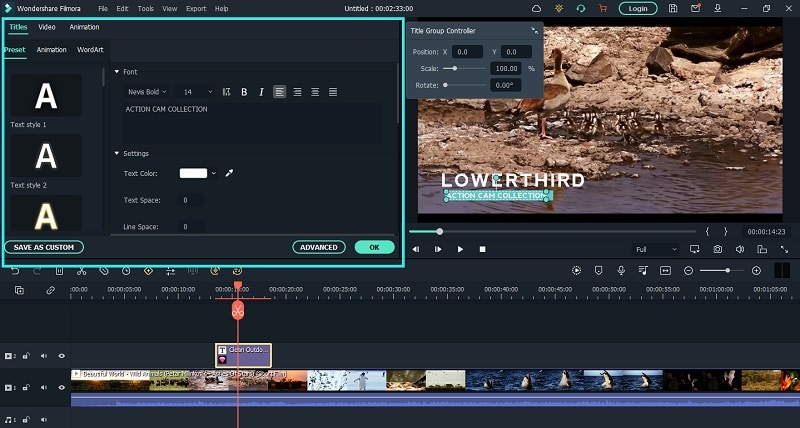
Step5Double clicking on the text layer on Timeline to edit the text and change the styles. Under Preset tab, you can change font, size, and color. Finally, click on OK button to save the edits done.
Part 2. Add Motion Title with Premiere Pro
Adobe Premiere Pro is a renowned video editor that is mostly used by professionals to edit videos and add effects and animations. Even though Premiere Pro has a steep learning curve, you can create motion title in simple steps. You can write any text on the video and select from different effects and animations to create motion title graphics. Here are the steps to add title motion graphics Premiere Pro free.
Step1Launch Premiere Pro and go to New> Project option. Import the video file and drop it into Timeline.
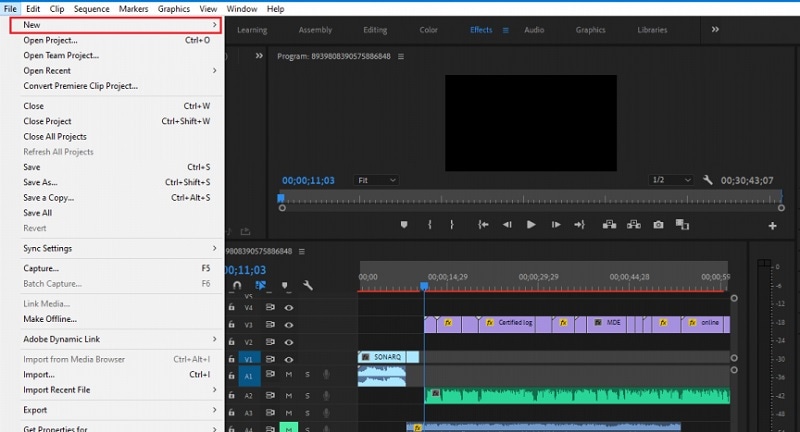
Step2Go to Title> New Title> Default Still option and follow the on-screen instructions.

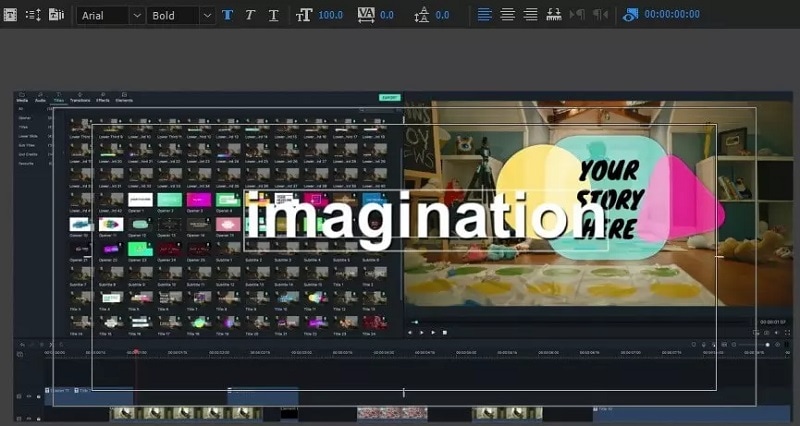
Step3You will see different types of title styles and designs to choose from as you feel.

Step4Click on Type Tool option and click on the area on the video where you want the text to appear. You can customize them from the right panel from Title Styles, Title Properties, Tools and Title Actions.
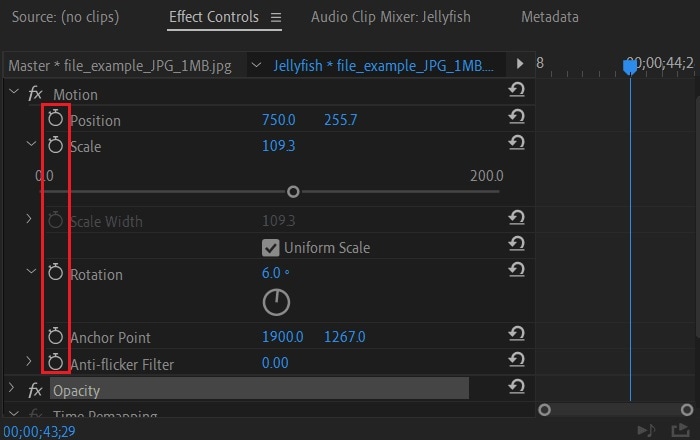
Step5To add motion to the title, click on Effects Control window. Click on any desired animation and turn to Stopwatch icon to apply the effect to the text. There is a dedicated Motion option available.
Part 3. Make motion title with Studio
Studio is a popular video editing software where you can not only apply motion title presets but also create motion title presets from scratch. The reason why video editors choose Studio is because it allows users to customize everything and create different templates and animations for personalization. Here are the steps to create title motion graphics in Studio as per your requirements.
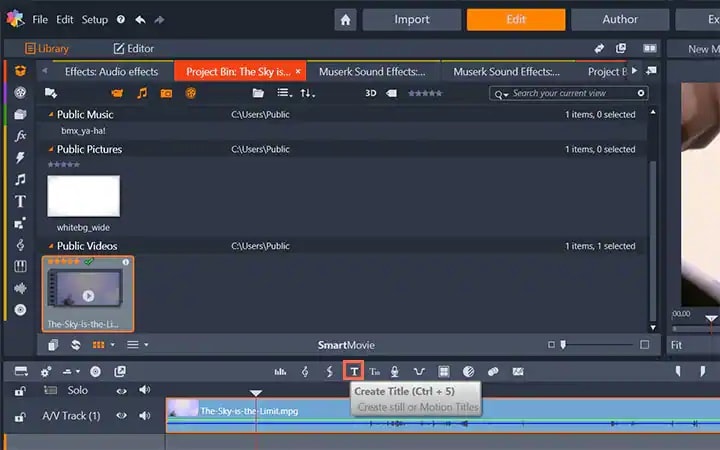
Step1Launch Studio. Import your video file, and you can import single frames such as images from a live video for stop motion titles. Once you have imported, go to the header bar above the Timeline. Click on Create Title option to open Title Editor to create title motion.
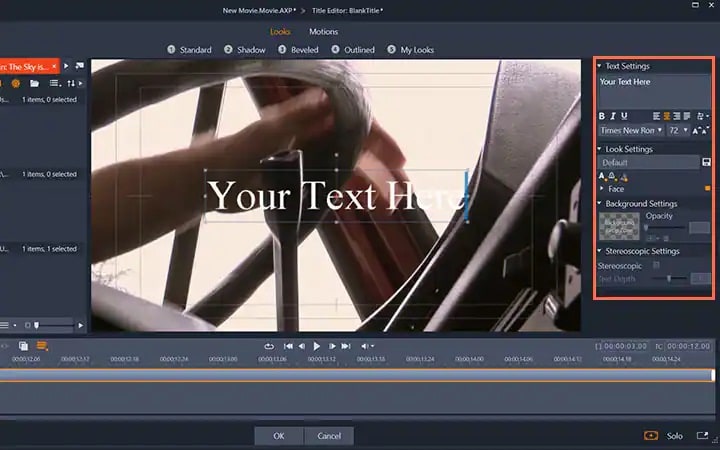
Step2Add your preferred text under Title Editor and adjust font, size, and style as you feel. Go to the right side to make changes to Look, Background, and Stereoscopic Settings to get the perfect text style from the wide range of choices available.
Step3Click on Motion option at the top to add motion to the text. Choose from the different motion title templates as per your preference.
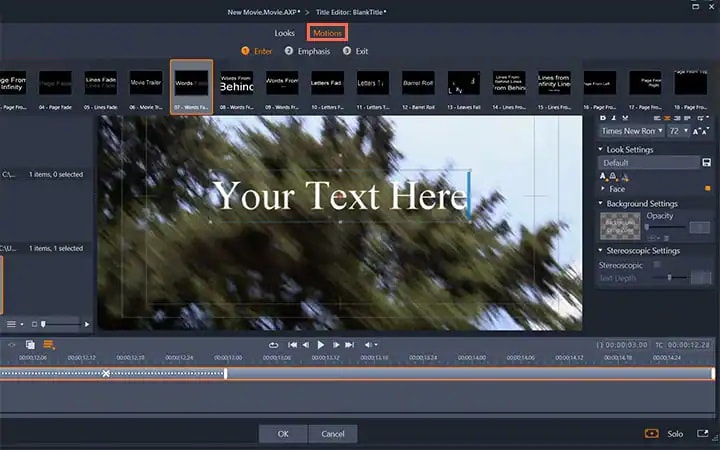
Step4You can adjust the duration of the motion effect from the right panel and click on Ok button.

Part 4. Add Motion Title with WeVideo
WeVideo is a popular online video editor that you can use to add title motion graphics Premiere Pro free. You can find many motion titles on WeVideo for free like you get in Premiere Pro and there are many exclusive motion text templates available. You need to create a free account with WeVideo to get started. You can create your video from scratch by selecting from the available video templates. You can even import your recorded video and add motion texts and animations as per your preference. Here are the steps to add motion title with WeVideo.
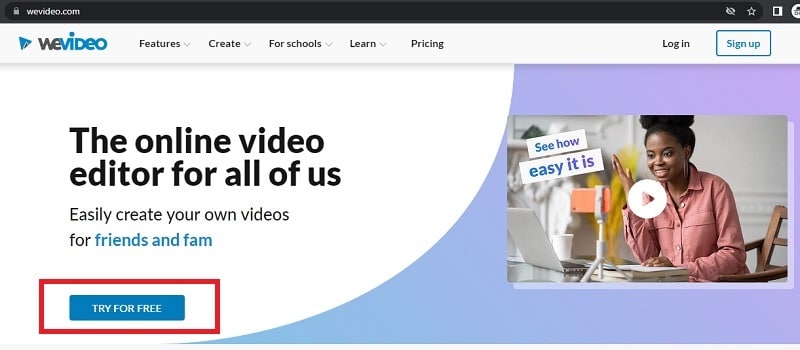
Step1Open your web browser and visit “wevideo.com”. Click on Try For Free button. Sign up for free and go to WeVideo video editor.
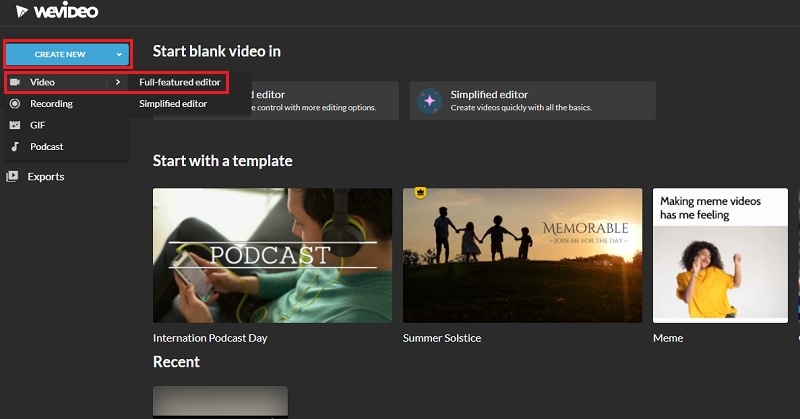
Step2Click on Create New button and select Video option. Click on Full-featured editor option.
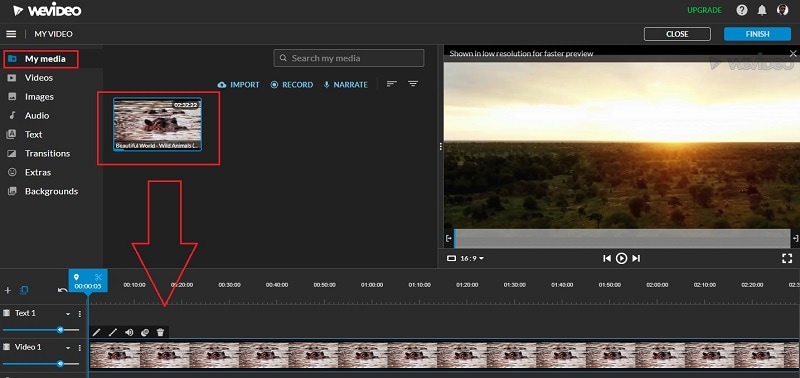
Step3Drag and drop your video file into My Media folder and bring it to Timeline.
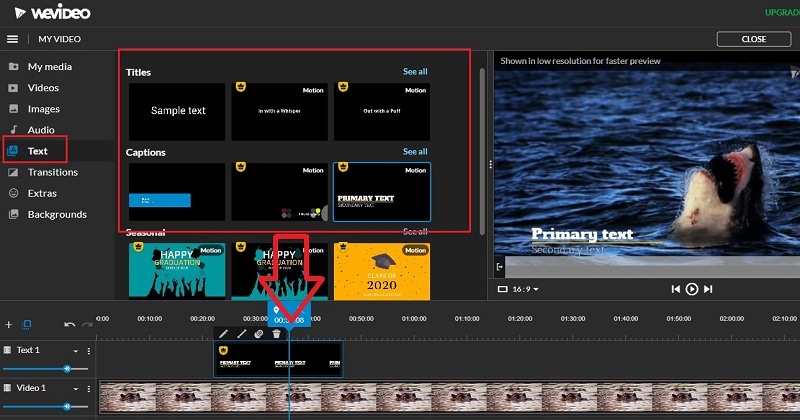
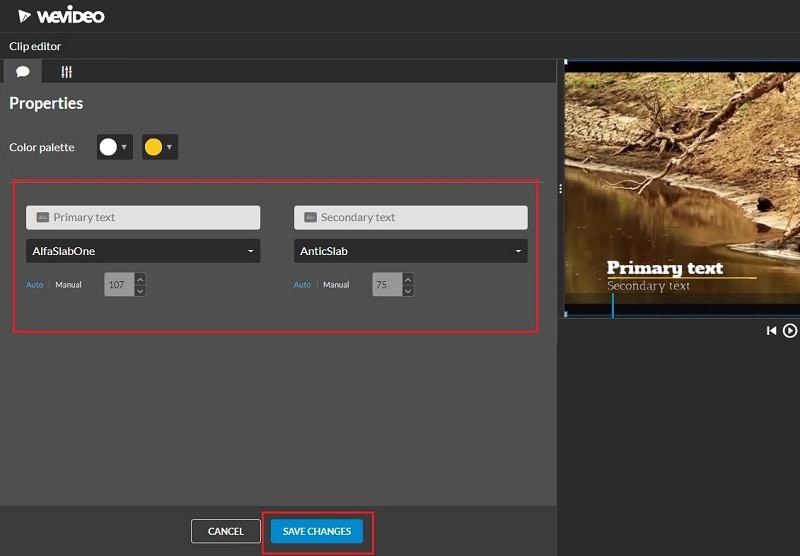
Step4Go to Text tab and you will see all the motion animated titles under Titles section. Click on them to check out their previews in Viewer. If you have selected anyone, drag and drop it into Timeline.
Step5Adjust the position where you want the title to appear on the video and stretch the duration as required. Double-click on the title to edit and customize it as per your preference. Finally, click on Save Changes button.
The Bottom Line
Motion titles are extremely important for any video because they bring in a variety to your video. They make the video eye-catching and help in getting the message across by grabbing the attention of the viewers. We have illustrated how to add motion titles Premiere Pro and Studio. You can also use WeVideo online video editor. We recommend Wondershare Filmora for its extensive collection of motion title templates to choose from and apply to your text.
Free Download For Win 7 or later(64-bit)
Free Download For macOS 10.14 or later
Also read:
- Updated Enhance Your Film Production with These 5 Silence Detection Tools
- New Logo Intro Videos Are the Hottest Trend in Town and Are Gaining Popularity Quickly. Keep Reading This Article to Learn Their Importance and How to Design One
- Updated 2024 Approved Mix and Match The Ultimate List of 8 Video and Photo Merging Tools
- Best Ideas on Using Filmora Green Screen for 2024
- A Detailed Guid to Remove Background From a Video in Premier Pro for 2024
- New 2024 Approved Full Guide to Funcall Voice Changer and Its Alternatives
- How To Brighten Video In Premiere Pro | Step By Step Guide for 2024
- Updated You Have to Get It Right when It Comes to Cinematic Grading. We Highlight the Most Common Mistakes to Avoid While Focusing on Various Tips to Apply in the Process
- Want to Buy a Drone for Better Videography Creating? This Article Will Review 6 of the Best Drones on the Market for You to Consider for 2024
- Updated 2024 Approved Create Slow Motion Videos Using Final Cut Pro with Ease
- New How to Add Background to Video With/Without a Green Screen
- New Are You Looking to Freeze-Frame in FCP? If Yes, Read One, as Here Is a Guide About How to Freeze-Frame in Final Cut Pro (FCP) with Ease
- Updated In 2024, Basic Knowledge About WMV Format and Best WMV Video Editor
- In 2024, 10 Matching Color Combination That Works Together
- 2024 Approved This Article Discusses the Splitting of the Video Clips in DaVinci Resolve Explicitly. There Is Also a Brief Description of Its Best Alternative, Wondershare Filmora. This Is Also Practically Relevant and Reasonable as Well
- In 2024, How to Apply Video Filters Mobile and Desktop
- Updated 2024 Approved How to Use Lumetri Color in Adobe After Effects
- In 2024, How To Fix OEM Unlock Missing on Realme C55?
- In 2024, How Do I Stop Someone From Tracking My Oppo Reno 8T 5G? | Dr.fone
- How to Fix Vivo X90S Find My Friends No Location Found? | Dr.fone
- How To Deal With the Samsung Galaxy A54 5G Screen Black But Still Works? | Dr.fone
- 5 Quick Methods to Bypass Honor Magic 6 Pro FRP
- In 2024, Hassle-Free Ways to Remove FRP Lock on Samsung Galaxy A24with/without a PC
- Top 10 Fixes for Phone Keep Disconnecting from Wi-Fi On Infinix Smart 8 Pro | Dr.fone
- 9 Quick Fixes to Unfortunately TouchWiz has stopped Of Realme V30 | Dr.fone
- The way to get back lost videos from Lava Yuva 3 Pro
- Full Guide to Fix iToolab AnyGO Not Working On Poco C55 | Dr.fone
- Title: Updated How to Add Freeze Frame to Your Video From Any Device?
- Author: Chloe
- Created at : 2024-06-26 06:24:16
- Updated at : 2024-06-27 06:24:16
- Link: https://ai-editing-video.techidaily.com/updated-how-to-add-freeze-frame-to-your-video-from-any-device/
- License: This work is licensed under CC BY-NC-SA 4.0.
