

Updated How to Add Text Effects in Adobe Premiere Pro?
How to Add Text Effects in Adobe Premiere Pro?
If you want to edit your raw video footage and turn ordinary clips into eye-catching videos, you will need a professional video editor. Adobe Premiere Pro is the most commonly used premium video editor that most professionals prefer. When it comes to editing videos, text effects play a major role along with video effects and animations.
If you are new to Adobe Premiere Pro, you will experience a steep learning curve. This is because the user interface is specially designed for professional video editors. Therefore, you might not get Premiere Pro text effects readily available. In this article, we will illustrate how you can add Adobe Premiere Pro text effects to your video project. We will also state the best alternative to Premiere Pro to add stunning text effects easily.
Part 1. Steps to Add Text Effects to Adobe Premiere
Text effects are an essential part of videos to enhance the video content immensely. You can add opening titles and end credits with text effects and animations. You can display the dialogues on the screen as subtitles. Showing location information and shooting date through text effects is quite regular these days. Besides, the use of lower thirds for social media promotion in videos is common. Without further ado, let us look at the steps to add Premiere text effects.
Step1 Add Your Text
First of all, you need to import your video and add text to it and apply different text effects. Here we are starting from scratch for better illustration. Go to Window> Essential Graphics> Text Tool(T). Type your text as per your requirements. You will notice a new text layer appearing under Edit tab.

Select the text layer and you will see all the properties that you can tweak. For example, go to Align and Transform section to reposition and resize your text properly. Go to Text section to change the style of the text. Similarly, there is an Appearance section to adjust color, shadow, and much more.
Step2 Apply Pre-Animated Template
Go to Graphics> Essential Graphics and browser through the title templates available to match your requirements. Once you have selected one title template, drag and drop it into your timeline above your video clip.

Double-click on the text to edit the content and type your title. Go to Essential Graphics panel and customize the text effect as per your preference. You can also choose the available elements included in the template to enhance the text effects as you think fit.
Step3 Edit the Text Effect and Animation
Select the text layer on your timeline to check out the keyframes applied in the template. Go to Effects Control panel and open Keyframe box by dragging it to the right. Adjust the keyframe to speed up or slow down the animation.

Bring the keyframes closer or spread them apart respectively. You can also adjust Velocity Controls present under different text properties as per the speed requirements.
Part 2. Alternative Way to Make Text Effects
If you are new to Adobe Premiere Pro, you will find title effects Premiere Pro difficult to add and edit as per your requirements. It is very common for amateur video editors to look for an easy alternative to Premiere Pro. We recommend Wondershare Filmora as the best alternative to Adobe Premiere text effects.
Filmora has a super intuitive user interface that is suitable for everyone including those who do not have prior video editing experience. There are more text effects and animations available that you can customize to get the desired effect. Here are the steps to add text effects to your video on Filmora.
Free Download For Win 7 or later(64-bit)
Free Download For macOS 10.14 or later
Step1 Download and install Wondershare Filmora and it is available for both Windows and macOS. Launch the application and click on New Project on the welcome screen.

Step2 Drag and drop your video clips under Project Media folder and then onto the timeline. Go to Titles and you will see different categories of text effects and templates.

Step3 Select a template whichever you think is perfect for your project and drop it on the timeline. Adjust its position on the timeline as per where you want it to appear. Double-click on it to edit the title and type in your text. Similarly, you can reposition the text from Viewer as per your need.

Select the text style as well as adjust fonts and settings to get different styles for your texts. There is also an Advanced section available for detailed editing and getting the desired text effect.
Step4 You can animate the texts in your video from Animation section. Choose from the animation presets to animate individual text in the video. Besides, you can also add keyframes and animate the text as per your preference.

Part 3. Related FAQs on Adobe Premiere Pro
1. How do you make text look good in Premiere Pro?
There are several steps you need to take to make text look good in Premiere Pro. First of all, the color of the text should be in contrast to the background. You can add a rectangle highlighter in the background. Experiment with font and text of the text. Apply a text effect from the different templates available. Customize the effect to get the desired result.
2. How do you add typing effects in Premiere?
Add your text to your video so that a text layer appears on the timeline. Animate the text Effects> Video Effects> Liner Wipe and double-click to get the typing effect. Tweak the parameters like transition completion, wipe angle, and others to smoothen out the animation. Draw a cursor icon using rectangle tool and animation it to move with the text using keyframes.
3. How do I open text effects controls in Premiere Pro?
Select the text layer from the timeline of the project. From the main menu, go to Windows> Effects Control option to open effect controls for text. Otherwise, you can directly go to Effects Control tab located below the menu bar after selecting your text layer.
The Bottom Line
Adding text effects in Premiere Pro can be slightly overwhelming for an amateur video editor who does not have enough experience with Premiere Pro. We have stated the simple steps to apply Premiere Pro text effects to your video project. However, we recommend Wondershare Filmora as the best and the easiest alternative to Premiere Pro where you get more text effects and add them instantly and effortlessly.
Free Download For macOS 10.14 or later
Step1 Download and install Wondershare Filmora and it is available for both Windows and macOS. Launch the application and click on New Project on the welcome screen.
Step2 Drag and drop your video clips under Project Media folder and then onto the timeline. Go to Titles and you will see different categories of text effects and templates.
Step3 Select a template whichever you think is perfect for your project and drop it on the timeline. Adjust its position on the timeline as per where you want it to appear. Double-click on it to edit the title and type in your text. Similarly, you can reposition the text from Viewer as per your need.
Select the text style as well as adjust fonts and settings to get different styles for your texts. There is also an Advanced section available for detailed editing and getting the desired text effect.
Step4 You can animate the texts in your video from Animation section. Choose from the animation presets to animate individual text in the video. Besides, you can also add keyframes and animate the text as per your preference.
Part 3. Related FAQs on Adobe Premiere Pro
1. How do you make text look good in Premiere Pro?
There are several steps you need to take to make text look good in Premiere Pro. First of all, the color of the text should be in contrast to the background. You can add a rectangle highlighter in the background. Experiment with font and text of the text. Apply a text effect from the different templates available. Customize the effect to get the desired result.
2. How do you add typing effects in Premiere?
Add your text to your video so that a text layer appears on the timeline. Animate the text Effects> Video Effects> Liner Wipe and double-click to get the typing effect. Tweak the parameters like transition completion, wipe angle, and others to smoothen out the animation. Draw a cursor icon using rectangle tool and animation it to move with the text using keyframes.
3. How do I open text effects controls in Premiere Pro?
Select the text layer from the timeline of the project. From the main menu, go to Windows> Effects Control option to open effect controls for text. Otherwise, you can directly go to Effects Control tab located below the menu bar after selecting your text layer.
The Bottom Line
Adding text effects in Premiere Pro can be slightly overwhelming for an amateur video editor who does not have enough experience with Premiere Pro. We have stated the simple steps to apply Premiere Pro text effects to your video project. However, we recommend Wondershare Filmora as the best and the easiest alternative to Premiere Pro where you get more text effects and add them instantly and effortlessly.
How Did AI Video Games Act More Human Than Human?
How Did AI Video Games Act More Human Than Human?
An easy yet powerful editor
Numerous effects to choose from
Detailed tutorials provided by the official channel
The gaming world is ever-changing, with developers looking to create innovative ways to immerse players into their digital worlds. One such technology that has begun to sweep is AI in the game industry.
AI is a powerful tool in many ways to improve the gaming experience. It can make artificial intelligence in computer games more believable and add replayability and immersion to games, and we can expect to see even more impressive applications in the future.
In this article
01 [What Is AI in Gaming?](#Part 1)
02 [Why Does AI in Gaming Matter?](#Part 2)
03 [How AI Will Completely Change Video Games](#Part 3)
04 [8 Games with Incredible Artificial Intelligence](#Part 4)
05 [What AI Video Games Assets Do Filmora Have?](#Part 5)
Part 1 What Is AI in Gaming?
In simple terms, AI is a set of algorithms that allow a computer to learn and improve from experience. Although you can apply it in many ways, artificial intelligence in video games is usually helpful to create more intelligent and more believable non-player characters (NPCs).
For example, an AI system might be helpful to determine how an NPC reacts to the player’s actions. If the player tries to steal from an NPC, the AI might make the NPC angry and more likely to attack the player. Alternatively, if the player is friendly to an NPC, the AI game playing might make the NPC more likely to help the player in future interactions.
Part 2 Why Does AI in Gaming Matter?
One of the most vital aspects of AI in video games is that it can make games more believable and immersive for players. When games can convincingly simulate human-like behavior, it can be a much more enjoyable experience for gamers. AI can make NPCs seem more lifelike and make the game world feel more believable.
AI is also becoming increasingly important for creating procedural content. This is where the game generates content on its own, rather than relying on pre-made assets. For example, a game might use procedural generation to create random dungeons or quests that the player can explore. This can add a lot of replayability to a game, as the player never knows what they will encounter next.
Part 3 How AI Will Completely Change Video Games
It is not a secret that AI is changing the world as we know it. With its ability to enable computers to learn and improve from experience, AI is paving the way for a future where machines can handle more complex tasks. And nowhere is this more apparent than in the world of video gaming.
In the past, developers brought in AI primarily for simple things like making certain NPCs (non-player characters) move and act realistically. But now, artificial intelligence in video games is being used for much more complex tasks like generating procedural content and creating believable human-like behavior. This results in a new generation of AI game playing that are more immersive and playable.
Part 4 Games with Incredible Artificial Intelligence
Now, we will look into eight video games that signify why we need the best ai in video games.
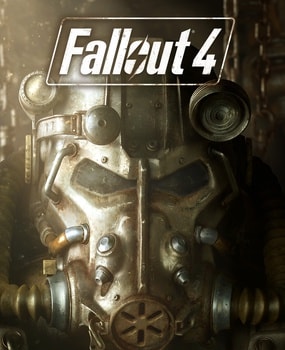
01Fallout 4
One of the most attractive examples of AI in video gaming is Fallout 4. This post-apocalyptic RPG features some of the most believable NPCs ever seen in a game. Each character is fully voiced, and they all have their unique personalities and backstories. The AI generates procedural content, meaning that the game world is always different each time you play.
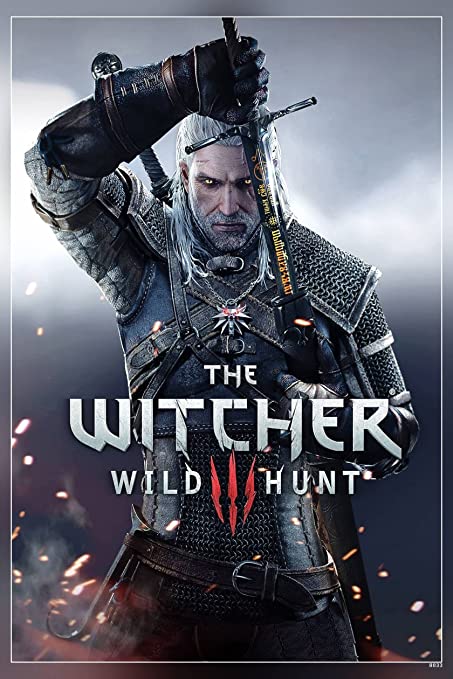
02The Witcher 3: Wild Hunt
The Witcher 3: Wild Hunt is one more great example of an AI video game. This open-world RPG features a vast array of believable NPCs, each with unique personality traits and motivations. The AI is also used to generate procedural content, resulting in a different game world every time you play.
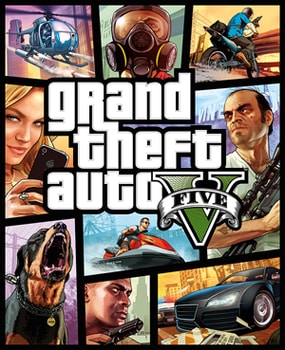
03Grand Theft Auto V
Grand Theft Auto V is yet another example of AI being used to create believable human-like behavior. The NPCs in this play are some of the most lifelike and realistic ever seen. They react to the player’s actions in believable ways, and the AI is used to generate procedural content, resulting in a game world that is always different.
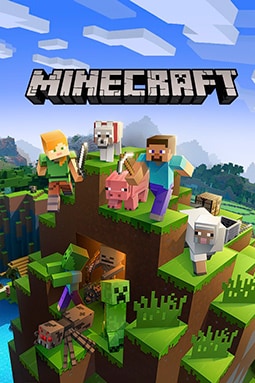
04Minecraft
Minecraft is a game that heavily uses procedural generation to create its content. The terrain and structures in the game are all generated on the fly by the AI, resulting in a different game world every time you play. What’s more, AI is also used to generate the behaviors of mobs (hostile creatures), making them more believable and lifelike.
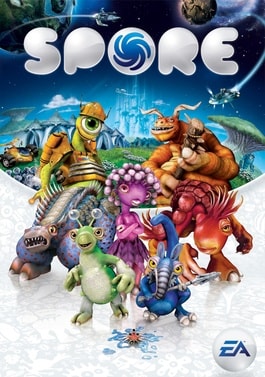
05Spore
Spore is an AI game play that is all about procedural generation. Every creature in the game is generated by AI, meaning that there are many possible creature designs. What’s more, AI is used to create creatures’ behaviors, making them more believable and lifelike.
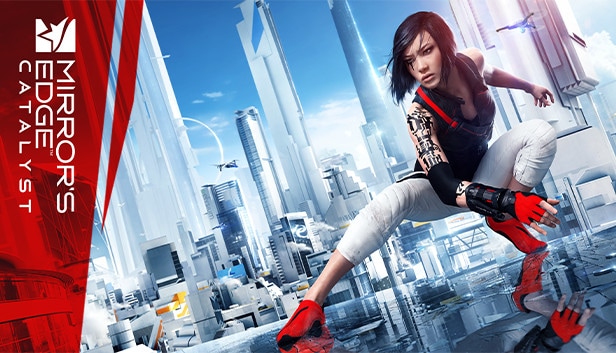
06Mirror’s Edge Catalyst
Mirror’s Edge Catalyst is a game that heavily uses AI to create its content. The levels in the game are all procedurally generated, meaning that they are different every time you play. This is made possible by the game’s AI, which produces the level layouts and obstacles on the fly.
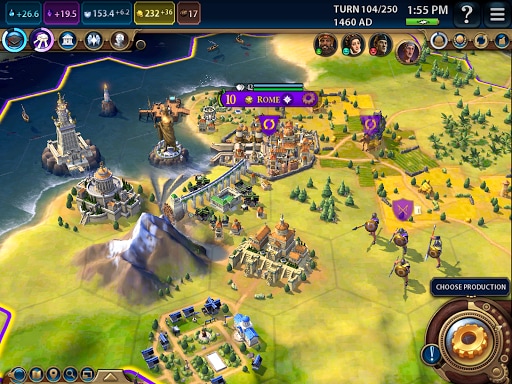
07Civilization VI
One of the most incredible examples of AI in video gaming is Civilization VI. This turn-based strategy game features some of the most believable NPCs ever seen in a game. Each character has its voice fully, and they all have unique personalities and backstories.
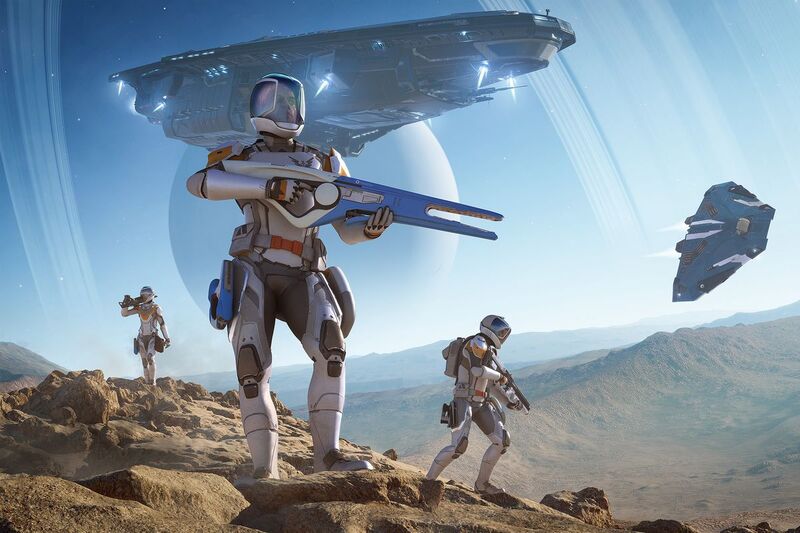
08Elite Dangerous
Elite Dangerous is a space simulation game that uses advanced AI to create believable and realistic human-like behavior. The NPCs in the game are some of the most lifelike and realistic ever seen. They react to the player’s actions in believable ways, and the AI is used to generate procedural content, resulting in a game world that is always different.
Part 5 **What AI Video Games Assets Do Wondershare Filmora Video Editor
With the increased use of AI in video games, most gamers have found gaming more enjoyable. However, an outstanding video editor has some assets that can significantly make AI video games better and more human. This video editor is one of the most sorted for and is called Filmora. Filmora is a great video editing software for creating stunning videos. It’s effortless to use and has various features to create professional-looking videos. It’s perfect for making videos for social media, YouTube, and other online platforms.
Its many features have a touch of artificial intelligence, making this program stand out from the other video editors and valuable for editing during ai video games creation.
Screen Recording
The Filmora screen recorder allows the user to concurrently record the screen and camera and the system and microphone audio. You can quickly record games, tutorials, YouTube videos, and other videos and then export them to YouTube, Vimeo, and other devices.
AI Portrait
The AI portrait function in Filmora video editor allows you to locate the human in your movie effortlessly and erase the background with a simple drag and click. There are also several portrait effects and AR stickers to add to your video editing enjoyment.
For Win 7 or later (64-bit)
For macOS 10.12 or later
Video Effects
Filmora customers can choose from various effects to utilize in their video editing software. It’s simple to create whatever effect you want with over 900 free effects, including drag-and-drop transitions, titles, filters, and motion components.
Do visit Wondershare Filmora exclusive website to know more about its latest upgrade and new features launch.
● Ending Thoughts →
● Thus, that was about what an ai video game is and why the characters act more like humans.
● So, as a video game lover, you can now explore the best of ai playing video games to have a personal experience of this new video gaming trend. Also, do try the Filmora software to see how you can change the looks and feel of your video game creation.
The gaming world is ever-changing, with developers looking to create innovative ways to immerse players into their digital worlds. One such technology that has begun to sweep is AI in the game industry.
AI is a powerful tool in many ways to improve the gaming experience. It can make artificial intelligence in computer games more believable and add replayability and immersion to games, and we can expect to see even more impressive applications in the future.
In this article
01 [What Is AI in Gaming?](#Part 1)
02 [Why Does AI in Gaming Matter?](#Part 2)
03 [How AI Will Completely Change Video Games](#Part 3)
04 [8 Games with Incredible Artificial Intelligence](#Part 4)
05 [What AI Video Games Assets Do Filmora Have?](#Part 5)
Part 1 What Is AI in Gaming?
In simple terms, AI is a set of algorithms that allow a computer to learn and improve from experience. Although you can apply it in many ways, artificial intelligence in video games is usually helpful to create more intelligent and more believable non-player characters (NPCs).
For example, an AI system might be helpful to determine how an NPC reacts to the player’s actions. If the player tries to steal from an NPC, the AI might make the NPC angry and more likely to attack the player. Alternatively, if the player is friendly to an NPC, the AI game playing might make the NPC more likely to help the player in future interactions.
Part 2 Why Does AI in Gaming Matter?
One of the most vital aspects of AI in video games is that it can make games more believable and immersive for players. When games can convincingly simulate human-like behavior, it can be a much more enjoyable experience for gamers. AI can make NPCs seem more lifelike and make the game world feel more believable.
AI is also becoming increasingly important for creating procedural content. This is where the game generates content on its own, rather than relying on pre-made assets. For example, a game might use procedural generation to create random dungeons or quests that the player can explore. This can add a lot of replayability to a game, as the player never knows what they will encounter next.
Part 3 How AI Will Completely Change Video Games
It is not a secret that AI is changing the world as we know it. With its ability to enable computers to learn and improve from experience, AI is paving the way for a future where machines can handle more complex tasks. And nowhere is this more apparent than in the world of video gaming.
In the past, developers brought in AI primarily for simple things like making certain NPCs (non-player characters) move and act realistically. But now, artificial intelligence in video games is being used for much more complex tasks like generating procedural content and creating believable human-like behavior. This results in a new generation of AI game playing that are more immersive and playable.
Part 4 Games with Incredible Artificial Intelligence
Now, we will look into eight video games that signify why we need the best ai in video games.
01Fallout 4
One of the most attractive examples of AI in video gaming is Fallout 4. This post-apocalyptic RPG features some of the most believable NPCs ever seen in a game. Each character is fully voiced, and they all have their unique personalities and backstories. The AI generates procedural content, meaning that the game world is always different each time you play.
02The Witcher 3: Wild Hunt
The Witcher 3: Wild Hunt is one more great example of an AI video game. This open-world RPG features a vast array of believable NPCs, each with unique personality traits and motivations. The AI is also used to generate procedural content, resulting in a different game world every time you play.
03Grand Theft Auto V
Grand Theft Auto V is yet another example of AI being used to create believable human-like behavior. The NPCs in this play are some of the most lifelike and realistic ever seen. They react to the player’s actions in believable ways, and the AI is used to generate procedural content, resulting in a game world that is always different.
04Minecraft
Minecraft is a game that heavily uses procedural generation to create its content. The terrain and structures in the game are all generated on the fly by the AI, resulting in a different game world every time you play. What’s more, AI is also used to generate the behaviors of mobs (hostile creatures), making them more believable and lifelike.
05Spore
Spore is an AI game play that is all about procedural generation. Every creature in the game is generated by AI, meaning that there are many possible creature designs. What’s more, AI is used to create creatures’ behaviors, making them more believable and lifelike.
06Mirror’s Edge Catalyst
Mirror’s Edge Catalyst is a game that heavily uses AI to create its content. The levels in the game are all procedurally generated, meaning that they are different every time you play. This is made possible by the game’s AI, which produces the level layouts and obstacles on the fly.
07Civilization VI
One of the most incredible examples of AI in video gaming is Civilization VI. This turn-based strategy game features some of the most believable NPCs ever seen in a game. Each character has its voice fully, and they all have unique personalities and backstories.
08Elite Dangerous
Elite Dangerous is a space simulation game that uses advanced AI to create believable and realistic human-like behavior. The NPCs in the game are some of the most lifelike and realistic ever seen. They react to the player’s actions in believable ways, and the AI is used to generate procedural content, resulting in a game world that is always different.
Part 5 **What AI Video Games Assets Do Wondershare Filmora Video Editor
With the increased use of AI in video games, most gamers have found gaming more enjoyable. However, an outstanding video editor has some assets that can significantly make AI video games better and more human. This video editor is one of the most sorted for and is called Filmora. Filmora is a great video editing software for creating stunning videos. It’s effortless to use and has various features to create professional-looking videos. It’s perfect for making videos for social media, YouTube, and other online platforms.
Its many features have a touch of artificial intelligence, making this program stand out from the other video editors and valuable for editing during ai video games creation.
Screen Recording
The Filmora screen recorder allows the user to concurrently record the screen and camera and the system and microphone audio. You can quickly record games, tutorials, YouTube videos, and other videos and then export them to YouTube, Vimeo, and other devices.
AI Portrait
The AI portrait function in Filmora video editor allows you to locate the human in your movie effortlessly and erase the background with a simple drag and click. There are also several portrait effects and AR stickers to add to your video editing enjoyment.
For Win 7 or later (64-bit)
For macOS 10.12 or later
Video Effects
Filmora customers can choose from various effects to utilize in their video editing software. It’s simple to create whatever effect you want with over 900 free effects, including drag-and-drop transitions, titles, filters, and motion components.
Do visit Wondershare Filmora exclusive website to know more about its latest upgrade and new features launch.
● Ending Thoughts →
● Thus, that was about what an ai video game is and why the characters act more like humans.
● So, as a video game lover, you can now explore the best of ai playing video games to have a personal experience of this new video gaming trend. Also, do try the Filmora software to see how you can change the looks and feel of your video game creation.
Progressive Solutions to Add VHS Effects to Video with Ease
Good videos with great edits and effects undoubtedly create a last impression. Videos are like windows to the past, allowing us to relive precious moments and memories. Similarly, good-looking videos have this remarkable ability to last forever. Even when it comes to content creation, videos are a great engagement tool. They engage audiences like no other medium can, conveying emotions and messages.
However, VHS effects have added more spice to the content creation and the creative work behind it. They give a normal video a distinct character and style, further improving it. By applying VHS filters, you can change the mood of your videos entirely. Applying these effects to your videos sometimes becomes difficult. However, there is always a simple solution to apply VHS to your videos.
Part 1: What is VHS Effect? An Overview
People from the 80s would remember the good old days when they used to watch movies on VHS tapes. In simple terms, the VHS effect is a style that tries to recreate the look of VHS recordings. It’s a nostalgic-style effect that has gained popularity in recent years. You can apply different filters and techniques to your videos to achieve this effect.
These techniques aim to replicate the features of VHS tapes. The key features of the VHS filters include distortion, noise, and tracking errors. Distortion and noise create flickering lines and static. Furthermore, the tracking errors give the impression of an unstable video signal. These elements make the video appear just like the old VHS tapes from the 80s.
Additionally, color grading plays an important role in creating this effect. VHS tapes had a unique color palette with saturated and slightly shifted colors. You can replicate this effect by adjusting and applying color grading effects.

Add VHS Effect to Video
Simply add video effects on Video with Filmora Video Effect Editor ! Experience the magic of cool yet outstanding video effects, where your videos come to life in beautiful visuals.
Apply VHS Effect Apply VHS Effect Learn More >


Part 2: How To Add VHS Effect to Video in Premiere Pro
If you want to add a VCR effect to your videos, you are at the right place. This part will discuss the steps to add VHS video effects using Premiere Pro. Although you can also try this on your Mac, you can surely look for other options. If you are a consistent user of FCPX instead of Premiere Pro, you can also apply VFH effects to your videos using FCPX .
Step 1: Open Adobe Premiere Pro and import the video to which you want to apply the effect. Click on the “Color” option in the main toolbar to open the “Lumetri Color” panel. In the panel, choose “Lumetri Scopes” from the top toolbar to open a graph window.

Step 2: Go to the “Basic Correction” option in the “Lumetri Color” box. Lower the “Whites” and increase the “Contrast.” Furthermore, set the “Blacks” to a value of 10 in the graph.

Step 3: Switch to the “Creative” tab in the “Lumetri Color” panel. Increase the “Faded Film” to your preference. Lower the “Sharpness,” “Saturation,” and “Vibrance” as desired. Adjust the color wheels in the “Color Wheels & Match” section of the “Lumetri Color” tab to achieve the desired VHS look. Find the “Vignette” option in the same tab and increase its value.

Step 4: Then, proceed to the editing mode by pressing the “Editing” button in the main toolbar. Choose “Edit” from the bottom half of the screen and search for the “Channel Blur” effect. After that, drag the effect and drop it onto your video clip. Then, select the video in the timeline and go to the “Video Control” section. Drag the “Channel Blur” effect above the previous adjustments and effects.

Step 5: In the “Channel Blur” effect tab, check the “Repeat Edge Pixel” option and increase the value of “Red Blurriness.” Change the “Blur Dimensions” option to “Horizontal.” Add another “Channel Blur” effect and repeat the process. Increase the value of “Blue Blurriness” to “30” and set “Red Blurriness” to “15.” Further, change the “Blur Dimensions” option to “Vertical.”

Step 6: After that, apply the “Unsharp Mask” and “Color Emboss” effects from the “Effect” panel. Adjust the “Amount” and “Radius” of the “Unsharp Mask” to “85” and “20,” respectively. Slightly increase the values of “Relief” for the “Color Emboss” effect.

Step 7: Apply the “Noise” effect from the “Noise & Grain” from the same section. Then, adjust the “Amount of Noise” according to your preference. Apply the “Wave Warp” effect and change the “Wave Height” to “2” and “Wave Width” to “1000.” Set the “Direction” to “0” and “Pinning” to “Horizontal Edges.”

Step 8: To crop your video to a 4:3 aspect ratio, create a “Color Matte” layer by clicking the “New Item” icon. Name the new layer and place it on the video clip. Repeat this step for another “Color Matte” layer. Search for the “Crop” effect in the “Effect” panel. Apply it to both color matte layers. Then, change the “Left” option to “86” for the first layer and the “Right” option to “86” for the second layer. Set the “Edge Feather” to “30” for both layers.

Step 9: Right-click and select “Save Preset” to save your VHS effect for future use. Finally, export your video to your system.

Part 3: How To Add VHS Effect to Video in Davinci Resolve
VHS tape filter is an awesome effect that brings you to the latter half of the 20th century. However, you can add this effect to your videos as well. You can learn how to apply this effect to your video in 3 simple steps:
Step 1: Open Davinci Resolve and import your video clip. Add an adjustment layer by selecting “Effects” from the main toolbar and searching for “Adjustment Layer.” Drag and drop it onto your video clip. Adjust the duration of the adjustment layer to match your video.

Step 2: Go to the bottom toolbar and select “Color.” Activate “Clips,” “Nodes,” and “Effects.” Ensure the adjustment layer is selected in the timeline. Click the “Library” button in the right corner. Search for the “Analog Damage” effect in the library search bar and drag and drop it onto the adjustment layer. Choose your desired VHS video filter from the “Preset” options in the “Analog Damage” tab. Select the “VHS Clean” effect for an almost similar VHS look.

Step 3: Adjust the settings by experimenting with different options like “Broadcast Signal” and “Scan Lines.” Preview your video by pressing the “Play” button and make further adjustments if needed. Finally, save the clip on your system.

Part 4: Some Online Solutions to Adding VHS Effect to Video Quickly
There are so many software and offline tools to apply old VHS effects. However, you don’t need to install software to add a VHS look to your videos. There are many online tools as well that you can use for this purpose.
1. Veed.io
Veed.io is a great online video editor loaded with tons of options. Other than editing and adjustment, this tool can even add subtitles to your videos. You can use this online video editor to add a VHS effect to the video. With simple and easy editing options, you can give your video an old VHS tape look. To apply this effect using this tool, follow the guided steps.
Step 1: Access the official website and click the “Video Editor Effects” option. Look for the “Choose Video” button and click on it. Further, upload your file by selecting “Upload a file.” You can also choose a stock video from the available options.

Step 2: Locate and select the “Filters” option in the sidebar after importing your video. Then, navigate to the “Effects” section and look for the VHS effects in the provided list. Choose the effect you like and apply the effect to your video by clicking it.

Step 3: Further, press the “Play” icon to preview the results. Once satisfied, press “Done,” located at the top right corner of the screen. Finally, press the “Export Video” button to save your file to your system.

2. Kapwing
Kapwing is an online video tool that is capable of doing more than you think. It is powered by AI technology to assist users in video editing, generation, and more. However, this tool is the best bet when it comes to adding a 90s VHS filter to a video. If you’re thinking of applying this effect to your video as well, simply follow the instructions.
Step 1: Access the Kapwing website and go to the “Tools” option. Then, press “Video Editor” in the new window to apply your desired VHS glitch effect.

Step 2: Then, upload your desired video by selecting the “Click to Upload” tab. Further, in the sidebar, select “Images” and search for the “VHS Effect GIF.” Choose from different overlays and drag your preferred one onto the video in the timeline. Adjust the overlay’s opacity as needed.

Step 3: Apply filters to your video for a more authentic VHS effect. To do so, select the video in the timeline and go to the “Effects” tab on the right panel. Choose a filter that gives your video an old and retro look. Once satisfied, click “Export Video” in the top right corner to save your video.

Part 5: Wondershare Filmora: An All-in-One Utility For Adding VHS Effect to Video
Wondershare Filmora is a tool packed with tons of options and features. In its latest update, the tool is now using AI to assist you in your editing work. There are so many effects and filters available that you can apply to your video footage. There is a comprehensive Filmora guide to adding VHS filters to videos on its website. However, these 5 steps will help you learn the process of applying a VHS screen effect.
Add VHS Effect For Win 7 or later(64-bit)
Add VHS Effect For macOS 10.14 or later
Step 1Install and Launch Wondershare Filmora
To begin, install and launch Wondershare Filmora on your computer. Once opened, select the “New Project” tab, which will take you to a new window. Import your video by either dragging and dropping it into the program or using the import media option. As you’ve added the video to the “Media” section, drag and drop it into the timeline.

Step 2Apply the VHS Effects
Access the “Effects” option in the top bar of the program. Search for “VHS” to explore the different VHS effects available. Choose the desired old VHS effect and drag it onto your video in the timeline. To adjust the intensity of the effect, modify the opacity settings in the “Effects” tab located on your screen. Continue adjusting until you are satisfied with the result.

Step 3Export and Save Your Video
Once you are happy with the applied VHS effect, it’s time to save your video. Access the “Export” button in the screen’s top left corner. Follow the instructions to select your desired settings and format for the exported video. Then, click “Export” again to begin the exporting process. Once completed, your video with the VHS effects will be saved and ready to be shared or enjoyed.

Conclusion
In conclusion, videos have a remarkable ability to leave a lasting impression. There are many ways to improve your content, and VHS is one such way. With VHS filters, you can transform your boring video into something appealing. In this scenario, Wondershare has provided tools to help you improve your videos. Filmora is a tool offered by Wondershare that will allow you to apply effects to your videos easily.
Apply VHS Effect Apply VHS Effect Learn More >
Part 2: How To Add VHS Effect to Video in Premiere Pro
If you want to add a VCR effect to your videos, you are at the right place. This part will discuss the steps to add VHS video effects using Premiere Pro. Although you can also try this on your Mac, you can surely look for other options. If you are a consistent user of FCPX instead of Premiere Pro, you can also apply VFH effects to your videos using FCPX .
Step 1: Open Adobe Premiere Pro and import the video to which you want to apply the effect. Click on the “Color” option in the main toolbar to open the “Lumetri Color” panel. In the panel, choose “Lumetri Scopes” from the top toolbar to open a graph window.
Step 2: Go to the “Basic Correction” option in the “Lumetri Color” box. Lower the “Whites” and increase the “Contrast.” Furthermore, set the “Blacks” to a value of 10 in the graph.
Step 3: Switch to the “Creative” tab in the “Lumetri Color” panel. Increase the “Faded Film” to your preference. Lower the “Sharpness,” “Saturation,” and “Vibrance” as desired. Adjust the color wheels in the “Color Wheels & Match” section of the “Lumetri Color” tab to achieve the desired VHS look. Find the “Vignette” option in the same tab and increase its value.
Step 4: Then, proceed to the editing mode by pressing the “Editing” button in the main toolbar. Choose “Edit” from the bottom half of the screen and search for the “Channel Blur” effect. After that, drag the effect and drop it onto your video clip. Then, select the video in the timeline and go to the “Video Control” section. Drag the “Channel Blur” effect above the previous adjustments and effects.
Step 5: In the “Channel Blur” effect tab, check the “Repeat Edge Pixel” option and increase the value of “Red Blurriness.” Change the “Blur Dimensions” option to “Horizontal.” Add another “Channel Blur” effect and repeat the process. Increase the value of “Blue Blurriness” to “30” and set “Red Blurriness” to “15.” Further, change the “Blur Dimensions” option to “Vertical.”
Step 6: After that, apply the “Unsharp Mask” and “Color Emboss” effects from the “Effect” panel. Adjust the “Amount” and “Radius” of the “Unsharp Mask” to “85” and “20,” respectively. Slightly increase the values of “Relief” for the “Color Emboss” effect.
Step 7: Apply the “Noise” effect from the “Noise & Grain” from the same section. Then, adjust the “Amount of Noise” according to your preference. Apply the “Wave Warp” effect and change the “Wave Height” to “2” and “Wave Width” to “1000.” Set the “Direction” to “0” and “Pinning” to “Horizontal Edges.”
Step 8: To crop your video to a 4:3 aspect ratio, create a “Color Matte” layer by clicking the “New Item” icon. Name the new layer and place it on the video clip. Repeat this step for another “Color Matte” layer. Search for the “Crop” effect in the “Effect” panel. Apply it to both color matte layers. Then, change the “Left” option to “86” for the first layer and the “Right” option to “86” for the second layer. Set the “Edge Feather” to “30” for both layers.
Step 9: Right-click and select “Save Preset” to save your VHS effect for future use. Finally, export your video to your system.
Part 3: How To Add VHS Effect to Video in Davinci Resolve
VHS tape filter is an awesome effect that brings you to the latter half of the 20th century. However, you can add this effect to your videos as well. You can learn how to apply this effect to your video in 3 simple steps:
Step 1: Open Davinci Resolve and import your video clip. Add an adjustment layer by selecting “Effects” from the main toolbar and searching for “Adjustment Layer.” Drag and drop it onto your video clip. Adjust the duration of the adjustment layer to match your video.
Step 2: Go to the bottom toolbar and select “Color.” Activate “Clips,” “Nodes,” and “Effects.” Ensure the adjustment layer is selected in the timeline. Click the “Library” button in the right corner. Search for the “Analog Damage” effect in the library search bar and drag and drop it onto the adjustment layer. Choose your desired VHS video filter from the “Preset” options in the “Analog Damage” tab. Select the “VHS Clean” effect for an almost similar VHS look.
Step 3: Adjust the settings by experimenting with different options like “Broadcast Signal” and “Scan Lines.” Preview your video by pressing the “Play” button and make further adjustments if needed. Finally, save the clip on your system.
Part 4: Some Online Solutions to Adding VHS Effect to Video Quickly
There are so many software and offline tools to apply old VHS effects. However, you don’t need to install software to add a VHS look to your videos. There are many online tools as well that you can use for this purpose.
1. Veed.io
Veed.io is a great online video editor loaded with tons of options. Other than editing and adjustment, this tool can even add subtitles to your videos. You can use this online video editor to add a VHS effect to the video. With simple and easy editing options, you can give your video an old VHS tape look. To apply this effect using this tool, follow the guided steps.
Step 1: Access the official website and click the “Video Editor Effects” option. Look for the “Choose Video” button and click on it. Further, upload your file by selecting “Upload a file.” You can also choose a stock video from the available options.
Step 2: Locate and select the “Filters” option in the sidebar after importing your video. Then, navigate to the “Effects” section and look for the VHS effects in the provided list. Choose the effect you like and apply the effect to your video by clicking it.
Step 3: Further, press the “Play” icon to preview the results. Once satisfied, press “Done,” located at the top right corner of the screen. Finally, press the “Export Video” button to save your file to your system.
2. Kapwing
Kapwing is an online video tool that is capable of doing more than you think. It is powered by AI technology to assist users in video editing, generation, and more. However, this tool is the best bet when it comes to adding a 90s VHS filter to a video. If you’re thinking of applying this effect to your video as well, simply follow the instructions.
Step 1: Access the Kapwing website and go to the “Tools” option. Then, press “Video Editor” in the new window to apply your desired VHS glitch effect.
Step 2: Then, upload your desired video by selecting the “Click to Upload” tab. Further, in the sidebar, select “Images” and search for the “VHS Effect GIF.” Choose from different overlays and drag your preferred one onto the video in the timeline. Adjust the overlay’s opacity as needed.
Step 3: Apply filters to your video for a more authentic VHS effect. To do so, select the video in the timeline and go to the “Effects” tab on the right panel. Choose a filter that gives your video an old and retro look. Once satisfied, click “Export Video” in the top right corner to save your video.
Part 5: Wondershare Filmora: An All-in-One Utility For Adding VHS Effect to Video
Wondershare Filmora is a tool packed with tons of options and features. In its latest update, the tool is now using AI to assist you in your editing work. There are so many effects and filters available that you can apply to your video footage. There is a comprehensive Filmora guide to adding VHS filters to videos on its website. However, these 5 steps will help you learn the process of applying a VHS screen effect.
Add VHS Effect For Win 7 or later(64-bit)
Add VHS Effect For macOS 10.14 or later
Step 1Install and Launch Wondershare Filmora
To begin, install and launch Wondershare Filmora on your computer. Once opened, select the “New Project” tab, which will take you to a new window. Import your video by either dragging and dropping it into the program or using the import media option. As you’ve added the video to the “Media” section, drag and drop it into the timeline.
Step 2Apply the VHS Effects
Access the “Effects” option in the top bar of the program. Search for “VHS” to explore the different VHS effects available. Choose the desired old VHS effect and drag it onto your video in the timeline. To adjust the intensity of the effect, modify the opacity settings in the “Effects” tab located on your screen. Continue adjusting until you are satisfied with the result.
Step 3Export and Save Your Video
Once you are happy with the applied VHS effect, it’s time to save your video. Access the “Export” button in the screen’s top left corner. Follow the instructions to select your desired settings and format for the exported video. Then, click “Export” again to begin the exporting process. Once completed, your video with the VHS effects will be saved and ready to be shared or enjoyed.
Conclusion
In conclusion, videos have a remarkable ability to leave a lasting impression. There are many ways to improve your content, and VHS is one such way. With VHS filters, you can transform your boring video into something appealing. In this scenario, Wondershare has provided tools to help you improve your videos. Filmora is a tool offered by Wondershare that will allow you to apply effects to your videos easily.
Customize PowerPoint Slideshow Icon in Simple Ways
Customise Powerpoint Slideshow Icon in Simple Ways
An easy yet powerful editor
Numerous effects to choose from
Detailed tutorials provided by the official channel
We often need to make different PowerPoint presentations. Be it for school projects, office presentations, college work or corporate presentations, PowerPoint slides are the major and the most commonly used technique for presenting any study or work material.
There are many methods to make your PowerPoint presentation stand out among the rest. Among all the ways, one of the most effective ones is customizing slideshow icons in PowerPoint. If you do not yet know about customizing slideshow icons in a PowerPoint, follow the following discussion, as we will discuss all the necessary information about it.
In this article
01 [Where is the Slide Show Button in PowerPoint?](#Part 1)
02 [What Are the Icons of PowerPoint Presentation?](#Part 2)
03 [How to Get More Icons for PowerPoint?](#Part 3)
04 [How to Customize PowerPoint Slideshow Icon in 8 Simple Ways](#Part 4)
Part 1 Where is the Slide Show Button in PowerPoint?
To present the PowerPoint presentation you make, you will have to find and click on the slide show view icon. The slide show option helps you to present the PowerPoint presentation. You can present each of the slides, one after the other.
You can choose to change the slides manually, or there is also an option where the slides can change automatically. You can readily select either of the options according to your needs. Also, you can fix the time duration that would determine how long would each slide stay on the screen if you choose to present your PowerPoint presentation automatically.
But before accessing all of them, it is crucial, or rather necessary, for you to know the slide show button in PowerPoint. So, here are the different steps that will help you find the slide sorter view icon in PowerPoint.
● Step 1
Open Microsoft PowerPoint.
![]()
● Step 2
Reach out to the top Menu bar.
![]()
● Step 3
You will find the option of “Slide Show” there.
● Step 4
You can make the necessary customization about the slide show setting of your presentation there.
![]()
● Step 5
Select the option “From Beginning” to begin your PowerPoint slide show from the first slide. Or, you can select the option “From Current Slide” if you’re going to start the slide show from the slide you are currently present.
![]()
Part 2 What Are the Icons of PowerPoint Presentation?
Customizing your slides for your slide show with the help of the innumerable icons of the PowerPoint requires you to know about the various groups of available icons. So, we will now discuss the different groups of icons available in the PowerPoint.
The following are the different icons of PowerPoint that you can integrate into your PowerPoint presentation.
● Accessibility
The first groups of icons are about accessibility. It denotes the symbols or icons that depict the differently-abled or specially-abled people. It helps represent and include a large community of specially-abled people.
![]()
● Analytics
The following group represents the different symbols related to Mathematics, analysis, presentation, graphs and the like.
● Animals
This set of icons includes the symbols for various animals and birds that one can include in their presentation and make it look more attractive.
![]()
● Apparel
This group of icons include the different symbols of the outfits, clothes, dresses and the other accessories that we wear.
● Arrows
It includes the symbols for the arrows pointing in different directions. This group of icons can be one of the most useful ones among the rest.
● Art
It includes a group of icons that depict anything and everything artistic.
![]()
● Body Parts
You will get the symbols for all the body parts in this icon group.
![]()
● Bugs
Get the symbols of the bugs and insects under this category.
● Buildings
This set of symbols shows different types of buildings. It can be a house, a church, a bakery, etc.
There are many such groups of icons, which include the follows.
● Business
● Commerce
● Communication
● Celebration
● Education
● Faces
● Dinosaurs
● Food and Drinks
● Holidays
● Home
● Interface
● Landscape
● Location
● Medical
● Nature and Outdoors
● Occupation
● People
● Process
● Puzzles and Games
● Security and Justice
● Signs and Symbols
● Sports
● Technology and electronics
● Tools and Buildings
● Vehicles
● Weather and Seasons
Part 3 How to Get More Icons for PowerPoint?
PowerPoint has an endless variety of icons for your presentation. No matter what your need is or which type of presentation you are making. You will find any type of icon to ornament your presentation to the fullest.
But, how can you get more icons for your PowerPoint presentation? So, here are the steps for integrating as many icons as you want in your PowerPoint presentation.
Step 1
Go to PowerPoint and reach out to the top Menu bar.
![]()
Step 2
Select the option “Insert”.
Step 3
Select the option “Icons.”
Step 4
Search for as many and whatever type of icon you want to integrate into your PowerPoint presentation.
![]()
Step 5
Select “Insert” option.
![]()
Part 4 How to Customize PowerPoint Slideshow Icon in 8 Simple Ways
Here are the eight different ways in which you can customize the PowerPoint Slideshow Icon.
01Using sketchy lines
First thing, insert any icon of PowerPoint and then use the option “Convert to Shape”.
Go to the “Shape Format Tab” and go to the “Shape Outline.”
Select “Sketchpad”.
You can readily customize the icons in PowerPoint using this recently introduced option at PowerPoint.
![]()
02Adding Simple Shapes
Through this step, you can add some additional details and make the icons of PowerPoint even more enhanced and attractive. You have the option of including a simple and basic shape. Or you can also add some detailing to the icons. You have the freedom of letting your creativity flow to the fullest.
● Group your icon
● Make it effortless to copy and paste and move around all over the slide.
03Adding Animations
You can present your icons in the PowerPoint presentation in the form of animations. You can make them appear through different animation speeds and variations. You can resize them and add layers for animating the icons in PowerPoint.
04Changing the properties of the icons
You can also change the icons’ brightness, contrast, or colours to make them look more enhanced and engaging.
05Adding entrances and exists
You can make your icons enter and leave the presentation in many unique ways.
![]()
06Select the icon you prefer to customise
● Choose the “BrightSlide tab.”
● Go to “My Animations”
Choose your preferred way of making your icon enter or exit the slide
07Using mask
For this, here are the steps.
● Cover a part of the entire slide by selecting a rectangle.
● Match your design and change the fill colour.
● Use the “Align” tools to make circles.
● Animate the icons according to the way you prefer.
08Direction
Another exciting yet straightforward way of customising your icons in PowerPoint is by making them appear from a different direction. Although it sounds simple, it will make your presentation look more formal and intreating.
09Fading in and out
You can readily make your icons fade in or fade out and make them appear more exciting and engaging for your presentation.
Another way of making your presentation look entirely out of the box is with one of the best video editing tools: Filmora. Wondershare Filmora Video Editor has been the best tool for editing videos and enhancing them, and you can readily use it for presenting any slide show or presentation.
For Win 7 or later (64-bit)
For macOS 10.12 or later
It will make your presentation unique, as it has some of the most extraordinary and incredible features. Some of the features are as follows.
● Motion Tracking feature- This feature will make your videos look more fascinating. You can use your creativity to customise the motion of your videos and edit them according to your ideas and inspirations.
● Effects-There are as many as more than 800 effects in Filmora. So, if you want to make your presentation look absolutely different and more incredible from the crowd, use Fimlora and its numerous effects to make your presentation the best of the best.
● Text and Titles- Add texts and titles wherever necessary so that you do not miss out on any information about your topic at the presentation.
● Music Library- Add some more uniqueness and exciting feature to your PowerPoint presentation with the help of the various music and tunes present at the Music Library of Filmora.
There are several other features of Filmora that, if we start including them, will make a list unending. It is the ideal tool for editing videos and also using it for producing some of the most wonderful presentations.
● Ending Thoughts →
● So, now you can readily make some of the most exciting and engaging PowerPoint presentations as you are well aware of the different ways of searching for the icons in PowerPoint, searching for the slideshow icon at PowerPoint, and also slideshow icons in PowerPoint.
● Additionally, you can use the best video editing tool, Filmora, for making your presentation stand out among the crowd in the optimal way possible.
● If you enjoyed reading this article, don’t forget to drop a comment below. Also, share your views with us regarding the content or anything related to the topic.
Also read:
- New 7 Best MP4 Video Editors on Mac Edit MP4 Videos Easily for 2024
- New Updated 8 Ways to Merge SRT with MP4
- Updated 2024 Approved 10 Best Music Video Templates to Make Your Video Popular
- In 2024, Creating a Slideshow Is Necessity of the Modern Time. Whether You Plan a Business Meeting or You Are Going to Do some Family Event with Slideshow Presentation, a Good Slideshow Maker Will Help You in This Direction
- Updated Guide To Cropping and Combining Content in Wondershare Filmora Latest
- 2024 Approved To Closely Observe the Content on Screen, We Often Zoom in to Catch the Details. This Article Will Provide You with a Brief Note on How to Zoom in on YouTube Videos Quickly on Your Devices
- New In 2024, How To Cut Videos For Instagram On Mac
- Updated Understanding The Best Tools for Changing Sky Background
- New 2024 Approved How to Add a Spooky Shadow Effect
- In 2024, Learn How to Merge Audio and Video Like a Pro with This Step-by-Step Guide to Using FFmpeg. Create Seamless Videos and Improve Your Video Production Skills
- New 10 Best Meme Text to Speech Tools Windows, Mac, Android, iPhone for 2024
- Simple Tricks Make 3D GIF Production of Inspiration Pop Up
- Updated Green Screen YouTube Videos for 2024
- 2024 Approved Read on to Learn About Multi Object Tracking, Its Types, and Requirements. Youll Also Learn About the Different Approaches Toward Object Tracking
- Updated 2024 Approved Phone Aspect Ratio Vertical Definition, Types and Tips
- 2024 Approved Land Into the Thrill of Creating Stunning GIFs with Ezgif
- Updated 2024 Approved Troubleshoot Snapchat Camera Zoomed in Issue
- In 2024, How to Create an Instant Slideshow on Mac
- Updated Guide To Slowing Down Videos in Snapchat Discussing the Details
- New How to Brighten Video in Premiere Pro for 2024
- Updated In 2024, How to Create OBS Slideshow
- Updated Are You Facing Trouble in Playing a TS File? We Got You! Read the Article Below to Learn the Most About TS Format, Pros and Cons, and More
- New In 2024, Reviewing Efectum App and The Best Alternatives for Smartphone Users
- Updated In 2024, How to Use a Stabilization Tool in Filmora
- Read This Review to Learn Everything You Need to Know About Leeming LUT Pro and How to Apply Pro LUTs Using Different Video Editors
- New Bandicut Video Editor Review
- Updated Clearly, the Efectum App Download without a Watermark Option Is on Android Phones. Thus, Read This Review on the Efectum App and Find Replacements for Good
- New 2024 Approved Is Augmented Reality Conferencing the Future of Workplace Collaboration?
- In 2024, How to Make a Gaming Montage - Guide & Tips
- What You Should Know About Speech-to-Text Technology for 2024
- How to Create a Custom Sequence Preset in Premiere Pro
- New VLC Media Player How to Merge Audio and Video Like a Pro
- Updated How To Quickly Create A Screen Print Effect In Photoshop Detailed Gui
- 2024 Approved Are You Ready to Learn About Something Free yet Amazing? We Are Talking About All Format Video Players for PC that You Should Know , Lets Begin
- Do You Want to Be Aware of VHSs Meaning? There Is Nothing to Be Worried About because We Will Guide You in This Article for 2024
- New 2024 Approved 12 Top Marketing Slideshow Templates
- In 2024, How to Convert Videos to Slow Motion?
- Best Tools To Create Blend Image Collage for 2024
- Updated Here Are the Steps to Crop a Video in Sony Vegas Pro Step 1 Click on Import and Import the Video to Be Edited. Click on It and Drag-Drop to Timeline
- In 2024, Top 5 Ways To Convert Hdr To Sdr Videos
- In 2024, YouTube Lives Are Very Popular Nowadays and People Can Interact with the Anchor at Real Time. If You Want to Comment on a YouTube Live Chat, You Can Follow the Guide Below
- Updated Do You Want a LUT that You Can Use for Your High-Definition Content? You Can Use Rec 709 LUT Premiere Pro for Your HD Digital Media to Give the Perfect Result
- Updated Are You a Videographer or Video Content Creator? Is Enhancing Your Videography Skills Your Priority? Do You Want to Learn the Basics of LumaFusion Color Grading? Read on to Find All the Information You Need
- How to Reset OnePlus 11 5G without Losing Data | Dr.fone
- Full Guide on Mirroring Your Realme Narzo 60 5G to Your PC/Mac | Dr.fone
- New 10 Free Football Streaming Sites To Bookmark
- 3 Solutions to Hard Reset Motorola Moto G84 5G Phone Using PC | Dr.fone
- How to Remove Forgotten PIN Of Your Samsung Galaxy M54 5G
- Top 6 Apps/Services to Trace Any Poco M6 Pro 4G Location By Mobile Number | Dr.fone
- In 2024, Unlock Your Poco C55s Potential The Top 20 Lock Screen Apps You Need to Try
- How to Simulate GPS Movement in AR games On Honor Play 40C? | Dr.fone
- How to Retrieve deleted photos on Realme GT 5
- In 2024, Overview of the Best Huawei Nova Y91 Screen Mirroring App | Dr.fone
- How to Transfer Photos from Vivo Y100i Power 5G to New Android? | Dr.fone
- Title: Updated How to Add Text Effects in Adobe Premiere Pro?
- Author: Chloe
- Created at : 2024-06-18 14:31:06
- Updated at : 2024-06-19 14:31:06
- Link: https://ai-editing-video.techidaily.com/updated-how-to-add-text-effects-in-adobe-premiere-pro/
- License: This work is licensed under CC BY-NC-SA 4.0.
