
:max_bytes(150000):strip_icc():format(webp)/Race-982fb219114a48fb96b9c5a2c6f93847.jpg)
Updated How to Make a Video Slideshow in iMovie for 2024
How to Make a Video Slideshow in iMovie
How to Make a Video Slideshow in iMovie
An easy yet powerful editor
Numerous effects to choose from
Detailed tutorials provided by the official channel
Landing into the world of creativity, it can be a smart choice to experiment with creating a slideshow in iMovie. Stay tuned to understand the exquisite design know-hows!
In this article
01 [What’s the Advantage of Slideshow in iMovie?](#Part 1)
02 [How to Make a Video Slideshow in iMovie?](#Part 2)
03 [In What Way Could You Edit Your Video Shortly?](#Part 3)
Part 1 What’s the Advantage of Slideshow in iMovie?
Slideshow presentations land among the most elusive means of sharing valuable information across a diverse range of personal and professional content creation domains. Be it a fun-filled family event or a high end business centered client presentation; slideshows are there to address it all! Talking about affordable software solutions to adhere the purpose, you can conveniently pick the iMovie slideshow creator program.
Entering deeper into the software specifications, the iMovie application package is essentially a video and graphic editor tool, exclusively for MacOS and iOS supported devices. Working with the program, you can create stunning slideshow presentations and storytelling movies to commemorate your most cherished personal and commercial events, moments and scenarios.
Now that you have got an elementary overview of the iMovie video editor software, let us move ahead with our discussion to talk about the latter’s credibility towards creating top rated slideshow presentations in the following section prior to proceeding with addressing the concern of how to make a slideshow on iMovie:
Benefits of Creating iMovie Slideshows
● User Cohesive Working Interface
The most pronounced credibility of iOS compatible software tools and program utilities is undoubtedly, their user friendly operation characteristic, and iMovie is no exception to the lineage. The editor workspace of the slideshow creator is intelligently designed to suit the technical aptitude of the expanded diversity of tech savvy and amateur graphic editors. The interface is equally appealing to the newbies in the design realm.
To proceed with creating a slideshow in iMovie, you can either begin with scratch, working on an entirely new idea; or move ahead with picking any preset slideshow template or background theme, followed by customizing the same in line with the specific creation requirements. The software’s effect library is a vast storehouse of high end editing features and tools with the most convenient access.
● Customization Elements
The iMovie program allows you to create cinematic movie edits in Hollywood style. From curiosity generating trailers to nail biting thrills, you can add it all to engage your audience within your presentation. Talking about the customization flexibility, you can try hands at including studio logos, cast names and credit rolls to add extra value to the edits, while simultaneously appreciating the participants of your project.
If that’s not enough, you can work to create your presentations in a variety of genres and themes by choosing from tons of premade templates under a variety of genre centered categories and sub-categories. Moving further, you can also add related effects from the program’s effect library to match the mood and setting of the slideshow.
● Effects And Improvisations
The software offers a decent range of slideshow enhancement features and special effects. You can pick from over 10 different filters, 8 vivid themes and several numbers of sound and audio effects, along with including recorded voiceovers of your own. You can also go ahead to import audio tracks and music files that are saved locally on your iOS device.
● Convenient Presentation Sharing
To make your presentations accessible to a wider audience, you can proceed to share the created slideshows directly from IMovie to any of your preferred media sharing platforms, or export the same to an online storage account, like, AirDrop, iCloud Drive, etc.
Part 2 How to Make a Video Slideshow in iMovie?
Having observed the credibility of designing slideshow presentations in the iMovie video editor program, you might easily have a motivation to explore your graphic creativity by working with the software to make an iMovie slideshow of your own. Adhering to the concern, let us see through the process of making a slideshow in iMovie through a detailed, step by step guide in the following section:
User’s Guide to Create Video Slideshow in iMovie
Step 1: Download and Install the Program
To create slideshow with iMovie, start with visiting the home website of the iMovie video editor program and proceed to download the software in your desired iOS system for free. Next in the line is the installation process, which you need to complete in order to successfully launch the application in your system.
Step 2: Open a New Project
In the app’s welcome screen, navigate to and click on the ‘File’ tab in the ‘Functions Toolbar’ at the top. From the dropdown menu that follows, select the ‘New Project’ option to start working on a new slideshow. You can alternatively, press the ‘+ N’ command keys from your device keyboard to launch a new project. Once your project file is created, assign it a suitable name and select a desired aspect ratio.

Step 3: Create the First Slide
The inaugural slide of your presentation is generally consists of the slideshow the title, which you can add by clicking on the ‘Title’ icon under the ‘Preview’ box, to see a variety of text customization choices appear within the editor workspace.
To work with adding titles to a slide, choose a preferred text style; followed by navigating to the ‘Events Pane’ and dropping the same within the first dotted frame box. You can edit the text in the blue box above the first frame. The amount of text you can add depends on the size of the box. To change the length of the box, click on the same to drag it to a desired place and finally include the text in the ‘Preview’ box.
Navigate to and hit the ‘Show Fonts’ button to customize the added text in terms of color, fonts, style and size. Tap the ‘Preview Slide’ button to see the applied changes and click on ‘Done’ to confirm the same. You can repeat the above process to add titles and informative banners to all the slides within the slideshow presentation that you are about to create.

Step 3: Include Still Images
Browse through the locally saved images within your device gallery and add the desired ones at a specific point in the editor timeline using the ‘Drag and Drop’ method. A green colored indicative light will mark the spot where the images are being dropped. You are free to drop all the images at the same time and sort them at a later stage. Do not close the image folder in your device until you have imported all the stills.
The images can be alternatively added to the timeline by selecting the required ones from the iOS device’s Photo Booth or iPhoto account. All you need to do is navigate to and hit the ‘Photo’ button to drop the selected images in the ‘Photos’ box at the bottom right corner of the software workspace.

Step 4: Adjust Image Pans and Transitions
Having included the desired images within the slideshow project, it is now time to improvise them with classic and enhanced looks. You can adhere to the task by making suitable changes under the ‘Video Adjustments’, ‘Crop Tool’ and ‘Clock’ options. Drag the cursor to a desired slide to see all the 3 options pop up at the top your slide screen.

● Video Adjustment Tool
Using the ‘Video Adjustment’ option, you are granted the liberty to adjust the brightness, contrast, white point, exposure, saturation and levels of the added images. If your images have an appreciable quality by default, you can skip this step.
● Crop Tool
Consider working with the ‘Crop Tool’ to zoom or pan the system camera across a selected slide. Click on the ‘Fit’ option to set the image within a chosen frame size; however you need to be cautious lest using the tool may render an incorrectly cropped image. Select the ‘Crop’ option to adjust the image aspect ratio according to your specific size constraints.
The ‘Ken Burns’ tool, you can rely on this one to spark the slideshow images with the coolest zoom and pan effects. The tool is represented by ‘Red and Green’ boxes above the ‘Video Preview’ box in the editor timeline. You can easily move and resize the boxes using the ‘Hand’ and the ‘Cross Hair’ tools respectively. When you are satisfied with your work, hit ‘Done’ to return and confirm the changes, or click on the next presentation slide to crop and pan the same.
● Clock Tool
The ‘Clock’ icon lets you adjust the screen time of each slide, assigning a preset minimum duration of 0.25 seconds to each slide. Setting a play duration somewhere between 2-2.5 seconds would be an optimal choice. Avoid choosing shorter slide duration unless it becomes an obvious requirement, lest the audience may find it hard to process the contents.
Prefer adjusting the screen time separately for each slide, in case you have a large project with more than 50 slides. It is instead, advisable to time the entire project under one time frame, while setting a longer screen time for the title slide.
Step 5: Add an Upbeat Background Audio
Adding background music to your presentation slides is pretty simple, with you having to just position the audio files within the desired slides using the ‘Drag and Drop’ method. The slides containing music pieces will have a ‘Light Green’ highlighting box under them. To correct a wrong placement, drag the audio file across the individual slides and drop at the correct space. You can further, modify the length of the audio clips by extending and trimming them.
To import audio files from your online iTunes account, navigate to and click within the ‘Music and Sound Effects’ box at the bottom right corner of the editor timeline. You can also clip the music file to start playing the background audio from a certain point within the track. To do this, take the cursor to the end of the track and drag the red indicator line to the point where you wish the audio to end at or begin playing from.

Step 6: Share Your Presentation
Run a mock slideshow in the ‘Preview’ box to ensure that every element of the presentation is at its specified place. When all looks good, navigate to the ‘Functions Toolbar’ at the top and hit the ‘Share’ tab to select a media sharing platform of your choice. You can even choose to export your slideshow directly from the editor timeline via QuickTime.
Part 3 In What Way Could You Edit Your Video Shortly?
Creating slideshow iMovie presentations is a creative task and everything comes on the line with the finesse of editing skills to evoke an intelligent play with features, tools and effects. While you can master the art with consistent effort and practice, there are some really cool tips and tricks to quickly edit and uplift iMovie presentations.
Let us have a look at a few of the most prominent ones in the following section before you move ahead to create slideshow in iMovie:
01Cool Ways to Quickly Edit Your iMovie Videos
● Crop to Zoon in the Video
When editing your videos in the iMovie software, you can zoom in a desired portion of the video frame. All you need to do is, select a clip, tap on the ‘Crop’ button at the top right corner over the ‘Preview’ box, choose the ‘Crop to Fill’ option and drag the effect to the specific clip area you wish to crop. Apply your changes by clicking inside the checkbox at the top right corner.

● Split a Clip
You can reduce the size of a sufficiently long video clip by choosing to break the same into several parts or trim it to ward off unwanted portions. To split your footage, take your cursor to the specific splitting point of the clip within the editor timeline, make a right click, and select the ‘Split Clip’ option from the dropdown menu that follows next.
● Detach an Audio File
Detaching audio from a clip allows you to experiment with different video play options. You can let the run the in the background as you proceed to split a clip for inserting a still image. To work with the effect, navigate to and right click on a desired clip within the editor timeline and tap on ‘Detach Audio’ in the upcoming list of options. The added music clip in ’Blue’ will detach to appear as an independent clip in ‘Green’ within the software timeline.
● Fade Audio In and Out
To ensure a smooth audio transition between successive clips, try hands at fading the audio in and out by pointing the cursor at a detached green or an attached blue audio clip, followed by dragging the small round circles at the beginning or end of the footage. To introduce a gradual fade in or out effect, drag the round button to the center of the video clip.
● Include Transitions
Transitions allow a seamless presentation flow by ensuring a smooth movement between different slides appearing in continuity. Add a suitable transition element to the video footage of your slideshow by navigating to and hitting the ‘Transition’ tab in the ‘Functions Toolbar’. The default transition screen time is 1 second, but you can customize the same by double clicking on the effect post the latter’s addition within the editor timeline.
02Editing Video Slideshows in Filmora
The iMovie slideshow maker program is an excellent choice to work on, as far as the creation of classic and stunning examples of professional, personal and commercial presentations is concerned. However, if you ever land across the need to pick alternative software for making high end slideshows, you can safely choose to go with the Wondershare Filmora Video Editor slideshow creator and editor application package without having to think twice.
For Win 7 or later (64-bit)
For macOS 10.12 or later
Talking about the specific concern of editing flexibility, tools and features; working with the program you are entitled to access a trunk of graphic customization utilities to spark up your presentations that are bound to receive jaw dropping viewer appreciation. The vast, inbuilt effect library of the program houses more than 800 different and top rated, latest editing effects to uplift and improvise your presentations. Here’s a mention of some of the most distinguished ones:
● The ‘Picture-in-Picture’ effect allows you to layer several video clips in a single track.
● You can change the background and add special effects to the presentation slides with the ‘Green Screen’ feature.
● The ‘Split Screen’ feature of the editor program allows you to introduce a new and unique style of storytelling though a multi-screen access.
● Filmora offers over 70 different ‘AI Potrait’ effects that visibly have the highest accuracy of background removal.
● Using the ‘Auto Reframe’ tool to automatically resize your videos without any pro level editing skills.
● You can work towards creating high resolution screen recordings of business meetings, live events, gameplay sessions, product demo presentations, etc., with the software’s ‘Screen Recorder’ tool.
● Use the ‘Silence Detection’ feature to instantly fade out the slideshow music and make your narration more pronounced.
● You can use the ‘Color Match’ tool to introduce suitable color corrections simultaneously within several slides, thus saving much of your valuable time.
● The program allows you to eliminate the camera shake distortions from your clips with its ‘Video Stabilization’ feature.
● Ending Thoughts →
● iMovie slideshows are exemplary in class and style as far as graphic presentation design is concerned.
● You can quickly create and conveniently edit slideshow presentations with the iMovie graphic editor package in your favorite iOS devices.
● When looking for relevant iMovie alternatives to design and edit slideshow presentations, you can conveniently depend on the Wondershare Filmora video editor program.
Landing into the world of creativity, it can be a smart choice to experiment with creating a slideshow in iMovie. Stay tuned to understand the exquisite design know-hows!
In this article
01 [What’s the Advantage of Slideshow in iMovie?](#Part 1)
02 [How to Make a Video Slideshow in iMovie?](#Part 2)
03 [In What Way Could You Edit Your Video Shortly?](#Part 3)
Part 1 What’s the Advantage of Slideshow in iMovie?
Slideshow presentations land among the most elusive means of sharing valuable information across a diverse range of personal and professional content creation domains. Be it a fun-filled family event or a high end business centered client presentation; slideshows are there to address it all! Talking about affordable software solutions to adhere the purpose, you can conveniently pick the iMovie slideshow creator program.
Entering deeper into the software specifications, the iMovie application package is essentially a video and graphic editor tool, exclusively for MacOS and iOS supported devices. Working with the program, you can create stunning slideshow presentations and storytelling movies to commemorate your most cherished personal and commercial events, moments and scenarios.
Now that you have got an elementary overview of the iMovie video editor software, let us move ahead with our discussion to talk about the latter’s credibility towards creating top rated slideshow presentations in the following section prior to proceeding with addressing the concern of how to make a slideshow on iMovie:
Benefits of Creating iMovie Slideshows
● User Cohesive Working Interface
The most pronounced credibility of iOS compatible software tools and program utilities is undoubtedly, their user friendly operation characteristic, and iMovie is no exception to the lineage. The editor workspace of the slideshow creator is intelligently designed to suit the technical aptitude of the expanded diversity of tech savvy and amateur graphic editors. The interface is equally appealing to the newbies in the design realm.
To proceed with creating a slideshow in iMovie, you can either begin with scratch, working on an entirely new idea; or move ahead with picking any preset slideshow template or background theme, followed by customizing the same in line with the specific creation requirements. The software’s effect library is a vast storehouse of high end editing features and tools with the most convenient access.
● Customization Elements
The iMovie program allows you to create cinematic movie edits in Hollywood style. From curiosity generating trailers to nail biting thrills, you can add it all to engage your audience within your presentation. Talking about the customization flexibility, you can try hands at including studio logos, cast names and credit rolls to add extra value to the edits, while simultaneously appreciating the participants of your project.
If that’s not enough, you can work to create your presentations in a variety of genres and themes by choosing from tons of premade templates under a variety of genre centered categories and sub-categories. Moving further, you can also add related effects from the program’s effect library to match the mood and setting of the slideshow.
● Effects And Improvisations
The software offers a decent range of slideshow enhancement features and special effects. You can pick from over 10 different filters, 8 vivid themes and several numbers of sound and audio effects, along with including recorded voiceovers of your own. You can also go ahead to import audio tracks and music files that are saved locally on your iOS device.
● Convenient Presentation Sharing
To make your presentations accessible to a wider audience, you can proceed to share the created slideshows directly from IMovie to any of your preferred media sharing platforms, or export the same to an online storage account, like, AirDrop, iCloud Drive, etc.
Part 2 How to Make a Video Slideshow in iMovie?
Having observed the credibility of designing slideshow presentations in the iMovie video editor program, you might easily have a motivation to explore your graphic creativity by working with the software to make an iMovie slideshow of your own. Adhering to the concern, let us see through the process of making a slideshow in iMovie through a detailed, step by step guide in the following section:
User’s Guide to Create Video Slideshow in iMovie
Step 1: Download and Install the Program
To create slideshow with iMovie, start with visiting the home website of the iMovie video editor program and proceed to download the software in your desired iOS system for free. Next in the line is the installation process, which you need to complete in order to successfully launch the application in your system.
Step 2: Open a New Project
In the app’s welcome screen, navigate to and click on the ‘File’ tab in the ‘Functions Toolbar’ at the top. From the dropdown menu that follows, select the ‘New Project’ option to start working on a new slideshow. You can alternatively, press the ‘+ N’ command keys from your device keyboard to launch a new project. Once your project file is created, assign it a suitable name and select a desired aspect ratio.
Step 3: Create the First Slide
The inaugural slide of your presentation is generally consists of the slideshow the title, which you can add by clicking on the ‘Title’ icon under the ‘Preview’ box, to see a variety of text customization choices appear within the editor workspace.
To work with adding titles to a slide, choose a preferred text style; followed by navigating to the ‘Events Pane’ and dropping the same within the first dotted frame box. You can edit the text in the blue box above the first frame. The amount of text you can add depends on the size of the box. To change the length of the box, click on the same to drag it to a desired place and finally include the text in the ‘Preview’ box.
Navigate to and hit the ‘Show Fonts’ button to customize the added text in terms of color, fonts, style and size. Tap the ‘Preview Slide’ button to see the applied changes and click on ‘Done’ to confirm the same. You can repeat the above process to add titles and informative banners to all the slides within the slideshow presentation that you are about to create.
Step 3: Include Still Images
Browse through the locally saved images within your device gallery and add the desired ones at a specific point in the editor timeline using the ‘Drag and Drop’ method. A green colored indicative light will mark the spot where the images are being dropped. You are free to drop all the images at the same time and sort them at a later stage. Do not close the image folder in your device until you have imported all the stills.
The images can be alternatively added to the timeline by selecting the required ones from the iOS device’s Photo Booth or iPhoto account. All you need to do is navigate to and hit the ‘Photo’ button to drop the selected images in the ‘Photos’ box at the bottom right corner of the software workspace.
Step 4: Adjust Image Pans and Transitions
Having included the desired images within the slideshow project, it is now time to improvise them with classic and enhanced looks. You can adhere to the task by making suitable changes under the ‘Video Adjustments’, ‘Crop Tool’ and ‘Clock’ options. Drag the cursor to a desired slide to see all the 3 options pop up at the top your slide screen.
● Video Adjustment Tool
Using the ‘Video Adjustment’ option, you are granted the liberty to adjust the brightness, contrast, white point, exposure, saturation and levels of the added images. If your images have an appreciable quality by default, you can skip this step.
● Crop Tool
Consider working with the ‘Crop Tool’ to zoom or pan the system camera across a selected slide. Click on the ‘Fit’ option to set the image within a chosen frame size; however you need to be cautious lest using the tool may render an incorrectly cropped image. Select the ‘Crop’ option to adjust the image aspect ratio according to your specific size constraints.
The ‘Ken Burns’ tool, you can rely on this one to spark the slideshow images with the coolest zoom and pan effects. The tool is represented by ‘Red and Green’ boxes above the ‘Video Preview’ box in the editor timeline. You can easily move and resize the boxes using the ‘Hand’ and the ‘Cross Hair’ tools respectively. When you are satisfied with your work, hit ‘Done’ to return and confirm the changes, or click on the next presentation slide to crop and pan the same.
● Clock Tool
The ‘Clock’ icon lets you adjust the screen time of each slide, assigning a preset minimum duration of 0.25 seconds to each slide. Setting a play duration somewhere between 2-2.5 seconds would be an optimal choice. Avoid choosing shorter slide duration unless it becomes an obvious requirement, lest the audience may find it hard to process the contents.
Prefer adjusting the screen time separately for each slide, in case you have a large project with more than 50 slides. It is instead, advisable to time the entire project under one time frame, while setting a longer screen time for the title slide.
Step 5: Add an Upbeat Background Audio
Adding background music to your presentation slides is pretty simple, with you having to just position the audio files within the desired slides using the ‘Drag and Drop’ method. The slides containing music pieces will have a ‘Light Green’ highlighting box under them. To correct a wrong placement, drag the audio file across the individual slides and drop at the correct space. You can further, modify the length of the audio clips by extending and trimming them.
To import audio files from your online iTunes account, navigate to and click within the ‘Music and Sound Effects’ box at the bottom right corner of the editor timeline. You can also clip the music file to start playing the background audio from a certain point within the track. To do this, take the cursor to the end of the track and drag the red indicator line to the point where you wish the audio to end at or begin playing from.
Step 6: Share Your Presentation
Run a mock slideshow in the ‘Preview’ box to ensure that every element of the presentation is at its specified place. When all looks good, navigate to the ‘Functions Toolbar’ at the top and hit the ‘Share’ tab to select a media sharing platform of your choice. You can even choose to export your slideshow directly from the editor timeline via QuickTime.
Part 3 In What Way Could You Edit Your Video Shortly?
Creating slideshow iMovie presentations is a creative task and everything comes on the line with the finesse of editing skills to evoke an intelligent play with features, tools and effects. While you can master the art with consistent effort and practice, there are some really cool tips and tricks to quickly edit and uplift iMovie presentations.
Let us have a look at a few of the most prominent ones in the following section before you move ahead to create slideshow in iMovie:
01Cool Ways to Quickly Edit Your iMovie Videos
● Crop to Zoon in the Video
When editing your videos in the iMovie software, you can zoom in a desired portion of the video frame. All you need to do is, select a clip, tap on the ‘Crop’ button at the top right corner over the ‘Preview’ box, choose the ‘Crop to Fill’ option and drag the effect to the specific clip area you wish to crop. Apply your changes by clicking inside the checkbox at the top right corner.
● Split a Clip
You can reduce the size of a sufficiently long video clip by choosing to break the same into several parts or trim it to ward off unwanted portions. To split your footage, take your cursor to the specific splitting point of the clip within the editor timeline, make a right click, and select the ‘Split Clip’ option from the dropdown menu that follows next.
● Detach an Audio File
Detaching audio from a clip allows you to experiment with different video play options. You can let the run the in the background as you proceed to split a clip for inserting a still image. To work with the effect, navigate to and right click on a desired clip within the editor timeline and tap on ‘Detach Audio’ in the upcoming list of options. The added music clip in ’Blue’ will detach to appear as an independent clip in ‘Green’ within the software timeline.
● Fade Audio In and Out
To ensure a smooth audio transition between successive clips, try hands at fading the audio in and out by pointing the cursor at a detached green or an attached blue audio clip, followed by dragging the small round circles at the beginning or end of the footage. To introduce a gradual fade in or out effect, drag the round button to the center of the video clip.
● Include Transitions
Transitions allow a seamless presentation flow by ensuring a smooth movement between different slides appearing in continuity. Add a suitable transition element to the video footage of your slideshow by navigating to and hitting the ‘Transition’ tab in the ‘Functions Toolbar’. The default transition screen time is 1 second, but you can customize the same by double clicking on the effect post the latter’s addition within the editor timeline.
02Editing Video Slideshows in Filmora
The iMovie slideshow maker program is an excellent choice to work on, as far as the creation of classic and stunning examples of professional, personal and commercial presentations is concerned. However, if you ever land across the need to pick alternative software for making high end slideshows, you can safely choose to go with the Wondershare Filmora Video Editor slideshow creator and editor application package without having to think twice.
For Win 7 or later (64-bit)
For macOS 10.12 or later
Talking about the specific concern of editing flexibility, tools and features; working with the program you are entitled to access a trunk of graphic customization utilities to spark up your presentations that are bound to receive jaw dropping viewer appreciation. The vast, inbuilt effect library of the program houses more than 800 different and top rated, latest editing effects to uplift and improvise your presentations. Here’s a mention of some of the most distinguished ones:
● The ‘Picture-in-Picture’ effect allows you to layer several video clips in a single track.
● You can change the background and add special effects to the presentation slides with the ‘Green Screen’ feature.
● The ‘Split Screen’ feature of the editor program allows you to introduce a new and unique style of storytelling though a multi-screen access.
● Filmora offers over 70 different ‘AI Potrait’ effects that visibly have the highest accuracy of background removal.
● Using the ‘Auto Reframe’ tool to automatically resize your videos without any pro level editing skills.
● You can work towards creating high resolution screen recordings of business meetings, live events, gameplay sessions, product demo presentations, etc., with the software’s ‘Screen Recorder’ tool.
● Use the ‘Silence Detection’ feature to instantly fade out the slideshow music and make your narration more pronounced.
● You can use the ‘Color Match’ tool to introduce suitable color corrections simultaneously within several slides, thus saving much of your valuable time.
● The program allows you to eliminate the camera shake distortions from your clips with its ‘Video Stabilization’ feature.
● Ending Thoughts →
● iMovie slideshows are exemplary in class and style as far as graphic presentation design is concerned.
● You can quickly create and conveniently edit slideshow presentations with the iMovie graphic editor package in your favorite iOS devices.
● When looking for relevant iMovie alternatives to design and edit slideshow presentations, you can conveniently depend on the Wondershare Filmora video editor program.
Top 6 Text to Speech Generators for YouTube Videos [Windows, Mac, And
Best Text To Speech Converter and Video Editor
Filmora’s Text to Speech (TTS) function allows you to convert your text files to voiceover and bring more elements to enrich your video.
Free Download Free Download Free Download Learn More >

Speech has a significant impact on the success rate of the entire YouTube adventure, whether storytelling or a standard sales pitch. It helps to have a decent voice and speaking abilities. However, not everyone gets both simultaneously; many individuals employ voice artists to provide voice-overs.
Some freelancers charge $5-$100 for a 5-minute voice-over. However, not everyone can afford an expensive voice artist, especially for longer films or just starting. Here are other options that I discovered as the most acceptable free text to voice generators for YouTube videos.
Let’s take a deeper look at the most excellent free text to speech software for YouTube videos.
Getting Started
Text to speech is a speech synthesis software that speaks aloud digital and textual content. The software offers a wide range of applications and is utilized by everyone from professionals and students to toddlers and adults.
Viewers are emotionally attached to documents such as PDFs, books, novels, and e-learning courses when they hear narration with a human voice. Text-to-speech systems are ideal for multitasking by busy professionals.
It’s no surprise that there are numerous text-to-speech options available. Audiobooks are also becoming more popular for the same reasons.
We’ll go over the best text-to-speech tools available in this guide. We’ve gathered a detailed list of the most exemplary free and commercial text-to-speech applications to help you choose the best option for your needs:
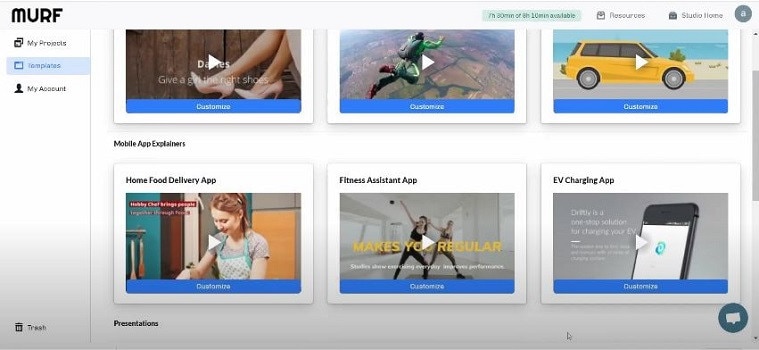
#1: Murf
It is available on Windows, Mac, Android, iPhone, and Online
Murf is a text-based voice-over maker. You can either compose your script or submit a voice clip to convert it into hyper-realistic AI voices. Murf delivers expert voice-over artists with experienced voices. You can check multiple parameters in the voices. You can use Murf to signify a brand, a product, a company, a presentation, and many more.
Features:
- Murf allows you to create voice-overs from the text. It also allows you to transform your speech into editable text, which you can subsequently edit or convert into AI voice.
- Murf Studio provides the ability to synchronize your speech with visuals.
- Murf provides over 100 authentic voices in 19 languages.
- It also gives options for inserting pauses, altering narration tempo, and emphasizing certain points.
- It also includes features such as script checking with grammar assistance, free background music, video and music cutting, and more.
- Murf offers comprehensive communication and collaboration tools, access control, a pronunciation library, and a service level agreement (SLA) for enterprises wishing to develop voice-overs in bulk.
Price
| Free | Basic | Pro | Enterprise |
|---|---|---|---|
| $0 / Month | $13 / Month | $26 / Month | $166 / Month |
| Try all 120+ voices 10 mins of voice generation 10 mins of transcription Share link for audio/video output No downloads Single User No credit card required | Unlimited Downloads 24 hours of voice generation/year Access to 60 voices (10 languages) Commercial Usage rights Chat and Email support Single User | Unlimited Downloads 96 hours of voice generation/year 48 hours of transcription/year Access 120+ voices (20 languages) Commercial Usage rights Recorded voice editing Voice changer Up to 3 users Priority Support | 5+ Users Unlimited Voice Generation Time Unlimited Transcription time Custom Voices Single-sign on (SSO) Collaboration and Access Control Dedicated Account Representative Centralized invoicing Service Agreement Deletion recovery Unlimited Storage |
Cons
- You may experience frequent technical glitches.
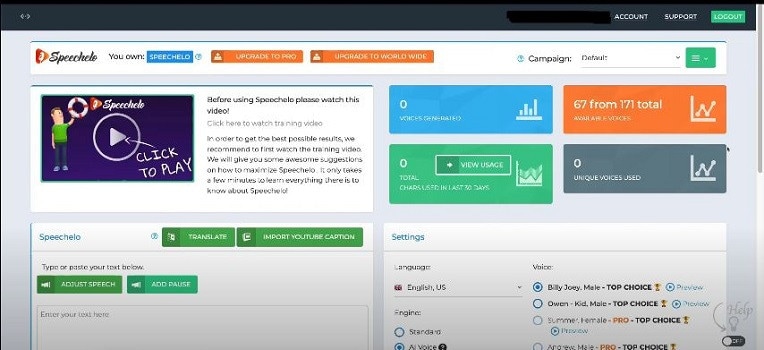
#2: Speechelo
It is available on Windows, Mac, Android, iPhone, and Online
Speechelo gives a realistic voice tone and expressions. This gets people more interested in voice-overs. You can use Speechelo to create sales videos, training films, and instructive videos, among other things. It includes attributes such as breathing and pauses, vocal tones, changing speed and pitch, and compatibility for 23 languages.
Features
- The text-to-speech engine in Speechelo can add intonation to the voice.
- It contains over 30 voices that sound natural.
- It has both male and female voices.
- It works with various video editing tools, including Camatasia, Adobe, Premier, and iMovie.
- Ordinary tone, cheerful tone, and serious tone are the three tones you may use to read your text.
Price
| Premium |
|---|
| $47 (Discount price) |
| One-time payment With 60-day money-back guarantee |
Cons
- The output of Speechelo will be 48kbps. If you’re familiar with sound production, you’ll see that this is a very low output.
- It might produce inaccurate output if you input long voice-overs.
#3: Synthesys
It is available on Windows, Mac, Android, iPhone, and Online
Synthesys helps to convert text into a natural-sounding voice. With Synthesis, you can choose from various tones, accents, male and female voices, languages, and reading speeds. Moreover, It simply takes three steps to create a natural-sounding artificial speech that you may use for a variety of commercial applications.
- To begin, select the gender, style, accent, and tone you want the created voice to have.
- You can paste or type the content you want to turn into speech into Synthesys’ AI voice-producing platform.
- Lastly, click ‘create’ to start creating your artificial speech in minutes. You may adjust the reading speed and pause length from here.
Features
- Cloud-based software.
- Expert and natural-sounding voices are available in an extensive collection.
- There are over 35 female voices and 30 male voices.
- You can create and sell unlimited voices.
- Extremely user-friendly interface.
Price
| Audio Synthesys | Human Studio Synthesys | Audio and Human Studio Synthesys |
|---|---|---|
| $29 / Month | #39 / Month | $59 / Month |
| Unlimited voice-overs downloads Access to 30 Real Human Voices Access to 66 Languages & 254 General Voices Fully Web-Based | Unlimited Videos Access to 73 Humatars (Extra Outfits included) Access to 66 Languages & 254 General Voices Upload Your Own Voice Full Video Customization Fully Web-Based | Unlimited Videos & Voice Overs Access to both Software All features included 20% OFF |
Cons
- It has character limitations when making a voice-over.
- It does not have a free trial version.
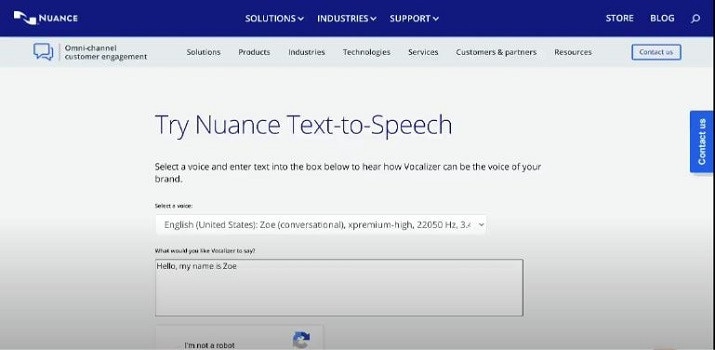
#4: Nuance Dragon
It is available in Windows only
Nuance Dragon is an artificial intelligence-powered voice recognition system. It offers both residential and commercial solutions. It spans across various data centers and delivers cloud services.
Its hosting platform is Microsoft Azure, which is HITRUST CSF-approved. All of their solutions follow industry-standard guidelines. Nuance Dragon protects data in transit and at rest with 256-bit encryption.
Features
- Nuance Dragon complies with HIPAA regulations, which are critical for public sector security and confidentiality.
- It applies to a wide range of professions.
- It offers complete protection.
Price
| Home | Professional |
|---|---|
| $200 | $500 |
| It has 99% recognition accuracy Immediate access to your dictation. One-time payment. | It has 99% recognition accuracy Share documents Sync custom words and commands Immediate access to your dictation. One-time payment. |
Cons
- It works only on Windows, and it is not available on Mac.
- It does not have a free trial version.
- It does not include Premium Consulting or Integration Services.
#5: Notevibes
It is available on Windows, Mac, Android, iPhone, and Online
Notevibes is a tremendous text-to-speech tool that comes in both a free and a commercial edition with many features. It offers customers over five hundred translation characters while also allowing them to modify the pronunciation.
As a result, users have access to all of their resources to learn a new language and significantly increase their reading skills. Furthermore, Notevibes features 177 distinct voices speaking in 18 different languages.
Users appreciate the natural-sounding voices that assist them in pronouncing words correctly. Users from many walks of life can profit from the tool because it has many functions.
Features
- Realistic voice generator
- Aloud Speaking
- Make an MP3 of your audio speech.
- 47 Individual Voices
- Characters: 200 – 1,000,000
Price
| Personal Pack | Commercial Pack | Corporate Pack |
|---|---|---|
| $9 / Month ($107 per year) | $90 / Month ($1080 per year) | $4,000 / Year |
| For personal use only: private listening, personal e-learning 1,200,000 characters pack per year 201 Premium Voices available 18 Languages (EN, ES, DE, FR, VT, RU, PT, IT, NL, TR, JP, KO, HI and etc) MP3 Download 1 Account License | For Commercial use: YouTube, broadcasts, TV, IVR voiceover and other businesses 12,000,000 characters pack per year Advanced voice editor new 201 Premium Voices available 18 Languages (EN, ES, DE, FR, VT, RU, PT, IT, NL, TR, JP, KO, HI and etc.) SSML tags support MP3, Wav Download Audio files history You 100% own intellectual property for all files | For Corporate Users All in Commercial and 50,000,000 characters pack per year Master account for management Team License (up to 10 users) Priority email support |
Cons
- It does not have a preview. You have to generate the voice-over to listen.
- You can’t combine a single audio file out of many audio files.
- The Voiceover & Editor Page is unique in that it has two sections: one for creating the voice-over and another for obtaining audio files. Switching between them will take some time. If you’re working on a large project, moving between bot sites will be a hassle.
- No project-based organization
#6: Natural Reader
It is available on Windows, Mac, Android, iPhone, and Online
Natural Reader is among the few free text-to-speech programs with several exciting features. It’s pretty easy to use, and you can get started right away by loading texts into its library.
Furthermore, the tool allows users to manage several files in various formats. Lastly, the built-in OCR will enable you to submit images or text scans and have them read aloud.
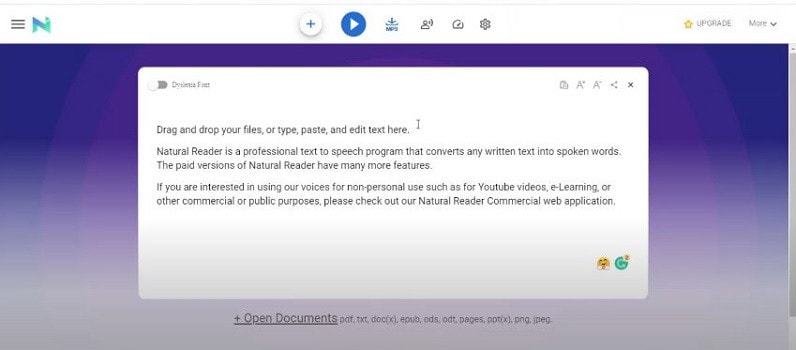
Features
- Built-in OCR
- Choice of interfaces
- Built-in browser
- Dyslexic-friendly font
Price
| Free | Personal | Professional | Ultimate |
|---|---|---|---|
| $0 (Free to use) | $99.50 (One-time payment) | $129.50 (One-time payment) | $199.50 (One-time payment) |
| Unlimited use with Free Voices Miniboard to read text in other applications Pronunciation Editor Works with PDF, Docx, TXT and ePub | 2 natural voices included All features of Free Version included Convert to MP3 | 4 natural voices included All features of Personal Version included | 6 natural voices included All features of Professional Version included 5000 images/year for OCR to read from images & scanned PDFs |
Cons
- There is no way to skip or jump around any text on the page.
- You will need internet access in the free software to access the voices.
- The paid version is very expensive in comparison to others.
- Long-term use is complex.
Pro Tip:
If you just use text-to-speech software sometimes, it’s best to utilize one of the many free options available. On the other hand, paid versions are great if you want extensive functionality and don’t mind limitations on usage.
You should check for text-to-speech software with natural voices enabled in commercial applications. A top-rated system should include real-time speech capabilities and a user-friendly UI.
Text to Speech Services’ Advantages
TTS systems can help content owners such as corporations, YouTubers, institutions, media houses, mobile app developers, e-learning solution providers, and others in comparable fields in the following ways:
- Global Reach: TTS voices that sound human, are clear, and can be customized can let you communicate with people worldwide. You can even incorporate translations in multiple languages to read the text in their own language.
- Improve User Experience: Allowing speech in pre-sales and after-sales can reduce human agent burden, provide individualized services, lower operating expenses, and speed up productivity.
- Saves Money and Time: Companies can quickly and easily implement TTS systems with little maintenance.
- Improves Productivity: E-learning experts and HR departments can create learning modules for staff training using TTS. This will allow employees to learn the information while working anywhere and at any time.
Text to speech solutions can also help online students, researchers, teachers, device users, app users, website visitors, machine users, and others in the following ways:
- People with Reading Difficulties: A considerable portion of the global population suffers from learning or reading disabilities, including language-based learning disabilities. TTS solutions in your documents might assist them in better understanding the document. It can also aid persons with vision problems and literacy issues.
- Multitasking: Listening to something allows you to execute multiple physical duties at once, such as cooking, cleaning, exercising, etc. It’s a welcome break for busy professionals who can’t find time to read the stacks of books that have accumulated on their desks for years. They can just put on their headphones and listen to them while doing other things.
- Great for Kids: Instead of being glued to their computers or phones all day, your children can listen to audio files, including their books and other study materials. It will safeguard their priceless sight. It will also increase word recognition, cognitive skills, make finding and correcting problems in their writing easier.
- Journey Mate: People can listen to information while traveling by using speech to text. You may always listen to the noises and enjoy them while riding without having to strain your eyes, regardless of how rocky the road is.
Frequently Asked Questions
What is Text to Speech Software?
TTS (text-to-speech) is an assistive technology that reads text aloud. TTS systems provide computer-generated sound, and we may vary the reading speed by increasing the speed or slowing things down.
Is Text-To-Speech Technology Handy?
According to studies, text-to-speech technology helps viewers concentrate on the content rather than the process of reading, resulting in a greater understanding of the topic and more engagement.
While some argue that audiobooks, or scripts read by paid voice actors, are superior to computer-generated voices, there is compelling proof that text to speech can be a handy tool for YouTube content creators.
Is The Voice Quality Consistent Across All Text to Speech Programs?
Voice quality ultimately depends on the service. However, some use human voices, while premium solutions employ the voices of well-known narrators like David Attenborough and Morgan Freeman.
You can even mimic the sound of youngsters speaking. Many gadgets, particularly online web page scanners and even audiobooks emphasize the text they are scanning.
What Are the Benefits of Using Text to Speech Software?
You can use this type of technology in a variety of ways. Some programs read text from a digital document or an interactive online page for users. Some programs can even convert handwritten text into speech using modern technology such as Optical Character Recognition (OCR).
Text-to-speech software is compatible with various devices and applies to all kinds of individual digital devices, including laptops, PCs, tablets, and smartphones.
What Is the Process of Converting Speech in Text to Speech Software?
The majority of text-to-speech software works in the same way. Users can either upload or input the content to convert to audio. Then they choose from the different voices to evaluate which sound is best for the voice-over.
Many TTS solutions rely on OCR technology in some form. OCR allows us to obtain text from documents and photos by recognizing written and digital text. If you click an image of a street sign, the program will read the words printed on it.
Is it possible to use Text to Speech on YouTube?
Absolutely, you can get them in YouTube videos, but to prevent advertising strikes, make sure you post videos with authentic human voices somewhere between.
What Text-To-Speech Software Does YouTube Content Creators Use?
To incorporate voice-overs on their sales pitches and informative videos, most YouTubers pay for text-to-speech software like Synthesys and Speechelo.
Is It Possible to Monetize YouTube Videos Using Text to Speech?
It varies on the text to speech engine you’re using; some TTS engines support YouTube monetization while others don’t.
Speech has a significant impact on the success rate of the entire YouTube adventure, whether storytelling or a standard sales pitch. It helps to have a decent voice and speaking abilities. However, not everyone gets both simultaneously; many individuals employ voice artists to provide voice-overs.
Some freelancers charge $5-$100 for a 5-minute voice-over. However, not everyone can afford an expensive voice artist, especially for longer films or just starting. Here are other options that I discovered as the most acceptable free text to voice generators for YouTube videos.
Let’s take a deeper look at the most excellent free text to speech software for YouTube videos.
Getting Started
Text to speech is a speech synthesis software that speaks aloud digital and textual content. The software offers a wide range of applications and is utilized by everyone from professionals and students to toddlers and adults.
Viewers are emotionally attached to documents such as PDFs, books, novels, and e-learning courses when they hear narration with a human voice. Text-to-speech systems are ideal for multitasking by busy professionals.
It’s no surprise that there are numerous text-to-speech options available. Audiobooks are also becoming more popular for the same reasons.
We’ll go over the best text-to-speech tools available in this guide. We’ve gathered a detailed list of the most exemplary free and commercial text-to-speech applications to help you choose the best option for your needs:
#1: Murf
It is available on Windows, Mac, Android, iPhone, and Online
Murf is a text-based voice-over maker. You can either compose your script or submit a voice clip to convert it into hyper-realistic AI voices. Murf delivers expert voice-over artists with experienced voices. You can check multiple parameters in the voices. You can use Murf to signify a brand, a product, a company, a presentation, and many more.
Features:
- Murf allows you to create voice-overs from the text. It also allows you to transform your speech into editable text, which you can subsequently edit or convert into AI voice.
- Murf Studio provides the ability to synchronize your speech with visuals.
- Murf provides over 100 authentic voices in 19 languages.
- It also gives options for inserting pauses, altering narration tempo, and emphasizing certain points.
- It also includes features such as script checking with grammar assistance, free background music, video and music cutting, and more.
- Murf offers comprehensive communication and collaboration tools, access control, a pronunciation library, and a service level agreement (SLA) for enterprises wishing to develop voice-overs in bulk.
Price
| Free | Basic | Pro | Enterprise |
|---|---|---|---|
| $0 / Month | $13 / Month | $26 / Month | $166 / Month |
| Try all 120+ voices 10 mins of voice generation 10 mins of transcription Share link for audio/video output No downloads Single User No credit card required | Unlimited Downloads 24 hours of voice generation/year Access to 60 voices (10 languages) Commercial Usage rights Chat and Email support Single User | Unlimited Downloads 96 hours of voice generation/year 48 hours of transcription/year Access 120+ voices (20 languages) Commercial Usage rights Recorded voice editing Voice changer Up to 3 users Priority Support | 5+ Users Unlimited Voice Generation Time Unlimited Transcription time Custom Voices Single-sign on (SSO) Collaboration and Access Control Dedicated Account Representative Centralized invoicing Service Agreement Deletion recovery Unlimited Storage |
Cons
- You may experience frequent technical glitches.
#2: Speechelo
It is available on Windows, Mac, Android, iPhone, and Online
Speechelo gives a realistic voice tone and expressions. This gets people more interested in voice-overs. You can use Speechelo to create sales videos, training films, and instructive videos, among other things. It includes attributes such as breathing and pauses, vocal tones, changing speed and pitch, and compatibility for 23 languages.
Features
- The text-to-speech engine in Speechelo can add intonation to the voice.
- It contains over 30 voices that sound natural.
- It has both male and female voices.
- It works with various video editing tools, including Camatasia, Adobe, Premier, and iMovie.
- Ordinary tone, cheerful tone, and serious tone are the three tones you may use to read your text.
Price
| Premium |
|---|
| $47 (Discount price) |
| One-time payment With 60-day money-back guarantee |
Cons
- The output of Speechelo will be 48kbps. If you’re familiar with sound production, you’ll see that this is a very low output.
- It might produce inaccurate output if you input long voice-overs.
#3: Synthesys
It is available on Windows, Mac, Android, iPhone, and Online
Synthesys helps to convert text into a natural-sounding voice. With Synthesis, you can choose from various tones, accents, male and female voices, languages, and reading speeds. Moreover, It simply takes three steps to create a natural-sounding artificial speech that you may use for a variety of commercial applications.
- To begin, select the gender, style, accent, and tone you want the created voice to have.
- You can paste or type the content you want to turn into speech into Synthesys’ AI voice-producing platform.
- Lastly, click ‘create’ to start creating your artificial speech in minutes. You may adjust the reading speed and pause length from here.
Features
- Cloud-based software.
- Expert and natural-sounding voices are available in an extensive collection.
- There are over 35 female voices and 30 male voices.
- You can create and sell unlimited voices.
- Extremely user-friendly interface.
Price
| Audio Synthesys | Human Studio Synthesys | Audio and Human Studio Synthesys |
|---|---|---|
| $29 / Month | #39 / Month | $59 / Month |
| Unlimited voice-overs downloads Access to 30 Real Human Voices Access to 66 Languages & 254 General Voices Fully Web-Based | Unlimited Videos Access to 73 Humatars (Extra Outfits included) Access to 66 Languages & 254 General Voices Upload Your Own Voice Full Video Customization Fully Web-Based | Unlimited Videos & Voice Overs Access to both Software All features included 20% OFF |
Cons
- It has character limitations when making a voice-over.
- It does not have a free trial version.
#4: Nuance Dragon
It is available in Windows only
Nuance Dragon is an artificial intelligence-powered voice recognition system. It offers both residential and commercial solutions. It spans across various data centers and delivers cloud services.
Its hosting platform is Microsoft Azure, which is HITRUST CSF-approved. All of their solutions follow industry-standard guidelines. Nuance Dragon protects data in transit and at rest with 256-bit encryption.
Features
- Nuance Dragon complies with HIPAA regulations, which are critical for public sector security and confidentiality.
- It applies to a wide range of professions.
- It offers complete protection.
Price
| Home | Professional |
|---|---|
| $200 | $500 |
| It has 99% recognition accuracy Immediate access to your dictation. One-time payment. | It has 99% recognition accuracy Share documents Sync custom words and commands Immediate access to your dictation. One-time payment. |
Cons
- It works only on Windows, and it is not available on Mac.
- It does not have a free trial version.
- It does not include Premium Consulting or Integration Services.
#5: Notevibes
It is available on Windows, Mac, Android, iPhone, and Online
Notevibes is a tremendous text-to-speech tool that comes in both a free and a commercial edition with many features. It offers customers over five hundred translation characters while also allowing them to modify the pronunciation.
As a result, users have access to all of their resources to learn a new language and significantly increase their reading skills. Furthermore, Notevibes features 177 distinct voices speaking in 18 different languages.
Users appreciate the natural-sounding voices that assist them in pronouncing words correctly. Users from many walks of life can profit from the tool because it has many functions.
Features
- Realistic voice generator
- Aloud Speaking
- Make an MP3 of your audio speech.
- 47 Individual Voices
- Characters: 200 – 1,000,000
Price
| Personal Pack | Commercial Pack | Corporate Pack |
|---|---|---|
| $9 / Month ($107 per year) | $90 / Month ($1080 per year) | $4,000 / Year |
| For personal use only: private listening, personal e-learning 1,200,000 characters pack per year 201 Premium Voices available 18 Languages (EN, ES, DE, FR, VT, RU, PT, IT, NL, TR, JP, KO, HI and etc) MP3 Download 1 Account License | For Commercial use: YouTube, broadcasts, TV, IVR voiceover and other businesses 12,000,000 characters pack per year Advanced voice editor new 201 Premium Voices available 18 Languages (EN, ES, DE, FR, VT, RU, PT, IT, NL, TR, JP, KO, HI and etc.) SSML tags support MP3, Wav Download Audio files history You 100% own intellectual property for all files | For Corporate Users All in Commercial and 50,000,000 characters pack per year Master account for management Team License (up to 10 users) Priority email support |
Cons
- It does not have a preview. You have to generate the voice-over to listen.
- You can’t combine a single audio file out of many audio files.
- The Voiceover & Editor Page is unique in that it has two sections: one for creating the voice-over and another for obtaining audio files. Switching between them will take some time. If you’re working on a large project, moving between bot sites will be a hassle.
- No project-based organization
#6: Natural Reader
It is available on Windows, Mac, Android, iPhone, and Online
Natural Reader is among the few free text-to-speech programs with several exciting features. It’s pretty easy to use, and you can get started right away by loading texts into its library.
Furthermore, the tool allows users to manage several files in various formats. Lastly, the built-in OCR will enable you to submit images or text scans and have them read aloud.
Features
- Built-in OCR
- Choice of interfaces
- Built-in browser
- Dyslexic-friendly font
Price
| Free | Personal | Professional | Ultimate |
|---|---|---|---|
| $0 (Free to use) | $99.50 (One-time payment) | $129.50 (One-time payment) | $199.50 (One-time payment) |
| Unlimited use with Free Voices Miniboard to read text in other applications Pronunciation Editor Works with PDF, Docx, TXT and ePub | 2 natural voices included All features of Free Version included Convert to MP3 | 4 natural voices included All features of Personal Version included | 6 natural voices included All features of Professional Version included 5000 images/year for OCR to read from images & scanned PDFs |
Cons
- There is no way to skip or jump around any text on the page.
- You will need internet access in the free software to access the voices.
- The paid version is very expensive in comparison to others.
- Long-term use is complex.
Pro Tip:
If you just use text-to-speech software sometimes, it’s best to utilize one of the many free options available. On the other hand, paid versions are great if you want extensive functionality and don’t mind limitations on usage.
You should check for text-to-speech software with natural voices enabled in commercial applications. A top-rated system should include real-time speech capabilities and a user-friendly UI.
Text to Speech Services’ Advantages
TTS systems can help content owners such as corporations, YouTubers, institutions, media houses, mobile app developers, e-learning solution providers, and others in comparable fields in the following ways:
- Global Reach: TTS voices that sound human, are clear, and can be customized can let you communicate with people worldwide. You can even incorporate translations in multiple languages to read the text in their own language.
- Improve User Experience: Allowing speech in pre-sales and after-sales can reduce human agent burden, provide individualized services, lower operating expenses, and speed up productivity.
- Saves Money and Time: Companies can quickly and easily implement TTS systems with little maintenance.
- Improves Productivity: E-learning experts and HR departments can create learning modules for staff training using TTS. This will allow employees to learn the information while working anywhere and at any time.
Text to speech solutions can also help online students, researchers, teachers, device users, app users, website visitors, machine users, and others in the following ways:
- People with Reading Difficulties: A considerable portion of the global population suffers from learning or reading disabilities, including language-based learning disabilities. TTS solutions in your documents might assist them in better understanding the document. It can also aid persons with vision problems and literacy issues.
- Multitasking: Listening to something allows you to execute multiple physical duties at once, such as cooking, cleaning, exercising, etc. It’s a welcome break for busy professionals who can’t find time to read the stacks of books that have accumulated on their desks for years. They can just put on their headphones and listen to them while doing other things.
- Great for Kids: Instead of being glued to their computers or phones all day, your children can listen to audio files, including their books and other study materials. It will safeguard their priceless sight. It will also increase word recognition, cognitive skills, make finding and correcting problems in their writing easier.
- Journey Mate: People can listen to information while traveling by using speech to text. You may always listen to the noises and enjoy them while riding without having to strain your eyes, regardless of how rocky the road is.
Frequently Asked Questions
What is Text to Speech Software?
TTS (text-to-speech) is an assistive technology that reads text aloud. TTS systems provide computer-generated sound, and we may vary the reading speed by increasing the speed or slowing things down.
Is Text-To-Speech Technology Handy?
According to studies, text-to-speech technology helps viewers concentrate on the content rather than the process of reading, resulting in a greater understanding of the topic and more engagement.
While some argue that audiobooks, or scripts read by paid voice actors, are superior to computer-generated voices, there is compelling proof that text to speech can be a handy tool for YouTube content creators.
Is The Voice Quality Consistent Across All Text to Speech Programs?
Voice quality ultimately depends on the service. However, some use human voices, while premium solutions employ the voices of well-known narrators like David Attenborough and Morgan Freeman.
You can even mimic the sound of youngsters speaking. Many gadgets, particularly online web page scanners and even audiobooks emphasize the text they are scanning.
What Are the Benefits of Using Text to Speech Software?
You can use this type of technology in a variety of ways. Some programs read text from a digital document or an interactive online page for users. Some programs can even convert handwritten text into speech using modern technology such as Optical Character Recognition (OCR).
Text-to-speech software is compatible with various devices and applies to all kinds of individual digital devices, including laptops, PCs, tablets, and smartphones.
What Is the Process of Converting Speech in Text to Speech Software?
The majority of text-to-speech software works in the same way. Users can either upload or input the content to convert to audio. Then they choose from the different voices to evaluate which sound is best for the voice-over.
Many TTS solutions rely on OCR technology in some form. OCR allows us to obtain text from documents and photos by recognizing written and digital text. If you click an image of a street sign, the program will read the words printed on it.
Is it possible to use Text to Speech on YouTube?
Absolutely, you can get them in YouTube videos, but to prevent advertising strikes, make sure you post videos with authentic human voices somewhere between.
What Text-To-Speech Software Does YouTube Content Creators Use?
To incorporate voice-overs on their sales pitches and informative videos, most YouTubers pay for text-to-speech software like Synthesys and Speechelo.
Is It Possible to Monetize YouTube Videos Using Text to Speech?
It varies on the text to speech engine you’re using; some TTS engines support YouTube monetization while others don’t.
Creative Ways to Add Green Screen Effects In Photoshop
Removing green screen backgrounds and replacing them with stunning videos is a common practice in video and movie making. The same process is applicable to still photos as well. You can take a photo with a green screen background and replace the screen with any photo as per your preference and requirement. You will need a high-quality photo editor to add green screen effects to your photo. There is no better photo editor in the world than Adobe Photoshop.
First, you have to opt for remove green screen Photoshop and then add anything you want in place of the green screen. The difference between Chroma key Photoshop and any other photo editor is that you can pay attention to details and remove the entire green screen halo effect around the main subject or object on the photo. Therefore, there will be no jittery green edges and green patches to disturb the overall photo quality. Here are the steps to use green screen effect in Adobe Photoshop.
1. How To Use Green Screen in Photoshop?
There are various ways available to remove greenscreen Photoshop. The beginners prefer using the Magic Wand tool but there will always be green patches around the main object on the photo. These green patches will get highlighted when you insert any image in the background. Therefore, we are using the best method to Chroma key Photoshop and that is through Color Range option. Here are the detailed steps to use color keying in Photoshop to use green screen effect.
Step 1: Launch Adobe Photoshop and open your photo with green screen background.
Step 2: Go to Select menu and click on Color Range.

Step 3: Pick the Eyedropper tool. Hold Shift key to select the green background. You can also hold Alt key to remove any selection that you might have done by mistake. When you are perfectly ok with the selection of the green screen background, you should click on OK button.

Step 3: Go to Select menu and click on Inverse. Now, the selection will be on the main subject instead of the background.

Step 4: If you want to see a preview of the selection in your photo, you should select Image radio button and from Selection Preview, select any option other than None.

Step 5: Go to Select menu again and click on Refine Edge. Use the sliders to fine-tune the selection so that the selection is smooth on the edges of the main subject of the photo. Once done, click on OK button.

Step 6: Go to Select menu and click on Inverse again.
Step 7: Press Delete key to delete the green screen background selection.
Step 8: Open the replacement image which you want to put in the place of the green screen background that you have just deleted.
Step 9: Select the entire replacement image and copy the replacement. Come back to your photo and paste the replacement image. Make sure that the layer of the replacement image must be placed below the layer of your photo.

Step 10: You can adjust the size of the images as per your requirement so that everything fits perfectly in the frame. Similarly, you should adjust the color scheme so that the superimposition does not look awkward.
2. Best Way To Add Green Screen Effect To Video
In the previous section, we have stated how to remove the green screen background in any image and replace that with a stunning background photo. In this section, we will state how to add green screen effects in a video. There are many who think that adding green screen effects in a video takes a lot of expertise, but it is not the case.
If you select the suitable video editor, it is a matter of a few steps only. We recommend Wondershare Filmora to add green screen effects to your video where you have shot the scenes with green screen backgrounds. Here are the steps to follow to remove green screen backgrounds and replace with any photo or video as per your preference.
For Win 7 or later (64-bit)
For macOS 10.12 or later
Step 1: Download and install Wondershare Filmora.
Step 2: Launch Filmora and go for Create New Project option to get started.
Step 3: Import your video with green screen background and move it to the Timeline.
Step 4: Import the replacement photo or video and put it directly on the Timeline.
On the Timeline, your recorded video should be below the replacement photo or video.

Step 5: Double-click on your video, and you will come across a panel on the upper-left side. From that panel, you have to turn on Chroma Key option. This will enable the green screen effect due to which you will see the replacement photo or video superimposed on your recorded video in the green screen background.

Step 6: Finally, adjust the parameters available to fine-tune the overall green screen effect. Lastly, click on Ok button.
Conclusion
If you are looking to add green screen effects to your photo, you can opt for Chroma key Photoshop. Adobe Photoshop is the best photo editor to remove the green screen backgrounds on your photo and replace them with any image you want. Color keying in Photoshop enables you to change any solid color background to anything you want. Similarly, you can use Wondershare Filmora to add green screen effects to your video in simple steps.
For macOS 10.12 or later
Step 1: Download and install Wondershare Filmora.
Step 2: Launch Filmora and go for Create New Project option to get started.
Step 3: Import your video with green screen background and move it to the Timeline.
Step 4: Import the replacement photo or video and put it directly on the Timeline.
On the Timeline, your recorded video should be below the replacement photo or video.
Step 5: Double-click on your video, and you will come across a panel on the upper-left side. From that panel, you have to turn on Chroma Key option. This will enable the green screen effect due to which you will see the replacement photo or video superimposed on your recorded video in the green screen background.
Step 6: Finally, adjust the parameters available to fine-tune the overall green screen effect. Lastly, click on Ok button.
Conclusion
If you are looking to add green screen effects to your photo, you can opt for Chroma key Photoshop. Adobe Photoshop is the best photo editor to remove the green screen backgrounds on your photo and replace them with any image you want. Color keying in Photoshop enables you to change any solid color background to anything you want. Similarly, you can use Wondershare Filmora to add green screen effects to your video in simple steps.
Top 10 Online And PC Cartoon Video Maker 2022 [For Beginner]
Abundant Video Effects - Wondershare Filmora
Provide abundant video effects - A creative video editor
Powerful color correction and grading
Detailed tutorials are provided by the official channel
Introduction
There are some issues common to the video production process. However, animated or cartoon videos have helped to combat such issues. You do not need to scout for locations, go through a seemingly endless casting process, or rent the pricey equipment. A cartoon is simply a type of animation or an illustration that usually appears in a semi-realistic or an unreal style. In addition, it uses simple, satirical, and humorous drawing language to tell the story.
Although there are restrictions, there are a lot of possibilities cartoon video makers still offer to their users. Therefore, this article will share the top 10 best cartoon video makers online and on PC that you can use before diving into an animated video world.
So, here is what we shall learn about cartoon makers today:
In this article
01 Best 5 Online Cartoon Makers
02 Cartoon Video Maker for Desktop (Win and Mac)
03 How Can I Create My Own Cartoon Using Wondershare Anireel
Part 1: Best 5 Online Cartoon Makers
1. Biteable
Biteable provides a seemingly endless list of template categories to cater to your online media marketing needs. Aside from offering entertaining cartoon-making templates, the platform also allows users to create motion graphics or content, and Facebook covers for their social media channels.
Price: Free, $23 per month, billed annually.
Features:
- Offering library with lots of templates to choose from
- Free to use, except you are looking for additional features
- Five simple steps to an incredible cartoon video
- It has an easily customizable template
Pros
- It is a perfect option for social media managers
- Quickly create entertaining cartoons
- Used by biggies like Amazon, Microsoft, Google, Disney, BBC, Shopify, Samsung, and salesforce.
- Over 9 million users
Cons
- There is a mandatory registration
- There are no audio editing options
- The file-sharing capabilities are limited to YouTube and Facebook
- The download option is disabled in the free version
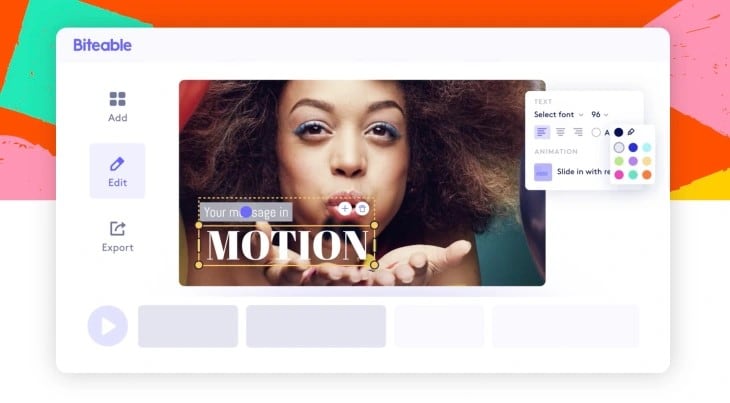
2. Animaker
With this animated maker, you get access to hundreds of animated characters, maps, and backgrounds. There are six (6) video styles available in this cartoon maker: Typography, Infographic, or 2D for different types of projects.
Price: Free version available. Subscription plans start at $12 per month/billed annually.
Features
- Different video styles, marketing, explainer, or 2D animation.
- Posts itself as the number 1 cartoon maker
- No need for a credit card to start.
- Four-step process; select template, customize it, add music, and download or share.
- 200+ voices, 25+ languages, and loads of customizable options.
- It offers auto-lip sync with advanced animation effects.
- There is a rich selection of 1000+ templates
Pros:
- Superb audio editing options
- Excellent and quick animation tools.
- Over 10 million users so far and still counting.
- Currently used by Amazon, Bosch, HP, Nokia, and Philips.
Cons:
- The monthly fee is pricey
- Account creation is mandatory for a free version
- The free version contains a watermark
3. Vyond
Vyond, the cartoon creator launched in 2007, is probably one of the oldest online cartoon video makers. Additionally, it is still one of the most popular online destinations meant for anyone who wants to create an animated video quickly.
Price: Subscription plans start from $39 per month, billed annually.
Features:
- Perfect for animated video creation
- There is automatic character lip-syncing
- Try it for free before purchasing
- Make videos for training, e-learning, marketing, human resources, etc.
- The maximum duration of the video is 120 minutes
Pros:
- It has a fully customizable template
- There are high-end object and character animated features
- Certified by GDPR, TrustArc, BSI, and CCPA
- A wholesome cartoon makerfor enterprise and individual
- Data security and privacy assurance by BSI, CCPA, and GPDR.
Cons:
- It is quite expensive
- Vyond is not the best option for inexperienced animators
- The features depend on the subscription model
4. Renderforest
This is a famous online cartoon video maker for many purposes. Among the numerous options, the platform offers to its user. They include; 3D explainer videos, logo animations, or professional presentations.
Price: Free version available. Subscription plans start at $16 per month, billed annually.
Features:
- There is an extensive library of templates with numerous options
- Has a large online storage
- Was among the top 100 software companies in 2019.
- Top ranked solution holder for 2020
- Up to 250GB of online storage space
- Use the in-built template to make a story, customize the video, and then export it to share with your friends.
- Amadeus, Bose, BBC, Vodafone, Sony Music, and many others use Renderforest.
Pros:
- Produce videos like a pro
- Comes with an ultimate animation pack.
- Trusted by millions and one of the oldest cartoon makers.
Cons:
- A limited amount of commercial music tracks
- There are modest export options
5. Moovly
With this cartoon maker, users must first log in. However, there is no need to create a new account as you can use your LinkedIn or Google account to sign in quickly.
Price: Free 30-day trial, $24.92 per month billed annually.
Features:
- Moovly is the perfect cartoon video maker for sales&marketing, human resources, internal communication, learning&development, agencies, and education.
- Apply expert features in one click with Moovly.
- Create videos and edit with browser-based or drag and drop features without installing software.
- Moovly has over 1.3 million free media, like images, sounds, music, and royalty-free stock videos at no extra charge.
- Besides, it offers 100 million extra media you can try and then purchase.
- You can add your images, music, and videos to create unique clips in style.
- Add text, remove color, add subtitles or generate them, auto-translate your text and subtitles, import PPT files, structure your content, record yourself or your computer screen, edit, mix, etc.
Pros:
- Even if users need to log in, they don’t need to create an account
- Allows users to import content from online sources like Storyblock, Shutterstock, etc.
- It is the number 1 customizable and straightforward solution to making cartoons.
- Use by Colgate-Palmolive, NHS, Teradata, Amadeus, Cisco, Continental, and Logitech.
- The interface is intuitive and user-friendly.
Cons:
- Watermarked videos during the free trial
- To export videos in HD 1080p quality, one needs to purchase one of the available plans.
Renderforest is the best cartoon maker online of the listed five in this article due to the vast library template and large online bandwidth.
Part 2: Cartoon Video Maker for Desktop (Win and Mac)
1. Wondershare Anireel
Anireel is one of the top animation software on the internet that allows users to bring their imaginations to life with a huge range of customizable elements and features.
Price: $9.99 per month billed annually and $19.99 monthly
Features:
- 40+ customizable templates
- Top animation software
- Compatible with Windows 11/10/8.1 (64 bit OS)
- Only three steps to an excellent animated video.
- Import images, videos, and sound in almost all formats.
- Create unique avatar, logo images, and more specific to your brand.
- The Deep Learning tech offers quick text-to-speech conversion.
- Animate camera movements, entry and exit effects, motion path, etc.
- Use the one-click option and change scripts to clips.
- Anireel cartoon video makercan lip-sync your characters with perfection.
- Quick and easy drag and drop editing.
Pros:
- It is convenient and simple to use
- Anireel has an intuitive interface
- The cartoon makeroffers a practical and seamless animated video editing
- It comes at an affordable and competitive price
Cons:
- It has a limited amount of assets
- Not suitable for too professional people to use.
2. Autodesk Maya
Autodesk Maya is one of the best animation tools used to create animation pictures, video games, and add 3D effects in motion pictures. Plus, this cartoon maker is the best if you require a high-quality visual impact.
Price: Free trial, $225 billed monthly.
Features:
- It offers AutoDesk financing for new buyers.
- Maya is the go-to shop for architects, engineers, designers, media, and entertainment.
- Shape 3D objects and add realistic effects with Maya cartoon maker’s NURBS modeling.
- The Integrated Arnold rendering technology lets you view scene changes in real-time.
- Maya has been part of the top movie makers, including the MCU.
- This cartoon video maker offers geometry-based polygon modeling and helps create accurate simulations for visual programming.
- Maya can load and change vast data sets at a faster pace.
Pros:
- It makes complex hand-made animation tasks extremely easy
- Efficient color management
- Allows the creation of realistic effects like cloth simulations and explosions
- 30-day free trial and 30-day money-back guarantee
- Meet deadlines, add fine details to develop even the most complex shots or characters.
- Excellent tool for professionals
Cons:
- The pro is quite expensive
3. Adobe Animate
This is one of the most powerful animation software products on the internet that has been available for decades. It can animate images used for games, film, or online and produce HTML 5, WebGL, or Flash content.
Price: This cartoon creator offers three pricing plans starting at US$24.14/month
Features:
- Excellent for complex animation
- The capability of freehand drawing
- Animate, illustrate, and make 3D typography.
- Import and add vector drawings for further editing.
- Export your work as HTML5 Canvas, WebGL, Flash/Adobe AIR, GIF, or QuickTime movie.
- With the Bone tool, make your cartoon characters fluid and natural.
- Synchronize sounds and music for your project.
- Choose parts of the clip to be animated.
Pros:
- It has Puppeting features
- It is an excellent choice for complex animations
- It includes freehand drawing capability
Cons:
- It is not suitable for beginners
- Other Adobe software may be required while working on a project
4. Adobe Character Animator
Adobe Character Animator is another type of Adobe’s animation software stack that allows users to use motion to capture and create live animations of their 2D characters.
Price: Adobe Character Animator has two pricing plans starting at US$34,49/month for the first year
Features:
- This product requires other Adobe products to function
- Lots of options to export and import.
- Make your real-life cartoon using the Motion Capture feature in five steps.
- The Avatar will walk, talk, and copy your expressions in real-time.
- Integrate and add assets from other Adobe Creative Cloud apps.
- Auto lip-syncing and real-time facial movement capture.
- Works on iOS and Android.
Pros:
- Easy to replicate real-life movements and expressions with facial tracking.
- There are various import and export options.
Cons:
- It is not a standalone product.
- Users need to have a webcam and microphone to use the motion capture feature.
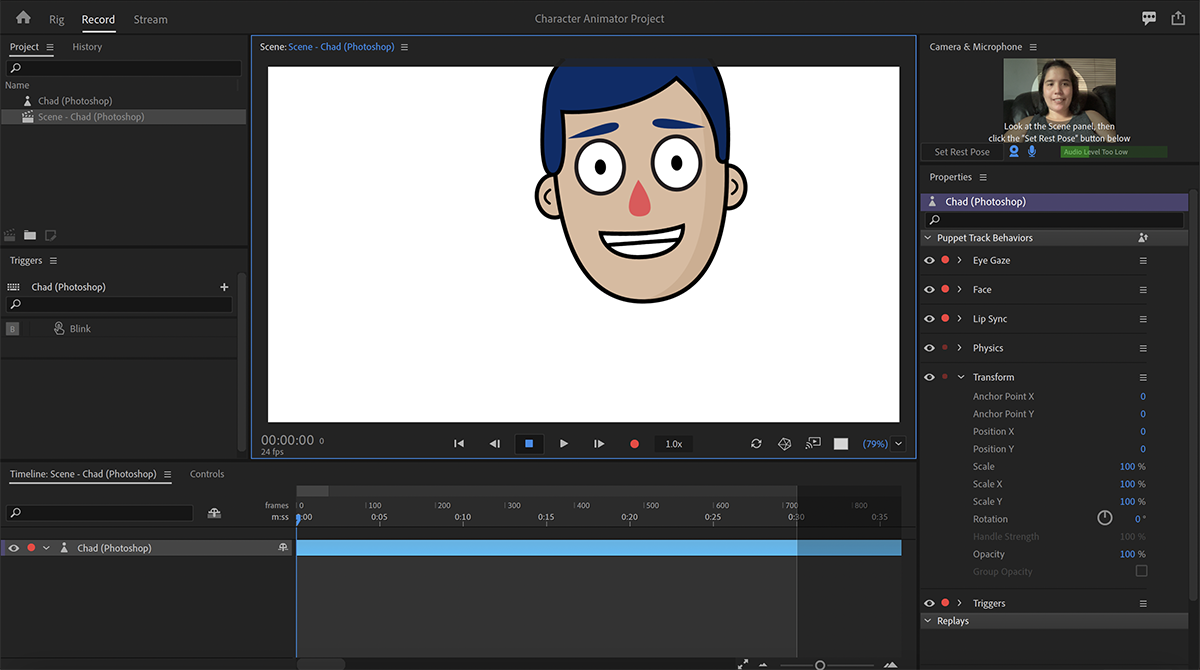
5. Cinema 4D
This cartoon maker has a 3D application interface that offers a keyframe animation, life-like characters, simulation building, object tracking, flexible rig building, cartoon styling, and animation basics.
Price: 4 pricing plans, starting at $99.91/month and $1199.00 billed annually.
Features:
- Keyframing animation effect
- It has a 3d interface
- The ZRemesher for retopology and new tools for modeling add to the new features.
- The Cloth Simulation features help make your cartoon more real.
- It supports CPU rendering with Redshift, which helps you preview, import, and export in high quality.
Pros:
- It is pretty easy to use.
- Lots of exciting design templates are available
- Many editing features are available
Cons
- It is pretty expensive compared to other software
- Not good for beginners
Wondershare Anireel is the best cartoon maker of the five listed in this article. It has lots of advanced features and templates to choose from.
Part 3: How Can I Create My Own Cartoon Using Wondershare Anireel
As stated, Wondershare Anireel has become our top cartoon creator pick due to its affordable pricing, secure server, and ease of use.
So, let us view the simple steps to create your cartoon using the Anireel software.
Step 1: Download, install and Create Character
Run Anireel on your device, visit Characters Tab and then click on Create a Character option, or you may click on the Create Brand Characters tab on the home screen.
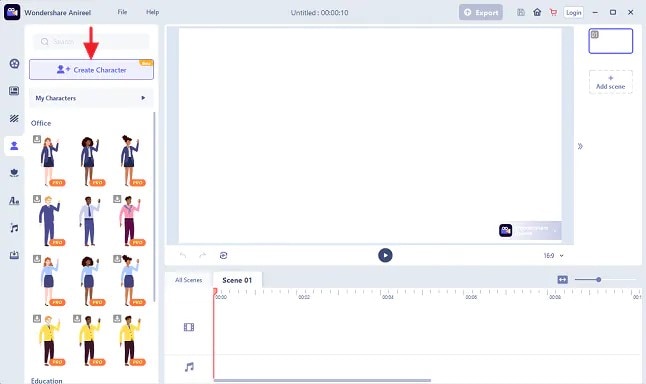
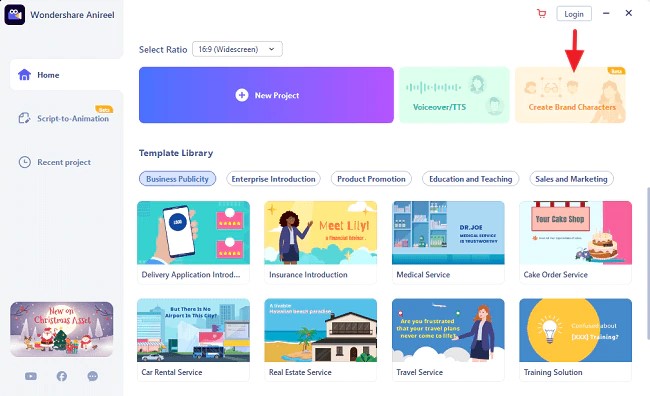
Step 2: Start Creating your Cartoon Character
Choose your gender and body shape, and apply some preset suits.
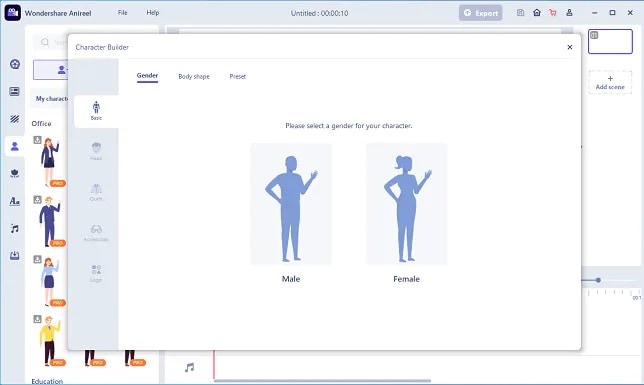
Now, you can start building facial features using the Head tab to customize the shape of the face, eyes, hairstyle, nose, mouth, ears, and eyebrows.
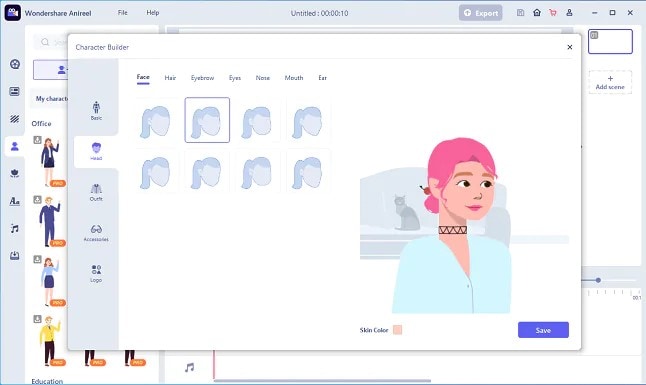
You can also choose to change the skin tone to match yours.
Step 3: Add an Outfit and Accessories
Choose the Outfit tab in Character Builder to select the base layer, outfit, bottom wear, and footwear. Pick what you want to use on your cartoon and keep adding.
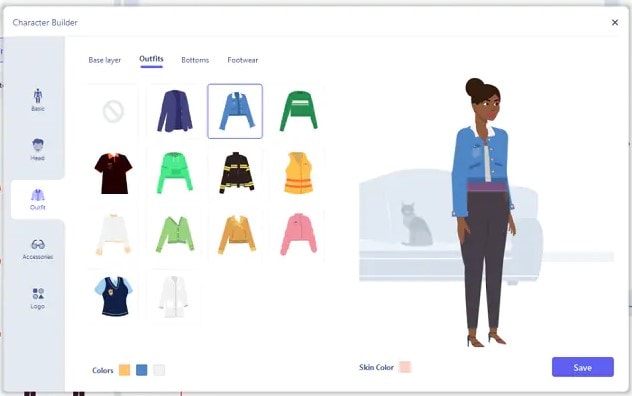
Next, reach the Accessories tab to add glasses, necklaces, and more to your cartoon character.
Step 4: Name your Cartoon and Apply
Click on Save and add a name to your cartoon when all done. Finally, click Apply Now to add your cartoon character to your Anireel cartoon maker canvas or My Characters tab.
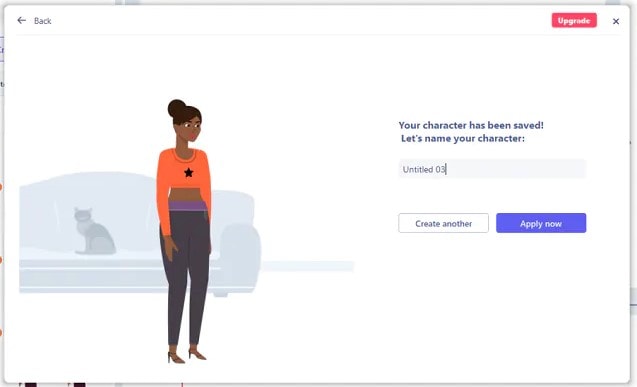
Part 4: People Also Want to Know
Below are some answers to a few queries about cartoon creators. Let us look at them one by one.
1. What is the best free cartoon maker?
Wondershare Anireel is the best cartoon maker for Android as it is free to use with lots of advanced features and templates to choose from.
2. What is the best app to make a cartoon?
Wondershare Anireel’s Microsoft app is also one of the best cartoon applications that are very flexible and easy to use on the go.
Conclusion
In this article, we explained the best cartoon creators in the industry. Also, we gave the best cartoon video maker from the list. Thus, as you saw, in this report, we have summarized a few essential points regarding cartoon video makers. You learned:
- The cartoon video maker for free that you should know of.
- The ten best cartoon video makers.
- Why are Wondershare Anireel and Renderforest excellent online cartoon video makers?
- How does Anireel, cartoon creator, work?
- Finally, a few FAQs for users to better understand the cartoon maker
Introduction
There are some issues common to the video production process. However, animated or cartoon videos have helped to combat such issues. You do not need to scout for locations, go through a seemingly endless casting process, or rent the pricey equipment. A cartoon is simply a type of animation or an illustration that usually appears in a semi-realistic or an unreal style. In addition, it uses simple, satirical, and humorous drawing language to tell the story.
Although there are restrictions, there are a lot of possibilities cartoon video makers still offer to their users. Therefore, this article will share the top 10 best cartoon video makers online and on PC that you can use before diving into an animated video world.
So, here is what we shall learn about cartoon makers today:
In this article
01 Best 5 Online Cartoon Makers
02 Cartoon Video Maker for Desktop (Win and Mac)
03 How Can I Create My Own Cartoon Using Wondershare Anireel
Part 1: Best 5 Online Cartoon Makers
1. Biteable
Biteable provides a seemingly endless list of template categories to cater to your online media marketing needs. Aside from offering entertaining cartoon-making templates, the platform also allows users to create motion graphics or content, and Facebook covers for their social media channels.
Price: Free, $23 per month, billed annually.
Features:
- Offering library with lots of templates to choose from
- Free to use, except you are looking for additional features
- Five simple steps to an incredible cartoon video
- It has an easily customizable template
Pros
- It is a perfect option for social media managers
- Quickly create entertaining cartoons
- Used by biggies like Amazon, Microsoft, Google, Disney, BBC, Shopify, Samsung, and salesforce.
- Over 9 million users
Cons
- There is a mandatory registration
- There are no audio editing options
- The file-sharing capabilities are limited to YouTube and Facebook
- The download option is disabled in the free version
2. Animaker
With this animated maker, you get access to hundreds of animated characters, maps, and backgrounds. There are six (6) video styles available in this cartoon maker: Typography, Infographic, or 2D for different types of projects.
Price: Free version available. Subscription plans start at $12 per month/billed annually.
Features
- Different video styles, marketing, explainer, or 2D animation.
- Posts itself as the number 1 cartoon maker
- No need for a credit card to start.
- Four-step process; select template, customize it, add music, and download or share.
- 200+ voices, 25+ languages, and loads of customizable options.
- It offers auto-lip sync with advanced animation effects.
- There is a rich selection of 1000+ templates
Pros:
- Superb audio editing options
- Excellent and quick animation tools.
- Over 10 million users so far and still counting.
- Currently used by Amazon, Bosch, HP, Nokia, and Philips.
Cons:
- The monthly fee is pricey
- Account creation is mandatory for a free version
- The free version contains a watermark
3. Vyond
Vyond, the cartoon creator launched in 2007, is probably one of the oldest online cartoon video makers. Additionally, it is still one of the most popular online destinations meant for anyone who wants to create an animated video quickly.
Price: Subscription plans start from $39 per month, billed annually.
Features:
- Perfect for animated video creation
- There is automatic character lip-syncing
- Try it for free before purchasing
- Make videos for training, e-learning, marketing, human resources, etc.
- The maximum duration of the video is 120 minutes
Pros:
- It has a fully customizable template
- There are high-end object and character animated features
- Certified by GDPR, TrustArc, BSI, and CCPA
- A wholesome cartoon makerfor enterprise and individual
- Data security and privacy assurance by BSI, CCPA, and GPDR.
Cons:
- It is quite expensive
- Vyond is not the best option for inexperienced animators
- The features depend on the subscription model
4. Renderforest
This is a famous online cartoon video maker for many purposes. Among the numerous options, the platform offers to its user. They include; 3D explainer videos, logo animations, or professional presentations.
Price: Free version available. Subscription plans start at $16 per month, billed annually.
Features:
- There is an extensive library of templates with numerous options
- Has a large online storage
- Was among the top 100 software companies in 2019.
- Top ranked solution holder for 2020
- Up to 250GB of online storage space
- Use the in-built template to make a story, customize the video, and then export it to share with your friends.
- Amadeus, Bose, BBC, Vodafone, Sony Music, and many others use Renderforest.
Pros:
- Produce videos like a pro
- Comes with an ultimate animation pack.
- Trusted by millions and one of the oldest cartoon makers.
Cons:
- A limited amount of commercial music tracks
- There are modest export options
5. Moovly
With this cartoon maker, users must first log in. However, there is no need to create a new account as you can use your LinkedIn or Google account to sign in quickly.
Price: Free 30-day trial, $24.92 per month billed annually.
Features:
- Moovly is the perfect cartoon video maker for sales&marketing, human resources, internal communication, learning&development, agencies, and education.
- Apply expert features in one click with Moovly.
- Create videos and edit with browser-based or drag and drop features without installing software.
- Moovly has over 1.3 million free media, like images, sounds, music, and royalty-free stock videos at no extra charge.
- Besides, it offers 100 million extra media you can try and then purchase.
- You can add your images, music, and videos to create unique clips in style.
- Add text, remove color, add subtitles or generate them, auto-translate your text and subtitles, import PPT files, structure your content, record yourself or your computer screen, edit, mix, etc.
Pros:
- Even if users need to log in, they don’t need to create an account
- Allows users to import content from online sources like Storyblock, Shutterstock, etc.
- It is the number 1 customizable and straightforward solution to making cartoons.
- Use by Colgate-Palmolive, NHS, Teradata, Amadeus, Cisco, Continental, and Logitech.
- The interface is intuitive and user-friendly.
Cons:
- Watermarked videos during the free trial
- To export videos in HD 1080p quality, one needs to purchase one of the available plans.
Renderforest is the best cartoon maker online of the listed five in this article due to the vast library template and large online bandwidth.
Part 2: Cartoon Video Maker for Desktop (Win and Mac)
1. Wondershare Anireel
Anireel is one of the top animation software on the internet that allows users to bring their imaginations to life with a huge range of customizable elements and features.
Price: $9.99 per month billed annually and $19.99 monthly
Features:
- 40+ customizable templates
- Top animation software
- Compatible with Windows 11/10/8.1 (64 bit OS)
- Only three steps to an excellent animated video.
- Import images, videos, and sound in almost all formats.
- Create unique avatar, logo images, and more specific to your brand.
- The Deep Learning tech offers quick text-to-speech conversion.
- Animate camera movements, entry and exit effects, motion path, etc.
- Use the one-click option and change scripts to clips.
- Anireel cartoon video makercan lip-sync your characters with perfection.
- Quick and easy drag and drop editing.
Pros:
- It is convenient and simple to use
- Anireel has an intuitive interface
- The cartoon makeroffers a practical and seamless animated video editing
- It comes at an affordable and competitive price
Cons:
- It has a limited amount of assets
- Not suitable for too professional people to use.
2. Autodesk Maya
Autodesk Maya is one of the best animation tools used to create animation pictures, video games, and add 3D effects in motion pictures. Plus, this cartoon maker is the best if you require a high-quality visual impact.
Price: Free trial, $225 billed monthly.
Features:
- It offers AutoDesk financing for new buyers.
- Maya is the go-to shop for architects, engineers, designers, media, and entertainment.
- Shape 3D objects and add realistic effects with Maya cartoon maker’s NURBS modeling.
- The Integrated Arnold rendering technology lets you view scene changes in real-time.
- Maya has been part of the top movie makers, including the MCU.
- This cartoon video maker offers geometry-based polygon modeling and helps create accurate simulations for visual programming.
- Maya can load and change vast data sets at a faster pace.
Pros:
- It makes complex hand-made animation tasks extremely easy
- Efficient color management
- Allows the creation of realistic effects like cloth simulations and explosions
- 30-day free trial and 30-day money-back guarantee
- Meet deadlines, add fine details to develop even the most complex shots or characters.
- Excellent tool for professionals
Cons:
- The pro is quite expensive
3. Adobe Animate
This is one of the most powerful animation software products on the internet that has been available for decades. It can animate images used for games, film, or online and produce HTML 5, WebGL, or Flash content.
Price: This cartoon creator offers three pricing plans starting at US$24.14/month
Features:
- Excellent for complex animation
- The capability of freehand drawing
- Animate, illustrate, and make 3D typography.
- Import and add vector drawings for further editing.
- Export your work as HTML5 Canvas, WebGL, Flash/Adobe AIR, GIF, or QuickTime movie.
- With the Bone tool, make your cartoon characters fluid and natural.
- Synchronize sounds and music for your project.
- Choose parts of the clip to be animated.
Pros:
- It has Puppeting features
- It is an excellent choice for complex animations
- It includes freehand drawing capability
Cons:
- It is not suitable for beginners
- Other Adobe software may be required while working on a project
4. Adobe Character Animator
Adobe Character Animator is another type of Adobe’s animation software stack that allows users to use motion to capture and create live animations of their 2D characters.
Price: Adobe Character Animator has two pricing plans starting at US$34,49/month for the first year
Features:
- This product requires other Adobe products to function
- Lots of options to export and import.
- Make your real-life cartoon using the Motion Capture feature in five steps.
- The Avatar will walk, talk, and copy your expressions in real-time.
- Integrate and add assets from other Adobe Creative Cloud apps.
- Auto lip-syncing and real-time facial movement capture.
- Works on iOS and Android.
Pros:
- Easy to replicate real-life movements and expressions with facial tracking.
- There are various import and export options.
Cons:
- It is not a standalone product.
- Users need to have a webcam and microphone to use the motion capture feature.
5. Cinema 4D
This cartoon maker has a 3D application interface that offers a keyframe animation, life-like characters, simulation building, object tracking, flexible rig building, cartoon styling, and animation basics.
Price: 4 pricing plans, starting at $99.91/month and $1199.00 billed annually.
Features:
- Keyframing animation effect
- It has a 3d interface
- The ZRemesher for retopology and new tools for modeling add to the new features.
- The Cloth Simulation features help make your cartoon more real.
- It supports CPU rendering with Redshift, which helps you preview, import, and export in high quality.
Pros:
- It is pretty easy to use.
- Lots of exciting design templates are available
- Many editing features are available
Cons
- It is pretty expensive compared to other software
- Not good for beginners
Wondershare Anireel is the best cartoon maker of the five listed in this article. It has lots of advanced features and templates to choose from.
Part 3: How Can I Create My Own Cartoon Using Wondershare Anireel
As stated, Wondershare Anireel has become our top cartoon creator pick due to its affordable pricing, secure server, and ease of use.
So, let us view the simple steps to create your cartoon using the Anireel software.
Step 1: Download, install and Create Character
Run Anireel on your device, visit Characters Tab and then click on Create a Character option, or you may click on the Create Brand Characters tab on the home screen.
Step 2: Start Creating your Cartoon Character
Choose your gender and body shape, and apply some preset suits.
Now, you can start building facial features using the Head tab to customize the shape of the face, eyes, hairstyle, nose, mouth, ears, and eyebrows.
You can also choose to change the skin tone to match yours.
Step 3: Add an Outfit and Accessories
Choose the Outfit tab in Character Builder to select the base layer, outfit, bottom wear, and footwear. Pick what you want to use on your cartoon and keep adding.
Next, reach the Accessories tab to add glasses, necklaces, and more to your cartoon character.
Step 4: Name your Cartoon and Apply
Click on Save and add a name to your cartoon when all done. Finally, click Apply Now to add your cartoon character to your Anireel cartoon maker canvas or My Characters tab.
Part 4: People Also Want to Know
Below are some answers to a few queries about cartoon creators. Let us look at them one by one.
1. What is the best free cartoon maker?
Wondershare Anireel is the best cartoon maker for Android as it is free to use with lots of advanced features and templates to choose from.
2. What is the best app to make a cartoon?
Wondershare Anireel’s Microsoft app is also one of the best cartoon applications that are very flexible and easy to use on the go.
Conclusion
In this article, we explained the best cartoon creators in the industry. Also, we gave the best cartoon video maker from the list. Thus, as you saw, in this report, we have summarized a few essential points regarding cartoon video makers. You learned:
- The cartoon video maker for free that you should know of.
- The ten best cartoon video makers.
- Why are Wondershare Anireel and Renderforest excellent online cartoon video makers?
- How does Anireel, cartoon creator, work?
- Finally, a few FAQs for users to better understand the cartoon maker
Also read:
- Updated How to Zoom Video in VLC Media Player
- New Looking for a Way to Learn How to Merge Videos in HandBrake? Theres a Better Solution Waiting for You Inside
- 2024 Approved How to Make Double Exposure Effect in Filmora
- 2024 Approved Want to Capture Captivating, Detailed Videos? If Yes, Then You Need to Learn the Recording of Super Slow Motion Videos. In This Article, I Will Show You How to Record a Super Slow-Motion Video on Your Android and iPhone
- In 2024, What Slideshow Templates Can Teach You About Aesthetic
- New There Are Several Video Players that You Can Use to Watch Videos on Your PC. To Have a Better Experience Viewing Videos and Enhancing Them Across a Similar Platform, You Can Try Out VLC Media Player for PC
- In 2024, Do You Wish to Create High-Quality Videos and Experience Effective Videos with Editing? No Problem at All because the Keyboard Shortcuts Listed Here Will Assist You
- 2024 Approved How to Change the Speed of Video in DaVinci Resolve?
- In 2024, What Is the Best Frame Rate for 4K Videos?
- New 2024 Approved Easy Way to Add Effects to Art Video
- New Are You Stuck with How to Use Discord GIF Ideally? Check that Out in This Article, as We Will Guide You on All You Need to Know About GIFs for Discord
- Updated Best 10 3D Slideshow Software Review for 2024
- Updated Learning How to Create LUTs with LUTs Generator
- New Top 5 Free Online Video Filter Editors Improve Your Videos with Filters
- Updated 2024 Approved 7 Best MP4 Editors for Mac Edit MP4 in Mac
- In 2024, How to Delete White Background in Photoshop. How to Create a Transparent Background in Photoshop? Steps to Get Rid of White Background in Photoshop
- Updated In 2024, End Screen Makers
- Updated Extracting Audio From Videos Is a Key to Better Storytelling. Learn How Filmoras Audio Removal Feature Can Enhance Your Video Stories
- New Easy Steps to Add Miniature Effect to Videos
- With the HDR Feature, You Can Make Your Images Look More Realistic and Add More Depth to Them. But if You Are Clueless as to How This Can Be Done Using Your Android Devices and the Best Situations for the Same, Then This Article Will Just Be an Apt Read
- Updated Create a Movie with Windows Movie Maker
- Updated In 2024, How to Rotate a Video in Windows 10
- Do You Want to Apply LUTs Using Open Broadcaster Software? You Can Download Free LUTs for OBS and Apply Them to Your Files. There Are Many LUTs Available for 2024
- New 2024 Approved Top 7 MP4 Video Editors on Mac Edit MP4 Videos Easily
- New 3 Ways to Create Motion Text Effects for Your Video
- 2024 Approved Top 20 Best Text To Speech Software Windows, Mac, Android, iPhone & Online
- TikTok Face Zoom | Create Your Face Zoom TikTok Now for 2024
- Updated In This Article We Will Be Covering the Most Important Topics You Have to Remember when Becoming a Successful YouTube-Star
- New 5 Best Video Denoisers
- New Are You in Search for a Step-by-Step Guide to How to Add Effects in TikTok? Here It Is. To Add some Flavor to Your TikTok Videos. Use These How to Add Effect to TikTok Recommendations
- New In 2024, Create Slide Masking Effect Intro
- In 2024, Best Cinematic LUTs For Premiere Pro Recommendation
- 2024 Approved Top 10 3D Slideshow Software Review
- New How to Change Quicktime Player Speed on Mac?
- Updated Quick Answer What Is a Transparent Logo and Why Do You Need It
- New Do You Find Choosing a Good LUT to Color-Correct Your Media Files Difficult? Discover some of the Best Professional LUTs From 3D LUT Creator to Download
- Updated Which 10 Best Video Editing Online Makers Is Worth Your Attention for 2024
- Updated Guide To Cropping and Combining Content in Wondershare Filmora Latest for 2024
- 5 Tools to Create a Time-Lapse Video Online
- Updated Simple Tricks Make 3D GIF Production of Inspiration Pop up Constantly
- New In 2024, Adobe Premiere Pro Download and Use Guide In Depth
- 2024 Approved Applications and Software Take up Your Devices Storage to Create Slow-Mo. Explore This Piece to Learn About some Slow-Motion Video Online Makers
- In 2024, Do You Want to Make Your Video Look Like Its From the 90S? Then, Make Sure to Add Vintage Overlays and VHS Sound Effects to Give It the Old Feel
- New 2024 Approved Best 9 Amv Makers for Computer
- 2024 Approved Camtasia Video Editor Review
- Updated How Long Does It Take To Edit A Video
- In 2024, PassFab iPhone 14 Pro Backup Unlocker Top 4 Alternatives | Dr.fone
- How To Simulate GPS Movement With Location Spoofer On Honor 90 Lite? | Dr.fone
- In 2024, Top 5 Car Locator Apps for Realme 11 Pro+ | Dr.fone
- 3uTools Virtual Location Not Working On Apple iPhone 14? Fix Now | Dr.fone
- Top 10 Password Cracking Tools For Motorola Edge 2023
- In 2024, 8 Best Apps for Screen Mirroring Itel P55+ PC | Dr.fone
- In 2024, Unlock Your ZTE Nubia Flip 5Gs Potential The Top 20 Lock Screen Apps You Need to Try
- In 2024, What Does Jailbreaking Apple iPhone 13 i Do? Get Answers here | Dr.fone
- Complete Tutorial to Use VPNa to Fake GPS Location On Infinix Hot 40 Pro | Dr.fone
- How to Unlock iPhone 6 Plus Passcode without iTunes without Knowing Passcode? | Dr.fone
- Fix Unfortunately Settings Has Stopped on Motorola Moto G34 5G Quickly | Dr.fone
- How to Upgrade iPhone 11 Pro Max without Data Loss? | Dr.fone
- How To Get Out of Recovery on Apple iPhone 6s Plus? | Dr.fone
- In 2024, 3 Ways to Track Sony Xperia 10 V without Them Knowing | Dr.fone
- How to Repair a Damaged video file of Nokia 105 Classic using Video Repair Utility on Windows?
- How to Resolve Lava Blaze 2 5G Screen Not Working | Dr.fone
- In 2024, 4 Ways to Transfer Music from Honor 100 Pro to iPhone | Dr.fone
- Proven Ways in How To Hide Location on Life360 For Poco C50 | Dr.fone
- In 2024, How to Bypass FRP on Samsung Galaxy S21 FE 5G (2023)?
- In 2024, Forgot iPhone Passcode Again? Unlock Apple iPhone 6s Without Passcode Now | Dr.fone
- The way to get back lost music from Vivo S17e
- Title: Updated How to Make a Video Slideshow in iMovie for 2024
- Author: Chloe
- Created at : 2024-04-24 07:08:36
- Updated at : 2024-04-25 07:08:36
- Link: https://ai-editing-video.techidaily.com/updated-how-to-make-a-video-slideshow-in-imovie-for-2024/
- License: This work is licensed under CC BY-NC-SA 4.0.
