
:max_bytes(150000):strip_icc():format(webp)/dts-play-fi-lifestyle-aaa-5a4c211daad52b00366a3575.jpg)
Updated IMovie Review – Is It The Best Video Editor for Mac Users, In 2024
IMovie Review – Is It The Best Video Editor for Mac Users
If you are a Mac user and you are getting started in video editing, it is better if you start with a free video editing software. There is no need to download any external free video editor when you are a Mac user. This is because Mac comes with a pre-installed free video editor called iMovie editor. iMovie is a video editing app from Apple where you will get all the standard and some advanced features.
iMovie is extremely popular among Mac users for video editing because it is completely free and easy to use. In fact, iMovie is also available for iPhone and iPad users. You can start your video editing on your iPhone and transfer the same work to Mac to continue editing on your Mac. But the most important question is if iMovie editor is the best video editor for Mac users. Read our iMovie review and find out a better alternative.
Part 1. Key Features of iMovie
Even iMovie is completely free to use, it competes with several premium video editors in terms of features. There are only a handful of free video editors available that lets you edit 4K videos, and iMovie is one of them. Similarly, there are only a few premium video editors available that support editing the same video project on different devices like iMovie. Here are all the key features of iMovie that you should know.
Templates and Themes – iMovie comes with different templates and themes for creating different types of videos including cinematic videos. There are classy and trending themes available to create trailers and short films. These themes and templates have limited customization options so that you can adjust as per your requirements.
Basic Editing – iMovie lets you combine video clips, split a large video file, trim video parts, crop and rotate video. Besides, you get to zoom videos as well as resize them as you need. You can add texts and titles as well as apply different transitions wherever you want to.
Advanced Editing – You can change speed and turn your video clips into slow-motion videos. You can correct the color as well as stabilize them. Besides, you can apply green screen effect and split screen effect. Moreover, you can reverse video as well as put overlays on videos. iMovie is also capable of recording video and audio if you want to record your screen or webcam video.
Audio Editing – iMovie lets you edit audio as well which is an essential requirement in video editing. You can increase and decrease volume, change speed and add beat markers to a video if required. Coming to audio effects, you can apply fade-in and fade-out effects. You can mute the audio in your recorded video and add a background music instead. Moreover, you can add voiceover and choose royalty-free audio clips.
Transitions and Effects – Even though there are limited visual effects, there are unique and eye-catchy. iMovie keeps on adding new and trending effects with every update so that the users have enough options to make their videos stand out. iMovie also provides different backgrounds that you can use on your video to enhance its quality. Apart from visual effects, there are several standard audio effects available.
User Interface – iMovie comes with a simple and intuitive user interface that lets everyone edit videos instantly without prior experience. This is exactly why some users never go for premium video editors. The user interface is clean, and all options are readily available. You can upload media files on Media Library, and they are automatically categorized from where you can access them instantly.
Part 2. How to Edit Videos with iMovie?
iMovie comes pre-installed on Mac, and hence, there is no need to download and install the application. Coming to how to use iMovie, there are three types of projects you can choose on iMovie. They are Media, Projects, and Theater. Media is where your footages reside, Projects represent the main workspace, and Theater is where your finished projects reside. Here are the steps regarding iMovie edit video.
Step 1: Open iMovie and click on Projects. You will see two options Movie and Trailer. Click on Movie to edit your videos.

Step 2: Click on My Movie under Project Media and go to My Media. Import your video clips and audio files under My Media.

Step 3: Drag and drop the video clips and audio clips on the timeline in proper order. You can go for iMovie edit audio and video such as trimming as required.
Step 4: Go to Transitions located at the top bar beside My Media and place the desired transitions in between the video clips.

Step 5: Similarly, go to Titles located at the top bar beside Transitions and place them on the timeline wherever appropriate.
Step 6: Finally, check your edited video on the canvas and then go to the top-right corner and click on Export. You will have to option to save it in Theater and share on social media as well as through email and iTunes.

Part 3. Alternative to Edit Videos - Filmora
In spite of iMovie being a good video editor, Mac users search for a better alternative. This is because there are limited transitions and effects available. You can have two video tracks only on the timeline and there is lack of customization. Besides, the advanced features of video editing such as motion tracking are not available. Moreover, there are limited file formats supported for importing and exporting.
Wondershare Filmora is the best alternative to iMovie for Mac users. Filmora is a premium video editor where all the shortcomings of iMovie are taken care of. Filmora supports almost all file formats for media files. There is a wide range of transitions, effects, elements as well as animations available. Besides, there are different styles of texts and titles available along with stock media library. Here are the steps to edit videos with iMovie.
For Win 7 or later (64-bit)
For macOS 10.12 or later
Step 1: Download and install Filmora on your Mac. Launch Filmora and click on New Project.
Step 2: Drag and drop your video clips and audio files Project Media folder. Drag and place the video clips on the timeline and arrange per perfectly. Place audio files on the timeline on a different track.

Step 3: If you want to apply transitions, go to Transitions at the top bar and drag any transition in between video clips on the timeline. You can also insert texts from Titles and objects from Elements from the top bar.

Step 4: Play the video to see the changes you have made, and click on Export button to save the video when you are satisfied.

Part 4. FAQs about iMovie
Is iMovie good for video editing?
Yes, iMovie is good for basic video editing. You can edit 4K videos, and iMovie is available on macOS and iOS. If you are a beginner, iMovie is perfect for you. If you want advanced editing features, we recommend Wondershare Filmora.
What’s better Premiere Pro or iMovie?
In terms of features and functionalities, Premiere Pro is far better than iMovie. However, Premiere Pro is more for advanced video editing while iMovie is more for beginners. iMovie is simpler to use than Premiere Pro, and hence, beginners will love it.
Can I make YouTube videos with iMovie?
Yes, you can make YouTube videos with iMovie as it has all the required tools and options. Import your video clips and audio files on the timeline, go for iMovie edit clip like trim and crop as required, add transitions, texts, and effects as applicable and publish your finished video on YouTube.
For macOS 10.12 or later
Step 1: Download and install Filmora on your Mac. Launch Filmora and click on New Project.
Step 2: Drag and drop your video clips and audio files Project Media folder. Drag and place the video clips on the timeline and arrange per perfectly. Place audio files on the timeline on a different track.
Step 3: If you want to apply transitions, go to Transitions at the top bar and drag any transition in between video clips on the timeline. You can also insert texts from Titles and objects from Elements from the top bar.
Step 4: Play the video to see the changes you have made, and click on Export button to save the video when you are satisfied.
Part 4. FAQs about iMovie
Is iMovie good for video editing?
Yes, iMovie is good for basic video editing. You can edit 4K videos, and iMovie is available on macOS and iOS. If you are a beginner, iMovie is perfect for you. If you want advanced editing features, we recommend Wondershare Filmora.
What’s better Premiere Pro or iMovie?
In terms of features and functionalities, Premiere Pro is far better than iMovie. However, Premiere Pro is more for advanced video editing while iMovie is more for beginners. iMovie is simpler to use than Premiere Pro, and hence, beginners will love it.
Can I make YouTube videos with iMovie?
Yes, you can make YouTube videos with iMovie as it has all the required tools and options. Import your video clips and audio files on the timeline, go for iMovie edit clip like trim and crop as required, add transitions, texts, and effects as applicable and publish your finished video on YouTube.
Are You Tired of Long Video Edits? Do You Speed up the Video in Canva without a Hassle? Well, Stick with Us as We Guide You Through the Process Step by Step
Canva video speed-ups are getting popular daily, and so is the art of making viral content.

One of the crucial features that every editing software should have is the ability to adjust the video speed. This is great for those who are creating YouTube shorts or simply looking to play with the slow-motion effects in their content. Now while talking about such edits, Canva is one such name that comes to mind.
It is a popular video editor and graphic designer you probably have heard of. Canva has tons of built-in functions, accompanied by an intuitive layout that users can’t get enough of. However, in terms of things like video speed-ups, it can get a bit complicated.
That’s why today we will go through the Canva video editor in detail and figure out whether it is possible to speed up the video in Canva or not. In the end, you will also discover other alternatives that provide the same functionality without any strings attached. So, let’s get straight into the topic!
Part I. Basic Understanding of Canva
Before jumping to Canva video speed-ups, it’s best to know a little about this tool. So Canva is an online media designing tool that enables you to create amazing content without much technical knowledge. It was launched back in 2013 and, until then, has managed to empower millions of people globally.
Whether it’s image editing, CV creation, or graphic modification, Canva is the forefront of modern tools. They even have a built-in video optimization feature that lets you boost your content without compromising quality. Everything in Canva is clutter-free, and the layout of their main website is beginners friendly.
There are also tons of free templates that you can use in Canva and format according to your preferred size and needs. Besides that, Canva’s native application is now available for all major operating systems. This means you can enjoy this tool as long as you have iOS 10 or higher (<Android 4.1).
Features of Creating and Editing with Canva
Some amazing perks that you get with Filmora include:
- ✅Dozens of customizable templates
- ✅Available with its drag-and-drop layout
- ✅Ability to add custom elements and transitions
- ✅Precise graphic movement
- ✅Supports single-key shortcuts
- ✅Cut and trim access
- ✅On-site recording
- ✅Up-loadable third-party content
- ✅ Mobile phone compatibility
- ✅Wide range of download formats
Part II. How to Speed Up a Video in Canva?
Managing video duration on your preferred domain is so crucial these days, mainly because of our smaller attention spans. This is why you should be looking to change video speed in Canva as soon as you get your hands on the project. Unfortunately, at the time of writing, there are no known features in which you can speed up the video in Canva. However, there are some alternative methods for archiving sped-up videos.
An Ultimate Guide to Speed Up a Canva Video

Step1Create a New Video Project with Canva
- Head over to Canva’s official webpage and open a new video project through the “Create“ button in the top right corner.

Step2Upload Your Speed Up Canva Video on the Console
- Now, you can either upload your video project into the console through the “Upload“ tab or use the provided video templates from the “Videos“ section.

- Once that’s done, drag and drop your clip on the timeline and adjust it according to your requirements.

Hit preview once you are comfortable with video positioning
Step3Download the Non-speed Up Video in Canva
After previewing the clip, you will soon realize that your video is going too slow and needs to be adjusted. Unfortunately, no feature as of right now could directly fix the issue. It needs to be revamped in a third-party program requiring video download.
- To download the original video in Canva, move your cursor to the top and select the “share“ button.

- Before you download the file, make sure that you have the MP4 format selected.

Step4Use Third-Party Software (Eizgif) to Change Video Speed In Canva
- Once you’ve downloaded your video file onto the system, open a new browser tab and search for Eizgif (or related speed-up video in the Canva tool). Now upload the same video on the given window.

- After the clip has been uploaded, a new tab will open up. Here you will find an option named “multiplier.” Changing its value from greater than one will make your video move fast.

- Adjustust the desired multiplier value and select “change video speed.”

Eizgif also gives you the freedom to adjust sound, if your video has any
Step5Re-upload the Speed-Up Video In Canva Editor
- When you feel like your video has a perfect speed, save it in your system directory.

- Now re-upload your changed video speed in Canva and drag it onto the timeline through the “Videos“ tab.

- Review the clip and notice the enhanced video speed from the Canva editor when it’s done.

So technically, you can change video speed in Canva, but the process can be time-consuming, especially for starters.
Part III. Wondershare Filmora - The Best All-in-one Video Speed-Up Alternative to Canva
Canva is no doubt a great video and graphic editor, but there are a handful of features that it needs to provide. For once, it can’t store files without internet access. Similarly, you need third-party applications even to use the most basic features, such as video speed-ups.
To work on these downsides, dozens of alternatives are available on the market; one of the better ones is Wondershare Filmora . It’s a full-proof video and audio editing app with tons of customizations under its belt. Individuals can use this powerful tool to create unique media content.
Everything is seamless in Filmora, and it’s supported on all major operating systems. There is no technical jargon in its application, and even beginners will be able to enjoy its interface.
Highlights of Filmora Compared to Canva Video Speed-Ups
- ✅Work on your speed-up projects without an internet connection
- ✅Not limited to download formats
- ✅Lack of template limitation on the free version
- ✅Beginner to advanced level UI
Free Download For Win 7 or later(64-bit)
Free Download For macOS 10.14 or later
How to Speed Up a Video Using Filmora?
Step1Create a New Project With Filmora Video Editor
First, if you don’t have it already, download the latest version of this tool from the web .
Once it’s installed, open the app and upload your new project straight into its console.

Step2Change the Speed Or Duration of Your Clip
- Now that your video is in the timeline, right-click it and select the custom “Speed & duration“ button.

- In the new window, change the speed value greater than 1, just like you did in the case of Eizgif. You can also adjust the speed slider for better coverage.

- After finishing, click “Ok“ and preview your clip to see the fast video effect in-placed.
BONUS STEPEnable the Speed Ramping Effects
Speed ramp is a unique feature in Filmora which allows you to apply acceleration or deceleration at any point in your clip, creating unique effects. To use these settings, you need to:
- Select your timeline video and choose the “Speed“ button on the bottom bar. After that, click on “Speed Ramping.”

- You can now apply multiple speed ramping effects based on your preference. Select it (for example, flash-out effect), and it will be used for your whole video.

Step3Export the Final Speed-Up Video
- After changing the video speed in Filmora, save it on your desktop. For that, move to the top left corner and select “File<Save Project.”

- You can also use the “Export“ option to move it to a local folder.
Conclusion
This was our two cents on how you can speed up a video on Canva. In the end, speeding up a video is a great way to keep your audience engaged in video production. It lets you make your content short and precise or introduce dramatic effects. If you want to use such features in your videos, then Filmora is a great way to start. Not only do you get fast video effects, but you can also save them without any internet access. So, give it a try and see the difference yourself!
Free Download For macOS 10.14 or later
How to Speed Up a Video Using Filmora?
Step1Create a New Project With Filmora Video Editor
First, if you don’t have it already, download the latest version of this tool from the web .
Once it’s installed, open the app and upload your new project straight into its console.
Step2Change the Speed Or Duration of Your Clip
- Now that your video is in the timeline, right-click it and select the custom “Speed & duration“ button.
- In the new window, change the speed value greater than 1, just like you did in the case of Eizgif. You can also adjust the speed slider for better coverage.
- After finishing, click “Ok“ and preview your clip to see the fast video effect in-placed.
BONUS STEPEnable the Speed Ramping Effects
Speed ramp is a unique feature in Filmora which allows you to apply acceleration or deceleration at any point in your clip, creating unique effects. To use these settings, you need to:
- Select your timeline video and choose the “Speed“ button on the bottom bar. After that, click on “Speed Ramping.”
- You can now apply multiple speed ramping effects based on your preference. Select it (for example, flash-out effect), and it will be used for your whole video.
Step3Export the Final Speed-Up Video
- After changing the video speed in Filmora, save it on your desktop. For that, move to the top left corner and select “File<Save Project.”
- You can also use the “Export“ option to move it to a local folder.
Conclusion
This was our two cents on how you can speed up a video on Canva. In the end, speeding up a video is a great way to keep your audience engaged in video production. It lets you make your content short and precise or introduce dramatic effects. If you want to use such features in your videos, then Filmora is a great way to start. Not only do you get fast video effects, but you can also save them without any internet access. So, give it a try and see the difference yourself!
15 Must-Use Gifs Editors
15 Must-Use Gifs Editors in 2024
An easy yet powerful editor
Numerous effects to choose from
Detailed tutorials provided by the official channel
Several websites and companies use the graphics interchange format that is the GIF. It can be seen to be used by a wide number of people on the internet and its format is supported by all platforms. The common goal of all the users can be satisfied.
Are you looking to create and edit gifs online or on your laptop but cannot find a suitable way out?
Finding the best and most user friendly GIF maker is not very hard, especially considering that free gif editor software is offered by so many providers. But if you’re only starting your journey with apps to make GIFs, it can be a difficult choice.
In this article
01 [How to Make GIF Interesting?](#Part 1)
02 [Top 5 Editors for Windows](#Part 2)
03 [Top 5 Editors for iPhone/Android](#Part 3)
04 [Top 5 Editors for Animated GIF Editing](#Part 4)
Part 1 How to Make GIF Interesting?
There are several ways by which a GIF can be made interesting. You can use colorful graphics and drop duplicate frames. Using fewer colors lets you make longer and more involved gifs.
Part 2 Top 5 Editors for Windows
Below are the top 5 editors which will help you to form GIFs for Windows: -
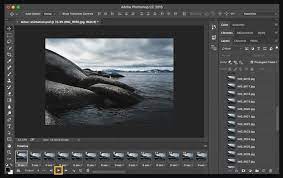
01Adobe Photoshop
Adobe Photoshop could be a useful device for making videos, image redaction, and GIF editing. This GIF code for Windows can allow you to import a GIF file so begin with the modification process.
Therefore, GIF editing is a breeze as you’ll alter the effects, modification the frame animation within the Timeline section, and do plenty a lot with this tool. You’ll simply utilize the free trial version to urge accustomed to the tool initial and then opt for the premium version to try to a lot more.
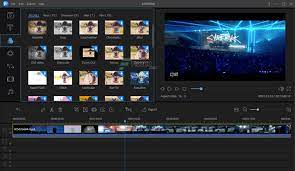
02EaseUS Video Editor
In the context of GIF makers, EaseUS Video Editor can also be said as one of the best. Free templates of texts, filters, elements, overlays, transitions, and music are available here which its users create GIF images with easily. You can also create lively and fully animated images, convert MP4 to GIFs and share it on YouTube, or other social media platforms.
The capabilities of this animated GIF maker for Windows are not restrained to this alone, as it can be used to edit all kinds of images, audio, and videos.
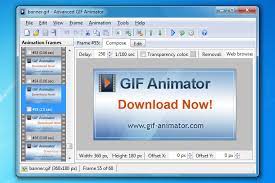
03GIF Animator
GIF animator editor is one of the first-rate GIF makers and is an awesome device for you if you desire to create GIF images, banners, buttons, and GIF videos. The device is very convenient to use and is a favorite of animators and designers.
The measurement of the photo can be modified and alongside that, it is feasible to control the frames, hastily cross texts, and enhance. Corrections to the movies can be brought and the built-in photograph editor can be used to rectify photographs and pictures, you can draw on them and you can convert movies to GIFs by the usage of the fragmented section of the video files.
04**Wondershare Filmora Video Editor **
If you are searching for nice animated GIF makers for Windows computers, then Wondershare Filmora’s animated movies and GIF editor device may want to be a brilliant choice. That’s due to the fact with this GIF maker Windows device lets you add a video, convert it to the GIF structure and then edit it later with its super features.
The interactive UI helps customers manner greater than one hundred fifty file codecs easily. With this device, you can crop, pace up a video, alter the body size, and caption it. Additionally, you add texts, add animation consequences to the images, and alter the pictures and movies in a few steps.

Wondershare Filmora - Best Video Editor for Mac/Windows
5,481,435 people have downloaded it.
Build unique custom animations without breaking a sweat.
Focus on creating epic stories and leave the details to Filmora’s auto features.
Start a creative adventure with drag & drop effects and endless possibilities.
Filmora simplifies advanced features to save you time and effort.
Filmora cuts out repetition so you can move on to your next creative breakthrough.
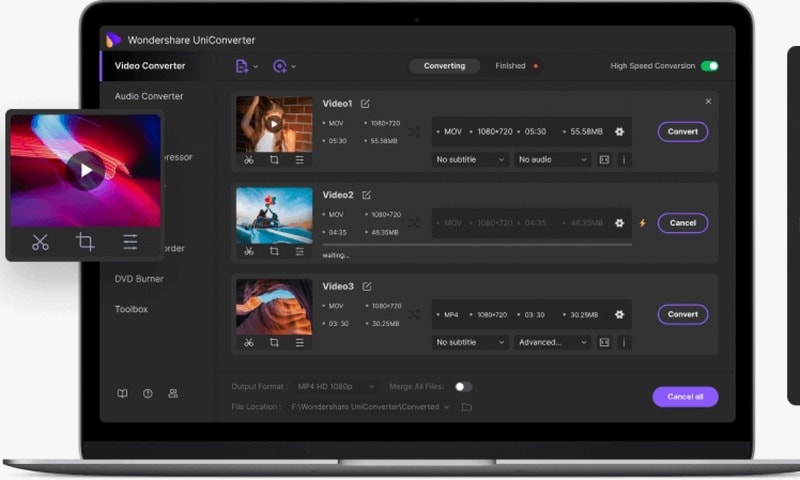
05Wondershare UniConverter
Wondershare UniConverter is one of the fine image, audio, and video editor and converter out there, and ranked the excellent GIF maker here. This GIF editor app is easy for customers and will furnish a pleasant platform for novices to operate their tasks. And when performed to create and edit GIF files, a person can export the GIF archives to both Android or iPhone barring having to use iTunes.
Part 3 Top 5 Editors for iPhone/Android
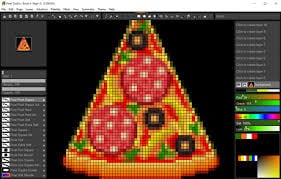
01PixelStudio
Pixel Studio is an animation app for pixel artwork fans. You can draw your little creations with pixel art. It additionally comes with a textual content tool, aid for matters like Samsung S-Pen, and it auto-saves so you don’t lose work. You can export your creations to GIF as nicely and that makes Pixel Studio one of the quality apps for customized GIFs. It’s normally an artwork app so meme lords may additionally want to put in a little greater effort than usual, however, the consequences are normally well worth it.
02Giphy Cam
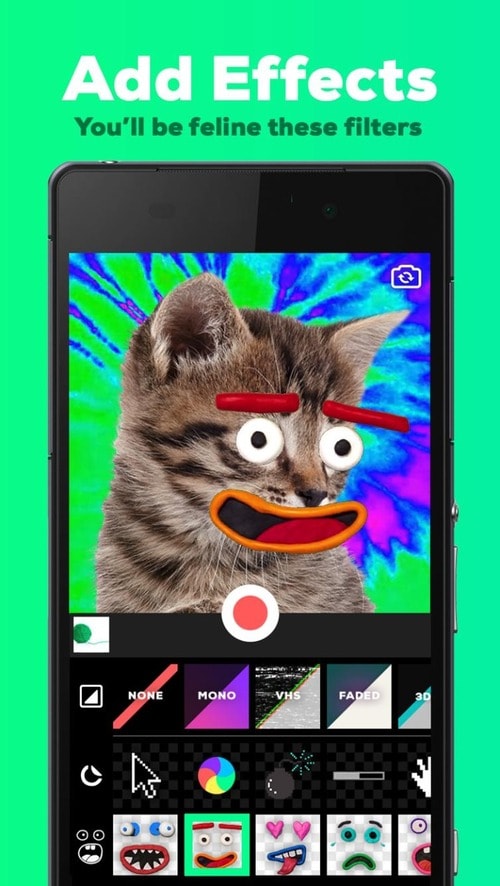
Giphy Cam is one of the more recent gif editing apps. The digicam data is a brief phase of video. You can alter that video with lots of filters, different effects, stickers, text, and more. It additionally has a five-shot burst mode alongside its video mode. This is likely the excellent GIF/camera app hybrid. It doesn’t have any digital camera features; however, it does GIFs higher than the others by way of a large margin. It’s free with no in-app purchases.
03PowerDirector
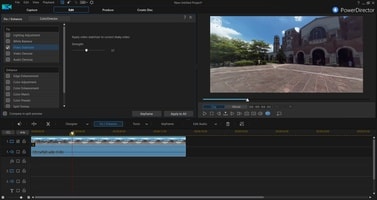
PowerDirector is one of many videos modifying apps with GIF support. This one simply takes place to be higher than most of the different ones. It’s a video editor app. Thus, it’ll have comparable features. However, two of the export codecs encompass GIF nonetheless pix and animated GIFs. This will work first-class for turning a video into a shorter GIF. The app is free to download and play with. You may additionally want to buy extra aspects by using in-app purchases.
04ImgPlay – GIF Maker
ImgPlay is a popular GIF editing app that is available for Android and iOS. You have the option of using an existing video or shooting one using your phone’s camera. In GIFs, you can apply 30 effects, crop a portion of your choice, and modify the frame rate.
05Motion Stills
Motion Stills is a Google app that allows you to record short films and turn them into looping GIFs. You can use the app to take a short 3s clip with a single tap or utilize the Fast Forward feature to condense an existing video into a short one. To make yips GIFs even better, you may add motion text and emoticons. After that, save it as a GIF and send it to your friends.
Part 4 Top 5 Editors for Animated GIF Editing
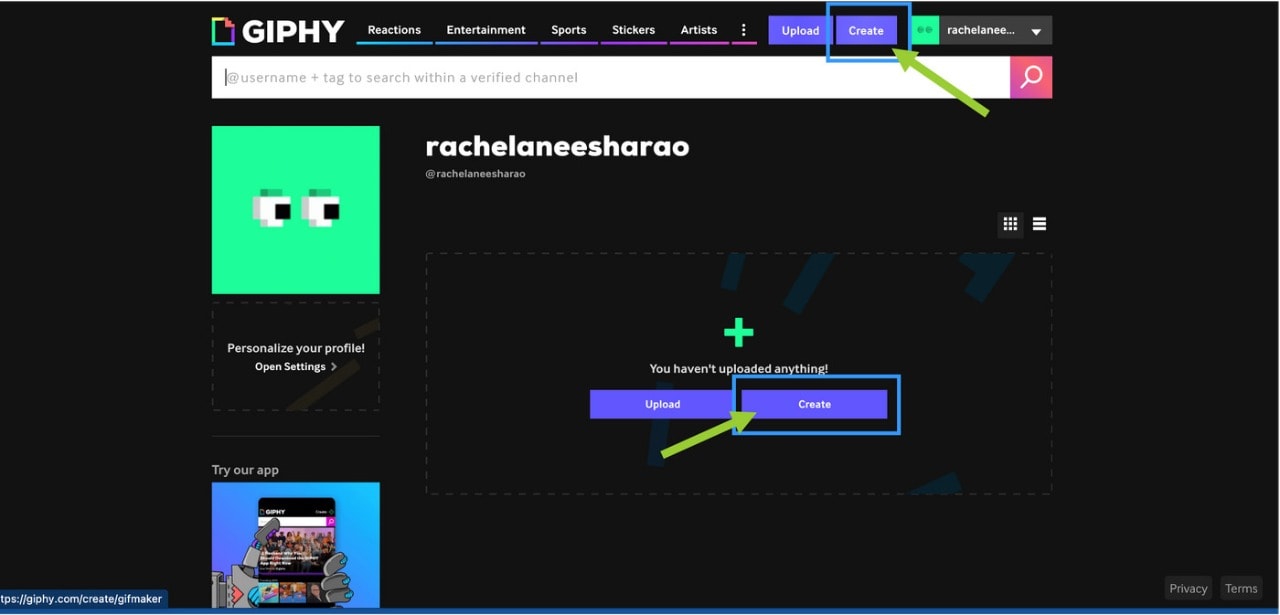
01Giphy
GIPHY is a designing tool that helps customers to create extraordinary GIFs, stickers, and backdrops. You can edit your plan with filters, captions, stickers, and different plan elements. The popular codecs for GIF uploads are JPG, PNG, GIF, MP4, or MOV, whilst the conventional file codecs to convert to stickers are JPG or PNG.
GIPHY permits you to paste URLs from specific sources such as Vimeo, YouTube, GIPHY, and others. The animated GIF maker software program makes it convenient for customers to edit and organize the uploaded archives in the favored order.
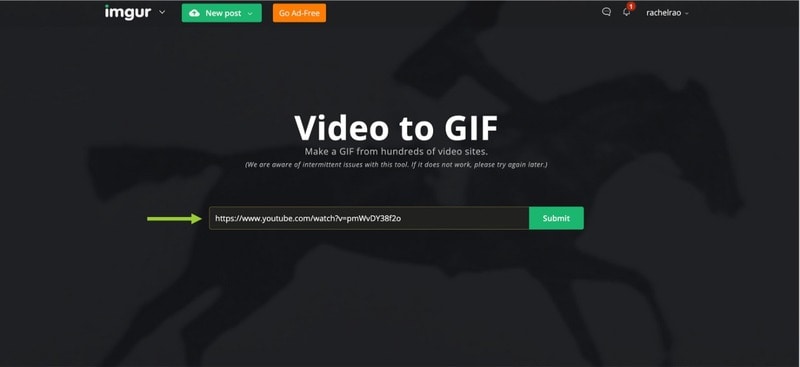
02Imgur
It’s a website that makes it simple to make GIFs. Simply paste the video URL into the web app and wait for it to process. After that, all you must do now is set the start time and duration of your GIF.
03KickMyGraphics
The utility comes with a humble person interface and it approves you to create animated GIFs from neighborhood images. In addition, you can additionally paste snapshots from your clipboard at once to the application. The utility additionally helps video files; however, you want to convert the video earlier than you can edit it. The utility affords a stay preview so you can see how your animation appears at any time. You can additionally see all handy frames and dispose of useless frames with ease.
As for editing, you can’t add your textual content or alter the brightness of your frames, however, you can trade their width, peak, and zoom level. You can additionally allow Loopback or Reverse mode and set delay, step frames, and a variety of repeats. You can additionally configure output first-class right from the application.
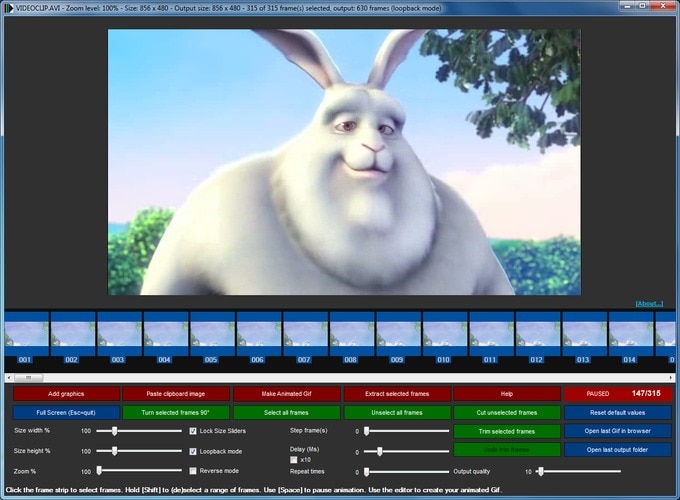
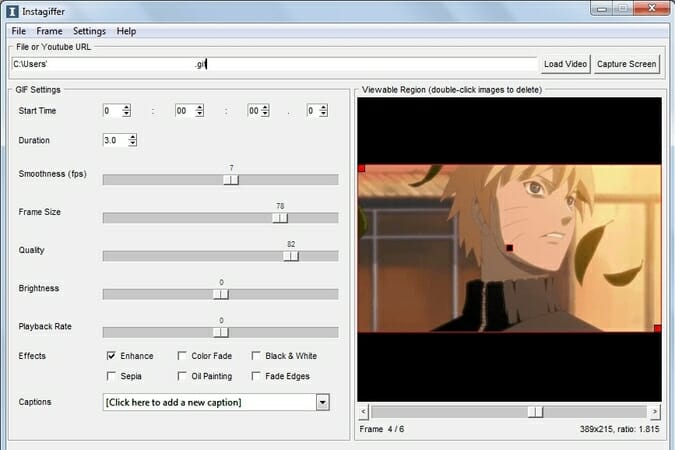
04Instagiffer
Instagiffer is some other easy software that lets you create animated GIFs on your PC. This utility affords a humble consumer interface; however, it makes up for it with an extensive variety of features. The software approves you to convert nearby movies to GIFs, however, you can additionally paste a YouTube URL and convert an online video to GIF with ease. According to the developer, the software additionally works with different video web hosting websites.
05GIMP
The software is free, so you can download and use it except for any restrictions. GIMP is best for picture designers and it comes with all preferences that an image editor needs. You can without problems edit your images, exchange their color, hue, saturation, or brightness, and add exceptional outcomes to them.
In addition, you can create special creations thanks to the built-in layer system. It’s worth citing that the software additionally helps programming algorithms so you can effortlessly edit your photos with the use of scripts.

● Key Takeaways from This Episode →
● If you are typically worried about how you can be able to come up with fascinating GIFs, you ought to hold in thought that you don’t have to create them from scratch.
● You can be capable to advance inspiring GIFs from current movies and photos eight after GIF editor software program free download.
● Hopefully, you are now capable to pick out a perfect GIF creator to use for your modifying tasks.
Several websites and companies use the graphics interchange format that is the GIF. It can be seen to be used by a wide number of people on the internet and its format is supported by all platforms. The common goal of all the users can be satisfied.
Are you looking to create and edit gifs online or on your laptop but cannot find a suitable way out?
Finding the best and most user friendly GIF maker is not very hard, especially considering that free gif editor software is offered by so many providers. But if you’re only starting your journey with apps to make GIFs, it can be a difficult choice.
In this article
01 [How to Make GIF Interesting?](#Part 1)
02 [Top 5 Editors for Windows](#Part 2)
03 [Top 5 Editors for iPhone/Android](#Part 3)
04 [Top 5 Editors for Animated GIF Editing](#Part 4)
Part 1 How to Make GIF Interesting?
There are several ways by which a GIF can be made interesting. You can use colorful graphics and drop duplicate frames. Using fewer colors lets you make longer and more involved gifs.
Part 2 Top 5 Editors for Windows
Below are the top 5 editors which will help you to form GIFs for Windows: -
01Adobe Photoshop
Adobe Photoshop could be a useful device for making videos, image redaction, and GIF editing. This GIF code for Windows can allow you to import a GIF file so begin with the modification process.
Therefore, GIF editing is a breeze as you’ll alter the effects, modification the frame animation within the Timeline section, and do plenty a lot with this tool. You’ll simply utilize the free trial version to urge accustomed to the tool initial and then opt for the premium version to try to a lot more.
02EaseUS Video Editor
In the context of GIF makers, EaseUS Video Editor can also be said as one of the best. Free templates of texts, filters, elements, overlays, transitions, and music are available here which its users create GIF images with easily. You can also create lively and fully animated images, convert MP4 to GIFs and share it on YouTube, or other social media platforms.
The capabilities of this animated GIF maker for Windows are not restrained to this alone, as it can be used to edit all kinds of images, audio, and videos.
03GIF Animator
GIF animator editor is one of the first-rate GIF makers and is an awesome device for you if you desire to create GIF images, banners, buttons, and GIF videos. The device is very convenient to use and is a favorite of animators and designers.
The measurement of the photo can be modified and alongside that, it is feasible to control the frames, hastily cross texts, and enhance. Corrections to the movies can be brought and the built-in photograph editor can be used to rectify photographs and pictures, you can draw on them and you can convert movies to GIFs by the usage of the fragmented section of the video files.
04**Wondershare Filmora Video Editor **
If you are searching for nice animated GIF makers for Windows computers, then Wondershare Filmora’s animated movies and GIF editor device may want to be a brilliant choice. That’s due to the fact with this GIF maker Windows device lets you add a video, convert it to the GIF structure and then edit it later with its super features.
The interactive UI helps customers manner greater than one hundred fifty file codecs easily. With this device, you can crop, pace up a video, alter the body size, and caption it. Additionally, you add texts, add animation consequences to the images, and alter the pictures and movies in a few steps.
Wondershare Filmora - Best Video Editor for Mac/Windows
5,481,435 people have downloaded it.
Build unique custom animations without breaking a sweat.
Focus on creating epic stories and leave the details to Filmora’s auto features.
Start a creative adventure with drag & drop effects and endless possibilities.
Filmora simplifies advanced features to save you time and effort.
Filmora cuts out repetition so you can move on to your next creative breakthrough.
05Wondershare UniConverter
Wondershare UniConverter is one of the fine image, audio, and video editor and converter out there, and ranked the excellent GIF maker here. This GIF editor app is easy for customers and will furnish a pleasant platform for novices to operate their tasks. And when performed to create and edit GIF files, a person can export the GIF archives to both Android or iPhone barring having to use iTunes.
Part 3 Top 5 Editors for iPhone/Android
01PixelStudio
Pixel Studio is an animation app for pixel artwork fans. You can draw your little creations with pixel art. It additionally comes with a textual content tool, aid for matters like Samsung S-Pen, and it auto-saves so you don’t lose work. You can export your creations to GIF as nicely and that makes Pixel Studio one of the quality apps for customized GIFs. It’s normally an artwork app so meme lords may additionally want to put in a little greater effort than usual, however, the consequences are normally well worth it.
02Giphy Cam
Giphy Cam is one of the more recent gif editing apps. The digicam data is a brief phase of video. You can alter that video with lots of filters, different effects, stickers, text, and more. It additionally has a five-shot burst mode alongside its video mode. This is likely the excellent GIF/camera app hybrid. It doesn’t have any digital camera features; however, it does GIFs higher than the others by way of a large margin. It’s free with no in-app purchases.
03PowerDirector
PowerDirector is one of many videos modifying apps with GIF support. This one simply takes place to be higher than most of the different ones. It’s a video editor app. Thus, it’ll have comparable features. However, two of the export codecs encompass GIF nonetheless pix and animated GIFs. This will work first-class for turning a video into a shorter GIF. The app is free to download and play with. You may additionally want to buy extra aspects by using in-app purchases.
04ImgPlay – GIF Maker
ImgPlay is a popular GIF editing app that is available for Android and iOS. You have the option of using an existing video or shooting one using your phone’s camera. In GIFs, you can apply 30 effects, crop a portion of your choice, and modify the frame rate.
05Motion Stills
Motion Stills is a Google app that allows you to record short films and turn them into looping GIFs. You can use the app to take a short 3s clip with a single tap or utilize the Fast Forward feature to condense an existing video into a short one. To make yips GIFs even better, you may add motion text and emoticons. After that, save it as a GIF and send it to your friends.
Part 4 Top 5 Editors for Animated GIF Editing
01Giphy
GIPHY is a designing tool that helps customers to create extraordinary GIFs, stickers, and backdrops. You can edit your plan with filters, captions, stickers, and different plan elements. The popular codecs for GIF uploads are JPG, PNG, GIF, MP4, or MOV, whilst the conventional file codecs to convert to stickers are JPG or PNG.
GIPHY permits you to paste URLs from specific sources such as Vimeo, YouTube, GIPHY, and others. The animated GIF maker software program makes it convenient for customers to edit and organize the uploaded archives in the favored order.
02Imgur
It’s a website that makes it simple to make GIFs. Simply paste the video URL into the web app and wait for it to process. After that, all you must do now is set the start time and duration of your GIF.
03KickMyGraphics
The utility comes with a humble person interface and it approves you to create animated GIFs from neighborhood images. In addition, you can additionally paste snapshots from your clipboard at once to the application. The utility additionally helps video files; however, you want to convert the video earlier than you can edit it. The utility affords a stay preview so you can see how your animation appears at any time. You can additionally see all handy frames and dispose of useless frames with ease.
As for editing, you can’t add your textual content or alter the brightness of your frames, however, you can trade their width, peak, and zoom level. You can additionally allow Loopback or Reverse mode and set delay, step frames, and a variety of repeats. You can additionally configure output first-class right from the application.
04Instagiffer
Instagiffer is some other easy software that lets you create animated GIFs on your PC. This utility affords a humble consumer interface; however, it makes up for it with an extensive variety of features. The software approves you to convert nearby movies to GIFs, however, you can additionally paste a YouTube URL and convert an online video to GIF with ease. According to the developer, the software additionally works with different video web hosting websites.
05GIMP
The software is free, so you can download and use it except for any restrictions. GIMP is best for picture designers and it comes with all preferences that an image editor needs. You can without problems edit your images, exchange their color, hue, saturation, or brightness, and add exceptional outcomes to them.
In addition, you can create special creations thanks to the built-in layer system. It’s worth citing that the software additionally helps programming algorithms so you can effortlessly edit your photos with the use of scripts.
● Key Takeaways from This Episode →
● If you are typically worried about how you can be able to come up with fascinating GIFs, you ought to hold in thought that you don’t have to create them from scratch.
● You can be capable to advance inspiring GIFs from current movies and photos eight after GIF editor software program free download.
● Hopefully, you are now capable to pick out a perfect GIF creator to use for your modifying tasks.
2 Methods to Crop a Video Using After Effects
Cropping a video is part of the process of video edting. Not all video editing software can be obtained freely. There are some that you need to spend to get the professional output that you aim for. After Effects,a member of the Adobe tools that exist can enhance your videos to another level. This article can help you know how to crop video in After Effects and on the alternative by using Wondershare Filmora. I know that it may seem confusing to compare these two at first. But, I’ll provide an explanation to get the cropped video that you want.
Method 1: Cropping a Video using After Effects
After Effects is a professional motion graphics tool that can create outputs that are beyond the limits of reality. Like the other Adobe tools, this comes with a subscription fee to be able to maximize this product. But, is the price worth the risk? The “ Adobe” brand is known for its quality applications and customer’s satisfaction.
Let’s start with using this tool. The situation is that you want to crop your video using Adobe After Effects but you don’t know how to start. Search for the application on your computer. Launch it, then click the New Project. If you have files from your storage then select the New Composition Footage.

Check if the video is already in the interface. Find the Magnifying tab and zoom out the video into 50%. After that, click the Grid icon and Proportional Grid.

Click the Square icon, it is located beside the Pencil icon at the top section. The shape’s purpose is to crop the video section that you want to remain. If you’re done cutting then you should unclick the Proportional grid, and the video’s magnification should be 100%. Afterwards, you can check the pixel aspect ratio correction in the After Effects. You need to go through the video before saving your project. This is to avoid unnecessary errors that will make the process troublesome.

Already satisfied with the cropped video? Then, select File, Export and finally Add to Render Queue. Check on the Render Settings (located bottom of the interface) to ensure high quality output. Following that, hit the Output To part and decide the destination and folder where you want it to be.

Watch your cropped video and go ahead and repeat this with your other videos. After practicing this process many times, this will come to you as easy. If you get lost while following the instructions go back to this guide until it becomes a part of your memory.
Congratulations on making your first cropped video using After Effects! What was your experience while following through the guide? I hope that the information presented here is easy to understand and implement.
Even though it is not a free application, I hope you have experienced the advantages of using this compared to other tools. Did it come as a surprise for you that you can crop a video not just in Adobe Premiere but also in After Effects as well?
I hope that fear will not hinder you from trying this tool to crop your videos.
Method 2: Cropping a Video using Wondershare Filmora
If you didn’t know there is also an awesome video editing software called Wondershare Filmora Video Editor .
You can try it by searching the internet and downloading it on your computer. If simplicity is your priority then this may suit you perfectly. If you’re still hesitant then read the reviews and watch how others are using it.
There is no need to worry if you have a tight budget as downloading this would be free. You just need to go to the official site. Do not be scared of trying with something unfamiliar. I will guide you with using it and utilizing it to get the result that you dream of.
Wondershare Filmora just like the others that exist are video editors that will turn your raw videos into the vision that you like. Thanks to these applications, the gruesome process of manually cutting it by hand and permanently altering the footage are gone. You can make how many changes that you want without damaging the original video.
For Win 7 or later (64-bit)
For macOS 10.14 or later
Are you done installing the application? If you have any encountered issues with installing it, you can contact customer support.
Not only does it have a straightforward and simple interface but it is also packed with useful tools that can turn your video into another level. But, you should not be overwhelmed by the number of icons and features that exist. Take a deep breath and proceed to opening it in your computer.

Preparation is a must especially if you have multiple videos on your computer. A good tip would be renaming them by the sequence you plan to have. And, you could also place them in folders to avoid repetition and double copies. Once you’re done, you can drag and drop your video or
click the Import.

Go ahead and select the video clip that you want to crop. Then, click the Crop tool and choose if you want the Crop or Pan & Zoom. Yes, you have options on what kind of crop you want it to be.

An alternative way is by right clicking the video clip .Under the Video tab you can select the Crop and Zoom or Crop to Fit then adjust to your preferred ratio.

You can review the cropped video to think through if this is the portion that you want to be included. Unlike other applications, you can go back and adjust it to your liking.
If you’re finally satisfied then you can export it. Choose the output format and you can also rename the file. Clicking the settings button will offer you additional options of your video output.
After all that, you have the cropped video that you can either upload or repurpose in another content. Did you enjoy the process of cropping it in Wondershare Filmora?
Remember, that you have the option to batch crop multiple video clips on this so no need to manually crop and export it. You can see the big picture and monitor if the flow makes sense to you.
Don’t you think that the subscription is worth it? There is a trial that you could check out to test its capabilities and awesomeness.
The Bottom Line
You are once again done with the process of checking out these two applications. After Effects and Wondershare Filmora have a different process when it comes to cropping videos. I hope that you had a clearer understanding on which of these two would suit your video editing needs. The interface also could change your mind depending if you want simplicity or a challenge. Price is also a factor that can affect your willingness to use these applications. But, this guide clearly shows you that it is worth paying for.
What are your thoughts on both of these tools? Did you find this information to be helpful?
Check if the video is already in the interface. Find the Magnifying tab and zoom out the video into 50%. After that, click the Grid icon and Proportional Grid.
Click the Square icon, it is located beside the Pencil icon at the top section. The shape’s purpose is to crop the video section that you want to remain. If you’re done cutting then you should unclick the Proportional grid, and the video’s magnification should be 100%. Afterwards, you can check the pixel aspect ratio correction in the After Effects. You need to go through the video before saving your project. This is to avoid unnecessary errors that will make the process troublesome.
Already satisfied with the cropped video? Then, select File, Export and finally Add to Render Queue. Check on the Render Settings (located bottom of the interface) to ensure high quality output. Following that, hit the Output To part and decide the destination and folder where you want it to be.
Watch your cropped video and go ahead and repeat this with your other videos. After practicing this process many times, this will come to you as easy. If you get lost while following the instructions go back to this guide until it becomes a part of your memory.
Congratulations on making your first cropped video using After Effects! What was your experience while following through the guide? I hope that the information presented here is easy to understand and implement.
Even though it is not a free application, I hope you have experienced the advantages of using this compared to other tools. Did it come as a surprise for you that you can crop a video not just in Adobe Premiere but also in After Effects as well?
I hope that fear will not hinder you from trying this tool to crop your videos.
Method 2: Cropping a Video using Wondershare Filmora
If you didn’t know there is also an awesome video editing software called Wondershare Filmora Video Editor .
You can try it by searching the internet and downloading it on your computer. If simplicity is your priority then this may suit you perfectly. If you’re still hesitant then read the reviews and watch how others are using it.
There is no need to worry if you have a tight budget as downloading this would be free. You just need to go to the official site. Do not be scared of trying with something unfamiliar. I will guide you with using it and utilizing it to get the result that you dream of.
Wondershare Filmora just like the others that exist are video editors that will turn your raw videos into the vision that you like. Thanks to these applications, the gruesome process of manually cutting it by hand and permanently altering the footage are gone. You can make how many changes that you want without damaging the original video.
For Win 7 or later (64-bit)
For macOS 10.14 or later
Are you done installing the application? If you have any encountered issues with installing it, you can contact customer support.
Not only does it have a straightforward and simple interface but it is also packed with useful tools that can turn your video into another level. But, you should not be overwhelmed by the number of icons and features that exist. Take a deep breath and proceed to opening it in your computer.
Preparation is a must especially if you have multiple videos on your computer. A good tip would be renaming them by the sequence you plan to have. And, you could also place them in folders to avoid repetition and double copies. Once you’re done, you can drag and drop your video or
click the Import.
Go ahead and select the video clip that you want to crop. Then, click the Crop tool and choose if you want the Crop or Pan & Zoom. Yes, you have options on what kind of crop you want it to be.
An alternative way is by right clicking the video clip .Under the Video tab you can select the Crop and Zoom or Crop to Fit then adjust to your preferred ratio.
You can review the cropped video to think through if this is the portion that you want to be included. Unlike other applications, you can go back and adjust it to your liking.
If you’re finally satisfied then you can export it. Choose the output format and you can also rename the file. Clicking the settings button will offer you additional options of your video output.
After all that, you have the cropped video that you can either upload or repurpose in another content. Did you enjoy the process of cropping it in Wondershare Filmora?
Remember, that you have the option to batch crop multiple video clips on this so no need to manually crop and export it. You can see the big picture and monitor if the flow makes sense to you.
Don’t you think that the subscription is worth it? There is a trial that you could check out to test its capabilities and awesomeness.
The Bottom Line
You are once again done with the process of checking out these two applications. After Effects and Wondershare Filmora have a different process when it comes to cropping videos. I hope that you had a clearer understanding on which of these two would suit your video editing needs. The interface also could change your mind depending if you want simplicity or a challenge. Price is also a factor that can affect your willingness to use these applications. But, this guide clearly shows you that it is worth paying for.
What are your thoughts on both of these tools? Did you find this information to be helpful?
Also read:
- Updated 2024 Approved After Reading This Article, You Can Add a B-Roll Feature From Filmora and Captivate More Audience. Explanation Video B-Roll and Story-Telling B-Roll Are Well Illustrated
- 2024 Approved Step-by-Step Guide to Storyboard
- New 2024 Approved 7 Ways to Make GIF From Videos on Mac
- New Make A Tattoo Disappear Like A Magic for 2024
- Updated In 2024, How to Add Freeze Frame to Your Video From Any Device?
- New Online Calculate and Change Video Aspect Ratio
- 2024 Approved Add some Sci-Fi Touch to Your Next Video Content Using Wondershare Filmora Editing Tools to Create an Alternate Reality Effect
- Do You Want to Watch Videos in QuickTime with Subtitles in Your Desired Language? Here Are Different Ways to Add Subtitles in QuickTime Player for 2024
- Top 10 Free Text to Speech Software Windows, Mac,Android, iPhone & O for 2024
- New How to Remove Echo From Videos with Adobe Audition
- In 2024, Create Amazing Slow-Motion Videos 8 Affordable Slow-Motion Cameras
- New Simple Tricks Make 3D GIF Production of Inspiration Pop Up
- Final Cut Pro for iPad
- New Cropping Videos in VLC Step by Step
- How to Use Frame Blending in Premiere Pro
- 2024 Approved How to Start a Video Editing Career
- 9 Best Sparkle Effects Photo and Video Editors You Should Know for 2024
- Updated Guide of 8 Photo Collage Apps for PC for 2024
- Updated 2024 Approved How to Make Text Reveal Effect Easily
- New In 2024, Create Dynamic Text Animation in Filmora
- Detailed Steps to Rotate Videos in Lightworks for 2024
- New Is Augmented Reality Conferencing the Future of Workplace Collaboratio
- In 2024, Top-Search The Best Game Screen Recording Tools for PC
- Updated Working Through the Details of iMovie Slow Motion Video Making 100 Effective for 2024
- In 2024, Unlocking the Power of Smart Lock A Beginners Guide for Oppo A2 Users
- In 2024, How To Do Samsung Galaxy S23 Tactical Edition Screen Sharing | Dr.fone
- Hard Reset Nokia C12 in 3 Efficient Ways | Dr.fone
- Fix the Error of Unfortunately the Process.com.android.phone Has Stopped on Oppo Reno 9A | Dr.fone
- Remove FRP Lock on Oppo Reno 11 Pro 5G
- In 2024, How to Change Google Play Location On Samsung Galaxy M14 4G | Dr.fone
- Trouble with Apple iPhone 14 Pro Swipe-Up? Try These 11 Solutions
- In 2024, 4 Ways to Mirror Apple iPhone 11 Pro to Laptop via USB or Wi-Fi | Dr.fone
- Looking For A Location Changer On Oppo K11 5G? Look No Further | Dr.fone
- Possible solutions to restore deleted videos from Vivo Y36
- Can Life360 Track You When Your Xiaomi Redmi Note 13 5G is off? | Dr.fone
- In 2024, 4 Ways to Transfer Music from Honor X8b to iPhone | Dr.fone
- How to Unlock a Network Locked Motorola Moto G24 Phone?
- Change Location on Yik Yak For your Poco X6 Pro to Enjoy More Fun | Dr.fone
- In 2024, Simple and Effective Ways to Change Your Country on YouTube App Of your Apple iPhone SE (2020) | Dr.fone
- In 2024, Dose Life360 Notify Me When Someone Checks My Location On Tecno Spark 20? | Dr.fone
- 5 Quick Methods to Bypass Itel A60 FRP
- Title: Updated IMovie Review – Is It The Best Video Editor for Mac Users, In 2024
- Author: Chloe
- Created at : 2024-04-24 07:08:30
- Updated at : 2024-04-25 07:08:30
- Link: https://ai-editing-video.techidaily.com/updated-imovie-review-is-it-the-best-video-editor-for-mac-users-in-2024/
- License: This work is licensed under CC BY-NC-SA 4.0.
