
:max_bytes(150000):strip_icc():format(webp)/free-disk-partition-software-tools-2624950-fad3ccc557d34ed89d53eff7538f5fdb.png)
Updated In 2024, Add Flesh to Your Video Content Before Posting Them for Your Audience to See Using Meme Texts. Use the Tutorial Guide Shared in This Post
Add Flesh to Your Video Content Before Posting Them for Your Audience to See Using Meme Texts. Use the Tutorial Guide Shared in This Post
Need to add meme text to a video clip but don’t know how to?
As we all know, visuals are the best way to engage, entertain, and pass knowledge across. But do you know you can make it better, as in more understandable, by including meme texts? Adding meme text to your video clips makes the storyline easy and quick to comprehend. Also, it makes your content appealing to your audience.
Performing this operation is easy, however, many people find it challenging because they do not have the idea. Is this the same for you? There is a simple guide you could follow to accomplish that here in this post. Here, we will introduce you to the top 2 ways to add meme text to videos.
Part 1. What Is the Most Used Fonts for Memes?
The font type and style you use in designing memes are crucial. With the right font, you can easily express yourself to your audience or viewers via memes. Find below the popular fonts often used for memes:
- Impact
The Impact is a famous font widely used in memes. This font stands out in meme pictures because of the boldness, and thickness. Viewers are able to read and understand the message you are passing across.

- Arial
Here is another font type that makes your meme appealing to the receiver. The round edge coupled with the smooth shape makes your meme photos easy to comprehend.

- Montserrat
If you are looking for a font with a modern look, Montserrat should be your choice. The Montserrat font is thin and squaric giving your meme that modern vibes.

Part 2. How to Add Meme Feel Text to Videos?
Here are the best two ways to add meme text to your video clips with complete ease:
Method 1: With Filmora Meme Maker
Wondershare Filmora is a wonderful video editor famous for its impressive editing features. This simple yet effective software lets you add text to videos easily and quickly. With the interactive user interface, you can easily add meme text to videos within the snap of a finger. It’s a powerful video editing tool compatible with Windows and Mac computers.
Beginners and professionals find it simple to operate. The software provides you with several meme editing features. From countless font types & styles to freedom to customize texts and lots more. Wondershare Filmora makes your meme appear stunning. Unlike its competitors in the same industry, this software is lightweight, fast, and secure. It exports edited files directly to your local storage.
Besides creating meme texts, this software permits you to edit your audio file. It supports audio editing tools like the silence detector, audio sync, audio ducking, and more. This software allows you to add/delete backgrounds from videos, create slideshows, record your display screen, etc. Wondershare Filmora holds everything you need in a video editor.
How to Add Meme Text to Videos with Filmora
Download, and install Filmora from the official website. Upon the successful installation, launch the software and follow the detailed stepwise guide below to add meme text to videos with Filmora Video Editor:
Step1 When Filmora opens, you will get an interface as below on your display screen:

Click on the New Project icon to enter the software main screen. Locate the Files icon at the top left corner of your screen, click on it and a couple of options will pop up underneath:

Scroll to the Import Media drop-down menu, click on it and select Import Media Files.
Wondershare Filmora will direct you to your local storage, and the window below will come up:

Alternatively, you can use the hotkeys: Ctrl + I to upload a new file.
Step2 Next, you have to move the video to the timeline panel so you can edit it. To do that, drag-and-drop the video to the section labeled Drag and drop media and effects here to create your video.
On adding the clip to timeline panel, you will get an interface as below:

Step3 Now click on the Titles button at the top menu bar. Immediately, the Text & Title preset will pop up on the left sidebar. There are over 200 text effects available on Filmora, select your preferred choice from the list. You can preview the text effect before applying it. To do that, double-click on one of them and check the result in the right hand panel.

Should the title suit your desire, drag and drop it in the timeline above the video timeline panel. To understand the step better, here is an image to help you out:

Step4 Once the step above is complete, double click on the Title frame in the timeline, and the window below will appear on your display screen:

To change font style, click on the Font type drop-down menu just as in the image below:

Scroll down and choose a font. Adjust font color clicking on the corresponding key to proceed. For advanced settings, click on ADVANCED to make necessary adjustments.

Step5 After completing the aforementioned step, click on the File, and select Save Project from the options that pops up. Choose your preferred destination path to save the file to your local drive.

Method 2: Use Clipchamp Meme Maker To Add the Text You Need
Although Wondershare Filmora is the ultimate video editing solution to add text to videos, Climchamp is another good tool to use. Climchamp is web-based video editor with no operating system limitations. The program allows you to upload video content of any format, add meme text to it and share with friends like Facebook.
This program is well-customized with a straightforward interface that allows amateurs and professionals to navigate easily. Climchamp comes with a library of video templates that you can choose from to customize your videos. It allows you to trim, cut, spli, crop, rotate, add audio & images, and flip videos conveniently.
Climchamp offers free and premium subscription video editing services. Mind you, the free version gives you access to limited features. If you wish to enjoy all of the amazing features the program holds, try subscribing to a premium package. Climchamp is internet depend. Thus, if you need a stable data connection for it to work effectively.
How to Add Meme Text to Videos with Climchamp
Step1 Ensure you are connected to a stable internet connection, open a web browser on your PC, and navigate your way to the official website for Climchamp video meme generator. The page below should pop up:

Click on the Create a video meme icon to proceed.

Climchamp video editing program will direct you to a new page where you have to create a profile. Fill out the form, and click on the appropriate button to proceed. Verify your profile, and login.

Step2 Locate the Templates icon on the left hand panel. Select a template, and Climchamp will request whether you want to go on with the chosen template.

Tap Add template to import it to the video editing program timeline. The interface below will come up:

Step3 Next, proceed to add a video content.
Click the + Create a Video tab at the top right corner of your screen. A new screen will come up just as below:

Tap on the + icon on the left sidebar.

Click on the appropriate key to import your desired video file.
Step4 Now drag-and-drop the content you just uploaded to the timeline panel, and click on the Play icon to view it.

Locate Export at the top right panel on your computer display screen, click it, and choose your preferred destination path.
Part 3. FAQs
Q1. What’s the best app to add texts to videos?
Adding texts to videos shouldn’t be a big deal when you have a professional video editing software. Many apps/software claims to provide quality video editing services, however, Filmora Video Editor is the best option. The software allows you to edit videos without distorting the quality. Additionally, it lets you export your edited files in several formats.
Q2. How do I add text to videos?
With Filmora, you can add text to videos. The detailed stepwise guide you need to follow is shared in the article above. Read through it to add text to your clips now.
Conclusion
With the detailed tutorial guide shared above, adding meme text to your videos shouldn’t be a difficult task to engage in anymore. There are two powerful tools introduced in the guide, Filmora is the best. It’s an offline video editing software that lets you manipulate your videos easily. The software comes with rich editing tools that you need to create stunning clips with professional results.
Free Download For Win 7 or later(64-bit)
Free Download For macOS 10.14 or later
Free Download For macOS 10.14 or later
Discover the Top 5 Online Tools for Merging Videos and Audios Quickly and Easily. Streamline Your Editing Process and Create Seamless Multimedia Content
When it comes to creating multimedia content, merging videos and audio can be a tricky task. But with the right tools, it can be a breeze. In this article, we will share the top 5 online tools for merging videos and audio quickly and easily.
These tools will streamline your editing process and help you create seamless multimedia content that will captivate your audience. Whether you are a professional video editor or just someone looking to create a personal video, these tools will come in handy. These tools have something for everyone, from basic editing features to advanced ones. So, let’s dive in and look at the best tools to merge videos and audio online.

- Merge Audio and Video Online Using Media.io for FREE
- Merge Audio and Video Online Without Watermark in 123APPS
- Mix Audio With Video Online in Clideo
- Veed.io Video Audio Merger Online
- Combine Video and Audio Online With FlexClip
- Join Video and Audio Online or Offline? Which To Choose?
- [Bonus] Merge Audio and Video Offline With Wondershare Filmora
5 Tools To Merge Video and Audio Online
There are a plethora of online tools available for merging videos and audio. However, not all tools are created equal. We have rounded up the top 5 online tools that are user-friendly, reliable, and efficient.
These tools will make it easy to merge your videos and audio and offer a range of features to help you create professional-looking multimedia content. Whether you are a beginner or an experienced video editor, these tools will help you finish the job in no time. So, without further ado, let’s look at the top 5 online tools for merging videos and audio online.
1. Merge Audio and Video Online Using Media.io for FREE

Ratings from G2: 4.5 out of 5
Pricing:
- Free - $0
- Basic - $3.95 / monthly
- Pro - $6.66 / annually
Sound is crucial in videos as it can enhance engagement, replace poor narration, and promote music videos. Use Media.io Online Video Editor to add music to videos for free easily. It’s a user-friendly program with multitrack timeline editing for all formats, allowing for adjustments such as trimming, splitting, fade effects, texts, elements, and picture overlays. Importantly, it doesn’t leave watermarks on your videos.
Pros
- Fast compression speeds
- No file limits
- No watermarks
- Smart output settings
Cons
- Lacks some advanced functionality
Here’s how to merge audio and video using Media.io:
Step1 Begin by opening Media.io Online Video Editor and uploading your video and audio files.

Step2 Improve the background audio by editing it with options such as trimming, splitting, copying, and deleting.

Step3 Adjust the aspect ratio, export the video, name the file, choose the resolution quality, then it’s finished.

You can learn more details about how to add audio to a video and how to edit videos using Media.io with the video below:
2. Merge Audio and Video Online Without Watermark in 123APPS

Ratings from G2: No rating yet
Pricing:
- Free
Add music to videos and easily edit using this powerful video editing platform. Publish videos with background audio of your choice, free and high-quality, without the need for downloads, software, or browser extensions. User-friendly interface, no learning curve, and works on any device, including Mac, PC, and mobile. The platform supports various file formats, including MP4, MOV, AVI, and WMV for video and MP3, WAV, and OGG for audio.
Pros
- Free and easy to use
- Multiple functions provided
Cons
- Lacks some advanced functionality
- Too basic for video cutting
Here’s how to merge audio and video using 123APPS:
Step1 Go to 123APPS and select “Video Tools“ > “Add Audio to Video.”

Step2 Upload the video and audio

Step3 Use the “Sound“ option to crop and adjust the audio volume

Step4 Select the output video format and download the final video with audio included.

3. Mix Audio With Video Online in Clideo

Ratings from G2: 4.8 out of 5
Pricing:
- Free - $0 with a watermark
- Monthly - $9.00
Clideo is a free, easy-to-use, browser-based video merging tool by Softo. It supports almost all video formats and allows you to add borders, choose aspect ratio templates or crop the video, apply transition effects, and add music. You can import multiple videos and arrange them in your desired order with drag and drop.
Pros
- Free to use with unlimited videos
- Easy to use
- Supports multiple video formats
Cons
- Lack of themes and design elements
Here’s how to merge audio and video using Clideo:
Step1 Go to Clideo’s page to add music to videos.

Step2 Drag and drop a video from your computer to access the editor.

Step3 Add the audio file and sync it with the video.

Step4 Select “Export“ and wait for it to finish, then download the final video.

4. Veed.io Video Audio Merger Online

Ratings from G2: 4.2 out of 5
Pricing:
- Free - $0
- Monthly - $12.00
VEED is a versatile video editor that makes it simple to merge, join, and combine various media files online. Whether using a Windows, Mac, or mobile device, you can easily cut, trim, and arrange multiple video clips into one file on a user-friendly timeline. You can also add audio, image files, and subtitles with a single click.
Compatible with all browsers and versions, VEED supports all file formats and allows you to upload multiple file types, arrange your video tracks, and export as one file. With VEED, you can easily create a seamless Instagram Story or YouTube Ad and even resize your clips in one click.
Pros
- Attractive and well-organized layout
- Compatible with all devices, including smartphones
- Simple and easy to begin using
Cons
- Cannot specify precise starting and ending times for video cuts
- The free version includes watermarks on output videos
- Limited to videos shorter than 10 minutes and 250 MB in size
Here’s how to merge audio and video using VEED:
Step1 Go to VEED’s website and upload your video files and audio.
Step2 Use the cutter/splitter tool to trim any file ends as needed.

Step3 Click the “Export“ button to merge the files into a single video. Download the newly created merged video file.

5. Combine Video and Audio Online With FlexClip

Ratings from G2: 4.0 out of 5
Pricing:
- Free - $0
- Basic - $9.99 per month
- Plus - $19.99 per month
- Business - $29.99 per month
FlexClip’s online audio and video merger is a simple solution for combining audio and video files. The process is as easy as uploading your video and audio files and then syncing them by adjusting the slider. The entire process takes just a few minutes, and there is no loss in video or audio quality, nor will a watermark be added to the output.
Once you have successfully merged your audio and video, you can easily share the video to YouTube or download it to your computer with just one click. It’s an efficient and effective way to merge audio and video.
Pros
- The stock library is royalty-free and allows for the monetization of projects without copyright restrictions
- The user interface is simple and easy to navigate
- The pricing is reasonable compared to other professional video editors
Cons
- The features are more basic compared to other professional video editors
- The video converter has limited output format options
Here’s how to merge audio and video using FlexClip:
Step1 Open the FlexClip website and drag and drop your video clip into the Media section. Add it to the timeline.
Step2 Upload your audio file from your computer to the Media section.

Step3 Adjust the audio and video on the timeline by dragging the slider.

Step4 Finish editing or select a resolution to download the merged video.
Join Video and Audio Online or Offline? Which To Choose?
Merging audio and video can be done either online or offline. Each method has its advantages and disadvantages.
Online video and audio merging join audio and video files using an online tool. The main advantage of this method is that it is easily accessible and requires no software installation. Many online tools are also free to use and offer various editing options. Additionally, online tools are often compatible with many file formats, making working with different audio and video files easy.
On the other hand, offline video and audio merging requires video editing software installed on a computer. The main advantage of this method is that it offers more advanced editing options and greater control over the final output. Offline tools also typically offer a wider range of output options and higher-quality output. However, offline tools can be more expensive and require a certain level of technical expertise to use effectively.
[Bonus] Merge Audio and Video Offline With Wondershare Filmora
Free Download For Win 7 or later(64-bit)
Free Download For macOS 10.14 or later
Merging audio and video offline with Filmora is a great option for those who want more advanced editing capabilities and are okay with downloading software to their computer. This powerful video editing software allows you to easily merge, trim, and edit multiple video and audio files, while also providing a wide range of creative tools, including effects, filters, and animations. With Filmora, you can create professional-quality videos with minimal effort.
Filmora is a powerful video editing software that allows users to merge audio and video offline easily. The software boasts a user-friendly interface that makes it easy for users to navigate and access the various features, including adding audio to video and syncing them together.
With Filmora, users can import audio and video files and use the software’s timeline to arrange and sync them. It also provides a wide range of options for editing, such as trimming, cutting, and adjusting the volume of audio tracks. Filmora also offers a variety of export options, including a choice of resolutions and file formats, making it a great choice for those looking to merge audio and video offline.
Here’s how to merge audio and video using Filmora:
Step1 Drag and drop or use the “Import Media“ button to add audio and video files to Filmora.

Step2 Arrange the media files on the timeline and sync the video with the audio.

Step3 Right-click the video, select “Detach Audio,“ delete the original audio, and replace it with new audio.

Step4 Choose a format and click “Export“ to save the final video.

Conclusion
There are many ways to merge audio and video, whether online or offline. Each method has its own set of advantages and disadvantages. It ultimately depends on your needs and preferences. Filmora is a great offline option for those looking for a professional video editor with a user-friendly interface, while online options offer a quick and easy solution for basic editing needs.
5 Tools To Merge Video and Audio Online
There are a plethora of online tools available for merging videos and audio. However, not all tools are created equal. We have rounded up the top 5 online tools that are user-friendly, reliable, and efficient.
These tools will make it easy to merge your videos and audio and offer a range of features to help you create professional-looking multimedia content. Whether you are a beginner or an experienced video editor, these tools will help you finish the job in no time. So, without further ado, let’s look at the top 5 online tools for merging videos and audio online.
1. Merge Audio and Video Online Using Media.io for FREE
Ratings from G2: 4.5 out of 5
Pricing:
- Free - $0
- Basic - $3.95 / monthly
- Pro - $6.66 / annually
Sound is crucial in videos as it can enhance engagement, replace poor narration, and promote music videos. Use Media.io Online Video Editor to add music to videos for free easily. It’s a user-friendly program with multitrack timeline editing for all formats, allowing for adjustments such as trimming, splitting, fade effects, texts, elements, and picture overlays. Importantly, it doesn’t leave watermarks on your videos.
Pros
- Fast compression speeds
- No file limits
- No watermarks
- Smart output settings
Cons
- Lacks some advanced functionality
Here’s how to merge audio and video using Media.io:
Step1 Begin by opening Media.io Online Video Editor and uploading your video and audio files.
Step2 Improve the background audio by editing it with options such as trimming, splitting, copying, and deleting.
Step3 Adjust the aspect ratio, export the video, name the file, choose the resolution quality, then it’s finished.
You can learn more details about how to add audio to a video and how to edit videos using Media.io with the video below:
2. Merge Audio and Video Online Without Watermark in 123APPS
Ratings from G2: No rating yet
Pricing:
- Free
Add music to videos and easily edit using this powerful video editing platform. Publish videos with background audio of your choice, free and high-quality, without the need for downloads, software, or browser extensions. User-friendly interface, no learning curve, and works on any device, including Mac, PC, and mobile. The platform supports various file formats, including MP4, MOV, AVI, and WMV for video and MP3, WAV, and OGG for audio.
Pros
- Free and easy to use
- Multiple functions provided
Cons
- Lacks some advanced functionality
- Too basic for video cutting
Here’s how to merge audio and video using 123APPS:
Step1 Go to 123APPS and select “Video Tools“ > “Add Audio to Video.”
Step2 Upload the video and audio
Step3 Use the “Sound“ option to crop and adjust the audio volume
Step4 Select the output video format and download the final video with audio included.
3. Mix Audio With Video Online in Clideo
Ratings from G2: 4.8 out of 5
Pricing:
- Free - $0 with a watermark
- Monthly - $9.00
Clideo is a free, easy-to-use, browser-based video merging tool by Softo. It supports almost all video formats and allows you to add borders, choose aspect ratio templates or crop the video, apply transition effects, and add music. You can import multiple videos and arrange them in your desired order with drag and drop.
Pros
- Free to use with unlimited videos
- Easy to use
- Supports multiple video formats
Cons
- Lack of themes and design elements
Here’s how to merge audio and video using Clideo:
Step1 Go to Clideo’s page to add music to videos.
Step2 Drag and drop a video from your computer to access the editor.
Step3 Add the audio file and sync it with the video.
Step4 Select “Export“ and wait for it to finish, then download the final video.
4. Veed.io Video Audio Merger Online
Ratings from G2: 4.2 out of 5
Pricing:
- Free - $0
- Monthly - $12.00
VEED is a versatile video editor that makes it simple to merge, join, and combine various media files online. Whether using a Windows, Mac, or mobile device, you can easily cut, trim, and arrange multiple video clips into one file on a user-friendly timeline. You can also add audio, image files, and subtitles with a single click.
Compatible with all browsers and versions, VEED supports all file formats and allows you to upload multiple file types, arrange your video tracks, and export as one file. With VEED, you can easily create a seamless Instagram Story or YouTube Ad and even resize your clips in one click.
Pros
- Attractive and well-organized layout
- Compatible with all devices, including smartphones
- Simple and easy to begin using
Cons
- Cannot specify precise starting and ending times for video cuts
- The free version includes watermarks on output videos
- Limited to videos shorter than 10 minutes and 250 MB in size
Here’s how to merge audio and video using VEED:
Step1 Go to VEED’s website and upload your video files and audio.
Step2 Use the cutter/splitter tool to trim any file ends as needed.
Step3 Click the “Export“ button to merge the files into a single video. Download the newly created merged video file.
5. Combine Video and Audio Online With FlexClip
Ratings from G2: 4.0 out of 5
Pricing:
- Free - $0
- Basic - $9.99 per month
- Plus - $19.99 per month
- Business - $29.99 per month
FlexClip’s online audio and video merger is a simple solution for combining audio and video files. The process is as easy as uploading your video and audio files and then syncing them by adjusting the slider. The entire process takes just a few minutes, and there is no loss in video or audio quality, nor will a watermark be added to the output.
Once you have successfully merged your audio and video, you can easily share the video to YouTube or download it to your computer with just one click. It’s an efficient and effective way to merge audio and video.
Pros
- The stock library is royalty-free and allows for the monetization of projects without copyright restrictions
- The user interface is simple and easy to navigate
- The pricing is reasonable compared to other professional video editors
Cons
- The features are more basic compared to other professional video editors
- The video converter has limited output format options
Here’s how to merge audio and video using FlexClip:
Step1 Open the FlexClip website and drag and drop your video clip into the Media section. Add it to the timeline.
Step2 Upload your audio file from your computer to the Media section.
Step3 Adjust the audio and video on the timeline by dragging the slider.
Step4 Finish editing or select a resolution to download the merged video.
Join Video and Audio Online or Offline? Which To Choose?
Merging audio and video can be done either online or offline. Each method has its advantages and disadvantages.
Online video and audio merging join audio and video files using an online tool. The main advantage of this method is that it is easily accessible and requires no software installation. Many online tools are also free to use and offer various editing options. Additionally, online tools are often compatible with many file formats, making working with different audio and video files easy.
On the other hand, offline video and audio merging requires video editing software installed on a computer. The main advantage of this method is that it offers more advanced editing options and greater control over the final output. Offline tools also typically offer a wider range of output options and higher-quality output. However, offline tools can be more expensive and require a certain level of technical expertise to use effectively.
[Bonus] Merge Audio and Video Offline With Wondershare Filmora
Free Download For Win 7 or later(64-bit)
Free Download For macOS 10.14 or later
Merging audio and video offline with Filmora is a great option for those who want more advanced editing capabilities and are okay with downloading software to their computer. This powerful video editing software allows you to easily merge, trim, and edit multiple video and audio files, while also providing a wide range of creative tools, including effects, filters, and animations. With Filmora, you can create professional-quality videos with minimal effort.
Filmora is a powerful video editing software that allows users to merge audio and video offline easily. The software boasts a user-friendly interface that makes it easy for users to navigate and access the various features, including adding audio to video and syncing them together.
With Filmora, users can import audio and video files and use the software’s timeline to arrange and sync them. It also provides a wide range of options for editing, such as trimming, cutting, and adjusting the volume of audio tracks. Filmora also offers a variety of export options, including a choice of resolutions and file formats, making it a great choice for those looking to merge audio and video offline.
Here’s how to merge audio and video using Filmora:
Step1 Drag and drop or use the “Import Media“ button to add audio and video files to Filmora.
Step2 Arrange the media files on the timeline and sync the video with the audio.
Step3 Right-click the video, select “Detach Audio,“ delete the original audio, and replace it with new audio.
Step4 Choose a format and click “Export“ to save the final video.
Conclusion
There are many ways to merge audio and video, whether online or offline. Each method has its own set of advantages and disadvantages. It ultimately depends on your needs and preferences. Filmora is a great offline option for those looking for a professional video editor with a user-friendly interface, while online options offer a quick and easy solution for basic editing needs.
Top Animated Title Makers
You know that your video needs a title, but rather than just type in some bland text to introduce the video, you can create an animated title page that is far more attractive. Animated titles make a video more attractive and when done correctly, they can even guarantee that your target audience will stick around long enough to watch the entire video. They can also be very useful for introducing the content of the video.
But to make an effective animated title, you need a tool that is designed to do just that. In this article, we look at some of the top animated title makers that you can use to create the perfect animated title for your video.
Part 1. Animated Title Maker Online
If you don’t want to install software on your computer to create the animated title, the following are the top online tools to choose from;
Animaker
Link: https://www.animaker.com/text-animation-maker
Rating: 4.5/5
Animaker is an online tool that is specifically designed to help you create text animations that you can then add to your video project. Available online on all browsers, Animaker has a simple user interface that makes it easy to create text animations in a matter of minutes. It is so easy to use that even the average beginner can create stunning text animations.
If you don’t want to create the animations from scratch, Animaker has numerous pre-designed templates for you to choose from that you can then just edit to fit your design. It also has a lot of customizable infographics that you can repurpose.

Animatron Studio
Link: https://www.animatron.com/studio
Rating: 4.5/5
The Animatron Studio is a one-stop solution for generating all types of animated texts. You can use it to create the perfect animated title for your video, but its numerous features also mean that it is one of the best ways to create attention-grabbing animated banner ads that can be posted on various ad sites,
It has a wealth of resources that you can use to create the title including more than 500,000 royalty-free images, videos, and audio to include in your project. If you don’t want to build the animated content from the ground up, you can select from the 200 pre-animated sets that Animatron Studio provides.
Kapwing Title Maker
Link: https://www.kapwing.com/animated-text-video-maker
Rating: 4.5/5
If your goal is to do more than just create an animated title for your video, Kapwing is a good solution. It is a complete online video editor that can also be used to create animated titles. As such, you can expect Kapwing to have more advanced features that allow you to customize the animated title in various ways.
For instance, it has a huge selection of animations that you can apply to the text. But you also get the option to upload your own animations, colors, and fonts. But please note that the free version of Kapwing will add a watermark to the video.

Biteable Animated Text Maker
Link: https://biteable.com/animated/text/
Rating: 4.5/5
Biteable is one of the most popular solutions that you can use to create all kinds of animated texts. It is simple enough to use that it is useful to both professionals and amateur video creators. It has numerous useful features including custom scenes, foundations, backgrounds, and characters all of which can work together to create the perfect animated title.
One of the main benefits of choosing Biteable is that you can share the videos you edit directly on social media without having to download the video.

Flexclip Video Maker
Link: https://www.flexclip.com/editor/
Rating: 4.5/5
Flexclip is another very easy-to-use and easily accessible solution to create animated texts for videos. Rather than create the texts from scratch, Flexclip allows you to create stunning animated texts just by selecting several parameters.
There are also a lot of pre-made designer text templates that are fully customizable. All you have to do is select one of the templates, and change the text, font, and any images to make it unique to you and your video.
Part 2. Animated Title Maker for Computer
Online tools can be useful, especially since they are more easily accessible. But if you want additional features and more ways to customize your animated title, the following desktop solutions may be more applicable to you;
Filmora
Rating: 4.5/5
Wondershare Filmora is a complete suite of video editing tools that can also come in handy when creating animated titles for videos. It is a very simple video editor with a simple user interface, making it an ideal solution even for beginner users. Adding a title to your video is easy and you get to choose from more than 200 different animations that you can apply to bring the text to life.
Filmora is also very useful because it comes with advanced editing features for the professional editor. You can use it to edit all aspects of the video including the clips and even any audio that may be on the project.

Adobe Animate
Rating: 4.5/5
Adobe Animate is a great option to create various animations for your video project, including animated texts. Used by animators to create 2D animated content, Adobe Animate has a lot of features designed to facilitate this kind of animation and is, therefore, one of the go-to solutions for designers looking to create illustrations like logos and infographics.
But like other Adobe programs, Adobe Animate is not very easy to use and the beginner may find that it takes quite a long time to figure out how it works. But once you figure it out, the 800+ web fonts can make it very easy for you to customize your animated title in various ways.

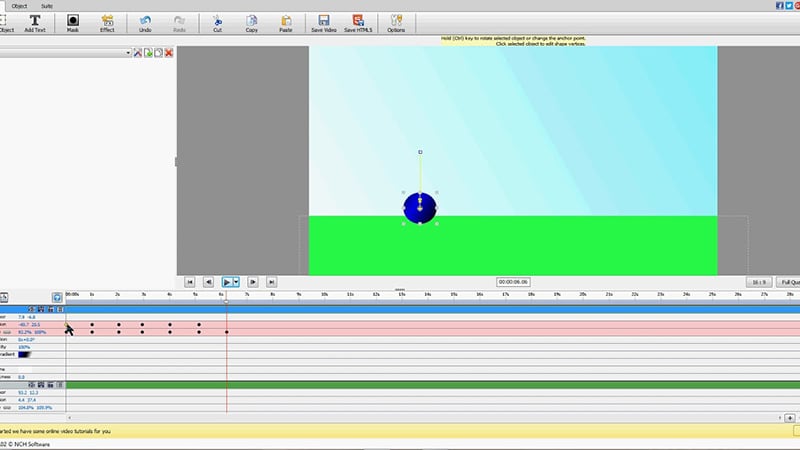
Express Animate
Rating: 4.5/5
Express Animate is a completely free program that you can download on your computer. It is a complete video editor which means that you can use it to animate text and characters, but it is also a great way to edit other aspects of the video including the audio tracks and adding digital effects.
With a simple user interface, Express Animate allows users to create 2D animations that can be used to create unique videos. It is also a good way to create GIFs and memes.
Movavi Video Editor
Rating: 4.5/5
Movavi Video Editor is another complete suite of editing tools that can also come in handy when you want to create an animated title for your video. Designed for both professionals and beginners, this video has all the advanced features you will need to edit all aspects of your video, including a built-in audio editor.
When it comes to animation, Movavi has a lot of effects and transitions as well as pre-made title templates to choose from. Once you have selected the title, you can easily customize the font and color to fit into your project.

Windows Movie Maker
Rating: 4.5/5
For PC users Windows Movie Maker is a simple to use and free way to edit videos. Included with the Windows OS, you likely don’t need to install any software to use and even though it is a free solution, Windows Movie Maker does have the necessary features to create and add animated titles to any video.
It comes with numerous effects, transitions, and templates to choose from when animating text. And it can also be used to edit videos in other ways including trimming and merging clips.

Part 3. Animated Title Maker Apps
If you are editing your videos on your mobile device, the following are the top animated title-making apps to choose from;
Tomo
Rating: 4.5/5
Link: https://m.apkpure.com/tomo-animate-text-in-video/com.entzeners.app.tomo
Tomo is one of the best apps that you can use to animate text in a video. It has robust features that allow you to easily add text to the video and then animate the text using various transitions and effects. Once the edits are complete, Tomo allows you to share the completed video directly on social media apps like Instagram and Twitter.

Adobe Spark
Rating: 4.5/5
Link:https://apps.apple.com/us/app/adobe-spark-post-design-maker/id1051937863
Available for both Android and iOS devices, Adobe Spark is a video editing tool that has numerous tools to add and edit texts on videos. You can use the professionally designed templates that you have access to when using Adobe Spark to create stunning animation titles. And since it easily integrates with other apps on the device, sharing the videos is very easy.
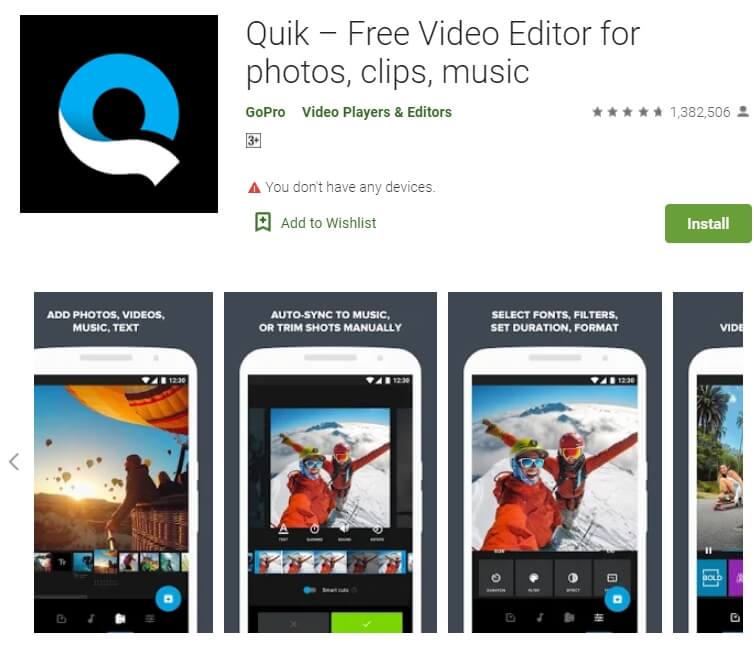
Quik
Rating: 4.5/5
Link: https://play.google.com/store/apps/details?id=com.gopro.smarty&hl=en&gl=US
Quik is an app that is dedicated to text animations and therefore one of the best solutions when you want to add and edit texts on videos. It is available for both iOS and Android and although the free version of the app is slightly limited, its basic editing features are still better than what you find on other more expensive solutions.
Hyper-type Animated Text Videos
Rating: 4.5/5
Link: https://itunes.apple.com/us/app/hype-type-animated-text-videos
This app gives you two options when it comes to animating the text on your video; auto-motion and typography. It focuses on just adding and editing text on a video and as such may not have any of the other video editing features you will find on some of the other apps. But if your goal is to create an interactive animated video title, Hyper-type Animated Text Videos is a great solution.
Vimeo
Rating: 4.5/5
Link: https://play.google.com/store/apps/details?id=com.vimeo.android.videoapp&hl=en&gl=US
Also available for both iOS and Android devices, Vimeo can also be a handy solution for the creation and editing of animated titles for videos. It has a lot of features to edit not just the text in videos, but also all other elements including audio. You even get a wide selection of royalty-free music that you can add to the video and motion stickers to make your title stand out even more. But the free version of Vimeo will add a watermark to the video.

Free Download For Win 7 or later(64-bit)
Free Download For macOS 10.14 or later
If You Want to Replace or Delete the Sky Pictures or Background Media, Then Give a Quick Read to This Article for Effective Solutions
An image’s background is essential because it provides context for your shot. Your main subject’s interaction with the background gives the picture more narrative and reinforces its story. If your background isn’t captivating, it can ruin everything. To make a photo appear more appealing or professional, you must know how to eliminate backgrounds effectively and edit photos with backgrounds.
This article aims to provide you with all the necessary information on how you can edit the sky and background. The article will emphasize some leading software for photo editing sky. You can gain knowledge about these tools and their key functionalities. In addition, you’ll read about an offline alternative to changing the sky in a photo.
Sky Replacement A cross-platform works like magic for background removal or sky replacement photos!
Free Download Free Download Learn More

Part 1: Top 8 Photo Sky Editor and Replacers Online [Must View]
Photo editing sky can be very beneficial as it makes your picture more focused and removes undesired objects. This part will take you through the top 8 sky-replacing apps. So, start exploring and choose the one you want:
1. SnapEdit
SnapEdit is one of the most incredible online tools with an AI sky replacement image option. With this function, users can add a more eye-catching sky background to their images instead of the default one. The tool modifies the sky background’s colors, textures, and gradients using artificial intelligence. Additionally, it offers a selection from a library of more attractive, lifelike replacement possibilities.

Key Features
- The tool can remove the grey sky with just a single click and give life to your background.
- If your outfit or tone doesn’t match the sky, you can change its hue according to your liking.
- SnapEdit lets you add and remove objects from the sky so your aesthetic picture is not ruined.
Pricing
| Pricing Plan | Billing |
|---|---|
| Pro | $5/month |
2. Fotor
With this sky replacement photo tool, you can add artistic skies to your images in place of boring ones. A single click can add breathtaking sunny, gloomy, or starry skies to your photos. You can utilize a variety of sky shots, like starry skies, blue skies, and night skies over Hawaii. This adds creativity and beauty to your images. You can also create a custom sky background for any uploaded photos.

Key Features
- You can replace the sky with any other background image. It doesn’t have to be just the sky.
- The tool offers professional Photoshop-like services without going through the complexities.
- AI sky replacement and automated editing give your sky a changed and improved look within seconds.
Pricing
| Pricing Plans | Billing |
|---|---|
| Fotor Pro | $2.66/month |
| Fotor Pro+ | $5.99/month |
3. Wondershare AI Lab
With this tool’s photo editing sky function, you can add a new sky to your images using AI technology. You can alter the sky in your pictures to a bright blue, pink, purple, and grey sky to add drama and interest. The tool can instantly replace the sky in your photo with the desired one and add a unique touch to your horizon. You can upload images up to 5MB, and the application supports most file formats.

Key Features
- The customized graphics will give you control over your photos and make them more beautiful.
- You can change the weather in your photos by replacing and editing the sky to make it better with your picture.
- You can increase sales and boost your post by adding a solid and clear background to the pictures.
Pricing
Free
4. Pixlr
Pixlr can easily swap out the sky in your images for a more visually stimulating background. In a split second, Pixlr’s AI-powered background remover can replace the backdrop image with an image of the sky and erase the original image. The creative and smart functions of the tool make it easy for everyone to change the sky in a photo.

Key Features
- Pixlr allows you to add different kinds of backgrounds to your photos. You can even add pictures directly from your system.
- The customization options help you to blend the background with your photos perfectly.
- The lasso tool will remove the original sky image clearly and precisely, even from the challenging edges.
Pricing
| Pricing Plans | Annual Billing |
|---|---|
| Plus | $0.99/month |
| Premium | $4.90/month |
| Team | $9.91/month |
5. Autoenhance.ai
Autoenhance.ai can identify the sky in your photos and replace it with one from their large collection of excellent sky photos that is more aesthetically pleasing. The tool enhances the overall effect of the picture by using AI technology to replace the sky in your picture subtly. Its sky replacement function can help replace the dreary sky with a sunny one, giving the photos a cheery and inviting appearance.

Key Features
- The photo enhancer can automatically enhance the color of the sky and upscale the quality of the image.
- You can efficiently replace or add sky to a photo with the help of AI.
- The AI can efficiently crop complex backgrounds such as trees or a flying or walking object.
Pricing
| Pricing Plans | Billing Per Month |
|---|---|
| Pay as you go | Minimum: $1.50/1 image Maximum: $309.99/1000 images |
| Subscriptions | Minimum: $49.99/75 images Maximum: $1249.99/10,000 images |
| Enterprise | Minimum: $2189.99/20,000 images Maximum: Custom/50,000+ images |
6. PhotoScissors
Using the photo editing program PhotoScissors, you can change around the sky in your images. The tool’s purpose is to assist you in correcting images that have incorrect exposure or white balance settings on your camera. It just takes three steps around the same number of minutes to change the sky in the photo online. All you need to do is make a few selections, and the tool will handle the rest.

Key Features
- You can remove the image background programmatically using the API of PhotoScissors.
- The tool accurately separates any image from the background or the sky.
- You can enhance the look of the sky quickly and easily by using its editing and customization options.
Pricing
| Number of Credits | Pricing |
|---|---|
| 1000 Credits | $29.99 |
| 200 Credits | $19.99 |
| 50 Credits | $9.99 |
| 10 Credits | $4.99 |
7. BeFunky
BeFunky’s AI-powered Sky Replacer is a specialized tool that recognizes the image’s sky and foreground to replace the sky precisely. The program is an all-in-one sky editor since it contains all the tools needed to alter the sky and foreground separately. This tool can edit the sky and front location so well that grey and dull photos become colorful and brighter.

Key Features
- The tool has a specialized feature for sky replacement images that can immediately change the sky.
- The editing feature enhances the lighting, saturation, and overall look.
- You can choose or download any sky photo and add it as your background.
Pricing
| Pricing Plan | Annual Billing |
|---|---|
| BeFunky Plus | $5.99/month |
8. remove.bg
With the sky replacement feature offered by the remove.bg software, you can add a new sky to your pictures. When you wish to enhance depth or alter the tone of your photo, this tool comes in handy. The software automatically replaces your photo’s background with a fresh sky image using artificial intelligence (AI). A range of sky photos are available for selection, including starry, dark sunny, galaxy sky, and more.

Key Features
- You can create impressive real estate photos by replacing the dull sky background with a fresh one.
- The tool can do batch processing, so you can drag many photos at once and edit them.
- You can remove any kind of background with great precision to get the perfect cutout.
Pricing
| Pricing Plan | Annual Billing/month |
|---|---|
| Subscription Plan | Minimum: $0.20/40 Credits Maximum: Custom Pricing |
| Pay as you go | Minimum: $1.99/1 Maximum: Custom Pricing |
Part 2: Wondershare Filmora: A Comprehensive Offline Solution for Background Replacement with Perfection
Background replacement can assist you in highlighting the primary topic to attract viewers while giving your products or marketing materials a polished, professional appearance. Many users look for offline background removal to edit their photos immediately. If you’re working on some projects, offline tools are a much safer option as they depend on the availability of the internet network.
When you think about an app that works offline and provides professional quality background removal, only one name comes to mind: Wondershare Filmora . The tool works like magic for background removal or sky replacement photos. You can completely rely on it for all your video editing and generating needs because of its intelligent AI features. It suits both professionals and beginners because of the ease of use and efficient AI system.
Free Download For Win 7 or later(64-bit)
Free Download For macOS 10.14 or later
Steps To Do Background Replacement Using Wondershare Filmora
There are various methods of removing and replacing the background in Wondershare Filmora. Follow the step-by-step instructions given below to use this function:
Step 1: Import Media Files To Filmora
Open the Wondershare Filmora tool and click on “New Project.” Now import your media file into the tool and then drag and drop it into the editing timeline. Import both the media files, i.e., the file from which you want to remove the background and the file you will use as a background.

Step 2: Remove Background from Imported Media
Now that both files have been brought together click on the media file that needs the background replacement. On the right side of the screen, you will see the editing tools of the app. Select the media type you edit and click the “AI Tools” option. Now, toggle on the “Chroma Key.”

Step 3: Preview and Export Final Results
Once you click on the chroma key option, the app automatically replaces the background of your media file. You can preview it, and if you are satisfied with the results, click “Export,” and save your new video.

Conclusion
Background removal and sky replacement images have become vital tools for content creators. The background of your images and videos is important as it sets a complete tone for the media. Many users use applications to replace the sky and background.
It’s important to do thorough research before you choose the right app for the job. This article gives you the best possible solutions for background replacement. You can professionally change the background of your media after reading the article.
Free Download Free Download Learn More
Part 1: Top 8 Photo Sky Editor and Replacers Online [Must View]
Photo editing sky can be very beneficial as it makes your picture more focused and removes undesired objects. This part will take you through the top 8 sky-replacing apps. So, start exploring and choose the one you want:
1. SnapEdit
SnapEdit is one of the most incredible online tools with an AI sky replacement image option. With this function, users can add a more eye-catching sky background to their images instead of the default one. The tool modifies the sky background’s colors, textures, and gradients using artificial intelligence. Additionally, it offers a selection from a library of more attractive, lifelike replacement possibilities.
Key Features
- The tool can remove the grey sky with just a single click and give life to your background.
- If your outfit or tone doesn’t match the sky, you can change its hue according to your liking.
- SnapEdit lets you add and remove objects from the sky so your aesthetic picture is not ruined.
Pricing
| Pricing Plan | Billing |
|---|---|
| Pro | $5/month |
2. Fotor
With this sky replacement photo tool, you can add artistic skies to your images in place of boring ones. A single click can add breathtaking sunny, gloomy, or starry skies to your photos. You can utilize a variety of sky shots, like starry skies, blue skies, and night skies over Hawaii. This adds creativity and beauty to your images. You can also create a custom sky background for any uploaded photos.
Key Features
- You can replace the sky with any other background image. It doesn’t have to be just the sky.
- The tool offers professional Photoshop-like services without going through the complexities.
- AI sky replacement and automated editing give your sky a changed and improved look within seconds.
Pricing
| Pricing Plans | Billing |
|---|---|
| Fotor Pro | $2.66/month |
| Fotor Pro+ | $5.99/month |
3. Wondershare AI Lab
With this tool’s photo editing sky function, you can add a new sky to your images using AI technology. You can alter the sky in your pictures to a bright blue, pink, purple, and grey sky to add drama and interest. The tool can instantly replace the sky in your photo with the desired one and add a unique touch to your horizon. You can upload images up to 5MB, and the application supports most file formats.
Key Features
- The customized graphics will give you control over your photos and make them more beautiful.
- You can change the weather in your photos by replacing and editing the sky to make it better with your picture.
- You can increase sales and boost your post by adding a solid and clear background to the pictures.
Pricing
Free
4. Pixlr
Pixlr can easily swap out the sky in your images for a more visually stimulating background. In a split second, Pixlr’s AI-powered background remover can replace the backdrop image with an image of the sky and erase the original image. The creative and smart functions of the tool make it easy for everyone to change the sky in a photo.
Key Features
- Pixlr allows you to add different kinds of backgrounds to your photos. You can even add pictures directly from your system.
- The customization options help you to blend the background with your photos perfectly.
- The lasso tool will remove the original sky image clearly and precisely, even from the challenging edges.
Pricing
| Pricing Plans | Annual Billing |
|---|---|
| Plus | $0.99/month |
| Premium | $4.90/month |
| Team | $9.91/month |
5. Autoenhance.ai
Autoenhance.ai can identify the sky in your photos and replace it with one from their large collection of excellent sky photos that is more aesthetically pleasing. The tool enhances the overall effect of the picture by using AI technology to replace the sky in your picture subtly. Its sky replacement function can help replace the dreary sky with a sunny one, giving the photos a cheery and inviting appearance.
Key Features
- The photo enhancer can automatically enhance the color of the sky and upscale the quality of the image.
- You can efficiently replace or add sky to a photo with the help of AI.
- The AI can efficiently crop complex backgrounds such as trees or a flying or walking object.
Pricing
| Pricing Plans | Billing Per Month |
|---|---|
| Pay as you go | Minimum: $1.50/1 image Maximum: $309.99/1000 images |
| Subscriptions | Minimum: $49.99/75 images Maximum: $1249.99/10,000 images |
| Enterprise | Minimum: $2189.99/20,000 images Maximum: Custom/50,000+ images |
6. PhotoScissors
Using the photo editing program PhotoScissors, you can change around the sky in your images. The tool’s purpose is to assist you in correcting images that have incorrect exposure or white balance settings on your camera. It just takes three steps around the same number of minutes to change the sky in the photo online. All you need to do is make a few selections, and the tool will handle the rest.
Key Features
- You can remove the image background programmatically using the API of PhotoScissors.
- The tool accurately separates any image from the background or the sky.
- You can enhance the look of the sky quickly and easily by using its editing and customization options.
Pricing
| Number of Credits | Pricing |
|---|---|
| 1000 Credits | $29.99 |
| 200 Credits | $19.99 |
| 50 Credits | $9.99 |
| 10 Credits | $4.99 |
7. BeFunky
BeFunky’s AI-powered Sky Replacer is a specialized tool that recognizes the image’s sky and foreground to replace the sky precisely. The program is an all-in-one sky editor since it contains all the tools needed to alter the sky and foreground separately. This tool can edit the sky and front location so well that grey and dull photos become colorful and brighter.
Key Features
- The tool has a specialized feature for sky replacement images that can immediately change the sky.
- The editing feature enhances the lighting, saturation, and overall look.
- You can choose or download any sky photo and add it as your background.
Pricing
| Pricing Plan | Annual Billing |
|---|---|
| BeFunky Plus | $5.99/month |
8. remove.bg
With the sky replacement feature offered by the remove.bg software, you can add a new sky to your pictures. When you wish to enhance depth or alter the tone of your photo, this tool comes in handy. The software automatically replaces your photo’s background with a fresh sky image using artificial intelligence (AI). A range of sky photos are available for selection, including starry, dark sunny, galaxy sky, and more.
Key Features
- You can create impressive real estate photos by replacing the dull sky background with a fresh one.
- The tool can do batch processing, so you can drag many photos at once and edit them.
- You can remove any kind of background with great precision to get the perfect cutout.
Pricing
| Pricing Plan | Annual Billing/month |
|---|---|
| Subscription Plan | Minimum: $0.20/40 Credits Maximum: Custom Pricing |
| Pay as you go | Minimum: $1.99/1 Maximum: Custom Pricing |
Part 2: Wondershare Filmora: A Comprehensive Offline Solution for Background Replacement with Perfection
Background replacement can assist you in highlighting the primary topic to attract viewers while giving your products or marketing materials a polished, professional appearance. Many users look for offline background removal to edit their photos immediately. If you’re working on some projects, offline tools are a much safer option as they depend on the availability of the internet network.
When you think about an app that works offline and provides professional quality background removal, only one name comes to mind: Wondershare Filmora . The tool works like magic for background removal or sky replacement photos. You can completely rely on it for all your video editing and generating needs because of its intelligent AI features. It suits both professionals and beginners because of the ease of use and efficient AI system.
Free Download For Win 7 or later(64-bit)
Free Download For macOS 10.14 or later
Steps To Do Background Replacement Using Wondershare Filmora
There are various methods of removing and replacing the background in Wondershare Filmora. Follow the step-by-step instructions given below to use this function:
Step 1: Import Media Files To Filmora
Open the Wondershare Filmora tool and click on “New Project.” Now import your media file into the tool and then drag and drop it into the editing timeline. Import both the media files, i.e., the file from which you want to remove the background and the file you will use as a background.
Step 2: Remove Background from Imported Media
Now that both files have been brought together click on the media file that needs the background replacement. On the right side of the screen, you will see the editing tools of the app. Select the media type you edit and click the “AI Tools” option. Now, toggle on the “Chroma Key.”
Step 3: Preview and Export Final Results
Once you click on the chroma key option, the app automatically replaces the background of your media file. You can preview it, and if you are satisfied with the results, click “Export,” and save your new video.
Conclusion
Background removal and sky replacement images have become vital tools for content creators. The background of your images and videos is important as it sets a complete tone for the media. Many users use applications to replace the sky and background.
It’s important to do thorough research before you choose the right app for the job. This article gives you the best possible solutions for background replacement. You can professionally change the background of your media after reading the article.
Also read:
- Updated 4 Methods to Resize a WebM File for 2024
- Updated Step by Step Guide on Make Gimp Transparent Background PNG for 2024
- New In 2024, 4 Ways to Add White Borders on Mobile and Desktop
- New Is Augmented Reality Conferencing the Future of Workplace Collaboration for 2024
- New Best 8 AR Apps for Android and iOS | Help You See the World of AR for 2024
- New 2024 Approved Where To Find The Best Free Canon LUTs? Learn More
- New Top 18 Video Editors for PC and Mac
- New How to Merge FLV Files Windows, Mac,Android, iPhone & Online for 2024
- New In 2024, Adobe Premiere Pro Rec 709 LUTs Finding The Best Choices
- Updated Magic Effects Video Making How To
- In 2024, How To Make Ninja Jump Effect with Filmora
- How to Make A Funny Vlog for TikTok, In 2024
- In 2024, Despite the Aforementioned Restrictions, Cartoon Video Makers Still Offer a Sea of Possibilities to Their Users, so Lets Dive Into the Magical World of Animated Videos
- What Is HDRI? Everything You Need to Know About HDRI
- Do You Know How to Create a Lol Montage Video? Had You Ever Tried that Video Type Before? Connect with This Article to Study the Tips and Tricks Associated with the Making of Montage Videos
- How To Edit Youtube Videos In Simple Steps for 2024
- Updated 2024 Approved Best Dark Moody LUTs During Editing
- New In 2024, Best 5 Tips to Freeze-Frame in After Effects
- New The Top 10 Effective SRT Editors Online
- New In This Article, We Will Discuss What Lens Distortion Is, How It May Be Fixed, and the Factors You Need to Pay Attention to Avoid Lens Distortion when Taking or Recording Videos
- Updated 2024 Approved How to Cut Videos on Mac without Using FFmpeg?
- New In 2024, Create a Kickass COD Warzone Thumbnail for Free
- In 2024, Guide to Create Intro Video with KineMaster
- Updated How To Change Font In Premiere Pro
- Get 15 Absolutely-Free LUTs From This Article as Well as Get an Insight on How Cinematic LUTs Affect Your Film for 2024
- Best PDF to GIF Converters for 2024
- Do You Know Everything Related to Wondershare Filmoras Video Editing Interface? If You Are Unaware of It, Read and Learn About Filmoras Interface for 2024
- Updated TikTok Velocity Dance Tutorial| Filmora
- New 2024 Approved How to Convert Videos to Slow Motion?
- New How to Color-Correct an S-Log Footage for 2024
- Mask Tracking Is Believed to Be a Helpful Procedure for Marking Proper Areas in Videos. Learn How to Perform Premiere Pro Mask Tracking in This Guide for 2024
- Updated What Are the Top 15 Slideshow Presentation Examples Your Audience Will
- 2024 Approved Top 10 Sound Extractors to Extract Sound From Video 2023
- In 2024, Keyframes Interval Everything You Need To Know | Filmora
- How to use iSpoofer on Nubia Red Magic 8S Pro? | Dr.fone
- In 2024, 5 Ways To Teach You To Transfer Files from Vivo Y78 5G to Other Android Devices Easily | Dr.fone
- How To Restore a Bricked Realme C67 4G Back to Operation | Dr.fone
- Downloading SamFw FRP Tool 3.0 for Vivo Y100 5G
- How To Create an Apple Developer Account On Apple iPhone 12
- Sim Unlock Samsung Galaxy M34 5G Phones without Code 2 Ways to Remove Android Sim Lock
- How to Mirror Your Sony Xperia 10 V Screen to PC with Chromecast | Dr.fone
- What Pokémon Evolve with A Dawn Stone For Tecno Spark 20? | Dr.fone
- In 2024, Fixing Foneazy MockGo Not Working On HTC U23 | Dr.fone
- Easily Unlock Your Xiaomi 14 Device SIM
- New In 2024, Stunning Ideas About Creating Personalised WhatsApp GIF Sticker
- How to Mirror PC Screen to Itel A60s Phones? | Dr.fone
- How to Fix Infinix Hot 40i Find My Friends No Location Found? | Dr.fone
- Your Complete Guide To Reset Vivo Y27 5G | Dr.fone
- Why Does My Infinix Note 30 Keep Turning Off By Itself? 6 Fixes Are Here | Dr.fone
- How Can I Unlock My iPhone SE After Forgetting my PIN Code? | Dr.fone
- In 2024, How Can HTC U23Mirror Share to PC? | Dr.fone
- Title: Updated In 2024, Add Flesh to Your Video Content Before Posting Them for Your Audience to See Using Meme Texts. Use the Tutorial Guide Shared in This Post
- Author: Chloe
- Created at : 2024-04-24 07:08:29
- Updated at : 2024-04-25 07:08:29
- Link: https://ai-editing-video.techidaily.com/updated-in-2024-add-flesh-to-your-video-content-before-posting-them-for-your-audience-to-see-using-meme-texts-use-the-tutorial-guide-shared-in-this-post/
- License: This work is licensed under CC BY-NC-SA 4.0.
