
Updated In 2024, Best Frame Rate for 4K Video

What Is the Best Frame Rate for 4K Videos?
People in the videography ad filmmaking world use complicated terminology like Ultra High Def to describe 4K videos. Even though you are not a complete stranger to the term 4K, you might still be unaware of what it means.
In a nutshell, 4K is the highest resolution you can watch your movies and videos. The details are incredibly crisp, meaning you can see pimples or the pores on an actor’s face through the screen. However, the frame rate will significantly affect how you enjoy a 4K video. Therefore, it would be wise to learn how to choose the ideal frame rate to suit your needs.
Keep reading this article to learn more about frame rates and which is suitable for a 4K video.

How Do Frame Rates Affect Video Viewing?
The motion will appear smoother if your video contains more frames per second. Even though your viewers are not tech-savvy, they will definitely notice the difference.
Consider a video of a duck drinking water from a pond. If you film and playback the same video in 24, 30, and 60fps, you will see a noticeable difference, assuming your shutter speed is set according to the 180-degree shutter rule.
If you are filming quicker motions of wildlife and birds, you are better off sticking to higher resolutions to give the viewer a pleasant experience and ensure the motion is fluid.
On the other hand, lower frame rates like 24fps are ideal for human movements, which are not as smooth as wildlife. Suppose you used 60fps for a cinematic film or a TV show. The video would look a bit odd because that is not how we see things in the natural world. In addition, your viewers aren’t used to such smoothness.
Viewing Requirements of 4K Videos
You may have heard about 4K videos and wondered what people mean by that term. In simple terms, a 4K video is a high-resolution video that is four times the usual 1080p HD video. When it comes to 4K videos, there are two standard resolutions. One of them is the standard for Digital Cinema which is 4096*2160 pixels. The other is for television and is 3840*2160 pixels.
To stream 4K content, you need a bandwidth between 10 and 20 Mbps. On the other hand, streaming platforms like Netflix require higher bandwidths of not less than 15 Mbps. In addition to the bandwidth we mentioned earlier, you need a 4KTV or 4K monitor.
This specification was brought up at the UHD Alliance, a union of more than 50 tech companies working together to support 4K content. Tech companies ought to ensure the devices they produce are compatible with 4K videos, which are becoming increasingly popular.
Below is a list of requirements any electronic device should fulfill before being termed a 4KTV or 4K monitor.

- A resolution of not less than 3840*2160.
- A 10-bit color depth that allows for 1,024 shades of red, yellow, and blue.
- A high dynamic range for color accuracy.
- An excellent combination of black level and peak brightness. The peak brightness should not exceed 1,000 nits, and the black level shouldn’t go below 0.5 nits. Alternatively, the peak brightness shouldn’t exceed 540 nits; neither should the black level plummet below 0.0005 nits.
Best Frame Rate for 4K Video
We all know that the frame rate you choose for your video will significantly impact the viewer’s experience and the overall style of your video. The frame rate will also affect how the video looks. For instance, a frame rate lower than 24fps will make your video look unprofessional and of poor quality. The content will also flicker because there aren’t many still images per second.
On the other hand, a lower FPS causes the file size to be smaller, causing it to consume a lower bandwidth. The vice versa is also true. Now that you understand these facts, you might wonder which frame rate would be best for your 4K videos.
Research reveals that the most acceptable frame rate is 30fps and 60fps. This is because the motion will appear natural to the human eye without being too fast or unrealistic.
If you are wondering what is the best frame rate for 4k videos, we urge you to select 60fps because it contains more detail. The higher frame rate also makes the motion look very smooth and crisp. Perhaps you want to shoot a slow-motion video. In that case, an even higher frame rate of 120fps would be ideal.
How To Choose The Base Frame Rates for Your Next Video
Choosing a frame rate for your videos is not complicated. However, it is not a straightforward process either. There are numerous moving parts that ought to work harmoniously for your video to turn out perfect and guarantee your audience will have a pleasant viewing experience. Before we dive into choosing the best frame rate for your 4K videos, let’s help you understand the filmmaking process.
Most filmmakers and videographers see it fit to shoot videos in 120p or 4K. This step makes their work easier during the editing process. If the raw footage is in 4K, they can de-emphasize or retain specific plot points that would look great in the final video. However, not everyone is shooting a video for Hollywood. Therefore, shooting in 4K on your laptop for your YouTube channel might be difficult.
Below are some factors you should consider when choosing the best frame rate for a 4k video.

File size
Shooting your video at a higher frame rate means more still images are packed into a single second of the video. Therefore, you will end up with a larger file size. If you want to shoot a video for your YouTube channel, it would be wise to stick to a smaller frame rate.
Purpose
It wouldn’t make sense to shoot a talking head video at more than 24fps. However, a higher frame rate would be ideal for a travel vlog, where the details need to be crisp.
Medium of delivery
The standard frame rate for television is 24fps. On the other hand, it would be best to stick to a higher frame rate of 60fps if you intend to shoot content for the silver screen.
Motion in the video
Lastly, the movement within the video will play a massive role in the frame rate you choose. The faster the motion, the higher the frame rate needs to be. For instance, action movies don’t do well in frame rates of less than 60 fps.
How To Set the Frame Rate of Your Editing Tools
Even though you didn’t use the ideal frame rate for 4k video during filming, you could use an editing tool to tweak the frame rate to where you need it to be. In our opinion, Wondershare Filmora is an excellent editing tool to set the ideal frame rate and take your videos to the next level.
Wondershare Filmora is a feature-rich platform that takes the tedium out of editing your videos and makes the outcome look spectacular. People won’t believe you when you say you edited the video yourself!
The platform is user-friendly, eliminating the need for a learning curve. You also don’t need to be an experienced editor or graphic designer to use this platform. Here is a list of nifty features you might find helpful on this platform.
- GIF support
- Audio equalizer
- Advanced text editing
- Noise removal
- Scene detection
- Audio mixer
- Color tuning
Out of all the wonderful features mentioned above, we will zero in on 4K editing support for now. You can use this feature to edit and export videos up to 4K without breaking a sweat.
Free Download For Win 7 or later(64-bit)
Free Download For macOS 10.14 or later
Wondershare Filmora allows you to customize your 4K videos by zooming in on a particular scene, tilting the video, or incorporating panning to give it a serene effect. We guarantee you will have fun using this platform and will get better at creating exquisite 4K content for your channel.
Below is a simple guide on using Wondershare Filmora to set the 4k video frame rate.
Step1 Launch the platform on your device and select the “File” tab. After a drop-down menu appears, select “Project Settings.”

Step2 In the dialogue box, select “Frame Rate” and choose the frame rate you think is ideal for your video.

Step3 Click “OK” and edit the videos as you like.
Conclusion
4K is the trend of the era, and it would be a shame if you got left behind. The viewer’s expectations are rising steadily, and they would rather skip your video to watch another if the quality is not up to par. In addition to giving you a competitive edge, 4K videos are very crisp and allow you to enjoy deep, vibrant colors.
You can also capture still photos from the video without compromising on quality. We can go on and on about the benefits of adopting 4K resolution in your videos. Therefore, it would be wise to increase your knowledge base and learn everything there is to know about 4K videos and how to set the best frame rates.
Free Download For macOS 10.14 or later
Wondershare Filmora allows you to customize your 4K videos by zooming in on a particular scene, tilting the video, or incorporating panning to give it a serene effect. We guarantee you will have fun using this platform and will get better at creating exquisite 4K content for your channel.
Below is a simple guide on using Wondershare Filmora to set the 4k video frame rate.
Step1 Launch the platform on your device and select the “File” tab. After a drop-down menu appears, select “Project Settings.”

Step2 In the dialogue box, select “Frame Rate” and choose the frame rate you think is ideal for your video.

Step3 Click “OK” and edit the videos as you like.
Conclusion
4K is the trend of the era, and it would be a shame if you got left behind. The viewer’s expectations are rising steadily, and they would rather skip your video to watch another if the quality is not up to par. In addition to giving you a competitive edge, 4K videos are very crisp and allow you to enjoy deep, vibrant colors.
You can also capture still photos from the video without compromising on quality. We can go on and on about the benefits of adopting 4K resolution in your videos. Therefore, it would be wise to increase your knowledge base and learn everything there is to know about 4K videos and how to set the best frame rates.
How to Add Miniature Effect in Video with Filmora
Want to add selective blur to make everything look smaller? Don’t have any idea how to focus on specific mini-things? Then don’t worry! In this article, you’ll get a step-by-step process to add miniature effects to your video. At the end of the process, you’ll have cinematic shots. Then start with us now! Scroll more to get pro tips!
What Is a Miniature Effect?

But first, let’s learn the logic of making the miniature effect. As many video editing pros present on Tiktok, the miniature effect is a fun way to brighten up your photography or video shots. For example, when taking a video or a time-lapse of a landscape, we always have a bigger depth of field, so most objects in the frame are in focus.
However, when we film a miniature model, the depth of field is shallow. So, we only see some objects in focus, and the rest is blurry. This visual trick makes our brain believe that the big landscape we’re seeing is actually a tiny model.

To create a miniature look, we can use specific effects to fake a shallow depth of field, and then the landscape view will look like a tiny model. While some keys to notice before making the miniature effect are:
- It utilizes selective blur to make things appear like small
- The miniature effect works best for footage filmed from a high angle.
- The tiny effect is usually used in drone footage, time lapses, or landscape photography.
Are you all set to add miniature effects to your video and make film-like shots? Then scroll more and get the step-by-step process.
How to Make a Miniature effect?
You are excited to add a miniature effect, and enjoy the rest! Without any further delay, follow the below instructions and get results!
Step1 Download the Wondershare Filmora
- First of all, you have to download the Wondershare Filmora .
- It’s packed with new features and effects plugins that make editing more filmy and fun!
![]()
Note: filmora has a unique “stock media” option that enables us to use all these elements and more to boost our videos!
Step2 Choose any stock footage
If you don’t have good-quality footage, but want to boost your video, here is how. You can get the miniature effect without a big format view camera or specialized lens.
- Open Filmora and select any stock footage in Wondershare Filmora.

Move to the stock media folder on the above bar in the Wondershare Filmora. Or you can look towards the left window, where you will see the sample videos tab.
- Click on the sample videos tab, and a new window will appear on the library screen.
Here you will see almost more than 20 videos. So, instead of using the actual recorded footage, we’ll make do with what we have by default. After selecting and adding the stock footage of your choice. Then you have to follow the below process:
- First, hold the Stock Footage as shown in the folder section.
- Then Drag and Drop it to the timeline section for further editing.

Who will get Stock Media?
Want to get stock media? You can only have access to the stock media library if you already buy the license of Wondershare Filmora.
- The latest version has an unlimited stock library.
- After purchasing any plan, you can access Stock Media (Unsplash, Giphy, Pixabay, Pixel).
Step3 Head to the effect panel
As we are working on miniature effects, what do we need first? First, we ensure that we have a Blur effect on the video.

To add a blur effect from the panel, follow the below-mentioned steps:
- First of all, move toward the above tabs.
- Then click on the 5th section, which is Effect
- After selecting the effect tab, a new window will pop up.
- In this section, we have 500+ different effects.
- Then, click on the search bar.
- Search for the Blur effect.
- After that, click on the Blur 2
- Then Download this effect if you haven’t done this already.
Step4 Add the blur effect to the video
After selecting and downloading the blur effect, it’s time to add it to the video. Again, see how precise it turned out. To add effect, follow below steps:
- First, drag and Drop the effect toward the timeline.
- Then, make sure to release the effect on the video to give it a lens blur appearance.

Step5 Add the effect multiple times
Want to get an ideal blur level? If you need more blur level in your video and make it more cinematic, then follow the below steps:
- First, ensure that the opacity of the blur effect is 100%.
- Then, if you still want more blurriness, add Blur 2 effect multiple times on the video.
- Finally, add effect by just the Drag and Drop

Step6 Drop the same video clip
- Add the same video clip 2nd time on the timeline.
- Add it by just the Drag and Drop
- Make sure you add it to 2nd video track in the timeline above the first one.

Step7 Add masks on the Video
Now, it’s time to select a specific video portion and add a mask. Due to this, we will have a selective blur portion. For this, follow the below guidelines:
- Double-click on the video present in 2nd track.
- The settings tab will be open in the top left section.
- Then find the Mask section and click on it.
- After this, click on the Double-line.
- Set the mask on video according to your style and choice.

![]()
Note: you can adjust the mask size and position by rotating and changing its shape.
Watch the rotating and adjusting actions as shown below!

For example, when we add a mask in the below time-lapse video, follow the above mask adjustments. Unfortunately, we can’t get good results. Therefore, we will apply another way to add a mask by changing shape and position. Follow the instructions for modifications:

- Make a building or any object Blurry near the camera because it is not present within the depth of field.
- While the object is far from the camera, it is focused because it is in the depth of the field.
- Then adjust the mask, as per your choice.
Want to change the shape of the mask? Then follow the below steps:

- Double-click on the video present in 2nd video track.
- Settings will activate on the top left side.
- Then click on the Mask tab to open it.
- Select the Rectangular mask from the list and apply it.
![]()
Note: make sure you are masking the same extent and excluding the object you want to be out of focus.
Now, it’s time to mask the whole object, which is far, but we want to make it in focus! For this, follow these steps:
- Add the same stock video clip a third time on the third video track of the timeline.
- Then add a mask in a Rectangle shape on the building.
- Don’t blur the edge of this mask.

Step8 Final Look
You are excited now to see the final look of your miniature effect! Finally, it’s in front of you! Just modify it more if you want to make it more precise.

Have you tried to add a miniature effect before? If yes, then share your experience with us! Try with more mask shapes and add more blur effects. Make sure that you are using Wondershare Filmora to make more filmy shots. Feel free to try out different effects and enjoy the following results!
Free Download For Win 7 or later(64-bit)
Free Download For macOS 10.14 or later
Step2 Choose any stock footage
If you don’t have good-quality footage, but want to boost your video, here is how. You can get the miniature effect without a big format view camera or specialized lens.
- Open Filmora and select any stock footage in Wondershare Filmora.

Move to the stock media folder on the above bar in the Wondershare Filmora. Or you can look towards the left window, where you will see the sample videos tab.
- Click on the sample videos tab, and a new window will appear on the library screen.
Here you will see almost more than 20 videos. So, instead of using the actual recorded footage, we’ll make do with what we have by default. After selecting and adding the stock footage of your choice. Then you have to follow the below process:
- First, hold the Stock Footage as shown in the folder section.
- Then Drag and Drop it to the timeline section for further editing.

Who will get Stock Media?
Want to get stock media? You can only have access to the stock media library if you already buy the license of Wondershare Filmora.
- The latest version has an unlimited stock library.
- After purchasing any plan, you can access Stock Media (Unsplash, Giphy, Pixabay, Pixel).
Step3 Head to the effect panel
As we are working on miniature effects, what do we need first? First, we ensure that we have a Blur effect on the video.

To add a blur effect from the panel, follow the below-mentioned steps:
- First of all, move toward the above tabs.
- Then click on the 5th section, which is Effect
- After selecting the effect tab, a new window will pop up.
- In this section, we have 500+ different effects.
- Then, click on the search bar.
- Search for the Blur effect.
- After that, click on the Blur 2
- Then Download this effect if you haven’t done this already.
Step4 Add the blur effect to the video
After selecting and downloading the blur effect, it’s time to add it to the video. Again, see how precise it turned out. To add effect, follow below steps:
- First, drag and Drop the effect toward the timeline.
- Then, make sure to release the effect on the video to give it a lens blur appearance.

Step5 Add the effect multiple times
Want to get an ideal blur level? If you need more blur level in your video and make it more cinematic, then follow the below steps:
- First, ensure that the opacity of the blur effect is 100%.
- Then, if you still want more blurriness, add Blur 2 effect multiple times on the video.
- Finally, add effect by just the Drag and Drop

Step6 Drop the same video clip
- Add the same video clip 2nd time on the timeline.
- Add it by just the Drag and Drop
- Make sure you add it to 2nd video track in the timeline above the first one.

Step7 Add masks on the Video
Now, it’s time to select a specific video portion and add a mask. Due to this, we will have a selective blur portion. For this, follow the below guidelines:
- Double-click on the video present in 2nd track.
- The settings tab will be open in the top left section.
- Then find the Mask section and click on it.
- After this, click on the Double-line.
- Set the mask on video according to your style and choice.

![]()
Note: you can adjust the mask size and position by rotating and changing its shape.
Watch the rotating and adjusting actions as shown below!

For example, when we add a mask in the below time-lapse video, follow the above mask adjustments. Unfortunately, we can’t get good results. Therefore, we will apply another way to add a mask by changing shape and position. Follow the instructions for modifications:

- Make a building or any object Blurry near the camera because it is not present within the depth of field.
- While the object is far from the camera, it is focused because it is in the depth of the field.
- Then adjust the mask, as per your choice.
Want to change the shape of the mask? Then follow the below steps:

- Double-click on the video present in 2nd video track.
- Settings will activate on the top left side.
- Then click on the Mask tab to open it.
- Select the Rectangular mask from the list and apply it.
![]()
Note: make sure you are masking the same extent and excluding the object you want to be out of focus.
Now, it’s time to mask the whole object, which is far, but we want to make it in focus! For this, follow these steps:
- Add the same stock video clip a third time on the third video track of the timeline.
- Then add a mask in a Rectangle shape on the building.
- Don’t blur the edge of this mask.

Step8 Final Look
You are excited now to see the final look of your miniature effect! Finally, it’s in front of you! Just modify it more if you want to make it more precise.

Have you tried to add a miniature effect before? If yes, then share your experience with us! Try with more mask shapes and add more blur effects. Make sure that you are using Wondershare Filmora to make more filmy shots. Feel free to try out different effects and enjoy the following results!
Free Download For Win 7 or later(64-bit)
Free Download For macOS 10.14 or later
A Guide to Adding Audio in Wondershare Filmora
Audios are the most important part of videos in today’s world. Even if your video quality is not cinematic, audio lets you engage multiple users, even on low-quality video. To ensure the maximum number of customers on your videos, you need to add optimized quality audio to them. And it’s okay if you don’t know how to add audio to videos because you are about to.
Wondershare Filmora will let you accomplish your task in a matter of seconds. Along with providing details on adding and adjusting audio, we will also introduce the premium quality features of Filmora to present it as a powerful tool. By the end of this discussion, you will get familiar with the procedure of how to adjust TikTok audio through this video editing tool.
Part 1: Discussing The Audio Features of Wondershare Filmora in Detail
The key features of Wondershare Filmora are itself a full fledge example of innovation and modernization. You can maximize the productivity of your videos by adding soothing and studio-quality audio. Not only does it serve as a good audio adjustor, but it also makes processing easier.
Filmora is not only used for adding audio to videos, but also for modifications of audio. The AI audio-related key features of Wondershare Filmora through which you can boost your audio quality and overall video quality are presented here:
1. Audio Ducking
Integrating two soundtracks into the videos means you have to dominate one of them. With the Audio Ducking feature of Filmora, you can lower the sound of one of the two tracks presented in the videos. This is very helpful when working on YouTube videos, podcasts, and Vlogs. This tool also automatically detects soundtracks, so you don’t have to face hassles.
2. Text-to-Speech (TTS)
In this busy world, everyone looks for reliable shortcuts and ways to accomplish their task in a limited time. Filmora offers you the ability to convert text files into realistic and outclass voiceovers. You can also write lengthy blogs, share them with the site and make voiceover videos with state of art accuracy
3. Silence Detection
Do you wish to detect the silent moments in the videos and remove them without impacting the video quality? No need to worry because the Silence Detection feature of Filmora will assist you with this problem. You can also customize the Volume Threshold, Minimum Duration, and Softening Butter. Moreover, you can remove the silenced parts with a few taps.
4. Audio Visualizer
The Audio Visualizer of Filmora can add new life to your lifeless videos and match them with your videos. In addition to this, it can also add dynamic effects to videos. Not only simple, but you also have the option to add podcasts and cinematic music videos. Filmora comprises more than 25 visualizer effects for the ease of the users.
5. Audio Synchronization
Matching audio with the length of the videos without any complication is like a dream to some users. However, it can be true if you are utilizing assistive tools such as Filmora. It supports the feature of Auto Sync, through which you can synchronize the audio with video irrespective of length and format. You can also select royalty-free music from Filmora, add it to the video and sync it automatically .
6. AI Audio Stretch
To fit the duration of your audio with audio, you can retime the audio in real-time with Filmora. This feature encompasses AI powers, so you don’t have to adjust everything manually. There is no need to add fading effects or cut unnecessary parts. Along with this, you can also preview the music track to match it with the length of the videos.
7. AI Audio Denoise
Background noises in videos cause a distraction for the users and impact the engagement of users in a bad way. From removing electrical noises to the removal of pet noises, this tool can help you with everything. As it supports a wide array of audio file formats, you will not face restrictions in this part.
8. Speech-to-Text (STT)
Transcribing long videos without errors and mistakes is one of the specialties in Filmora. It also integrates several plug-ins through which you can optimize the speech-to-text in a limited time. One of the best things is it can also work on SRT files.
Part 2: How to Add and Detach Audio in Wondershare Filmora?
Integrating audio in the video somehow depends upon the user’s preferences. Yet, a reliable video editor will let you add or detach the audio from videos without any issue. The best tool through which you can accomplish this task is Wondershare Filmora. You can also discover the procedure of addition and detaching videos in the below-given information:
How to Add Audio to Video with Wondershare Filmora?
As stated above, Filmora is an industry-standard tool that offers a straightforward procedure for modifying multimedia content. The procedure for adding audio in videos with Wondershare Filmora free audio editor is listed here:
Add Audio to Video For Win 7 or later(64-bit)
Add Audio to Video For macOS 10.14 or later
Step 1Import Video and Select Audio
Initially, import the video in Filmora and drag it to “Timeline.” Next, go to the “Audio” section and select the audio of your choice. You can also click the “Learn More” icon to get more information about the audio. You can also import the customized audio from your device.

Step 2Add Audio to Video
Following this, drag your selected audio in the video in “Timeline” and “Double Click” on the audio. Next, manage the “Volume,” “Sound Balance,” “Pitch,” “Audio Ducking,” and other parameters of audio from the right panel. After this, click the “Export” button, change settings, and again hit the “Export” button to save the video on the device.

How to Detach Audio From Video with Wondershare Filmora
The procedure of audio detaching is also very smooth. Feel free to follow the steps instructed here to accomplish this task:
Detach Audio From Video For Win 7 or later(64-bit)
Detach Audio From Video For macOS 10.14 or later
Step 1Drag Video to Timeline
To get started, launch Filmora and import the video by clicking on the “Click here to import media” button. To continue, drag the imported video to the “Timeline.”

Step 2Detach Audio from Video
Once done, right-click on the video in the timeline and locate the “Detach Audio” button. Following this, hit “Detach Audio” to separate the audio from the video and continue to save it on the device.

Part 3: How to Adjust the Parameters of Audios in Filmora?
Every person wishes to customize the audio in the video so they can share their creativity with the world without any complications. To adjust the audio parameters, you need to use a reliable tool that offers versatile audio editing features.
Adjust Audio Now For Win 7 or later(64-bit)
Adjust Audio Now For macOS 10.14 or later
Luckily, Wondershare Filmora can help you a lot in modifying and customizing the audio parameters. To change the audio parameters in this audio adjuster, follow the instructions listed here:
Step 1Access Filmora and Import Video
To change the audio parameters, access Wondershare Filmora on your device and click “New Project.” Following this, hit the “Click here to import media” button to import a video and drag it to the “Timeline.”

Step 2 Change Audio Parameters in the Video
Once the video is in the timeline, double-click on the audio in the timeline. After this, the audio parameter window will be opened in the right section. From here, you can change “Sound Balance,” “Fade In,” and “Fade Out” in a customized way. Moreover, you can also toggle the “Auto-Normalization” option and optimize “Volume.”

Step 3Saving the Adjusted Video to the Device
Saving the Adjusted Video to the Device

Conclusion
In a nutshell, this discussion has guided you about the addition and adjustment of Wondershare Filmora. With Filmora, you can optimize the quality of audio in videos in no time. Moreover, it also integrates several useful features such as Audio Ducking, AI Audio Denoise, Audio Visualizer, and more.
You can discover more information about its features from the above-given discussion. This article also discusses the steps to add and detach audio from video. In addition to this, you can also adjust multiple audio parameters with Filmora’s explicit toolkit.
How to Add Audio to Video with Wondershare Filmora?
As stated above, Filmora is an industry-standard tool that offers a straightforward procedure for modifying multimedia content. The procedure for adding audio in videos with Wondershare Filmora free audio editor is listed here:
Add Audio to Video For Win 7 or later(64-bit)
Add Audio to Video For macOS 10.14 or later
Step 1Import Video and Select Audio
Initially, import the video in Filmora and drag it to “Timeline.” Next, go to the “Audio” section and select the audio of your choice. You can also click the “Learn More” icon to get more information about the audio. You can also import the customized audio from your device.

Step 2Add Audio to Video
Following this, drag your selected audio in the video in “Timeline” and “Double Click” on the audio. Next, manage the “Volume,” “Sound Balance,” “Pitch,” “Audio Ducking,” and other parameters of audio from the right panel. After this, click the “Export” button, change settings, and again hit the “Export” button to save the video on the device.

How to Detach Audio From Video with Wondershare Filmora
The procedure of audio detaching is also very smooth. Feel free to follow the steps instructed here to accomplish this task:
Detach Audio From Video For Win 7 or later(64-bit)
Detach Audio From Video For macOS 10.14 or later
Step 1Drag Video to Timeline
To get started, launch Filmora and import the video by clicking on the “Click here to import media” button. To continue, drag the imported video to the “Timeline.”

Step 2Detach Audio from Video
Once done, right-click on the video in the timeline and locate the “Detach Audio” button. Following this, hit “Detach Audio” to separate the audio from the video and continue to save it on the device.

Part 3: How to Adjust the Parameters of Audios in Filmora?
Every person wishes to customize the audio in the video so they can share their creativity with the world without any complications. To adjust the audio parameters, you need to use a reliable tool that offers versatile audio editing features.
Adjust Audio Now For Win 7 or later(64-bit)
Adjust Audio Now For macOS 10.14 or later
Luckily, Wondershare Filmora can help you a lot in modifying and customizing the audio parameters. To change the audio parameters in this audio adjuster, follow the instructions listed here:
Step 1Access Filmora and Import Video
To change the audio parameters, access Wondershare Filmora on your device and click “New Project.” Following this, hit the “Click here to import media” button to import a video and drag it to the “Timeline.”

Step 2 Change Audio Parameters in the Video
Once the video is in the timeline, double-click on the audio in the timeline. After this, the audio parameter window will be opened in the right section. From here, you can change “Sound Balance,” “Fade In,” and “Fade Out” in a customized way. Moreover, you can also toggle the “Auto-Normalization” option and optimize “Volume.”

Step 3Saving the Adjusted Video to the Device
Saving the Adjusted Video to the Device

Conclusion
In a nutshell, this discussion has guided you about the addition and adjustment of Wondershare Filmora. With Filmora, you can optimize the quality of audio in videos in no time. Moreover, it also integrates several useful features such as Audio Ducking, AI Audio Denoise, Audio Visualizer, and more.
You can discover more information about its features from the above-given discussion. This article also discusses the steps to add and detach audio from video. In addition to this, you can also adjust multiple audio parameters with Filmora’s explicit toolkit.
Confused About Deciding the Next Destination for Your Trip? This Article Features some of the Best Vloggers You Can Find for Gaining Inspiration for Traveling
Do you wish to travel to the best parts of the world? Have you found it difficult to travel to your dream places? There are multiple techniques of understanding the dynamics of traveling around the globe. One effective way is to follow vloggers who provide unique information about places they travel.
Since you are looking for information to travel, this article presents you with some of the best vloggers that you can see before traveling to your favorite places.
Part 1: 15 Most Popular Vloggers That You Should Follow for Travel
This part will introduce you to some of the top vloggers that can be followed for travel tips and videos. This list will surely help you prepare for your traveling perfectly.
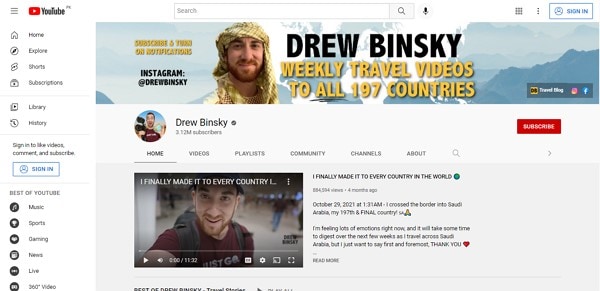
1. Drew Binsky
Subscriber Count: 3.12M+
Are you fascinated by new cultures and traditions? Drew Binsky is the perfect vlogger that you can follow for deciding your next trip. This American travel vlogger designs the perfect documentary for enthusiasts like you, with a focus on discovering cultures across the world. As he makes his video perfect with assisted storylines, he can be the perfect option for you to get started with traveling.
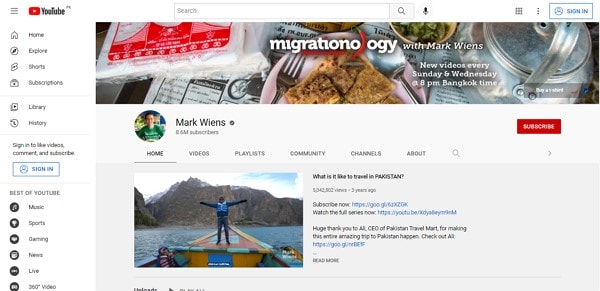
2. Mark Wiens
Subscriber Count: 8.6M+
A fan of both food and traveling? Migrationology is the perfect combination of YouTube vlogging that you can find across the Internet. Mark, the person behind this idea and venture, comes up with the best spots to travel and enjoy food. He accompanies his best visits with proper guides so that you can go through a perfect travel trip to the place you decide.
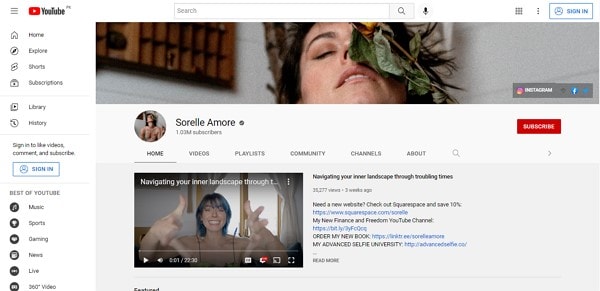
3. Sorelle Amore
Subscriber Count: 1.03M+
There are very few phenomenal female travel vloggers focused on providing exclusive content to their viewers. Being one powerhouse of excruciating content, Sorelle inspires her viewers with her experiences in traveling. With a greater motive to run her vlog channel, Sorelle Amore encourages her viewers to visit and endure the beauty of the world as it is. Her travel videos are always a step ahead.
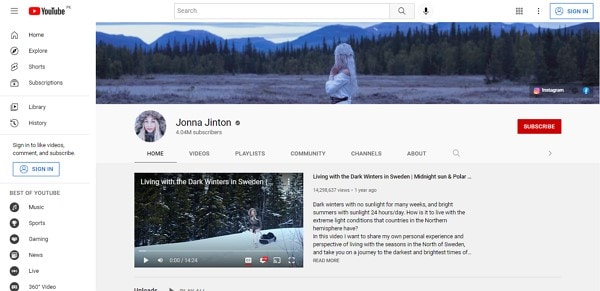
4. Jonna Jinton
Subscriber Count: 4.04M+
Jonna is a Swedish local that lives across the woods. While being an artist, musician, and filmmaker, Jonna has a very different perspective on life. Her idea of getting inspired by nature and finding the ‘right’ essence of nature are induced across her everyday travel videos. She accompanies her videos with music, painting, nature, ice baths, and much more, making her a different deal than the rest.
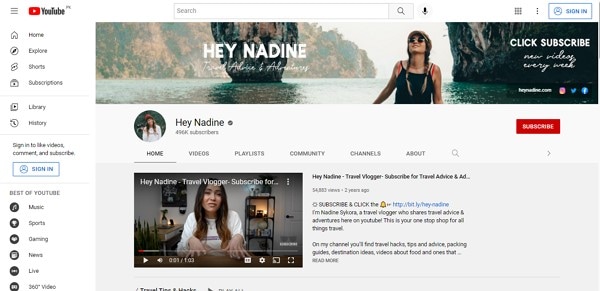
5. Hey Nadine
Subscriber Count: 496K+
This travel vlogger is probably among the first who started filming travel vlogs. While being the best in the market, Hey Nadine has been known for inspiring many people worldwide. Isn’t it great? Her videos are inclusive of the viewer’s desire, making people visit the places after looking at the videos. An authentic personality, combined with nature’s beauty, is what you’ll witness across her travel vlogs.
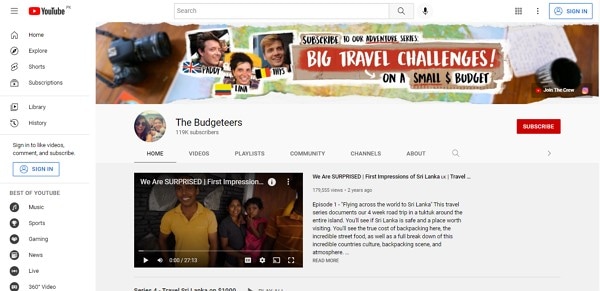
6. The Budgeteers
Subscriber Count: 119K+
The name says a lot about these travel vloggers. The Budgeteers work with wholesome travel vlogs across their channel, which represents a major keyword of ‘budget’ trips. As their objective is to cover trips on a low budget, it has been observed that most of their videos are based in the Southeast Asian region. A group of three people with great visuals and extensive presentation is everything you’ll find across this YouTube channel.
7. FunForLouis
Subscriber Count: 1.98M+
Do you seek diversity in selecting the best travel spot for your summer vacation? FunForLouis is a casual traveler and vlogger who builds up the idea of traveling with the desire to enjoy life. You will find extensive quality in his videos, making the viewers addicted to his videos. Louis Cole surely knows how to brand his travels and bring the best out for his viewers.

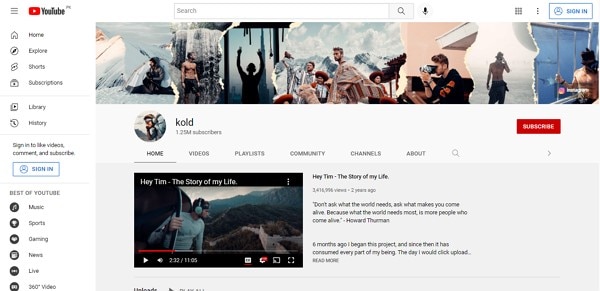
8. Kold
Subscriber Count: 1.25M+
Inspired by filmmakers and storytellers? Do you wish to hit the feeling of traveling to the best places worldwide? Kold is recognized among the best vloggers who essentially work in providing the best view of the location under effective transitions. Although he is not a regular vlogger, he surely brings the best content you can find across the Internet.
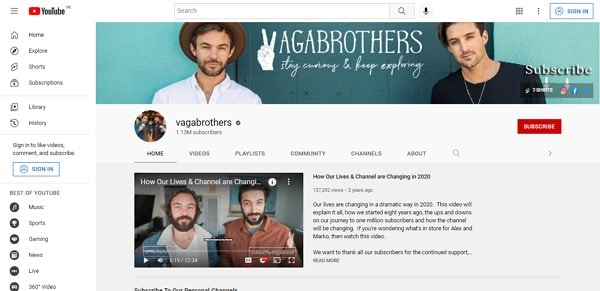
9. Vagabrothers
Subscriber Count: 1.13M+
Do you wish to find a fun side of traveling to the best sites in the world? Vagabrothers taps into a different aspect of traveling and helps viewers understand the beauty of being different. Their vlogging is inspired by fun shooting styles and a different perspective to showing the culture and traditions of the place they visit.
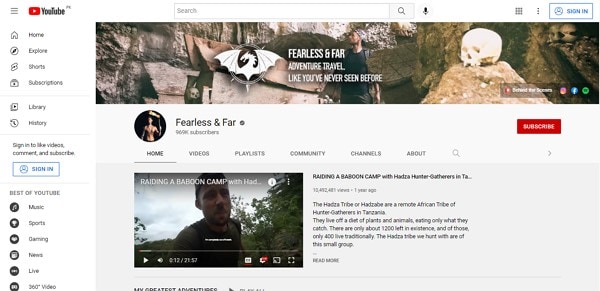
10. Fearless and Far
Subscriber Count: 969K+
Just as the name suggests, Mike Corey brings you some of the extreme travel vlogs. If you are a fan of going on extreme adventures, Mike will provide you with some of the best ideas to try. He will let you know the unheard parts of the world that you would want to visit after going through his videos. His sense of perfection in adventure makes him one of the top vloggers.
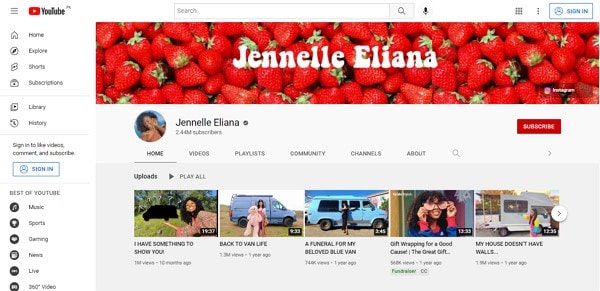
11. Jennelle Eliana
Subscriber Count: 2.44M+
Young blood is always inspiring. If you are curious how a person living in a van survives, this vlogger is the best choice to watch. Jennelle Eliana has not been an old player, yet her followers have been truly inspired by her motive and content. If you wish to be as inclusive to traveling as Jennelle, you should try out her ideology and style of traveling.
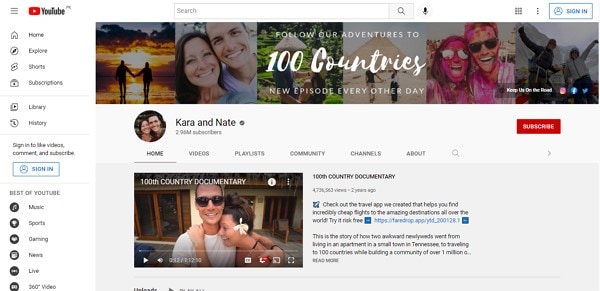
12. Kara and Nate
Subscriber Count: 2.96M+
Do you wish to spend traveling with your life partner, just like Kara and Nate present across their vlogging channel? This couple has been putting up content that is extremely exceptional in terms of vlogging; however, it puts them at the top amongst other best vloggers. Kara and Nate have tried to bring the better side to everything they face across their travel diaries, which can be clearly witnessed in their content.
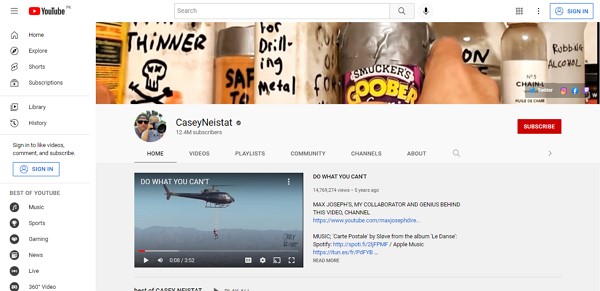
13. Casey Neistat
Subscriber Count: 12.4M+
A pioneer in YouTube vlogging, Casey Neistat brings up a different vibe to traveling. His videos are created with intent and desire, which drives a sensation across the viewers and builds an urge to travel. Casey has been inspiring people with his content, and by producing some masterpieces in travel vlogs, he has also put up his name in the top vloggers for travel.
14. Lost LeBlanc
Subscriber Count: 1.94M+
There is a whole different story to Christian LeBlanc when it comes across his traveling vlog channel. This vlogger has worked across his desire to get out of the corporate culture and work on his desire to explore the world. As he sold everything he owned, he has now been working as a travel vlogger, with the aim of inspiring people all along.

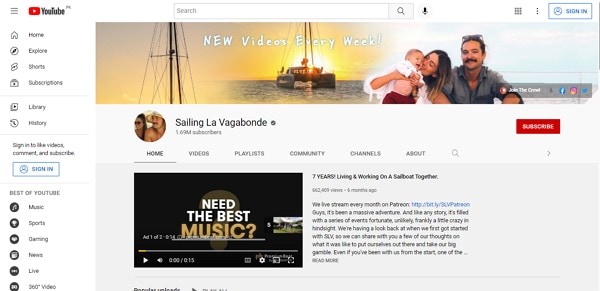
15. Sailing La Vagabonde
Subscriber Count: 1.69M+
If you wish to have a whole new traveling experience, you should see Elayna and Riley traveling the world across a boat. As they took a new lifestyle in their lives, they have presented a different perspective of traveling through water. Their idea of the environment is enticing, making them referred to among the best vloggers.
Closing Words
Have you gone through this extensive list of travel vloggers? Find out the best among them? We wish that you will be inspired by our list and would come across this industry with a new idea to travel vlogging. However, within this journey of video making, you should never forget the video editor that would help you. Wondershare Filmora is the perfect option that you may find in the market for putting up a nice travel vlog for your channel.
For Win 7 or later (64-bit)
For macOS 10.12 or later
For macOS 10.12 or later
For macOS 10.12 or later
For macOS 10.12 or later
Also read:
- [New] Essential Samsung VR Games for Beginners
- [New] Facebook Tutorial How to Create Facebook Account for 2024
- [New] How to Secure YouTube Channels' Audible Content for 2024
- [Updated] 2024 Approved Flavorful Follows Top Food Vloggers to Track
- [Updated] 2024 Approved Top-Tier Tips for Naming Your Podcast Right + Inspiring Title Ideas Countdown
- 2024 Approved Are You Looking to Store Your Videos Securely and Efficiently? Look No Further than Our Top Pick for the Best Cloud Storage Service for Videos
- 2024 Approved How to Make Custom Lower Thirds with Filmora
- 2024 Approved How to Use 3D Camera Tracking Effects in After Effects
- In 2024, How Can We Bypass Xiaomi 14 Ultra FRP?
- In 2024, How to Comment on YouTube Live Chat
- In 2024, No-Sweat Strategies for Skipping Edgenuity Video Content
- In-Depth Analysis of Garmin Forerunner E945: The Pinnacle of GPS Sport Watches on the Market Today
- New 2024 Approved Change Background Color in After Effects
- New Guide to Make Timelapse Video with iMovie
- Size Matters Not with the Power-Packed Apple iPad Mini 5 - Our In-Depth Analysis
- The Smart Choice Essential Steps in Upgrading Your Tech for 2024
- Updated 2024 Approved Final Cut Pro for iPad- Is It Available?
- Updated Difference Between Time Lapse and Hyperlapse for 2024
- Updated Full Guide to Funcall Voice Changer and Its Alternatives for 2024
- Title: Updated In 2024, Best Frame Rate for 4K Video
- Author: Chloe
- Created at : 2025-03-01 20:33:18
- Updated at : 2025-03-04 04:11:49
- Link: https://ai-editing-video.techidaily.com/updated-in-2024-best-frame-rate-for-4k-video/
- License: This work is licensed under CC BY-NC-SA 4.0.

