

Updated In 2024, Best Jump Cut Editing Tricks
Best Jump Cut Editing Tricks
The jump cut is more common than ever, from YouTube to movie montages. A jump cut is a method for transitioning from one shot to another without including any interstitial video. A jump cut is a cinematic technique when the editor abruptly cuts from one shot to another without any discernible transition.
When filmmakers wish to display someone’s views or ideas without having to invest time and money in recording them, for example, this may be utilized for creative effects. Learn all there is to know about jump cuts in the next paragraphs, including their history, how to create one, how to edit one, and how to utilize one in your next social media video.
Part 1: What is Jump Cut in Films?
To produce a smooth viewing experience, the director, editor, and cinematographer collaborate. Certain cuts have the power to startle a viewer out of this experience and remind them that they are watching a movie. The term “jump cut” refers to one of these cuts. Jump cuts are often discouraged in cinema, yet there are efficient methods to use them to provide the greatest narrative possible.
In video editing, a jump cut is the transition between two images of the same topic taken from the same or comparable angles and at two distinct times. This gives the impression that the action is ‘jumping’ ahead in time.
Most of the time, you want your videos’ cuts to flow seamlessly. This offers continuity and a nice watching experience for your viewers. Although it’s one of the most fundamental editing procedures, doing it correctly requires a bit more experience and ability. Let’s thus try to make your jump cut technique even better.
Part 2: 10 Most Shocking Jump Cuts in Film History
1. City of God
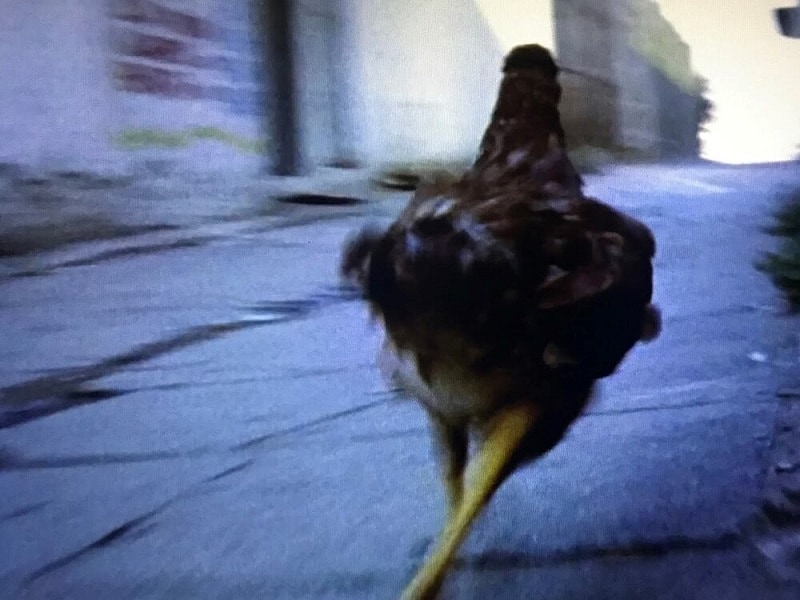
With the combination of jump cuts, repetitive action, frantic montage, and a final bullet time graphic match wipe, the opening sequence of City of God drives the viewer into the pulse of the music and the violence in Rio. This seems like a prescription for catastrophe, yet it works in City of God. The screen is made electrified.
The chicken forces the characters to cross paths, which causes the two scenes to collide. Rezende now captures Rocket and Liz’s expressions in slow motion, resulting in a dramatic scene. After a circular pan-centering Rocket, which melts into a different moment of ten years ago, the shot comes to a close.
2. The Ring
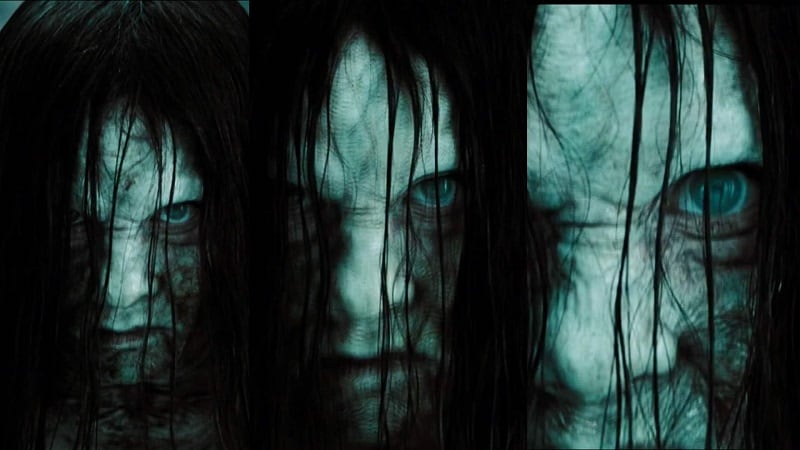
In the pivotal scenes of “The Ring,” director Gore Verbinski used a jump cut to give the impression that Samara Morgan, the ghost, moves quickly around the room. By deleting or including anything in the frame, which is unsettling for both characters and viewers, this is a tried-and-true method of increasing the number of scares.
Jump cuts may also be distracting if done improperly or inappropriately, even though they are often intended to confuse or surprise the audience. There is a time and place for the method, even if a jump cut is far from the sole tool in the video editor’s toolbox.
3. Juno
In the movie Juno, director Jason Reitman portrays the tale of a young adolescent who becomes pregnant and ultimately gives her kid up. Each leap represents a new stage in the character’s development as a result of this life-changing experience. Jump cuts in Jason Reitman’s comedy-drama Juno depict the youthful heroine’s journey both physically and mentally.
Jump cuts are a technique used by Reitman to convey both the passage of time and the changes in Juno’s life. like visiting the adoptive parents or getting regular checks at the doctor. You might think of each jump cut as one of the five phases of grieving. In the last chapter, “summer,” Juno has a better understanding of what she is giving up and how it will impact both her life and everyone else’s.

4. Samara Kills Noah the Ring
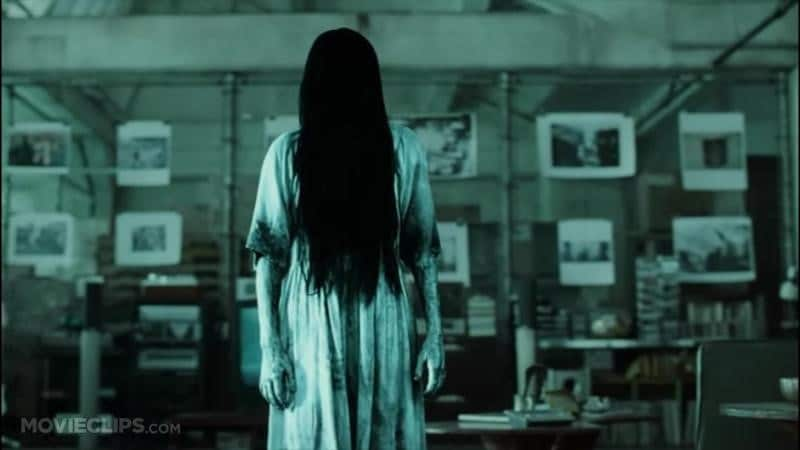
It’s a tremendously imaginative and horrifying conclusion after a whole film’s worth of very subtle build-up that couldn’t be farther from the really low expectations U.S. horror remakes often attract. Gerbinski cleverly arranges for Samara to “jump cut” in front of Noah while still flashing with TV static, shocking him and causing him to trip and fall.
It’s fair to say that American horror films tend to rely on lazy jump scares, created by quick-cut images and loud sound effects, and that typically goes double for cynical state-side remakes of foreign language horror hits. However, Gore Verbinski’s surprisingly stylish and moody 2002 remake of The Ring makes clever use of jump cuts during a crucial climactic scene to fully hammer home the terror of the film’s spectral, black-haired antagonist Sam
5. Dan’s Corpse – The Birds
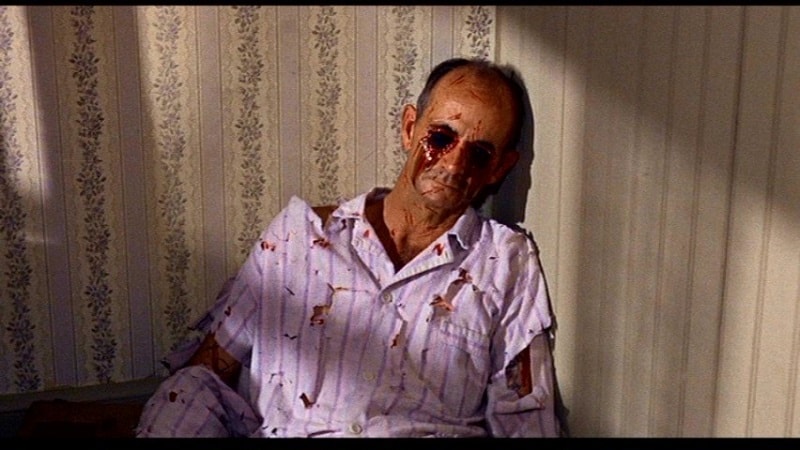
Instead of using a single cut or even zooming on Dan’s disfigured face, Hitch chooses to use two jump cuts that each bring us a little bit closer to Fawcett’s face.
When seen now, it is a straightforward yet shocking effect, but in 1963, it was unquestionably genuinely horrifying. It was just one more of his many deliberate choices to depart from established cinematic norms. Although the jump cut is a simple editing method by today’s standards, it was far less popular in earlier times, as seen by its skillful and startling use in Alfred Hitchcock’s great 1963 horror film The Birds.
6. Taking A Ride – Breathless
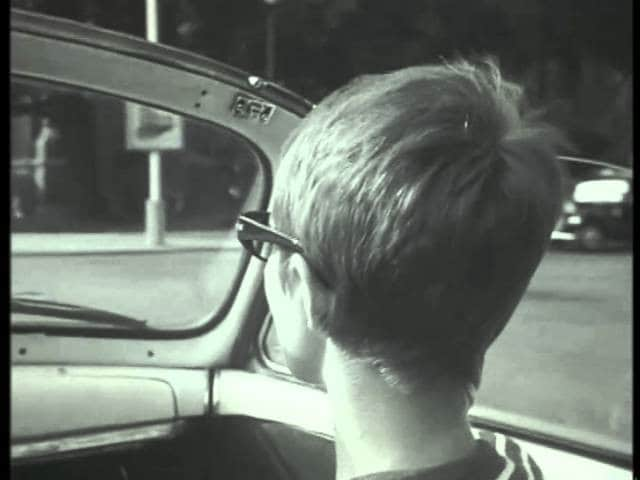
According to the Director Pierre Rissient, the jump cut technique was unplanned and developed out of a pressing necessity to trim Breathless from two and a half hours down to ninety minutes. The best example of this is when Patricia and Michel are driving about in their automobile, and Godard cuts between identical pictures of Patricia to show time passing while also heightening the urgency of the story of the couple on the run in the movie.
The significance of this sequence is that it dismantled rules for how a scene might be put together, despite the fact that it seemed absolutely primitive in retrospect. Not every movie that uses a jump cut in a dramatic or unexpected way must be in the horror category.
7. Charlie’s Head Hereditary
It’s one of the strangest and really unsettling jump cuts we’ve seen in recent memory, and it definitely deserves the surprisingly intricate gore display that it has. One of the most eerie and masterfully orchestrated horror movies of the decade, if not the whole 21st century, is Ari Aster’s Hereditary. Aster turns his attention to Peter, who is gazing out into the horizon, just as Annie can be heard screaming in agony, having found Charlie’s corpse in the garage.
While Annie’s screams can still be heard, the editor jump cuts from Peter’s face to Charlie’s severed, mangled head by the side of the road as it is being eaten by insects. After bringing his sister’s headless corpse-filled automobile home, a terrified Peter parks it and gets into bed.

8. Human Evolution in a Single Cut 2001: A Space Odyssey
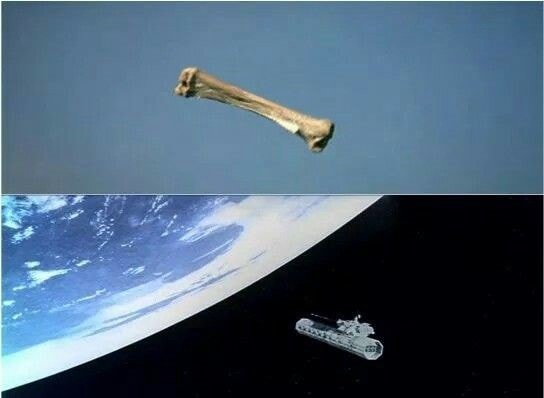
This brief clip illustrates how man evolved from the monkey to the contemporary day, where we had been to space. In this brief sequence, which depicts the origins of modern man, new technology that has evolved over millions of years is dramatically upgraded.
The sequence includes a jump cut as the bone, a weapon of prehistoric man, travels through the air. Then, the picture jumps forward by nearly a million years, and the bone is replaced by a spacecraft with a like form.
9. Dr Erin Mears’s Death Contagion
In the masterpiece Contagion, the jump cut clustering that is seen experimentally is produced by the model. Afterward, leap intensities mean-revert until the next jump. But more crucially, Contagion vividly captures the danger of widespread fear, prejudice, and disinformation during a pandemic, particularly when it comes to social media and the internet.
In this shocking edit in film history, the editor made it all feasible by using a jump cut. Regardless of how realistic Contagion seems, it should still be seen as a work of fiction.

10. The Jump Cut as a Special Effect the Haunted Castle
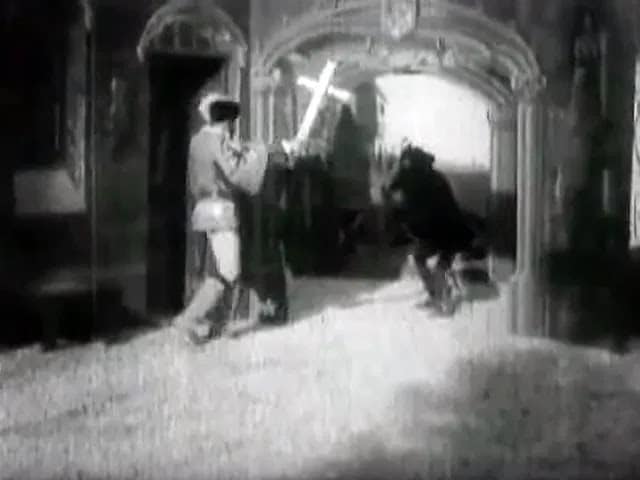
Whether a visual effect is created by hand or with a computer, selling it needs a community. The same is true for editing as well. In some cases, the visual impression is really the cuts. The modest cut is the most basic and traditional visual effect in movie magic. The method really dates back to early filmmakers and cinematic illusionists.
Amazed by the unexpected outcome, using a cut that has been deftly snuck into a whip-pan, two shots may be combined with full-scale sets and miniatures. A progressive makeup effect, such as the notorious metamorphosis in The Haunted Castle, may likewise be covered up using cuts.
Part 3: How do We Use Jump Cuts Today?
The viewing experience is impacted differently by various editing methods. Jump cuts may be helpful for video editing in filmmaking since they highlight just the most important elements of a story while also indicating the passage of time. The jump cut is now often used in music videos, vlogs, and YouTuber material, making it a preferred option for creators of online content.
Today’s movies often use “jump cuts,” particularly as the number of horror movies produced has increased. The use of jump cuts makes the picture highly unsettling. One editing method, the jump cut, is still as effective now as it was back when pictures were stitched together and celluloid was cut with a razor blade. It is a well-liked method of video editing that is often used to indicate the passage of time, highlight an emotion, or heighten tension.
The shots did not quite run in a fluid session in the early phases of filming to provide the audience with a steady view of the screen. Instead, there were “jumps” in the movie, and the forward return was partially omitted. This “jump shot” idea may be compared to the expression. Today, however, despite all of the technological advancements we have at our disposal, movie makers and producers are attempting to recreate the look.
Part 4: Top 9 Editing Tools to Smooth Over Jump Cuts
Even more of a barrier than the difficulty of acquiring a new talent is often the expense of video editing software. Consider using free video editing software to get started if you are unsure of how to spend your money or even whether you want to.
On PC
1. Filmora Video Editor
Supported Platforms: Windows and Mac
Description: Both Windows and Mac are compatible with the app. Trimming, transitions, overlays, and other basic video editing features are available. It does not, however, include several cutting-edge capabilities, including as motion tracking and multicam. After launching the software to edit jump cuts, you may also choose the other options that best suits your requirements including the multi-layer effects and elements.

A freemium video editing program largely geared at novices is Wondershare Filmora. There are a ton of filters and over-effects included with it, and they can work true jump cut magic on your films. A considerable number of functions are available in the free edition, however; videos are exported with the Filmora watermark, which must be removed by upgrading to the pro version. A huge library of drag-and-drop transitions, effects, and titles are among the many creative tools and production elements included in the application. Another feature is an intro designer with hundreds of themes.
Free Download For Win 7 or later(64-bit)
Free Download For macOS 10.14 or later
Key Features:
- People who wish to learn jump cuts will find this extremely helpful.
- Support for 4K editing and GIFs
- Effects for camera shaking, noise reduction, and reversing the color
- Free to use elements and transitions to make jump cuts look epic.
2. Windows Movie Maker
Supported Platforms: Windows
Description: For those who want to go back to the fundamentals, Windows Video Editor, a built-in editor from Microsoft, is a useful program. It’s fantastic for quickly editing brief video footage that you need available right away. While it includes the fundamental editing capabilities like cropping, cutting, and adding text or music, Windows Video Editor is more of a picture editor. The free Video Editor program, which comes with Windows 10 and later, is useful for simple video editing.

No editor simplifies the process more, whether trimming home movies or creating YouTube videos that go popular. You won’t have any trouble using this tool, even if you’re a newbie. The user interface is quite simple to use. All the capabilities and resources you need to edit your films are easily accessible.
Pros
- Auto-movie features for cutting your video clips into bespoke lengths
- Adding music, titles, and credits is simple using the animation tab.
- portion of 3D effects with little modification
Cons
- Certain playback choices eliminate special effects.
- Jump Cuts & Picture in Picture may be challenging
- a resource-intensive program
3. Adobe Premiere Pro
Supported Platforms: Windows and Mac
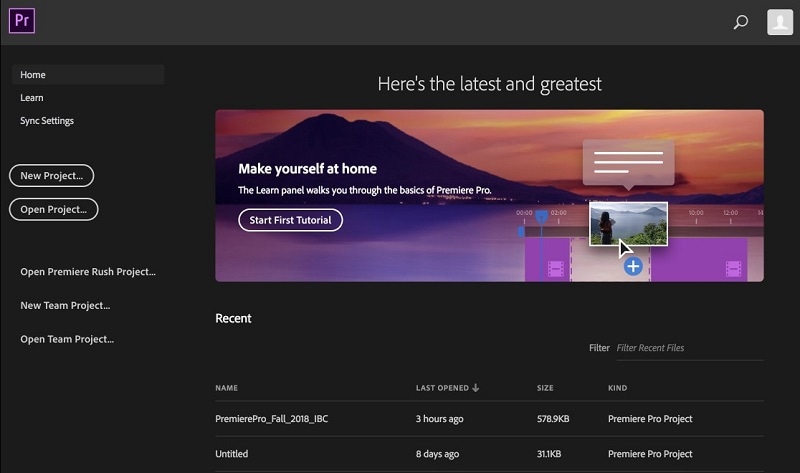
Description: A timeline-based video editor called Adobe Premiere Pro was created by the renowned Adobe Systems. It features a wide range of video editing tools, including the Ripple Edit, Rolling Edit, and Slip Tools. It’s a wonderful option for YouTubers because of features like Multiple Sequence Support, Multi-Camera Editing, Time Remapping, Color Correction Tools, and Audio Mixer Interface.
The program has a user-friendly interface and runs on both Windows and Mac. Its responsive user interface aids in achieving peak performance. Beginners may find working with it a bit confusing, but the good news is that there are many tutorials available. The timeline-based video editing program in the Creative Cloud is called Adobe Premiere Pro. Programs for web development and graphic design are among the other Adobe CC products. It has several fantastic capabilities, like the capacity to automatically color-correct your video, create multi-camera sequences, include audio effects, and more.
Pros
- Excellent capabilities for editing videos
- Capable of handling big tasks
- Renowned color-matching and correcting tools
Cons
- High system specifications
- Demands a pricey subscription
- If you are new to video editing, learning Premiere might be difficult.
4. VEGAS Pro
Supported Platforms: Windows
Description: Vegas Pro is a video editing program that is well-liked by seasoned video amateurs since it falls short of being professional software but isn’t the best choice for everyday users.
It provides a variety of tools and features that enable users to produce high-quality films. Vegas Pro may be difficult to learn, and it is not the most affordable video editing program. For it to function properly, a strong computer is also needed. So, Vegas Pro may not be your best choice if you don’t have a more recent PC.

Pros
- Direct YouTube upload
- Burning CD option available for films
- Color Rectification for Jump cuts
Cons
- Quite few cutting-edge features
- Outmoded UI
- Learning curve is there.
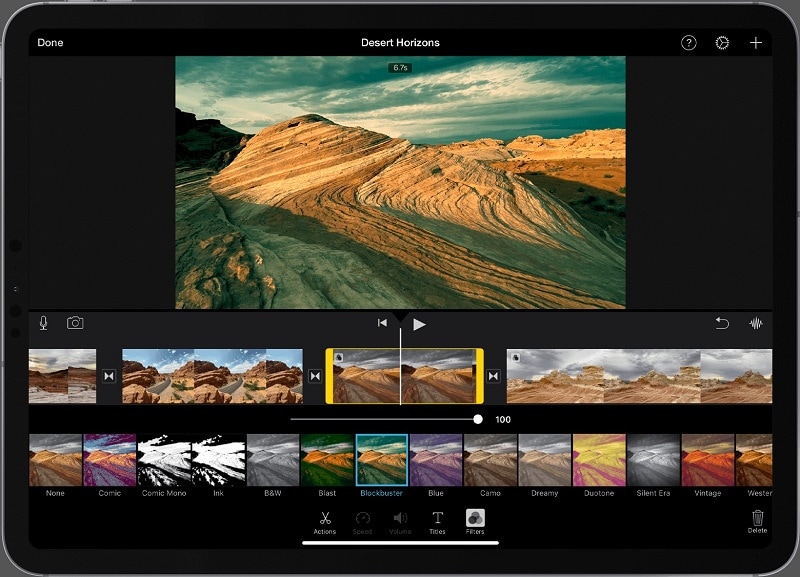
5. iMovie
Supported Platforms: Mac, iOS
Description: Apple-iOS based video editing software is available from iMovie, allowing you to begin editing on an iPhone or iPad and complete it on a Mac. iMovie is straightforward and offers a straightforward drag-and-drop interface to transfer files from your disk to your desktop, as many native Apple products do. It’s a simple approach to create effective films that can help your YouTube marketing efforts.

The basic capabilities of video editing software are included; however, the more complex functions are not very excellent. Any Mac user should check it out however since it is free. Apple makes the video editing program iMovie, which is compatible with iOS, macOS, and iPad OS devices. You may create 4K resolution videos using the program, which is free, straightforward, and simple to use.
Pros
- Choose from a variety of styles to include gorgeously animated titles and credits.
- Picture-in-picture and split-screen techniques may give your school report a broadcast vibe.
- Pick from 10 inventive video filters to give your videos a more dramatic feel.
Cons
- iMovie might be difficult to learn. Not “beginner user-friendly” is the layout.
- Due to its simplicity, iMovie cannot be considered a professional video editing program.
- Audio may sometimes spill into transitions.
6. Final Cut Pro X
Supported Platforms: Mac Only
Description: A popular editing program for GoPro footage, FINAL CUT PRO X’s desktop video editing software is offered in both a free and a paid version. Despite the free version’s fewer features, it still includes the full video editing suite, including a mask tool and chroma key functionality for green-screen video effects.

Final Cut Pro X is an effective option for small businesses and is best for clip resizing, scaling, trimming, snapping, and rotation. It also provides credit scrolling, frame stepping, time mapping, audio editing, and real-time preview. If you have the money to splash out for the full version, the suite of tools expands to include video stabilization, robust post-production effects, slideshow/presentation capabilities, 3D diagram templates, and direct social media publishing.
Pros
- picture filters that are simple to apply and resemble those on Instagram
- Masking tools for obscuring, distorting, or emphasizing certain components
- Tools for color correcting for a more professional appearance
Cons
- accessible for only one platform
- less settings for background animation
On iPhone
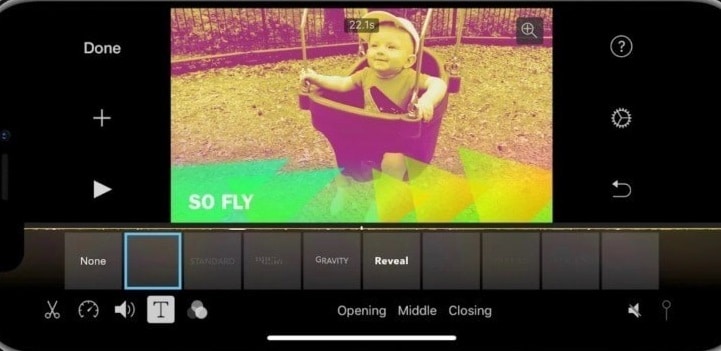
7. iMovie
With iMovie, you may work on your project interchangeably on an iPhone, iPad, or Mac thanks to the fact that data are maintained on Apple’s cloud. Additionally, iMovie is always being updated, so you can always anticipate new features and enhancements.
Key Characteristics:
- Support for 4K resolution, enabling users to produce movies with a cinematic quality
- Working on the same project from your iPad, iPhone, and Mac thanks to cloud storage
- Numerous studio-quality title animations for credits that look professional
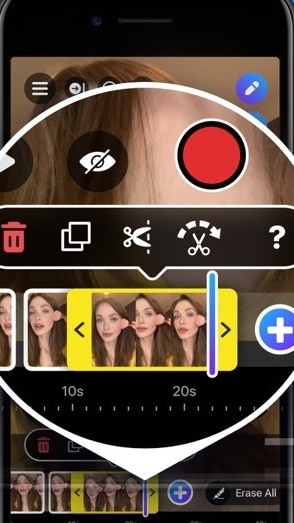
8. Jumpcut
Anyone who wants to make high-quality videos without spending any money should consider Jumpcut, which has a ton of straightforward and user-friendly features, including 3D video editing and a sound effects library, to experiment with various video compositions and styles.
You can quickly and easily export your finished video to YouTube, Facebook, Google Drive, and other mobile devices after finishing your video editing with special effects, overlays, texts, and transitions.
Key Characteristics:
- Online publishing and sharing tools for social media that allow for instant video sharing
- a sizable collection of visual effects and video transitions for customizing videos
- Tools for optimizing videos, such stabilizing
9. VlogEasy
VlogEasy is a powerful HD video and photo editor with professional features that is one of the most well-known name brands among mobile video editing apps for creators. The free version grants access to many of the features and effects, but not all, in exchange for having to view in-app advertisements.
This free video editing program offers the simplest way to edit a video; you can cut, merge, and enhance videos on any device — even on your camera or smartphone — through its non-destructive processing, and you can quickly create a high-definition video. VlogEasy is a freemium video editor with all video editing features: cut video, trim video, crop video, merge video, edit video with music, edit video for YouTube, add stickers to video, add text to video,
Key Characteristics:
- Rapid and simple video trimming and deletion
- 4K video assistance
- A variety of video features
Part 5: How is a Jump Cut Used in Social Media Videos
Jump from your lodge to the Subtropical Swimming Paradise to Archery to exploring the forest - the possibilities are endless - using the Jump Cut in social media videos, it’s a unique way to capture all those experiences for you and your family to look back on later.
Jump Cuts on TikTok
Jump cuts are quite simple to master and apply to almost all of the other transitions. After shooting your first clip, change the subject or the action in preparation for shooting your second clip. Try to keep the new action or subject in the same position. The magic will happen in the edit, when you combine the clips.
Jump Cuts on Instagram
You will need a smartphone to film your jump cut and a tool to “edit” your video to help you put it all together. Once all your video clips are in order, the next step is to cut down each video to just your jumps. You need to crop the video as you land in the location and as you jump out. You will need to use Instagram to film your separate clips on your smartphone first, then put them together in Instagram Reels.
Part 6: Creative Ways to Jump Cuts Like a Pro
Jump cuts can enhance your videos’ quality, making them worthwhile to learn for any content creator who wants to use editing as a tool rather than a barrier.
Way 1: Add shots and cutaways
When it comes to integrating jump cuts, think about immersing your audience in the story. Jump cuts are the opposite of continuity editing. instead of a seamless and immersive progression, we create something that feels less natural by chopping up a single clip. If you need even more convincing, keep in mind that boosting your content will also improve the experience of your viewers. And focusing on that will make them keep coming back to your videos for the foreseeable future.
Way 2: Intentionally Using Jump Cuts
While this editing method does serve that purpose, a good jump cut is more of a stylistic choice, and stylistic choices are what make a film stronger as long as they are planned and integrated, rather than thrown together during editing. Of course, the added benefit is that you’ll likely get some advice on other types of cuts you can use in your videos.
Free Download For macOS 10.14 or later
Key Features:
- People who wish to learn jump cuts will find this extremely helpful.
- Support for 4K editing and GIFs
- Effects for camera shaking, noise reduction, and reversing the color
- Free to use elements and transitions to make jump cuts look epic.
2. Windows Movie Maker
Supported Platforms: Windows
Description: For those who want to go back to the fundamentals, Windows Video Editor, a built-in editor from Microsoft, is a useful program. It’s fantastic for quickly editing brief video footage that you need available right away. While it includes the fundamental editing capabilities like cropping, cutting, and adding text or music, Windows Video Editor is more of a picture editor. The free Video Editor program, which comes with Windows 10 and later, is useful for simple video editing.
No editor simplifies the process more, whether trimming home movies or creating YouTube videos that go popular. You won’t have any trouble using this tool, even if you’re a newbie. The user interface is quite simple to use. All the capabilities and resources you need to edit your films are easily accessible.
Pros
- Auto-movie features for cutting your video clips into bespoke lengths
- Adding music, titles, and credits is simple using the animation tab.
- portion of 3D effects with little modification
Cons
- Certain playback choices eliminate special effects.
- Jump Cuts & Picture in Picture may be challenging
- a resource-intensive program
3. Adobe Premiere Pro
Supported Platforms: Windows and Mac
Description: A timeline-based video editor called Adobe Premiere Pro was created by the renowned Adobe Systems. It features a wide range of video editing tools, including the Ripple Edit, Rolling Edit, and Slip Tools. It’s a wonderful option for YouTubers because of features like Multiple Sequence Support, Multi-Camera Editing, Time Remapping, Color Correction Tools, and Audio Mixer Interface.
The program has a user-friendly interface and runs on both Windows and Mac. Its responsive user interface aids in achieving peak performance. Beginners may find working with it a bit confusing, but the good news is that there are many tutorials available. The timeline-based video editing program in the Creative Cloud is called Adobe Premiere Pro. Programs for web development and graphic design are among the other Adobe CC products. It has several fantastic capabilities, like the capacity to automatically color-correct your video, create multi-camera sequences, include audio effects, and more.
Pros
- Excellent capabilities for editing videos
- Capable of handling big tasks
- Renowned color-matching and correcting tools
Cons
- High system specifications
- Demands a pricey subscription
- If you are new to video editing, learning Premiere might be difficult.
4. VEGAS Pro
Supported Platforms: Windows
Description: Vegas Pro is a video editing program that is well-liked by seasoned video amateurs since it falls short of being professional software but isn’t the best choice for everyday users.
It provides a variety of tools and features that enable users to produce high-quality films. Vegas Pro may be difficult to learn, and it is not the most affordable video editing program. For it to function properly, a strong computer is also needed. So, Vegas Pro may not be your best choice if you don’t have a more recent PC.
Pros
- Direct YouTube upload
- Burning CD option available for films
- Color Rectification for Jump cuts
Cons
- Quite few cutting-edge features
- Outmoded UI
- Learning curve is there.
5. iMovie
Supported Platforms: Mac, iOS
Description: Apple-iOS based video editing software is available from iMovie, allowing you to begin editing on an iPhone or iPad and complete it on a Mac. iMovie is straightforward and offers a straightforward drag-and-drop interface to transfer files from your disk to your desktop, as many native Apple products do. It’s a simple approach to create effective films that can help your YouTube marketing efforts.
The basic capabilities of video editing software are included; however, the more complex functions are not very excellent. Any Mac user should check it out however since it is free. Apple makes the video editing program iMovie, which is compatible with iOS, macOS, and iPad OS devices. You may create 4K resolution videos using the program, which is free, straightforward, and simple to use.
Pros
- Choose from a variety of styles to include gorgeously animated titles and credits.
- Picture-in-picture and split-screen techniques may give your school report a broadcast vibe.
- Pick from 10 inventive video filters to give your videos a more dramatic feel.
Cons
- iMovie might be difficult to learn. Not “beginner user-friendly” is the layout.
- Due to its simplicity, iMovie cannot be considered a professional video editing program.
- Audio may sometimes spill into transitions.
6. Final Cut Pro X
Supported Platforms: Mac Only
Description: A popular editing program for GoPro footage, FINAL CUT PRO X’s desktop video editing software is offered in both a free and a paid version. Despite the free version’s fewer features, it still includes the full video editing suite, including a mask tool and chroma key functionality for green-screen video effects.
Final Cut Pro X is an effective option for small businesses and is best for clip resizing, scaling, trimming, snapping, and rotation. It also provides credit scrolling, frame stepping, time mapping, audio editing, and real-time preview. If you have the money to splash out for the full version, the suite of tools expands to include video stabilization, robust post-production effects, slideshow/presentation capabilities, 3D diagram templates, and direct social media publishing.
Pros
- picture filters that are simple to apply and resemble those on Instagram
- Masking tools for obscuring, distorting, or emphasizing certain components
- Tools for color correcting for a more professional appearance
Cons
- accessible for only one platform
- less settings for background animation
On iPhone
7. iMovie
With iMovie, you may work on your project interchangeably on an iPhone, iPad, or Mac thanks to the fact that data are maintained on Apple’s cloud. Additionally, iMovie is always being updated, so you can always anticipate new features and enhancements.
Key Characteristics:
- Support for 4K resolution, enabling users to produce movies with a cinematic quality
- Working on the same project from your iPad, iPhone, and Mac thanks to cloud storage
- Numerous studio-quality title animations for credits that look professional
8. Jumpcut
Anyone who wants to make high-quality videos without spending any money should consider Jumpcut, which has a ton of straightforward and user-friendly features, including 3D video editing and a sound effects library, to experiment with various video compositions and styles.
You can quickly and easily export your finished video to YouTube, Facebook, Google Drive, and other mobile devices after finishing your video editing with special effects, overlays, texts, and transitions.
Key Characteristics:
- Online publishing and sharing tools for social media that allow for instant video sharing
- a sizable collection of visual effects and video transitions for customizing videos
- Tools for optimizing videos, such stabilizing
9. VlogEasy
VlogEasy is a powerful HD video and photo editor with professional features that is one of the most well-known name brands among mobile video editing apps for creators. The free version grants access to many of the features and effects, but not all, in exchange for having to view in-app advertisements.
This free video editing program offers the simplest way to edit a video; you can cut, merge, and enhance videos on any device — even on your camera or smartphone — through its non-destructive processing, and you can quickly create a high-definition video. VlogEasy is a freemium video editor with all video editing features: cut video, trim video, crop video, merge video, edit video with music, edit video for YouTube, add stickers to video, add text to video,
Key Characteristics:
- Rapid and simple video trimming and deletion
- 4K video assistance
- A variety of video features
Part 5: How is a Jump Cut Used in Social Media Videos
Jump from your lodge to the Subtropical Swimming Paradise to Archery to exploring the forest - the possibilities are endless - using the Jump Cut in social media videos, it’s a unique way to capture all those experiences for you and your family to look back on later.
Jump Cuts on TikTok
Jump cuts are quite simple to master and apply to almost all of the other transitions. After shooting your first clip, change the subject or the action in preparation for shooting your second clip. Try to keep the new action or subject in the same position. The magic will happen in the edit, when you combine the clips.
Jump Cuts on Instagram
You will need a smartphone to film your jump cut and a tool to “edit” your video to help you put it all together. Once all your video clips are in order, the next step is to cut down each video to just your jumps. You need to crop the video as you land in the location and as you jump out. You will need to use Instagram to film your separate clips on your smartphone first, then put them together in Instagram Reels.
Part 6: Creative Ways to Jump Cuts Like a Pro
Jump cuts can enhance your videos’ quality, making them worthwhile to learn for any content creator who wants to use editing as a tool rather than a barrier.
Way 1: Add shots and cutaways
When it comes to integrating jump cuts, think about immersing your audience in the story. Jump cuts are the opposite of continuity editing. instead of a seamless and immersive progression, we create something that feels less natural by chopping up a single clip. If you need even more convincing, keep in mind that boosting your content will also improve the experience of your viewers. And focusing on that will make them keep coming back to your videos for the foreseeable future.
Way 2: Intentionally Using Jump Cuts
While this editing method does serve that purpose, a good jump cut is more of a stylistic choice, and stylistic choices are what make a film stronger as long as they are planned and integrated, rather than thrown together during editing. Of course, the added benefit is that you’ll likely get some advice on other types of cuts you can use in your videos.
Are You Trying to Make Your Video Pause on a Specific Frame? Learn How to Do so Quickly and with Ease by Adding a Freeze-Frame Effect in These Freeze-Frame Video Editing Apps
Best 5 Tools to Help You Know More Freeze Frame Video Editing Skills
An easy yet powerful editor
Numerous effects to choose from
Detailed tutorials provided by the official channel
The freeze-frame video editing effect is a technique used to stop the moving image of a video and hold it still onscreen. This effect aims to pause the world the video is living in and allow the audience to process the scene and gain more context fully. Note that the world around us keeps ongoing, and time never stops. But luckily for us, we can pause film and video with a simple but powerful video effect known as the freeze-frame.
In addition, a freeze-frame can be carried out in a video to showcase a specific frame in your clip by extending the length of Time that frame is displayed. For example, you can decide to freeze a frame to show the video frame where a goal is being scored in a sporting event or use it to showcase a captured reaction or a smile. When a freeze-frame applies to a video clip, the clip automatically splits at the freezing point, and the chosen frame is inserted as an image file (BMP) and displayed on screen for the duration you set. This article will teach how to use the freeze-frame editing service ideally.
In this article
01 [How to Add a Freeze-frame to Video Clips in all Tools](#Part 1)
02 [SUPER COOL Freeze-frame Effect with Filmora 11](#Part 2)
Part 1 How to Add a Freeze-frame to Video Clips in all Tools
Do you want to draw your audience’s attention to a point or for dramatic flair by stopping your video and holding on to a single frame? This section will give you the best tools for freeze-frame editing via a step-by-step guide on how to do it.
01After Effects
Here is a step-by-step guide on how to Freeze-frame in After Effects:
Step 1: Download After Effects
Download and install Adobe After Effects and open it on your desktop. This software works with both macOS and Windows.

Step 2: New Composition
Next is to open a new project or drag and drop your video and add it to the timeline. Another way is to click on “New Composition from Footage” and then browse the video you want to edit.

Step 3: Select the Frame
There is a Playhead or slider above the slide, which will help you to select the frame needed to be frozen. Press the “Space bar” to play and pause the video. Then, with the help of the slider, select the frame and pause the video at that instant.

Step 4: Create a New Layer
After you pause the video at the place you want to freeze, Press “Ctrl + Shift + D” to cut the video at that instant, then another layer of the video will add just after the moment.

Step 5: Freeze the Frame
Next is to right-click on the layer, and the settings will pop up. Go to Time> Freeze-frame, and your selected frame will get frozen.

Step 6: Save the Video
Finally, go to File > Export to save the video per your PC requirement.
02** Wondershare Filmora Video Editor
For Win 7 or later (64-bit)
For macOS 10.12 or later
Here is a step-by-step guide on how to Freeze-frame in Wondershare Filmora:
Step 1: Import your media files
After installing the software on your PC, drag and drop all files into the primary window or click on “Import” to browse your file folder. Also, this program supports a variety of media files, including MP4, MKV, WMV, MOV, DV, AVI, MTS, TS, 3GP, M4V, etc. After uploading the video, drag them to the Video Timeline.

Step 2: Freeze video with ease
Now play the video clip you want to add freeze-frame and pause it when it comes to the correct position. Then click the “Snapshot” icon under the Viewer panel. Immediately, a picture will add to the media library. Drag and drop the Picture to the PIP track over the main video track, and set the duration of the still image.

Step 3: Save your video
When satisfied with your result, click “Export” to export your video. In the pop-up window that appears, please select the file format options to save onto your computer, or you can directly upload it to Twitter, YouTube, or Facebook, to share with your family and friends.

03Premiere Pro
Here is a step-by-step guide on how to Freeze-frame in Premiere Pro using a video frame for the duration of a clip:
Step 1: Download Premiere Pro
Download and install Adobe Premiere Pro on your PC and open it to start editing your video. Import video to Premiere Pro and drag and drop to the timeline.
Step 2: Select a clip in a Timeline panel.
To freeze a frame using other methods than the In or Out point, open the video portion in the Source Monitor, and set the Marker 0 (zero) to the frame you wish to pause in the video.
Step 3: Choose Clip > Video Options > Frame Hold.
Next is to tap Hold On and select the frame you want to hold from the menu. However, you can choose the frame based on Source Timecode, In Point, Out Point, Sequence Timecode, or Playhead position.
Step 4: Finally, specify “Hold Filters” and click OK.
Effect settings use the values at the holding frame to prevent keyframed effect settings (if any are present) from animating during the clip’s duration.

04Kapwing
Step 1: Upload and edit your video with Kapwing.
Choose to “Get Started,” upload a file from your device, or paste a video link from a third-party site like YouTube, Vimeo, or TikTok. In any case, you’ll be whisked away to your very own video editing studio.

Step 2: Give your video a freeze-frame effect.
Select the “Timing” tab in the right navigation bar and click “Freeze Frame” after uploading your video to Kapwing.
In Kapwing, you may add a freeze-frame to a video.
As you can see, clicking “Freeze Frame” instantly creates an image layer for the frame your timeline slider was on. Click on the image layer and choose from the “Duration” dropdown option under the “Edit” tab in the right navigation bar to change the length of the freeze-frame. Alternatively, you may drag the image layer onto your timeline by clicking and dragging it.
That’s all there is to it!

05Animotica
Step 1: Creating a New Project
To begin, open your video editor and select Create a New Project. Choose Empty Project, give your project a name, and click the Create a New Project button.

Step 2: Selecting the Video to Freeze
Select Add Video/Photo Clips from the drop-down menu.
You can add video clips to Animotica by navigating to where you saved your video clip, selecting it, and opening it. You’ll now return to the project window, where your video will display. You can enable a wide range of enhancing options by tapping on the video clip with your mouse.

Step 3: The Freeze Effect
To activate your options, tap on the video clip. You must now decide which segment of the video you want to freeze. To make things easy for you, press the play and pause buttons when you reach the part you want to freeze.
Take a picture of the video by dragging your pointer down to the camera icon and pressing it to take a photo while keeping the clip paused, where you want it to be frozen. When you do that, a menu of three options will appear; select Take Snapshots and Insert in Current Position. This choice will split the movie in half and insert the scene you just recorded in the middle, resulting in a freeze.

Part 2 SUPER COOL Freeze-frame Effect with Filmora 11
With no prior experience in video editing, you may get started right away.
Filmora 11 is a scalable experience built for new and seasoned content creators who want freeze-frame editing. You may start cutting and editing your videos like an expert, even if you’re a beginner, and access anything you need from the toolbar once the software launches on your computer, including media, audio, titles, effects, split-screen formatting, elements, and transitions.
Hundreds of extra alternatives are available for each of these elements, which you can drag and drop over your chosen film. You can also use the scissors symbol to cut the movie by pausing on a specific frame within your shot and clicking it. Filmora 11 also comes with pre-set aspect ratios and resolutions for your chosen media to get started right away.
● Ending Thoughts →
● This article provided users with a guide to using Mac and Windows video editor freeze-frame for your video effects. Aside from the editor listed here, Movavi video editor freeze-frame and other editors are available on the Internet.
● However, the ones listed in this blog are our top picks for the best you can use. In addition, Filmora is the best freeze-frame effect editor with a lot of effects you can use in your video editing
The freeze-frame video editing effect is a technique used to stop the moving image of a video and hold it still onscreen. This effect aims to pause the world the video is living in and allow the audience to process the scene and gain more context fully. Note that the world around us keeps ongoing, and time never stops. But luckily for us, we can pause film and video with a simple but powerful video effect known as the freeze-frame.
In addition, a freeze-frame can be carried out in a video to showcase a specific frame in your clip by extending the length of Time that frame is displayed. For example, you can decide to freeze a frame to show the video frame where a goal is being scored in a sporting event or use it to showcase a captured reaction or a smile. When a freeze-frame applies to a video clip, the clip automatically splits at the freezing point, and the chosen frame is inserted as an image file (BMP) and displayed on screen for the duration you set. This article will teach how to use the freeze-frame editing service ideally.
In this article
01 [How to Add a Freeze-frame to Video Clips in all Tools](#Part 1)
02 [SUPER COOL Freeze-frame Effect with Filmora 11](#Part 2)
Part 1 How to Add a Freeze-frame to Video Clips in all Tools
Do you want to draw your audience’s attention to a point or for dramatic flair by stopping your video and holding on to a single frame? This section will give you the best tools for freeze-frame editing via a step-by-step guide on how to do it.
01After Effects
Here is a step-by-step guide on how to Freeze-frame in After Effects:
Step 1: Download After Effects
Download and install Adobe After Effects and open it on your desktop. This software works with both macOS and Windows.
Step 2: New Composition
Next is to open a new project or drag and drop your video and add it to the timeline. Another way is to click on “New Composition from Footage” and then browse the video you want to edit.
Step 3: Select the Frame
There is a Playhead or slider above the slide, which will help you to select the frame needed to be frozen. Press the “Space bar” to play and pause the video. Then, with the help of the slider, select the frame and pause the video at that instant.
Step 4: Create a New Layer
After you pause the video at the place you want to freeze, Press “Ctrl + Shift + D” to cut the video at that instant, then another layer of the video will add just after the moment.
Step 5: Freeze the Frame
Next is to right-click on the layer, and the settings will pop up. Go to Time> Freeze-frame, and your selected frame will get frozen.
Step 6: Save the Video
Finally, go to File > Export to save the video per your PC requirement.
02** Wondershare Filmora Video Editor
For Win 7 or later (64-bit)
For macOS 10.12 or later
Here is a step-by-step guide on how to Freeze-frame in Wondershare Filmora:
Step 1: Import your media files
After installing the software on your PC, drag and drop all files into the primary window or click on “Import” to browse your file folder. Also, this program supports a variety of media files, including MP4, MKV, WMV, MOV, DV, AVI, MTS, TS, 3GP, M4V, etc. After uploading the video, drag them to the Video Timeline.
Step 2: Freeze video with ease
Now play the video clip you want to add freeze-frame and pause it when it comes to the correct position. Then click the “Snapshot” icon under the Viewer panel. Immediately, a picture will add to the media library. Drag and drop the Picture to the PIP track over the main video track, and set the duration of the still image.
Step 3: Save your video
When satisfied with your result, click “Export” to export your video. In the pop-up window that appears, please select the file format options to save onto your computer, or you can directly upload it to Twitter, YouTube, or Facebook, to share with your family and friends.
03Premiere Pro
Here is a step-by-step guide on how to Freeze-frame in Premiere Pro using a video frame for the duration of a clip:
Step 1: Download Premiere Pro
Download and install Adobe Premiere Pro on your PC and open it to start editing your video. Import video to Premiere Pro and drag and drop to the timeline.
Step 2: Select a clip in a Timeline panel.
To freeze a frame using other methods than the In or Out point, open the video portion in the Source Monitor, and set the Marker 0 (zero) to the frame you wish to pause in the video.
Step 3: Choose Clip > Video Options > Frame Hold.
Next is to tap Hold On and select the frame you want to hold from the menu. However, you can choose the frame based on Source Timecode, In Point, Out Point, Sequence Timecode, or Playhead position.
Step 4: Finally, specify “Hold Filters” and click OK.
Effect settings use the values at the holding frame to prevent keyframed effect settings (if any are present) from animating during the clip’s duration.
04Kapwing
Step 1: Upload and edit your video with Kapwing.
Choose to “Get Started,” upload a file from your device, or paste a video link from a third-party site like YouTube, Vimeo, or TikTok. In any case, you’ll be whisked away to your very own video editing studio.
Step 2: Give your video a freeze-frame effect.
Select the “Timing” tab in the right navigation bar and click “Freeze Frame” after uploading your video to Kapwing.
In Kapwing, you may add a freeze-frame to a video.
As you can see, clicking “Freeze Frame” instantly creates an image layer for the frame your timeline slider was on. Click on the image layer and choose from the “Duration” dropdown option under the “Edit” tab in the right navigation bar to change the length of the freeze-frame. Alternatively, you may drag the image layer onto your timeline by clicking and dragging it.
That’s all there is to it!
05Animotica
Step 1: Creating a New Project
To begin, open your video editor and select Create a New Project. Choose Empty Project, give your project a name, and click the Create a New Project button.
Step 2: Selecting the Video to Freeze
Select Add Video/Photo Clips from the drop-down menu.
You can add video clips to Animotica by navigating to where you saved your video clip, selecting it, and opening it. You’ll now return to the project window, where your video will display. You can enable a wide range of enhancing options by tapping on the video clip with your mouse.
Step 3: The Freeze Effect
To activate your options, tap on the video clip. You must now decide which segment of the video you want to freeze. To make things easy for you, press the play and pause buttons when you reach the part you want to freeze.
Take a picture of the video by dragging your pointer down to the camera icon and pressing it to take a photo while keeping the clip paused, where you want it to be frozen. When you do that, a menu of three options will appear; select Take Snapshots and Insert in Current Position. This choice will split the movie in half and insert the scene you just recorded in the middle, resulting in a freeze.
Part 2 SUPER COOL Freeze-frame Effect with Filmora 11
With no prior experience in video editing, you may get started right away.
Filmora 11 is a scalable experience built for new and seasoned content creators who want freeze-frame editing. You may start cutting and editing your videos like an expert, even if you’re a beginner, and access anything you need from the toolbar once the software launches on your computer, including media, audio, titles, effects, split-screen formatting, elements, and transitions.
Hundreds of extra alternatives are available for each of these elements, which you can drag and drop over your chosen film. You can also use the scissors symbol to cut the movie by pausing on a specific frame within your shot and clicking it. Filmora 11 also comes with pre-set aspect ratios and resolutions for your chosen media to get started right away.
● Ending Thoughts →
● This article provided users with a guide to using Mac and Windows video editor freeze-frame for your video effects. Aside from the editor listed here, Movavi video editor freeze-frame and other editors are available on the Internet.
● However, the ones listed in this blog are our top picks for the best you can use. In addition, Filmora is the best freeze-frame effect editor with a lot of effects you can use in your video editing
KineMaster Templates 101: How to Get the Most Out of Video Templates
Creating videos has always been challenging, especially with the advent of mobile video editing apps like KineMaster. This app is for professionals and amateur content creators who want to take their videos to the next level. With KineMaster, you can easily edit, enhance and share your videos in no time. One of the best features that KineMaster offers is the ability to use video templates.
This article will guide you through using and downloading KineMaster templates. We will also share some alternative templates that you can use to elevate your video creation. Whether you’re a beginner or an advanced user, this guide will give you all the information you need to create stunning videos with KineMaster. So, let’s get started!

Overview of KineMaster & Its Video Templates
KineMaster is a powerful video editing app that allows users to create professional-looking videos on their mobile devices. It is available on both Android and iOS platforms.
With a wide range of features like multi-layer video, chroma key, and blending modes, KineMaster empowers users to edit their videos with precision and creativity. It is also one of the first mobile video editing apps that supports multiple video layers and audio keyframes.
KineMaster also provides a variety of video templates for different purposes, such as intro, outro, social media posts, and more. These templates are pre-designed and include different elements such as animation, text, and effects.
KineMaster templates provide an easy way for users to create videos with professional looks and styles. Templates are also customizable, so you can add photos, videos, and text to match your brand or style. This feature of KineMaster saves time for users to create the video from scratch and make the editing process much more seamless.
How To Use & Download KineMaster Video Templates?
KineMaster video templates are a great way to quickly create professional-looking videos without starting from scratch. With a wide range of templates to choose from, you can easily find one that suits your needs.
Whether you’re a beginner or an advanced user, these steps will provide you with all the information you need to get the most out of KineMaster’s video templates.
Step 1. Launch the KineMaster app and go to “Video Templates.“

Step 2. Search for a template category you want to use.

Step 3. Choose your template design.

Step 4. Tap the “Mix“ button to download the template.

Step 5. Edit the template to your preference. You can replace the clips with your video.

Step 6. Change the resolution of your video and tap the “Save as Video“ button to save your work.

Filmora for Mobile - KineMaster’s Alternative
Filmora for mobile is an alternative video editing app that provides features similar to KineMaster. It is a user-friendly app designed for amateur and professional content creators. The app is available on both Android and iOS platforms. Some of its key features include:
- A wide range of video effects, including filters, overlays, and elements.
- A library of music and sound effects to enhance your videos
- A variety of text and title templates for adding captions and subtitles.
- Multi-layer video editing allows you to add text, stickers, and more to your videos.
- A dedicated social media export feature that allows you to quickly share your videos on different platforms.
- A wide range of resolution and aspect ratio options.
- In-app purchase options for extra features and assets
Video Templates of Filmora - Alternative to KineMaster Template
Just like KineMaster, Filmora also offers a wide range of video templates to help users create professional-looking videos quickly. These templates include different elements such as animations, text, and effects. These templates are pre-designed and customizable, allowing users to add photos, videos, and text to match their brand or style.
Filmora also provides the feature of customizing these templates according to the user’s preference, making them flexible and versatile. The templates are regularly updated with new options and designs to match the latest trends and styles.
How To Use Video Templates of Filmora for Mobile in Video Editing?
This section will show you how to use Filmora’s video templates to enhance your video editing skills. With step-by-step instructions and visual aids, this guide will make it easy for you to use Filmora’s video templates to take your videos to the next level.
Step 1. Install and launch the Filmora app on your device.
Step 2. Tap the “Template“ button on the lower right part of the interface.

Step 3. Choose the template you want to use.

Step 4. Tap the “Make Video“ button to download the template.

Step 5. Add the required number of clips to edit the template, then tap “Next.”

Step 6. You can preview the video and edit it if necessary.

Step 7. Tap the “Export“ button to save your video.

KineMaster vs. Filmora Comparison
KineMaster and Filmora are powerful video editing apps that offer a wide range of features and tools for creating professional-looking videos. In the table below, we will compare the two apps side-by-side, highlighting the similarities and differences between the two. This will help you decide which app best fits your video editing needs.
| KineMaster | Wondershare Filmora | |
|---|---|---|
| Operating System | Android and iOS | Android and iOS |
| App Store Rating | 4.7 out of 5 | 4.7 out of 5 |
| Google Play Store Rating | 4.1 out of 5 | 4.7 out of 5 |
| Pricing | Free and offers In-App PurchasesPremium Subscriptions - $79.99 | Free and offers In-App Purchases |
| Number of Templates | 800+ Templates | 1000+ Templates |
KineMaster is a powerful video editing app available on Android and iOS platforms. It has a rating of 4.7 out of 5 on the App Store and 4.1 out of 5 on the Google Play Store. The app is free to download and use but offers in-app purchases for additional features and assets. Users can also opt for a premium subscription, priced at $79.99 per year.
One of the key features of KineMaster is its templates. These templates are suitable for various purposes, like intros, outros, social media posts, etc. It offers more than 1000 templates, giving the user more options.
KineMaster is an ideal app for amateur and professional content creators who want to take their videos to the next level. This app is great for YouTubers, Social media influencers, and small businesses looking to create engaging video content.
Filmora is another alternative video editing app available on Android and iOS platforms. It has a 4.7 out of 5 on both the App Store and the Google Play Store. Like KineMaster, Filmora is free to download and use, but it also offers in-app purchases for additional features and assets.
Filmora’s key feature is also its templates. It offers a wide range of pre-designed video templates, including animations, text, and effects. Users can customize these templates by adding photos, videos, and text to match their brand or style. It also offers more than 1000 templates, making it a great choice for users looking for various options.
Filmora is an ideal app for both amateur and professional content creators. Its user-friendly interface makes it perfect for beginners new to video editing, while its powerful features make it suitable for advanced users.
People Also Ask
Whether you’re a beginner or an advanced user, this section will provide the answers you need to make an informed decision.
Q1. Does KineMaster Have Watermarks?
KineMaster does have a watermark feature for the free version of the app. When you edit a video using the app’s free version, it will add a KineMaster watermark to the bottom-right corner of your video. However, you can remove this watermark by purchasing the full version of the app or by subscribing to the KineMaster Premium.
Q2. Is KineMaster Copyright Free?
KineMaster is not a copyright-free app, but it allows you to use copyright-free music and other media within the app. KineMaster has a library of royalty-free music and sound effects that you can use in your videos without fearing copyright infringement. However, you are responsible for ensuring that all media you use within the app is not protected by copyright.
Q3. Can KineMaster Videos Be Monetized on YouTube?
Yes, KineMaster videos can be monetized on YouTube. As long as your videos adhere to YouTube’s community guidelines and terms of service, you can monetize them on the platform.
Conclusion
KineMaster and Filmora are both powerful and versatile video editing apps that are great options for anyone looking to create professional-looking videos quickly and easily. Both apps offer a wide range of features, including templates, and are available on Android and iOS platforms.
Ultimately, the best app for you will depend on your specific needs and preferences. Consider factors such as pricing, features, and the number of templates when making your decision. Both apps are great choices, but Filmora may be more suitable for beginners.
8 Apps to Custom GIF Stickers
8 Apps to Custom Your GIF Stickers
An easy yet powerful editor
Numerous effects to choose from
Detailed tutorials provided by the official channel
GIF files are a new trend, and people are very happy to share them with their loved ones. Undoubtedly, according to the mood, the GIF file is available, and they can send it easily. But how can we forget that the present generation is quite curious to know about the process behind creating it?
If you are someone who is curious to know about the creation of GIF stickers and other related things, then you are on the right page. In this article, you will find out all the details regarding the making of such stickers and how you will be able to customize them as per your needs.
Stay tuned with us till the end because we will also share some of the best applications for custom GIF stickers that will help you. Let’s get started!
In this article
01 [Top 8 Apps to Custom GIF Stickers](#Part 1)
02 [How to Create Own Free Animated Stickers on Social Media?](#Part 2)
Part 1 Top 8 Apps to Custom GIF Stickers
When it comes to creating custom GIF stickers, it is also important to know about the applications that can cater to your needs. We all are aware about the availability of thousands of applications that claim to be the best ones, but relying on them is not easy. Well, in that case, we have come up with some applications that will help you. This includes:
01Gif Me! Camera
GIF Me! camera is an app that can easily generate GIF stickers. It turns photos and videos into GIFs and stickers. You can get a whole library of these stickers to use. This application allows users to create their own GIFs and share them with others on social media channels like Facebook, Instagram, Snapchat, and Twitter.
A user just needs to get the application and, after that, they are all set to create the hot GIF stickers of their choice and share them on different portals.

02Ezgif
Ezgif is a GIF maker that creates animated stickers. This application allows you to create animated GIF stickers from videos and pictures. The user can record a video and then select the part of the video they want to make into a sticker. Also, they can take a picture and turn it into an animated sticker. The stickers are then saved in the app’s library, which can be shared with other users or exported as an animated GIF file.
The stickers that are created can be shared on other portals easily, which simply means there will be no need to get any additional applications to complete the particular task.

03Pixel Animator: GIF Maker
Another good choice that you can make is The Pixel Animator app. This is a great option for those who want to make animated images from their photos. The app allows users to create animations using a timeline. It also has a photo editor that can be used to edit the images before they are converted into GIFs.
It is totally up to the user how they wish to create the GIF. The interface of the application is simple to understand, which clearly means that there will be no problem at all in getting your hands on this application. Also, the created stickers can be shared on other portals, including social media applications too.

04ImgPlay – GIF Maker
ImgPlay is a GIF Maker, an Explain App to create GIF stickers. ImgPlay provides animation effects, stickers, text, and emoji to make an animated video and stickers too. It also has powerful editing features like reverse playback, trimming, and cropping. The ImgPlay app can be used on any device with Android 4.0+ or iOS 9+. But one needs to make sure that initially, this application appears to be difficult to understand, but after getting all the details, this could be one of the simplest applications to use.

05Tumblr
Tumblr is a social media site that is focused on microblogging. Users can post text, photos, videos, quotes, links, and anything else they want. This is an app that allows users to create GIF stickers. By using the app, you can take a video or photo and turn it into a GIF sticker that you can then share on social media sites. This application is majorly under consideration by professionals because it has all the best features integrated into it.

06GIF Toaster
GIF Toaster is a web-based tool that helps you create GIF stickers, which are short looping videos that you can use in your messages. The tool is available at the URL toaster.co. Furthermore, this is a free mobile app that lets you create animated GIFs with just a few taps. After creating the stickers, you are all set to share them on all the portals out there without any problem.

07GIF Maker
GIF Maker is a mobile app that allows users to create GIF stickers from videos and images. Basically, this application is a fun and easy way to communicate with friends and family on social media with the help of available stickers. Simply put, users do not need any emoticons to express what they are feeling.
The created stickers can be easily shared on other portals too. A user just needs to be sure of the destination where they have saved it, and after choosing it, they are all set to use it and share it with their friends over these social media portals.

08GIF Camera
A GIF Camera is a mobile app that takes a series of photos and stitches them together to create a GIF. The app allows users to make their own GIFs or choose from an existing library of animated stickers.
This is a mobile app that uses artificial intelligence to generate animated GIFs from audio or video files. Furthermore, this is used for personal use as well as for business purposes such as marketing and training videos.

Part 2 How to Create Own Free Animated Stickers on Social Media?
Everyone is on social media nowadays, and undoubtedly, they share a lot of content with their friends. Well, if you are looking forward to sharing animated stickers on social media, do understand how to create them. There are others that will help you do it easily. Let’s understand!
01How to Create Telegram GIF Stickers?
Telegram is among the most popular social applications these days, and people are very happy to connect over it. Whenever you wish to create animated stickers for Telegram, there are third-party tools and applications that can help you. The method helping to create animated telegram stickers includes the use of “Filmora”.
**Wondershare Filmora Video Editor **is one of the best tools available to create the animated stickers of your choice. This tool comes with a simple interface and when you wish to create a Telegram GIF sticker, this tool will cater to all your needs. You just need to understand how to use this tool.

Wondershare Filmora - Best Video Editor for Mac/Windows
5,481,435 people have downloaded it.
Build unique custom animations without breaking a sweat.
Focus on creating epic stories and leave the details to Filmora’s auto features.
Start a creative adventure with drag & drop effects and endless possibilities.
Filmora simplifies advanced features to save you time and effort.
Filmora cuts out repetition so you can move on to your next creative breakthrough.
Steps to using Filmora to create telegram stickers:
Step 1: Get “Filmora” on your system and select the sticker. Upload the file from which you wish to cut out the area to create the sticker.
Step 2: Finish the cutout and select the editing options by clicking the continue button. If you wish to add any additional feature or effect to it, the sidebar will help you do it on filmora.
Step 3: When you are satisfied with the effect, just click on the “download” button to download it.
Once it is downloaded, you can find it right there in the downloaded files section on your device.
02How to Create Instagram GIF Stickers?
Instagram has become the most considerable application after Facebook. Instagram has millions of users who frequently share content on the platform. During chat, there is an option where users can send the animated stickers to their friends. Well, to send hot GIF stickers, it is important to understand how to do it. To create GIF stickers for Instagram, you need to use a third-party tool, and we suggest you consider Filmora.
The steps that you need to follow are the same as those that you have considered for creating stickers for the Telegram application. It is important to understand that after downloading the sticker, you just need to test the sticker on Instagram stories, and after that, you are all set to share it with your friends.
There is an option available where you can add layers of stickers to the stories that will help you to understand whether the speaker you have created is working successfully or not.
● Key Takeaways from This Episode →
● Filmora is the best tool to create GIF stickers.
● GIF stickers are a clear representation of your mood.
● GIF stickers can be shared on other portals too.
GIF files are a new trend, and people are very happy to share them with their loved ones. Undoubtedly, according to the mood, the GIF file is available, and they can send it easily. But how can we forget that the present generation is quite curious to know about the process behind creating it?
If you are someone who is curious to know about the creation of GIF stickers and other related things, then you are on the right page. In this article, you will find out all the details regarding the making of such stickers and how you will be able to customize them as per your needs.
Stay tuned with us till the end because we will also share some of the best applications for custom GIF stickers that will help you. Let’s get started!
In this article
01 [Top 8 Apps to Custom GIF Stickers](#Part 1)
02 [How to Create Own Free Animated Stickers on Social Media?](#Part 2)
Part 1 Top 8 Apps to Custom GIF Stickers
When it comes to creating custom GIF stickers, it is also important to know about the applications that can cater to your needs. We all are aware about the availability of thousands of applications that claim to be the best ones, but relying on them is not easy. Well, in that case, we have come up with some applications that will help you. This includes:
01Gif Me! Camera
GIF Me! camera is an app that can easily generate GIF stickers. It turns photos and videos into GIFs and stickers. You can get a whole library of these stickers to use. This application allows users to create their own GIFs and share them with others on social media channels like Facebook, Instagram, Snapchat, and Twitter.
A user just needs to get the application and, after that, they are all set to create the hot GIF stickers of their choice and share them on different portals.
02Ezgif
Ezgif is a GIF maker that creates animated stickers. This application allows you to create animated GIF stickers from videos and pictures. The user can record a video and then select the part of the video they want to make into a sticker. Also, they can take a picture and turn it into an animated sticker. The stickers are then saved in the app’s library, which can be shared with other users or exported as an animated GIF file.
The stickers that are created can be shared on other portals easily, which simply means there will be no need to get any additional applications to complete the particular task.
03Pixel Animator: GIF Maker
Another good choice that you can make is The Pixel Animator app. This is a great option for those who want to make animated images from their photos. The app allows users to create animations using a timeline. It also has a photo editor that can be used to edit the images before they are converted into GIFs.
It is totally up to the user how they wish to create the GIF. The interface of the application is simple to understand, which clearly means that there will be no problem at all in getting your hands on this application. Also, the created stickers can be shared on other portals, including social media applications too.
04ImgPlay – GIF Maker
ImgPlay is a GIF Maker, an Explain App to create GIF stickers. ImgPlay provides animation effects, stickers, text, and emoji to make an animated video and stickers too. It also has powerful editing features like reverse playback, trimming, and cropping. The ImgPlay app can be used on any device with Android 4.0+ or iOS 9+. But one needs to make sure that initially, this application appears to be difficult to understand, but after getting all the details, this could be one of the simplest applications to use.
05Tumblr
Tumblr is a social media site that is focused on microblogging. Users can post text, photos, videos, quotes, links, and anything else they want. This is an app that allows users to create GIF stickers. By using the app, you can take a video or photo and turn it into a GIF sticker that you can then share on social media sites. This application is majorly under consideration by professionals because it has all the best features integrated into it.
06GIF Toaster
GIF Toaster is a web-based tool that helps you create GIF stickers, which are short looping videos that you can use in your messages. The tool is available at the URL toaster.co. Furthermore, this is a free mobile app that lets you create animated GIFs with just a few taps. After creating the stickers, you are all set to share them on all the portals out there without any problem.
07GIF Maker
GIF Maker is a mobile app that allows users to create GIF stickers from videos and images. Basically, this application is a fun and easy way to communicate with friends and family on social media with the help of available stickers. Simply put, users do not need any emoticons to express what they are feeling.
The created stickers can be easily shared on other portals too. A user just needs to be sure of the destination where they have saved it, and after choosing it, they are all set to use it and share it with their friends over these social media portals.
08GIF Camera
A GIF Camera is a mobile app that takes a series of photos and stitches them together to create a GIF. The app allows users to make their own GIFs or choose from an existing library of animated stickers.
This is a mobile app that uses artificial intelligence to generate animated GIFs from audio or video files. Furthermore, this is used for personal use as well as for business purposes such as marketing and training videos.
Part 2 How to Create Own Free Animated Stickers on Social Media?
Everyone is on social media nowadays, and undoubtedly, they share a lot of content with their friends. Well, if you are looking forward to sharing animated stickers on social media, do understand how to create them. There are others that will help you do it easily. Let’s understand!
01How to Create Telegram GIF Stickers?
Telegram is among the most popular social applications these days, and people are very happy to connect over it. Whenever you wish to create animated stickers for Telegram, there are third-party tools and applications that can help you. The method helping to create animated telegram stickers includes the use of “Filmora”.
**Wondershare Filmora Video Editor **is one of the best tools available to create the animated stickers of your choice. This tool comes with a simple interface and when you wish to create a Telegram GIF sticker, this tool will cater to all your needs. You just need to understand how to use this tool.
Wondershare Filmora - Best Video Editor for Mac/Windows
5,481,435 people have downloaded it.
Build unique custom animations without breaking a sweat.
Focus on creating epic stories and leave the details to Filmora’s auto features.
Start a creative adventure with drag & drop effects and endless possibilities.
Filmora simplifies advanced features to save you time and effort.
Filmora cuts out repetition so you can move on to your next creative breakthrough.
Steps to using Filmora to create telegram stickers:
Step 1: Get “Filmora” on your system and select the sticker. Upload the file from which you wish to cut out the area to create the sticker.
Step 2: Finish the cutout and select the editing options by clicking the continue button. If you wish to add any additional feature or effect to it, the sidebar will help you do it on filmora.
Step 3: When you are satisfied with the effect, just click on the “download” button to download it.
Once it is downloaded, you can find it right there in the downloaded files section on your device.
02How to Create Instagram GIF Stickers?
Instagram has become the most considerable application after Facebook. Instagram has millions of users who frequently share content on the platform. During chat, there is an option where users can send the animated stickers to their friends. Well, to send hot GIF stickers, it is important to understand how to do it. To create GIF stickers for Instagram, you need to use a third-party tool, and we suggest you consider Filmora.
The steps that you need to follow are the same as those that you have considered for creating stickers for the Telegram application. It is important to understand that after downloading the sticker, you just need to test the sticker on Instagram stories, and after that, you are all set to share it with your friends.
There is an option available where you can add layers of stickers to the stories that will help you to understand whether the speaker you have created is working successfully or not.
● Key Takeaways from This Episode →
● Filmora is the best tool to create GIF stickers.
● GIF stickers are a clear representation of your mood.
● GIF stickers can be shared on other portals too.
Also read:
- Updated 2024 Approved Easily Cut Large Videos Faster on Mac 7 Solutions Included
- New 2024 Approved Thousands Already Know Ezgif and So Can You
- Updated Unlock the Power of Shotcut The Ultimate Guide to Rotating Videos
- Updated There Are a Few Ways to Remove or Mute Audio in a Video, but How? Read This Article and Learn How to Do It Using Recommended Android Apps
- In 2024, Do You Want to Make Your Video Look Like Its From the 90S? Then, Make Sure to Add Vintage Overlays and VHS Sound Effects to Give It the Old Feel
- Updated Looking for a Legitimate Tutorial to Create and Add Text Effects in Adobe Premiere Pro? Here Are the Simple Steps for Premiere Pro Text Effects and Find an Alternative Way
- Updated In 2024, How to Add Green Screen in OBS
- Updated What Is Animated GIF | GIF Example & Advantages of GIF for 2024
- How to Comment on YouTube Live Chat for 2024
- In 2024, How to Use Frame Blending in Adobe Premiere Pro
- Updated 2024 Approved Add Subtitles To Videos With Kapwing Step by Step
- In 2024, 10 Top Vloggers on YouTube
- How to Make Cool COD Warzone Thumbnail
- How To Speed Up Video With Lightworks Video Editor for 2024
- All Things About Adding Effects In Kinemaster
- Updated TikTok Velocity Dance Tutorial| Filmora
- 2024 Approved How to Enable and Use OBS Zoom Camera
- New 2024 Approved 3 Different Methods to Correct Color Distortion in Videos
- New In 2024, Is Augmented Reality Conferencing the Future of Workplace Collaboration?
- Try This Simple Trick to Make Instant 3D GIF that Pops Out of Your Screen. Here Are a Few Memorable Examples of the Most Popular 3D GIFs
- New Demystifying the Vectorscope A Comprehensive Guide for Premiere Pro Color Correction for 2024
- Have You Ever Watched a Movie Where You Felt the Filmmakers Left You Hanging? Yea, Thats What Freeze Frame Does. Here We Will Enlighten You on What It Is, Freeze Frame Examples Where It Has Been Helpful to Drive Our Point Home
- New How to Create a Slideshow on iPhone for 2024
- Updated 2024 Approved 6 Ways to Mimic Professional Filming Gears
- New 10 Top Vloggers on YouTube
- Whats an AV1 Format and How Does It Impact Your Life, In 2024
- Updated Progressive Solutions to Add VHS Effects to Video with Ease for 2024
- In 2024, How to Mirror Your Vivo V29e Screen to PC with Chromecast | Dr.fone
- In 2024, Recommended Best Applications for Mirroring Your Vivo S18 Screen | Dr.fone
- How to Unlock Apple iPhone 13 Passcode Screen?
- In 2024, 9 Best Phone Monitoring Apps for ZTE Blade A73 5G | Dr.fone
- In 2024, Top 7 Skype Hacker to Hack Any Skype Account On your Realme 11X 5G | Dr.fone
- A Guide Oppo A56s 5G Wireless and Wired Screen Mirroring | Dr.fone
- 4 Ways to Transfer Music from OnePlus 11R to iPhone | Dr.fone
- In 2024, How to use Pokemon Go Joystick on Vivo Y02T? | Dr.fone
- How To Reset Your Apple iPhone 12 Pro Max? | Dr.fone
- Is GSM Flasher ADB Legit? Full Review To Bypass Your Tecno Pova 5FRP Lock
- Easy steps to recover deleted photos from Honor Magic 6 Lite.
- How To Fix Unresponsive Phone Touchscreen Of Oppo Reno 10 5G | Dr.fone
- How to Recover deleted pictures on iPhone 13 mini? 5 Best Solutions | Stellar
- In 2024, Edit and Send Fake Location on Telegram For your Apple iPhone 12 mini in 3 Ways | Dr.fone
- In 2024, iPogo will be the new iSpoofer On Oppo Reno 10 Pro+ 5G? | Dr.fone
- In 2024, Latest way to get Shiny Meltan Box in Pokémon Go Mystery Box On Poco C51 | Dr.fone
- In 2024, Tutorial to Change Nokia 150 (2023) IMEI without Root A Comprehensive Guide
- How to Downgrade iPhone 14 Pro to an Older iOS Version? | Dr.fone
- Fixes for Apps Keep Crashing on Xiaomi Redmi Note 13 Pro+ 5G | Dr.fone
- Simple Solutions to Fix Android SystemUI Has Stopped Error For Tecno Pova 5 | Dr.fone
- How to restore wiped messages on Y56 5G
- 4 Methods to Turn off Life 360 On Vivo Y78+ without Anyone Knowing | Dr.fone
- Solutions to restore deleted files from Xiaomi Redmi A2
- Title: Updated In 2024, Best Jump Cut Editing Tricks
- Author: Chloe
- Created at : 2024-06-18 14:31:16
- Updated at : 2024-06-19 14:31:16
- Link: https://ai-editing-video.techidaily.com/updated-in-2024-best-jump-cut-editing-tricks/
- License: This work is licensed under CC BY-NC-SA 4.0.
