
:max_bytes(150000):strip_icc():format(webp)/GettyImages-1342255561-483b636ee00f40a1b3d91d1969b1aaf6.jpg)
Updated In 2024, Best Video Editors to Add Text to a Video
Best Video Editors to Add Text to a Video
While it can be very easy to add text to an image, the same cannot be said when it comes to adding even the simplest text to a video. You will need video editing software that is designed with the necessary features to help you add text to your video.
There are very many programs in the market that can technically be used to add text to a video. But the ones we will look at are video editors that make the process easy, but also give you a wide range of options to customize your text in numerous ways.
Filmora
Filmora by Wondershare is one of the best video editors in the market. Its user interface is so easy to use that adding text to the video is a simple 3-step process. Aside from adding text to the video, Filmora also allows you to edit other aspects of the video including adding transitions, overlays, and animations to any section of the video.

Key Features:
- You can use Filmora to add text to any section of the video
- It gives you the freedom to move the text to any section of the video
- Customizing the text, you add to the video can be done in numerous ways including changing the color, and font and adding animations to the text.
- It offers numerous templates to choose from and different font styles that you can use
- It has a simple user interface that makes the video editing process very easy
- It has numerous other video editing capabilities that allow you to create and edit videos in different ways including splitting videos, trimming videos, and even merging videos clips into one
- You can upload the videos directly to YouTube after editing.
After Effects
Adobe After Effects is a motion picture editing program that you can also use to add text and other animations to your video. While you can use it to add simple text to the video, it is an ideal solution when your goal is to add advanced text animations. It is however by no means a simple solution, especially for beginners who may find it hard to get going with After Effects.

Key Features:
- You can add simple lines of text to any section of the video
- Text is easily customizable by changing the color, font, and size of the text
- You can also choose to change the entire text layer and add advanced animations and effects
- There are a lot of text, animations, and effects templates to choose from
- You can easily copy text from other Adobe applications to use in After Effects
Movavi Editor
Movavi video editor is another great video editor that you can use to add and edit text on a video. Like most similar tools it is designed to simplify the process, allowing you to add text to any section of the document, move the text to any location on the video and even add text effects to customize the text. It has a very simple user interface that allows you to do that quickly and easily.

Key Features:
- You can add text to any section of the video
- Customizing the text by changing the font, color and size is also very easy
- The user interface is very easy to use, allowing you to add even blocks of text very quickly
- You also have additional options to edit the video including splitting and merging the video or adjusting the brightness, saturation, and color.
iMovie
This is a built-in video editor that you will find on macOS and iOS devices. Even though it is free, iMovie has a lot of features that come in handy when you want to add and edit text on a video. The fact that it can be used on iOS devices is an added advantage when you want to edit videos on the go.

Key Features:
- It allows users to add transitions and effects to the text you add to the video
- It comes with a lot of title templates to choose from
- Adding animated text is also very simple including Sideways Drift, Lens Flare, and more
- You can customize the text in very many ways including adding fonts, drop shadows, changing the color, and even resizing or repositioning the text.
Camtasia
TechSmith Camtasia is one of the most popular tools to create and edit videos. Of the numerous features that you get when you choose to use Camtasia is adding and editing text to the video. It has numerous templates that can be used to customize the text you add in various ways.

Key Features:
- It gives you numerous options to add text to the images including text boxes, templates, and effects
- It has a speech-to-text feature that is perfect for adding captions and subtitles to the video
- You can easily customize the text by adding transitions and effects or even by simply changing the font, color, and size of the text
- The text can be moved to any section of the video
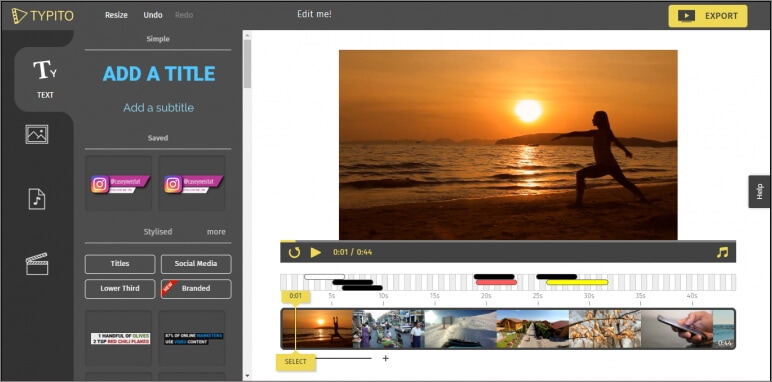
Typito
Typito is an online video editor with simple tools that can help you make changes to any video. designed to help YouTube content creators and video editors, Typito can be used to add all kinds of text and text effects to any video. It is accessible on all browsers and it is also very easy to use.
Key Features:
- It is very easy to use, allowing you to add text to any video in a few simple steps
- It has numerous templates to choose from
- Changing the font size, color, and style of the text is very easy
- You can publish videos directly to numerous video-sharing sites after editing
- It allows users to add animations, transitions, and effects to the text
Splice
Splice is an iOS app designed to help you add text to videos on iOS devices. Adding text to any video using Splice can be easily done using the overlay feature. It also has numerous other video editing features including allowing you to easily synchronize your videos and music, adding filters and transitions, and more.

Key Features:
- it has a simple user interface that makes adding text very easy
- You can customize the text in various ways including changing the font size, color and style or even adding various text effects
- Videos can be saved on the device or shared directly on social media apps like Facebook, Instagram, and YouTube
- It has numerous other video editing features including filters and animations
Clipomatic
If the text you want to add to the video is in the form of captions or subtitles, then Clipomatic is perhaps the best choice. It supports various languages including German, French, Portuguese, and even Chinese. You can also use it to add regular text to any video, reposition the text on any section of the video and customize the text in various ways.

Key Features:
- It is available for both Android and iOS
- Adding text to the video is very easy
- You can easily customize the text by changing the font color, and size and adding transitions and text effects
- It supports various languages, making it ideal for captions and subtitles
MySubtitle
MySubtitle is a simple but highly effective app that you can use to add text to your video. As the name suggests, this tool is ideal for adding subtitles and you can do that very easily by simply typing in the text and syncing the text to the video’s content.

Key Features:
- It is available for both iOS and Android devices
- You can type in your subtitles directly on the video
- Subtitles can then be paced to suit the video’s playback speed
- It is completely free to use
- You can share the videos you edit directly on various social media platforms
Free Download For Win 7 or later(64-bit)
Free Download For macOS 10.14 or later
Free Download For macOS 10.14 or later
Practical Way to Resize Video in Handbrake
Videos are a great medium to share thoughts, concepts, guides, and memories, but regardless of how far technology has come getting them online can pose an issue sometimes. These obstacles often tend to be because either a video clip is too long or the amount of data in it is so high that the service just cannot upload the file to its servers and make it available for the intended receiver.
To solve this issue, users often need to resize a video so that the data cap, which behaved as a restriction, is no longer applicable. Now, there exist multiple software that can do this, and most video editor programs include the ability to export videos in less data-hungry sizes or formats.
So, if you ever face a similar issue, here is a guide on how you can resize videos via Handbrake and Wondershare Filmora. The former is a lightweight tool perfect for batch resizing videos, while the latter is a powerful free video editing software.
How to resize video with Handbrake
Open Handbrake and follow the steps listed below.
Once open, the software will present you with options to either import a single video file for resize or a whole batch via folder selection.
Note: If you do not have Handbrake, you can download it by visiting the official website. Also, you will need Windows .NET Framework 6.0 to use Handbrake. If your system does not have the correct config Handbrake will let you know and fail to launch.
Once you have imported the video file, the software will present you with two choices.
- Option 1: Use a preset available in the application — the best choice for beginners to choose for beginners.
- Option 2: Set a custom resolution via the Dimensions Tab.
Note: To ensure the resize is perfect, find out which file format plays best with the end location of your video and convert the video clip to that version.

How your screen will look once you have imported a video file.
How to Resize Video via Option 1
Step 1: Import Video File by choosing
- Single Import, or
- Batch Import

Step 2: Choose a Preset in Handbrake.

Step 3: Click on Start Encode after choosing the desired preset.

Step 4: Wait for the Encode to finish. The application shows progress in a bar at the bottom of the screen.

Step 5: Click on Browse in the bottom right corner to enter the Save File dialogue. At this point, you can set a file name and select a new save location.


How to Resize Video via Option 2
Step 1: Import Video File by choosing
- Single Import, or
- Batch Import

Step 2: Click on the Dimensions Tab to open up a dialog box that will let you edit video resolution.


The Dimensions Dialog Box
Step 3: Modify resolution to ensure the clip you get is in the right setup.
Note: If you see 1920 x 1080 on your screen, the first number (1920) stands for the width of the video file, while the second number (1080) stands for the height.

Tip
The one thing to keep in mind while using Option 2 is to ensure that the aspect ratio of the video file is maintained; this will prevent the final video from looking like its skewed and prevent it from becoming too tall or too wide
Via Option 2 you can also add borders to the final video if desired, while resizing it to your liked resolution.
An easier way to resize video with Wondershare Filmora
While the resize feature in Handbrake is capable of working on multiple video files at once, the user interface of the application may seem daunting to some. Hence, if you’re just starting to learn, we recommend accessing more user-friendly software, say Wondershare Filmora Video Editor . You can resize videos in the video editor by following the steps we have detailed below.
For Win 7 or later (64-bit)
For macOS 10.14 or later
Just keep in mind, when using WonderShare Filmora the resize option appears at the end of the video editing process — during the export action.
Step 1: Import a video file into Wondershare Filmora.

Step 2: Drag the video file onto the timeline and then choose Export from the top bar.
Author’s Notes: Here, I recommend using the Export to Device option as having a local copy which you then manually upload to services like YouTube is a process that you can have more control over.

Step 3: Choose the video file format (marked in Red) and then choose the resolution you require (marked in Yellow).

Tip
If you press on the settings tab (marked in Yellow, in the image above) and choose custom you can modify more aspects of your video file. Including the configuration used by the audio components.

Choose Custom under the Settings Option to customise Video Details with more precision
Step 4: Click on Export once you’ve decided on the resolution.

With this you will now have a video file that has been resized to a size or converted to a format that will hopefully function well with your desired platform.
Note: You can also reset the resolution of an entire project before hand in Wondershare Filmora by choosing the right configuration from the Project Settings option, found under the File Tab.

The Bottom Line
Having read this piece, you may have noticed that software capable of resizing videos can prove quite useful. Wondershare Filmora is this, plus a lot more, its convenient and intuitive user interface is also something we believe will feel welcoming to users. Speaking of Handbrake, while effective and great for batch encoding — if you want to resize more than one video we recommend having Handbrake handy — its bare-bones interface can be intimidating. Regardless, both programs are convenient to utilize and perfectly capable of doing the task at hand with relative ease.
How your screen will look once you have imported a video file.
How to Resize Video via Option 1
Step 1: Import Video File by choosing
- Single Import, or
- Batch Import
Step 2: Choose a Preset in Handbrake.
Step 3: Click on Start Encode after choosing the desired preset.
Step 4: Wait for the Encode to finish. The application shows progress in a bar at the bottom of the screen.
Step 5: Click on Browse in the bottom right corner to enter the Save File dialogue. At this point, you can set a file name and select a new save location.
How to Resize Video via Option 2
Step 1: Import Video File by choosing
- Single Import, or
- Batch Import
Step 2: Click on the Dimensions Tab to open up a dialog box that will let you edit video resolution.
The Dimensions Dialog Box
Step 3: Modify resolution to ensure the clip you get is in the right setup.
Note: If you see 1920 x 1080 on your screen, the first number (1920) stands for the width of the video file, while the second number (1080) stands for the height.
Tip
The one thing to keep in mind while using Option 2 is to ensure that the aspect ratio of the video file is maintained; this will prevent the final video from looking like its skewed and prevent it from becoming too tall or too wide
Via Option 2 you can also add borders to the final video if desired, while resizing it to your liked resolution.
An easier way to resize video with Wondershare Filmora
While the resize feature in Handbrake is capable of working on multiple video files at once, the user interface of the application may seem daunting to some. Hence, if you’re just starting to learn, we recommend accessing more user-friendly software, say Wondershare Filmora Video Editor . You can resize videos in the video editor by following the steps we have detailed below.
For Win 7 or later (64-bit)
For macOS 10.14 or later
Just keep in mind, when using WonderShare Filmora the resize option appears at the end of the video editing process — during the export action.
Step 1: Import a video file into Wondershare Filmora.
Step 2: Drag the video file onto the timeline and then choose Export from the top bar.
Author’s Notes: Here, I recommend using the Export to Device option as having a local copy which you then manually upload to services like YouTube is a process that you can have more control over.
Step 3: Choose the video file format (marked in Red) and then choose the resolution you require (marked in Yellow).
Tip
If you press on the settings tab (marked in Yellow, in the image above) and choose custom you can modify more aspects of your video file. Including the configuration used by the audio components.
Choose Custom under the Settings Option to customise Video Details with more precision
Step 4: Click on Export once you’ve decided on the resolution.
With this you will now have a video file that has been resized to a size or converted to a format that will hopefully function well with your desired platform.
Note: You can also reset the resolution of an entire project before hand in Wondershare Filmora by choosing the right configuration from the Project Settings option, found under the File Tab.
The Bottom Line
Having read this piece, you may have noticed that software capable of resizing videos can prove quite useful. Wondershare Filmora is this, plus a lot more, its convenient and intuitive user interface is also something we believe will feel welcoming to users. Speaking of Handbrake, while effective and great for batch encoding — if you want to resize more than one video we recommend having Handbrake handy — its bare-bones interface can be intimidating. Regardless, both programs are convenient to utilize and perfectly capable of doing the task at hand with relative ease.
TOP 10 Types of Video Framing: From Novice to Master
Are you in search of the best practice to frame a video? If yes, then cheer up, as we have got you covered! In this guide, we will share the top 6 types of video framing that even novice and expert users can master.
Framing videos involves focusing on a specific subject and blocking out the irrelevant things in the background. Depending on the results you want, video framing can differ a lot. The information below will help you learn about different frames and how to utilize them effectively.
So, without further ado, let’s get into the deets.
- 01 Establishing Shots
- 02 Single Shot
- 03 Two Shot/Group Shot
- 04 Over-the-shoulder (OTS)
- 05 Insert Shot
- 06 POV Shot (OTS)
Part1 Basic Knowledge About Different Framing
Because framing is related to capturing or focusing an object by the camera lens, it can vary depending on your desired shot. Let’s start with the full-shot first and understand how it works.
01 Full Shot (FS)
Remember the shot of Marvel’s Guardians of the Galaxy, where all the players are focused in one wide frame? This excerpt is a practical example of what a full shot looks like. Full-shot video framing is particularly common in action or thriller movies where the creator wants to generate suspense in the audience.
As the name indicates, a full shot often emphasizes the scenery as your subject fills the frame. Like the background isn’t ignored or blurred out; instead, it isn’t overly stressed as well. In most cases, the camera starts with a wide-angle shot and then eventually ends with focusing on the subject.
A full-camera shot greatly emphasizes the physical presence of the character. It tracks the subject’s movements, gestures, or body language, making it the focal point. As a result, the shot obtained delivers a better understanding of actions and interactions among the character and its surroundings.
02 Medium Shot (MS)
We often see friends in movies, going to a casino, or playing cards at a bar. What do we observe in that shot? Hand movements, facial expressions, body language, and a little context of what is happening in the background. This shot is known as the medium shot and is often called the ¾ shot.
Using the medium shot video framing technique, the camera lens allows the viewers to see the background while still focusing on the main character. It’s like you will know what is happening at the back but still remain close to the character’s emotions and gestures.
A medium shot usually begins by showing the subject from the knees to his face. In other cases, the shot can also start from the character’s waist to the top of their head. Compared to long shots, a medium shot takes you closer to the subject’s emotions.
For example, in The Princess Diary, you can see how medium-shot video framing has been useful in portraying comedic scenes. You can see Mia reaching out for plates and glasses around the tables and her eyes squinting to concentrate on the process. The medium shot captures even the smallest emotions while focusing on the background.
03 Close-Up (CU)
When the subject’s head and face take up most of the frame, framing videos is known as a close-up shot. And a particular example of this shot can be spotted in the airport scene in “Casablanca.” This scene shows how the camera lens takes various shots before ending up on the actor’s face, showcasing a number of emotions and intimacy.
A close-up shot is an eye-level shot, and as a result, it takes the subject to the forefront. As a result, this shot establishes a distinct sense of connection between the audience and the character. Additionally, the environmental distraction is kept minimal throughout this shot. This setup helps maintain the emotional impact that the shot will portray.
Some of the common emotions that would be captured using close-up video framing techniques include:
- Tear-filled gaze
- Furrowed brow
- Subtle smile
Cinematographers often use such shots to intensify climaxes. These shots can be viewed as a window to the characters’ souls, allowing viewers to adapt the emotions on another level.
04 Extreme Close-Up (XCU)
To understand the extreme close-up video framing technique, let us illustrate the movie that remained our favorite action thriller while growing up: Minority Report (2002). In this movie, the shots briefly focus on the character’s eyes before hopping into the future view. This extreme close shot serves as a crucial plot to develop thematic elements in the audience.
So, an extremely close shot focuses on specific details of a character. This can be either the subject’s eyes, ears, or mouth. However, the shot is not often employed casually. Instead, it is used in a stance where it is appropriate and when there is a need to develop heightened emotion among the viewers.
You can see this shot as a magnifying glass that draws attention to even the smallest emotion that would have gone unnoticed otherwise.
Part2 Master framing types
Don’t know how to master framing types? No worries, we have a comprehensive guide on that! First of all, let’s start with the most basic way to frame a video:
01 Establishing Shots
An establishing shot is usually used to develop a context for the next upcoming scene. It is often a movie’s first scene and portrays an extremely wide shot of the context. This frame on the video indicates the location and time of the scene to the audience to engage with them on a deeper level.
One of the least-known things about an establishing shot is that it doesn’t require a narrative to explain what is happening. Instead, it is shot alone, and the context is shot so that the audience gets to know everything as soon as they see the excerpt.
An amazing example of establishing a shot can be seen in Stanely Kubrick’s horror film, The Shining. In the movie’s opening scene, the camera goes through the forest and mountains before getting onto the mountaintop hotel where the action occurs.
02 Single Shot
A single shot frames a video that includes a single subject or character. It occurs when a character is talking or reacting to a scenario. Here, remember that if the lens shifts focus from a subject, it is not a single shot.
In the movie Extraction 2020, you can see a single shot being utilized when the character goes on to rescue his son from the kidnappers. The shot extends a long way, including through a car crash, weapon chasing, and that iconic Hemsworth sliding off a building into a brutal fight. And the incredible part was that all of this was captured in a single shot.
03 Two Shot/Group Shot
As the name indicates, a two-shot or a group shot is used to frame a video that involves more than one character. It could be two people conversing or friends sitting at a cafe gossiping. This shot is particularly helpful in portraying the relationship between the characters in the frame.
A good example of two-shot video framing can be seen in the movie Silverado. During the final shooting scene, you can see two cowboys standing far apart while facing each other. Here, the two-shot technique emphasizes tension before the cowboys draw their guns.
04 Over-the-shoulder (OTS)
OTS, or Over-the-shoulder, is the most used shot in framing videos for making movies. To understand how this shot works, let us take an example of two subjects, one named A and the other named B. Now, A is sitting right in front of subject B. Here; the shot is executed by focusing on subject A from the shoulder of subject B. The basic purpose of the shot is to fill the conversation or the meeting between the subjects.
To understand this situation better, let’s take an example from the movie How to Train Your Dragon. In the scene, Hiccup is seen having a conversation with his father. Here, when Hiccup is talking, the camera is focused on him over his father’s shoulder. And when his father talks, the shot is taken over the shoulder of Hiccup.
05 Insert Shot
Insert short framing technique uses selective focus to draw the audience’s attention to the subject. Whether it be an object or merely a piece of information, insert shot has always been effective in emphasizing details.
For example, in The X-Files, an insert shot is used to provide the audience with a look at the file of Scully. This insert shot reveals the most shocking revelations in the file, including a tissue sample. Additionally, the file insert shot also shows how shady Mulder is.
06 POV Shot
A POV shot is used to frame a video in a way that shows what a character is doing. You can take this as a shot showing the world from the character’s perspective. Our modern-day games, including Call of Duty Black Ops, are a common example of such POV shots.
The movie Friday the 13th is an iconic example of a POV shot frame on video. If you remember, the movie revolved around a killer who wasn’t identified until the end. So, the audience watched the film from the killer’s perspective until he was recognized.
Conclusion
To sum it up, mastering the art of video framing, from full shots to POV shots, is an exciting journey that helps you to weave exciting stories. Understanding these techniques will empower you to craft a compelling narrative to captivate your audience, whether you are a beginner or a professional.
So, begin with framing videos now and let your work speak volumes!
Gif to Svg, Svg to Gif, Convert Gif to Svg, Animated Svg to Gif, Convert Svg to Gif, Svg to Gif Converter, Svg to Gif Animation, Svg Animation to Gif, Gif to Svg Converter
The Complete Guide to Converting GIF to SVG With Ease
An easy yet powerful editor
Numerous effects to choose from
Detailed tutorials provided by the official channel
The Complete Guide to Converting GIF to SVG With Ease
Are you searching out methods to transform GIF to SVG? Then you are lucky to have found the right article. While Scalable Vector Graphics can help you scale a photograph to any length with very little distortion, editing and playing your animated SVGs documents on a few gadgets can cause compatibility issues. Moreover, SVGs aren’t well suited with all websites, so in case you need to apply it for your weblog or websites wherein they are now no longer supported, then you may want to transform it to an extra handy layout like GIF.
There is plenty of photograph conversion gear and online editors that can help you convert SVG to GIF. However, now no longer all GIF converters and editors are green and clean to apply. In this article, you’ll know about the top SVG to GIF converters that you may use to make GIF images and use them together along with your buddies quickly.
In this article
01 [8 Best Easy GIF to SVG Converters](#Part 1)
02 [5 Best SVG to GIF Converters](#Part 2)
Part 1 Best Easy GIF to SVG Converters
01INetTools.net
It is a very online animated GIF to SVG converter. You get the option to select and upload the GIF from your storage. After uploading, it instantly starts converting it to the SVG and shows you the results when finished. Now, the converted SVG file can be downloaded. This online converter supports multiple conversions such as uploading multiple GIF files at once and converting them to SVG simultaneously. Also, there is no maximum file size limit mentioned anywhere and the SVG has the same colors as the GIF.

02Aconvert.com
This is the next website you can use to convert GIF to SVG. Multiple input methods are supported by this website. You can upload GIF documents out of your nearby storage, Google Drive, Dropbox, or even fetch a GIF through pasting a URL to it. Apart from a couple of entering methods, this internet site offers you a choice to alternate the picture length for the SVG file. By allowing this option, you could set the scale for the SVG after which the conversion begins. This way, you could convert and resize the SVG in a single step and download the final output.

03PicSVG.com
This is another free website to convert SVG to GIF animation. This website converts JPG and PNG files to SVG along with GIFs. But unlike other websites, there is a size limitation on the input file. Here, you can convert GIFs up to 4 MB in size which seems decent enough as most of the GIFs are within 1 MB of size.

04Online-Convert.com
This is a free cloud converter platform that supports dozens of files types and can animate GIF to SVG. This supports batch conversions and lets you input files from many sources such as local storage, Dropbox, Google Drive, or via a URL. 100 MB is the maximum file size limit which is enough. After adding the GIF files, conversion can be started and you can get the SVGs in the output.
This website has lots of settings that will help you to customize to get the desired output. Along with all these options, you can also set the black and white threshold and speckles threshold for the final SVG output.

05Inkscape
Inkscape is a GIF to SVG converter software for Windows, Mac, and Linux. Primarily it is used for designing vector graphics. The format of the images can be changed easily as you get the “save as” feature in it. This feature helps you to easily convert GIFs and other images to SVG, PDF, PNG, PS, EPS, DXF, etc. The main advantage of this is that you can convert GIF to different kinds of SVG such as Plain SVG, Optimized SVG, Compressed SVG, etc.
Before converting GIF to SVG, you can edit GIF images using various tools. A lot of filters are provided too which you can apply to the input GIF image, such as bevel, blur, color, distort, pixel tools, etc.

06RealWorld Paint
It is a nice free GIF to SVG converter desktop software. In this, you can view, create, and edit graphics in various formats such as GIF, SVG, WEBP, PNG, JPG, etc. Its “save as” feature can also be used for converting images from one supported format to another.
A good number of image modification tools are also included in it such as resize, crop, rotate, watermarking, filters, and more. Additionally, you can also draw designs over the GIF image using its painting tools.

07ImBatch
It is a batch image processor using which can also convert SVG to GIF animation and vice versa. Bulkpictures are used for editing and converting. You can easily add several GIF images to it and convert them all to SVG format at once. Since it lets you edit images, you can modify input GIF files before converting them. A wide number of image formats are supported for batch processing such as camera raw images (DNG, CR2, SR2, NEF, ARW, ORF, etc.), JPG, PNG, BMP, TIFF, and many more.

08LibreOffice Draw
LibreOffice Draw is a free GIF to SVG converter software for your desktop. This software comes with the popular free open-source office software called LibreOffice. Many other office-related applications in this package include LibreOffice Writer, LibreOffice Calc, LibreOffice Impress, etc.
When using it, you can simply open a GIF image file in it and then save it in SVG vector format. You can easily edit the input GIF image before the conversion. For eating the image, you can use its drawing tools, transformation tools, text tools, formatting options, etc.

Part 2 Best SVG to GIF Converters
01CloudConvert
This is an easy-to-use online file conversion tool with a robust and scalable API. It is an all-in-one cloud-based converter and supports over 200 different file formats from vectors, audio, and video. With this tool, you can convert SVG to GIF in your browser and email it to yourself or transfer it to combined cloud services like Google Drive and Dropbox.CloudConvert’sfull version starts at $8. You can also use the free trial version to convert your files quickly.

02Convertio
Convertio is an easy file converter that offers both paid and free online versions to convert SVG to GIF animation. The software payment pricing system starts at $7.99and it also works with all file types. More than 300 different file format conversion is applicable and it allows you to upload your converted files to other applications such as Dropbox and Google Drive. 100MB is the maximum file memory size that you can upload to this tool.

03CoolUtils
It is a powerful desktop SVG to GIF converter that offers a variety of file conversion utilities such as an online file converter to convert your animate SVG to GIF. The tool’s interface is clear and easy to understand, supports a lot of file formats, has reactive support, and features powerful engines that help to process your files in one go.

04Wondershare Filmora
It is an easy-to-use and trendy video editing software that gives power to your story and gives amazing results, regardless of you are a beginner or an expert. Wondershare Filmora Video Editor helps you to get started with any new project by importing and editing your video, adding special effects and transitions, and sharing your final creation on social media, mobile devices, or DVDs.
It is an interactive platform and editing tool that is easy to navigate. It gives lots of values and makes the process of converting SVG to GIF easier and more interesting. Filmora is free to download software. After signing up for free, you can edit videos, GIFs, and images without any watermark. It also allows the editing of GIFs to include subtitles, text, or captions.
It is a very remarkable editing tool with a wide set of attractive features that can make your image highly customized. Filmore also allows you to extract still images from video without changing the resolution.

Wondershare Filmora - Best Video Editor for Mac/Windows
5,481,435 people have downloaded it.
Build unique custom animations without breaking a sweat.
Focus on creating epic stories and leave the details to Filmora’s auto features.
Start a creative adventure with drag & drop effects and endless possibilities.
Filmora simplifies advanced features to save you time and effort.
Filmora cuts out repetition so you can move on to your next creative breakthrough.
05GIMP
This is another free alternative to an SVG to GIF converter software for Windows, Linux, and Mac. It is a very well-known image editing software with diverse image manipulation and painting tools. By using it, the format of supported images can also be changed with the help of its export feature. Hence, you can also convert SVG to GIFin this software.
However, by default, this software does not support SVG as an output format. So, for converting GIF or any other image file to SVG, you need to install an additional plugin to it.

Part 1 Ending Thoughts
Since you are now reading the end of this article, we are hoping you now know everything about SVG to GIF converter and the best SVG and GIF converter and vice versa that you can turn to and quickly convert your image files and share them with your friends as well as the meaning of SVG.
The Complete Guide to Converting GIF to SVG With Ease
Are you searching out methods to transform GIF to SVG? Then you are lucky to have found the right article. While Scalable Vector Graphics can help you scale a photograph to any length with very little distortion, editing and playing your animated SVGs documents on a few gadgets can cause compatibility issues. Moreover, SVGs aren’t well suited with all websites, so in case you need to apply it for your weblog or websites wherein they are now no longer supported, then you may want to transform it to an extra handy layout like GIF.
There is plenty of photograph conversion gear and online editors that can help you convert SVG to GIF. However, now no longer all GIF converters and editors are green and clean to apply. In this article, you’ll know about the top SVG to GIF converters that you may use to make GIF images and use them together along with your buddies quickly.
In this article
01 [8 Best Easy GIF to SVG Converters](#Part 1)
02 [5 Best SVG to GIF Converters](#Part 2)
Part 1 Best Easy GIF to SVG Converters
01INetTools.net
It is a very online animated GIF to SVG converter. You get the option to select and upload the GIF from your storage. After uploading, it instantly starts converting it to the SVG and shows you the results when finished. Now, the converted SVG file can be downloaded. This online converter supports multiple conversions such as uploading multiple GIF files at once and converting them to SVG simultaneously. Also, there is no maximum file size limit mentioned anywhere and the SVG has the same colors as the GIF.
02Aconvert.com
This is the next website you can use to convert GIF to SVG. Multiple input methods are supported by this website. You can upload GIF documents out of your nearby storage, Google Drive, Dropbox, or even fetch a GIF through pasting a URL to it. Apart from a couple of entering methods, this internet site offers you a choice to alternate the picture length for the SVG file. By allowing this option, you could set the scale for the SVG after which the conversion begins. This way, you could convert and resize the SVG in a single step and download the final output.
03PicSVG.com
This is another free website to convert SVG to GIF animation. This website converts JPG and PNG files to SVG along with GIFs. But unlike other websites, there is a size limitation on the input file. Here, you can convert GIFs up to 4 MB in size which seems decent enough as most of the GIFs are within 1 MB of size.
04Online-Convert.com
This is a free cloud converter platform that supports dozens of files types and can animate GIF to SVG. This supports batch conversions and lets you input files from many sources such as local storage, Dropbox, Google Drive, or via a URL. 100 MB is the maximum file size limit which is enough. After adding the GIF files, conversion can be started and you can get the SVGs in the output.
This website has lots of settings that will help you to customize to get the desired output. Along with all these options, you can also set the black and white threshold and speckles threshold for the final SVG output.
05Inkscape
Inkscape is a GIF to SVG converter software for Windows, Mac, and Linux. Primarily it is used for designing vector graphics. The format of the images can be changed easily as you get the “save as” feature in it. This feature helps you to easily convert GIFs and other images to SVG, PDF, PNG, PS, EPS, DXF, etc. The main advantage of this is that you can convert GIF to different kinds of SVG such as Plain SVG, Optimized SVG, Compressed SVG, etc.
Before converting GIF to SVG, you can edit GIF images using various tools. A lot of filters are provided too which you can apply to the input GIF image, such as bevel, blur, color, distort, pixel tools, etc.
06RealWorld Paint
It is a nice free GIF to SVG converter desktop software. In this, you can view, create, and edit graphics in various formats such as GIF, SVG, WEBP, PNG, JPG, etc. Its “save as” feature can also be used for converting images from one supported format to another.
A good number of image modification tools are also included in it such as resize, crop, rotate, watermarking, filters, and more. Additionally, you can also draw designs over the GIF image using its painting tools.
07ImBatch
It is a batch image processor using which can also convert SVG to GIF animation and vice versa. Bulkpictures are used for editing and converting. You can easily add several GIF images to it and convert them all to SVG format at once. Since it lets you edit images, you can modify input GIF files before converting them. A wide number of image formats are supported for batch processing such as camera raw images (DNG, CR2, SR2, NEF, ARW, ORF, etc.), JPG, PNG, BMP, TIFF, and many more.
08LibreOffice Draw
LibreOffice Draw is a free GIF to SVG converter software for your desktop. This software comes with the popular free open-source office software called LibreOffice. Many other office-related applications in this package include LibreOffice Writer, LibreOffice Calc, LibreOffice Impress, etc.
When using it, you can simply open a GIF image file in it and then save it in SVG vector format. You can easily edit the input GIF image before the conversion. For eating the image, you can use its drawing tools, transformation tools, text tools, formatting options, etc.
Part 2 Best SVG to GIF Converters
01CloudConvert
This is an easy-to-use online file conversion tool with a robust and scalable API. It is an all-in-one cloud-based converter and supports over 200 different file formats from vectors, audio, and video. With this tool, you can convert SVG to GIF in your browser and email it to yourself or transfer it to combined cloud services like Google Drive and Dropbox.CloudConvert’sfull version starts at $8. You can also use the free trial version to convert your files quickly.
02Convertio
Convertio is an easy file converter that offers both paid and free online versions to convert SVG to GIF animation. The software payment pricing system starts at $7.99and it also works with all file types. More than 300 different file format conversion is applicable and it allows you to upload your converted files to other applications such as Dropbox and Google Drive. 100MB is the maximum file memory size that you can upload to this tool.
03CoolUtils
It is a powerful desktop SVG to GIF converter that offers a variety of file conversion utilities such as an online file converter to convert your animate SVG to GIF. The tool’s interface is clear and easy to understand, supports a lot of file formats, has reactive support, and features powerful engines that help to process your files in one go.
04Wondershare Filmora
It is an easy-to-use and trendy video editing software that gives power to your story and gives amazing results, regardless of you are a beginner or an expert. Wondershare Filmora Video Editor helps you to get started with any new project by importing and editing your video, adding special effects and transitions, and sharing your final creation on social media, mobile devices, or DVDs.
It is an interactive platform and editing tool that is easy to navigate. It gives lots of values and makes the process of converting SVG to GIF easier and more interesting. Filmora is free to download software. After signing up for free, you can edit videos, GIFs, and images without any watermark. It also allows the editing of GIFs to include subtitles, text, or captions.
It is a very remarkable editing tool with a wide set of attractive features that can make your image highly customized. Filmore also allows you to extract still images from video without changing the resolution.
Wondershare Filmora - Best Video Editor for Mac/Windows
5,481,435 people have downloaded it.
Build unique custom animations without breaking a sweat.
Focus on creating epic stories and leave the details to Filmora’s auto features.
Start a creative adventure with drag & drop effects and endless possibilities.
Filmora simplifies advanced features to save you time and effort.
Filmora cuts out repetition so you can move on to your next creative breakthrough.
05GIMP
This is another free alternative to an SVG to GIF converter software for Windows, Linux, and Mac. It is a very well-known image editing software with diverse image manipulation and painting tools. By using it, the format of supported images can also be changed with the help of its export feature. Hence, you can also convert SVG to GIFin this software.
However, by default, this software does not support SVG as an output format. So, for converting GIF or any other image file to SVG, you need to install an additional plugin to it.
Part 1 Ending Thoughts
Since you are now reading the end of this article, we are hoping you now know everything about SVG to GIF converter and the best SVG and GIF converter and vice versa that you can turn to and quickly convert your image files and share them with your friends as well as the meaning of SVG.
Also read:
- New 10 Best Suggestions for AI Video Interviews
- New 2024 Approved A Guide To Motion Tracking Using The Best Video Editors
- In 2024, Color Finale Is a Color Grading Plugin for Final Cur Pro. It Allows Users to Make Cinematic Looking Video Scenes by Adjusting the Color. Here Well Share You some Basic Information About This Plugin
- Updated 2024 Approved Best AR Video App - Top 10 Picks
- Updated Best Cloud Storage Service for Videos for 2024
- Updated How to Add Customized Transitions to OBS
- Updated Quickly Turn Any Video Into a Paper Rip Effect for 2024
- New Top List 20 Best LUTs for Music Videos for 2024
- Updated This Article Aim to Teach You How to Make a Night to Day Effect Video with Filmora. Follow the Steps to Figure It Out
- New 2024 Approved How to Change Video Thumbnail on Google Drive
- In 2024, How to Turn On/Off Motion Blur in Minecraft?
- 2024 Approved 15 Best CapCut Templates for Slow Motion Editing
- New How to Add Customized Transitions to OBS
- New 3 Effective Methods to Correct Color Distortion in Videos for 2024
- Updated How to Trim Video in QuickTime Player on Your Mac
- How Much Information Do You Have About MP4 Digital File Storage? Let Us Tell You More About the MP4 File Format; Get Ready to Increase Your Knowledge
- 2024 Approved How to Use LUTs in Lumafusion & Free LUTs Resource
- New How to Create Glowing Edge Effect in TikTok Dancing Video for 2024
- Updated In 2024, Adding Text to Your Collage Not only Makes It Look Sophisticated but Also Versatile. So, if You Too Are Looking for Ways to Create a Collage Text, Check Out Our Article
- Updated 2024 Approved How to Do Velocity Edits on PC
- New How to Remove Background From a Video in Premier Pro
- Kdenlive Is a Free, Open-Source Video Editing Software Application. Kdenlive Is a Powerful Video Editor that Can Be Used to Create Professional-Quality Videos
- New In 2024, Voice Changer for Discord | Use Voicemod on Discord
- In 2024, How to Create Sony Vegas Freeze Frame
- Updated In 2024, General Knowledge About MP4 Format and Best MP4 Video Editor
- In 2024, Wondering How to Stand Out with Your Adobe Slideshow Presentation? Follow the Given Discussion to Learn All About the Easiest Ways of Making a Slideshow at Adobe
- New 2024 Approved 10 Catchy Pixel Art Wallpapers and How to Custom Your Own
- Updated In 2024, Create Promotional Video
- Updated In 2024, Guide to Making Cinematography for Music Video
- New Best Applications That Can Help Apply The Best VHS Camera Effect
- 2024 Approved Why Vimeo Slideshow Maker Become Popular
- Updated How to Convert a GIF to a Video for Instagram
- Updated In 2024, Blender - A Video Editor for Every Professional
- Updated 2024 Approved Top 8 AR Apps for Android and iOS | Help You See the World of AR
- How To Stream Anything From Realme C33 2023 to Apple TV | Dr.fone
- Restore Missing App Icon on Samsung Galaxy S23 FE Step-by-Step Solutions | Dr.fone
- In 2024, Top 15 Apps To Hack WiFi Password On Xiaomi Redmi 13C 5G
- 4 Ways to Transfer Music from Oppo Reno 11 5G to iPhone | Dr.fone
- How to Fix Locked Apple ID on iPhone 12 mini
- How To Fix Unresponsive Touch Screen on Oppo Reno 11 5G | Dr.fone
- In 2024, How to Track WhatsApp Messages on Samsung Galaxy Z Flip 5 Without Them Knowing? | Dr.fone
- FRP Hijacker by Hagard Download and Bypass your Vivo Y100i FRP Locks
- In 2024, How does the stardust trade cost In pokemon go On Apple iPhone X? | Dr.fone
- Easy steps to recover deleted call history from Meizu 21
- A Quick Guide to Xiaomi Redmi Note 13 5G FRP Bypass Instantly
- Top 5 Motorola Moto G04 Bypass FRP Tools for PC That Actually Work
- How to Quickly Fix Bluetooth Not Working on Itel S23+ | Dr.fone
- In 2024, How To Bypass Xiaomi Redmi K70E FRP In 3 Different Ways
- Remove FRP Lock on OnePlus 11 5G
- 4 Ways to Transfer Music from Nokia 150 (2023) to iPhone | Dr.fone
- 8 Quick Fixes Unfortunately, Snapchat has Stopped on Motorola Edge 40 Neo | Dr.fone
- In 2024, Proven Ways in How To Hide Location on Life360 For Samsung Galaxy XCover 6 Pro Tactical Edition | Dr.fone
- Top 4 Android System Repair Software for Honor 70 Lite 5G Bricked Devices | Dr.fone
- How to recover deleted pictures from Smart 8 HD.
- In 2024, How to Change/Add Location Filters on Snapchat For your Poco F5 Pro 5G | Dr.fone
- In 2024, Simple and Effective Ways to Change Your Country on YouTube App Of your Asus ROG Phone 7 | Dr.fone
- Easy Ways to Manage Your Samsung Galaxy S23+ Location Settings | Dr.fone
- Dose Life360 Notify Me When Someone Checks My Location On Oppo A56s 5G? | Dr.fone
- How to Exit Android Factory Mode On Xiaomi 14 Ultra? | Dr.fone
- Your Complete Guide To Reset Honor X50i+ | Dr.fone
- Mocking Sponge Bob Meme Generator
- In 2024, How to Change Location On Facebook Dating for your Motorola Razr 40 | Dr.fone
- Fake Android Location without Rooting For Your Xiaomi Redmi Note 12 5G | Dr.fone
- How to Successfully Bypass iCloud Activation Lock on Apple iPhone XR
- How To Repair iOS of Apple iPhone 14 Plus? | Dr.fone
- How To Reset the Security Questions of Your Apple ID On Your iPhone SE
- Title: Updated In 2024, Best Video Editors to Add Text to a Video
- Author: Chloe
- Created at : 2024-04-24 07:08:41
- Updated at : 2024-04-25 07:08:41
- Link: https://ai-editing-video.techidaily.com/updated-in-2024-best-video-editors-to-add-text-to-a-video/
- License: This work is licensed under CC BY-NC-SA 4.0.
