
Updated In 2024, Best Way To Color Grading & Color Correction in Filmora
The Best Way To Color Grading & Color Correction in Filmora
As a post-production analysis of the filmed video, you might have noticed how the color contrast in a real VS reel. The colors do not appear bright and robust on a screen as in real life.
While there are numerous reasons for the dull, uninviting look- a basic edit could fix it quickly. One of the vital, if not the first, steps in the process is color grading and color correction. However, what exactly are color grading and color correction? And how can they help fix the color ratios and balance in a video?
This article covers everything you need to know about color grading and correction and a complete guide to adjusting cinematic colors with the best video editor, Wondershare Filmora. So, without much ado, let’s dig into it!
Part 1. Color Grading VS Color Correction
These terms have often been used interchangeably; people consider them synonymous. However, they are two different artistic phenomena to adjust the color scheme.
Since we will discuss them in detail later, here is a brief description. Put simply, color correcting is a corrective procedure, while color grading is a cinematic adjustment.
Color correction diverts the colors to a relatively neutral baseline achieving a unified look for all captured shots. On the other hand, color grading is inclined more toward a creative look aimed at balancing colors that reflect the emotion of the sequence.

These two work hand in hand to dramatically uplift the overall look of the sequence. Let’s delve deeper into these techniques and see how to use them.
Part 2. What Is Color Correction?
We will start with color correction- the first step in color editing. Even with a slight glance at the raw shots, you can notice how much the tones are messed up. The crude product is oversaturated with colors.
Color correction is about making the shots look as natural as possible. It brings the sequences to the neutral baseline to achieve a unified look.
For now, we need to ignore our creative and aesthetic preferences and focus entirely on exposure and white balance. The actual end goal is to keep the colors true to life.
However, color-correcting a video is challenging if you are a beginner. There needs to be more than just understanding the fundamentals; it requires cinematic and technical skills.
Here is the basic process for a clean, color-corrected shot, irrespective of the software you use.
Essential Steps for Color Correcting a Shot
1. Set the color profile
Different video formats (HDR, LOG, RAW, HLG, etc.) have different exposure content. Therefore, select a color profile that matches your video format for the best results before starting.
2. Adjust the saturation
It is the primary step of color correction. Often the exposure of raw content is high. Next, equalize the saturation for a natural look.
3. Fix the contrast
Contrast is the difference between the light and dark areas of the image. Pictures with a higher contrast are sharper and more detailed.
However, adjust the contrast during color correcting so that the dark areas are not crushed, and you preserve the details maximally.
4. Set the white balance
It is time to adjust the white balance with the saturation and contrast fixed. The colors will shift to orange and blue hues if it is maladjusted.
Use the color curves to ensure pure whites so all colors fall correctly in place.
5. Double-check individual color tones
The final step is a secondary checking of the individual colors. Double-check the skin tones so they match in each shot.
Make sure the skin tones match their natural hues for an authentic, unfiltered look.
It is a basic walkthrough for color-correcting. More steps can vary according to the professional demands of the video. However, as a beginner, this is the best process to follow.
Once we’ve corrected the color, it is time to move to the next and primary step- color grading.
ChatGPT is Now Available in Filmora! Filmora now offers a ChatGPT plug-in to provide a more inspirational copywriting experience.
Try It Free Try It Free Learn More

Part 3. What Is Color Grading?
After you set all the tones to the baseline, you can start with the creative process of color grading. In this case, you do not change the colors anymore. Instead, you make artistic choices to change the moods and emotions of that particular sequence. Color grading is about manipulating the colors and contrasts that intensify the visual tone and explain your story to the world.
Color correction can be enough if you want to keep the video realistic. However, color grading is essential if you want to imply emotions and feelings in your content. Following is an essential step-by-step guide to color grading.
Basic Steps of Color Grading
If you are a beginner, the color grading process can be tricky without expertise. Hence here are the basic steps of color grading a video.
1. Color correcting
Correcting the colors and balance will always be the first step before you can color-grade footage. Next, the video must be normalized and should seem natural before you intensify the overall look.
2. Match the colors
In the next step, we balance the contours between color-corrected footage and color grading. Then, you can use LUTs (Look Up Tables) to match the individual colors to the scheme.
3. Shot-to-shot matching
The next integral step is to match the colors between all the shots so we can achieve a unified look. The contrasting appearance of shots can make them look unprofessional and poorly cinematic.
4. Adjust the mood and emotions
A well-executed color grading can potentiate the emotions in a shot. Use your artistic choices and tools from editing software to imply the director’s feelings in the video.
5. Make the final adjustments
As the final opportunity, tweak hues and chroma to ensure the colors match your palette in each scene. But, again, do not overdo anything, and play with colors to nudge the moods in the shot.
If your footage is the cake, color grading is the cherry on top that enhances the final look. You can instantly evoke connotations and bring the audience to a different page with some professional color grading.
However, while color correcting and grading, there are a few things that you should take care of. Here is a list of some To-do’s and Not To-do’s in the post-production edit.
Part 4. Things To Consider About the Editing Environment
Before you begin color-grading or color-correcting, here are some essential things to consider that can dramatically improve the results.
1. Neutral editing environment
Funky neon lights or fluorescent lights in the background can dominate your vision. As compensation, you will be over-saturating your footage with colors.
Make sure to use only white, neutral light with a CRI (color rendering Index) of at least 90. It will decrease inconsistencies as much as possible.
2. Using might shifts/orange screen
People often activate night shifts or orange screens to protect their eyes from excessive strain. Resultantly, the screen appears dull and orange-y.
Since this alters the actual colors of the video, the results are undermined. So make sure to turn off all technologies that can sabotage the grading.
3. Control the light
It is necessary to control the amount of light that enters your working space area. Excessive light alters your color perception and hence obstructs achieving a balanced contour.
Ensure that the light does not directly falls on the screen or your eyes. You must maintain an adequate distance from the screen to see nuances as you grade.
After completing all the fundamentals of color correcting and color grading, let’s demonstrate how to do it in real-time.
Choosing good software can be chaos. There are plenty of options in the market with the best features, but we will be using Wondershare Filmora . Read on for a step-by-step guide on color correcting and grading.
Free Download For Win 7 or later(64-bit)
Free Download For macOS 10.14 or later
Part 5. How To Color Correct and Color Grade A Video With Wondershare Filmora?
To color-correct and color-grade a video, we recommend using Wondershare Filmora , one of the finest video editing apps on the market. Equipped with various tools, Filmora allows professional color correction with a few quick steps.
Free Download For Win 7 or later(64-bit)
Free Download For macOS 10.14 or later
With the super simple interface, the software is easy to use for beginners and professionals alike. In addition, Filmora offers extensive tools to manipulate colors and color grade your footage professionally. Here is how to color correct and color grade your video with Filmora post-production.
Step1Open Wondershare Filmora
Before we start, Install Wondersahare Filmora on your device. If you already have it downloaded, launch the software so we can begin.

Step2Color correcting the video
Drag and drop the video to the timeline from the Projects menu. Then, follow these steps to color-correct the video:
- Double-click on the video to open the editing panel. Four options are available: Video, Audio, Color, and Speed. Open the color tab.

- From the Basics menu, adjust the Exposure, Light Color, Contrast, White Balance, and Vibrance. Then, move the slider or add a LUT value to apply.

- Filmora offers a wide variety of 3D LUTs with mapped color spaces that project your preferences on the video with a single click. Select a pre-made LUT to apply to your video in the Preset tab. Or custom builds a Look Up Table and saves it for future use.

- Turn on the Color Match toggle and tap View Comparison to match your current video with a reference shot.

Step3Color grading the video
In the color editing panel, use the other two tabs, HSL and Curves, to create the aesthetics of your video.
- In the HSL panel, select a color from the seven colors of the rainbow. Then, set the hue, luminance, and saturation for each. Next, you can use the slider to nudge the colors or directly input a LUT value.

- The shadow areas are dark and crushed. To fix this, add the Curves effect to the video. Go to the Curves tab, choose a primary color, and move the curves to balance the color scheme.

Step4Save and export the file
Once you finish the final touches, save your footage to a local folder.
- Click the Export button. A pop-up screen will open.
- Select the File type. (MP4, WMV, GIF, etc.)
- Choose a local destination for the file.
- Click Export.

Conclusion
Hopefully, this post has given you a good understanding of the differences between color grading and color correction. But ultimately, it is all about your thought process and intuitions.
Filmora’s extensive collection of color editing tools makes color correction and grading a five-finger thing. You can also follow our guide to create some unique and professional-looking masterpieces. Turn on the artistic side and start creating mystical shots!
Try It Free Try It Free Learn More
Part 3. What Is Color Grading?
After you set all the tones to the baseline, you can start with the creative process of color grading. In this case, you do not change the colors anymore. Instead, you make artistic choices to change the moods and emotions of that particular sequence. Color grading is about manipulating the colors and contrasts that intensify the visual tone and explain your story to the world.
Color correction can be enough if you want to keep the video realistic. However, color grading is essential if you want to imply emotions and feelings in your content. Following is an essential step-by-step guide to color grading.
Basic Steps of Color Grading
If you are a beginner, the color grading process can be tricky without expertise. Hence here are the basic steps of color grading a video.
1. Color correcting
Correcting the colors and balance will always be the first step before you can color-grade footage. Next, the video must be normalized and should seem natural before you intensify the overall look.
2. Match the colors
In the next step, we balance the contours between color-corrected footage and color grading. Then, you can use LUTs (Look Up Tables) to match the individual colors to the scheme.
3. Shot-to-shot matching
The next integral step is to match the colors between all the shots so we can achieve a unified look. The contrasting appearance of shots can make them look unprofessional and poorly cinematic.
4. Adjust the mood and emotions
A well-executed color grading can potentiate the emotions in a shot. Use your artistic choices and tools from editing software to imply the director’s feelings in the video.
5. Make the final adjustments
As the final opportunity, tweak hues and chroma to ensure the colors match your palette in each scene. But, again, do not overdo anything, and play with colors to nudge the moods in the shot.
If your footage is the cake, color grading is the cherry on top that enhances the final look. You can instantly evoke connotations and bring the audience to a different page with some professional color grading.
However, while color correcting and grading, there are a few things that you should take care of. Here is a list of some To-do’s and Not To-do’s in the post-production edit.
Part 4. Things To Consider About the Editing Environment
Before you begin color-grading or color-correcting, here are some essential things to consider that can dramatically improve the results.
1. Neutral editing environment
Funky neon lights or fluorescent lights in the background can dominate your vision. As compensation, you will be over-saturating your footage with colors.
Make sure to use only white, neutral light with a CRI (color rendering Index) of at least 90. It will decrease inconsistencies as much as possible.
2. Using might shifts/orange screen
People often activate night shifts or orange screens to protect their eyes from excessive strain. Resultantly, the screen appears dull and orange-y.
Since this alters the actual colors of the video, the results are undermined. So make sure to turn off all technologies that can sabotage the grading.
3. Control the light
It is necessary to control the amount of light that enters your working space area. Excessive light alters your color perception and hence obstructs achieving a balanced contour.
Ensure that the light does not directly falls on the screen or your eyes. You must maintain an adequate distance from the screen to see nuances as you grade.
After completing all the fundamentals of color correcting and color grading, let’s demonstrate how to do it in real-time.
Choosing good software can be chaos. There are plenty of options in the market with the best features, but we will be using Wondershare Filmora . Read on for a step-by-step guide on color correcting and grading.
Free Download For Win 7 or later(64-bit)
Free Download For macOS 10.14 or later
Part 5. How To Color Correct and Color Grade A Video With Wondershare Filmora?
To color-correct and color-grade a video, we recommend using Wondershare Filmora , one of the finest video editing apps on the market. Equipped with various tools, Filmora allows professional color correction with a few quick steps.
Free Download For Win 7 or later(64-bit)
Free Download For macOS 10.14 or later
With the super simple interface, the software is easy to use for beginners and professionals alike. In addition, Filmora offers extensive tools to manipulate colors and color grade your footage professionally. Here is how to color correct and color grade your video with Filmora post-production.
Step1Open Wondershare Filmora
Before we start, Install Wondersahare Filmora on your device. If you already have it downloaded, launch the software so we can begin.
Step2Color correcting the video
Drag and drop the video to the timeline from the Projects menu. Then, follow these steps to color-correct the video:
- Double-click on the video to open the editing panel. Four options are available: Video, Audio, Color, and Speed. Open the color tab.
- From the Basics menu, adjust the Exposure, Light Color, Contrast, White Balance, and Vibrance. Then, move the slider or add a LUT value to apply.
- Filmora offers a wide variety of 3D LUTs with mapped color spaces that project your preferences on the video with a single click. Select a pre-made LUT to apply to your video in the Preset tab. Or custom builds a Look Up Table and saves it for future use.
- Turn on the Color Match toggle and tap View Comparison to match your current video with a reference shot.
Step3Color grading the video
In the color editing panel, use the other two tabs, HSL and Curves, to create the aesthetics of your video.
- In the HSL panel, select a color from the seven colors of the rainbow. Then, set the hue, luminance, and saturation for each. Next, you can use the slider to nudge the colors or directly input a LUT value.
- The shadow areas are dark and crushed. To fix this, add the Curves effect to the video. Go to the Curves tab, choose a primary color, and move the curves to balance the color scheme.
Step4Save and export the file
Once you finish the final touches, save your footage to a local folder.
- Click the Export button. A pop-up screen will open.
- Select the File type. (MP4, WMV, GIF, etc.)
- Choose a local destination for the file.
- Click Export.
Conclusion
Hopefully, this post has given you a good understanding of the differences between color grading and color correction. But ultimately, it is all about your thought process and intuitions.
Filmora’s extensive collection of color editing tools makes color correction and grading a five-finger thing. You can also follow our guide to create some unique and professional-looking masterpieces. Turn on the artistic side and start creating mystical shots!
How to Use Kahoot! On Zoom
In the educational game Kahoot! participants respond to multiple-choice questions based on trivia. Each participant uses their own controller to answer questions in the online game. There are several question kinds to pick from, allowing for complete customization of the test. Each player needs their own controller for Kahoot! The game questions will be shown in the Zoom/Google Meet window, but the answers must be entered using the controller. With the Kahoot!! app for Zoom, presenters may use play and friendly rivalry to increase participant engagement. Users may organize knowledge- and feedback-gathering pulse checks with staff members, encourage original thought with word clouds, and empower participants’ voices with surveys, open-ended questions, and other tools. Utilizing the brainstorm tool, organizations may crowdsource ideas and advance teamwork.
Engagement has emerged as a crucial component of successful learning, collaboration, and connection as the globe has increased the use of video communications in social and professional situations. Users may access, host, and play Kahoot!! games and educational information with other meeting participants using the Kahoot!! app for Zoom without ever leaving the Zoom Meeting or requiring a second device. Corporate executives may motivate their staff via speeches, meetings, and online activities. Meeting hosts will have immediate access to data and statistics from their Kahoot!! experience, allowing them to respond in real time to audience engagement with the material. Additionally, hosts may email the Kahoot!! games to all participants so they can practice and improve their scores, which will increase participant engagement and learning retention. Hosts can also distribute the Kahoot!! games as self-paced challenges with individuals who couldn’t attend in person.
Part 1: Key Features of Kahoot
What more is there to discuss, Kahoot!? Every pupil adores it. Many instructors and educators use it all around the world to make learning simple, enjoyable, and interesting. Everyone may use it since it is free and extremely simple to use. These are some of its attributes:
- Quizzes may be made in a matter of minutes.
- Develop games based on the abilities of the kids. Playing at home or in the Zoom is simple for them.
- Various templates are offered. You can choose one of them with confidence.
- Kahoot! has the ability to be organized into many folders according to topics or subjects.
- Additionally, multiple choice questions may be included by quiz makers.
- Teachers using Kahoot! may combine different questions into one format, such as quizzes, polls, riddles, and slides.
- Use Apple Schoolwork, Google Zooms, and Microsoft Teams to share student-centered tasks.
Part 2: How to Host a Kahoot! Session within a Zoom Meeting
With the Zoom app, Kahoot! may be viewed, hosted, and used. It’s amazing that Kahoot!!, one of the most well-known brands in quiz-based learning, still provides a free-to-use platform, making it very accessible to both instructors and students. It’s also a useful resource for a hybrid class that combines online and classroom instruction. Most devices will be able to use the cloud-based service using a web browser. This implies that students using computers, tablets, and cellphones in class or at home may access this. Participants in Zoom Meetings may play games and learn without having to leave the Zoom meeting or bring a second device.
Step1Sign up for Zoom ahead of time and get ready. On the other hand, launch the Kahoot! test in your web browser, then be ready to share your screen in Zoom.
Step2As the participants come, allow them in and check to see whether you and they can both hear each other. To access the Kahoot! quiz, make sure they have a device or another browser tab open.
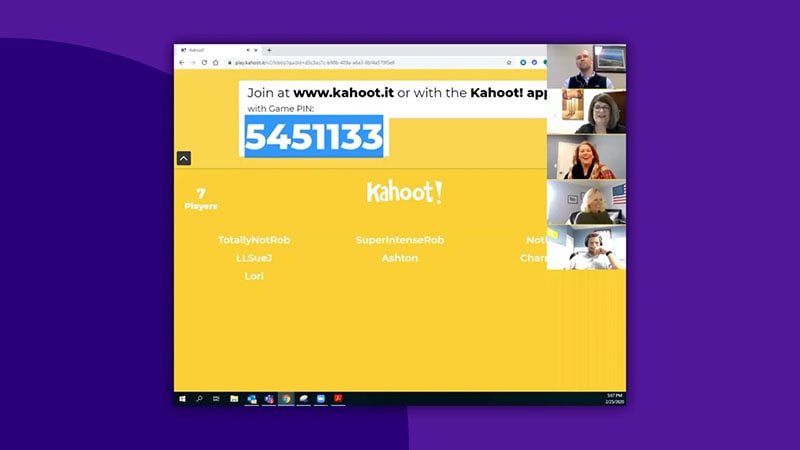
Step3Open the Kahoot! test and share it using Zoom’s “Share Screen” feature. While your screen is shared, continue to host the Kahoot! as normal. To view participants next to your shared screen, we advise selecting Side-by-Side Mode.
Part 3: How to Participate in Kahoot! Sessions within a Zoom Meeting
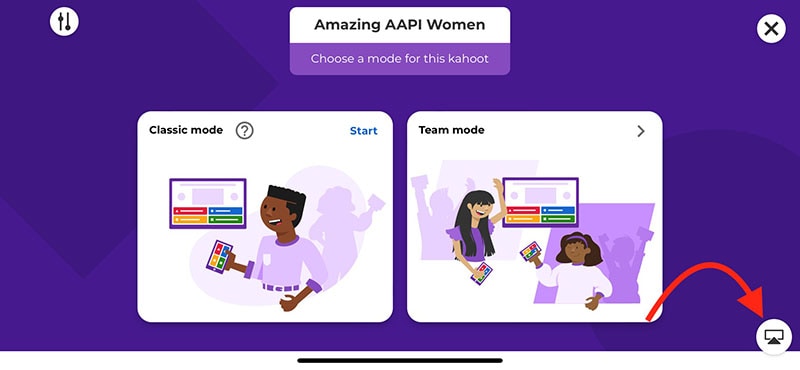
With more than 40 million ready-made games available on Kahoot!!, getting started is fast and simple. When time and resources are limited, hybrid or distant learning is ideal. After linking the Kahoot! to your Zoom account, you may utilize it. Use this app and start a meeting. Go to Apps on the toolbar and choose the program you wish to use. Select Who is Hosting to locate their host or to join a Kahoot! session being hosted by a friend or another player. Players may post a question to a shared screen on the Kahoot! platform. Kahoot!! just needs an account to be made in order to use it since it is free. Most devices may be used by students to access Kahoot!! from wherever there is an internet connection. This is how:
Step1Take the time to check that Zoom, Skype, Cisco Webex, or Google Hangout are operating and that your camera, microphone, and speaker are all operational.
Step2In the right-side panel, add the Kahoot!! app to your list of apps and click Join.
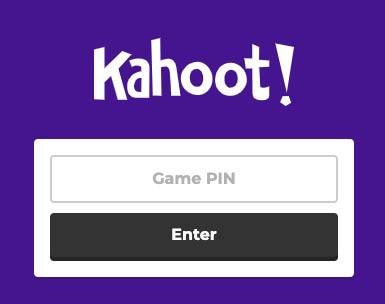
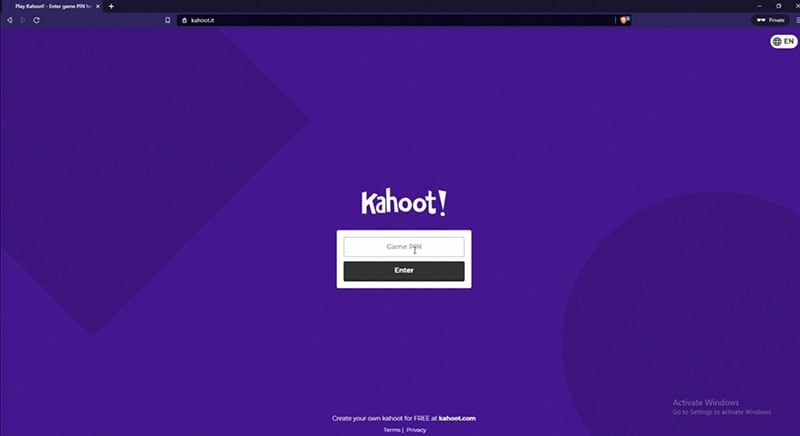
Step3The lobby will reveal your game PIN when you click the Play button, allowing the computer to show you a Kahoot! You may enter the game PIN and press Enter to join the Kahoot! session once the host shows their screen with you. To participate in a Kahoot! session, you don’t need a Kahoot! account.
Part 4: How to Record Zoom Meetings
Zoom is a conference tool that enables real-time, high-quality, low-latency communication. Filmora is an excellent video recorder for that reason, enabling users to capture on-screen activity such Zoom audio tracks and video conversations. Wondershare One of the most versatile and portable Zoom voice recorders is the Filmora. Even novices may easily utilize it due to its user-friendly UI. All you have to do is click the record button after choosing the proper audio source in the settings. The all-in-one video editing program Filmora allows you to record your screen with audio, a facecam, and a green screen effect. You can record the entire screen or just a portion of it, and you can perform a number of quick edits on your video using tools like trimming, cropping, changing the audio track’s volume, and so on.
How to Use Filmora to Record Zoom Lectures
Having said that, Filmora is a great Zoom recorder that can capture games, audio, and video conversations. This video recorder may be used to make video clip lessons in addition to recording movies, video games, and webcam footage. In addition to Zoom, it can also capture internet streaming audio. Here is information on how to record Zoom meetings using this software:
Step1Download and Install Filmora on your PC
To use this program for a number of tasks, including screen recording and recording editing, you must first download and install it on your computer. To achieve this, download the recording program by clicking the link below. Launch the program as soon as the download is finished to start the installation process, and then adhere to the on-screen directions to install and make this software available for usage.
Step2Choose the Record’s Ideal Position in the Zoom
Use it on your PC at this point. As soon as you start the program, a window interface with two choices for screen recording, editing already recorded videos, and generating videos will display. Choose the Recording option from the menu. When you click the record button, the program will direct you to the recording interface, where you can easily adjust the settings for your camera and audio. To add the microphone or Zoom sound in that particular field, use the necessary buttons as described below:
Step3Press the Record Button
It goes without saying that you must test your recording tools to ensure they are functional and capturing the highest quality audio. But once you’re ready, click the record button, which will allow you 3-5 seconds before starting to record the personalized screen of your PC as seen below:
Step4Export and Save Your Zoom Recording
You may now save the Zoom video for sharing on social media after making and modifying it. The following file types may be used to save the document: MP4, WMV, AVI, MOV, GIF, and MP3. The finest feature of Wondershare Filmora is the direct export and sharing of Zoom video recordings to YouTube; the only need is that you must be signed in to your YouTube account inside the application:
Because the MOV format is only available for online movies, you may also export your Zoom recordings to MP4 if you want to publish them to your YouTube channel. You are free to choose the format that best suits your needs. You may choose the encoder from a drop-down menu in the export options.
Conclusion
With the aid of several interesting tools and programs made accessible in this virtual environment, learning has now become enjoyable. Of them is Kahoot! In Zoom. It is an application that acts as a learning tool by providing fun games, tests, and a variety of other chances. In only a few minutes, quizzes may be made and distributed. Games and quizzes may be planned using this platform quite easily. The Kahoot! with Zoom will make it simpler than ever for corporate leaders to engage and encourage their team members with Kahoot!! engaging game-based learning experiences at a time when many organizations are staying virtual or planning for a hybrid model. Head towards recording Kahoot with Filmora to experience a smooth Kahoot! usage on Zoom. Plus, you can also share the gameplay afterwards.
In the educational game Kahoot! participants respond to multiple-choice questions based on trivia. Each participant uses their own controller to answer questions in the online game. There are several question kinds to pick from, allowing for complete customization of the test. Each player needs their own controller for Kahoot! The game questions will be shown in the Zoom/Google Meet window, but the answers must be entered using the controller. With the Kahoot!! app for Zoom, presenters may use play and friendly rivalry to increase participant engagement. Users may organize knowledge- and feedback-gathering pulse checks with staff members, encourage original thought with word clouds, and empower participants’ voices with surveys, open-ended questions, and other tools. Utilizing the brainstorm tool, organizations may crowdsource ideas and advance teamwork.
Engagement has emerged as a crucial component of successful learning, collaboration, and connection as the globe has increased the use of video communications in social and professional situations. Users may access, host, and play Kahoot!! games and educational information with other meeting participants using the Kahoot!! app for Zoom without ever leaving the Zoom Meeting or requiring a second device. Corporate executives may motivate their staff via speeches, meetings, and online activities. Meeting hosts will have immediate access to data and statistics from their Kahoot!! experience, allowing them to respond in real time to audience engagement with the material. Additionally, hosts may email the Kahoot!! games to all participants so they can practice and improve their scores, which will increase participant engagement and learning retention. Hosts can also distribute the Kahoot!! games as self-paced challenges with individuals who couldn’t attend in person.
Part 1: Key Features of Kahoot
What more is there to discuss, Kahoot!? Every pupil adores it. Many instructors and educators use it all around the world to make learning simple, enjoyable, and interesting. Everyone may use it since it is free and extremely simple to use. These are some of its attributes:
- Quizzes may be made in a matter of minutes.
- Develop games based on the abilities of the kids. Playing at home or in the Zoom is simple for them.
- Various templates are offered. You can choose one of them with confidence.
- Kahoot! has the ability to be organized into many folders according to topics or subjects.
- Additionally, multiple choice questions may be included by quiz makers.
- Teachers using Kahoot! may combine different questions into one format, such as quizzes, polls, riddles, and slides.
- Use Apple Schoolwork, Google Zooms, and Microsoft Teams to share student-centered tasks.
Part 2: How to Host a Kahoot! Session within a Zoom Meeting
With the Zoom app, Kahoot! may be viewed, hosted, and used. It’s amazing that Kahoot!!, one of the most well-known brands in quiz-based learning, still provides a free-to-use platform, making it very accessible to both instructors and students. It’s also a useful resource for a hybrid class that combines online and classroom instruction. Most devices will be able to use the cloud-based service using a web browser. This implies that students using computers, tablets, and cellphones in class or at home may access this. Participants in Zoom Meetings may play games and learn without having to leave the Zoom meeting or bring a second device.
Step1Sign up for Zoom ahead of time and get ready. On the other hand, launch the Kahoot! test in your web browser, then be ready to share your screen in Zoom.
Step2As the participants come, allow them in and check to see whether you and they can both hear each other. To access the Kahoot! quiz, make sure they have a device or another browser tab open.
Step3Open the Kahoot! test and share it using Zoom’s “Share Screen” feature. While your screen is shared, continue to host the Kahoot! as normal. To view participants next to your shared screen, we advise selecting Side-by-Side Mode.
Part 3: How to Participate in Kahoot! Sessions within a Zoom Meeting
With more than 40 million ready-made games available on Kahoot!!, getting started is fast and simple. When time and resources are limited, hybrid or distant learning is ideal. After linking the Kahoot! to your Zoom account, you may utilize it. Use this app and start a meeting. Go to Apps on the toolbar and choose the program you wish to use. Select Who is Hosting to locate their host or to join a Kahoot! session being hosted by a friend or another player. Players may post a question to a shared screen on the Kahoot! platform. Kahoot!! just needs an account to be made in order to use it since it is free. Most devices may be used by students to access Kahoot!! from wherever there is an internet connection. This is how:
Step1Take the time to check that Zoom, Skype, Cisco Webex, or Google Hangout are operating and that your camera, microphone, and speaker are all operational.
Step2In the right-side panel, add the Kahoot!! app to your list of apps and click Join.
Step3The lobby will reveal your game PIN when you click the Play button, allowing the computer to show you a Kahoot! You may enter the game PIN and press Enter to join the Kahoot! session once the host shows their screen with you. To participate in a Kahoot! session, you don’t need a Kahoot! account.
Part 4: How to Record Zoom Meetings
Zoom is a conference tool that enables real-time, high-quality, low-latency communication. Filmora is an excellent video recorder for that reason, enabling users to capture on-screen activity such Zoom audio tracks and video conversations. Wondershare One of the most versatile and portable Zoom voice recorders is the Filmora. Even novices may easily utilize it due to its user-friendly UI. All you have to do is click the record button after choosing the proper audio source in the settings. The all-in-one video editing program Filmora allows you to record your screen with audio, a facecam, and a green screen effect. You can record the entire screen or just a portion of it, and you can perform a number of quick edits on your video using tools like trimming, cropping, changing the audio track’s volume, and so on.
How to Use Filmora to Record Zoom Lectures
Having said that, Filmora is a great Zoom recorder that can capture games, audio, and video conversations. This video recorder may be used to make video clip lessons in addition to recording movies, video games, and webcam footage. In addition to Zoom, it can also capture internet streaming audio. Here is information on how to record Zoom meetings using this software:
Step1Download and Install Filmora on your PC
To use this program for a number of tasks, including screen recording and recording editing, you must first download and install it on your computer. To achieve this, download the recording program by clicking the link below. Launch the program as soon as the download is finished to start the installation process, and then adhere to the on-screen directions to install and make this software available for usage.
Step2Choose the Record’s Ideal Position in the Zoom
Use it on your PC at this point. As soon as you start the program, a window interface with two choices for screen recording, editing already recorded videos, and generating videos will display. Choose the Recording option from the menu. When you click the record button, the program will direct you to the recording interface, where you can easily adjust the settings for your camera and audio. To add the microphone or Zoom sound in that particular field, use the necessary buttons as described below:
Step3Press the Record Button
It goes without saying that you must test your recording tools to ensure they are functional and capturing the highest quality audio. But once you’re ready, click the record button, which will allow you 3-5 seconds before starting to record the personalized screen of your PC as seen below:
Step4Export and Save Your Zoom Recording
You may now save the Zoom video for sharing on social media after making and modifying it. The following file types may be used to save the document: MP4, WMV, AVI, MOV, GIF, and MP3. The finest feature of Wondershare Filmora is the direct export and sharing of Zoom video recordings to YouTube; the only need is that you must be signed in to your YouTube account inside the application:
Because the MOV format is only available for online movies, you may also export your Zoom recordings to MP4 if you want to publish them to your YouTube channel. You are free to choose the format that best suits your needs. You may choose the encoder from a drop-down menu in the export options.
Conclusion
With the aid of several interesting tools and programs made accessible in this virtual environment, learning has now become enjoyable. Of them is Kahoot! In Zoom. It is an application that acts as a learning tool by providing fun games, tests, and a variety of other chances. In only a few minutes, quizzes may be made and distributed. Games and quizzes may be planned using this platform quite easily. The Kahoot! with Zoom will make it simpler than ever for corporate leaders to engage and encourage their team members with Kahoot!! engaging game-based learning experiences at a time when many organizations are staying virtual or planning for a hybrid model. Head towards recording Kahoot with Filmora to experience a smooth Kahoot! usage on Zoom. Plus, you can also share the gameplay afterwards.
Premiere Pro Text Effects Beginner Guide
If you want to edit your raw video footage and turn ordinary clips into eye-catching videos, you will need a professional video editor. Adobe Premiere Pro is the most commonly used premium video editor that most professionals prefer. When it comes to editing videos, text effects play a major role along with video effects and animations.
If you are new to Adobe Premiere Pro, you will experience a steep learning curve. This is because the user interface is specially designed for professional video editors. Therefore, you might not get Premiere Pro text effects readily available. In this article, we will illustrate how you can add Adobe Premiere Pro text effects to your video project. We will also state the best alternative to Premiere Pro to add stunning text effects easily.
Part 1. Steps to Add Text Effects to Adobe Premiere
Text effects are an essential part of videos to enhance the video content immensely. You can add opening titles and end credits with text effects and animations. You can display the dialogues on the screen as subtitles. Showing location information and shooting date through text effects is quite regular these days. Besides, the use of lower thirds for social media promotion in videos is common. Without further ado, let us look at the steps to add Premiere text effects.
Step1 Add Your Text
First of all, you need to import your video and add text to it and apply different text effects. Here we are starting from scratch for better illustration. Go to Window> Essential Graphics> Text Tool(T). Type your text as per your requirements. You will notice a new text layer appearing under Edit tab.

Select the text layer and you will see all the properties that you can tweak. For example, go to Align and Transform section to reposition and resize your text properly. Go to Text section to change the style of the text. Similarly, there is an Appearance section to adjust color, shadow, and much more.
Step2 Apply Pre-Animated Template
Go to Graphics> Essential Graphics and browser through the title templates available to match your requirements. Once you have selected one title template, drag and drop it into your timeline above your video clip.

Double-click on the text to edit the content and type your title. Go to Essential Graphics panel and customize the text effect as per your preference. You can also choose the available elements included in the template to enhance the text effects as you think fit.
Step3 Edit the Text Effect and Animation
Select the text layer on your timeline to check out the keyframes applied in the template. Go to Effects Control panel and open Keyframe box by dragging it to the right. Adjust the keyframe to speed up or slow down the animation.

Bring the keyframes closer or spread them apart respectively. You can also adjust Velocity Controls present under different text properties as per the speed requirements.
Part 2. Alternative Way to Make Text Effects
If you are new to Adobe Premiere Pro, you will find title effects Premiere Pro difficult to add and edit as per your requirements. It is very common for amateur video editors to look for an easy alternative to Premiere Pro. We recommend Wondershare Filmora as the best alternative to Adobe Premiere text effects.
Filmora has a super intuitive user interface that is suitable for everyone including those who do not have prior video editing experience. There are more text effects and animations available that you can customize to get the desired effect. Here are the steps to add text effects to your video on Filmora.
Free Download For Win 7 or later(64-bit)
Free Download For macOS 10.14 or later
Step1 Download and install Wondershare Filmora and it is available for both Windows and macOS. Launch the application and click on New Project on the welcome screen.

Step2 Drag and drop your video clips under Project Media folder and then onto the timeline. Go to Titles and you will see different categories of text effects and templates.

Step3 Select a template whichever you think is perfect for your project and drop it on the timeline. Adjust its position on the timeline as per where you want it to appear. Double-click on it to edit the title and type in your text. Similarly, you can reposition the text from Viewer as per your need.

Select the text style as well as adjust fonts and settings to get different styles for your texts. There is also an Advanced section available for detailed editing and getting the desired text effect.
Step4 You can animate the texts in your video from Animation section. Choose from the animation presets to animate individual text in the video. Besides, you can also add keyframes and animate the text as per your preference.

Part 3. Related FAQs on Adobe Premiere Pro
1. How do you make text look good in Premiere Pro?
There are several steps you need to take to make text look good in Premiere Pro. First of all, the color of the text should be in contrast to the background. You can add a rectangle highlighter in the background. Experiment with font and text of the text. Apply a text effect from the different templates available. Customize the effect to get the desired result.
2. How do you add typing effects in Premiere?
Add your text to your video so that a text layer appears on the timeline. Animate the text Effects> Video Effects> Liner Wipe and double-click to get the typing effect. Tweak the parameters like transition completion, wipe angle, and others to smoothen out the animation. Draw a cursor icon using rectangle tool and animation it to move with the text using keyframes.
3. How do I open text effects controls in Premiere Pro?
Select the text layer from the timeline of the project. From the main menu, go to Windows> Effects Control option to open effect controls for text. Otherwise, you can directly go to Effects Control tab located below the menu bar after selecting your text layer.
The Bottom Line
Adding text effects in Premiere Pro can be slightly overwhelming for an amateur video editor who does not have enough experience with Premiere Pro. We have stated the simple steps to apply Premiere Pro text effects to your video project. However, we recommend Wondershare Filmora as the best and the easiest alternative to Premiere Pro where you get more text effects and add them instantly and effortlessly.
Free Download For macOS 10.14 or later
Step1 Download and install Wondershare Filmora and it is available for both Windows and macOS. Launch the application and click on New Project on the welcome screen.
Step2 Drag and drop your video clips under Project Media folder and then onto the timeline. Go to Titles and you will see different categories of text effects and templates.
Step3 Select a template whichever you think is perfect for your project and drop it on the timeline. Adjust its position on the timeline as per where you want it to appear. Double-click on it to edit the title and type in your text. Similarly, you can reposition the text from Viewer as per your need.
Select the text style as well as adjust fonts and settings to get different styles for your texts. There is also an Advanced section available for detailed editing and getting the desired text effect.
Step4 You can animate the texts in your video from Animation section. Choose from the animation presets to animate individual text in the video. Besides, you can also add keyframes and animate the text as per your preference.
Part 3. Related FAQs on Adobe Premiere Pro
1. How do you make text look good in Premiere Pro?
There are several steps you need to take to make text look good in Premiere Pro. First of all, the color of the text should be in contrast to the background. You can add a rectangle highlighter in the background. Experiment with font and text of the text. Apply a text effect from the different templates available. Customize the effect to get the desired result.
2. How do you add typing effects in Premiere?
Add your text to your video so that a text layer appears on the timeline. Animate the text Effects> Video Effects> Liner Wipe and double-click to get the typing effect. Tweak the parameters like transition completion, wipe angle, and others to smoothen out the animation. Draw a cursor icon using rectangle tool and animation it to move with the text using keyframes.
3. How do I open text effects controls in Premiere Pro?
Select the text layer from the timeline of the project. From the main menu, go to Windows> Effects Control option to open effect controls for text. Otherwise, you can directly go to Effects Control tab located below the menu bar after selecting your text layer.
The Bottom Line
Adding text effects in Premiere Pro can be slightly overwhelming for an amateur video editor who does not have enough experience with Premiere Pro. We have stated the simple steps to apply Premiere Pro text effects to your video project. However, we recommend Wondershare Filmora as the best and the easiest alternative to Premiere Pro where you get more text effects and add them instantly and effortlessly.
Also read:
- [New] Twitter's Best Binge-Friends Amazon Prime's Most Liked Shows, '23
- [Updated] Best Captures of Mac's Visual Display (Under 156 Characters)
- 2024 Approved How to Use Blender Green Screen
- Do You Know How You Can Trim or Merge Using Wondershare Filmora? Trimming and Merging Using This Tool Is an Easy Task; Learn How for 2024
- Do You Want to Make Your Background Disappear and Replace with an Attractive Background? Here Is How to Add a Green Screen to Zoom App and Add Any Virtual Background of Your Choice
- Easy Steps to Loop YouTube Videos on iPhone
- How to Access Your iPhone 15 Plus When You Forget the Passcode? | Dr.fone
- How to Fade in Text in Adobe Premiere Pro for 2024
- In 2024, From Novice to Pro Your Journey with the IO Screener
- In 2024, FRP Hijacker by Hagard Download and Bypass your Poco F5 Pro 5G FRP Locks
- In 2024, PassFab iPhone 11 Pro Max Backup Unlocker Top 4 Alternatives | Dr.fone
- In 2024, Ultimate Guide to Free PPTP VPN For Beginners On HTC U23 Pro | Dr.fone
- New 2024 Approved Easy Steps to Export Video in Filmora
- Review: The Insignia NS-43DF710NA19 - Affordable Smart Streaming Box With Ultra HD and Alexa Support
- Updated 3 Ways to Make Time-Lapse Video on MacBook
- Updated How to Correct Lens Distortion With Filmora for 2024
- User-Centric Update: Stellar Transforms Data Rescue Tools for Enhanced Home User Experience
- Title: Updated In 2024, Best Way To Color Grading & Color Correction in Filmora
- Author: Chloe
- Created at : 2025-02-25 05:38:06
- Updated at : 2025-03-03 18:22:20
- Link: https://ai-editing-video.techidaily.com/updated-in-2024-best-way-to-color-grading-and-color-correction-in-filmora/
- License: This work is licensed under CC BY-NC-SA 4.0.