
:max_bytes(150000):strip_icc():format(webp)/SetaLiveWallpaperinWindows11-b8ca3913592d4a5790808131bf8f34e1.jpg)
Updated In 2024, Easy Ways to Make Procreate GIFs
Easy Ways to Create Procreate GIFs
Easy Ways to Make Procreate GIFs
An easy yet powerful editor
Numerous effects to choose from
Detailed tutorials provided by the official channel
Stay tuned for a complete know-how into making Procreate GIFs.
In this article
01 [How Animation Works in Procreate](#Part 1)
02 [How to Make Animated Gifs in Procreate](#Part 2)
Part 1 How Animation Works in Procreate
GIFs are known to be the top ranked and most intuitive trendsetters in the world of infotainment and media service tools. Be it for fun or a targeted market influence, you can depend on GIFs for a variety of information solutions. Moving to the creative aspect, the experimentation belt with creating GIFs is huge. From making simple static and animated GIFs to creating professionally sound market promotion tools; you can play with your editing skills to extract just anything from these quick snippets.
Having said that, let’s take a dive into creating animated Procreate GIFs. Being a relatively new dimension of GIF editing, a merge of the two produces matchless and classic results. Read through the further article to get a complete guide for working on GIF creation and editing with Procreate.
● Underlying Concept
Before you begin creating a Procreate GIF, let’s get a bit familiar with the concept behind this GIF creation utility. This one is an excellent and advanced means of exploring your skills in digital drawing and animations. It is one of the easiest GIF maker software that helps you to become a pro in animation creativity even if you are beginner and for the ones already into the skill, Procreate is simply heaven.
Procreate allows you to work with animation in its ‘Animation Assist’ tool, where you get a generous workspace with the perfect editing canvas to experiment with a plethora of tools, effects and filters to create exciting GIFs with basic and complex animation craft.
The software allows frame-by-frame animation that refers to working with different frames of a particular illustration, while making minimal changes in each frame. Once you finish, your final creation gets played in a motion loop.
Part 1 How to Make Animated Gifs in Procreate
As is already stated, Procreate is among the most affordable GIF creator and editing software. Creating GIFs here is a few minute stuff within a span of counted steps. Let’s have a broader see through of the creation process. Take the following quick steps and get started to make your exclusive Procreate GIF:
● Step 1: Select an Artwork
Launch the software in your device to reach the Procreate welcome screen, where you need to select an existing static GIF to work on from your device. You can also create a fresh one if you like. Having done that, make a right swipe on the ‘Canvas’ icon and select ‘Duplicate’. This creates a copy of your artwork, preserving all of its layers, so that you are free to make changes or stick to the original one according to your preference.
If you want to use a specific section of your image to animate, you can use the crop tool to remove unwanted portions. Next, you need to put together the specific layers you wish to animate and also remove any unwanted layers you don’t want to use.

● Step 2: Enable Animation Assist Tool
From the Procreate tool gallery at the top, click on the ‘Wrench’ icon and select ‘Canvas’ from the ’Actions’ menu that drops down. In the interface that appears, enable the ‘Animation Assist’ tool with a right toggle. This will cause the ‘Animation Toolbar’ to appear at the bottom of the interface.

● Step 3: Add Frames and Make Image Adjustments
At this instant, you need to make additional adjustments in your selected image and create a copy of the image frames. To get this done, navigate to the ‘Animation Assist Toolbar’ and long press the ‘Add Frame’ button. A duplicate frame will now appear on the screen. Within this frame, you need to move the image elements that you wish to animate. To do this, select an element and drag it to a convenient spot of your choice.
While you go through with object movement, the software simultaneously shows you a semi-transparent preview of your creation through its unique ‘Onion-skin’ feature. You can enjoy playing your animation at this very stage, or continue to create something more exciting.
● Step 4: Enjoying? Let’s Continue.
Repeat Step 3 to create long and smooth GIFs with additional frames. Take caution to create a copy of your latest frame (not the original one), in case you need to make any adjustments later on. Consider playing your GIF to see if you need to add extra frames or implement further changes.
Step 5: Almost There.
You may notice a jerky movement of your final image frames. This is on account of the ‘Default Play’ feature of the Procreate software that initiates a run of your creation from the beginning to end and loops on the same fashion.
To set this right, navigate to the ‘Settings’ tool of the ‘Animation Assist Toolbar’ and tap ‘Ping-Pong’ on the opening interface. Your animated Gif will now play in a forward to backward loop, resulting in a smooth frame movement.
● Step 6: Time to Share.
Once you are happy with your artwork, you can share it across different media platforms. To export your creation, navigate to the Procreate tool gallery and tap the ‘Wrench’ icon and select ‘Share’. In the ‘Sharing Options’ menu, you will be asked to make a format selection. You can share your creation in either of the GIF, PNG or MP4 formats.
You may even require a size modification in the created file with respect to specific sharing platforms. You can either select a web compatible resolution to shrink your file, or create a copy of the file to resize the same.
Once you get familiar with Procreate and its GIF creation basics, you have the liberty to explore the huge effects library offered by the software to give your animated GIFs the classy, professional touch. So why wait? Just get the software and start a never ending spree of Procreating GIFs.
Procreate is undoubtedly an excellent tool for creating animated GIFs, but if you are looking for alternatives, another software to rely on is Wondershare Filmora Video Editor GIF creator.

Wondershare Filmora - Best Video Editor for Mac/Windows
5,481,435 people have downloaded it.
Build unique custom animations without breaking a sweat.
Focus on creating epic stories and leave the details to Filmora’s auto features.
Start a creative adventure with drag & drop effects and endless possibilities.
Filmora simplifies advanced features to save you time and effort.
Filmora cuts out repetition so you can move on to your next creative breakthrough.
● Filmora GIF Maker
Launched by Wondershare, this one is something you can blindly count upon for creating stunning animated GIFs from image and video files. Packed with tons of amazing features, Filmora is an inventory of audio-visual effects and filters that never runs out of fresh and appealing choices. Available to you as free and clean GIF generator software, this is easily compatible to almost any smart device. Working with Filmora will certainly make you admit that creating GIFs was never easier.

To start creating GIFs with this awesome tool, here’s what you need to do:
● Step 1: Import Necessary Media Files
Either a funny video or a group of stunning still images, you can choose any suitable media to make GIFs in Filmora. All you need to do is import the desired files from your PC or smartphone to the software’s timeline.
● Step 2: Timeline Dragging
Once you are done with importing the required files, you need to drag and drop the same to the ‘Editor Timeline’ of the GIF maker tool, where can improvise them to your heart’s content.

● Step 3: Time to Edit.
The Filmora effects library is simply heaven for the ones with creative instincts. Getting a liberty to browse and apply a glut of effects and filters, you are at the perfect place to create professionally sound and next level animated GIFs. Try hands on creating classy backgrounds with overlays, crop and trim clips to the perfect shot, make frame and time adjustments, add text to intensify your message, or pick up just anything you like, to create magic with your creativity.

● Step 4: Show it to the World.
When finally satisfied, save your artwork file to your device using the .gif extension and receive compliments from friends and peers by sharing it on your Instagram or other social media handles.

● Key Takeaways from This Episode →
● Animated GIFs are among the latest social media frenzy. These short, moving clips are nothing less than a complete entertainment roll-on. When it comes to creating animated GIFs, you can certainly take the Procreate software as a worthy choice.
● This one is a super easy and exciting means of working on animation GIFs that are by default, captivating for every onlooker. Talking of competing alternatives, you can trust on Wondershare Filmora, a handy, quick and clean solution to animated GIF creation.
Stay tuned for a complete know-how into making Procreate GIFs.
In this article
01 [How Animation Works in Procreate](#Part 1)
02 [How to Make Animated Gifs in Procreate](#Part 2)
Part 1 How Animation Works in Procreate
GIFs are known to be the top ranked and most intuitive trendsetters in the world of infotainment and media service tools. Be it for fun or a targeted market influence, you can depend on GIFs for a variety of information solutions. Moving to the creative aspect, the experimentation belt with creating GIFs is huge. From making simple static and animated GIFs to creating professionally sound market promotion tools; you can play with your editing skills to extract just anything from these quick snippets.
Having said that, let’s take a dive into creating animated Procreate GIFs. Being a relatively new dimension of GIF editing, a merge of the two produces matchless and classic results. Read through the further article to get a complete guide for working on GIF creation and editing with Procreate.
● Underlying Concept
Before you begin creating a Procreate GIF, let’s get a bit familiar with the concept behind this GIF creation utility. This one is an excellent and advanced means of exploring your skills in digital drawing and animations. It is one of the easiest GIF maker software that helps you to become a pro in animation creativity even if you are beginner and for the ones already into the skill, Procreate is simply heaven.
Procreate allows you to work with animation in its ‘Animation Assist’ tool, where you get a generous workspace with the perfect editing canvas to experiment with a plethora of tools, effects and filters to create exciting GIFs with basic and complex animation craft.
The software allows frame-by-frame animation that refers to working with different frames of a particular illustration, while making minimal changes in each frame. Once you finish, your final creation gets played in a motion loop.
Part 1 How to Make Animated Gifs in Procreate
As is already stated, Procreate is among the most affordable GIF creator and editing software. Creating GIFs here is a few minute stuff within a span of counted steps. Let’s have a broader see through of the creation process. Take the following quick steps and get started to make your exclusive Procreate GIF:
● Step 1: Select an Artwork
Launch the software in your device to reach the Procreate welcome screen, where you need to select an existing static GIF to work on from your device. You can also create a fresh one if you like. Having done that, make a right swipe on the ‘Canvas’ icon and select ‘Duplicate’. This creates a copy of your artwork, preserving all of its layers, so that you are free to make changes or stick to the original one according to your preference.
If you want to use a specific section of your image to animate, you can use the crop tool to remove unwanted portions. Next, you need to put together the specific layers you wish to animate and also remove any unwanted layers you don’t want to use.
● Step 2: Enable Animation Assist Tool
From the Procreate tool gallery at the top, click on the ‘Wrench’ icon and select ‘Canvas’ from the ’Actions’ menu that drops down. In the interface that appears, enable the ‘Animation Assist’ tool with a right toggle. This will cause the ‘Animation Toolbar’ to appear at the bottom of the interface.
● Step 3: Add Frames and Make Image Adjustments
At this instant, you need to make additional adjustments in your selected image and create a copy of the image frames. To get this done, navigate to the ‘Animation Assist Toolbar’ and long press the ‘Add Frame’ button. A duplicate frame will now appear on the screen. Within this frame, you need to move the image elements that you wish to animate. To do this, select an element and drag it to a convenient spot of your choice.
While you go through with object movement, the software simultaneously shows you a semi-transparent preview of your creation through its unique ‘Onion-skin’ feature. You can enjoy playing your animation at this very stage, or continue to create something more exciting.
● Step 4: Enjoying? Let’s Continue.
Repeat Step 3 to create long and smooth GIFs with additional frames. Take caution to create a copy of your latest frame (not the original one), in case you need to make any adjustments later on. Consider playing your GIF to see if you need to add extra frames or implement further changes.
Step 5: Almost There.
You may notice a jerky movement of your final image frames. This is on account of the ‘Default Play’ feature of the Procreate software that initiates a run of your creation from the beginning to end and loops on the same fashion.
To set this right, navigate to the ‘Settings’ tool of the ‘Animation Assist Toolbar’ and tap ‘Ping-Pong’ on the opening interface. Your animated Gif will now play in a forward to backward loop, resulting in a smooth frame movement.
● Step 6: Time to Share.
Once you are happy with your artwork, you can share it across different media platforms. To export your creation, navigate to the Procreate tool gallery and tap the ‘Wrench’ icon and select ‘Share’. In the ‘Sharing Options’ menu, you will be asked to make a format selection. You can share your creation in either of the GIF, PNG or MP4 formats.
You may even require a size modification in the created file with respect to specific sharing platforms. You can either select a web compatible resolution to shrink your file, or create a copy of the file to resize the same.
Once you get familiar with Procreate and its GIF creation basics, you have the liberty to explore the huge effects library offered by the software to give your animated GIFs the classy, professional touch. So why wait? Just get the software and start a never ending spree of Procreating GIFs.
Procreate is undoubtedly an excellent tool for creating animated GIFs, but if you are looking for alternatives, another software to rely on is Wondershare Filmora Video Editor GIF creator.
Wondershare Filmora - Best Video Editor for Mac/Windows
5,481,435 people have downloaded it.
Build unique custom animations without breaking a sweat.
Focus on creating epic stories and leave the details to Filmora’s auto features.
Start a creative adventure with drag & drop effects and endless possibilities.
Filmora simplifies advanced features to save you time and effort.
Filmora cuts out repetition so you can move on to your next creative breakthrough.
● Filmora GIF Maker
Launched by Wondershare, this one is something you can blindly count upon for creating stunning animated GIFs from image and video files. Packed with tons of amazing features, Filmora is an inventory of audio-visual effects and filters that never runs out of fresh and appealing choices. Available to you as free and clean GIF generator software, this is easily compatible to almost any smart device. Working with Filmora will certainly make you admit that creating GIFs was never easier.
To start creating GIFs with this awesome tool, here’s what you need to do:
● Step 1: Import Necessary Media Files
Either a funny video or a group of stunning still images, you can choose any suitable media to make GIFs in Filmora. All you need to do is import the desired files from your PC or smartphone to the software’s timeline.
● Step 2: Timeline Dragging
Once you are done with importing the required files, you need to drag and drop the same to the ‘Editor Timeline’ of the GIF maker tool, where can improvise them to your heart’s content.
● Step 3: Time to Edit.
The Filmora effects library is simply heaven for the ones with creative instincts. Getting a liberty to browse and apply a glut of effects and filters, you are at the perfect place to create professionally sound and next level animated GIFs. Try hands on creating classy backgrounds with overlays, crop and trim clips to the perfect shot, make frame and time adjustments, add text to intensify your message, or pick up just anything you like, to create magic with your creativity.
● Step 4: Show it to the World.
When finally satisfied, save your artwork file to your device using the .gif extension and receive compliments from friends and peers by sharing it on your Instagram or other social media handles.
● Key Takeaways from This Episode →
● Animated GIFs are among the latest social media frenzy. These short, moving clips are nothing less than a complete entertainment roll-on. When it comes to creating animated GIFs, you can certainly take the Procreate software as a worthy choice.
● This one is a super easy and exciting means of working on animation GIFs that are by default, captivating for every onlooker. Talking of competing alternatives, you can trust on Wondershare Filmora, a handy, quick and clean solution to animated GIF creation.
Things You Need to Know About Transparent PNG Remove and Convert
Things You Need to Know About Transparent PNG Remove and Convert
An easy yet powerful editor
Numerous effects to choose from
Detailed tutorials provided by the official channel
Are you thinking of merging two photos together with an identical background and no loss of quality? Or, do you have to remove the background color in a design? In such cases, PNG images work best for all.
PNG images are used at a broad level by web designers, graphic designers, and many other professionals around the world. It enables them to have a transparent background along with the finest image quality. It’s even possible to convert a JPG image to PNG transparent using any image editor. However, the process can seem a bit tedious and become complex if you are not using the right tool.
So, to help you out, we will reveal here the best way to remove the background of a photo and convert JPG image to PNG transparent.
In this article
01 [How to Remove the Background of a Photo in PowerPoint](#Part 1)
02 [How to Convert JPG to Transparent PNG](#Part 2)
Part 1 How to Remove the Background of a Photo in PowerPoint
If there is anything that a designer hates in his precious photo, then it’s the background. It hides and distracts from the main subject at hand. You can use various photo editing tools to remove the background from PNG images or JPG. However, they may not do the job as easily as you are thinking.
Yes, we know that you may be wondering about Adobe Photoshop now. It can be used for removing the background too but are you ready to pay for it? No, right? This is when you can depend on PowerPoint to erase the background of a photo without any hassle. Make sure you have PowerPoint 2010 or a later version installed before beginning. Because the earlier Microsoft PowerPoint versions don’t have a background removal feature.
Step 1: Open the image in a new tab
Launch PowerPoint on your desktop or Mac and change the layout of the slide to “Blank”. Next, insert your image, which has a solid or high-contrast background. Such pictures are easier to transform and edit.

Step 2: Select the “Remove Background” option
Click on your image to get the “Picture Format” in the menu toolbar. On the left top side, choose the “Remove Background” option. Now, PowerPoint will try to remove the background automatically. If the final picture that you are getting is not satisfactory, move to the next step.

Step 3: Select the Area
From the given options in the toolbar, mark the areas that you want to keep or remove in the final result. As you can view, how some parts of the pictures have been cut. So, spread the box to cover the entire area of the image, which you want to keep. Remember, purple-highlighted areas are removed automatically.

If you want to ensure a better result, use the cursor. Start hovering over the background and the main subject to get the plus and minus sign. These signs are useful for getting a precise image at the end. The Minus sign allows you to mark the areas to be removed. The plus sign can be used to keep the marked areas in the final picture.
Step 4: Finishing Touches
Check your image carefully and see whether any area is left to be removed or not. You can zoom in to find the tiniest spot. When you are satisfied with every detail, click anywhere outside of the image to stop further edits. Congratulations! Your transparent PNG is ready to save. Go to “File”>”Save As” and find the option to save your picture in PNG transparent format.
Part 2 How to Convert JPG to Transparent PNG
Ever wondered how logos in a graphic match with the background image color? It’s possible with transparent PNG images only. The transparent PNG images format contains superior quality and no background. Hence, it is pretty helpful for the designers to add them to graphics and videos.
In case you have some JPG images but you want it in PNG images format, don’t worry. You can use Kapwing as it’s a trusted content creation and video editing platform. It can bring your idea to life. It can convert JPG to PNG transparent easily. With the AI-powered facility, you can enjoy a seamless editing and conversion experience. Kapwing makes it really simple and fast, but the best part is that you can get it done for free.
Step 1: Add Your JPG
Launch Kapwing in any browser of your choice. Log in using your account or sign up with a new one. Now, you will be redirected to the Kapwing studio, where you can do all the editing and conversion. Upload your image to the “Kapwing Studio” and use the “Remove Image from Background” tool.

If the image is already saved on your device, simply hit “Click to Upload” or, if you wish, drag and drop the JPG image to initiate the conversion. On the other hand, in case the image is not available, you can copy and paste from a URL in the “Paste an image or video URL” box.
Step 2: Pick a Tool
After the image upload finishes, the next thing is to start removing its background. Go to the right side of the “Image” tab and click on the “Erase” button. Otherwise, you can use the “Remove Background from Image” tool to start.

You have two options to choose from – Erase and Magic Wand. The first tool gives you full control over what you want to remove or keep. Adjust the “eraser size” by sliding right on the dial. This way, you can remove the background precisely.
Apart from that, the Magic Wand tool is amazing for removing a particular area at once. You can remove the picture background in less time and effort. If you want to remove a certain area of the same color, then the Magic Wand is the best tool to use. It eliminates similar groups of pixels together. To modify the sensitivity, move the same dial to the right as you did while selecting the “Erase” tool.
For some impressive results, adjust the zoom and choose “Move” to select the pixels you want to remove.
Step 3: Make the PNG and Download
After everything has been set, it’s time to download your PNG transparent file. Click “Done” and then move back to the Kapwing Studio for additional features. You can add watermarks, text, and a lot more. Finally, hit the “Publish” button placed at the top right and “Download” to save the PNG file to your desktop.
You can do more with Wondershare Filmora Video Editor !
For Win 7 or later (64-bit)
For macOS 10.12 or later
Have you ever tried to extract images from a video file? Well, many of us wish to do so but lack the right tools or don’t have any idea of how to do it. Some people just take a screenshot of the video and crop it for use in memes, images, etc. However, doing this will reduce its overall resolution and quality.
If you want to preserve quality during the extraction of images from a video, use Wondershare Filmora. It lets you take images out of a video file frame by frame without any compromise on quality. It features many other tools to show your creativity.
It’s the latest update. Filmora V11 is here! Find out what’s new in this latest video editing software release and how it can help you create incredible videos and images. You can remove any unwanted object from an image, add filters and overlays, all on the go.
● Ending Thoughts →
● So there you have it: the full story on transparent PNGs, removing background, and conversion from JPG to PNG file format. As you can see, it’s not too hard to combine one image in your design. However, we don’t want you to forget anything. Hence, remember these things when you try to convert JPG to PNG transparent.
● Whichever method you choose to turn a PNG image into a JPG, make sure you are familiar with the tool. If not, first spend time figuring out the features. Seek out what suits you and then start. We would recommend following the above tips carefully instead of using any other tool.
● Beware of using third-party websites for background removal from a PNG. Many will store your pictures, which can be accessed by other users. They are not safe for you by any means.
● It’s not an easy job to convert JPG to transparent PNG using PowerPoint, especially when an image contains multiple images and colors. For such pictures, you can use Kapwing. It has plenty of additional features that you can use for creative work.
● If you have any questions or have different ways of accomplishing this, feel free to comment below. Thanks for reading.
Are you thinking of merging two photos together with an identical background and no loss of quality? Or, do you have to remove the background color in a design? In such cases, PNG images work best for all.
PNG images are used at a broad level by web designers, graphic designers, and many other professionals around the world. It enables them to have a transparent background along with the finest image quality. It’s even possible to convert a JPG image to PNG transparent using any image editor. However, the process can seem a bit tedious and become complex if you are not using the right tool.
So, to help you out, we will reveal here the best way to remove the background of a photo and convert JPG image to PNG transparent.
In this article
01 [How to Remove the Background of a Photo in PowerPoint](#Part 1)
02 [How to Convert JPG to Transparent PNG](#Part 2)
Part 1 How to Remove the Background of a Photo in PowerPoint
If there is anything that a designer hates in his precious photo, then it’s the background. It hides and distracts from the main subject at hand. You can use various photo editing tools to remove the background from PNG images or JPG. However, they may not do the job as easily as you are thinking.
Yes, we know that you may be wondering about Adobe Photoshop now. It can be used for removing the background too but are you ready to pay for it? No, right? This is when you can depend on PowerPoint to erase the background of a photo without any hassle. Make sure you have PowerPoint 2010 or a later version installed before beginning. Because the earlier Microsoft PowerPoint versions don’t have a background removal feature.
Step 1: Open the image in a new tab
Launch PowerPoint on your desktop or Mac and change the layout of the slide to “Blank”. Next, insert your image, which has a solid or high-contrast background. Such pictures are easier to transform and edit.
Step 2: Select the “Remove Background” option
Click on your image to get the “Picture Format” in the menu toolbar. On the left top side, choose the “Remove Background” option. Now, PowerPoint will try to remove the background automatically. If the final picture that you are getting is not satisfactory, move to the next step.
Step 3: Select the Area
From the given options in the toolbar, mark the areas that you want to keep or remove in the final result. As you can view, how some parts of the pictures have been cut. So, spread the box to cover the entire area of the image, which you want to keep. Remember, purple-highlighted areas are removed automatically.
If you want to ensure a better result, use the cursor. Start hovering over the background and the main subject to get the plus and minus sign. These signs are useful for getting a precise image at the end. The Minus sign allows you to mark the areas to be removed. The plus sign can be used to keep the marked areas in the final picture.
Step 4: Finishing Touches
Check your image carefully and see whether any area is left to be removed or not. You can zoom in to find the tiniest spot. When you are satisfied with every detail, click anywhere outside of the image to stop further edits. Congratulations! Your transparent PNG is ready to save. Go to “File”>”Save As” and find the option to save your picture in PNG transparent format.
Part 2 How to Convert JPG to Transparent PNG
Ever wondered how logos in a graphic match with the background image color? It’s possible with transparent PNG images only. The transparent PNG images format contains superior quality and no background. Hence, it is pretty helpful for the designers to add them to graphics and videos.
In case you have some JPG images but you want it in PNG images format, don’t worry. You can use Kapwing as it’s a trusted content creation and video editing platform. It can bring your idea to life. It can convert JPG to PNG transparent easily. With the AI-powered facility, you can enjoy a seamless editing and conversion experience. Kapwing makes it really simple and fast, but the best part is that you can get it done for free.
Step 1: Add Your JPG
Launch Kapwing in any browser of your choice. Log in using your account or sign up with a new one. Now, you will be redirected to the Kapwing studio, where you can do all the editing and conversion. Upload your image to the “Kapwing Studio” and use the “Remove Image from Background” tool.
If the image is already saved on your device, simply hit “Click to Upload” or, if you wish, drag and drop the JPG image to initiate the conversion. On the other hand, in case the image is not available, you can copy and paste from a URL in the “Paste an image or video URL” box.
Step 2: Pick a Tool
After the image upload finishes, the next thing is to start removing its background. Go to the right side of the “Image” tab and click on the “Erase” button. Otherwise, you can use the “Remove Background from Image” tool to start.
You have two options to choose from – Erase and Magic Wand. The first tool gives you full control over what you want to remove or keep. Adjust the “eraser size” by sliding right on the dial. This way, you can remove the background precisely.
Apart from that, the Magic Wand tool is amazing for removing a particular area at once. You can remove the picture background in less time and effort. If you want to remove a certain area of the same color, then the Magic Wand is the best tool to use. It eliminates similar groups of pixels together. To modify the sensitivity, move the same dial to the right as you did while selecting the “Erase” tool.
For some impressive results, adjust the zoom and choose “Move” to select the pixels you want to remove.
Step 3: Make the PNG and Download
After everything has been set, it’s time to download your PNG transparent file. Click “Done” and then move back to the Kapwing Studio for additional features. You can add watermarks, text, and a lot more. Finally, hit the “Publish” button placed at the top right and “Download” to save the PNG file to your desktop.
You can do more with Wondershare Filmora Video Editor !
For Win 7 or later (64-bit)
For macOS 10.12 or later
Have you ever tried to extract images from a video file? Well, many of us wish to do so but lack the right tools or don’t have any idea of how to do it. Some people just take a screenshot of the video and crop it for use in memes, images, etc. However, doing this will reduce its overall resolution and quality.
If you want to preserve quality during the extraction of images from a video, use Wondershare Filmora. It lets you take images out of a video file frame by frame without any compromise on quality. It features many other tools to show your creativity.
It’s the latest update. Filmora V11 is here! Find out what’s new in this latest video editing software release and how it can help you create incredible videos and images. You can remove any unwanted object from an image, add filters and overlays, all on the go.
● Ending Thoughts →
● So there you have it: the full story on transparent PNGs, removing background, and conversion from JPG to PNG file format. As you can see, it’s not too hard to combine one image in your design. However, we don’t want you to forget anything. Hence, remember these things when you try to convert JPG to PNG transparent.
● Whichever method you choose to turn a PNG image into a JPG, make sure you are familiar with the tool. If not, first spend time figuring out the features. Seek out what suits you and then start. We would recommend following the above tips carefully instead of using any other tool.
● Beware of using third-party websites for background removal from a PNG. Many will store your pictures, which can be accessed by other users. They are not safe for you by any means.
● It’s not an easy job to convert JPG to transparent PNG using PowerPoint, especially when an image contains multiple images and colors. For such pictures, you can use Kapwing. It has plenty of additional features that you can use for creative work.
● If you have any questions or have different ways of accomplishing this, feel free to comment below. Thanks for reading.
How To Export Video in Filmora
After you edit your video with Filmora you may wonder how to export your video in Filmora Indeed, you can export your video in Filmora in various options. This article will show you the multiple options you can get if you want to export your video in Filmora.
Steps to export your video with Filmora
To open the export box, press “CTRL+E” on your keyboard. After that, you’ll see many export options you can do.

Export Video Platform
If you want your video to end up on YouTube, you can click on the “YouTube” option, sign in, and enter all the basic metadata you need for your YouTube video. Then you can click “Export”, and the video will go straight to YouTube. Also, you can have all of your privacy settings, descriptions, and everything else.

Similar to YouTube, you can do the same thing if you want to export your video on Vimeo.

Export and Burn Video into DVD
You can also directly burn your video to a DVD. Even though video to DVD isn’t as common as it used to be, it’s still nice to be able to do it, especially if you like making DVDs.

Export Video to Other Devices
Go to the “Devices” option if you want to export your video to specific devices with everything looking good on that particular device. For instance, if you want to export your video to iPhone, you can see the size will be 41MB, and the resolution will be 1080p. All those things are going to look much better on an iPhone.

You can also adjust the quality of your video based on your needs by clicking on “Setting.”

Export Videos in High Res Quality
In the “Format” option you can choose the file extension, the format, or the codec. Exporting your video based on format is good if you prefer to save your video on your computer since maybe you may upload your video on YouTube, Instagram or other social media platforms.

You can choose “Apple Prores” if you want the least amount of compression possible and don’t care about the file size. For example, if you want to export a video from Filmora and then import it into another video editor without losing too much quality, you should definitely choose “Apple Prores.”

Before exporting, there is the option to upload to the cloud. If you do not know what it is, Wondershare has its own Drive, which allows you to save and remotely view your video files.
In the meantime, if you have a decent PC, you can enable “Hardware acceleration for video encoding.” This option will utilize as much computer power as you have to export the video and make the process significantly faster. Once everything is finished, click “Export.”

When you click Export, you can see the progress with thumbnails and everything. Lastly, your video has been exported successfully when the exporting process reaches 100%.

Summary
Indeed, there are many options to export your video using Filmora. If you wish to export your video directly to YouTube, simply select the YouTube option in the Export box. Meanwhile, if you want to export your video on your computer and upload it to various social media platforms, it’s much better to export it with a format option.
Free Download For Win 7 or later(64-bit)
Free Download For macOS 10.14 or later
Free Download For macOS 10.14 or later Free Download For macOS 10.14 or later Free Download For macOS 10.14 or later
Are You Looking for Funny Discord Emojis to Massively Improve Your Discord Experience? Using some Fun Bots for Discord Is an Excellent Way of Doing That! Thus, We Compiled a List of 10 Fun Discord Bots You Need
Top 10 Fun Discord Bots You Need in 2024
An easy yet powerful editor
Numerous effects to choose from
Detailed tutorials provided by the official channel
Consumers enjoy discord because it serves as a hub for their social groups and communities. It’s a haven where users can be themselves while socializing with others who share their interests and hobbies. There is no algorithm selecting what they should see, no continuous scrolling, and no news feed. Common interests fuel conversations and you can use some fun discord bots to pep up the conversation.

Fun bots to add discord with artificial intelligence (AI) technologies are among the most helpful tools available on the discord platform. Funny emojis for discord may be beneficial to greet new members and have funny light conversations! This aids in the creation and maintenance of a vibrant online community. You can add music, games, and fun memes to your server using these bots if you wish to.
In this article
01 [10 Fun Discord Bots You Need in 2024](#Part 1)
02 [Fun Discord Bots FAQs](#Part 2)
Part 1 Fun Discord Bots You Need in 2024
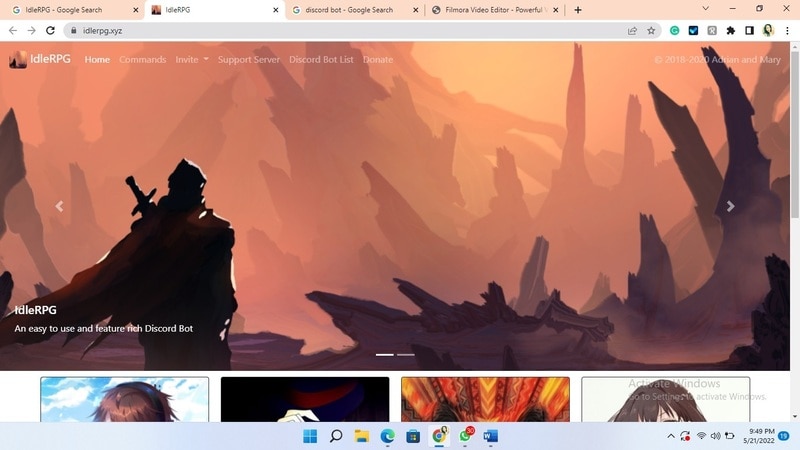
01IdleRPG
The IdleRPG is another enjoyable and engaging fun discord bot in the RPG gaming experience. It rewards server members for participating in the game while gaining XP and having fun. It offers character advancement and is comparable to other RPG games.
You may travel on a quest, trade various things, fight other players, and even find love. There’s also a scoreboard for the top ten loves, top ten PvP players, top ten wealthiest, and top ten XP players. IdleRPG also allows you to wager in various ways to help you boost your gaming money.
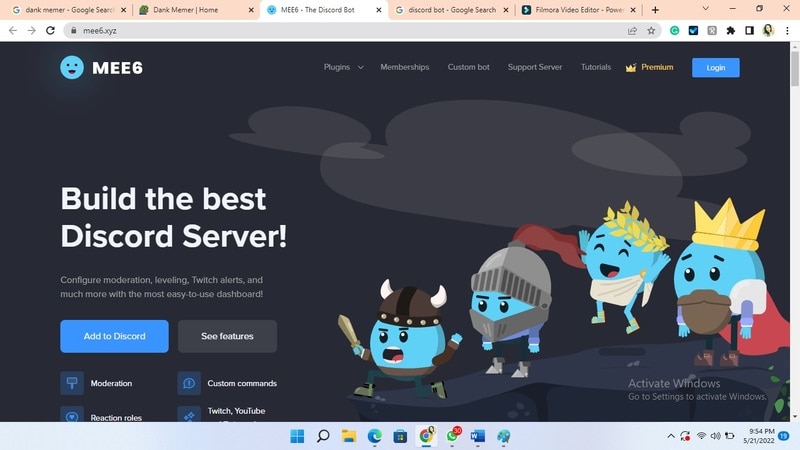
02MEE6
MEE6 is a widespread moderation and one of the greatest fun bots for discord. It takes care of many tasks that a mod team would typically do. This includes greeting new members, informing your server when you or your favorite content producers go live on Twitch or YouTube, and allowing users to assign roles depending on their reactions.
A command tool that allows you to generate custom commands and an XP leveling system that users may grind to earn access to various channels and permissions depending on activity are two of MEE6’s more complicated features. MEE6 also includes plugins for music and developing your fun discord bot.
03Dank Memer
Dank Memer is another fun bot to add to discord with a lighthearted tone. It offers one of the most extensive built-in economies, allowing participants to engage in text-based thievery, bank robbery, and gambling experiences.
As its name implies, it also offers a slew of meme-related commands. You can use simple chat instructions to create memes. Other memes automatically publish.
Even more impressive is that awesome memes are collected daily from Reddit’s top meme collections.

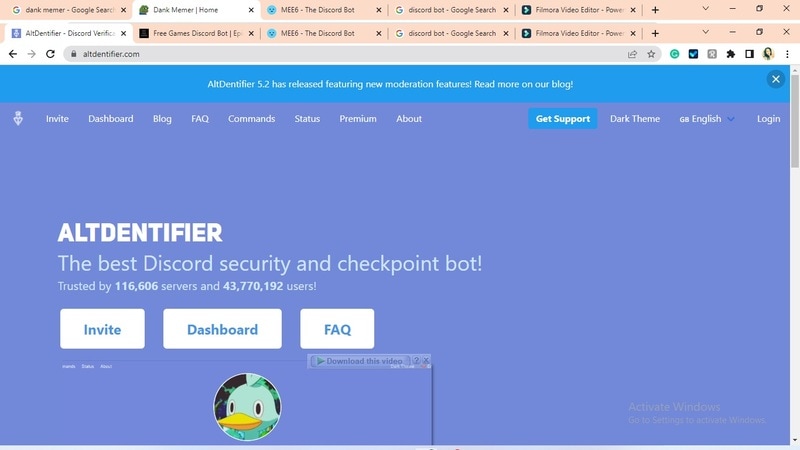
04AltDentifier
Another unique funny discord emoji bot is AltDentifier, which maintains your server clean and spam-free. It’s simple to set up and takes only a few minutes to get up and run. It now has over 35 million users spread across 100,000 servers. It also includes several more moderation commands to make administration easier.
The AltDentifier bot contains:
● An automated anti-raid system.
● A robust verification mechanism.
● Multilingual support.
● A review record.
It will also notify you if a user attempts to circumvent any limitations by utilizing a VPN.
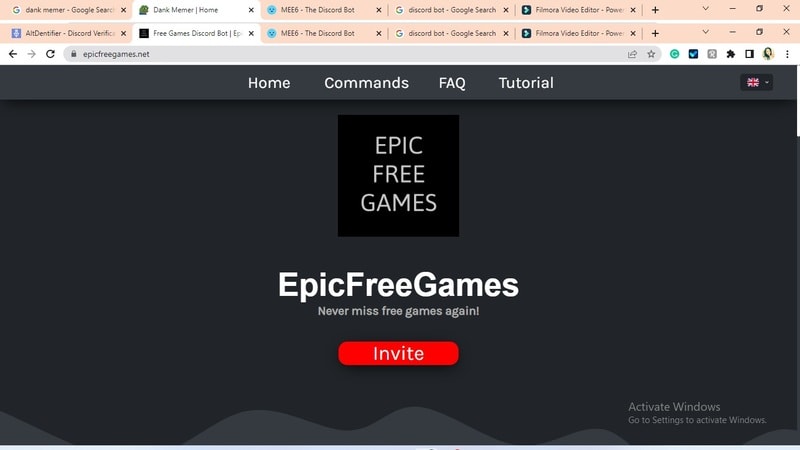
05EpicFreeGames
Over the last two years, Epic Free Games has given away thousands of free games. GTA V, Dead By Daylight, and NBA 2K21 are among the given-away titles. It even-handed away Discord Nitro lately. Have any of these free games ever escaped your notice? Fear not, for the EpicFreeGames bot has your back.
The EpicFreeGames bot delivers a message to a channel, reminding everyone of Epic’s free game(s). It only has one task, yet it can provide you with hundreds of dollars worth of games. Never miss another fantastic free Epic Games game again.
06**Rythm **
Rythm is a great fun discord bot for playing music in the voice stream of your server. This one features a beautiful user interface that includes a music player that you can interact with. This makes controlling the channel’s queue a breeze.
The options are changeable. You can designate DJ duties, prohibit the same songs from appearing in queues again, and block particular channels from playing music. Rhythm is less platform-agnostic than Groovy. Spotify, YouTube, SoundCloud, and Bandcamp are among the options. Apple Music is not currently supported.
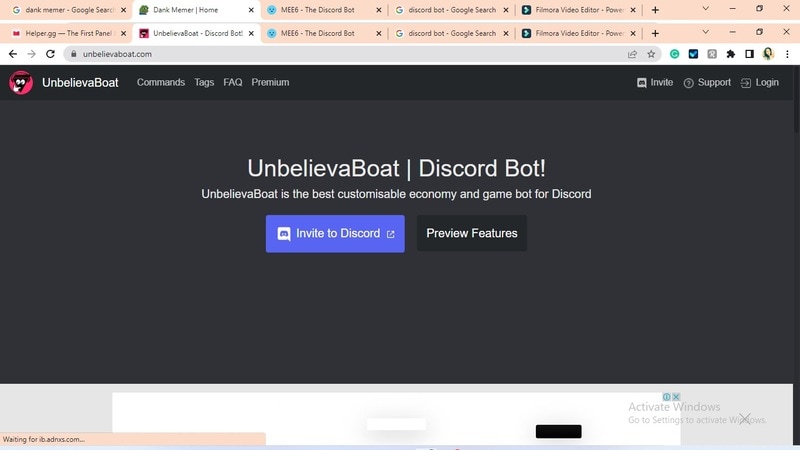
07Unbelievaboat
UnbelievaBoat is a versatile, fun bot to add to discord that uses exciting activities to keep server members engaged. These capabilities, fortunately, include a moderation mechanism that you may utilize to issue warnings and enforce bans. Your moderators may keep track of each action by assigning it a case number.
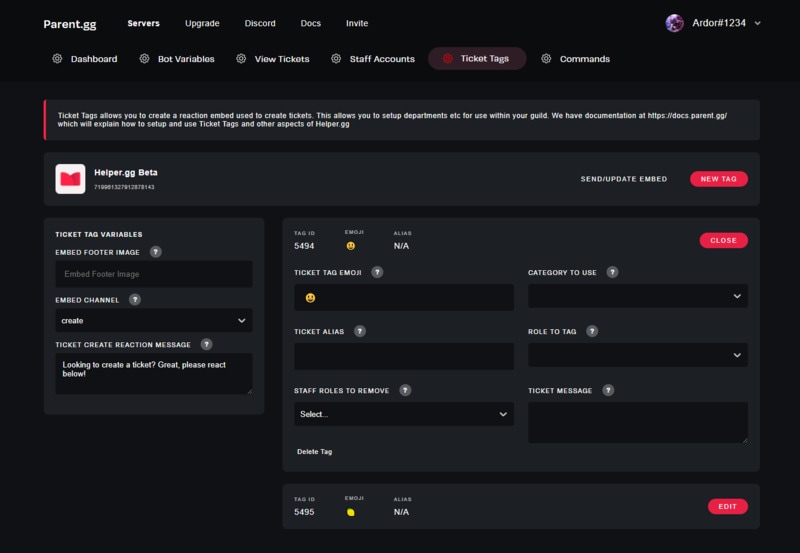
08Helper.gg
Helper.gg enables you to transform your discord server into a support ticket system. It’s a board ticket bot with a stunning UI that makes managing and responding to client tickets simple.
Create staff accounts for your company’s customer support representatives and manage their access. Ticket logging with the flexibility to rename and relocate tickets, add and delete users, and the contentment of having tickets close automatically based on the amount of time that has passed since the previous reply are all accessible.
09GameStats
Next, GameStats has one-of-a-kind funny emojis for the discord bot. We all enjoy looking at our in-game statistics and comparing them. The GameStats Discord bot makes sharing and displaying your impressive numbers simple.
Connect to your game or platform, make a personalized profile card, and begin sharing your tryhard statistics.
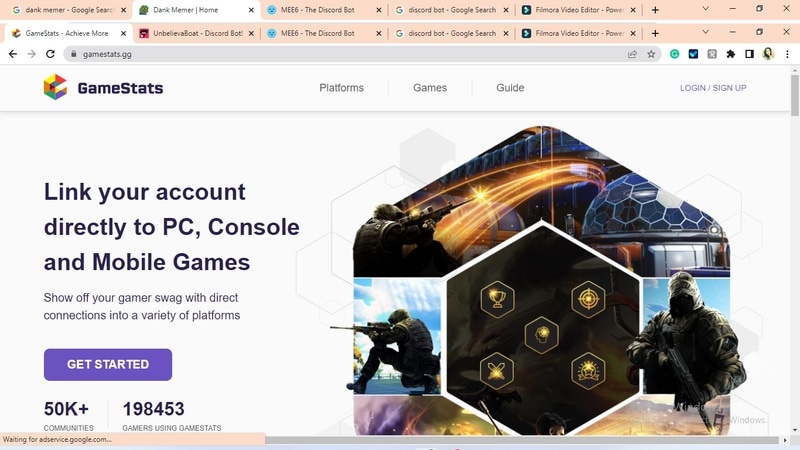
10Dyno
Dyno is another well-crafted fun discord bot. It’s an utterly customizable server moderation bot that assists with server automation. You also receive a basic online dashboard with Dyno that you can use to monitor and control your server.
It has functions such as creating positions, making announcements, banning members, and even requesting puppy or cat images. Dyno is a fun bot that allows you to automate your server management effortlessly. Premium subscriptions, which start at $4.99 per month and unlock more exclusive features, are also available.
However, if you are a creative video editor who likes sharing their experience on discord, Filmora is for you. With Filmora, you can bring your recorded experiences with funny discord emojis to life!
But Wait, What is Wondershare Filmora Video Editor ?
Filmora is a famous video editing program for those who wish to focus on editing and producing high-quality videos with the support of 4K video editing. It’s a reasonably priced software featuring tools like split, trim, add text, color, etc. When it comes to designing, adding effects, and modifying movies, it provides users with many possibilities. Users can add overlays, create animations and objects, add music, and more with Wondershare’s Filmora. It’s an excellent tool for individuals who wish to include dedications, tributes, fun emojis and anecdotes in their films. Any video can also benefit from voiceovers.
For Win 7 or later (64-bit)
For macOS 10.12 or later
Part 2 Fun Discord Bots FAQs
Q. What does MEE6 stand for?
A. MEE6 is a discord role bot that lets users assign roles to themselves via discord replies. This discord role generator will change user rights in discord automatically.
Q. Are these fun bots free?
A. Yes and no. Most fun bots for discord are free to use, although you must pay for some features.
Q. What is the top level I can reach on the MEE6 bot?
A. The maximum level accessible is 1,768,802, which would take 935 billion years if messages sent every minute.
Q. Help! My discord got hacked; how did that even happen?
A. Users may edit discord javascript files. A cybercriminal can install harmful malware to discord client files if they get user authorization. When people open the file, the code also gets executed. After then, the hacker has access to the user’s discord data.
Q. What can discord bots do?
A. On your server, the bots can conduct a variety of helpful automated chores and bot commands, like welcoming new users, monitoring content, and banning rule violators. Using fun discord bots’ instructions, you can add music, humor, games, and other emojis to your server.
● Ending Thoughts →
● In short, moderators and administrators can use funny discord emojis to administer their servers better, make them attractive, and get more users. There are many vanilla discord commands to choose from, and when you put fun bots to add to discord, the possibilities become unlimited.
● Besides, there are several funny emojis for discord to improve your discord skills and establish your discord server. Finally, Filmora can assist you in beautifying your recorded videos make funny emojis for discord.
Consumers enjoy discord because it serves as a hub for their social groups and communities. It’s a haven where users can be themselves while socializing with others who share their interests and hobbies. There is no algorithm selecting what they should see, no continuous scrolling, and no news feed. Common interests fuel conversations and you can use some fun discord bots to pep up the conversation.
Fun bots to add discord with artificial intelligence (AI) technologies are among the most helpful tools available on the discord platform. Funny emojis for discord may be beneficial to greet new members and have funny light conversations! This aids in the creation and maintenance of a vibrant online community. You can add music, games, and fun memes to your server using these bots if you wish to.
In this article
01 [10 Fun Discord Bots You Need in 2024](#Part 1)
02 [Fun Discord Bots FAQs](#Part 2)
Part 1 Fun Discord Bots You Need in 2024
01IdleRPG
The IdleRPG is another enjoyable and engaging fun discord bot in the RPG gaming experience. It rewards server members for participating in the game while gaining XP and having fun. It offers character advancement and is comparable to other RPG games.
You may travel on a quest, trade various things, fight other players, and even find love. There’s also a scoreboard for the top ten loves, top ten PvP players, top ten wealthiest, and top ten XP players. IdleRPG also allows you to wager in various ways to help you boost your gaming money.
02MEE6
MEE6 is a widespread moderation and one of the greatest fun bots for discord. It takes care of many tasks that a mod team would typically do. This includes greeting new members, informing your server when you or your favorite content producers go live on Twitch or YouTube, and allowing users to assign roles depending on their reactions.
A command tool that allows you to generate custom commands and an XP leveling system that users may grind to earn access to various channels and permissions depending on activity are two of MEE6’s more complicated features. MEE6 also includes plugins for music and developing your fun discord bot.
03Dank Memer
Dank Memer is another fun bot to add to discord with a lighthearted tone. It offers one of the most extensive built-in economies, allowing participants to engage in text-based thievery, bank robbery, and gambling experiences.
As its name implies, it also offers a slew of meme-related commands. You can use simple chat instructions to create memes. Other memes automatically publish.
Even more impressive is that awesome memes are collected daily from Reddit’s top meme collections.
04AltDentifier
Another unique funny discord emoji bot is AltDentifier, which maintains your server clean and spam-free. It’s simple to set up and takes only a few minutes to get up and run. It now has over 35 million users spread across 100,000 servers. It also includes several more moderation commands to make administration easier.
The AltDentifier bot contains:
● An automated anti-raid system.
● A robust verification mechanism.
● Multilingual support.
● A review record.
It will also notify you if a user attempts to circumvent any limitations by utilizing a VPN.
05EpicFreeGames
Over the last two years, Epic Free Games has given away thousands of free games. GTA V, Dead By Daylight, and NBA 2K21 are among the given-away titles. It even-handed away Discord Nitro lately. Have any of these free games ever escaped your notice? Fear not, for the EpicFreeGames bot has your back.
The EpicFreeGames bot delivers a message to a channel, reminding everyone of Epic’s free game(s). It only has one task, yet it can provide you with hundreds of dollars worth of games. Never miss another fantastic free Epic Games game again.
06**Rythm **
Rythm is a great fun discord bot for playing music in the voice stream of your server. This one features a beautiful user interface that includes a music player that you can interact with. This makes controlling the channel’s queue a breeze.
The options are changeable. You can designate DJ duties, prohibit the same songs from appearing in queues again, and block particular channels from playing music. Rhythm is less platform-agnostic than Groovy. Spotify, YouTube, SoundCloud, and Bandcamp are among the options. Apple Music is not currently supported.
07Unbelievaboat
UnbelievaBoat is a versatile, fun bot to add to discord that uses exciting activities to keep server members engaged. These capabilities, fortunately, include a moderation mechanism that you may utilize to issue warnings and enforce bans. Your moderators may keep track of each action by assigning it a case number.
08Helper.gg
Helper.gg enables you to transform your discord server into a support ticket system. It’s a board ticket bot with a stunning UI that makes managing and responding to client tickets simple.
Create staff accounts for your company’s customer support representatives and manage their access. Ticket logging with the flexibility to rename and relocate tickets, add and delete users, and the contentment of having tickets close automatically based on the amount of time that has passed since the previous reply are all accessible.
09GameStats
Next, GameStats has one-of-a-kind funny emojis for the discord bot. We all enjoy looking at our in-game statistics and comparing them. The GameStats Discord bot makes sharing and displaying your impressive numbers simple.
Connect to your game or platform, make a personalized profile card, and begin sharing your tryhard statistics.
10Dyno
Dyno is another well-crafted fun discord bot. It’s an utterly customizable server moderation bot that assists with server automation. You also receive a basic online dashboard with Dyno that you can use to monitor and control your server.
It has functions such as creating positions, making announcements, banning members, and even requesting puppy or cat images. Dyno is a fun bot that allows you to automate your server management effortlessly. Premium subscriptions, which start at $4.99 per month and unlock more exclusive features, are also available.
However, if you are a creative video editor who likes sharing their experience on discord, Filmora is for you. With Filmora, you can bring your recorded experiences with funny discord emojis to life!
But Wait, What is Wondershare Filmora Video Editor ?
Filmora is a famous video editing program for those who wish to focus on editing and producing high-quality videos with the support of 4K video editing. It’s a reasonably priced software featuring tools like split, trim, add text, color, etc. When it comes to designing, adding effects, and modifying movies, it provides users with many possibilities. Users can add overlays, create animations and objects, add music, and more with Wondershare’s Filmora. It’s an excellent tool for individuals who wish to include dedications, tributes, fun emojis and anecdotes in their films. Any video can also benefit from voiceovers.
For Win 7 or later (64-bit)
For macOS 10.12 or later
Part 2 Fun Discord Bots FAQs
Q. What does MEE6 stand for?
A. MEE6 is a discord role bot that lets users assign roles to themselves via discord replies. This discord role generator will change user rights in discord automatically.
Q. Are these fun bots free?
A. Yes and no. Most fun bots for discord are free to use, although you must pay for some features.
Q. What is the top level I can reach on the MEE6 bot?
A. The maximum level accessible is 1,768,802, which would take 935 billion years if messages sent every minute.
Q. Help! My discord got hacked; how did that even happen?
A. Users may edit discord javascript files. A cybercriminal can install harmful malware to discord client files if they get user authorization. When people open the file, the code also gets executed. After then, the hacker has access to the user’s discord data.
Q. What can discord bots do?
A. On your server, the bots can conduct a variety of helpful automated chores and bot commands, like welcoming new users, monitoring content, and banning rule violators. Using fun discord bots’ instructions, you can add music, humor, games, and other emojis to your server.
● Ending Thoughts →
● In short, moderators and administrators can use funny discord emojis to administer their servers better, make them attractive, and get more users. There are many vanilla discord commands to choose from, and when you put fun bots to add to discord, the possibilities become unlimited.
● Besides, there are several funny emojis for discord to improve your discord skills and establish your discord server. Finally, Filmora can assist you in beautifying your recorded videos make funny emojis for discord.
Also read:
- Updated In 2024, Top 10 Picks for Flawless Slow Motion Video Generation
- New Tactics to Make Transparent Image in Minimal Steps
- 2024 Approved Spooky Halloween with the Best 15+ Halloween Countdown Video Clips
- New If You Are Looking Forward to Make Attractive and Customized Slideshows, Lightroom Is One of the Best Options that You Can Consider
- Updated Detailed Tutorial to Resize Your Video in VLC
- New 2024 Approved Detailed Tutorial to Rotate Videos in Cyberlink PowerDirector
- New 2024 Approved 3 Methods to Combine 2 or 3 Videos Into 1
- Updated Vintage Film Effect 1920S - How to Make
- Step by Step to Rotate Video Using KMPlayer for 2024
- Updated In 2024, Best Options to Replace Sky of Any Photo Online + Offline
- New In 2024, Create an Awesome Logo Reveal with Logo Intro Templates
- Updated 2024 Approved Come And Pick! Best MOV to GIF Converters
- Updated In 2024, Something That You Should Know About MP4 Video Format
- New 2024 Approved How To Add Fade In Windows Video Editor
- New 2024 Approved 15 Camera Shake Preset for Premiere Pro
- Updated Top 12 Sony Vegas Slideshow Templates for Free Download
- Updated 2024 Approved How to Create Cooking Video Intro and End Screen for YouTube Channel?
- 2024 Approved Looking for the Simple Steps to Add a Filter to Your Video in Premiere Pro? Here Are the Complete Steps Along with the List of Free Premiere Filter Presets to Use
- Best 20 Slideshow Makers for Win/Mac/Online Review
- New In 2024, IMovie Review – Is It The Best Video Editor for Mac Users?
- New 2024 Approved General Information That You Need To Know About MKV Format
- Best Video Grabbers for Chrome
- Updated Zoom In and Zoom Out on YouTube
- How to Create OBS Slideshow
- 2024 Approved How to Download and Use Vegas Pro
- Brightening a Video Doesnt Need to Be Complicated. This Article Will Discuss How to Brighten up Your Videos Easily Using Premiere Pro for 2024
- Updated In 2024, Progressive Solutions to Adding VHS Effects to Video with Ease
- Updated 7 Solutions to Cut Video on Mac without Using FFmpeg?
- Updated How Can You Get VHS Filter and Glitch Filter to Your Images or Videos?
- Video Course and Online Learning Are Very Popular Nowadays. Here We Are Going to Recommend some of the Best Video Websites for Teachers to Use
- Updated In 2024, How to Make a Slow Motion Video in Wondershare Filmora
- New In 2024, MP3 Cutter Download
- How to Use the Logo Intro Templates for Your Next Video for 2024
- 2024 Approved A Countdown Effect Is Widely Used in Gaming and Report Videos. So How to Create Your Own Countdown Video? This Article Will Tell You some Ideas About Contdown Video Editing
- New Step by Step to Split Clips in VLC for 2024
- Updated Online Video Makers
- Updated Techniques You Never Heard of for Learning AI Marketing YouTube
- Are You Seeking Free Lumetri Presets to Enhance Your Videos? Find Out All About Lumetri Color Presets and How to Use Them in Presenting Proper Color Grading for 2024
- New How to Trim Video in QuickTime Player on Your Mac
- 2024 Approved Change Background Color in After Effects
- 2 Easy Methods | How To Zoom In On TikTok Videos for 2024
- Ultimate Guide on How to Plan and Storyboard a Music Video for 2024
- Updated In 2024, How to Add Miniature Effect in Video with Filmora
- This Blog Post Will Walk You Through How to Resize Videos Using VLC. Well Cover What the Default Settings Are for Video Resolutions, How to Change Them, and Why Its Important to Know What Size of Video Youre Uploading Before Uploading It
- Updated How To Make Split Screen Videos in Filmora for 2024
- New Check Out All Details About Kinemaster Here and Understand How to Add Effects in Kinemaster. You Can Use the Chroma Key for the Green Screen as Well
- In 2024, Guide Cropping and Combining Content in Wondershare Filmora Latest
- New 2024 Approved Color Correction Basics (S-LOG Footage)
- 3 Easy Solutions to Hard Reset Poco F5 5G | Dr.fone
- In 2024, How To Unlock a Realme 12 5G Easily?
- iPogo will be the new iSpoofer On Realme C67 4G? | Dr.fone
- How to play MP4 files on Huawei Nova Y91?
- Life360 Circle Everything You Need to Know On Realme Narzo N55 | Dr.fone
- In 2024, 5 Ways to Move Contacts From Oppo Find N3 Flip to iPhone (13/14/15) | Dr.fone
- Additional Tips About Sinnoh Stone For Vivo Y100t | Dr.fone
- Google Play Services Wont Update? 12 Fixes are Here on Lava Yuva 3 | Dr.fone
- Why Your Honor Magic 6 Pro Screen Might be Unresponsive and How to Fix It | Dr.fone
- Updated In 2024, Everything You Need to Know About Becoming a Motion Graphic Designer
- How to Fix Unfortunately, Contacts Has Stopped Error on Tecno Pova 5 | Dr.fone
- A Detailed VPNa Fake GPS Location Free Review On Oppo Reno 10 5G | Dr.fone
- In 2024, Android to Apple How To Transfer Photos From Xiaomi 13 Ultra to iPad Easily | Dr.fone
- In 2024, How to Change Netflix Location to Get More Country Version On Infinix Note 30 VIP Racing Edition | Dr.fone
- In 2024, Unlocking an iCloud Locked iPad and iPhone X
- How to Fix Life360 Shows Wrong Location On Apple iPhone X? | Dr.fone
- Why is iPogo not working On Motorola Edge 40? Fixed | Dr.fone
- In 2024, Guide on How To Change Your Apple ID Email Address On iPhone 6
- How to Use Pokémon Emerald Master Ball Cheat On Oppo Find X7 | Dr.fone
- Ultimate Guide to Catch the Regional-Located Pokemon For Oppo Reno 8T 5G | Dr.fone
- Title: Updated In 2024, Easy Ways to Make Procreate GIFs
- Author: Chloe
- Created at : 2024-04-24 07:08:33
- Updated at : 2024-04-25 07:08:33
- Link: https://ai-editing-video.techidaily.com/updated-in-2024-easy-ways-to-make-procreate-gifs/
- License: This work is licensed under CC BY-NC-SA 4.0.
