:max_bytes(150000):strip_icc():format(webp)/GettyImages-1342255561-483b636ee00f40a1b3d91d1969b1aaf6.jpg)
Updated In 2024, How to Create a Custom Sequence Preset in Premiere Pro

How to Create a Custom Sequence Preset in Premiere Pro
You’ve probably heard of Adobe Premiere Pro – it’s a top-tier video editing software that’s widely recognized in the market. But have you delved into the nitty-gritty of sequence presets? A custom sequence preset is your best friend for maintaining consistency across projects.
It allows users to save specific settings for sequence attributes like frame rate, resolution, and audio settings. Instead of reconfiguring these settings for each new project, a custom sequence preset lets you jump right into editing. Now, how do you create one? Keep reading!
Part 1: How to Create a Custom Sequence in Premiere Pro
Creating a custom sequence is like tailoring a shirt to fit you perfectly. Here’s a step-by-step guide to help you do just that:
Step 1: Displays the New Sequence Window
Begin by launching Adobe Premiere Pro. Once opened, navigate to the top menu and select File > New > Sequence. This will open up the New Sequence window, where all the magic happens!
Step 2: Change the Editing Mode to Custom in the Settings Panel
You’ll see several tabs in the New Sequence window, but we will focus on the “Settings” tab for our purposes. Click on it.
Here, you’ll find the ‘Editing Mode’ dropdown menu. By default, it’s set to a specific format like ‘DSLR’ or ‘AVCHD.’ Change this to ‘Custom.’ This will unlock a plethora of options for you to play with.
Deep Dive into Settings:
- Frame Size: Define your video’s width and height. Remember, 1920x1080 is Full HD, and 3840x2160 is 4K. Choose based on your project needs.
- Frame Rate: 24fps is the cinematic standard, but if you’re creating content for TV or web, 30fps or 60fps might be more suitable.
- Pixel Aspect Ratio: Stick with ‘Square Pixels’ unless you have a specific reason to do otherwise.
- Fields: Choose ‘No Fields’ for progressive footage. If you’re unsure, this is a safe bet.
- Audio Settings: Here, you can configure the sample rate, among other things. 48000Hz is standard for video.
Step 3: Give the New Preset a Name and Save It
Once you’ve customized the settings to your satisfaction, it’s time to save this configuration for future use. At the bottom of the New Sequence window, you’ll see a ‘Save Preset’ button. Click on it.
A pop-up window will show up, requesting you to provide a name for your new preset. Choose something descriptive so you can easily recognize it later. Once named, click ‘OK’.
Your custom sequence preset is now saved and will appear under the ‘Custom’ folder in the ‘Sequence Presets’ tab.
Part 2: Why Custom Sequence Presets are Essential for Efficient Editing
As you delve deeper into video editing, you’ll begin to appreciate the little things that shave off minutes from your workflow, allowing you to dedicate more time to the creative process. This is precisely where the utility of custom sequence presets in Premiere Pro comes into play. But why are these presets so crucial?
- Consistency Across Projects: If you’re managing multiple projects or a series of videos, having a standard format ensures that all your content has a uniform look and feel. Consistency is a hallmark of professional-grade content. It’s not just about the visuals – maintaining a uniform audio quality and format is equally significant. With a preset, you no longer need to remember the minutiae of each setting, ensuring consistency effortlessly.
- Speed Up Your Workflow: Every minute you spend adjusting the sequence settings is a minute less you have for cutting, color correcting, audio mixing, or adding those special effects that make your videos pop. Over time, those minutes can add up to hours. By using a custom sequence preset, you can jump straight into the creative part of editing without the preliminary setup.
- Avoid Common Mistakes: Have you ever rendered an entire project only to find that the frame rate was off or the audio was set to the wrong sample rate? These kinds of errors can occur when setting up a new sequence from scratch each time. By relying on a preset, you mitigate the risks of such oversights.
- Personalized Templates for Different Platforms: Different platforms may have varying preferred settings. For instance, the ideal video format for YouTube might differ from that of Instagram or TikTok. Instead of Googling these settings each time, you can have a custom sequence preset ready for each platform, ensuring your content is optimized wherever it’s destined.
- Ease of Collaboration: If you’re working as part of a team, having standard sequence presets ensures everyone is on the same page. This is particularly handy when multiple editors are working on different segments of the same project. With custom presets, you’re not just aligning sequences but also visions.
Incorporating this practice into your editing routine might initially seem trivial, but its benefits compound with time.
Part 3: Summary
Creating a custom sequence preset in Adobe Premiere Pro isn’t just about streamlining your workflow – it’s about ensuring consistency across your projects.
By saving your most-used settings, you’re creating a base template that can be pulled up any time, granting you more time for the creative process.
Adobe Premiere Pro’s interface is designed to make tasks like these intuitive, so even if you’re a beginner, with a bit of practice, you’ll be creating custom sequence presets like a pro.
The Ultimate Guide to Using AR Emoji Stickers in Your Videos
AR emoji stickers are a fun and creative way to add personality to your videos. With just a few clicks, you can turn yourself into a cartoon character, animal, or any other emoji representing your mood or personality. These stickers use augmented reality technology to superimpose the emoji onto your face in real time, giving your videos a dynamic and interactive element.
In this article, we’ll show you how to add AR emoji stickers to your videos and share some tips and tricks for using them like a pro. Whether creating content for social media, messaging apps, or projects, AR emoji stickers can help you add whimsy and personality to your videos.

- Filmora for Mobile AR Camera
- Samsung AR Emoji Stickers
- iPhone Memoji AR Stickers
- Mirror: Emoji Maker & Stickers for Android
- Yoji: AR Emoji Camera Recorder
What Are AR Emoji Stickers?
AR emoji stickers are a feature that allows users to create custom emoji stickers of themselves or others using augmented reality technology. These stickers can be used in videos or photos to add an extra layer of personalization and fun.

To create an AR emoji sticker, users typically need a smartphone or device with a front-facing camera. The camera scans the user’s face and generates a 3D model, which can then be customized with different facial expressions, hairstyles, and other features. Once the AR emoji sticker is created, it can be added to videos or photos in real-time using the device’s camera or a video editing app.
AR emoji stickers are a popular feature on messaging apps, social media platforms, and video editing software. They can be used to add a playful and personal touch to videos and photos and are especially popular with younger audiences.
Best 5 AR Emoji Stickers App
Many apps and platforms offer a variety of AR emoji stickers for users to choose from. These stickers can be added to videos or photos to add a personal and playful touch. Here are the five best apps and platforms for finding and using AR emoji stickers. Whether you’re looking for animated characters, animal faces, or something else, these apps have you covered.
1. Filmora for Mobile AR Camera

Filmora for Mobile is a video editing app that offers an AR camera feature for adding AR emoji stickers to videos. The AR camera allows users to select from various pre-made AR emoji stickers and add them to their videos in real-time. The stickers can be resized, rotated, and positioned to fit the user’s desired look.
In addition to AR emoji stickers, the Filmora for Mobile AR camera offers fun and creative effects, such as filters, overlays, and text.
Free Download For Win 7 or later(64-bit)
Free Download For macOS 10.14 or later
Editor’s Verdict: Filmora for Mobile’s AR camera is a fun and easy-to-use tool for adding AR emoji stickers and other creative effects to your videos. Its wide selection of stickers and intuitive interface makes it great for adding personality and emotion to videos.
Ratings in App Store: 4.7 out of 5
Ratings in Google Play Store: 4.7 out of 5
Operating System: Android and iOS
Pricing: Free for Download; Paid version starts from $5.99/month.
One of the standout features of Filmora for Mobile’s AR camera is the ability to customize the stickers with different facial expressions and mouth shapes. This allows users to create more dynamic and lifelike AR emoji stickers that can convey various emotions and moods. The app also allows users to record videos with the AR camera and share them directly to social media platforms or save them to their devices.
2. Samsung AR Emoji Stickers

Samsung’s AR Emoji stickers are a popular feature on the company’s messaging app, Samsung Messages. Users can create a 3D avatar of themselves or others using the app’s camera to use the stickers. The avatar can be customized with different hairstyles, facial expressions, and other features.
Once the avatar is created, it can be used as an AR emoji sticker in videos and photos. The stickers can be resized, rotated, and positioned to fit the user’s desired look. In addition to the customizable avatars, Samsung’s AR Emoji stickers also include a variety of pre-made stickers of popular characters and animals.
Editor’s Verdict: Samsung’s AR Emoji stickers are a fun and easy-to-use tool for adding personality and flair to your videos and photos. It is convenient for those looking to add fun to their video projects.
Ratings in Galaxy Store: 4.5 out of 5
Operating Systems: Android
Pricing: Free
One of the standout features of Samsung’s AR Emoji stickers is the ability to record videos with the stickers in real time. This allows users to create dynamic and interactive content that showcases their avatar in action. The app also allows users to save AR Emoji stickers and use them in other apps or share them on social media.
3. iPhone Memoji AR Stickers

iPhone’s Memoji AR stickers allow users to create custom avatars of themselves or others using the app’s camera. These avatars can be customized with different hairstyles, facial expressions, and other features and used as AR emoji stickers in videos and photos. In addition to the customizable avatars, the app also includes a variety of pre-made stickers of popular characters and animals.
Editor’s Verdict: Add personality and flair to your videos and photos with iPhone’s easy-to-use Memoji AR stickers. Customize your avatars or choose from a wide selection of pre-made stickers to convey emotions and moods. Create dynamic and interactive content with the real-time recording feature, and save or share your stickers for added convenience.
Ratings in App Store: 3.4 out of 5
Operating System: iOS
Pricing: Free
iPhone’s Memoji AR stickers create dynamic and interactive content that can be saved and shared on social media or other apps. The app offers customization options for creating personalized avatars and pre-made stickers. These features make iPhone’s Memoji AR stickers a great tool for adding personality and emotion to your videos.
4. Mirror: Emoji Maker & Stickers for Android
Mirror: Emoji Maker & Stickers is an app for Android devices that allows users to create custom AR emoji stickers of themselves or others. The app uses the device’s camera to scan the user’s face and generate a 3D model, which can then be customized with different hairstyles, facial expressions, and other features.
Editor’s Verdict: Personalize your videos and photos with custom AR emoji stickers using Android’s Mirror: Emoji Maker & Stickers app. Customize your avatar and add the sticker in real time, or choose from various pre-made stickers. Create dynamic and interactive content with the app’s real-time recording feature, and save or share your stickers for future use.
Ratings in App Store: 4.8 out of 5
Ratings in Google Play Store: 4.4 out of 5
Operating Systems: Android and iOS
Pricing: Free for Download; 23,99 € for 6-month premium access.
Once the AR emoji sticker is created, it can be added to videos or photos in real-time using the app’s camera or a video editing app. The stickers can be resized, rotated, and positioned to fit the user’s desired look. In addition to the customizable avatars, Mirror: Emoji Maker & Stickers also includes a variety of pre-made stickers of popular characters and animals.
5. Yoji: AR Emoji Camera Recorder
AR Emoji Camera Recorder is a camera app that allows users to create personalized, animated emojis using augmented reality (AR) technology. With this app, users can create emojis that look like them by taking a selfie and customizing the appearance of the emoji with a variety of different features and options.
Editor’s Verdict: The app is easy to use, and the AR technology used to create the personalized emojis is top-notch. The ability to record videos and take photos with the emoji superimposed over the user’s face in real-time adds a fun and personal touch to the content.
Ratings in App Store: 4.5 out of 5
Operating Systems: iOS
Pricing: Free for Download; Paid version starts from $1.99/week.
Once the emoji is created, users can record videos or take photos superimposed over their faces in real time, adding a fun and personal touch to their content. The app also includes a range of stickers and filters to further enhance the user’s videos and photos.
Add AR Emoji Stickers to Your Video
Ready to add some personality and flair to your videos? This section will introduce how to use Filmora for Mobile’s AR camera to add AR emoji stickers to your videos. Filmora for Mobile is a video editing app that offers a variety of creative features, including an AR camera for adding AR emoji stickers to videos in real time.
Whether you want to create your custom stickers or use pre-made ones, Filmora for Mobile has you covered. Follow along as we walk you through the steps for adding AR emoji stickers to your videos.
Recording The AR Video
Here’s how to record your AR video on your iOS device:
Step1 Download and install Filmora for Mobile from the app store.
Step2 Tap on the camera button in the top right corner.

Step3 Adjust the video ratio or switch between the front and rear cameras using the “frame“ icon.

Step4 Preview and select animoji or memoji features using the “Props“ button.

Step5 Tap the purple record button to capture your AR video.

Step6 Your video will be saved automatically and can be edited by tapping “Edit“ below the screen.

Step7 Preview and export your completed video.

Editing The AR Video
After recording the AR video, it’s time to edit it. Follow these steps to do so:
Step1 On the editing timeline, use the various tools and features located below the timeline to edit your video.

Step2 Use the “canvas“ button to adjust the video ratio for TikTok or Instagram.

Step3 Enhance your video with filters by tapping the “Filters“ button.

Step4 Preview and choose transition effects by tapping in between video junctions.

Step5 Preview your edited video and export it to save and share.

Conclusion
AR emoji stickers are a great way to bring personality and emotion to your videos. Filmora for Mobile is a particularly useful app for adding AR emoji stickers to your videos, with its easy-to-use AR camera and a wide variety of customization options. Whether you create your custom avatars or use pre-made stickers, Filmora for Mobile offers much flexibility for adding fun and flair to your video projects.
So, give Filmora for Mobile’s AR emoji stickers a try next time you want to spice up your video content.
What Are AR Emoji Stickers?
AR emoji stickers are a feature that allows users to create custom emoji stickers of themselves or others using augmented reality technology. These stickers can be used in videos or photos to add an extra layer of personalization and fun.

To create an AR emoji sticker, users typically need a smartphone or device with a front-facing camera. The camera scans the user’s face and generates a 3D model, which can then be customized with different facial expressions, hairstyles, and other features. Once the AR emoji sticker is created, it can be added to videos or photos in real-time using the device’s camera or a video editing app.
AR emoji stickers are a popular feature on messaging apps, social media platforms, and video editing software. They can be used to add a playful and personal touch to videos and photos and are especially popular with younger audiences.
Best 5 AR Emoji Stickers App
Many apps and platforms offer a variety of AR emoji stickers for users to choose from. These stickers can be added to videos or photos to add a personal and playful touch. Here are the five best apps and platforms for finding and using AR emoji stickers. Whether you’re looking for animated characters, animal faces, or something else, these apps have you covered.
1. Filmora for Mobile AR Camera

Filmora for Mobile is a video editing app that offers an AR camera feature for adding AR emoji stickers to videos. The AR camera allows users to select from various pre-made AR emoji stickers and add them to their videos in real-time. The stickers can be resized, rotated, and positioned to fit the user’s desired look.
In addition to AR emoji stickers, the Filmora for Mobile AR camera offers fun and creative effects, such as filters, overlays, and text.
Free Download For Win 7 or later(64-bit)
Free Download For macOS 10.14 or later
Editor’s Verdict: Filmora for Mobile’s AR camera is a fun and easy-to-use tool for adding AR emoji stickers and other creative effects to your videos. Its wide selection of stickers and intuitive interface makes it great for adding personality and emotion to videos.
Ratings in App Store: 4.7 out of 5
Ratings in Google Play Store: 4.7 out of 5
Operating System: Android and iOS
Pricing: Free for Download; Paid version starts from $5.99/month.
One of the standout features of Filmora for Mobile’s AR camera is the ability to customize the stickers with different facial expressions and mouth shapes. This allows users to create more dynamic and lifelike AR emoji stickers that can convey various emotions and moods. The app also allows users to record videos with the AR camera and share them directly to social media platforms or save them to their devices.
2. Samsung AR Emoji Stickers

Samsung’s AR Emoji stickers are a popular feature on the company’s messaging app, Samsung Messages. Users can create a 3D avatar of themselves or others using the app’s camera to use the stickers. The avatar can be customized with different hairstyles, facial expressions, and other features.
Once the avatar is created, it can be used as an AR emoji sticker in videos and photos. The stickers can be resized, rotated, and positioned to fit the user’s desired look. In addition to the customizable avatars, Samsung’s AR Emoji stickers also include a variety of pre-made stickers of popular characters and animals.
Editor’s Verdict: Samsung’s AR Emoji stickers are a fun and easy-to-use tool for adding personality and flair to your videos and photos. It is convenient for those looking to add fun to their video projects.
Ratings in Galaxy Store: 4.5 out of 5
Operating Systems: Android
Pricing: Free
One of the standout features of Samsung’s AR Emoji stickers is the ability to record videos with the stickers in real time. This allows users to create dynamic and interactive content that showcases their avatar in action. The app also allows users to save AR Emoji stickers and use them in other apps or share them on social media.
3. iPhone Memoji AR Stickers

iPhone’s Memoji AR stickers allow users to create custom avatars of themselves or others using the app’s camera. These avatars can be customized with different hairstyles, facial expressions, and other features and used as AR emoji stickers in videos and photos. In addition to the customizable avatars, the app also includes a variety of pre-made stickers of popular characters and animals.
Editor’s Verdict: Add personality and flair to your videos and photos with iPhone’s easy-to-use Memoji AR stickers. Customize your avatars or choose from a wide selection of pre-made stickers to convey emotions and moods. Create dynamic and interactive content with the real-time recording feature, and save or share your stickers for added convenience.
Ratings in App Store: 3.4 out of 5
Operating System: iOS
Pricing: Free
iPhone’s Memoji AR stickers create dynamic and interactive content that can be saved and shared on social media or other apps. The app offers customization options for creating personalized avatars and pre-made stickers. These features make iPhone’s Memoji AR stickers a great tool for adding personality and emotion to your videos.
4. Mirror: Emoji Maker & Stickers for Android
Mirror: Emoji Maker & Stickers is an app for Android devices that allows users to create custom AR emoji stickers of themselves or others. The app uses the device’s camera to scan the user’s face and generate a 3D model, which can then be customized with different hairstyles, facial expressions, and other features.
Editor’s Verdict: Personalize your videos and photos with custom AR emoji stickers using Android’s Mirror: Emoji Maker & Stickers app. Customize your avatar and add the sticker in real time, or choose from various pre-made stickers. Create dynamic and interactive content with the app’s real-time recording feature, and save or share your stickers for future use.
Ratings in App Store: 4.8 out of 5
Ratings in Google Play Store: 4.4 out of 5
Operating Systems: Android and iOS
Pricing: Free for Download; 23,99 € for 6-month premium access.
Once the AR emoji sticker is created, it can be added to videos or photos in real-time using the app’s camera or a video editing app. The stickers can be resized, rotated, and positioned to fit the user’s desired look. In addition to the customizable avatars, Mirror: Emoji Maker & Stickers also includes a variety of pre-made stickers of popular characters and animals.
5. Yoji: AR Emoji Camera Recorder
AR Emoji Camera Recorder is a camera app that allows users to create personalized, animated emojis using augmented reality (AR) technology. With this app, users can create emojis that look like them by taking a selfie and customizing the appearance of the emoji with a variety of different features and options.
Editor’s Verdict: The app is easy to use, and the AR technology used to create the personalized emojis is top-notch. The ability to record videos and take photos with the emoji superimposed over the user’s face in real-time adds a fun and personal touch to the content.
Ratings in App Store: 4.5 out of 5
Operating Systems: iOS
Pricing: Free for Download; Paid version starts from $1.99/week.
Once the emoji is created, users can record videos or take photos superimposed over their faces in real time, adding a fun and personal touch to their content. The app also includes a range of stickers and filters to further enhance the user’s videos and photos.
Add AR Emoji Stickers to Your Video
Ready to add some personality and flair to your videos? This section will introduce how to use Filmora for Mobile’s AR camera to add AR emoji stickers to your videos. Filmora for Mobile is a video editing app that offers a variety of creative features, including an AR camera for adding AR emoji stickers to videos in real time.
Whether you want to create your custom stickers or use pre-made ones, Filmora for Mobile has you covered. Follow along as we walk you through the steps for adding AR emoji stickers to your videos.
Recording The AR Video
Here’s how to record your AR video on your iOS device:
Step1 Download and install Filmora for Mobile from the app store.
Step2 Tap on the camera button in the top right corner.

Step3 Adjust the video ratio or switch between the front and rear cameras using the “frame“ icon.

Step4 Preview and select animoji or memoji features using the “Props“ button.

Step5 Tap the purple record button to capture your AR video.

Step6 Your video will be saved automatically and can be edited by tapping “Edit“ below the screen.

Step7 Preview and export your completed video.

Editing The AR Video
After recording the AR video, it’s time to edit it. Follow these steps to do so:
Step1 On the editing timeline, use the various tools and features located below the timeline to edit your video.

Step2 Use the “canvas“ button to adjust the video ratio for TikTok or Instagram.

Step3 Enhance your video with filters by tapping the “Filters“ button.

Step4 Preview and choose transition effects by tapping in between video junctions.

Step5 Preview your edited video and export it to save and share.

Conclusion
AR emoji stickers are a great way to bring personality and emotion to your videos. Filmora for Mobile is a particularly useful app for adding AR emoji stickers to your videos, with its easy-to-use AR camera and a wide variety of customization options. Whether you create your custom avatars or use pre-made stickers, Filmora for Mobile offers much flexibility for adding fun and flair to your video projects.
So, give Filmora for Mobile’s AR emoji stickers a try next time you want to spice up your video content.
Looking for Efficient Ways to Create a Slow-Motion Video? Read the Article for Reliable Solutions that Provide Excellent Results
The slow-motion effect has been used for years to add dramatic effects to movies. An important scene is always highlighted and looks better with a slow-motion effect. Applying slow motion is beneficial, too, as it can give you a better preview of the scene. The effect is easily accessible in many video editing applications.
How would you find an app that gives good final cut slow-motion results? This article has got you all covered on that. Here, you will find the Final Cut Pro slow-motion effect that works fantastic without ruining your video’s quality. So, follow the article to learn more about using FCP slow motion.
Slow Motion Video Maker Slow your video’s speed with better control of your keyframes to create unique cinematic effects!
Make A Slow Motion Video Make A Slow Motion Video More Features

Part 1: What Makes a Perfect Slow-Motion Video?
An ideal FCP slow-motion video requires careful attention to technical details and aesthetics. Below are some essential things to think about bringing perfection in slow-motion videos:
- Resolution: A slow-motion video with visual appeal and a high resolution is crucial. This is especially vital if you intend to crop or zoom in on the video while editing.
- Storytelling: Make sure the slow-motion clip supports the idea you’re attempting to portray. Your scenes will have more impact if you tell them with a thoughtful narrative.
- Editing: Try different speeds when editing your clip to achieve the best impact. Consider including sound effects or music to accompany the slow-motion images.
- Timing: Select the appropriate times to record in slow motion. You shouldn’t slow down your entire video. Instead, you can apply the effect to draw attention to acts or feelings.
- Frame Rate: Slow-motion videos are usually shot at a greater frame rate. Frame rates of 60, 120, 240, or even higher are common as they make the video look smoother.
- Shutter Speed: For precise and sharp results, use a fast shutter speed camera. This lessens the likelihood of motion blur in every slow-motion frame.
Part 2: Learning All Essential Techniques to Perform Slow Motion in Final Cut Pro X
Apple created Final Cut Pro , and it is only accessible to macOS users. Professional video editors can utilize the software’s array of capabilities. The tool offers incredible video editing functions. Its features are tailored to handle high-resolution video material. The tool has an AI object tracker that detects faces and objects. Its cinematic mode helps you create professional videos.
Final cut slow motion gives a dramatic and intense effect to your videos. You can create an entirely different video with the power of its editing features. Slow-mo Final Cut Pro gives high-resolution results. Follow the steps below to use this tool for slow-motion effects. However, you can choose any method that seems suitable and convenient to you:
Method 1
Import your video into the app and drag it into the timeline. Click on the video and select the “Speed Meter” icon from the timeline. If you want to access the retime menu directly, use the “Command+R” command. Now, select the “Slow” option, and from here, you can select the slow speed percentage at which you want your clip.

Method 2
Bring your video into the timeline and click on it. Select the “Speed Meter” icon; now, choose the “Custom” option. You can access customized settings directly using the “Control+Option+R” command to apply FCPX slow motion. Once you have opened the customization menu, manually set the speed rate and duration to how much you want.

Method 3
Drag the timeline cursor to where you want to make a speed change, select “Speed Meter,” and hit “Blade Speed” to create a cut and separate the clip. Make as many cuts as you want to, depending on how many speed changes you require. Now click on the clip whose speed you want changed and select “Custom” from the “Speed Meter” icon. Customize your clips’ speed rate and duration and save the video once you’re done.

Part 3: Wondershare Filmora: A Multi-Purpose Solution to Making Effective Slow-Motion Videos
Final Cut Pro can be difficult for beginners to understand. The tool has a variety of tutorials available online, but it’s still hard for many users to follow them. In this case, Wondershare Filmora is a great option for slow motion and other effects. It is an excellent alternative to final cut slow motion. Filmora offers many more wonderful features that will surely amaze you.
It can assist you in generating engaging content despite just cutting, trimming, and editing videos. With AI integration, this platform can automate your editing tasks.
Free Download For Win 7 or later(64-bit)
Free Download For macOS 10.14 or later
Step By Step Guide to Make Slow Motion Videos in Filmora
Unlike Final Cut Pro’s slow motion, Wondershare Filmora is more straightforward to operate. Follow the step-by-step guide below to apply slow-motion effects to your video.
Method 1: Uniform Speed
If you want to adjust the speed and retain its high quality, use the uniform speed option. You can access this option by following the stepwise method below. Using the advanced features, you don’t need any other tool to ensure the video’s original worth:
Step 1Import Your Project and Start a New Project
After launching Filmora, head to its “New Project” option from the home screen. You will enter the main editing screen this way. Import your project in the media panel and then drag it to the timeline.

Step 2Explore Uniform Speed and Adjust the Speed
Go to your video in the timeline and right-click on it. Now, explore the “Uniform Speed” option and tap on it to get an editing panel at the right. From that panel, move the “Speed” slider to the right and get a slow-motion video preview. You can see the “Duration” of the video after slowing it down and adjusting it accordingly.

Step 3Use Advanced Features to Ensure Quality of Videos
Move down and toggle the “Reverse Speed” option if required. You can enable the “Maintain Pitch” and “Ripple Edit” options to enhance the video automatically. Lastly, extend the “AI Frame Interpolation” menu using its downward symbol and choose “Optical Flow.” It will ensure that the video will remain slow with high quality.

Method 2: Speed Ramping
This method aims to bring smooth transitions in slow-motion videos. Instead of an abrupt change, a gradual increase in speed can impose a professional look. So, there are the steps to access this feature and get a preview of smooth playback.
Step 1Discover the Speed Ramping Feature
Access the Speed Ramping option next to the “Uniform Speed” in the right-side editing panel. Alternatively, you can right-click on the video and look for the “Speed Ramping” option from the list.

Step 2Pick a Template for Speed Ramping or Customize It
From the speed ramping section, you can choose any template from 6 options. Also, users can pick the “Customize” option to adjust the speed ramping as desired.

Step 3Use the Render Preview Option for Smooth Playback
To get a high-quality preview of your videos, look for Render Preview. In this regard, go to the top toolbar of the timeline section on the right side. Click the “Render Preview” icon next to the “Copilot Editor.” Wait for a while and get a smooth playback of your slow-motion video.

Integral Features of Filmora
Slowing down videos is easier than slow-mo Final Cut Pro. Filmora automates the process with an optical flow, ensuring the project’s high quality with one click. Without any wait, learn more about some top-rated features in the given section.
1. AI Thumbnail Creator
The AI Thumbnail Creator of Filmora makes thumbnail creation a matter of seconds. The tool is a treasure for YouTubers as it creates appealing thumbnails to attract viewers. It works with machine learning algorithms to detect the 3 best shots out of your video for thumbnail. Besides, there are over 58 thumbnail templates that can be customized after picking the right one.
2. AI Copilot Editing
AI Copilot is your personal assistant who guides you through everything related to Filmora. You can ask about any editing queries, and the AI will tell you the whole procedure within a second. It will also provide you with navigation towards the right feature. The tool is a big help for beginners; it makes using Filmora much faster and easier.
3. Motion Tracking
If you love giving an artistic touch to your videos, then motion tracking is exactly what you need. This feature automatically tracks the object throughout the video. You can add graphics, stickers, or even blur an object in the video. Furthermore, it allows you to add text with the tracked objects, like a name title with a running athlete.
4. Auto Reframe
With the help of the Auto Reframe feature, you can use one video on all social media platforms. The tool reframes your video in such a way that the main object doesn’t get removed. AI allows you to turn your landscape video into a vertical with a 19:6 aspect ratio. It saves you time and the trouble of creating different videos for every platform.
Conclusion
Slow-motion videos have become a trend due to social media, but they have been an essential film factor forever. Because of the rising demand for this effect, developers added the feature to their software. Many apps are developed to provide a slow-motion effect, which makes it tricky to choose one.
This article addresses your problem by showing you the use of final cut slow-motion. You have discovered a much simpler, faster, and effective platform, Wondershare Filmora. With proven statements in this article, it’s been easier to try Filmora and explore it fully instantly.
Make A Slow Motion Video Make A Slow Motion Video More Features

Part 1: What Makes a Perfect Slow-Motion Video?
An ideal FCP slow-motion video requires careful attention to technical details and aesthetics. Below are some essential things to think about bringing perfection in slow-motion videos:
- Resolution: A slow-motion video with visual appeal and a high resolution is crucial. This is especially vital if you intend to crop or zoom in on the video while editing.
- Storytelling: Make sure the slow-motion clip supports the idea you’re attempting to portray. Your scenes will have more impact if you tell them with a thoughtful narrative.
- Editing: Try different speeds when editing your clip to achieve the best impact. Consider including sound effects or music to accompany the slow-motion images.
- Timing: Select the appropriate times to record in slow motion. You shouldn’t slow down your entire video. Instead, you can apply the effect to draw attention to acts or feelings.
- Frame Rate: Slow-motion videos are usually shot at a greater frame rate. Frame rates of 60, 120, 240, or even higher are common as they make the video look smoother.
- Shutter Speed: For precise and sharp results, use a fast shutter speed camera. This lessens the likelihood of motion blur in every slow-motion frame.
Part 2: Learning All Essential Techniques to Perform Slow Motion in Final Cut Pro X
Apple created Final Cut Pro , and it is only accessible to macOS users. Professional video editors can utilize the software’s array of capabilities. The tool offers incredible video editing functions. Its features are tailored to handle high-resolution video material. The tool has an AI object tracker that detects faces and objects. Its cinematic mode helps you create professional videos.
Final cut slow motion gives a dramatic and intense effect to your videos. You can create an entirely different video with the power of its editing features. Slow-mo Final Cut Pro gives high-resolution results. Follow the steps below to use this tool for slow-motion effects. However, you can choose any method that seems suitable and convenient to you:
Method 1
Import your video into the app and drag it into the timeline. Click on the video and select the “Speed Meter” icon from the timeline. If you want to access the retime menu directly, use the “Command+R” command. Now, select the “Slow” option, and from here, you can select the slow speed percentage at which you want your clip.

Method 2
Bring your video into the timeline and click on it. Select the “Speed Meter” icon; now, choose the “Custom” option. You can access customized settings directly using the “Control+Option+R” command to apply FCPX slow motion. Once you have opened the customization menu, manually set the speed rate and duration to how much you want.

Method 3
Drag the timeline cursor to where you want to make a speed change, select “Speed Meter,” and hit “Blade Speed” to create a cut and separate the clip. Make as many cuts as you want to, depending on how many speed changes you require. Now click on the clip whose speed you want changed and select “Custom” from the “Speed Meter” icon. Customize your clips’ speed rate and duration and save the video once you’re done.

Part 3: Wondershare Filmora: A Multi-Purpose Solution to Making Effective Slow-Motion Videos
Final Cut Pro can be difficult for beginners to understand. The tool has a variety of tutorials available online, but it’s still hard for many users to follow them. In this case, Wondershare Filmora is a great option for slow motion and other effects. It is an excellent alternative to final cut slow motion. Filmora offers many more wonderful features that will surely amaze you.
It can assist you in generating engaging content despite just cutting, trimming, and editing videos. With AI integration, this platform can automate your editing tasks.
Free Download For Win 7 or later(64-bit)
Free Download For macOS 10.14 or later
Step By Step Guide to Make Slow Motion Videos in Filmora
Unlike Final Cut Pro’s slow motion, Wondershare Filmora is more straightforward to operate. Follow the step-by-step guide below to apply slow-motion effects to your video.
Method 1: Uniform Speed
If you want to adjust the speed and retain its high quality, use the uniform speed option. You can access this option by following the stepwise method below. Using the advanced features, you don’t need any other tool to ensure the video’s original worth:
Step 1Import Your Project and Start a New Project
After launching Filmora, head to its “New Project” option from the home screen. You will enter the main editing screen this way. Import your project in the media panel and then drag it to the timeline.

Step 2Explore Uniform Speed and Adjust the Speed
Go to your video in the timeline and right-click on it. Now, explore the “Uniform Speed” option and tap on it to get an editing panel at the right. From that panel, move the “Speed” slider to the right and get a slow-motion video preview. You can see the “Duration” of the video after slowing it down and adjusting it accordingly.

Step 3Use Advanced Features to Ensure Quality of Videos
Move down and toggle the “Reverse Speed” option if required. You can enable the “Maintain Pitch” and “Ripple Edit” options to enhance the video automatically. Lastly, extend the “AI Frame Interpolation” menu using its downward symbol and choose “Optical Flow.” It will ensure that the video will remain slow with high quality.

Method 2: Speed Ramping
This method aims to bring smooth transitions in slow-motion videos. Instead of an abrupt change, a gradual increase in speed can impose a professional look. So, there are the steps to access this feature and get a preview of smooth playback.
Step 1Discover the Speed Ramping Feature
Access the Speed Ramping option next to the “Uniform Speed” in the right-side editing panel. Alternatively, you can right-click on the video and look for the “Speed Ramping” option from the list.

Step 2Pick a Template for Speed Ramping or Customize It
From the speed ramping section, you can choose any template from 6 options. Also, users can pick the “Customize” option to adjust the speed ramping as desired.

Step 3Use the Render Preview Option for Smooth Playback
To get a high-quality preview of your videos, look for Render Preview. In this regard, go to the top toolbar of the timeline section on the right side. Click the “Render Preview” icon next to the “Copilot Editor.” Wait for a while and get a smooth playback of your slow-motion video.

Integral Features of Filmora
Slowing down videos is easier than slow-mo Final Cut Pro. Filmora automates the process with an optical flow, ensuring the project’s high quality with one click. Without any wait, learn more about some top-rated features in the given section.
1. AI Thumbnail Creator
The AI Thumbnail Creator of Filmora makes thumbnail creation a matter of seconds. The tool is a treasure for YouTubers as it creates appealing thumbnails to attract viewers. It works with machine learning algorithms to detect the 3 best shots out of your video for thumbnail. Besides, there are over 58 thumbnail templates that can be customized after picking the right one.
2. AI Copilot Editing
AI Copilot is your personal assistant who guides you through everything related to Filmora. You can ask about any editing queries, and the AI will tell you the whole procedure within a second. It will also provide you with navigation towards the right feature. The tool is a big help for beginners; it makes using Filmora much faster and easier.
3. Motion Tracking
If you love giving an artistic touch to your videos, then motion tracking is exactly what you need. This feature automatically tracks the object throughout the video. You can add graphics, stickers, or even blur an object in the video. Furthermore, it allows you to add text with the tracked objects, like a name title with a running athlete.
4. Auto Reframe
With the help of the Auto Reframe feature, you can use one video on all social media platforms. The tool reframes your video in such a way that the main object doesn’t get removed. AI allows you to turn your landscape video into a vertical with a 19:6 aspect ratio. It saves you time and the trouble of creating different videos for every platform.
Conclusion
Slow-motion videos have become a trend due to social media, but they have been an essential film factor forever. Because of the rising demand for this effect, developers added the feature to their software. Many apps are developed to provide a slow-motion effect, which makes it tricky to choose one.
This article addresses your problem by showing you the use of final cut slow-motion. You have discovered a much simpler, faster, and effective platform, Wondershare Filmora. With proven statements in this article, it’s been easier to try Filmora and explore it fully instantly.
Explore Our Comprehensive Guide to the 10 Best Cameras . Unlock the World of Advanced Technology Perfect for Capturing Slow-Motion Footage in Various Scenarios
Camera technology is evolving at an increased pace with improved features. Each brand competes in the media industry to release cameras with diverse functionalities. When you keep updated on the latest models, you will get to know different varieties and options. It will also help you stay current with evolving technology for slow-motion videos. Choosing the best slow-motion camera involves considering specific needs like filmmaking or creating slow-motion videos.
In this article, we’ll mention the top 10 best slow mo cameras for filming slow-motion videos. The slow-motion camera is specifically built to capture the moments in perfect frame rates. Furthermore, this article will highlight an innovative way to slow down videos without any camera.
Slow Motion Video Maker Slow your video’s speed with better control of your keyframes to create unique cinematic effects!
Make A Slow Motion Video Make A Slow Motion Video More Features

Part 1: How Do Slow-Motion Cameras Help in Recording Perfect Slow-Mo Videos?
Slow-motion cameras record videos at much faster speeds than regular cameras. This feature helps create slow-motion videos by slowing down the recorded action when played at normal speed. These slow-motion cameras are popular in filmmaking, sports analysis, science, and content creation. That’s because they capture detailed moments and highlight fast-moving things.
- Higher Frame Rate: Regular videos usually record 24, 30, or 60 frames per second (fps). But slow-motion cameras can capture hundreds or thousands of frames per second. More frames mean more details and smoother slow-motion videos when played back.
- Smooth Playback: Slow-motion videos look smooth and purposeful when played at regular speeds. More frames are recorded initially to achieve this effect. Ultimately, it will preserve all details when the video is played in slow motion.
- High-Resolution Sensors: Lots of slow-motion cameras have high-quality sensors. These sensors ensure that even with more frames captured, the picture stays sharp and detailed in slow-motion videos. This helps capture fine details without losing clarity.
- Creative Control: Slow-motion cameras let filmmakers and videographers control how fast or slow some parts of a scene look. This helps tell stories better, focus on details, and make videos more interesting and attractive to watch.
- Reduced Motion Blur: More frames per second make pictures clearer and sharper. This feature works especially for fast-moving things. This is important when you need to see tiny details or when the lighting isn’t great.
- Temporal Resolution: Slow-motion cameras can record lots of details in quick movements. They’re handy in sports, science, and creative videos where catching fast and detailed actions matter a lot.
Part 2: Finding The Top Slow-Motion Cameras to Use in 2024
If you want a good slow-motion camera, start by checking out the ones with higher frame rates. Also, think about what you’ll be recording and where you’ll share your videos. Buying a new camera can be confusing and perplexing. We hope you’ll find the best slow-motion camera in the list below. We have arranged the top slow-motion cameras to use in 2024 below:
- PowerShot G7 X Mark III Black
- Sony ZV-1 Camera
- GoPro HERO11 Black
- GoPro HERO10 Black
- Panasonic Lumix GH6
- Sony α7R IV
- Fujifilm X-S20
- Canon EOS-1D X Mark III DSLR Camera
- Nikon D6 FX-Format Digital SLR Camera
- Canon DSLR Camera [EOS 90D]
1. PowerShot G7 X Mark III Black
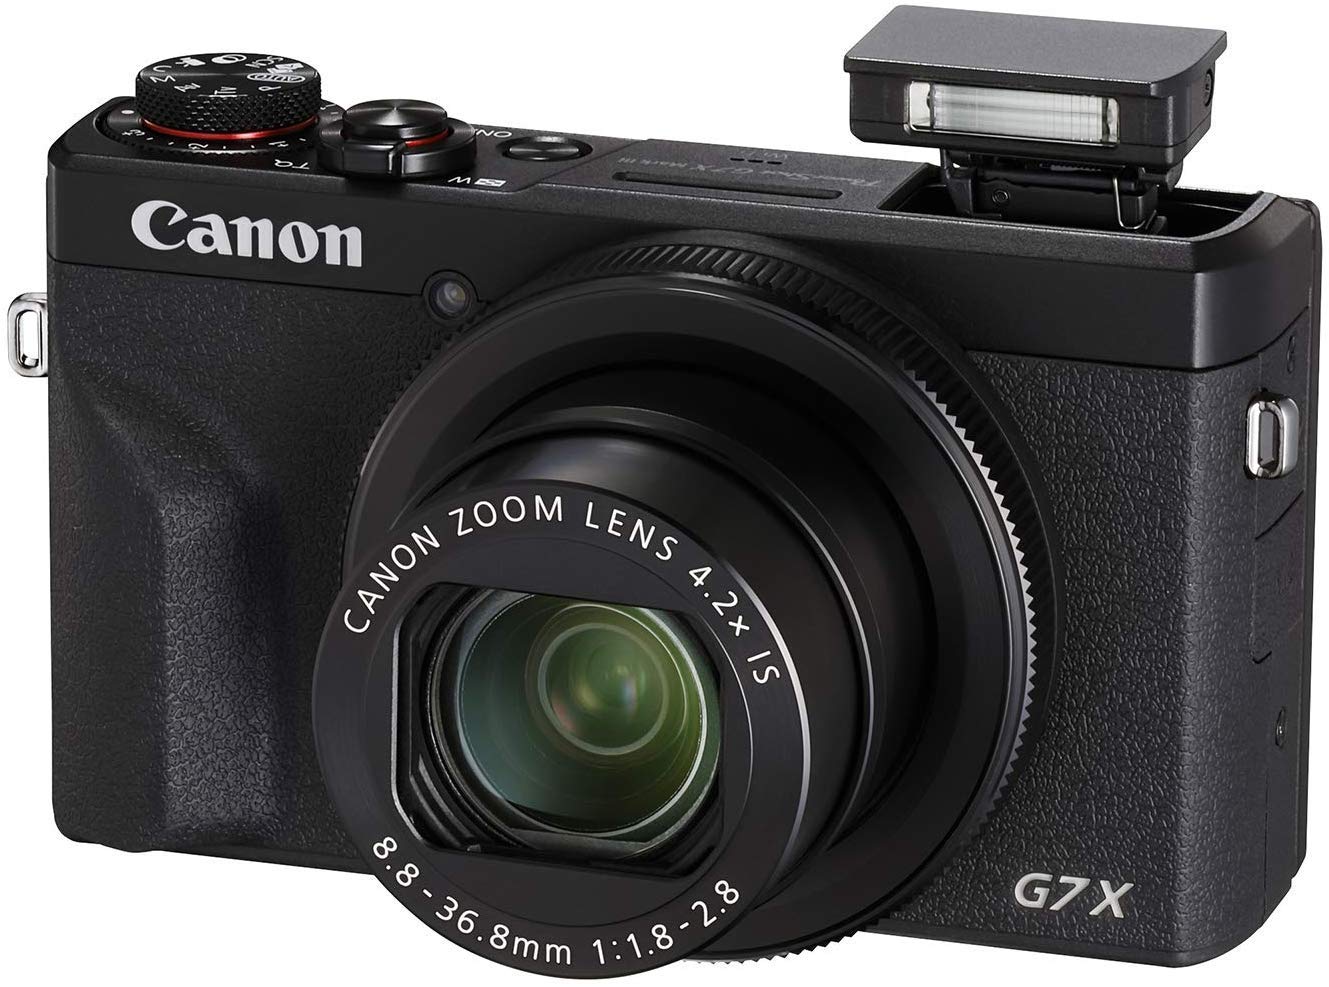
The PowerShot G7 X Mark III Black is a small but powerful camera for taking high-quality slow-motion videos. It has a 20.1 Megapixel camera and a DIGIC 8 Image Processor, which means it shows exceptional clarity even in different lighting. The 4.2x Optical Zoom Kens with Optical Image Stabilizer helps get close-up shots without making them blurry. For videos, it can record in 4K (at 30 frames per second) and Full HD (at 120 frames per second) for super smooth slow-motion shots.
2. Sony ZV-1 Camera
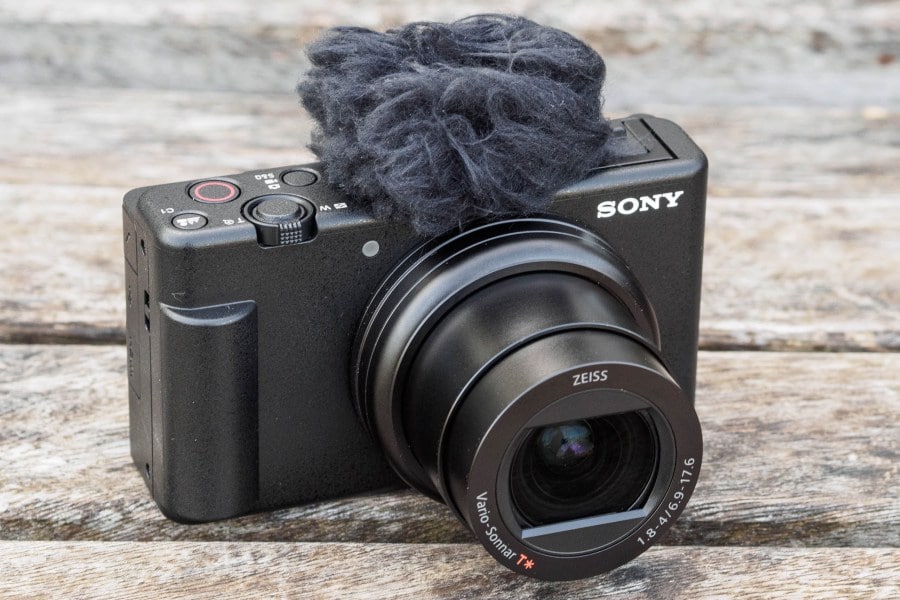
The Sony ZV-1 Camera is made specifically for content creators and vloggers. Although it has a compact design, it is packed with powerful features. This slow-motion video camera has a 1-inch sensor and digital and optical image stabilization. This means your pictures and videos will be clear and steady even if things are moving fast.
The camera’s results are sharp and colorful thanks to its 20.1 MP resolution and BIONZ X Image Processor. Also, it has a Fast Hybrid AF System that quickly focuses accurately, perfect for both photos and videos.
3. GoPro HERO11 Black
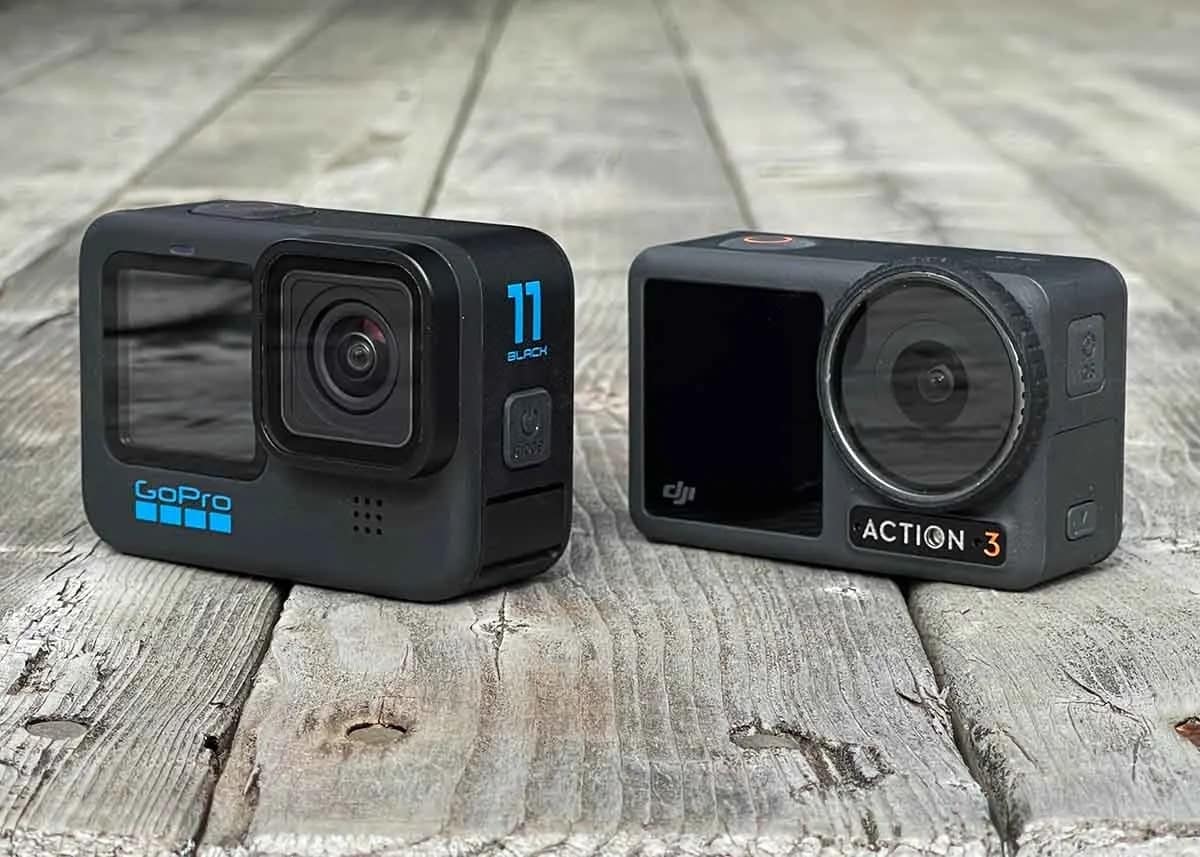
The GoPro HERO11 Black is an awesome slow-motion camera perfect for all kinds of adventures. It takes clear videos up to 5.3K resolution and sharp 27MP photos. The camera has great stabilization, so your videos always look smooth. You can change how wide your shots are and switch lenses digitally while keeping things clear.
GoPro HERO11 Black has cool effects for nighttime shots, making them look artistic. The camera is tough, waterproof up to 33 feet, and has a long-lasting battery that works well even in cold weather.
4. GoPro HERO10 Black
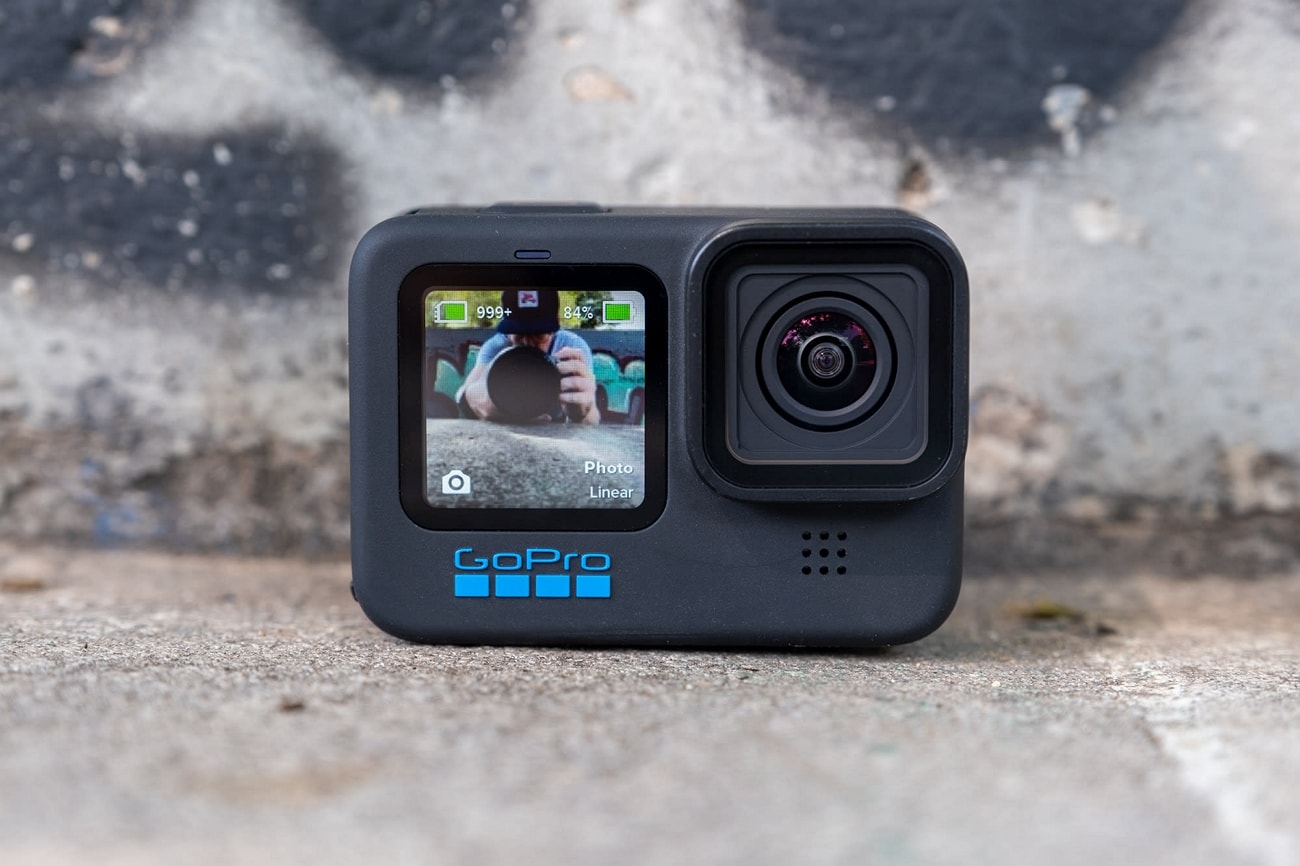
The GoPro HERO10 Black has a faster processor for smoother use and better touch controls. It can record super clear videos at higher speeds: 5.3K at 60fps and 4K at 120fps. You can also shoot camera slow-motion videos at 240fps in 2.7K resolution. The camera’s sensor is better, too, making photos sharper and allowing you to grab 15.8MP pictures from videos. It keeps footage perfectly steady with its excellent stabilization.
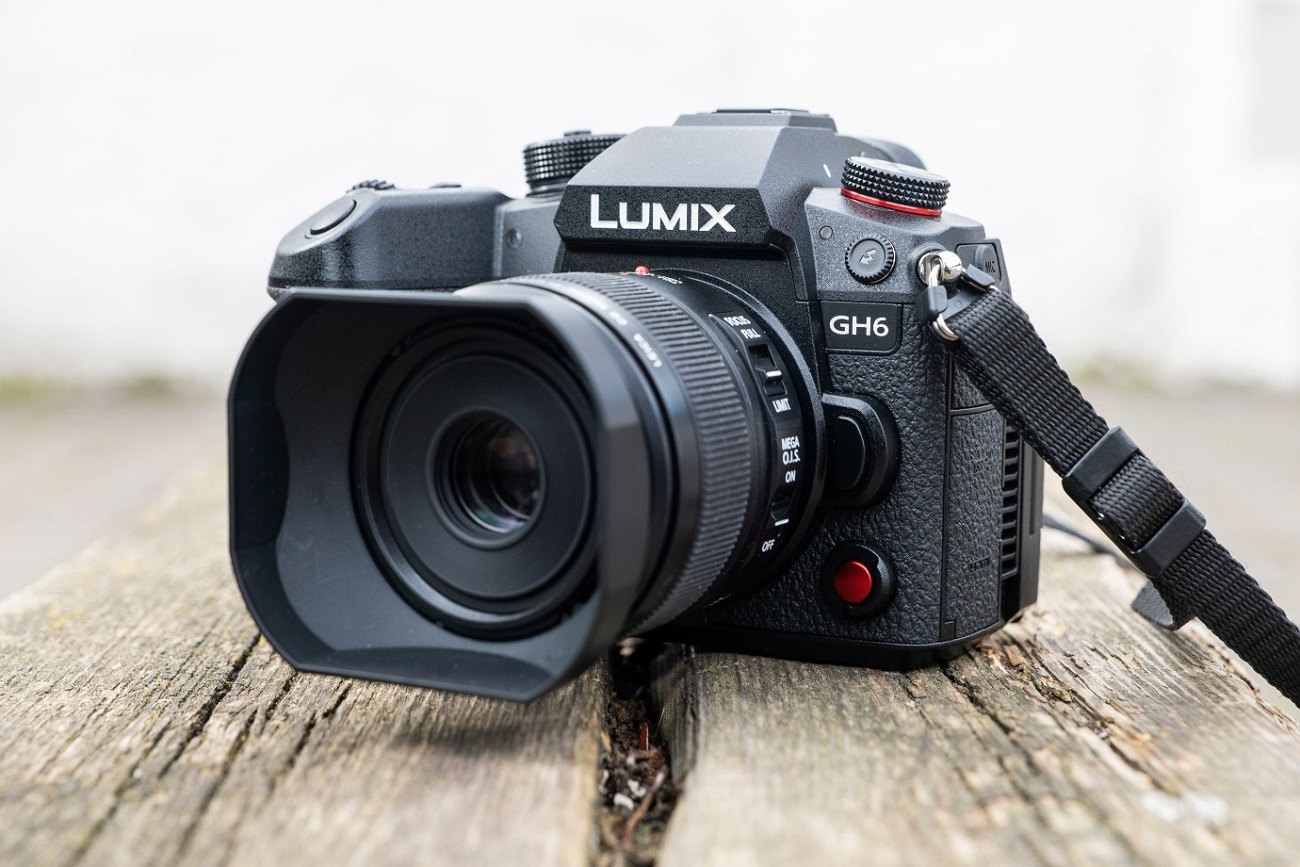
5. Panasonic LUMIX GH6
The LUMIX GH6 is an inspiring innovation in the LUMIX camera series, packed with amazing upgrades. It records high-quality videos internally in ProRes 422 HQ and ProRes 422, making them look great and easier to work with on computers later. This slow-mo video camera is faster due to a new engine, making pictures look better with less noise and better colors.
It’s great for professional video making, offering top-notch recording options. It also has image stabilization, a flexible rear monitor, and slots for different memory cards.
6. Sony α7R IV
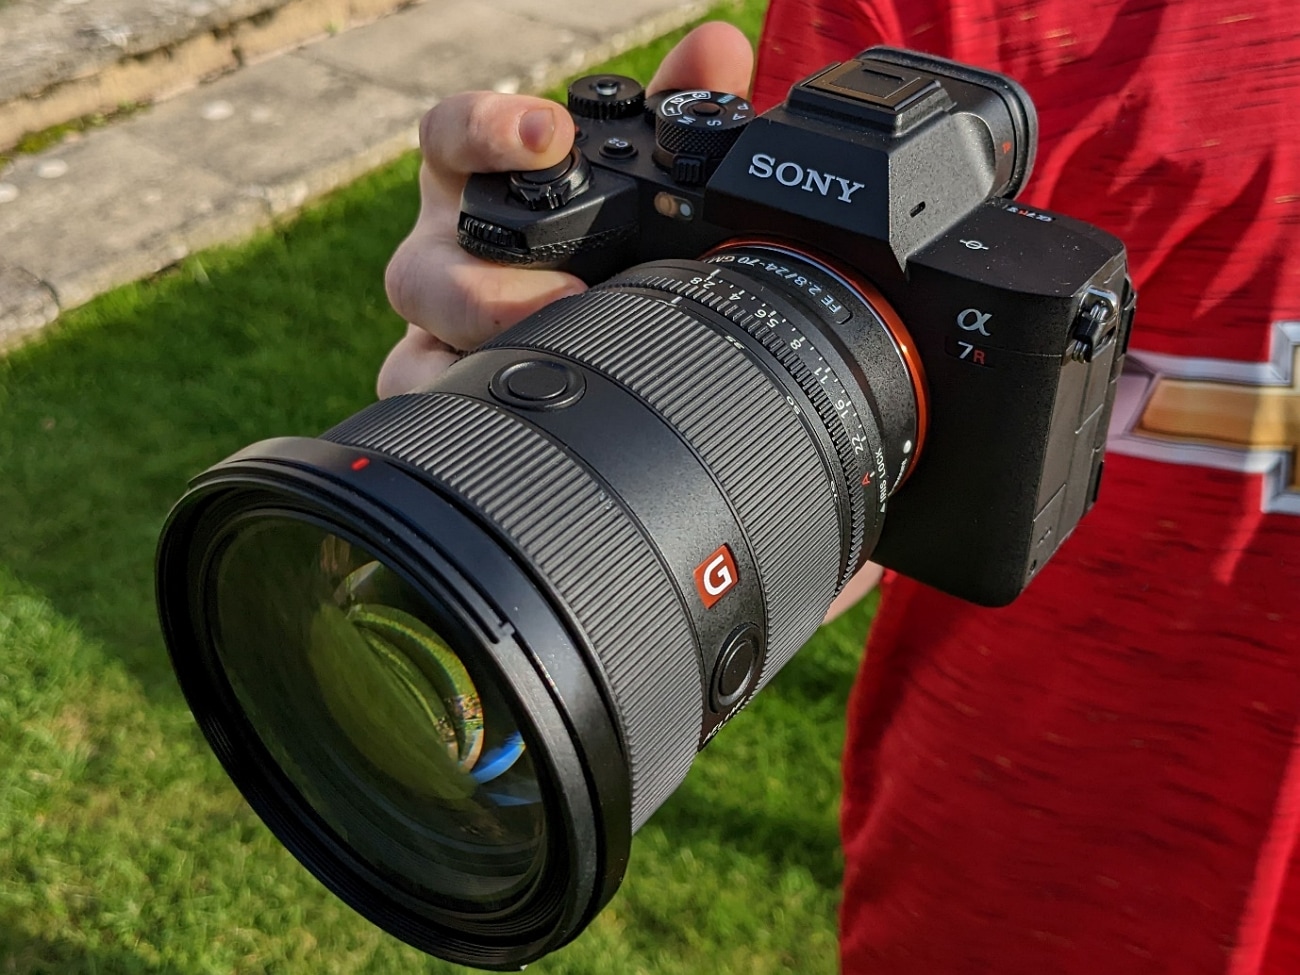
The Sony A7R IV is a top-notch mirrorless camera appreciated by videography experts. It takes super clear pictures with its 20MP full-frame sensor. Also, it has a feature that prevents shaky photos and helps videos stay steady. You can control how long the shutter stays open, which helps in different lighting.
This slow-motion video camera lets you choose different ways to measure light for better pictures. Small and adaptable, it is high-tech and has great performance in digital photography.
7. Fujifilm X-S20
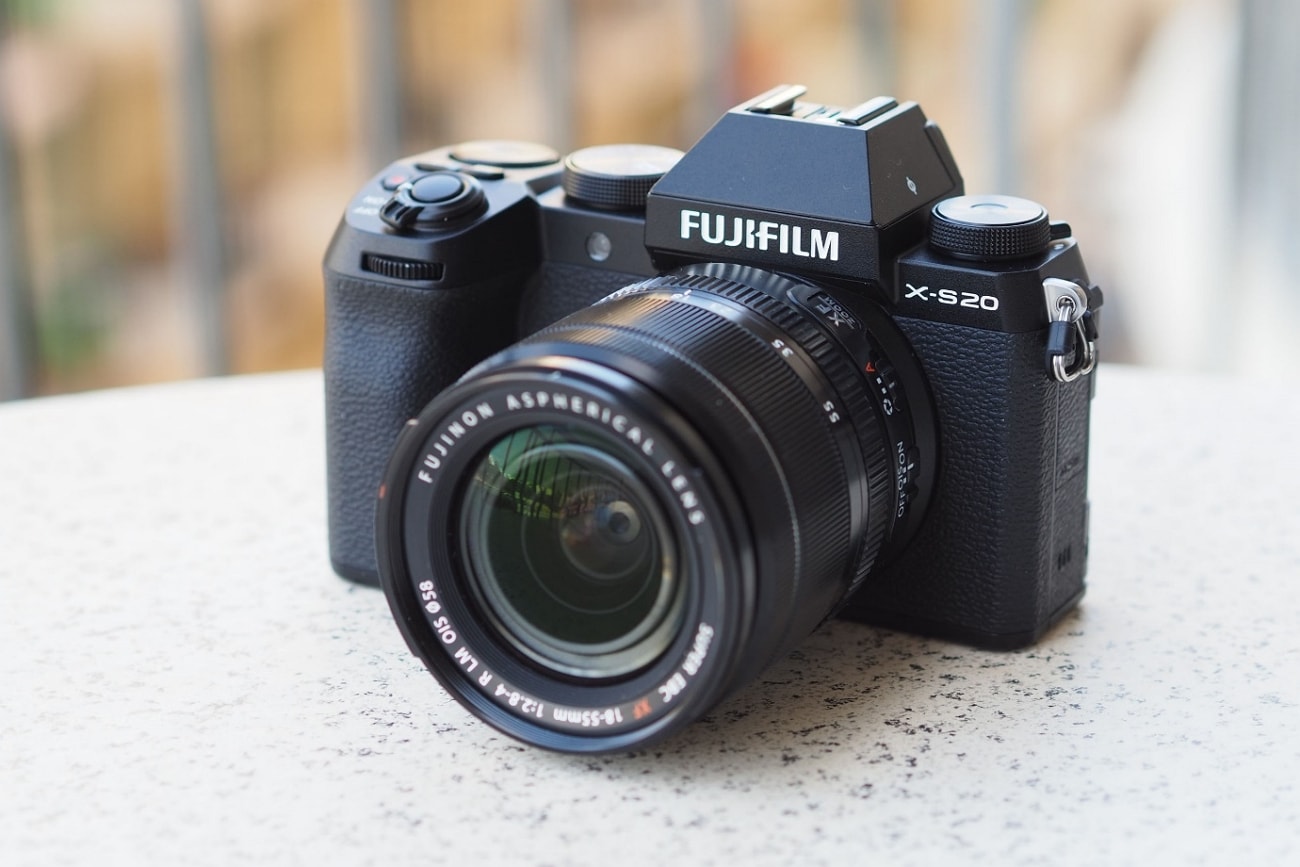
The Fujifilm X-S20 is a versatile camera that is equipped with advanced features and is easy to carry. This slow-motion camera has a 26.1MP sensor for really clear pictures. The screen is a vary-angle touchscreen of 3.0 inches and 1.84m-dot. You can connect it to Wi-Fi and Bluetooth to share and control the camera from a distance.
It’s perfect for videos, too, recording in high-quality up to 6.2K resolution. The camera is small and compact at 127.7 x 85.1 x 65.4mm and weighs only 491g.
8. Canon EOS-1D X Mark III DSLR Camera
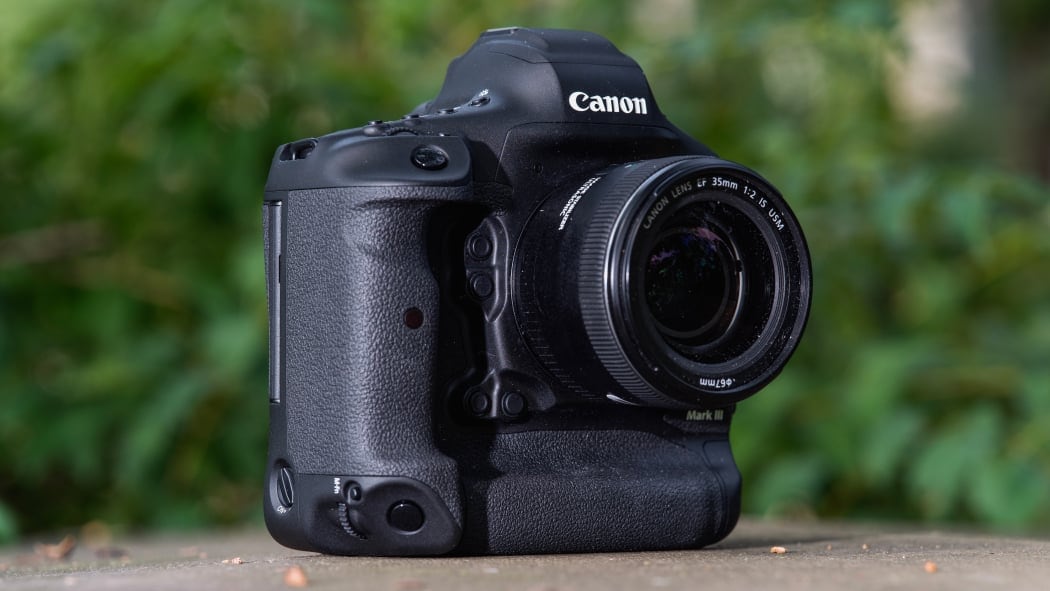
The Canon EOS-1D X Mark III is a top choice for professionals in photography and videography. It has a powerful 20.1 Megapixel Full-frame CMOS sensor that ensures high-quality images. The DIGIC X Image Processor handles low-light situations exceptionally well. Adding on, it offers a wide ISO range for great performance.
Its advanced autofocus system with deep learning technology tracks subjects accurately. This slow-mo camera supports impressive 4K UHD 2160p video recording.
9. Nikon D6 FX-Format Digital SLR Camera
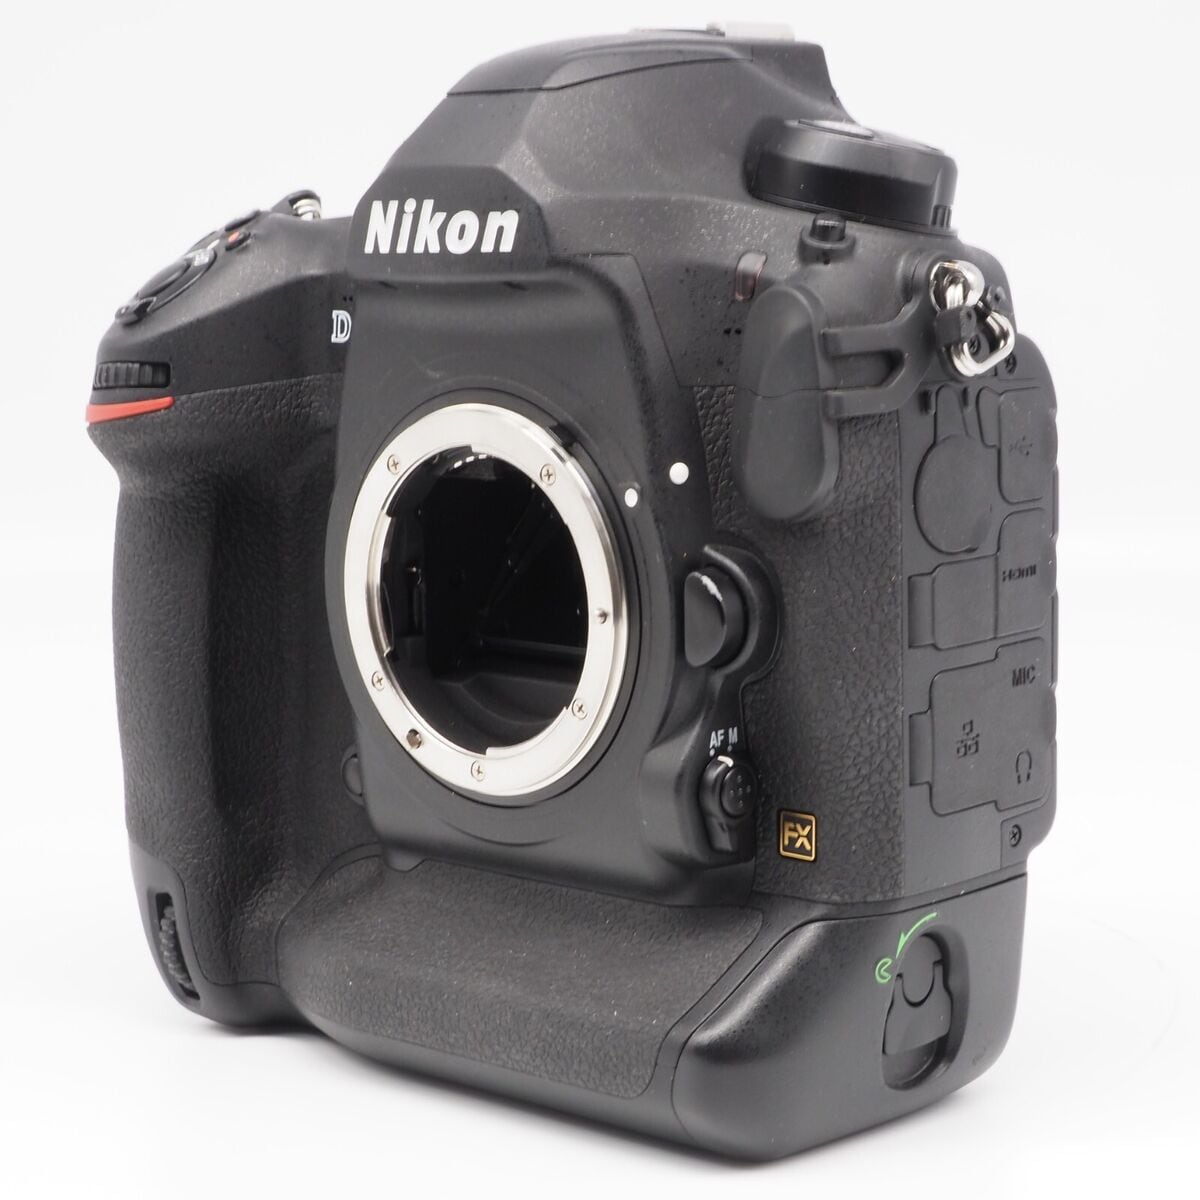
The Nikon D6 FX-Format Digital SLR Camera Body is made for professionals who promise top-notch performance. It has a powerful 20.8 Megapixel Full-frame CMOS sensor for high-quality photos. Also, it can work as a webcam with a maximum resolution of 16 MP and performs well in different situations.
Using digital image stabilization, the slow-motion video camera helps prevent blur. Moreover, it has a quick shutter speed of 1/8000 seconds for precise control over exposure.
10. Canon DSLR Camera [EOS 90D]
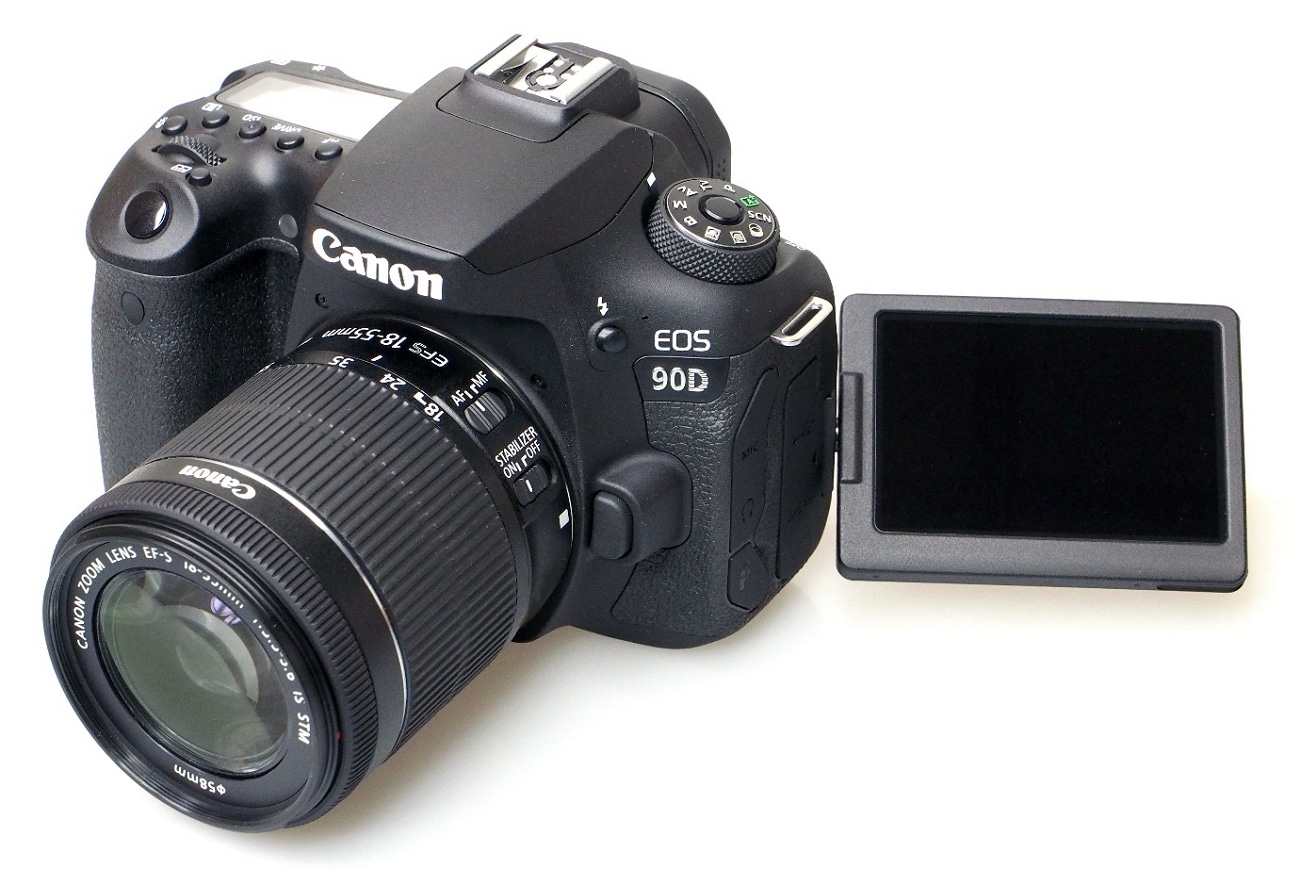
The Canon 90D Body is a slow-mo camera for both filmmakers and videographers. It has a 32.5-megapixel CMOS APS-C sensor for clear and detailed images. Furthermore, it supports recording videos in 4K UHD 30P and Full HD 120P, which helps in delivering excellent video quality. With a 45-Point All Cross-type AF System, the 90D provides precise autofocus across the entire frame.
Part 3: What To Do If You Do Not Have a Camera? Use Filmora for Slow-Mo Video Making
Sometimes, getting an affordable slow-motion camera for shooting videos can be tricky. But don’t worry! You can still create slow-motion videos without having a specific camera. Wondershare Filmora is an excellent solution to make fantastic slow-motion videos, even if you don’t own a special slow-motion camera.
You can adjust the speed of your videos easily to make certain moments slower, making your clips look cool. Filmora isn’t just about changing the speed of your videos. It’s a powerful editing software that lets you do lots of things to make your videos better.
Free Download For Win 7 or later(64-bit)
Free Download For macOS 10.14 or later
Steps Required to Slow Down Video Professionally with Speed Ramping
Filmora Speed Ramping feature allows you to control your clip’s speed. It gives the flexibility to either slow down the entire video or specific segments. Here’s a guide on executing slow-motion in the Filmora video editing interface.
Step 1Set Up Project and Import Footage
Start by launching Wondershare Filmora and creating a new project. Then, import your video by clicking the “+” icon. After that, select “Match to Media” to ensure your project settings align with your clip’s resolution.

Step 2Apply Slow-Motion Effect to Slow Down Video
In the next step, add the imported video to the timeline and access the “Speed” icon. Choose a preset, such as 0.5x from the “Slow” menu, to apply a slow-motion effect to the entire clip. Alternatively, right-click on the video, go to “Speed,” followed by “Uniform Speed,” and adjust the slider leftwards for slow motion.

Step 3Customize Speed for Specific Segments
To create slow-motion effects for specific parts or frames within your video, navigate to the “Speed Ramping” window. Then, choose “Customize” and modify the speed by dragging the points along the line.

Step 4Add Freeze Frame at Required Position
For freezing a frame, position the play head at the desired spot. Select “Add Freeze Frame,” then set the freeze duration in the “Freeze Time Field” and adjust its placement as required. Save changes by clicking “OK.”

Top Features Offered by Filmora
Wondershare Filmora offers its users a variety of advanced features to perform an edit conveniently. It enhances creativity and productivity with the help of AI-equipped in it. Described below are some of these features to know about Filmora:
1. AI Smart Masking
AI Smart Masking simplifies the process of adding high-quality transitions and effects. By contrast, it can be complex with manual editing. By activating this feature, it automatically handles the masking task. Once AI masking is enabled and the desired area is specified, it swiftly completes the process. This allows you to apply transitions and effects to the unmasked area afterward.
2. AI Copywriting
Filmora AI Copywriting is a new tool that incorporates ChatGPT API. It uses AI to create scripts, providing tons of ideas for creators to improve their video storytelling. This tool seamlessly integrates AI-generated text and narration into the editing process. With Filmora AI Copywriting, creators can quickly develop catchy YouTube titles and descriptions.
3. Audio Visualizer
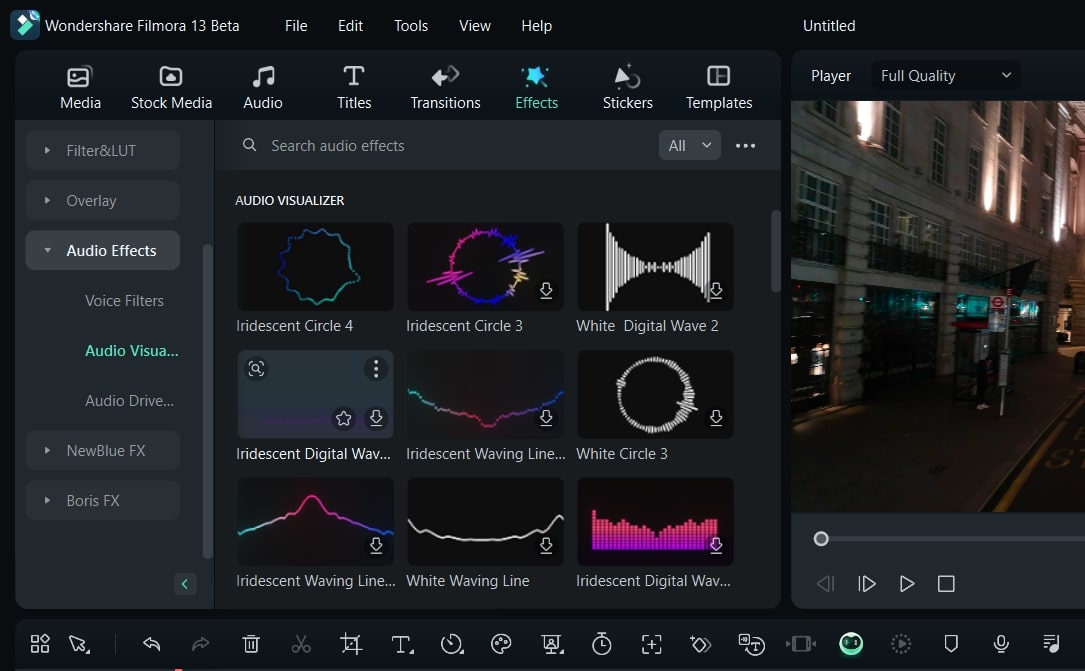
Filmora Audio Visualizer is an innovative tool for music videos on how you experience sound and visuals together. It works by matching the visuals to the sound in your video. The Audio Visualizer analyzes the audio and syncs with the music’s beats and rhythm. This creates an amazing display that makes watching and listening more enjoyable.
4. Speech-To-Text
The Filmora Speech-To-Text (STT) feature is a huge help for video editors who want to work more efficiently. With just one click, this tool changes spoken words in videos into written text. It saves a lot of time by avoiding the manual work of typing subtitles. This feature not only saves time but also ensures that subtitles match what’s being said in the video accurately.
Conclusion
In summary, slow-motion videography is an amazing way to tell stories visually. Mixing technology and your ideas helps create videos that capture people’s attention. For that reason, we have provided 10 slow-motion video cameras to help you capture slow-motion videos. Additionally, we also highlighted the perfect solution if you don’t have a camera: Wondershare Filmora. You can easily generate a slow-motion video using our simple guide with this tool.
Make A Slow Motion Video Make A Slow Motion Video More Features

Part 1: How Do Slow-Motion Cameras Help in Recording Perfect Slow-Mo Videos?
Slow-motion cameras record videos at much faster speeds than regular cameras. This feature helps create slow-motion videos by slowing down the recorded action when played at normal speed. These slow-motion cameras are popular in filmmaking, sports analysis, science, and content creation. That’s because they capture detailed moments and highlight fast-moving things.
- Higher Frame Rate: Regular videos usually record 24, 30, or 60 frames per second (fps). But slow-motion cameras can capture hundreds or thousands of frames per second. More frames mean more details and smoother slow-motion videos when played back.
- Smooth Playback: Slow-motion videos look smooth and purposeful when played at regular speeds. More frames are recorded initially to achieve this effect. Ultimately, it will preserve all details when the video is played in slow motion.
- High-Resolution Sensors: Lots of slow-motion cameras have high-quality sensors. These sensors ensure that even with more frames captured, the picture stays sharp and detailed in slow-motion videos. This helps capture fine details without losing clarity.
- Creative Control: Slow-motion cameras let filmmakers and videographers control how fast or slow some parts of a scene look. This helps tell stories better, focus on details, and make videos more interesting and attractive to watch.
- Reduced Motion Blur: More frames per second make pictures clearer and sharper. This feature works especially for fast-moving things. This is important when you need to see tiny details or when the lighting isn’t great.
- Temporal Resolution: Slow-motion cameras can record lots of details in quick movements. They’re handy in sports, science, and creative videos where catching fast and detailed actions matter a lot.
Part 2: Finding The Top Slow-Motion Cameras to Use in 2024
If you want a good slow-motion camera, start by checking out the ones with higher frame rates. Also, think about what you’ll be recording and where you’ll share your videos. Buying a new camera can be confusing and perplexing. We hope you’ll find the best slow-motion camera in the list below. We have arranged the top slow-motion cameras to use in 2024 below:
- PowerShot G7 X Mark III Black
- Sony ZV-1 Camera
- GoPro HERO11 Black
- GoPro HERO10 Black
- Panasonic Lumix GH6
- Sony α7R IV
- Fujifilm X-S20
- Canon EOS-1D X Mark III DSLR Camera
- Nikon D6 FX-Format Digital SLR Camera
- Canon DSLR Camera [EOS 90D]
1. PowerShot G7 X Mark III Black
The PowerShot G7 X Mark III Black is a small but powerful camera for taking high-quality slow-motion videos. It has a 20.1 Megapixel camera and a DIGIC 8 Image Processor, which means it shows exceptional clarity even in different lighting. The 4.2x Optical Zoom Kens with Optical Image Stabilizer helps get close-up shots without making them blurry. For videos, it can record in 4K (at 30 frames per second) and Full HD (at 120 frames per second) for super smooth slow-motion shots.

2. Sony ZV-1 Camera
The Sony ZV-1 Camera is made specifically for content creators and vloggers. Although it has a compact design, it is packed with powerful features. This slow-motion video camera has a 1-inch sensor and digital and optical image stabilization. This means your pictures and videos will be clear and steady even if things are moving fast.
The camera’s results are sharp and colorful thanks to its 20.1 MP resolution and BIONZ X Image Processor. Also, it has a Fast Hybrid AF System that quickly focuses accurately, perfect for both photos and videos.

3. GoPro HERO11 Black
The GoPro HERO11 Black is an awesome slow-motion camera perfect for all kinds of adventures. It takes clear videos up to 5.3K resolution and sharp 27MP photos. The camera has great stabilization, so your videos always look smooth. You can change how wide your shots are and switch lenses digitally while keeping things clear.
GoPro HERO11 Black has cool effects for nighttime shots, making them look artistic. The camera is tough, waterproof up to 33 feet, and has a long-lasting battery that works well even in cold weather.

4. GoPro HERO10 Black
The GoPro HERO10 Black has a faster processor for smoother use and better touch controls. It can record super clear videos at higher speeds: 5.3K at 60fps and 4K at 120fps. You can also shoot camera slow-motion videos at 240fps in 2.7K resolution. The camera’s sensor is better, too, making photos sharper and allowing you to grab 15.8MP pictures from videos. It keeps footage perfectly steady with its excellent stabilization.

5. Panasonic LUMIX GH6
The LUMIX GH6 is an inspiring innovation in the LUMIX camera series, packed with amazing upgrades. It records high-quality videos internally in ProRes 422 HQ and ProRes 422, making them look great and easier to work with on computers later. This slow-mo video camera is faster due to a new engine, making pictures look better with less noise and better colors.
It’s great for professional video making, offering top-notch recording options. It also has image stabilization, a flexible rear monitor, and slots for different memory cards.

6. Sony α7R IV
The Sony A7R IV is a top-notch mirrorless camera appreciated by videography experts. It takes super clear pictures with its 20MP full-frame sensor. Also, it has a feature that prevents shaky photos and helps videos stay steady. You can control how long the shutter stays open, which helps in different lighting.
This slow-motion video camera lets you choose different ways to measure light for better pictures. Small and adaptable, it is high-tech and has great performance in digital photography.

7. Fujifilm X-S20
The Fujifilm X-S20 is a versatile camera that is equipped with advanced features and is easy to carry. This slow-motion camera has a 26.1MP sensor for really clear pictures. The screen is a vary-angle touchscreen of 3.0 inches and 1.84m-dot. You can connect it to Wi-Fi and Bluetooth to share and control the camera from a distance.
It’s perfect for videos, too, recording in high-quality up to 6.2K resolution. The camera is small and compact at 127.7 x 85.1 x 65.4mm and weighs only 491g.

8. Canon EOS-1D X Mark III DSLR Camera
The Canon EOS-1D X Mark III is a top choice for professionals in photography and videography. It has a powerful 20.1 Megapixel Full-frame CMOS sensor that ensures high-quality images. The DIGIC X Image Processor handles low-light situations exceptionally well. Adding on, it offers a wide ISO range for great performance.
Its advanced autofocus system with deep learning technology tracks subjects accurately. This slow-mo camera supports impressive 4K UHD 2160p video recording.

9. Nikon D6 FX-Format Digital SLR Camera
The Nikon D6 FX-Format Digital SLR Camera Body is made for professionals who promise top-notch performance. It has a powerful 20.8 Megapixel Full-frame CMOS sensor for high-quality photos. Also, it can work as a webcam with a maximum resolution of 16 MP and performs well in different situations.
Using digital image stabilization, the slow-motion video camera helps prevent blur. Moreover, it has a quick shutter speed of 1/8000 seconds for precise control over exposure.

10. Canon DSLR Camera [EOS 90D]
The Canon 90D Body is a slow-mo camera for both filmmakers and videographers. It has a 32.5-megapixel CMOS APS-C sensor for clear and detailed images. Furthermore, it supports recording videos in 4K UHD 30P and Full HD 120P, which helps in delivering excellent video quality. With a 45-Point All Cross-type AF System, the 90D provides precise autofocus across the entire frame.

Part 3: What To Do If You Do Not Have a Camera? Use Filmora for Slow-Mo Video Making
Sometimes, getting an affordable slow-motion camera for shooting videos can be tricky. But don’t worry! You can still create slow-motion videos without having a specific camera. Wondershare Filmora is an excellent solution to make fantastic slow-motion videos, even if you don’t own a special slow-motion camera.
You can adjust the speed of your videos easily to make certain moments slower, making your clips look cool. Filmora isn’t just about changing the speed of your videos. It’s a powerful editing software that lets you do lots of things to make your videos better.
Free Download For Win 7 or later(64-bit)
Free Download For macOS 10.14 or later
Steps Required to Slow Down Video Professionally with Speed Ramping
Filmora Speed Ramping feature allows you to control your clip’s speed. It gives the flexibility to either slow down the entire video or specific segments. Here’s a guide on executing slow-motion in the Filmora video editing interface.
Step 1Set Up Project and Import Footage
Start by launching Wondershare Filmora and creating a new project. Then, import your video by clicking the “+” icon. After that, select “Match to Media” to ensure your project settings align with your clip’s resolution.

Step 2Apply Slow-Motion Effect to Slow Down Video
In the next step, add the imported video to the timeline and access the “Speed” icon. Choose a preset, such as 0.5x from the “Slow” menu, to apply a slow-motion effect to the entire clip. Alternatively, right-click on the video, go to “Speed,” followed by “Uniform Speed,” and adjust the slider leftwards for slow motion.

Step 3Customize Speed for Specific Segments
To create slow-motion effects for specific parts or frames within your video, navigate to the “Speed Ramping” window. Then, choose “Customize” and modify the speed by dragging the points along the line.

Step 4Add Freeze Frame at Required Position
For freezing a frame, position the play head at the desired spot. Select “Add Freeze Frame,” then set the freeze duration in the “Freeze Time Field” and adjust its placement as required. Save changes by clicking “OK.”

Top Features Offered by Filmora
Wondershare Filmora offers its users a variety of advanced features to perform an edit conveniently. It enhances creativity and productivity with the help of AI-equipped in it. Described below are some of these features to know about Filmora:
1. AI Smart Masking
AI Smart Masking simplifies the process of adding high-quality transitions and effects. By contrast, it can be complex with manual editing. By activating this feature, it automatically handles the masking task. Once AI masking is enabled and the desired area is specified, it swiftly completes the process. This allows you to apply transitions and effects to the unmasked area afterward.
2. AI Copywriting
Filmora AI Copywriting is a new tool that incorporates ChatGPT API. It uses AI to create scripts, providing tons of ideas for creators to improve their video storytelling. This tool seamlessly integrates AI-generated text and narration into the editing process. With Filmora AI Copywriting, creators can quickly develop catchy YouTube titles and descriptions.
3. Audio Visualizer
Filmora Audio Visualizer is an innovative tool for music videos on how you experience sound and visuals together. It works by matching the visuals to the sound in your video. The Audio Visualizer analyzes the audio and syncs with the music’s beats and rhythm. This creates an amazing display that makes watching and listening more enjoyable.

4. Speech-To-Text
The Filmora Speech-To-Text (STT) feature is a huge help for video editors who want to work more efficiently. With just one click, this tool changes spoken words in videos into written text. It saves a lot of time by avoiding the manual work of typing subtitles. This feature not only saves time but also ensures that subtitles match what’s being said in the video accurately.
Conclusion
In summary, slow-motion videography is an amazing way to tell stories visually. Mixing technology and your ideas helps create videos that capture people’s attention. For that reason, we have provided 10 slow-motion video cameras to help you capture slow-motion videos. Additionally, we also highlighted the perfect solution if you don’t have a camera: Wondershare Filmora. You can easily generate a slow-motion video using our simple guide with this tool.
Also read:
- In 2024, How to Create a Slideshow with Icecream Slideshow Maker
- In 2024, Best Voice Changers for WhatsApp Free Included
- New Step by Step to Rotate Videos Using Handbrake for 2024
- Updated Are You Excited to Find Out the Top-Class VHS Video Effects Maker? Put Your Worries at Rest because This Article Will Provide the Best VHS Effect Makers
- Updated 2 Ways to Add Custom Subtitles to Netflix for 2024
- Best Free LUTs To Use in Shotcut
- In 2024, Converting an SRT File to VTT Is Extremely Easy. The Article Enlists Various Methods You Can Use to Convert an SRT File to VTT, Introducing You to Filmora, Which Allows You to Edit Your SRT Files
- 2024 Approved Best 4 Love Video Maker with Music
- New In 2024, 5 Tried-And-True Ways to GIF Making
- New Splitting a Video Into Frames with the FFmpeg Step by Step
- In 2024, How to Add Selective Color Effect to Your Videos
- Updated A Review of 3D LUT Mobile App - A Composite Application for Editing Media
- In 2024, Something That You Should Know About MP4 Video Format
- Updated A Complete Overview of VSCO Video Editor for 2024
- Updated LumaFusion Offers Various Look Up Table Presets, or LUTs, Such as FiLMiC deLog and FiLMiC DeFlat, and Several Stylistic LUTs for Use with Neutral Use Video. You Can Also Manually Add the LUTs
- 2024 Approved SRT Not Displaying How to Open and Use SRT File in VLC?
- Updated Quick Answer What Is a Transparent Logo and Why Do You Need It for 2024
- In 2024, How to Use OBS Chroma Key With/Without Green Screen
- This Article Is Regarding the Guideline for Splitting the Video Clips in Adobe After Effects. Here, You Will Also Know About the Most Appropriate Substitute, Wondershare Filmora. Being Economical, You Can Also Use It Practically for 2024
- New In 2024, The Best 10 AI Video Analytics Companies at a Glance
- In 2024, Guide To Slowing Down Videos in Snapchat Discussing the Details
- Updated Polish and Enshrine Your Music Videos with the Best Editing Software, Filmora. Add Cuts to Your Beat, Light Leaks, and Much More
- In 2024, Deleting White Background in Photoshop Is Hard?
- 2024 Approved Want to Add Life to Your Customary Business Presentations and Videos on a MacOs Device with Expressive Emojis? Dive in to Have an Insight Into the Credibility of Using Emojis on a Mac
- 2024 Approved Do You Have the Habit to Create Subtitle for Your Video? You Can Always Add Open and Close Subtitles to Your Video to Make It Perfect. Follow This Article to Learn More About It
- Updated Record Slow Motion Videos With Phantom Slow-Mo Camera
- New In 2024, How to Edit A Time Lapse Video on iPhone?
- New In 2024, How to Resize FLV Videos EfficientlyWindows, Mac, Android, iPhone & Online
- Updated Are You Wondering How to Slow Down Videos or Speed Them up, Here Are Three Ways to Do It. Speed up or Slow Down Your Videos on PC, Online, and Phone
- Updated 2024 Approved Full Guide to Discord Boost
- New End Your Struggles with Choppy Playback on DaVinci Resolve. Read This Guide to Find Effective Fixes and Reliable DaVinci Resolve Slow Playback Alternatives
- New 2024 Approved How Did AI Video Games Act More Human Than Human?
- 2024 Approved Learn Topaz Video Enhance AI Review
- New How To Make a Photo Collage in Microsoft Word
- In 2024, When It Comes to Video Editing, There Are Countless Software Options Available on the Market. However, Not All of Them Come with Useful Masking Tools. In This Article, We Will Be Discussing the Top 8 Video Editor with Useful Masking Tools
- Updated Vintage Film Effect 1920S - How to Make for 2024
- Top 10 Sony LUT for Different Purposes
- Disabling iPhone 15 Parental Restrictions With/Without Password | Dr.fone
- App Wont Open on Your Samsung Galaxy A23 5G? Here Are All Fixes | Dr.fone
- In 2024, FREE Top 21 Best Anime Websites to Watch Anime Online
- The Updated Method to Bypass Lava Yuva 2 Pro FRP
- How to Rescue Lost Contacts from Reno 10 Pro 5G?
- In 2024, A Working Guide For Pachirisu Pokemon Go Map On Apple iPhone 12 mini | Dr.fone
- How To Do Vivo X100 Screen Sharing | Dr.fone
- 4 Ways to Transfer Music from Honor X50i+ to iPhone | Dr.fone
- In 2024, Top 15 Augmented Reality Games Like Pokémon GO To Play On Honor Magic 5 Pro | Dr.fone
- 5 Solutions For Tecno Camon 20 Pro 5G Unlock Without Password
- In 2024, Here Are Some Reliable Ways to Get Pokemon Go Friend Codes For Apple iPhone 6 | Dr.fone
- In 2024, 5 Ways to Transfer Music from Realme C67 4G to Other Android Devices Easily | Dr.fone
- How to Unlock Your iPhone XS Max Passcode 4 Easy Methods (With or Without iTunes)
- How To Unlock a Samsung Galaxy M54 5G Easily?
- How to Bypass Google FRP Lock from Itel A60 Devices
- In 2024, How to Cast Motorola G54 5G Screen to PC Using WiFi | Dr.fone
- In 2024, 9 Best Free Android Monitoring Apps to Monitor Phone Remotely For your ZTE Nubia Z60 Ultra | Dr.fone
- About Samsung Galaxy S24+ FRP Bypass
- The Complete Guide to Honor 90 Pro FRP Bypass Everything You Need to Know
- In 2024, How to Move Custom Ringtones from Apple iPhone 13 Pro Max to Android? | Dr.fone
- A Detailed Guide on Faking Your Location in Mozilla Firefox On Oppo Find X6 Pro | Dr.fone
- Title: Updated In 2024, How to Create a Custom Sequence Preset in Premiere Pro
- Author: Chloe
- Created at : 2024-04-24 07:08:34
- Updated at : 2024-04-25 07:08:34
- Link: https://ai-editing-video.techidaily.com/updated-in-2024-how-to-create-a-custom-sequence-preset-in-premiere-pro/
- License: This work is licensed under CC BY-NC-SA 4.0.


