
:max_bytes(150000):strip_icc():format(webp)/laptop-2443739-5b55bc7c46e0fb00378df55b.jpg)
Updated In 2024, How to Rotate Videos With Media Player Classic
How to Rotate Videos With Media Player Classic
The Internet and social media have become a staple in our daily lives. Internet users post thousands of videos every day that you can watch online or download and rewatch in your free time. Suppose you encounter a video that is upside down or shot at an angle that makes it difficult for you to enjoy it fully.
It would be nice to find a way to rotate the video to portrait mode so you can watch it without any distractions. Fortunately, this article will discuss using Media Player Classic to rotate any video. We also discuss an excellent alternative to the aforementioned media player.

What Is Media Player Classic?
In a nutshell, Media Player Classic is an open-source media player suitable for 32-bit and 64-bit Microsoft Windows. If you have used the original interface, you might notice that it resembles Windows Media Player 6.4. The only key difference is that the former is more feature-rich and provides more options. In addition, Media Player Classic is very compact and lightweight.

A programmer named “Gabest’’ created and designed this platform as a closed-source application. Things changed, and he later relicensed the media player as free under the terms of the GLP-2.0 license. He released the final version, MPC 6.4.9.0, on 20th March 2006.
Unfortunately, development stalled in 2006, much to the disappointment of many users who had grown to love it. Gabest made a public statement in 2007 saying that Media Player Classic was not dead, just that he couldn’t work on it anymore.
How To Rotate Video in Media Player Classic?
Media Player Classic allows you to rotate your video around three axes, X, Y, and Z. Once you are done, you can fix a video that was initially upside down or in landscape mode for a better viewing experience. Another perk of using Media Player Classic to rotate a video is that you can use shortcuts to make your work easier.
Before we teach you how to rotate video in windows Media Player Classic, there are a few things you should know. Unfortunately, this platform doesn’t allow you to rotate a video in its graphical user interface. You can’t also use it to edit a video. Suppose you want to add text or overwrite the original video clip. Media Player Classic can only allow you to playback a video or rotate it.
Here is a simple guide on how to rotate videos in Media Player Classic.
Step1 Launch Media Player Classic and click on the “View” tab. Select “Options” or click “O” to display the “Options” window.

Step2 Navigate to the left pane to the Player Group and click on “Keys.” If the Player Group is not expanded by the time, you launch the platform, double-click it and wait a few seconds. You can then navigate to the “PnS Rotate” command on the Keys list.

Step3 Go to the “PnS Rotate+” command and double-click the “Key” field. You can then click on any key to rotate your video around the x-axis. Once you are satisfied with the results, click “…” to apply the changes you have made.

Step4 You can now assign shortcuts to “PnS Rotate” commands. For instance, you could assign PnS Rotate Y for rotation along the Y axis and PnS Z for rotation along the Z axis. After each axis has a shortcut, select “Apply” then “OK” to save your changes and close the Options window respectively.

Step5 Select “Output” on the Options window and navigate to the DirectShow Video section to confirm whether the Media Classic Player supports rotation for the rendered video. Ascertain the Rotation feature has a green check mark, which indicates that the platform promotes rotation for the video. If the video has a red X, select “Apply” and click “OK.”

Step6 Use the shortcuts you assigned to the keys in Step 4 to rotate your video as you see fit. Since the rotation occurs gradually, you might need to press the keys numerous times or press and hold to see a visible change.
For instance, you can rotate your video from landscape to portrait by clicking “Alt-Num 1” and “Alt-Num 3,” respectively. To revert your video to its original state, press “Alt-Num 5.”
Need an alternative to Media Player Classic? Try Wondershare Filmora To Rotate a Video
Free Download For Win 7 or later(64-bit)
Free Download For macOS 10.14 or later
You might need a better alternative to Media Classic Player to help rotate your videos. As we mentioned, Media Classic Player doesn’t allow you to change the video. The scope of this platform only extends to playing and rotating videos along three axes. In our opinion, Wondershare Filmora is an excellent alternative.

This feature-rich platform is your one-stop solution for any creator who wants to make a mark with their videos. You can download it free on your desktop, laptop, or smartphone and use it anytime. The cloud storage allows you to snap a photo and upload it for editing at a later time.
In addition, the platform has a co-creation space where you can share your work with other users and compare notes. Here is a list of other nifty features we guarantee you will enjoy.
- Motion tracking
- Auto beat sync
- Split screen
- Title Editing
- Preset templates
- AI Portrait
- Mask and blend
- Text to speech
- Silence detection
- Audio visualizer
How To Rotate a Video 90 Degrees With Wondershare Filmora?
Now that you have seen how different this platform is from Media Classic Player, you might be curious about how effectively it rotates your videos. Perhaps our detailed guide will help you decide whether you want to give Wondershare Filmora a shot.
Stick around to learn how to rotate a video 90 degrees with Wondershare Filmora.
Step1 Import the video you want to rotate to Wondershare Filmora and drag and drop it to the timeline as shown below.

Step2 Click on the monitor icon and select “Change Project Aspect Ratio” in the drop-down menu.

Step3 In the “Project Settings” window, you can change your video’s Aspect Ratio, Resolution, Frame Rate, and Color space.

Step4 Once you are happy with your changes, click “OK” and close the window.

Step5 Double-click the video track and navigate to the Rotate option in the window. Hover your mouse over the dot in the Rotate tab until you get to 90 degrees. You could also adjust the rotation of the video by clicking on the pivot in the media player till the video is at 90 degrees.

Step6 Click “Export” to save a copy of the rotated video to your device.

Which Is Better To Rotate a Video? Media Player Classic or Wondershare Filmora?
Having seen both sides of the coin, you might wonder which option is better to help you rotate a video. In this section of the article, we pit Wondershare Filmora against Media Player Classic to help you determine which option will work best for you.
Take a look at the table below.
| Media Player Classic | Wondershare Filmora | |
|---|---|---|
| Operating System | Microsoft Windows | Windows & Mac |
| Ratings from G2 | N/A | 4.4/5 stars |
| Pricing | Free | Annual Plan – US$49.99/yearCross Platform Plan - US$59.99/YearPerpetual Plan - US$79.99 |
| Features | ● Enhanced video rendering● Removal of tearing● Supports SVCD, VCD, and DVD playback● AVI subtitles● Customizable toolbar | ● AI Portrait● Mask and blend● Text to speech● Silence detection● Audio visualizer● Motion tracking● Auto beat sync● Split screen● Title Editing● Preset templates |
As you have seen, Media player Classic doesn’t have the Rotate feature per se. However, you can assign shortcuts to the keys to rotate a video along three axes as you see fit. You can also use a combination of keys like Alt and Num to change how your video sits so you can enjoy it as you like.
On the other hand, Wondershare Filmora has a more comprehensive Rotate feature that allows you to drag your pointer along a bar till the video sits at the correct number of degrees.
This platform also provides additional features, like allowing you to scale the video to fit the screen and adjusting project settings like the resolution and frame rate. If you don’t want to use the sliding bar, you can use your pointer to manually adjust the rotation by clicking on the pivot with your pointer.
In a nutshell, Windows Media Player is the ideal choice if you want to rotate your video and leave it at that. However, if you are looking for more advanced features, you are better off choosing Wondershare Filmora. The latter option also makes your videos look more polished like they were edited by a professional.
Conclusion
Videos might be trickier to edit than photos, especially when you want to rotate them. Fortunately, developers have been working tirelessly to ensure you have many tools at your disposal to edit your videos from any device at any time.
If you don’t fancy editing videos on your laptop, you could download the software to your smartphone and rotate videos on the move. Technology is truly a blessing that has come to make our work easier. Hopefully, after reading this article, you can effortlessly rotate any video you encounter.
Free Download For macOS 10.14 or later
You might need a better alternative to Media Classic Player to help rotate your videos. As we mentioned, Media Classic Player doesn’t allow you to change the video. The scope of this platform only extends to playing and rotating videos along three axes. In our opinion, Wondershare Filmora is an excellent alternative.
This feature-rich platform is your one-stop solution for any creator who wants to make a mark with their videos. You can download it free on your desktop, laptop, or smartphone and use it anytime. The cloud storage allows you to snap a photo and upload it for editing at a later time.
In addition, the platform has a co-creation space where you can share your work with other users and compare notes. Here is a list of other nifty features we guarantee you will enjoy.
- Motion tracking
- Auto beat sync
- Split screen
- Title Editing
- Preset templates
- AI Portrait
- Mask and blend
- Text to speech
- Silence detection
- Audio visualizer
How To Rotate a Video 90 Degrees With Wondershare Filmora?
Now that you have seen how different this platform is from Media Classic Player, you might be curious about how effectively it rotates your videos. Perhaps our detailed guide will help you decide whether you want to give Wondershare Filmora a shot.
Stick around to learn how to rotate a video 90 degrees with Wondershare Filmora.
Step1 Import the video you want to rotate to Wondershare Filmora and drag and drop it to the timeline as shown below.
Step2 Click on the monitor icon and select “Change Project Aspect Ratio” in the drop-down menu.
Step3 In the “Project Settings” window, you can change your video’s Aspect Ratio, Resolution, Frame Rate, and Color space.
Step4 Once you are happy with your changes, click “OK” and close the window.
Step5 Double-click the video track and navigate to the Rotate option in the window. Hover your mouse over the dot in the Rotate tab until you get to 90 degrees. You could also adjust the rotation of the video by clicking on the pivot in the media player till the video is at 90 degrees.
Step6 Click “Export” to save a copy of the rotated video to your device.
Which Is Better To Rotate a Video? Media Player Classic or Wondershare Filmora?
Having seen both sides of the coin, you might wonder which option is better to help you rotate a video. In this section of the article, we pit Wondershare Filmora against Media Player Classic to help you determine which option will work best for you.
Take a look at the table below.
| Media Player Classic | Wondershare Filmora | |
|---|---|---|
| Operating System | Microsoft Windows | Windows & Mac |
| Ratings from G2 | N/A | 4.4/5 stars |
| Pricing | Free | Annual Plan – US$49.99/yearCross Platform Plan - US$59.99/YearPerpetual Plan - US$79.99 |
| Features | ● Enhanced video rendering● Removal of tearing● Supports SVCD, VCD, and DVD playback● AVI subtitles● Customizable toolbar | ● AI Portrait● Mask and blend● Text to speech● Silence detection● Audio visualizer● Motion tracking● Auto beat sync● Split screen● Title Editing● Preset templates |
As you have seen, Media player Classic doesn’t have the Rotate feature per se. However, you can assign shortcuts to the keys to rotate a video along three axes as you see fit. You can also use a combination of keys like Alt and Num to change how your video sits so you can enjoy it as you like.
On the other hand, Wondershare Filmora has a more comprehensive Rotate feature that allows you to drag your pointer along a bar till the video sits at the correct number of degrees.
This platform also provides additional features, like allowing you to scale the video to fit the screen and adjusting project settings like the resolution and frame rate. If you don’t want to use the sliding bar, you can use your pointer to manually adjust the rotation by clicking on the pivot with your pointer.
In a nutshell, Windows Media Player is the ideal choice if you want to rotate your video and leave it at that. However, if you are looking for more advanced features, you are better off choosing Wondershare Filmora. The latter option also makes your videos look more polished like they were edited by a professional.
Conclusion
Videos might be trickier to edit than photos, especially when you want to rotate them. Fortunately, developers have been working tirelessly to ensure you have many tools at your disposal to edit your videos from any device at any time.
If you don’t fancy editing videos on your laptop, you could download the software to your smartphone and rotate videos on the move. Technology is truly a blessing that has come to make our work easier. Hopefully, after reading this article, you can effortlessly rotate any video you encounter.
How to Change Video Resolution in Filmora
With the vast number of devices available in the market today, storing data and video files has become difficult. Frequently in cases where the devices share different forms of resolution, it makes sharing videos a hassle.
In those situations, changing the resolution of your video can be a great idea. It will also allow you to save storage. In this article, you’ll adjust the resolution in just a few clicks by Wondershare Filmora. But before we learn how to change a video’s resolution, let’s look into what a video resolution is!
Part 1. What Is a Video Resolution?
A video resolution, in short, is the quality of the video visible. A video is rendered at a specific rate whenever you watch a movie or go to a cinema. A screen is made up of tiny pixels and arranged in an order that determines the resolution of a screen.
Video resolution is rendered in a vertical and horizontal orientation. Therefore, whenever you play a video on YouTube, the resolution scale is available for you to choose from, i.e., 480p, 720p, 1080p, etc.
In most cases, a resolution is dictated by the full abbreviation. So, for example, a 720p video is 1280 x 720, and a 1080p video is a 1920 x 1080 resolution.

![]()
Note: The number written before is the number of horizontal pixels in a video. And the number written after is the vertical pixels in a video.
Before we adjust the resolution of a video, let’s look at a comparison between different types of video resolution.
Part 2. 7 Different Types of Video Resolution
It has been established that a video resolution is not a constant number and changes according to the screen. Scroll below to look at the different forms of video resolutions available!
360p
The full resolution is 480 x 360. This resolution is a minimal video resolution. On a big screen, 360p will look blurry. That is why a 360p resolution is the best for smaller devices such as Mobile phones.
480p
The full resolution is 853 x 480. Although an upgrade from the latter, this resolution is available on many devices. It’s mainly used in devices such as smaller TVs, laptops, and Desktop computers. It is also available for Burn-in DVDs.
720p
The full version of the resolution is 1280 x 720. This resolution is called HD, short for High Definition. 720p quality looks good almost on every device and is also reasonably available.
Most modern devices, such as Mobile phones, Touch Tablets, Laptops, and PCs, are calibrated in 720p Resolution.

1080p
The resolution in its complete form is 1920 x 1080. This resolution is also known as FHD, short for Full High Definition. 1080p resolution is the quality in which many high-quality devices are constructed. As a result, the screens of these devices have a clear and clean display.

![]()
Note: It is usually recommended to share videos on social media in 1080p resolution.
1440p
This resolution is also called QHD (Quad HD). The length and width of this resolution are 2560 x 1440. As the name suggests, its quality is quad (four times) than that of a standard 720p resolution.
The screens of devices constructed in this resolution usually have a high-end purpose. For example, this resolution is commonly used in Gaming monitors and High-end smartphones.

2160p
The screens constructed in this resolution are considered among the best available in the market. 2160p (3840 x 2160) is also known as UHD, which is short for Ultra High Definition. It is also known as 4K because it offers four times the power of 1080p or FHD (Full High Definition.)
These screens are usually available for high-end competitive gaming monitors or big screen LCD and LED Television. In addition, some of the flagship smartphones are also built with 4K resolution.

4320p
This resolution is also known as 8K. The length and width of the pixel arrangement are 7680 x 4320. The pixels are arranged in these screens to offer sixteen times the average power of a 1080p (FHD) monitor.
This resolution is only available on several devices, such as commercial TVs and monitors. However, this is the most significant resolution available in the modern market. Therefore, even if your monitor cannot support a larger resolution, you can test whether your PC can render an 8K resolution.

Part 3. Why Do You Need to Change a Video Resolution?
There are numerous cases where you will want to change the resolution of a video. Some of them are described below.
Decreasing a Video Resolution
Sometimes, you are trying to upload a video from a smartphone. Or, in general, you want to transfer videos to a smartphone. The resolution of your video can play a significant role in the transfer process.
If your video file has a higher resolution, it will take up more space on your phone. As well as, if your PC has a higher resolution, say a 4K resolution, and your phone is of 1080p resolution. You might not be able to play it.
To counter situations like these, you need to change the resolution of your video.
Increasing a Video Resolution
Similarly, there are instances where you would need to change the resolution of your video to increase it.
A good example would be to burn a low-quality DVD. To maintain good quality on a DVD, you need to increase its resolution before transfer.
Changing the exact resolution of a video is only possible in some cases because you cannot change the precise pixel of the video it is recorded in. But software like Wondershare Filmora allows you to change the resolution of your video easily.
Now let’s move to understanding the steps involved in changing the resolution of a video!
Part 4. Steps to Change Video Resolution in Filmora
To change the resolution of a video, you would need a basic video editor. This video editor needs to support the features that enable you to adjust a video resolution. In this case, Filmora is the best option.
Wondershare Filmora
Free Download For Win 7 or later(64-bit)
Free Download For macOS 10.14 or later
It has an attractive system UI that allows inexperienced users to learn how to use it quickly. It also has a diverse stock media collection. Not only that, but It gives you access to dependable features for changing the speed of a video.

Scroll below to learn how to download the latest version!
Step1 Download Filmora
Begin by installing the latest version of Wondershare Filmora if you don’t do already. Then, run the installer of this app on your PC or Mac.
Now that you have downloaded the app let’s change the resolution!
Step2 Import Video Clips
Your next step after launching Filmora is to import video clips you want to resize. To accomplish this, follow the steps outlined below:
- Locate and select the Import icon on the top left side of the Filmora Home Interface.
- It will take you to your computer’s library.
- Select the videos to be edited and then click OK.

If you need clarification about the resolution of the video that you imported, you can also check them before adding it to the timeline.
- Right-Click on the video in the import window.
- In the pop-up column, go to Properties.
It opens a window that will tell you the basic info about your video clips. Here you can also preview the resolution.

Now that we have our clips imported, it is time to add them to the timeline below!
Step3 Add The Video Clips to Timeline
To add Video clips to the timeline, go through the steps as guided:
- Hold Right click to drag and select the video clips in the import window.
- Release Right-click when in the timeline.

Doing so would have added the video clips to the timeline. Instead, it has created a workplace to edit our videos.
You can trim, add effects, and join multiple clips in this process. After finishing the editing process, it’s time to select an export format.
Step4 Export Your Video
You can export into video formats in two ways with Filmora. It can be either selecting a format for your video. Or you can also choose to export your video to a particular device.
Video Format Resolution
Wondershare Filmora is a fantastic software that allows you to access a variety of formats for your videos. These export formats include MP4, WMV, F4V, MOV, TS, 3GP, and more. To select a format for your video, follow the steps as guided:
- Click on Export.
- In the left column, click on the video format you need.
- Click Export on the bottom right corner of the window.

Exporting a video in a specific format not only allows you to change the format of a video but also allows you to change the resolution simultaneously.
Default Resolution Settings
Some formats have a built-in resolution. Whenever you choose a specific format for a video, the resolution of the video will be shifted to the resolution of that format, i.e., TS has a default 1080p resolution.
![]()
Note: Another thing to remember is that most video formats have defaulted to 1080p. But there are some formats whose resolutions vary according to their style. A good example is a 3GP format, which is set to 352 x 488 by default.
Customize the Resolution
But if you don’t find the resolution stable for your device, you can also change this default resolution in simple steps. In the export window, follow the steps mentioned ahead:
- In the preset tab, go to > settings.
- In the video tab, click on the resolution.
- In the drop-down menu, select the resolution that you desire.
You can also select a custom resolution by these steps:
- In the drop-down menu, click on Custom.
- Here, you can change the height and width according to your wish.

Exporting a Video to a Specific Device
Selecting a format for your video can help if you want to change the resolution. But in cases where you want to export a video to a particular mobile device. Such as an iPhone or an iPad, you can select the device export option.
In the device export option, you can select a custom device. Filmora allows you to choose from a wide variety of machines available when you choose a custom device; the resolution will be set to optimal for that particular device.
Select a Folder to Export Your Video
After you are done calibrating the resolution settings, you can move on to select the export location for your video. You can do so by the steps mentioned:
- In the main Export window, navigate to the Save
- Click on the Folder
- It will direct you to your PC library.
- Select the directory you want to export your video to.
- Click Select Folder.

Final Step
The last step to export your video is clicking on the Export icon in the bottom right corner of the window. It opens up a render window. Wait for a few minutes until the video finishes exporting.
When the export is finished, a window will pop up as a reminder. You can also find the target folder by clicking on Find Target.

Congratulations! You have successfully learned how to change the resolution of a video using Wondershare Filmora.
Conclusion
Rapid video technology advancement is leading to the development of higher-resolution devices. The greatest resolution in the modern day is the 8K; soon, everyone will be using 8K devices. So, it is beneficial to learn how to change a video’s resolution.
By following the steps mentioned in this article, you can now change the resolution of your video using Filmora.
Before we adjust the resolution of a video, let’s look at a comparison between different types of video resolution.
Part 2. 7 Different Types of Video Resolution
It has been established that a video resolution is not a constant number and changes according to the screen. Scroll below to look at the different forms of video resolutions available!
360p
The full resolution is 480 x 360. This resolution is a minimal video resolution. On a big screen, 360p will look blurry. That is why a 360p resolution is the best for smaller devices such as Mobile phones.
480p
The full resolution is 853 x 480. Although an upgrade from the latter, this resolution is available on many devices. It’s mainly used in devices such as smaller TVs, laptops, and Desktop computers. It is also available for Burn-in DVDs.
720p
The full version of the resolution is 1280 x 720. This resolution is called HD, short for High Definition. 720p quality looks good almost on every device and is also reasonably available.
Most modern devices, such as Mobile phones, Touch Tablets, Laptops, and PCs, are calibrated in 720p Resolution.
1080p
The resolution in its complete form is 1920 x 1080. This resolution is also known as FHD, short for Full High Definition. 1080p resolution is the quality in which many high-quality devices are constructed. As a result, the screens of these devices have a clear and clean display.
![]()
Note: It is usually recommended to share videos on social media in 1080p resolution.
1440p
This resolution is also called QHD (Quad HD). The length and width of this resolution are 2560 x 1440. As the name suggests, its quality is quad (four times) than that of a standard 720p resolution.
The screens of devices constructed in this resolution usually have a high-end purpose. For example, this resolution is commonly used in Gaming monitors and High-end smartphones.
2160p
The screens constructed in this resolution are considered among the best available in the market. 2160p (3840 x 2160) is also known as UHD, which is short for Ultra High Definition. It is also known as 4K because it offers four times the power of 1080p or FHD (Full High Definition.)
These screens are usually available for high-end competitive gaming monitors or big screen LCD and LED Television. In addition, some of the flagship smartphones are also built with 4K resolution.
4320p
This resolution is also known as 8K. The length and width of the pixel arrangement are 7680 x 4320. The pixels are arranged in these screens to offer sixteen times the average power of a 1080p (FHD) monitor.
This resolution is only available on several devices, such as commercial TVs and monitors. However, this is the most significant resolution available in the modern market. Therefore, even if your monitor cannot support a larger resolution, you can test whether your PC can render an 8K resolution.
Part 3. Why Do You Need to Change a Video Resolution?
There are numerous cases where you will want to change the resolution of a video. Some of them are described below.
Decreasing a Video Resolution
Sometimes, you are trying to upload a video from a smartphone. Or, in general, you want to transfer videos to a smartphone. The resolution of your video can play a significant role in the transfer process.
If your video file has a higher resolution, it will take up more space on your phone. As well as, if your PC has a higher resolution, say a 4K resolution, and your phone is of 1080p resolution. You might not be able to play it.
To counter situations like these, you need to change the resolution of your video.
Increasing a Video Resolution
Similarly, there are instances where you would need to change the resolution of your video to increase it.
A good example would be to burn a low-quality DVD. To maintain good quality on a DVD, you need to increase its resolution before transfer.
Changing the exact resolution of a video is only possible in some cases because you cannot change the precise pixel of the video it is recorded in. But software like Wondershare Filmora allows you to change the resolution of your video easily.
Now let’s move to understanding the steps involved in changing the resolution of a video!
Part 4. Steps to Change Video Resolution in Filmora
To change the resolution of a video, you would need a basic video editor. This video editor needs to support the features that enable you to adjust a video resolution. In this case, Filmora is the best option.
Wondershare Filmora
Free Download For Win 7 or later(64-bit)
Free Download For macOS 10.14 or later
It has an attractive system UI that allows inexperienced users to learn how to use it quickly. It also has a diverse stock media collection. Not only that, but It gives you access to dependable features for changing the speed of a video.
Scroll below to learn how to download the latest version!
Step1 Download Filmora
Begin by installing the latest version of Wondershare Filmora if you don’t do already. Then, run the installer of this app on your PC or Mac.
Now that you have downloaded the app let’s change the resolution!
Step2 Import Video Clips
Your next step after launching Filmora is to import video clips you want to resize. To accomplish this, follow the steps outlined below:
- Locate and select the Import icon on the top left side of the Filmora Home Interface.
- It will take you to your computer’s library.
- Select the videos to be edited and then click OK.
If you need clarification about the resolution of the video that you imported, you can also check them before adding it to the timeline.
- Right-Click on the video in the import window.
- In the pop-up column, go to Properties.
It opens a window that will tell you the basic info about your video clips. Here you can also preview the resolution.
Now that we have our clips imported, it is time to add them to the timeline below!
Step3 Add The Video Clips to Timeline
To add Video clips to the timeline, go through the steps as guided:
- Hold Right click to drag and select the video clips in the import window.
- Release Right-click when in the timeline.
Doing so would have added the video clips to the timeline. Instead, it has created a workplace to edit our videos.
You can trim, add effects, and join multiple clips in this process. After finishing the editing process, it’s time to select an export format.
Step4 Export Your Video
You can export into video formats in two ways with Filmora. It can be either selecting a format for your video. Or you can also choose to export your video to a particular device.
Video Format Resolution
Wondershare Filmora is a fantastic software that allows you to access a variety of formats for your videos. These export formats include MP4, WMV, F4V, MOV, TS, 3GP, and more. To select a format for your video, follow the steps as guided:
- Click on Export.
- In the left column, click on the video format you need.
- Click Export on the bottom right corner of the window.
Exporting a video in a specific format not only allows you to change the format of a video but also allows you to change the resolution simultaneously.
Default Resolution Settings
Some formats have a built-in resolution. Whenever you choose a specific format for a video, the resolution of the video will be shifted to the resolution of that format, i.e., TS has a default 1080p resolution.
![]()
Note: Another thing to remember is that most video formats have defaulted to 1080p. But there are some formats whose resolutions vary according to their style. A good example is a 3GP format, which is set to 352 x 488 by default.
Customize the Resolution
But if you don’t find the resolution stable for your device, you can also change this default resolution in simple steps. In the export window, follow the steps mentioned ahead:
- In the preset tab, go to > settings.
- In the video tab, click on the resolution.
- In the drop-down menu, select the resolution that you desire.
You can also select a custom resolution by these steps:
- In the drop-down menu, click on Custom.
- Here, you can change the height and width according to your wish.
Exporting a Video to a Specific Device
Selecting a format for your video can help if you want to change the resolution. But in cases where you want to export a video to a particular mobile device. Such as an iPhone or an iPad, you can select the device export option.
In the device export option, you can select a custom device. Filmora allows you to choose from a wide variety of machines available when you choose a custom device; the resolution will be set to optimal for that particular device.
Select a Folder to Export Your Video
After you are done calibrating the resolution settings, you can move on to select the export location for your video. You can do so by the steps mentioned:
- In the main Export window, navigate to the Save
- Click on the Folder
- It will direct you to your PC library.
- Select the directory you want to export your video to.
- Click Select Folder.
Final Step
The last step to export your video is clicking on the Export icon in the bottom right corner of the window. It opens up a render window. Wait for a few minutes until the video finishes exporting.
When the export is finished, a window will pop up as a reminder. You can also find the target folder by clicking on Find Target.
Congratulations! You have successfully learned how to change the resolution of a video using Wondershare Filmora.
Conclusion
Rapid video technology advancement is leading to the development of higher-resolution devices. The greatest resolution in the modern day is the 8K; soon, everyone will be using 8K devices. So, it is beneficial to learn how to change a video’s resolution.
By following the steps mentioned in this article, you can now change the resolution of your video using Filmora.
Top 10 Online And PC Cartoon Video Maker 2022 [For Beginner]
Abundant Video Effects - Wondershare Filmora
Provide abundant video effects - A creative video editor
Powerful color correction and grading
Detailed tutorials are provided by the official channel
Introduction
There are some issues common to the video production process. However, animated or cartoon videos have helped to combat such issues. You do not need to scout for locations, go through a seemingly endless casting process, or rent the pricey equipment. A cartoon is simply a type of animation or an illustration that usually appears in a semi-realistic or an unreal style. In addition, it uses simple, satirical, and humorous drawing language to tell the story.
Although there are restrictions, there are a lot of possibilities cartoon video makers still offer to their users. Therefore, this article will share the top 10 best cartoon video makers online and on PC that you can use before diving into an animated video world.
So, here is what we shall learn about cartoon makers today:
In this article
01 Best 5 Online Cartoon Makers
02 Cartoon Video Maker for Desktop (Win and Mac)
03 How Can I Create My Own Cartoon Using Wondershare Anireel
Part 1: Best 5 Online Cartoon Makers
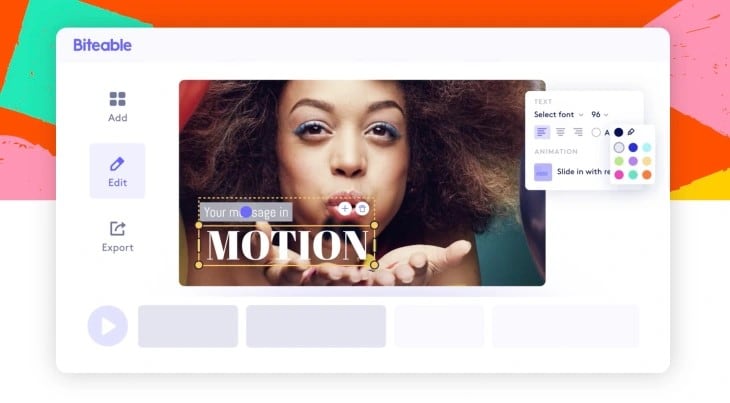
1. Biteable
Biteable provides a seemingly endless list of template categories to cater to your online media marketing needs. Aside from offering entertaining cartoon-making templates, the platform also allows users to create motion graphics or content, and Facebook covers for their social media channels.
Price: Free, $23 per month, billed annually.
Features:
- Offering library with lots of templates to choose from
- Free to use, except you are looking for additional features
- Five simple steps to an incredible cartoon video
- It has an easily customizable template
Pros
- It is a perfect option for social media managers
- Quickly create entertaining cartoons
- Used by biggies like Amazon, Microsoft, Google, Disney, BBC, Shopify, Samsung, and salesforce.
- Over 9 million users
Cons
- There is a mandatory registration
- There are no audio editing options
- The file-sharing capabilities are limited to YouTube and Facebook
- The download option is disabled in the free version
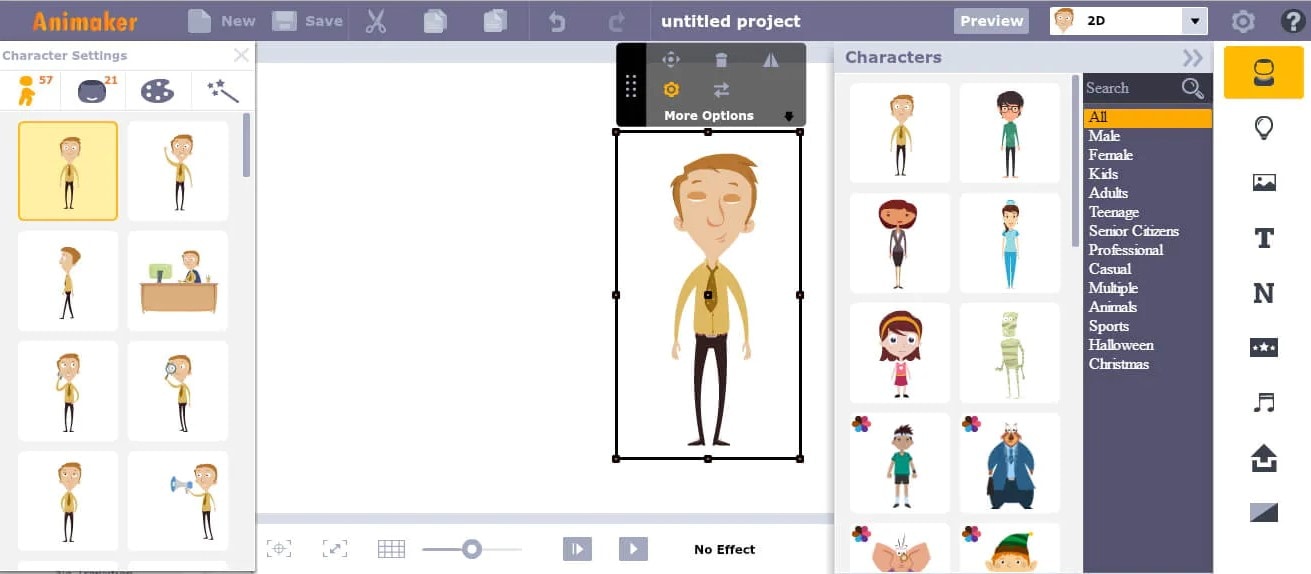
2. Animaker
With this animated maker, you get access to hundreds of animated characters, maps, and backgrounds. There are six (6) video styles available in this cartoon maker: Typography, Infographic, or 2D for different types of projects.
Price: Free version available. Subscription plans start at $12 per month/billed annually.
Features
- Different video styles, marketing, explainer, or 2D animation.
- Posts itself as the number 1 cartoon maker
- No need for a credit card to start.
- Four-step process; select template, customize it, add music, and download or share.
- 200+ voices, 25+ languages, and loads of customizable options.
- It offers auto-lip sync with advanced animation effects.
- There is a rich selection of 1000+ templates
Pros:
- Superb audio editing options
- Excellent and quick animation tools.
- Over 10 million users so far and still counting.
- Currently used by Amazon, Bosch, HP, Nokia, and Philips.
Cons:
- The monthly fee is pricey
- Account creation is mandatory for a free version
- The free version contains a watermark
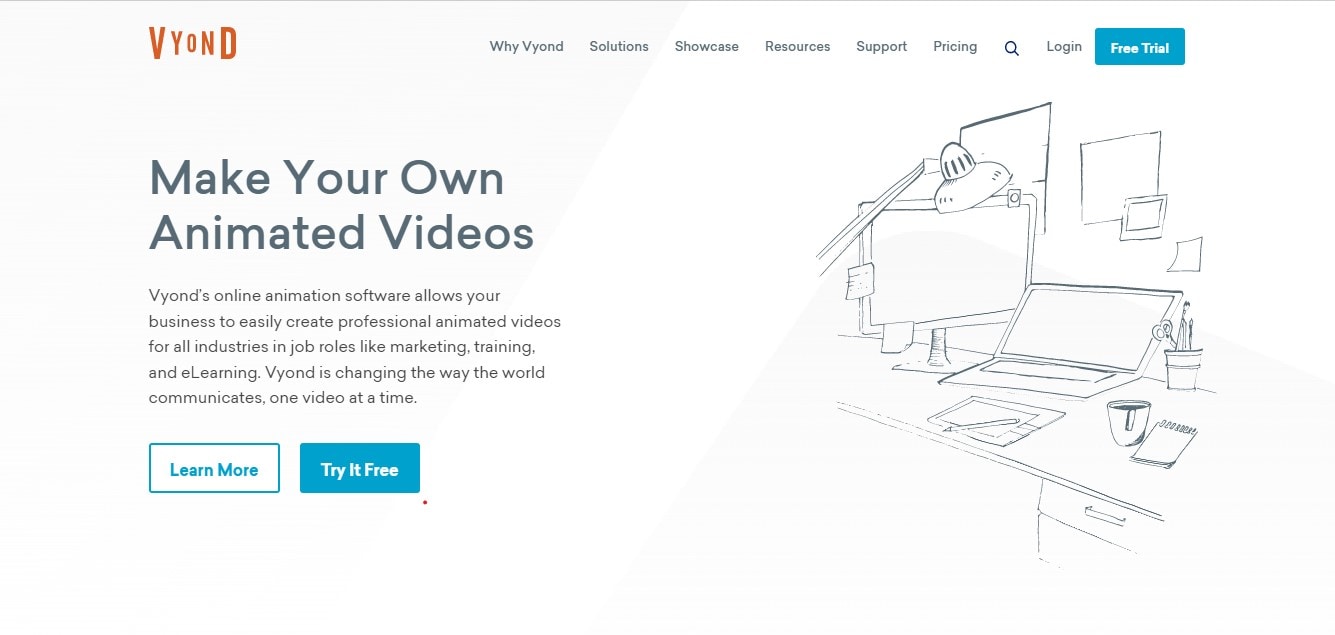
3. Vyond
Vyond, the cartoon creator launched in 2007, is probably one of the oldest online cartoon video makers. Additionally, it is still one of the most popular online destinations meant for anyone who wants to create an animated video quickly.
Price: Subscription plans start from $39 per month, billed annually.
Features:
- Perfect for animated video creation
- There is automatic character lip-syncing
- Try it for free before purchasing
- Make videos for training, e-learning, marketing, human resources, etc.
- The maximum duration of the video is 120 minutes
Pros:
- It has a fully customizable template
- There are high-end object and character animated features
- Certified by GDPR, TrustArc, BSI, and CCPA
- A wholesome cartoon makerfor enterprise and individual
- Data security and privacy assurance by BSI, CCPA, and GPDR.
Cons:
- It is quite expensive
- Vyond is not the best option for inexperienced animators
- The features depend on the subscription model
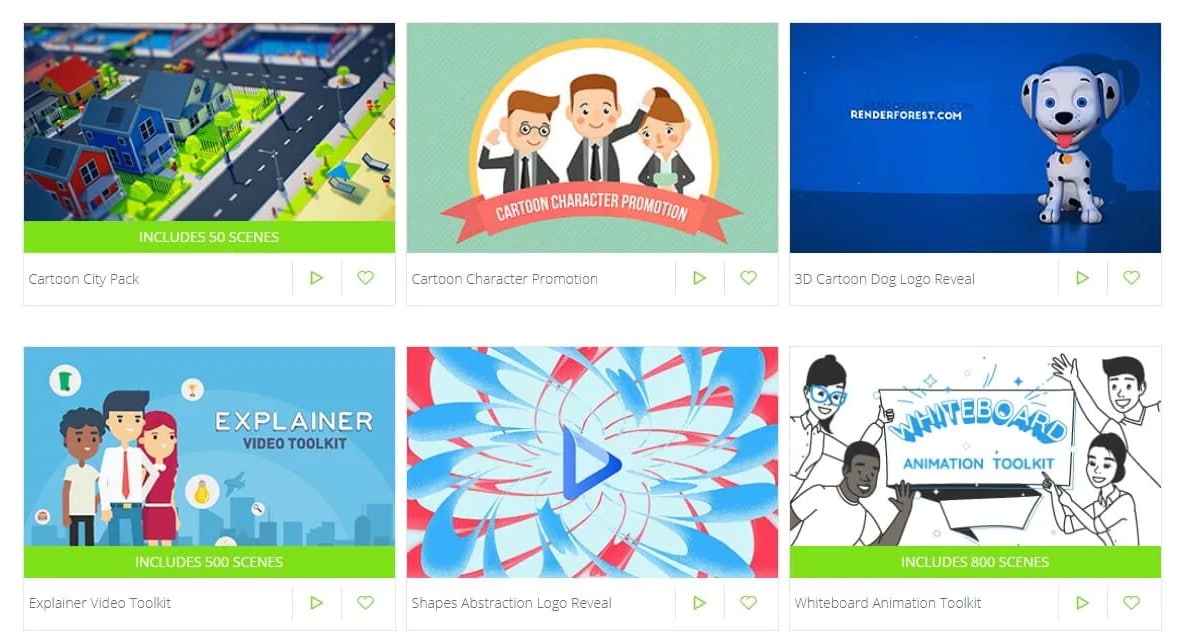
4. Renderforest
This is a famous online cartoon video maker for many purposes. Among the numerous options, the platform offers to its user. They include; 3D explainer videos, logo animations, or professional presentations.
Price: Free version available. Subscription plans start at $16 per month, billed annually.
Features:
- There is an extensive library of templates with numerous options
- Has a large online storage
- Was among the top 100 software companies in 2019.
- Top ranked solution holder for 2020
- Up to 250GB of online storage space
- Use the in-built template to make a story, customize the video, and then export it to share with your friends.
- Amadeus, Bose, BBC, Vodafone, Sony Music, and many others use Renderforest.
Pros:
- Produce videos like a pro
- Comes with an ultimate animation pack.
- Trusted by millions and one of the oldest cartoon makers.
Cons:
- A limited amount of commercial music tracks
- There are modest export options
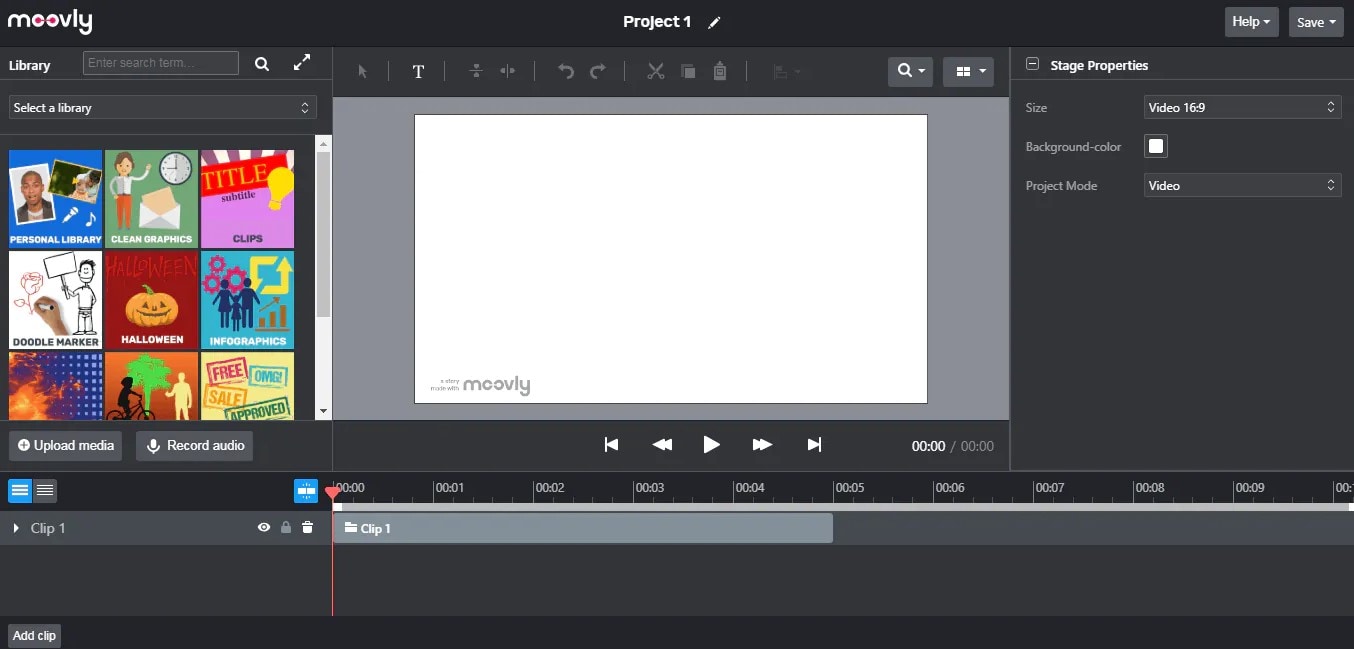
5. Moovly
With this cartoon maker, users must first log in. However, there is no need to create a new account as you can use your LinkedIn or Google account to sign in quickly.
Price: Free 30-day trial, $24.92 per month billed annually.
Features:
- Moovly is the perfect cartoon video maker for sales&marketing, human resources, internal communication, learning&development, agencies, and education.
- Apply expert features in one click with Moovly.
- Create videos and edit with browser-based or drag and drop features without installing software.
- Moovly has over 1.3 million free media, like images, sounds, music, and royalty-free stock videos at no extra charge.
- Besides, it offers 100 million extra media you can try and then purchase.
- You can add your images, music, and videos to create unique clips in style.
- Add text, remove color, add subtitles or generate them, auto-translate your text and subtitles, import PPT files, structure your content, record yourself or your computer screen, edit, mix, etc.
Pros:
- Even if users need to log in, they don’t need to create an account
- Allows users to import content from online sources like Storyblock, Shutterstock, etc.
- It is the number 1 customizable and straightforward solution to making cartoons.
- Use by Colgate-Palmolive, NHS, Teradata, Amadeus, Cisco, Continental, and Logitech.
- The interface is intuitive and user-friendly.
Cons:
- Watermarked videos during the free trial
- To export videos in HD 1080p quality, one needs to purchase one of the available plans.
Renderforest is the best cartoon maker online of the listed five in this article due to the vast library template and large online bandwidth.
Part 2: Cartoon Video Maker for Desktop (Win and Mac)
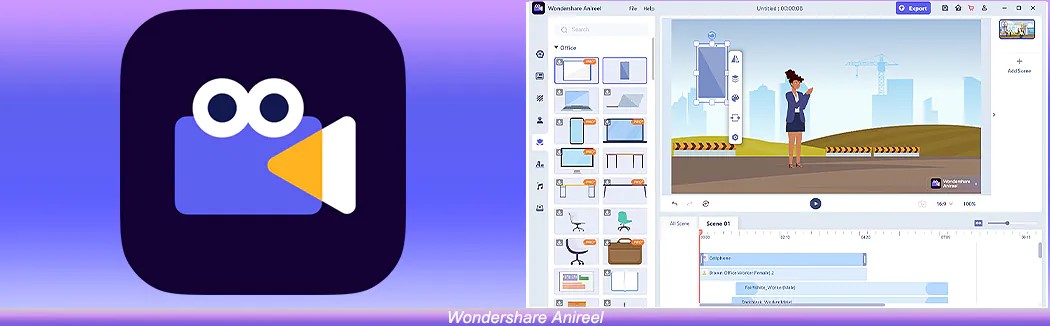
1. Wondershare Anireel
Anireel is one of the top animation software on the internet that allows users to bring their imaginations to life with a huge range of customizable elements and features.
Price: $9.99 per month billed annually and $19.99 monthly
Features:
- 40+ customizable templates
- Top animation software
- Compatible with Windows 11/10/8.1 (64 bit OS)
- Only three steps to an excellent animated video.
- Import images, videos, and sound in almost all formats.
- Create unique avatar, logo images, and more specific to your brand.
- The Deep Learning tech offers quick text-to-speech conversion.
- Animate camera movements, entry and exit effects, motion path, etc.
- Use the one-click option and change scripts to clips.
- Anireel cartoon video makercan lip-sync your characters with perfection.
- Quick and easy drag and drop editing.
Pros:
- It is convenient and simple to use
- Anireel has an intuitive interface
- The cartoon makeroffers a practical and seamless animated video editing
- It comes at an affordable and competitive price
Cons:
- It has a limited amount of assets
- Not suitable for too professional people to use.
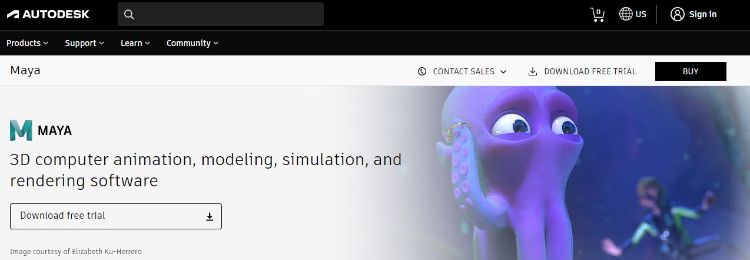
2. Autodesk Maya
Autodesk Maya is one of the best animation tools used to create animation pictures, video games, and add 3D effects in motion pictures. Plus, this cartoon maker is the best if you require a high-quality visual impact.
Price: Free trial, $225 billed monthly.
Features:
- It offers AutoDesk financing for new buyers.
- Maya is the go-to shop for architects, engineers, designers, media, and entertainment.
- Shape 3D objects and add realistic effects with Maya cartoon maker’s NURBS modeling.
- The Integrated Arnold rendering technology lets you view scene changes in real-time.
- Maya has been part of the top movie makers, including the MCU.
- This cartoon video maker offers geometry-based polygon modeling and helps create accurate simulations for visual programming.
- Maya can load and change vast data sets at a faster pace.
Pros:
- It makes complex hand-made animation tasks extremely easy
- Efficient color management
- Allows the creation of realistic effects like cloth simulations and explosions
- 30-day free trial and 30-day money-back guarantee
- Meet deadlines, add fine details to develop even the most complex shots or characters.
- Excellent tool for professionals
Cons:
- The pro is quite expensive
3. Adobe Animate
This is one of the most powerful animation software products on the internet that has been available for decades. It can animate images used for games, film, or online and produce HTML 5, WebGL, or Flash content.
Price: This cartoon creator offers three pricing plans starting at US$24.14/month
Features:
- Excellent for complex animation
- The capability of freehand drawing
- Animate, illustrate, and make 3D typography.
- Import and add vector drawings for further editing.
- Export your work as HTML5 Canvas, WebGL, Flash/Adobe AIR, GIF, or QuickTime movie.
- With the Bone tool, make your cartoon characters fluid and natural.
- Synchronize sounds and music for your project.
- Choose parts of the clip to be animated.
Pros:
- It has Puppeting features
- It is an excellent choice for complex animations
- It includes freehand drawing capability
Cons:
- It is not suitable for beginners
- Other Adobe software may be required while working on a project
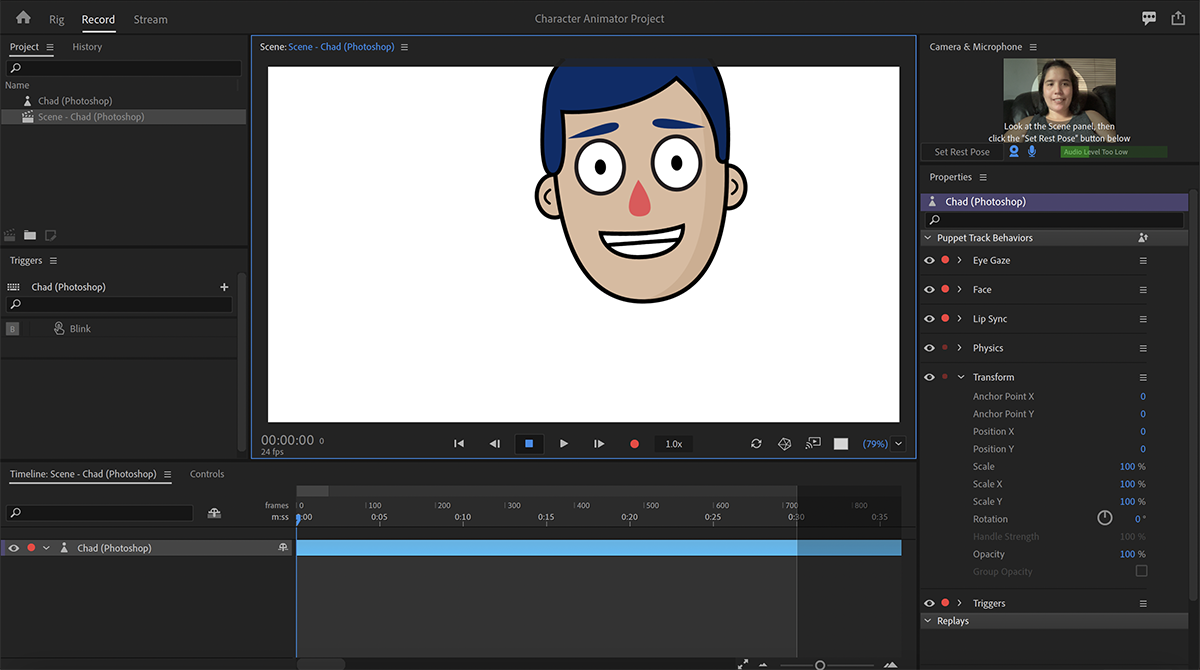
4. Adobe Character Animator
Adobe Character Animator is another type of Adobe’s animation software stack that allows users to use motion to capture and create live animations of their 2D characters.
Price: Adobe Character Animator has two pricing plans starting at US$34,49/month for the first year
Features:
- This product requires other Adobe products to function
- Lots of options to export and import.
- Make your real-life cartoon using the Motion Capture feature in five steps.
- The Avatar will walk, talk, and copy your expressions in real-time.
- Integrate and add assets from other Adobe Creative Cloud apps.
- Auto lip-syncing and real-time facial movement capture.
- Works on iOS and Android.
Pros:
- Easy to replicate real-life movements and expressions with facial tracking.
- There are various import and export options.
Cons:
- It is not a standalone product.
- Users need to have a webcam and microphone to use the motion capture feature.
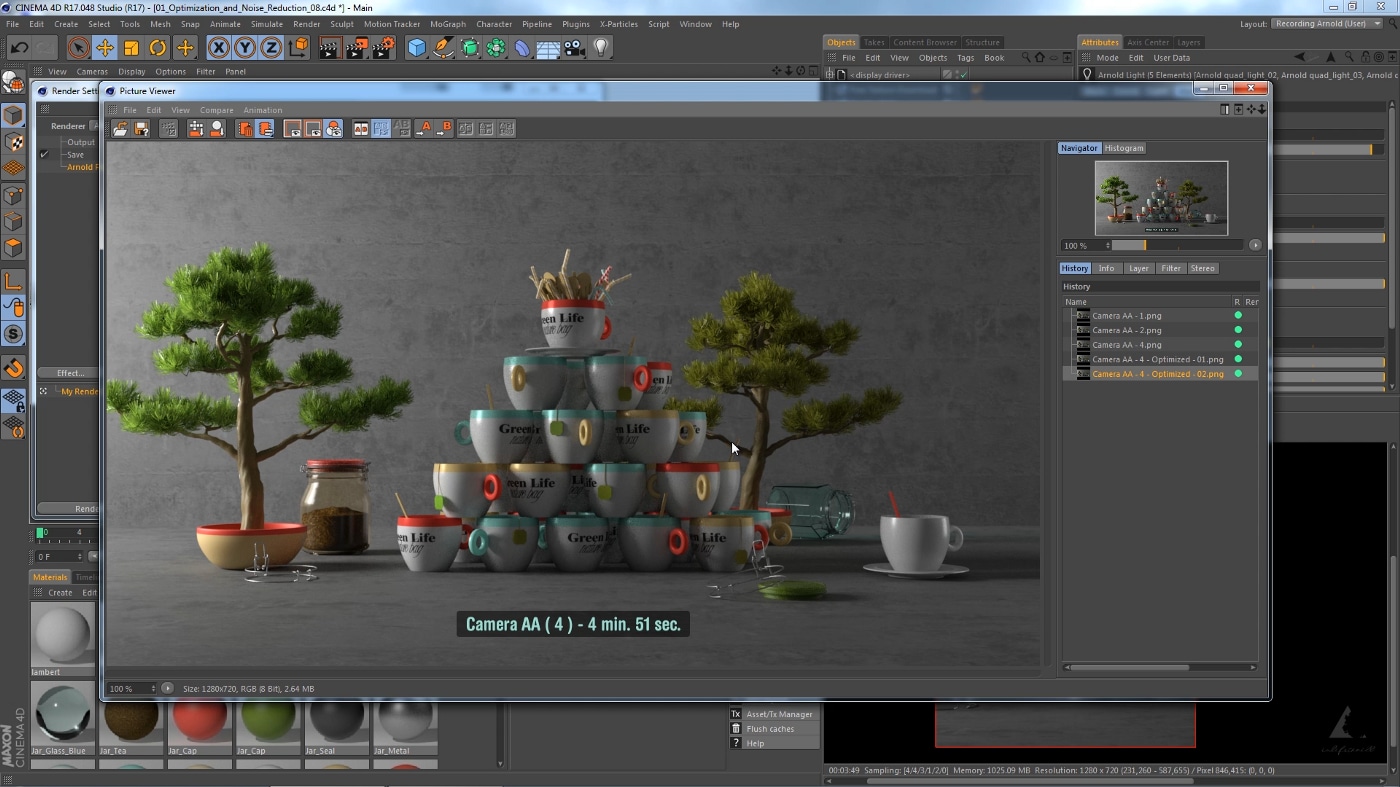
5. Cinema 4D
This cartoon maker has a 3D application interface that offers a keyframe animation, life-like characters, simulation building, object tracking, flexible rig building, cartoon styling, and animation basics.
Price: 4 pricing plans, starting at $99.91/month and $1199.00 billed annually.
Features:
- Keyframing animation effect
- It has a 3d interface
- The ZRemesher for retopology and new tools for modeling add to the new features.
- The Cloth Simulation features help make your cartoon more real.
- It supports CPU rendering with Redshift, which helps you preview, import, and export in high quality.
Pros:
- It is pretty easy to use.
- Lots of exciting design templates are available
- Many editing features are available
Cons
- It is pretty expensive compared to other software
- Not good for beginners
Wondershare Anireel is the best cartoon maker of the five listed in this article. It has lots of advanced features and templates to choose from.
Part 3: How Can I Create My Own Cartoon Using Wondershare Anireel
As stated, Wondershare Anireel has become our top cartoon creator pick due to its affordable pricing, secure server, and ease of use.
So, let us view the simple steps to create your cartoon using the Anireel software.
Step 1: Download, install and Create Character
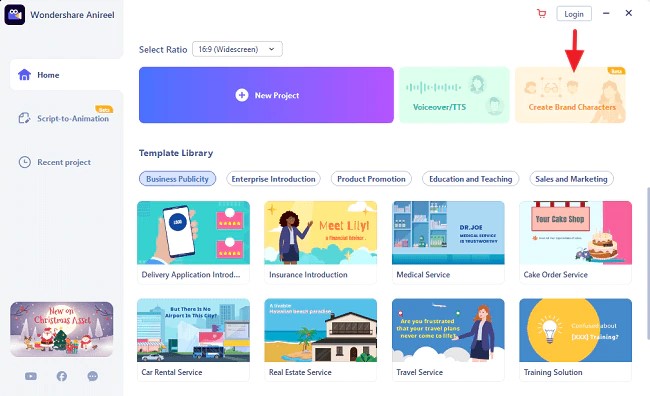
Run Anireel on your device, visit Characters Tab and then click on Create a Character option, or you may click on the Create Brand Characters tab on the home screen.
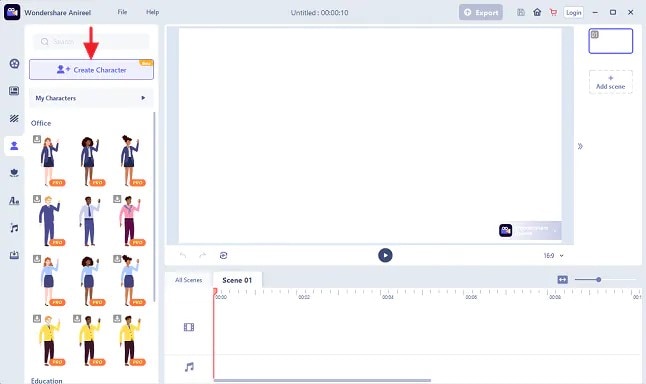
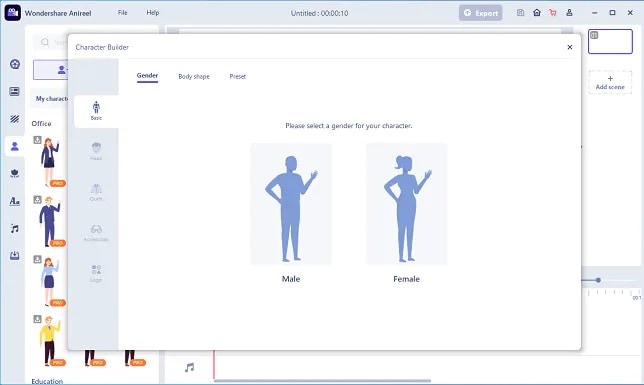
Step 2: Start Creating your Cartoon Character
Choose your gender and body shape, and apply some preset suits.
Now, you can start building facial features using the Head tab to customize the shape of the face, eyes, hairstyle, nose, mouth, ears, and eyebrows.
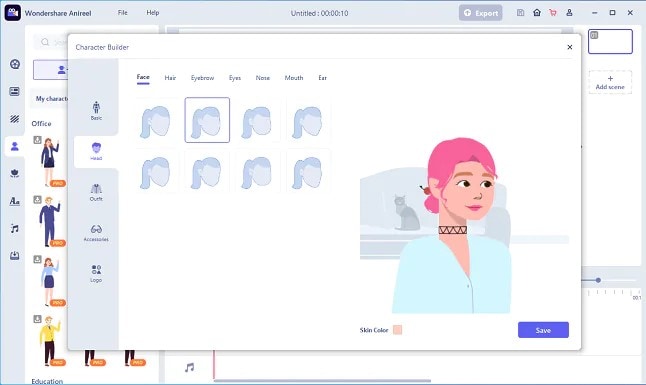
You can also choose to change the skin tone to match yours.
Step 3: Add an Outfit and Accessories
Choose the Outfit tab in Character Builder to select the base layer, outfit, bottom wear, and footwear. Pick what you want to use on your cartoon and keep adding.
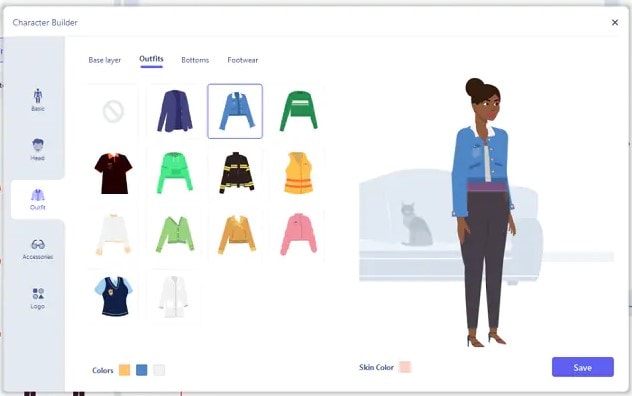
Next, reach the Accessories tab to add glasses, necklaces, and more to your cartoon character.
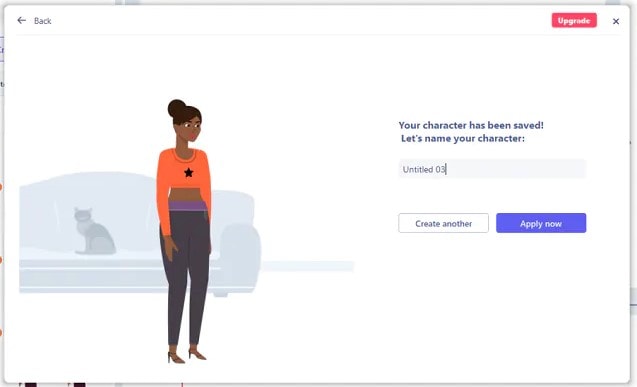
Step 4: Name your Cartoon and Apply
Click on Save and add a name to your cartoon when all done. Finally, click Apply Now to add your cartoon character to your Anireel cartoon maker canvas or My Characters tab.
Part 4: People Also Want to Know
Below are some answers to a few queries about cartoon creators. Let us look at them one by one.
1. What is the best free cartoon maker?
Wondershare Anireel is the best cartoon maker for Android as it is free to use with lots of advanced features and templates to choose from.
2. What is the best app to make a cartoon?
Wondershare Anireel’s Microsoft app is also one of the best cartoon applications that are very flexible and easy to use on the go.
Conclusion
In this article, we explained the best cartoon creators in the industry. Also, we gave the best cartoon video maker from the list. Thus, as you saw, in this report, we have summarized a few essential points regarding cartoon video makers. You learned:
- The cartoon video maker for free that you should know of.
- The ten best cartoon video makers.
- Why are Wondershare Anireel and Renderforest excellent online cartoon video makers?
- How does Anireel, cartoon creator, work?
- Finally, a few FAQs for users to better understand the cartoon maker
Introduction
There are some issues common to the video production process. However, animated or cartoon videos have helped to combat such issues. You do not need to scout for locations, go through a seemingly endless casting process, or rent the pricey equipment. A cartoon is simply a type of animation or an illustration that usually appears in a semi-realistic or an unreal style. In addition, it uses simple, satirical, and humorous drawing language to tell the story.
Although there are restrictions, there are a lot of possibilities cartoon video makers still offer to their users. Therefore, this article will share the top 10 best cartoon video makers online and on PC that you can use before diving into an animated video world.
So, here is what we shall learn about cartoon makers today:
In this article
01 Best 5 Online Cartoon Makers
02 Cartoon Video Maker for Desktop (Win and Mac)
03 How Can I Create My Own Cartoon Using Wondershare Anireel
Part 1: Best 5 Online Cartoon Makers
1. Biteable
Biteable provides a seemingly endless list of template categories to cater to your online media marketing needs. Aside from offering entertaining cartoon-making templates, the platform also allows users to create motion graphics or content, and Facebook covers for their social media channels.
Price: Free, $23 per month, billed annually.
Features:
- Offering library with lots of templates to choose from
- Free to use, except you are looking for additional features
- Five simple steps to an incredible cartoon video
- It has an easily customizable template
Pros
- It is a perfect option for social media managers
- Quickly create entertaining cartoons
- Used by biggies like Amazon, Microsoft, Google, Disney, BBC, Shopify, Samsung, and salesforce.
- Over 9 million users
Cons
- There is a mandatory registration
- There are no audio editing options
- The file-sharing capabilities are limited to YouTube and Facebook
- The download option is disabled in the free version
2. Animaker
With this animated maker, you get access to hundreds of animated characters, maps, and backgrounds. There are six (6) video styles available in this cartoon maker: Typography, Infographic, or 2D for different types of projects.
Price: Free version available. Subscription plans start at $12 per month/billed annually.
Features
- Different video styles, marketing, explainer, or 2D animation.
- Posts itself as the number 1 cartoon maker
- No need for a credit card to start.
- Four-step process; select template, customize it, add music, and download or share.
- 200+ voices, 25+ languages, and loads of customizable options.
- It offers auto-lip sync with advanced animation effects.
- There is a rich selection of 1000+ templates
Pros:
- Superb audio editing options
- Excellent and quick animation tools.
- Over 10 million users so far and still counting.
- Currently used by Amazon, Bosch, HP, Nokia, and Philips.
Cons:
- The monthly fee is pricey
- Account creation is mandatory for a free version
- The free version contains a watermark
3. Vyond
Vyond, the cartoon creator launched in 2007, is probably one of the oldest online cartoon video makers. Additionally, it is still one of the most popular online destinations meant for anyone who wants to create an animated video quickly.
Price: Subscription plans start from $39 per month, billed annually.
Features:
- Perfect for animated video creation
- There is automatic character lip-syncing
- Try it for free before purchasing
- Make videos for training, e-learning, marketing, human resources, etc.
- The maximum duration of the video is 120 minutes
Pros:
- It has a fully customizable template
- There are high-end object and character animated features
- Certified by GDPR, TrustArc, BSI, and CCPA
- A wholesome cartoon makerfor enterprise and individual
- Data security and privacy assurance by BSI, CCPA, and GPDR.
Cons:
- It is quite expensive
- Vyond is not the best option for inexperienced animators
- The features depend on the subscription model
4. Renderforest
This is a famous online cartoon video maker for many purposes. Among the numerous options, the platform offers to its user. They include; 3D explainer videos, logo animations, or professional presentations.
Price: Free version available. Subscription plans start at $16 per month, billed annually.
Features:
- There is an extensive library of templates with numerous options
- Has a large online storage
- Was among the top 100 software companies in 2019.
- Top ranked solution holder for 2020
- Up to 250GB of online storage space
- Use the in-built template to make a story, customize the video, and then export it to share with your friends.
- Amadeus, Bose, BBC, Vodafone, Sony Music, and many others use Renderforest.
Pros:
- Produce videos like a pro
- Comes with an ultimate animation pack.
- Trusted by millions and one of the oldest cartoon makers.
Cons:
- A limited amount of commercial music tracks
- There are modest export options
5. Moovly
With this cartoon maker, users must first log in. However, there is no need to create a new account as you can use your LinkedIn or Google account to sign in quickly.
Price: Free 30-day trial, $24.92 per month billed annually.
Features:
- Moovly is the perfect cartoon video maker for sales&marketing, human resources, internal communication, learning&development, agencies, and education.
- Apply expert features in one click with Moovly.
- Create videos and edit with browser-based or drag and drop features without installing software.
- Moovly has over 1.3 million free media, like images, sounds, music, and royalty-free stock videos at no extra charge.
- Besides, it offers 100 million extra media you can try and then purchase.
- You can add your images, music, and videos to create unique clips in style.
- Add text, remove color, add subtitles or generate them, auto-translate your text and subtitles, import PPT files, structure your content, record yourself or your computer screen, edit, mix, etc.
Pros:
- Even if users need to log in, they don’t need to create an account
- Allows users to import content from online sources like Storyblock, Shutterstock, etc.
- It is the number 1 customizable and straightforward solution to making cartoons.
- Use by Colgate-Palmolive, NHS, Teradata, Amadeus, Cisco, Continental, and Logitech.
- The interface is intuitive and user-friendly.
Cons:
- Watermarked videos during the free trial
- To export videos in HD 1080p quality, one needs to purchase one of the available plans.
Renderforest is the best cartoon maker online of the listed five in this article due to the vast library template and large online bandwidth.
Part 2: Cartoon Video Maker for Desktop (Win and Mac)
1. Wondershare Anireel
Anireel is one of the top animation software on the internet that allows users to bring their imaginations to life with a huge range of customizable elements and features.
Price: $9.99 per month billed annually and $19.99 monthly
Features:
- 40+ customizable templates
- Top animation software
- Compatible with Windows 11/10/8.1 (64 bit OS)
- Only three steps to an excellent animated video.
- Import images, videos, and sound in almost all formats.
- Create unique avatar, logo images, and more specific to your brand.
- The Deep Learning tech offers quick text-to-speech conversion.
- Animate camera movements, entry and exit effects, motion path, etc.
- Use the one-click option and change scripts to clips.
- Anireel cartoon video makercan lip-sync your characters with perfection.
- Quick and easy drag and drop editing.
Pros:
- It is convenient and simple to use
- Anireel has an intuitive interface
- The cartoon makeroffers a practical and seamless animated video editing
- It comes at an affordable and competitive price
Cons:
- It has a limited amount of assets
- Not suitable for too professional people to use.
2. Autodesk Maya
Autodesk Maya is one of the best animation tools used to create animation pictures, video games, and add 3D effects in motion pictures. Plus, this cartoon maker is the best if you require a high-quality visual impact.
Price: Free trial, $225 billed monthly.
Features:
- It offers AutoDesk financing for new buyers.
- Maya is the go-to shop for architects, engineers, designers, media, and entertainment.
- Shape 3D objects and add realistic effects with Maya cartoon maker’s NURBS modeling.
- The Integrated Arnold rendering technology lets you view scene changes in real-time.
- Maya has been part of the top movie makers, including the MCU.
- This cartoon video maker offers geometry-based polygon modeling and helps create accurate simulations for visual programming.
- Maya can load and change vast data sets at a faster pace.
Pros:
- It makes complex hand-made animation tasks extremely easy
- Efficient color management
- Allows the creation of realistic effects like cloth simulations and explosions
- 30-day free trial and 30-day money-back guarantee
- Meet deadlines, add fine details to develop even the most complex shots or characters.
- Excellent tool for professionals
Cons:
- The pro is quite expensive
3. Adobe Animate
This is one of the most powerful animation software products on the internet that has been available for decades. It can animate images used for games, film, or online and produce HTML 5, WebGL, or Flash content.
Price: This cartoon creator offers three pricing plans starting at US$24.14/month
Features:
- Excellent for complex animation
- The capability of freehand drawing
- Animate, illustrate, and make 3D typography.
- Import and add vector drawings for further editing.
- Export your work as HTML5 Canvas, WebGL, Flash/Adobe AIR, GIF, or QuickTime movie.
- With the Bone tool, make your cartoon characters fluid and natural.
- Synchronize sounds and music for your project.
- Choose parts of the clip to be animated.
Pros:
- It has Puppeting features
- It is an excellent choice for complex animations
- It includes freehand drawing capability
Cons:
- It is not suitable for beginners
- Other Adobe software may be required while working on a project
4. Adobe Character Animator
Adobe Character Animator is another type of Adobe’s animation software stack that allows users to use motion to capture and create live animations of their 2D characters.
Price: Adobe Character Animator has two pricing plans starting at US$34,49/month for the first year
Features:
- This product requires other Adobe products to function
- Lots of options to export and import.
- Make your real-life cartoon using the Motion Capture feature in five steps.
- The Avatar will walk, talk, and copy your expressions in real-time.
- Integrate and add assets from other Adobe Creative Cloud apps.
- Auto lip-syncing and real-time facial movement capture.
- Works on iOS and Android.
Pros:
- Easy to replicate real-life movements and expressions with facial tracking.
- There are various import and export options.
Cons:
- It is not a standalone product.
- Users need to have a webcam and microphone to use the motion capture feature.
5. Cinema 4D
This cartoon maker has a 3D application interface that offers a keyframe animation, life-like characters, simulation building, object tracking, flexible rig building, cartoon styling, and animation basics.
Price: 4 pricing plans, starting at $99.91/month and $1199.00 billed annually.
Features:
- Keyframing animation effect
- It has a 3d interface
- The ZRemesher for retopology and new tools for modeling add to the new features.
- The Cloth Simulation features help make your cartoon more real.
- It supports CPU rendering with Redshift, which helps you preview, import, and export in high quality.
Pros:
- It is pretty easy to use.
- Lots of exciting design templates are available
- Many editing features are available
Cons
- It is pretty expensive compared to other software
- Not good for beginners
Wondershare Anireel is the best cartoon maker of the five listed in this article. It has lots of advanced features and templates to choose from.
Part 3: How Can I Create My Own Cartoon Using Wondershare Anireel
As stated, Wondershare Anireel has become our top cartoon creator pick due to its affordable pricing, secure server, and ease of use.
So, let us view the simple steps to create your cartoon using the Anireel software.
Step 1: Download, install and Create Character
Run Anireel on your device, visit Characters Tab and then click on Create a Character option, or you may click on the Create Brand Characters tab on the home screen.
Step 2: Start Creating your Cartoon Character
Choose your gender and body shape, and apply some preset suits.
Now, you can start building facial features using the Head tab to customize the shape of the face, eyes, hairstyle, nose, mouth, ears, and eyebrows.
You can also choose to change the skin tone to match yours.
Step 3: Add an Outfit and Accessories
Choose the Outfit tab in Character Builder to select the base layer, outfit, bottom wear, and footwear. Pick what you want to use on your cartoon and keep adding.
Next, reach the Accessories tab to add glasses, necklaces, and more to your cartoon character.
Step 4: Name your Cartoon and Apply
Click on Save and add a name to your cartoon when all done. Finally, click Apply Now to add your cartoon character to your Anireel cartoon maker canvas or My Characters tab.
Part 4: People Also Want to Know
Below are some answers to a few queries about cartoon creators. Let us look at them one by one.
1. What is the best free cartoon maker?
Wondershare Anireel is the best cartoon maker for Android as it is free to use with lots of advanced features and templates to choose from.
2. What is the best app to make a cartoon?
Wondershare Anireel’s Microsoft app is also one of the best cartoon applications that are very flexible and easy to use on the go.
Conclusion
In this article, we explained the best cartoon creators in the industry. Also, we gave the best cartoon video maker from the list. Thus, as you saw, in this report, we have summarized a few essential points regarding cartoon video makers. You learned:
- The cartoon video maker for free that you should know of.
- The ten best cartoon video makers.
- Why are Wondershare Anireel and Renderforest excellent online cartoon video makers?
- How does Anireel, cartoon creator, work?
- Finally, a few FAQs for users to better understand the cartoon maker
7 Ways to Make GIF From Videos on Mac
GIFs are being used more than ever today. Thanks to their prevalence on social media. You’ll see everything from cute kittens to cheeky celebrities, most of which will put a big smile on your face.
In addition to GIFs used for recreational purposes, there are those used for commercial ones. For example, they are good for demonstrating the steps of a process. You can even use them in articles to give you a visual aid that goes with the written word.
Whether you want to create a GIF for business or pleasure, it doesn’t have to take more than a few minutes of your time. So, here are the best GIF makers for Mac to try.
BEST FREE GIF MAKER ON MAC - FILMORA VIDEO EDITOR
Supported OS: Windows and Mac
Filmora Video Editor is used by the vast majority of inexperienced creators. Drag-and-drop allows you to add video clips and images. It contains over 130 various types of pre-set titles and text. You can also easily integrate your company’s logo into your videos.
Editing GIF files with Wondershare Filmora is quick and easy: first, import your GIF or video into the media library. Second, drag your GIFs/videos/images to the timeline after that. After you’ve placed your video to the timeline, you can edit it with a variety of tools.
For Win 7 or later (64-bit)
For macOS 10.14 or later
Features:
3D Video Editing
Media Library
Video Capture
Video Stabilization
Pros:
Expansive video editing features
Professional appearance for an affordable price
User-friendly interface
Cons:
The video saving process may lag
Bug fixes may take time to resolve
Watermarks on the free version
Premade templates lack a professional feel
Steps On How To Make GIF In Filmora
- Import Media Files
The very first task for users is to import some editable video files or collections of photos to the timeline of Wondershare Filmora.

- Drag To Timeline

- Edit Media Files

- Add Text Effect To Gif Files

- Save And Export

SMART GIF MAKER
Supported OS: Windows and Mac
Smart GIF Maker is some other loose however extraordinarily beneficial app for Mac users. To make the procedure feasible, the creators used an incredibly simple user interface which is easy like any other popular app. With this app, users can without difficulty create new GIFs even as additionally enhancing current GIFs. Smart GIF Maker makes it easy to feature or dispose of frames from a GIF or maybe a photo.
Users may even customize the loop counts and body periods for every GIF they create. Simply drag and drop the photographs right into a body even as converting the order of the frames to your liking, and you may have a GIF prepared in no time.
Users can set the duration of each frame in the app at the same time. It even handles previews much better than it used to. In order to make things easier for users, the app asks whether or not to import the created file.
Features:
Simple UI
- Easily create new, or modify existing gifs.
- Easily add and remove frames to a gif.
- Click frames to modify images, or drag images to the frames.
- Preview gifs before exporting them.
Drag and drop
- Drag images from Finder to add to the gif.
- Drag frames inside the app to change the order.
Import and export
- Import gifs or movies, or create gifs entirely from individual images.
- Imports .gif, .mov and .mp4.
- Add .png, .jpg, .bmp, .tiff or .gif images to the gif.
- Export workspace as .gif.
Settings
- Set the frame duration of an individual or all frames.
- Set the loop counter of the gif.
Editor
- Edit frames in the gif using Paint-like features.
- Draw directly on frames, with varying colors and brush sizes.
- Use eraser and eyedropper tools to make editing easier!
Extras
- Reverse gifs,
- Set all frame durations at once.
Cons:
- Restricted features for free accounts
- Slow conversion process
Steps On How To Make GIF In Smart GIF Maker
- Import Your Video

When you import your video, the app breaks it down into frames you can then work with, remove, or edit. You can also use images with the app and import them with the same type of editing options.

- With each frame, you can change the drawing size, use an eraser tool, adjust the background color, and use the eyedropper for matching colors.


- After you edit your frames, you can set the time delay for each and the number of loops on the main screen. When you finish creating your GIF, hit the Preview button at the top and then export it to your computer if you’re happy with it.
GIPHY CAPTURE
Supported OS: Mac and Windows
Because of its simplicity and ease of use, GIPHY Capture is one of the most popular and well-liked apps for creating GIFs. The app is free and allows users to capture anything on their screen and convert it into a GIF lasting up to 30 seconds. A couple of clicks are all that is required to complete the task; one click initiates the process, while another click terminates it. All that remains is to add the appropriate captions and adjust the GIF’s export size, and you’re done. If you are a professional, the app even allows you to make more precise edits and trim a clip at specific time frames.
Once you’ve completed all of this and are satisfied with the end result, the next step is simple. Users can choose to save the GIF to their GIPHY account or share it directly with their friends and family.
Features:
Capture Instantly
- Create your GIF with just a couple of clicks
- Click to start, click to stop
- Capture GIFs up to 30 seconds long
Edit Precisely
- Super simple editing lets you get creative, fast
- Pick which kind of loop you like best
- Adjust the frame rate to your liking
- Animated captions: add them, style them, animate them
- Preview the file size of your GIF before saving
Quickly Save and Share
- Email your friends your favorite videos as GIFs
Simple Upload To Giphy
- Hold onto your favorite GIF creations forever
- Easily access them whenever you want
- Share your GIFs on Facebook, Tweet them to Twitter, or send them on Facebook Messenger
Cons:
● App Notifications are not working properly
● Audio / video loading problem
● App installation issues
● Login issues or account related issues
Steps On How To Make Gif In Giphy Capture
1. Once you’ve opened GIPHY Capture - open up your browser, video, or whatever you want to record. Adjust the size of your GIPHY capture frame by grabbing any of the sides or corners and stretching to your desired frame size

After your frame is set up, you’ll want to record a clip by pressing the red circle button. After 30-seconds (or less if you stop the recording sooner) the raw footage will be saved on the bottom of your GIPHY Capture window. This footage will be saved indefinitely, so if you close the app and reopen it at a later date you can pick up where you left off. However, if you delete the GIPHY Capture app from your computer, your videos will be deleted too.
You can take this 30-second clip and edit the length. It’s best to keep the GIF between 2-6 seconds if the intention is for the GIF to be shared in messaging apps and on the web. If you are making a “how-to” or tutorial GIF for an app or workflow you may need to make the length longer than 6 seconds.
You can choose to edit the loop type, pixel size, and frame rate. Changing these can affect the quality and file size of your GIF. In most cases leaving the standard preset options works best.

Under the Captions tab, you can easily add captions to your GIFs. Your captions can either have the regular or italicized text and come with a few preset options for changing the text color. You can edit the animation of the caption, just in case you want it to fade or drop into the frame. You can even edit the duration of the caption in your GIF. If you have a 6-second GIF but only want the caption to be in the frame for the final 2 seconds you can do so by editing the start and end time of the caption.
Now that you’ve created your GIF you can upload it directly to your GIPHY account and allow people to share it, provided you have a branded GIPHY channel.
If you don’t want to upload your new creation directly to GIPHY, you can download it as a .gif or .mp4 file locally to your computer.
GIFROCKET
Supported OS: Mac
GifRocket is the only downloadable record converter for developing GIFs. The only disadvantage is that it is only available to Mac users. This program is used to convert a video file to GIF format. That means you must already have the video file created. You can use a small clip from a previous video that you made or a clip that you downloaded. After you’ve downloaded and installed GifRocket on your computer, simply drag and drop your video file over the GifRocket tool window. The converter will begin working, and you will have a perfect GIF in a matter of seconds.
The production value must be the same as a full-length marketing video but the file size must be smaller, this tool is ideal for creating banner videos for site pages.
Features:
- Intuitive interface
- Change quality and file size of the outputted file
Cons:
- Lack of features like crop and frame rate, only available for Mac.
Steps On How To Make Gif In GIF Rocket
- After you download the app, open it, and there you will see a blank canvas. You’re supposed to drag the file here to start the conversion to GIF. But not so fast. First, click the Settings button. Here you’ll get three fields.

Enter the start and endpoint. Remember this is in the Hours: Minutes: Seconds layout so if your video is short, don’t forget to add zeros for the hours or minutes mark, or else the GIF won’t work.
Second, select the width of the GIF you want to create. The default is 320px. You can take it up to 500 or 600 if you’re dealing with a widescreen video but if you make the GIF too wide the size of the resulting file is also going to go up.
The last setting is quality. There is a slider and frankly, it’s not that helpful. There are only three points on it. I found the middle point, 50% to work the best. Once you’ve got the settings the way you want, click X, drag in the file and wait for Gifrocket to do its thing.

BEST PAID GIF MAKER ON MAC
PICGIF
Supported OS: Mac
PicGIF is yet another app for Mac users to express their contemporary entertainment in the form of a GIF. When it comes to gif creation, the app is quite versatile, and the quality of a created gif is truly astounding. PicGIF generates exceptionally eye-catching gifs with advanced high-satisfaction and stability, as opposed to other apps’ commonly crappy and blurry gifs.
You can make GIFs from movies or from a collection of photographs. All you have to do is select all of the photographs, adjust the fullness, and then select the rate at which the frames will flip. It’s a simple, easy-to-use, and brief app, but the lack of right cropping functionality can be a deterrent for users looking for it.
Features:
- Support a vast number of file formats
- Support hundreds of image formats like JPEG, TIFF, BMP, PNG, TGA, RAW, PIC, etc., and any image size.
- Support almost all common video formats: MOV, MPEG, MP4, M4V, 3GP, AVI, and more.
- Support combining multiple formats – images, GIFs, and videos into a new single GIF.
Pros:
- The PicGIF software is safe to use
- The support of PicGIF is good
Cons:
- Requires OS X 10.7 Lion or later
Steps On How To Make Gif In Pic GIF
- Importing
The picGIF app accepts many different image formats and all common video formats. The app says you can drag and drop onto the pop-up screen on opening the app, but it wouldn’t allow me to do this. However, I was able to work around it by just choosing “Add Photo” or “Add Video” in the File menu, or by doing “Command + O” or “Command + D”, respectively. Even though it says “Add Photo,” you can add multiple files at once.

2. Customization of Pictures
Once you have added the photos, you have several options to customize the gif. Under the “Properties” menu in PicGIF, you can change the size of the output or keep with the default of 360 x 240 pixels and can also choose whether they will be presented as portrait or landscape. At the bottom, you can also choose whether you want it auto optimized for quality or whether you want better quality, which will of course take longer.
Next is deciding how it will handle the photos if they don’t match the exact size of the output, whether you want them sized to fit, stretched, etc., and to choose a background color for when they don’t fit. Speed is the next option to be determined, either leave it on Auto or set the speed yourself. The photos will either be in the sequence you added them in or you can choose to have it go in reverse.


In the “Effects” menu, you can choose among popular options – Original, Vintage, Marcato, and B&W. After you make your choice, you can set the bars for Saturation, Hue, Exposure, Contrast, and Brightness. These are much like you would find in your standard photo apps
Hit the play button to test your GIF, and if it’s to your liking, click “Create GIF”. It only took seconds to create my GIF, but I only had six pictures and left it at the default size.
- Customization of Videos
There aren’t that many options for creating video GIFs. There are, but you need to buy the full version app for $4.99. For this price, you will be able to trim the video as you wish, add text, and add stickers. By sticking with the free version you are limited to either having it autoplay or changing the frames per second. You can also import existing GIFs and edit them. Saving this gif took longer than with the photos, but I was using a longer video.

GIFABLE
Supported OS: Mac
Gifable is another macOS application that enables user to create GIFs as well as save the display screen. This software is simple to use. It first takes a screenshot of the display and converts it to GIF format. This tool currently transmits data at a rate of 12 frames per second. Gifable advanced feature is that it can copy the GIF to the clipboard for clean copy and paste operations. However, there is a help menu that instructs newcomers on how to use the software. This device is ideal for blogging, tutorials, sharing with colleagues, and social media
Features:
- Currently records at 12 fps
- Shows a preview of the gif when the recording is finished
- Ability to copy the gif to your clipboard for easy copy and paste
- Quickly locate the file you created with a find in finder button
- Help menu to show you how to use Gifable
Pros:
- Click and drag to record
- Records automatically
Cons:
- Not compatible with all operating systems
- Low fps recording
Steps On How To Make Gif In Gifable
- Click the Gifable icon in your menu bar, and select record.

- Click and drag your mouse over the area you would like to record.

- Recording starts automatically!
- Click the Gifable icon, then stop recording, to stop the recording.

GIFOX
Supported OS: Mac
Gifox is yet another cutting-edge GIF generator with an appealing user interface. It is extremely simple to use and has a plethora of wonderful features. The app allows you to record your screen and then convert it to GIFs. It includes a sophisticated compression option that allows customers to tailor the output high-satisfactory and size. Gifox additionally permits you to pick the FPS for its animations.
Gifox is a cleverly specified and expertly crafted app that captures your display screen and converts it into lively gifs – a wonderful opportunity to static pix and huge videos. It’s the ideal companion for:
- Product demonstrations and micro-screencasts
- Reporting bugs and providing entertaining instructions
- Capturing precise video on the display screen
Features:
- Gifox allows us not to convert video clips, but we can also capture what is displayed on the screen, either full screen or a part of it.
- We can set the number of fps in each screen recording.
- We can also adjust the number of fps of playback when we convert the video.
- When performing video compression, we can adjust the number of colors we want to use in the conversion
- When recording the screen of our Mac to make a GIF, we can make use of keyboard shortcuts to start and stop recording.
- Once we have created the GIF, we can share it by dragging it to other apps, uploading it directly to our storage service, or even from Imgur.
Pros:
- It is vastly easy to use compared to many other apps in the market.
- It comes with the most dynamic interface.
Cons:
- File sizes of the produced GIFs are big in some cases, which leads to a slow upload on websites with huge traffic.
Steps On How To Make Gif In Gifox
1. Record Your Screen
After clicking the fox icon in the menu bar, you can find the buttons to record the screen on the left side of the interface.

Gifox provides two modes for recording the screen – area and window. This means you can record part of the window or choose to record the full window.
For an area recording, Gifox allows you the freedom to select the area. You can select any area by dragging your mouse from corner to corner.


When using the window recording mode, one great feature is that it doesn’t matter if several windows are overlapping. You can just select the one you want to record, and Gifox will ignore the other window.
Gifox also offers shortcuts so that you don’t have to always open the icon from the menu bar. This makes it even easier to use as a daily utility.

2. Flexible Setting
Gifox is not only easy to use but also a very flexible application. Here are just some of the options that you can customize:
- Mouse cursor appearance
- Window shadow
- Desktop background recording fps
- Playback fps
- Repeat count and pause
- Max colors
- Bayer scale
All of these are available in the Gifox settings window.

3. Compress
If you’re sharing a GIF on the internet, you’re going to like it to be of good quality but with the smallest file size possible. Gifox makes this possible. Available in preferences, the compress settings allow you to have full control over the quality of the GIF. You can change the color count, the palette, the dither, and the bayer scale. This eliminates the need to install a second program just for compressing your file.
WHICH SHOULD I CHOOSE: FREE OR PAID GIF MAKER ON MAC?
If the main reason you want this powerful and advanced GIF software is to create GIFs from videos, you should invest in the advanced version. Since there is not much you can do with videos and the free version.
However, if you want to make GIFs from photos, this free or open-source version will suffice.
FAQS ABOUT MAKING GIFS FROM VIDEO
- What tip can I have in editing GIFs?
You don’t need to make your GIF colorful. You need to use fewer colors. The fewer colors your GIF has, the more fun it is. Because if your GIF has a lot of colors, you will have a problem exporting it.
- Is it possible to export GIFs without watermarks?
Yes, some GIF editors have a feature to remove the watermarks using a free account. However, there are also GIF editors where you need to pay a flat amount first before exporting GIF without watermarks.
- Can I use Video Converter Ultimate offline to edit a GIF?
Absolutely, yes. Even without internet access, you can modify and quickly convert your GIF in no time.
Conclusion:
If the proper GIF editor is used, animated GIFs can be edited with little effort. There are GIF software programs that are highly recommended by users due to their ease of use and simple interface. It’s time to give them a shot!
For macOS 10.14 or later
Features:
3D Video Editing
Media Library
Video Capture
Video Stabilization
Pros:
Expansive video editing features
Professional appearance for an affordable price
User-friendly interface
Cons:
The video saving process may lag
Bug fixes may take time to resolve
Watermarks on the free version
Premade templates lack a professional feel
Steps On How To Make GIF In Filmora
- Import Media Files
The very first task for users is to import some editable video files or collections of photos to the timeline of Wondershare Filmora.
- Drag To Timeline
- Edit Media Files
- Add Text Effect To Gif Files
- Save And Export
SMART GIF MAKER
Supported OS: Windows and Mac
Smart GIF Maker is some other loose however extraordinarily beneficial app for Mac users. To make the procedure feasible, the creators used an incredibly simple user interface which is easy like any other popular app. With this app, users can without difficulty create new GIFs even as additionally enhancing current GIFs. Smart GIF Maker makes it easy to feature or dispose of frames from a GIF or maybe a photo.
Users may even customize the loop counts and body periods for every GIF they create. Simply drag and drop the photographs right into a body even as converting the order of the frames to your liking, and you may have a GIF prepared in no time.
Users can set the duration of each frame in the app at the same time. It even handles previews much better than it used to. In order to make things easier for users, the app asks whether or not to import the created file.
Features:
Simple UI
- Easily create new, or modify existing gifs.
- Easily add and remove frames to a gif.
- Click frames to modify images, or drag images to the frames.
- Preview gifs before exporting them.
Drag and drop
- Drag images from Finder to add to the gif.
- Drag frames inside the app to change the order.
Import and export
- Import gifs or movies, or create gifs entirely from individual images.
- Imports .gif, .mov and .mp4.
- Add .png, .jpg, .bmp, .tiff or .gif images to the gif.
- Export workspace as .gif.
Settings
- Set the frame duration of an individual or all frames.
- Set the loop counter of the gif.
Editor
- Edit frames in the gif using Paint-like features.
- Draw directly on frames, with varying colors and brush sizes.
- Use eraser and eyedropper tools to make editing easier!
Extras
- Reverse gifs,
- Set all frame durations at once.
Cons:
- Restricted features for free accounts
- Slow conversion process
Steps On How To Make GIF In Smart GIF Maker
- Import Your Video
When you import your video, the app breaks it down into frames you can then work with, remove, or edit. You can also use images with the app and import them with the same type of editing options.
- With each frame, you can change the drawing size, use an eraser tool, adjust the background color, and use the eyedropper for matching colors.
- After you edit your frames, you can set the time delay for each and the number of loops on the main screen. When you finish creating your GIF, hit the Preview button at the top and then export it to your computer if you’re happy with it.
GIPHY CAPTURE
Supported OS: Mac and Windows
Because of its simplicity and ease of use, GIPHY Capture is one of the most popular and well-liked apps for creating GIFs. The app is free and allows users to capture anything on their screen and convert it into a GIF lasting up to 30 seconds. A couple of clicks are all that is required to complete the task; one click initiates the process, while another click terminates it. All that remains is to add the appropriate captions and adjust the GIF’s export size, and you’re done. If you are a professional, the app even allows you to make more precise edits and trim a clip at specific time frames.
Once you’ve completed all of this and are satisfied with the end result, the next step is simple. Users can choose to save the GIF to their GIPHY account or share it directly with their friends and family.
Features:
Capture Instantly
- Create your GIF with just a couple of clicks
- Click to start, click to stop
- Capture GIFs up to 30 seconds long
Edit Precisely
- Super simple editing lets you get creative, fast
- Pick which kind of loop you like best
- Adjust the frame rate to your liking
- Animated captions: add them, style them, animate them
- Preview the file size of your GIF before saving
Quickly Save and Share
- Email your friends your favorite videos as GIFs
Simple Upload To Giphy
- Hold onto your favorite GIF creations forever
- Easily access them whenever you want
- Share your GIFs on Facebook, Tweet them to Twitter, or send them on Facebook Messenger
Cons:
● App Notifications are not working properly
● Audio / video loading problem
● App installation issues
● Login issues or account related issues
Steps On How To Make Gif In Giphy Capture
1. Once you’ve opened GIPHY Capture - open up your browser, video, or whatever you want to record. Adjust the size of your GIPHY capture frame by grabbing any of the sides or corners and stretching to your desired frame size
After your frame is set up, you’ll want to record a clip by pressing the red circle button. After 30-seconds (or less if you stop the recording sooner) the raw footage will be saved on the bottom of your GIPHY Capture window. This footage will be saved indefinitely, so if you close the app and reopen it at a later date you can pick up where you left off. However, if you delete the GIPHY Capture app from your computer, your videos will be deleted too.
You can take this 30-second clip and edit the length. It’s best to keep the GIF between 2-6 seconds if the intention is for the GIF to be shared in messaging apps and on the web. If you are making a “how-to” or tutorial GIF for an app or workflow you may need to make the length longer than 6 seconds.
You can choose to edit the loop type, pixel size, and frame rate. Changing these can affect the quality and file size of your GIF. In most cases leaving the standard preset options works best.
Under the Captions tab, you can easily add captions to your GIFs. Your captions can either have the regular or italicized text and come with a few preset options for changing the text color. You can edit the animation of the caption, just in case you want it to fade or drop into the frame. You can even edit the duration of the caption in your GIF. If you have a 6-second GIF but only want the caption to be in the frame for the final 2 seconds you can do so by editing the start and end time of the caption.
Now that you’ve created your GIF you can upload it directly to your GIPHY account and allow people to share it, provided you have a branded GIPHY channel.
If you don’t want to upload your new creation directly to GIPHY, you can download it as a .gif or .mp4 file locally to your computer.
GIFROCKET
Supported OS: Mac
GifRocket is the only downloadable record converter for developing GIFs. The only disadvantage is that it is only available to Mac users. This program is used to convert a video file to GIF format. That means you must already have the video file created. You can use a small clip from a previous video that you made or a clip that you downloaded. After you’ve downloaded and installed GifRocket on your computer, simply drag and drop your video file over the GifRocket tool window. The converter will begin working, and you will have a perfect GIF in a matter of seconds.
The production value must be the same as a full-length marketing video but the file size must be smaller, this tool is ideal for creating banner videos for site pages.
Features:
- Intuitive interface
- Change quality and file size of the outputted file
Cons:
- Lack of features like crop and frame rate, only available for Mac.
Steps On How To Make Gif In GIF Rocket
- After you download the app, open it, and there you will see a blank canvas. You’re supposed to drag the file here to start the conversion to GIF. But not so fast. First, click the Settings button. Here you’ll get three fields.
Enter the start and endpoint. Remember this is in the Hours: Minutes: Seconds layout so if your video is short, don’t forget to add zeros for the hours or minutes mark, or else the GIF won’t work.
Second, select the width of the GIF you want to create. The default is 320px. You can take it up to 500 or 600 if you’re dealing with a widescreen video but if you make the GIF too wide the size of the resulting file is also going to go up.
The last setting is quality. There is a slider and frankly, it’s not that helpful. There are only three points on it. I found the middle point, 50% to work the best. Once you’ve got the settings the way you want, click X, drag in the file and wait for Gifrocket to do its thing.
BEST PAID GIF MAKER ON MAC
PICGIF
Supported OS: Mac
PicGIF is yet another app for Mac users to express their contemporary entertainment in the form of a GIF. When it comes to gif creation, the app is quite versatile, and the quality of a created gif is truly astounding. PicGIF generates exceptionally eye-catching gifs with advanced high-satisfaction and stability, as opposed to other apps’ commonly crappy and blurry gifs.
You can make GIFs from movies or from a collection of photographs. All you have to do is select all of the photographs, adjust the fullness, and then select the rate at which the frames will flip. It’s a simple, easy-to-use, and brief app, but the lack of right cropping functionality can be a deterrent for users looking for it.
Features:
- Support a vast number of file formats
- Support hundreds of image formats like JPEG, TIFF, BMP, PNG, TGA, RAW, PIC, etc., and any image size.
- Support almost all common video formats: MOV, MPEG, MP4, M4V, 3GP, AVI, and more.
- Support combining multiple formats – images, GIFs, and videos into a new single GIF.
Pros:
- The PicGIF software is safe to use
- The support of PicGIF is good
Cons:
- Requires OS X 10.7 Lion or later
Steps On How To Make Gif In Pic GIF
- Importing
The picGIF app accepts many different image formats and all common video formats. The app says you can drag and drop onto the pop-up screen on opening the app, but it wouldn’t allow me to do this. However, I was able to work around it by just choosing “Add Photo” or “Add Video” in the File menu, or by doing “Command + O” or “Command + D”, respectively. Even though it says “Add Photo,” you can add multiple files at once.
2. Customization of Pictures
Once you have added the photos, you have several options to customize the gif. Under the “Properties” menu in PicGIF, you can change the size of the output or keep with the default of 360 x 240 pixels and can also choose whether they will be presented as portrait or landscape. At the bottom, you can also choose whether you want it auto optimized for quality or whether you want better quality, which will of course take longer.
Next is deciding how it will handle the photos if they don’t match the exact size of the output, whether you want them sized to fit, stretched, etc., and to choose a background color for when they don’t fit. Speed is the next option to be determined, either leave it on Auto or set the speed yourself. The photos will either be in the sequence you added them in or you can choose to have it go in reverse.
In the “Effects” menu, you can choose among popular options – Original, Vintage, Marcato, and B&W. After you make your choice, you can set the bars for Saturation, Hue, Exposure, Contrast, and Brightness. These are much like you would find in your standard photo apps
Hit the play button to test your GIF, and if it’s to your liking, click “Create GIF”. It only took seconds to create my GIF, but I only had six pictures and left it at the default size.
- Customization of Videos
There aren’t that many options for creating video GIFs. There are, but you need to buy the full version app for $4.99. For this price, you will be able to trim the video as you wish, add text, and add stickers. By sticking with the free version you are limited to either having it autoplay or changing the frames per second. You can also import existing GIFs and edit them. Saving this gif took longer than with the photos, but I was using a longer video.
GIFABLE
Supported OS: Mac
Gifable is another macOS application that enables user to create GIFs as well as save the display screen. This software is simple to use. It first takes a screenshot of the display and converts it to GIF format. This tool currently transmits data at a rate of 12 frames per second. Gifable advanced feature is that it can copy the GIF to the clipboard for clean copy and paste operations. However, there is a help menu that instructs newcomers on how to use the software. This device is ideal for blogging, tutorials, sharing with colleagues, and social media
Features:
- Currently records at 12 fps
- Shows a preview of the gif when the recording is finished
- Ability to copy the gif to your clipboard for easy copy and paste
- Quickly locate the file you created with a find in finder button
- Help menu to show you how to use Gifable
Pros:
- Click and drag to record
- Records automatically
Cons:
- Not compatible with all operating systems
- Low fps recording
Steps On How To Make Gif In Gifable
- Click the Gifable icon in your menu bar, and select record.
- Click and drag your mouse over the area you would like to record.
- Recording starts automatically!
- Click the Gifable icon, then stop recording, to stop the recording.
GIFOX
Supported OS: Mac
Gifox is yet another cutting-edge GIF generator with an appealing user interface. It is extremely simple to use and has a plethora of wonderful features. The app allows you to record your screen and then convert it to GIFs. It includes a sophisticated compression option that allows customers to tailor the output high-satisfactory and size. Gifox additionally permits you to pick the FPS for its animations.
Gifox is a cleverly specified and expertly crafted app that captures your display screen and converts it into lively gifs – a wonderful opportunity to static pix and huge videos. It’s the ideal companion for:
- Product demonstrations and micro-screencasts
- Reporting bugs and providing entertaining instructions
- Capturing precise video on the display screen
Features:
- Gifox allows us not to convert video clips, but we can also capture what is displayed on the screen, either full screen or a part of it.
- We can set the number of fps in each screen recording.
- We can also adjust the number of fps of playback when we convert the video.
- When performing video compression, we can adjust the number of colors we want to use in the conversion
- When recording the screen of our Mac to make a GIF, we can make use of keyboard shortcuts to start and stop recording.
- Once we have created the GIF, we can share it by dragging it to other apps, uploading it directly to our storage service, or even from Imgur.
Pros:
- It is vastly easy to use compared to many other apps in the market.
- It comes with the most dynamic interface.
Cons:
- File sizes of the produced GIFs are big in some cases, which leads to a slow upload on websites with huge traffic.
Steps On How To Make Gif In Gifox
1. Record Your Screen
After clicking the fox icon in the menu bar, you can find the buttons to record the screen on the left side of the interface.
Gifox provides two modes for recording the screen – area and window. This means you can record part of the window or choose to record the full window.
For an area recording, Gifox allows you the freedom to select the area. You can select any area by dragging your mouse from corner to corner.
When using the window recording mode, one great feature is that it doesn’t matter if several windows are overlapping. You can just select the one you want to record, and Gifox will ignore the other window.
Gifox also offers shortcuts so that you don’t have to always open the icon from the menu bar. This makes it even easier to use as a daily utility.
2. Flexible Setting
Gifox is not only easy to use but also a very flexible application. Here are just some of the options that you can customize:
- Mouse cursor appearance
- Window shadow
- Desktop background recording fps
- Playback fps
- Repeat count and pause
- Max colors
- Bayer scale
All of these are available in the Gifox settings window.
3. Compress
If you’re sharing a GIF on the internet, you’re going to like it to be of good quality but with the smallest file size possible. Gifox makes this possible. Available in preferences, the compress settings allow you to have full control over the quality of the GIF. You can change the color count, the palette, the dither, and the bayer scale. This eliminates the need to install a second program just for compressing your file.
WHICH SHOULD I CHOOSE: FREE OR PAID GIF MAKER ON MAC?
If the main reason you want this powerful and advanced GIF software is to create GIFs from videos, you should invest in the advanced version. Since there is not much you can do with videos and the free version.
However, if you want to make GIFs from photos, this free or open-source version will suffice.
FAQS ABOUT MAKING GIFS FROM VIDEO
- What tip can I have in editing GIFs?
You don’t need to make your GIF colorful. You need to use fewer colors. The fewer colors your GIF has, the more fun it is. Because if your GIF has a lot of colors, you will have a problem exporting it.
- Is it possible to export GIFs without watermarks?
Yes, some GIF editors have a feature to remove the watermarks using a free account. However, there are also GIF editors where you need to pay a flat amount first before exporting GIF without watermarks.
- Can I use Video Converter Ultimate offline to edit a GIF?
Absolutely, yes. Even without internet access, you can modify and quickly convert your GIF in no time.
Conclusion:
If the proper GIF editor is used, animated GIFs can be edited with little effort. There are GIF software programs that are highly recommended by users due to their ease of use and simple interface. It’s time to give them a shot!
Also read:
- Updated Easy Steps to Slow Down a Video on iPhone and Android
- How to Make Subtitle Videos
- Updated Do You Want to Enable the Motion Blur Effect While Playing Dying Light 2? Read This Article to Find Out How to Use Dying Light 2 Motion Blur for a Great Gaming Experience
- Special Animated Transition Tutorial【SUPER EASY】
- Video Editors Use Transitions to Tie Their Shots and Clips Together Into a Cohesive, Polished Program. Learn the Best Method to Create a Smooth Cut Transition Effect
- New 2024 Approved Find Out The Best Dark Moody LUTs During Editing
- 2024 Approved 3 Actionable Ways to Create Countdown Animation for Videos
- New Have You Ever Heard of the Video Format for PowerPoint? Allow Us to Help You Learn More About PowerPoint. It Will Help You Make an Impression by Making Good Slides
- Want to Know the Simplest Way to Match the Colors of Your Photos in Photoshop? The Following Discussion Will Help Match Color in Photoshop, Almost Effortlessly
- You Can Match Paint Colors From Pictures for Your Wall, as Well as for Your Videos. And to Know How to Do Both, We Have Laid Down the Following Discussion for 2024
- Step-by-Step Guide | Control Playback Speed in Premiere Pro
- New How Can You Deny These Best 10 Free Speech to Text Software
- Updated 2024 Approved How to Edit Facebook Video Ads for E-Commerce Business
- 2024 Approved Ultimate Guidelines to Help You Better Use VLC Media Player
- New 2024 Approved An Introduction to LUTs | Their Overview and Benefits
- Updated To Help You Perform This Action, in This Article, We List the Steps You Will Need for Cropping Into Video Clips with PowerDirector. As an Added Bonus, We Have Also Included the Method to Perform the Same Actions in WonderShare Filmora
- New Top 5 Apps To Add Song To Video
- How to Make a Video Loop in QuickTime
- Updated Mastering the Technique Playing Videos in Slow Motion on Your iPhone Like a Pro for 2024
- How to Create Discord Logo GIF
- Complete Tutorial on After Effects Countdown Timer Adding
- 2024 Approved Top 12 Sony Vegas Slideshow Templates for Free Download
- A Complete Guide to the Best Brand Story Videos |2023|
- New An Introduction to LUTs | Their Overview and Benefits
- 2024 Approved Make A Countdown Video
- New Detailed Guide to Rotate Videos in Blender
- 2024 Approved What Are the Best 10 GIF Creator?
- In 2024, Tutorial to Change Motorola Razr 40 IMEI without Root A Comprehensive Guide
- In 2024, How To Unlock Samsung Galaxy A05 Phone Without Password?
- Tips And Tricks To Tell if Your Apple iPhone 11 Pro Max Is Unlocked
- How to Change Lock Screen Wallpaper on Realme C55
- In 2024, The Most Useful Tips for Pokemon Go Ultra League On Apple iPhone 6 Plus | Dr.fone
- Reasons for Oppo A1x 5G Stuck on Boot Screen and Ways To Fix Them | Dr.fone
- 6 Fixes to Unfortunately WhatsApp has stopped Error Popups On Xiaomi Redmi A2 | Dr.fone
- How to get the dragon scale and evolution-enabled pokemon On Google Pixel 8? | Dr.fone
- In 2024, Full Guide to Unlock Your Infinix GT 10 Pro
- 10 Easy-to-Use FRP Bypass Tools for Unlocking Google Accounts On Poco C51
- How to Bypass Google FRP Lock on Lava Blaze Curve 5G Devices
- Full Guide How To Fix Connection Is Not Private on Oppo Reno 10 Pro+ 5G | Dr.fone
- Is GSM Flasher ADB Legit? Full Review To Bypass Your Oppo Reno 10 5G Phone FRP Lock
- How To Simulate GPS Movement With Location Spoofer On Xiaomi Redmi K70 Pro? | Dr.fone
- How to Fix Tecno Camon 20 Premier 5G Find My Friends No Location Found? | Dr.fone
- Best Pokemons for PVP Matches in Pokemon Go For Google Pixel 8 Pro | Dr.fone
- How To Transfer Messages From Apple iPhone 12 Pro to other iPhone All iOS Versions | Dr.fone
- Hard Resetting an Honor X9a Device Made Easy | Dr.fone
- How to Transfer Music from Xiaomi 13T Pro to iPod | Dr.fone
- How To Perform a Successful Streaming on Twitch for 2024
- In 2024, Top 4 Ways to Trace Apple iPhone 15 Pro Max Location | Dr.fone
- In 2024, Easy Steps on How To Create a New Apple ID Account On Apple iPhone XS Max | Dr.fone
- In 2024, How to Change/Add Location Filters on Snapchat For your Apple iPhone 11 Pro | Dr.fone
- How does the stardust trade cost In pokemon go On OnePlus 11 5G? | Dr.fone
- Title: Updated In 2024, How to Rotate Videos With Media Player Classic
- Author: Chloe
- Created at : 2024-04-24 07:08:37
- Updated at : 2024-04-25 07:08:37
- Link: https://ai-editing-video.techidaily.com/updated-in-2024-how-to-rotate-videos-with-media-player-classic/
- License: This work is licensed under CC BY-NC-SA 4.0.
