
:max_bytes(150000):strip_icc():format(webp)/GettyImages-Macys-59e6c3699abed500118af858.jpg)
Updated In 2024, Top 10 Fun Discord Bots You Need
Top 10 Fun Discord Bots You Need
Top 10 Fun Discord Bots You Need in 2024
An easy yet powerful editor
Numerous effects to choose from
Detailed tutorials provided by the official channel
Consumers enjoy discord because it serves as a hub for their social groups and communities. It’s a haven where users can be themselves while socializing with others who share their interests and hobbies. There is no algorithm selecting what they should see, no continuous scrolling, and no news feed. Common interests fuel conversations and you can use some fun discord bots to pep up the conversation.

Fun bots to add discord with artificial intelligence (AI) technologies are among the most helpful tools available on the discord platform. Funny emojis for discord may be beneficial to greet new members and have funny light conversations! This aids in the creation and maintenance of a vibrant online community. You can add music, games, and fun memes to your server using these bots if you wish to.
In this article
01 [10 Fun Discord Bots You Need in 2024](#Part 1)
02 [Fun Discord Bots FAQs](#Part 2)
Part 1 Fun Discord Bots You Need in 2024
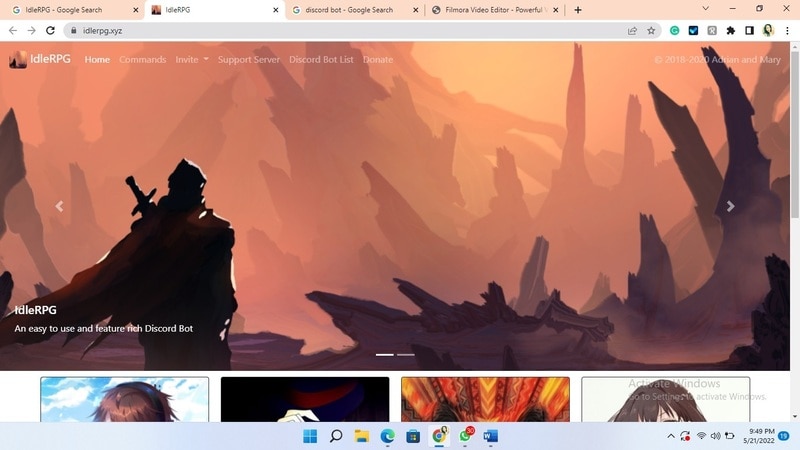
01IdleRPG
The IdleRPG is another enjoyable and engaging fun discord bot in the RPG gaming experience. It rewards server members for participating in the game while gaining XP and having fun. It offers character advancement and is comparable to other RPG games.
You may travel on a quest, trade various things, fight other players, and even find love. There’s also a scoreboard for the top ten loves, top ten PvP players, top ten wealthiest, and top ten XP players. IdleRPG also allows you to wager in various ways to help you boost your gaming money.
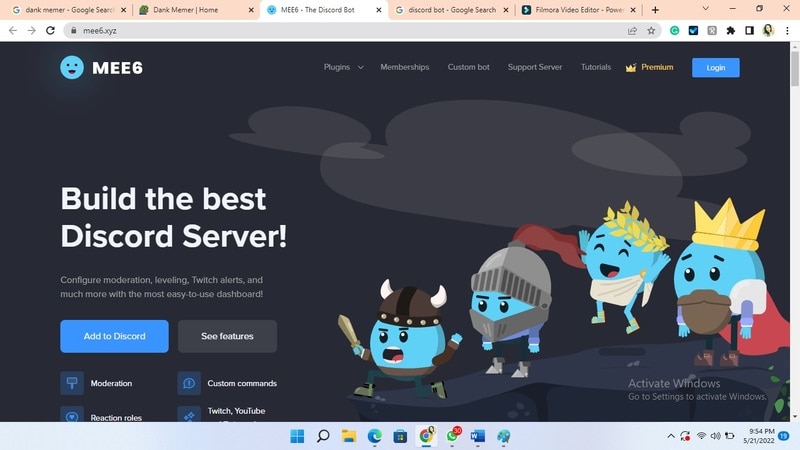
02MEE6
MEE6 is a widespread moderation and one of the greatest fun bots for discord. It takes care of many tasks that a mod team would typically do. This includes greeting new members, informing your server when you or your favorite content producers go live on Twitch or YouTube, and allowing users to assign roles depending on their reactions.
A command tool that allows you to generate custom commands and an XP leveling system that users may grind to earn access to various channels and permissions depending on activity are two of MEE6’s more complicated features. MEE6 also includes plugins for music and developing your fun discord bot.
03Dank Memer
Dank Memer is another fun bot to add to discord with a lighthearted tone. It offers one of the most extensive built-in economies, allowing participants to engage in text-based thievery, bank robbery, and gambling experiences.
As its name implies, it also offers a slew of meme-related commands. You can use simple chat instructions to create memes. Other memes automatically publish.
Even more impressive is that awesome memes are collected daily from Reddit’s top meme collections.

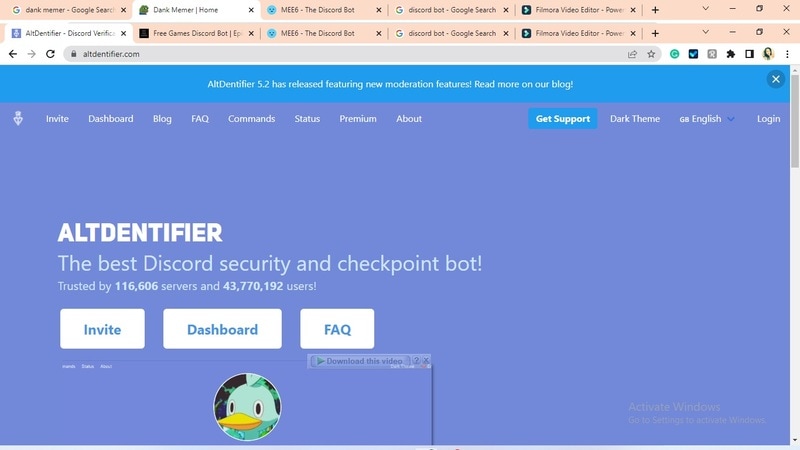
04AltDentifier
Another unique funny discord emoji bot is AltDentifier, which maintains your server clean and spam-free. It’s simple to set up and takes only a few minutes to get up and run. It now has over 35 million users spread across 100,000 servers. It also includes several more moderation commands to make administration easier.
The AltDentifier bot contains:
● An automated anti-raid system.
● A robust verification mechanism.
● Multilingual support.
● A review record.
It will also notify you if a user attempts to circumvent any limitations by utilizing a VPN.
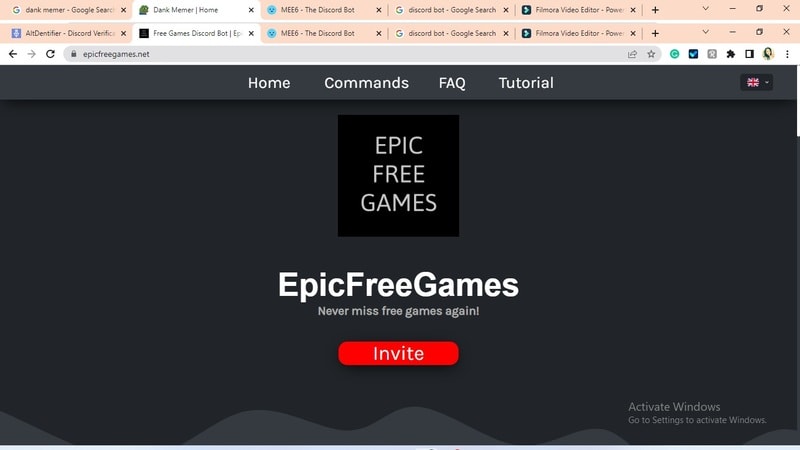
05EpicFreeGames
Over the last two years, Epic Free Games has given away thousands of free games. GTA V, Dead By Daylight, and NBA 2K21 are among the given-away titles. It even-handed away Discord Nitro lately. Have any of these free games ever escaped your notice? Fear not, for the EpicFreeGames bot has your back.
The EpicFreeGames bot delivers a message to a channel, reminding everyone of Epic’s free game(s). It only has one task, yet it can provide you with hundreds of dollars worth of games. Never miss another fantastic free Epic Games game again.
06**Rythm **
Rythm is a great fun discord bot for playing music in the voice stream of your server. This one features a beautiful user interface that includes a music player that you can interact with. This makes controlling the channel’s queue a breeze.
The options are changeable. You can designate DJ duties, prohibit the same songs from appearing in queues again, and block particular channels from playing music. Rhythm is less platform-agnostic than Groovy. Spotify, YouTube, SoundCloud, and Bandcamp are among the options. Apple Music is not currently supported.
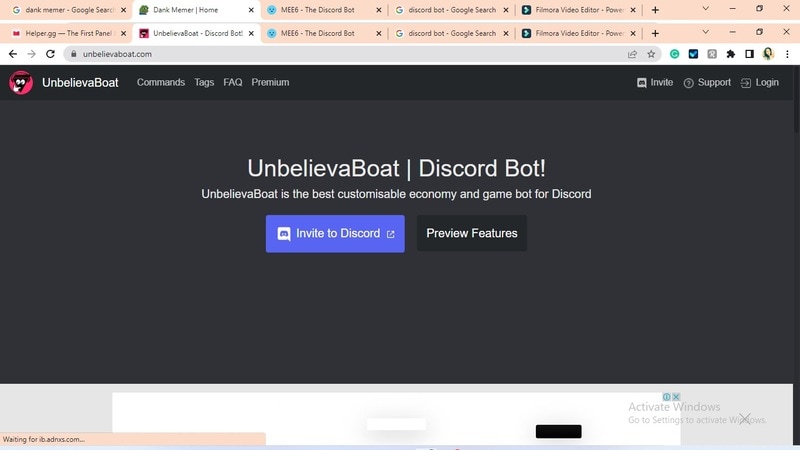
07Unbelievaboat
UnbelievaBoat is a versatile, fun bot to add to discord that uses exciting activities to keep server members engaged. These capabilities, fortunately, include a moderation mechanism that you may utilize to issue warnings and enforce bans. Your moderators may keep track of each action by assigning it a case number.
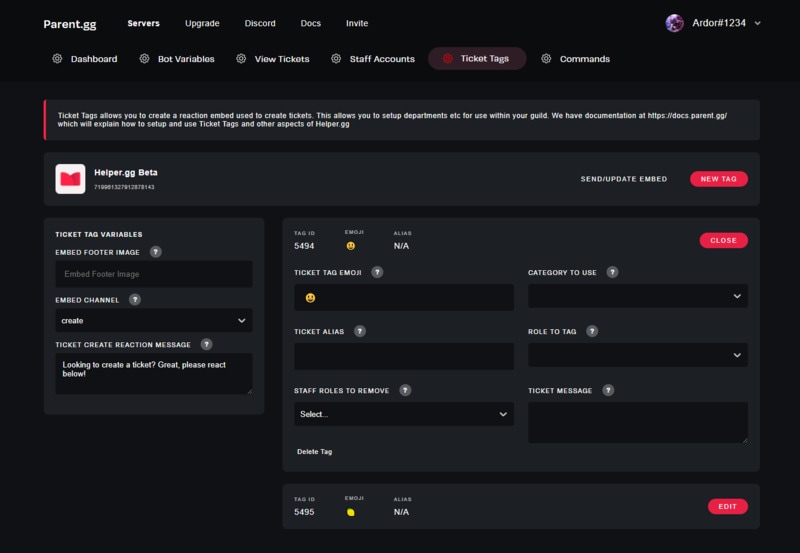
08Helper.gg
Helper.gg enables you to transform your discord server into a support ticket system. It’s a board ticket bot with a stunning UI that makes managing and responding to client tickets simple.
Create staff accounts for your company’s customer support representatives and manage their access. Ticket logging with the flexibility to rename and relocate tickets, add and delete users, and the contentment of having tickets close automatically based on the amount of time that has passed since the previous reply are all accessible.
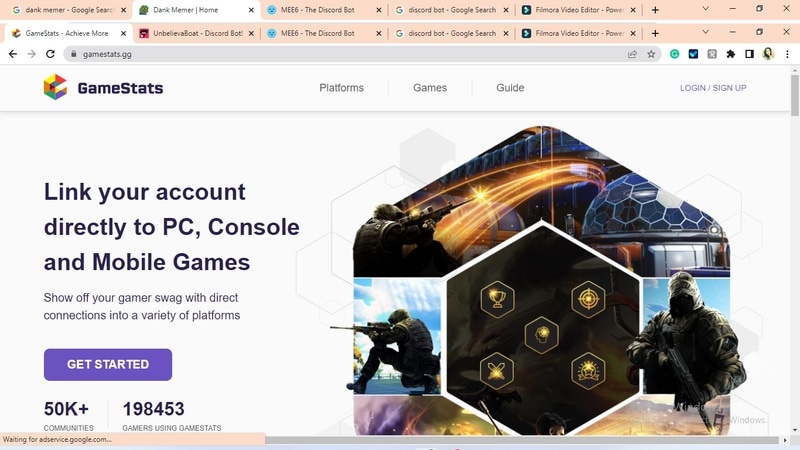
09GameStats
Next, GameStats has one-of-a-kind funny emojis for the discord bot. We all enjoy looking at our in-game statistics and comparing them. The GameStats Discord bot makes sharing and displaying your impressive numbers simple.
Connect to your game or platform, make a personalized profile card, and begin sharing your tryhard statistics.
10Dyno
Dyno is another well-crafted fun discord bot. It’s an utterly customizable server moderation bot that assists with server automation. You also receive a basic online dashboard with Dyno that you can use to monitor and control your server.
It has functions such as creating positions, making announcements, banning members, and even requesting puppy or cat images. Dyno is a fun bot that allows you to automate your server management effortlessly. Premium subscriptions, which start at $4.99 per month and unlock more exclusive features, are also available.
However, if you are a creative video editor who likes sharing their experience on discord, Filmora is for you. With Filmora, you can bring your recorded experiences with funny discord emojis to life!
But Wait, What is Wondershare Filmora Video Editor ?
Filmora is a famous video editing program for those who wish to focus on editing and producing high-quality videos with the support of 4K video editing. It’s a reasonably priced software featuring tools like split, trim, add text, color, etc. When it comes to designing, adding effects, and modifying movies, it provides users with many possibilities. Users can add overlays, create animations and objects, add music, and more with Wondershare’s Filmora. It’s an excellent tool for individuals who wish to include dedications, tributes, fun emojis and anecdotes in their films. Any video can also benefit from voiceovers.
For Win 7 or later (64-bit)
For macOS 10.12 or later
Part 2 Fun Discord Bots FAQs
Q. What does MEE6 stand for?
A. MEE6 is a discord role bot that lets users assign roles to themselves via discord replies. This discord role generator will change user rights in discord automatically.
Q. Are these fun bots free?
A. Yes and no. Most fun bots for discord are free to use, although you must pay for some features.
Q. What is the top level I can reach on the MEE6 bot?
A. The maximum level accessible is 1,768,802, which would take 935 billion years if messages sent every minute.
Q. Help! My discord got hacked; how did that even happen?
A. Users may edit discord javascript files. A cybercriminal can install harmful malware to discord client files if they get user authorization. When people open the file, the code also gets executed. After then, the hacker has access to the user’s discord data.
Q. What can discord bots do?
A. On your server, the bots can conduct a variety of helpful automated chores and bot commands, like welcoming new users, monitoring content, and banning rule violators. Using fun discord bots’ instructions, you can add music, humor, games, and other emojis to your server.
● Ending Thoughts →
● In short, moderators and administrators can use funny discord emojis to administer their servers better, make them attractive, and get more users. There are many vanilla discord commands to choose from, and when you put fun bots to add to discord, the possibilities become unlimited.
● Besides, there are several funny emojis for discord to improve your discord skills and establish your discord server. Finally, Filmora can assist you in beautifying your recorded videos make funny emojis for discord.
Consumers enjoy discord because it serves as a hub for their social groups and communities. It’s a haven where users can be themselves while socializing with others who share their interests and hobbies. There is no algorithm selecting what they should see, no continuous scrolling, and no news feed. Common interests fuel conversations and you can use some fun discord bots to pep up the conversation.
Fun bots to add discord with artificial intelligence (AI) technologies are among the most helpful tools available on the discord platform. Funny emojis for discord may be beneficial to greet new members and have funny light conversations! This aids in the creation and maintenance of a vibrant online community. You can add music, games, and fun memes to your server using these bots if you wish to.
In this article
01 [10 Fun Discord Bots You Need in 2024](#Part 1)
02 [Fun Discord Bots FAQs](#Part 2)
Part 1 Fun Discord Bots You Need in 2024
01IdleRPG
The IdleRPG is another enjoyable and engaging fun discord bot in the RPG gaming experience. It rewards server members for participating in the game while gaining XP and having fun. It offers character advancement and is comparable to other RPG games.
You may travel on a quest, trade various things, fight other players, and even find love. There’s also a scoreboard for the top ten loves, top ten PvP players, top ten wealthiest, and top ten XP players. IdleRPG also allows you to wager in various ways to help you boost your gaming money.
02MEE6
MEE6 is a widespread moderation and one of the greatest fun bots for discord. It takes care of many tasks that a mod team would typically do. This includes greeting new members, informing your server when you or your favorite content producers go live on Twitch or YouTube, and allowing users to assign roles depending on their reactions.
A command tool that allows you to generate custom commands and an XP leveling system that users may grind to earn access to various channels and permissions depending on activity are two of MEE6’s more complicated features. MEE6 also includes plugins for music and developing your fun discord bot.
03Dank Memer
Dank Memer is another fun bot to add to discord with a lighthearted tone. It offers one of the most extensive built-in economies, allowing participants to engage in text-based thievery, bank robbery, and gambling experiences.
As its name implies, it also offers a slew of meme-related commands. You can use simple chat instructions to create memes. Other memes automatically publish.
Even more impressive is that awesome memes are collected daily from Reddit’s top meme collections.
04AltDentifier
Another unique funny discord emoji bot is AltDentifier, which maintains your server clean and spam-free. It’s simple to set up and takes only a few minutes to get up and run. It now has over 35 million users spread across 100,000 servers. It also includes several more moderation commands to make administration easier.
The AltDentifier bot contains:
● An automated anti-raid system.
● A robust verification mechanism.
● Multilingual support.
● A review record.
It will also notify you if a user attempts to circumvent any limitations by utilizing a VPN.
05EpicFreeGames
Over the last two years, Epic Free Games has given away thousands of free games. GTA V, Dead By Daylight, and NBA 2K21 are among the given-away titles. It even-handed away Discord Nitro lately. Have any of these free games ever escaped your notice? Fear not, for the EpicFreeGames bot has your back.
The EpicFreeGames bot delivers a message to a channel, reminding everyone of Epic’s free game(s). It only has one task, yet it can provide you with hundreds of dollars worth of games. Never miss another fantastic free Epic Games game again.
06**Rythm **
Rythm is a great fun discord bot for playing music in the voice stream of your server. This one features a beautiful user interface that includes a music player that you can interact with. This makes controlling the channel’s queue a breeze.
The options are changeable. You can designate DJ duties, prohibit the same songs from appearing in queues again, and block particular channels from playing music. Rhythm is less platform-agnostic than Groovy. Spotify, YouTube, SoundCloud, and Bandcamp are among the options. Apple Music is not currently supported.
07Unbelievaboat
UnbelievaBoat is a versatile, fun bot to add to discord that uses exciting activities to keep server members engaged. These capabilities, fortunately, include a moderation mechanism that you may utilize to issue warnings and enforce bans. Your moderators may keep track of each action by assigning it a case number.
08Helper.gg
Helper.gg enables you to transform your discord server into a support ticket system. It’s a board ticket bot with a stunning UI that makes managing and responding to client tickets simple.
Create staff accounts for your company’s customer support representatives and manage their access. Ticket logging with the flexibility to rename and relocate tickets, add and delete users, and the contentment of having tickets close automatically based on the amount of time that has passed since the previous reply are all accessible.
09GameStats
Next, GameStats has one-of-a-kind funny emojis for the discord bot. We all enjoy looking at our in-game statistics and comparing them. The GameStats Discord bot makes sharing and displaying your impressive numbers simple.
Connect to your game or platform, make a personalized profile card, and begin sharing your tryhard statistics.
10Dyno
Dyno is another well-crafted fun discord bot. It’s an utterly customizable server moderation bot that assists with server automation. You also receive a basic online dashboard with Dyno that you can use to monitor and control your server.
It has functions such as creating positions, making announcements, banning members, and even requesting puppy or cat images. Dyno is a fun bot that allows you to automate your server management effortlessly. Premium subscriptions, which start at $4.99 per month and unlock more exclusive features, are also available.
However, if you are a creative video editor who likes sharing their experience on discord, Filmora is for you. With Filmora, you can bring your recorded experiences with funny discord emojis to life!
But Wait, What is Wondershare Filmora Video Editor ?
Filmora is a famous video editing program for those who wish to focus on editing and producing high-quality videos with the support of 4K video editing. It’s a reasonably priced software featuring tools like split, trim, add text, color, etc. When it comes to designing, adding effects, and modifying movies, it provides users with many possibilities. Users can add overlays, create animations and objects, add music, and more with Wondershare’s Filmora. It’s an excellent tool for individuals who wish to include dedications, tributes, fun emojis and anecdotes in their films. Any video can also benefit from voiceovers.
For Win 7 or later (64-bit)
For macOS 10.12 or later
Part 2 Fun Discord Bots FAQs
Q. What does MEE6 stand for?
A. MEE6 is a discord role bot that lets users assign roles to themselves via discord replies. This discord role generator will change user rights in discord automatically.
Q. Are these fun bots free?
A. Yes and no. Most fun bots for discord are free to use, although you must pay for some features.
Q. What is the top level I can reach on the MEE6 bot?
A. The maximum level accessible is 1,768,802, which would take 935 billion years if messages sent every minute.
Q. Help! My discord got hacked; how did that even happen?
A. Users may edit discord javascript files. A cybercriminal can install harmful malware to discord client files if they get user authorization. When people open the file, the code also gets executed. After then, the hacker has access to the user’s discord data.
Q. What can discord bots do?
A. On your server, the bots can conduct a variety of helpful automated chores and bot commands, like welcoming new users, monitoring content, and banning rule violators. Using fun discord bots’ instructions, you can add music, humor, games, and other emojis to your server.
● Ending Thoughts →
● In short, moderators and administrators can use funny discord emojis to administer their servers better, make them attractive, and get more users. There are many vanilla discord commands to choose from, and when you put fun bots to add to discord, the possibilities become unlimited.
● Besides, there are several funny emojis for discord to improve your discord skills and establish your discord server. Finally, Filmora can assist you in beautifying your recorded videos make funny emojis for discord.
Detailed Steps to Add Border to Video Using Premiere Pro
The border is really important as it frames up all the video. It makes the video eye-catching and gives a vivid effect. It also fixes the automated cropping issues, especially on Instagram. Along with this, it helps the viewers to watch the video as you can add effects about fun, travel, guides and etc. accordingly. Adding a border is super easy and it’s not more than fun!
So let’s start…
How to Add Borders to Videos in Premiere Pro
Today we are going to discuss how to add borders to the video clips or images in premiere pro. It’s pretty simple to make borders of different colors and sizes for your video clips.
So, here are the two different ways we can use to add borders to our videos or images.
- Adding a border to the video using a grid effect
- Adding a border to the video using the essential graphics panel
Way 1. Using a Grid Effect
While working on the project, make sure the aspect ratio of the video is 16:9, and project settings are HD (1080P) and UHD 4K in premiere pro.
Let’s start step by step.
Drag all the video clips by stacking them on video tracks in the timeline.
Hit the Effects tab and write the grid in the search panel.
Simply drag the grid option into the timeline of the videos.
Select the anchor value to 0 for the x and y.
Change the size to width and height slider.
Change the width to 1920 and height to 1080.
Now we have borders added as you can see below.
You can also change the width of the borders.
- Change the width to 30.
You have the option to change the color of the border.
- Select the blending mode to normal.
- Select the color picker tool and change the color of your desire.
Way 2. Using the Essential Graphics Panel
First of all, you wanna be in your premium pro graphics workspace. This will pull off your graphics panel on your right. The good thing about the essential graphics panel is, that it is vector-based. So the different video clips with different resolutions will not pixelate.
Let’s dive in…
Now, to use the graphics panel you need to perform the following steps.
Import the videos and drag them into the timeline.
Select the effects
Find “alpha adjust” and drag it into the effects control.
Create a 4-point polygon mask.
A rectangular mask will be created. You can edit it according to the frame requirement.
Go to the corner of the mask border and press the shift key. Drag the border to resize and scale it proportionally.
Again go to effect controls, under opacity hit invert alpha.
Under mask hit inverted.
Go to motion settings, change the position, and
Go to Alpha adjust and set the mask feathering to 0.
Now go back to the effects panel and search the paint bucket.
Under effects controls, hit the alpha channel under the fill selector
Then hit stroke under the stroke
You can turn up the stroke width to make it a bit thicker.
Hit the color tab to change the color of the border as desired.
An Easier Way to Add Borders to Videos on Computer
Filmora Video Editor is one of the best and most efficient video editing applications. It is not only very easy to use but it provides a professional interface for users to make the videos stand out. It can be used for both Windows and Mac.
For Win 7 or later (64-bit)
For macOS 10.14 or later
Let’s learn three different ways to add borders to the video/image using Wondershare Filmora 11.
- Using the Borders Preset
- Using overlay preset
- Using Human Border
1. Using the Borders Preset
- Download Wonder Share Filmora 11 on your device.
- Open the software and hit the import media under the media
- Select the desired media from the storage of your device.
- Drag and drop the selected video/image into the timeline.

- Select the effects tab and hit the utility
- You can search the borders in the search engine and use a border of your choice given in the panel.
- Select the border and hit the + button on the bottom right corner of the border.
- You can drag and drop the border into the timeline.
- You can see the border below.

- You can edit the border by double-clicking the border layer or directly clicking on the border in the preview area.
- The Effects controls will be opened.
- You can change the size, color and opacity of the border, by moving the slider.
- Hit OK

2. Using overlay preset
- Select the video/image layer and hit the effects
- Select overlay from the panel on the left side by scrolling down.
- You can choose the overlay of your choice by clicking on the + tab or simply dragging and dropping it into the timeline.

- Double click on the image/video with overlay effect.
- Select the effects tab under the image
- You can adjust the shadow of overlay by moving the slider of opacity.
- Hit Ok

3. Using Human Border
- Select the video/image and hit the effects
- Select AI Portrait from the panel.
- Select the desired human border.
- Hit the + tab or you can drag and drop into the timeline.

- Double-click on the human border layer, expand the human border controls panel under the effects
- You can change the color, size, thickness, opacity, etc.
- Hit Ok

How to Add a Border to the Video Online
You can also add borders to your videos/images online. All you need is, have a good internet connection and a browser.
Here is a guide for you to add frames to your video online.
Using Kapwing
- Open the browser and write the “Kapwing video maker”.
- You need to sign in the Kapwing to make an account
- An editing interphase will be opened as below.
- Hit on media and import media by clicking on +
- Drag and drop the video into the timeline.

1st Method
- Double click on the video in the preview window.
- 4 dots will appear on the corner of the video.
- You can drag the blue dots to make a frame and resize the image/video.
- Hit on lock ratio tab to maintain the pixels of the video.

- Double-click on the border area.
- You can change the color of the border.
- You can also resize the length and width of the border.

2nd Method
- Hit the elements and select the frames from the panel.
Here you can take square frames, circle frames, shapes, emoji’s and a lot of more frames.

3rd Method
- Hit the videos
- Select templates, a list of templates will be shown in this panel.
- Select the desired template and drag it into the timeline.

Conclusion
We have discussed different software to add borders. All the software and tools are free to use. Similarly, they can be used on both Mac as well as Windows. They are user-friendly and provide full control over borders. You can use any one of them to make your borders and can easily engage viewers in your videos.
In all of the above applications, I recommend you to use Wondershare filmora 11. It is the most professional software and makes your video stand out.
Way 1. Using a Grid Effect
While working on the project, make sure the aspect ratio of the video is 16:9, and project settings are HD (1080P) and UHD 4K in premiere pro.
Let’s start step by step.
Drag all the video clips by stacking them on video tracks in the timeline.
Hit the Effects tab and write the grid in the search panel.
Simply drag the grid option into the timeline of the videos.
Select the anchor value to 0 for the x and y.
Change the size to width and height slider.
Change the width to 1920 and height to 1080.
Now we have borders added as you can see below.
You can also change the width of the borders.
- Change the width to 30.
You have the option to change the color of the border.
- Select the blending mode to normal.
- Select the color picker tool and change the color of your desire.
Way 2. Using the Essential Graphics Panel
First of all, you wanna be in your premium pro graphics workspace. This will pull off your graphics panel on your right. The good thing about the essential graphics panel is, that it is vector-based. So the different video clips with different resolutions will not pixelate.
Let’s dive in…
Now, to use the graphics panel you need to perform the following steps.
Import the videos and drag them into the timeline.
Select the effects
Find “alpha adjust” and drag it into the effects control.
Create a 4-point polygon mask.
A rectangular mask will be created. You can edit it according to the frame requirement.
Go to the corner of the mask border and press the shift key. Drag the border to resize and scale it proportionally.
Again go to effect controls, under opacity hit invert alpha.
Under mask hit inverted.
Go to motion settings, change the position, and
Go to Alpha adjust and set the mask feathering to 0.
Now go back to the effects panel and search the paint bucket.
Under effects controls, hit the alpha channel under the fill selector
Then hit stroke under the stroke
You can turn up the stroke width to make it a bit thicker.
Hit the color tab to change the color of the border as desired.
An Easier Way to Add Borders to Videos on Computer
Filmora Video Editor is one of the best and most efficient video editing applications. It is not only very easy to use but it provides a professional interface for users to make the videos stand out. It can be used for both Windows and Mac.
For Win 7 or later (64-bit)
For macOS 10.14 or later
Let’s learn three different ways to add borders to the video/image using Wondershare Filmora 11.
- Using the Borders Preset
- Using overlay preset
- Using Human Border
1. Using the Borders Preset
- Download Wonder Share Filmora 11 on your device.
- Open the software and hit the import media under the media
- Select the desired media from the storage of your device.
- Drag and drop the selected video/image into the timeline.
- Select the effects tab and hit the utility
- You can search the borders in the search engine and use a border of your choice given in the panel.
- Select the border and hit the + button on the bottom right corner of the border.
- You can drag and drop the border into the timeline.
- You can see the border below.
- You can edit the border by double-clicking the border layer or directly clicking on the border in the preview area.
- The Effects controls will be opened.
- You can change the size, color and opacity of the border, by moving the slider.
- Hit OK
2. Using overlay preset
- Select the video/image layer and hit the effects
- Select overlay from the panel on the left side by scrolling down.
- You can choose the overlay of your choice by clicking on the + tab or simply dragging and dropping it into the timeline.
- Double click on the image/video with overlay effect.
- Select the effects tab under the image
- You can adjust the shadow of overlay by moving the slider of opacity.
- Hit Ok
3. Using Human Border
- Select the video/image and hit the effects
- Select AI Portrait from the panel.
- Select the desired human border.
- Hit the + tab or you can drag and drop into the timeline.
- Double-click on the human border layer, expand the human border controls panel under the effects
- You can change the color, size, thickness, opacity, etc.
- Hit Ok
How to Add a Border to the Video Online
You can also add borders to your videos/images online. All you need is, have a good internet connection and a browser.
Here is a guide for you to add frames to your video online.
Using Kapwing
- Open the browser and write the “Kapwing video maker”.
- You need to sign in the Kapwing to make an account
- An editing interphase will be opened as below.
- Hit on media and import media by clicking on +
- Drag and drop the video into the timeline.
1st Method
- Double click on the video in the preview window.
- 4 dots will appear on the corner of the video.
- You can drag the blue dots to make a frame and resize the image/video.
- Hit on lock ratio tab to maintain the pixels of the video.
- Double-click on the border area.
- You can change the color of the border.
- You can also resize the length and width of the border.
2nd Method
- Hit the elements and select the frames from the panel.
Here you can take square frames, circle frames, shapes, emoji’s and a lot of more frames.
3rd Method
- Hit the videos
- Select templates, a list of templates will be shown in this panel.
- Select the desired template and drag it into the timeline.
Conclusion
We have discussed different software to add borders. All the software and tools are free to use. Similarly, they can be used on both Mac as well as Windows. They are user-friendly and provide full control over borders. You can use any one of them to make your borders and can easily engage viewers in your videos.
In all of the above applications, I recommend you to use Wondershare filmora 11. It is the most professional software and makes your video stand out.
A Full Review of Leeming LUT Pro
Create High-Quality Video - Wondershare Filmora
An easy and powerful YouTube video editor
Numerous video and audio effects to choose from
Detailed tutorials are provided by the official channel
Color grading can be a tedious process, especially if you don’t have the technical skills required to achieve the desired result. That’s where a LUT can come in handy. So, what is a LUT?
LUT stands for “look up table.” Simply put, a LUT is a color preset that you can apply to your video footage to speed up the color grading process. While LUTs are commonly used to speed up the color grading process, they can also be used for other tasks, such as color transfer between software, monitor calibration, and more.
In this article, we’ll explore a particular LUT – Leeming LUT Pro™ and how you can use it in various video editors.

In this article
02 Supported Cameras of Leeming LUT Pro™
03 How to Import and Use Leeming LUT Pro™ in Different Video Editors
What is Leeming LUT Pro™?
Leeming LUT Pro™ is the world’s first unified, corrective Look Up Table (LUT) system for supported cameras. It’s designed to maximize dynamic range, fix skin tones, remove unwanted color casts and provide an accurate Rec709 starting point for further creative color grading.
The Pro LUTs are designed for perfect Rec709 colorimetry and have a linear luma curve, with an average measured dE(2000) of less than 1. As a result, they are visually indistinguishable from reality to the human eye.
Athena LUTs are a brighter version of Pro. They are designed around how the eye sees while retaining the same perfect colorimetry as Pro.
Supported Cameras of Leeming LUT Pro™
- Panasonic G Series: All G series cameras with Cine-D, V-LogL, and HLG for Rec709
- Panasonic S Series: All S series cameras with V-Log, V-Log BRAW, V-Log ProRes RAW, Cine-D, Cine-D2, and HLG for Rec709
- Fujifilm X Series: All X Series cameras with F-Log, Eterna Cinema, Pro Neg Std, and HLG for Rec709
- Canon R Series: All R series cameras with the Faithful Picture Style, C-Log, C-Log3, and CanonRAW
- Canon C Series: All C series cameras with BT.709, C-Log2, C-Log3, HDR-PQ for Rec709, and HLG for Rec709
- Blackmagic Pocket 4K/6K/6K Pro: All cameras with Gen 4 or Gen5 Film
- Blackmagic Pocket/Micro: Older cameras with Gen1 Film
- Nikon Z Series: All cameras with N-Log, Flat
- Sony A Series: All cameras with Picture profile menus, like the A7, with Cine2, S-Log2, S-Log3, HLG/3 for Rec709, and S-Cinetone
- JVC: GY-LS300 with J-Log1
- RunCam: 5 Orange Normal, Flat
- GoPro: 6,7 8, 9 & 10 ProTune, 4 & 5 ProTune, Session ProTune
- DJI: Mavic3, Phantom 4 Pro, Air 2S, Mavic 2 Pro, Mavic Air 2, Mini Series, Mavic Air, Mavic Pro, Pocket 2, Osmo Pocket, Osmo Action, X5 Series
How to Import and Use Leeming LUT Pro™ in Different Video Editors
Leeming LUT Pro™ is supported by various video editors, coloring software, and motion graphics programs, such as:
- Final Cut Pro X
- Avid Media Composer
- DaVinci Resolve
- Adobe Premiere Pro
- Adobe After Effects
- Magix Vegas
- Grass Valley Edius
- Lightworks
- Cyberlink PowerDirector
- LumaFusion
Next, we’ll explore how you can use Leeming LUT in some popular video editors.
1. How to Use Leeming LUT in FCPX
Follow these steps to use Leeming LUT in Final Cut Pro:
Step 1. Import Footage
Launch Final Cut Pro and import your footage. To import your footage, navigate to the top left corner and click on the import icon (the arrow pointing downwards).
In the window that opens, your camera or device name should appear in the left column under devices.
Click on your camera or device to display the media you want to import. Then select the media you want to import and click on the import selected button in the bottom right corner to import your footage.

Step 2. Highlight the Footage
Highlight all the footage by clicking and dragging your pointer over the footage or press Command + A to select all the footage.

Step 3. Open the Inspector
After highlighting all the footage, open the Inspector menu and click the little i icon. Then go down to the bottom of the Inspector and switch from Basic to General.
Step 4. Select the Camera LUT Option
Select Camera LUT from the options under General and click on the Add Custom Camera LUT option.
Step 5. Import Leeming LUTs into FCPX
Find the folder where your Leeming LUTs are stored and import them into Final Cut Pro by clicking on Open.
Step 6. Select the LUT
Once imported, go back to the Camera LUT option under General and click on it. Then scroll down the available options and select your Leeming LUT under the Custom Camera options.
Finally, click the profile you used to apply it to your footage.
2. How to Use Leeming LUT in PowerDirector
Follow these steps to use a LUT in PowerDirector:
Step 1. Launch PowerDirector
Open PowerDirector and select Full Mode.
Step 2. Import Media
Click the import button and then select Import Media Folder to import the video footage you want to apply the Leeming LUT to.
Step 3. Add Footage to Timeline
Drag and drop the imported video footage into your project’s timeline.
Step 4. Select the Fix/Enhance Option
Click on the video clip on the timeline and choose the Fix/Enhance option.
Step 5. Select the Color Presets & CLUTs Option
In the top left window that opens above the timeline, select the Color Presets & CLUTs option under Enhance.
Step 6. Apply the Leeming LUT to the Footage
Click on the import button in the panel to import the Leeming LUT file. Once imported, apply it to give your video a more vibrant look.
Part 5: Bonus! Use Filmora – Easy to Use Video Editor for Color LUTs
Besides Final Cut Pro and PowerDirector, Filmora is another excellent video editing software that you can use to apply LUTs to your video.
Designed for beginners and intermediate users, Filmora is an intuitive yet powerful video editing software.
For instance, you can apply 3D LUTs to your video using Filmora. Unlike 1D LUTs, which can only control one value setting, 3D LUTs can allow you to control various value settings. As a result, 3D LUTs can give you more control over specific color values in your video.
Here’s how you can apply LUTs using Filmora:
Step 1. Import the Footage
Launch Filmora and choose New Project. In the New Project window that opens, import the video you want to apply the LUT to by clicking on Import and selecting one of the drop-down options.
Step 2. Add the Video to the Timeline
Drag and drop the video into your project’s timeline.
Step 3. Open the Color Tab
Double click the video on the timeline to select it. Once it’s selected, go to the top left panel and click on the color tab.

Step 4. Apply a LUT to the Video
Under the color tab, navigate to the 3D LUT option and select one of the available options in the 3D LUT drop-down menu to apply a LUT.
Many LUTs are named after popular TV shows and series whose visual styles they mimic, such as Batman, House of Cards, Game of Thrones, Mission Impossible, Harry Potter, Star Wars, and more.
Once you apply a LUT, you can see your changes in the Preview Window. Besides using the preset LUTs, Filmora also allows you to use custom LUTs. Instead of choosing one of the presets, click on the Load New LUT option to import your custom LUT into Filmora.
Step 5. Make Fine Adjustments
Once you apply a LUT, Filmora can allow you to make further modifications to the video. Click on the Advanced button at the bottom of the color tab to view advanced color correction options.
In the new window that opens, you can adjust several things, such as color, light, HSL, and more. You can also choose from a variety of other available presets.

Step 6. Save the Changes
Once you’re satisfied with the changes you’ve applied, click on the OK button in the lower right corner to save the changes.
For Win 7 or later (64-bit)
For macOS 10.12 or later
Conclusion
LUTs are a fast way to color grade your footage after color correction. However, to ensure your LUTs work effectively, here are some important guidelines you should observe when using LUTs:
- Ensure your footage matches from shot to shot, especially if you’re applying LUTs to multiple clips.
- Ensure your exposure is correct before using LUTs. You can use a histogram to help you set the exposure.
- Ensure you apply LUTs to a video that’s been properly color corrected.
- Make small adjustments to things, such as brightness, saturation, contrast, exposure, color temperature, and tint for best results.
- Test out various LUTs before settling for one because shooting conditions can drastically affect how different LUTs look.
Ultimately, LUTs are an excellent way to make your video more cinematic. If you don’t have advanced video editing skills or prior experience working with LUTs, don’t worry. Filmora is a user-friendly video editing software that allows you to quickly apply LUTs with no video editing experience. Just download Filmora for free to get started.
Color grading can be a tedious process, especially if you don’t have the technical skills required to achieve the desired result. That’s where a LUT can come in handy. So, what is a LUT?
LUT stands for “look up table.” Simply put, a LUT is a color preset that you can apply to your video footage to speed up the color grading process. While LUTs are commonly used to speed up the color grading process, they can also be used for other tasks, such as color transfer between software, monitor calibration, and more.
In this article, we’ll explore a particular LUT – Leeming LUT Pro™ and how you can use it in various video editors.
In this article
02 Supported Cameras of Leeming LUT Pro™
03 How to Import and Use Leeming LUT Pro™ in Different Video Editors
What is Leeming LUT Pro™?
Leeming LUT Pro™ is the world’s first unified, corrective Look Up Table (LUT) system for supported cameras. It’s designed to maximize dynamic range, fix skin tones, remove unwanted color casts and provide an accurate Rec709 starting point for further creative color grading.
The Pro LUTs are designed for perfect Rec709 colorimetry and have a linear luma curve, with an average measured dE(2000) of less than 1. As a result, they are visually indistinguishable from reality to the human eye.
Athena LUTs are a brighter version of Pro. They are designed around how the eye sees while retaining the same perfect colorimetry as Pro.
Supported Cameras of Leeming LUT Pro™
- Panasonic G Series: All G series cameras with Cine-D, V-LogL, and HLG for Rec709
- Panasonic S Series: All S series cameras with V-Log, V-Log BRAW, V-Log ProRes RAW, Cine-D, Cine-D2, and HLG for Rec709
- Fujifilm X Series: All X Series cameras with F-Log, Eterna Cinema, Pro Neg Std, and HLG for Rec709
- Canon R Series: All R series cameras with the Faithful Picture Style, C-Log, C-Log3, and CanonRAW
- Canon C Series: All C series cameras with BT.709, C-Log2, C-Log3, HDR-PQ for Rec709, and HLG for Rec709
- Blackmagic Pocket 4K/6K/6K Pro: All cameras with Gen 4 or Gen5 Film
- Blackmagic Pocket/Micro: Older cameras with Gen1 Film
- Nikon Z Series: All cameras with N-Log, Flat
- Sony A Series: All cameras with Picture profile menus, like the A7, with Cine2, S-Log2, S-Log3, HLG/3 for Rec709, and S-Cinetone
- JVC: GY-LS300 with J-Log1
- RunCam: 5 Orange Normal, Flat
- GoPro: 6,7 8, 9 & 10 ProTune, 4 & 5 ProTune, Session ProTune
- DJI: Mavic3, Phantom 4 Pro, Air 2S, Mavic 2 Pro, Mavic Air 2, Mini Series, Mavic Air, Mavic Pro, Pocket 2, Osmo Pocket, Osmo Action, X5 Series
How to Import and Use Leeming LUT Pro™ in Different Video Editors
Leeming LUT Pro™ is supported by various video editors, coloring software, and motion graphics programs, such as:
- Final Cut Pro X
- Avid Media Composer
- DaVinci Resolve
- Adobe Premiere Pro
- Adobe After Effects
- Magix Vegas
- Grass Valley Edius
- Lightworks
- Cyberlink PowerDirector
- LumaFusion
Next, we’ll explore how you can use Leeming LUT in some popular video editors.
1. How to Use Leeming LUT in FCPX
Follow these steps to use Leeming LUT in Final Cut Pro:
Step 1. Import Footage
Launch Final Cut Pro and import your footage. To import your footage, navigate to the top left corner and click on the import icon (the arrow pointing downwards).
In the window that opens, your camera or device name should appear in the left column under devices.
Click on your camera or device to display the media you want to import. Then select the media you want to import and click on the import selected button in the bottom right corner to import your footage.
Step 2. Highlight the Footage
Highlight all the footage by clicking and dragging your pointer over the footage or press Command + A to select all the footage.
Step 3. Open the Inspector
After highlighting all the footage, open the Inspector menu and click the little i icon. Then go down to the bottom of the Inspector and switch from Basic to General.
Step 4. Select the Camera LUT Option
Select Camera LUT from the options under General and click on the Add Custom Camera LUT option.
Step 5. Import Leeming LUTs into FCPX
Find the folder where your Leeming LUTs are stored and import them into Final Cut Pro by clicking on Open.
Step 6. Select the LUT
Once imported, go back to the Camera LUT option under General and click on it. Then scroll down the available options and select your Leeming LUT under the Custom Camera options.
Finally, click the profile you used to apply it to your footage.
2. How to Use Leeming LUT in PowerDirector
Follow these steps to use a LUT in PowerDirector:
Step 1. Launch PowerDirector
Open PowerDirector and select Full Mode.
Step 2. Import Media
Click the import button and then select Import Media Folder to import the video footage you want to apply the Leeming LUT to.
Step 3. Add Footage to Timeline
Drag and drop the imported video footage into your project’s timeline.
Step 4. Select the Fix/Enhance Option
Click on the video clip on the timeline and choose the Fix/Enhance option.
Step 5. Select the Color Presets & CLUTs Option
In the top left window that opens above the timeline, select the Color Presets & CLUTs option under Enhance.
Step 6. Apply the Leeming LUT to the Footage
Click on the import button in the panel to import the Leeming LUT file. Once imported, apply it to give your video a more vibrant look.
Part 5: Bonus! Use Filmora – Easy to Use Video Editor for Color LUTs
Besides Final Cut Pro and PowerDirector, Filmora is another excellent video editing software that you can use to apply LUTs to your video.
Designed for beginners and intermediate users, Filmora is an intuitive yet powerful video editing software.
For instance, you can apply 3D LUTs to your video using Filmora. Unlike 1D LUTs, which can only control one value setting, 3D LUTs can allow you to control various value settings. As a result, 3D LUTs can give you more control over specific color values in your video.
Here’s how you can apply LUTs using Filmora:
Step 1. Import the Footage
Launch Filmora and choose New Project. In the New Project window that opens, import the video you want to apply the LUT to by clicking on Import and selecting one of the drop-down options.
Step 2. Add the Video to the Timeline
Drag and drop the video into your project’s timeline.
Step 3. Open the Color Tab
Double click the video on the timeline to select it. Once it’s selected, go to the top left panel and click on the color tab.
Step 4. Apply a LUT to the Video
Under the color tab, navigate to the 3D LUT option and select one of the available options in the 3D LUT drop-down menu to apply a LUT.
Many LUTs are named after popular TV shows and series whose visual styles they mimic, such as Batman, House of Cards, Game of Thrones, Mission Impossible, Harry Potter, Star Wars, and more.
Once you apply a LUT, you can see your changes in the Preview Window. Besides using the preset LUTs, Filmora also allows you to use custom LUTs. Instead of choosing one of the presets, click on the Load New LUT option to import your custom LUT into Filmora.
Step 5. Make Fine Adjustments
Once you apply a LUT, Filmora can allow you to make further modifications to the video. Click on the Advanced button at the bottom of the color tab to view advanced color correction options.
In the new window that opens, you can adjust several things, such as color, light, HSL, and more. You can also choose from a variety of other available presets.
Step 6. Save the Changes
Once you’re satisfied with the changes you’ve applied, click on the OK button in the lower right corner to save the changes.
For Win 7 or later (64-bit)
For macOS 10.12 or later
Conclusion
LUTs are a fast way to color grade your footage after color correction. However, to ensure your LUTs work effectively, here are some important guidelines you should observe when using LUTs:
- Ensure your footage matches from shot to shot, especially if you’re applying LUTs to multiple clips.
- Ensure your exposure is correct before using LUTs. You can use a histogram to help you set the exposure.
- Ensure you apply LUTs to a video that’s been properly color corrected.
- Make small adjustments to things, such as brightness, saturation, contrast, exposure, color temperature, and tint for best results.
- Test out various LUTs before settling for one because shooting conditions can drastically affect how different LUTs look.
Ultimately, LUTs are an excellent way to make your video more cinematic. If you don’t have advanced video editing skills or prior experience working with LUTs, don’t worry. Filmora is a user-friendly video editing software that allows you to quickly apply LUTs with no video editing experience. Just download Filmora for free to get started.
How to Create a Custom Sequence Preset in Premiere Pro
You’ve probably heard of Adobe Premiere Pro – it’s a top-tier video editing software that’s widely recognized in the market. But have you delved into the nitty-gritty of sequence presets? A custom sequence preset is your best friend for maintaining consistency across projects.
It allows users to save specific settings for sequence attributes like frame rate, resolution, and audio settings. Instead of reconfiguring these settings for each new project, a custom sequence preset lets you jump right into editing. Now, how do you create one? Keep reading!
Part 1: How to Create a Custom Sequence in Premiere Pro
Creating a custom sequence is like tailoring a shirt to fit you perfectly. Here’s a step-by-step guide to help you do just that:
Step 1: Displays the New Sequence Window
Begin by launching Adobe Premiere Pro. Once opened, navigate to the top menu and select File > New > Sequence. This will open up the New Sequence window, where all the magic happens!
Step 2: Change the Editing Mode to Custom in the Settings Panel
You’ll see several tabs in the New Sequence window, but we will focus on the “Settings” tab for our purposes. Click on it.
Here, you’ll find the ‘Editing Mode’ dropdown menu. By default, it’s set to a specific format like ‘DSLR’ or ‘AVCHD.’ Change this to ‘Custom.’ This will unlock a plethora of options for you to play with.
Deep Dive into Settings:
- Frame Size: Define your video’s width and height. Remember, 1920x1080 is Full HD, and 3840x2160 is 4K. Choose based on your project needs.
- Frame Rate: 24fps is the cinematic standard, but if you’re creating content for TV or web, 30fps or 60fps might be more suitable.
- Pixel Aspect Ratio: Stick with ‘Square Pixels’ unless you have a specific reason to do otherwise.
- Fields: Choose ‘No Fields’ for progressive footage. If you’re unsure, this is a safe bet.
- Audio Settings: Here, you can configure the sample rate, among other things. 48000Hz is standard for video.
Step 3: Give the New Preset a Name and Save It
Once you’ve customized the settings to your satisfaction, it’s time to save this configuration for future use. At the bottom of the New Sequence window, you’ll see a ‘Save Preset’ button. Click on it.
A pop-up window will show up, requesting you to provide a name for your new preset. Choose something descriptive so you can easily recognize it later. Once named, click ‘OK’.
Your custom sequence preset is now saved and will appear under the ‘Custom’ folder in the ‘Sequence Presets’ tab.
Part 2: Why Custom Sequence Presets are Essential for Efficient Editing
As you delve deeper into video editing, you’ll begin to appreciate the little things that shave off minutes from your workflow, allowing you to dedicate more time to the creative process. This is precisely where the utility of custom sequence presets in Premiere Pro comes into play. But why are these presets so crucial?
- Consistency Across Projects: If you’re managing multiple projects or a series of videos, having a standard format ensures that all your content has a uniform look and feel. Consistency is a hallmark of professional-grade content. It’s not just about the visuals – maintaining a uniform audio quality and format is equally significant. With a preset, you no longer need to remember the minutiae of each setting, ensuring consistency effortlessly.
- Speed Up Your Workflow: Every minute you spend adjusting the sequence settings is a minute less you have for cutting, color correcting, audio mixing, or adding those special effects that make your videos pop. Over time, those minutes can add up to hours. By using a custom sequence preset, you can jump straight into the creative part of editing without the preliminary setup.
- Avoid Common Mistakes: Have you ever rendered an entire project only to find that the frame rate was off or the audio was set to the wrong sample rate? These kinds of errors can occur when setting up a new sequence from scratch each time. By relying on a preset, you mitigate the risks of such oversights.
- Personalized Templates for Different Platforms: Different platforms may have varying preferred settings. For instance, the ideal video format for YouTube might differ from that of Instagram or TikTok. Instead of Googling these settings each time, you can have a custom sequence preset ready for each platform, ensuring your content is optimized wherever it’s destined.
- Ease of Collaboration: If you’re working as part of a team, having standard sequence presets ensures everyone is on the same page. This is particularly handy when multiple editors are working on different segments of the same project. With custom presets, you’re not just aligning sequences but also visions.
Incorporating this practice into your editing routine might initially seem trivial, but its benefits compound with time.
Part 3: Summary
Creating a custom sequence preset in Adobe Premiere Pro isn’t just about streamlining your workflow – it’s about ensuring consistency across your projects.
By saving your most-used settings, you’re creating a base template that can be pulled up any time, granting you more time for the creative process.
Adobe Premiere Pro’s interface is designed to make tasks like these intuitive, so even if you’re a beginner, with a bit of practice, you’ll be creating custom sequence presets like a pro.
Also read:
- New 2024 Approved How to Rotate Video in iMovie with Alternative
- New Top 16 Motion Blur Apps for Videos & Photos
- Updated Make Eye Zoom Transition Effect with Filmora
- Best Free Slow Motion Apps For Android and iPhone for 2024
- In 2024, Can You Enhance Your Drone Footage with Cinematic Drone LUTs? This Article Discusses Top Drone LUTs Recommendations to Simplify Video Editing
- Updated Create Slow Motion Videos Using Final Cut Pro with Ease for 2024
- Updated In 2024, How to Record Super Slow Motion Videos on Your Phone?
- In 2024, How To Trim Video In Premiere Pro in Different Ways
- In 2024, Are You Looking for Ways to Add Background to Green Screen Video Online? Worry Not, as in This Article; We Shall Discuss Using a Green Screen Background Adder in Filmora
- In 2024, Motion Tracking Is the Process of Tracking the Movements of a Project in a Video. This Article Will Show You How to Apply Motion Tracking Effect Into Videos
- In 2024, What Is a Memoji and How to Make a Memoji? You Can Learn Top 8 Memoji Makers for PC, Android, or iOS, and the Steps to Make a Memoji
- Updated How to Make Dynamic Video Collages?
- In 2024, Best Jump Cut Editing Tricks
- In 2024, This Article Discusses What Is Vegas Pro, How to Download, Install and Use It, and Its Key Features. It Further Discusses Its Alternative for Editing Your Videos and More. Check Out Now
- In 2024, How to Make a Smooth Speed Ramping in Premiere Pro?
- In 2024, If You Want to Color Grading Your Video, Final Cut Pro Can Be One of the Best Choices. However, Its Not Easy for Everyone to Use Color Grading Feature, and in This Guide Well Show You How to Do That
- 2024 Approved Perfect Guide for Beginners to Make a TikTok with Multiple Clips
- Updated You Can Easily Cut or Crop a Part of Your Video by Using Its Editing Tools Such as Crop (To Remove Unwanted Black Borders), Trim (To Remove the Unwanted Front and End Parts of Your Video Clip)
- Updated How to Add a Slideshow in PowerPoint for 2024
- Updated In 2024, HOW to Add Fade to Black on Premiere Pro
- How D AI Video Games Act More Human Than Human for 2024
- How to Use the Logo Intro Templates for Your Next Video for 2024
- Updated 2024 Approved 3 Best Motion Blur Plugins for Adobe After Effects
- 2024 Approved In This Article, We Will Discuss How to Rotate Videos in the Lightworks Application. Below Is a Way to Rotate Videos in Lightworks Manually, Here, We Will Use the Z-Axis Rotation
- What Is a Transparent Logo and Why Do You Need It for 2024
- Updated 2024 Approved Video Editing Tips to Know Before Editing First Draft
- How to Slow Down Time-Lapse Videos on iPhone
- In 2024, How To Use Special Features - Virtual Location On Honor X50i+? | Dr.fone
- Prank Your Friends! Easy Ways to Fake and Share Google Maps Location On Honor X50 | Dr.fone
- In 2024, How PGSharp Save You from Ban While Spoofing Pokemon Go On Samsung Galaxy S24+? | Dr.fone
- Will Pokémon Go Ban the Account if You Use PGSharp On Vivo V29e | Dr.fone
- Will MOV files play on Xiaomi Redmi K70E ?
- In 2024, Top 15 Apps To Hack WiFi Password On Infinix Hot 30 5G
- What Is a SIM Network Unlock PIN? Get Your Vivo Y100i Power 5G Phone Network-Ready
- In 2024, Simple and Effective Ways to Change Your Country on YouTube App Of your Lava Blaze Pro 5G | Dr.fone
- How to Bypass Google FRP Lock on Samsung Galaxy S23 Ultra Devices
- New 10 Best Free GIF Apps for iPhone and iPad
- Easy Guide How To Bypass Honor Magic5 Ultimate FRP Android 10/11/12/13
- How to use Snapchat Location Spoofer to Protect Your Privacy On Itel P40? | Dr.fone
- In 2024, 4 Ways to Unlock iPhone 14 Plus to Use USB Accessories Without Passcode | Dr.fone
- Pokemon Go Error 12 Failed to Detect Location On Realme C55? | Dr.fone
- Hard Resetting an Oppo Find N3 Device Made Easy | Dr.fone
- In 2024, What Legendaries Are In Pokemon Platinum On Google Pixel 8? | Dr.fone
- 4 Ways to Fix Android Blue Screen of Death On Tecno Spark 20 Pro | Dr.fone
- How to Change Location on TikTok to See More Content On your Apple iPhone 11 | Dr.fone
- Stuck at Android System Recovery Of Realme GT Neo 5 SE ? Fix It Easily | Dr.fone
- In 2024, How to Change your Motorola Moto G04 Location on Twitter | Dr.fone
- How to Share Location in Messenger On Apple iPhone X? | Dr.fone
- Can I use iTools gpx file to catch the rare Pokemon On Motorola Moto G14 | Dr.fone
- In 2024, Catch or Beat Sleeping Snorlax on Pokemon Go For Apple iPhone 12 mini | Dr.fone
- Title: Updated In 2024, Top 10 Fun Discord Bots You Need
- Author: Chloe
- Created at : 2024-04-24 07:08:38
- Updated at : 2024-04-25 07:08:38
- Link: https://ai-editing-video.techidaily.com/updated-in-2024-top-10-fun-discord-bots-you-need/
- License: This work is licensed under CC BY-NC-SA 4.0.
