
:max_bytes(150000):strip_icc():format(webp)/samsungvoiceassistant-1c59910bc4614b2a8531fc5b7a754e7d.jpg)
Updated In 2024, Top 8 Augmented Reality Video Games
Top 8 Augmented Reality Video Games
Top 8 Augmented Reality Video Games
An easy yet powerful editor
Numerous effects to choose from
Detailed tutorials provided by the official channel
Augmented reality video games are the latest sensation in the gamer fraternity. Be here to know everything about the top 8 AR video games of all times!
In this article
01 [What Is AR in Gaming? Is AR the Future of Gaming?](#Part 1)
02 [What Is the Most Popular AR Game Now?](#Part 2)
03 [8 Best Augmented Reality Games (For iOS & Android)](#Part 3)
Part 1 What Is AR in Gaming? Is AR the Future of Gaming?
Before taking a dive into the most appealing augmented reality gaming alternatives, it would be better to have a generalized understanding of the concept behind the AR utility. Sticking to digital terms, augmented reality refers to an enhanced presentation of your real world environment with the use of suitable digital equipments. The most basic example in this regard is using your smartphone camera to view the nearby environment in a considerably upgraded graphic setting through an AR application.
When thinking to experiment with the diversity of graphic elements in augmented reality, you can explore the digital overlays by trying hands at one or more of the following enhancements:
● Changing the color perspectives of the screen backgrounds, along with applying suitable filters to produce the effect of high quality chromatic scaling in the graphic elements.
● Superimposition of 3D graphic models, images and other elements conveying snippets of digital information.
● Add labels to screen elements for precise recognition and convenient location, when using the augmented reality concept for gaming purposes.
● Integrate the AR concept to with social media platforms, like using SnapChat and Instagram’s image filters to modify the player’s appearance within the game surroundings.
Moving ahead to the specific discussion on augmented reality video games, the concept was introduced in 2016, with Pokemon GO being the inaugural AR experiment. Since then, the gaming fraternity is dedicated towards providing a real-time perception of different gaming environments with high quality graphic imagery, matchless storytelling and an exquisite range of gaming hardware.
About the latest trends in the domain, you will land across a diversity of immersive augmented reality games introduced by some of the most pronounced game developing companies. These games are a complete entertainment package, where you gave the surety of getting a maximized real-time gameplay experience with enhanced capacities of headsets and motion controls.
Most of the aforesaid games use a GPS tracking system to create a more responsive and realistic gaming environment, allowing the player to undertake a flawless transition amid the real world and its technological replica.
● Augmented Reality: The Future of Console Gaming
Talking about the modern day console gaming prospects, a lot needs to be owed to the revolutions encountered in the gaming technology in the past decade. While the integration of augmented reality into conventional video gaming has come up with upgraded concepts of real-time gaming that has definitely given a boost to the present time gaming aspects.
Augmented reality is being regarded as a potential candidate in the domain of computer based gaming platforms, considering the fact that the latter has brought about an integration of real-world elements into gaming alternatives with minimal prerequisites. As of now, AR based games are all set to provide you with the most immersive gaming experience you have ever had.
As far as the future if console gaming in the light of augmented reality is concerned, it would be a rather quick judgment to define the latter’s prospects within any constraints. With the technology being a relatively newer entrant to the world of gaming, the realm of feature-based enhancement is wide open.
All said and done, the bottom line of the discussion is that the future would have a huge storehouse of immersive gaming alternatives, with the most realistic AR approaches, which would further be supplemented by the day to day technological advancements in the IT and communication industry. The introduction of high tech 5G devices will further let players embrace the real world through their console, thus ensuring a perfect synchronization of virtual gaming technology with the real-time environment.
Part 2 What Is the Most Popular AR Game Now?
Since its advent in 2016, augmented reality gaming has mastered the art of ruling the hearts of gamers around the world. Right from graphical enhancement to real-time modulation, and top quality futures to convenient gameplay, AR gaming has everything to keep you glued to your consoles and smartphones for hours that refuse to end!
AR video games are the talk of the trend, and boast of presenting an enormous variety of gaming choices in front of dedicated players. While it is quite obvious to have a tough time choosing your best AR game, you can begin your gaming streak with Pokemon GO, the first and the most popular entry into the series, till you make a new choice.
Diving into the game specifications, Pokemon GO is a location centered, augmented reality game, which is conveniently compatible to any of your smartphones. The game marked the entry of the augmented reality concept into the realm of video game development with its release in July 2016 as a new member of the Pokemon franchise. Talking of the game’s popularity, the latter became successful in becoming an absolute favorite among global gamers and is known to have generated the maximum revenue at the time of its release, taking the credit of being recognized as the first mainstream console game based on augmented reality.
As reviewed by the players, Pokemon GO is loaded with excellent features of storyline flow, game controls and interface mechanics, sociability and of course, the undeniably appealing legacy of the Pokemon brand. Other attractions of the game with special reference to augmented reality include, a free access revenue model and adequate information safety.

Part 2 Best Augmented Reality Games (For iOS & Android)
Having discussed enough about the advent and credibility of augmented reality based console gaming, you might easily feel motivated to try hands at the popular and appealing integration of technology and entertainment. Adhering to the concern, let us browse through the most interactive choices of augmented reality infused games that you would love to relish on your iOS and Android devices:
01Knightfall AR
Set in the fictional region of The Knights Templar, this one is a combat oriented AR video game that tasks you with the responsibility of defending the land of Acre against a rival army invasion, while protecting the Holy Grail, which is the most valuable relic of Christianity. When playing the game, you will be grouped into teams of Knights and Warriors to proceed with the quest.
This AR game promises you of an everlasting real-time action gaming experience, where you can fire bullets to kill enemies, collect gold and reconstruct your defense system. You need to win battles, while unlocking features and challenges to proceed through the gameplay. You are also allowed to choose a character in the game’s Photo mode for entertainment purposes.

02Zombie, Run
If you have a soft corner for your morning jog routine, get ready dive into the most thrilling sporty adventure with the aforesaid augmented reality gaming application. The gameplay put you amid a world of attacking zombies, where you are required to run and simultaneously collect specified game items to escape the fatal attacks of the nasty creatures.
You are entitled to enjoy an amplified experience of your regular morning jogs with the game’s motivating narration and complementing background music that boosts your gaming as well as exercising willpower.

03Temple Treasure Hunt
This one is the perfect game for you if the idea of treasure hunting and mystery solving turns you on. Using the concept of geo-location to inculcate the augmented reality characteristic, Temple Treasure Hunt is a simple yet exciting game with a diversity of legends to hear, mysteries to solve and adventures to experience.
As a player of the game, you are allowed to make a choice between assuming the role of either a treasure protector or a hunter. While the former requires you to create challenging treasure tests that would make it difficult for the hunters to locate the same, the latter, on the other hand demands you to hunt the protected treasure to win the game. Regardless of the role you pick, you are required to follow a route map to proceed through the game.

04Jurassic World Alive
The aforesaid game is a treat for those who have always been the secret admirers of the gigantic creatures of the prehistoric period. The thrilling gameplay of Jurassic World Alive lets you have an encounter with the freely wandering prehistoric beings within the modern day civilizations. Packed with well designed graphics, the game is all set to give its players an exciting and unforgettable augmented reality experience.
Landing into the game, you are given the liberty to explore the diversity of elements in the realms of the Jurassic World, while completing the game’s task if collecting DNA samples of the giant mammoths, Pteranodons and dinosaurs. If that is not enough, you are free to create a customized raptor of your own, and share the same while competing with similar counterparts in real-time.

05Harry Potter: Wizards Unite
Who amongst us is not a die-hard fan of the magically fantasizing Harry Potter series! Thanks to augmented reality, the love of the same can now be relished in real-time. Talking of the aforesaid Wizards Unite edition, this one is a fantasy adventure game that requires the players to relieve Harry Potter’s magical universe from the drastic doom that has struck upon the land with an aim of ultimate destruction.
When playing the game, you are supposed to slip into the role of a Wizard and proceed through the game by overcoming challenges and combating enemies. With the integration of realistic graphics, players get to experience wizard magic in true sense.

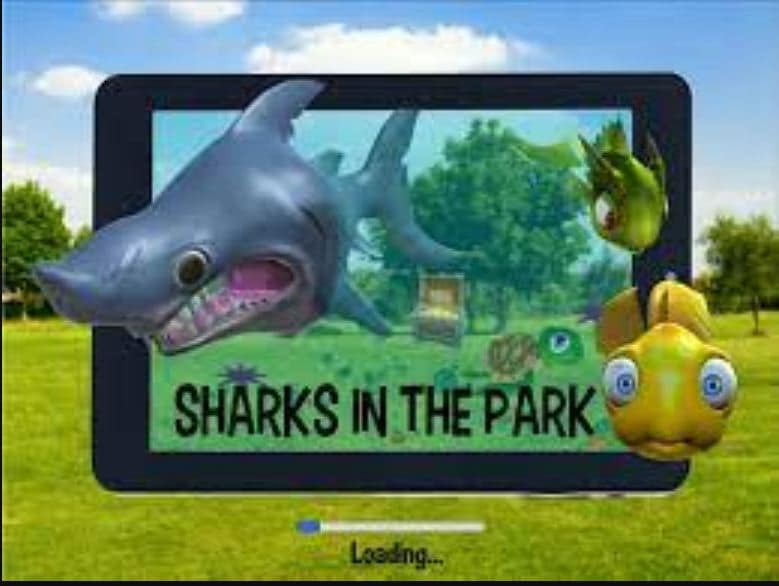
06Sharks in the Park
This one is a fun centered augmented reality game, set within an oceanic ecosystem. When traversing through the exquisite regions of the aquatic world, you will come across a hoard of newly found water species, which you need to interact with, in real-time for addressing the different aspects of the game quest.
The game accesses the GPS functionality of your smartphone to help you to walk through the ocean while you are on your expedition of discovering the different forms of aquatic life under the sea. The game further utilizes smartphone sensors for a synchronized movement tracking of the players, which means that your movements in real-time will be exactly replicated in the digital environment.
07Beer Pong AR
This game is conveniently regarded as the digital prototype of board games in the future and showcases the fusion of augmented reality into the already entertaining world of console gaming. The gameplay begins with the players getting a choice to select a preferred set of surroundings for installing the beer. This is followed by throwing ping pong balls from the most suitable angle.
Talking of the games another attraction is the perfect sync between the real and digital worlds and the non-messy post game experience. If you are keen on enjoying augmented reality gaming on an Android phone, Beer Pong AR is possibly the best alternative you can rely on.

08Dark: Subject One
If you are more comfortable in the adventure and mystery centered gameplay genres, consider trying hands at this game in the environment of augmented reality. The gameplay unfolds a horror storyline, where the player being the hero of the game, adheres to the task of searching for his disappeared friend. As the game progresses, the player is directed to a parallel universe, where he is welcomed by terrifying encounters.
Beating through the eerie landscapes and overcoming scary hurdles, the player lands across clues and hints to unravel the mystery of the case. The top class augmented reality elements promise you of an escalated horrid feel all through the gameplay.

09Experiencing Augmented Reality With Filmora
When looking for suitable alternatives to edit augmented reality video games, you can rely on the Wondershare Filmora Video Editor software without a second thought. Right from welcoming you with the most user-cohesive working interface to presenting a diverse library of top class video editing effects, this application has visibly everything that an editor of augmented reality video game will ever need.
For Win 7 or later (64-bit)
For macOS 10.12 or later
The software program even furnishes you with an additional in-built screen recorder program that allows you to record and edit video games with the most stunning audio-visual editing effects and filters within the app’s editing library.
● Ending Thoughts →
● The advent of augmented reality has put console gaming on a different level with the integration of real-time features.
● When looking for the best alternatives for landing into AR gaming, there are a variety of Android and iOS compatible games to choose from.
● To address the need of editing an AR video game, you can conveniently seek the help of Wondershare Filmora for the best quality editing output.
Augmented reality video games are the latest sensation in the gamer fraternity. Be here to know everything about the top 8 AR video games of all times!
In this article
01 [What Is AR in Gaming? Is AR the Future of Gaming?](#Part 1)
02 [What Is the Most Popular AR Game Now?](#Part 2)
03 [8 Best Augmented Reality Games (For iOS & Android)](#Part 3)
Part 1 What Is AR in Gaming? Is AR the Future of Gaming?
Before taking a dive into the most appealing augmented reality gaming alternatives, it would be better to have a generalized understanding of the concept behind the AR utility. Sticking to digital terms, augmented reality refers to an enhanced presentation of your real world environment with the use of suitable digital equipments. The most basic example in this regard is using your smartphone camera to view the nearby environment in a considerably upgraded graphic setting through an AR application.
When thinking to experiment with the diversity of graphic elements in augmented reality, you can explore the digital overlays by trying hands at one or more of the following enhancements:
● Changing the color perspectives of the screen backgrounds, along with applying suitable filters to produce the effect of high quality chromatic scaling in the graphic elements.
● Superimposition of 3D graphic models, images and other elements conveying snippets of digital information.
● Add labels to screen elements for precise recognition and convenient location, when using the augmented reality concept for gaming purposes.
● Integrate the AR concept to with social media platforms, like using SnapChat and Instagram’s image filters to modify the player’s appearance within the game surroundings.
Moving ahead to the specific discussion on augmented reality video games, the concept was introduced in 2016, with Pokemon GO being the inaugural AR experiment. Since then, the gaming fraternity is dedicated towards providing a real-time perception of different gaming environments with high quality graphic imagery, matchless storytelling and an exquisite range of gaming hardware.
About the latest trends in the domain, you will land across a diversity of immersive augmented reality games introduced by some of the most pronounced game developing companies. These games are a complete entertainment package, where you gave the surety of getting a maximized real-time gameplay experience with enhanced capacities of headsets and motion controls.
Most of the aforesaid games use a GPS tracking system to create a more responsive and realistic gaming environment, allowing the player to undertake a flawless transition amid the real world and its technological replica.
● Augmented Reality: The Future of Console Gaming
Talking about the modern day console gaming prospects, a lot needs to be owed to the revolutions encountered in the gaming technology in the past decade. While the integration of augmented reality into conventional video gaming has come up with upgraded concepts of real-time gaming that has definitely given a boost to the present time gaming aspects.
Augmented reality is being regarded as a potential candidate in the domain of computer based gaming platforms, considering the fact that the latter has brought about an integration of real-world elements into gaming alternatives with minimal prerequisites. As of now, AR based games are all set to provide you with the most immersive gaming experience you have ever had.
As far as the future if console gaming in the light of augmented reality is concerned, it would be a rather quick judgment to define the latter’s prospects within any constraints. With the technology being a relatively newer entrant to the world of gaming, the realm of feature-based enhancement is wide open.
All said and done, the bottom line of the discussion is that the future would have a huge storehouse of immersive gaming alternatives, with the most realistic AR approaches, which would further be supplemented by the day to day technological advancements in the IT and communication industry. The introduction of high tech 5G devices will further let players embrace the real world through their console, thus ensuring a perfect synchronization of virtual gaming technology with the real-time environment.
Part 2 What Is the Most Popular AR Game Now?
Since its advent in 2016, augmented reality gaming has mastered the art of ruling the hearts of gamers around the world. Right from graphical enhancement to real-time modulation, and top quality futures to convenient gameplay, AR gaming has everything to keep you glued to your consoles and smartphones for hours that refuse to end!
AR video games are the talk of the trend, and boast of presenting an enormous variety of gaming choices in front of dedicated players. While it is quite obvious to have a tough time choosing your best AR game, you can begin your gaming streak with Pokemon GO, the first and the most popular entry into the series, till you make a new choice.
Diving into the game specifications, Pokemon GO is a location centered, augmented reality game, which is conveniently compatible to any of your smartphones. The game marked the entry of the augmented reality concept into the realm of video game development with its release in July 2016 as a new member of the Pokemon franchise. Talking of the game’s popularity, the latter became successful in becoming an absolute favorite among global gamers and is known to have generated the maximum revenue at the time of its release, taking the credit of being recognized as the first mainstream console game based on augmented reality.
As reviewed by the players, Pokemon GO is loaded with excellent features of storyline flow, game controls and interface mechanics, sociability and of course, the undeniably appealing legacy of the Pokemon brand. Other attractions of the game with special reference to augmented reality include, a free access revenue model and adequate information safety.
Part 2 Best Augmented Reality Games (For iOS & Android)
Having discussed enough about the advent and credibility of augmented reality based console gaming, you might easily feel motivated to try hands at the popular and appealing integration of technology and entertainment. Adhering to the concern, let us browse through the most interactive choices of augmented reality infused games that you would love to relish on your iOS and Android devices:
01Knightfall AR
Set in the fictional region of The Knights Templar, this one is a combat oriented AR video game that tasks you with the responsibility of defending the land of Acre against a rival army invasion, while protecting the Holy Grail, which is the most valuable relic of Christianity. When playing the game, you will be grouped into teams of Knights and Warriors to proceed with the quest.
This AR game promises you of an everlasting real-time action gaming experience, where you can fire bullets to kill enemies, collect gold and reconstruct your defense system. You need to win battles, while unlocking features and challenges to proceed through the gameplay. You are also allowed to choose a character in the game’s Photo mode for entertainment purposes.
02Zombie, Run
If you have a soft corner for your morning jog routine, get ready dive into the most thrilling sporty adventure with the aforesaid augmented reality gaming application. The gameplay put you amid a world of attacking zombies, where you are required to run and simultaneously collect specified game items to escape the fatal attacks of the nasty creatures.
You are entitled to enjoy an amplified experience of your regular morning jogs with the game’s motivating narration and complementing background music that boosts your gaming as well as exercising willpower.
03Temple Treasure Hunt
This one is the perfect game for you if the idea of treasure hunting and mystery solving turns you on. Using the concept of geo-location to inculcate the augmented reality characteristic, Temple Treasure Hunt is a simple yet exciting game with a diversity of legends to hear, mysteries to solve and adventures to experience.
As a player of the game, you are allowed to make a choice between assuming the role of either a treasure protector or a hunter. While the former requires you to create challenging treasure tests that would make it difficult for the hunters to locate the same, the latter, on the other hand demands you to hunt the protected treasure to win the game. Regardless of the role you pick, you are required to follow a route map to proceed through the game.
04Jurassic World Alive
The aforesaid game is a treat for those who have always been the secret admirers of the gigantic creatures of the prehistoric period. The thrilling gameplay of Jurassic World Alive lets you have an encounter with the freely wandering prehistoric beings within the modern day civilizations. Packed with well designed graphics, the game is all set to give its players an exciting and unforgettable augmented reality experience.
Landing into the game, you are given the liberty to explore the diversity of elements in the realms of the Jurassic World, while completing the game’s task if collecting DNA samples of the giant mammoths, Pteranodons and dinosaurs. If that is not enough, you are free to create a customized raptor of your own, and share the same while competing with similar counterparts in real-time.
05Harry Potter: Wizards Unite
Who amongst us is not a die-hard fan of the magically fantasizing Harry Potter series! Thanks to augmented reality, the love of the same can now be relished in real-time. Talking of the aforesaid Wizards Unite edition, this one is a fantasy adventure game that requires the players to relieve Harry Potter’s magical universe from the drastic doom that has struck upon the land with an aim of ultimate destruction.
When playing the game, you are supposed to slip into the role of a Wizard and proceed through the game by overcoming challenges and combating enemies. With the integration of realistic graphics, players get to experience wizard magic in true sense.
06Sharks in the Park
This one is a fun centered augmented reality game, set within an oceanic ecosystem. When traversing through the exquisite regions of the aquatic world, you will come across a hoard of newly found water species, which you need to interact with, in real-time for addressing the different aspects of the game quest.
The game accesses the GPS functionality of your smartphone to help you to walk through the ocean while you are on your expedition of discovering the different forms of aquatic life under the sea. The game further utilizes smartphone sensors for a synchronized movement tracking of the players, which means that your movements in real-time will be exactly replicated in the digital environment.
07Beer Pong AR
This game is conveniently regarded as the digital prototype of board games in the future and showcases the fusion of augmented reality into the already entertaining world of console gaming. The gameplay begins with the players getting a choice to select a preferred set of surroundings for installing the beer. This is followed by throwing ping pong balls from the most suitable angle.
Talking of the games another attraction is the perfect sync between the real and digital worlds and the non-messy post game experience. If you are keen on enjoying augmented reality gaming on an Android phone, Beer Pong AR is possibly the best alternative you can rely on.
08Dark: Subject One
If you are more comfortable in the adventure and mystery centered gameplay genres, consider trying hands at this game in the environment of augmented reality. The gameplay unfolds a horror storyline, where the player being the hero of the game, adheres to the task of searching for his disappeared friend. As the game progresses, the player is directed to a parallel universe, where he is welcomed by terrifying encounters.
Beating through the eerie landscapes and overcoming scary hurdles, the player lands across clues and hints to unravel the mystery of the case. The top class augmented reality elements promise you of an escalated horrid feel all through the gameplay.
09Experiencing Augmented Reality With Filmora
When looking for suitable alternatives to edit augmented reality video games, you can rely on the Wondershare Filmora Video Editor software without a second thought. Right from welcoming you with the most user-cohesive working interface to presenting a diverse library of top class video editing effects, this application has visibly everything that an editor of augmented reality video game will ever need.
For Win 7 or later (64-bit)
For macOS 10.12 or later
The software program even furnishes you with an additional in-built screen recorder program that allows you to record and edit video games with the most stunning audio-visual editing effects and filters within the app’s editing library.
● Ending Thoughts →
● The advent of augmented reality has put console gaming on a different level with the integration of real-time features.
● When looking for the best alternatives for landing into AR gaming, there are a variety of Android and iOS compatible games to choose from.
● To address the need of editing an AR video game, you can conveniently seek the help of Wondershare Filmora for the best quality editing output.
Know How to Make a Video Background Transparent? Export Transparent Background Video After Adding Effects. Steps to Remove White Background From Video
End This Problem! Make Transparent Background Video Today
An easy yet powerful editor
Numerous effects to choose from
Detailed tutorials provided by the official channel
How to export transparent video premiere? Making video transparent background online. Steps to remove white background from video.

Have you ever wondered why most shooting of videos are done in white or transparent background? The reasons are that they are simple and easy to shoot. There are various options to add some effects to the videos by removing the white background. New and attractive background can be added with some effects at less cost and time. So, there are various applications which facilitate making video background transparent as well as video without background. So, let’s see some of them along with the steps.
In this article
01 [How to Export Transparent Background Videos in After Effects?](#Part 1)
02 [How to Export Transparent Background Videos in Premiere Pro?](#Part 2)
03 [How to Export Transparent Background Videos in Vsdc](#Part 3)
04 [Best 5 Tool to Make Video Transparent Background Online](#Part 4)
Part 1 How to Export Transparent Background Videos in After Effects?

Working with transparent background is easy and the reason is the flexibility of using a white background and exporting it to other videos. So, let’s learn how to export transparent background videos in After Effects step by step:
● Before exporting the video with transparent background, chose composition. It can be timeline or project panel.
● After this selection, go to application window. Click at composition menu and elect Add to Render Queue.
● You can see that Render Queue window will open with composition in the queue.
● Go to settings and select as required
● Take the cursor on the left side of window and go to the drop down menu. You will find the Output Module settings window.
● Go to format and select QuickTime, the industry standard.
● Staying at Output Module settings window, under Video Output, click Channels
● Select RGB + Alpha
● Click OK
This way you can also export transparent background after effects in After effects. You can easily export your video after effects file with variable alpha layers. With layering you can add variations in the videos through various layering effects. It can used to design a project with better results.
Part 2 How to Export Transparent Background Videos in Premiere Pro?
Sometimes a Transparent Background Video needs some cool effects for some projects. This can be done by exporting a video file in Premiere Pro. The steps to be followed for exporting a transparent background video are as follows:
● Load your video in Premiere Pro with transparent background. Do all the necessary editing so that the overlay is obtained for production.
● When the video is ready, move to the setting part. Here go to file menu and open export setting. Click on media.
● After this, there is need to configure the export setting particularly for transparent background. Just few setting more are required to ensure that the transparent background video or projects are exported well.
● In order to ensure that a video format supports transparency, do the required settings. Go to export format at the right of the window. Set it to Quick time. It is always good to export by using Quick time. However if you don’t need to export using Quick time and need MOV format, you can still do that. You can use the software Adobe Premiere Pro to import the other type of files also.
● Get alpha channel enabled. When the video format is all done, get to same column and you will find ‘Effects’, Video and audio tab. You can get some unique setting through this to export the videos of Premiere Pro.
● Go to “Video Codec” settings and elect the “None” options. This gives the best result outcome for transparent backgrounds. Particularly for transparent video overlay free and animations. For example YouTube subscribe button video animation.
● To enable alpha channel, go to the “Basic Video Settings” options. Get to the “depth” option. Here you can enable the alpha channel in the export settings. After doing that the alpha channel will permit to export transparent video backgrounds.
● Clicking on the button with the” + alpha” option inside the “Depth” setting. This will enable the alpha setting.
● Also check “Render at Maximum Depth”. This will help in obtaining a max depth which will give transparent video smoother and better results. They are good for higher quality videos.
● When all configurations is done, Proceed to export the video. The file from Adobe Premiere Pro gave you can be used. The process can be followed to export the other files also.
Part 3 How to Export Transparent Background Videos in Vsdc
No background video is very difficult to handle as people face trouble to export them due to their formats. Some formats do not support transparency. MOV and Gifs formats are good for transparent background. Vsdc can be used to make video background transparent as well as remove white background video. Following steps should be followed to export transparent background video in Vsdc:
● Open VSDC and go to start screen and click the Import content button. Select the green screen video from PC.
● Go to Project’s settings window and search for Opacity and kept it zero and click Finish.
● Then go to Video effects menu. Move to Transparency and then Background remover. Click Ok.
● The green light borders can be changed through Properties window
● When all things are ready open the Export project tab. From “Media devices” select PC.
● From “Output video formats”, choose MOV.
● Go to preview window and look for “Edit profile” button. Click and change the codec of the video.
● Go to Video settings menu, opt for Video codec >> PNG lossless.
● Lastly click on Apply profile
This way you can have a video after effects export with transparent background. This is just simple to export a video with a transparent background. It can be further used in various applications to create great effects.
Part 4 Best 5 Tool to Make Video Transparent Background Online
Various software offer number of fantastic tools for making video background transparent online. It can export a video by making series of pictures or videos more attractive and memorable.
Some of the tools or the makers to make Transparent Background Video are as under:
01Canva
The online version of canva can be used to edit images and videos. This is one of the widest tools chosen by the users in making and editing videos and images. The best thing is that it can be easily installed at PC and phones. It just needs Javascript in your browser. Transparent background option can be chosen to change the background of the image and make it visually attractive. It has convenient controls that change the background into transparent one easily.
02Online PNG Tools
If you are looking for a tool that can make your video background transparent in just few clicks, then Online PNG tools is the best option. You can upload many files and it allows you to turn them into transparent backgrounds. It is good when a user desire to turn a background easily and the level of perfection required is not much high. It is fast, free and easy to use which makes it an affordable tool.
03LunaPic
It is a free online picture and video editing tool that can effortlessly help in importing, adding effects and customization. Its edit option allows the users to upload the picture and perform the task to turn a background of picture or video transparent. In just few simple steps the required changes can be made. The best thing with this tool is that the output result does not affect the quality. One can also personalize the pictures which has high standards.
04Microsoft Paint
This is from Microsoft and the most widely used tool for pictures and video creation, editing and adding effects. Its drawing and editing tools make it first preference for every beginner and a professional. One can easily turn a picture background transparent through following few steps through ‘Select’ option. Go to ‘Transparent Selection’ from the list and turn an image background transparent. It can also go smooth with other applications to have transparent video format.
05Photoshop
When you are looking for a tool that can work with Windows, Android and iOS for adding transparent background online, then Photoshop shall be a good option. It can add some great effects in flawless manner in very less time. It works excellently on various elements such as brightness, transparent background and customization of pictures. This is a good platform to add visualization to images. One can add transparent background by going to background option.
These are some of the tools that can be used to make transparent background. If you need something like Pro, then you can try Filmora from Wondershare.
Filmora can be defined in number of ways. It is software, an application and a platform that provides an opportunity to a person to expand his creativity with some good picture and video editing tools. The green screen feature makes any background transparent. Variety of sound, text, video effects and animations help the users to make their projects better and presentable.
Wondershare Filmora Video Editor is a free tool that works on Artificial Intelligence. It detects the background and does editing on the same. It can remove the backgrounds from different kinds of images, videos, and presentations. This tool is great for those who need to bring some fantastic changes on the background of the images with no more hassle. It has advantage over the other tools as it works precisely on backgrounds and make sure that no details are disturbed from the original subject.
For Win 7 or later (64-bit)
For macOS 10.12 or later
● Ending Thoughts →
● The background on any image or video plays an important role in creating a visual impact. A background should be such that it may not be difficult to a creator to utilize the original picture, video or subject for its other projects. Hence in order to use them in other themes, exporting of transparent background should be easy. This can be done through various software or applications.
● Various platforms can be used to know the steps of exporting transparent background of images or videos. The selection shall be based on the degree of perfection, affordability, ease of use and volume of work. The various applications that offer exporting transparent background videos are After Effects; Premiere Pro, Vsdc and many more.
● The various tools for making transparent backgrounds are Online PNG Tools, Canva, Photoshop, MS paint, LunaPic and Filmora. Filmora is one of the most popular platforms that have different image and video editing tools. One can easily create, edit and export transparent backgrounds of images and videos through Filmora.
How to export transparent video premiere? Making video transparent background online. Steps to remove white background from video.
Have you ever wondered why most shooting of videos are done in white or transparent background? The reasons are that they are simple and easy to shoot. There are various options to add some effects to the videos by removing the white background. New and attractive background can be added with some effects at less cost and time. So, there are various applications which facilitate making video background transparent as well as video without background. So, let’s see some of them along with the steps.
In this article
01 [How to Export Transparent Background Videos in After Effects?](#Part 1)
02 [How to Export Transparent Background Videos in Premiere Pro?](#Part 2)
03 [How to Export Transparent Background Videos in Vsdc](#Part 3)
04 [Best 5 Tool to Make Video Transparent Background Online](#Part 4)
Part 1 How to Export Transparent Background Videos in After Effects?
Working with transparent background is easy and the reason is the flexibility of using a white background and exporting it to other videos. So, let’s learn how to export transparent background videos in After Effects step by step:
● Before exporting the video with transparent background, chose composition. It can be timeline or project panel.
● After this selection, go to application window. Click at composition menu and elect Add to Render Queue.
● You can see that Render Queue window will open with composition in the queue.
● Go to settings and select as required
● Take the cursor on the left side of window and go to the drop down menu. You will find the Output Module settings window.
● Go to format and select QuickTime, the industry standard.
● Staying at Output Module settings window, under Video Output, click Channels
● Select RGB + Alpha
● Click OK
This way you can also export transparent background after effects in After effects. You can easily export your video after effects file with variable alpha layers. With layering you can add variations in the videos through various layering effects. It can used to design a project with better results.
Part 2 How to Export Transparent Background Videos in Premiere Pro?
Sometimes a Transparent Background Video needs some cool effects for some projects. This can be done by exporting a video file in Premiere Pro. The steps to be followed for exporting a transparent background video are as follows:
● Load your video in Premiere Pro with transparent background. Do all the necessary editing so that the overlay is obtained for production.
● When the video is ready, move to the setting part. Here go to file menu and open export setting. Click on media.
● After this, there is need to configure the export setting particularly for transparent background. Just few setting more are required to ensure that the transparent background video or projects are exported well.
● In order to ensure that a video format supports transparency, do the required settings. Go to export format at the right of the window. Set it to Quick time. It is always good to export by using Quick time. However if you don’t need to export using Quick time and need MOV format, you can still do that. You can use the software Adobe Premiere Pro to import the other type of files also.
● Get alpha channel enabled. When the video format is all done, get to same column and you will find ‘Effects’, Video and audio tab. You can get some unique setting through this to export the videos of Premiere Pro.
● Go to “Video Codec” settings and elect the “None” options. This gives the best result outcome for transparent backgrounds. Particularly for transparent video overlay free and animations. For example YouTube subscribe button video animation.
● To enable alpha channel, go to the “Basic Video Settings” options. Get to the “depth” option. Here you can enable the alpha channel in the export settings. After doing that the alpha channel will permit to export transparent video backgrounds.
● Clicking on the button with the” + alpha” option inside the “Depth” setting. This will enable the alpha setting.
● Also check “Render at Maximum Depth”. This will help in obtaining a max depth which will give transparent video smoother and better results. They are good for higher quality videos.
● When all configurations is done, Proceed to export the video. The file from Adobe Premiere Pro gave you can be used. The process can be followed to export the other files also.
Part 3 How to Export Transparent Background Videos in Vsdc
No background video is very difficult to handle as people face trouble to export them due to their formats. Some formats do not support transparency. MOV and Gifs formats are good for transparent background. Vsdc can be used to make video background transparent as well as remove white background video. Following steps should be followed to export transparent background video in Vsdc:
● Open VSDC and go to start screen and click the Import content button. Select the green screen video from PC.
● Go to Project’s settings window and search for Opacity and kept it zero and click Finish.
● Then go to Video effects menu. Move to Transparency and then Background remover. Click Ok.
● The green light borders can be changed through Properties window
● When all things are ready open the Export project tab. From “Media devices” select PC.
● From “Output video formats”, choose MOV.
● Go to preview window and look for “Edit profile” button. Click and change the codec of the video.
● Go to Video settings menu, opt for Video codec >> PNG lossless.
● Lastly click on Apply profile
This way you can have a video after effects export with transparent background. This is just simple to export a video with a transparent background. It can be further used in various applications to create great effects.
Part 4 Best 5 Tool to Make Video Transparent Background Online
Various software offer number of fantastic tools for making video background transparent online. It can export a video by making series of pictures or videos more attractive and memorable.
Some of the tools or the makers to make Transparent Background Video are as under:
01Canva
The online version of canva can be used to edit images and videos. This is one of the widest tools chosen by the users in making and editing videos and images. The best thing is that it can be easily installed at PC and phones. It just needs Javascript in your browser. Transparent background option can be chosen to change the background of the image and make it visually attractive. It has convenient controls that change the background into transparent one easily.
02Online PNG Tools
If you are looking for a tool that can make your video background transparent in just few clicks, then Online PNG tools is the best option. You can upload many files and it allows you to turn them into transparent backgrounds. It is good when a user desire to turn a background easily and the level of perfection required is not much high. It is fast, free and easy to use which makes it an affordable tool.
03LunaPic
It is a free online picture and video editing tool that can effortlessly help in importing, adding effects and customization. Its edit option allows the users to upload the picture and perform the task to turn a background of picture or video transparent. In just few simple steps the required changes can be made. The best thing with this tool is that the output result does not affect the quality. One can also personalize the pictures which has high standards.
04Microsoft Paint
This is from Microsoft and the most widely used tool for pictures and video creation, editing and adding effects. Its drawing and editing tools make it first preference for every beginner and a professional. One can easily turn a picture background transparent through following few steps through ‘Select’ option. Go to ‘Transparent Selection’ from the list and turn an image background transparent. It can also go smooth with other applications to have transparent video format.
05Photoshop
When you are looking for a tool that can work with Windows, Android and iOS for adding transparent background online, then Photoshop shall be a good option. It can add some great effects in flawless manner in very less time. It works excellently on various elements such as brightness, transparent background and customization of pictures. This is a good platform to add visualization to images. One can add transparent background by going to background option.
These are some of the tools that can be used to make transparent background. If you need something like Pro, then you can try Filmora from Wondershare.
Filmora can be defined in number of ways. It is software, an application and a platform that provides an opportunity to a person to expand his creativity with some good picture and video editing tools. The green screen feature makes any background transparent. Variety of sound, text, video effects and animations help the users to make their projects better and presentable.
Wondershare Filmora Video Editor is a free tool that works on Artificial Intelligence. It detects the background and does editing on the same. It can remove the backgrounds from different kinds of images, videos, and presentations. This tool is great for those who need to bring some fantastic changes on the background of the images with no more hassle. It has advantage over the other tools as it works precisely on backgrounds and make sure that no details are disturbed from the original subject.
For Win 7 or later (64-bit)
For macOS 10.12 or later
● Ending Thoughts →
● The background on any image or video plays an important role in creating a visual impact. A background should be such that it may not be difficult to a creator to utilize the original picture, video or subject for its other projects. Hence in order to use them in other themes, exporting of transparent background should be easy. This can be done through various software or applications.
● Various platforms can be used to know the steps of exporting transparent background of images or videos. The selection shall be based on the degree of perfection, affordability, ease of use and volume of work. The various applications that offer exporting transparent background videos are After Effects; Premiere Pro, Vsdc and many more.
● The various tools for making transparent backgrounds are Online PNG Tools, Canva, Photoshop, MS paint, LunaPic and Filmora. Filmora is one of the most popular platforms that have different image and video editing tools. One can easily create, edit and export transparent backgrounds of images and videos through Filmora.
How To Cut Videos For Instagram On Mac
More video content is being created than before. Unfortunately, some social media platforms like Instagram require your video to be short. Therefore, many people wonder how to cut a video to make it easier to share. If you’re wondering how to cut video for Instagram on Mac, you’re in luck. This article shares the best tools to use for this purpose.
What You Should Know About Instagram Video

Instagram is a social media site owned by Facebook. However, its main focus is on sharing videos and photos. It also allows users to put up stories that only last 24 hours. Stories allow you to highlight some crucial aspects of your life. These stories could be made up of photos, texts, and videos. However, each story slide can only take up to 15 seconds of video.
Most times, your video would be longer than that. If you upload a video longer than the accepted 15 seconds, Instagram automatically trims it to 15 seconds. However, the resulting video might not be the parts you want to show to your audience. Maybe there’s a particular section you would like your followers to see. That’s why video cutters enter the picture.
A good video splitter to cut video for Instagram on Mac is necessary when you’re creating video content for your Instagram page. In addition, the video editing tool you choose must maintain the quality and the safety of the file. Therefore, we’ve selected the best tools to cut videos for Instagram on Mac. Next, we’ll explore these tools, highlighting their best features, cons, and how you can use them. On that note, let’s dive in.
Best Instagram Video Cutter for Mac - Filmroa Video Editor

Supported System: Windows and Mac
Splitting your Instagram video before sharing them makes it easier to highlight your best parts. If you’re wondering what the best tool to do that is, you’re in luck. Filmora Video Editor is the best video cutter for Mac for many reasons. Apart from cutting videos, it offers several editing tools to enhance your video. It provides video processing features like cropping, splitting, rotating, trimming, speed increase, and color correction. However, it also offers features for professional editing of videos.
Filmora supports all video formats, even the high-definition video formats for your editing. In addition, Wondershare Filmora offers you an intuitive and user-friendly interface compared to other video cutters out there. This makes it a fantastic choice for experts and novices alike. The steps to split your video and use other in-built features are pretty straightforward, and if you need tutorials, Wondershare Filmora makes them available.
For Win 7 or later (64-bit)
For macOS 10.14 or later
Steps to Cut Video for Instagram on Mac
Filmora makes it relatively easy to use its extensive features. You don’t need previous editing experience to use Wondershare Filmora. If you’re wondering how to cut video for Instagram on Mac, below are the steps to follow.
Step 1: Download Wondershare Filmore
First, you have to download the Filmora app on your Mac. You can get it on the App Store or the official website. After installation, launch Filmora to get started.
Step 2: Import Video

Once you install the app, you can import the video you would like to cut for Instagram on the app. Click ‘import media files here’ to choose a video file from your PC storage. Alternatively, you can drag and drop the Instagram video on the software’s timeline.
Step 3: Cut the Video

You can cut your video from any end you prefer. First, move the cursor where you would like to cut the video until the clip changes to the ‘I’ pointer. Then, you can move the cursor within the video length to cut to your preference.
Step 4: Split Instagram Video

You can also split the video into specific portions by dragging the slider to each endpoint and picking the scissors. Additionally, you can carry out more editing like adding transitions, sound effects, and more to beautify your video.
Step 5: Save Instagram Video

Now that the video is to your liking, hit the ‘export’ button and choose the output format you would prefer. Next, click ‘export’ to confirm your choice.
More Free Instagram Video Cutter for Mac to Cut Video For Instagram
Although Wondershare Filmore is the best option when you want to cut video for Instagram on Mac, other options are available. In this section, we’ll explore the free Instagram video cutters for Mac that you can use.
Lightworks

Supported System: Windows and Mac
Lightworks is one of the best video splitting tools you can use if you’re learning how to cut video for Instagram on Mac. It is best for both novices and professionals and allows you seamlessly cut the video to your desired part. With Lightworks software, you can easily get results.
Apart from cutting Instagram videos on Mac, there are several more editing features you can utilize to take your Insta video to the next level. It also allows you to combine several cut clips. Size isn’t an issue with Lightworks as it effortlessly handles large file sizes. It offers users all the features of a high-quality video processing video editor. The best part is that it allows you directly export your cut video to Instagram or any other social media platform you would prefer.
Pros
- It supports different audio, video, and image format
- It allows users to share projects to encourage collaborative workflow
- Easy to use by beginners and professionals
- Allows exporting of video to Instagram directly
Cons
- It doesn’t support 3D video editing
- You have to register before using the application
- No video stabilization feature
Step to Cut Video for Instagram on Mac Using Lightworks
The steps to using this software are pretty easy to follow. Below, we’ve outlined the steps to make it easier to use.
- Step 1: Download the Lightworks software on your Mac from the official software. Once you do this, install the app and launch the software to begin the video-cutting process.
- Step 2: Import the video into the software. You can do this by clicking ‘import video’ or simply dragging the clip into the timeline.

- Step 3: After uploading the clip on your timeline, you can start cutting the video to your preference. Simply slide the cursor to the point you want to cut from and press the ‘c’ key on your keyboard.

- Step 4: After cutting the part you want, erase the rest by using the deleting button.

- Step 5: Click the ‘all’ option and then choose ‘export’ from the menu that appears to save your newly-cut video. You can also export directly to Instagram to save space and time.

Avidemux

Supported System: Windows and Mac
Another free video cutter that you can use when learning how to cut video for Instagram on Mac is Avidemux. This app is simple and offers simple filtering, cutting, and encoding features. As a result, it makes it relatively easy for beginners to split, cut, and trim videos. In addition, Avidemux offers users an intuitive user interface that makes it easy to know the next step to take.
Avidemux supports the most common formats like AVI, MP4, and more. It also offers different filters to spice up your Instagram videos. You can resize your video and also color correct your video. It is not an advanced tool for professionals because it doesn’t offer advanced tools. However, if you simply want to cut video for Instagram for Mac, this free software helps you achieve that.
Pros
- It supports common video formats
- It’s easy to cut videos for Instagram using keyboard shortcuts
- Offers various filters for enhancing video
- It is free to use
- Easy for beginners to use
Cons
- It crashes sometimes
- There are limited features in the editing software
Steps to Cut Video for Instagram on Mac Using Avidemux
Avidemux has a user-friendly interface that makes it easy to cut and save your Instagram video within minutes. Below are the simple steps to cut Instagram videos you should follow.
- Step 1: Download Avidemux on your Mac and install it. After installation, launch Avidemus to begin cutting your Instagram video.
- Step 2: Next, load the file you would like to work with

- Step 3: Next, navigate to the portion of the video you would like to cut and check its ‘frame type.’ At the beginning, where you would like to cut the video from, click the ‘A’ button. It automatically records it as the start of the clip.

- Start 4: Move to where you would like the clip to end and click the ‘B’ button. This will automatically cut the Instagram video to your preference.

- Step 5: Save the video by going to file and choosing ‘save’ from the available options. Next, click ‘save video’ and name the file.

You’re now ready to use your new video on Instagram or any other video-sharing platform you would prefer.
iMovie

Supported System: Mac
Apple first released this software in 1999, but it has continually updated it to offer more features to users. IMovie is available on all iOS devices, including your MacBook. Due to the frequent upgrades, this software makes editing relatively easy for beginners. The user interface is user-friendly, and it is entirely free to use. It is also an excellent choice for cutting your Instagram videos.
One of the reasons Mac users love this app is that there’s no need for installation and downloading. There are different effects available to enhance your video. You can also use ready-made templates on the software that offers popular music and stunning graphics. In addition, you can also add transitions, change speed, and many more with this software.
Pros
- It puts your content in different media libraries to help you stay organized
- It offers access to various video and audio filters
- It provides a stability feature that’s not available with many Instagram video cutting tools
- It allows you to share directly on Instagram
- It is easy for beginners to use
Cons
- It lacks some useful controls
- It doesn’t allow tagging when you share directly to Instagram
- It only supports two video tracks
Steps to Cut Video for Instagram on Mac Using IMovie
If you want to cut your video for Instagram using IMovie, below are the steps you need to follow.
- Step 1: Open iMovie on your Macbook to get started
- Step 2: Now, create a new project and name the project with a name you prefer

- Step 3: Import your video to IMovie by granting the software access to your computer’s video library.

- Step 4: Start cutting out any part you don’t want; you can also trim the video in-between if there are parts within the clip you don’t want.

- Step 5: You can add filters, transitions, or any other effect you would like to enhance your video.

- Step 6: Finally, you can save your file on your Mac or upload it directly to Instagram.
More Paid Instagram Video Cutter for Mac to Cut Video For Instagram
Now that you know the top three free video cutters for Instagram on Mac, this section explores the best paid Instagram video cutter you can use to cut videos for Instagram on Mac. Without further ado, let’s take a look.
Movavi Video Editor

Supported System: Windows and Mac
This video editor is relatively easy to use and powerful. It offers many features that go beyond cutting video for Instagram. You can also utilize this video editing software to enhance your video and make it look professional. Movavi offers transitions, filters, titles, and many more features for your videos. It is easy for both novices and professionals to use this platform.
Movavi Video Editor supports all types of video formats for easy editing. It also allows you to set your video to full HD and 4K resolution so that the images are clean and clear. You can also convert to a new format without compromising the quality of your video. In addition, Movavi offers you a trial period you can use to check out the software to ensure it is the ideal option for you. With Movavi, you can also share directly to Instagram if you’re looking to save space on Mac.
Ros
- It allows you to cut videos and export them quickly
- It offers several other features to enhance your videos
- It supports all video formats
- It enables you to convert video to the new format without compromising the quality
- It is ideal for beginners and experts
Cons
- Subscription fees are pretty high
- Some of the settings can be quite complex for beginners
Steps to Cut Video for Instagram on Mac Using Movavi Video Editor
If you would like to try Movavi video editor but don’t know how to go about it, the steps below make it relatively easy.
- Firstly, Install Movavi Video Editor on your Mac and install the app following the instructions. After installation, launch the app to begin.
- Next, choose the video file you would like to cut by clicking ‘add files’ and selecting your media library.

- It will appear on the ‘media bin,’ and you’ll have to drag it to the timeline.
- Now, you can start cutting the video for Instagram. Click on the video and move the market to the point in the video you would like to cut. Next, click the split button.

- You can easily remove the unwanted segments by clicking delete after selecting it.

- After cutting your video, you can choose the output format you prefer and then click ‘export.’ Choose the folder on your Mac you would like to save to and click ‘start’ to begin the saving process.

Final Cut Pro

Supported System: Mac
Next on our list, we have Final Cut Pro, an excellent video cutter for Mac. It is software developed by Apple for professional video editing. This app is primarily for MacOS users, and it offers several cutting-edge editing features to ensure a smooth and high-resolution video. It supports different video formats and allows you to enhance audio, add effects, trim, and carry out 360-degree video editing if you want to improve your video.
This tool doesn’t offer a monthly subscription. Instead, users can simply make a one-time payment and have lifetime access to this editing tool. It is not an excellent choice for beginners as its advanced features and interface can be pretty complicated. However, if you want to give this video cutter ago, we’ll provide the steps to cut the video for Instagram below.
Pros
- It supports 360-video editing
- Performance is relatively fast and ensures an easy video-cutting process
- It supports different video formats
- It offers various editing tools to enhance your video for Instagram
Cons
- It isn’t ideal for beginners
- One-time payment is relatively high
- The interface can be quite confusing
Steps to Cut Video for Instagram on Mac Using Final Cut Pro
If you want to cut video for Instagram in Final Cut Pro, the blade tool is the best option. However, it can be pretty confusing to use Final Cut Pro if you’ve never used the software before. Follow the steps below to cut Instagram video using Final Cut Pro.
- First, you have to download the app; you can download it on the App Store or the official website.
- Next, install the video cutter on your Mac and launch it to begin cutting Instagram videos.
- Import the video you would like to cut by visiting the ‘file’ type and choosing ‘import.’ Next, choose media and select the video from the media library. Alternatively, you can simply press Command + I on your Mac keyboard to go straight to your PC storage.

- Next, move the imported clip to the timeline to begin the cutting process.
- Select the Tools menu and choose ‘Blade’ from the dropdown menu. You can also press the B key on your keyword to select this tool.

- Now, you’re ready to start cutting the video file. Move the selected blade tool to the frame you would like to cut from the clip and click.

- Next, move to where you would like the cut to the end and click again.

- That’s all you have to do. Once you cut the clip and you’re satisfied with your result, simply save your clip by hitting the ‘export’ button and choosing the location you prefer and your preferred output format.
Adobe Premiere Rush

Supported System: Windows and Mac
Premier Rush was designed for social media videos and to help vloggers make the most of their videos. Although it started as a mobile-only app, it now has a desktop option for Mac and Windows. The idea behind Rush is an editing tool that helps you edit your video and share it to your preferred social media platform fast. This editing tool offers a simple user interface, and the workflow is seamless to ensure speedy performance.
As long as you want a video cutter created for cutting video for Instagram on Mac, this software delivers. It offers different editing features to enhance your video. You can link your Instagram account and upload directly to the platform. It also allows you to save all edited video files on Cloud to save space on your MacBook.
Pros
- It allows you to transfer videos from Adobe Premiere Pro directly for editing
- Allows you to link your social media accounts for direct uploads
- It offers transitions, filters, and more editing tools to enhance your Instagram video
- You can save directly to the Cloud to save space and ensure easy access
- It is an excellent option for beginners
Cons
- You can’t change the output format
- It doesn’t offer ample audio tools
Steps to Cut Video for Instagram on Mac Using Adobe Premiere Rush
This section will cover all the crucial steps to get the most from Adobe Premier Rush. Keep reading to learn how to cut video for Instagram on Mac using Adobe Rush.
- Firstly, download and install the app on your Mac. Launch the software after installation to start editing
- Now, create a new project on the app and import the video you would like to cut for Instagram.

- Afterward, select the video you would like to cut, click ‘create,’ and you’re ready to begin.

- When the video appears on the timeline, select the video and click the ‘scissors’ icon on the left corner. This tool helps to cut your video to your preference.
- To use the scissors tool, simply go to the beginning of the video and drag the handle to where you would like the video to start. You can also do the same to the end by dragging the handle at the end to where you would prefer.

- After cutting your video, you can also utilize other editing features to enhance your video.

- Now, you’re ready to export your video. Simply click ‘share’ located at the top of the editing software and choose from the options whether you want to share directly to Instagram or save on Mac.
Which Should I Choose, Free or Paid Instagram Video Cutter?
Now that you know the best free and paid video cutters to cut Instagram videos, you’re probably wondering what the ideal option is. With so many options, you must make the right decision for your project. You need to consider several factors before you decide if a paid or free Instagram video cutter is the best option for you.
- Budget
When deciding between a paid or free Instagram cutter, one crucial factor is how much you’re willing to pay. If your budget is really low and doesn’t fit into any paid options, you can simply go for a free option. However, if the price isn’t an issue for you, going for a paid option is best because it offers you more editing features to enhance your video.
- Ease of Use
You should also consider how easy it is to use the video cutter. Some paid options are for professionals and can be challenging to understand. However, most free options offer poor performance times. The last thing Instagram users want is to devote hours to figure out where each tool is on the software. However, there are paid options with an intuitive interface that makes it easy to cut your Instagram video.
- Customer Support
You also need to consider whether customer support will be available when you need it. Some free options have no customer support to turn to. Instead, consider a video cutter that will offer helpful and responsive customer support when picking.
- Video Format Support
Before choosing a paid or free option, you need to consider if it would support the video format you prefer. You might be using different video formats, and you want to ensure you’re not limited to select options. You also want a video cutter that offers various output formats.
FAQs about Cut Video For Instagram
- How do you post long videos on Instagram without splitting? Instagram allows users to post long videos on the app, as long as 60 seconds. Alternatively, you can use the IGTV to upload long clips on Instagram without splitting.
- What is multi-capture on Instagram: This tool allows you to create and share multiple photos on your stories.
- How do I split the video into two parts for Instagram on Mac? The paid and free video cutters shared above will help you split a video into two parts for Instagram on Mac. Simply pick the option that fits your preference.
- Why can’t I split a video on iMovie? Maybe your iMovie software is experiencing a glitch; you can simply restart the software. Alternately, move the clip to the center row if you find the option greyed out. Moving the clip should help fix the issue.
Conclusion
Various tools are available to help you cut a video for Instagram on Mac. Therefore, just refer to the paid and free tools listed above whenever you need a video cutter. These video cutters are highly recommended and ensure the quality isn’t affected while cutting the video. When deciding which is the best option for you, free or paid, the factors listed will help you decide. Suppose you’re looking specifically for a video cutter that offers you all the features you need to enhance your video while providing an intuitive user interface. In that case, Wondershare Filmora is the ideal choice.
Instagram is a social media site owned by Facebook. However, its main focus is on sharing videos and photos. It also allows users to put up stories that only last 24 hours. Stories allow you to highlight some crucial aspects of your life. These stories could be made up of photos, texts, and videos. However, each story slide can only take up to 15 seconds of video.
Most times, your video would be longer than that. If you upload a video longer than the accepted 15 seconds, Instagram automatically trims it to 15 seconds. However, the resulting video might not be the parts you want to show to your audience. Maybe there’s a particular section you would like your followers to see. That’s why video cutters enter the picture.
A good video splitter to cut video for Instagram on Mac is necessary when you’re creating video content for your Instagram page. In addition, the video editing tool you choose must maintain the quality and the safety of the file. Therefore, we’ve selected the best tools to cut videos for Instagram on Mac. Next, we’ll explore these tools, highlighting their best features, cons, and how you can use them. On that note, let’s dive in.
Best Instagram Video Cutter for Mac - Filmroa Video Editor
Supported System: Windows and Mac
Splitting your Instagram video before sharing them makes it easier to highlight your best parts. If you’re wondering what the best tool to do that is, you’re in luck. Filmora Video Editor is the best video cutter for Mac for many reasons. Apart from cutting videos, it offers several editing tools to enhance your video. It provides video processing features like cropping, splitting, rotating, trimming, speed increase, and color correction. However, it also offers features for professional editing of videos.
Filmora supports all video formats, even the high-definition video formats for your editing. In addition, Wondershare Filmora offers you an intuitive and user-friendly interface compared to other video cutters out there. This makes it a fantastic choice for experts and novices alike. The steps to split your video and use other in-built features are pretty straightforward, and if you need tutorials, Wondershare Filmora makes them available.
For Win 7 or later (64-bit)
For macOS 10.14 or later
Steps to Cut Video for Instagram on Mac
Filmora makes it relatively easy to use its extensive features. You don’t need previous editing experience to use Wondershare Filmora. If you’re wondering how to cut video for Instagram on Mac, below are the steps to follow.
Step 1: Download Wondershare Filmore
First, you have to download the Filmora app on your Mac. You can get it on the App Store or the official website. After installation, launch Filmora to get started.
Step 2: Import Video
Once you install the app, you can import the video you would like to cut for Instagram on the app. Click ‘import media files here’ to choose a video file from your PC storage. Alternatively, you can drag and drop the Instagram video on the software’s timeline.
Step 3: Cut the Video
You can cut your video from any end you prefer. First, move the cursor where you would like to cut the video until the clip changes to the ‘I’ pointer. Then, you can move the cursor within the video length to cut to your preference.
Step 4: Split Instagram Video
You can also split the video into specific portions by dragging the slider to each endpoint and picking the scissors. Additionally, you can carry out more editing like adding transitions, sound effects, and more to beautify your video.
Step 5: Save Instagram Video
Now that the video is to your liking, hit the ‘export’ button and choose the output format you would prefer. Next, click ‘export’ to confirm your choice.
More Free Instagram Video Cutter for Mac to Cut Video For Instagram
Although Wondershare Filmore is the best option when you want to cut video for Instagram on Mac, other options are available. In this section, we’ll explore the free Instagram video cutters for Mac that you can use.
Lightworks
Supported System: Windows and Mac
Lightworks is one of the best video splitting tools you can use if you’re learning how to cut video for Instagram on Mac. It is best for both novices and professionals and allows you seamlessly cut the video to your desired part. With Lightworks software, you can easily get results.
Apart from cutting Instagram videos on Mac, there are several more editing features you can utilize to take your Insta video to the next level. It also allows you to combine several cut clips. Size isn’t an issue with Lightworks as it effortlessly handles large file sizes. It offers users all the features of a high-quality video processing video editor. The best part is that it allows you directly export your cut video to Instagram or any other social media platform you would prefer.
Pros
- It supports different audio, video, and image format
- It allows users to share projects to encourage collaborative workflow
- Easy to use by beginners and professionals
- Allows exporting of video to Instagram directly
Cons
- It doesn’t support 3D video editing
- You have to register before using the application
- No video stabilization feature
Step to Cut Video for Instagram on Mac Using Lightworks
The steps to using this software are pretty easy to follow. Below, we’ve outlined the steps to make it easier to use.
- Step 1: Download the Lightworks software on your Mac from the official software. Once you do this, install the app and launch the software to begin the video-cutting process.
- Step 2: Import the video into the software. You can do this by clicking ‘import video’ or simply dragging the clip into the timeline.
- Step 3: After uploading the clip on your timeline, you can start cutting the video to your preference. Simply slide the cursor to the point you want to cut from and press the ‘c’ key on your keyboard.
- Step 4: After cutting the part you want, erase the rest by using the deleting button.
- Step 5: Click the ‘all’ option and then choose ‘export’ from the menu that appears to save your newly-cut video. You can also export directly to Instagram to save space and time.
Avidemux
Supported System: Windows and Mac
Another free video cutter that you can use when learning how to cut video for Instagram on Mac is Avidemux. This app is simple and offers simple filtering, cutting, and encoding features. As a result, it makes it relatively easy for beginners to split, cut, and trim videos. In addition, Avidemux offers users an intuitive user interface that makes it easy to know the next step to take.
Avidemux supports the most common formats like AVI, MP4, and more. It also offers different filters to spice up your Instagram videos. You can resize your video and also color correct your video. It is not an advanced tool for professionals because it doesn’t offer advanced tools. However, if you simply want to cut video for Instagram for Mac, this free software helps you achieve that.
Pros
- It supports common video formats
- It’s easy to cut videos for Instagram using keyboard shortcuts
- Offers various filters for enhancing video
- It is free to use
- Easy for beginners to use
Cons
- It crashes sometimes
- There are limited features in the editing software
Steps to Cut Video for Instagram on Mac Using Avidemux
Avidemux has a user-friendly interface that makes it easy to cut and save your Instagram video within minutes. Below are the simple steps to cut Instagram videos you should follow.
- Step 1: Download Avidemux on your Mac and install it. After installation, launch Avidemus to begin cutting your Instagram video.
- Step 2: Next, load the file you would like to work with
- Step 3: Next, navigate to the portion of the video you would like to cut and check its ‘frame type.’ At the beginning, where you would like to cut the video from, click the ‘A’ button. It automatically records it as the start of the clip.
- Start 4: Move to where you would like the clip to end and click the ‘B’ button. This will automatically cut the Instagram video to your preference.
- Step 5: Save the video by going to file and choosing ‘save’ from the available options. Next, click ‘save video’ and name the file.
You’re now ready to use your new video on Instagram or any other video-sharing platform you would prefer.
iMovie
Supported System: Mac
Apple first released this software in 1999, but it has continually updated it to offer more features to users. IMovie is available on all iOS devices, including your MacBook. Due to the frequent upgrades, this software makes editing relatively easy for beginners. The user interface is user-friendly, and it is entirely free to use. It is also an excellent choice for cutting your Instagram videos.
One of the reasons Mac users love this app is that there’s no need for installation and downloading. There are different effects available to enhance your video. You can also use ready-made templates on the software that offers popular music and stunning graphics. In addition, you can also add transitions, change speed, and many more with this software.
Pros
- It puts your content in different media libraries to help you stay organized
- It offers access to various video and audio filters
- It provides a stability feature that’s not available with many Instagram video cutting tools
- It allows you to share directly on Instagram
- It is easy for beginners to use
Cons
- It lacks some useful controls
- It doesn’t allow tagging when you share directly to Instagram
- It only supports two video tracks
Steps to Cut Video for Instagram on Mac Using IMovie
If you want to cut your video for Instagram using IMovie, below are the steps you need to follow.
- Step 1: Open iMovie on your Macbook to get started
- Step 2: Now, create a new project and name the project with a name you prefer
- Step 3: Import your video to IMovie by granting the software access to your computer’s video library.
- Step 4: Start cutting out any part you don’t want; you can also trim the video in-between if there are parts within the clip you don’t want.
- Step 5: You can add filters, transitions, or any other effect you would like to enhance your video.
- Step 6: Finally, you can save your file on your Mac or upload it directly to Instagram.
More Paid Instagram Video Cutter for Mac to Cut Video For Instagram
Now that you know the top three free video cutters for Instagram on Mac, this section explores the best paid Instagram video cutter you can use to cut videos for Instagram on Mac. Without further ado, let’s take a look.
Movavi Video Editor
Supported System: Windows and Mac
This video editor is relatively easy to use and powerful. It offers many features that go beyond cutting video for Instagram. You can also utilize this video editing software to enhance your video and make it look professional. Movavi offers transitions, filters, titles, and many more features for your videos. It is easy for both novices and professionals to use this platform.
Movavi Video Editor supports all types of video formats for easy editing. It also allows you to set your video to full HD and 4K resolution so that the images are clean and clear. You can also convert to a new format without compromising the quality of your video. In addition, Movavi offers you a trial period you can use to check out the software to ensure it is the ideal option for you. With Movavi, you can also share directly to Instagram if you’re looking to save space on Mac.
Ros
- It allows you to cut videos and export them quickly
- It offers several other features to enhance your videos
- It supports all video formats
- It enables you to convert video to the new format without compromising the quality
- It is ideal for beginners and experts
Cons
- Subscription fees are pretty high
- Some of the settings can be quite complex for beginners
Steps to Cut Video for Instagram on Mac Using Movavi Video Editor
If you would like to try Movavi video editor but don’t know how to go about it, the steps below make it relatively easy.
- Firstly, Install Movavi Video Editor on your Mac and install the app following the instructions. After installation, launch the app to begin.
- Next, choose the video file you would like to cut by clicking ‘add files’ and selecting your media library.
- It will appear on the ‘media bin,’ and you’ll have to drag it to the timeline.
- Now, you can start cutting the video for Instagram. Click on the video and move the market to the point in the video you would like to cut. Next, click the split button.
- You can easily remove the unwanted segments by clicking delete after selecting it.
- After cutting your video, you can choose the output format you prefer and then click ‘export.’ Choose the folder on your Mac you would like to save to and click ‘start’ to begin the saving process.
Final Cut Pro
Supported System: Mac
Next on our list, we have Final Cut Pro, an excellent video cutter for Mac. It is software developed by Apple for professional video editing. This app is primarily for MacOS users, and it offers several cutting-edge editing features to ensure a smooth and high-resolution video. It supports different video formats and allows you to enhance audio, add effects, trim, and carry out 360-degree video editing if you want to improve your video.
This tool doesn’t offer a monthly subscription. Instead, users can simply make a one-time payment and have lifetime access to this editing tool. It is not an excellent choice for beginners as its advanced features and interface can be pretty complicated. However, if you want to give this video cutter ago, we’ll provide the steps to cut the video for Instagram below.
Pros
- It supports 360-video editing
- Performance is relatively fast and ensures an easy video-cutting process
- It supports different video formats
- It offers various editing tools to enhance your video for Instagram
Cons
- It isn’t ideal for beginners
- One-time payment is relatively high
- The interface can be quite confusing
Steps to Cut Video for Instagram on Mac Using Final Cut Pro
If you want to cut video for Instagram in Final Cut Pro, the blade tool is the best option. However, it can be pretty confusing to use Final Cut Pro if you’ve never used the software before. Follow the steps below to cut Instagram video using Final Cut Pro.
- First, you have to download the app; you can download it on the App Store or the official website.
- Next, install the video cutter on your Mac and launch it to begin cutting Instagram videos.
- Import the video you would like to cut by visiting the ‘file’ type and choosing ‘import.’ Next, choose media and select the video from the media library. Alternatively, you can simply press Command + I on your Mac keyboard to go straight to your PC storage.
- Next, move the imported clip to the timeline to begin the cutting process.
- Select the Tools menu and choose ‘Blade’ from the dropdown menu. You can also press the B key on your keyword to select this tool.
- Now, you’re ready to start cutting the video file. Move the selected blade tool to the frame you would like to cut from the clip and click.
- Next, move to where you would like the cut to the end and click again.
- That’s all you have to do. Once you cut the clip and you’re satisfied with your result, simply save your clip by hitting the ‘export’ button and choosing the location you prefer and your preferred output format.
Adobe Premiere Rush
Supported System: Windows and Mac
Premier Rush was designed for social media videos and to help vloggers make the most of their videos. Although it started as a mobile-only app, it now has a desktop option for Mac and Windows. The idea behind Rush is an editing tool that helps you edit your video and share it to your preferred social media platform fast. This editing tool offers a simple user interface, and the workflow is seamless to ensure speedy performance.
As long as you want a video cutter created for cutting video for Instagram on Mac, this software delivers. It offers different editing features to enhance your video. You can link your Instagram account and upload directly to the platform. It also allows you to save all edited video files on Cloud to save space on your MacBook.
Pros
- It allows you to transfer videos from Adobe Premiere Pro directly for editing
- Allows you to link your social media accounts for direct uploads
- It offers transitions, filters, and more editing tools to enhance your Instagram video
- You can save directly to the Cloud to save space and ensure easy access
- It is an excellent option for beginners
Cons
- You can’t change the output format
- It doesn’t offer ample audio tools
Steps to Cut Video for Instagram on Mac Using Adobe Premiere Rush
This section will cover all the crucial steps to get the most from Adobe Premier Rush. Keep reading to learn how to cut video for Instagram on Mac using Adobe Rush.
- Firstly, download and install the app on your Mac. Launch the software after installation to start editing
- Now, create a new project on the app and import the video you would like to cut for Instagram.
- Afterward, select the video you would like to cut, click ‘create,’ and you’re ready to begin.
- When the video appears on the timeline, select the video and click the ‘scissors’ icon on the left corner. This tool helps to cut your video to your preference.
- To use the scissors tool, simply go to the beginning of the video and drag the handle to where you would like the video to start. You can also do the same to the end by dragging the handle at the end to where you would prefer.
- After cutting your video, you can also utilize other editing features to enhance your video.
- Now, you’re ready to export your video. Simply click ‘share’ located at the top of the editing software and choose from the options whether you want to share directly to Instagram or save on Mac.
Which Should I Choose, Free or Paid Instagram Video Cutter?
Now that you know the best free and paid video cutters to cut Instagram videos, you’re probably wondering what the ideal option is. With so many options, you must make the right decision for your project. You need to consider several factors before you decide if a paid or free Instagram video cutter is the best option for you.
- Budget
When deciding between a paid or free Instagram cutter, one crucial factor is how much you’re willing to pay. If your budget is really low and doesn’t fit into any paid options, you can simply go for a free option. However, if the price isn’t an issue for you, going for a paid option is best because it offers you more editing features to enhance your video.
- Ease of Use
You should also consider how easy it is to use the video cutter. Some paid options are for professionals and can be challenging to understand. However, most free options offer poor performance times. The last thing Instagram users want is to devote hours to figure out where each tool is on the software. However, there are paid options with an intuitive interface that makes it easy to cut your Instagram video.
- Customer Support
You also need to consider whether customer support will be available when you need it. Some free options have no customer support to turn to. Instead, consider a video cutter that will offer helpful and responsive customer support when picking.
- Video Format Support
Before choosing a paid or free option, you need to consider if it would support the video format you prefer. You might be using different video formats, and you want to ensure you’re not limited to select options. You also want a video cutter that offers various output formats.
FAQs about Cut Video For Instagram
- How do you post long videos on Instagram without splitting? Instagram allows users to post long videos on the app, as long as 60 seconds. Alternatively, you can use the IGTV to upload long clips on Instagram without splitting.
- What is multi-capture on Instagram: This tool allows you to create and share multiple photos on your stories.
- How do I split the video into two parts for Instagram on Mac? The paid and free video cutters shared above will help you split a video into two parts for Instagram on Mac. Simply pick the option that fits your preference.
- Why can’t I split a video on iMovie? Maybe your iMovie software is experiencing a glitch; you can simply restart the software. Alternately, move the clip to the center row if you find the option greyed out. Moving the clip should help fix the issue.
Conclusion
Various tools are available to help you cut a video for Instagram on Mac. Therefore, just refer to the paid and free tools listed above whenever you need a video cutter. These video cutters are highly recommended and ensure the quality isn’t affected while cutting the video. When deciding which is the best option for you, free or paid, the factors listed will help you decide. Suppose you’re looking specifically for a video cutter that offers you all the features you need to enhance your video while providing an intuitive user interface. In that case, Wondershare Filmora is the ideal choice.
Advancements in Game Recording Software: A Comprehensive Overview
Recording gameplay on PC has been an essential part of operations for many streamers. This has led to developing several recording software dedicated to this specific purpose. With the market flooding with these tools, it is important to look at the quality instead of the quantity.
Let’s dive into the world of top game recorders for PC featuring services for the finest content creation. Take a look at their benefits, along with a simple and cost-effective alternative to make screen recording much easier on your PC.
Screen Recording Now For Win 7 or later(64-bit)
Screen Recording Now For macOS 10.14 or later
Part 1. Finding a Good Gameplay Recorder on PC? Get One Instantly
Now that you are aware of some top benefits that game recorders provide, it is time to learn how to reap these benefits. There are currently several apps to help you capture gameplay on PC. The following list provides an insight into the top 10 apps to record gameplay on your computer:
Top Gameplay Recorder Tools on PC:
1.Bandicam
2. OBS Studio
3.Xbox Game Bar
4.Action! – Game Recorder
5.XSplit Broadcaster
6.FBX
7.D3DGear
8.Geceta by Movavi
9.Radeon ReLive
10.ScreenPal
1.Bandicam
Bandicam stands amongst the top gameplay recorders available for PC today. It is an easy-to-use and free screen recording software that can capture anything you want on your screen.
Bandicam offers several useful features when it comes to screen recording. You can record audio, choose webcam overlay, draw real-time on the screen, and more. Bandicam also offers long-term screen recording, stretching as long as 24 hours. Besides recording gameplay, it is also suitable for recording lectures, webinars, video calls, and more.

2.OBS Studio
OBS Studio offers open-source software for recording and live-streaming videos. The game recorder for PC is available for download on Windows, Mac, and Linux. OBS allows real-time audio and video capturing abilities without compromising on performance. You can capture multiple sources simultaneously, including windows, text, images, webcams, and more.
The tool allows users to set unlimited scenes and seamlessly switch between them. You can easily choose custom transitions, duplicate screens, and tweak other aspects.

3.Xbox Game Bar
Your Windows PC will likely have an in-built Game Bar offered by Xbox. It is a customizable gaming overlay that makes gaming easier. Among other useful features, the Game Bar allows for real-time recording of any gameplay on the PC.
The Xbox Game Bar offers easy keyboard shortcuts that can be customized for various functions. The start and end of the recording are also narrated by the tool, so you can hear when changes are made. Game Bar can also help find new teammates with LFG (Looking For Group) and chat with other Xbox users.

4.Action! – Game Recorder
Action! – Game Recorder is one of the best software currently available for recording gameplay on PC. With smooth recordings and high-quality streaming, it is a reliable option for novice and expert gamers.
It can record HD gameplay at up to 120fps with low CPU usage. Users can easily get around its easy-to-use interface. You can export your videos directly to Facebook and YouTube. Action! also supports live streaming to Twitch, YouTube, and Upstream. You can even control the video recording on your PC via your smartphone.

5.XSplit Broadcaster
Another remarkable tool that offers simple yet powerful gameplay recording is XSplit. You can use tools to create content for popular platforms like Twitch, YouTube, and TikTok. XSplit Broadcaster comes as a feature-packed production studio for content creation.
XSplit offers unlimited customization options when it comes to recording gameplay. It offers flawless video and audio quality without putting additional load on the system. XSplit ensures lag-free gameplay, so your efficiency is not affected while recording.

6.FBX
If you want high-performance HD recordings without interruptions in your gameplay, FBX is a reliable option. It is a dedicated game recorder offering many useful features to users. FBX can save highlights of the best parts of your gameplay. You can customize hotkeys that instantly save short videos of your best action.
It can also capture high-quality screenshots for easy sharing. FBX also allows live streaming options with rapid setups. The tool can automatically adjust to your bandwidth to help eliminate jerky streams.

7.D3DGear
For fast and efficient recordings, you can opt for D3DGear. It is a high-quality game screen recorder for PC containing all the essentials for smooth recordings. The tool is available on Windows computers as a plugin and add-on software.
D3DGear can record gameplay smoothly without causing the game to drop much in the frame rate. It also allows users to live stream their gameplay to Twitch. D3DGear can also record Oculus Rift VR gameplay with HD SBS stereoscopic videos. Furthermore, it can produce Constant Frame Rate (CFR) movies, often required with Adobe software.

8.Gecata by Movavi
Movavi offers its state-of-the-art game recorder for PC in the form of Gecata. The tool is a lightweight and solid program for recording and streaming gameplay. You can use it to grab the best moments of your gaming experience and share them with your peers across the globe.
Gecata enables users to record and stream their games at the same time without any lag. You can also record webcam and microphone, in-game sound effects, music, and dialogues all in one click. Gecata provides full control, allowing you to customize overlays to monitor frame rate, bit count, and other metrics.

9.Radeon ReLive
Radeon ReLive by AMD certainly deserves a spot on this list of game recorder software for PCs. It is a user-friendly game recorder that helps users capture and share gameplay videos and screenshots. Radeon ReLive is configuring-friendly and has a minimal impact on the FPS rate.
The tool works on systems with AMD graphics cards. It allows users to tweak their game and display settings, allowing for seamless gameplay. Radeon also contains a switch for saving power and preventing the system from overheating.

10.ScreenPal
Formerly known as Screencast-o-Matic, ScreenPal is a user-friendly tool designed to capture and share screen recordings. You can record and edit your content on the same platform using this versatile tool. ScreenPal is available on Windows, Mac, iOS, Android, and Chromebook devices.
Besides recording gameplay on a PC, you can also use it for education, work, and other personal purposes. ScreenPal comes with a built-in editor that helps you tweak your videos after recording them. You can also host and share content on its easily accessible cloud.

[Cost-Effective] Screen Recording in Wondershare Filmora
The tools mentioned above are great for recording gameplay on PC. However, you might have noticed that many of these tools offer pricing plans that can prove heavy on the wallet. If you are looking for a cost-effective solution for recording gameplay, Wondershare Filmora is a stellar choice.
Filmora by Wondershare is an all-in-one solution when it comes to content creation. While other game recorders for PC often offer specific tools, Filmora offers a 360-degree approach. Besides recording the screen, Filmora also allows users to compile and edit their recorded gameplay without ever exiting the platform.
Anyone Can Create a Tutorial With These Easy Steps
Free Download For Win 7 or later(64-bit)
Free Download For macOS 10.14 or later
How to Record Gameplay Using Wondershare Filmora
The Screen Record feature on Filmora is a simple yet powerful function that can help you capture your computer’s screen and webcam. You can record audio using the microphone and the system at the same time.
Filmora also lets users customize the area of the screen they wish to capture. This makes it arguably the best game screen recorder for PC. To capture gameplay on PC using Filmora, follow the steps below:
Step1Open Screen Recorder on Filmora
Install and launch Wondershare Filmora on your PC. You can select the “Screen Recorder” feature from the startup window on Filmora.

Alternatively, you can also go to the “File” tab and select “Record Media” from the dropdown list, then choose to record the webcam, PC screen, or voiceover.

Step2Adjust Screen Recording Settings
Once the Screen Recorder panel opens, you can choose the recording ratio from the menu under the “Square” icon. The available options are to record the full screen, a target window, or any custom size. You can then toggle the switches next to the “Microphone,” “System Audio,” and “Camera” options to turn them on or off. Filmora also lets users adjust the frame rate, quality, and other parameters.

Step3 Adjust Screen Recording Settings
Once the Screen Recorder panel opens, you can choose the recording ratio from the menu under the “Square” icon. The available options are to record the full screen, a target window, or any custom size. You can then toggle the switches next to the “Microphone,” “System Audio,” and “Camera” options to turn them on or off. Filmora also lets users adjust the frame rate, quality, and other parameters.
Step4Record Through Filmora and Conclude
After specifying the settings, tap the “Record” button to start recording your gameplay. Filmora will ensure your gameplay is not affected by the recording. Hit the “Stop” button once you are done and edit the file in Filmora. Finally, export the recorded gameplay to a location of your choice.

Conclusion
Many dedicated software are available to help you capture gameplay on PC. The top game recording software for PC and their pricing plans are mentioned above for your convenience. However, our advice is to switch to Wondershare Filmora. Not only does Filmora offer a cost-effective solution, but it is also much easier to use and provides high-quality recordings without lag.
Screen Recording Now For Win 7 or later(64-bit)
Screen Recording Now For macOS 10.14 or later
Part 1. Finding a Good Gameplay Recorder on PC? Get One Instantly
Now that you are aware of some top benefits that game recorders provide, it is time to learn how to reap these benefits. There are currently several apps to help you capture gameplay on PC. The following list provides an insight into the top 10 apps to record gameplay on your computer:
Top Gameplay Recorder Tools on PC:
1.Bandicam
2. OBS Studio
3.Xbox Game Bar
4.Action! – Game Recorder
5.XSplit Broadcaster
6.FBX
7.D3DGear
8.Geceta by Movavi
9.Radeon ReLive
10.ScreenPal
1.Bandicam
Bandicam stands amongst the top gameplay recorders available for PC today. It is an easy-to-use and free screen recording software that can capture anything you want on your screen.
Bandicam offers several useful features when it comes to screen recording. You can record audio, choose webcam overlay, draw real-time on the screen, and more. Bandicam also offers long-term screen recording, stretching as long as 24 hours. Besides recording gameplay, it is also suitable for recording lectures, webinars, video calls, and more.
2.OBS Studio
OBS Studio offers open-source software for recording and live-streaming videos. The game recorder for PC is available for download on Windows, Mac, and Linux. OBS allows real-time audio and video capturing abilities without compromising on performance. You can capture multiple sources simultaneously, including windows, text, images, webcams, and more.
The tool allows users to set unlimited scenes and seamlessly switch between them. You can easily choose custom transitions, duplicate screens, and tweak other aspects.
3.Xbox Game Bar
Your Windows PC will likely have an in-built Game Bar offered by Xbox. It is a customizable gaming overlay that makes gaming easier. Among other useful features, the Game Bar allows for real-time recording of any gameplay on the PC.
The Xbox Game Bar offers easy keyboard shortcuts that can be customized for various functions. The start and end of the recording are also narrated by the tool, so you can hear when changes are made. Game Bar can also help find new teammates with LFG (Looking For Group) and chat with other Xbox users.
4.Action! – Game Recorder
Action! – Game Recorder is one of the best software currently available for recording gameplay on PC. With smooth recordings and high-quality streaming, it is a reliable option for novice and expert gamers.
It can record HD gameplay at up to 120fps with low CPU usage. Users can easily get around its easy-to-use interface. You can export your videos directly to Facebook and YouTube. Action! also supports live streaming to Twitch, YouTube, and Upstream. You can even control the video recording on your PC via your smartphone.
5.XSplit Broadcaster
Another remarkable tool that offers simple yet powerful gameplay recording is XSplit. You can use tools to create content for popular platforms like Twitch, YouTube, and TikTok. XSplit Broadcaster comes as a feature-packed production studio for content creation.
XSplit offers unlimited customization options when it comes to recording gameplay. It offers flawless video and audio quality without putting additional load on the system. XSplit ensures lag-free gameplay, so your efficiency is not affected while recording.
6.FBX
If you want high-performance HD recordings without interruptions in your gameplay, FBX is a reliable option. It is a dedicated game recorder offering many useful features to users. FBX can save highlights of the best parts of your gameplay. You can customize hotkeys that instantly save short videos of your best action.
It can also capture high-quality screenshots for easy sharing. FBX also allows live streaming options with rapid setups. The tool can automatically adjust to your bandwidth to help eliminate jerky streams.
7.D3DGear
For fast and efficient recordings, you can opt for D3DGear. It is a high-quality game screen recorder for PC containing all the essentials for smooth recordings. The tool is available on Windows computers as a plugin and add-on software.
D3DGear can record gameplay smoothly without causing the game to drop much in the frame rate. It also allows users to live stream their gameplay to Twitch. D3DGear can also record Oculus Rift VR gameplay with HD SBS stereoscopic videos. Furthermore, it can produce Constant Frame Rate (CFR) movies, often required with Adobe software.
8.Gecata by Movavi
Movavi offers its state-of-the-art game recorder for PC in the form of Gecata. The tool is a lightweight and solid program for recording and streaming gameplay. You can use it to grab the best moments of your gaming experience and share them with your peers across the globe.
Gecata enables users to record and stream their games at the same time without any lag. You can also record webcam and microphone, in-game sound effects, music, and dialogues all in one click. Gecata provides full control, allowing you to customize overlays to monitor frame rate, bit count, and other metrics.
9.Radeon ReLive
Radeon ReLive by AMD certainly deserves a spot on this list of game recorder software for PCs. It is a user-friendly game recorder that helps users capture and share gameplay videos and screenshots. Radeon ReLive is configuring-friendly and has a minimal impact on the FPS rate.
The tool works on systems with AMD graphics cards. It allows users to tweak their game and display settings, allowing for seamless gameplay. Radeon also contains a switch for saving power and preventing the system from overheating.
10.ScreenPal
Formerly known as Screencast-o-Matic, ScreenPal is a user-friendly tool designed to capture and share screen recordings. You can record and edit your content on the same platform using this versatile tool. ScreenPal is available on Windows, Mac, iOS, Android, and Chromebook devices.
Besides recording gameplay on a PC, you can also use it for education, work, and other personal purposes. ScreenPal comes with a built-in editor that helps you tweak your videos after recording them. You can also host and share content on its easily accessible cloud.
[Cost-Effective] Screen Recording in Wondershare Filmora
The tools mentioned above are great for recording gameplay on PC. However, you might have noticed that many of these tools offer pricing plans that can prove heavy on the wallet. If you are looking for a cost-effective solution for recording gameplay, Wondershare Filmora is a stellar choice.
Filmora by Wondershare is an all-in-one solution when it comes to content creation. While other game recorders for PC often offer specific tools, Filmora offers a 360-degree approach. Besides recording the screen, Filmora also allows users to compile and edit their recorded gameplay without ever exiting the platform.
Anyone Can Create a Tutorial With These Easy Steps
Free Download For Win 7 or later(64-bit)
Free Download For macOS 10.14 or later
How to Record Gameplay Using Wondershare Filmora
The Screen Record feature on Filmora is a simple yet powerful function that can help you capture your computer’s screen and webcam. You can record audio using the microphone and the system at the same time.
Filmora also lets users customize the area of the screen they wish to capture. This makes it arguably the best game screen recorder for PC. To capture gameplay on PC using Filmora, follow the steps below:
Step1Open Screen Recorder on Filmora
Install and launch Wondershare Filmora on your PC. You can select the “Screen Recorder” feature from the startup window on Filmora.
Alternatively, you can also go to the “File” tab and select “Record Media” from the dropdown list, then choose to record the webcam, PC screen, or voiceover.
Step2Adjust Screen Recording Settings
Once the Screen Recorder panel opens, you can choose the recording ratio from the menu under the “Square” icon. The available options are to record the full screen, a target window, or any custom size. You can then toggle the switches next to the “Microphone,” “System Audio,” and “Camera” options to turn them on or off. Filmora also lets users adjust the frame rate, quality, and other parameters.
Step3 Adjust Screen Recording Settings
Once the Screen Recorder panel opens, you can choose the recording ratio from the menu under the “Square” icon. The available options are to record the full screen, a target window, or any custom size. You can then toggle the switches next to the “Microphone,” “System Audio,” and “Camera” options to turn them on or off. Filmora also lets users adjust the frame rate, quality, and other parameters.
Step4Record Through Filmora and Conclude
After specifying the settings, tap the “Record” button to start recording your gameplay. Filmora will ensure your gameplay is not affected by the recording. Hit the “Stop” button once you are done and edit the file in Filmora. Finally, export the recorded gameplay to a location of your choice.
Conclusion
Many dedicated software are available to help you capture gameplay on PC. The top game recording software for PC and their pricing plans are mentioned above for your convenience. However, our advice is to switch to Wondershare Filmora. Not only does Filmora offer a cost-effective solution, but it is also much easier to use and provides high-quality recordings without lag.
Also read:
- Updated Camtasia Review – Is It The Best Video Editor?
- What Is the Best MP4 Cutter for YouTuber on Mac for 2024
- Whats The Best Laptops For Video Editing
- In 2024, This Article Talks in Detail About How to Download Windows Movie Maker 2012 Version, the Key Features, How to Use It, Etc. It Further Discusses an Alternative Way to Create Videos on Windows PC. Check Out
- Updated Looking for Final Cut Pro Alternative App for Your Android Smartphone or iPhone? Here Is the List of the Best FCP Alternative Apps for Android and iOS Users
- Updated Splitting Audio From a Video in Sony Vegas Step by Step
- In 2024, The Ultimate Wedding Videography Checklist
- Updated After Reading This Article, You Can Add a B-Roll Feature From Filmora and Captivate More Audience. Explanation Video B-Roll and Story-Telling B-Roll Are Well Illustrated
- New How to Create a Makeup Video for 2024
- Updated How To Blur The Video Background in After Effects
- 2024 Approved Best 8 Educational Video Websites for Teachers
- In 2024, How To Add Fade In Windows Video Editor
- 2024 Approved Simple Step by Step Tutorial on Creating a Lightroom Collage
- Do You Want to Edit a TikTok After Posting? This Article Will Provide Multiple Methods Through Which You Can Do It in No Time for 2024
- 2024 Approved Create Dynamic Text Animation in Filmora
- Live Stream on YouTube Using Zoom for 2024
- New How to Make Cool COD Warzone Thumbnail
- New Best 12 Best Freeze Frame Video Editing Examples for 2024
- New 2024 Approved How To Make a Timelapse in After Effects
- In 2024, How to Make First Impression Review Video
- 2024 Approved Recording Video in Slow Motion Some Considerable Points
- Learn How to Slow Down Time-Lapse Videos on Your iPhone to Make Detailed Slow-Motion Effects in Your Time-Lapse Captures for 2024
- In 2024, Easy Ways to Create Procreate GIFs
- Updated How to Record Super Slow Motion Videos on Your Phone?
- New 10 Top Suggestions for AI Video Interviews for 2024
- A Review of Efectum App Making Slow Motion Video for 2024
- Updated How to Convert Videos to Slow Motion?
- Detailed Tutorial to Merge Videos in VLC Media Player
- Updated Basic Introduction for LumaFusion Color Grading for 2024
- Updated How to Create an Alternate Reality Effect
- In 2024, Discover a Quick Guide to Add Personalized Video Filters in VN App. Learn How to Use Built-In Filters and Import External Ones for Creative Video Editing
- 2024 Approved How to Trim Video in Quicktime Player on Mac
- How to Fake Snapchat Location without Jailbreak On Nokia XR21 | Dr.fone
- Ultimate Guide on Oppo Find N3 FRP Bypass
- In 2024, How to Mirror Your Vivo V29 Pro Screen to PC with Chromecast | Dr.fone
- In 2024, Additional Tips About Sinnoh Stone For Apple iPhone 11 Pro | Dr.fone
- 5 Solutions For Infinix Smart 8 HD Unlock Without Password
- 15 Best Strongest Pokémon To Use in Pokémon GO PvP Leagues For Xiaomi Redmi Note 13 Pro+ 5G | Dr.fone
- In 2024, Proven Ways in How To Hide Location on Life360 For Huawei Nova Y91 | Dr.fone
- How to Change/Add Location Filters on Snapchat For your Vivo Y27 5G | Dr.fone
- 5 Ways to Track Samsung Galaxy A14 4G without App | Dr.fone
- Tips and Tricks for Setting Up your Xiaomi Redmi Note 13 Pro 5G Phone Pattern Lock
- Can Life360 Track You When Your Samsung Galaxy A24 is off? | Dr.fone
- FRP Hijacker by Hagard Download and Bypass your Vivo V27e FRP Locks
- Universal Unlock Pattern for Infinix Smart 8 Plus
- 2 Ways to Transfer Text Messages from Oppo Reno 10 5G to iPhone 15/14/13/12/11/X/8/ | Dr.fone
- Authentication Error Occurred on OnePlus Nord CE 3 5G? Here Are 10 Proven Fixes | Dr.fone
- 3 Easy Methods to Unlock iCloud Locked iPhone 14 Pro/iPad/iPod
- 4 Ways to Transfer Music from Xiaomi 13T to iPhone | Dr.fone
- New 2024 Approved Top List Best Livestream Shopping Apps Of
- Spoofing Life360 How to Do it on Nokia G310? | Dr.fone
- 10 Fake GPS Location Apps on Android Of your OnePlus 11R | Dr.fone
- Spotify Keeps Crashing A Complete List of Fixes You Can Use on Tecno Pop 7 Pro | Dr.fone
- In 2024, Complete Tutorial to Use GPS Joystick to Fake GPS Location On Tecno Spark Go (2023) | Dr.fone
- In 2024, How to Screen Mirroring Realme 12+ 5G to PC? | Dr.fone
- In 2024, How To Remove Screen Lock PIN On Poco F5 Pro 5G Like A Pro 5 Easy Ways
- In 2024, How To Change Vivo S17e Lock Screen Password?
- Title: Updated In 2024, Top 8 Augmented Reality Video Games
- Author: Chloe
- Created at : 2024-04-24 07:08:38
- Updated at : 2024-04-25 07:08:38
- Link: https://ai-editing-video.techidaily.com/updated-in-2024-top-8-augmented-reality-video-games/
- License: This work is licensed under CC BY-NC-SA 4.0.
