
:max_bytes(150000):strip_icc():format(webp)/tropical-beach-wallpaper-beach-backgrounds-587fbb765f9b584db3241860.jpg)
Updated In 2024, Ways to Learn Discord Game Bots – Even if Youre Just Starting Out
Ways to Learn Discord Game Bots – Even if You’re Just Starting Out
Ways to Learn Discord Game Bots – Even if You’re Just Starting out
An easy yet powerful editor
Numerous effects to choose from
Detailed tutorials provided by the official channel
Discord is free social communication service used by tens of millions of individuals aged 13 and above to socialize with their communities and friends. People use discord regularly to discuss various topics, from art projects and family vacations to homework and mental health help. It serves as a home for communities of different sizes but has become quite popular as discord bot games due to the rise in the gaming community.
The great majority of servers are private, invite-only locations where friends and communities may communicate and spend time together. More significant, more open groups based on specific themes like popular video games like PUBG and Genshin Impact. Because all discussions are opt-in, users have complete choice over who they connect with and how they use discord.
In this article
01 [What Are Discord Game Bots?](#Part 1)
02 [How Do You Add Bot Games to Discord?](#Part 2)
03 [Top 10 Picks of Discord Gaming Bots](#Part 3)
04 [Discord Game Bots FAQs](#Part 4)
Part 1 What Are Discord Game Bots?
Discord game bots are artificial intelligence (AI)-powered applications that automate processes and add music, games, welcome messages, memes, and other fun stuff to your server. These bots make it simple to interact with your audience, grow your community, and manage your server.
There is a plethora of game bots for discord to pick from, each with its purpose. Some may automatically welcome new users, while others utilize webhooks to interface with other apps—and it may be tough for novice users to figure out which ones will provide the most remarkable results for their requirements.
Part 2 How Do You Add Bot Games to Discord?
Follow the steps below to add game bots for discord successfully:
Step 1: To add a bot to your Discord server, go to the bot’s source page. We’ll be using ProBot for this lesson.
Step 2: Depending on the bot you’re adding, click Add to Discord or Invite Now.
Step 3: To grant the bot access, a pop-up window will appear asking you to check in to your Discord account.
Step 4: After you log in, you’ll see a box asking for account authorization. Locate and choose the Add to Server drop-down menu.
Step 5: This will bring up a list of discord servers where you can add a bot game discord. Continue after selecting your server.
Step 6: Examine the server permissions that the bot asks for. Select and deselect according to your requirements. When you’re ready, click Authorize.
For those who like to share their discord game bots experience through screen recordings and whatnot, a potent and convenient video editing tool to make your sessions look even more incredible is Filmora.
Wondershare Filmora Video Editor is a famous video editing program for those who wish to focus on editing and producing high-quality videos. The program supports 4K video editing. It’s a reasonably priced tool featuring effects for both video and audio. When it comes to designing, adding effects, and modifying movies, it provides users with many possibilities. You can use the tool to add overlays, create animations and objects, add music, and input text. Imagine sharing your experience in 4k!
For Win 7 or later (64-bit)
For macOS 10.12 or later
Part 3 Top 10 Picks of Discord Gaming Bots
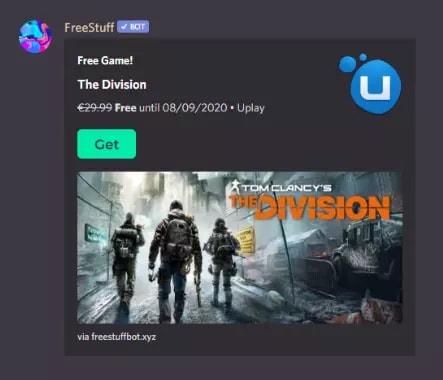
01Karuta
Karuta is a discord game bot where you gather anime characters. In Karuta, though, you collect characters using trading cards. Your cards and other objects may be customized, upgraded, and traded with other players. Better still, you maintain the same cards between servers, allowing you to play Karuta with the same deck on any server where the game discord bot is!
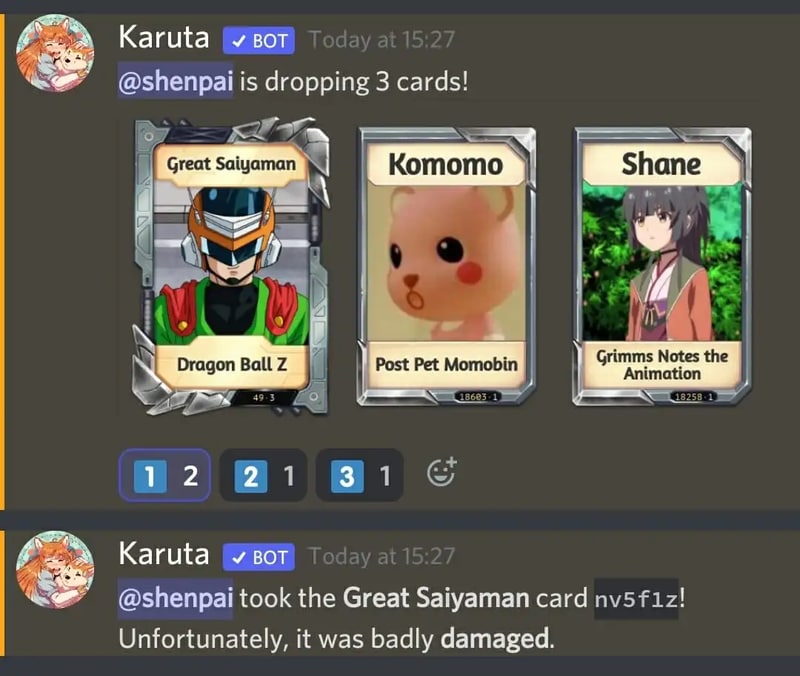
02Dragon Bot Z
Dragon Bot Z is the discord bot game that adds discord Ball Z, a multiplayer text-based RPG, to your server. Players in Discord Ball Z summon characters from the iconic Dragon Ball Z franchise, train them, fight foes, buy equipment, and trade with other players. This Discord game is ideal for Dragon Ball fans or anybody who likes text-based roleplaying games.
03Mudae
Mudae is a bot discord game with character-collecting. For example, you can claim popular anime and videogame characters as your “waifus” or “husbandos,” develop your harem, and compete for your favorite characters with other users. You can also trade the characters with other members.

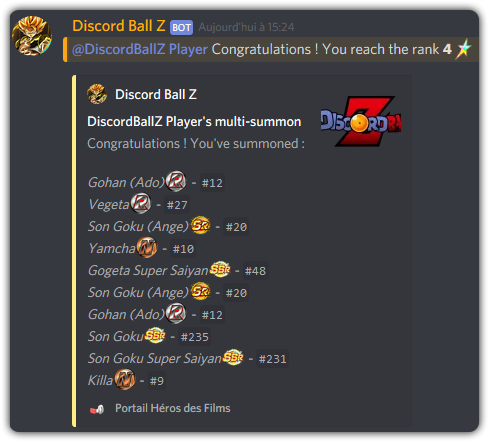
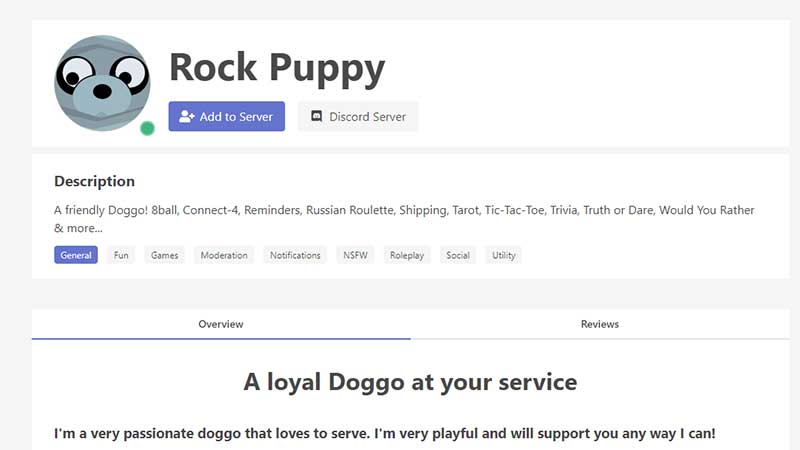
04Rock Puppy
Rock Puppy is a basic yet entertaining game bots discord bot that incorporates several classic games. You can enjoy Discord games like ConnectFour, Truth or Dare, Trivia, Tic-Tac-Toe, Russian Roulette, and Would You Rather with Rock Puppy. You may also use magic 8-ball, dice, or tarot cards, play classic board and party games on your server with Rock Puppy.
05GarticBOT
GarticBot is a bot game in discord that allows you to play the drawing game Gartic. GarticBot begins the Discord game by painting an image on your server. Members then compete against one another to predict the image the quickest. Others can guess your drawings if you submit them. Type the command g.draw, and Gartic will provide you with a URL to submit your artwork. GarticBot creates a fun Pictionary-style game for everyone on your server to play.

06TriviaBot
TriviaBot is the most popular trivia game discord bot. It has over 90,000 questions, and you can even submit your own for inclusion in the bot. Members can form and join teams to compete in competitions. You may also create a public leaderboard to display who performs the best on the server.

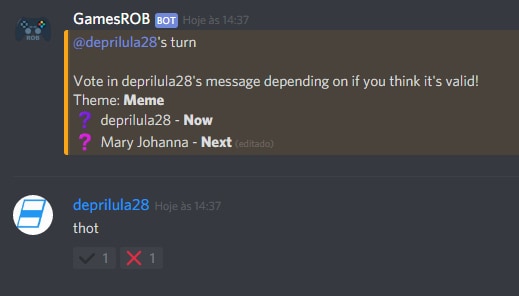
07GamesRob
The finest Uno discord game bot is GamesROB. ConnectFour, Trivia, Battleship, 2048, Tic-Tac-Toe, Minesweeper, and Hangman are the other traditional party games added to discord. You may also play “Detective,” a Discord game in which you try to figure out who is the “assassin” on your server, memory games, and Town, Country, River, a game in which you try to come up with as many phrases as possible within a theme.
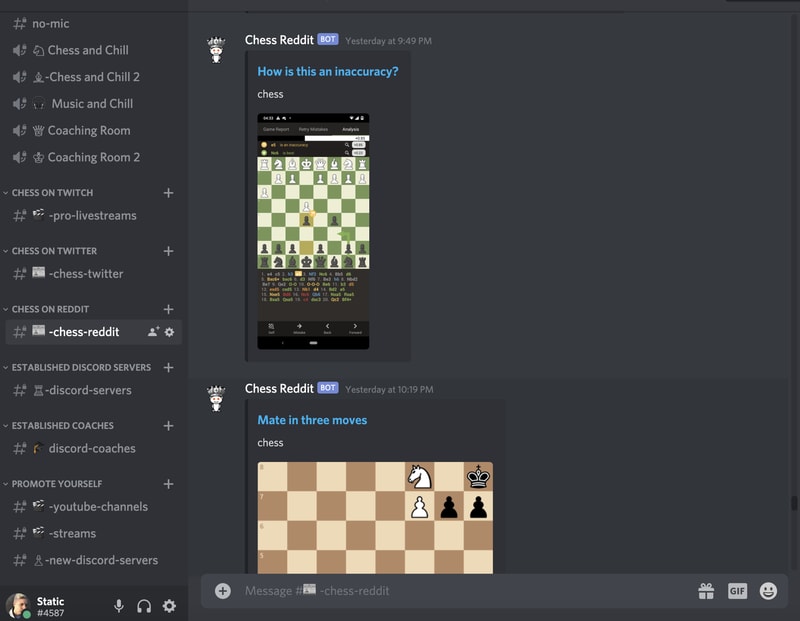
08Chess Reddit
Chess is a simple game that allows you to play chess on discord. You may play a chess game with other server members directly on the server. Instruct the bot on which pieces to move and where they should go. After each move, the Discord game bot creates a fresh graphic of the board so you can plot your next move. And, because the game hosts on your server, other users may watch and debate it!
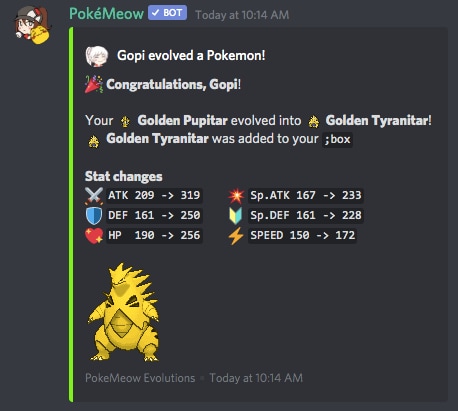
09PokeMeow
PokeMeow is by far the most popular Pokemon game discord bot. With this Pokemon bot, you may capture Pokemon on your server, trade, battle with other players, and accomplish tasks for in-game currency and stuff. As you keep building up your Pokedex, the Pokemon bot also allows to compete with other users on the worldwide leaderboard! PokeMeow is the ideal Pokemon Discord bot for fans of the Pokemon series.
10IdleRPG
IdleRPG is a discord game where you may play a text-based roleplaying game. You may make your character complete with ethnicity and social status. Then, you can go on quests and combat beasts, purchase, and exchange mythic objects, join guilds, engage with gods, and even marry other players. Play through your character’s adventure while engaging with and creating stories with other players. IdleRPG is likely to provide your server with hundreds of hours of roleplaying pleasure.

Part 4 Discord Game Bots FAQs
Now, let us go through some FAQs about discord game bots:
Q. Is it possible to play games with discord bots?
A. You could indeed play discord games in-server with bots, challenge other members, and win prizes! A game bot is a terrific method to keep players engaged on your server, especially if it’s a gaming Discord channel.
Q. Do game bots spy on you?
A. No, game discord bots do not have inbuilt spyware.
Q. How many bots should a server have?
A. It’s best not to have more than 20 bots game on discord on a server at any moment. More bots than this may cause users to become confused and the service to seem suspicious.
Q. Are discord bots free?
A. All these discord game bots are free to use. However, some have premium upgrades.
Q. Which bot is the most popular game bot in discord?
A. Worddle
Q. Which bot is the best bot for gaming on discord?
A. Gawesome is an excellent alternative for adding a multifunctional bot to your discord server.
● Ending Thoughts →
● Discord is accessible communication and socializing service for individuals aged 13 and above.
● The platform extends to various servers, each with its users, rules, themes, and channels, but one underutilized feature is the ability to develop and code custom AI-powered bots.
● Game bots for discord are artificial intelligence (AI)-powered applications that automate processes and add games to your discord server.
● These game discord bots make it simple to interact with your audience, grow your community, and manage your server.
● Lastly, to enhance the discord game bots experience and bring your gaming videos to life, use the Filmora software.
Discord is free social communication service used by tens of millions of individuals aged 13 and above to socialize with their communities and friends. People use discord regularly to discuss various topics, from art projects and family vacations to homework and mental health help. It serves as a home for communities of different sizes but has become quite popular as discord bot games due to the rise in the gaming community.
The great majority of servers are private, invite-only locations where friends and communities may communicate and spend time together. More significant, more open groups based on specific themes like popular video games like PUBG and Genshin Impact. Because all discussions are opt-in, users have complete choice over who they connect with and how they use discord.
In this article
01 [What Are Discord Game Bots?](#Part 1)
02 [How Do You Add Bot Games to Discord?](#Part 2)
03 [Top 10 Picks of Discord Gaming Bots](#Part 3)
04 [Discord Game Bots FAQs](#Part 4)
Part 1 What Are Discord Game Bots?
Discord game bots are artificial intelligence (AI)-powered applications that automate processes and add music, games, welcome messages, memes, and other fun stuff to your server. These bots make it simple to interact with your audience, grow your community, and manage your server.
There is a plethora of game bots for discord to pick from, each with its purpose. Some may automatically welcome new users, while others utilize webhooks to interface with other apps—and it may be tough for novice users to figure out which ones will provide the most remarkable results for their requirements.
Part 2 How Do You Add Bot Games to Discord?
Follow the steps below to add game bots for discord successfully:
Step 1: To add a bot to your Discord server, go to the bot’s source page. We’ll be using ProBot for this lesson.
Step 2: Depending on the bot you’re adding, click Add to Discord or Invite Now.
Step 3: To grant the bot access, a pop-up window will appear asking you to check in to your Discord account.
Step 4: After you log in, you’ll see a box asking for account authorization. Locate and choose the Add to Server drop-down menu.
Step 5: This will bring up a list of discord servers where you can add a bot game discord. Continue after selecting your server.
Step 6: Examine the server permissions that the bot asks for. Select and deselect according to your requirements. When you’re ready, click Authorize.
For those who like to share their discord game bots experience through screen recordings and whatnot, a potent and convenient video editing tool to make your sessions look even more incredible is Filmora.
Wondershare Filmora Video Editor is a famous video editing program for those who wish to focus on editing and producing high-quality videos. The program supports 4K video editing. It’s a reasonably priced tool featuring effects for both video and audio. When it comes to designing, adding effects, and modifying movies, it provides users with many possibilities. You can use the tool to add overlays, create animations and objects, add music, and input text. Imagine sharing your experience in 4k!
For Win 7 or later (64-bit)
For macOS 10.12 or later
Part 3 Top 10 Picks of Discord Gaming Bots
01Karuta
Karuta is a discord game bot where you gather anime characters. In Karuta, though, you collect characters using trading cards. Your cards and other objects may be customized, upgraded, and traded with other players. Better still, you maintain the same cards between servers, allowing you to play Karuta with the same deck on any server where the game discord bot is!
02Dragon Bot Z
Dragon Bot Z is the discord bot game that adds discord Ball Z, a multiplayer text-based RPG, to your server. Players in Discord Ball Z summon characters from the iconic Dragon Ball Z franchise, train them, fight foes, buy equipment, and trade with other players. This Discord game is ideal for Dragon Ball fans or anybody who likes text-based roleplaying games.
03Mudae
Mudae is a bot discord game with character-collecting. For example, you can claim popular anime and videogame characters as your “waifus” or “husbandos,” develop your harem, and compete for your favorite characters with other users. You can also trade the characters with other members.
04Rock Puppy
Rock Puppy is a basic yet entertaining game bots discord bot that incorporates several classic games. You can enjoy Discord games like ConnectFour, Truth or Dare, Trivia, Tic-Tac-Toe, Russian Roulette, and Would You Rather with Rock Puppy. You may also use magic 8-ball, dice, or tarot cards, play classic board and party games on your server with Rock Puppy.
05GarticBOT
GarticBot is a bot game in discord that allows you to play the drawing game Gartic. GarticBot begins the Discord game by painting an image on your server. Members then compete against one another to predict the image the quickest. Others can guess your drawings if you submit them. Type the command g.draw, and Gartic will provide you with a URL to submit your artwork. GarticBot creates a fun Pictionary-style game for everyone on your server to play.
06TriviaBot
TriviaBot is the most popular trivia game discord bot. It has over 90,000 questions, and you can even submit your own for inclusion in the bot. Members can form and join teams to compete in competitions. You may also create a public leaderboard to display who performs the best on the server.
07GamesRob
The finest Uno discord game bot is GamesROB. ConnectFour, Trivia, Battleship, 2048, Tic-Tac-Toe, Minesweeper, and Hangman are the other traditional party games added to discord. You may also play “Detective,” a Discord game in which you try to figure out who is the “assassin” on your server, memory games, and Town, Country, River, a game in which you try to come up with as many phrases as possible within a theme.
08Chess Reddit
Chess is a simple game that allows you to play chess on discord. You may play a chess game with other server members directly on the server. Instruct the bot on which pieces to move and where they should go. After each move, the Discord game bot creates a fresh graphic of the board so you can plot your next move. And, because the game hosts on your server, other users may watch and debate it!
09PokeMeow
PokeMeow is by far the most popular Pokemon game discord bot. With this Pokemon bot, you may capture Pokemon on your server, trade, battle with other players, and accomplish tasks for in-game currency and stuff. As you keep building up your Pokedex, the Pokemon bot also allows to compete with other users on the worldwide leaderboard! PokeMeow is the ideal Pokemon Discord bot for fans of the Pokemon series.
10IdleRPG
IdleRPG is a discord game where you may play a text-based roleplaying game. You may make your character complete with ethnicity and social status. Then, you can go on quests and combat beasts, purchase, and exchange mythic objects, join guilds, engage with gods, and even marry other players. Play through your character’s adventure while engaging with and creating stories with other players. IdleRPG is likely to provide your server with hundreds of hours of roleplaying pleasure.
Part 4 Discord Game Bots FAQs
Now, let us go through some FAQs about discord game bots:
Q. Is it possible to play games with discord bots?
A. You could indeed play discord games in-server with bots, challenge other members, and win prizes! A game bot is a terrific method to keep players engaged on your server, especially if it’s a gaming Discord channel.
Q. Do game bots spy on you?
A. No, game discord bots do not have inbuilt spyware.
Q. How many bots should a server have?
A. It’s best not to have more than 20 bots game on discord on a server at any moment. More bots than this may cause users to become confused and the service to seem suspicious.
Q. Are discord bots free?
A. All these discord game bots are free to use. However, some have premium upgrades.
Q. Which bot is the most popular game bot in discord?
A. Worddle
Q. Which bot is the best bot for gaming on discord?
A. Gawesome is an excellent alternative for adding a multifunctional bot to your discord server.
● Ending Thoughts →
● Discord is accessible communication and socializing service for individuals aged 13 and above.
● The platform extends to various servers, each with its users, rules, themes, and channels, but one underutilized feature is the ability to develop and code custom AI-powered bots.
● Game bots for discord are artificial intelligence (AI)-powered applications that automate processes and add games to your discord server.
● These game discord bots make it simple to interact with your audience, grow your community, and manage your server.
● Lastly, to enhance the discord game bots experience and bring your gaming videos to life, use the Filmora software.
2 Ways to Add Custom Subtitles to Netflix
Netflix is the most popular streaming service in the world. It offers loads of movies and series that you can watch on smartphones, tablets, and computers. Over the years, Netflix has become a one-stop destination for watching movies and TV shows in different languages.
While the user base of Netflix is quite diverse, the platform offers subtitles in limited languages for most movies and series. Suppose you want to view a Korean Drama on Netflix with French subtitles. However, you found that French subtitles are unavailable for that Korean Drama. In such a case, you might wonder if adding custom subtitles to Netflix is possible.
Well, you can add subtitles to Netflix, and there are two different methods to do the same. This guide will help you learn both methods available for adding custom subtitles to Netflix. So, let’s get started!
Method 1. Upload Your Custom Subtitle to Netflix
Before proceeding with this method, you must remember that it only works if you are a Netflix Premium user. Now, let’s discuss how to add subtitles to Netflix with this method.
Key Steps to Follow
Below are the steps for adding custom subtitles to Netflix.
Step 1 First of all, you need to install and add Language Learning with Netflix & YouTube™ extension to your web browser (Chrome or Edge).
Step 2 Make sure the extension is activated.
Step 3 Download the .srt file that contains the subtitles in your preferred language for a particular movie or TV show.
Step 4 Open Netflix on a Chrome or Edge browser and sign into your account.
Step 5 Play the movie or TV show for which you have downloaded the subtitles.
Step 6 Within the Netflix player, you will see a settings icon left to the Subtitles icon. Click on it.
Step 7 Among the various setting options, you need to choose the screen and find the one with the label “Lower Subtitles (Mother Language)”. You need to click on its field and select the “Upload Subtitle” option.
Step 8 You will see a pop-up window at the top of the screen where you need to click the “Choose File” button.
Step 9 You then need to navigate to the directory on your computer where you have downloaded the subtitles file, select it, and click the “Open” button.
Step 10 Click the “Okay” button to upload the subtitles to Netflix.
Step 11 Close the settings window and play the video. You can view the uploaded subtitles at the bottom of the player.
Method 2. Add Custom Subtitles to Netflix with Extensions
If you’re not a Netflix Premium user, you can still add subtitles to Netflix with the help of certain browser extensions. We’ll list them down and discuss the steps for using one of them; the basic steps for using all such extensions are pretty much the same.
1. Substital
Supported web browsers: C hrome | Firefox | Edge
Substital is among the most popular extensions that allow you to add subtitles to several online on-demand video streaming platforms, including Netflix. It has more than 100K users on the Chome Web Store.
Key Features
- Offers a built-in subtitles search feature.
- Supports .srt files and .zip files containing subtitles in the .srt format.
- You can manually sync the subtitles with the video.
- It allows you to customize the appearance of subtitles.
Steps to Add Custom Subtitles to Netflix with Substital
Following are the key steps to add custom subtitles to Netflix using the Substital extension:
Step 1 The first thing you need to do is to download and install the Substital extension on your browser.
Step 2 Open Netflix on the same browser and log in to your account.
Step 3 Play the movie or episode from a TV series for which you want to add custom subtitles.
Step 4 Download the subtitles file for the same movie or episode in your preferred language from the web.
Step 5 Now open the extensions menu in your browser and click on the Substital icon.
Step 6 You will see the name of the movie or TV show that you are watching on Netflix. Click on it.
Step 7 In this step, you need to drag and drop the subtitle file from your system (that you downloaded earlier) to the browser window.
Step 8 Finally, you can notice that the subtitles are loaded in the Netflix player.
2. Super Netflix
Web browsers: Chrome
Super Netflix is yet another reliable extension to add subtitles to Netflix. Apart from adding custom subtitles, this extension allows you to change the video playback speed. Like Substital, the Super Netflix extension on Chrome Web Store also has 100K+ users.
Key Features
- It can help you avoid spoilers by blurring images and episode descriptions.
- You can use the extension to skip intros automatically.
- Offers 5 different video modes.
- You get the option to change the Netflix streaming server.
3. Netflix SubStyler: customize subtitles
Web browsers: Chrome
Unlike the other two extensions mentioned above, Netflix SubStyler only allows you to change the styling of subtitles on Netflix. However, the thing that makes this extension worthy of your attention is that it comes loaded with several customization options.
Key Features
- You can choose a custom text color for the subtitles either with the help of an in-built color picker or by entering the RGB value of the color.
- The extension lets you add text outlines and change the size of the text.
- You can even add a text background and change its color and opacity.
Bonus Tip: How to Edit and Add Subtitles to Videos Available Offline
In certain cases, you may want to edit the subtitles of videos probably because either the subtitles are not available for a certain part of the video, or they are not correct. So, if you want to edit subtitles of videos that you have downloaded with ease, you can consider using Wondershare Filmora .
Free Download For Win 7 or later(64-bit)
Free Download For macOS 10.14 or later

Filmora is one of the most popular and powerful video editors out there. Developed by Wondershare, it allows you to import subtitle files in various formats, including .srt, and edit them directly. Some noteworthy features of Filmora for subtitles and video editing include the manual addition of subtitles, speech-to-text conversion, green screen, video stabilization, and color correction.
Wondershare Filmora also offers several advanced text editing tools that make it possible to customize the appearance of subtitles that you add to a video. You can change the color and size of the fonts and add a gradient effect to the text. Additionally, you can animate text to make it stand out.
Add Custom Subtitles with Filmora: A Step-by-Step Guide
If you want to add subtitles to any video using Filmora, you simply need to follow the steps mentioned below. Please note that for this tutorial, we’ll be using Filmora 11.
Step 1 Launch the Filmora app on your computer and create a new project.
Step 2 You can simply click the “Import media” button and load the video onto it.
Step 3 Hover over the video’s thumbnail and click on the (+) button to add it to the timeline.
Step 4 Now, you need to play the video and find the section of the video where you need to add subtitles. Pause the video and add a mark by pressing the M key on your keyboard. You can also do the same by clicking the marker button, which is located beside the microphone icon in the top right of the timeline tab.
Step 5 To add the subtitle, you need to click on the “Titles” button that you can see at the top of the Filmora window. You can see several subtitle templates available there.
Step 6 Download, preview, and choose a subtitle template that seems most appropriate.
Step 7 You can then drag and drop the subtitle to the timeline above the video timeline. You can also trim the subtitle length from any side of the subtitle timeline box.
Step 8 You need to double-click on the subtitle timeline box to add custom text, change font size, color, and alignment, and add animations.
Step 9 Once done, you can click on the “Ok” button to save the changes.
Step 10 Similarly, you can add subtitles for different sections of the video.
Conclusion
If you want to add custom subtitles to Netflix movies and TV shows, you can achieve the same with the two different methods mentioned above. For the first method to work, you must be a Netflix Premium user. On the other hand, the second method will work fine even if you aren’t a Netflix Premium user. Also, you can add custom subtitles to any offline videos using the Wondershare Filmora video editor.
Free Download For macOS 10.14 or later
Filmora is one of the most popular and powerful video editors out there. Developed by Wondershare, it allows you to import subtitle files in various formats, including .srt, and edit them directly. Some noteworthy features of Filmora for subtitles and video editing include the manual addition of subtitles, speech-to-text conversion, green screen, video stabilization, and color correction.
Wondershare Filmora also offers several advanced text editing tools that make it possible to customize the appearance of subtitles that you add to a video. You can change the color and size of the fonts and add a gradient effect to the text. Additionally, you can animate text to make it stand out.
Add Custom Subtitles with Filmora: A Step-by-Step Guide
If you want to add subtitles to any video using Filmora, you simply need to follow the steps mentioned below. Please note that for this tutorial, we’ll be using Filmora 11.
Step 1 Launch the Filmora app on your computer and create a new project.
Step 2 You can simply click the “Import media” button and load the video onto it.
Step 3 Hover over the video’s thumbnail and click on the (+) button to add it to the timeline.
Step 4 Now, you need to play the video and find the section of the video where you need to add subtitles. Pause the video and add a mark by pressing the M key on your keyboard. You can also do the same by clicking the marker button, which is located beside the microphone icon in the top right of the timeline tab.
Step 5 To add the subtitle, you need to click on the “Titles” button that you can see at the top of the Filmora window. You can see several subtitle templates available there.
Step 6 Download, preview, and choose a subtitle template that seems most appropriate.
Step 7 You can then drag and drop the subtitle to the timeline above the video timeline. You can also trim the subtitle length from any side of the subtitle timeline box.
Step 8 You need to double-click on the subtitle timeline box to add custom text, change font size, color, and alignment, and add animations.
Step 9 Once done, you can click on the “Ok” button to save the changes.
Step 10 Similarly, you can add subtitles for different sections of the video.
Conclusion
If you want to add custom subtitles to Netflix movies and TV shows, you can achieve the same with the two different methods mentioned above. For the first method to work, you must be a Netflix Premium user. On the other hand, the second method will work fine even if you aren’t a Netflix Premium user. Also, you can add custom subtitles to any offline videos using the Wondershare Filmora video editor.
VSDC Free Video Editor Review
If you are a Window user and you are looking for a free video editor without a watermark, VSDC free video editor is definitely a great application. There are only a handful of free video editors available where the output video will not have a watermark, and there is no limitation on the video length. VSDC video editor belongs to the non-liner video editor group where you can combine video clips, photos, objects, and blend and overlap them as per your requirements.
For a beginner, VSDC free video editor is undoubtedly one of the best video editors. It supports different types of video and audio formats as well as codes. The system requirements are very basic, and hence, it is perfect for low-end computers? But can you rely on VSDC editor when you need slightly advanced video editing? Check out our VSDC editor review and find a better alternative.
Part 1. How to Download and Install VSDC?
VSDC editor download is only available for Windows users. It is tailor-made for those who have a low-end computer with older Windows version OS. The software is compatible with Windows 2000 to Windows 11. The minimum RAM requirement is 128MB and free disk space of 200 MB. Here are the steps to download and install VSDC editor.
Step 1: Open your web browser and visit ‘www.videosoftdev.com/free-video-editor/download” .
Step 2: Click on Download Video Editor button based on 32-bit or 64-bit version of your computer. If you have Windows XP, you have to download VDSC video editor version 6.4 instead of the latest version for compatibility.
Step 3: Give some time for the installer file to get downloaded. It is merely 100 MB and it should not take long. After downloading the installer, launch it and follow the on-screen instruction to complete the installation.
Step 4: After proper installation, launch VSDC video editor. You will get the options to create a new project and capture screen, start editing an existing video and export the finished project in a proper video format.
Part 2. Key Features of VSDC
There are two versions of VSDC video editor available – Free video editor and Pro video editor. The free version has limited features while Pro version has advanced features. Here are going to discuss the key features of VSDC Free Video Editor.
Low System Requirements – One of the reasons for the wide popularity of VSDC video editor is that it does not demand high system configurations like most other video editors. If you have a low-end computer with an outdated Windows operating system, you can use VSDC video editor without any issue.
Basic Editing – Among the basic editing tools, you can cut, trim, split and join video clips. There are options for rotating and resizing videos. You can also go for color correction and put overlays on videos as applicable. Besides, you can edit 36-degree videos with zoom and chart tools.
Effects – VSDC has a wide collection of video, audio and text effects. You can also add objects to your video and apply different ready-made filters. There are also transitions to apply in between video clips and slides. You can also use green screen effect to change your background. The special split-screen effect and picture-in-picture effects are quite eye-catching.
Capture Video – VSDC video editor is equally competent in capturing videos from your webcam as well as recording your screen video. In fact, there is a dedicated option available for creating slideshow videos from photos. You can even record your voiceover if you want to.
File Formats - VSDC supports all the popular file formats for importing and exporting video and audio files. There are different export profiles available so that you can save your edited video for different devices conveniently.
Apart from these, if you opt for the Pro version, you get motion tracking, video masking, video stabilization, and much more such advanced video editing tools.
Part 3. How to Edit Videos with VSDC
If you have the recorded video and you want to edit it with VSDC video editor, the steps are quite simple. You can even record your webcam and screen video with audio if you want to start from scratch. Coming to the editing part, you can split large video files, merge video clips, add transitions in between, add objects in the video as well as crop and rotate videos. There are different effects you can apply to uplift video content. Here are the steps to edit videos with VSDC editor.
Step 1: Open VSDC Video Editor and click on Blank Project option. Name the project and change parameters, and click on Finish.

Step 2: Click on Add Object option at the top and select Video. Import the video clips saved on your hard drive. Similarly, you can go to Add Objects> Audio to import audio files.

Step 3: All the imported media files will appear on the timeline. If you have multiple video clips, you can shift the position of clips on the timeline so that one video clip ends and the other begins.
Step 4: If you want to add transitions in between the video clips, go to Video Effects> Transitions> select the effect you want to apply. Check the on-screen parameters such as duration and click on Ok button.

Step 5: If you want to add objects, go to Add Object and select shapes, texts, animations, charts, and much more. You can also add Audio Effects as well as Text Effects from the top bar.
Step 6: Once you are happy with the preview of the edited video, go to Export Project and check all the parameters. Click on Export Project option.

Part 4. Best VSDC Alternative Video Editor
Since VSDC video editor is available completely free, there is no hard in downloading the application and trying it out. But soon, you will understand that the video editor is limited as far as tools and features are concerned. If you want to get more than just basic tools, you will have to upgrade to its Pro version. However, there are better premium video editors available. We recommend Wondershare Filmora as a better alternative to VSDC video editor.
Filmora is extremely popular in the professional video editing world as it has an intuitive interface and does not demand high-end computers. There are tons of transitions, effects, filters, and objects available to add to your edit. You can perform all standard and advanced video editing to take your video to the next level. Here are all the steps to edit videos on Filmora.
For Win 7 or later (64-bit)
For macOS 10.12 or later
Step 1: Download and install Filmora and it is available for Windows and Mac. Launch Filmora and click on New Project. Import all your media files into Project Media folder by drag and drop action.

Step 2: Arrange the video clips and audio clips on the timeline by drag and drop action. You should be placing the video and audio files on different tracks. This is where you can do all the basic editing such as trimming, cutting, splitting, and merging.

Step 3: To add transitions in between the video clips, go to Transitions from the top bar and drag and drop any transition in between the clips. Check out Titles, Effects, and Elements from the top bar and insert them on the timeline as you think appropriate.

Step 4: Play the video to see if everything is perfect and click on Export button to save your video to your hard drive.

Part 5. FAQs about VSDC
1. Is VSDC video editor really free?
Yes, VSDC video editor is completely free to use. However, there is a pro version available where more features are present. But the free version does not put watermark on the output video and has all the standard tools for video editing without any limitation.
2. Is VSDC better than Adobe Premiere Pro?
No, VSDC is not better than Adobe Premiere Pro. VSDC is a free video tor while Adobe Premiere Pro is a premium one. Naturally, Adobe Premiere Pro has more features and functionalities. However, VSDC is better for beginners and those who have low-end computers if you compare it with Adobe Premiere Pro.
3. Is VSDC safe?
Yes VSDC video editor is safe and stable to use. However, there was an incident in 2019 where VSDC video editor’s official website was hacked, but the software itself is safe to use on Windows computers.
For macOS 10.12 or later
Step 1: Download and install Filmora and it is available for Windows and Mac. Launch Filmora and click on New Project. Import all your media files into Project Media folder by drag and drop action.
Step 2: Arrange the video clips and audio clips on the timeline by drag and drop action. You should be placing the video and audio files on different tracks. This is where you can do all the basic editing such as trimming, cutting, splitting, and merging.
Step 3: To add transitions in between the video clips, go to Transitions from the top bar and drag and drop any transition in between the clips. Check out Titles, Effects, and Elements from the top bar and insert them on the timeline as you think appropriate.
Step 4: Play the video to see if everything is perfect and click on Export button to save your video to your hard drive.
Part 5. FAQs about VSDC
1. Is VSDC video editor really free?
Yes, VSDC video editor is completely free to use. However, there is a pro version available where more features are present. But the free version does not put watermark on the output video and has all the standard tools for video editing without any limitation.
2. Is VSDC better than Adobe Premiere Pro?
No, VSDC is not better than Adobe Premiere Pro. VSDC is a free video tor while Adobe Premiere Pro is a premium one. Naturally, Adobe Premiere Pro has more features and functionalities. However, VSDC is better for beginners and those who have low-end computers if you compare it with Adobe Premiere Pro.
3. Is VSDC safe?
Yes VSDC video editor is safe and stable to use. However, there was an incident in 2019 where VSDC video editor’s official website was hacked, but the software itself is safe to use on Windows computers.
Tactics To Make Keynote Slideshow
Tactics to Make Keynote Slideshow
An easy yet powerful editor
Numerous effects to choose from
Detailed tutorials provided by the official channel
Designing custom slideshows in keynote slideshow is an absolute fun to do activity for infotainment and information sharing needs
In this article
01 [What is Keynote Slideshow and Why is It Popular?](#Part 1)
02 [How to Use Keynote Slides](#Part 2)
03 [How to Loop a Slideshow in Keynote?](#Part 3)
04 [4 Hot Faqs About Keynote Slideshow](#Part 4)
Part 1 What is Keynote Slideshow and Why is It Popular?
Keynote is slideshow presentation software developed by Apple. You can make a slideshow presentation using keynote. Using keynote is easier to work with and can give you a quality presentation. It is packed with intuitive design tools that aid in making an interactive and engaging presentation. Its readymade templates are amazing and you can focus on the content rather than focusing on the design of the templates.
Keynote is popular because of the following features:
● Its design is simple so it is easy to make presentations.
● It has easy to use tools and amazing quality transitions.
● It has impressive charts, columns, bars, pies etc.
● It is built in your Mac devices. You can use it on your Mac, iPhone, iPad or even for your PC if you have an iCloud account.
● Voice over support for reading notes.
01Themes
Most of us are not design professionals, so you can use keynote’s predefined themes. These inbuilt templates have enchanting font style and object placement with professional designs to create an efficacious presentation.
Apple introduced three new templates – Exhibition, Drafting and Modern Type which are Bold, Colorful and sketch- like. Black, White, Gradient and Classic are popular theme. When creating a presentation instead of selecting the default theme, scroll to the themes options and you can choose the desired theme.
02Media Browser
Apples iWork apps like Pages, Numbers and Keynote it supports for adding customizable art elements, also it has the ability to browse, select and import the images which are present in the user’s photos app.
Clicking on the menu bar media option will open the Media Browser. Users can access specific folders using the media browser. Selecting the appropriate folder from collections and by double clicking on the image, you can insert that image in your presentation.
03Split View
Apple has introduced the split view with EI Capitan. Spilt view provides the ability to use applications side by side while each app will remain in full-screen. It helps you to do multitasking and to do cross-referencing data between the Keynotes, Pages and Numbers.
For example – You wish to open Pages and Keynote simultaneously within Split View mode; you can start it by opening the Pages and then opening the Keynote presentation. Click and hold keynote’s green full screen icon and after holding the green screen the left half of the Mac will turn blue and then release the icon. The application will enter on full-screen, covering the remaining half screen. Repeat the steps for Pages also and you will end up with both the applications open side by side.
Part 2 How To Use Keynote Slides
Apple’s keynote is a great option for Mac users to make beautiful slides for their presentations. Making a presentation focuses on idea or information you want to deliver to your audience. Designing a keynote slide includes, keynote slides sizes and dimensions which are very important.
Here are some important things to consider to make the best use of keynote slides.
01Keynote Slide Size Matters
Before designing your slides think about the screen size you’ll be presenting your presentation. Every screen has an aspect ratio. The aim is to create a keynote presentation that matches the aspect ratio of the screen on which you are going to present.
Screens on which your presentation will appear are:
● iPad and tablets
● Conference room projectors
● Laptop
● Widescreen, large format display
Setting the size of the keynote slide will ensure that your slides will match to the screen on which you are going to present. Keynote slides can be changed in different ways which includes changing the designs, dimensions and ruler options etc.
02Change Keynote Layout Dimensions and Size
Start off in keynote by clicking on the document option given at the top right corner. A new panel will open and all the changes will be done in that panel.When you will click on the document panel, there will be two tabs on the panels, make sure you are working on the labeled document panel.

On the slide size at the down side, you can set the size of the slide. By default you have two options 4:3 and 16:9 slide sizes. When you will create a new document, its size will be 4:3 by default, so before making a keynote slide make sure you check the size.

Keep in mind that the content should be on the keynote slides. When you turn your widescreen content into a square shaped layout, to make it look fit in the square shaped layout you have to rearrange the content on slide.
03Changing the Keynote Design Options
You can make changes to the keynote themes that you are using with ease. Keynote theme can change or can enhance the look of your presentation. Even if you have started working on your presentation, you can still change the theme in just few clicks.
On the document panel, click on change theme button you will see different theme styles pop up on your screen.

Choose another theme for your presentation from this windows and click on choose button to re-theme your presentation. When you will choose your desired theme, all your content will be adapted to the newly selected theme.
04Entitle Rulers
Rulers are the important as they help in aligning element in your slide. A ruler ensures you that you are making each slide corresponding to the screen dimensions. Rulers can help you attain pixel – perfect design.
You can enable rulers by clicking on view > show rulers. At the top and the sides of the keynote documents, you will see the pixel measurements. These rulers will help you in aligning everything perfectly on your slide.

How To Loop A Slideshow In Keynote?
This is an easy to continue the slideshow when it ends. Presentation options in keynote o iPhone or iPad.
Step 1: select your presentation and open it in keynote. Get into the settings option by clicking on the three dots present at the top.
Step 2: select the settings option and then click on presentation type.
Step 3: Now allow the toggles for loop slideshow or restart slideshow if idle.
Step 4: Now tap ondone.

Part 3 Hot FAQ’S About Keynote Slideshow
● What are the requisites of a good Keynote presentation?The most essential element within a Keynote presentation is the latter’s unity of purpose. The slideshow content should be presented before the audience in a captivating manner, while taking care to maintain a logical sync between the different presentation elements. The slideshow should clearly depict its creation objective without the slightest ambiguity.
01What is the maximum number of slides that a Keynote presentation can hold?
In the light of the fact that the Keynote slideshow creator program works to split the slideshow information into a series of folders and files for a convenient and need specific access, you can deck up a Keynote presentation with 200 slides in one go without any hustle.
02What is the affordable size of Keynote presentation slide?
The ideal layout of a Keynote presentation fits in 3 typical slide sizes. You can work with the 16:19, 16:10 and 4:3 aspect ratios. When choosing a particular size constraint for your presentation slides, do keep in mind the aspect ratio of the display screen on which the slideshow has to be presented.
03What is the ideal screen resolution of a Keynote slideshow?
Keynote presentations work most effectively within the Full HD, 1920 x 1080 pixels resolution. Whether you choose to download the presentation images or use the locally saved ones, take care of them being in the correct screen dimensions to ensure a clear and sharpened display irrespective of the screen type.
04Is it possible to work with PowerPoint presentations in Keynote?
You can easily import your PowerPoint presentations in the Keynote application. All you need to do is, launch Keynote on your Mac compatible device, head to and tap the ‘Import an Existing File’ option and select the PowerPoint presentation you wish to work with in Keynote.
For Win 7 or later (64-bit)
For macOS 10.12 or later
● Ending Thoughts →
● Keynote slideshows are a sophisticated means to work with content delivery through a variety of media elements.
● Working with Keynote, you can add the most desired professional spunk to your slideshow presentations to make them stand out of the crowd.
● When looking for the most feasible slideshow creator alternatives to Keynote, picking the Wondershare Filmora software can be an intelligent choice.
Designing custom slideshows in keynote slideshow is an absolute fun to do activity for infotainment and information sharing needs
In this article
01 [What is Keynote Slideshow and Why is It Popular?](#Part 1)
02 [How to Use Keynote Slides](#Part 2)
03 [How to Loop a Slideshow in Keynote?](#Part 3)
04 [4 Hot Faqs About Keynote Slideshow](#Part 4)
Part 1 What is Keynote Slideshow and Why is It Popular?
Keynote is slideshow presentation software developed by Apple. You can make a slideshow presentation using keynote. Using keynote is easier to work with and can give you a quality presentation. It is packed with intuitive design tools that aid in making an interactive and engaging presentation. Its readymade templates are amazing and you can focus on the content rather than focusing on the design of the templates.
Keynote is popular because of the following features:
● Its design is simple so it is easy to make presentations.
● It has easy to use tools and amazing quality transitions.
● It has impressive charts, columns, bars, pies etc.
● It is built in your Mac devices. You can use it on your Mac, iPhone, iPad or even for your PC if you have an iCloud account.
● Voice over support for reading notes.
01Themes
Most of us are not design professionals, so you can use keynote’s predefined themes. These inbuilt templates have enchanting font style and object placement with professional designs to create an efficacious presentation.
Apple introduced three new templates – Exhibition, Drafting and Modern Type which are Bold, Colorful and sketch- like. Black, White, Gradient and Classic are popular theme. When creating a presentation instead of selecting the default theme, scroll to the themes options and you can choose the desired theme.
02Media Browser
Apples iWork apps like Pages, Numbers and Keynote it supports for adding customizable art elements, also it has the ability to browse, select and import the images which are present in the user’s photos app.
Clicking on the menu bar media option will open the Media Browser. Users can access specific folders using the media browser. Selecting the appropriate folder from collections and by double clicking on the image, you can insert that image in your presentation.
03Split View
Apple has introduced the split view with EI Capitan. Spilt view provides the ability to use applications side by side while each app will remain in full-screen. It helps you to do multitasking and to do cross-referencing data between the Keynotes, Pages and Numbers.
For example – You wish to open Pages and Keynote simultaneously within Split View mode; you can start it by opening the Pages and then opening the Keynote presentation. Click and hold keynote’s green full screen icon and after holding the green screen the left half of the Mac will turn blue and then release the icon. The application will enter on full-screen, covering the remaining half screen. Repeat the steps for Pages also and you will end up with both the applications open side by side.
Part 2 How To Use Keynote Slides
Apple’s keynote is a great option for Mac users to make beautiful slides for their presentations. Making a presentation focuses on idea or information you want to deliver to your audience. Designing a keynote slide includes, keynote slides sizes and dimensions which are very important.
Here are some important things to consider to make the best use of keynote slides.
01Keynote Slide Size Matters
Before designing your slides think about the screen size you’ll be presenting your presentation. Every screen has an aspect ratio. The aim is to create a keynote presentation that matches the aspect ratio of the screen on which you are going to present.
Screens on which your presentation will appear are:
● iPad and tablets
● Conference room projectors
● Laptop
● Widescreen, large format display
Setting the size of the keynote slide will ensure that your slides will match to the screen on which you are going to present. Keynote slides can be changed in different ways which includes changing the designs, dimensions and ruler options etc.
02Change Keynote Layout Dimensions and Size
Start off in keynote by clicking on the document option given at the top right corner. A new panel will open and all the changes will be done in that panel.When you will click on the document panel, there will be two tabs on the panels, make sure you are working on the labeled document panel.
On the slide size at the down side, you can set the size of the slide. By default you have two options 4:3 and 16:9 slide sizes. When you will create a new document, its size will be 4:3 by default, so before making a keynote slide make sure you check the size.
Keep in mind that the content should be on the keynote slides. When you turn your widescreen content into a square shaped layout, to make it look fit in the square shaped layout you have to rearrange the content on slide.
03Changing the Keynote Design Options
You can make changes to the keynote themes that you are using with ease. Keynote theme can change or can enhance the look of your presentation. Even if you have started working on your presentation, you can still change the theme in just few clicks.
On the document panel, click on change theme button you will see different theme styles pop up on your screen.
Choose another theme for your presentation from this windows and click on choose button to re-theme your presentation. When you will choose your desired theme, all your content will be adapted to the newly selected theme.
04Entitle Rulers
Rulers are the important as they help in aligning element in your slide. A ruler ensures you that you are making each slide corresponding to the screen dimensions. Rulers can help you attain pixel – perfect design.
You can enable rulers by clicking on view > show rulers. At the top and the sides of the keynote documents, you will see the pixel measurements. These rulers will help you in aligning everything perfectly on your slide.
How To Loop A Slideshow In Keynote?
This is an easy to continue the slideshow when it ends. Presentation options in keynote o iPhone or iPad.
Step 1: select your presentation and open it in keynote. Get into the settings option by clicking on the three dots present at the top.
Step 2: select the settings option and then click on presentation type.
Step 3: Now allow the toggles for loop slideshow or restart slideshow if idle.
Step 4: Now tap ondone.
Part 3 Hot FAQ’S About Keynote Slideshow
● What are the requisites of a good Keynote presentation?The most essential element within a Keynote presentation is the latter’s unity of purpose. The slideshow content should be presented before the audience in a captivating manner, while taking care to maintain a logical sync between the different presentation elements. The slideshow should clearly depict its creation objective without the slightest ambiguity.
01What is the maximum number of slides that a Keynote presentation can hold?
In the light of the fact that the Keynote slideshow creator program works to split the slideshow information into a series of folders and files for a convenient and need specific access, you can deck up a Keynote presentation with 200 slides in one go without any hustle.
02What is the affordable size of Keynote presentation slide?
The ideal layout of a Keynote presentation fits in 3 typical slide sizes. You can work with the 16:19, 16:10 and 4:3 aspect ratios. When choosing a particular size constraint for your presentation slides, do keep in mind the aspect ratio of the display screen on which the slideshow has to be presented.
03What is the ideal screen resolution of a Keynote slideshow?
Keynote presentations work most effectively within the Full HD, 1920 x 1080 pixels resolution. Whether you choose to download the presentation images or use the locally saved ones, take care of them being in the correct screen dimensions to ensure a clear and sharpened display irrespective of the screen type.
04Is it possible to work with PowerPoint presentations in Keynote?
You can easily import your PowerPoint presentations in the Keynote application. All you need to do is, launch Keynote on your Mac compatible device, head to and tap the ‘Import an Existing File’ option and select the PowerPoint presentation you wish to work with in Keynote.
For Win 7 or later (64-bit)
For macOS 10.12 or later
● Ending Thoughts →
● Keynote slideshows are a sophisticated means to work with content delivery through a variety of media elements.
● Working with Keynote, you can add the most desired professional spunk to your slideshow presentations to make them stand out of the crowd.
● When looking for the most feasible slideshow creator alternatives to Keynote, picking the Wondershare Filmora software can be an intelligent choice.
Also read:
- In 2024, How to Merge Videos in HandBrake? Expectation Vs. Reality
- New Shotcut Video Editor Review for 2024
- Updated When the Talk Is About an Effective Slideshow Design, People Also Ask of Creating a Quick Windows 10 Slideshow. Keep Reading to Know About the Quickest Ways of Setting the Issue Straight
- In 2024, Are You Thinking of Learning Video Editing in the Final Cut Pro Software? In This Article, You Will Learn Different Ways of Splitting and Merging Multiple Videos at Once as a New Skill to Get Your Business to a New Level
- New In 2024, Best Video Editors to Add Text to a Video
- Ultimate Guidelines to Help You Use VLC Media Player Better for 2024
- Updated Step by Step to Crop Videos Using Lightworks for 2024
- New In 2024, 11 Ways To Speed Up A Video On iPhone
- Updated 7 Best MP4 Editors on Mac Edit MP4 in Mac
- Updated Are You a Gaming YouTuber or Content Creator Whose Main Game Is COD Warzone? How Kickass Are Your Warzone Thumbnails? Heres a Guide on How to Make One for Free
- New Reviewing Efectum App and The Best Alternatives for Smartphone Users for 2024
- M31 LUT (Teal and Orange LUT) Free Download for 2024
- Updated 2024 Approved Best Online GIF to Image (PNG/JPG) Converters
- New OBS Studio Is a Free and Open-Source App for Screen-Casting and Live Streaming
- Updated Do You Know There Are Websites to Download Free Glitch Transition Effects for Premiere Pro? You Can Easily Download Them and Make Awesome Videos
- How to Turn On/Off Motion Blur in Minecraft, In 2024
- Updated How to Create An Eye-Catching Intro Videos with InVideo for 2024
- In 2024, Minecraft Pixel Art Is a Trending Subject, and They Simply Consist of In-Game Pixel Artworks, Besides the Minecraft Houses, Farms, or Cities. Lets Explore the Fantastic World of Minecraft Pixel Art
- In 2024, Are You Looking for an Ideal Halloween Countdown Video Clip for Your Video? This Article Will Walk You Through the Best Ones You Can Use to Get the Job Done Perfectly
- 2024 Approved Top 5 Ways To Convert Hdr To Sdr Videos
- How to Make Strobe Light Text Effect, In 2024
- How to Create Cooking Video Intro and End Screen for YouTube Channel, In 2024
- Updated In 2024, How to Add Adjustment Layer (Clip) in DaVinci Resolve?
- Updated Different Ways to Crop TikTok Video in High-Quality
- Updated 2024 Approved 15 Best LUTS to Buy
- New Detailed Tutorial to Rotate Videos in Cyberlink PowerDirector for 2024
- Updated How to Use Frame Blending in Premiere Pro
- Backup and Organize Your Footage in Minutes for 2024
- The Upcoming Generation of AR and VR Is Going to Define Augmented Reality Conferencing as the New Normal for All Business Purposes. With a Global Perspective to Build Better Communication, AR Can Be the Future of Collaborative Workspace
- Updated Rules of Three or Thirds Is a Classic Trick in Photography, and the Result of Video and Photo Is Really Great. This Article Will Show You How to Use Rule of Thirds to Make a Better Video
- How to Blur a Still or Moving Part of Video for 2024
- In 2024, 8 Tips to Apply Cinematic Color Grading to Your Video
- In 2024, The Most Useful Tips for Pokemon Go Ultra League On Oppo Find N3 Flip | Dr.fone
- How Can Samsung Galaxy M14 5GMirror Share to PC? | Dr.fone
- In 2024, Apple ID Locked or Disabled From Apple iPhone 14 Pro? 7 Mehtods You Cant-Miss
- Bypass iCloud Activation Lock with IMEI Code On your iPhone 15 Pro
- Honor X50 Music Recovery - Recover Deleted Music from Honor X50
- Best software to Fix and Repair Corrupt MP4,MOV,AVI video files of Poco
- Will Pokémon Go Ban the Account if You Use PGSharp On Asus ROG Phone 8 Pro | Dr.fone
- In 2024, How to Unlock Xiaomi Redmi K70E Phone without Any Data Loss
- How to recover old call logs from your Oppo A2?
- In 2024, Does find my friends work on Realme GT Neo 5 | Dr.fone
- In 2024, Network Locked SIM Card Inserted On Your Nokia C110 Phone? Unlock It Now
- How to Transfer Photos From Asus ROG Phone 8 Pro to Samsung Galaxy S21 Ultra | Dr.fone
- Pattern Locks Are Unsafe Secure Your Infinix Hot 40i Phone Now with These Tips
- Xiaomi Redmi Note 12 5G Not Receiving Texts? 10 Hassle-Free Solutions Here | Dr.fone
- In 2024, How to Change Netflix Location to Get More Country Version On Oppo A18 | Dr.fone
- How to Fix Apple iPhone 15 Plus Passcode not Working? | Dr.fone
- In 2024, Solutions to Spy on Realme 12+ 5G with and without jailbreak | Dr.fone
- In 2024, Planning to Use a Pokemon Go Joystick on Honor 90 Pro? | Dr.fone
- 3 Effective Ways to Unlock iCloud Account Without Password On Apple iPhone 15 Plus
- In 2024, How to Reset a Samsung Galaxy S23 Phone that is Locked?
- In 2024, 9 Best Phone Monitoring Apps for Apple iPhone 15 Pro Max | Dr.fone
- In 2024, 3 Facts You Need to Know about Screen Mirroring Honor X7b | Dr.fone
- In 2024, Forgotten The Voicemail Password Of Vivo G2? Try These Fixes
- Turning Off Two Factor Authentication On Apple iPhone 11? 5 Tips You Must Know
- In 2024, Top IMEI Unlokers for Your Vivo Y77t Phone
- Why Your WhatsApp Location is Not Updating and How to Fix On Poco X5 | Dr.fone
- Effective Ways To Fix Checkra1n Error 31 On Apple iPhone SE (2022)
- Title: Updated In 2024, Ways to Learn Discord Game Bots – Even if Youre Just Starting Out
- Author: Chloe
- Created at : 2024-04-24 07:08:39
- Updated at : 2024-04-25 07:08:39
- Link: https://ai-editing-video.techidaily.com/updated-in-2024-ways-to-learn-discord-game-bots-even-if-youre-just-starting-out/
- License: This work is licensed under CC BY-NC-SA 4.0.
