
:max_bytes(150000):strip_icc():format(webp)/dts-play-fi-lifestyle-aaa-5a4c211daad52b00366a3575.jpg)
Updated Looking For a Cheap Camera to Make Slow Motion Video? Get It Now
Looking For a Cheap Camera to Make Slow Motion Video? Get It Now
Budget slow-motion cameras are not just for filmmakers but are for everyone who loves making eye-catching videos and pictures. These specialized cheap slow mo cameras let us slow down time and see things in smooth frames that we normally can’t. However, not everyone can afford such fancy cameras, which are usually expensive. So, we will talk about affordable slow-motion cameras and their importance in videography.
Slow Motion Video Maker Slow your video’s speed with better control of your keyframes to create unique cinematic effects!
Make A Slow Motion Video Make A Slow Motion Video More Features

Part 1: Some Great Cheap Slow-Motion Cameras One Can Go Across
If you are looking for some cameras that are budget-friendly but still manage to capture those cool, slow-motion moments, this article will help you with it. We will enlist some of the best inexpensive slow-motion cameras you can buy for detailed videography without worrying about your money.
- DJI Pocket 2
- Insta360 One X2
- GoPro HERO11
- Sony Cyber-Shot DSC-RX100 VII
- Canon EOS R50
- Nikon Z6 II
- Canon PowerShot G5 X Mark II
- Fujifilm X-S20
1. DJI Pocket 2
Another budget-friendly camera named DJI Pocket 2 Creative Combo is a small camera perfect for videographers. It fits right in your pocket and is easy for any adventure. The camera has a special feature that keeps videos steady, even when you’re moving. Moreover, its smart tracking feature keeps your subjects in focus no matter how they move. Plus, it takes great pictures with a good sensor and shoots super clear 4K videos at 60 frames per second.
Average Price: $344

2. Insta360 One X2
Insta360 One X2 is a versatile, pocket-sized camera that is your all-in-one filming solution. With this affordable slow-motion camera, you can capture 360-degree footage. You can also use stable wide-angle shots to capture scenes from far away. With its Flow State Stabilization, your videos stay steady without the need for a gimbal. Also, with its 100MB bitrate video recording, you can experience smoother slow-mo videos.
Average Price: $300

3. GoPro HERO11
GoPro HERO11 Black allows you to shoot high-res 5.3K video at 60 fps and 4K at 120 fps. You can capture life’s action in stunning detail with its slow-motion feature. Also, thanks to Hyper Smooth 5.0 stabilization, your footage stays buttery smooth. Whether you’re a pro or a newbie, the one-button controls make it easy to use. All the features of this cheap slow-motion camera are packed into a compact and waterproof design for epic adventures.
Average Price: $299

4. Sony Cyber-Shot DSC-RX100 VII
The Sony RX100 VII is a really powerful slow-motion camera. It’s got a 20.1MP sensor that takes awesome pictures. With its Zeiss Vario-Sonar T lens, it can zoom to a great extent, allowing the capture of scenes with lots of details. Also, it focuses quickly, like in 0.02 seconds, and can shoot up to 20 frames per second without any delays. It can shoot 4K videos and has features like Interval Shooting and image stabilization, making it perfect for pro-quality videos.
Average Price: $950

5. Canon EOS R50
The Canon EOS R50 with an RF-S18-45mm STM Lens is a camera designed for filmmakers. The camera can shoot 4K videos and even super clear Full HD videos at 120 frames per second. Another handy thing is its auto-assist feature that helps with different photo settings. The focusing system is accurate and can quickly focus on different objects. And when the light isn’t great, it has a built-in flash that helps take better slow-motion videos at night.
Average Price: $699

6. Nikon Z6 II
Nikon Z6 II captures smooth slow-motion at Full HD/120p. It also provides a stunning 4K Ultra HD/60p video for a professional look. With an impressive 24.5 MP sensor, it excels in low-light conditions. You can stay powered on the go with the convenience of charging via USB-C while shooting. So, enjoy the lightweight and compact design of this affordable slow-motion camera for easy portability.
Average Price: $1500

7. Canon PowerShot G5 X Mark II
Canon PowerShot G5 X Mark II has a good 20.1-megapixel 1.0-inch Stacked CMOS Sensor that makes pictures look amazing. It also has a 5x Optical Zoom Lens with Optical Image Stabilizer, so it’s great for taking different kinds of clear and sharp photos. Plus, you can shoot awesome videos with this cheap slow-mo camera at 120 frames per second. This feature makes this camera an ideal choice for professional videography.
Average Price: $949

8. Fujifilm X-S20
The Fujifilm X-S20 is an in-expensive slow-motion camera known for its advanced features. With a 26.1MP sensor, this camera captures high-quality images and videos. The 3.0-inch vari-angle touchscreen is user-friendly to allow even beginners to shoot professional videos. Moreover, it is ideal for aesthetic video recording, as it can capture footage in an impressive 6.2K resolution.
Average Price: $1299

Part 2: Make Perfect Slow-Motion Videos with The Best Desktop Application
Let’s discuss making slow-motion videos without using any particular camera. You heard it right! It is possible to generate a slow-motion video filmed by any smartphone camera. You just have to install Wondershare Filmora on your system and import the video into it. This tool is capable of slowing down video smoothly with the help of its advanced AI features.
Wondershare Filmora also helps you to generate AI music and scripts that enhance your productivity. Moreover, it runs without any lagging, allowing you to continue the editing process seamlessly. Explore more features of Filmora below.
Steps Involved to Slow Down Video Professionally with Speed Ramping
In this section, we will learn how to edit your video to slow down using Filmora. Wondershare Filmora has a feature named Speed Ramping that allows you to slow down different parts of a video. Let’s discover how this can be achieved in a step-wise fashion.
Free Download For Win 7 or later(64-bit)
Free Download For macOS 10.14 or later
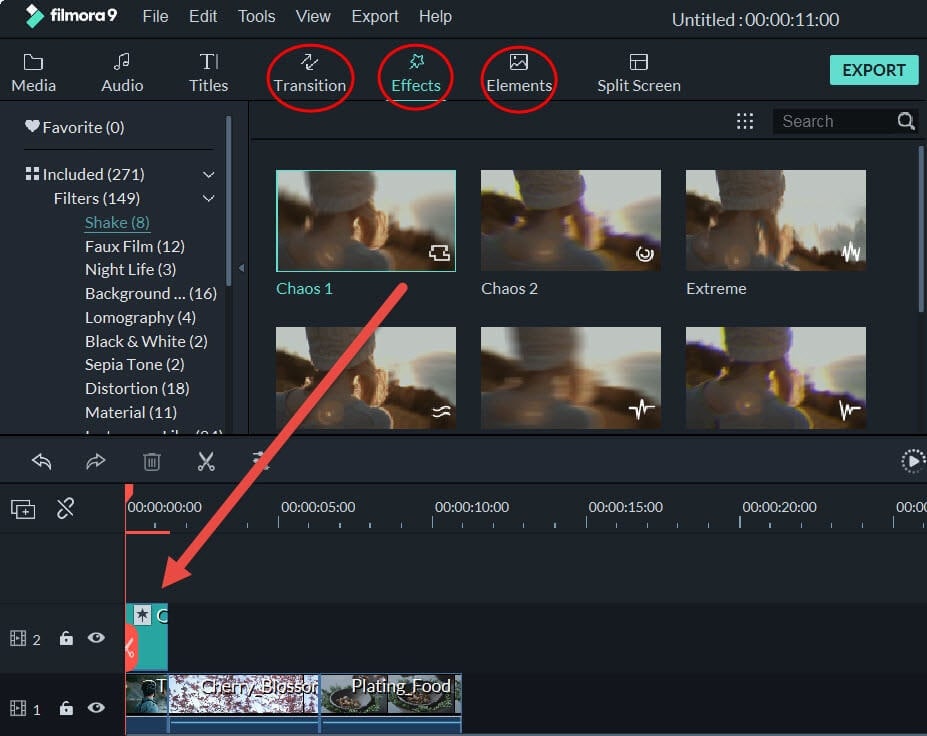
Step 1Activate Filmora and Import the Video
To begin, open Wondershare Filmora and create a new project, followed by importing your video. Subsequently, click the “+” icon on the video and choose the “Match to Media” option to ensure your project settings match the video’s resolution.

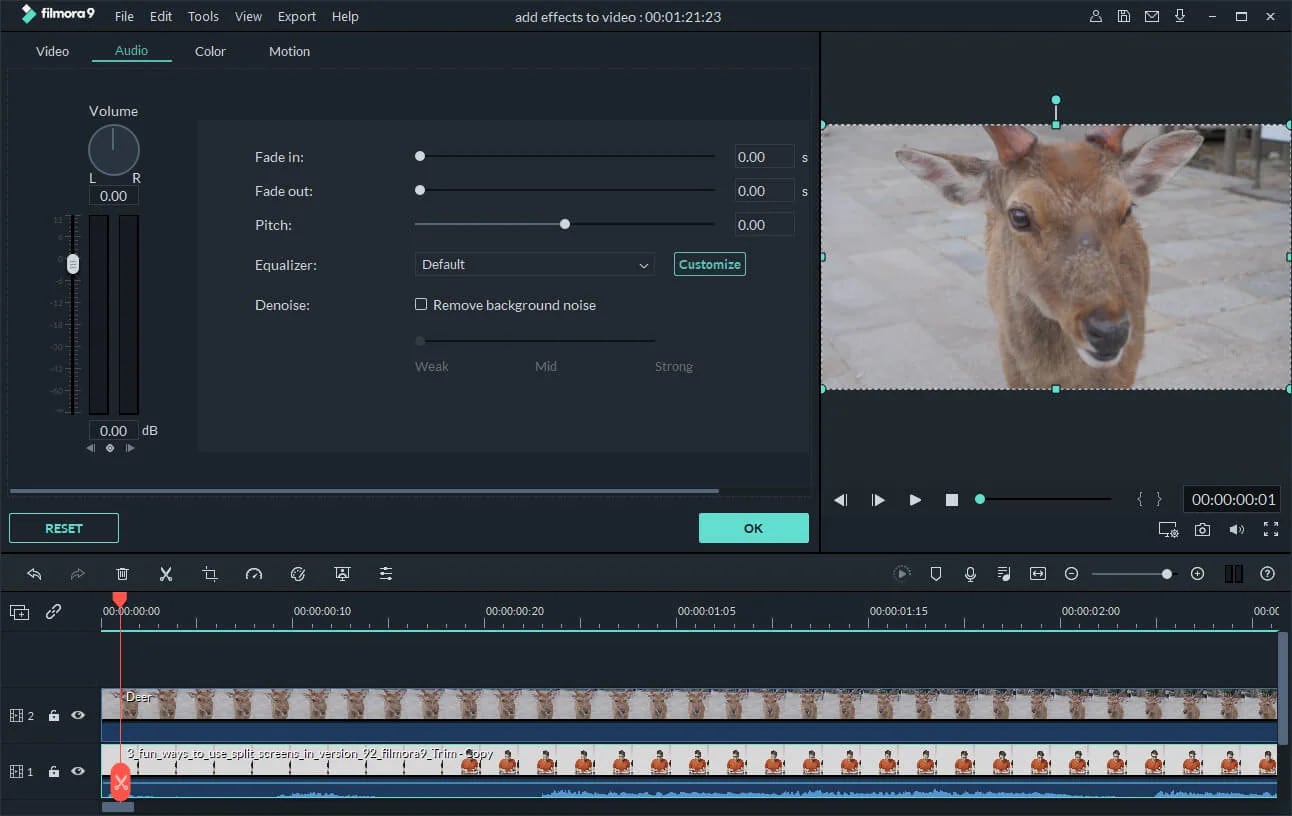
Step 2Make the Video to Slow Down
Add the video to the timeline and select the “Speed” icon. Then, pick a preset like 0.5x from the “Slow” menu to slow down the entire clip. On the other hand, you can also right-click the video, go to “Speed,” then “Uniform Speed,” and drag the slider left for slow motion.

Step 3Applying Speed Ramping on Specific Parts of Video
To create slow motion in specific parts of your video, go to the “Speed Ramping” window and choose the “Custom” option. Make adjustments to the speed by moving points below the line.

Step 4Freeze a Frame in the Video
If you want to freeze a frame, position the play head where you want to freeze it and select the “Add Freeze Frame” option. Set the freeze duration in the “Freeze Time Field” and adjust its position as needed. Click “OK” to save the changes.

Key Features of Wondershare Filmora
Filmora is a versatile video editing software that allows you to perform various tasks easily. This software is being used by professionals because of its innovative features. Some of these advanced features are listed below:
1. AI Copilot Editing
AI Copilot Editing is an innovative way to edit videos. It doesn’t just help; it also checks for mistakes and tells you if something’s wrong. This eliminates various errors and helps you edit smoothly. AI Copilot Editing changes how we edit videos, using smart tech to give helpful support for a smoother and more accurate editing experience.
2. AI Music Generator
The AI Music Generator changes how music gets made and helps create complete music tracks super-fast. You can choose different music styles and genres easily. Whether you need music for movies, for vlogs, or tunes for ads, this tool has you covered. This music can make your projects better and match exactly what you’re aiming for in your content.
3. AI Thumbnail Creator
The Automatic Thumbnail Generator makes creating video thumbnails super easy. It looks at your video and picks out three great shots for you to choose from. You can easily edit these shots to match what you want. You can also add text, titles, or cool graphics to the thumbnails. There are 58 different thumbnail styles to pick from, so you can find one that fits your video.
4. Screen Recorder
The Screen Recorder is an amazing tool that lets you record anything on your computer screen. It can also include your webcam footage while recording. You can capture both the sounds from your microphone and computer at the same time. It’s great for making videos of games, tutorials, or content for YouTube. Plus, it comes with editing tools and effects to make your recordings better before sharing them.
Conclusion
In conclusion, making awesome slow-motion videos doesn’t have to be hard if you’re on a budget. There are lots of affordable slow-mo cameras out there that can shoot great footage. Even then, you can always rely on the Filmora tool that can help create a slow-motion video. In this software, the Speed Ramping feature turns your raw videos into appealing slow-motion ones.
Whether you’ve got a cheap camera or editing tools, the most important thing is your imagination and how you see things.
Make A Slow Motion Video Make A Slow Motion Video More Features
Part 1: Some Great Cheap Slow-Motion Cameras One Can Go Across
If you are looking for some cameras that are budget-friendly but still manage to capture those cool, slow-motion moments, this article will help you with it. We will enlist some of the best inexpensive slow-motion cameras you can buy for detailed videography without worrying about your money.
- DJI Pocket 2
- Insta360 One X2
- GoPro HERO11
- Sony Cyber-Shot DSC-RX100 VII
- Canon EOS R50
- Nikon Z6 II
- Canon PowerShot G5 X Mark II
- Fujifilm X-S20
1. DJI Pocket 2
Another budget-friendly camera named DJI Pocket 2 Creative Combo is a small camera perfect for videographers. It fits right in your pocket and is easy for any adventure. The camera has a special feature that keeps videos steady, even when you’re moving. Moreover, its smart tracking feature keeps your subjects in focus no matter how they move. Plus, it takes great pictures with a good sensor and shoots super clear 4K videos at 60 frames per second.
Average Price: $344
2. Insta360 One X2
Insta360 One X2 is a versatile, pocket-sized camera that is your all-in-one filming solution. With this affordable slow-motion camera, you can capture 360-degree footage. You can also use stable wide-angle shots to capture scenes from far away. With its Flow State Stabilization, your videos stay steady without the need for a gimbal. Also, with its 100MB bitrate video recording, you can experience smoother slow-mo videos.
Average Price: $300
3. GoPro HERO11
GoPro HERO11 Black allows you to shoot high-res 5.3K video at 60 fps and 4K at 120 fps. You can capture life’s action in stunning detail with its slow-motion feature. Also, thanks to Hyper Smooth 5.0 stabilization, your footage stays buttery smooth. Whether you’re a pro or a newbie, the one-button controls make it easy to use. All the features of this cheap slow-motion camera are packed into a compact and waterproof design for epic adventures.
Average Price: $299
4. Sony Cyber-Shot DSC-RX100 VII
The Sony RX100 VII is a really powerful slow-motion camera. It’s got a 20.1MP sensor that takes awesome pictures. With its Zeiss Vario-Sonar T lens, it can zoom to a great extent, allowing the capture of scenes with lots of details. Also, it focuses quickly, like in 0.02 seconds, and can shoot up to 20 frames per second without any delays. It can shoot 4K videos and has features like Interval Shooting and image stabilization, making it perfect for pro-quality videos.
Average Price: $950
5. Canon EOS R50
The Canon EOS R50 with an RF-S18-45mm STM Lens is a camera designed for filmmakers. The camera can shoot 4K videos and even super clear Full HD videos at 120 frames per second. Another handy thing is its auto-assist feature that helps with different photo settings. The focusing system is accurate and can quickly focus on different objects. And when the light isn’t great, it has a built-in flash that helps take better slow-motion videos at night.
Average Price: $699
6. Nikon Z6 II
Nikon Z6 II captures smooth slow-motion at Full HD/120p. It also provides a stunning 4K Ultra HD/60p video for a professional look. With an impressive 24.5 MP sensor, it excels in low-light conditions. You can stay powered on the go with the convenience of charging via USB-C while shooting. So, enjoy the lightweight and compact design of this affordable slow-motion camera for easy portability.
Average Price: $1500
7. Canon PowerShot G5 X Mark II
Canon PowerShot G5 X Mark II has a good 20.1-megapixel 1.0-inch Stacked CMOS Sensor that makes pictures look amazing. It also has a 5x Optical Zoom Lens with Optical Image Stabilizer, so it’s great for taking different kinds of clear and sharp photos. Plus, you can shoot awesome videos with this cheap slow-mo camera at 120 frames per second. This feature makes this camera an ideal choice for professional videography.
Average Price: $949
8. Fujifilm X-S20
The Fujifilm X-S20 is an in-expensive slow-motion camera known for its advanced features. With a 26.1MP sensor, this camera captures high-quality images and videos. The 3.0-inch vari-angle touchscreen is user-friendly to allow even beginners to shoot professional videos. Moreover, it is ideal for aesthetic video recording, as it can capture footage in an impressive 6.2K resolution.
Average Price: $1299
Part 2: Make Perfect Slow-Motion Videos with The Best Desktop Application
Let’s discuss making slow-motion videos without using any particular camera. You heard it right! It is possible to generate a slow-motion video filmed by any smartphone camera. You just have to install Wondershare Filmora on your system and import the video into it. This tool is capable of slowing down video smoothly with the help of its advanced AI features.
Wondershare Filmora also helps you to generate AI music and scripts that enhance your productivity. Moreover, it runs without any lagging, allowing you to continue the editing process seamlessly. Explore more features of Filmora below.
Steps Involved to Slow Down Video Professionally with Speed Ramping
In this section, we will learn how to edit your video to slow down using Filmora. Wondershare Filmora has a feature named Speed Ramping that allows you to slow down different parts of a video. Let’s discover how this can be achieved in a step-wise fashion.
Free Download For Win 7 or later(64-bit)
Free Download For macOS 10.14 or later
Step 1Activate Filmora and Import the Video
To begin, open Wondershare Filmora and create a new project, followed by importing your video. Subsequently, click the “+” icon on the video and choose the “Match to Media” option to ensure your project settings match the video’s resolution.
Step 2Make the Video to Slow Down
Add the video to the timeline and select the “Speed” icon. Then, pick a preset like 0.5x from the “Slow” menu to slow down the entire clip. On the other hand, you can also right-click the video, go to “Speed,” then “Uniform Speed,” and drag the slider left for slow motion.
Step 3Applying Speed Ramping on Specific Parts of Video
To create slow motion in specific parts of your video, go to the “Speed Ramping” window and choose the “Custom” option. Make adjustments to the speed by moving points below the line.
Step 4Freeze a Frame in the Video
If you want to freeze a frame, position the play head where you want to freeze it and select the “Add Freeze Frame” option. Set the freeze duration in the “Freeze Time Field” and adjust its position as needed. Click “OK” to save the changes.
Key Features of Wondershare Filmora
Filmora is a versatile video editing software that allows you to perform various tasks easily. This software is being used by professionals because of its innovative features. Some of these advanced features are listed below:
1. AI Copilot Editing
AI Copilot Editing is an innovative way to edit videos. It doesn’t just help; it also checks for mistakes and tells you if something’s wrong. This eliminates various errors and helps you edit smoothly. AI Copilot Editing changes how we edit videos, using smart tech to give helpful support for a smoother and more accurate editing experience.
2. AI Music Generator
The AI Music Generator changes how music gets made and helps create complete music tracks super-fast. You can choose different music styles and genres easily. Whether you need music for movies, for vlogs, or tunes for ads, this tool has you covered. This music can make your projects better and match exactly what you’re aiming for in your content.
3. AI Thumbnail Creator
The Automatic Thumbnail Generator makes creating video thumbnails super easy. It looks at your video and picks out three great shots for you to choose from. You can easily edit these shots to match what you want. You can also add text, titles, or cool graphics to the thumbnails. There are 58 different thumbnail styles to pick from, so you can find one that fits your video.
4. Screen Recorder
The Screen Recorder is an amazing tool that lets you record anything on your computer screen. It can also include your webcam footage while recording. You can capture both the sounds from your microphone and computer at the same time. It’s great for making videos of games, tutorials, or content for YouTube. Plus, it comes with editing tools and effects to make your recordings better before sharing them.
Conclusion
In conclusion, making awesome slow-motion videos doesn’t have to be hard if you’re on a budget. There are lots of affordable slow-mo cameras out there that can shoot great footage. Even then, you can always rely on the Filmora tool that can help create a slow-motion video. In this software, the Speed Ramping feature turns your raw videos into appealing slow-motion ones.
Whether you’ve got a cheap camera or editing tools, the most important thing is your imagination and how you see things.
How to Edit FLV Video Files with FLV Editor [Windows, Mac,Android, iPhone & Online]
FLV is a common container format for transferring digital video and audio information over the Internet. A.flv file is a flash video that may be seen on your computer with Adobe Flash Player, Adobe Air, or some third-party Adobe Flash plugins.
FLV has become the standard video format for web-based streaming video service providers such as Hulu and VEVO due to its superior functionality and tiny size. It’s also the default format for Quicktime on Mac systems.
If you wish to edit FLV videos without any problems, you should utilize a multipurpose video editor that supports the FLV file format.
Best FLV Editor to Edit FlV Video on Windows and Mac - Filmroa Video Editor
Filmora Video Editor is a professional FLV video editing application. This software allows you to edit 4K video files, share completed films directly on social media platforms, and add subtitles and audio files.
You may mix multiple films and enhance your footage with numerous transitions and other effects using this FLV video editing software. Furthermore, the free Filmora application is ideal for adding audio files or video clips from the wide library and uploading your soundtrack.
For Win 7 or later (64-bit)
For macOS 10.14 or later
Therefore, you can use the following steps to edit FLV video on Windows and Mac:
Step 1: Import file:

Step 2: Edit the FLV file:
Acquire the perfect tool in your palm for anything you want to do, such as clipping, cropping, rotating, and more.
Furthermore, all editing capabilities in the toolbar allow drag-and-drop, making it even easier to touch up your films quickly. Consider the following scenario:
- Drag and drop a transition into the video/photo, or right-click it and select “Apply to All.”
- Please drag & drop a title template to the position where you want it to appear, then adjust it.
- To use the effects, select one from the 50+ available video effects, select it, and apply it to your photos/videos instantaneously.
Step 3: Save or Export the file:

When you’re done, export your modified MP4 files to Windows/Mac and quickly share them on YouTube, with the option of sending a message to Facebook and Twitter. When you click Create in the program window’s middle right corner, you’ll be taken to the Output window below.
Alternative Way to Edit FlV Video on Windows
1. VSDC
VSDC is a free video editor along with a lot of advanced features. Cut, combine, trim, crop, and other editing capabilities are available to help you polish your FLV films.
Although it may not look logical, learning the editing capabilities hidden within modular boxes is simple. One noteworthy aspect of VSDC is its ability to produce good visual effects using many trendy video effects, transitions, and filters.
Furthermore, strong chroma keys, color correction, object modification, and other editing tools can be utilized to edit FLV videos. It not only creates excellent FLV videos, but it also supports a wide range of media conversion, allowing you to convert FLV files to various formats and export them without a watermark.
Therefore, follow the below mentioned steps to edit FLV video using VSDC:
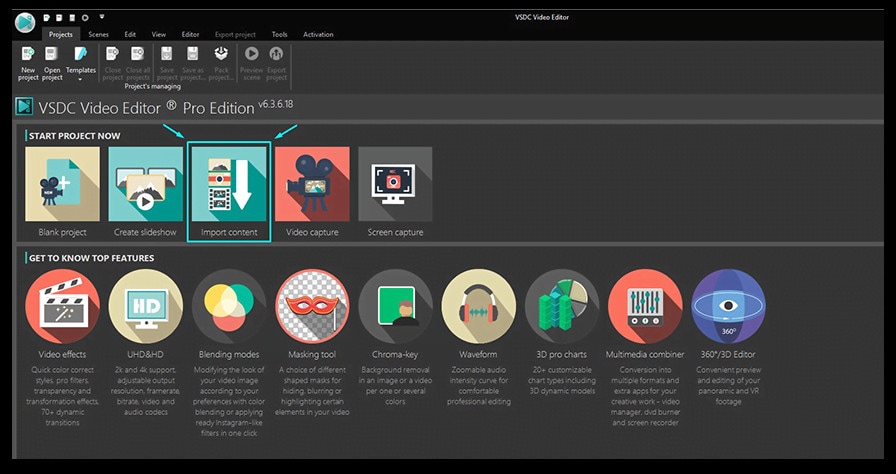
Step 1: Install the software on the Windows. Open the application and import the video.
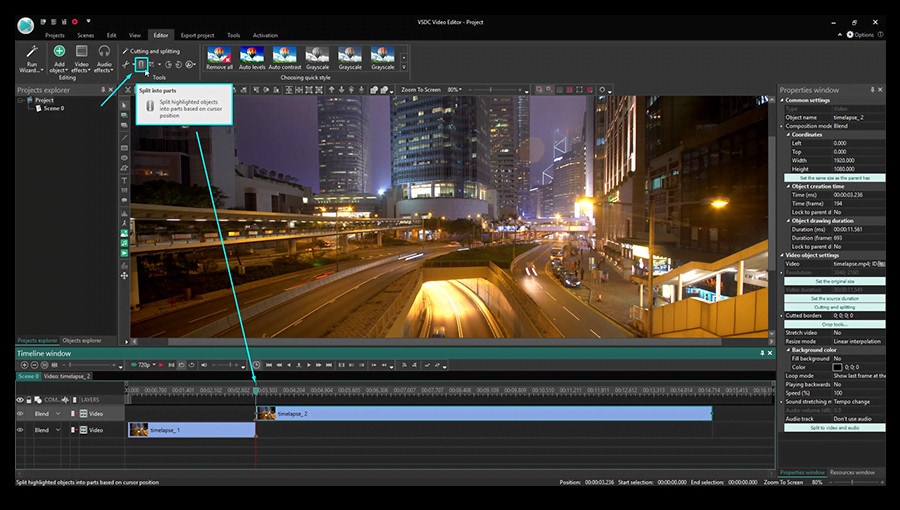
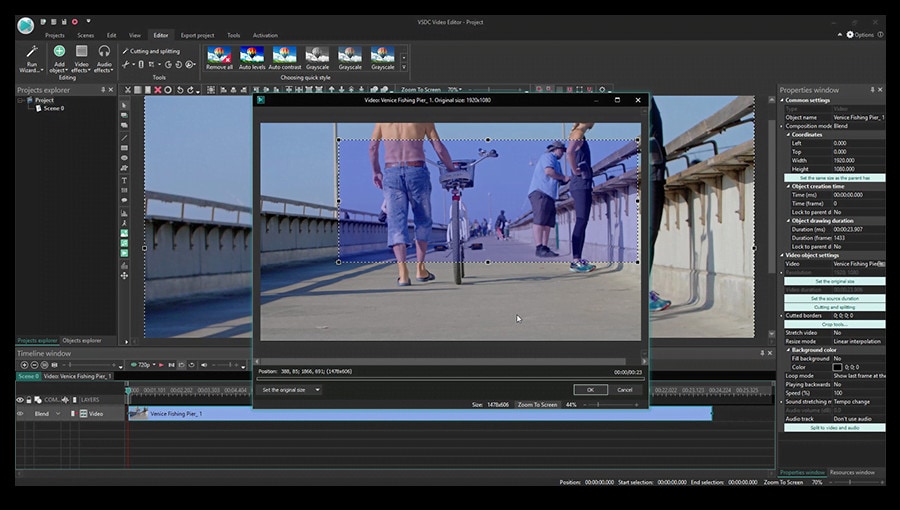
Step 2: Use cutting and splitting tools to edit the video.
The first icon is a picture of a pair of scissors, which is a cutting tool. It’s very useful when you need to cut the beginning or end of a film. Place the cursor exactly where you want to cut, then select “Trim start” or “Trim finish” from the dropdown cutting menu (the small triangle next to the scissors icon).
Cropping is also simple. If you have too much additional space around the scene object recorded, just choose the file you want to trim and select the cropping icon from the “Cutting and Splitting” option. A new window will appear, allowing you to select the region of the scene that should stay.
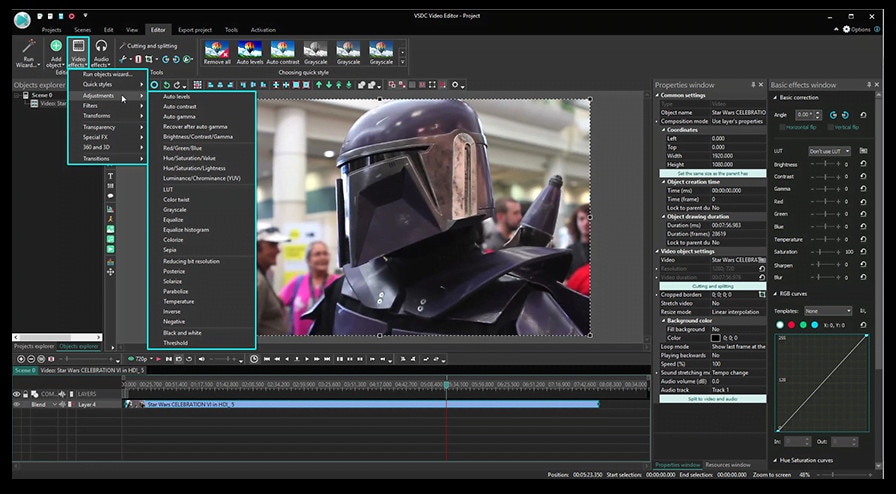
Step 3: Apply effects and transitions.
To use one, first select the video file you wish to edit, then go to the Video effects tab and select the effect you want to use. On the timeline, a new tab will appear, containing all of the effects done to the selected object. You can alter the effect’s duration and position in time by dragging it with the mouse there. The properties pane on the right-hand side can be used to change other parameters.
Transitions follow the same rule. Place your cursor where you want the transition to begin, then choose a transition from the Video effects dropdown menu and manually adjust the duration.
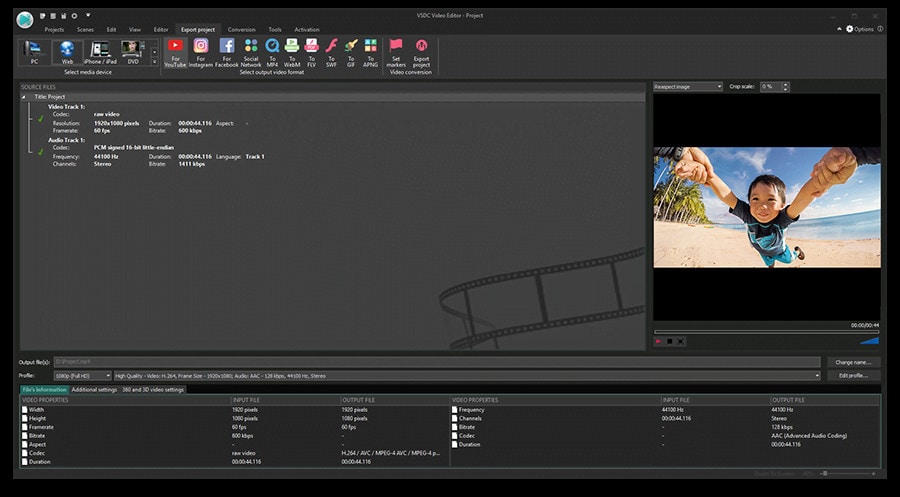
Step 4: Save changes and export video.
Make sure your movie appears exactly how you want it to before exporting it. If the video appears choppy, use the red preview button and lower the preview quality. When the PC’s resources are insufficient to process the video in real time, lagging can occur. Keep in mind that it has no bearing on the outcome. When you’re finished, navigate to the Export project tab and select an export format.
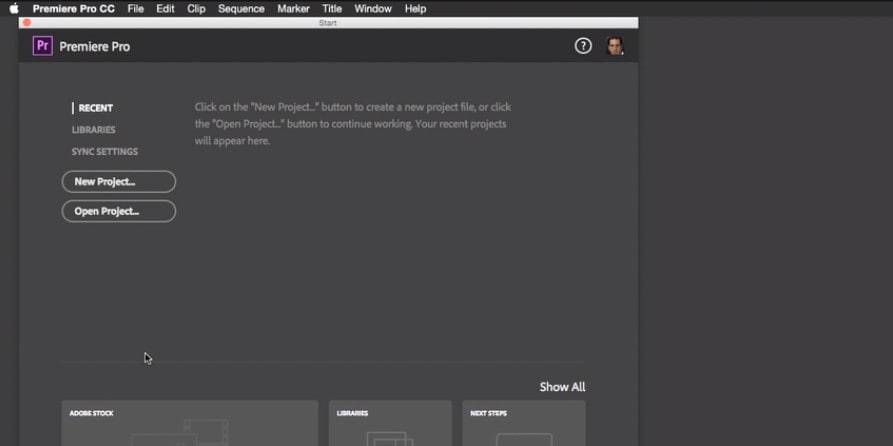
2. Adobe Premiere Pro:
Professional video editors use Premiere Pro to make everything from YouTube videos to Hollywood films like Mank, a 2021 Oscar candidate. It’s also widely utilized in the workflows of designers, animators, and VFX artists, and we can see why after lengthy testing.
We found the software’s UI to be simple to use, and it increased our productivity by separating things into various workspaces, such as editing, effects, and audio. When we tested it on both Mac and PC, we discovered that each workspace helps handle a specific activity while minimizing distraction.
Edit the FLV video with Adobe Premiere Pro using the following steps:
Step 1: Import the video and create initial sequence.
Step 2: In the Timeline, trim and rearrange clips, add audio, and transitions.
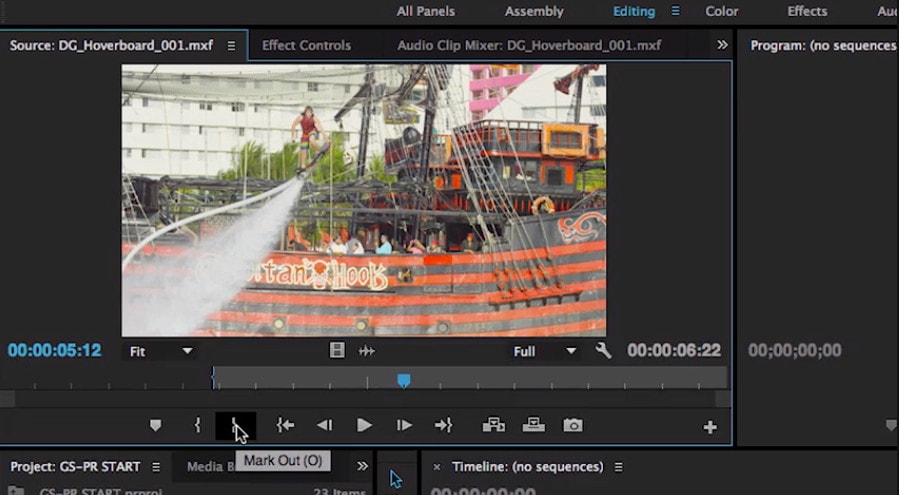
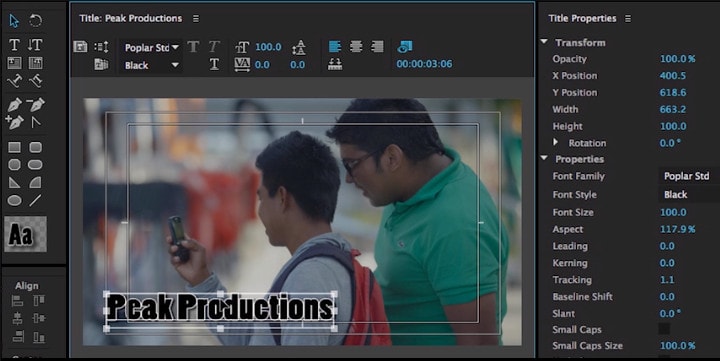
Step 3: Add title and graphics.
In Premiere Pro, you may make onscreen titles, as well as stylize and animate your images.
Step 4: Export your video.

Alternative Way to Edit FlV Video on Mac
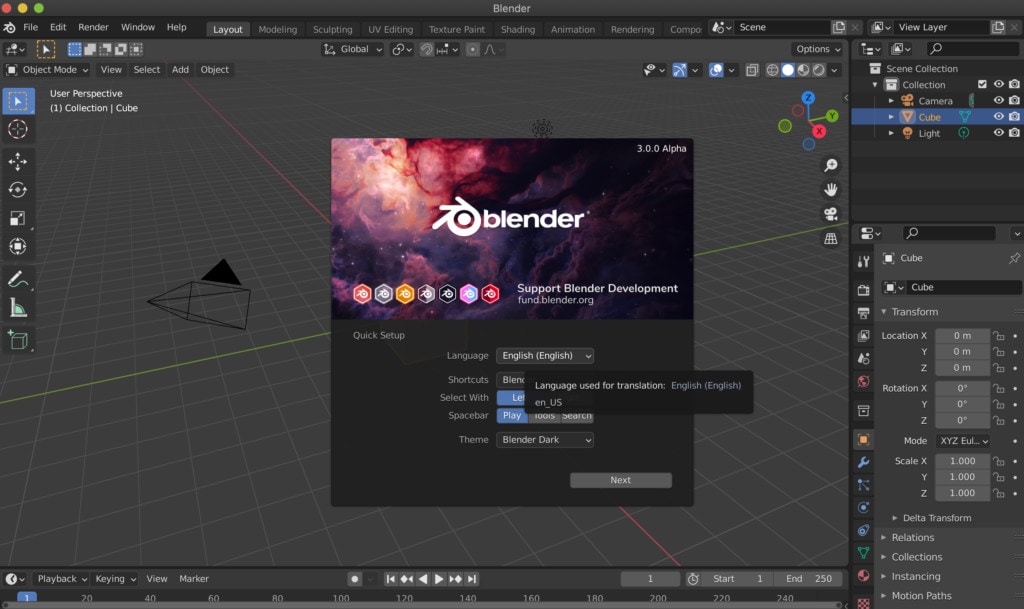
1. Blender:
Under the GNU General Public License, Blender is a free, open-source 3D content production program that runs on all major operating systems. Blender is one of the greatest video editors for both Windows and Mac, with advanced features such as modifier-based modeling tools, powerful character animation capabilities, a node-based material, etc.
Because it is developed for professionals, it is tough to use as a beginner. However, it is unrestricted in its use and distribution. In addition, color options are changeable and versatile in the UI.
In contrast, this free video editor is perfect for semi-pros or those who want to enhance their video editing skills. However, you’ll need a lot of time and effort to learn it.
Step 1: Open the application.
Step 2: Then, go into File->New->Video Editing to open the video editor.
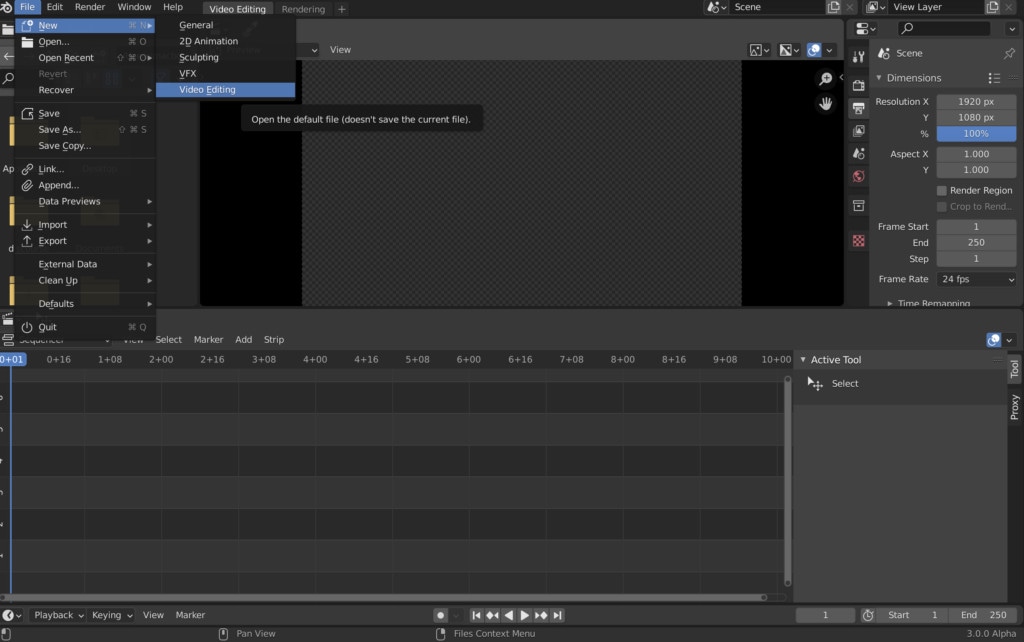
Step 3: Import the video and start editing using the editing tools.
Step 4: Save and export the video.

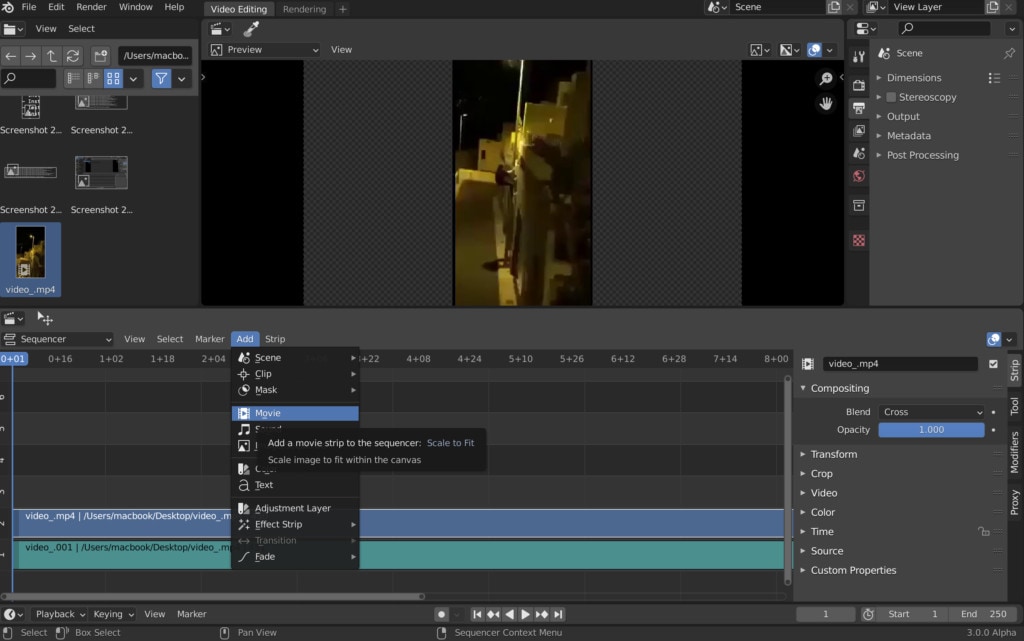
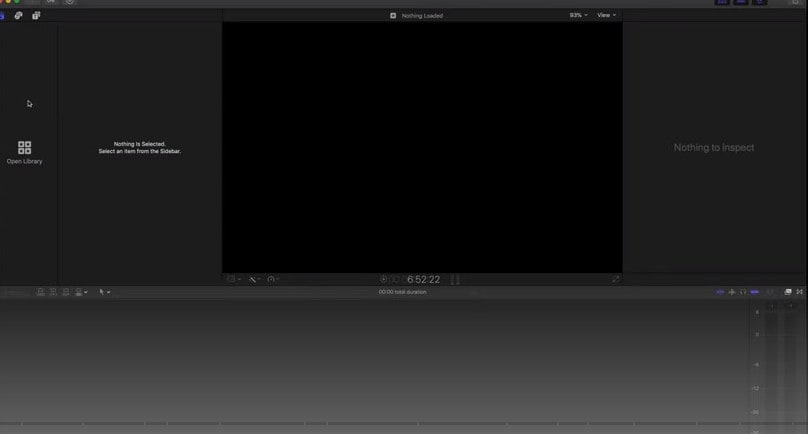
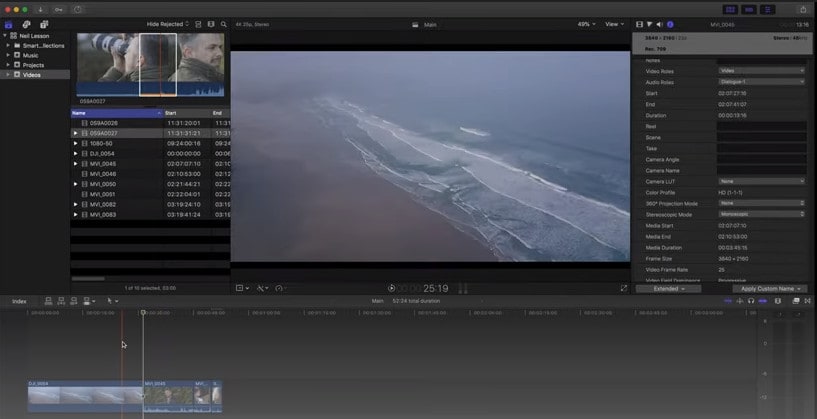
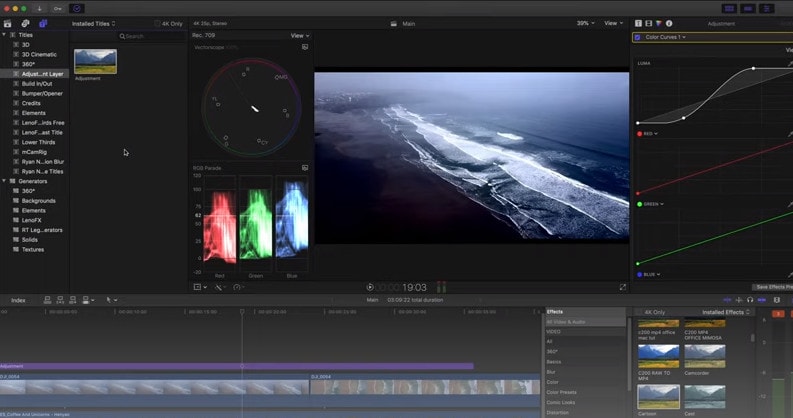
2. Final Cut Pro:
When it comes to video editing software, Apple’s Final Cut Pro is one of the industry standards. As a result, it’s widely utilized in the television and film industries - at least among Mac users. However, one of the truly convincing reasons to choose it over Premiere Pro is because it is subscription-free: you only pay once.
The software’s Magnetic Timeline, grouping tools, a vast selection of effects, solid organizational capabilities, and simple ways to add and edit audio make it a favorite among professional video editors. 360° video, HDR, and powerful color correcting tools are among the other capabilities. It’s a strong software with a lot of features.
Follow the steps to edit FLV video using Final Cut Pro:
Step 1: Create Project.
To make a movie in Final Cut Pro, you must first establish a project, which keeps track of your editing selections and the media you utilize.
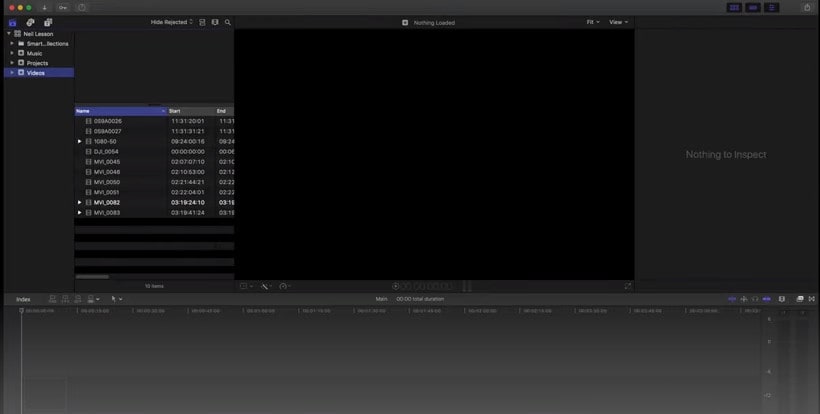
Step 2: Select and add clips to the timeline:
The second stage in making a movie with Final Cut Pro is to add and arrange clips in your project. In the timeline, you can move and reorder clips.
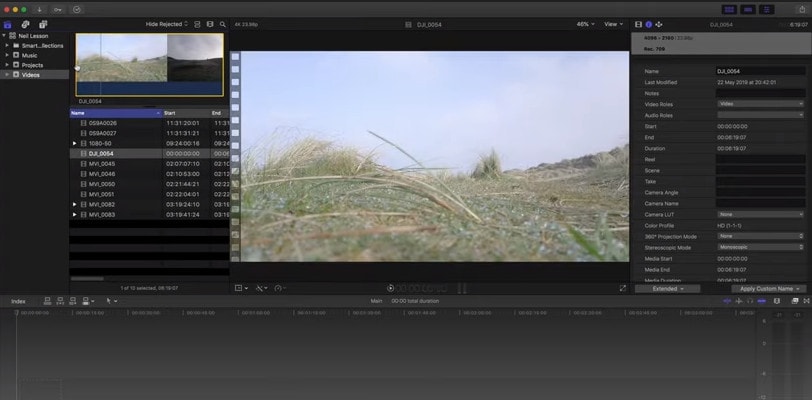
Step 3: Cut and trim video:
Final Cut Pro has a number of features for altering the start and stop points of clips in the timeline, as well as regulating the pacing of shots from one to the next.
Step 4: Edit the video by adding effects and transitions:
Final Cut Pro includes a number of advanced editing features that make it simple to create a professional film. Visual enhancements and colour correction are among the finishing touches.

Step 5: Save and export video:
2 Ways to Edit FlV Video on Android:
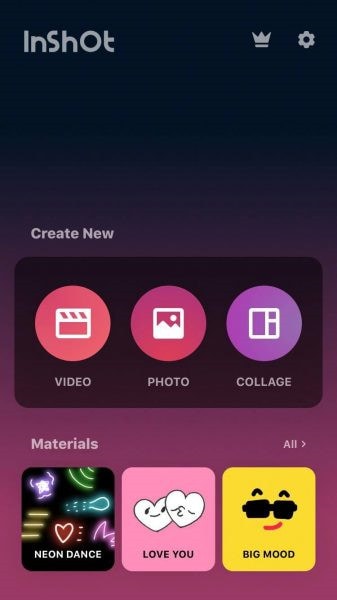
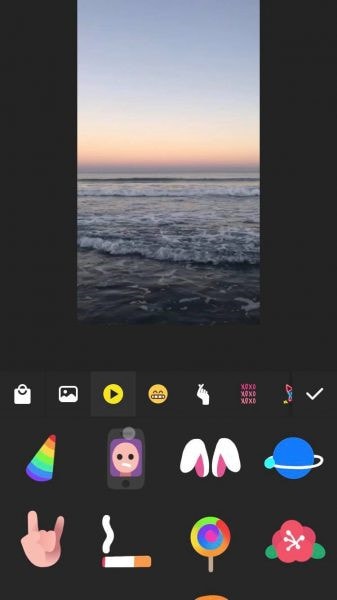
1. Inshot:
For Android users, Inshot is a fantastic image and video editor. This Android video editor allows you to add popular stickers and emoticons to your films, making them more fashionable and unique.
The program supports HD video output, allowing you more control over your footage. Moreover, the additional sound and video can be synchronized with the available video chronology.
You can quickly blend more than two movies into one with rich effects and sound with this Android editor app. In addition, you can generate a watermark using unique text provided in the app, and subtitles support allow you to produce one with a variety of fonts.
Following are the steps that you can follow to edit FLV video using Inshot:
Step 1: Open the app and import the video.
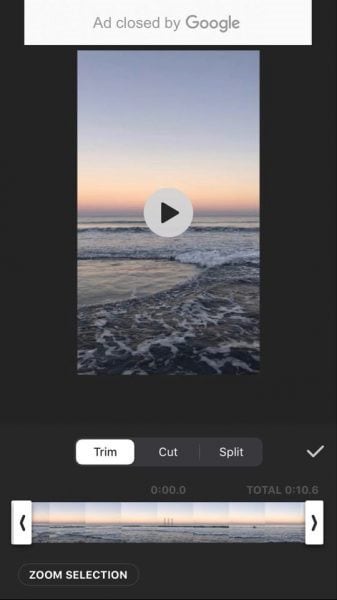
Tap “Video” to open your phone’s gallery folder and begin editing a video in the InShot app. Select a video to work with. Adjust the canvass after your video has been loaded into the InShot App. For your other social media accounts, there are aspect ratios and sizes that work well with the video. It also has the option of being in portrait or landscape mode.
Step 2: Trim and split videos.
Step 3: Merge videos (optional):
By combining clips, you can combine them into a single film or project. Simply choose the videos you want to import from the drop-down menu. By tapping the “+” button on the lower left of the screen, you can insert and merge more videos. Your project will then be updated using the selected video.
Step 4: Apply filters, add music, text and stickers.
Step 5: Once you are done with the editing process, save the file.
2. Videoshow:
VideoShow has a lot of video editing options. It is a simple and practical video editing program and movie scene maker for art directors and beginners. Using this video cutter, you may reverse, blur, duplicate, edit, merge and split collage clips or films.
You can also use VideoShow to adjust the audio or add subtitles to any video. It also allows you to use different filters on any video on your device. Over 50 intricate themes are included in the program, allowing you to create gorgeous music videos, slide shows, and vlogs in no time.
The annual subscription package is for $135.19, or you can also make a one-time purchase for $225.78.
However, to edit the video, you can use the following steps:
Step 1: Download and install the videoshow application and open it. Upload the video that you want to edit.
Step 2: Edit the video by applying filters or cutting and trimming the part of the video that you want to remove.
Step 3: Save changes and export the video to your preferred location.
2 Ways to Edit FlV Video on iPhone:
1. LumaFusion:
No other software program on the iPhone comes close to the feature set that LumaFusion offers for video editing. It is the only premium app on this list, and it is well worth every penny.
But, of course, YouTubers aren’t the only ones who use the program; mobile journalists and professional video producers who don’t want to lug along their bulky camera equipment and editing apparatus also use it.
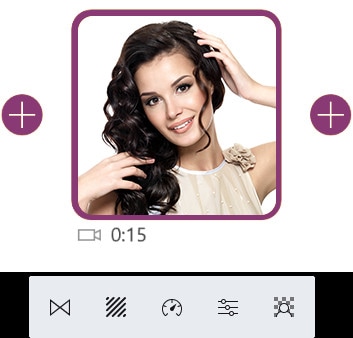
LumaFusion deals with up to six video and audio tracks for photographs, movies, audio, titles, and graphics, and six audio tracks for narration, music, and sound effects. You also receive a magnetic timeline; importing clips is a breeze once they’ve been imported.
There are many transitions and effects to choose from, all of which can be layered. Finally, it includes much royalty-free music, sound effects, and other assets. So if you need a professional video editing tool for your iPhone, LumaFusion ($29.99) is the way to go.
Follow these steps to edit FLV video using LumaFusion:
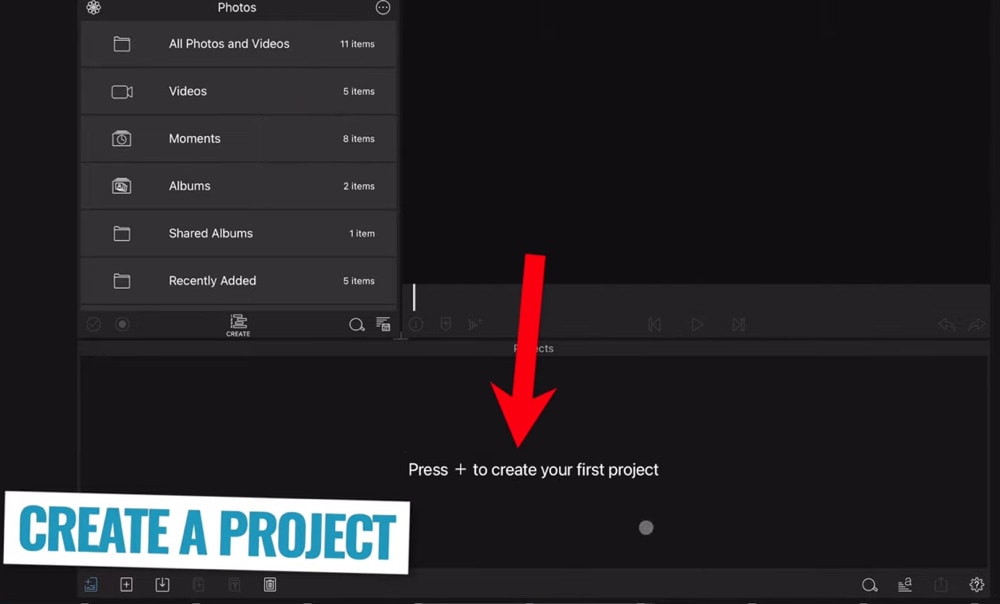
Step 1: To create your first project, press + at the bottom of the screen. You can create a new project by tapping that area or by tapping the Plus button.
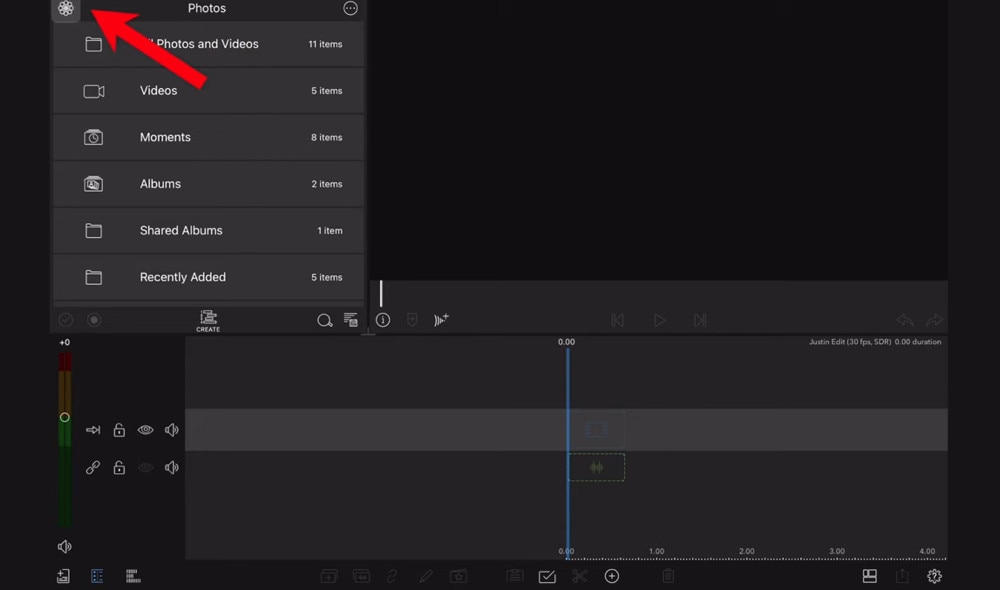
Step 2: Import video:
The Import section is located in the top left corner of the screen. This defaults to the Photos tab when you initially launch a new project. All of the photographs and videos can be seen here.
Step 3: Check layout and adjust volume levels
Step 4: Edit the video and add titles.
Step 5: Export the video.
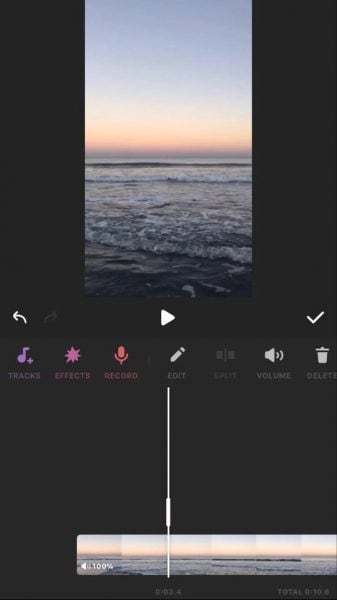
2. Filmora Go:
Without a doubt, Filmora is one of the greatest free video editors for iPhone that does not contain any watermarks. In addition, it’s compatible with both iPhones and Android devices and has a simple user interface.
Filmora is the greatest iPhone video editor for beginners, with themed filters and effects that add flair to your videos without any work.
Filmora has many unique features, including themes for your videos and ‘Materials,’ which are visual effects created by the program. Unfortunately, materials are only available with Filmora Pro, so keep that in mind.
Aside from that, you’ll find all of the typical features here. You can also add titles to videos, utilize stickers and effects, and add music to the background of your movie. You may also add another clip in picture-in-picture mode, which is beneficial.
Below are the following steps to edit FLV video:
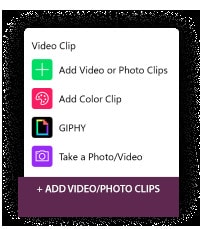
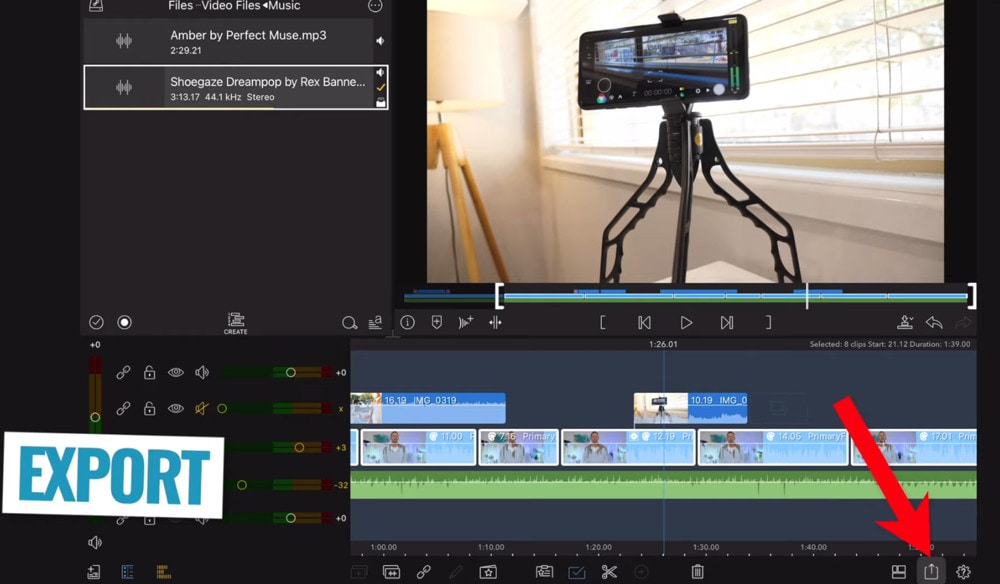
Step 1: Open the application and select ‘Create new video’. Now, import the video by choosing the video icon.
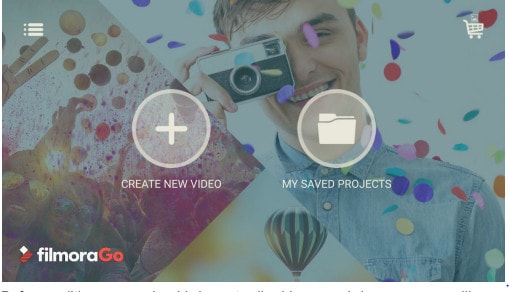
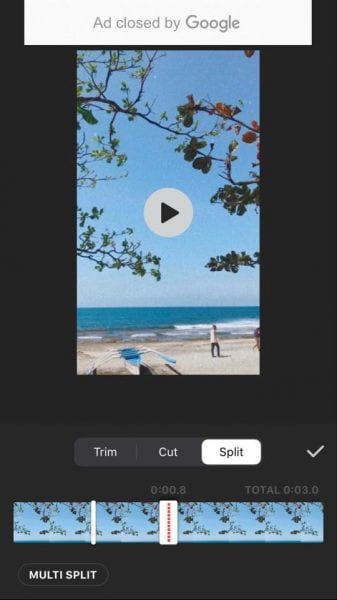
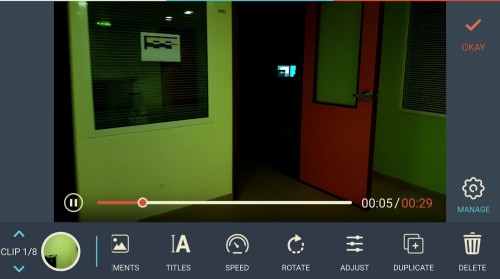
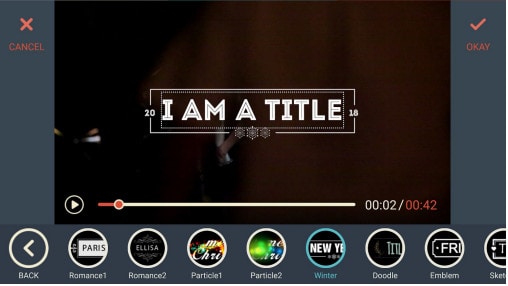
Step 2: Edit the video. Within the edit tool, you can trim and split the video. You can also improve the video quality by adding titles, transitions, and music, and voiceovers.


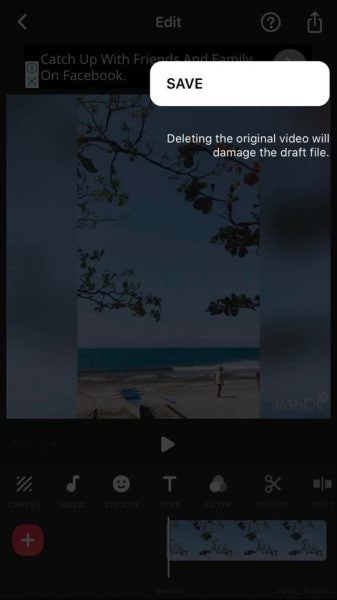
Step 3: After editing the video, select ‘SAVE’ and export the video or download it.
2 Ways to Edit FlV Video Online:
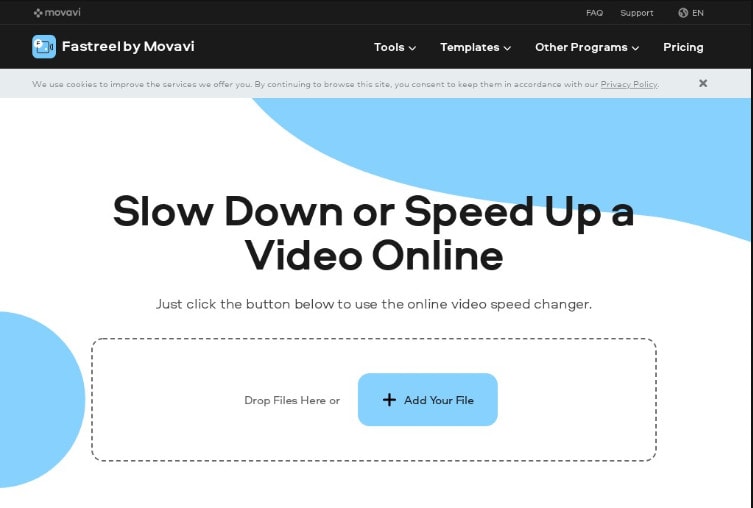
1. Fastreel:
If you’re seeking the finest free online video editor, Fastreel is a terrific tool to start with. This online video editing software provides a wide range of editing options. It can merge, edit, crop, and compress videos to make sharing easier.
It also includes many pre-made templates that you can change to create titles and transitions and other editing features like reverse, looping, and rotating. It’s also quite simple to use, and you can have polished videos in minutes.
There are also numerous pricing options to suit different customers, ranging from a completely free plan with watermarks to paid subscriptions with no limitations.
Use the following steps to edit FLV video:
Step 1: Open Fastreel web and import the video.
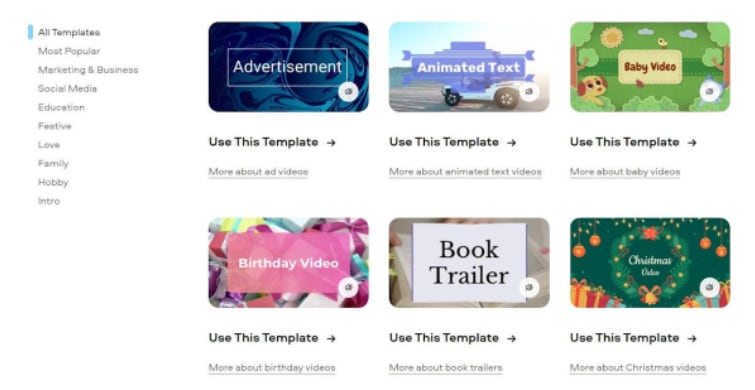
Step 2: Use templates to make it look attractive.
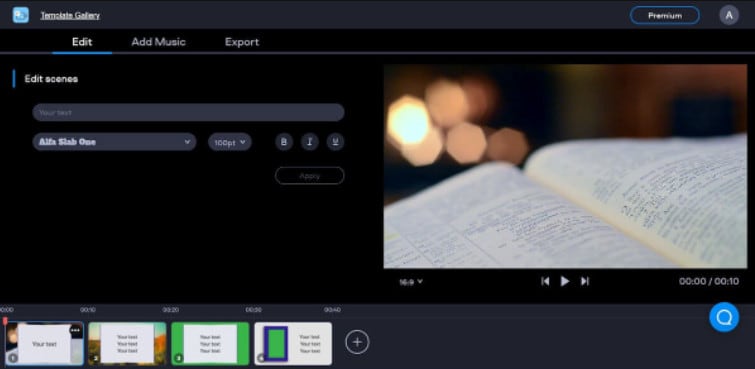
Step 3: Edit the video using the template.
Templates are unfinished videos with all of the effects already applied, such as backdrops, transitions, animated stickers, and titles. There are blank spots for your photos or videos, and you can arrange them in any sequence you like. You can also add music from the Fastreel library or upload your own track after entering your text.
Step 4: Once you are done with edits, save the video and export it.
2. WeVideo:
When you’re seeking the greatest video producer online, another wonderful choice to explore is WeVideo.
Google, Dropbox, Rover, and Roche are just a few of the huge names that trust our online editor. Its fast, versatile editing engine and vast stock content collection for adding stock movies, photos, and audio tracks to your productions are ideal for business users.
WeVideo also stands out since it provides unlimited cloud storage for all of your videos, which you can download and watch on any device. The only drawback is that all of this comes at a price, with WeVideo offering a variety of payment plans ranging from $4.99 to $36.99 a month.
Follow the steps to edit videos using WeVideo:
Step 1: Open WeVideo and import the video file.
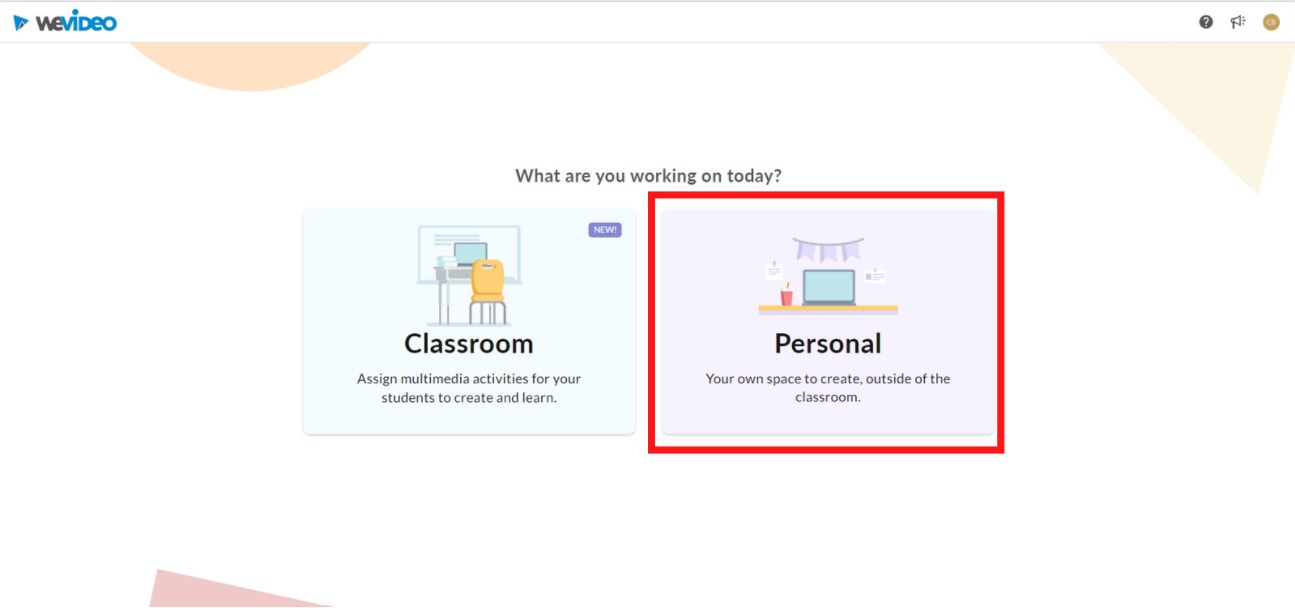
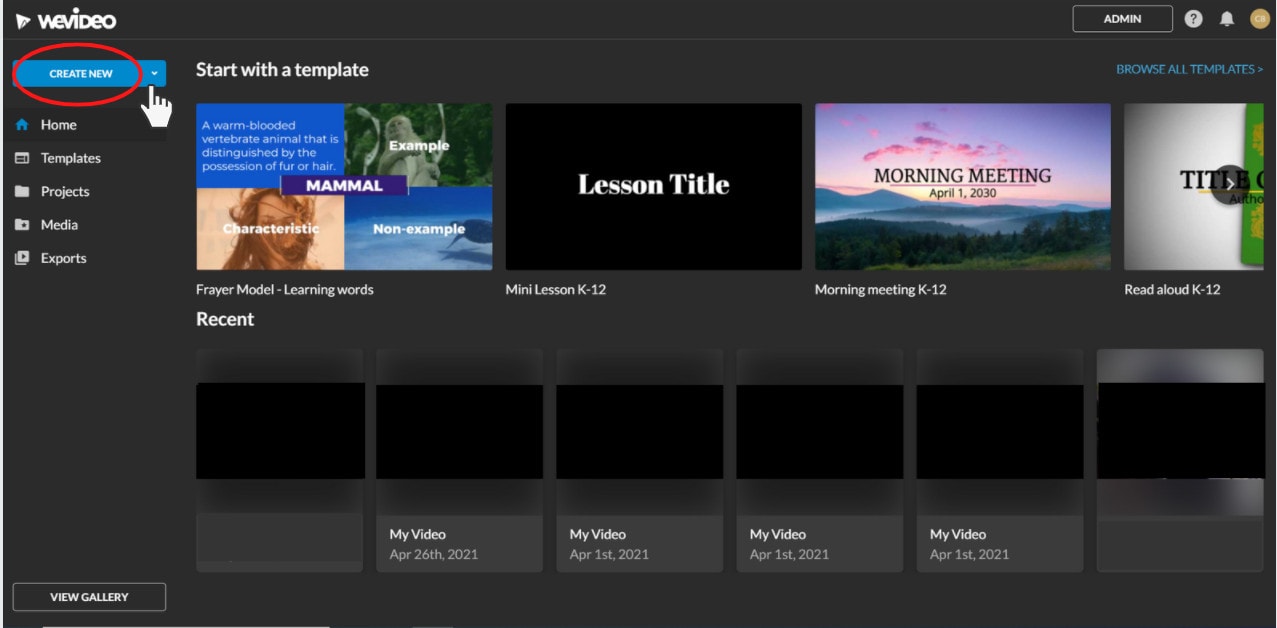
Step 2: Click on create new video in the left-hand corner of the screen.
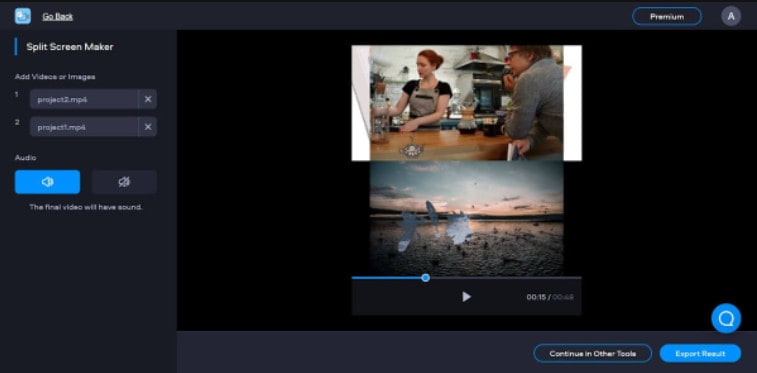
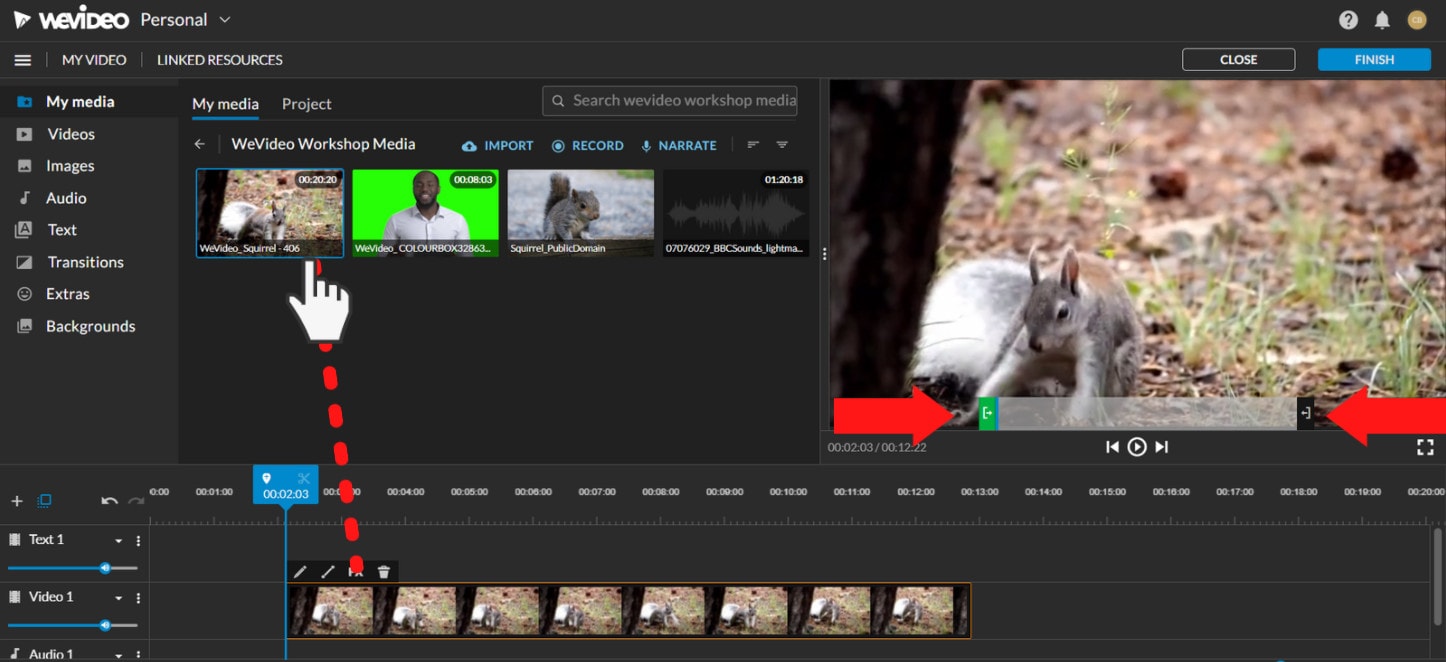
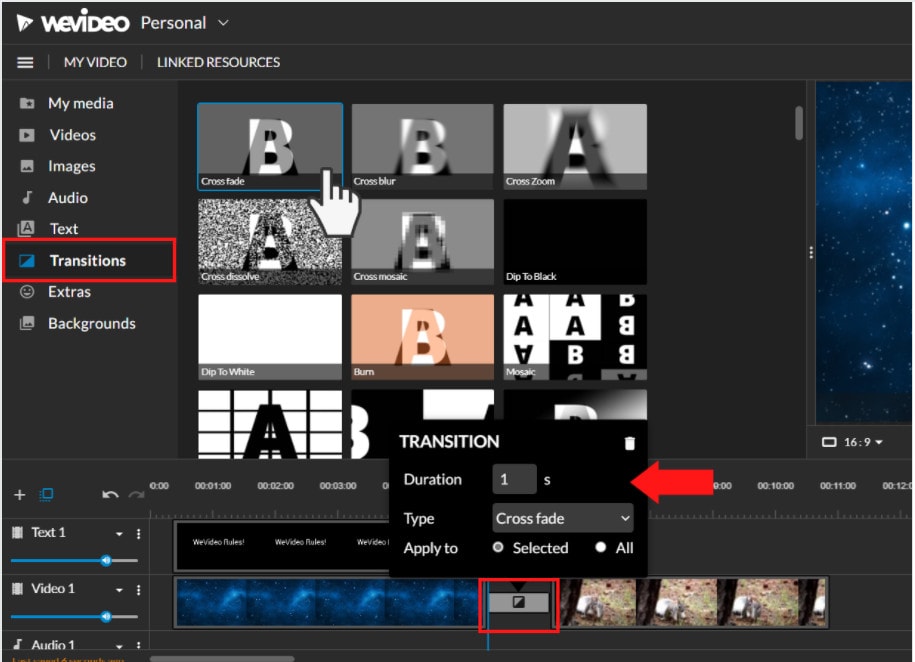
Step 3: Edit the video.
The video clip you imported will appear in the viewing window to the right once you click on it. By moving the arrows and either end, you can edit out the beginning or end of your footage.
- Drag the clip into your timeline from your media pool.
- Place the clip on your timeline by dragging and dropping it.
- Click the scissor symbol after moving the blue marker to the spot where you want to cut your clip.
- Once the material has been chopped, you can erase bits of it by selecting it with your mouse and then pressing delete on your keyboard or rearrange the clips in the timeline by dragging and dropping them to other positions.
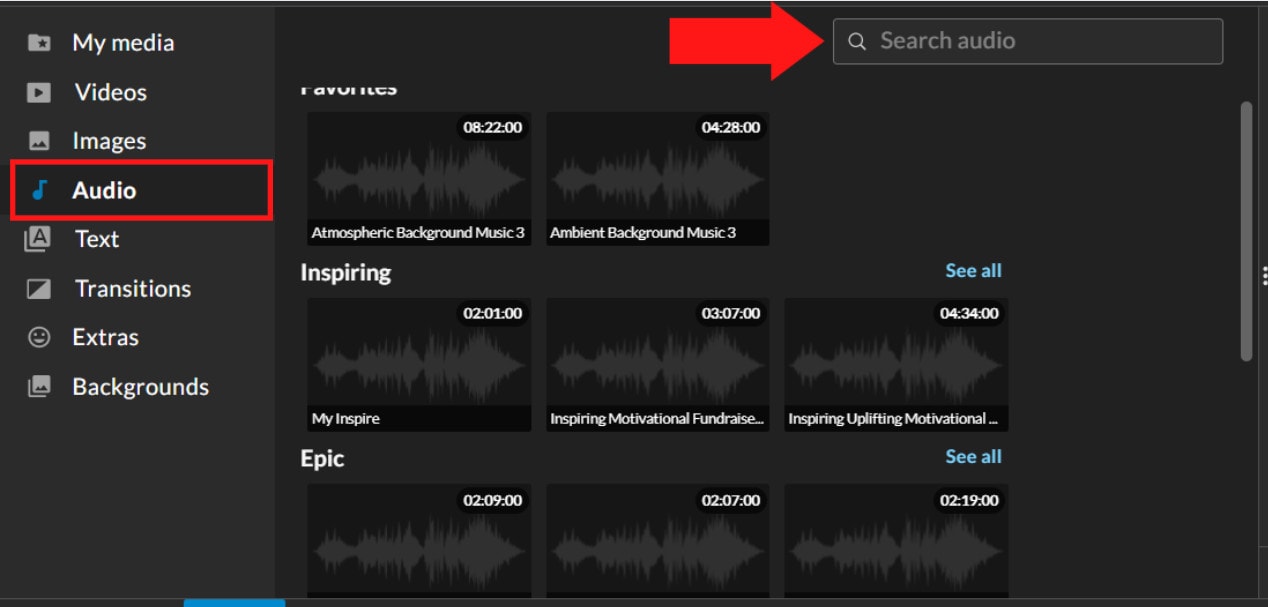
Step 4: Add effects, transitions, and music to the video.
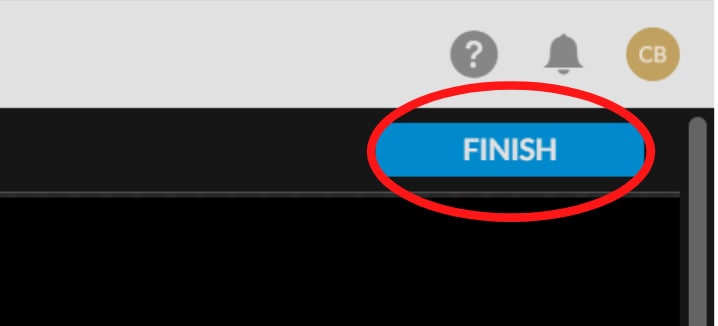
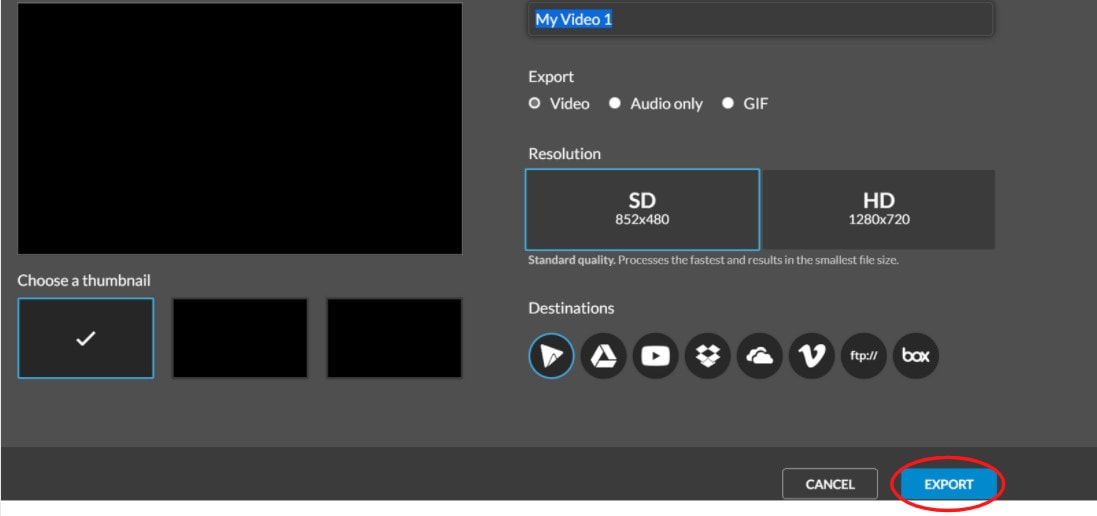
Step 5: Save and export the video by clicking on the Finish tab.
FAQs about editing FLV video
- How to open FLV files?
Any FLV player is required to view FLV files. Various players are available, including VLC, FLV Player, Sothink FLV Player for Mac, Tonec Free FLV Player, Any FLV Player, and others.
- Is Filmora compatible with Mac?
Filmora requires macOS Sierra (version 10.12) or later and the Big Sur (version 11) and Apple M1 chips. Touch Bar compatibility for MacBook Pro users and custom shortcuts to speed up editing.
- What is the best online FLV editor?
There are numerous free online editors to choose from. Fastreel, WeVideo, and FlexClip Video Maker are a few of the most popular.
- Is FLV better than MP4?
Because FLV and MP4 are the two most popular video file formats, it’s crucial to know which one is preferable. Adobe’s proprietary format is FLV. Both formats employ video and audio codecs and have equal performance levels. In their unprocessed state, MP4 files are more adaptable. You can, however, use an FLV file at the same time if you have the correct player.
- How do I choose a video editor?
When comparing video editing software, there are six crucial elements to consider.
- Budget and cost
- Ease of use/learning curve
- Multi-GPGPU acceleration and video format support
- Tools for advanced editing
- Music, special effects, and other goodies
- Customer service is second to none.
For macOS 10.14 or later
Therefore, you can use the following steps to edit FLV video on Windows and Mac:
Step 1: Import file:
Step 2: Edit the FLV file:
Acquire the perfect tool in your palm for anything you want to do, such as clipping, cropping, rotating, and more.
Furthermore, all editing capabilities in the toolbar allow drag-and-drop, making it even easier to touch up your films quickly. Consider the following scenario:
- Drag and drop a transition into the video/photo, or right-click it and select “Apply to All.”
- Please drag & drop a title template to the position where you want it to appear, then adjust it.
- To use the effects, select one from the 50+ available video effects, select it, and apply it to your photos/videos instantaneously.
Step 3: Save or Export the file:
When you’re done, export your modified MP4 files to Windows/Mac and quickly share them on YouTube, with the option of sending a message to Facebook and Twitter. When you click Create in the program window’s middle right corner, you’ll be taken to the Output window below.
Alternative Way to Edit FlV Video on Windows
1. VSDC
VSDC is a free video editor along with a lot of advanced features. Cut, combine, trim, crop, and other editing capabilities are available to help you polish your FLV films.
Although it may not look logical, learning the editing capabilities hidden within modular boxes is simple. One noteworthy aspect of VSDC is its ability to produce good visual effects using many trendy video effects, transitions, and filters.
Furthermore, strong chroma keys, color correction, object modification, and other editing tools can be utilized to edit FLV videos. It not only creates excellent FLV videos, but it also supports a wide range of media conversion, allowing you to convert FLV files to various formats and export them without a watermark.
Therefore, follow the below mentioned steps to edit FLV video using VSDC:
Step 1: Install the software on the Windows. Open the application and import the video.
Step 2: Use cutting and splitting tools to edit the video.
The first icon is a picture of a pair of scissors, which is a cutting tool. It’s very useful when you need to cut the beginning or end of a film. Place the cursor exactly where you want to cut, then select “Trim start” or “Trim finish” from the dropdown cutting menu (the small triangle next to the scissors icon).
Cropping is also simple. If you have too much additional space around the scene object recorded, just choose the file you want to trim and select the cropping icon from the “Cutting and Splitting” option. A new window will appear, allowing you to select the region of the scene that should stay.
Step 3: Apply effects and transitions.
To use one, first select the video file you wish to edit, then go to the Video effects tab and select the effect you want to use. On the timeline, a new tab will appear, containing all of the effects done to the selected object. You can alter the effect’s duration and position in time by dragging it with the mouse there. The properties pane on the right-hand side can be used to change other parameters.
Transitions follow the same rule. Place your cursor where you want the transition to begin, then choose a transition from the Video effects dropdown menu and manually adjust the duration.
Step 4: Save changes and export video.
Make sure your movie appears exactly how you want it to before exporting it. If the video appears choppy, use the red preview button and lower the preview quality. When the PC’s resources are insufficient to process the video in real time, lagging can occur. Keep in mind that it has no bearing on the outcome. When you’re finished, navigate to the Export project tab and select an export format.
2. Adobe Premiere Pro:
Professional video editors use Premiere Pro to make everything from YouTube videos to Hollywood films like Mank, a 2021 Oscar candidate. It’s also widely utilized in the workflows of designers, animators, and VFX artists, and we can see why after lengthy testing.
We found the software’s UI to be simple to use, and it increased our productivity by separating things into various workspaces, such as editing, effects, and audio. When we tested it on both Mac and PC, we discovered that each workspace helps handle a specific activity while minimizing distraction.
Edit the FLV video with Adobe Premiere Pro using the following steps:
Step 1: Import the video and create initial sequence.
Step 2: In the Timeline, trim and rearrange clips, add audio, and transitions.
Step 3: Add title and graphics.
In Premiere Pro, you may make onscreen titles, as well as stylize and animate your images.
Step 4: Export your video.
Alternative Way to Edit FlV Video on Mac
1. Blender:
Under the GNU General Public License, Blender is a free, open-source 3D content production program that runs on all major operating systems. Blender is one of the greatest video editors for both Windows and Mac, with advanced features such as modifier-based modeling tools, powerful character animation capabilities, a node-based material, etc.
Because it is developed for professionals, it is tough to use as a beginner. However, it is unrestricted in its use and distribution. In addition, color options are changeable and versatile in the UI.
In contrast, this free video editor is perfect for semi-pros or those who want to enhance their video editing skills. However, you’ll need a lot of time and effort to learn it.
Step 1: Open the application.
Step 2: Then, go into File->New->Video Editing to open the video editor.
Step 3: Import the video and start editing using the editing tools.
Step 4: Save and export the video.
2. Final Cut Pro:
When it comes to video editing software, Apple’s Final Cut Pro is one of the industry standards. As a result, it’s widely utilized in the television and film industries - at least among Mac users. However, one of the truly convincing reasons to choose it over Premiere Pro is because it is subscription-free: you only pay once.
The software’s Magnetic Timeline, grouping tools, a vast selection of effects, solid organizational capabilities, and simple ways to add and edit audio make it a favorite among professional video editors. 360° video, HDR, and powerful color correcting tools are among the other capabilities. It’s a strong software with a lot of features.
Follow the steps to edit FLV video using Final Cut Pro:
Step 1: Create Project.
To make a movie in Final Cut Pro, you must first establish a project, which keeps track of your editing selections and the media you utilize.
Step 2: Select and add clips to the timeline:
The second stage in making a movie with Final Cut Pro is to add and arrange clips in your project. In the timeline, you can move and reorder clips.
Step 3: Cut and trim video:
Final Cut Pro has a number of features for altering the start and stop points of clips in the timeline, as well as regulating the pacing of shots from one to the next.
Step 4: Edit the video by adding effects and transitions:
Final Cut Pro includes a number of advanced editing features that make it simple to create a professional film. Visual enhancements and colour correction are among the finishing touches.
Step 5: Save and export video:
2 Ways to Edit FlV Video on Android:
1. Inshot:
For Android users, Inshot is a fantastic image and video editor. This Android video editor allows you to add popular stickers and emoticons to your films, making them more fashionable and unique.
The program supports HD video output, allowing you more control over your footage. Moreover, the additional sound and video can be synchronized with the available video chronology.
You can quickly blend more than two movies into one with rich effects and sound with this Android editor app. In addition, you can generate a watermark using unique text provided in the app, and subtitles support allow you to produce one with a variety of fonts.
Following are the steps that you can follow to edit FLV video using Inshot:
Step 1: Open the app and import the video.
Tap “Video” to open your phone’s gallery folder and begin editing a video in the InShot app. Select a video to work with. Adjust the canvass after your video has been loaded into the InShot App. For your other social media accounts, there are aspect ratios and sizes that work well with the video. It also has the option of being in portrait or landscape mode.
Step 2: Trim and split videos.
Step 3: Merge videos (optional):
By combining clips, you can combine them into a single film or project. Simply choose the videos you want to import from the drop-down menu. By tapping the “+” button on the lower left of the screen, you can insert and merge more videos. Your project will then be updated using the selected video.
Step 4: Apply filters, add music, text and stickers.
Step 5: Once you are done with the editing process, save the file.
2. Videoshow:
VideoShow has a lot of video editing options. It is a simple and practical video editing program and movie scene maker for art directors and beginners. Using this video cutter, you may reverse, blur, duplicate, edit, merge and split collage clips or films.
You can also use VideoShow to adjust the audio or add subtitles to any video. It also allows you to use different filters on any video on your device. Over 50 intricate themes are included in the program, allowing you to create gorgeous music videos, slide shows, and vlogs in no time.
The annual subscription package is for $135.19, or you can also make a one-time purchase for $225.78.
However, to edit the video, you can use the following steps:
Step 1: Download and install the videoshow application and open it. Upload the video that you want to edit.
Step 2: Edit the video by applying filters or cutting and trimming the part of the video that you want to remove.
Step 3: Save changes and export the video to your preferred location.
2 Ways to Edit FlV Video on iPhone:
1. LumaFusion:
No other software program on the iPhone comes close to the feature set that LumaFusion offers for video editing. It is the only premium app on this list, and it is well worth every penny.
But, of course, YouTubers aren’t the only ones who use the program; mobile journalists and professional video producers who don’t want to lug along their bulky camera equipment and editing apparatus also use it.
LumaFusion deals with up to six video and audio tracks for photographs, movies, audio, titles, and graphics, and six audio tracks for narration, music, and sound effects. You also receive a magnetic timeline; importing clips is a breeze once they’ve been imported.
There are many transitions and effects to choose from, all of which can be layered. Finally, it includes much royalty-free music, sound effects, and other assets. So if you need a professional video editing tool for your iPhone, LumaFusion ($29.99) is the way to go.
Follow these steps to edit FLV video using LumaFusion:
Step 1: To create your first project, press + at the bottom of the screen. You can create a new project by tapping that area or by tapping the Plus button.
Step 2: Import video:
The Import section is located in the top left corner of the screen. This defaults to the Photos tab when you initially launch a new project. All of the photographs and videos can be seen here.
Step 3: Check layout and adjust volume levels
Step 4: Edit the video and add titles.
Step 5: Export the video.
2. Filmora Go:
Without a doubt, Filmora is one of the greatest free video editors for iPhone that does not contain any watermarks. In addition, it’s compatible with both iPhones and Android devices and has a simple user interface.
Filmora is the greatest iPhone video editor for beginners, with themed filters and effects that add flair to your videos without any work.
Filmora has many unique features, including themes for your videos and ‘Materials,’ which are visual effects created by the program. Unfortunately, materials are only available with Filmora Pro, so keep that in mind.
Aside from that, you’ll find all of the typical features here. You can also add titles to videos, utilize stickers and effects, and add music to the background of your movie. You may also add another clip in picture-in-picture mode, which is beneficial.
Below are the following steps to edit FLV video:
Step 1: Open the application and select ‘Create new video’. Now, import the video by choosing the video icon.
Step 2: Edit the video. Within the edit tool, you can trim and split the video. You can also improve the video quality by adding titles, transitions, and music, and voiceovers.
Step 3: After editing the video, select ‘SAVE’ and export the video or download it.
2 Ways to Edit FlV Video Online:
1. Fastreel:
If you’re seeking the finest free online video editor, Fastreel is a terrific tool to start with. This online video editing software provides a wide range of editing options. It can merge, edit, crop, and compress videos to make sharing easier.
It also includes many pre-made templates that you can change to create titles and transitions and other editing features like reverse, looping, and rotating. It’s also quite simple to use, and you can have polished videos in minutes.
There are also numerous pricing options to suit different customers, ranging from a completely free plan with watermarks to paid subscriptions with no limitations.
Use the following steps to edit FLV video:
Step 1: Open Fastreel web and import the video.
Step 2: Use templates to make it look attractive.
Step 3: Edit the video using the template.
Templates are unfinished videos with all of the effects already applied, such as backdrops, transitions, animated stickers, and titles. There are blank spots for your photos or videos, and you can arrange them in any sequence you like. You can also add music from the Fastreel library or upload your own track after entering your text.
Step 4: Once you are done with edits, save the video and export it.
2. WeVideo:
When you’re seeking the greatest video producer online, another wonderful choice to explore is WeVideo.
Google, Dropbox, Rover, and Roche are just a few of the huge names that trust our online editor. Its fast, versatile editing engine and vast stock content collection for adding stock movies, photos, and audio tracks to your productions are ideal for business users.
WeVideo also stands out since it provides unlimited cloud storage for all of your videos, which you can download and watch on any device. The only drawback is that all of this comes at a price, with WeVideo offering a variety of payment plans ranging from $4.99 to $36.99 a month.
Follow the steps to edit videos using WeVideo:
Step 1: Open WeVideo and import the video file.
Step 2: Click on create new video in the left-hand corner of the screen.
Step 3: Edit the video.
The video clip you imported will appear in the viewing window to the right once you click on it. By moving the arrows and either end, you can edit out the beginning or end of your footage.
- Drag the clip into your timeline from your media pool.
- Place the clip on your timeline by dragging and dropping it.
- Click the scissor symbol after moving the blue marker to the spot where you want to cut your clip.
- Once the material has been chopped, you can erase bits of it by selecting it with your mouse and then pressing delete on your keyboard or rearrange the clips in the timeline by dragging and dropping them to other positions.
Step 4: Add effects, transitions, and music to the video.
Step 5: Save and export the video by clicking on the Finish tab.
FAQs about editing FLV video
- How to open FLV files?
Any FLV player is required to view FLV files. Various players are available, including VLC, FLV Player, Sothink FLV Player for Mac, Tonec Free FLV Player, Any FLV Player, and others.
- Is Filmora compatible with Mac?
Filmora requires macOS Sierra (version 10.12) or later and the Big Sur (version 11) and Apple M1 chips. Touch Bar compatibility for MacBook Pro users and custom shortcuts to speed up editing.
- What is the best online FLV editor?
There are numerous free online editors to choose from. Fastreel, WeVideo, and FlexClip Video Maker are a few of the most popular.
- Is FLV better than MP4?
Because FLV and MP4 are the two most popular video file formats, it’s crucial to know which one is preferable. Adobe’s proprietary format is FLV. Both formats employ video and audio codecs and have equal performance levels. In their unprocessed state, MP4 files are more adaptable. You can, however, use an FLV file at the same time if you have the correct player.
- How do I choose a video editor?
When comparing video editing software, there are six crucial elements to consider.
- Budget and cost
- Ease of use/learning curve
- Multi-GPGPU acceleration and video format support
- Tools for advanced editing
- Music, special effects, and other goodies
- Customer service is second to none.
How To Use Virtual Green Screen to Shoot Video
We have seen video creators on YouTube using green screen effects to beautify their background to make the video look professional and eye-catching. The same is applicable for gamers who live stream their gameplay on Twitch. Instead of physically hanging green screens in the background, some video creators opt for virtual green screens. Yes, it is possible to shoot videos with a virtual green background, and you do not have to buy screen greens and deal with the problem of hanging them in the background.
The concept of using virtual greenscreen is rather new, but it is getting popular among amateur video creators who do not want to invest in purchasing green screens initially. When you use a virtual background to shoot your video, the actual physical background is replaced completely with a virtual green background. Thereafter, you have to replace this virtual background with anything by using a video editor. In this article, we will illustrate how to use a virtual green screen to shoot video.
1. Free Virtual Green Screen
In order to shoot a video with green virtual background, you cannot shoot your video with your regular camera app. Otherwise, your physical background will get recorded, and replacing that through video editor is going to be time-consuming. Therefore, there are specific apps available through which you have to shoot your video so that your physical background gets completely replaced by virtual greenscreen in real-time.
Snap Camera from Snapchat is a free app through which you can shoot your video to get a virtual green background. The app comes with a Green Screen filter that makes this virtual background effect possible. However, you will need a camera recording app that can record your video with green screen effects from Snap Camera. We will be using OBS Studio for recording the video which is also available for free. Snap Camera is compatible with Windows 10 and Mac 10.11+, and hence, you can use it to shoot video from your computer webcam. Here are the steps to follow –
Step 1: Download and install Snap Camera app on your computer.
Step 2: Set up your webcam perfectly so that its angle is direct to your face.
Step 3: Open Snap Camera app and you will see yourself on the app through your webcam. Select the appropriate Lens(filter) and you have to select Green Screen Snap Filter.

Step 4: You should see a green virtual background by now. Now, you have to launch OBS Studio (webcam recording software).
Step 5: Go to Sources and click on “+” icon and select Video Capture Device option.

Step 6: While configuration the new device, select Snap Camera as Device. This will enable green screen virtual backgrounds and you can start recording. After recording is done, save the file on your hard drive.

Now that you have recorded the video with green virtual background without green screen, it is time to edit the virtual greenscreen out with the video editor.
2. Best Way To Apply Green Screen Effect To Your Recorded Video
The best video editor to add green effect to your recorded video with virtual green screen is Wondershare Filmora. There are loads of video editors available with green screen feature but Filmora has the simplest steps to add green screen effects. That is why you do not have to be an expert video editor to add green screen effects to your video.
Apart from green screen effects, you can enhance the video quality by adjusting different parameters and adding other video effects to make the video interesting. Here are the steps to follow to add green screen effects to the recorded video with green virtual background.
For Win 7 or later (64-bit)
For macOS 10.12 or later
Step 1: Download and install Wondershare Filmora. Launch the video editor and select Create New Project option to get started.
Step 2: Import the recorded video with virtual green screen and drag it onto the Timeline.
Step 3: Get the stunning photo or video effect with which you want to replace the virtual background without green screen in the recorded video. Put it directly on the Timeline.
Please note that your recorded green screen video is above the replacement video on the Timeline.

Step 4: Double-click on the recorded video and you will see a panel on the upper-left side. From that panel, turn on Chroma Key option. We have already stated that green screen effect is technically referred to as Chroma Key.
Now you will the superimposed version of the replacement video effect on the green screen background of your recorded video.

Step 5: You can adjust several parameters available to fine tune the green screen effect. When you are done, click on Ok button.
Conclusion
You can now have virtual background without green screen purchase on your video. All you need is a proper application to replace your physical background with a virtual green screen and record the entire video. We have recommended free Snap Camera app and OBS Studio for this job. Then you need to edit the green screen virtual backgrounds with a video editor for which we have recommended Wondershare Filmora.
For macOS 10.12 or later
Step 1: Download and install Wondershare Filmora. Launch the video editor and select Create New Project option to get started.
Step 2: Import the recorded video with virtual green screen and drag it onto the Timeline.
Step 3: Get the stunning photo or video effect with which you want to replace the virtual background without green screen in the recorded video. Put it directly on the Timeline.
Please note that your recorded green screen video is above the replacement video on the Timeline.
Step 4: Double-click on the recorded video and you will see a panel on the upper-left side. From that panel, turn on Chroma Key option. We have already stated that green screen effect is technically referred to as Chroma Key.
Now you will the superimposed version of the replacement video effect on the green screen background of your recorded video.
Step 5: You can adjust several parameters available to fine tune the green screen effect. When you are done, click on Ok button.
Conclusion
You can now have virtual background without green screen purchase on your video. All you need is a proper application to replace your physical background with a virtual green screen and record the entire video. We have recommended free Snap Camera app and OBS Studio for this job. Then you need to edit the green screen virtual backgrounds with a video editor for which we have recommended Wondershare Filmora.
Explore Our Comprehensive Guide to the 10 Best Cameras . Unlock the World of Advanced Technology Perfect for Capturing Slow-Motion Footage in Various Scenarios
Camera technology is evolving at an increased pace with improved features. Each brand competes in the media industry to release cameras with diverse functionalities. When you keep updated on the latest models, you will get to know different varieties and options. It will also help you stay current with evolving technology for slow-motion videos. Choosing the best slow-motion camera involves considering specific needs like filmmaking or creating slow-motion videos.
In this article, we’ll mention the top 10 best slow mo cameras for filming slow-motion videos. The slow-motion camera is specifically built to capture the moments in perfect frame rates. Furthermore, this article will highlight an innovative way to slow down videos without any camera.
Slow Motion Video Maker Slow your video’s speed with better control of your keyframes to create unique cinematic effects!
Make A Slow Motion Video Make A Slow Motion Video More Features
Part 1: How Do Slow-Motion Cameras Help in Recording Perfect Slow-Mo Videos?
Slow-motion cameras record videos at much faster speeds than regular cameras. This feature helps create slow-motion videos by slowing down the recorded action when played at normal speed. These slow-motion cameras are popular in filmmaking, sports analysis, science, and content creation. That’s because they capture detailed moments and highlight fast-moving things.
- Higher Frame Rate: Regular videos usually record 24, 30, or 60 frames per second (fps). But slow-motion cameras can capture hundreds or thousands of frames per second. More frames mean more details and smoother slow-motion videos when played back.
- Smooth Playback: Slow-motion videos look smooth and purposeful when played at regular speeds. More frames are recorded initially to achieve this effect. Ultimately, it will preserve all details when the video is played in slow motion.
- High-Resolution Sensors: Lots of slow-motion cameras have high-quality sensors. These sensors ensure that even with more frames captured, the picture stays sharp and detailed in slow-motion videos. This helps capture fine details without losing clarity.
- Creative Control: Slow-motion cameras let filmmakers and videographers control how fast or slow some parts of a scene look. This helps tell stories better, focus on details, and make videos more interesting and attractive to watch.
- Reduced Motion Blur: More frames per second make pictures clearer and sharper. This feature works especially for fast-moving things. This is important when you need to see tiny details or when the lighting isn’t great.
- Temporal Resolution: Slow-motion cameras can record lots of details in quick movements. They’re handy in sports, science, and creative videos where catching fast and detailed actions matter a lot.
Part 2: Finding The Top Slow-Motion Cameras to Use in 2024
If you want a good slow-motion camera, start by checking out the ones with higher frame rates. Also, think about what you’ll be recording and where you’ll share your videos. Buying a new camera can be confusing and perplexing. We hope you’ll find the best slow-motion camera in the list below. We have arranged the top slow-motion cameras to use in 2024 below:
- PowerShot G7 X Mark III Black
- Sony ZV-1 Camera
- GoPro HERO11 Black
- GoPro HERO10 Black
- Panasonic Lumix GH6
- Sony α7R IV
- Fujifilm X-S20
- Canon EOS-1D X Mark III DSLR Camera
- Nikon D6 FX-Format Digital SLR Camera
- Canon DSLR Camera [EOS 90D]
1. PowerShot G7 X Mark III Black
The PowerShot G7 X Mark III Black is a small but powerful camera for taking high-quality slow-motion videos. It has a 20.1 Megapixel camera and a DIGIC 8 Image Processor, which means it shows exceptional clarity even in different lighting. The 4.2x Optical Zoom Kens with Optical Image Stabilizer helps get close-up shots without making them blurry. For videos, it can record in 4K (at 30 frames per second) and Full HD (at 120 frames per second) for super smooth slow-motion shots.

2. Sony ZV-1 Camera
The Sony ZV-1 Camera is made specifically for content creators and vloggers. Although it has a compact design, it is packed with powerful features. This slow-motion video camera has a 1-inch sensor and digital and optical image stabilization. This means your pictures and videos will be clear and steady even if things are moving fast.
The camera’s results are sharp and colorful thanks to its 20.1 MP resolution and BIONZ X Image Processor. Also, it has a Fast Hybrid AF System that quickly focuses accurately, perfect for both photos and videos.

3. GoPro HERO11 Black
The GoPro HERO11 Black is an awesome slow-motion camera perfect for all kinds of adventures. It takes clear videos up to 5.3K resolution and sharp 27MP photos. The camera has great stabilization, so your videos always look smooth. You can change how wide your shots are and switch lenses digitally while keeping things clear.
GoPro HERO11 Black has cool effects for nighttime shots, making them look artistic. The camera is tough, waterproof up to 33 feet, and has a long-lasting battery that works well even in cold weather.

4. GoPro HERO10 Black
The GoPro HERO10 Black has a faster processor for smoother use and better touch controls. It can record super clear videos at higher speeds: 5.3K at 60fps and 4K at 120fps. You can also shoot camera slow-motion videos at 240fps in 2.7K resolution. The camera’s sensor is better, too, making photos sharper and allowing you to grab 15.8MP pictures from videos. It keeps footage perfectly steady with its excellent stabilization.

5. Panasonic LUMIX GH6
The LUMIX GH6 is an inspiring innovation in the LUMIX camera series, packed with amazing upgrades. It records high-quality videos internally in ProRes 422 HQ and ProRes 422, making them look great and easier to work with on computers later. This slow-mo video camera is faster due to a new engine, making pictures look better with less noise and better colors.
It’s great for professional video making, offering top-notch recording options. It also has image stabilization, a flexible rear monitor, and slots for different memory cards.

6. Sony α7R IV
The Sony A7R IV is a top-notch mirrorless camera appreciated by videography experts. It takes super clear pictures with its 20MP full-frame sensor. Also, it has a feature that prevents shaky photos and helps videos stay steady. You can control how long the shutter stays open, which helps in different lighting.
This slow-motion video camera lets you choose different ways to measure light for better pictures. Small and adaptable, it is high-tech and has great performance in digital photography.

7. Fujifilm X-S20
The Fujifilm X-S20 is a versatile camera that is equipped with advanced features and is easy to carry. This slow-motion camera has a 26.1MP sensor for really clear pictures. The screen is a vary-angle touchscreen of 3.0 inches and 1.84m-dot. You can connect it to Wi-Fi and Bluetooth to share and control the camera from a distance.
It’s perfect for videos, too, recording in high-quality up to 6.2K resolution. The camera is small and compact at 127.7 x 85.1 x 65.4mm and weighs only 491g.

8. Canon EOS-1D X Mark III DSLR Camera
The Canon EOS-1D X Mark III is a top choice for professionals in photography and videography. It has a powerful 20.1 Megapixel Full-frame CMOS sensor that ensures high-quality images. The DIGIC X Image Processor handles low-light situations exceptionally well. Adding on, it offers a wide ISO range for great performance.
Its advanced autofocus system with deep learning technology tracks subjects accurately. This slow-mo camera supports impressive 4K UHD 2160p video recording.

9. Nikon D6 FX-Format Digital SLR Camera
The Nikon D6 FX-Format Digital SLR Camera Body is made for professionals who promise top-notch performance. It has a powerful 20.8 Megapixel Full-frame CMOS sensor for high-quality photos. Also, it can work as a webcam with a maximum resolution of 16 MP and performs well in different situations.
Using digital image stabilization, the slow-motion video camera helps prevent blur. Moreover, it has a quick shutter speed of 1/8000 seconds for precise control over exposure.

10. Canon DSLR Camera [EOS 90D]
The Canon 90D Body is a slow-mo camera for both filmmakers and videographers. It has a 32.5-megapixel CMOS APS-C sensor for clear and detailed images. Furthermore, it supports recording videos in 4K UHD 30P and Full HD 120P, which helps in delivering excellent video quality. With a 45-Point All Cross-type AF System, the 90D provides precise autofocus across the entire frame.

Part 3: What To Do If You Do Not Have a Camera? Use Filmora for Slow-Mo Video Making
Sometimes, getting an affordable slow-motion camera for shooting videos can be tricky. But don’t worry! You can still create slow-motion videos without having a specific camera. Wondershare Filmora is an excellent solution to make fantastic slow-motion videos, even if you don’t own a special slow-motion camera.
You can adjust the speed of your videos easily to make certain moments slower, making your clips look cool. Filmora isn’t just about changing the speed of your videos. It’s a powerful editing software that lets you do lots of things to make your videos better.
Free Download For Win 7 or later(64-bit)
Free Download For macOS 10.14 or later
Steps Required to Slow Down Video Professionally with Speed Ramping
Filmora Speed Ramping feature allows you to control your clip’s speed. It gives the flexibility to either slow down the entire video or specific segments. Here’s a guide on executing slow-motion in the Filmora video editing interface.
Step 1Set Up Project and Import Footage
Start by launching Wondershare Filmora and creating a new project. Then, import your video by clicking the “+” icon. After that, select “Match to Media” to ensure your project settings align with your clip’s resolution.

Step 2Apply Slow-Motion Effect to Slow Down Video
In the next step, add the imported video to the timeline and access the “Speed” icon. Choose a preset, such as 0.5x from the “Slow” menu, to apply a slow-motion effect to the entire clip. Alternatively, right-click on the video, go to “Speed,” followed by “Uniform Speed,” and adjust the slider leftwards for slow motion.

Step 3Customize Speed for Specific Segments
To create slow-motion effects for specific parts or frames within your video, navigate to the “Speed Ramping” window. Then, choose “Customize” and modify the speed by dragging the points along the line.

Step 4Add Freeze Frame at Required Position
For freezing a frame, position the play head at the desired spot. Select “Add Freeze Frame,” then set the freeze duration in the “Freeze Time Field” and adjust its placement as required. Save changes by clicking “OK.”

Top Features Offered by Filmora
Wondershare Filmora offers its users a variety of advanced features to perform an edit conveniently. It enhances creativity and productivity with the help of AI-equipped in it. Described below are some of these features to know about Filmora:
1. AI Smart Masking
AI Smart Masking simplifies the process of adding high-quality transitions and effects. By contrast, it can be complex with manual editing. By activating this feature, it automatically handles the masking task. Once AI masking is enabled and the desired area is specified, it swiftly completes the process. This allows you to apply transitions and effects to the unmasked area afterward.
2. AI Copywriting
Filmora AI Copywriting is a new tool that incorporates ChatGPT API. It uses AI to create scripts, providing tons of ideas for creators to improve their video storytelling. This tool seamlessly integrates AI-generated text and narration into the editing process. With Filmora AI Copywriting, creators can quickly develop catchy YouTube titles and descriptions.
3. Audio Visualizer
Filmora Audio Visualizer is an innovative tool for music videos on how you experience sound and visuals together. It works by matching the visuals to the sound in your video. The Audio Visualizer analyzes the audio and syncs with the music’s beats and rhythm. This creates an amazing display that makes watching and listening more enjoyable.

4. Speech-To-Text
The Filmora Speech-To-Text (STT) feature is a huge help for video editors who want to work more efficiently. With just one click, this tool changes spoken words in videos into written text. It saves a lot of time by avoiding the manual work of typing subtitles. This feature not only saves time but also ensures that subtitles match what’s being said in the video accurately.
Conclusion
In summary, slow-motion videography is an amazing way to tell stories visually. Mixing technology and your ideas helps create videos that capture people’s attention. For that reason, we have provided 10 slow-motion video cameras to help you capture slow-motion videos. Additionally, we also highlighted the perfect solution if you don’t have a camera: Wondershare Filmora. You can easily generate a slow-motion video using our simple guide with this tool.
Make A Slow Motion Video Make A Slow Motion Video More Features
Part 1: How Do Slow-Motion Cameras Help in Recording Perfect Slow-Mo Videos?
Slow-motion cameras record videos at much faster speeds than regular cameras. This feature helps create slow-motion videos by slowing down the recorded action when played at normal speed. These slow-motion cameras are popular in filmmaking, sports analysis, science, and content creation. That’s because they capture detailed moments and highlight fast-moving things.
- Higher Frame Rate: Regular videos usually record 24, 30, or 60 frames per second (fps). But slow-motion cameras can capture hundreds or thousands of frames per second. More frames mean more details and smoother slow-motion videos when played back.
- Smooth Playback: Slow-motion videos look smooth and purposeful when played at regular speeds. More frames are recorded initially to achieve this effect. Ultimately, it will preserve all details when the video is played in slow motion.
- High-Resolution Sensors: Lots of slow-motion cameras have high-quality sensors. These sensors ensure that even with more frames captured, the picture stays sharp and detailed in slow-motion videos. This helps capture fine details without losing clarity.
- Creative Control: Slow-motion cameras let filmmakers and videographers control how fast or slow some parts of a scene look. This helps tell stories better, focus on details, and make videos more interesting and attractive to watch.
- Reduced Motion Blur: More frames per second make pictures clearer and sharper. This feature works especially for fast-moving things. This is important when you need to see tiny details or when the lighting isn’t great.
- Temporal Resolution: Slow-motion cameras can record lots of details in quick movements. They’re handy in sports, science, and creative videos where catching fast and detailed actions matter a lot.
Part 2: Finding The Top Slow-Motion Cameras to Use in 2024
If you want a good slow-motion camera, start by checking out the ones with higher frame rates. Also, think about what you’ll be recording and where you’ll share your videos. Buying a new camera can be confusing and perplexing. We hope you’ll find the best slow-motion camera in the list below. We have arranged the top slow-motion cameras to use in 2024 below:
- PowerShot G7 X Mark III Black
- Sony ZV-1 Camera
- GoPro HERO11 Black
- GoPro HERO10 Black
- Panasonic Lumix GH6
- Sony α7R IV
- Fujifilm X-S20
- Canon EOS-1D X Mark III DSLR Camera
- Nikon D6 FX-Format Digital SLR Camera
- Canon DSLR Camera [EOS 90D]
1. PowerShot G7 X Mark III Black
The PowerShot G7 X Mark III Black is a small but powerful camera for taking high-quality slow-motion videos. It has a 20.1 Megapixel camera and a DIGIC 8 Image Processor, which means it shows exceptional clarity even in different lighting. The 4.2x Optical Zoom Kens with Optical Image Stabilizer helps get close-up shots without making them blurry. For videos, it can record in 4K (at 30 frames per second) and Full HD (at 120 frames per second) for super smooth slow-motion shots.
2. Sony ZV-1 Camera
The Sony ZV-1 Camera is made specifically for content creators and vloggers. Although it has a compact design, it is packed with powerful features. This slow-motion video camera has a 1-inch sensor and digital and optical image stabilization. This means your pictures and videos will be clear and steady even if things are moving fast.
The camera’s results are sharp and colorful thanks to its 20.1 MP resolution and BIONZ X Image Processor. Also, it has a Fast Hybrid AF System that quickly focuses accurately, perfect for both photos and videos.
3. GoPro HERO11 Black
The GoPro HERO11 Black is an awesome slow-motion camera perfect for all kinds of adventures. It takes clear videos up to 5.3K resolution and sharp 27MP photos. The camera has great stabilization, so your videos always look smooth. You can change how wide your shots are and switch lenses digitally while keeping things clear.
GoPro HERO11 Black has cool effects for nighttime shots, making them look artistic. The camera is tough, waterproof up to 33 feet, and has a long-lasting battery that works well even in cold weather.
4. GoPro HERO10 Black
The GoPro HERO10 Black has a faster processor for smoother use and better touch controls. It can record super clear videos at higher speeds: 5.3K at 60fps and 4K at 120fps. You can also shoot camera slow-motion videos at 240fps in 2.7K resolution. The camera’s sensor is better, too, making photos sharper and allowing you to grab 15.8MP pictures from videos. It keeps footage perfectly steady with its excellent stabilization.
5. Panasonic LUMIX GH6
The LUMIX GH6 is an inspiring innovation in the LUMIX camera series, packed with amazing upgrades. It records high-quality videos internally in ProRes 422 HQ and ProRes 422, making them look great and easier to work with on computers later. This slow-mo video camera is faster due to a new engine, making pictures look better with less noise and better colors.
It’s great for professional video making, offering top-notch recording options. It also has image stabilization, a flexible rear monitor, and slots for different memory cards.
6. Sony α7R IV
The Sony A7R IV is a top-notch mirrorless camera appreciated by videography experts. It takes super clear pictures with its 20MP full-frame sensor. Also, it has a feature that prevents shaky photos and helps videos stay steady. You can control how long the shutter stays open, which helps in different lighting.
This slow-motion video camera lets you choose different ways to measure light for better pictures. Small and adaptable, it is high-tech and has great performance in digital photography.
7. Fujifilm X-S20
The Fujifilm X-S20 is a versatile camera that is equipped with advanced features and is easy to carry. This slow-motion camera has a 26.1MP sensor for really clear pictures. The screen is a vary-angle touchscreen of 3.0 inches and 1.84m-dot. You can connect it to Wi-Fi and Bluetooth to share and control the camera from a distance.
It’s perfect for videos, too, recording in high-quality up to 6.2K resolution. The camera is small and compact at 127.7 x 85.1 x 65.4mm and weighs only 491g.
8. Canon EOS-1D X Mark III DSLR Camera
The Canon EOS-1D X Mark III is a top choice for professionals in photography and videography. It has a powerful 20.1 Megapixel Full-frame CMOS sensor that ensures high-quality images. The DIGIC X Image Processor handles low-light situations exceptionally well. Adding on, it offers a wide ISO range for great performance.
Its advanced autofocus system with deep learning technology tracks subjects accurately. This slow-mo camera supports impressive 4K UHD 2160p video recording.
9. Nikon D6 FX-Format Digital SLR Camera
The Nikon D6 FX-Format Digital SLR Camera Body is made for professionals who promise top-notch performance. It has a powerful 20.8 Megapixel Full-frame CMOS sensor for high-quality photos. Also, it can work as a webcam with a maximum resolution of 16 MP and performs well in different situations.
Using digital image stabilization, the slow-motion video camera helps prevent blur. Moreover, it has a quick shutter speed of 1/8000 seconds for precise control over exposure.
10. Canon DSLR Camera [EOS 90D]
The Canon 90D Body is a slow-mo camera for both filmmakers and videographers. It has a 32.5-megapixel CMOS APS-C sensor for clear and detailed images. Furthermore, it supports recording videos in 4K UHD 30P and Full HD 120P, which helps in delivering excellent video quality. With a 45-Point All Cross-type AF System, the 90D provides precise autofocus across the entire frame.
Part 3: What To Do If You Do Not Have a Camera? Use Filmora for Slow-Mo Video Making
Sometimes, getting an affordable slow-motion camera for shooting videos can be tricky. But don’t worry! You can still create slow-motion videos without having a specific camera. Wondershare Filmora is an excellent solution to make fantastic slow-motion videos, even if you don’t own a special slow-motion camera.
You can adjust the speed of your videos easily to make certain moments slower, making your clips look cool. Filmora isn’t just about changing the speed of your videos. It’s a powerful editing software that lets you do lots of things to make your videos better.
Free Download For Win 7 or later(64-bit)
Free Download For macOS 10.14 or later
Steps Required to Slow Down Video Professionally with Speed Ramping
Filmora Speed Ramping feature allows you to control your clip’s speed. It gives the flexibility to either slow down the entire video or specific segments. Here’s a guide on executing slow-motion in the Filmora video editing interface.
Step 1Set Up Project and Import Footage
Start by launching Wondershare Filmora and creating a new project. Then, import your video by clicking the “+” icon. After that, select “Match to Media” to ensure your project settings align with your clip’s resolution.
Step 2Apply Slow-Motion Effect to Slow Down Video
In the next step, add the imported video to the timeline and access the “Speed” icon. Choose a preset, such as 0.5x from the “Slow” menu, to apply a slow-motion effect to the entire clip. Alternatively, right-click on the video, go to “Speed,” followed by “Uniform Speed,” and adjust the slider leftwards for slow motion.
Step 3Customize Speed for Specific Segments
To create slow-motion effects for specific parts or frames within your video, navigate to the “Speed Ramping” window. Then, choose “Customize” and modify the speed by dragging the points along the line.
Step 4Add Freeze Frame at Required Position
For freezing a frame, position the play head at the desired spot. Select “Add Freeze Frame,” then set the freeze duration in the “Freeze Time Field” and adjust its placement as required. Save changes by clicking “OK.”
Top Features Offered by Filmora
Wondershare Filmora offers its users a variety of advanced features to perform an edit conveniently. It enhances creativity and productivity with the help of AI-equipped in it. Described below are some of these features to know about Filmora:
1. AI Smart Masking
AI Smart Masking simplifies the process of adding high-quality transitions and effects. By contrast, it can be complex with manual editing. By activating this feature, it automatically handles the masking task. Once AI masking is enabled and the desired area is specified, it swiftly completes the process. This allows you to apply transitions and effects to the unmasked area afterward.
2. AI Copywriting
Filmora AI Copywriting is a new tool that incorporates ChatGPT API. It uses AI to create scripts, providing tons of ideas for creators to improve their video storytelling. This tool seamlessly integrates AI-generated text and narration into the editing process. With Filmora AI Copywriting, creators can quickly develop catchy YouTube titles and descriptions.
3. Audio Visualizer
Filmora Audio Visualizer is an innovative tool for music videos on how you experience sound and visuals together. It works by matching the visuals to the sound in your video. The Audio Visualizer analyzes the audio and syncs with the music’s beats and rhythm. This creates an amazing display that makes watching and listening more enjoyable.
4. Speech-To-Text
The Filmora Speech-To-Text (STT) feature is a huge help for video editors who want to work more efficiently. With just one click, this tool changes spoken words in videos into written text. It saves a lot of time by avoiding the manual work of typing subtitles. This feature not only saves time but also ensures that subtitles match what’s being said in the video accurately.
Conclusion
In summary, slow-motion videography is an amazing way to tell stories visually. Mixing technology and your ideas helps create videos that capture people’s attention. For that reason, we have provided 10 slow-motion video cameras to help you capture slow-motion videos. Additionally, we also highlighted the perfect solution if you don’t have a camera: Wondershare Filmora. You can easily generate a slow-motion video using our simple guide with this tool.
Also read:
- Ultimate Guidelines to Help You Better Use VLC Media Player
- New How to Perfectly Use Canva Color Match for 2024
- Updated In 2024, How to Make a Movie with Windows Movie Maker?
- Want to Speed up Your Video to Shorten Its Duration and Make It More Entertaining? Here Is How to Speed up Videos in Final Cut Pro. Get a Better Alternative to FCP to Speed up Videos
- 2024 Approved 2 Methods to Crop a Video in VLC
- Updated 4 Solutions to Add White Borders on Mobile and Desktop
- 2024 Approved Do You Want to Make Your Video Look Like Its From the 90S? Then, Make Sure to Add Vintage Overlays and VHS Sound Effects to Give It the Old Feel
- In 2024, Transparent Logo and Images Look Cool when You Are Planning to Create a Brand Identity. An Image with Unique Features Catches the Attention of Viewers and Leaves Impression
- In 2024, Want to Learn How to Create the Random Letter Reveal Intro? Read Through the Stages of Preparing This Effect via Filmora in This Guide
- Updated A Guide to Find a High-Quality Video Marketing Agency
- New 10 Apps to Make Videos with Pictures and Music
- In 2024, How to Create Your Own LOL Montage Video
- 2024 Approved Step by Step to Rotate Videos Using OBS
- New How to Create a Slideshow on iPhone
- Updated In 2024, How to Change Quicktime Player Speed on Mac?
- The Ultimate Guide to Using Shotcut To Rotate Videos
- New 2024 Approved Working Through the Details of iMovie Slow Motion Video Making 100 Effective
- Updated A Vlog Has Many Elements to Answer. While Setting up Ideas for It, There Are Several Things Into Which You Should Look. This Article Presents a Picture of How a Vlog Video Is Made Perfectly for 2024
- Top 12 AI Video Generators to Pick for 2024
- 2024 Approved Best Ai Generated Memes
- New How to Make a Slideshow with Icecream Slideshow Maker
- New How to Create Glowing Edge Effect in TikTok Dancing Video
- Updated Step by Step Guide on Make Gimp Transparent Background PNG for 2024
- Updated Best Image (JPG/PNG) to GIF Converters for 2024
- New Guide To Using Luts Perfectly in Final Cut Pro for 2024
- In 2024, Level Up Videos By Applying Keyframe Like A Pro
- New Best Jump Cut Editing Tricks for 2024
- Updated How Have Game Recording Software Improved Their Stature in the Market? An Overview
- 2024 Approved How to Use OBS Chroma Key With/Without Green Screen
- Different Methods To Unlock Your Apple iPhone 12 Pro | Dr.fone
- In 2024, How to Unlock Poco C65 Phone with Broken Screen
- Fake Android Location without Rooting For Your Lava Yuva 2 Pro | Dr.fone
- In 2024, How to Change Location On Facebook Dating for your Lava Blaze 2 5G | Dr.fone
- In 2024, Solved How To Transfer From Apple iPhone 7 Plus to iPhone 15 | Dr.fone
- How to Transfer Music from Xiaomi Redmi Note 12R to iPod | Dr.fone
- Can’t view MKV movies content on Xiaomi 14 Ultra
- New In 2024, Best Options Top Live Streaming Platforms According to Types
- How to Use Pokémon Emerald Master Ball Cheat On Vivo V30 Pro | Dr.fone
- Full Guide to Hard Reset Your Honor 70 Lite 5G | Dr.fone
- How to Activate Stellar Data Recovery for iPhone 15 | Stellar
- In 2024, 9 Mind-Blowing Tricks to Hatch Eggs in Pokemon Go Without Walking On Apple iPhone 8 | Dr.fone
- In 2024, Can I use iTools gpx file to catch the rare Pokemon On Nokia 130 Music | Dr.fone
- Title: Updated Looking For a Cheap Camera to Make Slow Motion Video? Get It Now
- Author: Chloe
- Created at : 2024-05-20 03:38:14
- Updated at : 2024-05-21 03:38:14
- Link: https://ai-editing-video.techidaily.com/updated-looking-for-a-cheap-camera-to-make-slow-motion-video-get-it-now/
- License: This work is licensed under CC BY-NC-SA 4.0.
