
:max_bytes(150000):strip_icc():format(webp)/safari-photo--canon-and-nikon-digital-cameras-and-lenses--masai-mara-game-reserve--kenya--769713645-5bde071546e0fb0026a2c012.jpg)
Updated Looking for Simple Steps to Customize the Speed of Your Video in DaVinci Resolve? Find Out How You Can Do that and Discover an Easier Alternative to DaVinci Resolve
Looking for Simple Steps to Customize the Speed of Your Video in DaVinci Resolve? Find Out How You Can Do that and Discover an Easier Alternative to DaVinci Resolve
Slow-motion videos are in trend on social media platforms. You can shoot the footage in slow-motion mode or slow it down while editing the video. Similarly, if you are making a funny video, there are surely going to be parts where the video speeds up. Sped-up video clips have always been part of comic relief and entertainment for the audience. You will need a feature-rich video editor to customize the speed of your video.
DaVinci Resolve has established itself as a complete video editor. You can edit your video, correct the color, add visual effects and edit audio parts. You can undoubtedly change video speed in DaVinci Resolve. However, DaVinci Resolve’s user interface is slightly complex for beginners. We will instruct on how you can speed up a video using DaVinci Resolve. We will also suggest you an easier alternative if you are not in favor of DaVinci Resolve.
Part I. What are the Scenarios When You Need to Speed Up Video?
There are several scenarios when speeding up a video becomes a necessity. Here are the most probable ones that you can relate to.
Boring But Necessary Parts - There could be some sections in a long video that are necessary but boring to watch. You can’t bore your viewers and let them leave your video midway. Hence, you can speed up those sections to pass them away quickly.
Funny Videos - The subject’s actions in the video look very funny when you speed them up. Therefore, if you make funny videos to entertain your viewers, speeding up certain sections of your video with funny audio in the background should be a regular thing.
Short Videos - Short-duration videos are extremely popular on social media platforms.
People upload them as Stories and Statuses to entertain their followers regularly. Therefore, a sped-up video can shorten the duration, accommodate the necessary content, and fit the video duration requirements of the respective social media platforms.
Timelapse - Timelapse videos are a treat to watch. You can shoot the video in timelapse mode or speed up the video while editing. That is how you can fit hours of a video into a few minutes or seconds of video duration.
Part II. Speed Up Video using DaVinci Resolve
DaVinci Resolve is a professional video editor where you can change your video’s speed in several ways. You can instantly change your video clip’s speed by mentioning the speed in terms of percentage.
You can also use the advanced Speed Ramp option to customize the video speed unevenly. Besides, there are retime curves to adjust the video speed at your convenience. Let us go through the detailed guide on how to speed up the video in DaVinci Resolve 17.
Method 1. Change Clip Speed Option
The simplest way is through the Change Clip Speed option. You can explicitly mention the speed percentage as needed. To speed it up, mention speed percentage above 100. If you want to slow it down, the speed percentage will be below 100. Here are the steps you need to execute.
Step1 After you have placed the video clip onto the timeline, select the clip and right-click on it.

Step2 Tap “Change Clip Speed…” option.

Step3 Once the Change Clip Speed dialog box opens, modify the speed from 100% to something higher if you want to speed it up.

Step4 Click on the Change button when you are happy with the result.
Method 2. Speed Ramping Option
Speed ramping is a process where you can vary the speed of your video unevenly. It means you can speed up some portions while slowing down others. This is achieved through retime controls that let you edit the video clips in sections using speed points. Here are the steps to illustrate the process.
Step1 Right-click the video clip on your timeline. From the menu, select the Retime Controls option.

Step2 Move the play head where you want to change the speed. Click the arrow next to 100% and select the Add Speed Point option. Similarly, move the play head to another point and add a new speed point.

Step3 Click on the arrow next to 100% to change the speed between two-speed points. Go to the Change Speed option and select from the preset. Based on your preset speed selection, the video’s speed within the speed points will change.

Part III. Pros and Cons
Every video editor has its advantages as well as drawbacks. So if you think about changing video speed through DaVinci Resolve, check its pros and cons.
Pros
- Change the speed of the entire video clip instantly.
- Change the speed of certain sections of the video through speed ramping.
- Vary the speed of the video clip unevenly with Retime curves.
- Change video speed with Optical Flow for better motion representation.
Cons
- There are too many options to change video speed.
- The regular video speed-changing options produce jittery results.
- Some change video speed options are complicated to execute.
- There are reports of sudden crashes with too many video speed changes.
The cons are too grave to ignore. The learning curve is also steep too. Many look for an easier alternative to DaVinci Resolve speed ramp transition.
Part IV. A Simpler Alternative to DaVinci Resolve to Change Video Speed
Wondershare Filmora is perfectly suitable for you if you are looking for an easier alternative to DaVinci Resolve. Filmora comes with a simple user interface. You get almost the same features as you get in DaVinci Resolve as a video editor. Focusing on changing video speed, Filmora has similar options as DaVinci Resolve, but they are easier to operate.
Anyone can instantly change the speed of the entire or part of a video. There are uniform speed and simplified speed ramping options available for advanced users. You can customize the speed of a video clip as you need. There is not going to be any jittery motion when the speed is changed. In short, Filmora is tailor-made to fulfill all your demands for speeding up videos in easier steps.
Free Download For Win 7 or later(64-bit)
Free Download For macOS 10.14 or later
How Do You Change Video Speed in Filmora?
There are basically three ways to change video speed in Filmora. You can choose from presets for instant change. You can customize the video speed as well as use speed ramping for an advanced level of video speed change. We will now illustrate how to change video speed in Wondershare Filmora.
Watch this video to discover all the methods to change video speed in Filmora.
Method 1. Select From Speed Presets
You can instantly select from Speed Presets if you want to change your video speed in fewer steps. There are fast speed presets as well as slow speed presets available. Follow these steps to choose a speed preset.
Step1 Install Filmora on your computer (Windows or macOS). Open Filmora and select Create New Project.

Step2 Drag the video file from your computer to Filmora’s timeline. Choose video and tap Speed icon that you can find at the top of the timeline.

Step3 From the menu, go to the Fast or the Slow option and select a speed preset. Finally, you can export the file to save it to your computer.

Method 2. Alter Uniform Speed
If you want to customize the video speed as per your need, the Uniform Speed option is for you. You can select from 0.01X to 100X speed. The selected speed will be applicable to the entire video clip uniformly. Here are the steps to set uniform speed.
Step1 Once you have the video on the timeline, click on the Speed icon.
Step2 Choose the Uniform Speed option, which will open the Uniform Speed tab.

Step3 Adjust the speed slider to change the video speed as you need.

Step4 After setting the speed, click on the Ok button. Then you can export the video in any file format.
Method 3. Use Speed Ramping
Speed ramping provides you with a graph to customize the video speed. You can speed up and slow down different parts of your video as you think appropriate. As per the graph’s crests and troughs, the video’s speed varies. Here are the steps to execute.
Step1 Place the video file onto the timeline and go to the Speed icon.
Step2 Select the Speed Ramping option. This will open the Speed Ramping tab.

Step3 You can select any preset or select the Customize option. When you select the Customize option, you can edit the graph accordingly.

Step4 Click on the Ok button, followed by the Export button, to save the video.
Part V. Comparison Between DaVinci Resolve and Filmora
| Parameters | DaVinci Resolve | Filmora |
|---|---|---|
| Change Video Speed Options | Too Many | Appropriate |
| Video Speed Presets | Limited | Ample |
| Ease of Speed Change | Slightly Complicated | Very Easy |
| Export Options | Limited | Ample |
| Application Stability | Less stable | Highly stable |
| Average Rating | 3/5 | 4.5/5 |
| Pricing | High | Reasonable |
| Best For | Advanced video editors | Beginners and advanced video editors |
Conclusion
We have answered how you can use the speed ramp DaVinci Resolve 17 to speed up your video. We have also illustrated the steps to change speed settings in DaVinci Resolve. But many users look for an easier video editor to avoid DaVinci Resolve’s complicacy. Wondershare Filmora is that intuitive video editor where you can change video speed as you need. You can instantly choose from presets and customize the video speed throughout.
The cons are too grave to ignore. The learning curve is also steep too. Many look for an easier alternative to DaVinci Resolve speed ramp transition.
Part IV. A Simpler Alternative to DaVinci Resolve to Change Video Speed
Wondershare Filmora is perfectly suitable for you if you are looking for an easier alternative to DaVinci Resolve. Filmora comes with a simple user interface. You get almost the same features as you get in DaVinci Resolve as a video editor. Focusing on changing video speed, Filmora has similar options as DaVinci Resolve, but they are easier to operate.
Anyone can instantly change the speed of the entire or part of a video. There are uniform speed and simplified speed ramping options available for advanced users. You can customize the speed of a video clip as you need. There is not going to be any jittery motion when the speed is changed. In short, Filmora is tailor-made to fulfill all your demands for speeding up videos in easier steps.
Free Download For Win 7 or later(64-bit)
Free Download For macOS 10.14 or later
How Do You Change Video Speed in Filmora?
There are basically three ways to change video speed in Filmora. You can choose from presets for instant change. You can customize the video speed as well as use speed ramping for an advanced level of video speed change. We will now illustrate how to change video speed in Wondershare Filmora.
Watch this video to discover all the methods to change video speed in Filmora.
Method 1. Select From Speed Presets
You can instantly select from Speed Presets if you want to change your video speed in fewer steps. There are fast speed presets as well as slow speed presets available. Follow these steps to choose a speed preset.
Step1 Install Filmora on your computer (Windows or macOS). Open Filmora and select Create New Project.
Step2 Drag the video file from your computer to Filmora’s timeline. Choose video and tap Speed icon that you can find at the top of the timeline.
Step3 From the menu, go to the Fast or the Slow option and select a speed preset. Finally, you can export the file to save it to your computer.
Method 2. Alter Uniform Speed
If you want to customize the video speed as per your need, the Uniform Speed option is for you. You can select from 0.01X to 100X speed. The selected speed will be applicable to the entire video clip uniformly. Here are the steps to set uniform speed.
Step1 Once you have the video on the timeline, click on the Speed icon.
Step2 Choose the Uniform Speed option, which will open the Uniform Speed tab.
Step3 Adjust the speed slider to change the video speed as you need.
Step4 After setting the speed, click on the Ok button. Then you can export the video in any file format.
Method 3. Use Speed Ramping
Speed ramping provides you with a graph to customize the video speed. You can speed up and slow down different parts of your video as you think appropriate. As per the graph’s crests and troughs, the video’s speed varies. Here are the steps to execute.
Step1 Place the video file onto the timeline and go to the Speed icon.
Step2 Select the Speed Ramping option. This will open the Speed Ramping tab.
Step3 You can select any preset or select the Customize option. When you select the Customize option, you can edit the graph accordingly.
Step4 Click on the Ok button, followed by the Export button, to save the video.
Part V. Comparison Between DaVinci Resolve and Filmora
| Parameters | DaVinci Resolve | Filmora |
|---|---|---|
| Change Video Speed Options | Too Many | Appropriate |
| Video Speed Presets | Limited | Ample |
| Ease of Speed Change | Slightly Complicated | Very Easy |
| Export Options | Limited | Ample |
| Application Stability | Less stable | Highly stable |
| Average Rating | 3/5 | 4.5/5 |
| Pricing | High | Reasonable |
| Best For | Advanced video editors | Beginners and advanced video editors |
Conclusion
We have answered how you can use the speed ramp DaVinci Resolve 17 to speed up your video. We have also illustrated the steps to change speed settings in DaVinci Resolve. But many users look for an easier video editor to avoid DaVinci Resolve’s complicacy. Wondershare Filmora is that intuitive video editor where you can change video speed as you need. You can instantly choose from presets and customize the video speed throughout.
Best 31 Video Trimmers for Computer, Phone and Online
In the world of videography, editing a video is equally important as shooting a video. No matter how perfectly you shoot a video, there are some parts that you need to trim out so that the video could be presented perfectly to your target audience. If you are getting started in the videography world, this article is for you to learn how to trim videos with the best video trimmer.
First, we will touch upon different ways of making a video. Thereafter, you will move on to how to trim a video that you have either recorded with recording software or shot with your digital camera. We will begin by providing you the list of the best video trimmers for Windows, Mac and mobile users. The video trimmers are segregated for beginner and advanced users, and hence, you can choose as per your preference and requirements.
We will also touch on how to edit your video and share the edited video among your target audiences. Therefore, take your time to go through our list of the top 32 best video trimmers of 2022. Starting from free and premium video trimmers to video trimmers for beginners and advanced users, you will definitely find the best video trimmer that is tailor-made to satisfy your requirements.
Contents
01 [How to Make a Video before Trimming](#Part 1)
02 [Video Trimmer for PC and Mac](#Part 2)
03 [Video Trimmers for Mobile](#Part 3)
04 [Online Video Trimmers ](#Part 4)
05 [Editing Tips to Improve Your Videos](#Part 5)
06 [How to Share Your Videos](#Part 6)
07 [Related FAQs about Video Trimming](#Part 7)
Part 1 How to Make a Video before Trimming
Before coming to the trimming of a video section in detail, let us begin with how to make a video. You have two options when it comes to making a video. You can either record a video with recording software or you can shoot a video with your camera. Let us discuss both options in detail now.
-Record a video
You can record a video with recording software when you are capturing video from your webcam or from your computer screen. There are two options you have when it comes to choose a recording software.
- Premium Recorder - A premium recorder is a professional video recording software that you have to purchase to avail all the features and functionalities. Choose the best video recorder.
- Free Recorder - If you are not willing to spend any money on a recording software, there are plenty of free recording applications available. We recommend OBS Studio as the best free video recorder.
-Shoot a video
The second option is shooting a video with your external digital camera. You can also use your phone camera to shoot a video. For example, making vlogs, comedy skits, travel videos, or short films needs a digital camera. If you are using your phone camera, you can cut and crop the video after shooting using the video trimmer apps or online video trimmers. If you are shooting external with an external camera, you can transfer the video to your mobile or computer and use a preferred video trimmer for editing.
Part 2 Video Trimmer for PC and Mac
When it comes to editing and trimming a video, using a computer is the best option. This is because you have a wider screen to pay attention to the details of the video and trim out the unnecessary parts easily. Besides, editing a video requires CPU resources which are best served by a computer. We have divided the video trimmers for computers into two categories for user convenience. You can easily find video trimmers for Windows PC as well as for Mac.
# For Beginner Users
This category is perfect for those who do not have any experience in video editing and they are looking for a basic video trimmer to get the job done. Besides, if you need to trim videos once in a while, these are perfect for you. You can trim video free with the following video trimmers.
1. Windows Photos
Best for: Windows users with no editing skills
G2 rating: 4.0/5
Price: Free
If you are a Windows PC user and you are looking for a basic video trimming application, Windows Photos is right there for you. The application comes pre-installed on Windows PC and hence, there is no need to install any external application. Even though Windows Photos is primarily used for viewing photos, there is a dedicated video editor available where you can trim your recorded video easily. Apart from trimming videos, you can do some basic editing like adding title cards and text, video effects, background music, and filters. Here are the pros and cons of Windows Photos.
Pros:-
- Comes pre-installed in Windows.
- Super easy user interface to operate.
- Quick trimming and cutting out videos.
- Different motion transitions and effects present.
- Add titles, texts, and audio to video.
- AVarious filters and 3D effects available.
Cons:-
- Not suitable for trimming large videos.
- Lack of different file formats for saving the videos.
2. QuickTime Player
Best for: Mac users with basic trimming needs
G2 rating: 4.2/5
Price: Free
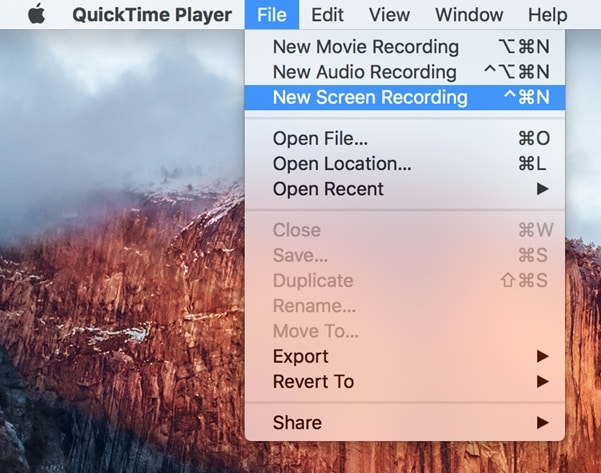
If you are a Mac user and you are looking for a free video editor for trimming your video, QuickTime Player is the best application for you. Just like Windows Photos for Windows users, QuickTime Player comes pre-installed for Mac users. In fact, it is the default media player for Mac users. Apart from playing media files, you can use QuickTime Player for video recording as well as editing the recorded video. This includes trimming videos and replaying on the application to reach the level of perfection easily. Here are the pros and cons of QuickTime Player you should be aware of.
Pros:-
- The user interface is super easy to operate.
- Trim, flip, split, and merge videos quickly.
- Option to record video with audio flawlessly.
- Instant preview of the edited video on QuickTime.
- QuickTime is compatible with iPhone and iPad.
- Advanced streaming options available in Pro version.
- Supports playing different video file formats.
Cons:-
- Some of the settings are complicated.
- It can crash while editing large video files.
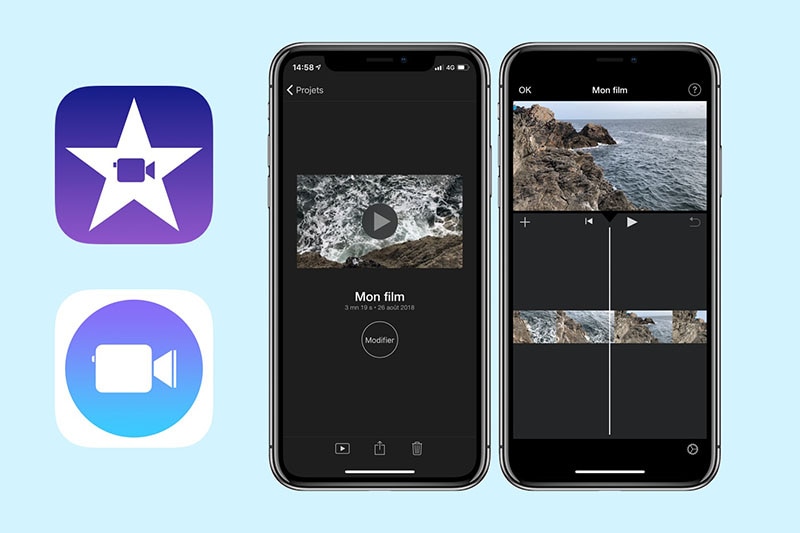
3. iMovie
Best for: Playing and editing videos
G2 rating: 4.3/5
Price: Free

If you are a Mac user and you are looking for a dedicated video editor, iMovie is a great choice. iMovie also comes pre-install on Mac and it is compatible with iPhone and iPad as well. The application is available completely free for mac users and hence, many prefer it over QuickTime Player for editing videos. You can quickly trim your videos as well as rotate and crop your videos as per your requirements. You can enhance your video with effects and filters available. Here are the pros and cons of iMovie you should be aware of.
Pros:-
- Intuitive user interface for easy operation.
- Quick edits to make a raw video presentable.
- Supports 4K video editing without crashing.
- Add different graphical elements for engaging videos.
- Different types of effects and filters for video enhancement.
- Easy sharing options across devices and online platforms.
- Work on multiple video projects simultaneously.
Cons:-
- Editing MP4 video is complicated.
- Lacks advanced editing features.
4. Media Cope
Best for: Multiple video using needs
G2 rating: 4.0/5
Price: Free
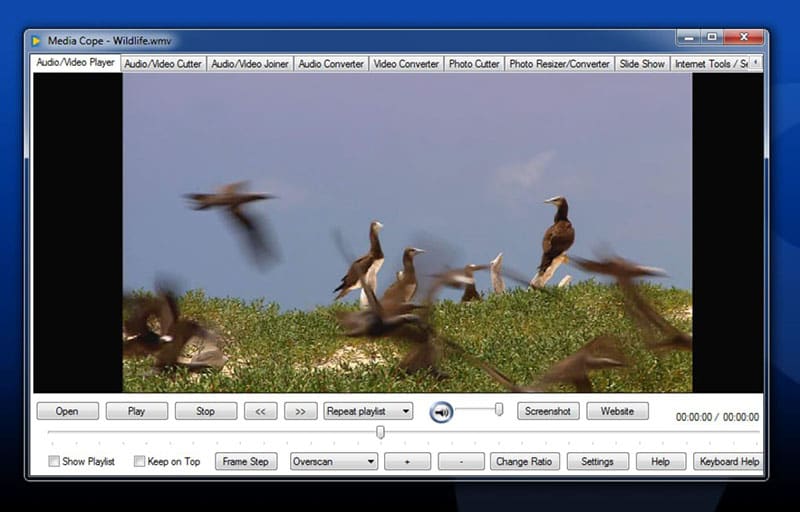
Media Cope is a freeware video trimmer for Windows users only. It is a basic video editor with standard editing options. The software is best suited for those who have older Windows versions such as Windows 7. The lightweight application can act as an audio and video player. You can easily trim your video and extract import parts as well. You can also join audio and video files and convert them into desired file formats. Here are the pros and cons of Media Cope.
Pros:-
- Can play audio and video files of different formats.
- Instantly trim and cut video and audio files.
- Can join audio and video clips and save in desired file format.
- Can convert audio and video files as per requirements.
- Transform photos into slideshow instantly.
- Resize photos and take screenshots from videos.
- Modify different video parameters and export the file.
Cons:-
- Lack of various standard video editing options.
- Looks outdated for modern Windows OS.
5. OpenShot
Best for: Open source software lovers
G2 rating: 4.4/5
Price: Free

If you are looking for a video editor that is compatible with all desktop operating system, OpenShot is the best choice for you. It is a completely free, open-source video editor for Windows, Mac and even Linux users. In this list of video editors for beginners, this is the best in terms of features and functionalities. You can trim and slice video, add animations, insert different layers and video effects to enhance the video content. The user interface is rather intuitive in spite of having all the different options you look for in a video editor. Here are the pros and cons of OpenShot video editor.
Pros:-
- Simple but powerful user interface.
- Trim video instantly without different options.
- Add 3D titles, 3D animations, and slow motion effects.
- Loads of video and audio effects present to apply.
- Add different layers of videos, audio tracks, and images.
- Advanced option for keyframing and time mapping.
- Multi-lingual support and frequent updates for new features.
Cons:-
- Unstable performance for large video files.
- The hardware acceleration is not very powerful.
# For Advanced Users
If you are a regular video creator and you want your videos to stand out, this category is for you. You can edit and trim your videos exactly the way you want. Besides, you can transform your raw videos into professional-quality videos with the following video editors.
1. Filmora
Best for: Rich videos effects and templates
G2 rating: 4.4/5
Price: $49.99

Wondershare Filmora is an outstanding video editor where you can trim your video and audio files like a professional. Since you are an advanced user, you will need more than just trimming to make your raw video look stunning. Filmora offers you all the tools and features you will ever need to take your video to the next level.
Compared to other popular premium video editors, Filmora does not need heavy CPU resource and it has an intuitive user interface. That is why video creators especially YouTubers and Vloggers prefer it for editing their videos regularly. The software is available for both Windows and Mac users. Here are the pros and cons of Filmora that you should be aware of.
For Win 7 or later (64-bit)
For macOS 10.12 or later
Pros:-
- Record screen and webcam video with audio sources.
- Basic tools for trimming, splitting, and joining video files.
- Customize different video settings and parameters.
- Add video and audio effects and graphical elements.
- Wide range of stock library of media files and animations.
- Add multiple layers and work with multiple channels while editing.
- Export the recorded or edited video file in different file formats.
Cons:-
- Saving the edited video takes time due to processing part.
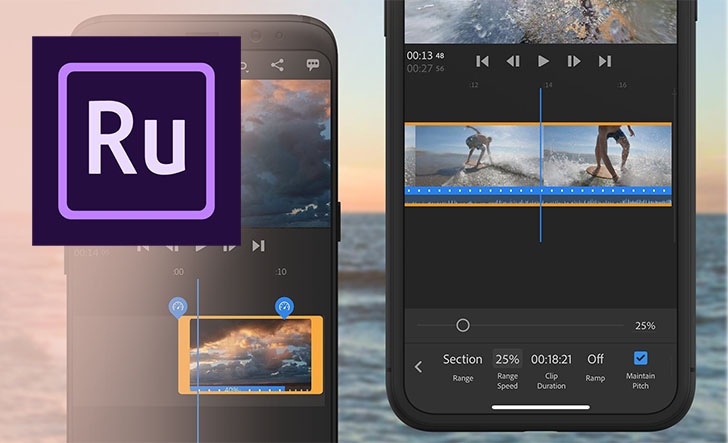
2. Adobe Premiere Pro
Best for: Professional video trim, edit and after effects
G2 rating: 4.5/5
Price: $20.99/month

Adobe Premiere Pro is the most powerful video editor and that is why even professional video editors use it for editing movies. There is hardly any video file format that Premiere does not support. You can edit multiple videos at the same time and switch between scenes and clips. Trimming video and audio files is swift with intuitive controls. There is also option for non-linear video editing for advanced users.
Since it is extremely popular in the videography world, there are many organizational tools available for editing large video projects and integrated workflow. The software supports VR video, 3D video, and multicam video editing. The software is available for Windows as well as Mac users. Here are the pros and cons of Adobe Premiere Pro.
Pros:-
- Customizable layouts for reorganizing user interface.
- Quick trimming and playback option without rendering.
- Supports a wide range of file formats for import and export.
- All the different tools for professional video and audio editing.
- Can work on and render multiple video files easily.
- Cross-app functionality with amazing stabilization features.
Cons:-
- The learning curve is rather steep and takes a lot of time.
- The software is only suitable for high-end computers.
3. Final Cut Pro
Best for: Advanced organizing tools of any professional video editing
G2 rating: 4.4/5
Price: $299

Final Cut Pro is equally popular in the videography world as Adobe Premiere Pro. Final Cut Pro is primarily for Mac users as it is developed by Apple. This is the most powerful video editor for Mac users as it is packed with loads of features for professional video editing. Trimming videos is as easy as it gets, along with other standard editing options.
The software supports editing multicam videos, VR videos, 3D videos as well as 360 degree videos. There are endless presets and effects available that you can apply on your video while editing. You can easily edit 4K videos without performance lag. In fact, Final Cut Pro shines where other video editors fail to perform with high resolution and large video files. Here are the pros and cons of Final Cut Pro.
Pros:-
- Trimming, cutting, splitting and joining videos are easy.
- Seamless video editing with standard and advanced tools.
- Different motion graphics templates available.
- Supports external plug-ins and VR headset playback.
- Proper video files and assets organizing and audio editing options.
- Relatively quick rendering of large video files.
Cons:-
- May take time to get used to all the available options.
- Relatively expensive in comparison to peers.
4. Movavi Video Editor
Best for: People who love more brilliant effects in videos
G2 rating: 4.8/5
Price: $74.95

Movavi Video Editor is a premium software for trimming and editing videos. It is available for both Windows and Mac users. There is a free version available but it puts a watermark on the output video. Apart from trimming and splitting videos, you can add various video effects starting from adding titles and transitions to stickers and elements. Besides, you can opt for greenscreen effect and edit videos in vertical mode. Here are the pros and cons of Movavi Video Editor you should be aware of.
Pros:-
- Integrated video capturing options from different sources.
- Instant trimming, splitting, and joining of videos.
- Loads of titles, filters and transitions present.
- Add video PiP layers as well as voiceover.
- Vertical video editing mode present.
- Video stabilization mode and Chroma key.
- Keyframing, slow motion and motion tracking.
Cons:-
- The rendering is not very fast.
- Lack of color tuning options.
5. Bandicut
Best for: Trim, join and split video with fast speed
G2 rating: 4.0/5
Price: $44.96
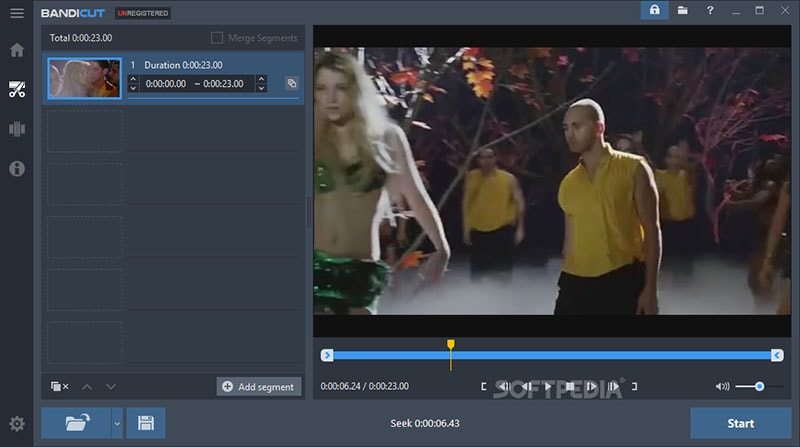
Bandicut from Bandicam is a dedicated video trimmer for Windows users. It is a premium application with a one-time purchase fee. The software ensures lossless video trimming, and you can trim video instantly thanks to its intuitive user interface. It is a versatile application that you can use to extract audio from a video as well as joining multiple video files. Splitting a large video file into multiple files is super easy. However, it is not a full-fledged video editor like Filmora or Premiere. Therefore, if your objective is specifically to trim, split, and join videos, this is the one for you. Here are the pros and cons of Bandicut.
Pros:-
- Trim and split videos instantly
- Super intuitive user interface.
- Cut segments from videos.
- Join multiple videos quickly.
- Supports different file formats.
- No loss of video quality during editing.
- Hardware acceleration for high performance.
Cons:-
- Very limited editing features.
6. VSDC
Best for: Movie level video cut with light professional skills
G2 rating: 4.0/5
Price: $19.99

VSDC is a free video editor with all the basic editing tools available. VSDC Pro is a premium video editor where advanced features are available. For trimming a video, VSDC free video editor can get the job done. Even though it is completely free, some features are comparable to many premium video editors. For example, you get access to a large set of filters, effects, and transitions that you can apply to your videos. Even when you have a low-end PC, you can do basic video editing works comfortably. Here are all the pros and cons of VSDC free video editor you should know.
Pros:-
- Instant trimming and basic editing of videos.
- Wide range of effects and filters as well as Chroma key.
- Color correction option and non-linear editing available.
- Supports editing 360 degree videos and split-screen videos.
- Supports different video and audio file formats.
- Lightweight and suitable for low-end computers.
Cons:-
- Lacks standard audio editing options.
- Lacks hotkeys and useful keyboard shortcuts.
7. Camtasia
Best for: Tutorial video recording and editing
G2 rating: 4.6/5
Price: $224.99

Camtasia by TechSmith is a premium video editor for Windows and Mac users. Even though it is more popular as a video editor, you can trim your videos easily on the software. You can record anything on your screen as well as external webcam. You can edit recorded video as well as import external video files for quick editing. The software offers easy share instant through which you can share on popular video streaming platforms. There are various templates and themes available to create and edit videos of different categories. Here are the pros and cons of Camtasia.
Pros:-
- Quick trimming, splitting, joining video options.
- Different templates and packages for versatile video creation.
- Various transitions, annotations, and presets present.
- PowerPoint integration, screen and web cam capture.
- Different cursor and audio effects with royalty-free assets.
- Import different media files and upload directly on video streaming platforms.
Cons:-
- Reports of crashes when working with large files.
- No keyframe and motion tracking.
- Very few customization options.
Part 3 Video Trimmers for Mobile
In today’s world, the cameras of smartphones are extremely powerful, and there are many who shoot videos with phone cameras instead of a dedicated digital camera. For example, there are many popular vloggers who shoot their videos with phone cameras, and video creators make short videos with phone cameras. When you shoot a video on your phone, you must be looking for a video trimmer app for your phone so that you can trim the recorded video instantly and share across social media and video streaming platforms. Here is the list of the best video trimmers for mobile.
# For Beginner Users
1. VidTrim Pro
Best for: Android video trimming, merging, frame grabbing
Rating: 4.1/5
Download Link: https://play.google.com/store/apps/details?id=com.goseet.VidTrimPro&hl=en\_US&gl=US
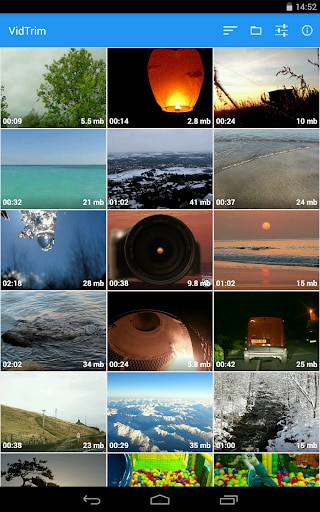
VidTrim is a dedicated video trimmer available for Android users. The free version adds a watermark to the output video, and hence, you have to opt for VidTrim Pro to avoid all limitations. Apart from trimming videos, you can merge videos and convert videos into audio files. You can also add effects and music tracks to your videos. The user interface is as simple as it gets. Here are the pros and cons of VidTrim Pro app.
Pros:-
- Trim videos as well as merge video clips.
- Convert supported video files into Mp3 audio files.
- Rotate videos as well as save screenshots from videos.
- Add cool video effects, sound effects, and soundtracks.
- Multi-lingual support and video file format converter.
Cons:-
- Limited video editing features for a paid video editor app.
- The user interface is simple but outdated.
2. KineMaster
Best for: Video content downloadable
Rating: 4.2/5
Download Link: https://play.google.com/store/apps/details?id=com.nexstreaming.app.kinemasterfree&hl=en\_US&gl=US

You must have seen many videos online with the watermark “Made with Kinemaster”. This is because KineMaster is very popular among amateur video creators. KineMaster is available for Android as well as iOS users. You can instantly trim and crop videos. Besides, you can add special effects, animations and stickers as well as tweak different video settings for enhancements. KineMaster is available free of cost but it attaches a watermark to the output video at one corner. You can subscribe to KineMaster Premium to remove watermark and unlock more features. Here are the pros and cons of KineMaster.
Pros:-
- Trim, cut, slice, and crop videos instantly.
- Add music, sound effects as well as voiceover.
- Provides amazing visual effects and animations.
- Adjust color filters, modes and video speed.
- Supports keyframing and motion tracking.
- Save 4K videos and share instantly online.
Cons:-
- KineMaster chroma key feature has bugs.
- Can crash or freeze handling large video files.
3. Quik
Best for: Producing cinematic auto-edits.
Rating: 4.3/5
Download Link: https://play.google.com/store/apps/details?id=com.gopro.smarty&hl=en\_US&gl=US
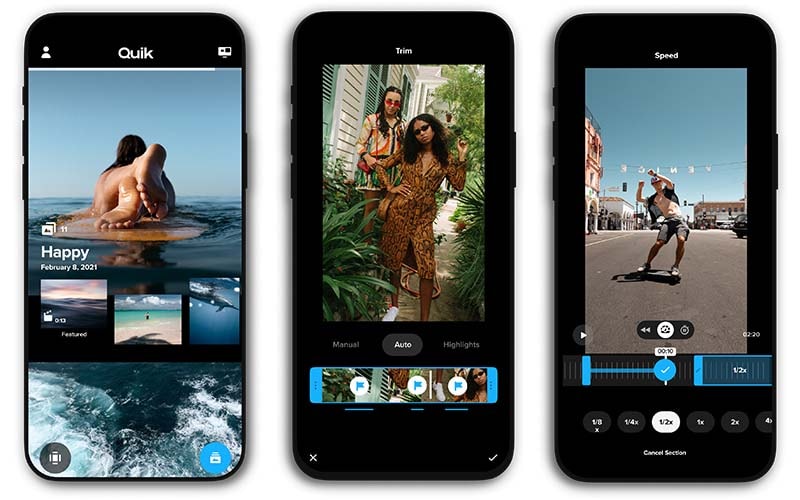
Quick from GoPro is fast becoming a popular video editor app. GoPro is the most popular action camera brand and naturally, its video editing app has garnered enough attention. The app is available for Android and iOS users. The app has a mixed bag of options for editing videos quickly. You can trim your videos, add filters and adjust video speed. Besides, its AI can locate the best shots in a video and enhance them with special effects. Here are the pros and cons of Quick app.
Pros:-
- Trim, crop, adjust speed, remove audio from videos.
- Different preset templates available with effects and filters.
- Add music, titles, effects, and transitions.
- Easy sharing of videos and photos.
- Powerful AI to highlight the best shots in a video.
- Adjust video orientation, save in 1080p resolution.
Cons:-
- Not suitable for large video files.
- No font adjustment options.
4. iMovie
Best for: Create Hollywood-style trailers and beautiful movies
Rating: 4.0/5
Download Link: https://apps.apple.com/us/app/imovie/id377298193
iMovie app by Apple is exclusively available for iOS users. iMovie is also available as a software which we have already discussed. In terms of features, iMovie app is very similar to iMovie software. You can instantly make basic editing works. Apart from editing, the app is ideal for creating different types of videos with ready-made templates. There are loads of graphical effects, animated titles, and video filters available to apply. Here are the pros and cons of iMovie app for you.
Pros:-
- Record, trim, split, join and crop videos on the go.
- Choose from different themes and templates to create videos.
- Animated titles, video filters, graphical effects available.
- Chroma key, PiP mode as well as split screen effect possible.
- Add sound effects, music, and depth of field effect.
- Optimized output for social media and video streaming platforms.
- Supports 4K video editing and easy share across Apple devices.
Cons:-
- Limited resources and customization options.
- The app size is large and uses high CPU resources.
# For Advanced Users
1. LumaFusion
Best for: Professional video trimming for iOS devices
Rating: 4.8/5
Download Link: https://apps.apple.com/us/app/lumafusion/id1062022008

LumaFusion is a top-rated video editor for iPad and iPhone. The app is as good as a premium video editor for desktop users. Therefore, professional video creators who use iPhone or iPad for video editing prefer LumaFusion all the time. You can trim, cut, crop, split, and merge videos intuitively from its timeline. Most importantly, you can edit multiple video and audio files together like a professional. Here are the pros and cons of LumaFusion.
Pros:-
- Trim and export video in different file formats.
- Work with multiple video and audio files.
- Preset transitions, instant preview, markers for timeline.
- Add Chroma and Luma key effects as well as stunning visual effects.
- Adjust speed, audio, use keyframes, correct colors.
- Work with titles, fonts, borders, and share conveniently.
- Wide range of media files available in the library.
Cons:-
- Does not support motion tracking.
- Can be difficult to edit large files.
2. Adobe Premiere Rush
Best for: Shoot, edit, and share online videos anywhere.
Rating: 3.0/5
Download Link: https://play.google.com/store/apps/details?id=com.adobe.premiererush.videoeditor&hl=en\_US&gl=US
Even though Adobe Premium Rush app is available or Android and iOS users, it is more popular among iPhone and iPad users. The app is free though there are in-app purchases available. Rush Premium has more features and functionalities. Editing any video is quite convenient though Adobe has tried its level best to offer all the possible features of Adobe Premium Pro desktop software on the app. The app supports multitrack timeline for professional videos. Here are all the pros and cons of Adobe Premiere Rush you should be aware of.
Pros:-
- Record video in high-resolution with the app.
- Trim, crop, mirror, and flip videos.
- Add images, overlays, texts, and stickers.
- Pan and zoom effect, animation titles.
- Royalty-free audio tracks, color correction options.
- Easy exporting of files in different formats.
Cons:-
- Rendering projects can be slow.
- Comes with limited features.
3. Filmmaker Pro Video Editor
Best for: 4K quality video editing
Rating: 4.6/5
Download Link: https://apps.apple.com/us/app/filmmaker-pro-video-editor/id1082956994
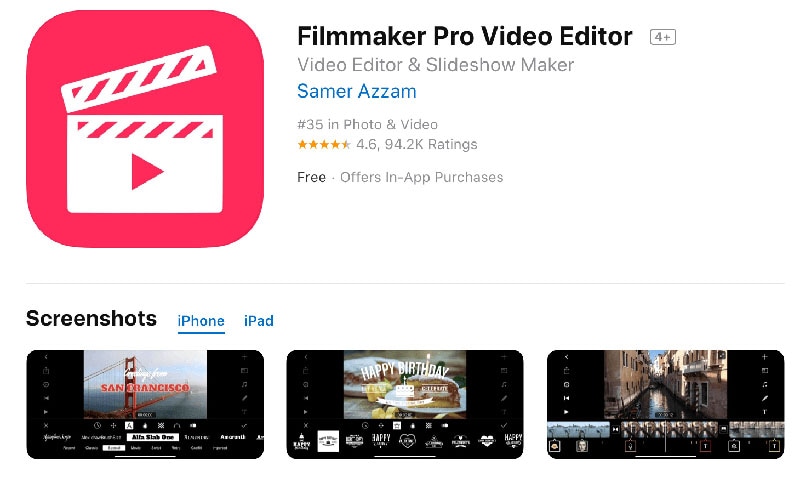
Filmmaker Pro is a highly rated video editor that you can use to trim your videos. Filmmaker Pro app is available for both Android and iOS. The app supports 4K video for editing works. The timeline has color codes for different assets and hence, editing becomes easy. You can edit different video parameters and settings and add different effects. The auto save option is extremely useful when it comes to editing a large file. Even though it is available for free, they have a subscription plan for unlocking all features. Here are the pros and cons of Filmmaker Pro Video Editor.
Pros:-
- Trim, split, crop and rotate videos.
- Adjust video speed, volume, video grading.
- Chroma key, voice to text caption, keyframe and motion tracking.
- Different Picture-in-Picture mode for videos, photos, and GIFs.
- Various transition effects, audio effects, and text overlays.
- Different drawing tools, stickers, and graphical elements present.
Cons:-
- The free version has limited features.
- The number of effects are relatively less.
4. Splice Video Editor and Maker
Best for: Vloggers and social platform video cutting
Rating: 4.7/5
Download Link: https://play.google.com/store/apps/details?id=com.splice.video.editor&hl=en\_US&gl=US
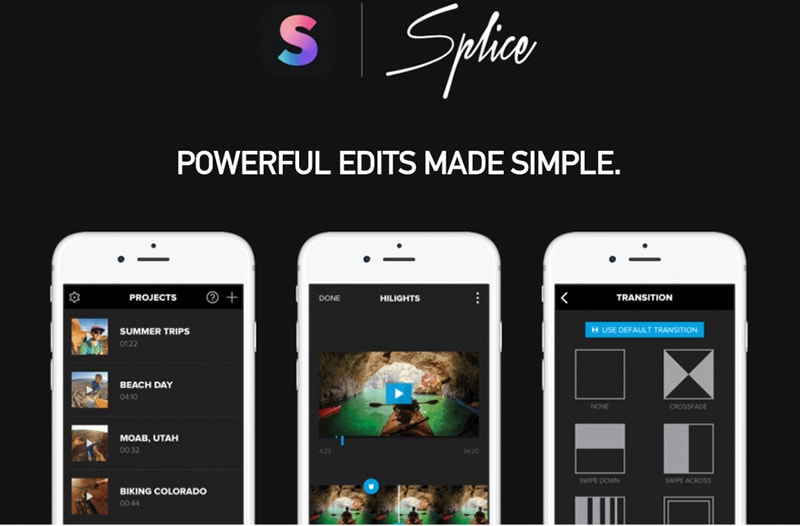
Splice Video Editor and Maker is a free but powerful app that enables you to do pro-level editing. You can trim your video clips, adjust speed, and add music on the go. In fact, you can create videos and slideshows instantly and you can add texts and overlays. The music library has different categories of tracks to apply to videos. You can also merge videos as well as change aspect ratio according. The app is available for Android and iOS users. Here are all the pros and cons of Splice Video Editor and Marker.
Pros:-
- Easy interface for smooth trimming and merging of videos.
- Adjust speed, aspect ratio, and video parameters.
- Organize clips and tracks in the timeline intuitively.
- Add custom texts, titles, tracks, transitions, and effects.
- Comes with a wide stock library of media files.
- Direct uploading video files on different social media platforms.
Cons:-
- Limited effects and filters available.
- Frequent crashes while handling large files.
5. Funimate
Best for: Mobile game video trim to show off gaming skills
Rating: 4.5/5
Download Link: https://play.google.com/store/apps/details?id=com.avcrbt.funimate&hl=en\_US&gl=US
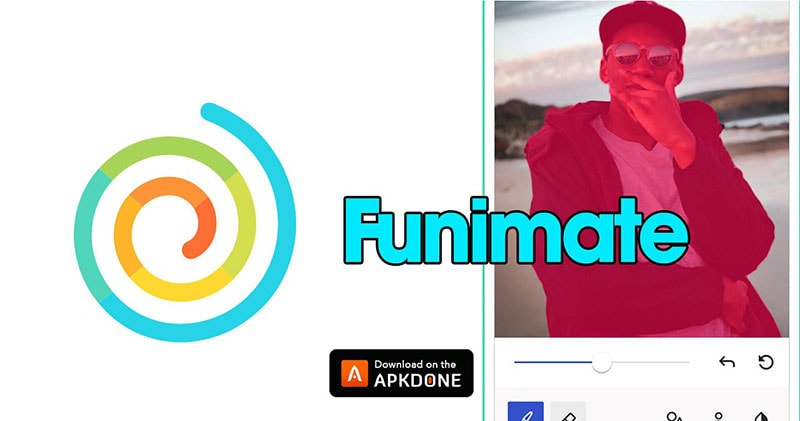
Funimate video editor and maker app is quite highly rated on both Play Store and App Store. It is a very powerful and feature-rich app where you will get all the desired editing tools to publish a professional-quality video. Starting from element library to video masks and AI effects, the app takes your video to the next level. You can obviously perform the basic editing works like trimming, splitting and joining. Here are the pros and cons of Funimate app.
Pros:-
- Trimming, merging, and cutting videos.
- Text effects, video AI effects, and effect mixer.
- Comes with over 100 advanced video effects.
- Allows adding music to videos for engaging videos.
- Supports slow motion and looping videos.
- Advanced keyframing and element library.
- Allows creating a professional photo slideshow.
Cons:-
- No multilingual support and auto-save feature.
- Some lagging issues have been reported.
Part 4 Online Video Trimmers
If you are using a video editor on your computer, it takes considerable amount of space in your storage. The same is applicable to video editors for smartphones. If you do not want to install any app on your device yet trim videos conveniently, the online video trimmers are for you. You can open the video trimmer directly from your web browser and trim your video and save it without installing any application on your device. Here is the list of the best online video trimmers.
# For Beginner Users
1. https://online-video-cutter.com/
Best for: Trimming large videos files.
Ratings: 4.2/5
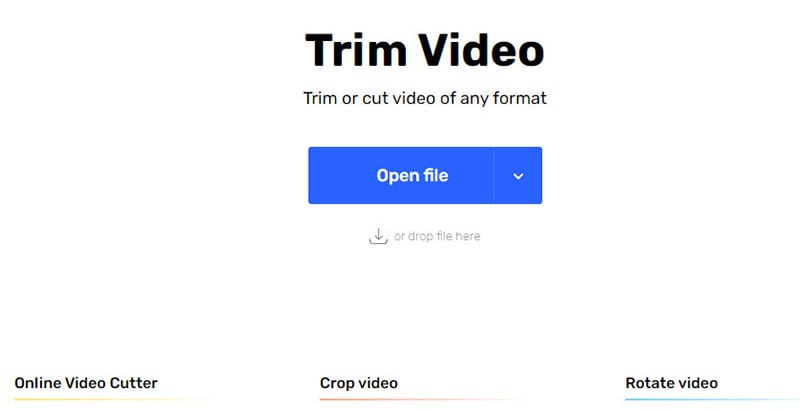
Online Video Cutter is a dedicated video trimmer where you need to drag and drop your video file and cut out the required portion. You can even crop and rotate your videos if there is any such requirement. You can access the online platform directly from your web browser. There is no need for installation of any web launcher. The platform is also secured and hence, your videos won’t get leaked. There is also a Chrome extension available that you can use if you are a Chrome user. Here are the pros and cons of Online Video Cutter.
Pros:-
- Easy video trimming by drag-and-drop files.
- Enables uploading different file formats.
- Rotate feature for saving in portrait and landscape mode.
- Automatically deletes files for better security.
- Crop feature for changing frame size.
- Can edit video file of 4GB capacity.
Cons:-
- May reduce the video quality for the editing video.
2. https://clideo.com/cut-video
Best for: Trimming short videos.
Ratings: 4.5/5
This is another online video trimmer that supports different video file formats. The user interface is sleek for quick video trimming. You can upload file from your device as well as from Cloud storage. In fact, you can use the platform to convert video files. The level of trust and security is high and there are additional settings available for better editing. Here are the pros and cons Clideo Video Cutter.
Pros:-
- Intuitive interface for quick trimming.
- Supports different file formats.
- Converts videos into different formats.
- Offers high-level online security.
- Add fade in and fade out effects.
- Upload video files from Google Drive and Dropbox.
Cons:-
- No drag and drop feature.
- File size is limited to 500 MB only.
3. https://www.kapwing.com/tools/trim-video
Best for: Editing video elaborately.
Ratings: 4.4/5
Kapwing is a dedicated online video editor that will give you the vibe of using a desktop video editor. Therefore, it is suitable for those who are looking for an online platform for trimming as well as various other editing works. You can add texts, images, elements, audio, transitions, as well as record videos. You can also export in different file formats. However, the free version attaches a watermark. Therefore, you have to upgrade to its premium version and use the platform is a full-fledged video editor. Here are the pros and cons of Kapwing.
Pros:-
- Trim, crop, zoom videos and adjust video parameters.
- Supports import and export of different file formats.
- Add effects, audio, and elements to the videos.
- You can work with multiple layers while editing.
- Different sound effects, templates, and scenes and emojis present.
- Stunning user interface that looks like a video editor software.
Cons:-
- Free version attaches watermark and lowers video quality.
4. https://www.freeconvert.com/video-trimmer
Best for: Basic video trimming
Ratings: 4.0/5
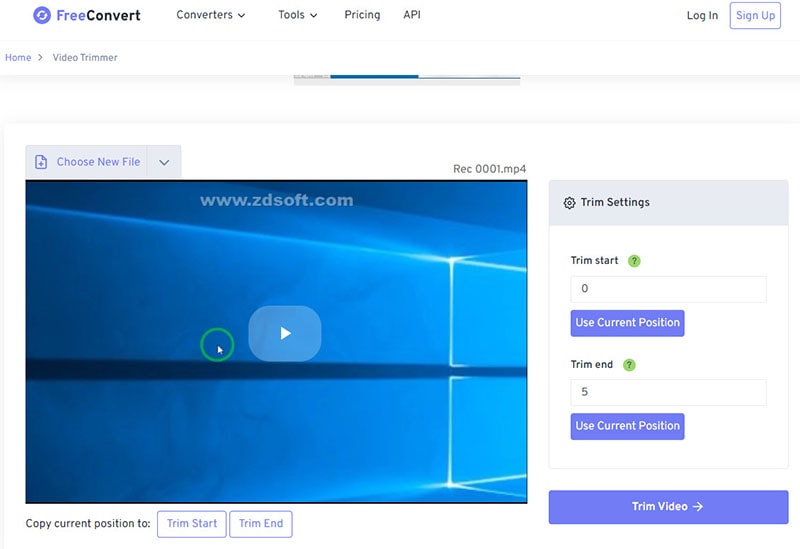
FreeConvert Video Trimmer is a free online tool through which you can trim videos of size up to 1GB easily. The platform supports as many as 40 different video file formats. Therefore, you can trim almost any video file easily. The security is tightened so that the uploaded videos do not get leaked. You can upload video files from your device, Google Drive, Dropbox as well as from URL. Therefore, if you want to trim videos that are available online, you can do it easily with this tool. Here are the pros and cons of FreeConvert Video Trimmer.
Pros:-
- Easy to use, intuitive interface.
- Does not require any registration.
- Supports over 40 file formats.
- Compatible with multiple browsers.
- 256-bit SSL encryption offers better security.
- Allows adjustment of parameters before conversion.
Cons:-
- There are too many annoying ads.
# For Advanced Users
5. https://www.veed.io/tools/video-cutter
Best for: Trimming videos for social media platforms.
Ratings: 4.3/5
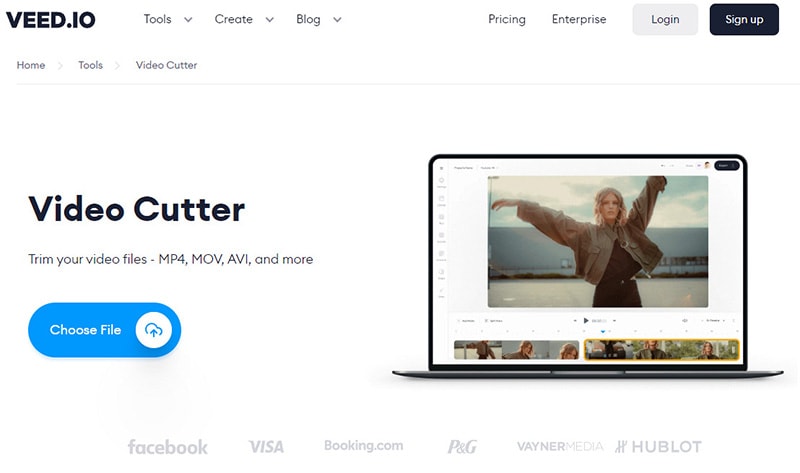
Veed.io has a wide collection of tools for video editing and the video cutter is a dedicated video trimmer. You can trim videos of popular file formats easily. Apart from video files, the platform supports trimming GIFs and audio files. You can upload videos as well as mention URL of videos that are present online for trimming. The online tool does not degrade the video quality and the output file is of high-quality as well. Here are the pros and cons of Veed.io video cutter.
Pros:-
- Allows saving the video in a high-quality format.
- Supports cutting a wide range of audio file formats.
- Ability to upload and cut animated GIFs.
- Allows cutting YouTube videos directly using URL.
- Easy drag and drop feature for saving time.
- “Split” option for removing the middle part of the video.
Cons:-
- Not suitable for trimming large video files.
6. https://www.fastreel.com/video-cutter.html
Best for: Trimming videos for personal use.
Ratings: 4.2/5
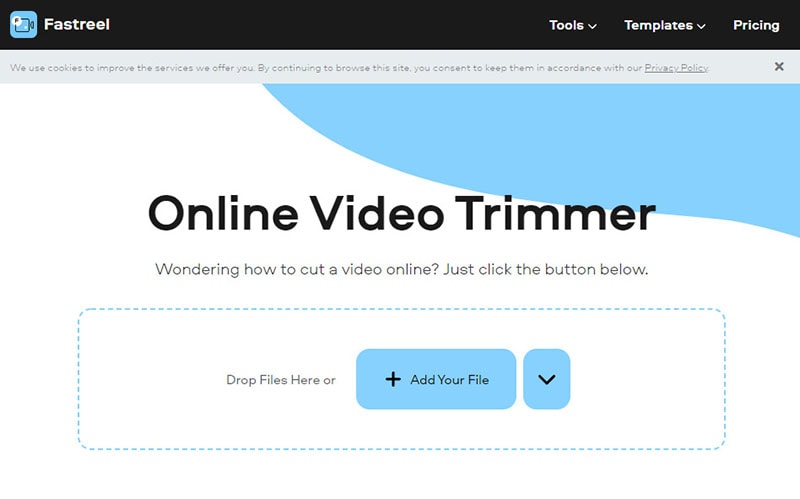
Fastreel online video trimmer lets you trim your videos with a few clicks. Drop your file and mark the points for trimming and there you go. That tool is also useful if you want to split your video. There are several video file formats that the platform supports. The user interface is intuitive and the trimming can be precise. The free version attaches a watermark and hence, the premium version is what you should have. Here are the pros and cons of Fastreel online video trimmer.
Pros:-
- Simple interface for hassle-free trimming.
- Supports different video file formats.
- Feature of data security offers better safety.
- Quick video trimming without using the editor.
- Different file formats while saving the video.
- Precision cutting for removing unwanted segments.
Cons:-
- The free version comes with watermark.
- Free version lowers the video quality.
7. https://flixier.com/tools/video-trimmer
Best for: editing videos as a teamwork
Ratings: 4.4/5

Flixier Video Trimmer is a premium tool to trim and crop videos instantly. The tool is available in a free version but there are many limitations. Therefore, you need to have a premium version of Flixier Video Trimmer. You can export videos in 1080p and 4K resolution. You can opt for transcribing your videos and store videos in the cloud. In the premium version, two team members can work together. Here are the pros and cons of Flixier Video Trimmer.
Pros:-
- Upload videos from YouTube, Twitch, and cloud platforms.
- No need to create account for instant trimming.
- Trim, crop, cut, and add images to videos.
- Supports multiple file formats.
- Comes with an easy collaborative platform.
- Additional translation and transcribe options.
Cons:-
- There are lots of limitations of premium plans as well.
- Only the highest premium plan supports 4K resolution.
8. https://www.wevideo.com/features/video-cutter
Best for: Best premium online video editor
Ratings: 4.5/5
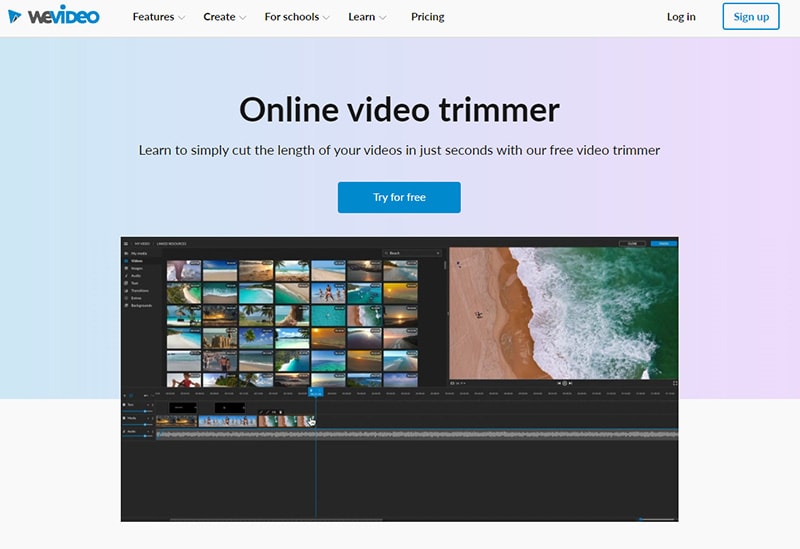
WeVideo Video Cutter is a paid video trimmer though you try out the platform for free. The platform supports a wide range of video files. You can drag and drop files and trim videos instantly. Trimming cannot get any easier and the processing speed of the editing video is fast. You can finish trimming your videos in a few seconds. There is a unique zoom feature to trim out videos accurately. You can also add texts and music to your video file before exporting. Here are the pros and cons of WeVideo Video Cutter.
Pros:-
- Drag and drop feature for quick editing.
- Smooth and accurate trimming with zoom function.
- Music and motion titles library.
- Compatible with different web browsers.
- Export edited files in different file formats.
- There is no capping on file size as such.
Cons:-
- The pricing is on the steeper side.
Part 5 Editing Tips to Improve Your Videos
Apart from trimming, you have to edit different other aspects so that you can make the video engaging and eye-catching. Here are some editing tips you should stick to improve your video content.
Get The Best Video Editor - Editing a video is equally important as shooting a video. Once you have the best video editor, you can rest assured that your editing work is half done. This is because you have all the tools to turn your raw video into stunning video. You can experiment and come up with the best editing work to your own surprise.
Get The Length Correct - In today’s world, viewers have very less time to watch videos. Therefore, a lengthy and elaborative video is a bummer. Hence, you should trim the video and keep only the portions that are relevant, engaging, and not boring.
Start with a Bang - The first impression is always the most important, and hence, the intro of your video is extremely crucial to keep the attention of the audiences intact. To make the intro interesting, you should not only focus on the content but also on video effects and animations that are attention-grabbing.
Smooth Cuts and Soothing Colours - When you are cutting from one scene or angle to another, the transition should be smooth so that it does not feel abrupt. Therefore, you should cut scenes when the subjects and objects seem to be static so that the transition is smooth naturally. Play attention to colour and the video editors allow you to enhance the quality by adjusting the colors and picture properties.
Graphical Objects - Use graphical objects and animated texts wherever possible for better explanations. Things can get boring visually when you do not add graphical elements, transitions, and animations appropriately in different places. Similarly, the use of texts and titles makes the video more engaging. Instead of static texts, there are animated texts and titles available with stickers and memes that you can edit your video with.
Play Attention to Sound - Sound is the most neglected part of a video by amateur video creators when one should pay attention to it. The sound effects can keep the audiences hooked to your video and make them not get bored. Certain sound effects refresh the attention of the audiences when it starts to fade, and hence, you should place the sound effects wisely.
Proper Flow - The editing work should be smooth so that the flow of the video is smooth and efficient. It takes time, and hence, you can practice and learn video editing so that your video can stand out instantly after your editing touches. Besides, the editing should be such that the video feels like a story that audiences can invest in and get engaged throughout.
Part 6 How to Share Your Videos
In order to share videos after trimming them, you need to save the video properly. There are different file formats available for video files. For example, MP4 is the most popular video file format among Windows users. On the contrary, MOV is the most popular video file format. Different file formats have different features such as compression and lossless. According to the file format, the file size varies for the same duration of video.
Therefore, the video trimmer you are using must have different file formats for saving and exporting the editing video files. Some video trimmers have in-built features to share videos on social media platforms and upload on video streaming platforms like YouTube. Depending on your target audiences, you need to adjust the parameters like aspect ratio, video resolution, as well as duration. Besides, you can upload videos on cloud storage and share with anyone as per your requirements.
Part 7 Related FAQs about Video Trimming
1. What is the best video trimmer?
Wondershare Filmora is the best video trimmer as all the features are well-balanced. Apart from trimming, it has all the tools for professional-quality video editing. Filmora can also be used for recording videos. Trimming videos is as easy as it gets and you can export the edited video in different file formats.
2. How can I trim a video?
To trim a video, you will need a video trimmer. If you are a desktop user and you need to regularly edit videos, there are video trimmers available for beginners as well as advanced users. Similarly, there are video editor apps available for mobile users. If you need to trim just one video, you should use an online video trimmer.
3. How can I trim a large video?
In order to trim a large video file, you will need a professional video editor like Filmora so that there is no loss in video quality and frequent crashes and screen freezing incidents while trimming. Drag and drop the video file on Filmora’s timeline and trim the unnecessary parts. You can view the changes and export the file in desired file format.
4. What does trim mean in video editing?
Trimming a video means you are cutting off different portions of a video and reducing its length. Trimming is mostly done to remove unnecessary parts from a video so that the video becomes more engaging without any unnecessary fillers.
5. Can I trim a video in VLC?
Here are the steps to trim a video in VLC Media Player.
- Open VLC Player. Go to View> Advanced Controls. This will make the recording buttons appear.
- Open the video that you want to trim. Mark the portion that you want to keep in your video.
- Play the video and go to the point from where you want to keep the video. Click on Record button.
- Go to the point where you want to end the video. Click on Record button again. All other portions are trimmed and the edited video will be saved.
6. How to trim YouTube videos?
In order to trim YouTube videos, you need to download the videos on your device. You can use an online video trimmer where you can upload the files and trim the videos as per your requirements.
02 [Video Trimmer for PC and Mac](#Part 2)
03 [Video Trimmers for Mobile](#Part 3)
04 [Online Video Trimmers ](#Part 4)
05 [Editing Tips to Improve Your Videos](#Part 5)
06 [How to Share Your Videos](#Part 6)
07 [Related FAQs about Video Trimming](#Part 7)
Part 1 How to Make a Video before Trimming
Before coming to the trimming of a video section in detail, let us begin with how to make a video. You have two options when it comes to making a video. You can either record a video with recording software or you can shoot a video with your camera. Let us discuss both options in detail now.
-Record a video
You can record a video with recording software when you are capturing video from your webcam or from your computer screen. There are two options you have when it comes to choose a recording software.
- Premium Recorder - A premium recorder is a professional video recording software that you have to purchase to avail all the features and functionalities. Choose the best video recorder.
- Free Recorder - If you are not willing to spend any money on a recording software, there are plenty of free recording applications available. We recommend OBS Studio as the best free video recorder.
-Shoot a video
The second option is shooting a video with your external digital camera. You can also use your phone camera to shoot a video. For example, making vlogs, comedy skits, travel videos, or short films needs a digital camera. If you are using your phone camera, you can cut and crop the video after shooting using the video trimmer apps or online video trimmers. If you are shooting external with an external camera, you can transfer the video to your mobile or computer and use a preferred video trimmer for editing.
Part 2 Video Trimmer for PC and Mac
When it comes to editing and trimming a video, using a computer is the best option. This is because you have a wider screen to pay attention to the details of the video and trim out the unnecessary parts easily. Besides, editing a video requires CPU resources which are best served by a computer. We have divided the video trimmers for computers into two categories for user convenience. You can easily find video trimmers for Windows PC as well as for Mac.
# For Beginner Users
This category is perfect for those who do not have any experience in video editing and they are looking for a basic video trimmer to get the job done. Besides, if you need to trim videos once in a while, these are perfect for you. You can trim video free with the following video trimmers.
1. Windows Photos
Best for: Windows users with no editing skills
G2 rating: 4.0/5
Price: Free
If you are a Windows PC user and you are looking for a basic video trimming application, Windows Photos is right there for you. The application comes pre-installed on Windows PC and hence, there is no need to install any external application. Even though Windows Photos is primarily used for viewing photos, there is a dedicated video editor available where you can trim your recorded video easily. Apart from trimming videos, you can do some basic editing like adding title cards and text, video effects, background music, and filters. Here are the pros and cons of Windows Photos.
Pros:-
- Comes pre-installed in Windows.
- Super easy user interface to operate.
- Quick trimming and cutting out videos.
- Different motion transitions and effects present.
- Add titles, texts, and audio to video.
- AVarious filters and 3D effects available.
Cons:-
- Not suitable for trimming large videos.
- Lack of different file formats for saving the videos.
2. QuickTime Player
Best for: Mac users with basic trimming needs
G2 rating: 4.2/5
Price: Free
If you are a Mac user and you are looking for a free video editor for trimming your video, QuickTime Player is the best application for you. Just like Windows Photos for Windows users, QuickTime Player comes pre-installed for Mac users. In fact, it is the default media player for Mac users. Apart from playing media files, you can use QuickTime Player for video recording as well as editing the recorded video. This includes trimming videos and replaying on the application to reach the level of perfection easily. Here are the pros and cons of QuickTime Player you should be aware of.
Pros:-
- The user interface is super easy to operate.
- Trim, flip, split, and merge videos quickly.
- Option to record video with audio flawlessly.
- Instant preview of the edited video on QuickTime.
- QuickTime is compatible with iPhone and iPad.
- Advanced streaming options available in Pro version.
- Supports playing different video file formats.
Cons:-
- Some of the settings are complicated.
- It can crash while editing large video files.
3. iMovie
Best for: Playing and editing videos
G2 rating: 4.3/5
Price: Free
If you are a Mac user and you are looking for a dedicated video editor, iMovie is a great choice. iMovie also comes pre-install on Mac and it is compatible with iPhone and iPad as well. The application is available completely free for mac users and hence, many prefer it over QuickTime Player for editing videos. You can quickly trim your videos as well as rotate and crop your videos as per your requirements. You can enhance your video with effects and filters available. Here are the pros and cons of iMovie you should be aware of.
Pros:-
- Intuitive user interface for easy operation.
- Quick edits to make a raw video presentable.
- Supports 4K video editing without crashing.
- Add different graphical elements for engaging videos.
- Different types of effects and filters for video enhancement.
- Easy sharing options across devices and online platforms.
- Work on multiple video projects simultaneously.
Cons:-
- Editing MP4 video is complicated.
- Lacks advanced editing features.
4. Media Cope
Best for: Multiple video using needs
G2 rating: 4.0/5
Price: Free
Media Cope is a freeware video trimmer for Windows users only. It is a basic video editor with standard editing options. The software is best suited for those who have older Windows versions such as Windows 7. The lightweight application can act as an audio and video player. You can easily trim your video and extract import parts as well. You can also join audio and video files and convert them into desired file formats. Here are the pros and cons of Media Cope.
Pros:-
- Can play audio and video files of different formats.
- Instantly trim and cut video and audio files.
- Can join audio and video clips and save in desired file format.
- Can convert audio and video files as per requirements.
- Transform photos into slideshow instantly.
- Resize photos and take screenshots from videos.
- Modify different video parameters and export the file.
Cons:-
- Lack of various standard video editing options.
- Looks outdated for modern Windows OS.
5. OpenShot
Best for: Open source software lovers
G2 rating: 4.4/5
Price: Free
If you are looking for a video editor that is compatible with all desktop operating system, OpenShot is the best choice for you. It is a completely free, open-source video editor for Windows, Mac and even Linux users. In this list of video editors for beginners, this is the best in terms of features and functionalities. You can trim and slice video, add animations, insert different layers and video effects to enhance the video content. The user interface is rather intuitive in spite of having all the different options you look for in a video editor. Here are the pros and cons of OpenShot video editor.
Pros:-
- Simple but powerful user interface.
- Trim video instantly without different options.
- Add 3D titles, 3D animations, and slow motion effects.
- Loads of video and audio effects present to apply.
- Add different layers of videos, audio tracks, and images.
- Advanced option for keyframing and time mapping.
- Multi-lingual support and frequent updates for new features.
Cons:-
- Unstable performance for large video files.
- The hardware acceleration is not very powerful.
# For Advanced Users
If you are a regular video creator and you want your videos to stand out, this category is for you. You can edit and trim your videos exactly the way you want. Besides, you can transform your raw videos into professional-quality videos with the following video editors.
1. Filmora
Best for: Rich videos effects and templates
G2 rating: 4.4/5
Price: $49.99
Wondershare Filmora is an outstanding video editor where you can trim your video and audio files like a professional. Since you are an advanced user, you will need more than just trimming to make your raw video look stunning. Filmora offers you all the tools and features you will ever need to take your video to the next level.
Compared to other popular premium video editors, Filmora does not need heavy CPU resource and it has an intuitive user interface. That is why video creators especially YouTubers and Vloggers prefer it for editing their videos regularly. The software is available for both Windows and Mac users. Here are the pros and cons of Filmora that you should be aware of.
For Win 7 or later (64-bit)
For macOS 10.12 or later
Pros:-
- Record screen and webcam video with audio sources.
- Basic tools for trimming, splitting, and joining video files.
- Customize different video settings and parameters.
- Add video and audio effects and graphical elements.
- Wide range of stock library of media files and animations.
- Add multiple layers and work with multiple channels while editing.
- Export the recorded or edited video file in different file formats.
Cons:-
- Saving the edited video takes time due to processing part.
2. Adobe Premiere Pro
Best for: Professional video trim, edit and after effects
G2 rating: 4.5/5
Price: $20.99/month
Adobe Premiere Pro is the most powerful video editor and that is why even professional video editors use it for editing movies. There is hardly any video file format that Premiere does not support. You can edit multiple videos at the same time and switch between scenes and clips. Trimming video and audio files is swift with intuitive controls. There is also option for non-linear video editing for advanced users.
Since it is extremely popular in the videography world, there are many organizational tools available for editing large video projects and integrated workflow. The software supports VR video, 3D video, and multicam video editing. The software is available for Windows as well as Mac users. Here are the pros and cons of Adobe Premiere Pro.
Pros:-
- Customizable layouts for reorganizing user interface.
- Quick trimming and playback option without rendering.
- Supports a wide range of file formats for import and export.
- All the different tools for professional video and audio editing.
- Can work on and render multiple video files easily.
- Cross-app functionality with amazing stabilization features.
Cons:-
- The learning curve is rather steep and takes a lot of time.
- The software is only suitable for high-end computers.
3. Final Cut Pro
Best for: Advanced organizing tools of any professional video editing
G2 rating: 4.4/5
Price: $299
Final Cut Pro is equally popular in the videography world as Adobe Premiere Pro. Final Cut Pro is primarily for Mac users as it is developed by Apple. This is the most powerful video editor for Mac users as it is packed with loads of features for professional video editing. Trimming videos is as easy as it gets, along with other standard editing options.
The software supports editing multicam videos, VR videos, 3D videos as well as 360 degree videos. There are endless presets and effects available that you can apply on your video while editing. You can easily edit 4K videos without performance lag. In fact, Final Cut Pro shines where other video editors fail to perform with high resolution and large video files. Here are the pros and cons of Final Cut Pro.
Pros:-
- Trimming, cutting, splitting and joining videos are easy.
- Seamless video editing with standard and advanced tools.
- Different motion graphics templates available.
- Supports external plug-ins and VR headset playback.
- Proper video files and assets organizing and audio editing options.
- Relatively quick rendering of large video files.
Cons:-
- May take time to get used to all the available options.
- Relatively expensive in comparison to peers.
4. Movavi Video Editor
Best for: People who love more brilliant effects in videos
G2 rating: 4.8/5
Price: $74.95
Movavi Video Editor is a premium software for trimming and editing videos. It is available for both Windows and Mac users. There is a free version available but it puts a watermark on the output video. Apart from trimming and splitting videos, you can add various video effects starting from adding titles and transitions to stickers and elements. Besides, you can opt for greenscreen effect and edit videos in vertical mode. Here are the pros and cons of Movavi Video Editor you should be aware of.
Pros:-
- Integrated video capturing options from different sources.
- Instant trimming, splitting, and joining of videos.
- Loads of titles, filters and transitions present.
- Add video PiP layers as well as voiceover.
- Vertical video editing mode present.
- Video stabilization mode and Chroma key.
- Keyframing, slow motion and motion tracking.
Cons:-
- The rendering is not very fast.
- Lack of color tuning options.
5. Bandicut
Best for: Trim, join and split video with fast speed
G2 rating: 4.0/5
Price: $44.96
Bandicut from Bandicam is a dedicated video trimmer for Windows users. It is a premium application with a one-time purchase fee. The software ensures lossless video trimming, and you can trim video instantly thanks to its intuitive user interface. It is a versatile application that you can use to extract audio from a video as well as joining multiple video files. Splitting a large video file into multiple files is super easy. However, it is not a full-fledged video editor like Filmora or Premiere. Therefore, if your objective is specifically to trim, split, and join videos, this is the one for you. Here are the pros and cons of Bandicut.
Pros:-
- Trim and split videos instantly
- Super intuitive user interface.
- Cut segments from videos.
- Join multiple videos quickly.
- Supports different file formats.
- No loss of video quality during editing.
- Hardware acceleration for high performance.
Cons:-
- Very limited editing features.
6. VSDC
Best for: Movie level video cut with light professional skills
G2 rating: 4.0/5
Price: $19.99
VSDC is a free video editor with all the basic editing tools available. VSDC Pro is a premium video editor where advanced features are available. For trimming a video, VSDC free video editor can get the job done. Even though it is completely free, some features are comparable to many premium video editors. For example, you get access to a large set of filters, effects, and transitions that you can apply to your videos. Even when you have a low-end PC, you can do basic video editing works comfortably. Here are all the pros and cons of VSDC free video editor you should know.
Pros:-
- Instant trimming and basic editing of videos.
- Wide range of effects and filters as well as Chroma key.
- Color correction option and non-linear editing available.
- Supports editing 360 degree videos and split-screen videos.
- Supports different video and audio file formats.
- Lightweight and suitable for low-end computers.
Cons:-
- Lacks standard audio editing options.
- Lacks hotkeys and useful keyboard shortcuts.
7. Camtasia
Best for: Tutorial video recording and editing
G2 rating: 4.6/5
Price: $224.99
Camtasia by TechSmith is a premium video editor for Windows and Mac users. Even though it is more popular as a video editor, you can trim your videos easily on the software. You can record anything on your screen as well as external webcam. You can edit recorded video as well as import external video files for quick editing. The software offers easy share instant through which you can share on popular video streaming platforms. There are various templates and themes available to create and edit videos of different categories. Here are the pros and cons of Camtasia.
Pros:-
- Quick trimming, splitting, joining video options.
- Different templates and packages for versatile video creation.
- Various transitions, annotations, and presets present.
- PowerPoint integration, screen and web cam capture.
- Different cursor and audio effects with royalty-free assets.
- Import different media files and upload directly on video streaming platforms.
Cons:-
- Reports of crashes when working with large files.
- No keyframe and motion tracking.
- Very few customization options.
Part 3 Video Trimmers for Mobile
In today’s world, the cameras of smartphones are extremely powerful, and there are many who shoot videos with phone cameras instead of a dedicated digital camera. For example, there are many popular vloggers who shoot their videos with phone cameras, and video creators make short videos with phone cameras. When you shoot a video on your phone, you must be looking for a video trimmer app for your phone so that you can trim the recorded video instantly and share across social media and video streaming platforms. Here is the list of the best video trimmers for mobile.
# For Beginner Users
1. VidTrim Pro
Best for: Android video trimming, merging, frame grabbing
Rating: 4.1/5
Download Link: https://play.google.com/store/apps/details?id=com.goseet.VidTrimPro&hl=en\_US&gl=US
VidTrim is a dedicated video trimmer available for Android users. The free version adds a watermark to the output video, and hence, you have to opt for VidTrim Pro to avoid all limitations. Apart from trimming videos, you can merge videos and convert videos into audio files. You can also add effects and music tracks to your videos. The user interface is as simple as it gets. Here are the pros and cons of VidTrim Pro app.
Pros:-
- Trim videos as well as merge video clips.
- Convert supported video files into Mp3 audio files.
- Rotate videos as well as save screenshots from videos.
- Add cool video effects, sound effects, and soundtracks.
- Multi-lingual support and video file format converter.
Cons:-
- Limited video editing features for a paid video editor app.
- The user interface is simple but outdated.
2. KineMaster
Best for: Video content downloadable
Rating: 4.2/5
Download Link: https://play.google.com/store/apps/details?id=com.nexstreaming.app.kinemasterfree&hl=en\_US&gl=US
You must have seen many videos online with the watermark “Made with Kinemaster”. This is because KineMaster is very popular among amateur video creators. KineMaster is available for Android as well as iOS users. You can instantly trim and crop videos. Besides, you can add special effects, animations and stickers as well as tweak different video settings for enhancements. KineMaster is available free of cost but it attaches a watermark to the output video at one corner. You can subscribe to KineMaster Premium to remove watermark and unlock more features. Here are the pros and cons of KineMaster.
Pros:-
- Trim, cut, slice, and crop videos instantly.
- Add music, sound effects as well as voiceover.
- Provides amazing visual effects and animations.
- Adjust color filters, modes and video speed.
- Supports keyframing and motion tracking.
- Save 4K videos and share instantly online.
Cons:-
- KineMaster chroma key feature has bugs.
- Can crash or freeze handling large video files.
3. Quik
Best for: Producing cinematic auto-edits.
Rating: 4.3/5
Download Link: https://play.google.com/store/apps/details?id=com.gopro.smarty&hl=en\_US&gl=US
Quick from GoPro is fast becoming a popular video editor app. GoPro is the most popular action camera brand and naturally, its video editing app has garnered enough attention. The app is available for Android and iOS users. The app has a mixed bag of options for editing videos quickly. You can trim your videos, add filters and adjust video speed. Besides, its AI can locate the best shots in a video and enhance them with special effects. Here are the pros and cons of Quick app.
Pros:-
- Trim, crop, adjust speed, remove audio from videos.
- Different preset templates available with effects and filters.
- Add music, titles, effects, and transitions.
- Easy sharing of videos and photos.
- Powerful AI to highlight the best shots in a video.
- Adjust video orientation, save in 1080p resolution.
Cons:-
- Not suitable for large video files.
- No font adjustment options.
4. iMovie
Best for: Create Hollywood-style trailers and beautiful movies
Rating: 4.0/5
Download Link: https://apps.apple.com/us/app/imovie/id377298193
iMovie app by Apple is exclusively available for iOS users. iMovie is also available as a software which we have already discussed. In terms of features, iMovie app is very similar to iMovie software. You can instantly make basic editing works. Apart from editing, the app is ideal for creating different types of videos with ready-made templates. There are loads of graphical effects, animated titles, and video filters available to apply. Here are the pros and cons of iMovie app for you.
Pros:-
- Record, trim, split, join and crop videos on the go.
- Choose from different themes and templates to create videos.
- Animated titles, video filters, graphical effects available.
- Chroma key, PiP mode as well as split screen effect possible.
- Add sound effects, music, and depth of field effect.
- Optimized output for social media and video streaming platforms.
- Supports 4K video editing and easy share across Apple devices.
Cons:-
- Limited resources and customization options.
- The app size is large and uses high CPU resources.
# For Advanced Users
1. LumaFusion
Best for: Professional video trimming for iOS devices
Rating: 4.8/5
Download Link: https://apps.apple.com/us/app/lumafusion/id1062022008
LumaFusion is a top-rated video editor for iPad and iPhone. The app is as good as a premium video editor for desktop users. Therefore, professional video creators who use iPhone or iPad for video editing prefer LumaFusion all the time. You can trim, cut, crop, split, and merge videos intuitively from its timeline. Most importantly, you can edit multiple video and audio files together like a professional. Here are the pros and cons of LumaFusion.
Pros:-
- Trim and export video in different file formats.
- Work with multiple video and audio files.
- Preset transitions, instant preview, markers for timeline.
- Add Chroma and Luma key effects as well as stunning visual effects.
- Adjust speed, audio, use keyframes, correct colors.
- Work with titles, fonts, borders, and share conveniently.
- Wide range of media files available in the library.
Cons:-
- Does not support motion tracking.
- Can be difficult to edit large files.
2. Adobe Premiere Rush
Best for: Shoot, edit, and share online videos anywhere.
Rating: 3.0/5
Download Link: https://play.google.com/store/apps/details?id=com.adobe.premiererush.videoeditor&hl=en\_US&gl=US
Even though Adobe Premium Rush app is available or Android and iOS users, it is more popular among iPhone and iPad users. The app is free though there are in-app purchases available. Rush Premium has more features and functionalities. Editing any video is quite convenient though Adobe has tried its level best to offer all the possible features of Adobe Premium Pro desktop software on the app. The app supports multitrack timeline for professional videos. Here are all the pros and cons of Adobe Premiere Rush you should be aware of.
Pros:-
- Record video in high-resolution with the app.
- Trim, crop, mirror, and flip videos.
- Add images, overlays, texts, and stickers.
- Pan and zoom effect, animation titles.
- Royalty-free audio tracks, color correction options.
- Easy exporting of files in different formats.
Cons:-
- Rendering projects can be slow.
- Comes with limited features.
3. Filmmaker Pro Video Editor
Best for: 4K quality video editing
Rating: 4.6/5
Download Link: https://apps.apple.com/us/app/filmmaker-pro-video-editor/id1082956994
Filmmaker Pro is a highly rated video editor that you can use to trim your videos. Filmmaker Pro app is available for both Android and iOS. The app supports 4K video for editing works. The timeline has color codes for different assets and hence, editing becomes easy. You can edit different video parameters and settings and add different effects. The auto save option is extremely useful when it comes to editing a large file. Even though it is available for free, they have a subscription plan for unlocking all features. Here are the pros and cons of Filmmaker Pro Video Editor.
Pros:-
- Trim, split, crop and rotate videos.
- Adjust video speed, volume, video grading.
- Chroma key, voice to text caption, keyframe and motion tracking.
- Different Picture-in-Picture mode for videos, photos, and GIFs.
- Various transition effects, audio effects, and text overlays.
- Different drawing tools, stickers, and graphical elements present.
Cons:-
- The free version has limited features.
- The number of effects are relatively less.
4. Splice Video Editor and Maker
Best for: Vloggers and social platform video cutting
Rating: 4.7/5
Download Link: https://play.google.com/store/apps/details?id=com.splice.video.editor&hl=en\_US&gl=US
Splice Video Editor and Maker is a free but powerful app that enables you to do pro-level editing. You can trim your video clips, adjust speed, and add music on the go. In fact, you can create videos and slideshows instantly and you can add texts and overlays. The music library has different categories of tracks to apply to videos. You can also merge videos as well as change aspect ratio according. The app is available for Android and iOS users. Here are all the pros and cons of Splice Video Editor and Marker.
Pros:-
- Easy interface for smooth trimming and merging of videos.
- Adjust speed, aspect ratio, and video parameters.
- Organize clips and tracks in the timeline intuitively.
- Add custom texts, titles, tracks, transitions, and effects.
- Comes with a wide stock library of media files.
- Direct uploading video files on different social media platforms.
Cons:-
- Limited effects and filters available.
- Frequent crashes while handling large files.
5. Funimate
Best for: Mobile game video trim to show off gaming skills
Rating: 4.5/5
Download Link: https://play.google.com/store/apps/details?id=com.avcrbt.funimate&hl=en\_US&gl=US
Funimate video editor and maker app is quite highly rated on both Play Store and App Store. It is a very powerful and feature-rich app where you will get all the desired editing tools to publish a professional-quality video. Starting from element library to video masks and AI effects, the app takes your video to the next level. You can obviously perform the basic editing works like trimming, splitting and joining. Here are the pros and cons of Funimate app.
Pros:-
- Trimming, merging, and cutting videos.
- Text effects, video AI effects, and effect mixer.
- Comes with over 100 advanced video effects.
- Allows adding music to videos for engaging videos.
- Supports slow motion and looping videos.
- Advanced keyframing and element library.
- Allows creating a professional photo slideshow.
Cons:-
- No multilingual support and auto-save feature.
- Some lagging issues have been reported.
Part 4 Online Video Trimmers
If you are using a video editor on your computer, it takes considerable amount of space in your storage. The same is applicable to video editors for smartphones. If you do not want to install any app on your device yet trim videos conveniently, the online video trimmers are for you. You can open the video trimmer directly from your web browser and trim your video and save it without installing any application on your device. Here is the list of the best online video trimmers.
# For Beginner Users
1. https://online-video-cutter.com/
Best for: Trimming large videos files.
Ratings: 4.2/5
Online Video Cutter is a dedicated video trimmer where you need to drag and drop your video file and cut out the required portion. You can even crop and rotate your videos if there is any such requirement. You can access the online platform directly from your web browser. There is no need for installation of any web launcher. The platform is also secured and hence, your videos won’t get leaked. There is also a Chrome extension available that you can use if you are a Chrome user. Here are the pros and cons of Online Video Cutter.
Pros:-
- Easy video trimming by drag-and-drop files.
- Enables uploading different file formats.
- Rotate feature for saving in portrait and landscape mode.
- Automatically deletes files for better security.
- Crop feature for changing frame size.
- Can edit video file of 4GB capacity.
Cons:-
- May reduce the video quality for the editing video.
2. https://clideo.com/cut-video
Best for: Trimming short videos.
Ratings: 4.5/5
This is another online video trimmer that supports different video file formats. The user interface is sleek for quick video trimming. You can upload file from your device as well as from Cloud storage. In fact, you can use the platform to convert video files. The level of trust and security is high and there are additional settings available for better editing. Here are the pros and cons Clideo Video Cutter.
Pros:-
- Intuitive interface for quick trimming.
- Supports different file formats.
- Converts videos into different formats.
- Offers high-level online security.
- Add fade in and fade out effects.
- Upload video files from Google Drive and Dropbox.
Cons:-
- No drag and drop feature.
- File size is limited to 500 MB only.
3. https://www.kapwing.com/tools/trim-video
Best for: Editing video elaborately.
Ratings: 4.4/5
Kapwing is a dedicated online video editor that will give you the vibe of using a desktop video editor. Therefore, it is suitable for those who are looking for an online platform for trimming as well as various other editing works. You can add texts, images, elements, audio, transitions, as well as record videos. You can also export in different file formats. However, the free version attaches a watermark. Therefore, you have to upgrade to its premium version and use the platform is a full-fledged video editor. Here are the pros and cons of Kapwing.
Pros:-
- Trim, crop, zoom videos and adjust video parameters.
- Supports import and export of different file formats.
- Add effects, audio, and elements to the videos.
- You can work with multiple layers while editing.
- Different sound effects, templates, and scenes and emojis present.
- Stunning user interface that looks like a video editor software.
Cons:-
- Free version attaches watermark and lowers video quality.
4. https://www.freeconvert.com/video-trimmer
Best for: Basic video trimming
Ratings: 4.0/5
FreeConvert Video Trimmer is a free online tool through which you can trim videos of size up to 1GB easily. The platform supports as many as 40 different video file formats. Therefore, you can trim almost any video file easily. The security is tightened so that the uploaded videos do not get leaked. You can upload video files from your device, Google Drive, Dropbox as well as from URL. Therefore, if you want to trim videos that are available online, you can do it easily with this tool. Here are the pros and cons of FreeConvert Video Trimmer.
Pros:-
- Easy to use, intuitive interface.
- Does not require any registration.
- Supports over 40 file formats.
- Compatible with multiple browsers.
- 256-bit SSL encryption offers better security.
- Allows adjustment of parameters before conversion.
Cons:-
- There are too many annoying ads.
# For Advanced Users
5. https://www.veed.io/tools/video-cutter
Best for: Trimming videos for social media platforms.
Ratings: 4.3/5
Veed.io has a wide collection of tools for video editing and the video cutter is a dedicated video trimmer. You can trim videos of popular file formats easily. Apart from video files, the platform supports trimming GIFs and audio files. You can upload videos as well as mention URL of videos that are present online for trimming. The online tool does not degrade the video quality and the output file is of high-quality as well. Here are the pros and cons of Veed.io video cutter.
Pros:-
- Allows saving the video in a high-quality format.
- Supports cutting a wide range of audio file formats.
- Ability to upload and cut animated GIFs.
- Allows cutting YouTube videos directly using URL.
- Easy drag and drop feature for saving time.
- “Split” option for removing the middle part of the video.
Cons:-
- Not suitable for trimming large video files.
6. https://www.fastreel.com/video-cutter.html
Best for: Trimming videos for personal use.
Ratings: 4.2/5
Fastreel online video trimmer lets you trim your videos with a few clicks. Drop your file and mark the points for trimming and there you go. That tool is also useful if you want to split your video. There are several video file formats that the platform supports. The user interface is intuitive and the trimming can be precise. The free version attaches a watermark and hence, the premium version is what you should have. Here are the pros and cons of Fastreel online video trimmer.
Pros:-
- Simple interface for hassle-free trimming.
- Supports different video file formats.
- Feature of data security offers better safety.
- Quick video trimming without using the editor.
- Different file formats while saving the video.
- Precision cutting for removing unwanted segments.
Cons:-
- The free version comes with watermark.
- Free version lowers the video quality.
7. https://flixier.com/tools/video-trimmer
Best for: editing videos as a teamwork
Ratings: 4.4/5
Flixier Video Trimmer is a premium tool to trim and crop videos instantly. The tool is available in a free version but there are many limitations. Therefore, you need to have a premium version of Flixier Video Trimmer. You can export videos in 1080p and 4K resolution. You can opt for transcribing your videos and store videos in the cloud. In the premium version, two team members can work together. Here are the pros and cons of Flixier Video Trimmer.
Pros:-
- Upload videos from YouTube, Twitch, and cloud platforms.
- No need to create account for instant trimming.
- Trim, crop, cut, and add images to videos.
- Supports multiple file formats.
- Comes with an easy collaborative platform.
- Additional translation and transcribe options.
Cons:-
- There are lots of limitations of premium plans as well.
- Only the highest premium plan supports 4K resolution.
8. https://www.wevideo.com/features/video-cutter
Best for: Best premium online video editor
Ratings: 4.5/5
WeVideo Video Cutter is a paid video trimmer though you try out the platform for free. The platform supports a wide range of video files. You can drag and drop files and trim videos instantly. Trimming cannot get any easier and the processing speed of the editing video is fast. You can finish trimming your videos in a few seconds. There is a unique zoom feature to trim out videos accurately. You can also add texts and music to your video file before exporting. Here are the pros and cons of WeVideo Video Cutter.
Pros:-
- Drag and drop feature for quick editing.
- Smooth and accurate trimming with zoom function.
- Music and motion titles library.
- Compatible with different web browsers.
- Export edited files in different file formats.
- There is no capping on file size as such.
Cons:-
- The pricing is on the steeper side.
Part 5 Editing Tips to Improve Your Videos
Apart from trimming, you have to edit different other aspects so that you can make the video engaging and eye-catching. Here are some editing tips you should stick to improve your video content.
Get The Best Video Editor - Editing a video is equally important as shooting a video. Once you have the best video editor, you can rest assured that your editing work is half done. This is because you have all the tools to turn your raw video into stunning video. You can experiment and come up with the best editing work to your own surprise.
Get The Length Correct - In today’s world, viewers have very less time to watch videos. Therefore, a lengthy and elaborative video is a bummer. Hence, you should trim the video and keep only the portions that are relevant, engaging, and not boring.
Start with a Bang - The first impression is always the most important, and hence, the intro of your video is extremely crucial to keep the attention of the audiences intact. To make the intro interesting, you should not only focus on the content but also on video effects and animations that are attention-grabbing.
Smooth Cuts and Soothing Colours - When you are cutting from one scene or angle to another, the transition should be smooth so that it does not feel abrupt. Therefore, you should cut scenes when the subjects and objects seem to be static so that the transition is smooth naturally. Play attention to colour and the video editors allow you to enhance the quality by adjusting the colors and picture properties.
Graphical Objects - Use graphical objects and animated texts wherever possible for better explanations. Things can get boring visually when you do not add graphical elements, transitions, and animations appropriately in different places. Similarly, the use of texts and titles makes the video more engaging. Instead of static texts, there are animated texts and titles available with stickers and memes that you can edit your video with.
Play Attention to Sound - Sound is the most neglected part of a video by amateur video creators when one should pay attention to it. The sound effects can keep the audiences hooked to your video and make them not get bored. Certain sound effects refresh the attention of the audiences when it starts to fade, and hence, you should place the sound effects wisely.
Proper Flow - The editing work should be smooth so that the flow of the video is smooth and efficient. It takes time, and hence, you can practice and learn video editing so that your video can stand out instantly after your editing touches. Besides, the editing should be such that the video feels like a story that audiences can invest in and get engaged throughout.
Part 6 How to Share Your Videos
In order to share videos after trimming them, you need to save the video properly. There are different file formats available for video files. For example, MP4 is the most popular video file format among Windows users. On the contrary, MOV is the most popular video file format. Different file formats have different features such as compression and lossless. According to the file format, the file size varies for the same duration of video.
Therefore, the video trimmer you are using must have different file formats for saving and exporting the editing video files. Some video trimmers have in-built features to share videos on social media platforms and upload on video streaming platforms like YouTube. Depending on your target audiences, you need to adjust the parameters like aspect ratio, video resolution, as well as duration. Besides, you can upload videos on cloud storage and share with anyone as per your requirements.
Part 7 Related FAQs about Video Trimming
1. What is the best video trimmer?
Wondershare Filmora is the best video trimmer as all the features are well-balanced. Apart from trimming, it has all the tools for professional-quality video editing. Filmora can also be used for recording videos. Trimming videos is as easy as it gets and you can export the edited video in different file formats.
2. How can I trim a video?
To trim a video, you will need a video trimmer. If you are a desktop user and you need to regularly edit videos, there are video trimmers available for beginners as well as advanced users. Similarly, there are video editor apps available for mobile users. If you need to trim just one video, you should use an online video trimmer.
3. How can I trim a large video?
In order to trim a large video file, you will need a professional video editor like Filmora so that there is no loss in video quality and frequent crashes and screen freezing incidents while trimming. Drag and drop the video file on Filmora’s timeline and trim the unnecessary parts. You can view the changes and export the file in desired file format.
4. What does trim mean in video editing?
Trimming a video means you are cutting off different portions of a video and reducing its length. Trimming is mostly done to remove unnecessary parts from a video so that the video becomes more engaging without any unnecessary fillers.
5. Can I trim a video in VLC?
Here are the steps to trim a video in VLC Media Player.
- Open VLC Player. Go to View> Advanced Controls. This will make the recording buttons appear.
- Open the video that you want to trim. Mark the portion that you want to keep in your video.
- Play the video and go to the point from where you want to keep the video. Click on Record button.
- Go to the point where you want to end the video. Click on Record button again. All other portions are trimmed and the edited video will be saved.
6. How to trim YouTube videos?
In order to trim YouTube videos, you need to download the videos on your device. You can use an online video trimmer where you can upload the files and trim the videos as per your requirements.
A Guide To Adopting Lumetri Color Presets in Effective Color Grading
Color grading plays a crucial role in a video’s post-production. It can impact a video’s appearance and atmosphere. The Lumetri Color panel in Adobe Premiere Pro provides an efficient and powerful set of tools for color grading. However, knowing where to start or how to achieve the desired look can be challenging. One approach is to use Lumetri Color presets, which are pre-configured color grading settings.
You can apply these to your footage with a few clicks. This article will provide a guide on how to adopt Lumetri Color presets. We’ll cover the basics of color grading and their importance. We will also learn how to access and use Lumetri presets. By the end of this guide, you’ll have the knowledge and tools to take your color grading skills to the next level.
Part 1: What are Lumetri Color Presets?
Lumetri Color Presets are pre-made color grading settings that you can use for videos. These are used in Adobe’s Lumetri Color panel in Premiere Pro or After Effects. The Lumetri Color panel allows editors and colorists to adjust the colors and tones of a video clip. It improves your video’s visual appeal and storytelling impact.
The Lumetri Color panel is a powerful tool that provides a range of controls for color grading. It allows you to adjust these image attributes and see the changes in real time. Lumetri Looks provides a simple way to apply a pre-designed look or style to your footage. These presets can range from subtle adjustments to drastic color grading effects. Moreover, you can customize them further to fit your needs.
Empower your videos with a new mood using different LUTs. Filmora now offers 100+ top-quality 3D LUTs cover a broad range of scenarios. Transform your videos with Filmora’s powerful 3D LUTs.
Apply LUT on Videos Apply LUT on Videos Learn More


Part 2: Why Are Lumetri Color Presets Important?
There are many benefits attached to the use of a Lumetri preset. These benefits range from saving your time and effort to enhancing your video to new heights. Given below are some factors which emphasize the importance of Lumetri color presets:
Saves Time
Lumetri color can save a lot of time for video content creators. People adjust the colors and tones in a video to achieve a specific look. Instead, a Lumetri color preset can be applied in a few clicks. It is especially useful when working on larger projects or when deadlines are tight.
Enhanced Look
Color grading is an essential part of video production. Here, Lumetri color can help improve the look of a video. By applying a preset, you can achieve a specific mood or tone that would otherwise be hectic to create. It results in more visually appealing and professional-looking content.
Further Adjustments
You can use Lumetri color presets as a base for further color grading adjustments. After applying a preset, you can still make manual adjustments to fine-tune the colors. It helps achieve a more personalized look while still saving a lot of time and effort.
Maintains Consistency
Using Lumetri color can help maintain consistency across different video projects. It is especially important for branding purposes. Furthermore, it can help establish a recognizable visual style. Besides, using similar presets across different videos gives a cohesive look.
Part 3: How To Install Free Lumetri Color Presets on Device?
There is no doubt that Lumetri Color Presets are an essential tool for video editors. These presets help enhance the quality of their videos. Moreover, they also offer various color grading options. If you are looking for free Lumetri Color Presets, we have good news. Given below are the simple steps for free Lumetri Color download and installation:
Step 1Download Special Presets and Access Adobe Premiere Pro Folder
Start by downloading the “PremiumBeat Hollywood Lumetri Looks” folder from the official website. Now unzip the folder to view its contents. Next, you need to open the Adobe Premiere Pro folder.
To open the Premiere Pro folder, you need to open “Finder” and navigate to “Application.” Here open the “Adobe Premiere Pro CC” folder. Windows users can access the “Adobe Premiere Pro CC” through the “Program Files” of their “C:/” drive.

Step 2Lead Into Its Lumetri Folder
Here, you need to access the “Lumetri” folder. To do that, you need to hold “Command,” click “Adobe Premiere CC,” and choose “Show Package Contents.” Now go to the “Lumetri” folder in “Contents.” Windows users can access the “Lumetri” folder through the “Adobe Premiere Pro CC” folder.

Step 3Unzip The Presets To Lumetri Folder
Now, you need to access the “Cine” folder within the “Lumetri” folder. Afterward, move all “.look” files from the unzipped “PremiumBeat Hollywood Lumetri Looks” folder. Mac users can do that using the drag-and-drop method, while Windows users can do copy/paste.

Part 4: How To Use Lumetri LUT Presets in Premiere Pro?
Now that you have installed free Lumetri presets, the next part is how to use them. These presets can become a powerful feature in your Premiere Pro. It will allow you to apply a pre-defined color grading effect to your footage. In this guide, we will walk you through the steps to use Lumetri LUT presets in Adobe Premiere Pro:
Step 1Open the Color Workspace
After downloading free Lumetri presets, you need to restart your Adobe Premier Pro. Now open your project and access the “Lumetri Color” panel through “Color” from the top bar.

Step 2Lead Into Lumetri Color Section
Scroll down in the “Lumetri Color” panel to find the “Creative” section. Here click the “Look” dropdown menu, and you will find all the installed presets here.

Step 3Apply the Required Presets
Choose a preset and apply it to your project. You can preview the file to see the effect of a preset on your footage.

Bonus Part: Using Lumetri Color Preset LUTs in Wondershare Filmora
Using Lumetri Color Presets or LUTs is essential during the post-production of your footage. However, using Adobe Premier Pro can be tough, especially for beginners. It has a steep learning curve and is also expensive. As a replacement, you can use Wondershare Filmora . It is a video editor known for its extensive features and affordable cost. This tool started its journey with more than 100 LUTs to use in your video.
Add LUTs on Video For Win 7 or later(64-bit)
Add LUTs on Video For macOS 10.14 or later
Furthermore, the video editing innovation has introduced 100+ new LUTs, taking the total number to well past 200. You can use this wide range of LUTs to enhance your video or footage to new heights. Moreover, it allows you to preview each LUT file as you hover over it. When using LUTs in Filmora, you can also set their intensity to your liking.

Main Features of Wondershare Filmora
- Filmora comes with various built-in effects, including transitions, filters, overlays, etc.
- Its Green Screen feature lets you replace the background of your videos with custom images or videos.
- The LUTs section of Filmora include scenarios like travel vlogger, event record, landscape film, and more.
- Using its motion-tracking feature, you can add text or graphics on a moving object or person in your video.
Conclusion
To sum it up, adopting Lumetri Presets is an effective way to enhance your video content. You can get professional-level color grading results by using the provided instructions. While Premiere Pro is a good choice for color grading, it has a steep learning curve. That’s why Wondershare Filmora stands out as the best choice due to its clean interface and affordable price.
Moreover, it offers an extensive library of built-in LUTs. You can take your video content to the next level using Filmora and the knowledge gained from this guide.
Apply LUT on Videos Apply LUT on Videos Learn More
Part 2: Why Are Lumetri Color Presets Important?
There are many benefits attached to the use of a Lumetri preset. These benefits range from saving your time and effort to enhancing your video to new heights. Given below are some factors which emphasize the importance of Lumetri color presets:
Saves Time
Lumetri color can save a lot of time for video content creators. People adjust the colors and tones in a video to achieve a specific look. Instead, a Lumetri color preset can be applied in a few clicks. It is especially useful when working on larger projects or when deadlines are tight.
Enhanced Look
Color grading is an essential part of video production. Here, Lumetri color can help improve the look of a video. By applying a preset, you can achieve a specific mood or tone that would otherwise be hectic to create. It results in more visually appealing and professional-looking content.
Further Adjustments
You can use Lumetri color presets as a base for further color grading adjustments. After applying a preset, you can still make manual adjustments to fine-tune the colors. It helps achieve a more personalized look while still saving a lot of time and effort.
Maintains Consistency
Using Lumetri color can help maintain consistency across different video projects. It is especially important for branding purposes. Furthermore, it can help establish a recognizable visual style. Besides, using similar presets across different videos gives a cohesive look.
Part 3: How To Install Free Lumetri Color Presets on Device?
There is no doubt that Lumetri Color Presets are an essential tool for video editors. These presets help enhance the quality of their videos. Moreover, they also offer various color grading options. If you are looking for free Lumetri Color Presets, we have good news. Given below are the simple steps for free Lumetri Color download and installation:
Step 1Download Special Presets and Access Adobe Premiere Pro Folder
Start by downloading the “PremiumBeat Hollywood Lumetri Looks” folder from the official website. Now unzip the folder to view its contents. Next, you need to open the Adobe Premiere Pro folder.
To open the Premiere Pro folder, you need to open “Finder” and navigate to “Application.” Here open the “Adobe Premiere Pro CC” folder. Windows users can access the “Adobe Premiere Pro CC” through the “Program Files” of their “C:/” drive.
Step 2Lead Into Its Lumetri Folder
Here, you need to access the “Lumetri” folder. To do that, you need to hold “Command,” click “Adobe Premiere CC,” and choose “Show Package Contents.” Now go to the “Lumetri” folder in “Contents.” Windows users can access the “Lumetri” folder through the “Adobe Premiere Pro CC” folder.
Step 3Unzip The Presets To Lumetri Folder
Now, you need to access the “Cine” folder within the “Lumetri” folder. Afterward, move all “.look” files from the unzipped “PremiumBeat Hollywood Lumetri Looks” folder. Mac users can do that using the drag-and-drop method, while Windows users can do copy/paste.
Part 4: How To Use Lumetri LUT Presets in Premiere Pro?
Now that you have installed free Lumetri presets, the next part is how to use them. These presets can become a powerful feature in your Premiere Pro. It will allow you to apply a pre-defined color grading effect to your footage. In this guide, we will walk you through the steps to use Lumetri LUT presets in Adobe Premiere Pro:
Step 1Open the Color Workspace
After downloading free Lumetri presets, you need to restart your Adobe Premier Pro. Now open your project and access the “Lumetri Color” panel through “Color” from the top bar.
Step 2Lead Into Lumetri Color Section
Scroll down in the “Lumetri Color” panel to find the “Creative” section. Here click the “Look” dropdown menu, and you will find all the installed presets here.
Step 3Apply the Required Presets
Choose a preset and apply it to your project. You can preview the file to see the effect of a preset on your footage.
Bonus Part: Using Lumetri Color Preset LUTs in Wondershare Filmora
Using Lumetri Color Presets or LUTs is essential during the post-production of your footage. However, using Adobe Premier Pro can be tough, especially for beginners. It has a steep learning curve and is also expensive. As a replacement, you can use Wondershare Filmora . It is a video editor known for its extensive features and affordable cost. This tool started its journey with more than 100 LUTs to use in your video.
Add LUTs on Video For Win 7 or later(64-bit)
Add LUTs on Video For macOS 10.14 or later
Furthermore, the video editing innovation has introduced 100+ new LUTs, taking the total number to well past 200. You can use this wide range of LUTs to enhance your video or footage to new heights. Moreover, it allows you to preview each LUT file as you hover over it. When using LUTs in Filmora, you can also set their intensity to your liking.
Main Features of Wondershare Filmora
- Filmora comes with various built-in effects, including transitions, filters, overlays, etc.
- Its Green Screen feature lets you replace the background of your videos with custom images or videos.
- The LUTs section of Filmora include scenarios like travel vlogger, event record, landscape film, and more.
- Using its motion-tracking feature, you can add text or graphics on a moving object or person in your video.
Conclusion
To sum it up, adopting Lumetri Presets is an effective way to enhance your video content. You can get professional-level color grading results by using the provided instructions. While Premiere Pro is a good choice for color grading, it has a steep learning curve. That’s why Wondershare Filmora stands out as the best choice due to its clean interface and affordable price.
Moreover, it offers an extensive library of built-in LUTs. You can take your video content to the next level using Filmora and the knowledge gained from this guide.
Stunning Glitch Effect and Its Creation Steps for Premiere Pro
Glitch means errors and malfunction in the footage in software, games, videos, images, and audio. Presently, creative professionals are intentionally adding the glitch effect to their work to give a unique vibe to it. The effect appears as the pixels glitch organically, appearing to melt or duplicate onto the next scene.
The article takes Adobe Premiere Pro under consideration. First, glitch effect Premiere templates and then the step-by-step guide to add glitch transition Premiere Pro would be discussed. Time to begin!
In this article
01 Part 1: 8 Amazing Glitch Effect for Premiere Pro
02 Part 2: How Do You Do the Glitch Effect in Premiere Pro?
Part 1: 8 Amazing Glitch Effect for Premiere Pro
There are extensive websites in business that offer amazing templates to add glitch effects to your video. The subsection of this article shall come up with eight workable VHS effect Premiere, which would be perfectly compatible with Premiere Pro. These VHS effect Premiere Pro are HD quality, which means you do not have to worry about the output. So, let us start! Shall we?
The first VHS overlay Premiere is Digital Glitch Transitions. Envato Elements offers 20 glitch transitions that can be used in different video themes. The HD resolution of this distortion effect Premiere Pro is 1920x1080. There are noise effects as well.

Glitch Slideshow is another amazing glitch effect Premiere Pro free introduced by Envato Elements. If you are a photographer or a film director, this glitch transition Premiere gives you what you need. The HD resolution is offered, and no plugins are required.

3. Venus
Venus is the perfect choice to add an Adobe Premiere VHS effect by offering an adjustable duration of the video with effortless customization. The template is highly famous among YouTubers and content creators to leave a long-lasting impact on the audience via glitchy titles and effects.

Presenting another Premiere Pro template, Fast Glitch Transitions is a ready-to-use template. It offers ten fast-tracked transitions that add value to the project. Moreover, it brings versatile colors to the video with the glitches. This Premiere VHS effect is perfect for intros and travel videos.

Allow me to introduce you to another new and stylish static effect Premiere Pro known as Glitch Multiframe Opener. It is a dynamic template that needs no plugins. Be free to use the template for commercials, Facebook video openers, and teasers. Moreover, photos and videos can be added to make the glitch workable.

Glitch Urban Opener is an impeccable glitch effect for Premiere Pro, presenting trendy and creative designs. It brings smooth transitions to the video with 17 editable layers, 11 media holders, and one logo placeholder. All of these options make this VHS filter Premiereeasily customizable and operatable.

Another retro effect Premiere Pro from Motion Elements is 30 Glitch Transitions. The media industry uses this template to insert different glitch effects into the video and make it eye-catching for everyone. The effects are styled with interference, bad TV, distortions, VHS noise, and other fatal errors.

Last but not the least, Glitch Transitions can be counted upon to act as the best Adobe Premiere glitch effect. There are three transitions for different themes. The color controls help manage the video editing more effectively. Moreover, the templates offer horizontal and vertical directions to work better.

Part 2: How Do You Do the Glitch Effect in Premiere Pro?
Are you a Premiere Pro user? Do you need to add the Premiere glitch transition to the video? Worry no more! Follow this subsection vividly. Would you?
Adobe Premiere Pro is a video editing software that has got you covered. You can enhance the speed of the video to tell your story better and share the vision. With Premiere Pro in the frame, you can shift the colors, insert graphics and titles, and give a unique music effect to the video. All in one platform, a dream come true, don’t you agree?
If you want to perform a Premiere Pro VHS effect, allow us to walk you through the process. It is highly recommended that you follow the guide carefully to have desirable results. So, what are we waiting for? Time to start, right?
Step 1: Importing the Targeted Video
To begin the process, open Adobe Premiere Pro on your system. Import the targeted footage and drag it to the timeline. After the video is added, head to the “Effects” panel on the left side of the interface.

Step 2: Launching the VR Digital Glitch
Type away glitch in the search bar. The user will find VR Digital Glitch in the results. Drag the effect to the clip on the timeline. Now, it is time to navigate to the “Effect Controls.”

Step 3: Changing the Distortion Control
Scroll down to find “Distortion” in the controls and expand it. The user is suggested to increase the color distortion to give an RGB effect to the footage. After that, you should reduce the distortion rate to 0 so that different artifacts can be eliminated effortlessly.

Step 4: Changing the Noise Strength
Moving on, expand the “Noise” control section and increase the noise strength. It will give the footage a significant level of graininess.

Step 5: Animating the Glitch Effect
To animate the glitch, use the playhead on the top and drag it to the first position where the effect should start from. Hit the stopwatch located on the left of “Master Amplitude.” It will create a keyframe. Alter the “Master Amplitude” to 0 as we do not want the clip to begin with a glitch.

Step 6: Playing with the Playhead
Now, use your keyboard’s right arrow to move the playhead three frames forward. After that, set the “Master Amplitude” to 100. Again, move the playhead three frames forward and set the “Master Amplitude” to 0. The animation is produced on the RGB color distortion.

Step 7: Positioning the Video
Move back to the first keyframe and head to the top that shows “Scale” settings. Enhance the scale value so that the video position can be leveled. Click on the stopwatch next to “Position” to create a keyframe. Move the playhead one frame forward and adjust the position of the frame.

Step 8: Final Process
Again, move the playhead to the next frame and click on the “Reset” shaped icon to reset the position of the video. Move another frame forward and reposition the video. You can do this multiple times to give a glitchy effect to the clip. There you go! It is all done.

Conclusion
A raw video doesn’t send the message as the user wants. For this, creative professionals need to give some effects to the video, such as glitch effect Premiere. The article highlighted some famous glitch effects which were perfectly compatible with Adobe Premiere Pro. The whole procedure to add the Adobe Premiere glitch effect was also the crux of this write-up.
02 Part 2: How Do You Do the Glitch Effect in Premiere Pro?
Part 1: 8 Amazing Glitch Effect for Premiere Pro
There are extensive websites in business that offer amazing templates to add glitch effects to your video. The subsection of this article shall come up with eight workable VHS effect Premiere, which would be perfectly compatible with Premiere Pro. These VHS effect Premiere Pro are HD quality, which means you do not have to worry about the output. So, let us start! Shall we?
The first VHS overlay Premiere is Digital Glitch Transitions. Envato Elements offers 20 glitch transitions that can be used in different video themes. The HD resolution of this distortion effect Premiere Pro is 1920x1080. There are noise effects as well.
Glitch Slideshow is another amazing glitch effect Premiere Pro free introduced by Envato Elements. If you are a photographer or a film director, this glitch transition Premiere gives you what you need. The HD resolution is offered, and no plugins are required.
3. Venus
Venus is the perfect choice to add an Adobe Premiere VHS effect by offering an adjustable duration of the video with effortless customization. The template is highly famous among YouTubers and content creators to leave a long-lasting impact on the audience via glitchy titles and effects.
Presenting another Premiere Pro template, Fast Glitch Transitions is a ready-to-use template. It offers ten fast-tracked transitions that add value to the project. Moreover, it brings versatile colors to the video with the glitches. This Premiere VHS effect is perfect for intros and travel videos.
Allow me to introduce you to another new and stylish static effect Premiere Pro known as Glitch Multiframe Opener. It is a dynamic template that needs no plugins. Be free to use the template for commercials, Facebook video openers, and teasers. Moreover, photos and videos can be added to make the glitch workable.
Glitch Urban Opener is an impeccable glitch effect for Premiere Pro, presenting trendy and creative designs. It brings smooth transitions to the video with 17 editable layers, 11 media holders, and one logo placeholder. All of these options make this VHS filter Premiereeasily customizable and operatable.
Another retro effect Premiere Pro from Motion Elements is 30 Glitch Transitions. The media industry uses this template to insert different glitch effects into the video and make it eye-catching for everyone. The effects are styled with interference, bad TV, distortions, VHS noise, and other fatal errors.
Last but not the least, Glitch Transitions can be counted upon to act as the best Adobe Premiere glitch effect. There are three transitions for different themes. The color controls help manage the video editing more effectively. Moreover, the templates offer horizontal and vertical directions to work better.
Part 2: How Do You Do the Glitch Effect in Premiere Pro?
Are you a Premiere Pro user? Do you need to add the Premiere glitch transition to the video? Worry no more! Follow this subsection vividly. Would you?
Adobe Premiere Pro is a video editing software that has got you covered. You can enhance the speed of the video to tell your story better and share the vision. With Premiere Pro in the frame, you can shift the colors, insert graphics and titles, and give a unique music effect to the video. All in one platform, a dream come true, don’t you agree?
If you want to perform a Premiere Pro VHS effect, allow us to walk you through the process. It is highly recommended that you follow the guide carefully to have desirable results. So, what are we waiting for? Time to start, right?
Step 1: Importing the Targeted Video
To begin the process, open Adobe Premiere Pro on your system. Import the targeted footage and drag it to the timeline. After the video is added, head to the “Effects” panel on the left side of the interface.
Step 2: Launching the VR Digital Glitch
Type away glitch in the search bar. The user will find VR Digital Glitch in the results. Drag the effect to the clip on the timeline. Now, it is time to navigate to the “Effect Controls.”
Step 3: Changing the Distortion Control
Scroll down to find “Distortion” in the controls and expand it. The user is suggested to increase the color distortion to give an RGB effect to the footage. After that, you should reduce the distortion rate to 0 so that different artifacts can be eliminated effortlessly.
Step 4: Changing the Noise Strength
Moving on, expand the “Noise” control section and increase the noise strength. It will give the footage a significant level of graininess.
Step 5: Animating the Glitch Effect
To animate the glitch, use the playhead on the top and drag it to the first position where the effect should start from. Hit the stopwatch located on the left of “Master Amplitude.” It will create a keyframe. Alter the “Master Amplitude” to 0 as we do not want the clip to begin with a glitch.
Step 6: Playing with the Playhead
Now, use your keyboard’s right arrow to move the playhead three frames forward. After that, set the “Master Amplitude” to 100. Again, move the playhead three frames forward and set the “Master Amplitude” to 0. The animation is produced on the RGB color distortion.
Step 7: Positioning the Video
Move back to the first keyframe and head to the top that shows “Scale” settings. Enhance the scale value so that the video position can be leveled. Click on the stopwatch next to “Position” to create a keyframe. Move the playhead one frame forward and adjust the position of the frame.
Step 8: Final Process
Again, move the playhead to the next frame and click on the “Reset” shaped icon to reset the position of the video. Move another frame forward and reposition the video. You can do this multiple times to give a glitchy effect to the clip. There you go! It is all done.
Conclusion
A raw video doesn’t send the message as the user wants. For this, creative professionals need to give some effects to the video, such as glitch effect Premiere. The article highlighted some famous glitch effects which were perfectly compatible with Adobe Premiere Pro. The whole procedure to add the Adobe Premiere glitch effect was also the crux of this write-up.
Also read:
- Updated Tiktok Aspect Ratio Is a Crucial Element to Succeeding in the Tiktok Algorithm. Here Are some Suggestions to Improve Video Quality and Land on the for You Page
- New 2024 Approved Finding LUTs Made by Danny Gevirtz
- 2024 Approved A Detailed Guid to Remove Background From a Video in Premier Pro
- In 2024, To Closely Observe the Content on Screen, We Often Zoom in to Catch the Details. This Article Will Provide You with a Brief Note on How to Zoom in on YouTube Videos Quickly on Your Devices
- New 2024 Approved Best Cloud Storage Service for Videos
- Are You Eager to Discover the Method of Video Scaling in Filmora? You Are in the Right Place because This Discussion Will Cover the Content on This Matter for 2024
- New MP3 Cutter Download
- New 2024 Approved Finding the Best Game Recorder for PC
- New 2024 Approved Best Dark Moody LUTs During Editing
- How To Make A Do-It-Yourself Video
- Discover How You Can Use Vectorscope to Adjust Luminance, Color Grading, and More in Your Video Editing Projects
- In 2024, TXT to SRT 3 Effective Ways to Convert TXT to SRT
- Updated How to Add Text Effects in Adobe Premiere Pro for 2024
- Updated 2024 Approved Creating Video Testimonials
- How to Cut Videos on Mac without Using FFmpeg for 2024
- Its Always a Cool Thing to Use a 3D Intro Maker to Create Intro Videos for Your Clips. This Post Will Introduce You 4 of the Best Intro Video Makers to Help You Improve Your Video
- How To Start a Private Live Stream on YouTube
- In 2024, Additional Tips About Sinnoh Stone For Apple iPhone SE (2020) | Dr.fone
- Does Motorola Razr 40 Have Find My Friends? | Dr.fone
- How To Change Your SIM PIN Code on Your Lenovo Phone
- Top 15 Apps To Hack WiFi Password On Vivo V29
- In 2024, How to Transfer Contacts from Motorola Moto G04 to Outlook | Dr.fone
- Here are Some Pro Tips for Pokemon Go PvP Battles On Samsung Galaxy S23 | Dr.fone
- In 2024, How to use Pokemon Go Joystick on Vivo Y17s? | Dr.fone
- Updated In 2024, How to Convert Animated GIF From Video
- In 2024, How Do You Get Sun Stone Evolutions in Pokémon For Nubia Z50S Pro? | Dr.fone
- In 2024, How to Track Oppo Reno 11F 5G Location by Number | Dr.fone
- How To Fix Apple ID Verification Code Not Working From iPhone 14 Pro
- Complete Guide For iPhone 13 Lock Screen
- How to Unlock Apple iPhone SE (2022) Online? Here are 6 Easy Ways
- Best 10 Mock Location Apps Worth Trying On Apple iPhone XS | Dr.fone
- Title: Updated Looking for Simple Steps to Customize the Speed of Your Video in DaVinci Resolve? Find Out How You Can Do that and Discover an Easier Alternative to DaVinci Resolve
- Author: Chloe
- Created at : 2024-04-24 07:08:22
- Updated at : 2024-04-25 07:08:22
- Link: https://ai-editing-video.techidaily.com/updated-looking-for-simple-steps-to-customize-the-speed-of-your-video-in-davinci-resolve-find-out-how-you-can-do-that-and-discover-an-easier-alternative-to-/
- License: This work is licensed under CC BY-NC-SA 4.0.
