
:max_bytes(150000):strip_icc():format(webp)/Apple-Watch-Ultra-2-23e8ec3e4ee04c6e98c9d654a35f59ec.jpg)
Updated Top Applications That Can Help Apply The Best VHS Camera Effect for 2024
Top Applications That Can Help Apply The Best VHS Camera Effect
Nowadays, tools available on the internet make it easy to apply effects and overlays. These effects can give your videos a whole new look and feel. It wasn’t easy to apply effects in the past, but it has become much simpler with the advancements. Each video effect offers a unique style and can completely transform the video.
Even if you want to create a vintage look or add glitches, these tools can do it for you. There are many popular video filters that you use today. One such popular filter is the camcorder effect that you can apply to your video. This effect creates an old VCR video look with noise and distortion. You can try many apps, which are mentioned in this article, to use such effects.
Part 1: How Can the VHS Effect Be Beneficial in the Current Film Industry?
VHS camcorder overlay is not just a filter to apply to your videos for fun. There are many advantages of VHS effects that are discussed in the portion below.
1. Retro Aesthetics
The VHS effect taps into nostalgia and retro aesthetics. This effect captures the interest of viewers who have a fondness for the past. It creates a sense of familiarity and nostalgia in your video. Such effects further add emotions by connecting with audiences on an emotional level.
2. Differentiation and Uniqueness
In a crowded media landscape, the VHS look helps films and videos stand out. Its distinct visual style catches the eye and makes content more memorable. Furthermore, it increases the likelihood of being noticed and shared by people on the internet.
3. Genre-Specific Atmosphere
These effects are closely associated with specific genres like horror and retro. By using these effects, you can enhance the atmosphere and mood of the video. Additionally, improving the overall storytelling and engagement in the intended genre experience.
4. Historical Context
When films are set in specific time periods, this effect mimics the visual aesthetics of that era. It helps establish and reinforce the historical context of your video. Moreover, it provides an authentic representation that enhances the audience’s engagement.
5. Budget-Friendly
The VHS camera effect offers a budget-friendly way to achieve a vintage look. Additionally, without requiring post-production resources, you can achieve the look. It is particularly valuable for independent filmmakers and artists with limited budgets. These effects allow them to create visually appealing content within their budget.
6. Experimental and Creative
VHS effects provide a unique canvas for artistic expression and creativity. Filmmakers and video artists can distort reality and challenge traditional aesthetics. Moreover, enthusiasts can go creative and experiment with these effects in a new way.
Part 2: Some Top Applications For Creating The Best VHS Camera Effect
You don’t have to worry, as there are many apps that can apply your favorite effects to your video. Moreover, if you are specifically looking to apply a camcorder vintage effect, try one of these.
- 1 - Camcorder - Record VHS Home Videos [iOS]
- 2 - True VHS - 90s Vintage Camera [iOS]
- 3 - Vaporgram Glitch Photo Editor [Android]
- 4 - Film Cam -Vintage Roll Camera [Android]
- 5 - Rarevision VHS Lite - 80s Cam [Android | iOS]
- 6 - Glitch Video Effect - Live VHS [iOS]
- 7 - VHS Video Editor, Vintage Cam [iOS]
1. Camcorder - Record VHS Home Videos [iOS ]
Camcorder – Record VHS Home Videos is a camcorder video maker app, as its name suggests. You can upload your video and give it the old 80s feel. It gives your videos the authentic camcorder feel by adding the date and other details in your video. The good part about this app is that it is free for a while, which means there are no annoying ads. You can apply your favorite VHS camera effects to your videos ad-free.
Compatibility: iOS 7.0 and newer

2. True VHS - 90s Vintage Camera [iOS ]
True VHS is an application to give your videos the early 90s look. It is a vintage camera app replicating the old footage and creating a similar ambiance. This app adds distortion and RGB effects to your videos. Moreover, it adds PLAY SP to give more authenticity to your video clips. True VHS also offers different effects and aspect ratios that you can choose for your edits.
Compatibility: iOS 11.0 and newer

3. Vaporgram Glitch Photo Editor [Android ]
Another amazing tool that gives you the original feel of VHS footage is Vaporgram. This Android app adds glitch effects and RGB to your media files. To create a more original VHS look of your video, this tool also adds scanlines and distorted 3D effects. It is a fun app with multiple textures and filters to add to your media. This app will surely take you back to the 20th century.
Compatibility: Android 5.0 and newer

4. Film Cam -Vintage Roll Camera [Android ]
Do you want to give your videos the old vintage camera film look? Film Cam gives your videos a retro Kodak or Fujifilm look, making it a unique feature of this application. Editing your videos using this app will give your clips the exact feel of an old film look. People will surely be surprised when they know edited videos are not captured using a Kodak camera.
Compatibility: Android 6.0 and newer

5. Rarevision VHS Lite - 80s Cam [Android | iOS ]
If you wish to hold a camcorder and record a video, thinking it’s the 80s, you’re in luck. This app is for you, as Rarevision offers you the same thing you want. It will let you imagine you are in the last quarter of the 20th century. Your videos look jittery, with glitches and lines in them. Furthermore, the colors of your videos will be distorted with decreased saturation.
Compatibility: Android 5.0 and newer, iOS 9.0 and newer

6. Glitch Video Effect - Live VHS [iOS ]
You are in the right place because this is an amazing VHS camera overlay editor. Glitch Video Effect is an app available on iOS that creates a perfect retro look. This app is loaded with over 100 VHS overlays and glitch effects that you can apply to your videos. It has everything from distortion, noise, and faded colors to create a perfect VHS look. Take back your videos to the old school and create a vintage feel.
Compatibility: iOS 12.0 and newer

7. VHS Video Editor, Vintage Cam [iOS ]
Don’t confuse yourself with retro, 90s, VHS, and vintage looks. All these looks are different from each other, and this iOS app has it all. From light leaks to the original VHS look, you can add any effect to your video. With over 100 effects and overlay options, VHS Video Editor has much to offer. Your videos will look dusty, with grains and increased noise, creating an old vintage look.
Compatibility: iOS 13.0 and newer

Part 3: Introducing Wondershare Filmora: An Explicit Solution To Easy VHS Camera Filters
Wondershare Filmora Video Editor , like always, brings newer and better features to the user. This powerful tool lets you edit, adjust, and correct your video. Nevertheless, this tool can do much more than you expect. You can create your overlays, effects, and filters using this tool. It is a solution for professionals and beginners both. You can apply the existing presets to your video using Wondershare Filmora.
Apply VHS Camera Effect For Win 7 or later(64-bit)
Apply VHS Camera Effect For macOS 10.14 or later


As discussed, Filmora lets you easily open the doors of creative expression. If you think creating an overlay is difficult, apply an effect from the library. You will find many effects and overlays in the built-in library, including a VHS camera filter. You can find these specific filters in good numbers, which exceed more than 100 effects. To apply this filter to your video, you can follow the guided instructions provided.
Step 1 Create a New Project
To begin, open Wondershare Filmora on your system and click on the “New Project” tab in the main interface. This will lead you to a new window where you can start your project.

Step 2 Import and Arrange Your Video
Import your file from the system using the import media option. Next, drag and drop your video into the timeline area to organize and prepare it for editing.

Step 3 Apply VHS Overlay
Now, it’s time to apply the VHS effects to your video. Locate the “Effects” option in the top bar of the software and click on it. In the Effects panel, search for “VHS” to find a range of VHS overlays to choose from. Select the effect that suits your style and drag it onto the timeline, placing it over your video.

Step 4 Adjust the Overlay
Change the intensity of the VHS overlay by adjusting its opacity. Go to the “Effects” tab on the right side of the screen and find the effect you applied. From there, modify its transparency to achieve the desired look. Once you’re satisfied, click on the “Export” button located at the top left of the screen to save your video with the applied VHS effects.

Conclusion
In conclusion, the internet offers many video effects that can enhance the look of your videos. With the help of such tools, you can easily apply these effects and overlays to your videos. However, if you want to apply a specific effect like the VHS camera effect, you can. Wondershare Filmora is a platform where you can edit and apply different effects to your video.
1. Camcorder - Record VHS Home Videos [iOS ]
Camcorder – Record VHS Home Videos is a camcorder video maker app, as its name suggests. You can upload your video and give it the old 80s feel. It gives your videos the authentic camcorder feel by adding the date and other details in your video. The good part about this app is that it is free for a while, which means there are no annoying ads. You can apply your favorite VHS camera effects to your videos ad-free.
Compatibility: iOS 7.0 and newer
2. True VHS - 90s Vintage Camera [iOS ]
True VHS is an application to give your videos the early 90s look. It is a vintage camera app replicating the old footage and creating a similar ambiance. This app adds distortion and RGB effects to your videos. Moreover, it adds PLAY SP to give more authenticity to your video clips. True VHS also offers different effects and aspect ratios that you can choose for your edits.
Compatibility: iOS 11.0 and newer
3. Vaporgram Glitch Photo Editor [Android ]
Another amazing tool that gives you the original feel of VHS footage is Vaporgram. This Android app adds glitch effects and RGB to your media files. To create a more original VHS look of your video, this tool also adds scanlines and distorted 3D effects. It is a fun app with multiple textures and filters to add to your media. This app will surely take you back to the 20th century.
Compatibility: Android 5.0 and newer
4. Film Cam -Vintage Roll Camera [Android ]
Do you want to give your videos the old vintage camera film look? Film Cam gives your videos a retro Kodak or Fujifilm look, making it a unique feature of this application. Editing your videos using this app will give your clips the exact feel of an old film look. People will surely be surprised when they know edited videos are not captured using a Kodak camera.
Compatibility: Android 6.0 and newer
5. Rarevision VHS Lite - 80s Cam [Android | iOS ]
If you wish to hold a camcorder and record a video, thinking it’s the 80s, you’re in luck. This app is for you, as Rarevision offers you the same thing you want. It will let you imagine you are in the last quarter of the 20th century. Your videos look jittery, with glitches and lines in them. Furthermore, the colors of your videos will be distorted with decreased saturation.
Compatibility: Android 5.0 and newer, iOS 9.0 and newer
6. Glitch Video Effect - Live VHS [iOS ]
You are in the right place because this is an amazing VHS camera overlay editor. Glitch Video Effect is an app available on iOS that creates a perfect retro look. This app is loaded with over 100 VHS overlays and glitch effects that you can apply to your videos. It has everything from distortion, noise, and faded colors to create a perfect VHS look. Take back your videos to the old school and create a vintage feel.
Compatibility: iOS 12.0 and newer
7. VHS Video Editor, Vintage Cam [iOS ]
Don’t confuse yourself with retro, 90s, VHS, and vintage looks. All these looks are different from each other, and this iOS app has it all. From light leaks to the original VHS look, you can add any effect to your video. With over 100 effects and overlay options, VHS Video Editor has much to offer. Your videos will look dusty, with grains and increased noise, creating an old vintage look.
Compatibility: iOS 13.0 and newer
Part 3: Introducing Wondershare Filmora: An Explicit Solution To Easy VHS Camera Filters
Wondershare Filmora Video Editor , like always, brings newer and better features to the user. This powerful tool lets you edit, adjust, and correct your video. Nevertheless, this tool can do much more than you expect. You can create your overlays, effects, and filters using this tool. It is a solution for professionals and beginners both. You can apply the existing presets to your video using Wondershare Filmora.
Apply VHS Camera Effect For Win 7 or later(64-bit)
Apply VHS Camera Effect For macOS 10.14 or later
As discussed, Filmora lets you easily open the doors of creative expression. If you think creating an overlay is difficult, apply an effect from the library. You will find many effects and overlays in the built-in library, including a VHS camera filter. You can find these specific filters in good numbers, which exceed more than 100 effects. To apply this filter to your video, you can follow the guided instructions provided.
Step 1 Create a New Project
To begin, open Wondershare Filmora on your system and click on the “New Project” tab in the main interface. This will lead you to a new window where you can start your project.
Step 2 Import and Arrange Your Video
Import your file from the system using the import media option. Next, drag and drop your video into the timeline area to organize and prepare it for editing.
Step 3 Apply VHS Overlay
Now, it’s time to apply the VHS effects to your video. Locate the “Effects” option in the top bar of the software and click on it. In the Effects panel, search for “VHS” to find a range of VHS overlays to choose from. Select the effect that suits your style and drag it onto the timeline, placing it over your video.
Step 4 Adjust the Overlay
Change the intensity of the VHS overlay by adjusting its opacity. Go to the “Effects” tab on the right side of the screen and find the effect you applied. From there, modify its transparency to achieve the desired look. Once you’re satisfied, click on the “Export” button located at the top left of the screen to save your video with the applied VHS effects.
Conclusion
In conclusion, the internet offers many video effects that can enhance the look of your videos. With the help of such tools, you can easily apply these effects and overlays to your videos. However, if you want to apply a specific effect like the VHS camera effect, you can. Wondershare Filmora is a platform where you can edit and apply different effects to your video.
Top 6 Text to Speech Generators for YouTube Videos [Windows, Mac, And
Best Text To Speech Converter and Video Editor
Filmora’s Text to Speech (TTS) function allows you to convert your text files to voiceover and bring more elements to enrich your video.
Free Download Free Download Free Download Learn More >

Speech has a significant impact on the success rate of the entire YouTube adventure, whether storytelling or a standard sales pitch. It helps to have a decent voice and speaking abilities. However, not everyone gets both simultaneously; many individuals employ voice artists to provide voice-overs.
Some freelancers charge $5-$100 for a 5-minute voice-over. However, not everyone can afford an expensive voice artist, especially for longer films or just starting. Here are other options that I discovered as the most acceptable free text to voice generators for YouTube videos.
Let’s take a deeper look at the most excellent free text to speech software for YouTube videos.
Getting Started
Text to speech is a speech synthesis software that speaks aloud digital and textual content. The software offers a wide range of applications and is utilized by everyone from professionals and students to toddlers and adults.
Viewers are emotionally attached to documents such as PDFs, books, novels, and e-learning courses when they hear narration with a human voice. Text-to-speech systems are ideal for multitasking by busy professionals.
It’s no surprise that there are numerous text-to-speech options available. Audiobooks are also becoming more popular for the same reasons.
We’ll go over the best text-to-speech tools available in this guide. We’ve gathered a detailed list of the most exemplary free and commercial text-to-speech applications to help you choose the best option for your needs:
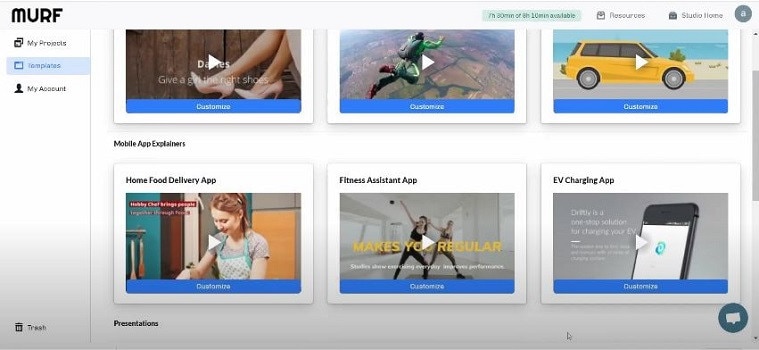
#1: Murf
It is available on Windows, Mac, Android, iPhone, and Online
Murf is a text-based voice-over maker. You can either compose your script or submit a voice clip to convert it into hyper-realistic AI voices. Murf delivers expert voice-over artists with experienced voices. You can check multiple parameters in the voices. You can use Murf to signify a brand, a product, a company, a presentation, and many more.
Features:
- Murf allows you to create voice-overs from the text. It also allows you to transform your speech into editable text, which you can subsequently edit or convert into AI voice.
- Murf Studio provides the ability to synchronize your speech with visuals.
- Murf provides over 100 authentic voices in 19 languages.
- It also gives options for inserting pauses, altering narration tempo, and emphasizing certain points.
- It also includes features such as script checking with grammar assistance, free background music, video and music cutting, and more.
- Murf offers comprehensive communication and collaboration tools, access control, a pronunciation library, and a service level agreement (SLA) for enterprises wishing to develop voice-overs in bulk.
Price
| Free | Basic | Pro | Enterprise |
|---|---|---|---|
| $0 / Month | $13 / Month | $26 / Month | $166 / Month |
| Try all 120+ voices 10 mins of voice generation 10 mins of transcription Share link for audio/video output No downloads Single User No credit card required | Unlimited Downloads 24 hours of voice generation/year Access to 60 voices (10 languages) Commercial Usage rights Chat and Email support Single User | Unlimited Downloads 96 hours of voice generation/year 48 hours of transcription/year Access 120+ voices (20 languages) Commercial Usage rights Recorded voice editing Voice changer Up to 3 users Priority Support | 5+ Users Unlimited Voice Generation Time Unlimited Transcription time Custom Voices Single-sign on (SSO) Collaboration and Access Control Dedicated Account Representative Centralized invoicing Service Agreement Deletion recovery Unlimited Storage |
Cons
- You may experience frequent technical glitches.
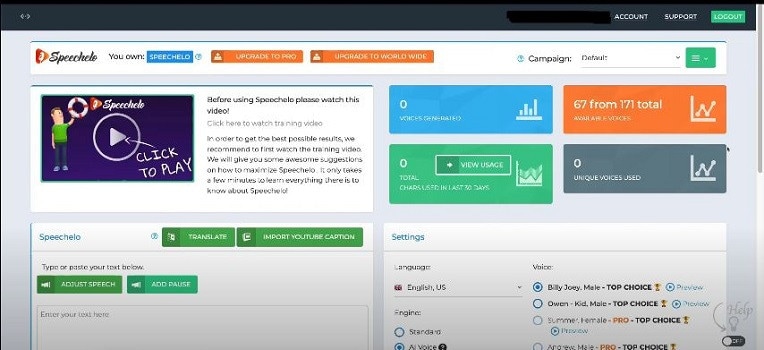
#2: Speechelo
It is available on Windows, Mac, Android, iPhone, and Online
Speechelo gives a realistic voice tone and expressions. This gets people more interested in voice-overs. You can use Speechelo to create sales videos, training films, and instructive videos, among other things. It includes attributes such as breathing and pauses, vocal tones, changing speed and pitch, and compatibility for 23 languages.
Features
- The text-to-speech engine in Speechelo can add intonation to the voice.
- It contains over 30 voices that sound natural.
- It has both male and female voices.
- It works with various video editing tools, including Camatasia, Adobe, Premier, and iMovie.
- Ordinary tone, cheerful tone, and serious tone are the three tones you may use to read your text.
Price
| Premium |
|---|
| $47 (Discount price) |
| One-time payment With 60-day money-back guarantee |
Cons
- The output of Speechelo will be 48kbps. If you’re familiar with sound production, you’ll see that this is a very low output.
- It might produce inaccurate output if you input long voice-overs.
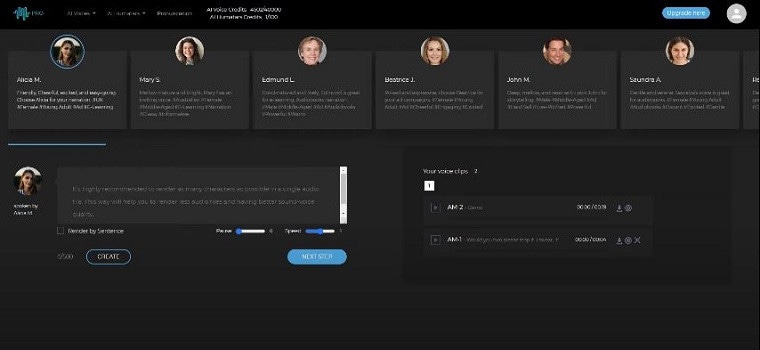
#3: Synthesys
It is available on Windows, Mac, Android, iPhone, and Online
Synthesys helps to convert text into a natural-sounding voice. With Synthesis, you can choose from various tones, accents, male and female voices, languages, and reading speeds. Moreover, It simply takes three steps to create a natural-sounding artificial speech that you may use for a variety of commercial applications.
- To begin, select the gender, style, accent, and tone you want the created voice to have.
- You can paste or type the content you want to turn into speech into Synthesys’ AI voice-producing platform.
- Lastly, click ‘create’ to start creating your artificial speech in minutes. You may adjust the reading speed and pause length from here.
Features
- Cloud-based software.
- Expert and natural-sounding voices are available in an extensive collection.
- There are over 35 female voices and 30 male voices.
- You can create and sell unlimited voices.
- Extremely user-friendly interface.
Price
| Audio Synthesys | Human Studio Synthesys | Audio and Human Studio Synthesys |
|---|---|---|
| $29 / Month | #39 / Month | $59 / Month |
| Unlimited voice-overs downloads Access to 30 Real Human Voices Access to 66 Languages & 254 General Voices Fully Web-Based | Unlimited Videos Access to 73 Humatars (Extra Outfits included) Access to 66 Languages & 254 General Voices Upload Your Own Voice Full Video Customization Fully Web-Based | Unlimited Videos & Voice Overs Access to both Software All features included 20% OFF |
Cons
- It has character limitations when making a voice-over.
- It does not have a free trial version.
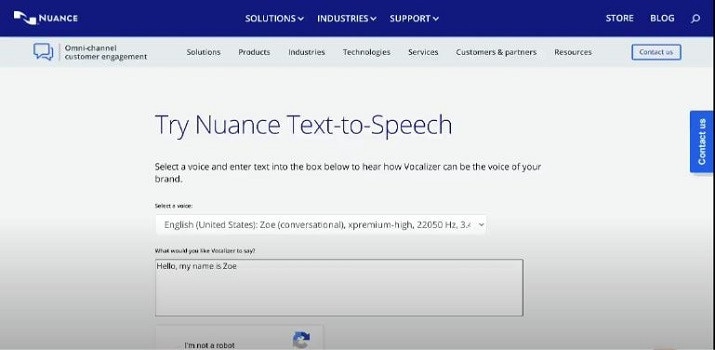
#4: Nuance Dragon
It is available in Windows only
Nuance Dragon is an artificial intelligence-powered voice recognition system. It offers both residential and commercial solutions. It spans across various data centers and delivers cloud services.
Its hosting platform is Microsoft Azure, which is HITRUST CSF-approved. All of their solutions follow industry-standard guidelines. Nuance Dragon protects data in transit and at rest with 256-bit encryption.
Features
- Nuance Dragon complies with HIPAA regulations, which are critical for public sector security and confidentiality.
- It applies to a wide range of professions.
- It offers complete protection.
Price
| Home | Professional |
|---|---|
| $200 | $500 |
| It has 99% recognition accuracy Immediate access to your dictation. One-time payment. | It has 99% recognition accuracy Share documents Sync custom words and commands Immediate access to your dictation. One-time payment. |
Cons
- It works only on Windows, and it is not available on Mac.
- It does not have a free trial version.
- It does not include Premium Consulting or Integration Services.
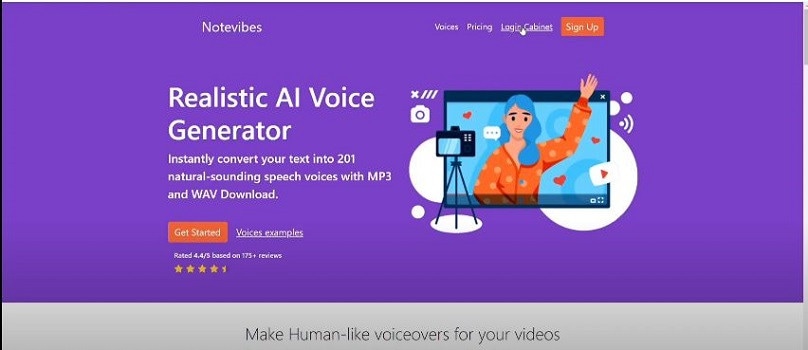
#5: Notevibes
It is available on Windows, Mac, Android, iPhone, and Online
Notevibes is a tremendous text-to-speech tool that comes in both a free and a commercial edition with many features. It offers customers over five hundred translation characters while also allowing them to modify the pronunciation.
As a result, users have access to all of their resources to learn a new language and significantly increase their reading skills. Furthermore, Notevibes features 177 distinct voices speaking in 18 different languages.
Users appreciate the natural-sounding voices that assist them in pronouncing words correctly. Users from many walks of life can profit from the tool because it has many functions.
Features
- Realistic voice generator
- Aloud Speaking
- Make an MP3 of your audio speech.
- 47 Individual Voices
- Characters: 200 – 1,000,000
Price
| Personal Pack | Commercial Pack | Corporate Pack |
|---|---|---|
| $9 / Month ($107 per year) | $90 / Month ($1080 per year) | $4,000 / Year |
| For personal use only: private listening, personal e-learning 1,200,000 characters pack per year 201 Premium Voices available 18 Languages (EN, ES, DE, FR, VT, RU, PT, IT, NL, TR, JP, KO, HI and etc) MP3 Download 1 Account License | For Commercial use: YouTube, broadcasts, TV, IVR voiceover and other businesses 12,000,000 characters pack per year Advanced voice editor new 201 Premium Voices available 18 Languages (EN, ES, DE, FR, VT, RU, PT, IT, NL, TR, JP, KO, HI and etc.) SSML tags support MP3, Wav Download Audio files history You 100% own intellectual property for all files | For Corporate Users All in Commercial and 50,000,000 characters pack per year Master account for management Team License (up to 10 users) Priority email support |
Cons
- It does not have a preview. You have to generate the voice-over to listen.
- You can’t combine a single audio file out of many audio files.
- The Voiceover & Editor Page is unique in that it has two sections: one for creating the voice-over and another for obtaining audio files. Switching between them will take some time. If you’re working on a large project, moving between bot sites will be a hassle.
- No project-based organization
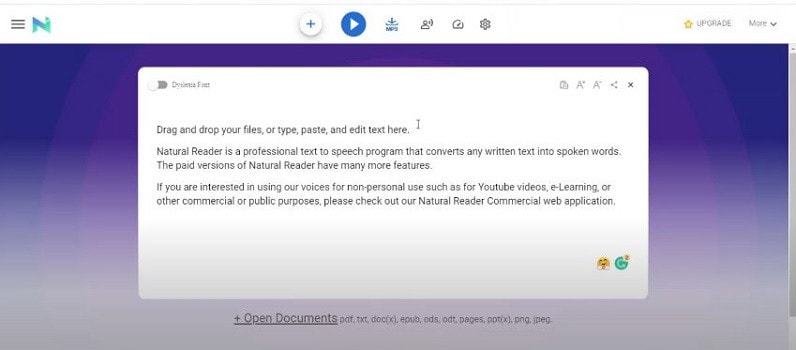
#6: Natural Reader
It is available on Windows, Mac, Android, iPhone, and Online
Natural Reader is among the few free text-to-speech programs with several exciting features. It’s pretty easy to use, and you can get started right away by loading texts into its library.
Furthermore, the tool allows users to manage several files in various formats. Lastly, the built-in OCR will enable you to submit images or text scans and have them read aloud.
Features
- Built-in OCR
- Choice of interfaces
- Built-in browser
- Dyslexic-friendly font
Price
| Free | Personal | Professional | Ultimate |
|---|---|---|---|
| $0 (Free to use) | $99.50 (One-time payment) | $129.50 (One-time payment) | $199.50 (One-time payment) |
| Unlimited use with Free Voices Miniboard to read text in other applications Pronunciation Editor Works with PDF, Docx, TXT and ePub | 2 natural voices included All features of Free Version included Convert to MP3 | 4 natural voices included All features of Personal Version included | 6 natural voices included All features of Professional Version included 5000 images/year for OCR to read from images & scanned PDFs |
Cons
- There is no way to skip or jump around any text on the page.
- You will need internet access in the free software to access the voices.
- The paid version is very expensive in comparison to others.
- Long-term use is complex.
Pro Tip:
If you just use text-to-speech software sometimes, it’s best to utilize one of the many free options available. On the other hand, paid versions are great if you want extensive functionality and don’t mind limitations on usage.
You should check for text-to-speech software with natural voices enabled in commercial applications. A top-rated system should include real-time speech capabilities and a user-friendly UI.
Text to Speech Services’ Advantages
TTS systems can help content owners such as corporations, YouTubers, institutions, media houses, mobile app developers, e-learning solution providers, and others in comparable fields in the following ways:
- Global Reach: TTS voices that sound human, are clear, and can be customized can let you communicate with people worldwide. You can even incorporate translations in multiple languages to read the text in their own language.
- Improve User Experience: Allowing speech in pre-sales and after-sales can reduce human agent burden, provide individualized services, lower operating expenses, and speed up productivity.
- Saves Money and Time: Companies can quickly and easily implement TTS systems with little maintenance.
- Improves Productivity: E-learning experts and HR departments can create learning modules for staff training using TTS. This will allow employees to learn the information while working anywhere and at any time.
Text to speech solutions can also help online students, researchers, teachers, device users, app users, website visitors, machine users, and others in the following ways:
- People with Reading Difficulties: A considerable portion of the global population suffers from learning or reading disabilities, including language-based learning disabilities. TTS solutions in your documents might assist them in better understanding the document. It can also aid persons with vision problems and literacy issues.
- Multitasking: Listening to something allows you to execute multiple physical duties at once, such as cooking, cleaning, exercising, etc. It’s a welcome break for busy professionals who can’t find time to read the stacks of books that have accumulated on their desks for years. They can just put on their headphones and listen to them while doing other things.
- Great for Kids: Instead of being glued to their computers or phones all day, your children can listen to audio files, including their books and other study materials. It will safeguard their priceless sight. It will also increase word recognition, cognitive skills, make finding and correcting problems in their writing easier.
- Journey Mate: People can listen to information while traveling by using speech to text. You may always listen to the noises and enjoy them while riding without having to strain your eyes, regardless of how rocky the road is.
Frequently Asked Questions
What is Text to Speech Software?
TTS (text-to-speech) is an assistive technology that reads text aloud. TTS systems provide computer-generated sound, and we may vary the reading speed by increasing the speed or slowing things down.
Is Text-To-Speech Technology Handy?
According to studies, text-to-speech technology helps viewers concentrate on the content rather than the process of reading, resulting in a greater understanding of the topic and more engagement.
While some argue that audiobooks, or scripts read by paid voice actors, are superior to computer-generated voices, there is compelling proof that text to speech can be a handy tool for YouTube content creators.
Is The Voice Quality Consistent Across All Text to Speech Programs?
Voice quality ultimately depends on the service. However, some use human voices, while premium solutions employ the voices of well-known narrators like David Attenborough and Morgan Freeman.
You can even mimic the sound of youngsters speaking. Many gadgets, particularly online web page scanners and even audiobooks emphasize the text they are scanning.
What Are the Benefits of Using Text to Speech Software?
You can use this type of technology in a variety of ways. Some programs read text from a digital document or an interactive online page for users. Some programs can even convert handwritten text into speech using modern technology such as Optical Character Recognition (OCR).
Text-to-speech software is compatible with various devices and applies to all kinds of individual digital devices, including laptops, PCs, tablets, and smartphones.
What Is the Process of Converting Speech in Text to Speech Software?
The majority of text-to-speech software works in the same way. Users can either upload or input the content to convert to audio. Then they choose from the different voices to evaluate which sound is best for the voice-over.
Many TTS solutions rely on OCR technology in some form. OCR allows us to obtain text from documents and photos by recognizing written and digital text. If you click an image of a street sign, the program will read the words printed on it.
Is it possible to use Text to Speech on YouTube?
Absolutely, you can get them in YouTube videos, but to prevent advertising strikes, make sure you post videos with authentic human voices somewhere between.
What Text-To-Speech Software Does YouTube Content Creators Use?
To incorporate voice-overs on their sales pitches and informative videos, most YouTubers pay for text-to-speech software like Synthesys and Speechelo.
Is It Possible to Monetize YouTube Videos Using Text to Speech?
It varies on the text to speech engine you’re using; some TTS engines support YouTube monetization while others don’t.
Speech has a significant impact on the success rate of the entire YouTube adventure, whether storytelling or a standard sales pitch. It helps to have a decent voice and speaking abilities. However, not everyone gets both simultaneously; many individuals employ voice artists to provide voice-overs.
Some freelancers charge $5-$100 for a 5-minute voice-over. However, not everyone can afford an expensive voice artist, especially for longer films or just starting. Here are other options that I discovered as the most acceptable free text to voice generators for YouTube videos.
Let’s take a deeper look at the most excellent free text to speech software for YouTube videos.
Getting Started
Text to speech is a speech synthesis software that speaks aloud digital and textual content. The software offers a wide range of applications and is utilized by everyone from professionals and students to toddlers and adults.
Viewers are emotionally attached to documents such as PDFs, books, novels, and e-learning courses when they hear narration with a human voice. Text-to-speech systems are ideal for multitasking by busy professionals.
It’s no surprise that there are numerous text-to-speech options available. Audiobooks are also becoming more popular for the same reasons.
We’ll go over the best text-to-speech tools available in this guide. We’ve gathered a detailed list of the most exemplary free and commercial text-to-speech applications to help you choose the best option for your needs:
#1: Murf
It is available on Windows, Mac, Android, iPhone, and Online
Murf is a text-based voice-over maker. You can either compose your script or submit a voice clip to convert it into hyper-realistic AI voices. Murf delivers expert voice-over artists with experienced voices. You can check multiple parameters in the voices. You can use Murf to signify a brand, a product, a company, a presentation, and many more.
Features:
- Murf allows you to create voice-overs from the text. It also allows you to transform your speech into editable text, which you can subsequently edit or convert into AI voice.
- Murf Studio provides the ability to synchronize your speech with visuals.
- Murf provides over 100 authentic voices in 19 languages.
- It also gives options for inserting pauses, altering narration tempo, and emphasizing certain points.
- It also includes features such as script checking with grammar assistance, free background music, video and music cutting, and more.
- Murf offers comprehensive communication and collaboration tools, access control, a pronunciation library, and a service level agreement (SLA) for enterprises wishing to develop voice-overs in bulk.
Price
| Free | Basic | Pro | Enterprise |
|---|---|---|---|
| $0 / Month | $13 / Month | $26 / Month | $166 / Month |
| Try all 120+ voices 10 mins of voice generation 10 mins of transcription Share link for audio/video output No downloads Single User No credit card required | Unlimited Downloads 24 hours of voice generation/year Access to 60 voices (10 languages) Commercial Usage rights Chat and Email support Single User | Unlimited Downloads 96 hours of voice generation/year 48 hours of transcription/year Access 120+ voices (20 languages) Commercial Usage rights Recorded voice editing Voice changer Up to 3 users Priority Support | 5+ Users Unlimited Voice Generation Time Unlimited Transcription time Custom Voices Single-sign on (SSO) Collaboration and Access Control Dedicated Account Representative Centralized invoicing Service Agreement Deletion recovery Unlimited Storage |
Cons
- You may experience frequent technical glitches.
#2: Speechelo
It is available on Windows, Mac, Android, iPhone, and Online
Speechelo gives a realistic voice tone and expressions. This gets people more interested in voice-overs. You can use Speechelo to create sales videos, training films, and instructive videos, among other things. It includes attributes such as breathing and pauses, vocal tones, changing speed and pitch, and compatibility for 23 languages.
Features
- The text-to-speech engine in Speechelo can add intonation to the voice.
- It contains over 30 voices that sound natural.
- It has both male and female voices.
- It works with various video editing tools, including Camatasia, Adobe, Premier, and iMovie.
- Ordinary tone, cheerful tone, and serious tone are the three tones you may use to read your text.
Price
| Premium |
|---|
| $47 (Discount price) |
| One-time payment With 60-day money-back guarantee |
Cons
- The output of Speechelo will be 48kbps. If you’re familiar with sound production, you’ll see that this is a very low output.
- It might produce inaccurate output if you input long voice-overs.
#3: Synthesys
It is available on Windows, Mac, Android, iPhone, and Online
Synthesys helps to convert text into a natural-sounding voice. With Synthesis, you can choose from various tones, accents, male and female voices, languages, and reading speeds. Moreover, It simply takes three steps to create a natural-sounding artificial speech that you may use for a variety of commercial applications.
- To begin, select the gender, style, accent, and tone you want the created voice to have.
- You can paste or type the content you want to turn into speech into Synthesys’ AI voice-producing platform.
- Lastly, click ‘create’ to start creating your artificial speech in minutes. You may adjust the reading speed and pause length from here.
Features
- Cloud-based software.
- Expert and natural-sounding voices are available in an extensive collection.
- There are over 35 female voices and 30 male voices.
- You can create and sell unlimited voices.
- Extremely user-friendly interface.
Price
| Audio Synthesys | Human Studio Synthesys | Audio and Human Studio Synthesys |
|---|---|---|
| $29 / Month | #39 / Month | $59 / Month |
| Unlimited voice-overs downloads Access to 30 Real Human Voices Access to 66 Languages & 254 General Voices Fully Web-Based | Unlimited Videos Access to 73 Humatars (Extra Outfits included) Access to 66 Languages & 254 General Voices Upload Your Own Voice Full Video Customization Fully Web-Based | Unlimited Videos & Voice Overs Access to both Software All features included 20% OFF |
Cons
- It has character limitations when making a voice-over.
- It does not have a free trial version.
#4: Nuance Dragon
It is available in Windows only
Nuance Dragon is an artificial intelligence-powered voice recognition system. It offers both residential and commercial solutions. It spans across various data centers and delivers cloud services.
Its hosting platform is Microsoft Azure, which is HITRUST CSF-approved. All of their solutions follow industry-standard guidelines. Nuance Dragon protects data in transit and at rest with 256-bit encryption.
Features
- Nuance Dragon complies with HIPAA regulations, which are critical for public sector security and confidentiality.
- It applies to a wide range of professions.
- It offers complete protection.
Price
| Home | Professional |
|---|---|
| $200 | $500 |
| It has 99% recognition accuracy Immediate access to your dictation. One-time payment. | It has 99% recognition accuracy Share documents Sync custom words and commands Immediate access to your dictation. One-time payment. |
Cons
- It works only on Windows, and it is not available on Mac.
- It does not have a free trial version.
- It does not include Premium Consulting or Integration Services.
#5: Notevibes
It is available on Windows, Mac, Android, iPhone, and Online
Notevibes is a tremendous text-to-speech tool that comes in both a free and a commercial edition with many features. It offers customers over five hundred translation characters while also allowing them to modify the pronunciation.
As a result, users have access to all of their resources to learn a new language and significantly increase their reading skills. Furthermore, Notevibes features 177 distinct voices speaking in 18 different languages.
Users appreciate the natural-sounding voices that assist them in pronouncing words correctly. Users from many walks of life can profit from the tool because it has many functions.
Features
- Realistic voice generator
- Aloud Speaking
- Make an MP3 of your audio speech.
- 47 Individual Voices
- Characters: 200 – 1,000,000
Price
| Personal Pack | Commercial Pack | Corporate Pack |
|---|---|---|
| $9 / Month ($107 per year) | $90 / Month ($1080 per year) | $4,000 / Year |
| For personal use only: private listening, personal e-learning 1,200,000 characters pack per year 201 Premium Voices available 18 Languages (EN, ES, DE, FR, VT, RU, PT, IT, NL, TR, JP, KO, HI and etc) MP3 Download 1 Account License | For Commercial use: YouTube, broadcasts, TV, IVR voiceover and other businesses 12,000,000 characters pack per year Advanced voice editor new 201 Premium Voices available 18 Languages (EN, ES, DE, FR, VT, RU, PT, IT, NL, TR, JP, KO, HI and etc.) SSML tags support MP3, Wav Download Audio files history You 100% own intellectual property for all files | For Corporate Users All in Commercial and 50,000,000 characters pack per year Master account for management Team License (up to 10 users) Priority email support |
Cons
- It does not have a preview. You have to generate the voice-over to listen.
- You can’t combine a single audio file out of many audio files.
- The Voiceover & Editor Page is unique in that it has two sections: one for creating the voice-over and another for obtaining audio files. Switching between them will take some time. If you’re working on a large project, moving between bot sites will be a hassle.
- No project-based organization
#6: Natural Reader
It is available on Windows, Mac, Android, iPhone, and Online
Natural Reader is among the few free text-to-speech programs with several exciting features. It’s pretty easy to use, and you can get started right away by loading texts into its library.
Furthermore, the tool allows users to manage several files in various formats. Lastly, the built-in OCR will enable you to submit images or text scans and have them read aloud.
Features
- Built-in OCR
- Choice of interfaces
- Built-in browser
- Dyslexic-friendly font
Price
| Free | Personal | Professional | Ultimate |
|---|---|---|---|
| $0 (Free to use) | $99.50 (One-time payment) | $129.50 (One-time payment) | $199.50 (One-time payment) |
| Unlimited use with Free Voices Miniboard to read text in other applications Pronunciation Editor Works with PDF, Docx, TXT and ePub | 2 natural voices included All features of Free Version included Convert to MP3 | 4 natural voices included All features of Personal Version included | 6 natural voices included All features of Professional Version included 5000 images/year for OCR to read from images & scanned PDFs |
Cons
- There is no way to skip or jump around any text on the page.
- You will need internet access in the free software to access the voices.
- The paid version is very expensive in comparison to others.
- Long-term use is complex.
Pro Tip:
If you just use text-to-speech software sometimes, it’s best to utilize one of the many free options available. On the other hand, paid versions are great if you want extensive functionality and don’t mind limitations on usage.
You should check for text-to-speech software with natural voices enabled in commercial applications. A top-rated system should include real-time speech capabilities and a user-friendly UI.
Text to Speech Services’ Advantages
TTS systems can help content owners such as corporations, YouTubers, institutions, media houses, mobile app developers, e-learning solution providers, and others in comparable fields in the following ways:
- Global Reach: TTS voices that sound human, are clear, and can be customized can let you communicate with people worldwide. You can even incorporate translations in multiple languages to read the text in their own language.
- Improve User Experience: Allowing speech in pre-sales and after-sales can reduce human agent burden, provide individualized services, lower operating expenses, and speed up productivity.
- Saves Money and Time: Companies can quickly and easily implement TTS systems with little maintenance.
- Improves Productivity: E-learning experts and HR departments can create learning modules for staff training using TTS. This will allow employees to learn the information while working anywhere and at any time.
Text to speech solutions can also help online students, researchers, teachers, device users, app users, website visitors, machine users, and others in the following ways:
- People with Reading Difficulties: A considerable portion of the global population suffers from learning or reading disabilities, including language-based learning disabilities. TTS solutions in your documents might assist them in better understanding the document. It can also aid persons with vision problems and literacy issues.
- Multitasking: Listening to something allows you to execute multiple physical duties at once, such as cooking, cleaning, exercising, etc. It’s a welcome break for busy professionals who can’t find time to read the stacks of books that have accumulated on their desks for years. They can just put on their headphones and listen to them while doing other things.
- Great for Kids: Instead of being glued to their computers or phones all day, your children can listen to audio files, including their books and other study materials. It will safeguard their priceless sight. It will also increase word recognition, cognitive skills, make finding and correcting problems in their writing easier.
- Journey Mate: People can listen to information while traveling by using speech to text. You may always listen to the noises and enjoy them while riding without having to strain your eyes, regardless of how rocky the road is.
Frequently Asked Questions
What is Text to Speech Software?
TTS (text-to-speech) is an assistive technology that reads text aloud. TTS systems provide computer-generated sound, and we may vary the reading speed by increasing the speed or slowing things down.
Is Text-To-Speech Technology Handy?
According to studies, text-to-speech technology helps viewers concentrate on the content rather than the process of reading, resulting in a greater understanding of the topic and more engagement.
While some argue that audiobooks, or scripts read by paid voice actors, are superior to computer-generated voices, there is compelling proof that text to speech can be a handy tool for YouTube content creators.
Is The Voice Quality Consistent Across All Text to Speech Programs?
Voice quality ultimately depends on the service. However, some use human voices, while premium solutions employ the voices of well-known narrators like David Attenborough and Morgan Freeman.
You can even mimic the sound of youngsters speaking. Many gadgets, particularly online web page scanners and even audiobooks emphasize the text they are scanning.
What Are the Benefits of Using Text to Speech Software?
You can use this type of technology in a variety of ways. Some programs read text from a digital document or an interactive online page for users. Some programs can even convert handwritten text into speech using modern technology such as Optical Character Recognition (OCR).
Text-to-speech software is compatible with various devices and applies to all kinds of individual digital devices, including laptops, PCs, tablets, and smartphones.
What Is the Process of Converting Speech in Text to Speech Software?
The majority of text-to-speech software works in the same way. Users can either upload or input the content to convert to audio. Then they choose from the different voices to evaluate which sound is best for the voice-over.
Many TTS solutions rely on OCR technology in some form. OCR allows us to obtain text from documents and photos by recognizing written and digital text. If you click an image of a street sign, the program will read the words printed on it.
Is it possible to use Text to Speech on YouTube?
Absolutely, you can get them in YouTube videos, but to prevent advertising strikes, make sure you post videos with authentic human voices somewhere between.
What Text-To-Speech Software Does YouTube Content Creators Use?
To incorporate voice-overs on their sales pitches and informative videos, most YouTubers pay for text-to-speech software like Synthesys and Speechelo.
Is It Possible to Monetize YouTube Videos Using Text to Speech?
It varies on the text to speech engine you’re using; some TTS engines support YouTube monetization while others don’t.
Why You Should Master Slideshows In Lightroom, Fresh Insight?
Why You Should Master Slideshows in Lightroom, Fresh Insight
An easy yet powerful editor
Numerous effects to choose from
Detailed tutorials provided by the official channel
Adobe Lightroom is an image manipulation software which is developed by Adobe Inc. It is used for editing, importing, saving and sharing a large no. of digital images. Lightroom editing functions include HSL, colour grading, lens correction, white balance, the transformation of spot removal, red-eye correction and adjustment brushing. Lightroom has a feature of slideshow module which you must have heard about it before.
The process of creating a slideshow video can be time-consuming but once you have created it, you can rewind your memories in just 3-4 minutes. If you want you can share the video on your social media accounts.
In this article
01 [What is Lightroom and What Advantages Does It Have for Making Slideshows](#Part 1)
02 [What Does Slideshows in Lightroom Do to Different Groups of People](#Part 2)
03 [How to Create a Professional-looking Slideshow with Lightroom](#Part 3)
04 [Hot FAQs About Slideshows in Lightroom](#Part 4)
Part 1 What is lightroom and what advantages does it have for making slideshows?
Lightroom helps in editing the images and it allows the users to edit the images by using external features. Photographers usually like working on the lightroom because it is a very popular and easy tool. It is perfect for beginners and graphic designers who are looking for an easy and straightforward editor.
Lightroom is used for image retouching. Lightroom includes improving the color tone, color balance, cropping, filters, removing red-eye effect, and many more things. Lightroom supports some the image formats like JPEG, PSD, PNG and TIFF. You can also edit the raw images.
Advantages
● Easy to use - The lightroom interface is less complex, which makes it easy to use especially for the newcomers.
● Tidy interface - In lightroom, it is easier to search for images as it gathers the metadata on each image on its own. So you can find the image with a very specific date, time, resolution, model, etc.
● Editing capabilities - With editing capabilities like contrast, exposure, clarity, warmth, and saturation, Lightroom can give the desired look to the image which photographers want to create.
Part 2 What do slideshows in Lightroom do to a different group of people?
01Enable or Disable People View
If you are a beginner and people view is disabled, all pre-existing face model data is deleted from lightroom servers. Lightroom will no longer analyze new images and will not group them in clusters automatically. You need to enable it so that the lightroom desktop can analyze images in the cloud to identify people and form clusters in people’s view.
02View people in your photos
● In the My Photos panel at the upper-left side of the screen, select People to view the people view. You can access People clusters in which each cluster contains images of a particular person. Below the cover photo of each cluster, you can see the total number of photos for each person.
● To view photos of that person you can click on any cluster. In the cluster at the upper right corner of the screen, you can view the total number of photos.
03Sort options in People View
To sort People clusters follow the steps:
● In the My Photos panel at the upper left side of the screen, select People to view People View.
● Click on the three dots at the upper right corner of the screen, from the drop-down list select Sort By, and then select the following option:
● First Name: Sort the clusters in the alphabetical order of the first name.
● Last Name: Sort the clusters in the alphabetical order of the last name.
● Count: Sort the clusters with the highest number of photos to the least no. of photos in a cluster.
Part 3 How to create a professional-looking slideshow with Lightroom?
Do you know that you can create a professional-looking slideshow using lightroom? Here are some steps that you can follow to make a professional-looking slideshow.
Step 1 - Photo selection
The first thing you have to do is select the images you want to include in making the slideshow. There are a lot of ways to do this in Lightroom.
● In the grid view select the photos you want to include. Select CTRL (CMD) key and click on each image.
● Add those images to Quick Collection because it is easiest to work with. Click the B key to add them to the quick collection.
● It will be added to the collection panel when you will name the collection for the slideshow.

Step 2 - Arrange the photos
Now, it is time for arranging the photos in a sequence in which you want them to watch in a slideshow. If you want to rearrange them simply drag and drop each image in the grid view where you want to make them appear in a slideshow.
Try to arrange the photos in such a way so that they can tell a story to the viewers who are watching it.
Step 3 – Create a slideshow
Once you have arranged the photos in a sequence, then create a slideshow.
● Click on the ‘slideshow’ menu given at the top of your screen.
● This will lead you to the slideshow module view in lightroom.
● Click on the ‘Create Slideshow’ given at the top right of the central panel.
● Add a name to your slideshow and then click on create.
● Once you have created it and named your slideshow, all the changes will be automatically saved in lightroom.

Step 4 – Select a template for a slideshow
From the template browser given on the left-hand side panel, you can select a template for your slideshow. Before adding anything, do a run-through on your slideshow to see how it looks.
Step 5 – Designing the lightroom slideshow
You can customize your slideshow to make it more professional. You can make following changes or enrichments by using the features given at the right-hand side panel:
● Titles - You can add text, company logo, introduction or any other important information. You can easily add these things in your slideshow in lightroom.
● Watermarks and overlays - You can add watermarks and custom overlay text in every slide you want to by using the overlays windows.
● Layout - You can change the spacing for each slide by unselecting the Link All Box and selecting the ratio which you prefer. Although the program automatically sets the spacing for each slide.
● Options – You can add a frame or you can change the border it allows you to select how your images are going to be displayed in each slide.
● Background – You can add a background to enhance an image, not to divert attention from it. You can add an image as your background or add any colour as your background. You can create background by using various options available.
● Music – You can add music of your choice using an mp3 file.
● Transitions - Setting a transitions between the slides can really make a huge impact on your overall experience. You can use the auto option or you can set the transitions manually.
Step - 6 Completion of slideshow
Once you have made all the desired changes, you can press “Play” option to run the slideshow. If you still want to make any changes you can go back and change whatever you like. Once it’s done and you are happy with the results it’s time to export the slideshow in the form of video or PDF.

Part 4 Hot FAQs about slideshow in lightroom
Q1. How can you make a slideshow in lightroom?
A. You can create a slideshow by using the slideshow module in lightroom, where you can select templates, layouts, add tiles or songs, choose transitions and playback options.
Q2. Where is the slideshow module in lightroom?
A. Start by clicking on ‘slideshow’ option given at the top menu of your screen. This will open the slideshow module view in lightroom. The right and left panels in slideshow module will look different than the ones in the library module.
Q3. How can you change the sequence of the photos in slideshow lightroom?
A. You can control the order of the photos in a Lightroom folder by dragging and dropping each image from one place to the other in the filmstrip view. To rearrange grab the image and drag on it until you see a black bar appear between two images.
Q4. What is the transition effect in slideshow?
A. Transitions are often called – the movement you see when slide changes to another slide in a slideshow. They are different from animation effect. You can set it manually or with an auto option.
Q5. How to make your slideshow more attractive?
A. There are a lot of options to make your look slideshow more attractive. By using the beautiful template, layouts, background and adding transitions with the perfect time ratio. This will enhance the look of your slideshow and will make it more attractive.
If you are not able to follow the interface of lightroom you can consider Filmora for making attractive slideshows. Wondershare Filmora Video Editor allows you to crop, pan and zoom the slideshow automatically or manually by applying pan and zoom photo placement. It has its own music track and sound effect gallery that allows you to customize the slideshows. Filmora allows you to record your own voiceovers as well. It has also fade-in, fade-out effects with amazing transitions. It exports the videos at resolutions of up to 4K.
For Win 7 or later (64-bit)
For macOS 10.12 or later
● Ending Thoughts →
● Adobe Lightroom is one of the best software for making slideshows due to its amazing features like color grading, red eye correction, transformation of spot removal, white balance etc.
● Lightroom has a feature of slideshow module in which you can create quality slideshow presentations for your business.
● If you are not able to use lightroom you can consider using Filmora for creating amazing slideshows.
Adobe Lightroom is an image manipulation software which is developed by Adobe Inc. It is used for editing, importing, saving and sharing a large no. of digital images. Lightroom editing functions include HSL, colour grading, lens correction, white balance, the transformation of spot removal, red-eye correction and adjustment brushing. Lightroom has a feature of slideshow module which you must have heard about it before.
The process of creating a slideshow video can be time-consuming but once you have created it, you can rewind your memories in just 3-4 minutes. If you want you can share the video on your social media accounts.
In this article
01 [What is Lightroom and What Advantages Does It Have for Making Slideshows](#Part 1)
02 [What Does Slideshows in Lightroom Do to Different Groups of People](#Part 2)
03 [How to Create a Professional-looking Slideshow with Lightroom](#Part 3)
04 [Hot FAQs About Slideshows in Lightroom](#Part 4)
Part 1 What is lightroom and what advantages does it have for making slideshows?
Lightroom helps in editing the images and it allows the users to edit the images by using external features. Photographers usually like working on the lightroom because it is a very popular and easy tool. It is perfect for beginners and graphic designers who are looking for an easy and straightforward editor.
Lightroom is used for image retouching. Lightroom includes improving the color tone, color balance, cropping, filters, removing red-eye effect, and many more things. Lightroom supports some the image formats like JPEG, PSD, PNG and TIFF. You can also edit the raw images.
Advantages
● Easy to use - The lightroom interface is less complex, which makes it easy to use especially for the newcomers.
● Tidy interface - In lightroom, it is easier to search for images as it gathers the metadata on each image on its own. So you can find the image with a very specific date, time, resolution, model, etc.
● Editing capabilities - With editing capabilities like contrast, exposure, clarity, warmth, and saturation, Lightroom can give the desired look to the image which photographers want to create.
Part 2 What do slideshows in Lightroom do to a different group of people?
01Enable or Disable People View
If you are a beginner and people view is disabled, all pre-existing face model data is deleted from lightroom servers. Lightroom will no longer analyze new images and will not group them in clusters automatically. You need to enable it so that the lightroom desktop can analyze images in the cloud to identify people and form clusters in people’s view.
02View people in your photos
● In the My Photos panel at the upper-left side of the screen, select People to view the people view. You can access People clusters in which each cluster contains images of a particular person. Below the cover photo of each cluster, you can see the total number of photos for each person.
● To view photos of that person you can click on any cluster. In the cluster at the upper right corner of the screen, you can view the total number of photos.
03Sort options in People View
To sort People clusters follow the steps:
● In the My Photos panel at the upper left side of the screen, select People to view People View.
● Click on the three dots at the upper right corner of the screen, from the drop-down list select Sort By, and then select the following option:
● First Name: Sort the clusters in the alphabetical order of the first name.
● Last Name: Sort the clusters in the alphabetical order of the last name.
● Count: Sort the clusters with the highest number of photos to the least no. of photos in a cluster.
Part 3 How to create a professional-looking slideshow with Lightroom?
Do you know that you can create a professional-looking slideshow using lightroom? Here are some steps that you can follow to make a professional-looking slideshow.
Step 1 - Photo selection
The first thing you have to do is select the images you want to include in making the slideshow. There are a lot of ways to do this in Lightroom.
● In the grid view select the photos you want to include. Select CTRL (CMD) key and click on each image.
● Add those images to Quick Collection because it is easiest to work with. Click the B key to add them to the quick collection.
● It will be added to the collection panel when you will name the collection for the slideshow.
Step 2 - Arrange the photos
Now, it is time for arranging the photos in a sequence in which you want them to watch in a slideshow. If you want to rearrange them simply drag and drop each image in the grid view where you want to make them appear in a slideshow.
Try to arrange the photos in such a way so that they can tell a story to the viewers who are watching it.
Step 3 – Create a slideshow
Once you have arranged the photos in a sequence, then create a slideshow.
● Click on the ‘slideshow’ menu given at the top of your screen.
● This will lead you to the slideshow module view in lightroom.
● Click on the ‘Create Slideshow’ given at the top right of the central panel.
● Add a name to your slideshow and then click on create.
● Once you have created it and named your slideshow, all the changes will be automatically saved in lightroom.
Step 4 – Select a template for a slideshow
From the template browser given on the left-hand side panel, you can select a template for your slideshow. Before adding anything, do a run-through on your slideshow to see how it looks.
Step 5 – Designing the lightroom slideshow
You can customize your slideshow to make it more professional. You can make following changes or enrichments by using the features given at the right-hand side panel:
● Titles - You can add text, company logo, introduction or any other important information. You can easily add these things in your slideshow in lightroom.
● Watermarks and overlays - You can add watermarks and custom overlay text in every slide you want to by using the overlays windows.
● Layout - You can change the spacing for each slide by unselecting the Link All Box and selecting the ratio which you prefer. Although the program automatically sets the spacing for each slide.
● Options – You can add a frame or you can change the border it allows you to select how your images are going to be displayed in each slide.
● Background – You can add a background to enhance an image, not to divert attention from it. You can add an image as your background or add any colour as your background. You can create background by using various options available.
● Music – You can add music of your choice using an mp3 file.
● Transitions - Setting a transitions between the slides can really make a huge impact on your overall experience. You can use the auto option or you can set the transitions manually.
Step - 6 Completion of slideshow
Once you have made all the desired changes, you can press “Play” option to run the slideshow. If you still want to make any changes you can go back and change whatever you like. Once it’s done and you are happy with the results it’s time to export the slideshow in the form of video or PDF.
Part 4 Hot FAQs about slideshow in lightroom
Q1. How can you make a slideshow in lightroom?
A. You can create a slideshow by using the slideshow module in lightroom, where you can select templates, layouts, add tiles or songs, choose transitions and playback options.
Q2. Where is the slideshow module in lightroom?
A. Start by clicking on ‘slideshow’ option given at the top menu of your screen. This will open the slideshow module view in lightroom. The right and left panels in slideshow module will look different than the ones in the library module.
Q3. How can you change the sequence of the photos in slideshow lightroom?
A. You can control the order of the photos in a Lightroom folder by dragging and dropping each image from one place to the other in the filmstrip view. To rearrange grab the image and drag on it until you see a black bar appear between two images.
Q4. What is the transition effect in slideshow?
A. Transitions are often called – the movement you see when slide changes to another slide in a slideshow. They are different from animation effect. You can set it manually or with an auto option.
Q5. How to make your slideshow more attractive?
A. There are a lot of options to make your look slideshow more attractive. By using the beautiful template, layouts, background and adding transitions with the perfect time ratio. This will enhance the look of your slideshow and will make it more attractive.
If you are not able to follow the interface of lightroom you can consider Filmora for making attractive slideshows. Wondershare Filmora Video Editor allows you to crop, pan and zoom the slideshow automatically or manually by applying pan and zoom photo placement. It has its own music track and sound effect gallery that allows you to customize the slideshows. Filmora allows you to record your own voiceovers as well. It has also fade-in, fade-out effects with amazing transitions. It exports the videos at resolutions of up to 4K.
For Win 7 or later (64-bit)
For macOS 10.12 or later
● Ending Thoughts →
● Adobe Lightroom is one of the best software for making slideshows due to its amazing features like color grading, red eye correction, transformation of spot removal, white balance etc.
● Lightroom has a feature of slideshow module in which you can create quality slideshow presentations for your business.
● If you are not able to use lightroom you can consider using Filmora for creating amazing slideshows.
How to Use Frame Blending in Adobe Premiere Pro
Create High-Quality Video - Wondershare Filmora
An easy and powerful YouTube video editor
Numerous video and audio effects to choose from
Detailed tutorials are provided by the official channel
Frame blending is a video editing technique used to create smooth transitions between two video frames. This process is often used to create special effects or transition between two different video clips. Frame blending can be done manually or with the help of software.
When frame blending is done manually, the editor will take two consecutive frames and blend them. This is done by using a process called cross-fading. Cross-fading is when the first frame gradually fades out while the second frame gradually fades in. The result is a seamless transition between the two frames.
Frame blending can also be done with the help of software. Many software programs offer frame blending capabilities Like Adobe Premiere Pro and more. These software programs typically have a user interface that allows the user to select the two frames that they want to blend. The software will then perform the cross-fading process automatically.

In this article
01 What is frame blending in Premiere Pro?
02 How to Choose from Frame Blending/ Frame Sampling/ Optical Flow
03 How to use Frame Blanding in Adobe Premiere Pro?
What is frame blending in Premiere Pro?
In Adobe Premiere Pro, frame blending is a built-in feature that can be used to create smooth transitions between two video frames. This feature can be accessed by selecting the “Effects” tab and choosing the “Frame Blending” option.
When using frame blending in Premiere Pro, the user will first need to select the two frames they want to blend. The user can then specify the amount of cross-fade they want to apply. The software will then automatically perform the frame blending process.

How to Choose from Frame Blending/ Frame Sampling/ Optical Flow
The different types of frame blending are:
- Frame Sampling: best for smooth movements, no image distortion.
- Optical Flow: smoother results but can cause image distortion.
- Frame Blending: a mix of the two, some image distortion but smoother results.
So, choosing which type of frame blending to use depends on the footage and the desired results. If you want smooth results with no image distortion, frame sampling is the best option. However, if you don’t mind some image distortion in exchange for smoother results, optical flow or frame blending would be better choices.
How to decide which option is the best for your use? Let’s explain more, and It depends on the footage and the desired results. If you want smooth results with no image distortion, frame sampling is the best option. However, if you don’t mind some image distortion in exchange for smoother results, optical flow or frame blending would be better choices.

How to use Frame Blanding in Adobe Premiere Pro?
Step 1\
Using frame blending in Adobe Premiere Pro is a simple process. First, the user will need to select the two frames that they want to blend. The user can then specify the amount of cross-fade they want to apply. The software will then automatically perform the frame blending process.
Open up Adobe Premiere Pro and load the two frames that you want to blend to get started. Once the frames are loaded, select the “Effects” tab and then choose the “Frame Blending” option.
Step 2\
Next, select the two frames that you want to blend. You can perform this by clicking on the first frame and then holding down the “Shift” key while clicking on the second frame.
Once the two frames are selected, specify the amount of cross-fade that you want to apply. You can do this by adjusting the “Crossfade Duration” slider. The software will then automatically perform the frame blending process.

Frame blending is a simple and effective way to create smooth transitions between two video frames. This technique can create a variety of different effects, such as dissolves, fades, and more. Frame blending is a built-in feature in Adobe Premiere Pro and can be accessed by selecting the “Effects” tab and then choosing the “Frame Blending” option. To use frame blending, simply select the two frames you want to blend and specify the amount of cross-fade you want to apply. The software will then automatically perform the frame blending process.
You can also consider Filmora for Blending Frame
Filmora is a video editing software that allows you to create, edit, and export videos. The software includes various features, such as the ability to add text, transitions, and effects. You can also use Filmora to create titles, lower thirds, etc.
How to use Filmora?
To use Filmora, simply load the video you want to edit and make the changes you want. Once you’re happy with the results, export the video, and it will be saved in the format of your choice.
How to use Frame Blending in Filmora?
There are things to keep in mind when using frame blending in Filmora.
First, the software only supports AVI and WMV files. Second, the frame blending feature is only available in the paid version of the software. Lastly, frame blending can only be used on two video frames at a time.
The video is made up of distinct layers blended together to create a unique and appealing look. There is a craft of making a running frame out of more than one video or picture. Even though the technique is considerably older, and individuals undertake it with much work, it has recently become simpler. We now have the easier method of combining two or more clips in a single frame, which we term Blend Modes.

How to composite with blending modes?
- Choose the videos and effects that you wish to overlay.
- Double-click the overlay clip on the timeline to view and adjust the video options for the split-screen effect.
- Go to the Compositing section and choose Blending Mode from the drop-down menu to apply an effect. Select Screen from the drop-down menu if you’d like to overlay an effect over a video.
Frame blending is a simple and effective way to create smooth transitions between two video frames. This technique can create a variety of different effects, such as dissolves, fades, and more. Frame blending is a built-in feature in Filmora and can be accessed by loading the video you want to edit and then making the changes you want. Once you’re happy with the results, export the video, and it will be saved in the format of your choice.
Advance features in Filmora 11
The latest version of Filmora (11.2.1) includes several new and improved features, such as:
- The ability to add textured background images
- An updated user interface
- A wider variety of title templates
- More video and audio effects
- Improved performance and stability
Filmora is a good choice for video editors who want to do more with their software. The program contains all of the essential functions of a video editor, such as the ability to add text, transitions, and effects. In addition, Filmora also includes some more advanced features, such as the ability to add textured background images and the ability to create titles, lower thirds, and more.
For Win 7 or later (64-bit)
For macOS 10.12 or later
Conclusion
● Frame blending is a simple and effective way to create smooth transitions between two video frames. This technique can be used to create a variety of different effects, such as dissolves, fades, and more. Frame blending is a built-in feature in Filmora and can be accessed by loading the video you want to edit and then making the changes you want. Once you’re happy with the results, export the video, and it will be saved in the format of your choice.
Frame blending is a video editing technique used to create smooth transitions between two video frames. This process is often used to create special effects or transition between two different video clips. Frame blending can be done manually or with the help of software.
When frame blending is done manually, the editor will take two consecutive frames and blend them. This is done by using a process called cross-fading. Cross-fading is when the first frame gradually fades out while the second frame gradually fades in. The result is a seamless transition between the two frames.
Frame blending can also be done with the help of software. Many software programs offer frame blending capabilities Like Adobe Premiere Pro and more. These software programs typically have a user interface that allows the user to select the two frames that they want to blend. The software will then perform the cross-fading process automatically.
In this article
01 What is frame blending in Premiere Pro?
02 How to Choose from Frame Blending/ Frame Sampling/ Optical Flow
03 How to use Frame Blanding in Adobe Premiere Pro?
What is frame blending in Premiere Pro?
In Adobe Premiere Pro, frame blending is a built-in feature that can be used to create smooth transitions between two video frames. This feature can be accessed by selecting the “Effects” tab and choosing the “Frame Blending” option.
When using frame blending in Premiere Pro, the user will first need to select the two frames they want to blend. The user can then specify the amount of cross-fade they want to apply. The software will then automatically perform the frame blending process.
How to Choose from Frame Blending/ Frame Sampling/ Optical Flow
The different types of frame blending are:
- Frame Sampling: best for smooth movements, no image distortion.
- Optical Flow: smoother results but can cause image distortion.
- Frame Blending: a mix of the two, some image distortion but smoother results.
So, choosing which type of frame blending to use depends on the footage and the desired results. If you want smooth results with no image distortion, frame sampling is the best option. However, if you don’t mind some image distortion in exchange for smoother results, optical flow or frame blending would be better choices.
How to decide which option is the best for your use? Let’s explain more, and It depends on the footage and the desired results. If you want smooth results with no image distortion, frame sampling is the best option. However, if you don’t mind some image distortion in exchange for smoother results, optical flow or frame blending would be better choices.
How to use Frame Blanding in Adobe Premiere Pro?
Step 1\
Using frame blending in Adobe Premiere Pro is a simple process. First, the user will need to select the two frames that they want to blend. The user can then specify the amount of cross-fade they want to apply. The software will then automatically perform the frame blending process.
Open up Adobe Premiere Pro and load the two frames that you want to blend to get started. Once the frames are loaded, select the “Effects” tab and then choose the “Frame Blending” option.
Step 2\
Next, select the two frames that you want to blend. You can perform this by clicking on the first frame and then holding down the “Shift” key while clicking on the second frame.
Once the two frames are selected, specify the amount of cross-fade that you want to apply. You can do this by adjusting the “Crossfade Duration” slider. The software will then automatically perform the frame blending process.
Frame blending is a simple and effective way to create smooth transitions between two video frames. This technique can create a variety of different effects, such as dissolves, fades, and more. Frame blending is a built-in feature in Adobe Premiere Pro and can be accessed by selecting the “Effects” tab and then choosing the “Frame Blending” option. To use frame blending, simply select the two frames you want to blend and specify the amount of cross-fade you want to apply. The software will then automatically perform the frame blending process.
You can also consider Filmora for Blending Frame
Filmora is a video editing software that allows you to create, edit, and export videos. The software includes various features, such as the ability to add text, transitions, and effects. You can also use Filmora to create titles, lower thirds, etc.
How to use Filmora?
To use Filmora, simply load the video you want to edit and make the changes you want. Once you’re happy with the results, export the video, and it will be saved in the format of your choice.
How to use Frame Blending in Filmora?
There are things to keep in mind when using frame blending in Filmora.
First, the software only supports AVI and WMV files. Second, the frame blending feature is only available in the paid version of the software. Lastly, frame blending can only be used on two video frames at a time.
The video is made up of distinct layers blended together to create a unique and appealing look. There is a craft of making a running frame out of more than one video or picture. Even though the technique is considerably older, and individuals undertake it with much work, it has recently become simpler. We now have the easier method of combining two or more clips in a single frame, which we term Blend Modes.
How to composite with blending modes?
- Choose the videos and effects that you wish to overlay.
- Double-click the overlay clip on the timeline to view and adjust the video options for the split-screen effect.
- Go to the Compositing section and choose Blending Mode from the drop-down menu to apply an effect. Select Screen from the drop-down menu if you’d like to overlay an effect over a video.
Frame blending is a simple and effective way to create smooth transitions between two video frames. This technique can create a variety of different effects, such as dissolves, fades, and more. Frame blending is a built-in feature in Filmora and can be accessed by loading the video you want to edit and then making the changes you want. Once you’re happy with the results, export the video, and it will be saved in the format of your choice.
Advance features in Filmora 11
The latest version of Filmora (11.2.1) includes several new and improved features, such as:
- The ability to add textured background images
- An updated user interface
- A wider variety of title templates
- More video and audio effects
- Improved performance and stability
Filmora is a good choice for video editors who want to do more with their software. The program contains all of the essential functions of a video editor, such as the ability to add text, transitions, and effects. In addition, Filmora also includes some more advanced features, such as the ability to add textured background images and the ability to create titles, lower thirds, and more.
For Win 7 or later (64-bit)
For macOS 10.12 or later
Conclusion
● Frame blending is a simple and effective way to create smooth transitions between two video frames. This technique can be used to create a variety of different effects, such as dissolves, fades, and more. Frame blending is a built-in feature in Filmora and can be accessed by loading the video you want to edit and then making the changes you want. Once you’re happy with the results, export the video, and it will be saved in the format of your choice.
Also read:
- In 2024, Working Out All Important Details of Slowing Down Video in After Effects
- 2024 Approved Make Eye Zoom Transition Effect with Filmora
- New 2024 Approved Best 8 AI Video Denoise Software
- Updated 11 Apps To Speed Up A Video On iPhone
- Updated Want to Come up with Exciting Sony Vegas Slideshow Templates for Your Next Project on YouTube and Other Mediums Then There Is Something for You
- What Is MKV Format and How To Play MKV Video for 2024
- 8 Best Video Editor with Useful Masking
- New In 2024, 2 Practical Ways to Combine Videos on TikTok
- New Best 5 Apps To Add Song To Video
- Top 15 Slow Motion CapCut Templates to Work With for 2024
- In 2024, Do You Want to Know About Phone Aspect Ratio Vertical? Trying to Learn About iPhone Vertical Video Dimensions? Read This Article to Get All Your Answers on Vertical Phone Aspect Ratio Definition, Types and Tips
- Updated The Complete Guide to Zoho Slides with Ease
- Guide to Add Transition Effects in Premiere Pro
- New 2024 Approved Best 8 Augmented Reality Video Games
- 2024 Approved Do You Wish to Design the Perfect Slow-Motion Video on Your Smartphone? Learn some Top-Rated Free Slow-Mo Apps for Android and iOS Users in This Article
- 2024 Approved Want to Imbibe Your Graphic Expertise with Designing Classic iMovie Presentations? Be Here to Work Through the Process Within the Quickest Possible Time Span
- New In 2024, 10 Recommended Websites to Discover Awesome Premiere Pro Video Templates
- Updated In 2024, 100+ Best TikTok Captions Enhance Your Content
- Updated In 2024, What Is the Best FPS for YouTube Videos?
- Updated How to Uue Adobe Lightroom Color Grading for 2024
- New 10 Best Meme Text to Speech Tools Windows, Mac, Android, iPhone for 2024
- New Do You Like Clouds or Sky and Want to Use Them as a Video Background? Explore This Article to Learn About the Sky Change Video in Filmora
- Updated In 2024, Learn Top Best Free LUTs For Premiere Pro
- Updated 2024 Approved 10 Best Audio Visualizers Windows, Mac, Android, iPhone & Online
- New Some Facts About GIF Background You Didnt Know for 2024
- New 2024 Approved 3 Best Motion Blur Plugins for Adobe After Effects
- New How to Create a Custom Slide Show in PowerPoint
- In 2024, 4 Simple Methods for Making a High-Quality Recap Video
- How to Use LUTs in Lumafusion & Free Resource for 2024
- Learn How to Do Velocity Edits on PC to Enhance Your Videos, Adjusting Speed for Dynamic and Visually Engaging Results for 2024
- Updated LumaFusion Color Grading Achieving It Through LUTs
- 2024 Approved What Are The Stages Of Film Production - 2023
- Read and Learn How to Convert a Slow-Motion Video to Normal in This Guide. Besides, Find the Best Desktop Solution to Adjust Video Speed Quickly and Easily
- Create Kinetice Typography Text Effect in Filmora for 2024
- Updated In 2024, 7 Solutions to Cut Video on Mac without Using FFmpeg?
- 2024 Approved Top 10 TEXT TO SPEECH VIDEO MAKERS
- Updated How to Use LUTs in Lumafusion & Free LUTs Resource
- New Achieving GoPro Slow Motion with Quality An In-Depth Overview
- In 2024, Top 18 Video Editors for PC and Mac
- New How Have Game Recording Software Improved Their Stature in the Market? An Overview for 2024
- Updated Learn How to Make a Gaming Montage - Guide & Tips
- In 2024, Looking for the Best Websites for 3D Text PNG? Weve Covered You with Our Top 8 Picks for Your Upcoming Work
- Updated In 2024, How to Edit A Time Lapse Video on iPhone?
- How to Create Liquid Water Reveal Intro, In 2024
- In 2024, If You Are a Free Video Editor Being a Windows User, VSDC Free Video Editor Is a Great Choice. But Is It the Best Video Editor You Should Use? Find Out From Our VSDC Free Video Editor Review
- In 2024, How to Make Split Screen Videos in Filmora
- Updated AVI Video Format How to Open, Play, Edit AVI File for 2024
- 2024 Approved Mastering OpenCV Object Tracking A Comprehensive Guide for Beginners and Experts
- Leading Applications to Create Fast Motion in iPhone for 2024
- New In 2024, Top 8 Memoji Makers to Make a Memoji on PC, Android & iPhone
- How to Unlock SIM Card on iPhone 12 Pro Max online without jailbreak
- How to fix iCloud lock on your Apple iPhone 6 and iPad
- Why Your Vivo V29e Screen Might be Unresponsive and How to Fix It | Dr.fone
- In 2024, The Ultimate Guide to Get the Rare Candy on Pokemon Go Fire Red On Apple iPhone 6 Plus | Dr.fone
- Xiaomi Redmi Note 13 5G can’t play AVCHD .mts video
- In 2024, How to Change GPS Location on Nokia C12 Plus Easily & Safely | Dr.fone
- For People Wanting to Mock GPS on Itel S23 Devices | Dr.fone
- Why is iPogo not working On Apple iPhone 11 Pro Max? Fixed | Dr.fone
- In 2024, 5 Ways Change Your Home Address in Google/Apple Map on Apple iPhone X/iPad | Dr.fone
- How to Change Your HTC U23 Pro Location on life360 Without Anyone Knowing? | Dr.fone
- How to Bypass FRP from Tecno Phantom V Fold?
- Can Life360 Track Or See Text Messages? What Can You Do with Life360 On Sony Xperia 10 V? | Dr.fone
- In 2024, Easy Tutorial for Activating iCloud from iPhone 13 Pro Max Safe and Legal
- Read This Guide to Find a Reliable Alternative to Fake GPS On Apple iPhone X | Dr.fone
- In 2024, 5 Easy Ways to Copy Contacts from Tecno Spark 20C to iPhone 14 and 15 | Dr.fone
- How To Update or Downgrade iPhone 15 Without iTunes? | Dr.fone
- Undelete lost messages from Vivo X100
- How to Reset a Xiaomi 14 Ultra Phone That Is Locked | Dr.fone
- In 2024, A Comprehensive Guide to iCloud Unlock From iPhone 15 Online
- How to Remove an AirTag from Your Apple ID Account From Apple iPhone 12 Pro Max?
- Here are Some of the Best Pokemon Discord Servers to Join On Vivo X Flip | Dr.fone
- Guide to Mirror Your Honor Play 8T to Other Android devices | Dr.fone
- Title: Updated Top Applications That Can Help Apply The Best VHS Camera Effect for 2024
- Author: Chloe
- Created at : 2024-04-24 07:08:39
- Updated at : 2024-04-25 07:08:39
- Link: https://ai-editing-video.techidaily.com/updated-top-applications-that-can-help-apply-the-best-vhs-camera-effect-for-2024/
- License: This work is licensed under CC BY-NC-SA 4.0.
