
:max_bytes(150000):strip_icc():format(webp)/GettyImages-597071115-37c5865742de421eafc8b7da4cc5a618.jpg)
Vintage Film Effect 1920S - How to Make
Vintage Film Effect 1920S - How to Make
Do you want to roll back the hands of time and shoot a film like you were in WWI or Charlie Chaplin’s era? That’s what a vintage film effect is all about. In other words, this video effect will give your videos an old-film look and feel. So, without wasting time, let’s learn how to convert a normal video into a film shot in the 1920s with Wondershare Filmora.
Preparation

In this tutorial, you don’t need a lot of creativity to create a vintage film, as Wondershare Filmora will be doing the heavy lifting. Just shoot an action video like chasing each other around, chatting with friends, running away from something, or doing anything else. Let’s learn how to do that below!
Free Download For Win 7 or later(64-bit)
Free Download For macOS 10.14 or later
Step1 Add a video you want to edit

Upload your video on Filmora, then move it to the editing timeline by dragging it. This should take a second or two.
Step2 Add a crop effect

After successfully adding your video to the timeline, tap the Effect tab on top of the screen and click Utility. Then, choose the Crop effect and add a few tracks above the video clip.

Next, double-tap the Crop effect on the editing timeline to open the effect editing tools. Now change the crop amount to 15 to add a vintage feel to your video. Just enter 15 on the Left and Right boxes.
Step3 Add the Dirty Film and Silent Film effects

Tap the Effect tab, then open the Overlay drop-down menu. Then, choose the Old Film category before adding a Dirty Film effect above the clip. To apply a more vintage feel to your video, add a Silent Film effect to the track above the Dirty Film effect.
Step4 Add a black & white effect to your video

Up to this point, your film should now start having a more vintage feel. But to make it look even older, double-click the video clip and tap the Color tab. After that, open the 3D LUT arrow and choose the B&W Film option. Now play the video and enjoy.
Summary
See, you don’t need to break a sweat to add a vintage feel to your funny video. With Filmora, you’ll access multiple tools and effects to create an old-looking film with just a single click. And don’t forget to play around with other Filmora overlays and effects to bring out the inner video editor in you. Thanks for reading!
Free Download For macOS 10.14 or later
Step1 Add a video you want to edit
Upload your video on Filmora, then move it to the editing timeline by dragging it. This should take a second or two.
Step2 Add a crop effect
After successfully adding your video to the timeline, tap the Effect tab on top of the screen and click Utility. Then, choose the Crop effect and add a few tracks above the video clip.
Next, double-tap the Crop effect on the editing timeline to open the effect editing tools. Now change the crop amount to 15 to add a vintage feel to your video. Just enter 15 on the Left and Right boxes.
Step3 Add the Dirty Film and Silent Film effects
Tap the Effect tab, then open the Overlay drop-down menu. Then, choose the Old Film category before adding a Dirty Film effect above the clip. To apply a more vintage feel to your video, add a Silent Film effect to the track above the Dirty Film effect.
Step4 Add a black & white effect to your video
Up to this point, your film should now start having a more vintage feel. But to make it look even older, double-click the video clip and tap the Color tab. After that, open the 3D LUT arrow and choose the B&W Film option. Now play the video and enjoy.
Summary
See, you don’t need to break a sweat to add a vintage feel to your funny video. With Filmora, you’ll access multiple tools and effects to create an old-looking film with just a single click. And don’t forget to play around with other Filmora overlays and effects to bring out the inner video editor in you. Thanks for reading!
Top 5 Best Video Denoisers
We all know that our recorded videos are not always perfect – when we use a mobile phone or digital cameras to shoot, our clips may contain hiss, compression and particles. These are the impurities that make our videos look uncomfortable, but it’s not a final result impossible to altar – help can come in the form of several video denoise software.
Editing is the guarantor that makes sure we can do different operations and achieve our desired results – computer programs, tools, opportunities that give us a hand in this process are kind of endless.
So, sometimes it’s really difficult to choose among so many options that come into waves. And if we choose our preferred ways, some people might not agree with us. Even so that it is quite subjective, we can still explain which tools and software we like to modify our videos, and fight with the impurities they have.
It looks amateur if the video is grainy, even if it is night shooting. We can get rid of the noise when we add lights or shoot in well-lit places, but there are some situations we can just depend on the ISO. So, for these grainy videos, there is a thing called denoising – when you get rid of the grains and make your shots as clear as possible. There are different ways to do this, and that happens in different software as well. What are the 5 best video denoisers in 2024 for us to work with? That, as we have already mentioned, might be something very subjective, but here is our selection: Wondershare Filmora, Neat Video, Shotcut, Adobe Premiere Pro, and DaVinci Resolve
Wondershare Filmora X
Wondershare Filmora X offers to change our damaged scene into something more acceptable. How to operate it? - You need to go to the Effects panel and type: “Smart Denoise”. right-click on the video and choose Edit Properties.

This ensures you see the Smart Denoise, where you can change opacity of the clip, threshold and radius.

Reduce Opacity until you are satisfied with the result. The box next to Smart Denoise will show you the scene before and after the effect.
Bonus tip: Wondershare Filmora audio denoise
We already explained how video denoising works, and we will go on with our selection and explanatory article about the process, but, as we are on the Filmora topic, we might as well mention that denoising might mean another thing too – which, in this case, regards audio background noise. It means to remove unwanted hum from the audio in order for it to become more hearable. So, doing this in Wondershare Filmora works in a quite easy way. Use the guideline:
Drag and drop your video into the timeline. Right-click on the clip and hit Detach Audio, which will let you separate audio and video from one another and make sure you can work on them one by one.

Double-click on the audio track and have access to the editing panel, where you can see Remove background noise – it is not needed to emphasize what this option does for you!

That’s it – you are done, but keep in mind that there is a second way to achieve the same result as well, but this in case you don’t want to detach the audio: Double-click on the video clip in the timeline, the editing panel opens, so switch to Audio. Checking the box next to Remove background noise will show that there are three levels – weak, mid, and strong, and of course, you can choose to your liking!
If the voice recording doesn’t sound natural anymore, you can do the following: Click on Customize and Customize Equalizer window will open.

On the left, you can see the low tunes, while the highs are on the right. Background noises are often on the left, so you can lower them to get rid of them, but in order to have a more natural sound, raise the middle ones a little – and you are done when you are content with the sound!

So, hmm… back to the original topic – denoising a video, shall we?..
Neat video
Neat Video kind of, speaks for itself… it is a powerful video editing tool suitable for Windows, macOS and Linux. It aims to reduce the digital noise, flicker, dust, scratches and other defects in the captured videos to improve the visual quality of the videos.
It is a plug-in for Premiere Pro, that does more or less what the product noise says: it makes grainy video look neater. It’s very easy to use and
How to do that in Neat Video? Here are the steps:
Find the clip you want to reduce the noise of and search for the neat video effect in the Effects Panel.

The video editors mostly use the SR version of it, because it seems faster and has kind of a better performance.

Then, you’ll have to drag the neat video plug-in to the clip to your choosing, take your attention to the Effect Controls panel on the left, and find: fx Reduce Noise v5 (SR) – press the button saying Prepare and this will open up the Build button as well, which wil open the Neat video effect window.

There, you’ll need to click on the Auto Profile. Selection window will appear, which you can move around the scene and resize, in order to select the noisy area of your footage. It is recommended to find the darkest or grainiest area there and select judging by this.

On the left side, you will find Filter Settings: under Spatial, you can play with the Noise Reduction Amount and Noise Level.

Then, you will hit Apply and – done, you can instantly see the results!
Shotcut
What about Shotcut? It is a free, open-source and cross-platform video denoiser for Windows operating system. It is also an outstanding video editor with trimming, splitting, color correction and other tools.
In order to reduce the noise there, do the following: first off, find filters, open that window and type in: Noise. This will open the options, and several of them are for noise reduction.


Choose Reduce Noise: Wavelet, add it to the Video and then feel free to modify the settings, such as: Decompose, Threshold, Percent. You can check and uncheck the effect in order to see the before-after difference. Then, click Apply button and it is ready to go!
Anyway, you can also try other similar effects such as Reduce Noise: HQDN3D and Reduce Noise: Smart Blur.
Adobe Premiere Pro
Even though we discussed video denoising in Adobe Premier Pro but with the help of a plug-in called Neat Video, reducing the noise in the video in this software can be achieved without the plug-in as well, through using effect which is called Median. And, Premiere Pro kind of deserves to be mentioned, so, let’s go for it!
Add the desired footage into the Timeline of Premiere Pro. Then, find the Effects Panel, where our wanted Median can be found –drag and drop the effect to the clip.

The Median should modify the grainiest parts of the whole clip, so in order to do this, we need to use masks. In the Effects Control panel, select the mask shape for the clip – the options are: rectangle, circle, or pen tool. With Pen tool, you move the Mask around the screen and resize it – the covered area will be affected.

If you change Feather setting to 100, the effect will lose a sharp edge and instead, there will be a smooth border.

So, you might think it is needed to repeat these steps several time to create masks in different areas, in order to cover all of the grainy space of the scene.
And, at last, to reduce the noise, adjust the effect settings.

Actually, Median just blurs the grainy parts, without directly taking them away. Lastly, you can get to know the Radios settings, which will help you to achieve your most desired look!
Davinci Resolve
DaVinci Resolve is also worth mentioning in this list, in a way because it is also different from other video editors. Let’s see how it works and, meanwhile, differs:
Add the footage into the timeline. Find the fusion tab underneath the timeline panel.

There, MediaIn1 and MediaOut1 will appear, and first, click on MediaIn1, - the scene will be shown in the first viewer – and MediaOut1 by default is appearing in the second. So, stay on MediaIn1, hit shift+spacebar, and find Remove Noise (RN). Click Add, which adds the Remove Noise1 node. On the top right corner there is an Inspector, which opens all the properties you can modify.

After going only into the second viewer, and in the top bar there is channel icons. Open it and click on red, but don’t get alarmed when your footage turns black and white – it’s just for a while. Go back to the Inspector, increase Softness Red and Detail Red.

This step helps remove grain from the red channel. Then repeat the same for green and blue channels. After finishing go to the same channel button and set it to “back to color”. The clip will be colorized again and now be clearer, compared to the first viewer.

So, Evrika – we hot to know 5 best video denoisers in 2024, with the addition of audio background noise removal in Wondershare Filmora – hope you enjoyed it, and hope this will help you create better videos for yourself and your viewers!
This ensures you see the Smart Denoise, where you can change opacity of the clip, threshold and radius.
Reduce Opacity until you are satisfied with the result. The box next to Smart Denoise will show you the scene before and after the effect.
Bonus tip: Wondershare Filmora audio denoise
We already explained how video denoising works, and we will go on with our selection and explanatory article about the process, but, as we are on the Filmora topic, we might as well mention that denoising might mean another thing too – which, in this case, regards audio background noise. It means to remove unwanted hum from the audio in order for it to become more hearable. So, doing this in Wondershare Filmora works in a quite easy way. Use the guideline:
Drag and drop your video into the timeline. Right-click on the clip and hit Detach Audio, which will let you separate audio and video from one another and make sure you can work on them one by one.
Double-click on the audio track and have access to the editing panel, where you can see Remove background noise – it is not needed to emphasize what this option does for you!
That’s it – you are done, but keep in mind that there is a second way to achieve the same result as well, but this in case you don’t want to detach the audio: Double-click on the video clip in the timeline, the editing panel opens, so switch to Audio. Checking the box next to Remove background noise will show that there are three levels – weak, mid, and strong, and of course, you can choose to your liking!
If the voice recording doesn’t sound natural anymore, you can do the following: Click on Customize and Customize Equalizer window will open.
On the left, you can see the low tunes, while the highs are on the right. Background noises are often on the left, so you can lower them to get rid of them, but in order to have a more natural sound, raise the middle ones a little – and you are done when you are content with the sound!
So, hmm… back to the original topic – denoising a video, shall we?..
Neat video
Neat Video kind of, speaks for itself… it is a powerful video editing tool suitable for Windows, macOS and Linux. It aims to reduce the digital noise, flicker, dust, scratches and other defects in the captured videos to improve the visual quality of the videos.
It is a plug-in for Premiere Pro, that does more or less what the product noise says: it makes grainy video look neater. It’s very easy to use and
How to do that in Neat Video? Here are the steps:
Find the clip you want to reduce the noise of and search for the neat video effect in the Effects Panel.
The video editors mostly use the SR version of it, because it seems faster and has kind of a better performance.
Then, you’ll have to drag the neat video plug-in to the clip to your choosing, take your attention to the Effect Controls panel on the left, and find: fx Reduce Noise v5 (SR) – press the button saying Prepare and this will open up the Build button as well, which wil open the Neat video effect window.
There, you’ll need to click on the Auto Profile. Selection window will appear, which you can move around the scene and resize, in order to select the noisy area of your footage. It is recommended to find the darkest or grainiest area there and select judging by this.
On the left side, you will find Filter Settings: under Spatial, you can play with the Noise Reduction Amount and Noise Level.
Then, you will hit Apply and – done, you can instantly see the results!
Shotcut
What about Shotcut? It is a free, open-source and cross-platform video denoiser for Windows operating system. It is also an outstanding video editor with trimming, splitting, color correction and other tools.
In order to reduce the noise there, do the following: first off, find filters, open that window and type in: Noise. This will open the options, and several of them are for noise reduction.
Choose Reduce Noise: Wavelet, add it to the Video and then feel free to modify the settings, such as: Decompose, Threshold, Percent. You can check and uncheck the effect in order to see the before-after difference. Then, click Apply button and it is ready to go!
Anyway, you can also try other similar effects such as Reduce Noise: HQDN3D and Reduce Noise: Smart Blur.
Adobe Premiere Pro
Even though we discussed video denoising in Adobe Premier Pro but with the help of a plug-in called Neat Video, reducing the noise in the video in this software can be achieved without the plug-in as well, through using effect which is called Median. And, Premiere Pro kind of deserves to be mentioned, so, let’s go for it!
Add the desired footage into the Timeline of Premiere Pro. Then, find the Effects Panel, where our wanted Median can be found –drag and drop the effect to the clip.
The Median should modify the grainiest parts of the whole clip, so in order to do this, we need to use masks. In the Effects Control panel, select the mask shape for the clip – the options are: rectangle, circle, or pen tool. With Pen tool, you move the Mask around the screen and resize it – the covered area will be affected.
If you change Feather setting to 100, the effect will lose a sharp edge and instead, there will be a smooth border.
So, you might think it is needed to repeat these steps several time to create masks in different areas, in order to cover all of the grainy space of the scene.
And, at last, to reduce the noise, adjust the effect settings.
Actually, Median just blurs the grainy parts, without directly taking them away. Lastly, you can get to know the Radios settings, which will help you to achieve your most desired look!
Davinci Resolve
DaVinci Resolve is also worth mentioning in this list, in a way because it is also different from other video editors. Let’s see how it works and, meanwhile, differs:
Add the footage into the timeline. Find the fusion tab underneath the timeline panel.
There, MediaIn1 and MediaOut1 will appear, and first, click on MediaIn1, - the scene will be shown in the first viewer – and MediaOut1 by default is appearing in the second. So, stay on MediaIn1, hit shift+spacebar, and find Remove Noise (RN). Click Add, which adds the Remove Noise1 node. On the top right corner there is an Inspector, which opens all the properties you can modify.
After going only into the second viewer, and in the top bar there is channel icons. Open it and click on red, but don’t get alarmed when your footage turns black and white – it’s just for a while. Go back to the Inspector, increase Softness Red and Detail Red.
This step helps remove grain from the red channel. Then repeat the same for green and blue channels. After finishing go to the same channel button and set it to “back to color”. The clip will be colorized again and now be clearer, compared to the first viewer.
So, Evrika – we hot to know 5 best video denoisers in 2024, with the addition of audio background noise removal in Wondershare Filmora – hope you enjoyed it, and hope this will help you create better videos for yourself and your viewers!
How To Split Screen On Tiktok
TikTok is probably the most popular video-sharing app in the world right now. Many TikTokers have become famous for making videos that have a significant impact and encourage creativity and new ideas. One of the most popular TikTok trends is the split-screen effect. You’ve probably seen a lot of TikTok split-screen videos with cool effects that made you wonder how the user split their screen. Becoming skilled in using TikTok effects is not as difficult as it might look. It only requires a significant amount of practice. Read on as we show you how to make a TikTok split-screen video.
Using CapCut To Split Screen
CapCut is the official free TikTok Video Maker and Video Editor with Music for TikTok that is multifunctional. Its interface is quite similar and easy to use.
CapCut includes free advanced capabilities such as keyframe animation, stabilization, and Picture-in-Picture (PIP). These are in addition to its fundamental functions, such as video editing, adding stickers, text, and music.
Steps to Split Screen Video with CapCut On Android and IOS Devices
- To use the app, you need to install it first. iPhone and Android users can download CapCut. Navigate to the appropriate app store of your choice and download CapCut.
- After installation, launch the app.
- Then go ahead and grant CapCut permission to view your camera roll. Incorporating video clips into your project has never been easier. Go to the app’s main screen and select “New Project“ from the drop-down menu.
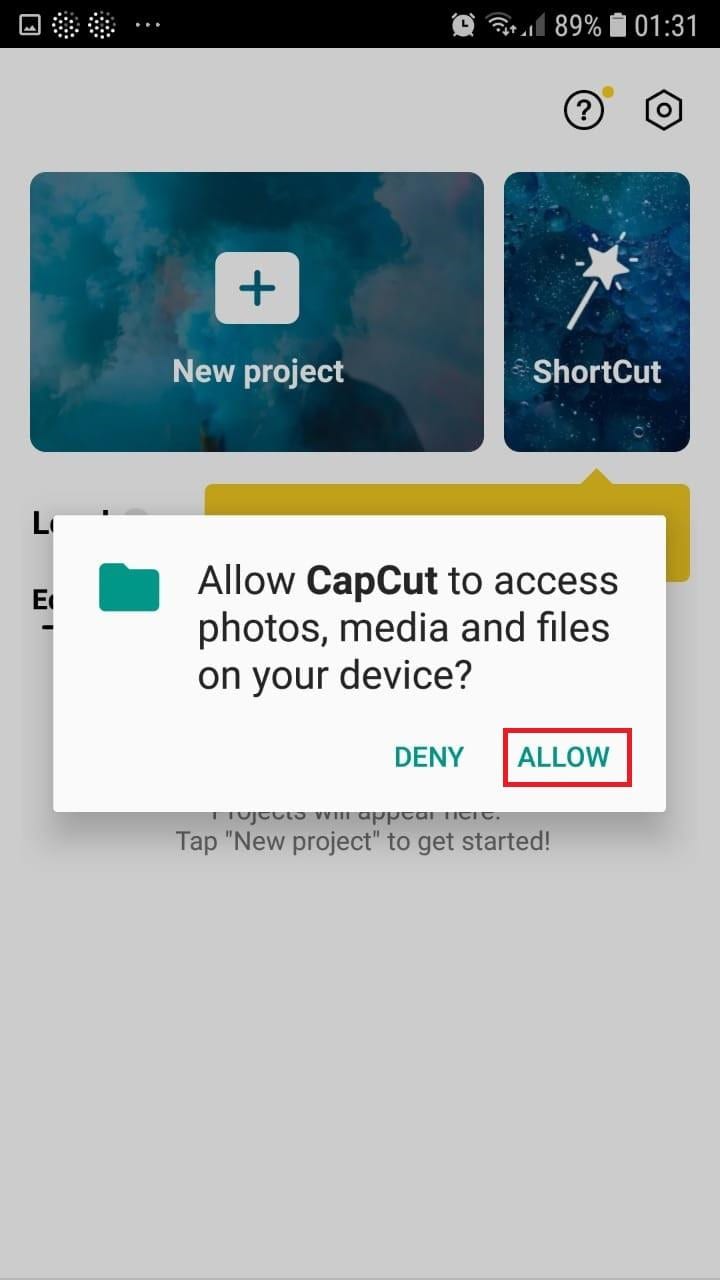
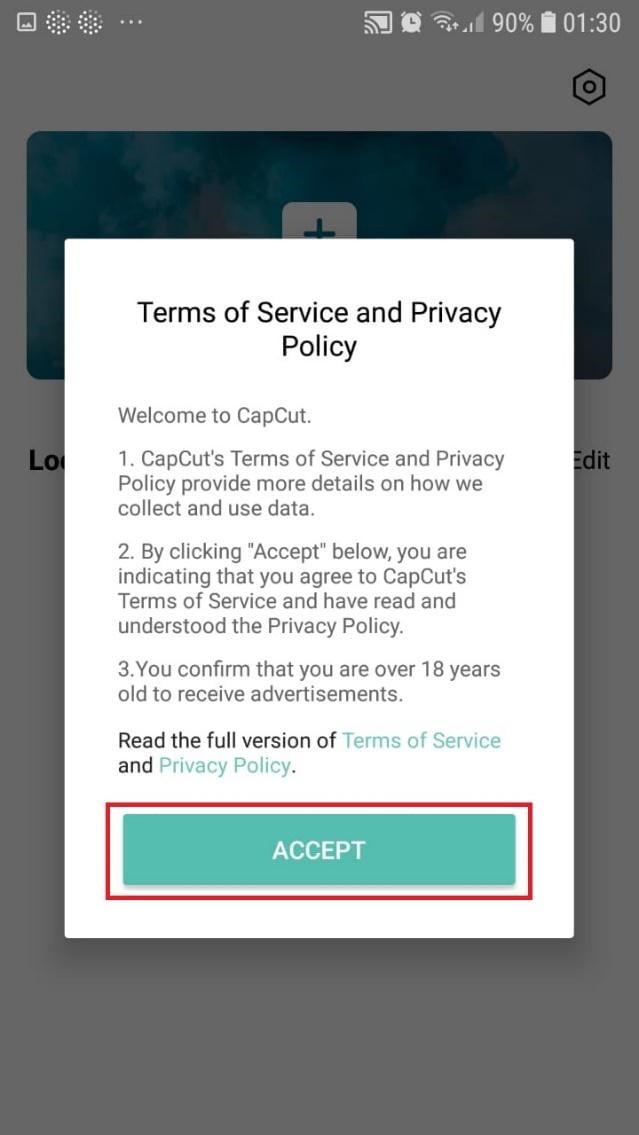
- To confirm your selection, click the green Accept This confirms that CapCut requires access to your photographs to function correctly. Tap on the button on the following pop-up window to gain access to all the photos. This is a one-time process that must be carried out the first time you launch the application.
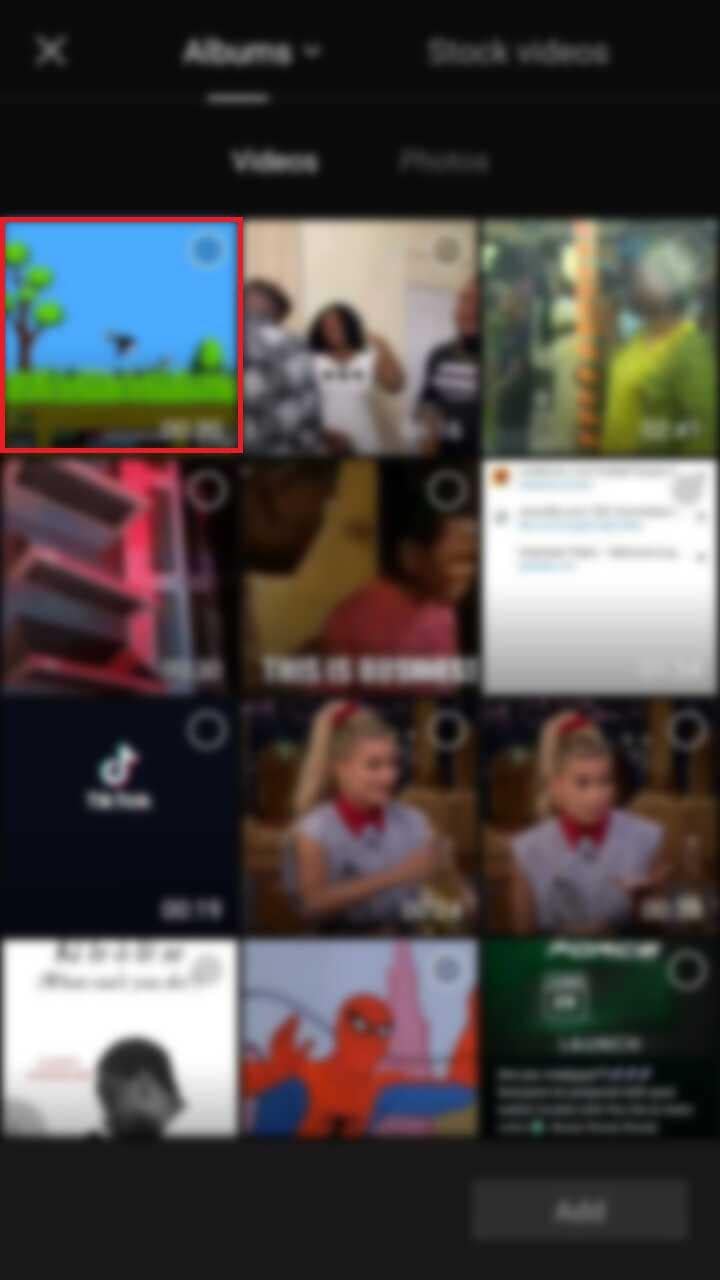
- Begin a New Project. After opening the app, press the “New Project“ icon to bring up a new screen showing your device’s videos.

- Choose a video clip. Locate the desired video clip for your project by scrolling through the pages displaying your camera roll. Tap the video’s thumbnail and then tap the “Add“ icon in the screen’s lower part.
- Get familiar with your workspace. Upon uploading your first clip, CapCut leads you to the primary workspace. This is where you will spend most of your time within the app. The preview panel, the timeline, and the toolbar are in order from top to bottom.
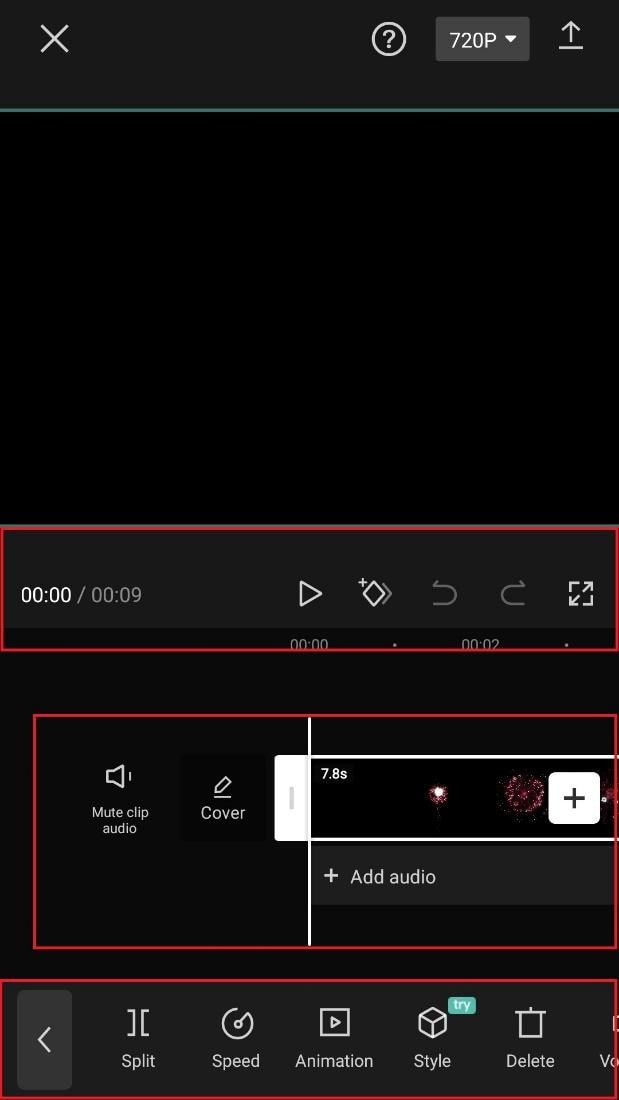
- View the toolbar and timeline. They represent your screen’s bottom half. The timeline, located below the preview panel, is where you’ll make all your adjustments. You can access all your video editing tools, including split, text, audio, effects, stickers, and more, on the toolbar at the bottom of your screen.
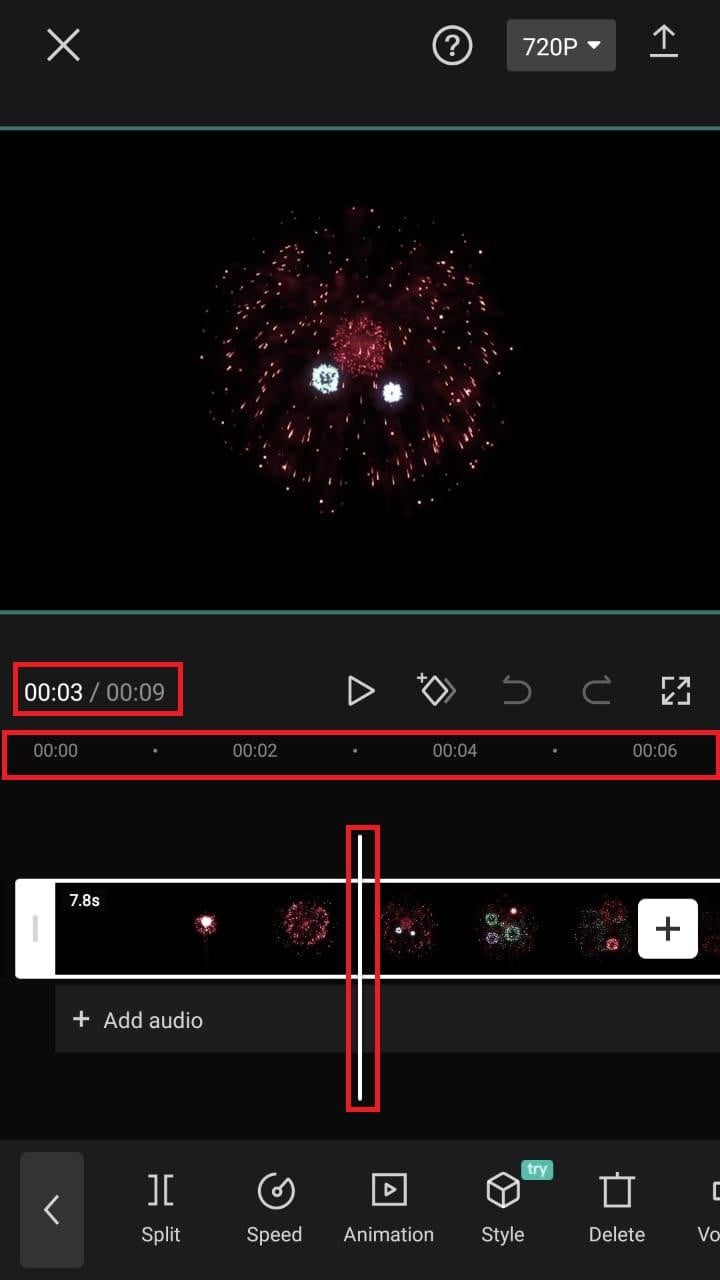
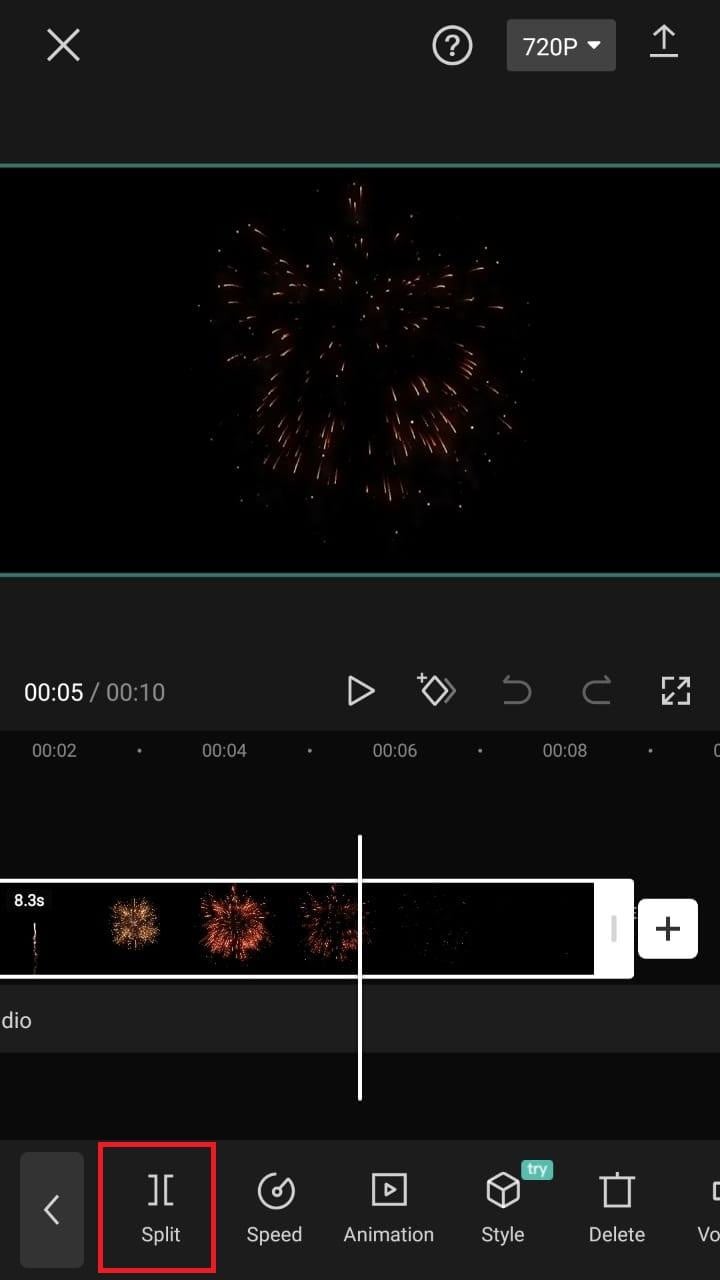
- Split video clips. To split a video clip in half, move the play head to the desired location on the timeline. Tap on your clip, then press the “Split“ toolbar icon. Your result now shows two different clips, not just one.
A Better Split-Screen Effect Video Editor
Filmora is one of the best free HD video makers and video editors with several functionalities, including text, backgrounds, filters, special effects, emoji, audio, and special effects.
Filmora is a feature-packed video editor which has a variety of tools to work with. With this video editor, producing memes, videos with images, pictures, music, stickers, and sound effects and editing videos for YouTube, Twitter, WhatsApp, Facebook, TikTok, and Instagram is simple and entertaining.
Free Download For Win 7 or later(64-bit)
Free Download For macOS 10.14 or later
Steps to Split Screen Video with Filmora
- Download Filmora from the App store
- After installation, launch it.
- Click on “Continue” to continue to use the app.

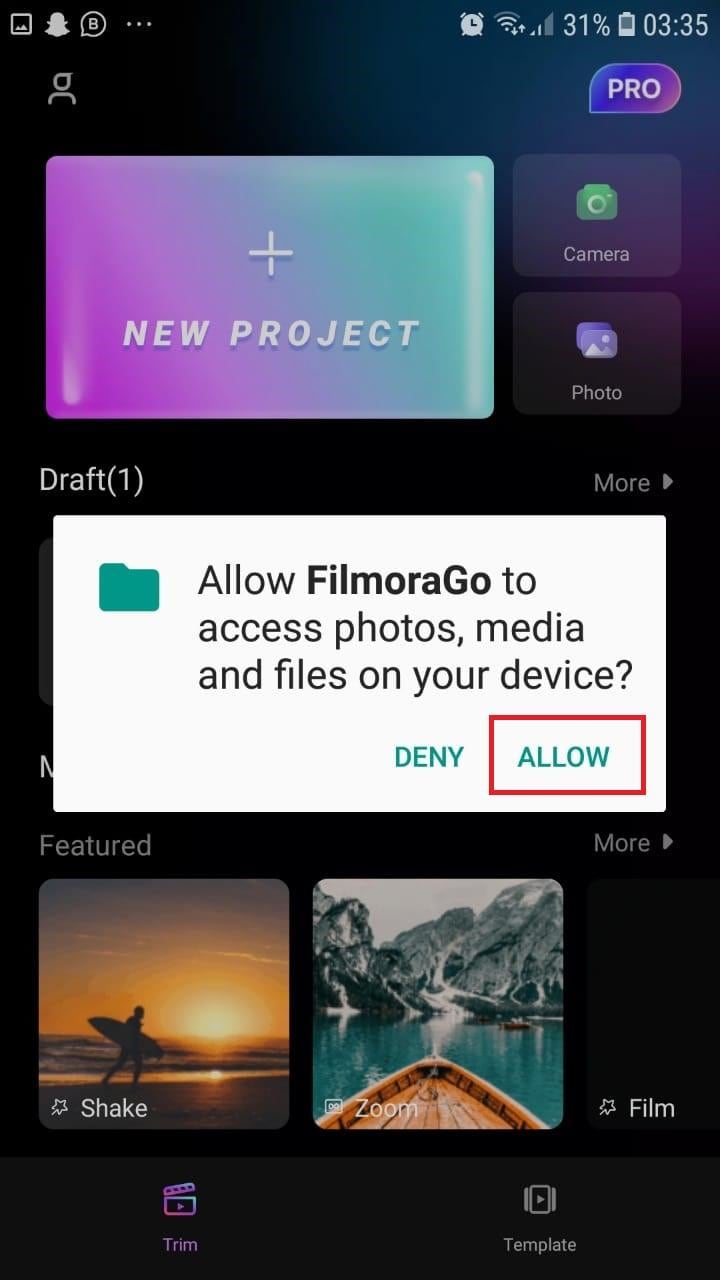
- Click on Allow to grant Filmora access to your photos and videos.
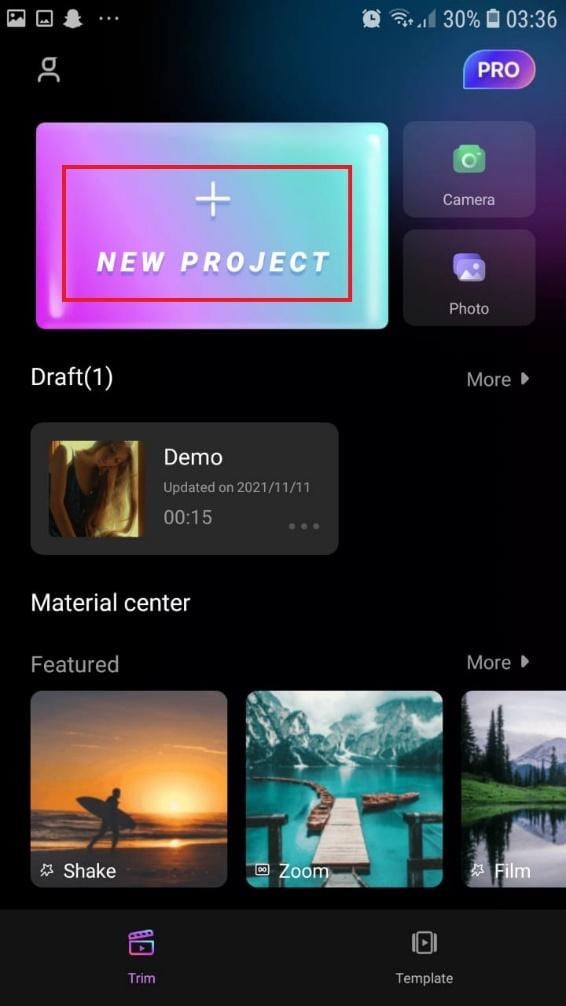
- You can now tap on “New Project” with the + Symbol.
- Select your desired video and tap on “Next” at the bottom right of your screen
- You can select various options from the bottom of your screen to edit the selected video the way you like.

- Click on trim, and then you will see the different split-screen and collage feature options. Pick any that appeals to you.
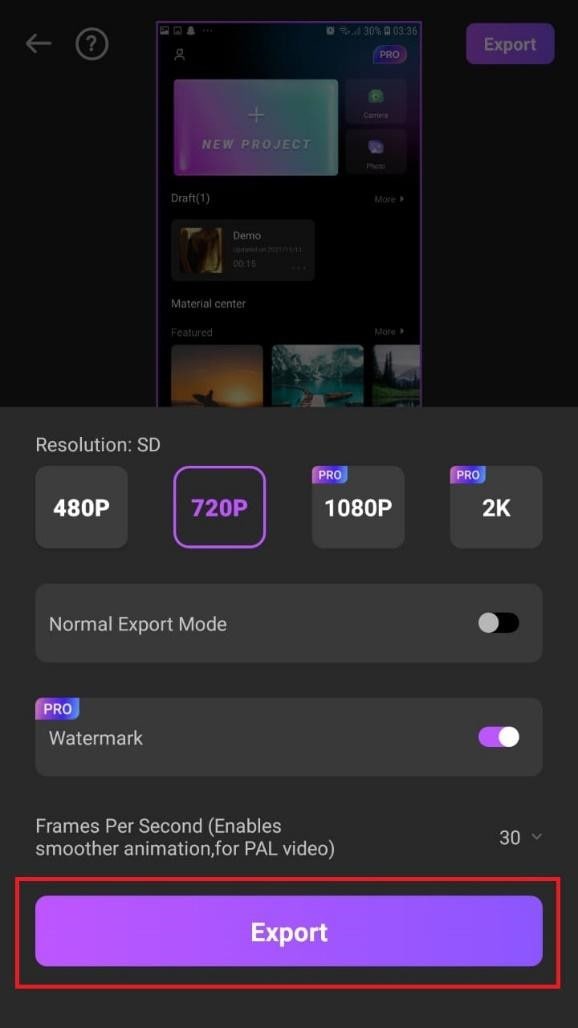
- When you are done with the editing, tap on “Export” at the top right of your screen.

- Go ahead and tap on “Export” on the next screen. Your video will be successfully exported and saved to your camera roll.
Using Filmora is very efficient in splitting your videos and making collage features for TikTok. It is a very simplified app available on both the Google Play Store and Apple Appstore.
Conclusion
TikTok is a platform that users use worldwide to create and share content. It could be pictures, videos, reels, or any other media type. Some people create videos for their audience on TikTok to educate them, while others do it to entertain them.
In any case, the goal is to build a more significant following on TikTok and garner greater attention from its users. You could even make money off the app.
One of the methods to impress your fans and explore multiple possibilities to build unique reels is to use the TikTok split-screen and collage feature effect available on TikTok. Although there are a few different ways to create a Split Screen on TikTok, the steps highlighted in this article are the most straightforward.
Free Download For macOS 10.14 or later
Steps to Split Screen Video with Filmora
- Download Filmora from the App store
- After installation, launch it.
- Click on “Continue” to continue to use the app.
- Click on Allow to grant Filmora access to your photos and videos.
- You can now tap on “New Project” with the + Symbol.
- Select your desired video and tap on “Next” at the bottom right of your screen
- You can select various options from the bottom of your screen to edit the selected video the way you like.
- Click on trim, and then you will see the different split-screen and collage feature options. Pick any that appeals to you.
- When you are done with the editing, tap on “Export” at the top right of your screen.
- Go ahead and tap on “Export” on the next screen. Your video will be successfully exported and saved to your camera roll.
Using Filmora is very efficient in splitting your videos and making collage features for TikTok. It is a very simplified app available on both the Google Play Store and Apple Appstore.
Conclusion
TikTok is a platform that users use worldwide to create and share content. It could be pictures, videos, reels, or any other media type. Some people create videos for their audience on TikTok to educate them, while others do it to entertain them.
In any case, the goal is to build a more significant following on TikTok and garner greater attention from its users. You could even make money off the app.
One of the methods to impress your fans and explore multiple possibilities to build unique reels is to use the TikTok split-screen and collage feature effect available on TikTok. Although there are a few different ways to create a Split Screen on TikTok, the steps highlighted in this article are the most straightforward.
How To Slow Down GIF: Building an Understanding
Graphic interchange format, mostly known as GIF, is extensively used to convey information. GIF is a communication tool in bitmap image format that clearly conveys your online content. When sharing GIF images, playback speed is the most important thing to count. If the playback speed of the GIF is faster than usual, viewers may skip their focus essential data.
As a solution, you must learn how to adjust slow motion GIF’s speed. This article will teach you the stepwise methods to achieve a slow-motion GIF. Before heading towards the methods, learn about some GIF video platforms. By the end, you will be able to make a matchless slow-mo GIF through a desktop solution.
Slow Motion Video Maker Slow your video’s speed with better control of your keyframes to create unique cinematic effects!
Make A Slow Motion Video Make A Slow Motion Video More Features

Part 1: Where Can I Get Impressive Slow-Motion GIFs for Myself?
Slowing down GIFs brings viewers’ attention to specific actions in video content. It exaggerates facial expressions or movements in the videos, leading to humorous results. Creators choose to slow down GIFs to convey particular moods and styles. Different contexts require different slow-mo GIF videos; below are some platforms to cater to all of them.
1. Giphy
One of the famous platforms for GIFs is Giphy, which offers an extensive collection of GIFs. If you want a GIF that can add humor to your content, pick the entertainment category from Giphy. It provides different domains of GIFs for your ease of selection. Some of its categories include sports, gaming, animals, and cartoons.

Key Features
- Using this platform, you can not only get a GIF but also upload one. Graphics designers or GIF creators can use this place to publish their work globally.
- After selecting one GIF, you can share it on any platform. It allows you to embed the GIF directly on websites or share it through links.
- Every GIF on Giphy provides in-depth details like size, frame, and source. This way, you can instantly choose one that matches your project’s requirements.
2. Tenor
Another popular platform to get high-quality GIFs is Tenor. It supports multiple languages in its interface so international users can better comprehend it. Apart from that, there are many categories in the trending searches of GIFs. It shows which domain of GIFs is ranking the most. Some trending tenors include cars, snow, happy holidays, good nights, and GIFs.

Key Features
- When you pick one GIF, you can change its format before downloading. In this regard, you can choose HD, MP4, and SD quality options.
- This platform detects your selection and suggests relevant GIFs afterward. For instance, if you pick a cat GIF, then you will find a cat GIF when scrolling down.
- Tenor provides GIF specification details under each. Besides, you can share the selected GIF image through the URL and embedded link.
Part 2: What to Do If You Want to Slow Down GIFs: The Best Tools
Knowing platforms, as mentioned above, makes it easier for you to avail the desired GIF. After grabbing one of your choices, you can make it a slow-motion GIF, if required. To do so, there are several tools in the market. Some of them are explained below, along with step-by-step instructions on how to use them.
List of Best Tools to Slow Down GIFs
1. Ezgif.com
This tool is primarily responsible for online GIF making and image editing. Besides, it can convert your video into GIF, resize, cut, crop, and optimize them. Moreover, you can add effects and text to your videos or GIFs to make them appealing. GIF animation speed changers are the real game changers among online solutions:
Step 1
Browse the official site of Ezgif.com and tap on the “Effects” section. Afterward, choose the “Adjust GIF Speed” section to proceed to further options. There, click the “Choose File” white button and look for the file you want to slow down. Optionally, paste the URL link in the given section and tap “Upload” to continue.

Step 2
Scroll down the window and insert the digits on which percentage you want to slow down the speed. Afterward, click the “Change Speed” button and find a slow-motion GIF in the output image.

2. VEED.io
VEED.io is a preferred choice by many creators for professional or high-quality videos. It offers screen recording, video editing, and subtitle translation services. Apart from that, it can fix GIF speed with the GIF speed changer feature. After changing speed, you can add transitions and animation effects in Veed.io. For now, let’s just stick to the slow-mo GIF in the following steps:
Step 1
Access the “GIF Speed Changer” in VEED.io, start by tapping “Choose GIF File” and enter the editing screen.

Step 2
From the next screen, you will get a pop-up menu first. You have to hit the “Upload a File” option and select a GIF file to import into VEED.io. Under the video preview, click on the “Speed” icon next to the “Sound” symbol. Then, choose “0.5x” and get a slow-down GIF preview in front of you.

3. Canva
Students must be aware of this platform as a presentation template provider. Canva is a tool that provides stunning templates to customize with its cloud storage system. Gradually, it’s turning more into a video editing platform. Regarding slow-motion GIFs, it can change the GIF speed online. After slowing down the GIF, you can convert it into MP4 or enhance it by adding graphics.
Step 1
Reach out to the GIF Speed Changer feature of Canva’s video editing. Then, tap the “Change GIF Speed” button to access the editing screen.

Step 2
Navigate towards the left-side panel and hit the “Upload Files.” Now, search and select your GIF to import in Canva’s editing window. Afterward, go to the “Playback” option at the top left and then direct to the left panel. Move the “Video Speed” slider to the left for a Slow-mo GIF. Click on the video for a preview, or look for any other playback adjustments.

Part 3: Make Impressive Slow Mo GIFs Using Desktop Solution
Are you getting customized speed adjustment options using any of the above tools? The answer is quite clear: no online tools do not offer personalization for slow-motion GIFs. That’s where you need Wondershare Filmora as a better alternative. It is currently the best video editor that transforms your videos into art pieces.
With more than 10 billion stock media, you don’t have to browse different sites. Filmora is an all-in-all platform that can not only edit your video but also aims to polish it to the next level. Besides, editors can use Filmora anywhere with just a password.
Free Download For Win 7 or later(64-bit)
Free Download For macOS 10.14 or later
How to Make Slow-motion GIF with Filmora
After discovering the top-notch features of Filmora, it’s time to use it. Although it’s very simple to operate, this step-by-step guide will help you process faster:
Step 1Launch Filmora and Import GIF to the Timeline
Download Wondershare Filmora from its official site. After a successful launch, you will enter its main screen. Look for the “New Project” option from the main interface. Tapping on the New Project, you will find the editing screen. Import your GIF in the media panel and drag it into the timeline section to begin the process.

Step 2Slow Down the GIF with Optical Flow
Right-click on the video and pick the “Uniform Speed” option from the list. This way, you will find an editing panel on the right side. Now, you can move the “Speed” slider towards the left. You can press the space bar and get the slow-motion GIF preview. Direct downward and choose the “Optical Flow” option from the extended menu of “AI Interpolation.”

Step 3Continue to Edit or Head to Export the Media
Finally, you will get a slow but high-quality GIF. Now, it’s up to you to continue exploring other features of Filmora or head to save the file. To save the file, go to the top right corner and press the “Export” button.

Key Features Marking Filmora’s Greatness
Filmora is proven to be the easiest software with the most powerful editing features. As proof, you can read the main features of Filmora to comprehend its functionalities better.
1. Speed Ramping
Create a unique cinematic effect in your video by adjusting keyframes. Filmora offers speed ramping features to bring a smooth transition in slow-motion or fast motions. In speed ramping, you get 6 templates, such as bullet time, montage, and jumper. Using those templates, you don’t need to manually adjust keyframes for speed ramping. Also, you can retain the original pitch of the audio after changing the speed.
2. AI Copilot Editing
To boost productivity, Filmora provides an AI Copilot editor option. It saves time that could be wasted searching for some feature or making the editing perfect. Users can ask anything to copilot in natural language. They can take help from an already existing question in the copilot editors. This feature will guide you toward practical actions through navigation buttons.
3. AI Music Generator
Who else is fed up with finding the perfect music for Vlog? Commonly, you didn’t find a video of exact length and mood. Thus, Filmora enables you to generate a soundtrack according to your mood and video length. Using it, you just have to prompt with the number of tracks, mood, and length. The AI-generated music will not require copyrights, so you can use it freely anywhere.
4. AI Image
Have you ever heard that any video editor can convert your text prompts into images? Filmora is offering this option, especially for people who are struggling to get their desired image. For this purpose, they need to describe images in simple language. Afterward, they are required to pick one style for accurate results.
5. AI Copywriting
Do you have a deadline for script submission, but it is not ready yet? Leave this headache to Filmora’s AI copywriting feature, which aims to produce engaging scripts. With ChatGPT integration, it can generate YouTube titles and descriptions. Furthermore, you can ask AI to convert your script into an appealing video.
Conclusion
To summarize, slowing down is the ultimate solution to retain the viewer’s attention. In this article, you have seen the top-notch platforms for slow-motion GIFs. They are not enough for remarkable videos because of the limited speed adjustment options. So, using Filmora remains the best option in providing easier ways to customize the speed of GIFs.
Make A Slow Motion Video Make A Slow Motion Video More Features
Part 1: Where Can I Get Impressive Slow-Motion GIFs for Myself?
Slowing down GIFs brings viewers’ attention to specific actions in video content. It exaggerates facial expressions or movements in the videos, leading to humorous results. Creators choose to slow down GIFs to convey particular moods and styles. Different contexts require different slow-mo GIF videos; below are some platforms to cater to all of them.
1. Giphy
One of the famous platforms for GIFs is Giphy, which offers an extensive collection of GIFs. If you want a GIF that can add humor to your content, pick the entertainment category from Giphy. It provides different domains of GIFs for your ease of selection. Some of its categories include sports, gaming, animals, and cartoons.
Key Features
- Using this platform, you can not only get a GIF but also upload one. Graphics designers or GIF creators can use this place to publish their work globally.
- After selecting one GIF, you can share it on any platform. It allows you to embed the GIF directly on websites or share it through links.
- Every GIF on Giphy provides in-depth details like size, frame, and source. This way, you can instantly choose one that matches your project’s requirements.
2. Tenor
Another popular platform to get high-quality GIFs is Tenor. It supports multiple languages in its interface so international users can better comprehend it. Apart from that, there are many categories in the trending searches of GIFs. It shows which domain of GIFs is ranking the most. Some trending tenors include cars, snow, happy holidays, good nights, and GIFs.
Key Features
- When you pick one GIF, you can change its format before downloading. In this regard, you can choose HD, MP4, and SD quality options.
- This platform detects your selection and suggests relevant GIFs afterward. For instance, if you pick a cat GIF, then you will find a cat GIF when scrolling down.
- Tenor provides GIF specification details under each. Besides, you can share the selected GIF image through the URL and embedded link.
Part 2: What to Do If You Want to Slow Down GIFs: The Best Tools
Knowing platforms, as mentioned above, makes it easier for you to avail the desired GIF. After grabbing one of your choices, you can make it a slow-motion GIF, if required. To do so, there are several tools in the market. Some of them are explained below, along with step-by-step instructions on how to use them.
List of Best Tools to Slow Down GIFs
1. Ezgif.com
This tool is primarily responsible for online GIF making and image editing. Besides, it can convert your video into GIF, resize, cut, crop, and optimize them. Moreover, you can add effects and text to your videos or GIFs to make them appealing. GIF animation speed changers are the real game changers among online solutions:
Step 1
Browse the official site of Ezgif.com and tap on the “Effects” section. Afterward, choose the “Adjust GIF Speed” section to proceed to further options. There, click the “Choose File” white button and look for the file you want to slow down. Optionally, paste the URL link in the given section and tap “Upload” to continue.
Step 2
Scroll down the window and insert the digits on which percentage you want to slow down the speed. Afterward, click the “Change Speed” button and find a slow-motion GIF in the output image.
2. VEED.io
VEED.io is a preferred choice by many creators for professional or high-quality videos. It offers screen recording, video editing, and subtitle translation services. Apart from that, it can fix GIF speed with the GIF speed changer feature. After changing speed, you can add transitions and animation effects in Veed.io. For now, let’s just stick to the slow-mo GIF in the following steps:
Step 1
Access the “GIF Speed Changer” in VEED.io, start by tapping “Choose GIF File” and enter the editing screen.
Step 2
From the next screen, you will get a pop-up menu first. You have to hit the “Upload a File” option and select a GIF file to import into VEED.io. Under the video preview, click on the “Speed” icon next to the “Sound” symbol. Then, choose “0.5x” and get a slow-down GIF preview in front of you.
3. Canva
Students must be aware of this platform as a presentation template provider. Canva is a tool that provides stunning templates to customize with its cloud storage system. Gradually, it’s turning more into a video editing platform. Regarding slow-motion GIFs, it can change the GIF speed online. After slowing down the GIF, you can convert it into MP4 or enhance it by adding graphics.
Step 1
Reach out to the GIF Speed Changer feature of Canva’s video editing. Then, tap the “Change GIF Speed” button to access the editing screen.
Step 2
Navigate towards the left-side panel and hit the “Upload Files.” Now, search and select your GIF to import in Canva’s editing window. Afterward, go to the “Playback” option at the top left and then direct to the left panel. Move the “Video Speed” slider to the left for a Slow-mo GIF. Click on the video for a preview, or look for any other playback adjustments.
Part 3: Make Impressive Slow Mo GIFs Using Desktop Solution
Are you getting customized speed adjustment options using any of the above tools? The answer is quite clear: no online tools do not offer personalization for slow-motion GIFs. That’s where you need Wondershare Filmora as a better alternative. It is currently the best video editor that transforms your videos into art pieces.
With more than 10 billion stock media, you don’t have to browse different sites. Filmora is an all-in-all platform that can not only edit your video but also aims to polish it to the next level. Besides, editors can use Filmora anywhere with just a password.
Free Download For Win 7 or later(64-bit)
Free Download For macOS 10.14 or later
How to Make Slow-motion GIF with Filmora
After discovering the top-notch features of Filmora, it’s time to use it. Although it’s very simple to operate, this step-by-step guide will help you process faster:
Step 1Launch Filmora and Import GIF to the Timeline
Download Wondershare Filmora from its official site. After a successful launch, you will enter its main screen. Look for the “New Project” option from the main interface. Tapping on the New Project, you will find the editing screen. Import your GIF in the media panel and drag it into the timeline section to begin the process.
Step 2Slow Down the GIF with Optical Flow
Right-click on the video and pick the “Uniform Speed” option from the list. This way, you will find an editing panel on the right side. Now, you can move the “Speed” slider towards the left. You can press the space bar and get the slow-motion GIF preview. Direct downward and choose the “Optical Flow” option from the extended menu of “AI Interpolation.”
Step 3Continue to Edit or Head to Export the Media
Finally, you will get a slow but high-quality GIF. Now, it’s up to you to continue exploring other features of Filmora or head to save the file. To save the file, go to the top right corner and press the “Export” button.
Key Features Marking Filmora’s Greatness
Filmora is proven to be the easiest software with the most powerful editing features. As proof, you can read the main features of Filmora to comprehend its functionalities better.
1. Speed Ramping
Create a unique cinematic effect in your video by adjusting keyframes. Filmora offers speed ramping features to bring a smooth transition in slow-motion or fast motions. In speed ramping, you get 6 templates, such as bullet time, montage, and jumper. Using those templates, you don’t need to manually adjust keyframes for speed ramping. Also, you can retain the original pitch of the audio after changing the speed.
2. AI Copilot Editing
To boost productivity, Filmora provides an AI Copilot editor option. It saves time that could be wasted searching for some feature or making the editing perfect. Users can ask anything to copilot in natural language. They can take help from an already existing question in the copilot editors. This feature will guide you toward practical actions through navigation buttons.
3. AI Music Generator
Who else is fed up with finding the perfect music for Vlog? Commonly, you didn’t find a video of exact length and mood. Thus, Filmora enables you to generate a soundtrack according to your mood and video length. Using it, you just have to prompt with the number of tracks, mood, and length. The AI-generated music will not require copyrights, so you can use it freely anywhere.
4. AI Image
Have you ever heard that any video editor can convert your text prompts into images? Filmora is offering this option, especially for people who are struggling to get their desired image. For this purpose, they need to describe images in simple language. Afterward, they are required to pick one style for accurate results.
5. AI Copywriting
Do you have a deadline for script submission, but it is not ready yet? Leave this headache to Filmora’s AI copywriting feature, which aims to produce engaging scripts. With ChatGPT integration, it can generate YouTube titles and descriptions. Furthermore, you can ask AI to convert your script into an appealing video.
Conclusion
To summarize, slowing down is the ultimate solution to retain the viewer’s attention. In this article, you have seen the top-notch platforms for slow-motion GIFs. They are not enough for remarkable videos because of the limited speed adjustment options. So, using Filmora remains the best option in providing easier ways to customize the speed of GIFs.
Also read:
- Updated How to Get the Most Out of KineMaster Video Templates
- New 10 Best Free Text to Speech Software Windows, Mac,Android, iPhone & Online for 2024
- In This Article, We Will Cover the Stages of Film Production You Need to Keep in Mind.Without Further Ado, Lets Get Started
- Updated 2024 Approved Step by Step to Rotate Video in Google Photos
- New Cropping Video in VLC Step by Step for 2024
- New Learn How to Slow Down Time-Lapse Videos on Your iPhone to Make Detailed Slow-Motion Effects in Your Time-Lapse Captures
- 2024 Approved Fixes | What If YouTube Zoom to Fill Not Working?
- New Detailed Guide to Crop Video in Sony Vegas Pro for 2024
- New Here Are a Number of Tools Used in the Market to Resize the Videos. We Are Going to Teach How to Resize the Video in Davinci Resolve and Fimora Wondershare. Once You Have Mastered How to Resize a Video, It Would Be as Simple as the Click
- In 2024, How to Make A Jaw-Dropping Time Lapse Video?
- Updated How to Add Text Behind Objects in Video
- What Should Be Considered to Choose A Nice GoPro for Vlogging for 2024
- New How to Create Intro with Renderforest
- In 2024, Step by Step Guide on Make Gimp Transparent Background PNG
- Updated In 2024, Best 6 WMV to GIF Converters
- Updated Kdenlive Review – Is It The Best Video Editor?
- New Easy Ways to Change Aspect Ratio in iMovie for 2024
- 4 Solutions to Resize a WebM File
- New HOW to Add Fade to Black on Premiere Pro for 2024
- 2024 Approved What Are the Top 15 Slideshow Presentation Examples Your Audience Will
- Edit FLV Video Files with FLV Editor Windows, Mac,Android, iPhone
- Updated Have a Desire to Uplift Your Editing Creativity with Trying Hands at Working with Storyboards? Keep Reading to Have a Comprehensive Understating of the Workflow Through Stepwise User Guides
- New In 2024, 8 Top Premiere Pro Slideshow Templates
- New Guide on VHS Technology and Its Influence on Video Editing for 2024
- Updated Best Video Editors to Add Text to a Video for 2024
- In 2024, How to Animate Designs With Canva GIF
- Create a Stunning Light Sweep Effect in Filmora. Use Simple and Easy Steps to Export a High-Quality Video that Will Impress Even Pro Video Editors for 2024
- Adjust the TikTok Videos Length to Make Them Captivating for 2024
- New Color Finale Is a Color Grading Plugin for Final Cur Pro. It Allows Users to Make Cinematic Looking Video Scenes by Adjusting the Color. Here Well Share You some Basic Information About This Plugin
- Updated 2024 Approved 10 Best Free GIF Background Remover for PC and Online
- Updated Top 5 Solutions on How to Add Emojis to iPhone
- 2024 Approved How Did AI Video Games Act More Human Than Human?
- M31 LUT (Teal and Orange LUT) Free Download for 2024
- How to Slow Down Time-Lapse Videos on iPhone for 2024
- The Complete Guide to GIF for Discord Profile for 2024
- Updated Do You Wish to Learn About some Tools to Slow Down a Video? Discover How to Slow Down Time Lapse on iPhone Throughout This Article
- Updated In 2024, 5 Best Chrome Extensions You Can Use to Translate Videos
- Ultimate Guide to Free PPTP VPN For Beginners On Meizu 21 Pro | Dr.fone
- In 2024, 5 Ways to Move Contacts From Nokia C12 to iPhone (13/14/15) | Dr.fone
- In 2024, 6 Ways To Transfer Contacts From OnePlus Ace 2 to iPhone | Dr.fone
- In 2024, Getting the Pokemon Go GPS Signal Not Found 11 Error in Vivo Y36 | Dr.fone
- How to Infinix Hot 30i Get Deleted photos Back with Ease and Safety?
- 5 Quick Methods to Bypass Motorola Moto G Stylus 5G (2023) FRP
- Fix Cant Take Screenshot Due to Security Policy on Xiaomi 13T | Dr.fone
- In 2024, Ultimate Guide on OnePlus Ace 2V FRP Bypass
- Turning Off Two Factor Authentication From iPhone 12 mini? 5 Tips You Must Know
- How To Transfer WhatsApp From iPhone 15 to other iPhone 11 Pro Max devices? | Dr.fone
- How to Fix Pokemon Go Route Not Working On Asus ROG Phone 7? | Dr.fone
- Does Google Pixel 8 Pro Have Find My Friends? | Dr.fone
- In 2024, Top 12 Prominent Xiaomi Redmi K70E Fingerprint Not Working Solutions
- Title: Vintage Film Effect 1920S - How to Make
- Author: Chloe
- Created at : 2024-05-20 03:37:25
- Updated at : 2024-05-21 03:37:25
- Link: https://ai-editing-video.techidaily.com/vintage-film-effect-1920s-how-to-make/
- License: This work is licensed under CC BY-NC-SA 4.0.
