
:max_bytes(150000):strip_icc():format(webp)/man-attaching-action-camera-to-chest-664655587-5c8c2559c9e77c0001ac184b.jpg)
Want to Explore the Exciting World of GIFs? Here Is Everything You Will Ever Want to Know and Learn About the Most Appealing GIF Libraries, All at Once Place for 2024
Want to Explore the Exciting World of GIFs? Here Is Everything You Will Ever Want to Know and Learn About the Most Appealing GIF Libraries, All at Once Place
Quick Answer: What Is a GIF File?
An easy yet powerful editor
Numerous effects to choose from
Detailed tutorials provided by the official channel
Stay tuned to get an insight into what and how of GIFs with utmost ease! Here’s all about the origin, credibility, creation and content repositories of GIFs!
In this article
01 [What Is a GIF File?](#Part 1)
02 [Are GIF Files Subject to Copyright?](#Part 2)
03 [How to Convert a GIF File](#Part 3)
04 [6 Places to Find the Best Gifs](#Part 4)
Part 1 What Is a GIF File?
GIF is an acronym for Graphics Interchange Format. Talking of the explicit GIF meaning, this one is a short motion snippet created from a set of serially arranged still images in a looping motion. Talking of the origin of GIFs, these were first introduced in 1987 by Steve Wilhite from the US based online service provider CompuServe, precisely on June 15.
GIFs serve as portable image formats for still and animated images, and are primarily small sized files. However, these are very well compatible with large content files too. In today’s times, GIFs are a trending means of entertainment based content sharing and intensified message delivery to target audience. Additionally, you can conveniently use motion images in the GIF format as effective tools of improvising and upgrading your marketing straggles for an enhanced brand promotion.
Considering the immense content varieties of GIFs, these are an eminent part of blogs, social media posts and product websites. You can even use them to objectify your emotions and feelings when conversing with peers through the latest instant messaging applications. The bottom line is, GIFs are an integral part of today’s modern and dynamic communication patterns and needs.
Part 2 Are GIF File Subject to Copyright?
The straight and simple answer to this query is a ‘Yes’. CIFs are indeed subject to copyright, just like its creative counterparts. These essentially constitute an original copyrighted creation, or may even originate from an existing copyright protected work. However, you may encounter potential glitches when choosing to work with GIF images while sticking with legal constraints.
Talking of the potential issues with the legality of GIF usage, there are two major concerns; the first being the sharing of unlicensed copyrighted GIF content, while the absence of legalized methods for licensed commercial use of these short motion clips being the second. Talking of possible reasons, there is again a duel. At present, there no copyright exercise from the end of original creators of GIF content, along with the absence of exact copyright claim constraints that can be imposed by content owners.
This scenario poses a potential need to look for suitable mitigation methods to curb copyright claims and disputes resulting from illegal use of GIFs. As a matter of fact, the development of a proper legal framework for undisputed GIF usage is a time consuming process. However, you can stay cautious by adhering to the following measures in the meantime:
● Refrain from using GIFs in a manner that would appear unsolicited to you, had you been the content owner.
● Take a note to credit the original creators in case3 you are using the GIF content from a known copyright source.
● Avoid drawing content from doubtful sources, instead search for trusted alternatives, or creating a GIF of your own would be an even better and safe choice.
Part 3 How to Convert a GIF File
GIFs are an exciting means of creating a buzz about the information being conveyed. You can ensure an effective reach and impact of your brand if you include these catchy, short animation loops in your promotion strategy. Counting upon the credibility of GIFs, it is equally exciting to create these on your own. Try hands at experimenting with your creative skills to make and share interesting content through GIFs.
When looking for an excellent GIF creator tool, you don’t need to have second thoughts on picking up the Wondershare Filmora GIF Creator. This software has everything to make you fall in love with creating and editing GIFs! You can choose to create looping animations from static images and video files in a variety of formats when creating GIFs in Wondershare Filmora Video Editor .

Wondershare Filmora - Best Video Editor for Mac/Windows
5,481,435 people have downloaded it.
Build unique custom animations without breaking a sweat.
Focus on creating epic stories and leave the details to Filmora’s auto features.
Start a creative adventure with drag & drop effects and endless possibilities.
Filmora simplifies advanced features to save you time and effort.
Filmora cuts out repetition so you can move on to your next creative breakthrough.
Creating GIFs in Filmora
As already stated, making GIFs in Filmora is super easy. You just need to follow the steps mentioned below:
Step 1: Download and Launch Filmora
From the link given above, download the Filmora GIF creator software for free and install the same in your preferred device. When you finish, launch the software to reach its timeline.
Step 2: Media Upload
Select a set of locally saved still images or any desired video file to upload to the software’s timeline. Filmora supports over 150 different file formats, granting you the liberty to choose your suitable one without a glitch.

Step 3: Timeline Placement
Drag the uploaded media files to the Filmora editor timeline to customize your artwork with suitable effects and filters, while exploring your editing creativity. You can try non adding overlays; background effects, audio and music, or making size, frame and play speed adjustments and even add suitable tests to make your content impressive.

Step 4: Save and Export
When you are happy with your work, save it locally using the .gif extension. This will cause a GIF file download in your device’s memory. Your artwork is now ready to be exported to your media sharing handles.

Part 4 Places to Find the Best Gifs
Creating GIFs of your own is an absolute fun, but considering the fact that you may require to look for excellent pre made GIF content at some instances, the web is flooded with appealing GIF libraries that are enriched with top quality, amazing GIF content. Some of the best GIF websites include the following:
01GIFHY
This is probably the first name that comes in mind when the talk is about quality with variety in GIF content. The site is an extensive library of stunning GIFs, with tons of different and relatable content categories that are packed with all the latest and trending GIFs. Ann additional advantage of using this site to hunt for the perfect GIF is, the site has a direct export feature. This means that you can directly share your selected GIF on the site to your instant massaging conversations and social media handles.

02Tenor
This one is another heap of amazing GIFs available online. Having a vast and distributed content inventory, Tenor lands among the most potential competitors of GIPHY. In spite of being on the same page in terms of website interface and content categorization, these two libraries offer potentially diverse search results for the sane keyword. It is interesting to know that Tenor takes the credit of introducing the GIF Keyboard.

03Gfycat
If you are interested to experiment with GIF hosting, this website is your one stop access for adhering to all related concerns. Though you may be a little disappointed with the site’s content search filter, its GIF category bank is quite impressive. Additionally, you will be pleased with the high-definition image quality of the GIFs available on this site. You can visibly count on this as a dependable means to access and host premade GIFs.

04GIFbin
GIFs are known to be the trendsetters in content sharing, but if you are among the ones who like to stay out of the crowd, you can visit this site for state of the art nostalgic GIF content. Browsing through the retro inspired content categories of the website, you will experience getting back to those Limewire and MSN Messenger days almost two decades back. The site comes with a simple interface and has a massive library to access content in the GIF file format.

05Imgflip
You can take this site as a bridge connecting the GIF sharing and meme creation spectrums. Though the site excels as a quality meme creation platform, it is simultaneously a hub of stunning GIF content in diverse categories, particularly in the comic genre. The GIFs on the site have an embedded watermark, which you may prefer removing before downloading or sharing the contents, if not, it is equally fine to keep the watermark.

06Tumblr
This site is visibly a time travel into the GIF world. Covering an extensive range of GIFs from the retro panorama to the latest ongoing trends, this website is an eminent store house of futuristic GIF content too. you can either browse through selected content categories or pick up a specific keyword search in the Tumblr search field. Consider visiting this site to take a nostalgia tour to the domain of quality content sharing.

Premade GIFs are a content of class in the world of information sharing. These are intuitively power packed tools of data promotion, but may require additional customization in some cases. Whether aiming to intensify your message or just for a creative fun, if you want to explore your editing skills to personalize your GIFs, you can choose the Filmora GIF Maker software to serve your purpose.

Key Features
The software is loaded with exciting features to let you enjoy the GIF creation experience. Some are them are outlined below:
● The software is free to use and comes with a clean and organized user interface.
● This is quick and easy GIF maker software that helps you create amazing GIF content in a spic and span process.
● The Filmora editor library is a huge storehouse of professional quality effects and filters, like, overlays, audio-visual effects, image size and frame adjustment tools, etc., that are ready to give an outstanding professional touch to your creation.
● This software is conveniently compatible with your Windows and MacOS supported devices.
● It supports almost all common image and video file formats.
● Key Takeaways from This Episode →
● GIFs are an extensive content sharing alternative that are known to add volume and substance to still captures and thereby assure a precise and impactful message delivery.
● You can create stunning GIFs from static images as well as convert different file formats into GIFs.
● When looking for quality premade GIF content, you can visit a range of GIF website to pick exactly what you like. However, if you want to take up further customization, consider using the Filmora GIF Creator software to either edit premade GIFs, or create exciting ones of your own!
Stay tuned to get an insight into what and how of GIFs with utmost ease! Here’s all about the origin, credibility, creation and content repositories of GIFs!
In this article
01 [What Is a GIF File?](#Part 1)
02 [Are GIF Files Subject to Copyright?](#Part 2)
03 [How to Convert a GIF File](#Part 3)
04 [6 Places to Find the Best Gifs](#Part 4)
Part 1 What Is a GIF File?
GIF is an acronym for Graphics Interchange Format. Talking of the explicit GIF meaning, this one is a short motion snippet created from a set of serially arranged still images in a looping motion. Talking of the origin of GIFs, these were first introduced in 1987 by Steve Wilhite from the US based online service provider CompuServe, precisely on June 15.
GIFs serve as portable image formats for still and animated images, and are primarily small sized files. However, these are very well compatible with large content files too. In today’s times, GIFs are a trending means of entertainment based content sharing and intensified message delivery to target audience. Additionally, you can conveniently use motion images in the GIF format as effective tools of improvising and upgrading your marketing straggles for an enhanced brand promotion.
Considering the immense content varieties of GIFs, these are an eminent part of blogs, social media posts and product websites. You can even use them to objectify your emotions and feelings when conversing with peers through the latest instant messaging applications. The bottom line is, GIFs are an integral part of today’s modern and dynamic communication patterns and needs.
Part 2 Are GIF File Subject to Copyright?
The straight and simple answer to this query is a ‘Yes’. CIFs are indeed subject to copyright, just like its creative counterparts. These essentially constitute an original copyrighted creation, or may even originate from an existing copyright protected work. However, you may encounter potential glitches when choosing to work with GIF images while sticking with legal constraints.
Talking of the potential issues with the legality of GIF usage, there are two major concerns; the first being the sharing of unlicensed copyrighted GIF content, while the absence of legalized methods for licensed commercial use of these short motion clips being the second. Talking of possible reasons, there is again a duel. At present, there no copyright exercise from the end of original creators of GIF content, along with the absence of exact copyright claim constraints that can be imposed by content owners.
This scenario poses a potential need to look for suitable mitigation methods to curb copyright claims and disputes resulting from illegal use of GIFs. As a matter of fact, the development of a proper legal framework for undisputed GIF usage is a time consuming process. However, you can stay cautious by adhering to the following measures in the meantime:
● Refrain from using GIFs in a manner that would appear unsolicited to you, had you been the content owner.
● Take a note to credit the original creators in case3 you are using the GIF content from a known copyright source.
● Avoid drawing content from doubtful sources, instead search for trusted alternatives, or creating a GIF of your own would be an even better and safe choice.
Part 3 How to Convert a GIF File
GIFs are an exciting means of creating a buzz about the information being conveyed. You can ensure an effective reach and impact of your brand if you include these catchy, short animation loops in your promotion strategy. Counting upon the credibility of GIFs, it is equally exciting to create these on your own. Try hands at experimenting with your creative skills to make and share interesting content through GIFs.
When looking for an excellent GIF creator tool, you don’t need to have second thoughts on picking up the Wondershare Filmora GIF Creator. This software has everything to make you fall in love with creating and editing GIFs! You can choose to create looping animations from static images and video files in a variety of formats when creating GIFs in Wondershare Filmora Video Editor .
Wondershare Filmora - Best Video Editor for Mac/Windows
5,481,435 people have downloaded it.
Build unique custom animations without breaking a sweat.
Focus on creating epic stories and leave the details to Filmora’s auto features.
Start a creative adventure with drag & drop effects and endless possibilities.
Filmora simplifies advanced features to save you time and effort.
Filmora cuts out repetition so you can move on to your next creative breakthrough.
Creating GIFs in Filmora
As already stated, making GIFs in Filmora is super easy. You just need to follow the steps mentioned below:
Step 1: Download and Launch Filmora
From the link given above, download the Filmora GIF creator software for free and install the same in your preferred device. When you finish, launch the software to reach its timeline.
Step 2: Media Upload
Select a set of locally saved still images or any desired video file to upload to the software’s timeline. Filmora supports over 150 different file formats, granting you the liberty to choose your suitable one without a glitch.
Step 3: Timeline Placement
Drag the uploaded media files to the Filmora editor timeline to customize your artwork with suitable effects and filters, while exploring your editing creativity. You can try non adding overlays; background effects, audio and music, or making size, frame and play speed adjustments and even add suitable tests to make your content impressive.
Step 4: Save and Export
When you are happy with your work, save it locally using the .gif extension. This will cause a GIF file download in your device’s memory. Your artwork is now ready to be exported to your media sharing handles.
Part 4 Places to Find the Best Gifs
Creating GIFs of your own is an absolute fun, but considering the fact that you may require to look for excellent pre made GIF content at some instances, the web is flooded with appealing GIF libraries that are enriched with top quality, amazing GIF content. Some of the best GIF websites include the following:
01GIFHY
This is probably the first name that comes in mind when the talk is about quality with variety in GIF content. The site is an extensive library of stunning GIFs, with tons of different and relatable content categories that are packed with all the latest and trending GIFs. Ann additional advantage of using this site to hunt for the perfect GIF is, the site has a direct export feature. This means that you can directly share your selected GIF on the site to your instant massaging conversations and social media handles.
02Tenor
This one is another heap of amazing GIFs available online. Having a vast and distributed content inventory, Tenor lands among the most potential competitors of GIPHY. In spite of being on the same page in terms of website interface and content categorization, these two libraries offer potentially diverse search results for the sane keyword. It is interesting to know that Tenor takes the credit of introducing the GIF Keyboard.
03Gfycat
If you are interested to experiment with GIF hosting, this website is your one stop access for adhering to all related concerns. Though you may be a little disappointed with the site’s content search filter, its GIF category bank is quite impressive. Additionally, you will be pleased with the high-definition image quality of the GIFs available on this site. You can visibly count on this as a dependable means to access and host premade GIFs.
04GIFbin
GIFs are known to be the trendsetters in content sharing, but if you are among the ones who like to stay out of the crowd, you can visit this site for state of the art nostalgic GIF content. Browsing through the retro inspired content categories of the website, you will experience getting back to those Limewire and MSN Messenger days almost two decades back. The site comes with a simple interface and has a massive library to access content in the GIF file format.
05Imgflip
You can take this site as a bridge connecting the GIF sharing and meme creation spectrums. Though the site excels as a quality meme creation platform, it is simultaneously a hub of stunning GIF content in diverse categories, particularly in the comic genre. The GIFs on the site have an embedded watermark, which you may prefer removing before downloading or sharing the contents, if not, it is equally fine to keep the watermark.
06Tumblr
This site is visibly a time travel into the GIF world. Covering an extensive range of GIFs from the retro panorama to the latest ongoing trends, this website is an eminent store house of futuristic GIF content too. you can either browse through selected content categories or pick up a specific keyword search in the Tumblr search field. Consider visiting this site to take a nostalgia tour to the domain of quality content sharing.
Premade GIFs are a content of class in the world of information sharing. These are intuitively power packed tools of data promotion, but may require additional customization in some cases. Whether aiming to intensify your message or just for a creative fun, if you want to explore your editing skills to personalize your GIFs, you can choose the Filmora GIF Maker software to serve your purpose.
Key Features
The software is loaded with exciting features to let you enjoy the GIF creation experience. Some are them are outlined below:
● The software is free to use and comes with a clean and organized user interface.
● This is quick and easy GIF maker software that helps you create amazing GIF content in a spic and span process.
● The Filmora editor library is a huge storehouse of professional quality effects and filters, like, overlays, audio-visual effects, image size and frame adjustment tools, etc., that are ready to give an outstanding professional touch to your creation.
● This software is conveniently compatible with your Windows and MacOS supported devices.
● It supports almost all common image and video file formats.
● Key Takeaways from This Episode →
● GIFs are an extensive content sharing alternative that are known to add volume and substance to still captures and thereby assure a precise and impactful message delivery.
● You can create stunning GIFs from static images as well as convert different file formats into GIFs.
● When looking for quality premade GIF content, you can visit a range of GIF website to pick exactly what you like. However, if you want to take up further customization, consider using the Filmora GIF Creator software to either edit premade GIFs, or create exciting ones of your own!
In the past decade, social media has made slow-motion videos wildly popular. When Apple introduced the slow-motion effect in its camera, people went crazy about it. Due to the great demand, many developers introduced this effect in their applications. Slow-mo has been trendy for years, and its use is not ending soon.
This article will guide you about the iMovie slow motion effect and explain the app in detail. Users considering creating a video across their Mac should be aware of slow-mo in iMovie. If you are fascinated by finding more, read this article about slow-down video iMovie.
Slow Motion Video Maker Slow your video’s speed with better control of your keyframes to create unique cinematic effects!
Make A Slow Motion Video Make A Slow Motion Video More Features

Part 1: An Introduction to Slow Motion Videos: A Comprehensive Review
Slow-mo videos are recorded at a frame rate higher than 24 frames per second (fps). After that, they are replayed at a slower pace. This method produces an effect that can bring out special moments. Slow-motion recordings are frequently employed in sports, action, and wildlife cinematography.
What makes it so popular is how it captures fast-moving scenes in better detail. Access to the slow-motion effect was not so common, but with apps like iMovie slow-mo, the effect is accessible to everyone. You can use online video editors or desktop editing software to make slow-motion videos.
Free Download For Win 7 or later(64-bit)
Free Download For macOS 10.14 or later
Part 2: How to Set Slow Motion Settings in iMovie Video Making?
iMovie is a wonderful choice if you want to make slow-motion videos. Also, it allows users to change the speed of video clips per their needs. With slo-mo in iMovie, you can even fine-tune the speed of a single clip by splitting it into intervals, each with a different speed. You can set multiple ranges to cause a clip to speed up and down.
You can freeze a single frame in your film to create the illusion that time has stopped. The app is a fantastic option for Apple users who want to quickly add slow-motion effects to their videos. iMovie is a pretty straightforward tool that gives quick results. Follow the step-by-step guide below to slow down video in iMovie.
Step 1
Launch iMovie in your system and click “New Project.” Go to the “Movies” option to import the video you want to edit. Drag the media in the project timeline to make changes to it.

Step 2
Select the video from the timeline and click the speed icon that looks like a clock. From “Speed,” select the “Slow” option and choose the percentage of slow-motion effect you want to apply in your video. To set a customized slow-mo percentage, click “Speed” again and choose “Custom.” After that, manually add the percentage of how slow you want your video to be.

Part 3: A Great Alternative to Making Slow Motion Videos: Wondershare Filmora
iMovie slow motion is undoubtedly a simple solution for creating slow-mo videos. But sometimes, you need a tool with more advanced features than iMovie. If you want to access professional features with a simple interface, Wondershare Filmora is the right platform. The tool not only provides a precise slow-motion effect, but it has many other features that will leave you amazed.
You can control your video and edit it any way you like. Wondershare Filmora gives you the freedom to be creative. For both beginners and professionals, it is an excellent choice. This software is worth checking if you want to create a cinematic masterpiece.
Step-By-Step Guide to Make Slow Motion Videos with Optical Flow
Unlike the slow-mo in iMovie, the Filmora’s effect is much more advanced and provides professional results. Look at the easy steps below and slow down your video quickly.
Free Download For Win 7 or later(64-bit)
Free Download For macOS 10.14 or later
Step 1Ensure the Latest Version of Filmora and Import Media
Firstly, ensure that you are using the latest version of Filmora. After launching it in your system, access its editing screen through the “New Project” option in its main interface. Drag and drop your video into the timeline section after importing it. You can simply import by pressing the “Ctrl + I” keys from your keyboard.

Step 2Apply Slow-Motion and Use Optical Flow
After bringing media into the timeline, right-click on it. From the displayed list, look for the “Uniform Speed” option. Tap on it and get directed toward the right-side editing screen. There, you have to use the “Speed” slider and move to the left for slow videos or to the right for fast-speed videos.

When you are done adjusting speed, head down to the “AI Frame Interpolation” option. Extend its menu and choose “Optical Flow” to reduce the speed of your video while maintaining its quality.

Step 3Analyze and Save the Video by Customizing Export Options
Check if the function has been applied by playing the video. Lastly, select the “Export” button located in the screen’s upper right corner. From the “Export” window, adjust video parameters to save the video your desired way.

Key Features of Wondershare Filmora
Wondershare Filmora’s impressive tools never cease to impress. Let’s discuss a few of its remarkable features in video editing:
1. Instant Mode
This feature is perfect for creating quick social media videos. You can find a variety of templates and choose the one that best suits your video’s concept. There are more than 115 templates from business, travel, and Vlog categories. Instant mode will help you to rearrange video clips with AI algorithms that cut your 3 hours of editing time.
2. AI Smart Cutout
Removing an object from a video can be challenging while maintaining a natural appearance. Not more with Filmora’s AI smart cutout that can automatically remove unwanted items. It can detect and refine the cutout frame by frame to maintain perfection and high quality. Besides, you get different preview modes to modify certain areas.
3. Auto Beat Sync
Music and film with wonderful rhythm add an entertaining aspect to the content. Utilizing the auto-beat sync feature in Filmora is the way to do it. With this tool, your music and video will automatically match the clips. Furthermore, it can inevitably identify dark sides in your footage to delete them.
4. AI Copywriting
It’s challenging to develop exciting scripts or captions for your films. In situations like this, an AI copywriting tool is invaluable. ChatGPT integration in Filmora lets you get YouTube titles and descriptions that match your needs. To generate one, you must describe the content you want using natural language.
Conclusion
In short, the slow-motion effect is one of the most popular video effects used in movies. Thus, a good video editor is necessary whether you edit videos for entertainment or business purposes. Your video will not look good and will negatively impact the viewers if it is not edited well. Here, you have learned how to slow down video iMovie. If you want an advanced tool, try the alternative Wondershare Filmora.
Make A Slow Motion Video Make A Slow Motion Video More Features
Part 1: An Introduction to Slow Motion Videos: A Comprehensive Review
Slow-mo videos are recorded at a frame rate higher than 24 frames per second (fps). After that, they are replayed at a slower pace. This method produces an effect that can bring out special moments. Slow-motion recordings are frequently employed in sports, action, and wildlife cinematography.
What makes it so popular is how it captures fast-moving scenes in better detail. Access to the slow-motion effect was not so common, but with apps like iMovie slow-mo, the effect is accessible to everyone. You can use online video editors or desktop editing software to make slow-motion videos.
Free Download For Win 7 or later(64-bit)
Free Download For macOS 10.14 or later
Part 2: How to Set Slow Motion Settings in iMovie Video Making?
iMovie is a wonderful choice if you want to make slow-motion videos. Also, it allows users to change the speed of video clips per their needs. With slo-mo in iMovie, you can even fine-tune the speed of a single clip by splitting it into intervals, each with a different speed. You can set multiple ranges to cause a clip to speed up and down.
You can freeze a single frame in your film to create the illusion that time has stopped. The app is a fantastic option for Apple users who want to quickly add slow-motion effects to their videos. iMovie is a pretty straightforward tool that gives quick results. Follow the step-by-step guide below to slow down video in iMovie.
Step 1
Launch iMovie in your system and click “New Project.” Go to the “Movies” option to import the video you want to edit. Drag the media in the project timeline to make changes to it.
Step 2
Select the video from the timeline and click the speed icon that looks like a clock. From “Speed,” select the “Slow” option and choose the percentage of slow-motion effect you want to apply in your video. To set a customized slow-mo percentage, click “Speed” again and choose “Custom.” After that, manually add the percentage of how slow you want your video to be.
Part 3: A Great Alternative to Making Slow Motion Videos: Wondershare Filmora
iMovie slow motion is undoubtedly a simple solution for creating slow-mo videos. But sometimes, you need a tool with more advanced features than iMovie. If you want to access professional features with a simple interface, Wondershare Filmora is the right platform. The tool not only provides a precise slow-motion effect, but it has many other features that will leave you amazed.
You can control your video and edit it any way you like. Wondershare Filmora gives you the freedom to be creative. For both beginners and professionals, it is an excellent choice. This software is worth checking if you want to create a cinematic masterpiece.
Step-By-Step Guide to Make Slow Motion Videos with Optical Flow
Unlike the slow-mo in iMovie, the Filmora’s effect is much more advanced and provides professional results. Look at the easy steps below and slow down your video quickly.
Free Download For Win 7 or later(64-bit)
Free Download For macOS 10.14 or later
Step 1Ensure the Latest Version of Filmora and Import Media
Firstly, ensure that you are using the latest version of Filmora. After launching it in your system, access its editing screen through the “New Project” option in its main interface. Drag and drop your video into the timeline section after importing it. You can simply import by pressing the “Ctrl + I” keys from your keyboard.
Step 2Apply Slow-Motion and Use Optical Flow
After bringing media into the timeline, right-click on it. From the displayed list, look for the “Uniform Speed” option. Tap on it and get directed toward the right-side editing screen. There, you have to use the “Speed” slider and move to the left for slow videos or to the right for fast-speed videos.
When you are done adjusting speed, head down to the “AI Frame Interpolation” option. Extend its menu and choose “Optical Flow” to reduce the speed of your video while maintaining its quality.
Step 3Analyze and Save the Video by Customizing Export Options
Check if the function has been applied by playing the video. Lastly, select the “Export” button located in the screen’s upper right corner. From the “Export” window, adjust video parameters to save the video your desired way.
Key Features of Wondershare Filmora
Wondershare Filmora’s impressive tools never cease to impress. Let’s discuss a few of its remarkable features in video editing:
1. Instant Mode
This feature is perfect for creating quick social media videos. You can find a variety of templates and choose the one that best suits your video’s concept. There are more than 115 templates from business, travel, and Vlog categories. Instant mode will help you to rearrange video clips with AI algorithms that cut your 3 hours of editing time.
2. AI Smart Cutout
Removing an object from a video can be challenging while maintaining a natural appearance. Not more with Filmora’s AI smart cutout that can automatically remove unwanted items. It can detect and refine the cutout frame by frame to maintain perfection and high quality. Besides, you get different preview modes to modify certain areas.
3. Auto Beat Sync
Music and film with wonderful rhythm add an entertaining aspect to the content. Utilizing the auto-beat sync feature in Filmora is the way to do it. With this tool, your music and video will automatically match the clips. Furthermore, it can inevitably identify dark sides in your footage to delete them.
4. AI Copywriting
It’s challenging to develop exciting scripts or captions for your films. In situations like this, an AI copywriting tool is invaluable. ChatGPT integration in Filmora lets you get YouTube titles and descriptions that match your needs. To generate one, you must describe the content you want using natural language.
Conclusion
In short, the slow-motion effect is one of the most popular video effects used in movies. Thus, a good video editor is necessary whether you edit videos for entertainment or business purposes. Your video will not look good and will negatively impact the viewers if it is not edited well. Here, you have learned how to slow down video iMovie. If you want an advanced tool, try the alternative Wondershare Filmora.
How to Make a Smooth Speed Ramping in Premiere Pro?
Versatile Video Editor - Wondershare Filmora
An easy and powerful editor
Numerous effects to choose from
Detailed tutorials are provided by the official channel
Speed ramping is a popular Premiere Pro effect for good reason: it looks fantastic! When utilized simultaneously to spice up a video clip, slow motion and quick motion may both be great aesthetic choices. This practice may save you time by enabling you to show more about what you want to see in your edit without using harsh jump cuts.

This effect may be used for a number of reasons, including clip transitions, speeding up a clip to make it shorter, and slowing down a clip to make it longer. Speed ramping may be used with a number of various effects.
According to the business, Adobe Premiere Pro is one of the most widely used video editing products on the market today. The ability to alter the speed of individual clips is one of Premiere Pro’s most important capabilities. While speed ramping is often used in sports highlights, changing the speed of video may be useful for a number of other types of material.
You’ll learn how to construct a spectacular speed ramp in Adobe Premiere Pro, beginning with capturing the proper kind of video and moving to advanced tips and methods. Following that, we’ll go through some ideas and inspiration for when to use a speed ramp in your circumstance.
What is Speed Ramping?
A speed ramp is used to gradually increase the speed of a video clip as it accelerates or decelerates. It is guaranteed that a smooth transition between two separate speeds will take place. The method is crucial in changing the tempo of the film and, as a consequence, creating a dramatic impression. The film’s required velocity is achieved by the employment of super-fast visual effects.
A speed ramp, as opposed to a rapid shift in speed, provides for a more smooth transition between two drastically differing speeds. This method is used to focus attention on certain parts of your video, which has a huge impact on your editing. It provides just the right amount of zing to keep your audience interested and excited about your presentation.
Examples of Speed Ramping
It works especially well when utilized to focus the viewer’s attention on a certain moment or action in your videos, such as a tough jump or an impending bullet. Another name for this approach speeds ramping (sometimes known as time remapping). It may also be used to create a visually pleasing transition between two clips or pictures inside a single movie.
You may also use Speed Ramping to alter the runtime of your video to fit the time limits of other social media sites, such as Instagram and Vine. If you just have 30 seconds to deliver your video, the following are the two most common places where people apply speed ramping techniques:
Assume you are shooting a person walking and want the clip to play in slow motion so that viewers can clearly see the person’s face. In this scenario, speed ramping is precisely what you need since it enables you to do precisely that.
Do you remember the famous movie “The Matrix” scene, when Neo dodges the bullets? It’s not some typical scene; it’s a pretty good example of speed ramping.
How to Create Speed Ramping/Time Remapping in Premiere Pro?
Speed Ramping premiere pro is an excellent tool for speeding up video clips. ‘ In order to speed up or slow down the speed of a video clip, this effect may be employed. In this article, you’ll learn how to make the most of this fantastic tool in Adobe Premiere Pro.

While using Premiere Pro, the ability to change a clip’s speed without altering its pitch is a very useful feature. An example of how this feature comes in helpful is when you have a clip that shows someone or something moving from left to right or vice versa.
Advanced Premiere Pro Time Remapping
The fact that this effect is so simple to use is its main benefit. By moving handles around on the clip, you may quickly choose different regions of the clip to be influenced by the adjustment when you apply it. This makes achieving the required result extremely quick and easy.

If you want to go deep into the game, Speed Ramp offers some more advanced options that give you even more control over your speed modifications. The properties section allows you to designate which portions of the timeline are affected by the ramp, as well as change factors like the curve type and bias.
Steps To Use Speed Ramping In Premiere Pro
Follow the below-mentioned steps to learn how to use speed ramping in premiere pro:
- Download and install Adobe Premiere Pro. Once installed, launch the application.
- Create a new project in Premiere by clicking the New Project button. After that, import the film that you want to speed ramp. It is the simplest and most straightforward method of importing film into Premiere to just click and drag the clip into the project window.
- Before commencing any work with speed, click and drag the video track in the timeline to make it taller by increasing the height of the track. This will guarantee that you can see the speed ramp as you go to the next stages.
- To create a sequence if you don’t already have one, drag a clip into the timeline and drop it where you want it to appear. Using the clip’s parameters, Premiere will automatically generate a sequence with the necessary settings.
- Decide when you want to apply the speed ramp and mark the spot on the screen where you will do so. The key to a pleasant speed ramp is movement, so choose a time when the environment is very active. You can specify in and out points, cut the clip with “Command+K,” or divide the clip into parts using the razor blade tool (which is accessible through the “Command+K” shortcut).
- Keyframes will be created at this point. It’s first and foremost important that the keyframes be clearly visible. Access the proper view by selecting “Show Clip Keyframes” from the context menu when you right-click on your clip.
- Another drop-down option will appear, from which you’ll choose “Time Remapping” and then press the “Enter” key.
- Select “Speed” from the drop-down menu.
- To create a keyframe, choose the pen from the toolbar (or just use the “P” key on your keyboard) and click on the white line running across the video track. If you wish to make a speed ramp, you’ll need at least two keyframes: one to indicate where the speed ramp should begin and another to indicate where it should terminate.
- If you wish to create more sophisticated speed ramps, you may do so by including more keyframes in your animation.
- Switch back to the selection tool when you’ve finished placing your keyframes. “V” is the shortcut key for this.
- Now comes the critical moment: it’s time to change the speed. This is a task that Premiere Pro makes rather simple. The only thing you have to do now is click on the white line between the keyframes you have created and drag it either up or down, depending on your preference for speed or slowness.
- It’s not finished yet; we still need to smooth it out a little more. With the selection tool selected, click and drag one of the keyframe markers to the other side of the screen. The number of frames across which the speed shift will occur will be stretched out as a result of this. The longer and more gradual the speed ramp will be, the greater the distance between the two sides of the keyframe indication is separated.
- Complete the process with the other keyframe, and your speed ramp will be complete!
Techniques to Make Speed Ramping Smooth
In this section, we will be viewing some advanced time remapping features of Adobe Premiere Pro, which are as follows.
Keyframe Interpolation
When creating a speed ramp, keyframes are used to indicate the beginning and finishing points of the speed shift. However, there are a number of methods in which Premiere may transport the clip from point A to point B.
In the video industry, filling in the data between the two locations is known as keyframe interpolation.
- Simply dragging to divide a keyframe, like in the previous example, results in an equitable speed increase between the keyframes in the animation. Linear interpolation is the term used to describe this process.
- Instead of using Bezier Interpolation, you may utilize it to produce a smoother, more natural speed ramp. With Bezier Interpolation, the pace at which the speed increases will likewise accelerate, giving the effect of a more pronounced ramp.
- To build an S-curve shape, choose a keyframe and drag the Bezier handles to the desired position. Make adjustments until you are satisfied with the outcome.
Speed Ramp Transition
Speed ramp transitions are easy to make and may be utilized to add visual interest to a wide range of video genres. This effect is achieved by boosting the clip speed at the end of a clip before transitioning into a cut.
- In the second clip, the tempo is abruptly boosted and subsequently decreased to provide a smooth transition between situations. It may symbolize the passage of time, a character’s perplexity, or simply add flair to a commercial film.
- Using Premiere Pro, create a ramp-up at the end of your first clip and a ramp-down at the start of your second clip. The speed rubber band will be curved like a bell curve across the two clips when finished.
Adding speed ramps to films in Premiere Pro may improve the usefulness and looks of a variety of movies, from narrative features to social media posts. In Premiere, you may easily create and adjust speed duration directly in the timeline to meet any needs.
Speed Ramping In Wondershare Filmora
We understood how to do speed ramping in Premiere Pro. You can also get the same results using a much easier software that is “Wondershare Filmora”.
What is Wondershare Filmora?
Filmora is a video editor that is best suited for social video editors, vloggers, home movies, and other video projects. In addition, it may be used on both Macs and PCs. To begin using Filmora, you just need to pay a one-time registration fee of $0! You’ll notice a watermark when you export from the free version. For $59.99, Filmora’s latest version is a one-time purchase that doesn’t need a subscription!
Amazing Features
Filmora is an award-winning video editing program, that allows users to create visually stunning videos without the need for complex editing techniques.
Video playback in Filmora’s latest version may be accelerated by the graphics card (GPU). It’s accelerating at an alarming rate right now. It’s also possible to lower the resolution of a 4K or higher video for quicker playing. Cuts and splits are a snap using Filmora. Make a cut by dragging your play head to the location where you want to split the footage. Then, to remove the additional clip from the clip, use the delete key.
Even those with the most basic PC hardware may use this video editing software to create high-quality movies. Moreover, the most anticipated features that Filmora’s latest version offers are as follows:
- Motion Tracking
- Keyframing Animations
- Audio Ducking
- Split Screen
- Video Transitions
- Speed Control
- Color Grading
- Filmstock Effects
- Multiple Formats Exporting
Users may utilize the color tuning option to change the white balance and dynamic range of their video clip, among other things. You may alter the audio levels of each track using the audio mixer tool. The advanced Text Editor function allows you to adjust the color, size, font, and even the motion of text. The screen recording tool enables you to capture your computer’s screen as well as your webcam in excellent quality. The video stabilization feature lowers or eliminates the effect of camera shake on video.
Speed Ramping In Filmora
The method is crucial in changing the tempo of the film and, as a consequence, creating a dramatic impression. The film’s required speed is achieved by the employment of super-fast visual effects.
When using a camera with a much higher frame rate, the speed ramping approach may provide excellent effects. It aids in the production of the most dramatic impression.
Speed ramping effects are available in six presets, which include Montage, Hero Moment, Bullet Time, Jumper, and Flash In, all of which will add a theatrical element to your movie that will leave your viewers in awe.

Creative pros can swiftly and effectively speed up a movie with Wondershare Filmora. However, in order to get the intended results, it is essential to completely understand and adhere to the approach.
Wondershare Filmora 11 has a variety of tools and features to help you create a visually stunning film in a short period of time. Its Instant Mode allows you to produce a video creation from start to finish in less than 5 minutes.
Steps
- Download and Install Filmora. Launch the application on your system.

- Navigate to the chosen video and open it in the program to speed up and lengthen it. You may also add the movie to the interface by dragging and dropping it there.

- When the video appears in the timeline, right-click it to begin playback. As a consequence, a context menu is displayed.

- Select Speed from the pop-up editing window, and then select Speed Ramping from the drop-down menu.

- Alternatively, right-click on the video or audio clip, choose Speed from the drop-down menu, and select Speed Ramping.

- In the Speed Ramping panel, you may adjust the speed or choose from a number of presets, including Montage, Hero Moment, Bullet Time, Jumper, Flash in, and Flash out, to use as templates. You have the option of using the Preset speed ramps. Alternatively, you may personalize your own innovative ones.

- Move the play head to the point where you wish to increase or decrease the speed of the video or audio. Then, to add speed keyframes, choose the Add icon from the toolbar. The video or audio clips will be marked as Speed Ramping when the speed ramp has been added by Filmora.

- If you want to delete a keyframe, you can do so by selecting that particular keyframe and selecting the delete button like in the image:

- As we go on to the video keyframe speed adjustment, just slide the keyframe dot upward or downward to alter the point speed of the movie. Aside from that, you can keep the audio pitch constant regardless of how fast or slow the video is moving.

- The settings will be saved if you are pleased with them after you make the necessary modifications. In any other case, you may use the Reset button to return to the original configuration.
- When you’ve finished your work, go to the “File” panel and choose “Save Project” from the list of options that display. Change the name of the project and then click “Save.”
- Additionally, the movie may be exported using Filmora’s “Export” feature; just choose “Export” and then specify a new name for the file. The video may be exported to a device, a system, or even YouTube. After that, choose “Export.”

Speed Ramping Tips
- High Frame Rate: The frame rate is an important consideration when it comes to speed ramping. If you wish to slow down the video after it’s been recorded, shoot it at a frame rate higher than 60 frames per second. When a video is slowed down, there should be enough frames to guarantee that the video passes the 24 frames per second threshold frame rate.
- Choose The Appropriate Frame Resolution: Another possibility is to modify your video’s frame resolution. The tip has the ability to edit the clip’s properties from the Slowing down the video is achieved by changing the frame rate in the clip’s parameters from 120 to 24 frames per second. As a consequence, the frames will be expanded to the proper frame rate. As a consequence, the video is slowed down but not jerked.
- Purposeful Time Remapping: Instead of keeping the same pace throughout the film, a deliberate speed ramp should be implemented. A video has emotional, mysterious, exciting, and slow-motion Why is this the case? The usage of the same video speed throughout the film may have a negative influence on the watching experience. As a result, it is critical that videos be separated into genres and that the tempo of the videos is modified accordingly.
Conclusion
The use of the ideal cinematic effect at the right time boosts the audience and engagement with the material. This respective article explored speed ramping in-depth and oughts to teach creative pros how to slow down a video and speed up a movie. It covers speed raming in premiere pro and then moves toward Wondershare Filmora which seems a bit easier. Wondershare Filmora is a good choice for completing the task as quickly as possible. You will have access to all of the effects and tools mentioned, as well as the ability to keep the audio pitch consistent throughout the effect, which is critical while altering the video speed.
Speed ramping is a popular Premiere Pro effect for good reason: it looks fantastic! When utilized simultaneously to spice up a video clip, slow motion and quick motion may both be great aesthetic choices. This practice may save you time by enabling you to show more about what you want to see in your edit without using harsh jump cuts.
This effect may be used for a number of reasons, including clip transitions, speeding up a clip to make it shorter, and slowing down a clip to make it longer. Speed ramping may be used with a number of various effects.
According to the business, Adobe Premiere Pro is one of the most widely used video editing products on the market today. The ability to alter the speed of individual clips is one of Premiere Pro’s most important capabilities. While speed ramping is often used in sports highlights, changing the speed of video may be useful for a number of other types of material.
You’ll learn how to construct a spectacular speed ramp in Adobe Premiere Pro, beginning with capturing the proper kind of video and moving to advanced tips and methods. Following that, we’ll go through some ideas and inspiration for when to use a speed ramp in your circumstance.
What is Speed Ramping?
A speed ramp is used to gradually increase the speed of a video clip as it accelerates or decelerates. It is guaranteed that a smooth transition between two separate speeds will take place. The method is crucial in changing the tempo of the film and, as a consequence, creating a dramatic impression. The film’s required velocity is achieved by the employment of super-fast visual effects.
A speed ramp, as opposed to a rapid shift in speed, provides for a more smooth transition between two drastically differing speeds. This method is used to focus attention on certain parts of your video, which has a huge impact on your editing. It provides just the right amount of zing to keep your audience interested and excited about your presentation.
Examples of Speed Ramping
It works especially well when utilized to focus the viewer’s attention on a certain moment or action in your videos, such as a tough jump or an impending bullet. Another name for this approach speeds ramping (sometimes known as time remapping). It may also be used to create a visually pleasing transition between two clips or pictures inside a single movie.
You may also use Speed Ramping to alter the runtime of your video to fit the time limits of other social media sites, such as Instagram and Vine. If you just have 30 seconds to deliver your video, the following are the two most common places where people apply speed ramping techniques:
Assume you are shooting a person walking and want the clip to play in slow motion so that viewers can clearly see the person’s face. In this scenario, speed ramping is precisely what you need since it enables you to do precisely that.
Do you remember the famous movie “The Matrix” scene, when Neo dodges the bullets? It’s not some typical scene; it’s a pretty good example of speed ramping.
How to Create Speed Ramping/Time Remapping in Premiere Pro?
Speed Ramping premiere pro is an excellent tool for speeding up video clips. ‘ In order to speed up or slow down the speed of a video clip, this effect may be employed. In this article, you’ll learn how to make the most of this fantastic tool in Adobe Premiere Pro.
While using Premiere Pro, the ability to change a clip’s speed without altering its pitch is a very useful feature. An example of how this feature comes in helpful is when you have a clip that shows someone or something moving from left to right or vice versa.
Advanced Premiere Pro Time Remapping
The fact that this effect is so simple to use is its main benefit. By moving handles around on the clip, you may quickly choose different regions of the clip to be influenced by the adjustment when you apply it. This makes achieving the required result extremely quick and easy.
If you want to go deep into the game, Speed Ramp offers some more advanced options that give you even more control over your speed modifications. The properties section allows you to designate which portions of the timeline are affected by the ramp, as well as change factors like the curve type and bias.
Steps To Use Speed Ramping In Premiere Pro
Follow the below-mentioned steps to learn how to use speed ramping in premiere pro:
- Download and install Adobe Premiere Pro. Once installed, launch the application.
- Create a new project in Premiere by clicking the New Project button. After that, import the film that you want to speed ramp. It is the simplest and most straightforward method of importing film into Premiere to just click and drag the clip into the project window.
- Before commencing any work with speed, click and drag the video track in the timeline to make it taller by increasing the height of the track. This will guarantee that you can see the speed ramp as you go to the next stages.
- To create a sequence if you don’t already have one, drag a clip into the timeline and drop it where you want it to appear. Using the clip’s parameters, Premiere will automatically generate a sequence with the necessary settings.
- Decide when you want to apply the speed ramp and mark the spot on the screen where you will do so. The key to a pleasant speed ramp is movement, so choose a time when the environment is very active. You can specify in and out points, cut the clip with “Command+K,” or divide the clip into parts using the razor blade tool (which is accessible through the “Command+K” shortcut).
- Keyframes will be created at this point. It’s first and foremost important that the keyframes be clearly visible. Access the proper view by selecting “Show Clip Keyframes” from the context menu when you right-click on your clip.
- Another drop-down option will appear, from which you’ll choose “Time Remapping” and then press the “Enter” key.
- Select “Speed” from the drop-down menu.
- To create a keyframe, choose the pen from the toolbar (or just use the “P” key on your keyboard) and click on the white line running across the video track. If you wish to make a speed ramp, you’ll need at least two keyframes: one to indicate where the speed ramp should begin and another to indicate where it should terminate.
- If you wish to create more sophisticated speed ramps, you may do so by including more keyframes in your animation.
- Switch back to the selection tool when you’ve finished placing your keyframes. “V” is the shortcut key for this.
- Now comes the critical moment: it’s time to change the speed. This is a task that Premiere Pro makes rather simple. The only thing you have to do now is click on the white line between the keyframes you have created and drag it either up or down, depending on your preference for speed or slowness.
- It’s not finished yet; we still need to smooth it out a little more. With the selection tool selected, click and drag one of the keyframe markers to the other side of the screen. The number of frames across which the speed shift will occur will be stretched out as a result of this. The longer and more gradual the speed ramp will be, the greater the distance between the two sides of the keyframe indication is separated.
- Complete the process with the other keyframe, and your speed ramp will be complete!
Techniques to Make Speed Ramping Smooth
In this section, we will be viewing some advanced time remapping features of Adobe Premiere Pro, which are as follows.
Keyframe Interpolation
When creating a speed ramp, keyframes are used to indicate the beginning and finishing points of the speed shift. However, there are a number of methods in which Premiere may transport the clip from point A to point B.
In the video industry, filling in the data between the two locations is known as keyframe interpolation.
- Simply dragging to divide a keyframe, like in the previous example, results in an equitable speed increase between the keyframes in the animation. Linear interpolation is the term used to describe this process.
- Instead of using Bezier Interpolation, you may utilize it to produce a smoother, more natural speed ramp. With Bezier Interpolation, the pace at which the speed increases will likewise accelerate, giving the effect of a more pronounced ramp.
- To build an S-curve shape, choose a keyframe and drag the Bezier handles to the desired position. Make adjustments until you are satisfied with the outcome.
Speed Ramp Transition
Speed ramp transitions are easy to make and may be utilized to add visual interest to a wide range of video genres. This effect is achieved by boosting the clip speed at the end of a clip before transitioning into a cut.
- In the second clip, the tempo is abruptly boosted and subsequently decreased to provide a smooth transition between situations. It may symbolize the passage of time, a character’s perplexity, or simply add flair to a commercial film.
- Using Premiere Pro, create a ramp-up at the end of your first clip and a ramp-down at the start of your second clip. The speed rubber band will be curved like a bell curve across the two clips when finished.
Adding speed ramps to films in Premiere Pro may improve the usefulness and looks of a variety of movies, from narrative features to social media posts. In Premiere, you may easily create and adjust speed duration directly in the timeline to meet any needs.
Speed Ramping In Wondershare Filmora
We understood how to do speed ramping in Premiere Pro. You can also get the same results using a much easier software that is “Wondershare Filmora”.
What is Wondershare Filmora?
Filmora is a video editor that is best suited for social video editors, vloggers, home movies, and other video projects. In addition, it may be used on both Macs and PCs. To begin using Filmora, you just need to pay a one-time registration fee of $0! You’ll notice a watermark when you export from the free version. For $59.99, Filmora’s latest version is a one-time purchase that doesn’t need a subscription!
Amazing Features
Filmora is an award-winning video editing program, that allows users to create visually stunning videos without the need for complex editing techniques.
Video playback in Filmora’s latest version may be accelerated by the graphics card (GPU). It’s accelerating at an alarming rate right now. It’s also possible to lower the resolution of a 4K or higher video for quicker playing. Cuts and splits are a snap using Filmora. Make a cut by dragging your play head to the location where you want to split the footage. Then, to remove the additional clip from the clip, use the delete key.
Even those with the most basic PC hardware may use this video editing software to create high-quality movies. Moreover, the most anticipated features that Filmora’s latest version offers are as follows:
- Motion Tracking
- Keyframing Animations
- Audio Ducking
- Split Screen
- Video Transitions
- Speed Control
- Color Grading
- Filmstock Effects
- Multiple Formats Exporting
Users may utilize the color tuning option to change the white balance and dynamic range of their video clip, among other things. You may alter the audio levels of each track using the audio mixer tool. The advanced Text Editor function allows you to adjust the color, size, font, and even the motion of text. The screen recording tool enables you to capture your computer’s screen as well as your webcam in excellent quality. The video stabilization feature lowers or eliminates the effect of camera shake on video.
Speed Ramping In Filmora
The method is crucial in changing the tempo of the film and, as a consequence, creating a dramatic impression. The film’s required speed is achieved by the employment of super-fast visual effects.
When using a camera with a much higher frame rate, the speed ramping approach may provide excellent effects. It aids in the production of the most dramatic impression.
Speed ramping effects are available in six presets, which include Montage, Hero Moment, Bullet Time, Jumper, and Flash In, all of which will add a theatrical element to your movie that will leave your viewers in awe.
Creative pros can swiftly and effectively speed up a movie with Wondershare Filmora. However, in order to get the intended results, it is essential to completely understand and adhere to the approach.
Wondershare Filmora 11 has a variety of tools and features to help you create a visually stunning film in a short period of time. Its Instant Mode allows you to produce a video creation from start to finish in less than 5 minutes.
Steps
- Download and Install Filmora. Launch the application on your system.
- Navigate to the chosen video and open it in the program to speed up and lengthen it. You may also add the movie to the interface by dragging and dropping it there.
- When the video appears in the timeline, right-click it to begin playback. As a consequence, a context menu is displayed.
- Select Speed from the pop-up editing window, and then select Speed Ramping from the drop-down menu.
- Alternatively, right-click on the video or audio clip, choose Speed from the drop-down menu, and select Speed Ramping.
- In the Speed Ramping panel, you may adjust the speed or choose from a number of presets, including Montage, Hero Moment, Bullet Time, Jumper, Flash in, and Flash out, to use as templates. You have the option of using the Preset speed ramps. Alternatively, you may personalize your own innovative ones.
- Move the play head to the point where you wish to increase or decrease the speed of the video or audio. Then, to add speed keyframes, choose the Add icon from the toolbar. The video or audio clips will be marked as Speed Ramping when the speed ramp has been added by Filmora.
- If you want to delete a keyframe, you can do so by selecting that particular keyframe and selecting the delete button like in the image:
- As we go on to the video keyframe speed adjustment, just slide the keyframe dot upward or downward to alter the point speed of the movie. Aside from that, you can keep the audio pitch constant regardless of how fast or slow the video is moving.
- The settings will be saved if you are pleased with them after you make the necessary modifications. In any other case, you may use the Reset button to return to the original configuration.
- When you’ve finished your work, go to the “File” panel and choose “Save Project” from the list of options that display. Change the name of the project and then click “Save.”
- Additionally, the movie may be exported using Filmora’s “Export” feature; just choose “Export” and then specify a new name for the file. The video may be exported to a device, a system, or even YouTube. After that, choose “Export.”
Speed Ramping Tips
- High Frame Rate: The frame rate is an important consideration when it comes to speed ramping. If you wish to slow down the video after it’s been recorded, shoot it at a frame rate higher than 60 frames per second. When a video is slowed down, there should be enough frames to guarantee that the video passes the 24 frames per second threshold frame rate.
- Choose The Appropriate Frame Resolution: Another possibility is to modify your video’s frame resolution. The tip has the ability to edit the clip’s properties from the Slowing down the video is achieved by changing the frame rate in the clip’s parameters from 120 to 24 frames per second. As a consequence, the frames will be expanded to the proper frame rate. As a consequence, the video is slowed down but not jerked.
- Purposeful Time Remapping: Instead of keeping the same pace throughout the film, a deliberate speed ramp should be implemented. A video has emotional, mysterious, exciting, and slow-motion Why is this the case? The usage of the same video speed throughout the film may have a negative influence on the watching experience. As a result, it is critical that videos be separated into genres and that the tempo of the videos is modified accordingly.
Conclusion
The use of the ideal cinematic effect at the right time boosts the audience and engagement with the material. This respective article explored speed ramping in-depth and oughts to teach creative pros how to slow down a video and speed up a movie. It covers speed raming in premiere pro and then moves toward Wondershare Filmora which seems a bit easier. Wondershare Filmora is a good choice for completing the task as quickly as possible. You will have access to all of the effects and tools mentioned, as well as the ability to keep the audio pitch consistent throughout the effect, which is critical while altering the video speed.
15 Must-Use Gifs Editors
15 Must-Use Gifs Editors in 2024
An easy yet powerful editor
Numerous effects to choose from
Detailed tutorials provided by the official channel
Several websites and companies use the graphics interchange format that is the GIF. It can be seen to be used by a wide number of people on the internet and its format is supported by all platforms. The common goal of all the users can be satisfied.
Are you looking to create and edit gifs online or on your laptop but cannot find a suitable way out?
Finding the best and most user friendly GIF maker is not very hard, especially considering that free gif editor software is offered by so many providers. But if you’re only starting your journey with apps to make GIFs, it can be a difficult choice.
In this article
01 [How to Make GIF Interesting?](#Part 1)
02 [Top 5 Editors for Windows](#Part 2)
03 [Top 5 Editors for iPhone/Android](#Part 3)
04 [Top 5 Editors for Animated GIF Editing](#Part 4)
Part 1 How to Make GIF Interesting?
There are several ways by which a GIF can be made interesting. You can use colorful graphics and drop duplicate frames. Using fewer colors lets you make longer and more involved gifs.
Part 2 Top 5 Editors for Windows
Below are the top 5 editors which will help you to form GIFs for Windows: -
01Adobe Photoshop
Adobe Photoshop could be a useful device for making videos, image redaction, and GIF editing. This GIF code for Windows can allow you to import a GIF file so begin with the modification process.
Therefore, GIF editing is a breeze as you’ll alter the effects, modification the frame animation within the Timeline section, and do plenty a lot with this tool. You’ll simply utilize the free trial version to urge accustomed to the tool initial and then opt for the premium version to try to a lot more.
02EaseUS Video Editor
In the context of GIF makers, EaseUS Video Editor can also be said as one of the best. Free templates of texts, filters, elements, overlays, transitions, and music are available here which its users create GIF images with easily. You can also create lively and fully animated images, convert MP4 to GIFs and share it on YouTube, or other social media platforms.
The capabilities of this animated GIF maker for Windows are not restrained to this alone, as it can be used to edit all kinds of images, audio, and videos.
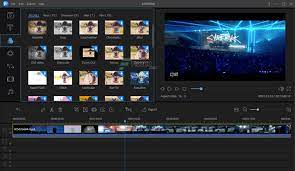
03GIF Animator
GIF animator editor is one of the first-rate GIF makers and is an awesome device for you if you desire to create GIF images, banners, buttons, and GIF videos. The device is very convenient to use and is a favorite of animators and designers.
The measurement of the photo can be modified and alongside that, it is feasible to control the frames, hastily cross texts, and enhance. Corrections to the movies can be brought and the built-in photograph editor can be used to rectify photographs and pictures, you can draw on them and you can convert movies to GIFs by the usage of the fragmented section of the video files.
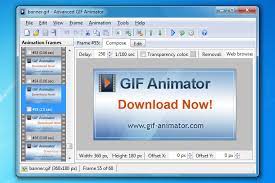
04**Wondershare Filmora Video Editor **
If you are searching for nice animated GIF makers for Windows computers, then Wondershare Filmora’s animated movies and GIF editor device may want to be a brilliant choice. That’s due to the fact with this GIF maker Windows device lets you add a video, convert it to the GIF structure and then edit it later with its super features.
The interactive UI helps customers manner greater than one hundred fifty file codecs easily. With this device, you can crop, pace up a video, alter the body size, and caption it. Additionally, you add texts, add animation consequences to the images, and alter the pictures and movies in a few steps.
Wondershare Filmora - Best Video Editor for Mac/Windows
5,481,435 people have downloaded it.
Build unique custom animations without breaking a sweat.
Focus on creating epic stories and leave the details to Filmora’s auto features.
Start a creative adventure with drag & drop effects and endless possibilities.
Filmora simplifies advanced features to save you time and effort.
Filmora cuts out repetition so you can move on to your next creative breakthrough.
05Wondershare UniConverter
Wondershare UniConverter is one of the fine image, audio, and video editor and converter out there, and ranked the excellent GIF maker here. This GIF editor app is easy for customers and will furnish a pleasant platform for novices to operate their tasks. And when performed to create and edit GIF files, a person can export the GIF archives to both Android or iPhone barring having to use iTunes.
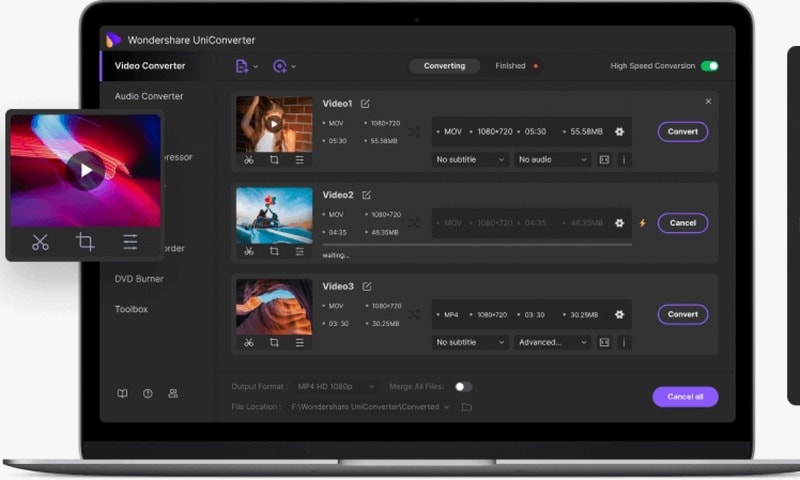
Part 3 Top 5 Editors for iPhone/Android
01PixelStudio
Pixel Studio is an animation app for pixel artwork fans. You can draw your little creations with pixel art. It additionally comes with a textual content tool, aid for matters like Samsung S-Pen, and it auto-saves so you don’t lose work. You can export your creations to GIF as nicely and that makes Pixel Studio one of the quality apps for customized GIFs. It’s normally an artwork app so meme lords may additionally want to put in a little greater effort than usual, however, the consequences are normally well worth it.
02Giphy Cam
Giphy Cam is one of the more recent gif editing apps. The digicam data is a brief phase of video. You can alter that video with lots of filters, different effects, stickers, text, and more. It additionally has a five-shot burst mode alongside its video mode. This is likely the excellent GIF/camera app hybrid. It doesn’t have any digital camera features; however, it does GIFs higher than the others by way of a large margin. It’s free with no in-app purchases.
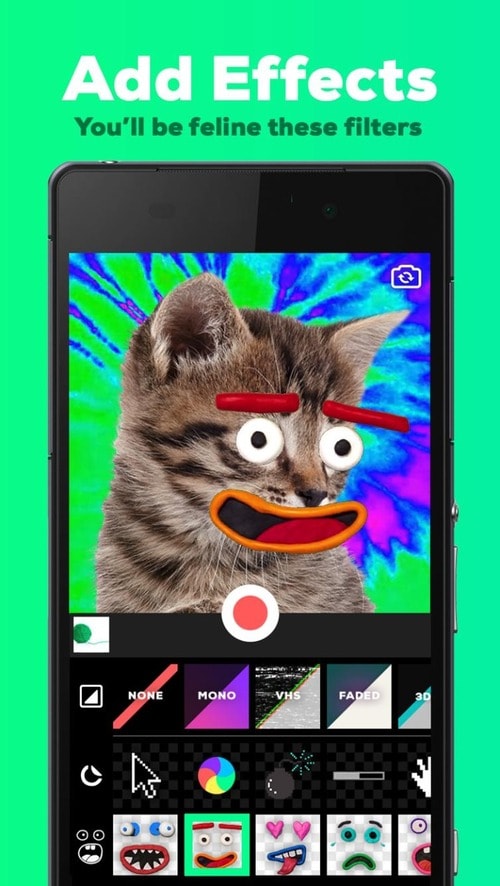
03PowerDirector
PowerDirector is one of many videos modifying apps with GIF support. This one simply takes place to be higher than most of the different ones. It’s a video editor app. Thus, it’ll have comparable features. However, two of the export codecs encompass GIF nonetheless pix and animated GIFs. This will work first-class for turning a video into a shorter GIF. The app is free to download and play with. You may additionally want to buy extra aspects by using in-app purchases.
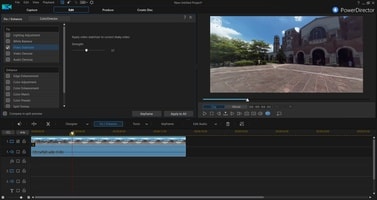
04ImgPlay – GIF Maker
ImgPlay is a popular GIF editing app that is available for Android and iOS. You have the option of using an existing video or shooting one using your phone’s camera. In GIFs, you can apply 30 effects, crop a portion of your choice, and modify the frame rate.
05Motion Stills
Motion Stills is a Google app that allows you to record short films and turn them into looping GIFs. You can use the app to take a short 3s clip with a single tap or utilize the Fast Forward feature to condense an existing video into a short one. To make yips GIFs even better, you may add motion text and emoticons. After that, save it as a GIF and send it to your friends.
Part 4 Top 5 Editors for Animated GIF Editing
01Giphy
GIPHY is a designing tool that helps customers to create extraordinary GIFs, stickers, and backdrops. You can edit your plan with filters, captions, stickers, and different plan elements. The popular codecs for GIF uploads are JPG, PNG, GIF, MP4, or MOV, whilst the conventional file codecs to convert to stickers are JPG or PNG.
GIPHY permits you to paste URLs from specific sources such as Vimeo, YouTube, GIPHY, and others. The animated GIF maker software program makes it convenient for customers to edit and organize the uploaded archives in the favored order.
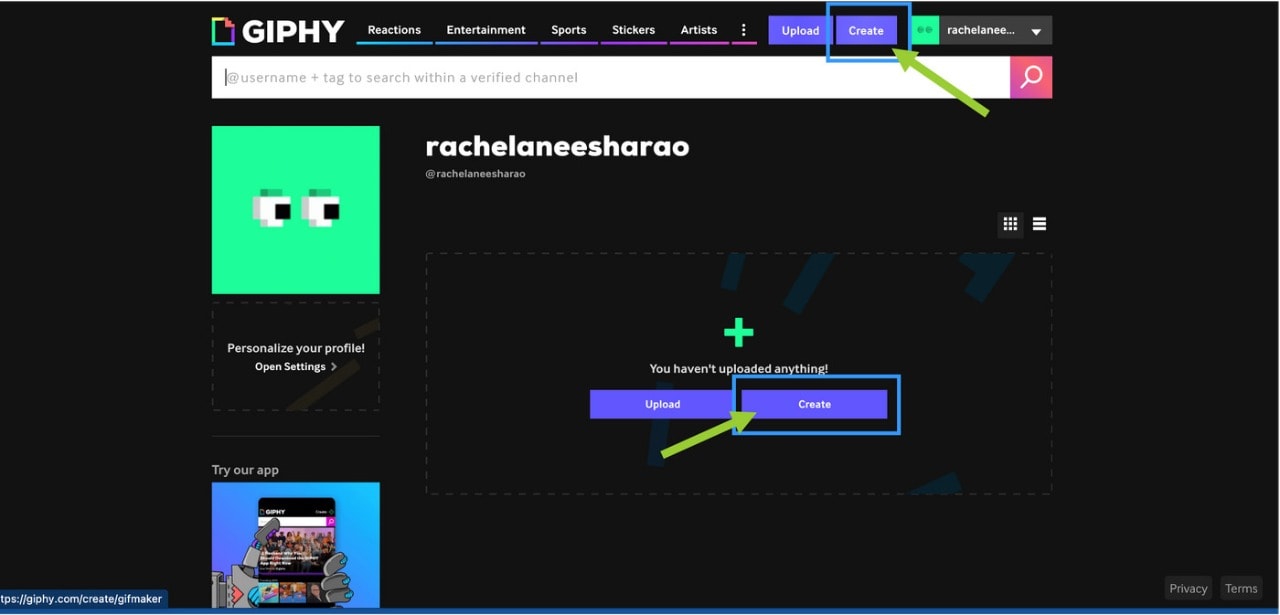
02Imgur
It’s a website that makes it simple to make GIFs. Simply paste the video URL into the web app and wait for it to process. After that, all you must do now is set the start time and duration of your GIF.
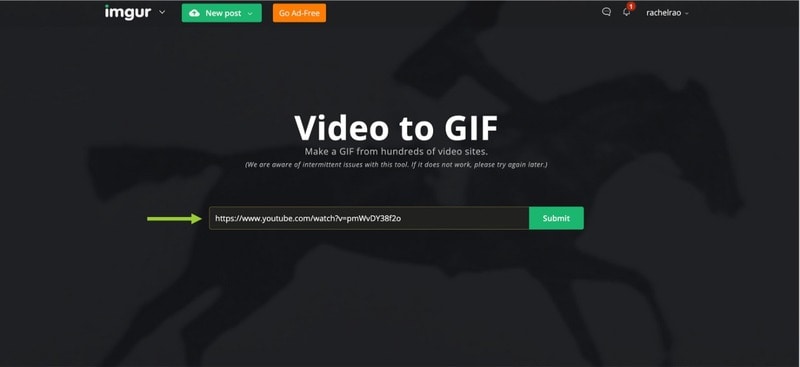
03KickMyGraphics
The utility comes with a humble person interface and it approves you to create animated GIFs from neighborhood images. In addition, you can additionally paste snapshots from your clipboard at once to the application. The utility additionally helps video files; however, you want to convert the video earlier than you can edit it. The utility affords a stay preview so you can see how your animation appears at any time. You can additionally see all handy frames and dispose of useless frames with ease.
As for editing, you can’t add your textual content or alter the brightness of your frames, however, you can trade their width, peak, and zoom level. You can additionally allow Loopback or Reverse mode and set delay, step frames, and a variety of repeats. You can additionally configure output first-class right from the application.
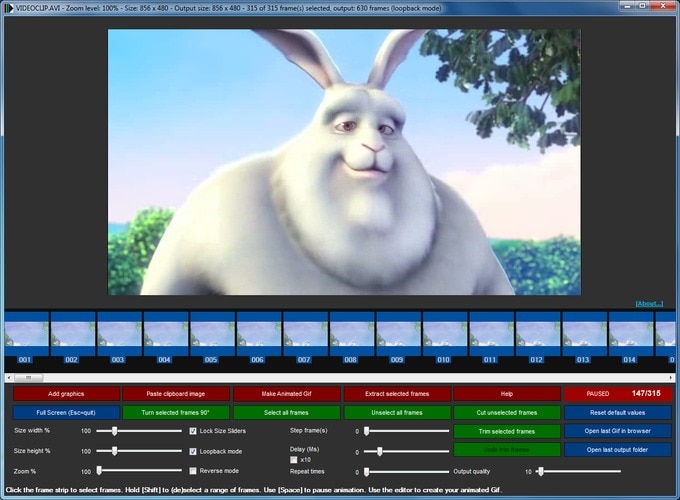
04Instagiffer
Instagiffer is some other easy software that lets you create animated GIFs on your PC. This utility affords a humble consumer interface; however, it makes up for it with an extensive variety of features. The software approves you to convert nearby movies to GIFs, however, you can additionally paste a YouTube URL and convert an online video to GIF with ease. According to the developer, the software additionally works with different video web hosting websites.
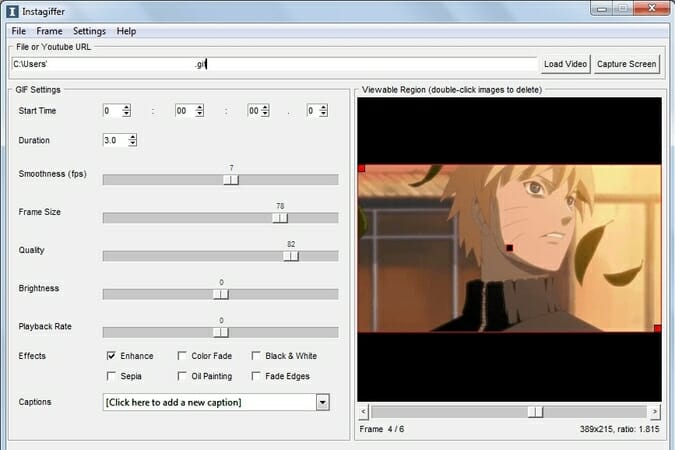
05GIMP
The software is free, so you can download and use it except for any restrictions. GIMP is best for picture designers and it comes with all preferences that an image editor needs. You can without problems edit your images, exchange their color, hue, saturation, or brightness, and add exceptional outcomes to them.
In addition, you can create special creations thanks to the built-in layer system. It’s worth citing that the software additionally helps programming algorithms so you can effortlessly edit your photos with the use of scripts.

● Key Takeaways from This Episode →
● If you are typically worried about how you can be able to come up with fascinating GIFs, you ought to hold in thought that you don’t have to create them from scratch.
● You can be capable to advance inspiring GIFs from current movies and photos eight after GIF editor software program free download.
● Hopefully, you are now capable to pick out a perfect GIF creator to use for your modifying tasks.
Several websites and companies use the graphics interchange format that is the GIF. It can be seen to be used by a wide number of people on the internet and its format is supported by all platforms. The common goal of all the users can be satisfied.
Are you looking to create and edit gifs online or on your laptop but cannot find a suitable way out?
Finding the best and most user friendly GIF maker is not very hard, especially considering that free gif editor software is offered by so many providers. But if you’re only starting your journey with apps to make GIFs, it can be a difficult choice.
In this article
01 [How to Make GIF Interesting?](#Part 1)
02 [Top 5 Editors for Windows](#Part 2)
03 [Top 5 Editors for iPhone/Android](#Part 3)
04 [Top 5 Editors for Animated GIF Editing](#Part 4)
Part 1 How to Make GIF Interesting?
There are several ways by which a GIF can be made interesting. You can use colorful graphics and drop duplicate frames. Using fewer colors lets you make longer and more involved gifs.
Part 2 Top 5 Editors for Windows
Below are the top 5 editors which will help you to form GIFs for Windows: -
01Adobe Photoshop
Adobe Photoshop could be a useful device for making videos, image redaction, and GIF editing. This GIF code for Windows can allow you to import a GIF file so begin with the modification process.
Therefore, GIF editing is a breeze as you’ll alter the effects, modification the frame animation within the Timeline section, and do plenty a lot with this tool. You’ll simply utilize the free trial version to urge accustomed to the tool initial and then opt for the premium version to try to a lot more.
02EaseUS Video Editor
In the context of GIF makers, EaseUS Video Editor can also be said as one of the best. Free templates of texts, filters, elements, overlays, transitions, and music are available here which its users create GIF images with easily. You can also create lively and fully animated images, convert MP4 to GIFs and share it on YouTube, or other social media platforms.
The capabilities of this animated GIF maker for Windows are not restrained to this alone, as it can be used to edit all kinds of images, audio, and videos.
03GIF Animator
GIF animator editor is one of the first-rate GIF makers and is an awesome device for you if you desire to create GIF images, banners, buttons, and GIF videos. The device is very convenient to use and is a favorite of animators and designers.
The measurement of the photo can be modified and alongside that, it is feasible to control the frames, hastily cross texts, and enhance. Corrections to the movies can be brought and the built-in photograph editor can be used to rectify photographs and pictures, you can draw on them and you can convert movies to GIFs by the usage of the fragmented section of the video files.
04**Wondershare Filmora Video Editor **
If you are searching for nice animated GIF makers for Windows computers, then Wondershare Filmora’s animated movies and GIF editor device may want to be a brilliant choice. That’s due to the fact with this GIF maker Windows device lets you add a video, convert it to the GIF structure and then edit it later with its super features.
The interactive UI helps customers manner greater than one hundred fifty file codecs easily. With this device, you can crop, pace up a video, alter the body size, and caption it. Additionally, you add texts, add animation consequences to the images, and alter the pictures and movies in a few steps.
Wondershare Filmora - Best Video Editor for Mac/Windows
5,481,435 people have downloaded it.
Build unique custom animations without breaking a sweat.
Focus on creating epic stories and leave the details to Filmora’s auto features.
Start a creative adventure with drag & drop effects and endless possibilities.
Filmora simplifies advanced features to save you time and effort.
Filmora cuts out repetition so you can move on to your next creative breakthrough.
05Wondershare UniConverter
Wondershare UniConverter is one of the fine image, audio, and video editor and converter out there, and ranked the excellent GIF maker here. This GIF editor app is easy for customers and will furnish a pleasant platform for novices to operate their tasks. And when performed to create and edit GIF files, a person can export the GIF archives to both Android or iPhone barring having to use iTunes.
Part 3 Top 5 Editors for iPhone/Android
01PixelStudio
Pixel Studio is an animation app for pixel artwork fans. You can draw your little creations with pixel art. It additionally comes with a textual content tool, aid for matters like Samsung S-Pen, and it auto-saves so you don’t lose work. You can export your creations to GIF as nicely and that makes Pixel Studio one of the quality apps for customized GIFs. It’s normally an artwork app so meme lords may additionally want to put in a little greater effort than usual, however, the consequences are normally well worth it.
02Giphy Cam
Giphy Cam is one of the more recent gif editing apps. The digicam data is a brief phase of video. You can alter that video with lots of filters, different effects, stickers, text, and more. It additionally has a five-shot burst mode alongside its video mode. This is likely the excellent GIF/camera app hybrid. It doesn’t have any digital camera features; however, it does GIFs higher than the others by way of a large margin. It’s free with no in-app purchases.
03PowerDirector
PowerDirector is one of many videos modifying apps with GIF support. This one simply takes place to be higher than most of the different ones. It’s a video editor app. Thus, it’ll have comparable features. However, two of the export codecs encompass GIF nonetheless pix and animated GIFs. This will work first-class for turning a video into a shorter GIF. The app is free to download and play with. You may additionally want to buy extra aspects by using in-app purchases.
04ImgPlay – GIF Maker
ImgPlay is a popular GIF editing app that is available for Android and iOS. You have the option of using an existing video or shooting one using your phone’s camera. In GIFs, you can apply 30 effects, crop a portion of your choice, and modify the frame rate.
05Motion Stills
Motion Stills is a Google app that allows you to record short films and turn them into looping GIFs. You can use the app to take a short 3s clip with a single tap or utilize the Fast Forward feature to condense an existing video into a short one. To make yips GIFs even better, you may add motion text and emoticons. After that, save it as a GIF and send it to your friends.
Part 4 Top 5 Editors for Animated GIF Editing
01Giphy
GIPHY is a designing tool that helps customers to create extraordinary GIFs, stickers, and backdrops. You can edit your plan with filters, captions, stickers, and different plan elements. The popular codecs for GIF uploads are JPG, PNG, GIF, MP4, or MOV, whilst the conventional file codecs to convert to stickers are JPG or PNG.
GIPHY permits you to paste URLs from specific sources such as Vimeo, YouTube, GIPHY, and others. The animated GIF maker software program makes it convenient for customers to edit and organize the uploaded archives in the favored order.
02Imgur
It’s a website that makes it simple to make GIFs. Simply paste the video URL into the web app and wait for it to process. After that, all you must do now is set the start time and duration of your GIF.
03KickMyGraphics
The utility comes with a humble person interface and it approves you to create animated GIFs from neighborhood images. In addition, you can additionally paste snapshots from your clipboard at once to the application. The utility additionally helps video files; however, you want to convert the video earlier than you can edit it. The utility affords a stay preview so you can see how your animation appears at any time. You can additionally see all handy frames and dispose of useless frames with ease.
As for editing, you can’t add your textual content or alter the brightness of your frames, however, you can trade their width, peak, and zoom level. You can additionally allow Loopback or Reverse mode and set delay, step frames, and a variety of repeats. You can additionally configure output first-class right from the application.
04Instagiffer
Instagiffer is some other easy software that lets you create animated GIFs on your PC. This utility affords a humble consumer interface; however, it makes up for it with an extensive variety of features. The software approves you to convert nearby movies to GIFs, however, you can additionally paste a YouTube URL and convert an online video to GIF with ease. According to the developer, the software additionally works with different video web hosting websites.
05GIMP
The software is free, so you can download and use it except for any restrictions. GIMP is best for picture designers and it comes with all preferences that an image editor needs. You can without problems edit your images, exchange their color, hue, saturation, or brightness, and add exceptional outcomes to them.
In addition, you can create special creations thanks to the built-in layer system. It’s worth citing that the software additionally helps programming algorithms so you can effortlessly edit your photos with the use of scripts.
● Key Takeaways from This Episode →
● If you are typically worried about how you can be able to come up with fascinating GIFs, you ought to hold in thought that you don’t have to create them from scratch.
● You can be capable to advance inspiring GIFs from current movies and photos eight after GIF editor software program free download.
● Hopefully, you are now capable to pick out a perfect GIF creator to use for your modifying tasks.
Also read:
- New In 2024, Step by Step to Add Border to Video Using Premiere Pro
- Updated 10 Best Free Spanish Text To Speech Converter Software Windows, Mac, Android, iPhone, & Online
- In 2024, Edit FLV Video Files with FLV Editor Windows, Mac,Android, iPhone
- New In 2024, Best Applications That Can Help Apply The Best VHS Camera Effect
- Updated In 2024, Best Frame Rate for 4K Video
- Updated Best 5 Tools to Help You Know More Freeze-Frame Video Editing Skills for 2024
- In 2024, Before & After Editing Trick - Filmora
- Best Tools To Create Blend Image Collage
- New 2024 Approved Top 5 Solutions on How to Add Emojis to iPhone
- New Some Top Methods to Create AI Slow Motion Videos
- Have You Ever Tried Using the Premiere Pro Motion Blur Plugin? Read This Article to Learn How to Efficiently Use the ReelSmart Motion Blur Plugin in Premiere Pro
- New 2024 Approved 3 Best Motion Blur Plugins for Adobe After Effects
- Updated 2024 Approved 20 Best Text To Speech Software Windows, Mac, Android, iPhone & O
- New Splitting a Video in VSDC Step by Step
- Updated A Guide to Understanding Efectum App and Some Top Alternatives for 2024
- New 2024 Approved Adding Text to Your Collage Not only Makes It Look Sophisticated but Also Versatile. So, if You Too Are Looking for Ways to Create a Collage Text, Check Out Our Article
- Are You Excited to Learn About a File Format that Helps in Easy Transfer? We Are Talking About the 3GP Format. Stay with Us and Get to Know More About It for 2024
- Stunning Glitch Effect and Its Creation Guideline for Premiere Pro
- What Is Animated GIF | GIF Example & Advantages of GIF
- In 2024, Tutorial to Add Effects with Movavi Slideshow Maker
- Updated 7 Ways Add Subtitles to MKV Videos on All Platforms for 2024
- In 2024, Top 8 AI Video Denoise Software
- Editing Videos Was Never so Easy as It Is Now. With Video Enhancer Ai, This Task Is Very Simple to Do and No Trouble Will Be There in Getting the Things Done as Needed. Choose the Right AI Video Enhancer for Task Completion
- New 2024 Approved Add Zoom Blur Effect In Photoshop Step by Step
- New Kdenlive Review – Is It The Best Video Editor?
- In 2024, Looking for the Best Quiz-Making Tools? Read Our Full Review to Find Out the 10 Best Video Quiz Makers Available
- In 2024, Are You an Apple User Interested in Adding a Slow-Mo to Their Videos? This Article Features an Exceptional Procedure for Creating Slow-Mo in iMovie
- New How to Save As MP4 File on Windows Movie Maker?
- How to Create Sports Intro and YouTube Endscreen?
- New 2024 Approved Top 20 Slideshow Makers for Win/Mac/Online Review
- Top List of Best VHS Video Effect Makers
- 2024 Approved Check Out All Details About Kinemaster Here and Understand How to Add Effects in Kinemaster. You Can Use the Chroma Key for the Green Screen as Well
- In 2024, 8 Best Free Title Maker You Must Try and Put to Use
- Create Chroma Key Written Text Effects in Filmora
- Updated Best Ever Ways Make Tiktok Slideshow Solved
- In 2024, Create True 3D Text Effects Using After Effects
- In 2024, Do You Need to Create a Video for Your Business Online but Feel You Do Not Have the Skill and Time to Do That? Try Out These AI Video Generators that Will Work for You to Carry Out Tasks Effectively
- In 2024, The Ultimate Guide to Countdown Animation in Videos
- 2024 Approved In This Article, You Will Learn How to Create an Attractive and Engaging Slideshow Video Using Tools Available in the Wondershare Filmora
- Updated In 2024, Hard to Remove Black Background in After Effects? Heres the Best Way to Deal With It
- 4K Videos Are the in Thing because of Their Flexibility and High Resolution. Stick Around to Learn How to Choose the Best Frame Rate for 4K Videos for 2024
- Updated Top 4 Free 3D Intro Maker to Use
- Updated 2024 Approved Reviewing Efectum App and The Best Alternatives for Smartphone Users
- Updated In 2024, How to Convert Images Into Video - Kapwing Tutorial
- Updated In 2024, How to Create Freeze Frame Clone Effect
- New How to Make Loop Video in PowerPoint
- Top 7 Skype Hacker to Hack Any Skype Account On your OnePlus Nord N30 5G | Dr.fone
- Different Methods To Unlock Your iPhone 6 Plus | Dr.fone
- In 2024, Top-Notch Solutions for Disabled Apple ID On iPhone 13 Pro Making It Possible
- The Ultimate Guide to Get the Rare Candy on Pokemon Go Fire Red On Oppo Reno 10 5G | Dr.fone
- Complete Guide on Unlocking iPhone 11 Pro Max with a Broken Screen? | Dr.fone
- In 2024, Universal Unlock Pattern for Xiaomi Redmi Note 12 Pro 5G
- 11 Proven Solutions to Fix Google Play Store Not Working Issue on Motorola Moto G34 5G | Dr.fone
- Unlock Your iPhone 13 mini in Minutes with ICCID Code Everything You Need to Know
- In 2024, How to Detect and Stop mSpy from Spying on Your Realme 11X 5G | Dr.fone
- How to Hide/Fake Snapchat Location on Your Realme C67 5G | Dr.fone
- How to Cast OnePlus 12 to Computer for iPhone and Android? | Dr.fone
- How To Transfer WhatsApp From Apple iPhone 6 Plus to other iPhone 15 Pro devices? | Dr.fone
- 3 Solutions to Find Your ZTE Nubia Z60 Ultra Current Location of a Mobile Number | Dr.fone
- Easy Ways to Manage Your Xiaomi Redmi 13C Location Settings | Dr.fone
- How To Deal With the Tecno Pop 7 Pro Screen Black But Still Works? | Dr.fone
- In 2024, How To Track IMEI Number Of Xiaomi Redmi Note 12 4G Through Google Earth?
- Network Locked SIM Card Inserted On Your Vivo Y27s Phone? Unlock It Now
- Downloading SamFw FRP Tool 3.0 for Vivo Y27 4G
- In 2024, 7 Ways to Lock Apps on Apple iPhone 12 mini and iPad Securely
- Tecno Spark 20C Screen Unresponsive? Heres How to Fix It | Dr.fone
- In 2024, Here are Some of the Best Pokemon Discord Servers to Join On Xiaomi Redmi A2+ | Dr.fone
- Tips And Tricks To Tell if Your iPhone XS Max Is Unlocked
- In 2024, 9 Best Free Android Monitoring Apps to Monitor Phone Remotely For your Realme C67 4G | Dr.fone
- Read This Guide to Find a Reliable Alternative to Fake GPS On Vivo Y27 5G | Dr.fone
- In 2024, Top 10 Oppo A18 Android SIM Unlock APK
- New 2024 Approved Best Options Top Live Streaming Platforms According to Types
- In 2024, How to Screen Share on Apple iPhone XR? | Dr.fone
- In 2024, Unlock Apple ID without Phone Number From iPhone 15 Pro
- Fake Android Location without Rooting For Your Oppo K11 5G | Dr.fone
- How to Rescue Lost Music from Asus ROG Phone 7 Ultimate
- Solutions to restore deleted files from Vivo Y100A
- How to Lock Apps on Vivo Y36 to Protect Your Individual Information
- New 2024 Approved How to Make GIF Stickers for WhatsApp 100 The Easy Way
- Undelete lost music from OnePlus 12R
- Which is the Best Fake GPS Joystick App On Samsung Galaxy M34 5G? | Dr.fone
- Complete Tutorial to Use VPNa to Fake GPS Location On Oppo Reno 9A | Dr.fone
- In 2024, How to Bypass Google FRP Lock from Vivo Y100i Power 5G Devices
- Title: Want to Explore the Exciting World of GIFs? Here Is Everything You Will Ever Want to Know and Learn About the Most Appealing GIF Libraries, All at Once Place for 2024
- Author: Chloe
- Created at : 2024-04-24 07:08:24
- Updated at : 2024-04-25 07:08:24
- Link: https://ai-editing-video.techidaily.com/want-to-explore-the-exciting-world-of-gifs-here-is-everything-you-will-ever-want-to-know-and-learn-about-the-most-appealing-gif-libraries-all-at-once-place-/
- License: This work is licensed under CC BY-NC-SA 4.0.
