
:max_bytes(150000):strip_icc():format(webp)/how-to-set-up-a-ps5-5088641-1bcc6bca24cd460bb2b276fdeb6cb830.jpg)
Want to Make Professional-Looking Videos? Keep Reading to Give Your Videos a Cinematic Feel with the Audio Mixer of Filmora
Want to Make Professional-Looking Videos? Keep Reading to Give Your Videos a Cinematic Feel with the Audio Mixer of Filmora
Have you seen those classic and outstanding videos of professional YouTubers? Yeah, they feel different from the videos we usually make. The reason mainly lies within the outclass audio quality of those videos.
And now, you might think it’s impossible to mess with the audio control without the support of a professional. But believe me; it’s much simpler than you think. In this brief guide, we’ll show you how to use the audio mixer of Filmora to fine-tune all of your videos skillfully.
But let’s first see what an audio mixer is.
Part 1: What is an audio mixer?
An audio mixer is a tool that gives you control over the audio quality of your videos. Using the audio mixer, you can easily give your video a cinematic feel by controlling different modes and levels.
And that’s not where it ends!!! This mixing console also allows you to mix, combine and balance audio from different sources. So control your audio and give your video that extra bit of depth.
To your surprise, you can access this excellent tool without cost using the world’s leading video editor, Filmora . Let’s see a brief intro of Wondershare Filmora, and then we’ll show you how to use the audio mixer of Filmora in a stepwise manner.
Free Download For Win 7 or later(64-bit)
Free Download For macOS 10.14 or later
Part 2: An easy-to-use audio mixer - Wondershare Filmora
![]()
Wondershare Filmora is one of the world’s leading video-editor and is no less than a blessing for all creators. Its stunning editing features like split screen, motion tracking, speed ramping, and many others allow you to take your video to the next level. Moreover, the massive arsenal of video effects and AI portraits gives you various choices.
What’s more, you can tweak the audio using auto synchronization, audio duckling, an audio visualizer, and even an audio mixer. Isn’t it fantastic? Now let’s move forward and see how we can sharpen our video with the audio mixer of Filmora in detail steps.
Part 3: Steps to effectively use the audio mixer in Filmora
Here are the steps you need to follow to use the audio mixer of Filmora effectively.
Step1Download & install
First, you must have a suitable version of Filmora installed on your device. Here are the steps to install the free version.
- Go to the official website of Filmora and hit the “Free Download” button. Filmora is available for Windows 11 and all the previous versions, as well as for macOS 10.14 to macOS 13
Free Download For Win 7 or later(64-bit)
Free Download For macOS 10.14 or later
- When the download finishes, follow the guidelines of the installation wizard to install Filmora on your computer.
Now let’s see how to prepare our video.
Step2Prepare your video
After you have installed the latest version of Filmora, you need to prepare your video for editing.
For this,
- Launch the Filmora on your computer and click the “New Project” button from the starting interface.

- Now let’s import our video. Click on the “Import Media” section or drag and drop your video/audio file here to import it.

- Once the media file has been imported, add it to the editing panel below with the drag-and-drop method. This is important to create a workspace for your video.

- Now it’s time to edit the video. Make all the editing you want with graphics and visuals to finalize your video before using the audio mixer. And once it’s done, we can move to the first-class audio mixer of Filmora.
Bonus Tip: Before using the audio mixer, ensure you have a headphone to see the changes you are making instead of relying on your desktop speaker.
Step3Start the audio mixer
To open up the audio mixer, click on the “audio mixer” icon on the toolbar below the preview window.

This is what your audio mixer will look like at the start.

Now we can start adjusting the audio settings. Let’s go with the audio levels first.
Step4Adjust the audio levels
To adjust the audio levels, look at the left side of the audio mixer. Here you’ll see two vertical bars, which are;
- The audio levels for the video clip.
- The audio levels for the sound and music in the music track.
You can adjust the icon up or down to make these channels louder or softer.

After the audio levels, let’s see how we can change the audio channels.
Free Download For Win 7 or later(64-bit)
Free Download For macOS 10.14 or later
Step5Adjust the audio channels
See those circles above the audio levels? These are for adjusting the audio channels.
- Rotate the knob-like icon in these circles to adjust the Audio channels’ pan/bounce control. This switches the sound between the left and right channels.
- On top of that, you can see these changes on the channel control panel.

To check the effect, let’s rotate the knob to the left. And to see the result hit the “Play” button on the bottom left corner of the audio mixer interface. Here’s how it looks.

Now it’s time to select the audio mode.
Step6Select the audio mode
The audio mixer of Filmora provides you with two audio mode options. These are;
● Stereo Mode
In the Stereo mode, you can pan from left to right and control your audio just like the knob of the audio channel.
● Surround Mode
You can pan from left to right and front to back in this mode by rotating the video or music icons. This provides you with complete control over the audio positions. But remember that this mode works best if your video is played with the surround sound system.

Once you have changed the audio mode, let’s look at the master levels.
Step7Adjust the master levels
On the very left of the window, you’ll find the Master levels.
This is where you can adjust the master section or all your audio files on your timeline.
- Just drag the master level slider upward and downwards, and you’ll notice the changes right away.

So done with the changes? Let’s preview them.
Free Download For Win 7 or later(64-bit)
Free Download For macOS 10.14 or later
Step8Preview your changes
After carefully making all the changes to your audio, preview it for the last time before going with them. The “Play” button is still there in the bottom left corner.
Perfect!!! No? Make the changes again until you are satisfied and then hit the “Apply” button on the bottom right corner to adjust these changes.

And here we are, done!!! Now you can easily surprise your friends with your master-like audio handling. Before we wind up our guide, we’ll answer some of the frequently asked questions about the audio mixer of Filmora. So let’s dive right into it.
Part 4: Hot FAQs about the audio mixer of Filmora
1.How important is an audio mixer in video editing?
An audio mixer is necessary if you want to create impressive videos. This master volume control allows you to deepen the audio effect and merge two audio sources to get the maximum out of them. This is why most content creators give grave importance to audio mixers during video editing.
2.Where can we find the audio mixer in Filmora?
Like other highly advanced editing tools, you can also find the audio mixer in Filmora. After you’ve placed your media file on the editing panel, the “audio mixer” icon appears on the toolbar under the preview channel.
3.Is the audio mixer of Filmora available for free?
Yes, you can freely use the audio mixer of Filmora as much as you want without any cost. And unlike many other free sound control tools, you get all the latest and advanced features like the preview tool with the audio mixer of Filmora.
Conclusion
Every top-ranked video contains the best-suited audio tracks with it. And the audio mixer of Filmora comes in handy whenever you want to tweak the audio settings of a video.
In this article, we’ve covered everything you need to know about using the audio mixer in Filmora.
Free Download For Win 7 or later(64-bit)
Free Download For macOS 10.14 or later
Free Download For macOS 10.14 or later
Part 2: An easy-to-use audio mixer - Wondershare Filmora
![]()
Wondershare Filmora is one of the world’s leading video-editor and is no less than a blessing for all creators. Its stunning editing features like split screen, motion tracking, speed ramping, and many others allow you to take your video to the next level. Moreover, the massive arsenal of video effects and AI portraits gives you various choices.
What’s more, you can tweak the audio using auto synchronization, audio duckling, an audio visualizer, and even an audio mixer. Isn’t it fantastic? Now let’s move forward and see how we can sharpen our video with the audio mixer of Filmora in detail steps.
Part 3: Steps to effectively use the audio mixer in Filmora
Here are the steps you need to follow to use the audio mixer of Filmora effectively.
Step1Download & install
First, you must have a suitable version of Filmora installed on your device. Here are the steps to install the free version.
- Go to the official website of Filmora and hit the “Free Download” button. Filmora is available for Windows 11 and all the previous versions, as well as for macOS 10.14 to macOS 13
Free Download For Win 7 or later(64-bit)
Free Download For macOS 10.14 or later
- When the download finishes, follow the guidelines of the installation wizard to install Filmora on your computer.
Now let’s see how to prepare our video.
Step2Prepare your video
After you have installed the latest version of Filmora, you need to prepare your video for editing.
For this,
- Launch the Filmora on your computer and click the “New Project” button from the starting interface.
- Now let’s import our video. Click on the “Import Media” section or drag and drop your video/audio file here to import it.
- Once the media file has been imported, add it to the editing panel below with the drag-and-drop method. This is important to create a workspace for your video.
- Now it’s time to edit the video. Make all the editing you want with graphics and visuals to finalize your video before using the audio mixer. And once it’s done, we can move to the first-class audio mixer of Filmora.
Bonus Tip: Before using the audio mixer, ensure you have a headphone to see the changes you are making instead of relying on your desktop speaker.
Step3Start the audio mixer
To open up the audio mixer, click on the “audio mixer” icon on the toolbar below the preview window.
This is what your audio mixer will look like at the start.
Now we can start adjusting the audio settings. Let’s go with the audio levels first.
Step4Adjust the audio levels
To adjust the audio levels, look at the left side of the audio mixer. Here you’ll see two vertical bars, which are;
- The audio levels for the video clip.
- The audio levels for the sound and music in the music track.
You can adjust the icon up or down to make these channels louder or softer.
After the audio levels, let’s see how we can change the audio channels.
Free Download For Win 7 or later(64-bit)
Free Download For macOS 10.14 or later
Step5Adjust the audio channels
See those circles above the audio levels? These are for adjusting the audio channels.
- Rotate the knob-like icon in these circles to adjust the Audio channels’ pan/bounce control. This switches the sound between the left and right channels.
- On top of that, you can see these changes on the channel control panel.
To check the effect, let’s rotate the knob to the left. And to see the result hit the “Play” button on the bottom left corner of the audio mixer interface. Here’s how it looks.
Now it’s time to select the audio mode.
Step6Select the audio mode
The audio mixer of Filmora provides you with two audio mode options. These are;
● Stereo Mode
In the Stereo mode, you can pan from left to right and control your audio just like the knob of the audio channel.
● Surround Mode
You can pan from left to right and front to back in this mode by rotating the video or music icons. This provides you with complete control over the audio positions. But remember that this mode works best if your video is played with the surround sound system.
Once you have changed the audio mode, let’s look at the master levels.
Step7Adjust the master levels
On the very left of the window, you’ll find the Master levels.
This is where you can adjust the master section or all your audio files on your timeline.
- Just drag the master level slider upward and downwards, and you’ll notice the changes right away.
So done with the changes? Let’s preview them.
Free Download For Win 7 or later(64-bit)
Free Download For macOS 10.14 or later
Step8Preview your changes
After carefully making all the changes to your audio, preview it for the last time before going with them. The “Play” button is still there in the bottom left corner.
Perfect!!! No? Make the changes again until you are satisfied and then hit the “Apply” button on the bottom right corner to adjust these changes.
And here we are, done!!! Now you can easily surprise your friends with your master-like audio handling. Before we wind up our guide, we’ll answer some of the frequently asked questions about the audio mixer of Filmora. So let’s dive right into it.
Part 4: Hot FAQs about the audio mixer of Filmora
1.How important is an audio mixer in video editing?
An audio mixer is necessary if you want to create impressive videos. This master volume control allows you to deepen the audio effect and merge two audio sources to get the maximum out of them. This is why most content creators give grave importance to audio mixers during video editing.
2.Where can we find the audio mixer in Filmora?
Like other highly advanced editing tools, you can also find the audio mixer in Filmora. After you’ve placed your media file on the editing panel, the “audio mixer” icon appears on the toolbar under the preview channel.
3.Is the audio mixer of Filmora available for free?
Yes, you can freely use the audio mixer of Filmora as much as you want without any cost. And unlike many other free sound control tools, you get all the latest and advanced features like the preview tool with the audio mixer of Filmora.
Conclusion
Every top-ranked video contains the best-suited audio tracks with it. And the audio mixer of Filmora comes in handy whenever you want to tweak the audio settings of a video.
In this article, we’ve covered everything you need to know about using the audio mixer in Filmora.
Free Download For Win 7 or later(64-bit)
Free Download For macOS 10.14 or later
Top 10 Online And PC Cartoon Video Maker 2022 [For Beginner]
Abundant Video Effects - Wondershare Filmora
Provide abundant video effects - A creative video editor
Powerful color correction and grading
Detailed tutorials are provided by the official channel
Introduction
There are some issues common to the video production process. However, animated or cartoon videos have helped to combat such issues. You do not need to scout for locations, go through a seemingly endless casting process, or rent the pricey equipment. A cartoon is simply a type of animation or an illustration that usually appears in a semi-realistic or an unreal style. In addition, it uses simple, satirical, and humorous drawing language to tell the story.
Although there are restrictions, there are a lot of possibilities cartoon video makers still offer to their users. Therefore, this article will share the top 10 best cartoon video makers online and on PC that you can use before diving into an animated video world.
So, here is what we shall learn about cartoon makers today:
In this article
01 Best 5 Online Cartoon Makers
02 Cartoon Video Maker for Desktop (Win and Mac)
03 How Can I Create My Own Cartoon Using Wondershare Anireel
Part 1: Best 5 Online Cartoon Makers
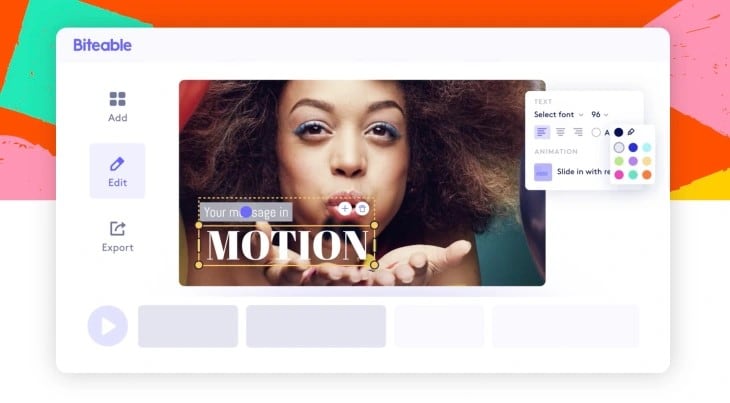
1. Biteable
Biteable provides a seemingly endless list of template categories to cater to your online media marketing needs. Aside from offering entertaining cartoon-making templates, the platform also allows users to create motion graphics or content, and Facebook covers for their social media channels.
Price: Free, $23 per month, billed annually.
Features:
- Offering library with lots of templates to choose from
- Free to use, except you are looking for additional features
- Five simple steps to an incredible cartoon video
- It has an easily customizable template
Pros
- It is a perfect option for social media managers
- Quickly create entertaining cartoons
- Used by biggies like Amazon, Microsoft, Google, Disney, BBC, Shopify, Samsung, and salesforce.
- Over 9 million users
Cons
- There is a mandatory registration
- There are no audio editing options
- The file-sharing capabilities are limited to YouTube and Facebook
- The download option is disabled in the free version
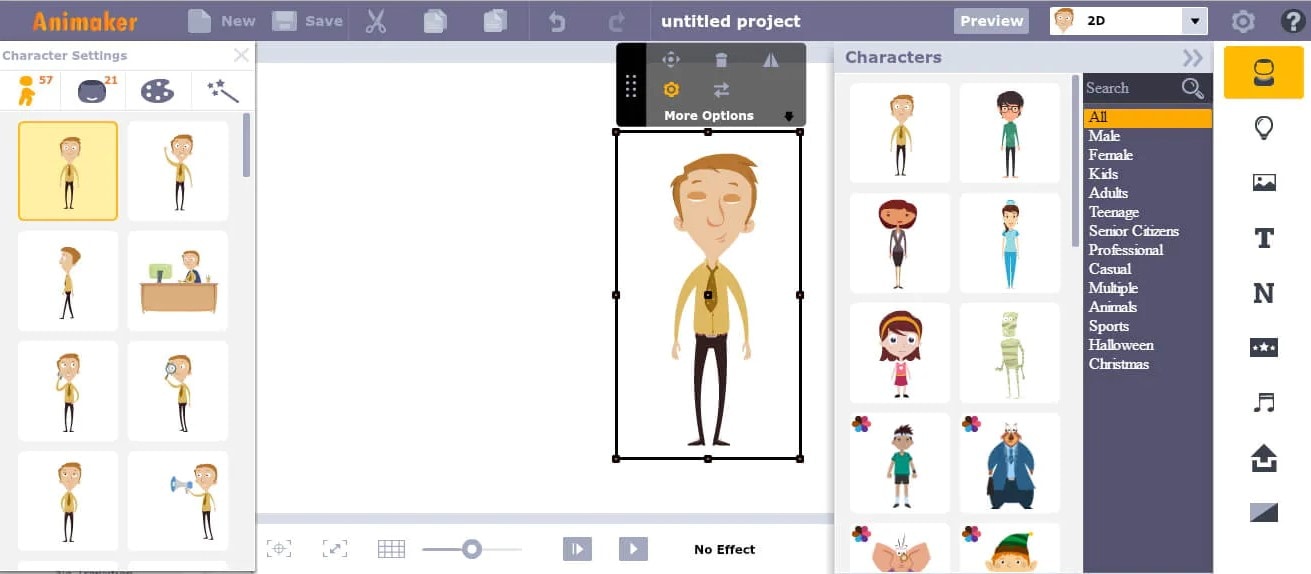
2. Animaker
With this animated maker, you get access to hundreds of animated characters, maps, and backgrounds. There are six (6) video styles available in this cartoon maker: Typography, Infographic, or 2D for different types of projects.
Price: Free version available. Subscription plans start at $12 per month/billed annually.
Features
- Different video styles, marketing, explainer, or 2D animation.
- Posts itself as the number 1 cartoon maker
- No need for a credit card to start.
- Four-step process; select template, customize it, add music, and download or share.
- 200+ voices, 25+ languages, and loads of customizable options.
- It offers auto-lip sync with advanced animation effects.
- There is a rich selection of 1000+ templates
Pros:
- Superb audio editing options
- Excellent and quick animation tools.
- Over 10 million users so far and still counting.
- Currently used by Amazon, Bosch, HP, Nokia, and Philips.
Cons:
- The monthly fee is pricey
- Account creation is mandatory for a free version
- The free version contains a watermark
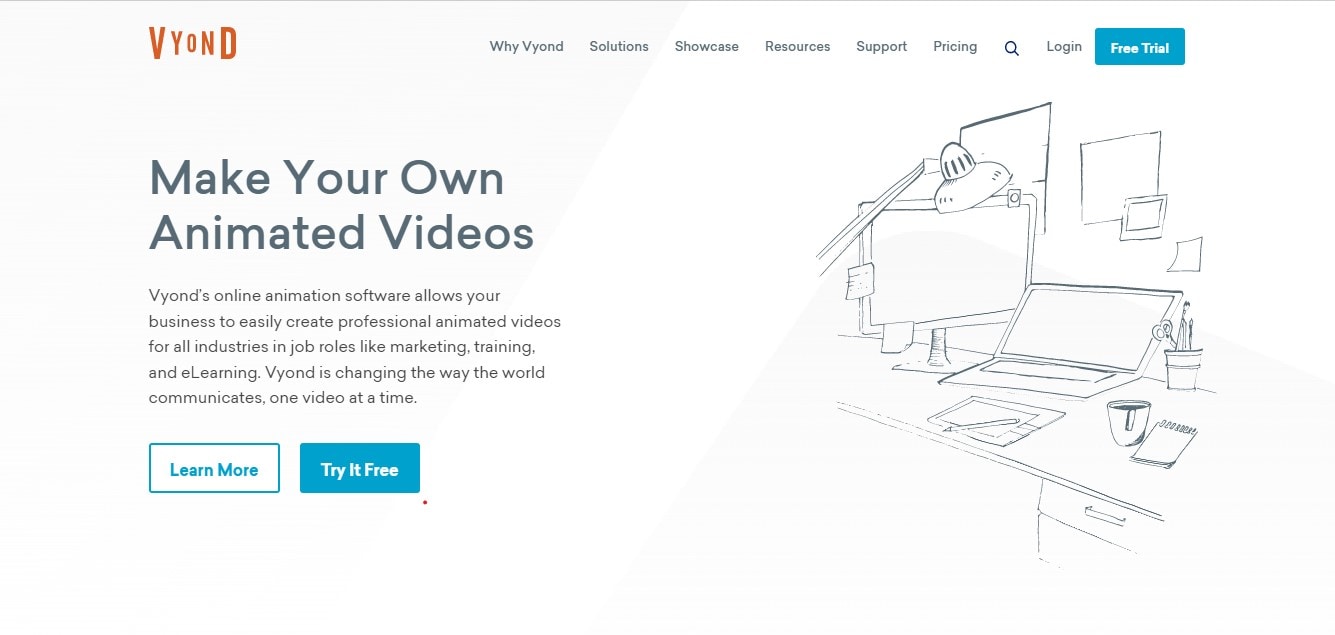
3. Vyond
Vyond, the cartoon creator launched in 2007, is probably one of the oldest online cartoon video makers. Additionally, it is still one of the most popular online destinations meant for anyone who wants to create an animated video quickly.
Price: Subscription plans start from $39 per month, billed annually.
Features:
- Perfect for animated video creation
- There is automatic character lip-syncing
- Try it for free before purchasing
- Make videos for training, e-learning, marketing, human resources, etc.
- The maximum duration of the video is 120 minutes
Pros:
- It has a fully customizable template
- There are high-end object and character animated features
- Certified by GDPR, TrustArc, BSI, and CCPA
- A wholesome cartoon makerfor enterprise and individual
- Data security and privacy assurance by BSI, CCPA, and GPDR.
Cons:
- It is quite expensive
- Vyond is not the best option for inexperienced animators
- The features depend on the subscription model
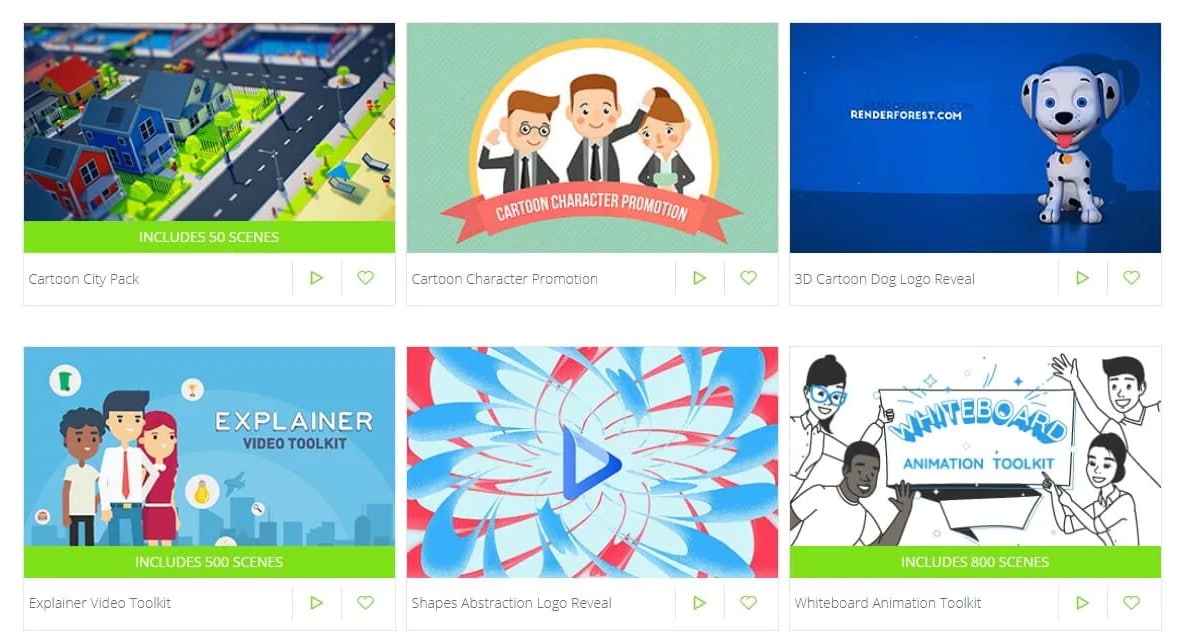
4. Renderforest
This is a famous online cartoon video maker for many purposes. Among the numerous options, the platform offers to its user. They include; 3D explainer videos, logo animations, or professional presentations.
Price: Free version available. Subscription plans start at $16 per month, billed annually.
Features:
- There is an extensive library of templates with numerous options
- Has a large online storage
- Was among the top 100 software companies in 2019.
- Top ranked solution holder for 2020
- Up to 250GB of online storage space
- Use the in-built template to make a story, customize the video, and then export it to share with your friends.
- Amadeus, Bose, BBC, Vodafone, Sony Music, and many others use Renderforest.
Pros:
- Produce videos like a pro
- Comes with an ultimate animation pack.
- Trusted by millions and one of the oldest cartoon makers.
Cons:
- A limited amount of commercial music tracks
- There are modest export options
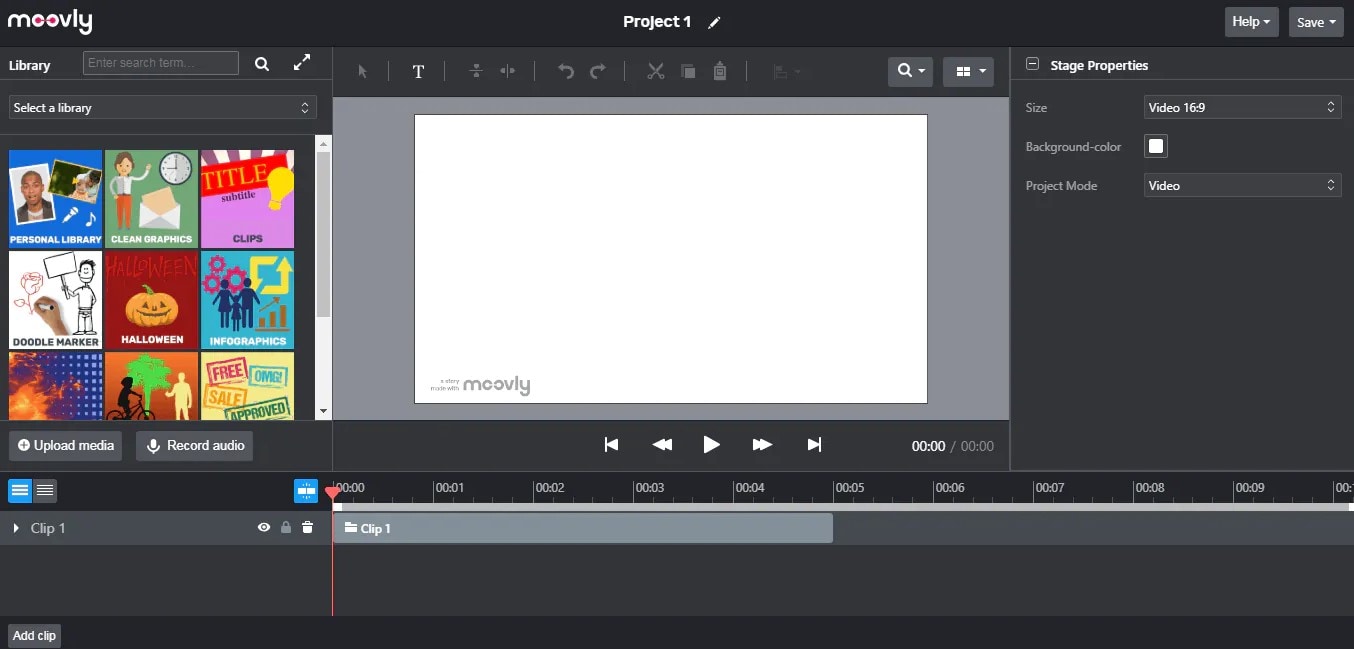
5. Moovly
With this cartoon maker, users must first log in. However, there is no need to create a new account as you can use your LinkedIn or Google account to sign in quickly.
Price: Free 30-day trial, $24.92 per month billed annually.
Features:
- Moovly is the perfect cartoon video maker for sales&marketing, human resources, internal communication, learning&development, agencies, and education.
- Apply expert features in one click with Moovly.
- Create videos and edit with browser-based or drag and drop features without installing software.
- Moovly has over 1.3 million free media, like images, sounds, music, and royalty-free stock videos at no extra charge.
- Besides, it offers 100 million extra media you can try and then purchase.
- You can add your images, music, and videos to create unique clips in style.
- Add text, remove color, add subtitles or generate them, auto-translate your text and subtitles, import PPT files, structure your content, record yourself or your computer screen, edit, mix, etc.
Pros:
- Even if users need to log in, they don’t need to create an account
- Allows users to import content from online sources like Storyblock, Shutterstock, etc.
- It is the number 1 customizable and straightforward solution to making cartoons.
- Use by Colgate-Palmolive, NHS, Teradata, Amadeus, Cisco, Continental, and Logitech.
- The interface is intuitive and user-friendly.
Cons:
- Watermarked videos during the free trial
- To export videos in HD 1080p quality, one needs to purchase one of the available plans.
Renderforest is the best cartoon maker online of the listed five in this article due to the vast library template and large online bandwidth.
Part 2: Cartoon Video Maker for Desktop (Win and Mac)
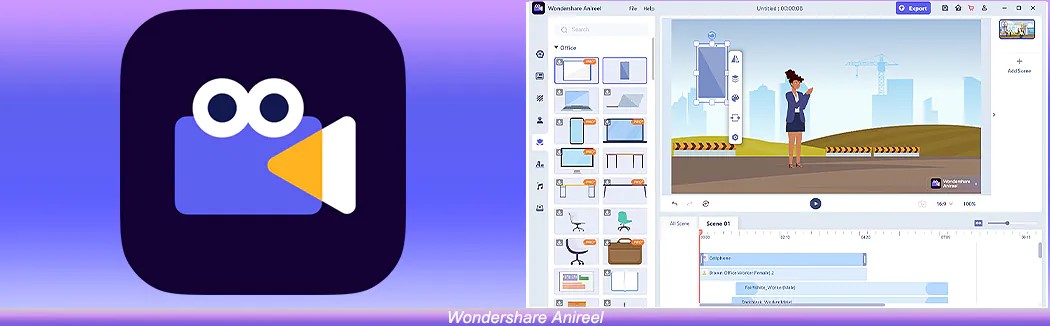
1. Wondershare Anireel
Anireel is one of the top animation software on the internet that allows users to bring their imaginations to life with a huge range of customizable elements and features.
Price: $9.99 per month billed annually and $19.99 monthly
Features:
- 40+ customizable templates
- Top animation software
- Compatible with Windows 11/10/8.1 (64 bit OS)
- Only three steps to an excellent animated video.
- Import images, videos, and sound in almost all formats.
- Create unique avatar, logo images, and more specific to your brand.
- The Deep Learning tech offers quick text-to-speech conversion.
- Animate camera movements, entry and exit effects, motion path, etc.
- Use the one-click option and change scripts to clips.
- Anireel cartoon video makercan lip-sync your characters with perfection.
- Quick and easy drag and drop editing.
Pros:
- It is convenient and simple to use
- Anireel has an intuitive interface
- The cartoon makeroffers a practical and seamless animated video editing
- It comes at an affordable and competitive price
Cons:
- It has a limited amount of assets
- Not suitable for too professional people to use.
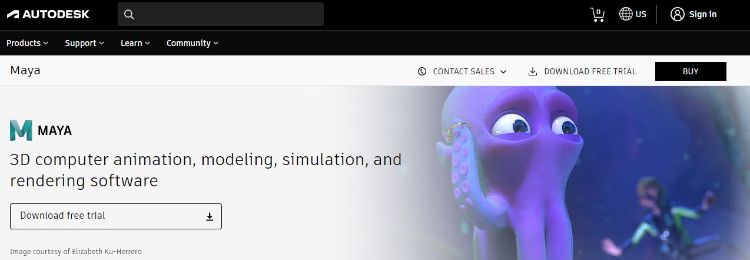
2. Autodesk Maya
Autodesk Maya is one of the best animation tools used to create animation pictures, video games, and add 3D effects in motion pictures. Plus, this cartoon maker is the best if you require a high-quality visual impact.
Price: Free trial, $225 billed monthly.
Features:
- It offers AutoDesk financing for new buyers.
- Maya is the go-to shop for architects, engineers, designers, media, and entertainment.
- Shape 3D objects and add realistic effects with Maya cartoon maker’s NURBS modeling.
- The Integrated Arnold rendering technology lets you view scene changes in real-time.
- Maya has been part of the top movie makers, including the MCU.
- This cartoon video maker offers geometry-based polygon modeling and helps create accurate simulations for visual programming.
- Maya can load and change vast data sets at a faster pace.
Pros:
- It makes complex hand-made animation tasks extremely easy
- Efficient color management
- Allows the creation of realistic effects like cloth simulations and explosions
- 30-day free trial and 30-day money-back guarantee
- Meet deadlines, add fine details to develop even the most complex shots or characters.
- Excellent tool for professionals
Cons:
- The pro is quite expensive
3. Adobe Animate
This is one of the most powerful animation software products on the internet that has been available for decades. It can animate images used for games, film, or online and produce HTML 5, WebGL, or Flash content.
Price: This cartoon creator offers three pricing plans starting at US$24.14/month
Features:
- Excellent for complex animation
- The capability of freehand drawing
- Animate, illustrate, and make 3D typography.
- Import and add vector drawings for further editing.
- Export your work as HTML5 Canvas, WebGL, Flash/Adobe AIR, GIF, or QuickTime movie.
- With the Bone tool, make your cartoon characters fluid and natural.
- Synchronize sounds and music for your project.
- Choose parts of the clip to be animated.
Pros:
- It has Puppeting features
- It is an excellent choice for complex animations
- It includes freehand drawing capability
Cons:
- It is not suitable for beginners
- Other Adobe software may be required while working on a project
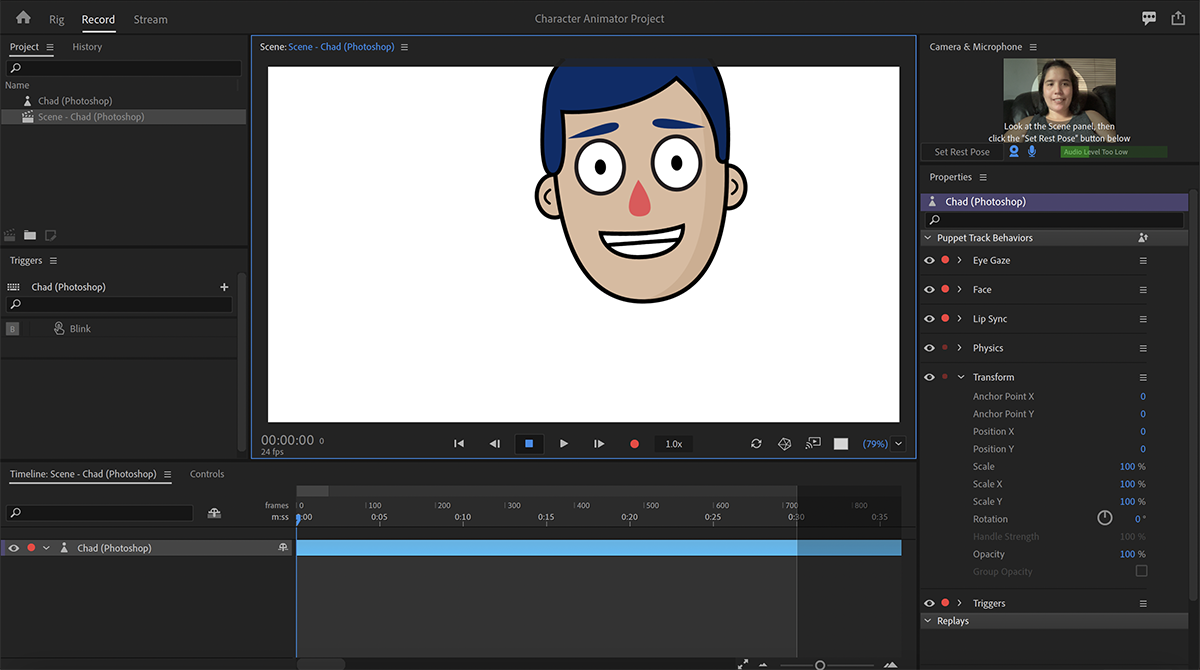
4. Adobe Character Animator
Adobe Character Animator is another type of Adobe’s animation software stack that allows users to use motion to capture and create live animations of their 2D characters.
Price: Adobe Character Animator has two pricing plans starting at US$34,49/month for the first year
Features:
- This product requires other Adobe products to function
- Lots of options to export and import.
- Make your real-life cartoon using the Motion Capture feature in five steps.
- The Avatar will walk, talk, and copy your expressions in real-time.
- Integrate and add assets from other Adobe Creative Cloud apps.
- Auto lip-syncing and real-time facial movement capture.
- Works on iOS and Android.
Pros:
- Easy to replicate real-life movements and expressions with facial tracking.
- There are various import and export options.
Cons:
- It is not a standalone product.
- Users need to have a webcam and microphone to use the motion capture feature.
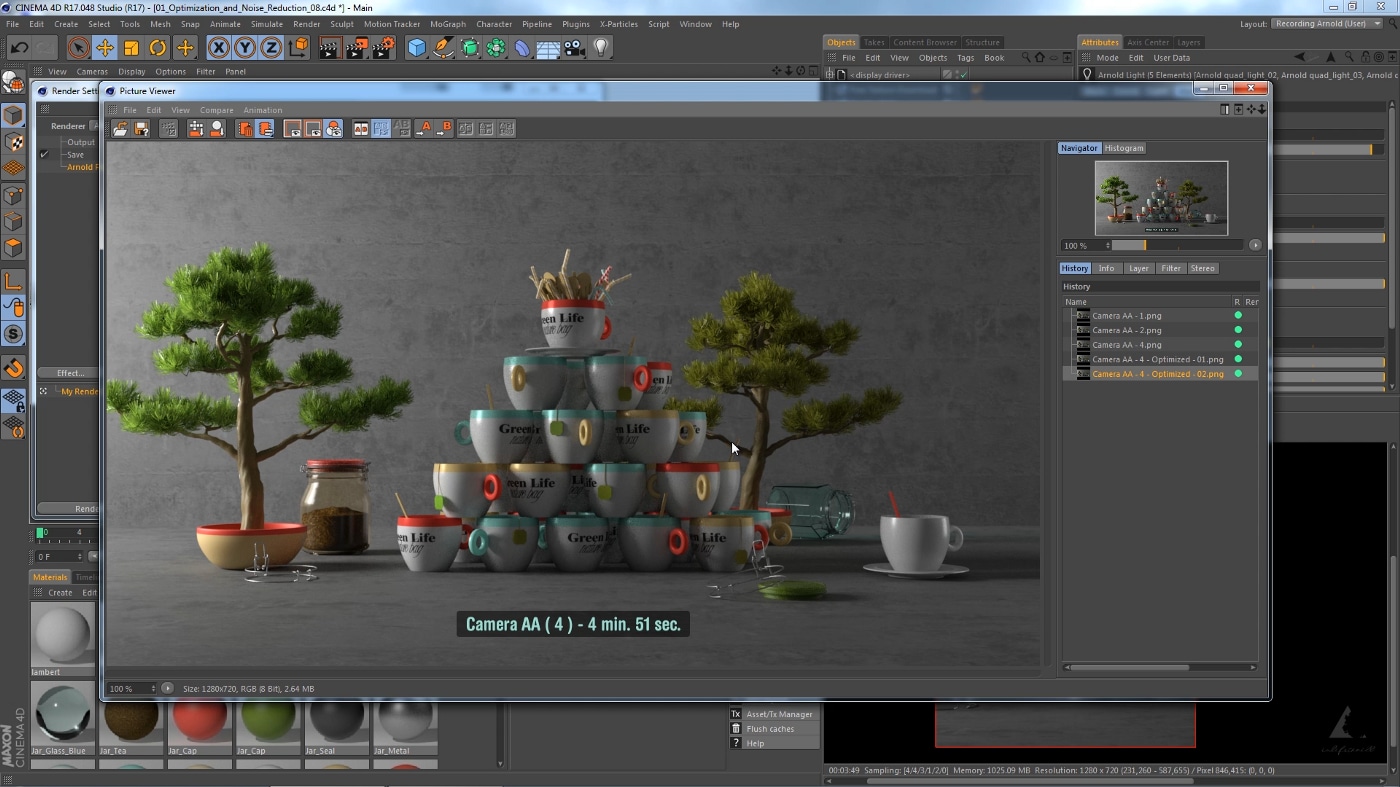
5. Cinema 4D
This cartoon maker has a 3D application interface that offers a keyframe animation, life-like characters, simulation building, object tracking, flexible rig building, cartoon styling, and animation basics.
Price: 4 pricing plans, starting at $99.91/month and $1199.00 billed annually.
Features:
- Keyframing animation effect
- It has a 3d interface
- The ZRemesher for retopology and new tools for modeling add to the new features.
- The Cloth Simulation features help make your cartoon more real.
- It supports CPU rendering with Redshift, which helps you preview, import, and export in high quality.
Pros:
- It is pretty easy to use.
- Lots of exciting design templates are available
- Many editing features are available
Cons
- It is pretty expensive compared to other software
- Not good for beginners
Wondershare Anireel is the best cartoon maker of the five listed in this article. It has lots of advanced features and templates to choose from.
Part 3: How Can I Create My Own Cartoon Using Wondershare Anireel
As stated, Wondershare Anireel has become our top cartoon creator pick due to its affordable pricing, secure server, and ease of use.
So, let us view the simple steps to create your cartoon using the Anireel software.
Step 1: Download, install and Create Character
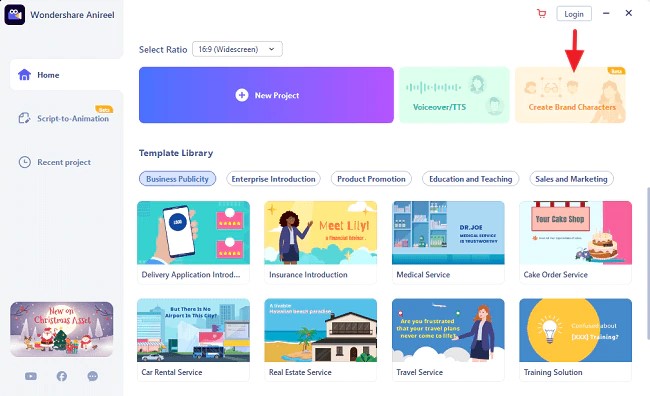
Run Anireel on your device, visit Characters Tab and then click on Create a Character option, or you may click on the Create Brand Characters tab on the home screen.
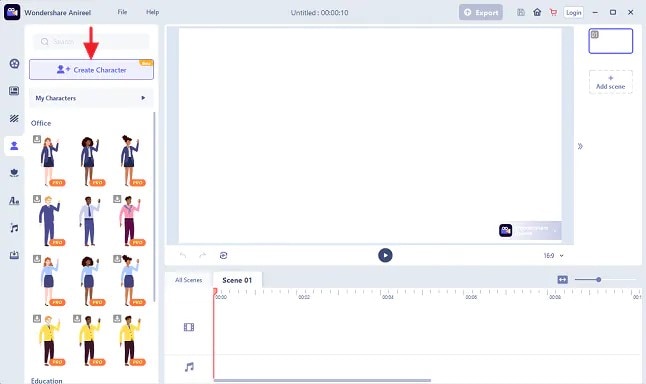
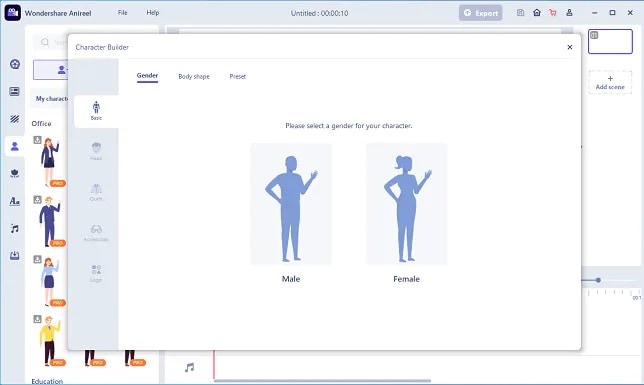
Step 2: Start Creating your Cartoon Character
Choose your gender and body shape, and apply some preset suits.
Now, you can start building facial features using the Head tab to customize the shape of the face, eyes, hairstyle, nose, mouth, ears, and eyebrows.
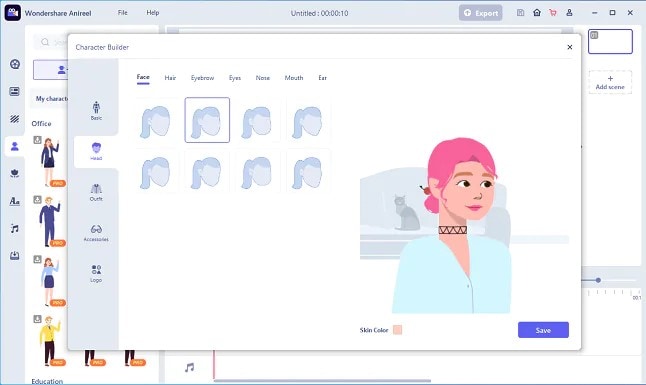
You can also choose to change the skin tone to match yours.
Step 3: Add an Outfit and Accessories
Choose the Outfit tab in Character Builder to select the base layer, outfit, bottom wear, and footwear. Pick what you want to use on your cartoon and keep adding.
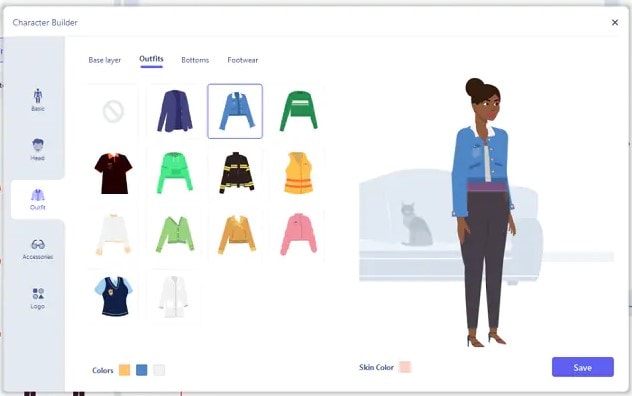
Next, reach the Accessories tab to add glasses, necklaces, and more to your cartoon character.
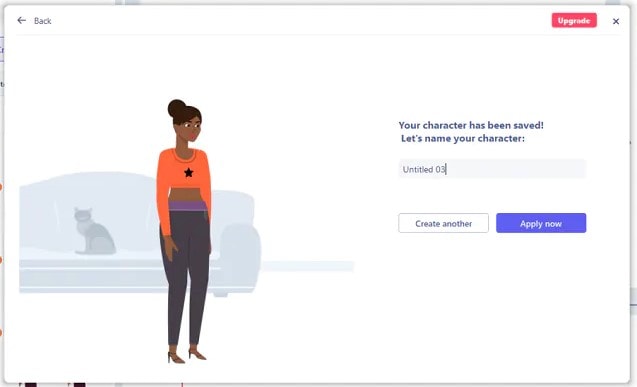
Step 4: Name your Cartoon and Apply
Click on Save and add a name to your cartoon when all done. Finally, click Apply Now to add your cartoon character to your Anireel cartoon maker canvas or My Characters tab.
Part 4: People Also Want to Know
Below are some answers to a few queries about cartoon creators. Let us look at them one by one.
1. What is the best free cartoon maker?
Wondershare Anireel is the best cartoon maker for Android as it is free to use with lots of advanced features and templates to choose from.
2. What is the best app to make a cartoon?
Wondershare Anireel’s Microsoft app is also one of the best cartoon applications that are very flexible and easy to use on the go.
Conclusion
In this article, we explained the best cartoon creators in the industry. Also, we gave the best cartoon video maker from the list. Thus, as you saw, in this report, we have summarized a few essential points regarding cartoon video makers. You learned:
- The cartoon video maker for free that you should know of.
- The ten best cartoon video makers.
- Why are Wondershare Anireel and Renderforest excellent online cartoon video makers?
- How does Anireel, cartoon creator, work?
- Finally, a few FAQs for users to better understand the cartoon maker
Introduction
There are some issues common to the video production process. However, animated or cartoon videos have helped to combat such issues. You do not need to scout for locations, go through a seemingly endless casting process, or rent the pricey equipment. A cartoon is simply a type of animation or an illustration that usually appears in a semi-realistic or an unreal style. In addition, it uses simple, satirical, and humorous drawing language to tell the story.
Although there are restrictions, there are a lot of possibilities cartoon video makers still offer to their users. Therefore, this article will share the top 10 best cartoon video makers online and on PC that you can use before diving into an animated video world.
So, here is what we shall learn about cartoon makers today:
In this article
01 Best 5 Online Cartoon Makers
02 Cartoon Video Maker for Desktop (Win and Mac)
03 How Can I Create My Own Cartoon Using Wondershare Anireel
Part 1: Best 5 Online Cartoon Makers
1. Biteable
Biteable provides a seemingly endless list of template categories to cater to your online media marketing needs. Aside from offering entertaining cartoon-making templates, the platform also allows users to create motion graphics or content, and Facebook covers for their social media channels.
Price: Free, $23 per month, billed annually.
Features:
- Offering library with lots of templates to choose from
- Free to use, except you are looking for additional features
- Five simple steps to an incredible cartoon video
- It has an easily customizable template
Pros
- It is a perfect option for social media managers
- Quickly create entertaining cartoons
- Used by biggies like Amazon, Microsoft, Google, Disney, BBC, Shopify, Samsung, and salesforce.
- Over 9 million users
Cons
- There is a mandatory registration
- There are no audio editing options
- The file-sharing capabilities are limited to YouTube and Facebook
- The download option is disabled in the free version
2. Animaker
With this animated maker, you get access to hundreds of animated characters, maps, and backgrounds. There are six (6) video styles available in this cartoon maker: Typography, Infographic, or 2D for different types of projects.
Price: Free version available. Subscription plans start at $12 per month/billed annually.
Features
- Different video styles, marketing, explainer, or 2D animation.
- Posts itself as the number 1 cartoon maker
- No need for a credit card to start.
- Four-step process; select template, customize it, add music, and download or share.
- 200+ voices, 25+ languages, and loads of customizable options.
- It offers auto-lip sync with advanced animation effects.
- There is a rich selection of 1000+ templates
Pros:
- Superb audio editing options
- Excellent and quick animation tools.
- Over 10 million users so far and still counting.
- Currently used by Amazon, Bosch, HP, Nokia, and Philips.
Cons:
- The monthly fee is pricey
- Account creation is mandatory for a free version
- The free version contains a watermark
3. Vyond
Vyond, the cartoon creator launched in 2007, is probably one of the oldest online cartoon video makers. Additionally, it is still one of the most popular online destinations meant for anyone who wants to create an animated video quickly.
Price: Subscription plans start from $39 per month, billed annually.
Features:
- Perfect for animated video creation
- There is automatic character lip-syncing
- Try it for free before purchasing
- Make videos for training, e-learning, marketing, human resources, etc.
- The maximum duration of the video is 120 minutes
Pros:
- It has a fully customizable template
- There are high-end object and character animated features
- Certified by GDPR, TrustArc, BSI, and CCPA
- A wholesome cartoon makerfor enterprise and individual
- Data security and privacy assurance by BSI, CCPA, and GPDR.
Cons:
- It is quite expensive
- Vyond is not the best option for inexperienced animators
- The features depend on the subscription model
4. Renderforest
This is a famous online cartoon video maker for many purposes. Among the numerous options, the platform offers to its user. They include; 3D explainer videos, logo animations, or professional presentations.
Price: Free version available. Subscription plans start at $16 per month, billed annually.
Features:
- There is an extensive library of templates with numerous options
- Has a large online storage
- Was among the top 100 software companies in 2019.
- Top ranked solution holder for 2020
- Up to 250GB of online storage space
- Use the in-built template to make a story, customize the video, and then export it to share with your friends.
- Amadeus, Bose, BBC, Vodafone, Sony Music, and many others use Renderforest.
Pros:
- Produce videos like a pro
- Comes with an ultimate animation pack.
- Trusted by millions and one of the oldest cartoon makers.
Cons:
- A limited amount of commercial music tracks
- There are modest export options
5. Moovly
With this cartoon maker, users must first log in. However, there is no need to create a new account as you can use your LinkedIn or Google account to sign in quickly.
Price: Free 30-day trial, $24.92 per month billed annually.
Features:
- Moovly is the perfect cartoon video maker for sales&marketing, human resources, internal communication, learning&development, agencies, and education.
- Apply expert features in one click with Moovly.
- Create videos and edit with browser-based or drag and drop features without installing software.
- Moovly has over 1.3 million free media, like images, sounds, music, and royalty-free stock videos at no extra charge.
- Besides, it offers 100 million extra media you can try and then purchase.
- You can add your images, music, and videos to create unique clips in style.
- Add text, remove color, add subtitles or generate them, auto-translate your text and subtitles, import PPT files, structure your content, record yourself or your computer screen, edit, mix, etc.
Pros:
- Even if users need to log in, they don’t need to create an account
- Allows users to import content from online sources like Storyblock, Shutterstock, etc.
- It is the number 1 customizable and straightforward solution to making cartoons.
- Use by Colgate-Palmolive, NHS, Teradata, Amadeus, Cisco, Continental, and Logitech.
- The interface is intuitive and user-friendly.
Cons:
- Watermarked videos during the free trial
- To export videos in HD 1080p quality, one needs to purchase one of the available plans.
Renderforest is the best cartoon maker online of the listed five in this article due to the vast library template and large online bandwidth.
Part 2: Cartoon Video Maker for Desktop (Win and Mac)
1. Wondershare Anireel
Anireel is one of the top animation software on the internet that allows users to bring their imaginations to life with a huge range of customizable elements and features.
Price: $9.99 per month billed annually and $19.99 monthly
Features:
- 40+ customizable templates
- Top animation software
- Compatible with Windows 11/10/8.1 (64 bit OS)
- Only three steps to an excellent animated video.
- Import images, videos, and sound in almost all formats.
- Create unique avatar, logo images, and more specific to your brand.
- The Deep Learning tech offers quick text-to-speech conversion.
- Animate camera movements, entry and exit effects, motion path, etc.
- Use the one-click option and change scripts to clips.
- Anireel cartoon video makercan lip-sync your characters with perfection.
- Quick and easy drag and drop editing.
Pros:
- It is convenient and simple to use
- Anireel has an intuitive interface
- The cartoon makeroffers a practical and seamless animated video editing
- It comes at an affordable and competitive price
Cons:
- It has a limited amount of assets
- Not suitable for too professional people to use.
2. Autodesk Maya
Autodesk Maya is one of the best animation tools used to create animation pictures, video games, and add 3D effects in motion pictures. Plus, this cartoon maker is the best if you require a high-quality visual impact.
Price: Free trial, $225 billed monthly.
Features:
- It offers AutoDesk financing for new buyers.
- Maya is the go-to shop for architects, engineers, designers, media, and entertainment.
- Shape 3D objects and add realistic effects with Maya cartoon maker’s NURBS modeling.
- The Integrated Arnold rendering technology lets you view scene changes in real-time.
- Maya has been part of the top movie makers, including the MCU.
- This cartoon video maker offers geometry-based polygon modeling and helps create accurate simulations for visual programming.
- Maya can load and change vast data sets at a faster pace.
Pros:
- It makes complex hand-made animation tasks extremely easy
- Efficient color management
- Allows the creation of realistic effects like cloth simulations and explosions
- 30-day free trial and 30-day money-back guarantee
- Meet deadlines, add fine details to develop even the most complex shots or characters.
- Excellent tool for professionals
Cons:
- The pro is quite expensive
3. Adobe Animate
This is one of the most powerful animation software products on the internet that has been available for decades. It can animate images used for games, film, or online and produce HTML 5, WebGL, or Flash content.
Price: This cartoon creator offers three pricing plans starting at US$24.14/month
Features:
- Excellent for complex animation
- The capability of freehand drawing
- Animate, illustrate, and make 3D typography.
- Import and add vector drawings for further editing.
- Export your work as HTML5 Canvas, WebGL, Flash/Adobe AIR, GIF, or QuickTime movie.
- With the Bone tool, make your cartoon characters fluid and natural.
- Synchronize sounds and music for your project.
- Choose parts of the clip to be animated.
Pros:
- It has Puppeting features
- It is an excellent choice for complex animations
- It includes freehand drawing capability
Cons:
- It is not suitable for beginners
- Other Adobe software may be required while working on a project
4. Adobe Character Animator
Adobe Character Animator is another type of Adobe’s animation software stack that allows users to use motion to capture and create live animations of their 2D characters.
Price: Adobe Character Animator has two pricing plans starting at US$34,49/month for the first year
Features:
- This product requires other Adobe products to function
- Lots of options to export and import.
- Make your real-life cartoon using the Motion Capture feature in five steps.
- The Avatar will walk, talk, and copy your expressions in real-time.
- Integrate and add assets from other Adobe Creative Cloud apps.
- Auto lip-syncing and real-time facial movement capture.
- Works on iOS and Android.
Pros:
- Easy to replicate real-life movements and expressions with facial tracking.
- There are various import and export options.
Cons:
- It is not a standalone product.
- Users need to have a webcam and microphone to use the motion capture feature.
5. Cinema 4D
This cartoon maker has a 3D application interface that offers a keyframe animation, life-like characters, simulation building, object tracking, flexible rig building, cartoon styling, and animation basics.
Price: 4 pricing plans, starting at $99.91/month and $1199.00 billed annually.
Features:
- Keyframing animation effect
- It has a 3d interface
- The ZRemesher for retopology and new tools for modeling add to the new features.
- The Cloth Simulation features help make your cartoon more real.
- It supports CPU rendering with Redshift, which helps you preview, import, and export in high quality.
Pros:
- It is pretty easy to use.
- Lots of exciting design templates are available
- Many editing features are available
Cons
- It is pretty expensive compared to other software
- Not good for beginners
Wondershare Anireel is the best cartoon maker of the five listed in this article. It has lots of advanced features and templates to choose from.
Part 3: How Can I Create My Own Cartoon Using Wondershare Anireel
As stated, Wondershare Anireel has become our top cartoon creator pick due to its affordable pricing, secure server, and ease of use.
So, let us view the simple steps to create your cartoon using the Anireel software.
Step 1: Download, install and Create Character
Run Anireel on your device, visit Characters Tab and then click on Create a Character option, or you may click on the Create Brand Characters tab on the home screen.
Step 2: Start Creating your Cartoon Character
Choose your gender and body shape, and apply some preset suits.
Now, you can start building facial features using the Head tab to customize the shape of the face, eyes, hairstyle, nose, mouth, ears, and eyebrows.
You can also choose to change the skin tone to match yours.
Step 3: Add an Outfit and Accessories
Choose the Outfit tab in Character Builder to select the base layer, outfit, bottom wear, and footwear. Pick what you want to use on your cartoon and keep adding.
Next, reach the Accessories tab to add glasses, necklaces, and more to your cartoon character.
Step 4: Name your Cartoon and Apply
Click on Save and add a name to your cartoon when all done. Finally, click Apply Now to add your cartoon character to your Anireel cartoon maker canvas or My Characters tab.
Part 4: People Also Want to Know
Below are some answers to a few queries about cartoon creators. Let us look at them one by one.
1. What is the best free cartoon maker?
Wondershare Anireel is the best cartoon maker for Android as it is free to use with lots of advanced features and templates to choose from.
2. What is the best app to make a cartoon?
Wondershare Anireel’s Microsoft app is also one of the best cartoon applications that are very flexible and easy to use on the go.
Conclusion
In this article, we explained the best cartoon creators in the industry. Also, we gave the best cartoon video maker from the list. Thus, as you saw, in this report, we have summarized a few essential points regarding cartoon video makers. You learned:
- The cartoon video maker for free that you should know of.
- The ten best cartoon video makers.
- Why are Wondershare Anireel and Renderforest excellent online cartoon video makers?
- How does Anireel, cartoon creator, work?
- Finally, a few FAQs for users to better understand the cartoon maker
Learn to Create Custom Sequence Presets in Premiere Pro for Efficient Video Editing. Ensure Consistency and Speed up Your Workflow with Personalized Settings
You’ve probably heard of Adobe Premiere Pro – it’s a top-tier video editing software that’s widely recognized in the market. But have you delved into the nitty-gritty of sequence presets? A custom sequence preset is your best friend for maintaining consistency across projects.
It allows users to save specific settings for sequence attributes like frame rate, resolution, and audio settings. Instead of reconfiguring these settings for each new project, a custom sequence preset lets you jump right into editing. Now, how do you create one? Keep reading!
Part 1: How to Create a Custom Sequence in Premiere Pro
Creating a custom sequence is like tailoring a shirt to fit you perfectly. Here’s a step-by-step guide to help you do just that:
Step 1: Displays the New Sequence Window
Begin by launching Adobe Premiere Pro. Once opened, navigate to the top menu and select File > New > Sequence. This will open up the New Sequence window, where all the magic happens!
Step 2: Change the Editing Mode to Custom in the Settings Panel
You’ll see several tabs in the New Sequence window, but we will focus on the “Settings” tab for our purposes. Click on it.
Here, you’ll find the ‘Editing Mode’ dropdown menu. By default, it’s set to a specific format like ‘DSLR’ or ‘AVCHD.’ Change this to ‘Custom.’ This will unlock a plethora of options for you to play with.
Deep Dive into Settings:
- Frame Size: Define your video’s width and height. Remember, 1920x1080 is Full HD, and 3840x2160 is 4K. Choose based on your project needs.
- Frame Rate: 24fps is the cinematic standard, but if you’re creating content for TV or web, 30fps or 60fps might be more suitable.
- Pixel Aspect Ratio: Stick with ‘Square Pixels’ unless you have a specific reason to do otherwise.
- Fields: Choose ‘No Fields’ for progressive footage. If you’re unsure, this is a safe bet.
- Audio Settings: Here, you can configure the sample rate, among other things. 48000Hz is standard for video.
Step 3: Give the New Preset a Name and Save It
Once you’ve customized the settings to your satisfaction, it’s time to save this configuration for future use. At the bottom of the New Sequence window, you’ll see a ‘Save Preset’ button. Click on it.
A pop-up window will show up, requesting you to provide a name for your new preset. Choose something descriptive so you can easily recognize it later. Once named, click ‘OK’.
Your custom sequence preset is now saved and will appear under the ‘Custom’ folder in the ‘Sequence Presets’ tab.
Part 2: Why Custom Sequence Presets are Essential for Efficient Editing
As you delve deeper into video editing, you’ll begin to appreciate the little things that shave off minutes from your workflow, allowing you to dedicate more time to the creative process. This is precisely where the utility of custom sequence presets in Premiere Pro comes into play. But why are these presets so crucial?
- Consistency Across Projects: If you’re managing multiple projects or a series of videos, having a standard format ensures that all your content has a uniform look and feel. Consistency is a hallmark of professional-grade content. It’s not just about the visuals – maintaining a uniform audio quality and format is equally significant. With a preset, you no longer need to remember the minutiae of each setting, ensuring consistency effortlessly.
- Speed Up Your Workflow: Every minute you spend adjusting the sequence settings is a minute less you have for cutting, color correcting, audio mixing, or adding those special effects that make your videos pop. Over time, those minutes can add up to hours. By using a custom sequence preset, you can jump straight into the creative part of editing without the preliminary setup.
- Avoid Common Mistakes: Have you ever rendered an entire project only to find that the frame rate was off or the audio was set to the wrong sample rate? These kinds of errors can occur when setting up a new sequence from scratch each time. By relying on a preset, you mitigate the risks of such oversights.
- Personalized Templates for Different Platforms: Different platforms may have varying preferred settings. For instance, the ideal video format for YouTube might differ from that of Instagram or TikTok. Instead of Googling these settings each time, you can have a custom sequence preset ready for each platform, ensuring your content is optimized wherever it’s destined.
- Ease of Collaboration: If you’re working as part of a team, having standard sequence presets ensures everyone is on the same page. This is particularly handy when multiple editors are working on different segments of the same project. With custom presets, you’re not just aligning sequences but also visions.
Incorporating this practice into your editing routine might initially seem trivial, but its benefits compound with time.
Part 3: Summary
Creating a custom sequence preset in Adobe Premiere Pro isn’t just about streamlining your workflow – it’s about ensuring consistency across your projects.
By saving your most-used settings, you’re creating a base template that can be pulled up any time, granting you more time for the creative process.
Adobe Premiere Pro’s interface is designed to make tasks like these intuitive, so even if you’re a beginner, with a bit of practice, you’ll be creating custom sequence presets like a pro.
Adding Slow Motion in DaVinci Resolve: A Comprehensive Overview
In content creation and filmmaking, slow-motion videos have achieved recognition. There are multiple scenarios that slow-motion videos can help with. They assist in emphasizing important shots in footage and bring perfection. According to creators, slow motion reveals video details that often go unnoticed. The ability of software to offer adjustable frame rates does the trick in such videos.
This article highlights slow-motion videos with reference to DaVinci Resolve’s slow motion. A comprehensive guide will be given to operate slow-motion DaVinci Resolve. The article will also commence a brief discussion on the importance of slow-mo. An AI alternative to DaVinci’s slow motion will be discussed. This software also assists in creating slow-motion videos in multiple methods.
Slow Motion Video Maker Slow your video’s speed with better control of your keyframes to create unique cinematic effects!
Make A Slow Motion Video Make A Slow Motion Video More Features

Part 1: Learning the Best Ways to Add Slow Motion in DaVinci Resolve [100% Working]
Post-production editing is what adds value and perfection to your shots. DaVinci Resolve is an all-in-one editor designed to assist in post-production tasks. You can do professional-level editing, apply effects, infuse cinematic visuals, and more. In addition, it possesses multipurpose high-grade audio editing tools for videos.
With its custom settings options, you can create slow motions in DaVinci Resolve. It has multiple options for manipulating the speed of the entire video clip. With its speed ramping option, you can slow down a specific portion of the video. The Optical Flow feature in it brings precision to your slow-motion videos. If you want to get rid of switching between software, DaVinci slow motion is an option.
Methods of Creating Slow Motion Videos in DaVinci Resolve 18
There are multiple options and techniques for producing slow-motion DaVinci Resolve. The following section contains the step-by-step guide to doing that:
Method 1. Using the Timeline Settings
Are you looking for a speedy and straightforward method to slow down a video? In this DaVinci Resolve slow motion smooth, speed is adjustable via percentage. Here is a step-by-step guide to commence this action in DaVinci:
Step 1: After importing your clip into this software, bring it to the timeline. Then, right-click on this clip in the timeline; a selection panel will appear. In this panel, locate the “Retime Controls” option and click it.

Step 2: Commencing this action will feature a speed change option on your clip. Click on the navigation icon adjacent to the speed percentage in the timeline clip. As this opens a dropdown menu, select the “Change Speed” option to continue. Further, select a slower percentage in the given panel to slow down your video.

Step 3: There is a built-in option to bring smoothness to your slow-motion video. For this, select your clip and navigate towards the top-right panel. In the “Video” tab, scroll down and access the “Retime and Scaling” section. Here, expand the “Retime Process” option and select “Optical Flow.” This will add extra smoothness to your DaVinci slow-motion video.

Method 2. Using the Clip Attribution Settings
This method is suitable if you have shot a video at a higher frame rate. This method is also plain and requires a few clicks to complete. Following is the detailed guide to creating a DaVinci Resolve slow-motion smooth:
Step 1: Once you have imported the video in the timeline, navigate towards the Media Pool. From there, find your clip, right-click on it, and click the “Clip Attributes” option.

Step 2: From the Clip Attributes window, go to the “Video” tab and expand “Video Frame Rate.” From the appearing frame rate options, select a lesser frame rate.

Step 3: To sync the audio with your clip, navigate towards the timeline panel. Select the audio track and right-click on it to access settings. From the options menu, locate and uncheck the “Link Clips” option.

Step 4: Navigate toward the bottom of the editing interface and select “Fairlight.” In here, go to the right-side panel and access the “Audio” tab. From there, find and adjust the “Speed Change” settings. Your audio is now synced with the duration of your video.

Part 2: Making Slow Motion Video Making Easy with Wondershare Filmora
Slow motion in DaVinci Resolve gives accurate and precise results. However, the editing interface of this software can appear tricky to some users. If you are new to video editing or have beginner-level skills, using it can be difficult. To liberate you from such technicalities, we introduce you to Wondershare Filmora . This is an AI-driven desktop tool offering slow-motion video functions.
Methods to Make a Slow Motion Video in Wondershare Filmora
Filmora is a reliable alternative to slow motion in DaVinci Resolve, offering two methods. We have discussed both methods in the following section below:
Free Download For Win 7 or later(64-bit)
Free Download For macOS 10.14 or later
- Method 1. Using the Manual Speed Adjustment Option
- Method 2: Using the AI Frame Interpolation Option
Method 1. Using the Manual Speed Adjustment Option
If you are someone who prefers to oversee the editing task, Filmora offers the manual option. To commence this action, follow the step-by-step guide below:
Step 1Import Media and Access Uniform Speed
After downloading Filmora on your device, launch it and create a new project. Upon accessing the media “Import” option, import files and bring them to the timeline. Right-click on the clip within the timeline and select “Uniform Speed” from the drop-down menu.

Step 2Access the Settings Panel
Navigate towards the settings panel and access the “Uniform Speed” tab. Under this tab, adjust the “Speed” slider or set the values. You can also adjust the “Duration” of the clip to do so.

Method 2. Using the AI Frame Interpolation Option
If you want better results while slowing down video frames, you can opt for this option. You can commence Optical Flow action for smooth video frames. Given below is the detailed instructional manual for this:
Step 1Access the Speed Ramping Option
After importing media and dropping it into the timeline, select the video in the timeline. Then, navigate towards the right-side panel and go to the “Speed” tab. Under this tab, select the “Speed Ramping” option and enable the “Optical Flow” option after selecting any particular speed ramping preset. You can access this option by expanding the “AI Frame Interpolation” options.

Step 2Render Preview and Export
Afterward, navigate towards the timeline panel and select the “Render Preview” option. Once the rendering is done, play your video to see the results. If the results are satisfactory, click the “Export” button to export your video.

This DaVinci slow-motion alternative has more to offer when it comes to editing. Filmora offers a wide range of video, audio, and text editing features. The majority of these features are AI-backed and speed up task completion. Along with slow motion, you can increase the speed of a video and customize it. Filmora offers a built-in Stock Media library with effects and preset options.
AI-Backed Video Editing Features of Wondershare Filmora
Wondershare Filmora is a multifunctional software designed to increase productivity. Its AI technology enhances an editor’s productivity by offering automated options. This section emphasizes some of the AI-driven video editing features of Filmora:
1. AI Copilot Editing
Have you just started using Filmora and feel confused while editing? There is no need to see videos or read articles for it. Wondershare Filmora has a built-in AI chatbot assistant to guide you. You can ask its AI copilot feature anything about accessing effects or functions. It will give you detailed directions on it along with CTA buttons for direct access.

2. AI Text-to-Video
If you have an idea for a video but not the skill to create it, Filmora has got you covered. Using this feature, you can craft a proper video from text. You just need to add a script or textual direction in the prompt section. AI will handle and insert the AI voice, text, and graphics independently.

3. AI Copywriting
Wondering what to enter as a prompt in Filmora’s Text-to-Video AI? There is no need to switch with AI copywriters as Filmora offers its own. With its ChatGPT integration, this feature generates accurate and rapid scripts. Users just need to add a description for a script, and it will generate content on it.

4. AI Smart Masking
Everyone loves those unique and high-quality transitions and effects. However, incorporating such transitions and effects can be tricky in manual editing. With its AI masking feature, you just need to activate the feature, and it will do the rest. When you enable AI masking and specify the area to mask, it will operate within seconds. You can later add transitions and effects to the unmasked area.

Conclusion
Upon conclusion, let’s rewind the complete knowledge of this article. At first, the article discussed how slow-motion videos have a significant contribution. Along with video editing, they contribute to research, training, and education. Moreover, we discussed DaVinci’s resolve in slow motion and a guide to use it. Although, we recommend you use Wondershare Filmora as it is an easy-to-use alternative.
Make A Slow Motion Video Make A Slow Motion Video More Features
Part 1: Learning the Best Ways to Add Slow Motion in DaVinci Resolve [100% Working]
Post-production editing is what adds value and perfection to your shots. DaVinci Resolve is an all-in-one editor designed to assist in post-production tasks. You can do professional-level editing, apply effects, infuse cinematic visuals, and more. In addition, it possesses multipurpose high-grade audio editing tools for videos.
With its custom settings options, you can create slow motions in DaVinci Resolve. It has multiple options for manipulating the speed of the entire video clip. With its speed ramping option, you can slow down a specific portion of the video. The Optical Flow feature in it brings precision to your slow-motion videos. If you want to get rid of switching between software, DaVinci slow motion is an option.
Methods of Creating Slow Motion Videos in DaVinci Resolve 18
There are multiple options and techniques for producing slow-motion DaVinci Resolve. The following section contains the step-by-step guide to doing that:
Method 1. Using the Timeline Settings
Are you looking for a speedy and straightforward method to slow down a video? In this DaVinci Resolve slow motion smooth, speed is adjustable via percentage. Here is a step-by-step guide to commence this action in DaVinci:
Step 1: After importing your clip into this software, bring it to the timeline. Then, right-click on this clip in the timeline; a selection panel will appear. In this panel, locate the “Retime Controls” option and click it.
Step 2: Commencing this action will feature a speed change option on your clip. Click on the navigation icon adjacent to the speed percentage in the timeline clip. As this opens a dropdown menu, select the “Change Speed” option to continue. Further, select a slower percentage in the given panel to slow down your video.
Step 3: There is a built-in option to bring smoothness to your slow-motion video. For this, select your clip and navigate towards the top-right panel. In the “Video” tab, scroll down and access the “Retime and Scaling” section. Here, expand the “Retime Process” option and select “Optical Flow.” This will add extra smoothness to your DaVinci slow-motion video.
Method 2. Using the Clip Attribution Settings
This method is suitable if you have shot a video at a higher frame rate. This method is also plain and requires a few clicks to complete. Following is the detailed guide to creating a DaVinci Resolve slow-motion smooth:
Step 1: Once you have imported the video in the timeline, navigate towards the Media Pool. From there, find your clip, right-click on it, and click the “Clip Attributes” option.
Step 2: From the Clip Attributes window, go to the “Video” tab and expand “Video Frame Rate.” From the appearing frame rate options, select a lesser frame rate.
Step 3: To sync the audio with your clip, navigate towards the timeline panel. Select the audio track and right-click on it to access settings. From the options menu, locate and uncheck the “Link Clips” option.
Step 4: Navigate toward the bottom of the editing interface and select “Fairlight.” In here, go to the right-side panel and access the “Audio” tab. From there, find and adjust the “Speed Change” settings. Your audio is now synced with the duration of your video.
Part 2: Making Slow Motion Video Making Easy with Wondershare Filmora
Slow motion in DaVinci Resolve gives accurate and precise results. However, the editing interface of this software can appear tricky to some users. If you are new to video editing or have beginner-level skills, using it can be difficult. To liberate you from such technicalities, we introduce you to Wondershare Filmora . This is an AI-driven desktop tool offering slow-motion video functions.
Methods to Make a Slow Motion Video in Wondershare Filmora
Filmora is a reliable alternative to slow motion in DaVinci Resolve, offering two methods. We have discussed both methods in the following section below:
Free Download For Win 7 or later(64-bit)
Free Download For macOS 10.14 or later
- Method 1. Using the Manual Speed Adjustment Option
- Method 2: Using the AI Frame Interpolation Option
Method 1. Using the Manual Speed Adjustment Option
If you are someone who prefers to oversee the editing task, Filmora offers the manual option. To commence this action, follow the step-by-step guide below:
Step 1Import Media and Access Uniform Speed
After downloading Filmora on your device, launch it and create a new project. Upon accessing the media “Import” option, import files and bring them to the timeline. Right-click on the clip within the timeline and select “Uniform Speed” from the drop-down menu.
Step 2Access the Settings Panel
Navigate towards the settings panel and access the “Uniform Speed” tab. Under this tab, adjust the “Speed” slider or set the values. You can also adjust the “Duration” of the clip to do so.
Method 2. Using the AI Frame Interpolation Option
If you want better results while slowing down video frames, you can opt for this option. You can commence Optical Flow action for smooth video frames. Given below is the detailed instructional manual for this:
Step 1Access the Speed Ramping Option
After importing media and dropping it into the timeline, select the video in the timeline. Then, navigate towards the right-side panel and go to the “Speed” tab. Under this tab, select the “Speed Ramping” option and enable the “Optical Flow” option after selecting any particular speed ramping preset. You can access this option by expanding the “AI Frame Interpolation” options.
Step 2Render Preview and Export
Afterward, navigate towards the timeline panel and select the “Render Preview” option. Once the rendering is done, play your video to see the results. If the results are satisfactory, click the “Export” button to export your video.
This DaVinci slow-motion alternative has more to offer when it comes to editing. Filmora offers a wide range of video, audio, and text editing features. The majority of these features are AI-backed and speed up task completion. Along with slow motion, you can increase the speed of a video and customize it. Filmora offers a built-in Stock Media library with effects and preset options.
AI-Backed Video Editing Features of Wondershare Filmora
Wondershare Filmora is a multifunctional software designed to increase productivity. Its AI technology enhances an editor’s productivity by offering automated options. This section emphasizes some of the AI-driven video editing features of Filmora:
1. AI Copilot Editing
Have you just started using Filmora and feel confused while editing? There is no need to see videos or read articles for it. Wondershare Filmora has a built-in AI chatbot assistant to guide you. You can ask its AI copilot feature anything about accessing effects or functions. It will give you detailed directions on it along with CTA buttons for direct access.
2. AI Text-to-Video
If you have an idea for a video but not the skill to create it, Filmora has got you covered. Using this feature, you can craft a proper video from text. You just need to add a script or textual direction in the prompt section. AI will handle and insert the AI voice, text, and graphics independently.
3. AI Copywriting
Wondering what to enter as a prompt in Filmora’s Text-to-Video AI? There is no need to switch with AI copywriters as Filmora offers its own. With its ChatGPT integration, this feature generates accurate and rapid scripts. Users just need to add a description for a script, and it will generate content on it.
4. AI Smart Masking
Everyone loves those unique and high-quality transitions and effects. However, incorporating such transitions and effects can be tricky in manual editing. With its AI masking feature, you just need to activate the feature, and it will do the rest. When you enable AI masking and specify the area to mask, it will operate within seconds. You can later add transitions and effects to the unmasked area.
Conclusion
Upon conclusion, let’s rewind the complete knowledge of this article. At first, the article discussed how slow-motion videos have a significant contribution. Along with video editing, they contribute to research, training, and education. Moreover, we discussed DaVinci’s resolve in slow motion and a guide to use it. Although, we recommend you use Wondershare Filmora as it is an easy-to-use alternative.
Also read:
- 2024 Approved How to Rotate a Video in Windows 10
- New 2024 Approved 7 Best MP4 Editors on Mac Edit MP4 in Mac
- New Tutorial Guides for Video Maker with Song
- How to Use Color Grading in Final Cut Pro for 2024
- 2024 Approved 10 Top Free GIF Background Remover for PC and Online
- New 2024 Approved Best Ever Ways Make Tiktok Slideshow Solved
- In 2024, Ideas That Help You Out in Making Transparent Image
- Top Free Video Editing Software Enhance Your Content with These Essential Tools
- 2024 Approved Ideas That Will Help You Out in Making Transparent Image
- Guide Adopting Lumetri Color Presets in Effective Color Grading for 2024
- Updated In 2024, Step by Step Guide on Make Gimp Transparent Background PNG
- In 2024, Guiding Principles of Track Matte and Tracking in Adobe After Effects
- Updated 2024 Approved Top 7 MP4 Video Editors on Mac Edit MP4 Videos Easily
- 2024 Approved How to Get Motion Blur in Valorant?
- New In 2024, Steps to Rotate Videos in Lightworks
- In 2024, All About GIF Keyboard That You May Want to Know
- Best 5 PDF to GIF Converters You Should Know
- Updated In 2024, 6 Instant Ways to Create Windows 10 Slideshow
- Updated Things You Need to Know About Color Grading in Photography
- Updated How to Change the Speed of Video in DaVinci Resolve?
- How to Fix Error 495 While Download/Updating Android Apps On Xiaomi Redmi Note 12 Pro 4G | Dr.fone
- How to Factory Reset iPhone 15 Pro Max and iPad Without Apple ID | Stellar
- How to Soft Reset Poco M6 Pro 5G phone? | Dr.fone
- In 2024, How to Unlock Apple ID Activation Lock From Apple iPhone 6s Plus?
- How to Remove Forgotten PIN Of Your Nubia
- Want to Uninstall Google Play Service from Vivo X90S? Here is How | Dr.fone
- How To Remove Screen Lock PIN On Realme C67 5G Like A Pro 5 Easy Ways
- How to Fix Corrupt video files of Xiaomi Civi 3 using Video Repair Utility?
- CatchEmAll Celebrate National Pokémon Day with Virtual Location On Infinix Hot 30 5G | Dr.fone
- How to use Device Manager to reinstall hardware drivers on Windows 11 & 10
- Can I recover permanently deleted photos from Infinix Hot 40 Pro
- How to Transfer Data from Infinix Smart 8 Plus to BlackBerry | Dr.fone
- Why Does My Tecno Spark 10 Pro Keep Turning Off By Itself? 6 Fixes Are Here | Dr.fone
- 5 Solutions For Samsung Galaxy S24 Unlock Without Password
- In 2024, How to Change Samsung Galaxy XCover 6 Pro Tactical Edition Location on Skout | Dr.fone
- Title: Want to Make Professional-Looking Videos? Keep Reading to Give Your Videos a Cinematic Feel with the Audio Mixer of Filmora
- Author: Chloe
- Created at : 2024-05-20 03:37:37
- Updated at : 2024-05-21 03:37:37
- Link: https://ai-editing-video.techidaily.com/want-to-make-professional-looking-videos-keep-reading-to-give-your-videos-a-cinematic-feel-with-the-audio-mixer-of-filmora/
- License: This work is licensed under CC BY-NC-SA 4.0.
