
:max_bytes(150000):strip_icc():format(webp)/GettyImages-585151372-a659baf0c7b441b9b7e7896716b12784.jpg)
Weve Picked up the Best Online as Well as Offline MOV to GIF Converters . These Converters Are Easy to Use and Have No Limitations on Size. Get Your One for 2024
We’ve Picked up the Best Online as Well as Offline MOV to GIF Converters . These Converters Are Easy to Use and Have No Limitations on Size. Get Your One
Powerful Video Editor - Wondershare Filmora
Provide abundant video effects - A creative video editor
Powerful color correction and grading
Detailed tutorials are provided by the official channel
There are more than enough GIF makers available on the Internet. However, we’ve found it difficult to find quality MP4-to-GIF converters. Some of the tools that commonly pop up in your search results are either unreliable or simply bad at what they do. In some cases, you will also have to deal with intrusive ads and pop-ups.
Stop scrolling through a sea of options, and start converting your video files into animated GIFs in just a few steps. You no longer need to upload your files to some random website to get your desired results.
We’ve picked up the best online as well as offline MP4-to-GIF converters of 2022 and explained how to use them in a more easy way.
Best 5 MOV to GIF Converter Software
It’s no secret that converting video to GIFs is a good idea: they’re small, easy to share, and fun to look at. That’s why we decided to take the time to compare and review some of the best-animated GIF makers out there, from free online tools to offline software for PCs, Macs, and other devices.
1. Wondershare Filmora

Wondershare Filmora Video Editor is a professional and easy-to-use video editing software. This converter provides you with a lot of really cool filters and effects that let you make your videos even better. It is able to export videos in many different formats, including GIFs.
It is one of the best MOV to GIF Converters for Mac & Windows. It has all the important features that you need to convert, edit and create animated GIFs from any video format quickly and easily. With its simple and easy-to-use interface, you can choose your desired video clip or effect, edit it in different ways and then output it as a GIF.
Pros
Easy-to-use Tool for all device users
Able to export videos in multiple formats
Create animated GIFs from any video format
Best for professional work
Cons
Super effects cannot be added
Some effects can disturb tool’s functioning
2. Adobe Premiere Pro

To make the best GIFs, you need to use a program that can be versatile and powerful all at once. Adobe Premiere Pro is one of the best video editing softwares for professionals and amateurs. It is a great choice for people who have basic knowledge of film creation and want to produce video content at a professional level.
The reasons for its popularity are quite clear. The program has a non-linear video editing interface, an unrivaled system of working tools, and a powerful feature set.
Pros
Goes professionally with Windows OS, macOS
Provides non-linear video editing
Supports Flash Video, HD, and HDV
Featured for all professional tasks
Cons
Freemium for only a month
3. Movavi Video Editor Plus

The best way to create video highlights is to use an editing program and extract the best moments from your footage. Movavi’s new Video Editor Plus has all the tools you need to create compelling videos quickly and easily, with a user interface that even novice editors can master right away.
This affordable program gives you all the power (and simplicity) you need to create a high-quality GIF that represents your video perfectly. All without costing too much or putting up too many barriers to using this software.
Pros
Movement tracking and picture-in-picture features
Chroma keying
Sharp movie-creation software
Has multiple different features more
Cons
Resistive on slow slides
Doesn’t support high-end transitions
4. VLC

VLC Player is a highly portable multimedia player for various audio and video formats, including MPEG-4, DivX, MP3, and Ogg/Vorbis.
It is a free and open-source cross-platform multimedia player and framework that plays most multimedia files as well as DVDs, Audio CDs, VCDs, and various streaming protocols.
It can also be used to convert MOV format to GIF in many different ways.
To start with: you can use the tool to create animated avatars for Facebook and other social networks or even make an animated GIF for mobile phone wallpaper.
Pros
Most popular media players today
support DivX streaming and MPEG
Can be controlled using keyboard shortcuts
Support all formats, including BluRay, .mov, and .avi
Cons
No feature for upgradations
Some found it a hard tool as a converter
5. Cyberlink PowerDirector

Whether they’re an amateur or a seasoned pro, editing videos is easier than ever before with CyberLink PowerDirector . It comes with a host of advanced editing tools, including multi-cam editing, 3D title creation, and special effects. Avid editors can also upload their work to cloud services right from the app!
It is ideal for practically anyone who wants to create movies. It even comes with easy-to-use video editing and productive media sharing tools, so anyone can turn their videos into polished movies using this tool.
Pros
Featuring over 100 top-notch audio and video editing attributes
Enables you to easily edit and export videos in 4K
Features 360-degree video editing qualification
Quick customer support 24 hours a day
Cons
Adding ads to the page causes frustration
Costly
Online MOV to GIF Converter
If you have ever wanted to convert your MOV files into gifs, here are a few online tools that will help you do it with ease. Upload your .mov file to the service and enjoy the convenience of watching your favorite movies in animated gif format.
1. CloudConvert

The CloudConvert allows you to convert online documents, images, presentations, and much more into other formats. To use its API you need a free account on our servers (which allow you to do around 100 conversions per month).
Conversion is done on their servers, which means that: - The users of your app never have to install any software. - The API is fast and scalable. - It works across all popular platforms: Windows, macOS, Linux, iPhone, Android…
Pros
200+ File Formats Sustained
Absolute Data Protection
Persuasive API Integration
Rapid Online File Converter
Cons
Conversion minutes determine prepaid package plans
2. EZGIF.COM

Create GIFs from your video clips with this free online MOV to GIF converter.Ezgif.com is a simple to use toolset designed primarily for creating and editing animated GIFs but also can perform conversions.
With Ezgif you can capture videos, adjust the frames to suit your needs, save them as an animated GIF with text or sound, share them via email, Facebook, and more!
So, convert MOV, M4V, MP4, and various other video formats to animated GIFs with this free tool.
Pros
Design is comprehensive for all level users
Engaging work/functioning
Can stand with lots of devices
Easy to use
Cons
The structure of the tool is linear
3. Convertio

Convertio is easy to use, fast and available without signing up. The website offers a list of file converters that can be added directly to your Chrome browser.
The process uses Optimal media conversion settings that ensure the best quality possible with every conversion. It has worldwide popularity with millions of visitors each month.
It also has a large database of links to various online video web pages, so you can quickly access the video file you need and convert it into GIF format as well as other image formats like JPG, PNG, and BMP.
Pros
Permits you to check up to ten pages for free
Uses Optical Character Recognition technology
Save transformed files to Google Drive or Dropbox
Professional overall
Cons
There are certain security and safety risks
How to Convert MOV to GIF Using Wondershare Filmora?
Step 1: Import the MOV file
To get started, simply drag and drop your MOV file onto the interface of Filmora. Alternatively, click on the “Import” button in the upper left corner to browse and load the MOV file from your hard drive or external storage device. A third option is to right-click on the video in the media library and choose “Import Media Files” from the drop-down menu. This will open up a new window where you can select your desired video file.

Now that you have successfully imported your MOV file into Filmora, let’s look at how to proceed with making a GIF out of it.
Step 2: Trim to shorten the video
Next, you will need to trim the video. This is optional, but important if you want to make a GIF from a video. A longer video means a bigger file size and an increased loading time for your final GIF, so try to keep it as short as possible!

To trim your video, add another start and endpoint by clicking on the scissors icon below. You can also put them in manually by typing in the time (in seconds) into the box provided.
Step 3: Export as GIF
Click on the Export button to open up the Export dialog box. From here, you can choose how you want your file exported from a number of options including GIF under the Formats tab. Under the Video tab, select the video quality settings that best suit your requirements. You can also set the frame rate and resolution for your GIF image file at this point. Once you are done, click on Save to specify a location for your file as well as a name for it.

Step 4: Save the GIF file
Click “Convert” to start the MOV to GIF conversion.
When it’s done, click “Open Folder”, and you’ll see the generated GIF file there, which could be shared with others via social platforms such as Twitter, YouTube, and Facebook directly or used for other purposes.
Conclusion
We have not gathered several MOV to GIF converters for you to buy, but we have gone ahead and selected some and explained how to use them in easy steps. You no longer need to upload your files to some random website to get your desired results.
We’ve explored the market, and picked up the best MOV-to-GIF converters.
There are more than enough GIF makers available on the Internet. However, we’ve found it difficult to find quality MP4-to-GIF converters. Some of the tools that commonly pop up in your search results are either unreliable or simply bad at what they do. In some cases, you will also have to deal with intrusive ads and pop-ups.
Stop scrolling through a sea of options, and start converting your video files into animated GIFs in just a few steps. You no longer need to upload your files to some random website to get your desired results.
We’ve picked up the best online as well as offline MP4-to-GIF converters of 2022 and explained how to use them in a more easy way.
Best 5 MOV to GIF Converter Software
It’s no secret that converting video to GIFs is a good idea: they’re small, easy to share, and fun to look at. That’s why we decided to take the time to compare and review some of the best-animated GIF makers out there, from free online tools to offline software for PCs, Macs, and other devices.
1. Wondershare Filmora
Wondershare Filmora Video Editor is a professional and easy-to-use video editing software. This converter provides you with a lot of really cool filters and effects that let you make your videos even better. It is able to export videos in many different formats, including GIFs.
It is one of the best MOV to GIF Converters for Mac & Windows. It has all the important features that you need to convert, edit and create animated GIFs from any video format quickly and easily. With its simple and easy-to-use interface, you can choose your desired video clip or effect, edit it in different ways and then output it as a GIF.
Pros
Easy-to-use Tool for all device users
Able to export videos in multiple formats
Create animated GIFs from any video format
Best for professional work
Cons
Super effects cannot be added
Some effects can disturb tool’s functioning
2. Adobe Premiere Pro
To make the best GIFs, you need to use a program that can be versatile and powerful all at once. Adobe Premiere Pro is one of the best video editing softwares for professionals and amateurs. It is a great choice for people who have basic knowledge of film creation and want to produce video content at a professional level.
The reasons for its popularity are quite clear. The program has a non-linear video editing interface, an unrivaled system of working tools, and a powerful feature set.
Pros
Goes professionally with Windows OS, macOS
Provides non-linear video editing
Supports Flash Video, HD, and HDV
Featured for all professional tasks
Cons
Freemium for only a month
3. Movavi Video Editor Plus
The best way to create video highlights is to use an editing program and extract the best moments from your footage. Movavi’s new Video Editor Plus has all the tools you need to create compelling videos quickly and easily, with a user interface that even novice editors can master right away.
This affordable program gives you all the power (and simplicity) you need to create a high-quality GIF that represents your video perfectly. All without costing too much or putting up too many barriers to using this software.
Pros
Movement tracking and picture-in-picture features
Chroma keying
Sharp movie-creation software
Has multiple different features more
Cons
Resistive on slow slides
Doesn’t support high-end transitions
4. VLC
VLC Player is a highly portable multimedia player for various audio and video formats, including MPEG-4, DivX, MP3, and Ogg/Vorbis.
It is a free and open-source cross-platform multimedia player and framework that plays most multimedia files as well as DVDs, Audio CDs, VCDs, and various streaming protocols.
It can also be used to convert MOV format to GIF in many different ways.
To start with: you can use the tool to create animated avatars for Facebook and other social networks or even make an animated GIF for mobile phone wallpaper.
Pros
Most popular media players today
support DivX streaming and MPEG
Can be controlled using keyboard shortcuts
Support all formats, including BluRay, .mov, and .avi
Cons
No feature for upgradations
Some found it a hard tool as a converter
5. Cyberlink PowerDirector
Whether they’re an amateur or a seasoned pro, editing videos is easier than ever before with CyberLink PowerDirector . It comes with a host of advanced editing tools, including multi-cam editing, 3D title creation, and special effects. Avid editors can also upload their work to cloud services right from the app!
It is ideal for practically anyone who wants to create movies. It even comes with easy-to-use video editing and productive media sharing tools, so anyone can turn their videos into polished movies using this tool.
Pros
Featuring over 100 top-notch audio and video editing attributes
Enables you to easily edit and export videos in 4K
Features 360-degree video editing qualification
Quick customer support 24 hours a day
Cons
Adding ads to the page causes frustration
Costly
Online MOV to GIF Converter
If you have ever wanted to convert your MOV files into gifs, here are a few online tools that will help you do it with ease. Upload your .mov file to the service and enjoy the convenience of watching your favorite movies in animated gif format.
1. CloudConvert
The CloudConvert allows you to convert online documents, images, presentations, and much more into other formats. To use its API you need a free account on our servers (which allow you to do around 100 conversions per month).
Conversion is done on their servers, which means that: - The users of your app never have to install any software. - The API is fast and scalable. - It works across all popular platforms: Windows, macOS, Linux, iPhone, Android…
Pros
200+ File Formats Sustained
Absolute Data Protection
Persuasive API Integration
Rapid Online File Converter
Cons
Conversion minutes determine prepaid package plans
2. EZGIF.COM
Create GIFs from your video clips with this free online MOV to GIF converter.Ezgif.com is a simple to use toolset designed primarily for creating and editing animated GIFs but also can perform conversions.
With Ezgif you can capture videos, adjust the frames to suit your needs, save them as an animated GIF with text or sound, share them via email, Facebook, and more!
So, convert MOV, M4V, MP4, and various other video formats to animated GIFs with this free tool.
Pros
Design is comprehensive for all level users
Engaging work/functioning
Can stand with lots of devices
Easy to use
Cons
The structure of the tool is linear
3. Convertio
Convertio is easy to use, fast and available without signing up. The website offers a list of file converters that can be added directly to your Chrome browser.
The process uses Optimal media conversion settings that ensure the best quality possible with every conversion. It has worldwide popularity with millions of visitors each month.
It also has a large database of links to various online video web pages, so you can quickly access the video file you need and convert it into GIF format as well as other image formats like JPG, PNG, and BMP.
Pros
Permits you to check up to ten pages for free
Uses Optical Character Recognition technology
Save transformed files to Google Drive or Dropbox
Professional overall
Cons
There are certain security and safety risks
How to Convert MOV to GIF Using Wondershare Filmora?
Step 1: Import the MOV file
To get started, simply drag and drop your MOV file onto the interface of Filmora. Alternatively, click on the “Import” button in the upper left corner to browse and load the MOV file from your hard drive or external storage device. A third option is to right-click on the video in the media library and choose “Import Media Files” from the drop-down menu. This will open up a new window where you can select your desired video file.
Now that you have successfully imported your MOV file into Filmora, let’s look at how to proceed with making a GIF out of it.
Step 2: Trim to shorten the video
Next, you will need to trim the video. This is optional, but important if you want to make a GIF from a video. A longer video means a bigger file size and an increased loading time for your final GIF, so try to keep it as short as possible!
To trim your video, add another start and endpoint by clicking on the scissors icon below. You can also put them in manually by typing in the time (in seconds) into the box provided.
Step 3: Export as GIF
Click on the Export button to open up the Export dialog box. From here, you can choose how you want your file exported from a number of options including GIF under the Formats tab. Under the Video tab, select the video quality settings that best suit your requirements. You can also set the frame rate and resolution for your GIF image file at this point. Once you are done, click on Save to specify a location for your file as well as a name for it.
Step 4: Save the GIF file
Click “Convert” to start the MOV to GIF conversion.
When it’s done, click “Open Folder”, and you’ll see the generated GIF file there, which could be shared with others via social platforms such as Twitter, YouTube, and Facebook directly or used for other purposes.
Conclusion
We have not gathered several MOV to GIF converters for you to buy, but we have gone ahead and selected some and explained how to use them in easy steps. You no longer need to upload your files to some random website to get your desired results.
We’ve explored the market, and picked up the best MOV-to-GIF converters.
Top Animated Title Makers
You know that your video needs a title, but rather than just type in some bland text to introduce the video, you can create an animated title page that is far more attractive. Animated titles make a video more attractive and when done correctly, they can even guarantee that your target audience will stick around long enough to watch the entire video. They can also be very useful for introducing the content of the video.
But to make an effective animated title, you need a tool that is designed to do just that. In this article, we look at some of the top animated title makers that you can use to create the perfect animated title for your video.
Part 1. Animated Title Maker Online
If you don’t want to install software on your computer to create the animated title, the following are the top online tools to choose from;
Animaker
Link: https://www.animaker.com/text-animation-maker
Rating: 4.5/5
Animaker is an online tool that is specifically designed to help you create text animations that you can then add to your video project. Available online on all browsers, Animaker has a simple user interface that makes it easy to create text animations in a matter of minutes. It is so easy to use that even the average beginner can create stunning text animations.
If you don’t want to create the animations from scratch, Animaker has numerous pre-designed templates for you to choose from that you can then just edit to fit your design. It also has a lot of customizable infographics that you can repurpose.

Animatron Studio
Link: https://www.animatron.com/studio
Rating: 4.5/5
The Animatron Studio is a one-stop solution for generating all types of animated texts. You can use it to create the perfect animated title for your video, but its numerous features also mean that it is one of the best ways to create attention-grabbing animated banner ads that can be posted on various ad sites,
It has a wealth of resources that you can use to create the title including more than 500,000 royalty-free images, videos, and audio to include in your project. If you don’t want to build the animated content from the ground up, you can select from the 200 pre-animated sets that Animatron Studio provides.
Kapwing Title Maker
Link: https://www.kapwing.com/animated-text-video-maker
Rating: 4.5/5
If your goal is to do more than just create an animated title for your video, Kapwing is a good solution. It is a complete online video editor that can also be used to create animated titles. As such, you can expect Kapwing to have more advanced features that allow you to customize the animated title in various ways.
For instance, it has a huge selection of animations that you can apply to the text. But you also get the option to upload your own animations, colors, and fonts. But please note that the free version of Kapwing will add a watermark to the video.

Biteable Animated Text Maker
Link: https://biteable.com/animated/text/
Rating: 4.5/5
Biteable is one of the most popular solutions that you can use to create all kinds of animated texts. It is simple enough to use that it is useful to both professionals and amateur video creators. It has numerous useful features including custom scenes, foundations, backgrounds, and characters all of which can work together to create the perfect animated title.
One of the main benefits of choosing Biteable is that you can share the videos you edit directly on social media without having to download the video.

Flexclip Video Maker
Link: https://www.flexclip.com/editor/
Rating: 4.5/5
Flexclip is another very easy-to-use and easily accessible solution to create animated texts for videos. Rather than create the texts from scratch, Flexclip allows you to create stunning animated texts just by selecting several parameters.
There are also a lot of pre-made designer text templates that are fully customizable. All you have to do is select one of the templates, and change the text, font, and any images to make it unique to you and your video.

Part 2. Animated Title Maker for Computer
Online tools can be useful, especially since they are more easily accessible. But if you want additional features and more ways to customize your animated title, the following desktop solutions may be more applicable to you;
Filmora
Rating: 4.5/5
Wondershare Filmora is a complete suite of video editing tools that can also come in handy when creating animated titles for videos. It is a very simple video editor with a simple user interface, making it an ideal solution even for beginner users. Adding a title to your video is easy and you get to choose from more than 200 different animations that you can apply to bring the text to life.
Filmora is also very useful because it comes with advanced editing features for the professional editor. You can use it to edit all aspects of the video including the clips and even any audio that may be on the project.

Adobe Animate
Rating: 4.5/5
Adobe Animate is a great option to create various animations for your video project, including animated texts. Used by animators to create 2D animated content, Adobe Animate has a lot of features designed to facilitate this kind of animation and is, therefore, one of the go-to solutions for designers looking to create illustrations like logos and infographics.
But like other Adobe programs, Adobe Animate is not very easy to use and the beginner may find that it takes quite a long time to figure out how it works. But once you figure it out, the 800+ web fonts can make it very easy for you to customize your animated title in various ways.

Express Animate
Rating: 4.5/5
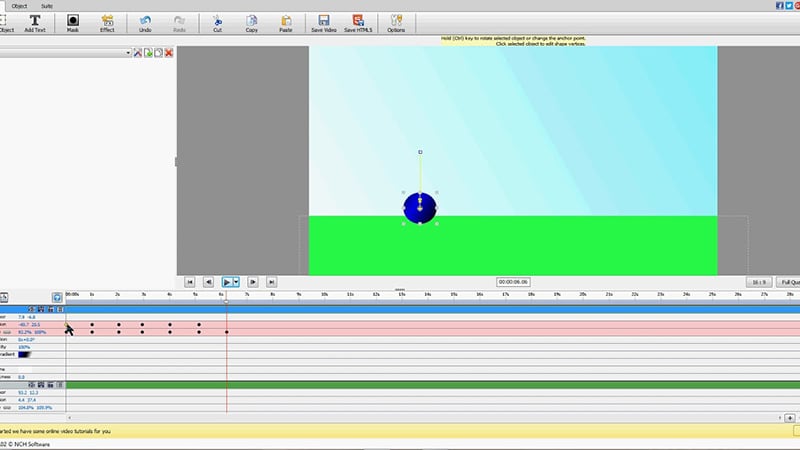
Express Animate is a completely free program that you can download on your computer. It is a complete video editor which means that you can use it to animate text and characters, but it is also a great way to edit other aspects of the video including the audio tracks and adding digital effects.
With a simple user interface, Express Animate allows users to create 2D animations that can be used to create unique videos. It is also a good way to create GIFs and memes.
Movavi Video Editor
Rating: 4.5/5
Movavi Video Editor is another complete suite of editing tools that can also come in handy when you want to create an animated title for your video. Designed for both professionals and beginners, this video has all the advanced features you will need to edit all aspects of your video, including a built-in audio editor.
When it comes to animation, Movavi has a lot of effects and transitions as well as pre-made title templates to choose from. Once you have selected the title, you can easily customize the font and color to fit into your project.

Windows Movie Maker
Rating: 4.5/5
For PC users Windows Movie Maker is a simple to use and free way to edit videos. Included with the Windows OS, you likely don’t need to install any software to use and even though it is a free solution, Windows Movie Maker does have the necessary features to create and add animated titles to any video.
It comes with numerous effects, transitions, and templates to choose from when animating text. And it can also be used to edit videos in other ways including trimming and merging clips.

Part 3. Animated Title Maker Apps
If you are editing your videos on your mobile device, the following are the top animated title-making apps to choose from;
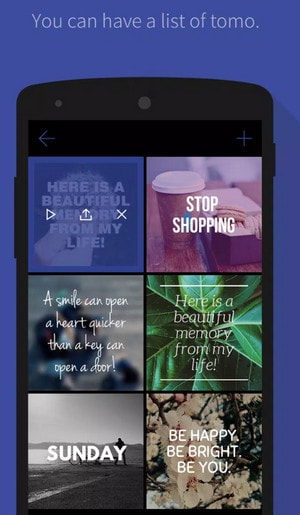
Tomo
Rating: 4.5/5
Link: https://m.apkpure.com/tomo-animate-text-in-video/com.entzeners.app.tomo
Tomo is one of the best apps that you can use to animate text in a video. It has robust features that allow you to easily add text to the video and then animate the text using various transitions and effects. Once the edits are complete, Tomo allows you to share the completed video directly on social media apps like Instagram and Twitter.
Adobe Spark
Rating: 4.5/5
Link:https://apps.apple.com/us/app/adobe-spark-post-design-maker/id1051937863
Available for both Android and iOS devices, Adobe Spark is a video editing tool that has numerous tools to add and edit texts on videos. You can use the professionally designed templates that you have access to when using Adobe Spark to create stunning animation titles. And since it easily integrates with other apps on the device, sharing the videos is very easy.
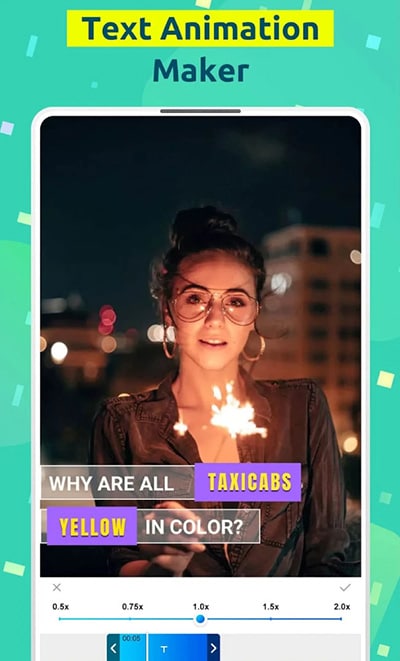
Quik
Rating: 4.5/5
Link: https://play.google.com/store/apps/details?id=com.gopro.smarty&hl=en&gl=US
Quik is an app that is dedicated to text animations and therefore one of the best solutions when you want to add and edit texts on videos. It is available for both iOS and Android and although the free version of the app is slightly limited, its basic editing features are still better than what you find on other more expensive solutions.
Hyper-type Animated Text Videos
Rating: 4.5/5
Link: https://itunes.apple.com/us/app/hype-type-animated-text-videos
This app gives you two options when it comes to animating the text on your video; auto-motion and typography. It focuses on just adding and editing text on a video and as such may not have any of the other video editing features you will find on some of the other apps. But if your goal is to create an interactive animated video title, Hyper-type Animated Text Videos is a great solution.
Vimeo
Rating: 4.5/5
Link: https://play.google.com/store/apps/details?id=com.vimeo.android.videoapp&hl=en&gl=US
Also available for both iOS and Android devices, Vimeo can also be a handy solution for the creation and editing of animated titles for videos. It has a lot of features to edit not just the text in videos, but also all other elements including audio. You even get a wide selection of royalty-free music that you can add to the video and motion stickers to make your title stand out even more. But the free version of Vimeo will add a watermark to the video.

Free Download For Win 7 or later(64-bit)
Free Download For macOS 10.14 or later
The Most Complete Guide to Make Fortnite Montage
If you’re skilled at playing Fortnite, you’ll probably want to share your gameplay clips as montages with other players. The popularity of Fortnite montage videos is rapidly growing because millions of people play the game. Tons of people also like watching their peers play this online video game in the form of gaming montages. We’ll explain how to make a montage Fortnite that will get views when you upload it on social media platforms.
What Is Fortnite?
Fortnite is a popular online game developed by the American game studio Epic Games. The video game was released in 2017, and it’s available in three-game mode versions with the same game engine and gameplay. These are:
- Fortnite: Save the World: Set on contemporary Earth, Save the World is a co-op hybrid third-person shooter (TPS), tower defense (TD), and survival game. The game allows a maximum of four players to fight off creatures that look like zombies and defend objects with traps or fortifications they have built.
- Fortnite Battle Royale: This is a free-to-play (F2P) battle royale video game that allows up to one hundred players to fight against each other until only one person remains.
- Fortnite Creative: Released in 2018, Fortnite Creative allows players to create battle arenas and worlds. They can then share these predetermined structures with up to 16 other players for a range of multiplayer game modes that have customizable rules.
Since its release, Fortnite has become a worldwide phenomenon, with more than 350 million people playing the game across the globe. In the first year of Fortnite’s release, players downloaded its mobile version 78 million times.
The game became such a global hit because it’s free to play. It’s also available on most gaming platforms and features an engaging theme. Additionally, because Battle Royale allows up to 100 gamers to fight it out until they find the last man standing, this means the replayability of this online video game is infinite. What’s more? Each game is unique.
Fortnite has also become popular because users can purchase DLC (downloadable content) to enhance their gaming experience.
Things to Prepare before making a Fortnite Montage video
You have to prepare several things if you want to make an epic Fortnite montage video that will keep your audience watching. These include:
1. Fortnite Gaming Clips
Epic Games developed a system that allows you to save your best gameplay performances. You can then export the Fortnite replays that you have saved.
To save the beautiful moments of the game, you have to know where to find the Replays videos; this is how to find them:
- Head over to Career and select the Replays option. You’ll see all the replay clips, including their date, finish, and length.

Get Fortnite Video Clip
- Select the clips and watch them so that you can choose the ones you want to use in your Fortnite montage video.
Now that you know where the Replay videos are, you have to save them on your computer. You can only save the Replay videos on your PC using a screen capture tool that allows you to record the videos.
ApowerREC is one of the most popular tools that people use to record and download Fortnite’s Replays videos. This screen capture tool allows you to create high-quality Fortnite videos with a one-press shortcut.
To start using this software, follow the steps below:
- Launch the software and set some preferences by heading to Settings.

Record Fortnite video clip
- Set the video and audio quality, hotkeys, and more.

ApowerRec Setting
- To record the screen and sound, enable this option.

Enable option to record
- If you’ll be using a microphone, click on the speaker symbol and enable audio boost and noise cancellation.

Audio Setting
- Set the recording mode that you want. You can use Regional mode or Game mode.
- Open your Fortnite game and got to the Replay videos.
- Play the Replay video you want.
- Click on Regional and set the recording frame along the area you want to record.
- Hit the Recording button to initiate the recording process.

Start Recording
- You can add annotations as you prefer while the tool is recording the Replay video.
- Use the zoom function if you want to look closely at something.
- When you’re done, hit the stop button. The recorded file will pop up in the program’s recording list.
- Repeat the process for the rest of the video clips you want to use in your montage Fortnite.

Complete Recording
2. Pick the Right Background Music
To make your Fortnite montage video engaging, you’ll need to choose background music that fits your montage videos. Music is one of the key elements in creating an exhilarating viewing experience for your audience.
Make sure you pick royalty-free music that fits the genre of your Fortnite montage video. Choose a song that expresses the themes and personality of the game.
You cannot use your favorite song from the radio, as your copyright law prohibits people from using the work of others without permission or paying a royalty.
If you are caught using copyrighted music, you might have to pay the music owner monetary damages. You can also go to jail because of copyright infringement.
There are loads of platforms that offer non-copyrighted music that you can use in your montage Fortnite. These include YouTube, Twitch, and Pixabay.
3. Choose the Correct Video Editing Software
Now that you have downloaded all the Fortnite video clips and saved them on your computer, you need to choose the correct video editing software. Here are three of the most reliable programs that you can use to make a montage Fortnite video.
Filmora
Filmora is a video editing software compatible with Windows and macOS devices. Filmora’s Template Mode allows you to create impressive Fortnite montage videos that will get more views on social media platforms.
You’ll find ready-made, stylish video templates that you can use to create epic gaming montage videos. It’s easy to use this tool, and you do not need any experience to create visually striking montage videos.
Wondershare Filmora11 Express Better
Achieve More
Grow Together
Free Download Free Download Learn More

![]()
Premiere Pro CC
Designed for the most demanding users, Premiere Pro CC is a comprehensive video editing program developed by Adobe Inc. The software includes audio editing functionality.
This Fortnite montage editor is a subscription-based version of Adobe Premiere Pro, and the CC represents “Creative Cloud.”
You can use Premiere Pro CC effects to add spice to your montage video. These include spark effects, glitch transitions, and light leak overlay.
VideoProc Vlogger
Developed by Digiarty, VideoProc Vlogger is a multitrack video editing software for Mac and Windows users. The program supports speed ramping effects. You can also use the audio analyzer if you want to mark out the beat and edit the highlight to match the energy of the music. You can also add audio and visual effects, text effects, glitch effects, and light glaring and flashy effects.
How to Make a Fortnite Montage with Filmora
It’s easy to make a Fortnite montage with Filmora. The software was designed to be user-friendly and save you time while creating montages. This Fortnite montage editor has tons of tools that make it the go-to software for players who want to share stunning gaming montages with other gamers on social media platforms.
Follow these steps to learn how to make a Fortnite montage video with Filmora:
Step1Import Media File
Choose the New Project option. Import your video clips to Filmora’s media library. You can do this by heading to File>Import Media> Import Media Files. You can then locate the video files on your computer and import them to the media library by selecting them and hitting the Open button.

Import Media
Step2Add Effects to Your Footage
Select your videos and drag them from the media library then drop them on your timeline. Now, right-click on the video in the timeline to make some edits to your video. Essentially, you can trim, split, crop, and zoom your video. You can also add velocity effects.
Navigate to the Stock Media tab, where you can choose royalty-free music and use it as your background music.
Go to the Effects tab, and select the Overlay option, where you can choose the overlay you want to add to your video. Filmora has tons of overlays that you can use to add emotions and set the tone in your Fortnite montage videos.

Add Effects
Step3Add Filters
Under the Effects tab, go to Filters to add filters to your montage video. The program has many filters that you can choose from, such as glitch, shake, and mosaic. Use these two effects to add transitions to your video clip.

Add Filters
Closing Thoughts:
To make a Fortnite montage video, you need to know how to save and download the clips you will use, get the right background music, and find a reliable montage editor. Use Filmora to edit Fortnite Tik Tok montage videos. The software has some cool effects that will make your gaming montage stand out and get more views.
Free Download Free Download Learn More
![]()
Premiere Pro CC
Designed for the most demanding users, Premiere Pro CC is a comprehensive video editing program developed by Adobe Inc. The software includes audio editing functionality.
This Fortnite montage editor is a subscription-based version of Adobe Premiere Pro, and the CC represents “Creative Cloud.”
You can use Premiere Pro CC effects to add spice to your montage video. These include spark effects, glitch transitions, and light leak overlay.
VideoProc Vlogger
Developed by Digiarty, VideoProc Vlogger is a multitrack video editing software for Mac and Windows users. The program supports speed ramping effects. You can also use the audio analyzer if you want to mark out the beat and edit the highlight to match the energy of the music. You can also add audio and visual effects, text effects, glitch effects, and light glaring and flashy effects.
How to Make a Fortnite Montage with Filmora
It’s easy to make a Fortnite montage with Filmora. The software was designed to be user-friendly and save you time while creating montages. This Fortnite montage editor has tons of tools that make it the go-to software for players who want to share stunning gaming montages with other gamers on social media platforms.
Follow these steps to learn how to make a Fortnite montage video with Filmora:
Step1Import Media File
Choose the New Project option. Import your video clips to Filmora’s media library. You can do this by heading to File>Import Media> Import Media Files. You can then locate the video files on your computer and import them to the media library by selecting them and hitting the Open button.
Import Media
Step2Add Effects to Your Footage
Select your videos and drag them from the media library then drop them on your timeline. Now, right-click on the video in the timeline to make some edits to your video. Essentially, you can trim, split, crop, and zoom your video. You can also add velocity effects.
Navigate to the Stock Media tab, where you can choose royalty-free music and use it as your background music.
Go to the Effects tab, and select the Overlay option, where you can choose the overlay you want to add to your video. Filmora has tons of overlays that you can use to add emotions and set the tone in your Fortnite montage videos.
Add Effects
Step3Add Filters
Under the Effects tab, go to Filters to add filters to your montage video. The program has many filters that you can choose from, such as glitch, shake, and mosaic. Use these two effects to add transitions to your video clip.
Add Filters
Closing Thoughts:
To make a Fortnite montage video, you need to know how to save and download the clips you will use, get the right background music, and find a reliable montage editor. Use Filmora to edit Fortnite Tik Tok montage videos. The software has some cool effects that will make your gaming montage stand out and get more views.
How To Edit Youtube Videos In Easy Steps
How to Edit YouTube Videos in Simple Steps
An easy yet powerful editor
Numerous effects to choose from
Detailed tutorials provided by the official channel
In this article
01 [How to Edit Your YouTube Videos for Beginners?](#Part 1)
02 [How to edit YouTube videos on phone?](#Part 2)
03 [What do Professional YouTubers Use to Edit Videos?](#Part 3)
04 [YouTube Video Editing Q&A](#Part 4)
Part 1 How to Edit Your YouTube Videos for Beginners?
There are a lot of tools for beginners from which they can edit their videos on a budget. Here some of them:
01YouTube Creator Studio
Price: Free
Great For: Quick and basic video edits
YouTube has its own web based video editor which is free of cost. YouTube creator studio is a basic editing tool which allows you to trim the clips from any part of the video. You can also blur the objects and faces if you want. There are several other features that will help you to make your video attractive and engaging.
If you have uploaded a video on YouTube then also, YouTube creator studio allows you to edit the video without losing your video ID and video URL. You can also “Add an End Screen” to your video to give your viewers an option to subscribe your channel.
Pros:
● Create (ability to edit and post your content)
● Activity Insight (you can check your performance metrics)
● Monetization Management
Cons:
There are no cons as such.

02Videorama
Price: Free
Great For: making movies from videos and photos.
If you shoot a video on an iPhone or iPad then Videorama is the best tool to edit your video. You can choose video clips and photos from your gallery and put them together. In this, you can create overlays, add music, filters, add text and can also record a voice – over. Click on the “OK, Share” after you are done with editing, choose the preferred resolution and frame rate. Now your video is ready to post on your YouTube channel.
Pros:
● Easy to use
● Great range of SFX and VFX
● Text Effects and Filters are good
Cons:
● Lack some basic editing features
● IAP’s can get expensive
● More diverse effects would be nice.

● Shotcut
Price: Free
Good For: Used for editing videos and audios for free
Shotcut is a multimedia editing tool and if you are a beginner in video or audio editing this tool is quite the deal for you. You can create or edit the videos by using its various features and can make an engaging or captivating video. It has some tutorials to help you out. For YouTube, it is the best tool to edit your videos.
There are a lot effects and some of that which are used commonly are color grading, color tint etc. When we talk about audio editing features, Shotcut is mostly used to enhance your video with adding music to it.
For editing video you can select from multiple presents or you can set the frame rate and resolution which you want by setting it on ‘Custom’.
Pros:
● Free to use
● Comes with tutorials
● It has a simple interface.
Cons:
● Doesn’t support animation
● Do not have optional plugins.
● Lacks features like multicam editing and motion tracking.

03Movavi Video Editor
Price: $ 59.95
Great For: Quick and fast video editor
Movavi is a video editor tool to edit your video and share it with everyone. You can edit your videos and make them look more alluring to people by using its Key frame animations, special effects and readymade intros.
You can also change the background in your video clips easily by applying Chroma key. It has an easy and refined interface so that you can use it easily and there is nothing to learn in it before using. You can edit your videos and download it for free. There is no need of internet connection when using it. So, it is the best to use it while on the go.
Pros:
● Easy interface
● Amazing feature and special effects
● Fast and quick editor
Cons:
● Free trial isn’t good as it has limited features
● Few templates for text templates and transitions
● You have limited control over color tuning.

04Apple iMovie
Price: Free for Mac users / $14.99 in the Apple Play Store
Great For: Making photos and videos in a beautiful production.
Apple iMovie is a video editor is for those who want to do editing on a professional level. It is for Mac users. It is easy to use and it gives you high quality of video editing with its special effects, high fidelity filters, green screen effects, etc . It allows you to add various clips and shots and arrange them in order, add text, music, effects and your engaging video is ready.
Before starting to edit your video for YouTube or for other sites, always select the standard aspect ratio that is (4:3). If you will choose any theme for your video, iMovie will add transitions effects and add title on its own.
Pros:
● User friendly interface
● It is quick and fast
● Easy sharing
Cons:
● Limited editing features
● Quite expensive
● It requires high level of HDD space

05Videoshop – video editor
Price: Free
Great For: Easy and fast video editor
Videoshop is a third party video editing app from which you can edit your videos on your android or iPhone. Videoshop has amazing features like you can trim, cut, adjust the lightning, rotate your video, add transitions, etc. You can add music and text to make your video more engaging.
There are a lot of filters and features that you can apply to your video to make it look more captivating. Once you have completed editing the video, click on the ‘Share’ icon. It makes your video ready to upload on YouTube or other sites.
Pros:
● Combine clips from various videos
● Fast and easy way to edit videos
● Add special effects, filters and sound
Cons:
● Free for limited time
● Requires subscription to access app’s features like watermark free
● Not fit for editing batch videos
06HitFilm Express
Price: Free
Great For: Gives you professional-grade video editing
HitFilm Express is a free video editing tool which is packed with amazing features to edit your videos for any platform including YouTube. It has a lot of filters and 400+ visual effects that help to give your video a professional touch. You can add voice over to your videos as well by just clicking on a button.
You can create commercials, movies, audio songs while using this as it allows you to add music, text and image etc. you can make quality videos by using HitFilm and share it with the world.
Pros:
● Clean user interface
● Easy to use
● Perfect for YouTube creators
Cons:
● Sometimes crashes and freezes
● Welcome screen is cluttered
● Steep learning curve

Part 2 How to edit YouTube videos on phone?
Editing can enhance the look of your video and making an engaging video can attract the audience to give it a watch. There are various tools to edit your YouTube video. Some of them are listed below:
01YouTube Creator Studio
This is one of the best options to edit a new video or a video that is already uploaded. This built-in editor can easily be accessed on the phone to carry out the necessary editing. You can follow the below discussed guide for the same.
Step 1: Sign in to the YouTube’s studio (channel dashboard).
Step 2: Click on the content option given at the left sidebar.
Step 3: Click on the thumbnail of the video you want to edit from uploads.

Step 4: Click on theEditor given at the left sidebar.
Step 5: You can trim the beginning or the end part of the video. You can trim the video from the Trim option which is right above the timeline.

Step 6: Add end screen to your video
Click on the end screen icon which is given at the middle of the timeline. If you want your viewers to know that you have more related videos or you want to make them subscribe your channel then you can add an end screen to your video.

02iMovie
Editing videos on iphone was never so easy. Using the iMovie app, one can easily edit the YouTube videos for free. The app can easily be downloaded from the app store. Here is a step by step guide that you can follow to edit the video.
Step 1: Import media
Open the app to My Movie section present on main screen. Now, add the video for editing by clicking on ‘Import media’. Now, you need to drag it to the bottom timeline.

Step 2: Trim or split the video
Now, you can trim or split the clip as per your requirement. You can do this by clicking on the spot in video that you want to split or trim. For this, click on modify and then select Split Clip, Trim to Clip Edge or Trim to Playhead.

Step 3: Add music and effects
You can check out the sound and music effects, background, transitions and themed titles at the top toolbar and implement them in the video. Using the icons present just above the clip, you can make color corrections, stabilize the clip, change volume, eliminate background noise, apply speed changes, etc.

Step 4: Share the video
After the editing is complete, click on the Share icon present at the top right corner. Now, click on YouTube & facebook. Now, save the video to your Mac device. When the file is saved, go to YouTube Studio And upload your video.

03Windows Photo app
To use this app, you need to have windows 10 on your system. The Windows Photo app is an effective tool to edit the videos. The editing process is very simple and can be done in a few minutes. Here is a simple guide to help you.
Step 1: Open the app
Launch the app and click on the Video Editor option. To start the editing process, click on new video project. Now, name your project to start the process.

Step 2: Import the video
Click on ‘Add’ and then ‘From this pc’ to add the video. You can then drag the clip to open it in storyboard. There are several options at the storyboard using which you can add text to the title etc. to do this, select Add title card option. You can add text, select style and duration. Finally click on Done.

Step 3: Edit the video
You can find the trim, split and other editing options at the top. Using these options, you can make the desirable changes to the video. After completing the editing work, you can click on Finish video option. Now, choose the video quality (540p, 720p, 1080p) and select Export option to save the video on your computer.

Part 3 What do Professional You Tubers Use to Edit Videos?
Professional YouTubers use the best software for editing their videos and make them engaging and of high quality. One such software that you can also give a try is Wondershare Filmora Video Editor . The easy to use and interactive interface makes this software a top notch choice of the editors. In Filmora, you can edit your videos and audios, record the PC screen, add a voiceover to your video and also add colors in an easy way. The templates are customizable and you can edit them according to you. It has a lot of animated elements, transitions, title designs etc.
For Win 7 or later (64-bit)
For macOS 10.12 or later
Why to choose Filmora for editing YouTube videos:
● Can record the PC screen
● It has Pan and Zoom movements
● Can edit your audios with audio mixers
● Have amazing Filters, Text effects and Overlays.
● Color tuning
● Upload your videos directly to YouTube, Face book or Vimeo.
● Can adjust the speed
● Video stabilization
Part 4 YouTube Video Editing Q&A
What are the tools used for editing YouTube videos?
A. There are various tools available for editing the YouTube’s video. Some of them are listed here:
● YouTube creator studio
● Apple iMovie
● Videorama
● Shotcut
● Movavi video editor
How can you edit a YouTube video on your smart phone?
A. You can easily edit a YouTube video on your smart phone. Here are the steps to follow:
● Step 1: Log in to you YouTube account and click on the three dots at top right corner.
● Step 2: Tap on the three vertical dots at the side of your video which you want to edit.
● Step 3: Edit the video as you wish. You can change its description, add effects etc.
● Step 4: Click on the save button after you are done editing.
How can you add music to your video?
A. Adding music to video is very simple and can be done using Movavi Video Editor. Here is a small guide that you can follow.
● Download the Movavi Video Editor.
● Select the audio and video in Movavi Video Editor.
● Adjust the length and volume of the audio according to your video.
● Save the file.
How can you add Transitions on a video editor?
A. You can add transition to your video in two ways. You can add transitions to one or two different video clips or the other is adding transition to one media file.
What are the steps for editing a video?
A. A simple but highly effective way to edit a video is make a plan, film the video, add the media, arrange the media, edit the video, trim the video, add transitions, add title, add effects, and merge the Audio. Now, give a final touch to your video and the project is ready.
● Ending Thoughts →
● Editing videos on a budget is now easy as there are several software like Movavi Video Editor, Videorama, Apple iMovie, Shotcut tools that help you do it with ease.
● You can also edit your YouTube videos on your smart phones as it is quite simple and also you can use these tools to edit the video professionally.
● Filmora is the best tool from which you can edit your YouTube videos and can upload them directly on YouTube.
In this article
01 [How to Edit Your YouTube Videos for Beginners?](#Part 1)
02 [How to edit YouTube videos on phone?](#Part 2)
03 [What do Professional YouTubers Use to Edit Videos?](#Part 3)
04 [YouTube Video Editing Q&A](#Part 4)
Part 1 How to Edit Your YouTube Videos for Beginners?
There are a lot of tools for beginners from which they can edit their videos on a budget. Here some of them:
01YouTube Creator Studio
Price: Free
Great For: Quick and basic video edits
YouTube has its own web based video editor which is free of cost. YouTube creator studio is a basic editing tool which allows you to trim the clips from any part of the video. You can also blur the objects and faces if you want. There are several other features that will help you to make your video attractive and engaging.
If you have uploaded a video on YouTube then also, YouTube creator studio allows you to edit the video without losing your video ID and video URL. You can also “Add an End Screen” to your video to give your viewers an option to subscribe your channel.
Pros:
● Create (ability to edit and post your content)
● Activity Insight (you can check your performance metrics)
● Monetization Management
Cons:
There are no cons as such.
02Videorama
Price: Free
Great For: making movies from videos and photos.
If you shoot a video on an iPhone or iPad then Videorama is the best tool to edit your video. You can choose video clips and photos from your gallery and put them together. In this, you can create overlays, add music, filters, add text and can also record a voice – over. Click on the “OK, Share” after you are done with editing, choose the preferred resolution and frame rate. Now your video is ready to post on your YouTube channel.
Pros:
● Easy to use
● Great range of SFX and VFX
● Text Effects and Filters are good
Cons:
● Lack some basic editing features
● IAP’s can get expensive
● More diverse effects would be nice.
● Shotcut
Price: Free
Good For: Used for editing videos and audios for free
Shotcut is a multimedia editing tool and if you are a beginner in video or audio editing this tool is quite the deal for you. You can create or edit the videos by using its various features and can make an engaging or captivating video. It has some tutorials to help you out. For YouTube, it is the best tool to edit your videos.
There are a lot effects and some of that which are used commonly are color grading, color tint etc. When we talk about audio editing features, Shotcut is mostly used to enhance your video with adding music to it.
For editing video you can select from multiple presents or you can set the frame rate and resolution which you want by setting it on ‘Custom’.
Pros:
● Free to use
● Comes with tutorials
● It has a simple interface.
Cons:
● Doesn’t support animation
● Do not have optional plugins.
● Lacks features like multicam editing and motion tracking.
03Movavi Video Editor
Price: $ 59.95
Great For: Quick and fast video editor
Movavi is a video editor tool to edit your video and share it with everyone. You can edit your videos and make them look more alluring to people by using its Key frame animations, special effects and readymade intros.
You can also change the background in your video clips easily by applying Chroma key. It has an easy and refined interface so that you can use it easily and there is nothing to learn in it before using. You can edit your videos and download it for free. There is no need of internet connection when using it. So, it is the best to use it while on the go.
Pros:
● Easy interface
● Amazing feature and special effects
● Fast and quick editor
Cons:
● Free trial isn’t good as it has limited features
● Few templates for text templates and transitions
● You have limited control over color tuning.
04Apple iMovie
Price: Free for Mac users / $14.99 in the Apple Play Store
Great For: Making photos and videos in a beautiful production.
Apple iMovie is a video editor is for those who want to do editing on a professional level. It is for Mac users. It is easy to use and it gives you high quality of video editing with its special effects, high fidelity filters, green screen effects, etc . It allows you to add various clips and shots and arrange them in order, add text, music, effects and your engaging video is ready.
Before starting to edit your video for YouTube or for other sites, always select the standard aspect ratio that is (4:3). If you will choose any theme for your video, iMovie will add transitions effects and add title on its own.
Pros:
● User friendly interface
● It is quick and fast
● Easy sharing
Cons:
● Limited editing features
● Quite expensive
● It requires high level of HDD space
05Videoshop – video editor
Price: Free
Great For: Easy and fast video editor
Videoshop is a third party video editing app from which you can edit your videos on your android or iPhone. Videoshop has amazing features like you can trim, cut, adjust the lightning, rotate your video, add transitions, etc. You can add music and text to make your video more engaging.
There are a lot of filters and features that you can apply to your video to make it look more captivating. Once you have completed editing the video, click on the ‘Share’ icon. It makes your video ready to upload on YouTube or other sites.
Pros:
● Combine clips from various videos
● Fast and easy way to edit videos
● Add special effects, filters and sound
Cons:
● Free for limited time
● Requires subscription to access app’s features like watermark free
● Not fit for editing batch videos
06HitFilm Express
Price: Free
Great For: Gives you professional-grade video editing
HitFilm Express is a free video editing tool which is packed with amazing features to edit your videos for any platform including YouTube. It has a lot of filters and 400+ visual effects that help to give your video a professional touch. You can add voice over to your videos as well by just clicking on a button.
You can create commercials, movies, audio songs while using this as it allows you to add music, text and image etc. you can make quality videos by using HitFilm and share it with the world.
Pros:
● Clean user interface
● Easy to use
● Perfect for YouTube creators
Cons:
● Sometimes crashes and freezes
● Welcome screen is cluttered
● Steep learning curve
Part 2 How to edit YouTube videos on phone?
Editing can enhance the look of your video and making an engaging video can attract the audience to give it a watch. There are various tools to edit your YouTube video. Some of them are listed below:
01YouTube Creator Studio
This is one of the best options to edit a new video or a video that is already uploaded. This built-in editor can easily be accessed on the phone to carry out the necessary editing. You can follow the below discussed guide for the same.
Step 1: Sign in to the YouTube’s studio (channel dashboard).
Step 2: Click on the content option given at the left sidebar.
Step 3: Click on the thumbnail of the video you want to edit from uploads.
Step 4: Click on theEditor given at the left sidebar.
Step 5: You can trim the beginning or the end part of the video. You can trim the video from the Trim option which is right above the timeline.
Step 6: Add end screen to your video
Click on the end screen icon which is given at the middle of the timeline. If you want your viewers to know that you have more related videos or you want to make them subscribe your channel then you can add an end screen to your video.
02iMovie
Editing videos on iphone was never so easy. Using the iMovie app, one can easily edit the YouTube videos for free. The app can easily be downloaded from the app store. Here is a step by step guide that you can follow to edit the video.
Step 1: Import media
Open the app to My Movie section present on main screen. Now, add the video for editing by clicking on ‘Import media’. Now, you need to drag it to the bottom timeline.
Step 2: Trim or split the video
Now, you can trim or split the clip as per your requirement. You can do this by clicking on the spot in video that you want to split or trim. For this, click on modify and then select Split Clip, Trim to Clip Edge or Trim to Playhead.
Step 3: Add music and effects
You can check out the sound and music effects, background, transitions and themed titles at the top toolbar and implement them in the video. Using the icons present just above the clip, you can make color corrections, stabilize the clip, change volume, eliminate background noise, apply speed changes, etc.
Step 4: Share the video
After the editing is complete, click on the Share icon present at the top right corner. Now, click on YouTube & facebook. Now, save the video to your Mac device. When the file is saved, go to YouTube Studio And upload your video.
03Windows Photo app
To use this app, you need to have windows 10 on your system. The Windows Photo app is an effective tool to edit the videos. The editing process is very simple and can be done in a few minutes. Here is a simple guide to help you.
Step 1: Open the app
Launch the app and click on the Video Editor option. To start the editing process, click on new video project. Now, name your project to start the process.
Step 2: Import the video
Click on ‘Add’ and then ‘From this pc’ to add the video. You can then drag the clip to open it in storyboard. There are several options at the storyboard using which you can add text to the title etc. to do this, select Add title card option. You can add text, select style and duration. Finally click on Done.
Step 3: Edit the video
You can find the trim, split and other editing options at the top. Using these options, you can make the desirable changes to the video. After completing the editing work, you can click on Finish video option. Now, choose the video quality (540p, 720p, 1080p) and select Export option to save the video on your computer.
Part 3 What do Professional You Tubers Use to Edit Videos?
Professional YouTubers use the best software for editing their videos and make them engaging and of high quality. One such software that you can also give a try is Wondershare Filmora Video Editor . The easy to use and interactive interface makes this software a top notch choice of the editors. In Filmora, you can edit your videos and audios, record the PC screen, add a voiceover to your video and also add colors in an easy way. The templates are customizable and you can edit them according to you. It has a lot of animated elements, transitions, title designs etc.
For Win 7 or later (64-bit)
For macOS 10.12 or later
Why to choose Filmora for editing YouTube videos:
● Can record the PC screen
● It has Pan and Zoom movements
● Can edit your audios with audio mixers
● Have amazing Filters, Text effects and Overlays.
● Color tuning
● Upload your videos directly to YouTube, Face book or Vimeo.
● Can adjust the speed
● Video stabilization
Part 4 YouTube Video Editing Q&A
What are the tools used for editing YouTube videos?
A. There are various tools available for editing the YouTube’s video. Some of them are listed here:
● YouTube creator studio
● Apple iMovie
● Videorama
● Shotcut
● Movavi video editor
How can you edit a YouTube video on your smart phone?
A. You can easily edit a YouTube video on your smart phone. Here are the steps to follow:
● Step 1: Log in to you YouTube account and click on the three dots at top right corner.
● Step 2: Tap on the three vertical dots at the side of your video which you want to edit.
● Step 3: Edit the video as you wish. You can change its description, add effects etc.
● Step 4: Click on the save button after you are done editing.
How can you add music to your video?
A. Adding music to video is very simple and can be done using Movavi Video Editor. Here is a small guide that you can follow.
● Download the Movavi Video Editor.
● Select the audio and video in Movavi Video Editor.
● Adjust the length and volume of the audio according to your video.
● Save the file.
How can you add Transitions on a video editor?
A. You can add transition to your video in two ways. You can add transitions to one or two different video clips or the other is adding transition to one media file.
What are the steps for editing a video?
A. A simple but highly effective way to edit a video is make a plan, film the video, add the media, arrange the media, edit the video, trim the video, add transitions, add title, add effects, and merge the Audio. Now, give a final touch to your video and the project is ready.
● Ending Thoughts →
● Editing videos on a budget is now easy as there are several software like Movavi Video Editor, Videorama, Apple iMovie, Shotcut tools that help you do it with ease.
● You can also edit your YouTube videos on your smart phones as it is quite simple and also you can use these tools to edit the video professionally.
● Filmora is the best tool from which you can edit your YouTube videos and can upload them directly on YouTube.
Also read:
- Updated How to Create the Stranger Things Upside Down Effect for 2024
- How to Make a Smooth Speed Ramping in Premiere Pro?
- Change Video Speed with FFmpeg
- New In 2024, How to Loop Video in Canva
- New LumaFusion Offers Various Look Up Table Presets, or LUTs, Such as FiLMiC deLog and FiLMiC DeFlat, and Several Stylistic LUTs for Use with Neutral Use Video. You Can Also Manually Add the LUTs
- Updated 2024 Approved How To Make a Video by Mouse in Filmora?
- New Easy Ways to Remove Motion Blur In Photoshop
- New Recommended Video Background Changers
- New 8 Top Premiere Pro Slideshow Templates
- New How to Be a Good Podcast Host (2024 Updated)
- 2024 Approved End Screen Makers
- Updated In 2024, Add Motion Blur in After Effects
- Learn How to Do Velocity Edits on PC to Enhance Your Videos, Adjusting Speed for Dynamic and Visually Engaging Results
- Updated Splitting a Video in VSDC Step by Step
- Efficient Ways to Manage Your Timeline for 2024
- If You Do Not Know How to QuickTime Trim Video Clips, You Are in the Right Place. We Have Provided Information that Will Help You Trim Videos with This Application and Make Them Engaging for Viewers
- New 2024 Approved What Is AI Composite Video App and AI Composite Video Tutorial
- Updated 2024 Approved Easy Way to Combine Several Xvid Files Into One Windows, Mac,Android
- Fun & Easy Masking Tricks in Filmora
- New 10 BEST TEXT TO SPEECH VIDEO MAKERS
- Timeline Template Is a Visual Representation Showing the Passage of Time. It Includes Text, Diagrams, Images and Icons. They Are Perfect for Telling Stories, Events Etc for 2024
- Updated Wondering About How to Easily Create a Slideshow on Your iPhone? Well, Take Note of some of the Finest Apps to Turn Your Vision Into Reality
- New Top 11 Best Video Editing Apps for iPhone for 2024
- Best Practical Tips to Improve Your Lighting in the Sun for 2024
- Updated 2024 Approved Discover the Ultimate LUTs for Wondershare Filmora Uncover the Answer
- In 2024, What Are The Stages Of Film Production
- In 2024, How to Add Subtitles to MKV Videos on All Platforms
- New Complete Tutorial to Make an Impressive Countdown Timer Video
- AVI Video Format How to Open, Play, Edit AVI File?
- New How to Create and Add an Adjustment Layer in Final Cut Pro for 2024
- New Guide Cropping and Combining Content in Wondershare Filmora Latest for 2024
- New 2024 Approved How to Create Loop Videos with Filmora
- Updated Which 10 Best Video Editing Online Makers Is Worth Your Attention for 2024
- Speed up Video on Splice for 2024
- Right Tools for Converting 60FPS Frame Rate in Videos
- In 2024, How to Track Xiaomi Redmi Note 13 Pro+ 5G Location without Installing Software? | Dr.fone
- In 2024, Complete Guide For iPhone X Lock Screen
- In 2024, 11 Best Location Changers for Apple iPhone 14 Plus | Dr.fone
- Pokemon Go No GPS Signal? Heres Every Possible Solution On Motorola Moto G34 5G | Dr.fone
- Fake the Location to Get Around the MLB Blackouts on Nokia C12 Pro | Dr.fone
- How to Unlock Samsung Galaxy A54 5G Phone without PIN
- In 2024, Everything You Need to Know about Lock Screen Settings on your Infinix Smart 7 HD
- In 2024, How to Fix Pokemon Go Route Not Working On Oppo A58 4G? | Dr.fone
- In 2024, Full Guide to Catch 100 IV Pokémon Using a Map On OnePlus Ace 2V | Dr.fone
- In 2024, List of Pokémon Go Joysticks On Samsung Galaxy S21 FE 5G (2023) | Dr.fone
- In 2024, How To Open Your iPhone 12 Pro Max Without a Home Button
- Did Your iPhone 12 Passcode Change Itself? Unlock It Now | Dr.fone
- In 2024, Full Guide to Bypass Vivo Y28 5G FRP
- New Multiple Ways How To Remove iCloud Activation Lock On your iPhone 15 Pro
- In 2024, How to Turn Off Google Location to Stop Tracking You on Asus ROG Phone 8 | Dr.fone
- In 2024, About Tecno Spark Go (2023) FRP Bypass
- In 2024, How to Unlock iPhone 7 with a Mask On
- Two Ways to Track My Boyfriends Asus ROG Phone 7 Ultimate without Him Knowing | Dr.fone
- In 2024, 11 Best Location Changers for Huawei P60 | Dr.fone
- Updated Reviewing the Live Streaming Shopping Industry in China
- Bypass Activation Lock On iPhone 12 mini - 4 Easy Ways
- In 2024, 10 Best Fake GPS Location Spoofers for Honor X9b | Dr.fone
- In 2024, How does the stardust trade cost In pokemon go On Apple iPhone 14? | Dr.fone
- Fix Cant Take Screenshot Due to Security Policy on Oppo A18 | Dr.fone
- In 2024, How to Transfer Contacts from Infinix Note 30 5G To Phone | Dr.fone
- New Everything You Need to Know About Becoming a Motion Graphic Designer
- Title: Weve Picked up the Best Online as Well as Offline MOV to GIF Converters . These Converters Are Easy to Use and Have No Limitations on Size. Get Your One for 2024
- Author: Chloe
- Created at : 2024-04-24 07:08:24
- Updated at : 2024-04-25 07:08:24
- Link: https://ai-editing-video.techidaily.com/weve-picked-up-the-best-online-as-well-as-offline-mov-to-gif-converters-these-converters-are-easy-to-use-and-have-no-limitations-on-size-get-your-one-for-20/
- License: This work is licensed under CC BY-NC-SA 4.0.
