
What Are the Top 15 Slideshow Presentation Examples Your Audience Will
What Are the Top 15 Slideshow Presentation Examples Your Audience Will
What’s the Best 15 Slideshow Presentation Examples Your Audience Will Love
An easy yet powerful editor
Numerous effects to choose from
Detailed tutorials provided by the official channel
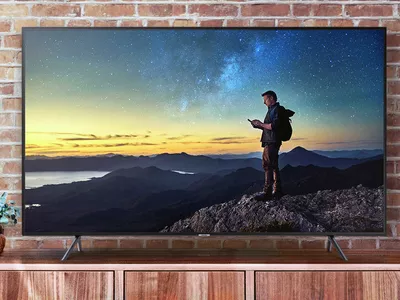
No matter what type of industry or business you are in, slideshow presentations have become an important tool for several tasks like showcasing your products, and services, engaging with the clients and prospective buyers, changing their perceptions, leading to sales, and much more. Great presentations are a combination of style, content, effects, text, media files, and much more. There are several tools and software available these days that can help you create a slideshow presentation of your choice.

More in detail about these presentations, best powerpoint slideshow examples, and more are discussed in the following parts of the topic.
In this article
01 [Tips for creating an impressive slideshow presentation](#Part 1)
02 [Best 15 slideshow presentation examples](#Part 2)
03 [The best tool to edit your videos for slideshow presentations- Wondershare Filmora](#Part 3)
Part 1 Tips For Creating An Impressive Slideshow Presentation
To create a unique and engaging slideshow presentation, we have shortlisted some tips that will surely work. Check them as below.
● Have a theme
First of all, have a theme for a slideshow based on which the other elements can be selected. The theme or the story you want to portray can be based on the target audience and the purpose of creating a slideshow. For instance, if you want to generate sales from your products, create a slideshow that shows the benefits of your products and compares them with others in the same category.
● Keep it simple
The real purpose of a slideshow presentation is to convey your data or message in a simple manner that can be easily related. Since the slides move one after the other in a slideshow, they should be created in a manner so that the viewer can quickly understand them.
● Keep minimum text
Though text can be included in a slideshow, keep them to a minimum. A slideshow is a creative presentation having pictures, videos, graphs, and several other elements. So, keep the text whenever necessary and don’t include too much-written content. Moreover, a viewer can relate to and recall the product, brand, or service more through a message rather than a text.
● Include compelling visuals
Include relevant visuals like videos and images into your slideshow. Make sure that the files are in high resolution and clear and support the theme or the message you are trying to convey through the presentation.
● Add effects, filters, overlays, and other elements
Instead of adding the raw image and video footage, edit and customize them to make them more interesting and engaging. There are several professional video editing tools like Wondershare Filmora and others that can help you add effects, transitions, overlays, filters, and customize files as needed. Additional elements like graphs, charts, and more can also be added to the presentation.
● Use Templates
Templates are ready-made design that helps you create a slideshow presentation quickly and easily. The templates in a variety of designs in different categories are available for you to choose the most suitable one. You can check the collection of templates from various online sites and tools.
Part 2 Best 15 Slideshow Presentation Examples
A wide range of presentations in different categories is created by people. To help you check what a unique and engaging presentation looks like, below listed are the top slideshow examples.
What would Steve Do? 10 Lessons from the World’s most captivating presenters by HubSpot

Powerful Body Language Tips for your next presentation

Fix your bad PowerPoint by Seth Godin

How I got 2.5 million views on SlideShare by Nick Demey

Killer ways to design the same slide

How to Produce Better Content Ideas by Mark Johnstone

How Google Works by Eric Schmid

Why Content Marketing Fails by Rand Fishkin

Digital Strategy 101 By Bud Caddell

The History of SEO by HubSpot

How to really get into marketing by Inbound.org

Search for meaning in B2B Marketing by Velocity Partners

The What If techniques by Motivate Design

Ways to Win the Internets by Upworthy

Crap: The Content Marketing Deluge by Velocity Partners

Part 3 The Best Tool To Edit Your Videos For Slideshow Presentations - Wondershare Filmora
As discussed in the above parts of the article, images and videos play a very crucial role in creating an impressive slideshow presentation. To further make these media files bright, clear, and relevant to your theme editing and customization can be done for this task, several software and programs are available. One such excellent tool is Wondershare Filmora Video Editor which works as a complete video editing software with advanced features.
Your files can be edited like a professional and that too in a hassle-free manner using the program. Some of the key editing features of the software include cropping, cutting, adding effects, transitions, overlays, green screen, split screen, AI portrait, masking, and more.
For Win 7 or later (64-bit)
For macOS 10.12 or later
Additionally, the tool also supports making a slideshow with music files and also has a built-in media library. Templates in different categories are also present.

● Ending Thoughts →
● Slideshow presentations are used for creating awareness about products and services, sending a message, presenting data, and several other tasks.
● To create a slideshow, several factors like media files, theme, colors, text, effects and other factors have to be considered.
● Several popular great slideshow presentation examples can be referred to as what a unique presentation looks like.
● Wondershare Filmora is an excellent tool for editing slideshow videos and also for creating a slideshow.
No matter what type of industry or business you are in, slideshow presentations have become an important tool for several tasks like showcasing your products, and services, engaging with the clients and prospective buyers, changing their perceptions, leading to sales, and much more. Great presentations are a combination of style, content, effects, text, media files, and much more. There are several tools and software available these days that can help you create a slideshow presentation of your choice.
More in detail about these presentations, best powerpoint slideshow examples, and more are discussed in the following parts of the topic.
In this article
01 [Tips for creating an impressive slideshow presentation](#Part 1)
02 [Best 15 slideshow presentation examples](#Part 2)
03 [The best tool to edit your videos for slideshow presentations- Wondershare Filmora](#Part 3)
Part 1 Tips For Creating An Impressive Slideshow Presentation
To create a unique and engaging slideshow presentation, we have shortlisted some tips that will surely work. Check them as below.
● Have a theme
First of all, have a theme for a slideshow based on which the other elements can be selected. The theme or the story you want to portray can be based on the target audience and the purpose of creating a slideshow. For instance, if you want to generate sales from your products, create a slideshow that shows the benefits of your products and compares them with others in the same category.
● Keep it simple
The real purpose of a slideshow presentation is to convey your data or message in a simple manner that can be easily related. Since the slides move one after the other in a slideshow, they should be created in a manner so that the viewer can quickly understand them.
● Keep minimum text
Though text can be included in a slideshow, keep them to a minimum. A slideshow is a creative presentation having pictures, videos, graphs, and several other elements. So, keep the text whenever necessary and don’t include too much-written content. Moreover, a viewer can relate to and recall the product, brand, or service more through a message rather than a text.
● Include compelling visuals
Include relevant visuals like videos and images into your slideshow. Make sure that the files are in high resolution and clear and support the theme or the message you are trying to convey through the presentation.
● Add effects, filters, overlays, and other elements
Instead of adding the raw image and video footage, edit and customize them to make them more interesting and engaging. There are several professional video editing tools like Wondershare Filmora and others that can help you add effects, transitions, overlays, filters, and customize files as needed. Additional elements like graphs, charts, and more can also be added to the presentation.
● Use Templates
Templates are ready-made design that helps you create a slideshow presentation quickly and easily. The templates in a variety of designs in different categories are available for you to choose the most suitable one. You can check the collection of templates from various online sites and tools.
Part 2 Best 15 Slideshow Presentation Examples
A wide range of presentations in different categories is created by people. To help you check what a unique and engaging presentation looks like, below listed are the top slideshow examples.
What would Steve Do? 10 Lessons from the World’s most captivating presenters by HubSpot
Powerful Body Language Tips for your next presentation
Fix your bad PowerPoint by Seth Godin
How I got 2.5 million views on SlideShare by Nick Demey
Killer ways to design the same slide
How to Produce Better Content Ideas by Mark Johnstone
How Google Works by Eric Schmid
Why Content Marketing Fails by Rand Fishkin
Digital Strategy 101 By Bud Caddell
The History of SEO by HubSpot
How to really get into marketing by Inbound.org
Search for meaning in B2B Marketing by Velocity Partners
The What If techniques by Motivate Design
Ways to Win the Internets by Upworthy
Crap: The Content Marketing Deluge by Velocity Partners
Part 3 The Best Tool To Edit Your Videos For Slideshow Presentations - Wondershare Filmora
As discussed in the above parts of the article, images and videos play a very crucial role in creating an impressive slideshow presentation. To further make these media files bright, clear, and relevant to your theme editing and customization can be done for this task, several software and programs are available. One such excellent tool is Wondershare Filmora Video Editor which works as a complete video editing software with advanced features.
Your files can be edited like a professional and that too in a hassle-free manner using the program. Some of the key editing features of the software include cropping, cutting, adding effects, transitions, overlays, green screen, split screen, AI portrait, masking, and more.
For Win 7 or later (64-bit)
For macOS 10.12 or later
Additionally, the tool also supports making a slideshow with music files and also has a built-in media library. Templates in different categories are also present.
● Ending Thoughts →
● Slideshow presentations are used for creating awareness about products and services, sending a message, presenting data, and several other tasks.
● To create a slideshow, several factors like media files, theme, colors, text, effects and other factors have to be considered.
● Several popular great slideshow presentation examples can be referred to as what a unique presentation looks like.
● Wondershare Filmora is an excellent tool for editing slideshow videos and also for creating a slideshow.
6 Ways to Mimic Professional Filming Gears
The professional and expensive gears are primarily out of budget for starters. But there is no need to stop filming because household things will give good output.
In this article, you will learn 6 pro tips to make professional filming gear using cardboard, container, and tape. It will turn out into POV and barrel roll shots. Scroll more to learn the top ways, and then enjoy the rest with your audience.
Part 1. Things to Remember Before Making Gears
Before using tools for professional videos, you should remember some side effects and cautions to make everything reliable and simple. Read the below outlines!
Not Professional Results
You should remember that homemade tools will give you different results than professional gear because they are expensive for a purpose. But you can experiment and get fun during filming with these products.
Safety Measures
If you use any heavy or temperature-sensitive equipment, you should take safety before operating them.
Handle Carefully
Before experimenting, make sure that you are holding everything tightly. Ensure that no accident occurs during filming!
After taking precautions and understanding the output, it’s time to make tools and film!
Part 2. Smooth Camera Movement with A Door
With a simple mobile camera, you can make smooth shots of any action, like walking, running, and playing. There is no need to get any professional gear.
It easy to achieve by attaching a camera to the door. You can use duct or any other tape which is easily available in the home. Fasten the mobile phone to the side of the door with tape, as shown below!

Moving the door while performing any action will result in smooth shots. Check out the final results below.

Part 3. Film Shots of Underwater
Filming underwater is always a dream of any videographer, but we were limited to get shots from the water’s surface. So now it’s time to add more creativity to your video.
First, you need to take a transparent container or any glass container. Pour water according to your need in it.
![]()
Note: Ensure the container is light enough to put on the phone.
Then, place the container on the lens of the phone to make a video. Then, take care of the phone from the water.

Pro Tip: You can also shine light source in water and add glitter or colors to get more astonishing shots.
Part 4. Make Colourful Shots Without Coloured Lights
All filmmakers love party lights and want to add colors like that in the video. Different colored lights in videos usually represent different mood swings and enhance the creativity of storytellers.
Professional videographers use expensive lights to give these effects. But you don’t need to purchase any expensive gear. Because you can make colorful shots easily with colored plastic binder dividers, or you can also use cellophane wraps.
First, wrap the colored divider around the LED light or any light you use to shoot video.
![]()
Note: Check the light temperature after short intervals because it melts or burns the dividers when the light source gets hot.

Now make the video and try with different colors to add suspense, horror, and happy effects to the video.

The video still needs more creative effects and designs; scroll more to read exciting tips.
Part 5. Different Shapes of Light with Cardboard
To add a fantasy location in the video and make light effects in the form of shapes, try out easily available cardboard. Most of the time, aesthetic videos are made by these hacks, giving viewers different vibes.
Only a professional photographer and videographer know how to attract the audience to the shots by doing these simple hacks.
The interesting thing is that if light has more shape, it will precisely describe more about the scene’s backstory, location, and context. Give it a try!
Step1 Cutting of cardboards
Cut the cardboard in any shape, whatever you want. We will experiment by cutting cardboard in window blinds shape.
![]()
Note: There is no specific recommendation for the cardboard, you can use any size or shape which suits you the best.

Step2 Make shots in different shapes of light
After giving shape, now move the cardboard around the light source and make a video. It seems like the subject is sitting near the window and has aesthetic vibes.
![]()
Note: The more precise the cutting of cardboard, the more professional it looks.

Become more creative and make more shapes with cardboard because the audience always prefers new content in the market.
Part 6. Create Point of View Shots
After adding colors and shapes, now it’s time to get some Point of View (POV) shots. Most of the time, viewers become bored by watching framing and filming coverages.
POV shots are mostly captured from a specific angle to show an object’s characters. They are mostly seen in food commercials, and videographers of snacks just love to make these shots.
To make POV shots, there is nothing specific required. You just have to make a suitable position for the lens. Follow the below guidelines and capture it!
Step1 Cut ends of packet
To create POV shots of your favorite snack, first of all, cut down both ends of the packets.
Step2 Attach packet on a camera
After cutting, attach the packet of snacks to the camera lens or phone with the help of old-fashioned tape.
Ensure the camera is turned on, and then make a POV shot. Now, it’s time to enjoy the rest part with the audience. Check out the final results, as shown below!

Due to this, the food seems good, and you can notice the number of spices too. This one actually looks amazing!
What if we add the rotatory shots, too, in the video? For this, check out the last tip and try that!
Part 7. Create a Barrel Roll Shot
Barrel roll shots are the full axial shot by spinning the camera lens. Epic shots that formerly required costly gimbals and sophisticated techniques are now as simple as strolling.
It’s pretty easy to make a rotatory shot at 360° by using equipment easily available at home. Rolling may feel anxiety and disorientation. Filmmakers utilize it to confuse or unnerve audiences in movies.
There is no need to purchase expensive gambles to make barrel roll clips. Instead, try this hack by utilizing a power drill present at your home. Then, follow the below steps to give it a professional look!
Step1 Take equipment
First, take a camera lens or smartphone, whatever you are using to make a video, and a power drill as a gimbal.
Step2 Camera with drill
Attach the camera to the power drill with the help of old-fashioned tape.
![]()
Note: You should have a piece of square foam or soft block placed between the camera and drill to assist.

Now, it’s time to turn on the drill and ensure that the video option is “Turn On” in the camera. Then, enjoy the shots of 360° with your audience!

Conclusion
Finally, you get a filmy video after performing above mentioned 6 DIY hacks without expensive gear. More creativity in a video attracts more audience, which makes you more prior in the videography industry.
You can also try more tools at home and share your ideas with others to get reviews on them and make better changes. Make sure that you are taking all safety measures and precautions.
Then, place the container on the lens of the phone to make a video. Then, take care of the phone from the water.
Pro Tip: You can also shine light source in water and add glitter or colors to get more astonishing shots.
Part 4. Make Colourful Shots Without Coloured Lights
All filmmakers love party lights and want to add colors like that in the video. Different colored lights in videos usually represent different mood swings and enhance the creativity of storytellers.
Professional videographers use expensive lights to give these effects. But you don’t need to purchase any expensive gear. Because you can make colorful shots easily with colored plastic binder dividers, or you can also use cellophane wraps.
First, wrap the colored divider around the LED light or any light you use to shoot video.
![]()
Note: Check the light temperature after short intervals because it melts or burns the dividers when the light source gets hot.
Now make the video and try with different colors to add suspense, horror, and happy effects to the video.
The video still needs more creative effects and designs; scroll more to read exciting tips.
Part 5. Different Shapes of Light with Cardboard
To add a fantasy location in the video and make light effects in the form of shapes, try out easily available cardboard. Most of the time, aesthetic videos are made by these hacks, giving viewers different vibes.
Only a professional photographer and videographer know how to attract the audience to the shots by doing these simple hacks.
The interesting thing is that if light has more shape, it will precisely describe more about the scene’s backstory, location, and context. Give it a try!
Step1 Cutting of cardboards
Cut the cardboard in any shape, whatever you want. We will experiment by cutting cardboard in window blinds shape.
![]()
Note: There is no specific recommendation for the cardboard, you can use any size or shape which suits you the best.
Step2 Make shots in different shapes of light
After giving shape, now move the cardboard around the light source and make a video. It seems like the subject is sitting near the window and has aesthetic vibes.
![]()
Note: The more precise the cutting of cardboard, the more professional it looks.
Become more creative and make more shapes with cardboard because the audience always prefers new content in the market.
Part 6. Create Point of View Shots
After adding colors and shapes, now it’s time to get some Point of View (POV) shots. Most of the time, viewers become bored by watching framing and filming coverages.
POV shots are mostly captured from a specific angle to show an object’s characters. They are mostly seen in food commercials, and videographers of snacks just love to make these shots.
To make POV shots, there is nothing specific required. You just have to make a suitable position for the lens. Follow the below guidelines and capture it!
Step1 Cut ends of packet
To create POV shots of your favorite snack, first of all, cut down both ends of the packets.
Step2 Attach packet on a camera
After cutting, attach the packet of snacks to the camera lens or phone with the help of old-fashioned tape.
Ensure the camera is turned on, and then make a POV shot. Now, it’s time to enjoy the rest part with the audience. Check out the final results, as shown below!
Due to this, the food seems good, and you can notice the number of spices too. This one actually looks amazing!
What if we add the rotatory shots, too, in the video? For this, check out the last tip and try that!
Part 7. Create a Barrel Roll Shot
Barrel roll shots are the full axial shot by spinning the camera lens. Epic shots that formerly required costly gimbals and sophisticated techniques are now as simple as strolling.
It’s pretty easy to make a rotatory shot at 360° by using equipment easily available at home. Rolling may feel anxiety and disorientation. Filmmakers utilize it to confuse or unnerve audiences in movies.
There is no need to purchase expensive gambles to make barrel roll clips. Instead, try this hack by utilizing a power drill present at your home. Then, follow the below steps to give it a professional look!
Step1 Take equipment
First, take a camera lens or smartphone, whatever you are using to make a video, and a power drill as a gimbal.
Step2 Camera with drill
Attach the camera to the power drill with the help of old-fashioned tape.
![]()
Note: You should have a piece of square foam or soft block placed between the camera and drill to assist.
Now, it’s time to turn on the drill and ensure that the video option is “Turn On” in the camera. Then, enjoy the shots of 360° with your audience!
Conclusion
Finally, you get a filmy video after performing above mentioned 6 DIY hacks without expensive gear. More creativity in a video attracts more audience, which makes you more prior in the videography industry.
You can also try more tools at home and share your ideas with others to get reviews on them and make better changes. Make sure that you are taking all safety measures and precautions.
How to Color-Correct an S-Log Footage
S-Log is a gamma curve optimized for digital cameras to maximize the image sensor’s performance. Although these videos may look flat and washed out, they contain lots of color information. Even better, video creators can use color correction to edit the S-Log videos and make them look as natural as possible. That’s what this article is all about.
How to Color-Correct an S-Log Footage
This tutorial assumes that you already have an S-Log footage. If not, you can record S-Log footage using most Canon, Sony, and Panasonic cameras.

Let’s get to the steps!
Step1 Adjust the color settings
Start by adding your video to the timeline on Wondershare Filmora and then double-click the video track. Then, click on the Color tab before tapping Advanced.
Free Download For Win 7 or later(64-bit)
Free Download For macOS 10.14 or later 
Step2 Read and study the histogram
Now you’ll see the Advanced Color Correction pop-up window. Here, you’ll see a histogram with the brightest point on the right and the darkest point on the left. From our example, you can see that the video has more dark pixels than bright ones. Horizontally, the histogram shows you how many pixels are in a certain range of brightness.

Step3 Adjust the image colors
Once you’ve understood the histogram, look for pure black and white parts on the video clip. For example, in this video, you can see that the roofs are pure black and the boat at the bottom-right corner is pure white.

After finding the white and black parts in the video, go to the Light section, then adjust the Highlights to see if you can get a pure white on the boat. If the boat or any other image of your choice doesn’t look pure white, increase the Whites slide to make it whiter.

Now adjust the Shadows settings to reduce the effect and make the roofs look closer to pure black. If you want the roofs to look darker, drag the Blacks slider to the left.
Pro tip: Ensure that the darkest and brightest points don’t cross the broken lines on the edge, or the video will start losing details.
Step4 Adjust the color saturation
Does your video still look a little flat? Probably yes! In that case, click the Color section and adjust the Saturation slider to the right to make the video less flat. Saturation simply means how colorful a video clip is to the viewer. Apart from the color saturation, you can also adjust the Vibrance to make your video objects look more colorful.

Step5 Preview and compare the video
Now it’s time to check and compare the results. To make it easier, click the Eye icon at the top-right corner to switch between the original S-Log video and the color-corrected clip. You can also tap the AB icon and choose Split View-Left/Right to view the clips in the side-by-side mode.

Summary
I guess that was easy, right? Up to this juncture, you should be able to perform basic color correction on your video using Wondershare Filmora. Remember, this video editor packs many other editing tools to bring out your creativity. Give it a try  For macOS 10.14 or later
Step2 Read and study the histogram
Now you’ll see the Advanced Color Correction pop-up window. Here, you’ll see a histogram with the brightest point on the right and the darkest point on the left. From our example, you can see that the video has more dark pixels than bright ones. Horizontally, the histogram shows you how many pixels are in a certain range of brightness.
Step3 Adjust the image colors
Once you’ve understood the histogram, look for pure black and white parts on the video clip. For example, in this video, you can see that the roofs are pure black and the boat at the bottom-right corner is pure white.
After finding the white and black parts in the video, go to the Light section, then adjust the Highlights to see if you can get a pure white on the boat. If the boat or any other image of your choice doesn’t look pure white, increase the Whites slide to make it whiter.
Now adjust the Shadows settings to reduce the effect and make the roofs look closer to pure black. If you want the roofs to look darker, drag the Blacks slider to the left.
Pro tip: Ensure that the darkest and brightest points don’t cross the broken lines on the edge, or the video will start losing details.
Step4 Adjust the color saturation
Does your video still look a little flat? Probably yes! In that case, click the Color section and adjust the Saturation slider to the right to make the video less flat. Saturation simply means how colorful a video clip is to the viewer. Apart from the color saturation, you can also adjust the Vibrance to make your video objects look more colorful.
Step5 Preview and compare the video
Now it’s time to check and compare the results. To make it easier, click the Eye icon at the top-right corner to switch between the original S-Log video and the color-corrected clip. You can also tap the AB icon and choose Split View-Left/Right to view the clips in the side-by-side mode.
Summary
I guess that was easy, right? Up to this juncture, you should be able to perform basic color correction on your video using Wondershare Filmora. Remember, this video editor packs many other editing tools to bring out your creativity. Give it a try For macOS 10.14 or later
Step2 Read and study the histogram
Now you’ll see the Advanced Color Correction pop-up window. Here, you’ll see a histogram with the brightest point on the right and the darkest point on the left. From our example, you can see that the video has more dark pixels than bright ones. Horizontally, the histogram shows you how many pixels are in a certain range of brightness.
Step3 Adjust the image colors
Once you’ve understood the histogram, look for pure black and white parts on the video clip. For example, in this video, you can see that the roofs are pure black and the boat at the bottom-right corner is pure white.
After finding the white and black parts in the video, go to the Light section, then adjust the Highlights to see if you can get a pure white on the boat. If the boat or any other image of your choice doesn’t look pure white, increase the Whites slide to make it whiter.
Now adjust the Shadows settings to reduce the effect and make the roofs look closer to pure black. If you want the roofs to look darker, drag the Blacks slider to the left.
Pro tip: Ensure that the darkest and brightest points don’t cross the broken lines on the edge, or the video will start losing details.
Step4 Adjust the color saturation
Does your video still look a little flat? Probably yes! In that case, click the Color section and adjust the Saturation slider to the right to make the video less flat. Saturation simply means how colorful a video clip is to the viewer. Apart from the color saturation, you can also adjust the Vibrance to make your video objects look more colorful.
Step5 Preview and compare the video
Now it’s time to check and compare the results. To make it easier, click the Eye icon at the top-right corner to switch between the original S-Log video and the color-corrected clip. You can also tap the AB icon and choose Split View-Left/Right to view the clips in the side-by-side mode.
Summary
I guess that was easy, right? Up to this juncture, you should be able to perform basic color correction on your video using Wondershare Filmora. Remember, this video editor packs many other editing tools to bring out your creativity. Give it a try!
How To Make An Interactive Quiz Video? [Step-by-Step Guide]
Quiz videos are becoming popular on YouTube but creating good content takes work. You’ll have to spend time on it, find the right questions and spend resources on powerful video editing software. In this guide, we’ll show you what a quiz video is, its advantages, and how you can use Filmora to make interactive video quizzes.
So, what are you waiting for? Read on to learn how to create quiz videos for Youtube!
Part 1. What Is A Quiz Video?
A quiz video is a type of content that provides viewers with a series of questions that are typically about a particular topic or subject matter and may also provide additional information about the topic. You can use the video for various purposes, including educational, entertainment, and marketing.

To make an appealing video quiz, you have to look at it from various angles, such as its purpose, type, and relevancy.
Moreover, a well-made quiz video will demand the viewer’s attention and encourage them to take action without being intrusive or annoying. One of the best ways is to provide visual captions that can explain the point being made in an engaging, fast-paced, and entertaining way.
Part 2. What Are The Advantages Of A Quiz And How To Use It?
Quizzing is a great way to engage your audience and encourage them to interact with your content. They can be used to create thought-provoking content, impart knowledge, and improve learning outcomes.
When used correctly, a quiz can be a powerful learning tool. But how do you use it effectively? And what are some of the advantages?
To answer these questions, we’ve provided some advantages of creating video quizzes and some scenarios where you can use them.
Advantages
Here are some advantages of video quizzes:
Draw Attention
A quiz can draw the viewer’s attention to the topic under discussion. Specifically, if you are a teacher, you can use GK question videos in your classroom to emphasize the content you are teaching and can better assess your students’ knowledge.
Increase Interactivity
Quizzes are a great way to increase engagement and interaction with your audience. By incorporating video into your questions, you can add an element of excitement and increase the likelihood that people will want to participate.

A Good Way To Introduce A Topic
Quizzes are an excellent way to introduce a new topic or subject matter. They can help you provide context and background information to help people understand the concepts you’re trying to teach or introduce.
Increase One’s Impressions Of Your Content
By adding a quiz, you can increase the time that someone spends on your page or channel as they work to answer the questions. This is valuable because it allows you to introduce a new topic in a fun and interactive way, along with getting more impressions on your content.
Scene
Here are some scenes where you can use the quizzes:
Educational
You can use quizzes in any educational setting, such as a classroom, online course, or YouTube video, to provide knowledge to others and assess their understanding.
Speech
Quizzes can also be used in speeches to add interest and engagement. For instance, a motivational speaker can play a quiz during their talks to the audience to help them understand his point better and get their response.
Presentation
Adding a fun quiz to your presentation can help to break the monotony and keep your audience engaged throughout the session.
Social media
Quizzes can aid in generating engagement on your social media page. For example, you can use them to drive traffic to your website or blog or simply to get people talking about your brand.
Part 3. How To Make An Interactive Quiz Video In Filmora?
Suppose the above advantages have compelled you to create an interactive quiz video to engage your audience and get them involved in your content. In that case, you can use Filmora software which makes it easy to make quiz videos with its built-in interactive video editing tools.
Here’s how you can make an interactive quiz video using Filmora :
Free Download For Win 7 or later(64-bit)
Free Download For macOS 10.14 or later
Step1 Upload Your Materials
In the first step, it is essential that you complete in-depth research and find reliable information for your quiz video. Afterward, go to the Filmora website and download the software that is compatible with your system. Install the program on your PC/laptop and launch it.
On the homepage, select the “Create New Project” option, and choose “Click here to upload a media file” to upload your video. Alternatively, you can drag and drop the background video from your system to the Filmora interface.
Finally, drag and drop the background video into the timeline.

Step2 Make An Intro
Now, start by creating an introduction. You can do this by opening the “Media” tab, selecting a template, and dropping it in the timeline once it is downloaded.
Then, go to the “Titles” tab, choose a text style you like, and drop it in the timeline. Finally, align both the template and your video file.
To add text to your intro, click on the text track in the timeline. Enter the intro text, ideally the quiz topic, then customize the text color and style as desired. The Advanced option also lets you animate your text. Save the changes by clicking “OK.”
Step3 Add A Quiz To The Timeline
Next, add the GK questions and answers to your video using the “Titles” tab. You should adjust the display time and text on the timeline as needed.

Step4 Increase Interactivity In Your Quiz Video
To make your video more engaging, go to the “Transition” tab and add an interesting transition effect. You can also add effects or countdown elements between questions or reveal the answer.
Step5 Repeat The Process And Export Your Final Video
After completing the previous steps, you can now create the entire quiz video by repeating the above steps.
Once you are done, click the “Play” icon to preview your work, and select the “Export” icon to either save the clip to your device or upload it directly to your YouTube channel.
Conclusion
In this detailed guide, we’ve explored what a video quiz is, its advantages, and scenes where you can use them. We’ve also walked you through the step-by-step process of making an interactive video quiz using the Wondershare Filmora software.
Hopefully, you’ve enjoyed reading this article and can now create quiz videos for your presentation, classroom, or YouTube videos.
Free Download For macOS 10.14 or later
Step1 Upload Your Materials
In the first step, it is essential that you complete in-depth research and find reliable information for your quiz video. Afterward, go to the Filmora website and download the software that is compatible with your system. Install the program on your PC/laptop and launch it.
On the homepage, select the “Create New Project” option, and choose “Click here to upload a media file” to upload your video. Alternatively, you can drag and drop the background video from your system to the Filmora interface.
Finally, drag and drop the background video into the timeline.
Step2 Make An Intro
Now, start by creating an introduction. You can do this by opening the “Media” tab, selecting a template, and dropping it in the timeline once it is downloaded.
Then, go to the “Titles” tab, choose a text style you like, and drop it in the timeline. Finally, align both the template and your video file.
To add text to your intro, click on the text track in the timeline. Enter the intro text, ideally the quiz topic, then customize the text color and style as desired. The Advanced option also lets you animate your text. Save the changes by clicking “OK.”
Step3 Add A Quiz To The Timeline
Next, add the GK questions and answers to your video using the “Titles” tab. You should adjust the display time and text on the timeline as needed.
Step4 Increase Interactivity In Your Quiz Video
To make your video more engaging, go to the “Transition” tab and add an interesting transition effect. You can also add effects or countdown elements between questions or reveal the answer.
Step5 Repeat The Process And Export Your Final Video
After completing the previous steps, you can now create the entire quiz video by repeating the above steps.
Once you are done, click the “Play” icon to preview your work, and select the “Export” icon to either save the clip to your device or upload it directly to your YouTube channel.
Conclusion
In this detailed guide, we’ve explored what a video quiz is, its advantages, and scenes where you can use them. We’ve also walked you through the step-by-step process of making an interactive video quiz using the Wondershare Filmora software.
Hopefully, you’ve enjoyed reading this article and can now create quiz videos for your presentation, classroom, or YouTube videos.
Also read:
- Updated 2024 Approved How to Clone Yourself in Videos with Filmora?
- Updated Do You Want to Download Slow-Motion Apps that Can Edit Video Professionally? This Article Will Discuss some Slomo Makers for Both iOS and Android
- In 2024, Learn About some of the Best Photo Collage with Music Tools
- 2024 Approved How to Resize FLV Video Efficiently Windows, Mac,Android, iPhone & O
- New 8 Apps to Custom GIF Stickers
- Updated Techniques You Never Heard of for Learning YouTube AI Marketing
- Step by Step to Cut a Video in Lightworks for 2024
- How to Brighten a Video in Windows 10 | Step-By-Step Guide for 2024
- Learn to Create Custom Sequence Presets in Premiere Pro for Efficient Video Editing. Ensure Consistency and Speed up Your Workflow with Personalized Settings
- 2024 Approved Do You Want to Stream and Record at the Same Time but Cant Find an Easy Solution? This Guide Will Help You Get This Done Using Three Easy-to-Follow Methods
- New 2024 Approved Record Slow Motion Videos With Phantom Slow-Mo Camera
- New Create a Brand Video to Make Your Business Shine for 2024
- In 2024, What Can Be Better than Converting Apple Video Format Into Other Formats so that You Can Use the Files Easily. We Have a Few Options that You Can Use for This Purpose
- Updated In 2024, How to Convert Images Into Video - Kapwing Tutorial
- 2024 Approved If Youre Wondering How to Employ Transition Effects in Your Videos to Create Your Signature Look, This Article Can Help
- A Vlog Has Many Elements to Answer. While Setting up Ideas for It, There Are Several Things Into Which You Should Look. This Article Presents a Picture of How a Vlog Video Is Made Perfectly
- Updated 2024 Approved HDR Photography How to Use HDR Mode on Your Android Devices
- Updated In 2024, How Can You Get VHS Filter and Glitch Filter to Your Images or Videos?
- In This Article, We Talk About How to Add Old Film Overlays and Other Effects to Turn the Videos or Photos More Vintage and with an Older Aspect. We Take a Look at Filmora in This Guide and Give Tips on How to Create Great Retro Videos
- Do You Want to Rotate Your TikTok Video to Stylize It More? This Article Will Provide Simple Methods of Rotating TikTok Videos to Improve the Audience Viewing Experience
- Updated Wish to Rock on YouTube, but Lacking Tricks? Here, We Will Tell You Everything About How the YouTube Algorithm AI Works and How You Can Perform Well According to AI
- In 2024, Add Stylish Text to Videos
- How to Add Custom Filters in VN App 2024 Quick Guide
- In 2024, How To Mirror a Video Clip in Premiere Pro
- New 2024 Approved How to Create an Adobe Slideshow the Easy Way
- AVI Video Format Is Known and Famous for Its Features. Many of You Must Have Heard About It but Do You Know some Details About AVI? Lets Increase Your Knowledge and Talk About It
- 2024 Approved How To Split Videos in Premier Pro
- Updated How to Make Loop Video in PowerPoint
- 2024 Approved Best Frame Rate for 4K Video
- New In 2024, How to Crop Videos in Windows Media Player
- 2024 Approved Best Tips for Camtasia Freeze-Frame
- How to Create Emoji on Mac That Take Less Than 10 Mins for 2024
- 3 Best Tools to Hard Reset Itel P40+ | Dr.fone
- A Complete Guide To OEM Unlocking on OnePlus Nord N30 SE
- In 2024, How to Cast Vivo V30 Lite 5G Screen to PC Using WiFi | Dr.fone
- How To Fix Unresponsive Phone Touchscreen Of Xiaomi Redmi Note 13 Pro+ 5G | Dr.fone
- Play Store Stuck on Downloading Of Infinix Hot 30i? 7 Ways to Resolve | Dr.fone
- In 2024, How PGSharp Save You from Ban While Spoofing Pokemon Go On Lava Agni 2 5G? | Dr.fone
- New In 2024, What Is AI Advertising?
- Does iTools virtual location not work On Apple iPhone SE (2022)/iPad? | Dr.fone
- 3 Methods to Mirror Vivo S17e to Roku | Dr.fone
- In 2024, Top 4 Ways to Trace Motorola Defy 2 Location | Dr.fone
- Top 10 AirPlay Apps in Vivo Y56 5G for Streaming | Dr.fone
- In 2024, Network Locked SIM Card Inserted On Your Lava Blaze Curve 5G Phone? Unlock It Now
- In 2024, Best Text-to-Audio Converters of All Times
- How to Transfer Photos from Apple iPhone 12 to other iPhone without iCloud | Dr.fone
- Top 5 Tracking Apps to Track Realme Note 50 without Them Knowing | Dr.fone
- How and Where to Find a Shiny Stone Pokémon For Vivo X100? | Dr.fone
- In 2024, 3 Ways to Unlock iPhone XS Max without Passcode or Face ID
- How do I reset my Vivo Y78t Phone without technical knowledge? | Dr.fone
- Everything You Need To Know About Unlocked Apple iPhone 6s Plus
- In 2024, Is GSM Flasher ADB Legit? Full Review To Bypass Your Xiaomi Redmi Note 12 Pro 5GFRP Lock
- Disabling iPhone 13 Pro Max Parental Restrictions With/Without Password
- In 2024, AddROM Bypass An Android Tool to Unlock FRP Lock Screen For your Samsung
- In 2024, Best Apple iPhone SE (2022) & iPad Screen Mirroring App | Dr.fone
- How to Reset Samsung Galaxy F54 5G without Losing Data | Dr.fone
- How To Remove Screen Lock PIN On Infinix GT 10 Pro Like A Pro 5 Easy Ways
- Title: What Are the Top 15 Slideshow Presentation Examples Your Audience Will
- Author: Chloe
- Created at : 2024-06-26 06:24:07
- Updated at : 2024-06-27 06:24:07
- Link: https://ai-editing-video.techidaily.com/what-are-the-top-15-slideshow-presentation-examples-your-audience-will/
- License: This work is licensed under CC BY-NC-SA 4.0.
