
:max_bytes(150000):strip_icc():format(webp)/tropical-beach-wallpaper-beach-backgrounds-587fbb765f9b584db3241860.jpg)
What Is the Best FPS for YouTube Videos, In 2024
What Is the Best FPS for YouTube Videos?
YouTube has become one of the to go to social media platforms for internet use because it provides entertainment for people who want to get entertained, learn or catch up with their favorite personalities. This platform has also given content creators a space to showcase their talents, educate the masses or simply have a good time when playing their games.
However, being a content creator on YouTube entails more than just posting a video weekly. You ought to ensure you get the frame rate in the video right. Failure to choose the correct frame rate will affect how your audience enjoys the video, increasing the chances that you lose subscribers.
Without further ado, let’s discuss the best fps for YouTube.

How Does FPS Affect Viewing YouTube Videos?
Before we dive into how FPS affects your viewing experience on YouTube and determine the best frame rate for YouTube, let’s define what it is. FPS is short for frames per second and is the number of still images appearing on display in one second. The more frames per second you have in your video, the clearer your video will become. The vice versa is also true.
To further simplify this definition, we will use the example of a flipbook. An animator usually draws an image on each page of the book. When they flip the pages in rapid succession, the images appear to be in motion. Suppose the animator used fewer pages to make their flipbook.

The animation would not be as smooth and crisp as if they had used more pages, each with a different still image contributing to the final motion.
The human brain can easily differentiate between 12 distinct images. However, when the photos exceed 18 and move rapidly, the brain is tricked into believing that the pictures are in motion. A frame rate lower than 24FPS will make your YouTube video look choppy and unnatural, as if it lags in real time.
Ideally, 24fps is the best fps for YouTube videos featuring mundane activities that we see in daily life. However, if you want to pack more information into your video and make the motion a bit smoother, then 30fps is the best video frame rate for YouTube.
Perhaps you post fast-paced content about gaming and other live-action videos. You are better off choosing 60FPS, which makes high-speed scenes look more fluid and helps you capture double the information.
What Is the Recommended & Highest Frame Rate for YouTube Videos?
Unfortunately, there is no correct answer when it comes to the best video frame rate for YouTube videos. The controversy still continues, and everyone seems to have their own opinion.
According to Thomas Edison , anything less than 46FPS for motion pictures will strain the eyes and give an unpleasant viewing experience. At the time, filmmakers and videographers were adamant about sticking to between 22-26PFS for their videos, provided the audio adaptability remained at 35mm.
Different frame rates are used for various displays, genres, and mediums. For instance, 1-16FPS was common in silent-era movies and stop-motion movies. However, this frame rate is neither universally accepted nor widespread in the world today.

An excellent example of a frame rate that produces larger-than-life videos with exceptional detail is 24fps. However, the NTSC confirms that it is, in fact, 23.97 frames per second when you consider issues to do with color and hue.
Another universally acceptable frame rate is 30fps, which is widespread in television. Videographers also use it to make slow-motion segments in sports videos or other fast-paced content. The sweet 60fps makes any motion look smooth as butter and significantly reduces any blur in your videos. This frame rate is also characterized by super fine details you can easily miss with 24 and 30fps. It is also the highest fps video on YouTube.
120fps is synonymous with grandeur, with its monumental footage suitable for slow-motion scenes. Lastly, anything above 120fps works great with ultra-slow-motion videos. Of course, we are talking 240fps, which is rare but not uncommon. However, you would need a high-speed capture camera, which we believe doesn’t come cheap.
To sum it all up, 24fps is the recommended frame rate for YouTube. You can go higher than the baseline and use 30fps or higher if you make videos with lots of motion, like gaming videos. Most of the time, a higher frame rate is a personal choice rather than a necessity. However, we understand you want to give your viewers a pleasant experience while watching your content.
What Is the Best Frame Rate for YouTube Videos?
If you want to record a video for your YouTube channel, you might wonder what is the best fps for YouTube videos. You are better off sticking between 24fps and 60fps. The platform has only recently added 8K support for videos, which is a plus for many content creators. Below is a list of frame rates for the most popular genres on YouTube.

- Podcasts and talk shows - 30 FPS
- Gaming videos - 60 FPS
- Makeup tutorials - 60 FPS
- Educational videos - 24- 30 FPS
- Health and fitness - 24-30 FPS
- Sports - 40-60 FPS
Remember that the list above is not exhaustive and doesn’t cover all types of content on the platform. We can’t also guarantee that there is a “best” frame rate for your YouTube video. We suggest you heed our suggestion and practice to determine the best frame rate for YouTube videos.
We couldn’t fail to mention that your frame rate should match the content uploading and decoding. Since the interlaced content may experience performance issues on YouTube, it would help if you deinterlaced it.
How To Check FPS on YouTube Video?
Below is a simple guide on how to check fps on YouTube videos.
Step1 Open any video on YouTube and right-click on it. A pop-up window will appear. Select “Stats for nerds.”

Step2 Narrow down on the “Current/Optimal Res” tab. The first set of figures before the forward slash represents the current resolution, while the figures after the forward slash represent the optimal resolution for the video. For instance, the figure in the picture below indicates that the resolution is 1280*720, and the frame rate is 30FPS. The figures repeat themselves, meaning that the video is at the optimal resolution.

How To Adjust FPS When Editing a YouTube Video?
An efficient video editing tool is all you need to adjust the frame rate for a video you want to upload to YouTube. Since there are so many options in the market, it is easy to get swept away by the prospects and wonder which one to choose.
Based on our research, Wondershare Filmora is one of the most efficient editing tools to change the FPS in your video and make it more enjoyable to watch.
Free Download For Win 7 or later(64-bit)
Free Download For macOS 10.14 or later
Wondershare Filmora is highly feature-rich, making it an editor’s dream. We guarantee you don’t need to be a pro to use this platform. The user-friendly interface is the ideal choice for even the most clueless novice.
However, a little knowledge goes a long way in ensuring you don’t get stuck using it. In addition, customer support is impeccable, meaning you will always find someone to help you whenever you encounter a problem using the platform.
The split-screen icon allows you to play and edit different clips simultaneously without clicking out of the app or finishing one task before starting the next. You can also select the number of split screens you want, depending on the videos you want to edit in one go. The newer version, Filomra 12, has everything you need to edit your video and make anyone who watches it glued to the screen because of how crisp it is.

Below are some examples of key features you might find interesting.
- GIF support
- Audio equalizer
- 4K editing
- Advanced text editing
- Noise removal
- Scene detection
- Audio mixer
- Colour tuning
Here is a detailed guide on how to use Wondershare Filmora to adjust the frame rate for YouTube videos.
Step1 Launch the platform on your PC or laptop and click on the “File” tab at the top of the page. A drop-down menu will appear. Select “Project Settings.”

Step2 After a dialogue box appears, click “Frame Rate” and choose the best option.

Step3 Continue customizing your video using the other editing tools in the platform, and click “Export” to save a copy to your device.
Conclusion
Making crisp, polished-looking YouTube videos takes a lot of time and dedication. Fortunately, you knew that by the time you decided to start creating content for the platform. With all the knowledge at your fingertips, you have no reason not to broaden your knowledge base and gather enough information to help you create the best videos.
There are plenty of video editing tools to get your video to the correct resolution, so your content is above par. If you don’t know how to use a specific app or platform, you must search for a tutorial and start practicing. You could also consult other creators in your niche and ask them how they make their videos look so good.
Free Download For macOS 10.14 or later
Wondershare Filmora is highly feature-rich, making it an editor’s dream. We guarantee you don’t need to be a pro to use this platform. The user-friendly interface is the ideal choice for even the most clueless novice.
However, a little knowledge goes a long way in ensuring you don’t get stuck using it. In addition, customer support is impeccable, meaning you will always find someone to help you whenever you encounter a problem using the platform.
The split-screen icon allows you to play and edit different clips simultaneously without clicking out of the app or finishing one task before starting the next. You can also select the number of split screens you want, depending on the videos you want to edit in one go. The newer version, Filomra 12, has everything you need to edit your video and make anyone who watches it glued to the screen because of how crisp it is.
Below are some examples of key features you might find interesting.
- GIF support
- Audio equalizer
- 4K editing
- Advanced text editing
- Noise removal
- Scene detection
- Audio mixer
- Colour tuning
Here is a detailed guide on how to use Wondershare Filmora to adjust the frame rate for YouTube videos.
Step1 Launch the platform on your PC or laptop and click on the “File” tab at the top of the page. A drop-down menu will appear. Select “Project Settings.”
Step2 After a dialogue box appears, click “Frame Rate” and choose the best option.
Step3 Continue customizing your video using the other editing tools in the platform, and click “Export” to save a copy to your device.
Conclusion
Making crisp, polished-looking YouTube videos takes a lot of time and dedication. Fortunately, you knew that by the time you decided to start creating content for the platform. With all the knowledge at your fingertips, you have no reason not to broaden your knowledge base and gather enough information to help you create the best videos.
There are plenty of video editing tools to get your video to the correct resolution, so your content is above par. If you don’t know how to use a specific app or platform, you must search for a tutorial and start practicing. You could also consult other creators in your niche and ask them how they make their videos look so good.
How to Make a Bokeh Effect
There’s a strong chance you’ve heard about bokeh before if you frequently visit photography websites or have friends who are photographers. What exactly is this optical effect that camera aficionados frequently discuss? Bokeh, who is derived from the Japanese word for “blur,” is a term used in photography to describe how a lens presents an out-of-focus background.
Part 1. What is a Bokeh Effect?
The Japanese word boke, which meaning “blur,” “haze,” or “boke-aji,” the “blur quality,” is where the term “bokeh” originates. The pronunciation of bokeh is BOH-K or BOH-kay. You can find a lot of people discussing the beautiful bokeh that their favorite fast lenses allow on any photography website or forum.
Bokeh is characterized by the words “smooth,” “amazing,” “superb,” “good,” “beautiful,” “sweet,” “silky,” and “great.” But what is it exactly? When using a fast lens and the widest aperture possible, such as f/2.8 or wider, you can create bokeh, which is described as “the effect of a fuzzy out-of-focus background.” Bokeh is the appealing or aesthetically pleasant aspect of out-of-focus blur in a shot, to put it simply.
Part 2. What is a Bokeh effect used for?
Most often, bokeh is employed for artistic purposes. You might occasionally desire a little background blur so that the viewer’s attention is drawn to the subject. In other cases, you can want it to completely detract from the subject, as in portraiture when you want to concentrate on the individual’s eyes or mouth while blurring the rest of the image. It’s true that some people use bokeh inadvertently, like looking for photos with excellent bokeh that they may use as free images on their websites or blogs. This isn’t advised, though, as it’s against the law and usually frowned upon in the photographic community as a whole to steal someone else’s image in this manner.
Part 3. How do you create a Bokeh effect?
Bokeh’s smooth, organic texture is among its most lovely features. The major goal in producing this effect is to distinguish the subject from the backdrop by employing a shallow depth of field. You will learn how to create beautiful bokeh for your photos in this video. One of the most alluring photographic effects, particularly for portraits, is bokeh. It can impart a sense of perfection to everything in a photo, making it look lot more appealing and engaging. Bokeh helps to create a dreamy backdrop that gives the image a whole new level of depth and perspective.
Using a camera lens with a shallow depth of focus is one of the many methods for achieving bokeh in photography. You need a short depth of field so that your lens aperture can be opened up as wide as possible to achieve beautiful bokeh. You can take pictures with shallow depth of field, often known as bokeh, with a point and shoot or a DSLR. A common photography technique used to make the subject stand out from the backdrop is called bokeh.
It can be used to draw attention to the topic by blurring or losing focus on the background. Three different kinds of lenses can create beautiful bokeh: prime lenses with a wide aperture The best lenses for bokeh are often wide-aperture prime lenses. Although they are frequently more expensive and heavier than zoom lenses, they offer a wider field of view. Since there is a greater difference in depth between the foreground and background when using a wide-open aperture, wide aperture prime lenses make blurring the background easier.
Part 4. What software do you need for a Bokeh effect?
Bokeh is one of the best techniques for creating a soft out-of-focus background and emphasizing a certain spot in a shot. Utilizing a fast lens and modifying the camera’s aperture settings are the typical methods for obtaining bokeh. Still, using software for both Windows and Mac, even amateur photographers may enhance their photographs with a fantastic bokeh effect.
It might be challenging to determine which photo editing software is ideal for producing high-quality bokeh effects without trying them all out, which isn’t always an option. The top five Bokeh Effect Makers will be discussed in this post in order to improve your photographs’ visual appeal and set them apart from the competition.
# Paintshop Pro
With a comprehensive toolkit created for users of all ability levels, Paintshop Pro enables you to edit, enhance, and repair your photos. A touch-friendly photography option with a distinctive split-screen before-and-after function was recently added to the software. Paintshop Pro is a good option if you’re searching for a reasonably priced photo editor that lets you tack on extra premium capabilities as you go.
Depending on your degree of competence, the software offers three distinct workspaces for you to choose from. Essential editing tools and cutting-edge technologies like AI Upsampling and AI Style Transfer can be found in the Photography Workspace, which is intended for beginners or those making short alterations.
All of the common editing and retouching tools are present in the Essentials Workspace, but only a limited number of tools and palettes are visible. You may also change the available settings to display or hide the controls you need. Last but not least, Paintshop Pro’s Complete Workspace shows all of its tools and features.
# Blur n Bokeh
The focus of Blur & Bokeh for Mac is blurring an image’s backdrop and foreground. It has the ability to boost the saturation, brightness, and warmth of the highlighted areas, as well as masking with edge detection. The clever edge-preserving method is one of the software’s strongest components. It offers excellent outcomes for creating realistic-looking image output.
You may modify the foreground and background of your photographs using a variety of filters. Although Blur n Bokeh is excellent at producing bokeh, it’s not the ideal choice if you’re searching for software that provides a variety of additional picture editing features.
# PhotoDirector
All skill levels will benefit greatly from using PhotoDirector, a complete photo editor that is free to download and simple to use. Express Mode, who is great for making quick edits, or Full Mode, which offers preset and manual photo alteration options along with creative effects, overlays, and beauty options, are two ways the program lets you access the editor.
The best part is that there is a special bokeh tool that lets you add bokeh lights and blur a specific section of an image with just one click. PhotoDirector employs an image’s natural light sources to create the bokeh effects, in contrast to other tools. Having said that, you may select a shape from 25 options and even enable live animation.
Both beginning and experienced photographers will find PhotoDirector to be a desirable alternative. PhotoDirector is unquestionably at the top of the list if you’re seeking for reliable post-processing software with a large range of features.
# Tadaa SLR
Although there are many amazing things about your iPhone, its camera will never be able to take pictures with the same wonderfully shallow depth of field as your DSLR. That will always be the case unless Apple manages to get a much, much larger sensor into the phone.
Software, however, may mimic that lavish, shallow depth of field appearance. Tadaa SLR accomplishes this. Actually, Tadaa allows you to alter the photo’s focus point in addition to artificially adjusting the depth of field. Similar to what you can accomplish with the cutting-edge Lytro camera, it does it after you take the picture.
Tadaa is launched in camera mode, and you compose and snap your picture. Alternately, you can pick a picture from your camera roll if you wish to start with an existing image. A few widgets are as follows: Switch between a square or wide shot, show a line of thirds grid, and turn the flash on and off. Even access to the front and back cameras is provided by Tadaa.
Conclusion
Many popular photo editing programs require intermediate-level photo editing knowledge and can be a bit on the expensive side, but there are a few programs out there that cater to all skill levels and have free versions
that don’t cut corners on quality.
While each photo editor comes with various pros and cons, only one strikes a balance between offering a wide range of editing tools and being easy to navigate, and that’s PhotoDirector.
Free Download For Win 7 or later(64-bit)
Free Download For macOS 10.14 or later
Have You Ever Used Premiere Pro to Create Slow-Motion Effects? This Article Will Provide a Guide on Producing Slow-Motion Effects by Using Adobe Premiere Pro
Adobe Premiere Pro is a famous video editing program in the media industry. It includes professional-quality features that enable advanced video editing. Due to its impressive performance, many content creators use this tool to add slow-motion effects to the videos. If you are at a beginner stage of video editing, you may not know how to operate Premiere Pro slow-motion effects. Thus, this guide will provide you with basic yet accurate instructions.
To create slow-motion effects in Premiere Pro, the guide will describe the instructions in a simple way. We will also highlight the templates of this tool providing slow-motion effects in Premiere Pro for videos. Hence, keep discovering this guide to learn more details.
Slow Motion Video Maker Slow your video’s speed with better control of your keyframes to create unique cinematic effects!
Make A Slow Motion Video Make A Slow Motion Video More Features

Part 1: How To Perform Slow Motion on Adobe Premiere Pro?
Adobe Premiere Pro offers an advanced user interface to perform complex functions. It contains a wide range of features supporting non-destructive video editing. Its auto-correct feature lets you adjust the color patterns of the video in a smart way. Moreover, it contains a comparison view to analyze the before and after visual effects. You can also add adjustment layers in the timeline to change many clips at once.
On Premiere Pro, you can also connect third-party plugins for more features. It also supports many professional-grade formats to offer flexibility for video editors. Among other features, it can also apply slow-motion effects to the video. To make Premiere Pro slow-motion effects, you can use the following steps:
Step 1: On Premiere Pro, upload the video in which you want to create a slow-motion effect. To proceed, drag it to the timeline with your cursor. At the start of the timeline, right-click on the small icon saying FX on the left side. From there, select “Time Remapping” and then “Speed.”

Step 2: Now, add the keyframe where you want to begin and end the slow-motion effect. To do so, press “CTRL + Click” on the timeline. To add a ramp, click on the added keyframes and drag them a little to the right side.

Step 3: To proceed, move to the central part of the two added keyframes. Afterward, click on the central part and drag it downwards. By doing so, you can see the reduced percentage number on the timeline. To add a more slow-motion effect, pull down the central part of the timeline. For more adjustments in the length within the keyframes, you can go to the effects control. By doing so, you can determine how smoothly you want to create a slow-motion effect.

Part 2:Leading Templates Offering Quick Slow Motion Effect in Premiere Pro
In this section, you can find popular slow-motion effect Premiere Pro templates. After accessing the templates, you can customize them as per your needs. Hence, let’s dig into the details below:
This template is perfect for use in the intros of videos, presentations, slideshows, etc. It contains 9 different scenes of outdoor areas. Moreover, it offers 16 media placeholders and 7 text placeholders to add custom content. You can promote your brand by using its 2 placeholder logos. Hence, it’s a perfect slow-motion video template with HD-quality resolution.

The slow-motion explosion logo opener is an attractive template featuring vibrant colors. It contains a hand-drawn animated logo with suitable backgrounds. Along with the logo reveal, it includes background music that matches the theme of the video. It also offers media and text placeholders to let you introduce your brand.

Do you want to create a modern video on Premiere Pro? Well, this slow-motion template features freeze frames to offer viewers a unique look. The template gives a glimpse of urban life with energetic background music. It’s available in full HD resolution with eye-catching urban locations. Hence, try this template for demos, fashion, and action videos.

Dynamic Sport is one of the famous slow-motion Premiere Pro templates. With a modern outlook, it includes simple text animation. Moreover, it uses many transitioning effects to produce a stunning video. You can insert extra content with its 8 editable text placeholders. Thus, download this template and customize it in Premiere Pro.

This planet-themed template introduces cinematic spinning planets. With 8 text placeholders, you can write content related to your shows, movies, and events. It contains intriguing background music that can grasp the attention of your audience. In full HD resolution, this template can help you produce cinematic slow-motion videos with minimal effort.

Part 3: Tutorial: Perform Slow Motion in Filmora Video Editing
Are you ready to perform slow-motion effects in Premiere Pro in Filmora? Check the directions below to add a slow-motion effect to your video .
Free Download For Win 7 or later(64-bit)
Free Download For macOS 10.14 or later
Step 1Browse and Import the File
After the launch of Filmora, click on the “New Project” button. Click on the “Import Media” section to browse the video file. Once done, drag the video to the timeline to start the editing process.

Step 2Open Speed Ramping Settings
Go to the right panel of the screen to open the settings. From there, go to the “Speed” tab and select “Speed Ramping”. It will display the speed ramping settings below.

Step 3Adjust the Video Speed
The presets are available for speed ramping in the above section. Choose “Customize” and then proceed to the small graph given below. Here, you can move the points to adjust the video’s speed. By pulling down the points, you can reduce the video’s speed. Continue the process until you achieve your desired speed.

Step 4Render the Video
Expand the option of “AI Frame Interpolation” and choose “Optical Flow.” Once done, click on “Render Preview” from the timeline’s toolbar to see the highest-quality results.

Conclusion
Slow-motion effect Premiere Pro can produce high-end results for professionals. Yet, this tool is not ideal for every kind of user. In contrast, Filmora is the most flexible tool due to its friendly user interface. Without extensive manual efforts, you can produce slow-motion videos within a few clicks. Moreover, it features many AI options to let you increase your productivity.
Make A Slow Motion Video Make A Slow Motion Video More Features
Part 1: How To Perform Slow Motion on Adobe Premiere Pro?
Adobe Premiere Pro offers an advanced user interface to perform complex functions. It contains a wide range of features supporting non-destructive video editing. Its auto-correct feature lets you adjust the color patterns of the video in a smart way. Moreover, it contains a comparison view to analyze the before and after visual effects. You can also add adjustment layers in the timeline to change many clips at once.
On Premiere Pro, you can also connect third-party plugins for more features. It also supports many professional-grade formats to offer flexibility for video editors. Among other features, it can also apply slow-motion effects to the video. To make Premiere Pro slow-motion effects, you can use the following steps:
Step 1: On Premiere Pro, upload the video in which you want to create a slow-motion effect. To proceed, drag it to the timeline with your cursor. At the start of the timeline, right-click on the small icon saying FX on the left side. From there, select “Time Remapping” and then “Speed.”
Step 2: Now, add the keyframe where you want to begin and end the slow-motion effect. To do so, press “CTRL + Click” on the timeline. To add a ramp, click on the added keyframes and drag them a little to the right side.
Step 3: To proceed, move to the central part of the two added keyframes. Afterward, click on the central part and drag it downwards. By doing so, you can see the reduced percentage number on the timeline. To add a more slow-motion effect, pull down the central part of the timeline. For more adjustments in the length within the keyframes, you can go to the effects control. By doing so, you can determine how smoothly you want to create a slow-motion effect.
Part 2:Leading Templates Offering Quick Slow Motion Effect in Premiere Pro
In this section, you can find popular slow-motion effect Premiere Pro templates. After accessing the templates, you can customize them as per your needs. Hence, let’s dig into the details below:
This template is perfect for use in the intros of videos, presentations, slideshows, etc. It contains 9 different scenes of outdoor areas. Moreover, it offers 16 media placeholders and 7 text placeholders to add custom content. You can promote your brand by using its 2 placeholder logos. Hence, it’s a perfect slow-motion video template with HD-quality resolution.
The slow-motion explosion logo opener is an attractive template featuring vibrant colors. It contains a hand-drawn animated logo with suitable backgrounds. Along with the logo reveal, it includes background music that matches the theme of the video. It also offers media and text placeholders to let you introduce your brand.
Do you want to create a modern video on Premiere Pro? Well, this slow-motion template features freeze frames to offer viewers a unique look. The template gives a glimpse of urban life with energetic background music. It’s available in full HD resolution with eye-catching urban locations. Hence, try this template for demos, fashion, and action videos.
Dynamic Sport is one of the famous slow-motion Premiere Pro templates. With a modern outlook, it includes simple text animation. Moreover, it uses many transitioning effects to produce a stunning video. You can insert extra content with its 8 editable text placeholders. Thus, download this template and customize it in Premiere Pro.
This planet-themed template introduces cinematic spinning planets. With 8 text placeholders, you can write content related to your shows, movies, and events. It contains intriguing background music that can grasp the attention of your audience. In full HD resolution, this template can help you produce cinematic slow-motion videos with minimal effort.
Part 3: Tutorial: Perform Slow Motion in Filmora Video Editing
Are you ready to perform slow-motion effects in Premiere Pro in Filmora? Check the directions below to add a slow-motion effect to your video .
Free Download For Win 7 or later(64-bit)
Free Download For macOS 10.14 or later
Step 1Browse and Import the File
After the launch of Filmora, click on the “New Project” button. Click on the “Import Media” section to browse the video file. Once done, drag the video to the timeline to start the editing process.
Step 2Open Speed Ramping Settings
Go to the right panel of the screen to open the settings. From there, go to the “Speed” tab and select “Speed Ramping”. It will display the speed ramping settings below.
Step 3Adjust the Video Speed
The presets are available for speed ramping in the above section. Choose “Customize” and then proceed to the small graph given below. Here, you can move the points to adjust the video’s speed. By pulling down the points, you can reduce the video’s speed. Continue the process until you achieve your desired speed.
Step 4Render the Video
Expand the option of “AI Frame Interpolation” and choose “Optical Flow.” Once done, click on “Render Preview” from the timeline’s toolbar to see the highest-quality results.
Conclusion
Slow-motion effect Premiere Pro can produce high-end results for professionals. Yet, this tool is not ideal for every kind of user. In contrast, Filmora is the most flexible tool due to its friendly user interface. Without extensive manual efforts, you can produce slow-motion videos within a few clicks. Moreover, it features many AI options to let you increase your productivity.
How to Windows Online Movie Maker [Complete Guide]
The likelihood is that video will soon play a significant role in your content marketing approach, if it hasn’t already – and for that using windows online movie maker is inevitable. You are an emerging brand, a sole proprietor, or even a podcaster. Knowing the importance of video marketing to content producers and agencies is second nature if you’re an astute digital marketer It may be costly and challenging to utilize video editing software. Fortunately, there are free online video editors available.
Before very recently, video editing needed highly specialized skills and was done manually using different tools. Windows Movie Maker used to be a standard component of every Windows user’s toolbox and was a highly recommended video editing product for novices. With the windows movie maker online, the application was well-liked for its ease of use and entertaining special effects, but most significantly - it was free. It came pre-installed on all Windows machines. You may do that with the help of our handy list of the top three online video creators.
Part 1. How to Make a Video Online [Use Movie Maker Windows Online]
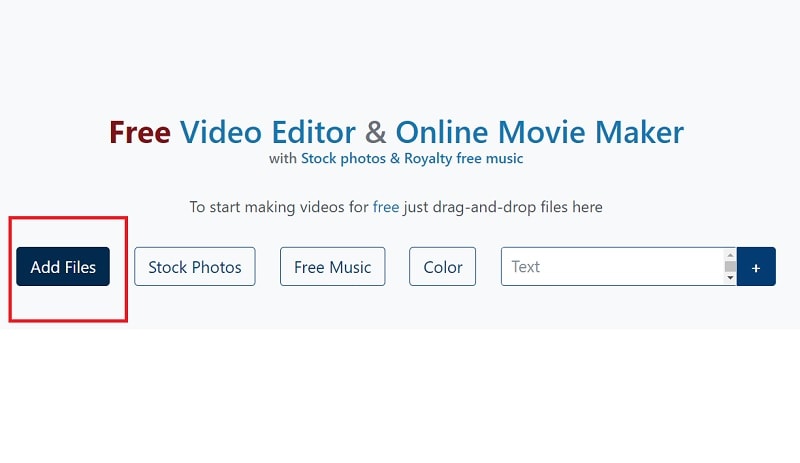
Using the help of Movie Maker, you may create videos online with your browser. It enables you to create professional-caliber videos without having to purchase video editing tools at professional-caliber costs. For every genre and need, this web program includes stock video, animated text, audio tracks, and on-screen effects. Your own video clips are uploaded. Then, use the simple drag-and-drop online video editor in Movie Maker to edit footage and add special effects and music to make your movie shine.
Making fantastic compilation films from your already-existing photographs and videos doesn’t need you to be a skilled editor. Even for amateur video makers, the platform’s UI is simple to use and straightforward to navigate. The customizing choices in Movie Maker are many. You have the option of uploading your own fonts and logos. You may also watermark your films and alter the text’s color. Additionally, there are a ton of very unique components like stickers, vector shapes, and masks that may enhance the visual appeal of your video productions and widen your creative boundaries.
Steps to Make Video with Movie Maker Online
Step1 Go to Movie Maker Online
Using Movie Maker Online, you can quickly and easily make incredibly interesting compilation films using your already-posted photographs and videos. You’ll immediately be sent to the editor, where you can begin organizing your films. Here’s the official link to the toolkit:
Step2 Upload Files to Web
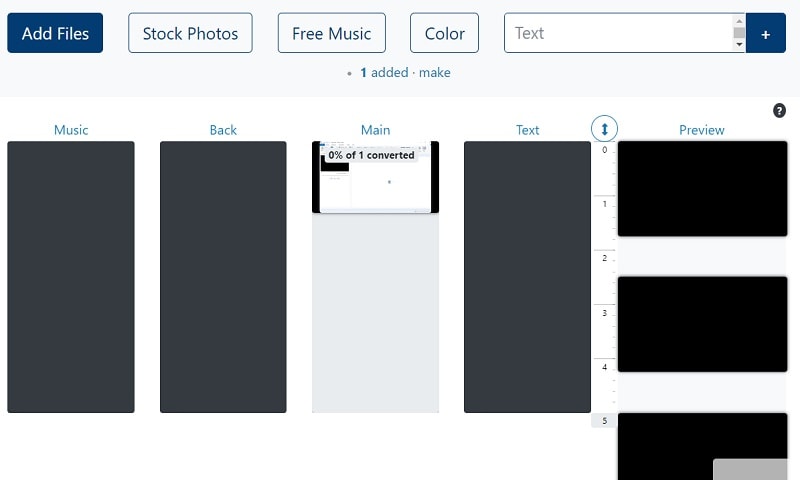
Your photographs, videos, and text may all be uploaded. If you like the default music, you may skip the step to change it; otherwise, you can choose another song from our library or upload your own MP3 file. Files from a variety of sources and devices may be added. Click the Import Media button to start importing your own media. Click Open after locating the video you wish to modify.
Step3 Create an online video
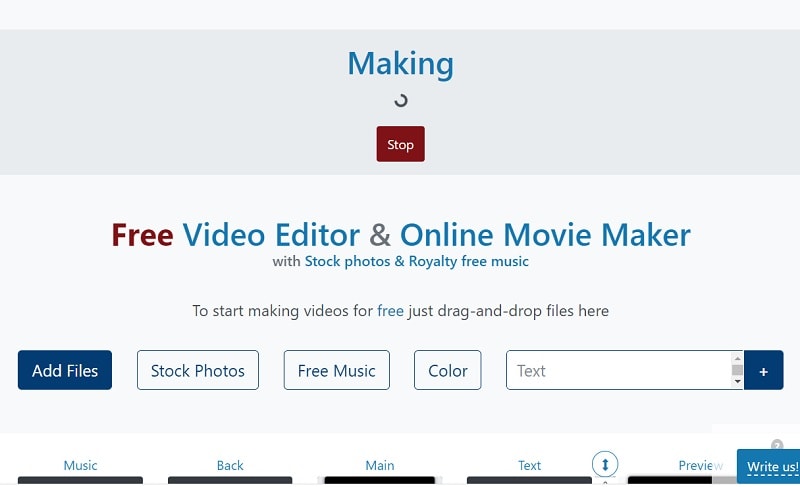
Add your music to your video compilation after all of your clips have been placed on the timeline. To accomplish that, choose a song depending on the genre or mood you want by clicking on the Music option on the left menu panel. To listen to the music track, click the little icon to the left of it. Text, colors, pictures, and video may all be customized to your heart’s delight. Add effects, drag, cut, etc. Press the Make Video button.
Step4 Save and Share with Others
Sharing your films on Facebook, Instagram, YouTube, and other platforms is made effortless. You may also send your loved ones the URLs to your videos. When you are happy with the changes, click the Save & Share option in the upper right corner, choose the quality you want to download your movie in, and then click the Export button. Download the updated video, then post it.
Part 2. Other Windows Online Movie Makers to Use [Top 3]
1. Kizoa
Link: Kizoa
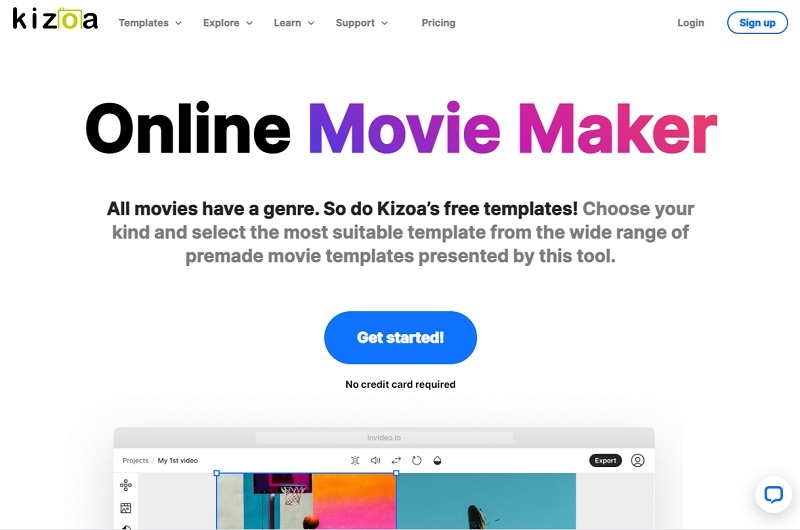
Customizing the appearance of your film is one of the finest ways to make it seem like it is your own. With the Kizoa tool, you may trim, apply a crossfade effect, choose the required resolution, and format for an output video in addition to merging files. Utilize Kizoa’s online video creator to produce eye-catching videos that will hold your audience’s attention. Create any kind of video, from personal family video slideshows to expert films to advertise your company. With the drag-and-drop movie production tool from Kizoa, you can create your very own video in a matter of minutes.
Use a video template as your starting point if you need inspiration. Key framing, animated overlays, noise reduction, transitions, and titles are just a few of the features it provides to help you produce excellent footage. For rapid video editing, there is a video production wizard. Windows Movie Maker’s auto movie themes pale in comparison to those provided by this program. Its extensive collection of stock footage and audio tracks helps you to concentrate on the crucial elements without having to drastically decrease the length of your film or the number of scenes.
2. FlexClip
Link: FlexClip
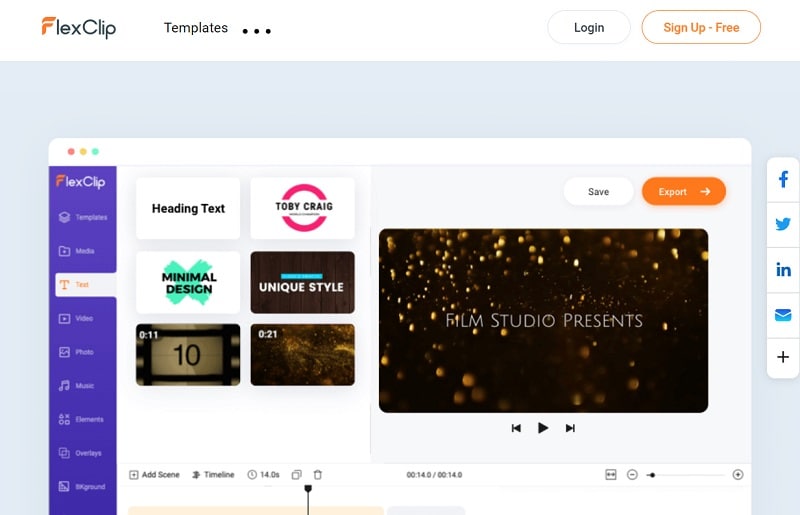
With the aid of the online video effects tool FlexClip, you may quickly and easily make entertaining short films. It has a ton of video editing features that you may use without logging in or creating an account, like merging, compressing, compiling, adding text, creating memes, etc. For those that are muted, you may use FlexClip to add animated text that blends in with the style of your film. Additionally, you may add your logo so that everyone is aware of who created the masterpiece they just saw.
An online video editor called FlexClip is mainly focused on producing high-quality marketing, advertising, and promotional films for companies. Recording a single video that will function on all social networking and video-sharing websites is almost impossible. Instagram, YouTube, and Facebook Marketing are among the partners of FlexClip that have received expert approval. It is used by marketers and enthusiasts to quickly create looping movies and stop motion animation. But as it only provides very basic functionality, it may not be the greatest choice for more intricate, demanding editing.
3. Veed.Io
Link: Veed.Io
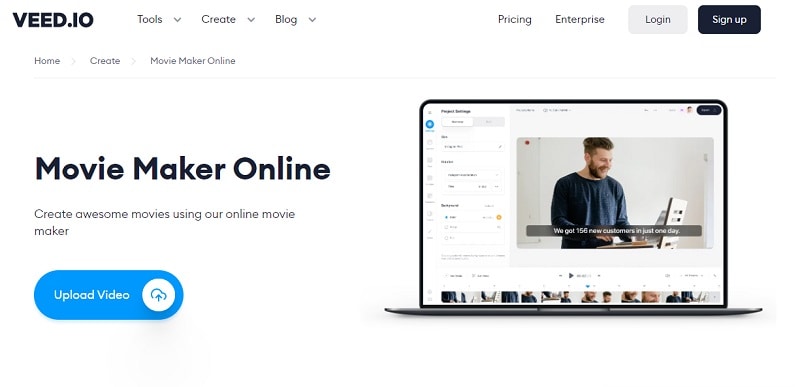
With only a few mouse clicks, users of the browser-based video editing program VEED may create professional-caliber movies. The greatest movie-making tools, including filters, effects, and stickers, are available on VEED. There are no intricate timelines, layers, or intricacy since it is a simple program that runs in your web browser. Simple drag-and-drop functionality is all you need to convey your tales. You may modify your video using its features. Using the video track below, you may combine, divide, or cut your files. Visit our website to see all of our filters, stickers, add-ons, and other tools.
Any device, whether an iPhone or Android phone, a MacBook, a Windows or Linux computer, may use VEED’s online video editor. You have access to all the resources you need to make amazing videos using VEED’s online video editor. Our user-friendly interface is very simple to use and is contemporary and intuitive. The native video sizes on each of the publishing sites, including Facebook, YouTube, and Vimeo, may all be altered using Veed. Finally, click “Export” in the editor’s upper-right corner, and your video will render quickly. Share some!
Conclusion
Use this editing list to produce more compelling video mashups for YouTube and other social media platforms in order to expand your audience, cultivate real connections with them, and eventually increase conversion rates. Because they combine the complex capabilities of the expensive, professional video suites with the user-friendliness and cost that appeal to novices, these online makers are a popular among editors of all skill levels. Make an investment in one of these video editing tools and own it.
Free Download For Win 7 or later(64-bit)
Free Download For macOS 10.14 or later
Part 1. How to Make a Video Online [Use Movie Maker Windows Online]
Using the help of Movie Maker, you may create videos online with your browser. It enables you to create professional-caliber videos without having to purchase video editing tools at professional-caliber costs. For every genre and need, this web program includes stock video, animated text, audio tracks, and on-screen effects. Your own video clips are uploaded. Then, use the simple drag-and-drop online video editor in Movie Maker to edit footage and add special effects and music to make your movie shine.
Making fantastic compilation films from your already-existing photographs and videos doesn’t need you to be a skilled editor. Even for amateur video makers, the platform’s UI is simple to use and straightforward to navigate. The customizing choices in Movie Maker are many. You have the option of uploading your own fonts and logos. You may also watermark your films and alter the text’s color. Additionally, there are a ton of very unique components like stickers, vector shapes, and masks that may enhance the visual appeal of your video productions and widen your creative boundaries.
Steps to Make Video with Movie Maker Online
Step1 Go to Movie Maker Online
Using Movie Maker Online, you can quickly and easily make incredibly interesting compilation films using your already-posted photographs and videos. You’ll immediately be sent to the editor, where you can begin organizing your films. Here’s the official link to the toolkit:
Step2 Upload Files to Web
Your photographs, videos, and text may all be uploaded. If you like the default music, you may skip the step to change it; otherwise, you can choose another song from our library or upload your own MP3 file. Files from a variety of sources and devices may be added. Click the Import Media button to start importing your own media. Click Open after locating the video you wish to modify.
Step3 Create an online video
Add your music to your video compilation after all of your clips have been placed on the timeline. To accomplish that, choose a song depending on the genre or mood you want by clicking on the Music option on the left menu panel. To listen to the music track, click the little icon to the left of it. Text, colors, pictures, and video may all be customized to your heart’s delight. Add effects, drag, cut, etc. Press the Make Video button.
Step4 Save and Share with Others
Sharing your films on Facebook, Instagram, YouTube, and other platforms is made effortless. You may also send your loved ones the URLs to your videos. When you are happy with the changes, click the Save & Share option in the upper right corner, choose the quality you want to download your movie in, and then click the Export button. Download the updated video, then post it.
Part 2. Other Windows Online Movie Makers to Use [Top 3]
1. Kizoa
Link: Kizoa
Customizing the appearance of your film is one of the finest ways to make it seem like it is your own. With the Kizoa tool, you may trim, apply a crossfade effect, choose the required resolution, and format for an output video in addition to merging files. Utilize Kizoa’s online video creator to produce eye-catching videos that will hold your audience’s attention. Create any kind of video, from personal family video slideshows to expert films to advertise your company. With the drag-and-drop movie production tool from Kizoa, you can create your very own video in a matter of minutes.
Use a video template as your starting point if you need inspiration. Key framing, animated overlays, noise reduction, transitions, and titles are just a few of the features it provides to help you produce excellent footage. For rapid video editing, there is a video production wizard. Windows Movie Maker’s auto movie themes pale in comparison to those provided by this program. Its extensive collection of stock footage and audio tracks helps you to concentrate on the crucial elements without having to drastically decrease the length of your film or the number of scenes.
2. FlexClip
Link: FlexClip
With the aid of the online video effects tool FlexClip, you may quickly and easily make entertaining short films. It has a ton of video editing features that you may use without logging in or creating an account, like merging, compressing, compiling, adding text, creating memes, etc. For those that are muted, you may use FlexClip to add animated text that blends in with the style of your film. Additionally, you may add your logo so that everyone is aware of who created the masterpiece they just saw.
An online video editor called FlexClip is mainly focused on producing high-quality marketing, advertising, and promotional films for companies. Recording a single video that will function on all social networking and video-sharing websites is almost impossible. Instagram, YouTube, and Facebook Marketing are among the partners of FlexClip that have received expert approval. It is used by marketers and enthusiasts to quickly create looping movies and stop motion animation. But as it only provides very basic functionality, it may not be the greatest choice for more intricate, demanding editing.
3. Veed.Io
Link: Veed.Io
With only a few mouse clicks, users of the browser-based video editing program VEED may create professional-caliber movies. The greatest movie-making tools, including filters, effects, and stickers, are available on VEED. There are no intricate timelines, layers, or intricacy since it is a simple program that runs in your web browser. Simple drag-and-drop functionality is all you need to convey your tales. You may modify your video using its features. Using the video track below, you may combine, divide, or cut your files. Visit our website to see all of our filters, stickers, add-ons, and other tools.
Any device, whether an iPhone or Android phone, a MacBook, a Windows or Linux computer, may use VEED’s online video editor. You have access to all the resources you need to make amazing videos using VEED’s online video editor. Our user-friendly interface is very simple to use and is contemporary and intuitive. The native video sizes on each of the publishing sites, including Facebook, YouTube, and Vimeo, may all be altered using Veed. Finally, click “Export” in the editor’s upper-right corner, and your video will render quickly. Share some!
Conclusion
Use this editing list to produce more compelling video mashups for YouTube and other social media platforms in order to expand your audience, cultivate real connections with them, and eventually increase conversion rates. Because they combine the complex capabilities of the expensive, professional video suites with the user-friendliness and cost that appeal to novices, these online makers are a popular among editors of all skill levels. Make an investment in one of these video editing tools and own it.
Free Download For Win 7 or later(64-bit)
Free Download For macOS 10.14 or later
Also read:
- 2024 Approved It Is Crucial to Introduce Your Kids to the Different Colors and Practice the Color Matching Game. So, Here Are the Various Factors Related to Color Matching for Your Child with a Tool to Help You in It Ideally
- Updated In 2024, | How to Share YouTube Video on Zoom?
- 8 Frame Rate Video Converters You Must Try for 2024
- New Discover the Art of Masking in After Effects A Comprehensive Guide for 2024
- New 2024 Approved Online Video Makers
- Effective 10 Ways to Convert YouTube to MOV at Ease PC & Online for 2024
- Updated Adobe Premiere Pro Guide to Slow-Down Video for 2024
- Updated How to Add Subtitles in QuickTime Player, In 2024
- 2024 Approved How to Create Loop Videos Using Filmora
- New Are You Looking for a Voice Changer to Make Your Gaming Experience More Fun? Here Is a List of the Top 6 Best Alternatives of Clownfish Voice Changers to Use
- In 2024, AI Features of Wondershare Filmora - Silence Detection in Videos
- Updated Go Through This Guide on All Steps in Freezing Frame Sequences in Videos Using Filmora. Details Include Splitting the Clip, Reversing Speed, and More
- In 2024, Attaining Slow Motion Video Trend Finding The Best CapCut Templates
- Updated In 2024, VSCO Slow Motion
- New Step by Step to Cut Video in Adobe Premiere Pro for 2024
- The Most Useful Tips for Pokemon Go Ultra League On Tecno Spark Go (2023) | Dr.fone
- In 2024, Top 15 Augmented Reality Games Like Pokémon GO To Play On Huawei Nova Y71 | Dr.fone
- Which Pokémon can Evolve with a Moon Stone For Vivo Y56 5G? | Dr.fone
- Updated All About Kapwing Video Translation for 2024
- Simple and Effective Ways to Change Your Country on YouTube App Of your Motorola Moto E13 | Dr.fone
- 4 solution to get rid of pokemon fail to detect location On Samsung Galaxy A15 4G | Dr.fone
- How To Restore Missing Music Files from Oppo K11x
- How to Change Spotify Location After Moving to Another Country On Vivo V29 Pro | Dr.fone
- In 2024, Top 7 Phone Number Locators To Track OnePlus 12 Location | Dr.fone
- In 2024, How PGSharp Save You from Ban While Spoofing Pokemon Go On Vivo X Flip? | Dr.fone
- Updated In 2024, 10 2D/3D Animation Tips & Tricks for You
- Getting the Pokemon Go GPS Signal Not Found 11 Error in Tecno Camon 20 Pro 5G | Dr.fone
- How to Change Location On Facebook Dating for your Nokia C22 | Dr.fone
- Title: What Is the Best FPS for YouTube Videos, In 2024
- Author: Chloe
- Created at : 2024-05-20 03:38:23
- Updated at : 2024-05-21 03:38:23
- Link: https://ai-editing-video.techidaily.com/what-is-the-best-fps-for-youtube-videos-in-2024/
- License: This work is licensed under CC BY-NC-SA 4.0.
