
:max_bytes(150000):strip_icc():format(webp)/how-to-use-a-ps5-controller-on-your-pc-or-mac-5089439-b56739aa27bd48858200878a6b64f952.jpg)
What Is the Top Filmora Slideshow Templates? Experts Choice for 2024
What Is the Top Filmora Slideshow Templates? Experts Choice
47. What is the Best Filmora Slideshow Templates Experts Choice
An easy yet powerful editor
Numerous effects to choose from
Detailed tutorials provided by the official channel
With Filmora software, present information and content through slideshows. Filmora slideshow templates are available on the website free for making effective slideshows.
Part 1 Why Filmora Slideshow Templates Are Popular?
Filmora Slideshow templates are widely used by the users for creating new and impressiveslideshows. The reason for popularity of this software is many such as:
● It is an affordable software/application available free of cost for making slideshows using templates.
● It can run on computers and cell phones also, so there is flexibility in its access.
● It is equipped with various tools and features for both video and audio applications.
● Background effects, picture effects and animation features further make it more popular than the rest of the software.
● It is a good pleasing interface suitable to all content creators whether they are beginners or professionals.
● Video and audio control and video stabilization features make it further popular.
● Advanced text-editing make it possible to add contents in the video slides.
● Templates can be created by adding titles, text, sound, filters, and transitions.
● Theme-based templates are designed and developed looking into the needs f every user for different occasions.
● It has better editing tools like split, merge, rotate, and more.
● Auto-create videos features give the users comfort for using the application by saving their time and energy. Further they can add royalty-free images, videos, and music.
● Aspect ratio for the video creation can be changed.
Part 2 Where to Download Free Filmora Slideshow Templates
To use unlimited and free Filmora slideshow templates, one is required to have the application downloaded from the website. And thereafter one can download the different styles and patterns of templates from section filmora slideshow template free download. Once you create an account in the Filmora platform, you can easily connect with various templates useful for various occasions.
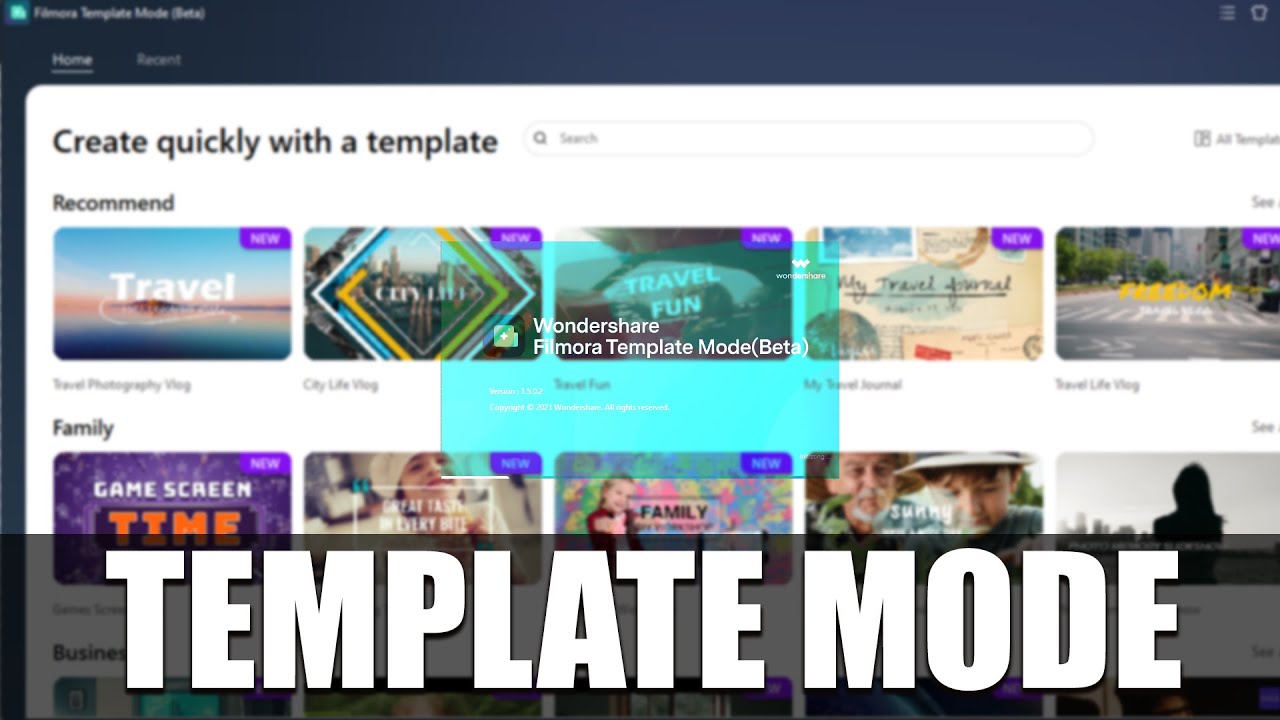
Filmora software or application is the only destination for having a bunch of various templates with many tools to improve the creation of slide shows. One can see the various templates available in the official website of Filmora. One can make slideshow with the help of video maker offered by Filmora. This software is free of cost. The easy-to-use interface feature of this software is good for beginners. It has various in-built customizable templates based in various themes like project, marketing, corporate, celebration, fun, natural, family, and business. It has auto-create mode which saves time and energy of the users as it automatically plays the slides when all media files, pictures or texts are placed over the various slides. For this one is just required to select the different files and click on “Auto-create” option.
Part 3 Best 10 Filmora Slideshow Templates
Filmora has many advanced templates for presentation and slideshow. One can find different kind of templates suitable for creating content and information for various applications. Filmora templates slideshow becomes more attractive when in-built Filmora templates are used. Some of the best 10 Filmora slideshow templates are:
01Business- Proposal Presentation Template
Looking into the business need of business users and marketing professionals, Filmora has developed Business-proposal presentation template with 45 unique custom slides. Business users can create impressive business proposals with various theme and color options. One can insert pictures and text easily in this template and can edit number of times.
02Pitch Deck Template
This template is used to design a pitch deck used by the companies to present at the stage and project about the company. These templates are well designed as they are handled by professionals.
03Company Profile Google Slides Template
It is mostly useful to business professionals to prepare business portfolios. The best thing with these templates is that they are unique, elegant, professional and creative. This template is multipurpose for different business applications.
04Clean Slideshow After Effects Templates
Those who want to make simple but impressive templates, clean slideshow after effect templates are best option. Through this template, one can focus on the main content and can add transitions. Photo slideshows can be easily created through this template.
05Minimal Corporate Presentation
This template is good for the beginners who desire to prepare a simple slideshow. The advantage of this template is that it is easy to use and text can be easily edited. One can insert picture for various corporate and business presentations.
06Corporate Event Promo
A business mostly does promotions and this needs a proper preparation. Corporate event promo presentation template is the best choice for such situations. One can create creative promo slides with such template by adding title and overlays in the template. They can also be edited easily.
07Business Marketing Presentation Layout
Most of the business organizations preferto choose such a template that can present their marketing plan in the best possible way. This Business Marketing Presentation is perfect for every business concern. It comes with nine designing options, through which one can easily replace images and text.
08Event Conference
For creating information and documents over template useful in an event conference, this template of filmora is very useful. The details of event and necessary information can be put in a systematic way through this template. However when played as slideshow, it can reach to maximum number of viewers.
09Mosaic Slideshow
Display of photographs, video albums or glimpse of any events can be impressively done with the help of Mosaic slideshow template. With increasing trends of photo sharing and video making, these templates are gaining popularity.
10Old Fashion Slides
As the name suggests, the templates is good for vintage slideshow. One can use this template for photo and video slideshows. Those who love to be creative, they can use this template.
These are some filmora template slideshow available at the website; however the users can also explore the other category of templates based on occasions at the website of Filmora. Every content creator will surely get desired template to present their information, data and pictures in a unique way.
Part 4 FAQ of Filmora Slideshow Templates
Wondershare Filmora Video Editor is a popular video editing application that also supports making slideshows through the use of various templates. It offers advance editing software for those who love to be creative and present their content in an artistic way. The various features of the software like elegant transitions, beautiful slides, video effects, text, audio and background effects make it more popular among beginners and professionals.
For Win 7 or later (64-bit)
For macOS 10.12 or later
Working with Filmora is easy and time saving. One can easily drag and drop the slides made and do editing on it. Making video through templates is an easy task. Just in few simple steps one can make and export the slides and play it. Photo video slideshows can also be made by using Filmora application. It runs smoothly over various operating systems.
● Whether Filmora has slideshow templates at its site?
Yes, the official website has various online free slideshow templates for the users.
● Whether I need to pay to get sample templates from Filmora?
The trial version of the software is free and you can download the slideshow templates free of cost.
● Whether the slideshow prepared in Flimora site can be edited with other application?
Yes, you can easily do editing on the slides made with Filmora application on other applications.
● What type of slideshare is available at Filmora?
All kind of slideshare and templates are available at Filmora that are useful for business, projects, marketing and personal purposes.
● Ending Thoughts →
● Filmora is a software/application widely used as video editing software and it is getting popular among the users due to its extraordinary features. It has great video editing tools, effects and transitions that give a complete package of video, slideshow and presentation making.
● Filmora has wide range of templates developed at its site for ease of making presentation and slideshows. These are developed looking to needs of every content creator. Some of templates available at the website are clean slideshow after effects templates, Mosaic slideshow, Business- proposal presentation template and many others.
● The filmora photo slideshow template free download and other templates can be searched on the official website of Filmora and can be downloaded from there in simple steps. It can edit and saved at any operating system.
With Filmora software, present information and content through slideshows. Filmora slideshow templates are available on the website free for making effective slideshows.
Part 1 Why Filmora Slideshow Templates Are Popular?
Filmora Slideshow templates are widely used by the users for creating new and impressiveslideshows. The reason for popularity of this software is many such as:
● It is an affordable software/application available free of cost for making slideshows using templates.
● It can run on computers and cell phones also, so there is flexibility in its access.
● It is equipped with various tools and features for both video and audio applications.
● Background effects, picture effects and animation features further make it more popular than the rest of the software.
● It is a good pleasing interface suitable to all content creators whether they are beginners or professionals.
● Video and audio control and video stabilization features make it further popular.
● Advanced text-editing make it possible to add contents in the video slides.
● Templates can be created by adding titles, text, sound, filters, and transitions.
● Theme-based templates are designed and developed looking into the needs f every user for different occasions.
● It has better editing tools like split, merge, rotate, and more.
● Auto-create videos features give the users comfort for using the application by saving their time and energy. Further they can add royalty-free images, videos, and music.
● Aspect ratio for the video creation can be changed.
Part 2 Where to Download Free Filmora Slideshow Templates
To use unlimited and free Filmora slideshow templates, one is required to have the application downloaded from the website. And thereafter one can download the different styles and patterns of templates from section filmora slideshow template free download. Once you create an account in the Filmora platform, you can easily connect with various templates useful for various occasions.
Filmora software or application is the only destination for having a bunch of various templates with many tools to improve the creation of slide shows. One can see the various templates available in the official website of Filmora. One can make slideshow with the help of video maker offered by Filmora. This software is free of cost. The easy-to-use interface feature of this software is good for beginners. It has various in-built customizable templates based in various themes like project, marketing, corporate, celebration, fun, natural, family, and business. It has auto-create mode which saves time and energy of the users as it automatically plays the slides when all media files, pictures or texts are placed over the various slides. For this one is just required to select the different files and click on “Auto-create” option.
Part 3 Best 10 Filmora Slideshow Templates
Filmora has many advanced templates for presentation and slideshow. One can find different kind of templates suitable for creating content and information for various applications. Filmora templates slideshow becomes more attractive when in-built Filmora templates are used. Some of the best 10 Filmora slideshow templates are:
01Business- Proposal Presentation Template
Looking into the business need of business users and marketing professionals, Filmora has developed Business-proposal presentation template with 45 unique custom slides. Business users can create impressive business proposals with various theme and color options. One can insert pictures and text easily in this template and can edit number of times.
02Pitch Deck Template
This template is used to design a pitch deck used by the companies to present at the stage and project about the company. These templates are well designed as they are handled by professionals.
03Company Profile Google Slides Template
It is mostly useful to business professionals to prepare business portfolios. The best thing with these templates is that they are unique, elegant, professional and creative. This template is multipurpose for different business applications.
04Clean Slideshow After Effects Templates
Those who want to make simple but impressive templates, clean slideshow after effect templates are best option. Through this template, one can focus on the main content and can add transitions. Photo slideshows can be easily created through this template.
05Minimal Corporate Presentation
This template is good for the beginners who desire to prepare a simple slideshow. The advantage of this template is that it is easy to use and text can be easily edited. One can insert picture for various corporate and business presentations.
06Corporate Event Promo
A business mostly does promotions and this needs a proper preparation. Corporate event promo presentation template is the best choice for such situations. One can create creative promo slides with such template by adding title and overlays in the template. They can also be edited easily.
07Business Marketing Presentation Layout
Most of the business organizations preferto choose such a template that can present their marketing plan in the best possible way. This Business Marketing Presentation is perfect for every business concern. It comes with nine designing options, through which one can easily replace images and text.
08Event Conference
For creating information and documents over template useful in an event conference, this template of filmora is very useful. The details of event and necessary information can be put in a systematic way through this template. However when played as slideshow, it can reach to maximum number of viewers.
09Mosaic Slideshow
Display of photographs, video albums or glimpse of any events can be impressively done with the help of Mosaic slideshow template. With increasing trends of photo sharing and video making, these templates are gaining popularity.
10Old Fashion Slides
As the name suggests, the templates is good for vintage slideshow. One can use this template for photo and video slideshows. Those who love to be creative, they can use this template.
These are some filmora template slideshow available at the website; however the users can also explore the other category of templates based on occasions at the website of Filmora. Every content creator will surely get desired template to present their information, data and pictures in a unique way.
Part 4 FAQ of Filmora Slideshow Templates
Wondershare Filmora Video Editor is a popular video editing application that also supports making slideshows through the use of various templates. It offers advance editing software for those who love to be creative and present their content in an artistic way. The various features of the software like elegant transitions, beautiful slides, video effects, text, audio and background effects make it more popular among beginners and professionals.
For Win 7 or later (64-bit)
For macOS 10.12 or later
Working with Filmora is easy and time saving. One can easily drag and drop the slides made and do editing on it. Making video through templates is an easy task. Just in few simple steps one can make and export the slides and play it. Photo video slideshows can also be made by using Filmora application. It runs smoothly over various operating systems.
● Whether Filmora has slideshow templates at its site?
Yes, the official website has various online free slideshow templates for the users.
● Whether I need to pay to get sample templates from Filmora?
The trial version of the software is free and you can download the slideshow templates free of cost.
● Whether the slideshow prepared in Flimora site can be edited with other application?
Yes, you can easily do editing on the slides made with Filmora application on other applications.
● What type of slideshare is available at Filmora?
All kind of slideshare and templates are available at Filmora that are useful for business, projects, marketing and personal purposes.
● Ending Thoughts →
● Filmora is a software/application widely used as video editing software and it is getting popular among the users due to its extraordinary features. It has great video editing tools, effects and transitions that give a complete package of video, slideshow and presentation making.
● Filmora has wide range of templates developed at its site for ease of making presentation and slideshows. These are developed looking to needs of every content creator. Some of templates available at the website are clean slideshow after effects templates, Mosaic slideshow, Business- proposal presentation template and many others.
● The filmora photo slideshow template free download and other templates can be searched on the official website of Filmora and can be downloaded from there in simple steps. It can edit and saved at any operating system.
What Is MOV Format and How To Edit MOV Video Creatively?
We come across different media files every day, and surprisingly, every file has a unique format. Different devices and different programs support and entertain different file formats. It is hard to find the correct file format for your device.
The following article will shed light on MOV format. Not just this, apart from its introduction, pros and cons, if you plan to edit your MOV video format, we will also introduce a video editor. Let’s start!
In this article
02 What Are Pros and Coins about MOV Video Format?
03 Best MOV Video Editor- Filmora Video Editor
04 How to Edit MOV Video Files in An Creative Way?
05 Differences Between MP4 and MOV
Part 1. What Is MOV Format?
You might be using the MOV format without noticing and knowing what it is? MOV is a QuickTime file developed by Apple Inc. It is a multimedia container file. MOV file format is capable of keeping multiple types of data on different tracks, which may include audio, video, or even texts.

Does the MOV video format only work on Mac? MOV is developed by Apple, but it does not mean that it is not compatible with other devices. You can use it on Windows along with Sony and DVD. MOV file format is the same as MPEG-4 format file. It is sometimes considered as the basis for the MPEG-4 file format.
Part 2. What Are Pros and Coins about MOV Video Format
Do you know what benefits you get from the MOV video format? Or else, why not discuss its disadvantages? The following section of this article will shed light on both the advantages and also disadvantages of the MOV format.
Advantages of MOV Format
MOV file format is a famous format because of the simplicity it provides in editing and also because it embeds well in different programs. The format is very convenient as it holds various media content like videos, audio, everything in one compact place. MOV video files are easily edited as the primary elements are adjusted.
MOV format is widely used on the web, and because of this reason, the format is ideal for sharing files on the internet. The format is perfect for Mac and QuickTime Player. It is highly compatible with different platforms like Mac, Windows, iOS, and Android. Do you know about the storage space of MOV? The format acquires low storage space, making it a great file format.
Drawbacks of MOV Format
Moving on to its drawbacks, MOV has lossy compression of video tracks. The overall quality of the video might also be damaged while compressing the video. Every track of the MOV format file is encoded with a specific codec. Only those apps can smoothly play a MOV file that supports and recognize the encoded codec. In this case, you might need to convert the file format.
Part 3. Best MOV Video Editor- Filmora Video Editor
Are you looking for a great video editor to edit your MOV format videos? We might have something for you. Let’s introduce Wondershare Filmora to edit drastic videos. The software is very easy to understand and use. Its intuitive interface guides the user about every step.

For Win 7 or later (64-bit)
For macOS 10.12 or later
Filmora Video Editor has enormous features that could make a stunning video. You cannot find a better video editor than Filmora because of its features like cutting, trimming, joining, splitting, and so much more than this. Let’s share a few more features of Filmora:
Auto Reframe
Isn’t it easy if your video gets automatically focused? With Filmora, Auto Reframe feature, the AI technology automatically detects the focal point of the video and keeps it in the frame. With this feature, the main object of the video always remains in focus.
Stabilize Video
Do you know what wonders Stabilize Video feature can do? While filming a video, your hand might shake, and your video quality is disturbed, but with Filmora, you can fix the video. Use its Stabilize Video feature and smooth the shaky footage.
Silence Detection
You are not always speaking in a video; some parts of the video are silent. What to do with such parts? Well, take help from Filmora and remove the silent instances from your video. The Silence Detection feature spontaneously detects the silent parts of the MOV file format video and removes them, saving your precious time.
Split Screen
Are you creating a tutorial? Split Screen is the ideal feature to use for creating such videos. Filmora lets you display multiple videos on a single screen with this feature. You can simultaneously incorporate various clips by using the different provided templates.
Part 4. How to Edit MOV Video Files in An Creative Way?
Filmora is a stunning video editor with uncountable features. You can create mind-blowing videos with Wondershare Filmora. Apart from features like trim, cut, join, split, you also get some great advanced features like Motion Tracking, AI Portrait, Pan & Zoom, and a lot more.
The video editor is easy to use, and even novice users can understand the software and work with it. Filmora is a famous editor because of its functionalities. If you are looking for a video editor to edit your MOV file format, try Filmora, you will not be disappointed. Follow the steps below for assistance:
Step 1: Importing Media
After installing Filmora, launch it on your device. From the home screen, head to the ‘File’ tab and look for the ‘Import Media’ option. A sub-menu will appear as you hover on the option, click on the ‘Import Media Files’, and locate the MOV format file from the device to work with.

Step 2: Add Audio Effects
Do you want to make your video interesting? Try by adding some sound effects. For this, head to the ‘Audio’ section from the top menu and look for your preferred effect.

Step 3: Add Transitions
You might mix and join various videos but do they look good? For smooth transitions, move to the ‘Transition’ tab and select a cool effect.

Step 4: Elements and Titles
Have you tried adding any cool elements to your MOV video? From the ‘Elements’ section, add things like Laser Eye, fun emoji, and a lot more. Along with this, add titles to your video from the ‘Titles’ tab.

Step 5: Export MOV File
Are you satisfied with the final MOV video format file? If you are, export the video to your device. Hit the ‘Export’ button and select ‘MOV’ format as your output format to save the video.

Part 5. Differences Between MP4 and MOV
Both MP4 and MOV file format is almost the same thing. Some of the minor differences that exist are MOV format is recommended best for Mac devices. On the contrary, MP4 is universal that can be used on any device irrespective of the operating system or the software.

MP4 files are more compressed, thus taking less space than MOV video format, which takes slightly more space. The quality of payback that MP4 provides is less than what the MOV file format provides. MOV format, thus, for this reason, is used more by professionals.
Final Thoughts
The article has everything you need to know about the MOV format. From its introduction to the steps of editing a MOV video format, we shared everything in detail. It’s time to talk about a nice video creator and also a video editor. We are talking about Wondershare Filmora. The video editor will wow you with its features and editing capabilities.
The video editor offers regular options like split, cut, trim, join, etc. Whereas it also comes with advanced editing features like Color Match, Chroma Key Background, Auto Highlight, and whatnot. If you want to create a stunning and eye-catching video, take help from Filmora.
Wondershare Filmora
Get started easily with Filmora’s powerful performance, intuitive interface, and countless effects!
Try It Free Try It Free Try It Free Learn More >

02 What Are Pros and Coins about MOV Video Format?
03 Best MOV Video Editor- Filmora Video Editor
04 How to Edit MOV Video Files in An Creative Way?
05 Differences Between MP4 and MOV
Part 1. What Is MOV Format?
You might be using the MOV format without noticing and knowing what it is? MOV is a QuickTime file developed by Apple Inc. It is a multimedia container file. MOV file format is capable of keeping multiple types of data on different tracks, which may include audio, video, or even texts.
Does the MOV video format only work on Mac? MOV is developed by Apple, but it does not mean that it is not compatible with other devices. You can use it on Windows along with Sony and DVD. MOV file format is the same as MPEG-4 format file. It is sometimes considered as the basis for the MPEG-4 file format.
Part 2. What Are Pros and Coins about MOV Video Format
Do you know what benefits you get from the MOV video format? Or else, why not discuss its disadvantages? The following section of this article will shed light on both the advantages and also disadvantages of the MOV format.
Advantages of MOV Format
MOV file format is a famous format because of the simplicity it provides in editing and also because it embeds well in different programs. The format is very convenient as it holds various media content like videos, audio, everything in one compact place. MOV video files are easily edited as the primary elements are adjusted.
MOV format is widely used on the web, and because of this reason, the format is ideal for sharing files on the internet. The format is perfect for Mac and QuickTime Player. It is highly compatible with different platforms like Mac, Windows, iOS, and Android. Do you know about the storage space of MOV? The format acquires low storage space, making it a great file format.
Drawbacks of MOV Format
Moving on to its drawbacks, MOV has lossy compression of video tracks. The overall quality of the video might also be damaged while compressing the video. Every track of the MOV format file is encoded with a specific codec. Only those apps can smoothly play a MOV file that supports and recognize the encoded codec. In this case, you might need to convert the file format.
Part 3. Best MOV Video Editor- Filmora Video Editor
Are you looking for a great video editor to edit your MOV format videos? We might have something for you. Let’s introduce Wondershare Filmora to edit drastic videos. The software is very easy to understand and use. Its intuitive interface guides the user about every step.
For Win 7 or later (64-bit)
For macOS 10.12 or later
Filmora Video Editor has enormous features that could make a stunning video. You cannot find a better video editor than Filmora because of its features like cutting, trimming, joining, splitting, and so much more than this. Let’s share a few more features of Filmora:
Auto Reframe
Isn’t it easy if your video gets automatically focused? With Filmora, Auto Reframe feature, the AI technology automatically detects the focal point of the video and keeps it in the frame. With this feature, the main object of the video always remains in focus.
Stabilize Video
Do you know what wonders Stabilize Video feature can do? While filming a video, your hand might shake, and your video quality is disturbed, but with Filmora, you can fix the video. Use its Stabilize Video feature and smooth the shaky footage.
Silence Detection
You are not always speaking in a video; some parts of the video are silent. What to do with such parts? Well, take help from Filmora and remove the silent instances from your video. The Silence Detection feature spontaneously detects the silent parts of the MOV file format video and removes them, saving your precious time.
Split Screen
Are you creating a tutorial? Split Screen is the ideal feature to use for creating such videos. Filmora lets you display multiple videos on a single screen with this feature. You can simultaneously incorporate various clips by using the different provided templates.
Part 4. How to Edit MOV Video Files in An Creative Way?
Filmora is a stunning video editor with uncountable features. You can create mind-blowing videos with Wondershare Filmora. Apart from features like trim, cut, join, split, you also get some great advanced features like Motion Tracking, AI Portrait, Pan & Zoom, and a lot more.
The video editor is easy to use, and even novice users can understand the software and work with it. Filmora is a famous editor because of its functionalities. If you are looking for a video editor to edit your MOV file format, try Filmora, you will not be disappointed. Follow the steps below for assistance:
Step 1: Importing Media
After installing Filmora, launch it on your device. From the home screen, head to the ‘File’ tab and look for the ‘Import Media’ option. A sub-menu will appear as you hover on the option, click on the ‘Import Media Files’, and locate the MOV format file from the device to work with.
Step 2: Add Audio Effects
Do you want to make your video interesting? Try by adding some sound effects. For this, head to the ‘Audio’ section from the top menu and look for your preferred effect.
Step 3: Add Transitions
You might mix and join various videos but do they look good? For smooth transitions, move to the ‘Transition’ tab and select a cool effect.
Step 4: Elements and Titles
Have you tried adding any cool elements to your MOV video? From the ‘Elements’ section, add things like Laser Eye, fun emoji, and a lot more. Along with this, add titles to your video from the ‘Titles’ tab.
Step 5: Export MOV File
Are you satisfied with the final MOV video format file? If you are, export the video to your device. Hit the ‘Export’ button and select ‘MOV’ format as your output format to save the video.
Part 5. Differences Between MP4 and MOV
Both MP4 and MOV file format is almost the same thing. Some of the minor differences that exist are MOV format is recommended best for Mac devices. On the contrary, MP4 is universal that can be used on any device irrespective of the operating system or the software.
MP4 files are more compressed, thus taking less space than MOV video format, which takes slightly more space. The quality of payback that MP4 provides is less than what the MOV file format provides. MOV format, thus, for this reason, is used more by professionals.
Final Thoughts
The article has everything you need to know about the MOV format. From its introduction to the steps of editing a MOV video format, we shared everything in detail. It’s time to talk about a nice video creator and also a video editor. We are talking about Wondershare Filmora. The video editor will wow you with its features and editing capabilities.
The video editor offers regular options like split, cut, trim, join, etc. Whereas it also comes with advanced editing features like Color Match, Chroma Key Background, Auto Highlight, and whatnot. If you want to create a stunning and eye-catching video, take help from Filmora.
Wondershare Filmora
Get started easily with Filmora’s powerful performance, intuitive interface, and countless effects!
Try It Free Try It Free Try It Free Learn More >
Camtasia vs Final Cut Pro
With many available video editing solutions in the market today, it is a bit hard to choose the best video editing software for your unique needs. Remember, it’s all about investing money. In every purchase, you need to be sure about purchasing no matter the amount. In the case of video editing software, the concern is just significant as you should find software that perfectly suits your requirements. A video editing software may be having excellent features, but become complex when working with. On the other hand, the software may be quite user-friendly, but its range of tools is not as large.
Implementing tools such as Camtasia or Final Cut Pro requires a great deal of contemplating and comparison of crucial factors. You may be wondering, when you compare Camtasia vs Final cut pro, which is the best to use. To make a clear comparison between these two video editing programs, one has to judge all the crucial elements. Though the two programs share some degree of similarity, this article will help you understand if Final Cut Pro is better than Camtasia. We are going to compare Final Cut Pro X vs Techsmith Camtasia using their features, pros, and Cons, market prices, functionality, and customer support to help you fully understand them.
Overall Comparison
This table will help you compare Camtasia vs Final cut pro.
674 reviews341 reviews$ 249.99 for a user license$139.99 upgrade$299.99 per licenseRelatively easy to use A bit complicated for beginners</6h>
| | Camtasia | Final Cut Pro | |
| ——————— | ————————————————————————————————————————- | ————————————————————————————————————————— |
| Overall rating | 674 reviews | 341 reviews |
| Entry-level Price | $ 249.99 for a user license $139.99 upgrade | $299.99 per license |
| Ease of use | Relatively easy to use | A bit complicated for beginners |
| Market share | Small-Business (50.5% of reviews) Mid-Market (26.0% of reviews) Enterprise (23.4% of reviews) | Small-Business (71.0% of reviews) Mid-Market (17.05 reviews) Enterprise (11.9% of reviews) |
| Value of money | 2/10 – low cost | 4/10 – average cost |
| Customer support | Provide Email Languages supported; English, French, Germany, Japanese. | Email Languages supported; English |
| Functionality | Speed is a bit slow Various exporting settings. Enough editing capability. Does not support live recording from a camera. | Speed is higher than its comparison Exporting settings are limited Not as efficient as its comparison Has DV camera support |
| Support system | Desktop, Cloud | Desktop, Cloud, Mobile |
As you can see in the table above there is no great deference seen when comparing Final cut pro X vs Techsmith Camtasia, but it can tell you if is Final cut pro better than Camtasia or reverse is the case.
Final Cut Pro
Final Cut Pro is the perfect macOS video editing software that can help you achieve a professional-looking video. This software is built with the latest and most powerful tools that make it an effortless tool for video editing. It has impressive filters, graphics, and a range of other cool video editing features. Its coolest part is its ability to enable 360-degree video editing for VR and VR headset playback. This program uses multi-core multi-thread machines quickly to allow you to import the videos in different formats faster than others.

Like any other software, Final Cut Pro possesses some pros and cons as listed below;
Pros:
- It is a stable program that can be very useful in small businesses.
- It has a powerful architecture for your complex and heavy projects.
- Its fast rendering speed can allow you to conduct Multicam editing.
- It has classic GPU utilization and powerful media organization to allow you to organize assets such as audio and video carefully.
- Its easy audio modification capabilities can allow you to create impeccable VR videos.
- It has a customizable and streamlined share interface that makes high-quality file delivery easy and fast.
- It can edit videos offline.
- It is tailored with real-time graphics and cool effects like text and blurs that are easy to apply.
Cons:
- It is complex and thus difficult for beginners.
- It has limited export options.
- It only works on Mac computers.
Editing video with Final Cut Pro is not a complicated process. Here are the steps to help a beginner get started.
Step1: Create a new project & import media
When you Launch the Final Cut Pro interface, Libraries and Events are automatically created. You only need to create a new project.
At the top menu bar, click File > New > Project to create a new project. Here you will have to type in a new name of the project and then select ‘Use Automatic Settings’.
At the top menu bar again, click File > Import > Media to enable the program to bring up the Media Import window where you can select the video and audio files you want to import into your new project.
After selecting all the media you want to include in your project press ‘Import Selected’ and then close the media window.
Step 2: Add your trimmed clips to the timeline.
The thumbnails of all the media you have imported will be appearing in the browser. For you to create a new video you need to arrange and trim that media in the timeline.
In your browser, you can set the ‘In and Out’ points for each video clip by holding ‘_Option_’. To do this you will have to click the thumbnail and drag it. The yellow timeline that appears on the clip represents the range that will be added to your video timeline.
After arranging them in the order that you want them to play, trim your clips by moving the mouse cursor to the edge of its thumbnail. This is done by using the ‘Trim tool’. Drag forward or backward to adjust the clip’s endings.
If you are arranging the clips in your sequence, you need to drag and drop any of the clips from the timeline into a different position. Final Cut Pro has a tool known as Magnetic timeline that will automatically insert and arrange the clips for you. You just need to ensure that your clips do not overlap or lay on top of each other.
To preview your video in the viewer, press the space bar on your keyboard or the Play icon in your software interface.
Step 3: Add Title, Texts, Transitions, and Effects
Title and Texts: Final Cut Pro has many Titles located in the browser where you imported your media. You can add them by dragging them into your video’s timeline. To access those titles you can press the ‘Title and Generators’ icon in the sidebar to open it.
Transitions: When adding Transitions, there is nothing wrong with a “hard cut_” between 2 clips. Use the transitions only where they make sense so as not to ruin your video. To add these transitions, you need to open the ‘_Transition browser’ by clicking on its indicated icon.
The transition’s length can be adjusted by dragging inwards or outwards. To customize your transition you can open the inspector by pressing ‘Command + 4’ and make the adjustments.
Effects: With Final Cut Pro inbuilt Effects, you can add some more value to your video after you are done with basic arrangements in the timeline. To add the effects click on the ‘Effects browser’ icon to open it.
Next to the effects browser icon, choose your preferred effect and add it between any 2 clips. By doing this you will have added animation effect between them.
Step 4: Add Audio, Music, and Color.
Audio & Music: At this point, you can import and add your music. Photos and Audio sidebar icon is located above the browser and you can click to open, and then select Sound Effects.
To see all the songs available in Final Cut Pro, you can type the word ‘Jingle‘ and you can preview them by pressing the small play button.
Color correction: By highlighting all the video clips in your video timeline, you can see a yellow outline around them.
Then open the drop-down menu by clicking the ‘_Enhancement_’ icon situated below the Viewer.
To improve the color and contrast, select Balance Color or ‘Option + Cmd + B’.
Now that you are done editing your video, you can save and share as you prefer.
Camtasia
Camtasia is a perfect all-in-one video editing and screen recording program. If you compare Camtasia vs Final cut pro, Camtasia is quite easy to use even for beginners. It can work in both Windows and macOS and provides the user with a demonstration and education video platform. It contains cool features to help you capture and edit your videos and audios appropriately.

Here are some pros and cons of Camtasia.
Pros:
- It is easy to learn.
- It has a good capture feature.
- Impressive cursor effects.
- It has Interactivity features.
- It has a good asset library
- Availability of mobile version.
- It offers great customer service.
- Available at a low cost.
Cons:
- Constant crashes and bugs.
- Limited customization
- No key tracking.
Here are key steps to follow when editing a video with Camtasia.
Step 1: Break up steps of a process with lower thirds.
Break any long multi-step video to help lower the viewer’s cognitive load.
Step 2: Reinforce texts with video.
Remove any mistakes and extra content such as unnecessary footage from the ends of your recording. If you trim too much drag the clip back to restore. This process is known as trimming.
You can zoom in on the most important section to focus your viewer’s attention there.
Step 3: Add narrative to video
Alternative Way to Edit Videos
Getting an appropriate video editing software is quite challenging as the makers of these software sometimes get confused about if the programs needed are for home videos or professional-quality work such as Hollywood movies. This is why you will find that some programs are complex to use while others lack essential features to make your work efficient.
Filmora video editor is one of the most efficient for video editing. This software is powerful and easy to use and it is built with many features to make your vision come true. It is fit for small scale, medium scale and large businesses.
For Win 7 or later (64-bit)
For macOS 10.12 or later
These steps will help you to know how to edit video with Filmora software;
Step 1: Start a new project.

After making sure that you have Filmora video editor installed on your computer, start a new project. Open the app then choose a dropdown option from the Select Project Aspect Ratio.
Step 2: Import your media

The footage, photos, and audios you use in your video are the key basic aspects of your video. Organizing all the files you are going to use in a single file. You can do this by browsing the file menu. Click the ‘File > Import Media Folder’ menu in Filmora and select the folder that contains your video files.
After importing your video files the thumbnails for each file will appear in one half of the application. Double-click on the thumbnails for a preview.
These thumbnails prove that all your captured video clips are already in the application and ready to be edited. Click on the Filmora video editing guide to get to help you know what to do.
Step 3: Add clips to the timeline, trim, adjust appropriately and sequence them.

Now that you have reviewed your video library and seen that they are there, you need to add them to the video editing timeline at the bottom of your app. This is quite easy as you can view all your video clips and determine which is to be added first.
Drag and drop each video or photo in the timeline to add it to your project.
After adding the clips, you can trim and adjust them appropriately. Click on the right or left edges of the clip you want to shorten in the timeline and drag it to shorten.
If you want to split a clip in the timeline, pick the scissors by clicking on the ‘_Scissors_’ icon.
When working on your video footage, click the spacebar of your computer keyboard to preview. By doing this, you will be able to see how your clips are joined together.
Trim appropriately and perfect the runtime of every single clip and re-order your clips where there is a need to do so. This can be done by clicking on the targeted clip and dragging it to where you want it to be.
Step 4: Add video Effects, Transmissions between the clips, and Text overlays

Click on the Effect icon at the top of the app and a deep visual library of effects will be visible. If you want to add a certain effect to your active clip, just double-click it.
Add transitions in your video timeline to cut the scene-to-scene. They are quite necessary as they help establish your audience’s attention.
The next thing after adding the transmissions will be adding the overlays and exporting your video by clicking on the ‘Export‘ button.
Step 5: Export your finished video.

You can click the ‘Export’ button and switch to the platform you want your video to be exported.
Conclusion
Choosing an appropriate video editing tool is equally as important as the video itself. And with the availability of so many of these video editing tools, choosing among them is quite hard. You can easily get confused especially if you are a beginner in the video editing industry. To avoid the complications you need to know what editing software is the best for your project.
As you can see in the table above there is no great deference seen when comparing Final cut pro X vs Techsmith Camtasia, but it can tell you if is Final cut pro better than Camtasia or reverse is the case.
Final Cut Pro
Final Cut Pro is the perfect macOS video editing software that can help you achieve a professional-looking video. This software is built with the latest and most powerful tools that make it an effortless tool for video editing. It has impressive filters, graphics, and a range of other cool video editing features. Its coolest part is its ability to enable 360-degree video editing for VR and VR headset playback. This program uses multi-core multi-thread machines quickly to allow you to import the videos in different formats faster than others.
Like any other software, Final Cut Pro possesses some pros and cons as listed below;
Pros:
- It is a stable program that can be very useful in small businesses.
- It has a powerful architecture for your complex and heavy projects.
- Its fast rendering speed can allow you to conduct Multicam editing.
- It has classic GPU utilization and powerful media organization to allow you to organize assets such as audio and video carefully.
- Its easy audio modification capabilities can allow you to create impeccable VR videos.
- It has a customizable and streamlined share interface that makes high-quality file delivery easy and fast.
- It can edit videos offline.
- It is tailored with real-time graphics and cool effects like text and blurs that are easy to apply.
Cons:
- It is complex and thus difficult for beginners.
- It has limited export options.
- It only works on Mac computers.
Editing video with Final Cut Pro is not a complicated process. Here are the steps to help a beginner get started.
Step1: Create a new project & import media
When you Launch the Final Cut Pro interface, Libraries and Events are automatically created. You only need to create a new project.
At the top menu bar, click File > New > Project to create a new project. Here you will have to type in a new name of the project and then select ‘Use Automatic Settings’.
At the top menu bar again, click File > Import > Media to enable the program to bring up the Media Import window where you can select the video and audio files you want to import into your new project.
After selecting all the media you want to include in your project press ‘Import Selected’ and then close the media window.
Step 2: Add your trimmed clips to the timeline.
The thumbnails of all the media you have imported will be appearing in the browser. For you to create a new video you need to arrange and trim that media in the timeline.
In your browser, you can set the ‘In and Out’ points for each video clip by holding ‘_Option_’. To do this you will have to click the thumbnail and drag it. The yellow timeline that appears on the clip represents the range that will be added to your video timeline.
After arranging them in the order that you want them to play, trim your clips by moving the mouse cursor to the edge of its thumbnail. This is done by using the ‘Trim tool’. Drag forward or backward to adjust the clip’s endings.
If you are arranging the clips in your sequence, you need to drag and drop any of the clips from the timeline into a different position. Final Cut Pro has a tool known as Magnetic timeline that will automatically insert and arrange the clips for you. You just need to ensure that your clips do not overlap or lay on top of each other.
To preview your video in the viewer, press the space bar on your keyboard or the Play icon in your software interface.
Step 3: Add Title, Texts, Transitions, and Effects
Title and Texts: Final Cut Pro has many Titles located in the browser where you imported your media. You can add them by dragging them into your video’s timeline. To access those titles you can press the ‘Title and Generators’ icon in the sidebar to open it.
Transitions: When adding Transitions, there is nothing wrong with a “hard cut_” between 2 clips. Use the transitions only where they make sense so as not to ruin your video. To add these transitions, you need to open the ‘_Transition browser’ by clicking on its indicated icon.
The transition’s length can be adjusted by dragging inwards or outwards. To customize your transition you can open the inspector by pressing ‘Command + 4’ and make the adjustments.
Effects: With Final Cut Pro inbuilt Effects, you can add some more value to your video after you are done with basic arrangements in the timeline. To add the effects click on the ‘Effects browser’ icon to open it.
Next to the effects browser icon, choose your preferred effect and add it between any 2 clips. By doing this you will have added animation effect between them.
Step 4: Add Audio, Music, and Color.
Audio & Music: At this point, you can import and add your music. Photos and Audio sidebar icon is located above the browser and you can click to open, and then select Sound Effects.
To see all the songs available in Final Cut Pro, you can type the word ‘Jingle‘ and you can preview them by pressing the small play button.
Color correction: By highlighting all the video clips in your video timeline, you can see a yellow outline around them.
Then open the drop-down menu by clicking the ‘_Enhancement_’ icon situated below the Viewer.
To improve the color and contrast, select Balance Color or ‘Option + Cmd + B’.
Now that you are done editing your video, you can save and share as you prefer.
Camtasia
Camtasia is a perfect all-in-one video editing and screen recording program. If you compare Camtasia vs Final cut pro, Camtasia is quite easy to use even for beginners. It can work in both Windows and macOS and provides the user with a demonstration and education video platform. It contains cool features to help you capture and edit your videos and audios appropriately.
Here are some pros and cons of Camtasia.
Pros:
- It is easy to learn.
- It has a good capture feature.
- Impressive cursor effects.
- It has Interactivity features.
- It has a good asset library
- Availability of mobile version.
- It offers great customer service.
- Available at a low cost.
Cons:
- Constant crashes and bugs.
- Limited customization
- No key tracking.
Here are key steps to follow when editing a video with Camtasia.
Step 1: Break up steps of a process with lower thirds.
Break any long multi-step video to help lower the viewer’s cognitive load.
Step 2: Reinforce texts with video.
Remove any mistakes and extra content such as unnecessary footage from the ends of your recording. If you trim too much drag the clip back to restore. This process is known as trimming.
You can zoom in on the most important section to focus your viewer’s attention there.
Step 3: Add narrative to video
Alternative Way to Edit Videos
Getting an appropriate video editing software is quite challenging as the makers of these software sometimes get confused about if the programs needed are for home videos or professional-quality work such as Hollywood movies. This is why you will find that some programs are complex to use while others lack essential features to make your work efficient.
Filmora video editor is one of the most efficient for video editing. This software is powerful and easy to use and it is built with many features to make your vision come true. It is fit for small scale, medium scale and large businesses.
For Win 7 or later (64-bit)
For macOS 10.12 or later
These steps will help you to know how to edit video with Filmora software;
Step 1: Start a new project.
After making sure that you have Filmora video editor installed on your computer, start a new project. Open the app then choose a dropdown option from the Select Project Aspect Ratio.
Step 2: Import your media
The footage, photos, and audios you use in your video are the key basic aspects of your video. Organizing all the files you are going to use in a single file. You can do this by browsing the file menu. Click the ‘File > Import Media Folder’ menu in Filmora and select the folder that contains your video files.
After importing your video files the thumbnails for each file will appear in one half of the application. Double-click on the thumbnails for a preview.
These thumbnails prove that all your captured video clips are already in the application and ready to be edited. Click on the Filmora video editing guide to get to help you know what to do.
Step 3: Add clips to the timeline, trim, adjust appropriately and sequence them.
Now that you have reviewed your video library and seen that they are there, you need to add them to the video editing timeline at the bottom of your app. This is quite easy as you can view all your video clips and determine which is to be added first.
Drag and drop each video or photo in the timeline to add it to your project.
After adding the clips, you can trim and adjust them appropriately. Click on the right or left edges of the clip you want to shorten in the timeline and drag it to shorten.
If you want to split a clip in the timeline, pick the scissors by clicking on the ‘_Scissors_’ icon.
When working on your video footage, click the spacebar of your computer keyboard to preview. By doing this, you will be able to see how your clips are joined together.
Trim appropriately and perfect the runtime of every single clip and re-order your clips where there is a need to do so. This can be done by clicking on the targeted clip and dragging it to where you want it to be.
Step 4: Add video Effects, Transmissions between the clips, and Text overlays
Click on the Effect icon at the top of the app and a deep visual library of effects will be visible. If you want to add a certain effect to your active clip, just double-click it.
Add transitions in your video timeline to cut the scene-to-scene. They are quite necessary as they help establish your audience’s attention.
The next thing after adding the transmissions will be adding the overlays and exporting your video by clicking on the ‘Export‘ button.
Step 5: Export your finished video.
You can click the ‘Export’ button and switch to the platform you want your video to be exported.
Conclusion
Choosing an appropriate video editing tool is equally as important as the video itself. And with the availability of so many of these video editing tools, choosing among them is quite hard. You can easily get confused especially if you are a beginner in the video editing industry. To avoid the complications you need to know what editing software is the best for your project.
How to Change Frame Rate in Premiere Pro
The video’s frame rate is an important aspect of it. Too high of a frame rate makes the video seem unnatural. On the other hand, too low can make some videos choppy. You can fix that by changing the frame rate using a video editor. And we are here to help you learn how to do that. Here’s how to change the frame rate in Premiere Pro.
The frame rate sometimes makes or breaks the video. So it is important to get this setting right. Suppose you made a mistake and recorded your video in the wrong setting. You can follow this guide to solve your problem.

How To Check Video Frame Rate in Premiere Pro
Before we teach you how to change a video’s frame rate in Premiere Pro, let’s first make sure you know how to check. Maybe you don’t need to modify the video because it is already in the correct setting.
So how do you do that in Premiere Pro?
- Import the video to Adobe Premiere Pro.
- Check the “Media” window. Next to the video file name is its frame rate. It is written in the format x.00 fps. FPS stands for “frames per second,” which is used interchangeably with the term frame rate.

Reasons for Changing Frame Rate
Suppose you have an action-packed video. It would not look great at 30 fps - it will look too choppy. That will give your audience a rotten viewing experience. By increasing the frames, you can make the motion more fluid and smoother.
Increasing the frames per second also results in better slow-motion videos. A 30 fps one would not look good with this effect because it does not show smooth motion. Thus, we recommend making the video at least 60 fps.
However, a higher frame rate does not always mean better videos. It can result in what they call the “soap opera effect.” It means the video shows too many details. That makes the videos seem “unnatural” or less cinematic.
High frame rates make videos look more realistic since there is less stuttering and motion blur between frames. That’s great. But for older audiences - the ones used to watching videos at 24 fps, it can be off-putting. So it’s also important to consider your target audience when deciding the right frame rate for your video.
With these reasons in mind, you may want to change your video’s frame rate.
How To Change FPS in Premiere Pro
Let’s dilly-dally no more. Here’s a quick guide on how to change fps in Adobe Premiere Pro. This program gives you two different ways to change fps. One is changing the frame rate of a sequence; the other is changing the frame rate of the video clip. We will teach you how to do both.
l Change the Frame Rate of a Sequence
Suppose you want to keep the frame rate of most of the video the same. Only some parts need adjusting. You can change the frame rate of the sequences that need changing instead. Here are the steps to follow to achieve this:
- Open your project in Adobe Premiere Pro.
- In the Project panel, select the sequence whose frame rate you want to change. Right-click on that sequence.
- Choose “Sequence Settings” from the menu that appears.

- Click the drop-down menu for “Timebase.”
- Select the frame rate you want the sequence to be in.

- Click “OK.”
l Change the Frame Rate of a Video Clip
Here are the steps you should follow if you want to change the frame rate of an entire video clip.
- Import your video clip to Premiere Pro and drag it to the timeline.
- Go to the “Effects” tab. It’s in the options at the bottom left of the screen.

- Select “Video Effects” > “Time” > “Posterize Time.”

- Drag and drop the Posterize Time effect to the clip whose frame rate you want to change.
- Click “Effect Controls” at the top left of the screen.
- Select the small “arrow” button next to the “Frame Rate” text under “Posterize Time.”
- Change the frame rate to your preferred setting. For example, type “60” to make the video 60 fps.

- Click “Sequence” > “Render Selection.”
And that’s it! That is how you change a video clip’s frame rate in Adobe Premiere Pro.
How To Make 120 FPS Videos With Premiere Pro
Videos that are 120 fps are very popular now. If you are a gaming content creator on YouTube, you probably record videos at this frame rate. You’d want to edit that footage and export it at the same frame rate.
Adobe Premiere Pro allows you to do that. But it’s a little bit of a hidden feature. When creating a sequence, you may notice that the highest the frame rate can go is 60 frames per second. That’s obviously not the number that we want. Don’t worry. There is a workaround. The best thing is that it’s super easy.
Follow these steps to change your video to 120 fps:
- Import your 120 fps video to Adobe Premiere Pro.
- Select your footage. Drag it to your timeline or the tab where the text says, “Drop media here to create sequence.”

- Select the timeline panel. Click “Sequence” > “Sequence Settings.”
- Check the “Timebase” section. It should say “119.88 frames/second,” 120 fps when rounded off.

- Edit the video as needed and render it. The output should stay at 120 fps.
How To Change Video From 30 FPS to 60 FPS in Premiere Pro
Do you have a video recorded at 30 frames per second, and do you want it at 60? Here’s a simple solution to that. Follow these steps in Adobe Premiere Pro to double the video’s frame rate.
- Open Adobe Premiere Pro. Click “File” > “New” > “Sequence.”

- Click “AVCHD” > “1080p” > “AVCHD 1080p60” > “OK.”

- Import your 30 fps video into Adobe Premiere Pro.
- Drag the video into the timeline.
- Click “Keep existing settings.”

- Right-click the video in the timeline. Select “Time interpolation” > “Optical Flow.”

- Press the “Enter” key. Wait for the processing to finish. This can take hours.
- Click “File” > “Export” > “Media.”

- Select a preset.
- Scroll down to the “Effects” section to check if the frame rate is at 60 fps. If not, change it to 60 fps.

- Click “Export.”
[Bonus] Wondershare Filmora - Premiere Pro’s Alternative
Free Download For Win 7 or later(64-bit)
Free Download For macOS 10.14 or later
What if you don’t have Adobe Premiere Pro or don’t like this tool? What’s a good alternative? That would be Wondershare Filmora.

Why use Filmora as a substitute for Premiere Pro? This video editor offers lots of great features, basic or advanced. With these at your fingertips, you can bring your videos to the next level and wow your audiences.
Among Filmora’s handy features is the ability to quickly change a video’s frame rate. You don’t even need to be a video editing expert to do it with this software! That’s how straightforward the process is.
How To Change the Frame Rate in Wondershare Filmora
Changing a video’s frame rate in Wondershare Filmora is super easy. Even a child can do it due to how simple the steps are. Here, read this 5-step guide to change a video’s frame rate using this amazing video editor.
- Launch Wondershare Filmora and create a new project.

- Import the video whose frame rate you want to change.
- Drag the video into the timeline.
![]()
- Click “Export.”
- Select the format you want the output file to be in. Find the “Frame Rate” in the options, click the drop-down menu, and select the frame rate that you want. Click “Export.”

Conclusion
Getting the frame rate of a video right is important, so you should not neglect it. It greatly affects your audience’s viewing experience. Thankfully, if you make mistakes, you can correct them with video editors like Premiere Pro. If it’s not to your liking, you can use Wondershare Filmora instead - it’s the best alternative.
Filmora lets you change a video’s frame rate very easily. Also, it gives you a bunch of other features you might enjoy using. And here’s some good news: this software app is affordable! You can also download the free trial to give it a shot.
Free Download For macOS 10.14 or later
What if you don’t have Adobe Premiere Pro or don’t like this tool? What’s a good alternative? That would be Wondershare Filmora.
Why use Filmora as a substitute for Premiere Pro? This video editor offers lots of great features, basic or advanced. With these at your fingertips, you can bring your videos to the next level and wow your audiences.
Among Filmora’s handy features is the ability to quickly change a video’s frame rate. You don’t even need to be a video editing expert to do it with this software! That’s how straightforward the process is.
How To Change the Frame Rate in Wondershare Filmora
Changing a video’s frame rate in Wondershare Filmora is super easy. Even a child can do it due to how simple the steps are. Here, read this 5-step guide to change a video’s frame rate using this amazing video editor.
- Launch Wondershare Filmora and create a new project.
- Import the video whose frame rate you want to change.
- Drag the video into the timeline.
![]()
- Click “Export.”
- Select the format you want the output file to be in. Find the “Frame Rate” in the options, click the drop-down menu, and select the frame rate that you want. Click “Export.”
Conclusion
Getting the frame rate of a video right is important, so you should not neglect it. It greatly affects your audience’s viewing experience. Thankfully, if you make mistakes, you can correct them with video editors like Premiere Pro. If it’s not to your liking, you can use Wondershare Filmora instead - it’s the best alternative.
Filmora lets you change a video’s frame rate very easily. Also, it gives you a bunch of other features you might enjoy using. And here’s some good news: this software app is affordable! You can also download the free trial to give it a shot.
Also read:
- New In 2024, How to Loop QuickTime Video
- Why Vimeo Slideshow Maker Become More and More Popular
- Are You Looking for the Best Video Marketing Agency to Help Your Business Grow Exponentially with Engaging Video Content? Here Is How to Find a High-Quality Video Marketing Company that Takes Your Videos to the Next Level
- New Are You Also a Fan of the Slow Mo Guys? Well! Who Isnt? Learn How You Can Create Compelling Slow-Mo Videos Like the Slow Mo Guys Here
- New Create Dynamic Text Animation in Filmora for 2024
- New In 2024, How to Make Loop Video in PowerPoint
- In 2024, The Ultimate Guide to Use LUTS to Color Grade on iPhone
- New 100 Workable How to Mask Track with Adobe Premiere Pro for 2024
- New 2024 Approved Tips for Choosing Location and Scheduling Music Video
- New 2024 Approved Guide To Using Free Luts for OBS
- Updated 2024 Approved How to Add Zoom Blur Effect In Photoshop
- Top 5 Best Video to PPT Converters
- Updated 2024 Approved How to Create Cooking Video Intro and Outro for YouTube Channel?
- New This Article Presents the Guide to Using Magic Effects for Creating Competent Films with Step-by-Step Instructions and Filmoras Grow and Win Program Contest
- New In 2024, 10 Catchy Pixel Art Wallpapers and How to Custom Your Own
- Updated In 2024, 5 Recommended Websites for Text GIF Maker
- In 2024, Simple and Effective Ways to Change Your Country on YouTube App Of your Lava Yuva 3 | Dr.fone
- Fixing Foneazy MockGo Not Working On Honor X7b | Dr.fone
- In 2024, How Can Vivo Y77tMirror Share to PC? | Dr.fone
- Everything You Need to Know about Lock Screen Settings on your ZTE Nubia Flip 5G
- In 2024, How to Fix Pokemon Go Route Not Working On Vivo Y100A? | Dr.fone
- In 2024, The Ultimate Guide How to Bypass Swipe Screen to Unlock on Samsung Galaxy A23 5G Device
- Top IMEI Unlokers for iPhone 8 and Android Phones
- How to Spy on Text Messages from Computer & Oppo Reno 8T | Dr.fone
- In 2024, 8 Best Apps for Screen Mirroring Poco X5 Pro PC | Dr.fone
- In 2024, Forgot Locked Apple iPhone 15 Pro Max Password? Learn the Best Methods To Unlock | Dr.fone
- How to Get and Use Pokemon Go Promo Codes On Apple iPhone 15 Plus | Dr.fone
- Title: What Is the Top Filmora Slideshow Templates? Experts Choice for 2024
- Author: Chloe
- Created at : 2024-04-24 07:08:16
- Updated at : 2024-04-25 07:08:16
- Link: https://ai-editing-video.techidaily.com/what-is-the-top-filmora-slideshow-templates-experts-choice-for-2024/
- License: This work is licensed under CC BY-NC-SA 4.0.
