
:max_bytes(150000):strip_icc():format(webp)/hexadecimal-code-security-key-krzysztof-zmij-e-plus-getty-images-57c76b825f9b5829f4bd185e.jpg)
You Can Splice Video on the iPhone Using Various Applications. This Article Will Guide You Through the Steps Necessary to Splice Your Videos for 2024
You Can Splice Video on the iPhone Using Various Applications. This Article Will Guide You Through the Steps Necessary to Splice Your Videos
Create High-Quality Video - Wondershare Filmora
An easy and powerful YouTube video editor
Numerous video and audio effects to choose from
Detailed tutorials provided by the official channel
Your iPhone comes with so many features, including a camera. You, therefore, have a great chance to take photos, record videos, and catch every moment at your will. You’ll need to share your videos on social media sites or other platforms. Remember, you can spice them up with other add-ons. The most sophisticated way is to splice your iPhone, merging your videos into a compelling piece of art. Let’s uncover several video editors that you can use on your iPhone for splicing your videos.

In this article
01 How to Splice Videos on an iPhone
02 [Desktop solution] Splice videos with Filmora
How to Splice Videos on an iPhone
The iPhone lets you do simple edits in the camera roll, such as trimming videos. However, when it comes to joining multiple clips, you need to step up your game with video editors. We bring you exclusive tools that you can use to splice videos together on your iPhone.
Method 1: Using iMovie on the iPhone, splice videos together
This splicing app from Apple is smart at editing professional-quality videos. You can get it for free to splice your videos on the iPhone. Color grading, narration, and the green-screen effect are just a few of the many tools available in iMovie.
Features of iMovie
- Combine multiple videos and transitions.
- Green-screen controls to soften the effects that you add to your movie.
- Freely adjust the level of your audio clip.
- Timeline mode features include a color balance and tone adjusting feature.
- A people detection feature that quickly recognizes characters in a film.
- Directly export your spliced video to social networking sites or upload it to a cloud service.
- Excellent tools to facilitate video editing.
Steps to splice video on iMovie
Step 1. First, visit the “App Store, download the iMovie app, and install it on your iPhone.
Step 2. Once iMovie is installed on your iPhone, you can then launch it and continue with the splicing mission of your videos.
Step 3. Check the main screen of the app for the “three” tabs located at the top. Choose the tab indicated as the “Projects to create a new project” option. You’ll then be redirected to the next screen, where you should then tap on the “Create Project” option.
Step 4. When prompted, please choose the “Movie” option as the project type to create.
Step 5. Next, select the videos you want and tap on the “Add” option to add your videos from your iPhone Camera Roll. Next, tap on the “Create Movie” option at the bottom.
Step 6. iMovie lets you add any effects to your video at this point. Once completed, tap on the “Done” tab found at the top-left corner of your iPhone’s screen. Finally, save your combined videos into one file. You can also directly upload your video to cloud storage platforms.

Method 2: Using Filmora on the iPhone, splice videos together
Filmora is another app that lets you splice iOS in a few steps. It presents an intuitive interface with powerful video editing features. You can add background music, motion effects, and text effects to your video, and merge several clips into one. Let’s check out how to combine your videos on the iPhone.
Filmora’s Features
- The Transitions feature lets you create interestingly moving clips.
- Simple editing features to trim, cut, and merge videos.
- The Canvas feature is suitable for choosing the best aspect ratio for your video.
- You can also play your footage backward with the reverse feature.
- You can easily adjust the speed of your video by speeding it up or slowing it down.
A guide to splice video with Filmora
Step 1. You first need to download and install the “Filmora Go” app on your iPhone.
Step 2. Next, hit the “New Project” button and begin to select the videos you wish to splice.
Step 3. Add the selected videos to the interface by clicking on the “Import” button. The “Edit” panel will automatically open.
Step 4. Check for the available tools in the “Editing panel” section. You can now freely use the available effects, like adding music, cropping your videos, adding text, among other effects.
Step 5: Finally, you can save and export your video to other media platforms if you want.
Method 3: Splice videos together on the iPhone using Quik
You can also splice your iPhone with Quik Video Editor. Quik video editor is quite advanced and will support the merging of various video clips into one. With this app, you can escalate your video editing gigs, such as adding text, filters, music, among other options. Follow these steps to merge your videos.
Quik’s distinguishing characteristics
- You can energize your videos by adjusting the speed. Likewise, you can stop the time with Freeze Frame.
- Use exclusive filters to tweak your video to perfection, such as snow and water filters.
- Easily add music to your video.
- Sync your edits with royalty-free tracks.
- Trimming, cropping, and other simple edits
How to splice video with Quik
Step 1. Download and install the “Quik” app on your iPhone, then fire it up.
Step 2. Next, begin to create a new project in the Quik video editor on your iPhone. Just tap on the “All photos” dropdown, then select the “Videos” option. Choose the video clips that you wish to splice on your iPhone.
Step 3. You can also get other effects to add to your video. At the bottom, check out the “Effect” tab. Here, you can easily add music, filters, and others to polish your movie.
Step 4. Finally, click on the “Save” tab to save the merged videos.

[Desktop solution] Splice videos with Filmora
Apart from splicing videos on the iPhone, you can also utilize the desktop to merge your videos. Many users like to transfer their data, including videos, to a desktop for backup or to create memory space on their phones. This may result in too many videos saved on your desktop. You can splice them together into a single movie by using Filmora.
This video editor works on both Windows and Mac computers. It is also easy to use, enabling a simple drop-and-drag action. Besides, it harbors spending editing features and an additional 300+ built-in visual effects like overlays, transitions, and filters. Here are some notable features of Filmora.
Key Features of Filmora
- It will merge your videos without any quality loss to the original file.
- Easily speed up hi-res footage with the Proxy workflow feature.
- Use the instant mode feature to quickly edit your videos.
- With the masking feature, you can easily animate and customize the mask for an improved finish.
- This app also comes with an in-built stock media feature that facilitates free copyright stock footage.
For Win 7 or later (64-bit)
For macOS 10.12 or later
Steps to using Filmora to splice videos
Filmora supports Windows and Macs. So first, choose your computer’s version and download the correct one. Then follow these steps to splice your videos.
Step 1: Add videos.
After installing and launching Filmora on your PC, continue to add the videos that you want to splice. So, click on the “Import” tab to load your clips into the program. You can also drag and drop the video clips directly into the media library.
Step 2. Splice video
All the videos you’ve added will show up as thumbnails in the editor’s window. Now simply drag and drop the clips to the same video track in the timeline. Next, place the “Playhead” at the starting point of the clip where you want the sliced video to start playing. Your videos will be spliced together seamlessly. You can also use the “Preview” feature to preview your video before saving it to the computer.
Step 3: Finalize your video.
Filmora comes with numerous editing features that let you rotate, trim, add titles, transitions, set speed, add music, and much more. To trim your clip, simply move the “Playhead” to the position you wish to cut first. Next, click on the split icon in the toolbar. You can also right-click on any transition to apply effects, add subtitles, rotate, and perform other advanced editing.
Step 4. Save and Export
Ascertain that your video is good enough, then hit the “Create” tab. Continue to save and export your video in any format. Just click on the “Export” tab to finally share your video on platforms like YouTube and Vimeo. You can also directly convert to other portable devices like the iPhone.
Conclusion
●Several options are available to splice video on the iPhone. You can use the free app, iMovie, for iPhone and Mac. Filmora and Quik are also uniquely able to splice video into a single merge. However, if you wish to retain the original quality of your video, Filmora Video Editor is the option to settle for. It has improved features that will manage any form of edit in simple steps. More so, you can easily share your finished video on social media sites as well as upload it directly to streaming sites like YouTube and Vimeo.es.
Your iPhone comes with so many features, including a camera. You, therefore, have a great chance to take photos, record videos, and catch every moment at your will. You’ll need to share your videos on social media sites or other platforms. Remember, you can spice them up with other add-ons. The most sophisticated way is to splice your iPhone, merging your videos into a compelling piece of art. Let’s uncover several video editors that you can use on your iPhone for splicing your videos.
In this article
01 How to Splice Videos on an iPhone
02 [Desktop solution] Splice videos with Filmora
How to Splice Videos on an iPhone
The iPhone lets you do simple edits in the camera roll, such as trimming videos. However, when it comes to joining multiple clips, you need to step up your game with video editors. We bring you exclusive tools that you can use to splice videos together on your iPhone.
Method 1: Using iMovie on the iPhone, splice videos together
This splicing app from Apple is smart at editing professional-quality videos. You can get it for free to splice your videos on the iPhone. Color grading, narration, and the green-screen effect are just a few of the many tools available in iMovie.
Features of iMovie
- Combine multiple videos and transitions.
- Green-screen controls to soften the effects that you add to your movie.
- Freely adjust the level of your audio clip.
- Timeline mode features include a color balance and tone adjusting feature.
- A people detection feature that quickly recognizes characters in a film.
- Directly export your spliced video to social networking sites or upload it to a cloud service.
- Excellent tools to facilitate video editing.
Steps to splice video on iMovie
Step 1. First, visit the “App Store, download the iMovie app, and install it on your iPhone.
Step 2. Once iMovie is installed on your iPhone, you can then launch it and continue with the splicing mission of your videos.
Step 3. Check the main screen of the app for the “three” tabs located at the top. Choose the tab indicated as the “Projects to create a new project” option. You’ll then be redirected to the next screen, where you should then tap on the “Create Project” option.
Step 4. When prompted, please choose the “Movie” option as the project type to create.
Step 5. Next, select the videos you want and tap on the “Add” option to add your videos from your iPhone Camera Roll. Next, tap on the “Create Movie” option at the bottom.
Step 6. iMovie lets you add any effects to your video at this point. Once completed, tap on the “Done” tab found at the top-left corner of your iPhone’s screen. Finally, save your combined videos into one file. You can also directly upload your video to cloud storage platforms.
Method 2: Using Filmora on the iPhone, splice videos together
Filmora is another app that lets you splice iOS in a few steps. It presents an intuitive interface with powerful video editing features. You can add background music, motion effects, and text effects to your video, and merge several clips into one. Let’s check out how to combine your videos on the iPhone.
Filmora’s Features
- The Transitions feature lets you create interestingly moving clips.
- Simple editing features to trim, cut, and merge videos.
- The Canvas feature is suitable for choosing the best aspect ratio for your video.
- You can also play your footage backward with the reverse feature.
- You can easily adjust the speed of your video by speeding it up or slowing it down.
A guide to splice video with Filmora
Step 1. You first need to download and install the “Filmora Go” app on your iPhone.
Step 2. Next, hit the “New Project” button and begin to select the videos you wish to splice.
Step 3. Add the selected videos to the interface by clicking on the “Import” button. The “Edit” panel will automatically open.
Step 4. Check for the available tools in the “Editing panel” section. You can now freely use the available effects, like adding music, cropping your videos, adding text, among other effects.
Step 5: Finally, you can save and export your video to other media platforms if you want.
Method 3: Splice videos together on the iPhone using Quik
You can also splice your iPhone with Quik Video Editor. Quik video editor is quite advanced and will support the merging of various video clips into one. With this app, you can escalate your video editing gigs, such as adding text, filters, music, among other options. Follow these steps to merge your videos.
Quik’s distinguishing characteristics
- You can energize your videos by adjusting the speed. Likewise, you can stop the time with Freeze Frame.
- Use exclusive filters to tweak your video to perfection, such as snow and water filters.
- Easily add music to your video.
- Sync your edits with royalty-free tracks.
- Trimming, cropping, and other simple edits
How to splice video with Quik
Step 1. Download and install the “Quik” app on your iPhone, then fire it up.
Step 2. Next, begin to create a new project in the Quik video editor on your iPhone. Just tap on the “All photos” dropdown, then select the “Videos” option. Choose the video clips that you wish to splice on your iPhone.
Step 3. You can also get other effects to add to your video. At the bottom, check out the “Effect” tab. Here, you can easily add music, filters, and others to polish your movie.
Step 4. Finally, click on the “Save” tab to save the merged videos.
[Desktop solution] Splice videos with Filmora
Apart from splicing videos on the iPhone, you can also utilize the desktop to merge your videos. Many users like to transfer their data, including videos, to a desktop for backup or to create memory space on their phones. This may result in too many videos saved on your desktop. You can splice them together into a single movie by using Filmora.
This video editor works on both Windows and Mac computers. It is also easy to use, enabling a simple drop-and-drag action. Besides, it harbors spending editing features and an additional 300+ built-in visual effects like overlays, transitions, and filters. Here are some notable features of Filmora.
Key Features of Filmora
- It will merge your videos without any quality loss to the original file.
- Easily speed up hi-res footage with the Proxy workflow feature.
- Use the instant mode feature to quickly edit your videos.
- With the masking feature, you can easily animate and customize the mask for an improved finish.
- This app also comes with an in-built stock media feature that facilitates free copyright stock footage.
For Win 7 or later (64-bit)
For macOS 10.12 or later
Steps to using Filmora to splice videos
Filmora supports Windows and Macs. So first, choose your computer’s version and download the correct one. Then follow these steps to splice your videos.
Step 1: Add videos.
After installing and launching Filmora on your PC, continue to add the videos that you want to splice. So, click on the “Import” tab to load your clips into the program. You can also drag and drop the video clips directly into the media library.
Step 2. Splice video
All the videos you’ve added will show up as thumbnails in the editor’s window. Now simply drag and drop the clips to the same video track in the timeline. Next, place the “Playhead” at the starting point of the clip where you want the sliced video to start playing. Your videos will be spliced together seamlessly. You can also use the “Preview” feature to preview your video before saving it to the computer.
Step 3: Finalize your video.
Filmora comes with numerous editing features that let you rotate, trim, add titles, transitions, set speed, add music, and much more. To trim your clip, simply move the “Playhead” to the position you wish to cut first. Next, click on the split icon in the toolbar. You can also right-click on any transition to apply effects, add subtitles, rotate, and perform other advanced editing.
Step 4. Save and Export
Ascertain that your video is good enough, then hit the “Create” tab. Continue to save and export your video in any format. Just click on the “Export” tab to finally share your video on platforms like YouTube and Vimeo. You can also directly convert to other portable devices like the iPhone.
Conclusion
●Several options are available to splice video on the iPhone. You can use the free app, iMovie, for iPhone and Mac. Filmora and Quik are also uniquely able to splice video into a single merge. However, if you wish to retain the original quality of your video, Filmora Video Editor is the option to settle for. It has improved features that will manage any form of edit in simple steps. More so, you can easily share your finished video on social media sites as well as upload it directly to streaming sites like YouTube and Vimeo.es.
Best Method to Split the Video Into Parts Online
Apart from offline editing software, online video splitters are also available with the evolution of technology nowadays. VEED is one of them. It helps you in splitting the video into different parts. The splitter tool is available for deleting a specific part of the video. Even you can save these parts separately. The whole video editor is extremely user-friendly.
Along with the split and trimming of the videos, VEED also offers several tools for editing and adding effects to the images. It is suitable for training video makers and social media managers to demonstrate the products, business presentations, and HR videos. There are camera filters present, including sepia, night vision, fish eye, and many others. This article is actually the guide regarding editing the videos through VEED. As a substitute, Wondershare Filmora is also under discussion that is also available for the same purpose.
How can you split the video clips online from VEED?
VEED also supports different formats such as WMV, AVI, MPEG and others. While editing the videos in VEED, it converts into MP4, which is compatible with most media players. This is the most suitable format for sharing videos on social networking sites. This splitter tool also helps create a GIF file with animation. Even there is also a possibility of creating GIFs from various software. No matter the duration is of the video, VEED can split the video. It is freely available, and you can use it easily from your browser. You don’t need purchasing of premium software for splitting the videos.
Step 1: Select the video and upload it on the VEED. Simply drag and drop your video file in the editor when you click on “Choose video”. After the selection, split or trim on the timeline and drag towards the left side corner to make the clips shorter.

Step 2: Click on where you are looking to split the video or keep moving the slider on the timeline. Now, you need to press the “S” key on the keyboard or click on the button “Split”. It is easy to delete the clips you don’t need anymore.
Step 3: Click on the option of “Export”, and this is the time for saving the new file as the MP4 video file. Simply export them as a single video file. It is the simplest option to use, and you can do all the steps in a few clicks.

An easier way to split the video into parts
An online tool is available for instant tasks and increases efficiency. But unfortunately, it becomes time-consuming whenever the size of your file is a large or unstable internet connection. Here emerges the usage of Filmora Video Editor . It is an incredible tool for creating and editing your images and videos. This also helps maintain the quality of the videos without any concern about their size. All the options of splitting, rotating, resizing, and trimming the videos are also available offline.
For Win 7 or later (64-bit)
For macOS 10.14 or later
Features:
- Cloning of the effects
- Magical effects
- Motion graphics and addition of animation as well
- Splitting of the screen and video clips
- Matching of the colour
- Controls available for adjusting the audios and videos
There is a number of options available for a variety of users. There is Wondershare Filmora Pro for the experts and solutions for the business owners. The whole business plan of Wondershare Filmora is for showcasing your brand. Support centres are available for helping you whenever you face any hurdle. All the new features are updated in the latest version of it. User guides are also available on its official site. For splitting the videos and extracting your favourite scenes, below steps are how to split the videos in Wondershare Filmora:
Step 1. To split the videos in Wondershare Filmora, the feature of scene detection is very helpful for this purpose. It automatically makes the parts of the videos depending on the changes of the scene. To enable this feature, right-click on your video clip in your library folder and choose the “scene detection” option for its window.

Step 2. Click on “Detect”, and Wondershare Filmora starts dividing the videos into the number of clips depending on changing of the scenes. Click on every small clip for it is easy for you to preview the outcome for its addition on the timeline.

Step 3. For deleting the specific part of the video, its selection is essential and click on the trash icon. Click on “Add on the timeline” for separating the clips and edit them later. The clips you have split can be imported on the timeline, just like in the picture below.

Step 4. After splitting the video files, there are many options to apply to them like rotation, merger, cropping and recording the voice-over. Join the number of segments and add the background music to make the new video.
Wondershare Filmora is on the top ranking in the list of video editing software. Without facing any issues, you can simply create videos as well as edit them as well. You can get quickly a video editor of a professional level in just a smaller number of days of using it. All the tools are just on your timeline, and the simple interface makes it more enjoyable to use.
It is possible for the user to apply every feature in many ways, so Wondershare Filmora is very simple in handling all the functionalities. The whole software is full of fun. It guarantees to deliver highly professional results. Whether online or offline, Wondershare Filmora is also available to bring your imagination into reality. Even you can join the certification program of Wondershare Filmora. Start using it now as you will feel the difference in using it apart from other video editing software.
Step 2: Click on where you are looking to split the video or keep moving the slider on the timeline. Now, you need to press the “S” key on the keyboard or click on the button “Split”. It is easy to delete the clips you don’t need anymore.
Step 3: Click on the option of “Export”, and this is the time for saving the new file as the MP4 video file. Simply export them as a single video file. It is the simplest option to use, and you can do all the steps in a few clicks.
An easier way to split the video into parts
An online tool is available for instant tasks and increases efficiency. But unfortunately, it becomes time-consuming whenever the size of your file is a large or unstable internet connection. Here emerges the usage of Filmora Video Editor . It is an incredible tool for creating and editing your images and videos. This also helps maintain the quality of the videos without any concern about their size. All the options of splitting, rotating, resizing, and trimming the videos are also available offline.
For Win 7 or later (64-bit)
For macOS 10.14 or later
Features:
- Cloning of the effects
- Magical effects
- Motion graphics and addition of animation as well
- Splitting of the screen and video clips
- Matching of the colour
- Controls available for adjusting the audios and videos
There is a number of options available for a variety of users. There is Wondershare Filmora Pro for the experts and solutions for the business owners. The whole business plan of Wondershare Filmora is for showcasing your brand. Support centres are available for helping you whenever you face any hurdle. All the new features are updated in the latest version of it. User guides are also available on its official site. For splitting the videos and extracting your favourite scenes, below steps are how to split the videos in Wondershare Filmora:
Step 1. To split the videos in Wondershare Filmora, the feature of scene detection is very helpful for this purpose. It automatically makes the parts of the videos depending on the changes of the scene. To enable this feature, right-click on your video clip in your library folder and choose the “scene detection” option for its window.
Step 2. Click on “Detect”, and Wondershare Filmora starts dividing the videos into the number of clips depending on changing of the scenes. Click on every small clip for it is easy for you to preview the outcome for its addition on the timeline.
Step 3. For deleting the specific part of the video, its selection is essential and click on the trash icon. Click on “Add on the timeline” for separating the clips and edit them later. The clips you have split can be imported on the timeline, just like in the picture below.
Step 4. After splitting the video files, there are many options to apply to them like rotation, merger, cropping and recording the voice-over. Join the number of segments and add the background music to make the new video.
Wondershare Filmora is on the top ranking in the list of video editing software. Without facing any issues, you can simply create videos as well as edit them as well. You can get quickly a video editor of a professional level in just a smaller number of days of using it. All the tools are just on your timeline, and the simple interface makes it more enjoyable to use.
It is possible for the user to apply every feature in many ways, so Wondershare Filmora is very simple in handling all the functionalities. The whole software is full of fun. It guarantees to deliver highly professional results. Whether online or offline, Wondershare Filmora is also available to bring your imagination into reality. Even you can join the certification program of Wondershare Filmora. Start using it now as you will feel the difference in using it apart from other video editing software.
Learning How to Slow Down a Video on iPhone Properly
Slow-motion videos are widely used for various purposes in videography or filmmaking. They not only underline the significance of a shot but also elevate creativity. The frame rate is remarkably higher in slow-motion videos than in normal videos. There are two methods included in the process of how to slow down a video on an iPhone.
The first method involves increasing the frame rate; meanwhile, the other is playback speed adjustment. This article will enfold apps to teach how to slow a video down on iPhone. All these applications will be available in the iPhone’s official App Store. However, check the compatibility of these apps with the iOS version you’re using. Ultimately, we’ll share a desktop alternative on how to slow down a video iPhone.
Slow Motion Video Maker Slow your video’s speed with better control of your keyframes to create unique cinematic effects!
Make A Slow Motion Video Make A Slow Motion Video More Features

Part 1: Pre-Recorded A Video? Adjust Slow Motion Parameters Right Away
One of the major reasons Gen Z and Gen Alpha opt for iPhones is their high-quality camera. It is ideal for capturing and editing videos in high resolution is ideal. In 2013, iPhones were integrated with the Slow-mo feature for creative purposes. Where first users needed third-party applications, they could use the built-in feature. Here is how do you slow down a video on iPhone officially:
Step 1
Locate the “Photos” application on your iPhone and launch it by simply clicking. Upon accessing the app, go to the bottom and click on “Albums.” Afterward, click the “Slo-mo” option from the expanding menu. Formerly, select a video from your device media library import.

Step 2
Once the video has been selected, navigate to the top right corner and select “Edit.”

Step 3
When the editing panel appears, navigate towards the bottom of the timeline bar. Drag the slider’s position to adjust the speed to create a slow motion. As the slow-motion effect has been created, click the “Done” button. Commencing this action will finalize your slow-motion video.

Part 2: Some Top-Notch Solutions to Slow Down Any Video on iPhone
The iPhone does offer a built-in feature to help you curate a perfect slow-mo. Nonetheless, a third-party application can offer additional and upgraded features. They offer specialized effects and filters, multiplatform support, and more. This section discusses 4 applications and how to make video slow motion iPhone using them. Find the brief introduction, capabilities, and guides of these apps below:
- SpeedPro Slow Speed Video Edit
- Slow Fast Slow – Control the Speed of Your Videos
- Slo Mo – Speed Up Video Editor
- Video Speed Editor Slow & Fast
1. SpeedPro Slow Speed Video Edit
This is an exclusive application to answer your question about how to put a video in slow motion on an iPhone. This application offers a -2x to -6x playback speed option for a slow-mo. Its intuitive feature enables speed alteration from a specific video section. This option is ideal for creatively editing your Instagram reels. Along with slowing down the speed, you can also enhance it for fast motion generation.

Key Features
- The application offers a timeline editing interface that enhances precision and accuracy.
- It possesses the ability to incorporate music in your videos using its Music feature.
- The application collaborates with social platforms like Instagram and Facebook for
Steps to Add Slow Motion in Video Using SpeedPro Slow Speed Video Edit
When you embark on a new experience, using something for the first time can be tricky. The unfamiliarity makes it harder, and one doubts its abilities. Hence, consider us your partner in guiding you on how to edit slow motion on your iPhone. We have curated a step-by-step guide to help you in creating a slow-mo:
Step 1: After downloading and accessing the application’s main menu, click the “Speed Pro” option. Then, select a video clip from your device that you desire to apply this effect to.

Step 2: Once the video clip has been selected, click the “Done” button to import.

Step 3: Afterward, you’ll be redirected to its editing interface for speed change. Navigate toward the speed slider at the bottom of the video display. Drag the slider towards the left to select a suitable playback speed option. You can also apply the slow-mo to a specific area by dragging the timeline slider.

2. Slow Fast Slow - Control the Speed of Your Videos
Use this application to record a slow-motion video or add the effect in post-production editing. This application offers a high frame rate of 240 fps for a high-grade slow-mo effect. This means you can now slow a video up to 1/16th of its original speed. It wins at creating slow motion with the iPhone’s built-in speed manipulation feature.

Key Features
- Provides audio pitch maintenance feature during speed alteration.
- Gives the option to adjust the screen ratio before editing, like square or more.
- The application is compatible with all your iOS 10.0 devices and higher versions.
Steps to Add Slow Motion in Video Using Slow Fast Slow
The encounter with an advanced tool or application is often stressful as you are unfamiliar with it. You do not want to mess up the video, so you must master an app. Following is how to slow down a video on an iPhone using the Slow Fast Slow app:
Step 1: After launching the application, give it access to your files for editing. Then, click on the “Other Videos” option to select a video from a device for slow-mo.

Step 2: Once the video has been imported, you will reach the editing interface. You’ll notice a slider with different points. These points indicate the time frames of your video. The slider is positioned downward to add a slow-mo effect at specific durations.

Step 3: Once you are done with the editing, click the play button to preview. Next, navigate towards the right-side bottom of the preview screen and hit “Export.” Select any particular resolution to save the slowed-down video on your device.

3. Slo Mo – Speed Up Video Editor
Are you looking for a versatile application about how to make a normal video slow-motion iPhone 13? Fashioned to modify a video’s speed, this app can help you. It allows users to adjust the video speed up to 12x for slow and fast motion. In addition, you can alter the video frame rate up to 240 fps at precise frames.

Key Feature
- With an additional freeze frame feature, infuse an innovative touch to videos.
- Experience a more productive workflow with its quick processing feature.
- Keeping up an accessible to all approach, the user interface is straightforward and minimal.
Steps to Add Slow Motion in Video Using Slo Mo – Speed Up Video Editor
Those initial stages of operating a new app and getting your hands on its UI are difficult. However, this article prioritizes your ease more than anything. Find our guide on how to make a video in slow motion on iPhone here:
Step 1: Upon launching the application, it will ask you for storage access. After that, you’ll have to import a video to add slow motion. Just select any normal video on your device and click on the “Next” option.

Step 2: Navigate toward the bar at the bottom of the timeline panel and select “Adjust.”

Step 3: This will feature the speed control options on your screen; go to “Advance.” Further, change the speed change slider towards the left to manipulate it. Afterward, preview the video and click on the “tick” icon.

Step 4: Further, select the “Export” icon appearing in the expanded menu.

4. Video Speed Editor Slow & Fast
How do you slow down a video on an iPhone after recording in a minimalistic way? This iPhone application is designed for such contexts to create slow-motion videos. Users can slow down a clip’s playback speed up to 8x at specific durations. Simply trim the video parts to apply the speed setting at specific sections and merge them later.

Key Features
- After slow motion, you have the option to keep the original sound or insert music offered by it.
- The timeline editing method helps you to trim the video at the right time.
- The application is compatible with iOS 12.0, iPadOS 12.0, macOS 11.0, and newer versions.
Steps to Add Slow Motion in Video Using Video Speed Editor Slow & Fast
This application has an innovative user interface with a simple operational menu. To add a slow-motion effect to a video, buy its Pro subscription first. To assist you further, here is how to slow down an iPhone video in it:
Step 1: Create a new project after launching the application and giving access to storage. Do this by clicking on the screen saying, “Tap to create a new project.”

Step 2: From the Videos section of your media, select a video and hit “Choose.”

Step 3: In the editing interface, simply select a speed option from -2x to -8x for slowing. Once the video is slowed down according to your preferences, export it.

Part 3: Failed to Slow Down Video Properly? Try Wondershare Filmora as a Remedy
Have you tried all the given solutions on how to slow-mo a video on an iPhone and are still clueless? Not getting the desired results can be frustrating, but we have brought the best answer. Wondershare Filmora helps you achieve slow motion on a computer or laptop. The software is compatible with all Windows and macOS devices. You can just connect your iPhone with the source using a cable and import media.
Being a versatile software, Filmora introduces you to two advanced methods. Uniform speed emerges as a simple method of creating a slow-motion effect. On the other hand, Speed Ramping allows you to edit speed for professional purposes. Amongst speed alteration, users can also use the frame interpolation technique. It increases video frames to ensure a smooth playback during slow-mo.
Step-by-Step Guide to Creating Slow-Motion in Filmora
If you are using Filmora for the first time, the user interface might initially seem confusing. However, in comparison to other post-production software, it possesses a minimal interface. In this section, learn about how to slo-mo a video iPhone using Filmora:
Free Download For Win 7 or later(64-bit)
Free Download For macOS 10.14 or later
Step 1Connect iPhone and Import Clip
Once you have created a new project on Filmora, import media. First, to import media from your iPhone, connect it to your computer or related device. Then, go to “Import” > “Import from a Camera or Phone” option. Further, select the device name and import data.

Step 2Access Speed Ramping Option
Use your cursor to bring the edited media to the timeline and select it. From the appearing settings panel, access the “Speed” > “Speed Ramping” tabs. Here, either choose any of the predesigned templates or customize one.

Step 3Enable Optical Flow for Additional Touch
If the slow motion seems rough or abrupt, Filmora has a solution to that as well. Go to the “AI Frame Interpolation” section and expand it. From the expanding menu, click the “Optical Flow” option for a high-quality slow-mo.

Step 4Rendering for Final Preview
To observe the overall results, navigate towards the top toolbar. Select the “File” tab and “Render Preview” from the dropdown menu. After reviewing the final video, use your cursor to click the “Export” button.

Key Features of Wondershare Filmora
Wondershare Filmora provides a wide range of features for a full-fledged editing experience. Some of these features are for video, some are for audio, and others are for visuals. Here is a list of some of Filmora’s key features that you must give a try to:
1. Instant Mode
Once you have recorded a video, the post-production process cannot be neglected. However, when you start editing a video, the process might be confusing at first. With Filmora’s Instant Mode, use AI’s assistance to edit any video without effort. There are 115 built-in templates to integrate according to context and highlights it.
2. Green Screen
Integrate attractive backgrounds in your videos, like mountains, beaches, or more. With Filmora’s Green Screen feature, remove the video backgrounds with accuracy. After removing the background, you can insert multiple backgrounds, like solid colors. If there are backgrounds that you have previously saved, import them to the timeline. They will automatically show in the video, and you can customize them further.
3. Color Correction
Filmora offers an extensive range of color correction elements to enhance visibility. There are 40+ free presets in Filmora that you can download and apply within the app. In addition, you can do custom color settings and save them as custom presets. You can also use the 3D LUT feature to set preferences for specific factors.
4. Text-to-Speech
Another important feature that helps with interactive video creation is text-to-speech. It allows users to transform text into speech with voice selection options. The software has been trained on NLP and integrates realistic voices in videos. Being closer to the human voice helps with better audience interaction and understanding.
Conclusion
The main theme of this article was how to slow down a video on iPhone and the tools to do it. We mentioned 4 applications that are compatible with higher versions of the iPhone. In addition, the article provided detailed guides on all these applications.
Among them, Wondershare Filmora has been integrated with an advanced slow-mo feature. It allows a seamless and professional user interface to import, edit, and customize. The AI Optical Flow in it adds a remarkable fine touch to your slow-mo video.
Make A Slow Motion Video Make A Slow Motion Video More Features
Part 1: Pre-Recorded A Video? Adjust Slow Motion Parameters Right Away
One of the major reasons Gen Z and Gen Alpha opt for iPhones is their high-quality camera. It is ideal for capturing and editing videos in high resolution is ideal. In 2013, iPhones were integrated with the Slow-mo feature for creative purposes. Where first users needed third-party applications, they could use the built-in feature. Here is how do you slow down a video on iPhone officially:
Step 1
Locate the “Photos” application on your iPhone and launch it by simply clicking. Upon accessing the app, go to the bottom and click on “Albums.” Afterward, click the “Slo-mo” option from the expanding menu. Formerly, select a video from your device media library import.
Step 2
Once the video has been selected, navigate to the top right corner and select “Edit.”
Step 3
When the editing panel appears, navigate towards the bottom of the timeline bar. Drag the slider’s position to adjust the speed to create a slow motion. As the slow-motion effect has been created, click the “Done” button. Commencing this action will finalize your slow-motion video.
Part 2: Some Top-Notch Solutions to Slow Down Any Video on iPhone
The iPhone does offer a built-in feature to help you curate a perfect slow-mo. Nonetheless, a third-party application can offer additional and upgraded features. They offer specialized effects and filters, multiplatform support, and more. This section discusses 4 applications and how to make video slow motion iPhone using them. Find the brief introduction, capabilities, and guides of these apps below:
- SpeedPro Slow Speed Video Edit
- Slow Fast Slow – Control the Speed of Your Videos
- Slo Mo – Speed Up Video Editor
- Video Speed Editor Slow & Fast
1. SpeedPro Slow Speed Video Edit
This is an exclusive application to answer your question about how to put a video in slow motion on an iPhone. This application offers a -2x to -6x playback speed option for a slow-mo. Its intuitive feature enables speed alteration from a specific video section. This option is ideal for creatively editing your Instagram reels. Along with slowing down the speed, you can also enhance it for fast motion generation.
Key Features
- The application offers a timeline editing interface that enhances precision and accuracy.
- It possesses the ability to incorporate music in your videos using its Music feature.
- The application collaborates with social platforms like Instagram and Facebook for
Steps to Add Slow Motion in Video Using SpeedPro Slow Speed Video Edit
When you embark on a new experience, using something for the first time can be tricky. The unfamiliarity makes it harder, and one doubts its abilities. Hence, consider us your partner in guiding you on how to edit slow motion on your iPhone. We have curated a step-by-step guide to help you in creating a slow-mo:
Step 1: After downloading and accessing the application’s main menu, click the “Speed Pro” option. Then, select a video clip from your device that you desire to apply this effect to.
Step 2: Once the video clip has been selected, click the “Done” button to import.
Step 3: Afterward, you’ll be redirected to its editing interface for speed change. Navigate toward the speed slider at the bottom of the video display. Drag the slider towards the left to select a suitable playback speed option. You can also apply the slow-mo to a specific area by dragging the timeline slider.
2. Slow Fast Slow - Control the Speed of Your Videos
Use this application to record a slow-motion video or add the effect in post-production editing. This application offers a high frame rate of 240 fps for a high-grade slow-mo effect. This means you can now slow a video up to 1/16th of its original speed. It wins at creating slow motion with the iPhone’s built-in speed manipulation feature.
Key Features
- Provides audio pitch maintenance feature during speed alteration.
- Gives the option to adjust the screen ratio before editing, like square or more.
- The application is compatible with all your iOS 10.0 devices and higher versions.
Steps to Add Slow Motion in Video Using Slow Fast Slow
The encounter with an advanced tool or application is often stressful as you are unfamiliar with it. You do not want to mess up the video, so you must master an app. Following is how to slow down a video on an iPhone using the Slow Fast Slow app:
Step 1: After launching the application, give it access to your files for editing. Then, click on the “Other Videos” option to select a video from a device for slow-mo.
Step 2: Once the video has been imported, you will reach the editing interface. You’ll notice a slider with different points. These points indicate the time frames of your video. The slider is positioned downward to add a slow-mo effect at specific durations.
Step 3: Once you are done with the editing, click the play button to preview. Next, navigate towards the right-side bottom of the preview screen and hit “Export.” Select any particular resolution to save the slowed-down video on your device.
3. Slo Mo – Speed Up Video Editor
Are you looking for a versatile application about how to make a normal video slow-motion iPhone 13? Fashioned to modify a video’s speed, this app can help you. It allows users to adjust the video speed up to 12x for slow and fast motion. In addition, you can alter the video frame rate up to 240 fps at precise frames.
Key Feature
- With an additional freeze frame feature, infuse an innovative touch to videos.
- Experience a more productive workflow with its quick processing feature.
- Keeping up an accessible to all approach, the user interface is straightforward and minimal.
Steps to Add Slow Motion in Video Using Slo Mo – Speed Up Video Editor
Those initial stages of operating a new app and getting your hands on its UI are difficult. However, this article prioritizes your ease more than anything. Find our guide on how to make a video in slow motion on iPhone here:
Step 1: Upon launching the application, it will ask you for storage access. After that, you’ll have to import a video to add slow motion. Just select any normal video on your device and click on the “Next” option.
Step 2: Navigate toward the bar at the bottom of the timeline panel and select “Adjust.”
Step 3: This will feature the speed control options on your screen; go to “Advance.” Further, change the speed change slider towards the left to manipulate it. Afterward, preview the video and click on the “tick” icon.
Step 4: Further, select the “Export” icon appearing in the expanded menu.
4. Video Speed Editor Slow & Fast
How do you slow down a video on an iPhone after recording in a minimalistic way? This iPhone application is designed for such contexts to create slow-motion videos. Users can slow down a clip’s playback speed up to 8x at specific durations. Simply trim the video parts to apply the speed setting at specific sections and merge them later.
Key Features
- After slow motion, you have the option to keep the original sound or insert music offered by it.
- The timeline editing method helps you to trim the video at the right time.
- The application is compatible with iOS 12.0, iPadOS 12.0, macOS 11.0, and newer versions.
Steps to Add Slow Motion in Video Using Video Speed Editor Slow & Fast
This application has an innovative user interface with a simple operational menu. To add a slow-motion effect to a video, buy its Pro subscription first. To assist you further, here is how to slow down an iPhone video in it:
Step 1: Create a new project after launching the application and giving access to storage. Do this by clicking on the screen saying, “Tap to create a new project.”
Step 2: From the Videos section of your media, select a video and hit “Choose.”
Step 3: In the editing interface, simply select a speed option from -2x to -8x for slowing. Once the video is slowed down according to your preferences, export it.
Part 3: Failed to Slow Down Video Properly? Try Wondershare Filmora as a Remedy
Have you tried all the given solutions on how to slow-mo a video on an iPhone and are still clueless? Not getting the desired results can be frustrating, but we have brought the best answer. Wondershare Filmora helps you achieve slow motion on a computer or laptop. The software is compatible with all Windows and macOS devices. You can just connect your iPhone with the source using a cable and import media.
Being a versatile software, Filmora introduces you to two advanced methods. Uniform speed emerges as a simple method of creating a slow-motion effect. On the other hand, Speed Ramping allows you to edit speed for professional purposes. Amongst speed alteration, users can also use the frame interpolation technique. It increases video frames to ensure a smooth playback during slow-mo.
Step-by-Step Guide to Creating Slow-Motion in Filmora
If you are using Filmora for the first time, the user interface might initially seem confusing. However, in comparison to other post-production software, it possesses a minimal interface. In this section, learn about how to slo-mo a video iPhone using Filmora:
Free Download For Win 7 or later(64-bit)
Free Download For macOS 10.14 or later
Step 1Connect iPhone and Import Clip
Once you have created a new project on Filmora, import media. First, to import media from your iPhone, connect it to your computer or related device. Then, go to “Import” > “Import from a Camera or Phone” option. Further, select the device name and import data.
Step 2Access Speed Ramping Option
Use your cursor to bring the edited media to the timeline and select it. From the appearing settings panel, access the “Speed” > “Speed Ramping” tabs. Here, either choose any of the predesigned templates or customize one.
Step 3Enable Optical Flow for Additional Touch
If the slow motion seems rough or abrupt, Filmora has a solution to that as well. Go to the “AI Frame Interpolation” section and expand it. From the expanding menu, click the “Optical Flow” option for a high-quality slow-mo.
Step 4Rendering for Final Preview
To observe the overall results, navigate towards the top toolbar. Select the “File” tab and “Render Preview” from the dropdown menu. After reviewing the final video, use your cursor to click the “Export” button.
Key Features of Wondershare Filmora
Wondershare Filmora provides a wide range of features for a full-fledged editing experience. Some of these features are for video, some are for audio, and others are for visuals. Here is a list of some of Filmora’s key features that you must give a try to:
1. Instant Mode
Once you have recorded a video, the post-production process cannot be neglected. However, when you start editing a video, the process might be confusing at first. With Filmora’s Instant Mode, use AI’s assistance to edit any video without effort. There are 115 built-in templates to integrate according to context and highlights it.
2. Green Screen
Integrate attractive backgrounds in your videos, like mountains, beaches, or more. With Filmora’s Green Screen feature, remove the video backgrounds with accuracy. After removing the background, you can insert multiple backgrounds, like solid colors. If there are backgrounds that you have previously saved, import them to the timeline. They will automatically show in the video, and you can customize them further.
3. Color Correction
Filmora offers an extensive range of color correction elements to enhance visibility. There are 40+ free presets in Filmora that you can download and apply within the app. In addition, you can do custom color settings and save them as custom presets. You can also use the 3D LUT feature to set preferences for specific factors.
4. Text-to-Speech
Another important feature that helps with interactive video creation is text-to-speech. It allows users to transform text into speech with voice selection options. The software has been trained on NLP and integrates realistic voices in videos. Being closer to the human voice helps with better audience interaction and understanding.
Conclusion
The main theme of this article was how to slow down a video on iPhone and the tools to do it. We mentioned 4 applications that are compatible with higher versions of the iPhone. In addition, the article provided detailed guides on all these applications.
Among them, Wondershare Filmora has been integrated with an advanced slow-mo feature. It allows a seamless and professional user interface to import, edit, and customize. The AI Optical Flow in it adds a remarkable fine touch to your slow-mo video.
Five Thoughts on Discord Create Account’s How-To Questions
Five Thoughts on Discord Create Account
An easy yet powerful editor
Numerous effects to choose from
Detailed tutorials provided by the official channel
Discord was a great alternative to voice chat systems such as TeamSpeak, Mumble, and Ventrilo for online gamers. Gamers make discord accounts for these services to play together rather than the voice communication facilities integrated into games, which are frequently of poor quality and lack functionality.
Founded in 2015, discord allowed individuals to talk while playing PC games seamlessly. Users may utilize the service to establish servers that can include many text and audio channels. A typical discord account server may feature chat rooms dedicated to specific themes (such as “gaming” and “anime x manga”), as well as voice channels devoted to specific games or activities. The service’s high-quality, low-latency audio chat is a popular tool for Twitch broadcasters and podcasters. It has also expanded to accommodate massive video conversations to compete with Zoom.
In this article
01 [How Does Discord Work and What is it Used for?](#Part 1)
02 [How to Make a Discord Signup in the Browser?](#Part 2)
03 [How to Make a Discord Signup with Desktop?](#Part 3)
04 [How to Make a Signup Discord with App?](#Part 4)
05 [Discord Create Account FAQs](#Part 5)
Part 1 How Does Discord Work and What is it Used for?
Discord account allows friends to communicate with one another one-on-one or in groups via a server. You may use it to send direct messages to pals, as well as video calls, audio chat, and screen sharing. Once on a server, you can join a voice chat channel to communicate with other gamers who are playing certain games.
You can share many things on discord, including media files like images, gifs, audio, and videos. Speaking of videos, video editing doesn’t get any better than Filmora. Wondershare Filmora Video Editor is a sophisticated editing application for Windows and Mac users. It was initially known as Wondershare Video Editor, but following its fifth release, it got renamed Filmora. The video editor’s primary features include animation, overlays, audio control, on-screen recording, and multi-editing modes. The video editor is well-known for its feature-rich but the simple interface, making it suited for both novice and experienced users.
For Win 7 or later (64-bit)
For macOS 10.12 or later
Filmora’s standout features
● Editing Audio Equalizer 4K Resolution Support
● Support for GIFs
● Screen Dividers
● Controls For Video And Audio
● Multiple Video Clips Can Be Layered
● Stabilization of Video
● Presets for Color Grading
● Text Editing Expertise
● Tilt-Shift
● The mosaic (Blurring)
● Noise Elimination
● Importance in Social Life
● Preview of Each Frame
● Controlling the Speed
● Audio-Mixer
● Backgrounds in Chroma Key
● Screen Capture
● Separation of audio
● Scene Recognition
You can make your discord account and use it on almost any platform, including discord desktop software for Windows and Mac and iOS and Android apps for talking and calling on the move. If you prefer not to download anything, it also works in a web browser. You can link your discord account app to various popular services, such as Twitch and Spotify, so your friends can see your actions. While there is no discord Xbox app, you may link your discord and Xbox accounts so that others can see what you’re up to on your Xbox Series X or Xbox Series S.
Part 2 How to Make a Discord Signup in the Browser
Don’t have the discord account?
You can quickly sign up using your preferred web browser, i.e., Chrome, Microsoft Edge, Firefox, or Safari.
Follow the steps below to make a discord account using your web browser:
Step 1: Go to <www.discord.com> and click the “Login” button in the upper right corner.
Step 2: To establish a new discord account, click “Register” underneath the login page.
Step 3:
● Enter your email, a username, and a strong password.
● Date of birth.
● Accept the terms of service.
After entering the above, click the “Continue” button.
Step 4: Check the box besides “I am human” to enable the captcha.
Step 5: You will receive an email asking you to confirm your information. Select the “Verify email” option.
Once you’ve signed up for discord, you may access it via the Discord website or the mobile app. The program is free to download for Windows, Linux, Mac, Android, and iOS.
Follow the steps above to sign up on discord account successfully. Easy right? Let’s proceed!
Part 3 How to Make a Discord Signup with Desktop?
The discord creating account on your desktop is pretty much the same as using your browser.
Follow the steps below to make a discord account using your desktop.
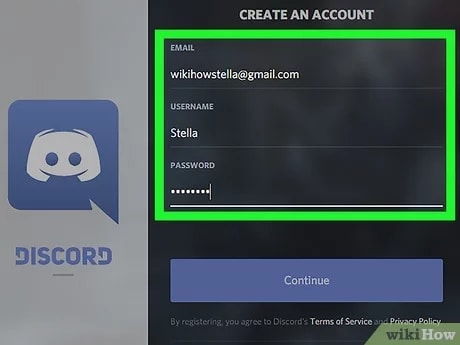
Step 1: Click “Login” on the Discord website (top right).
Step 2: Underneath the sign-in box, click “Register.”
Step 3: Enter the email address, username, password, and birth date.
Step 4: Agree to the terms of service and then click “Continue.”
Step 5: Use the captcha to prove that you are not a robot.
Step 6: You will get an email to confirm your data; click on the link in the email to confirm.
See that? No big deal, right?
Part 4 How to Make a Signup Discord with App
Signing up for a discord account through the app is relatively easy, like the procedures above, you will not break a sweat.
Follow the easy steps below for discord create account on your smartphone device:

Step 1: Install and launch the Discord app on your smartphone
Step 2: Select the Register option.
Step 3: Choose whether to register by cellphone number or email address and input either one.
Step 4: You will get a message with a confirmation code or an email with a link.
Step 5: Enter the code or navigate to the URL.
Step 6: Enter your username and password here.
Step 7: Enter your birth date.
Step 8: Accept the terms of the agreement.
Step 9: Click “Next” to finish the Discord registration.
What Happens When You Disable your Discord Account?
When you deactivate your account, it goes to suspension mode. You may reactivate it by signing in and following the on-screen instructions. Keep in mind that discord accounts dormant for two years are removed, so if you want to keep yours, you must reactivate it (but you can disable it after this if you like).
After you deactivate an account, users will no longer get discord alerts. Users may, however, still receive friend requests, and any friend requests users get while their account is blocked will be ready for when they reactivate it. However, when a user decides to delete their account, the said account will get permanently deleted.
Tip: If you want to stay away from your discord account for a while with a plan to return to it later, it is advisable to log out or deactivate rather than delete it.
Part 5 Discord Create Account FAQs
Q. Is discord free, or do I have to pay?
A. Yes and no. The premium edition of discord is not free. If you don’t want to utilize the premium features, you may still download and make a discord account for free.
Q. Is there anything I cannot do on discord?
A. Do not organize, promote, or participate in any unlawful or possibly dangerous activities, such as sexual solicitation, human trafficking, or selling or enabling the sale of forbidden or potentially harmful products (firearms, ammunition, drugs, and controlled substances).
Q. Do messages disappear on discord?
A. Your messages are only destroyed: 1. if they are deleted individually (by you or a user with proper rights), 2. if you get banned, and the person banning you decides to delete all of your messages at once.
Q. Does discord account keep a record of interactions?
A. Yes, discord will track every discussion you have on discord acount, record everything you say on discord, and examine all photographs you transmit over discord.
Q. How will I know when someone blocks me on discord?
A. When you block someone, their online status on discord account changes to “offline” until unblocked and vice versa. They will also show offline in mutual servers or your chat history.
Q. How do I permanently delete my discord account?
A. To delete your discord created account for good, head to user settings, then tap on ‘my account.’ From there, tap on ‘Account Removal’ then tap on ‘Delete Account.’
If you are a server owner, you will have to delete the server or pass ownership of the server.
Q. How do I find servers to join on discord?
A. If you have a buddy who has a discord server you’d want to join, request an invite. If you’re a member of a discord community, ask for an invite or check on the community website.
By tapping the magnifying glass in the left window of the discord account app, you may also search for public servers that anybody can join.
● Ending Thoughts →
● Discord is a web program that works in most browsers. A desktop version is available for Windows, macOS, Linux, iOS, and Android. Discord’s desktop and browser versions are functionally and visually identical in practically every regard if you want to make a discord account. So, re-read the article and the FAQs on discord create account, and start your journey.
● Finally, for the creatives, boost your discord create account and usage experience by using Filmora to edit videos and make cool animations.
Discord was a great alternative to voice chat systems such as TeamSpeak, Mumble, and Ventrilo for online gamers. Gamers make discord accounts for these services to play together rather than the voice communication facilities integrated into games, which are frequently of poor quality and lack functionality.
Founded in 2015, discord allowed individuals to talk while playing PC games seamlessly. Users may utilize the service to establish servers that can include many text and audio channels. A typical discord account server may feature chat rooms dedicated to specific themes (such as “gaming” and “anime x manga”), as well as voice channels devoted to specific games or activities. The service’s high-quality, low-latency audio chat is a popular tool for Twitch broadcasters and podcasters. It has also expanded to accommodate massive video conversations to compete with Zoom.
In this article
01 [How Does Discord Work and What is it Used for?](#Part 1)
02 [How to Make a Discord Signup in the Browser?](#Part 2)
03 [How to Make a Discord Signup with Desktop?](#Part 3)
04 [How to Make a Signup Discord with App?](#Part 4)
05 [Discord Create Account FAQs](#Part 5)
Part 1 How Does Discord Work and What is it Used for?
Discord account allows friends to communicate with one another one-on-one or in groups via a server. You may use it to send direct messages to pals, as well as video calls, audio chat, and screen sharing. Once on a server, you can join a voice chat channel to communicate with other gamers who are playing certain games.
You can share many things on discord, including media files like images, gifs, audio, and videos. Speaking of videos, video editing doesn’t get any better than Filmora. Wondershare Filmora Video Editor is a sophisticated editing application for Windows and Mac users. It was initially known as Wondershare Video Editor, but following its fifth release, it got renamed Filmora. The video editor’s primary features include animation, overlays, audio control, on-screen recording, and multi-editing modes. The video editor is well-known for its feature-rich but the simple interface, making it suited for both novice and experienced users.
For Win 7 or later (64-bit)
For macOS 10.12 or later
Filmora’s standout features
● Editing Audio Equalizer 4K Resolution Support
● Support for GIFs
● Screen Dividers
● Controls For Video And Audio
● Multiple Video Clips Can Be Layered
● Stabilization of Video
● Presets for Color Grading
● Text Editing Expertise
● Tilt-Shift
● The mosaic (Blurring)
● Noise Elimination
● Importance in Social Life
● Preview of Each Frame
● Controlling the Speed
● Audio-Mixer
● Backgrounds in Chroma Key
● Screen Capture
● Separation of audio
● Scene Recognition
You can make your discord account and use it on almost any platform, including discord desktop software for Windows and Mac and iOS and Android apps for talking and calling on the move. If you prefer not to download anything, it also works in a web browser. You can link your discord account app to various popular services, such as Twitch and Spotify, so your friends can see your actions. While there is no discord Xbox app, you may link your discord and Xbox accounts so that others can see what you’re up to on your Xbox Series X or Xbox Series S.
Part 2 How to Make a Discord Signup in the Browser
Don’t have the discord account?
You can quickly sign up using your preferred web browser, i.e., Chrome, Microsoft Edge, Firefox, or Safari.
Follow the steps below to make a discord account using your web browser:
Step 1: Go to <www.discord.com> and click the “Login” button in the upper right corner.
Step 2: To establish a new discord account, click “Register” underneath the login page.
Step 3:
● Enter your email, a username, and a strong password.
● Date of birth.
● Accept the terms of service.
After entering the above, click the “Continue” button.
Step 4: Check the box besides “I am human” to enable the captcha.
Step 5: You will receive an email asking you to confirm your information. Select the “Verify email” option.
Once you’ve signed up for discord, you may access it via the Discord website or the mobile app. The program is free to download for Windows, Linux, Mac, Android, and iOS.
Follow the steps above to sign up on discord account successfully. Easy right? Let’s proceed!
Part 3 How to Make a Discord Signup with Desktop?
The discord creating account on your desktop is pretty much the same as using your browser.
Follow the steps below to make a discord account using your desktop.
Step 1: Click “Login” on the Discord website (top right).
Step 2: Underneath the sign-in box, click “Register.”
Step 3: Enter the email address, username, password, and birth date.
Step 4: Agree to the terms of service and then click “Continue.”
Step 5: Use the captcha to prove that you are not a robot.
Step 6: You will get an email to confirm your data; click on the link in the email to confirm.
See that? No big deal, right?
Part 4 How to Make a Signup Discord with App
Signing up for a discord account through the app is relatively easy, like the procedures above, you will not break a sweat.
Follow the easy steps below for discord create account on your smartphone device:
Step 1: Install and launch the Discord app on your smartphone
Step 2: Select the Register option.
Step 3: Choose whether to register by cellphone number or email address and input either one.
Step 4: You will get a message with a confirmation code or an email with a link.
Step 5: Enter the code or navigate to the URL.
Step 6: Enter your username and password here.
Step 7: Enter your birth date.
Step 8: Accept the terms of the agreement.
Step 9: Click “Next” to finish the Discord registration.
What Happens When You Disable your Discord Account?
When you deactivate your account, it goes to suspension mode. You may reactivate it by signing in and following the on-screen instructions. Keep in mind that discord accounts dormant for two years are removed, so if you want to keep yours, you must reactivate it (but you can disable it after this if you like).
After you deactivate an account, users will no longer get discord alerts. Users may, however, still receive friend requests, and any friend requests users get while their account is blocked will be ready for when they reactivate it. However, when a user decides to delete their account, the said account will get permanently deleted.
Tip: If you want to stay away from your discord account for a while with a plan to return to it later, it is advisable to log out or deactivate rather than delete it.
Part 5 Discord Create Account FAQs
Q. Is discord free, or do I have to pay?
A. Yes and no. The premium edition of discord is not free. If you don’t want to utilize the premium features, you may still download and make a discord account for free.
Q. Is there anything I cannot do on discord?
A. Do not organize, promote, or participate in any unlawful or possibly dangerous activities, such as sexual solicitation, human trafficking, or selling or enabling the sale of forbidden or potentially harmful products (firearms, ammunition, drugs, and controlled substances).
Q. Do messages disappear on discord?
A. Your messages are only destroyed: 1. if they are deleted individually (by you or a user with proper rights), 2. if you get banned, and the person banning you decides to delete all of your messages at once.
Q. Does discord account keep a record of interactions?
A. Yes, discord will track every discussion you have on discord acount, record everything you say on discord, and examine all photographs you transmit over discord.
Q. How will I know when someone blocks me on discord?
A. When you block someone, their online status on discord account changes to “offline” until unblocked and vice versa. They will also show offline in mutual servers or your chat history.
Q. How do I permanently delete my discord account?
A. To delete your discord created account for good, head to user settings, then tap on ‘my account.’ From there, tap on ‘Account Removal’ then tap on ‘Delete Account.’
If you are a server owner, you will have to delete the server or pass ownership of the server.
Q. How do I find servers to join on discord?
A. If you have a buddy who has a discord server you’d want to join, request an invite. If you’re a member of a discord community, ask for an invite or check on the community website.
By tapping the magnifying glass in the left window of the discord account app, you may also search for public servers that anybody can join.
● Ending Thoughts →
● Discord is a web program that works in most browsers. A desktop version is available for Windows, macOS, Linux, iOS, and Android. Discord’s desktop and browser versions are functionally and visually identical in practically every regard if you want to make a discord account. So, re-read the article and the FAQs on discord create account, and start your journey.
● Finally, for the creatives, boost your discord create account and usage experience by using Filmora to edit videos and make cool animations.
Also read:
- New Detailed Guide to Crop Videos in Sony Vegas Pro for 2024
- New In 2024, 4 Methods to Merge MP4 and MP3
- New In 2024, How to Create Glowing Edge Effect in TikTok Dancing Video
- New How to Change the Speed of Video in DaVinci Resolve, In 2024
- In 2024, Want to Come up with Exciting Sony Vegas Slideshow Templates for Your Next Project on YouTube and Other Mediums Then There Is Something for You
- New 4 Methods to Crop a Video on Android Easily
- New In 2024, How to Make Vintage Film Effect 1950S
- New Best 10 Anime Movies for All Time
- New 2024 Approved Guide To Selecting and Using the Best Braw Luts
- Updated In 2024, 4 Methods to Crop a Video on Android Easily
- New Create Kinetice Typography Text Effect in Filmora for 2024
- Updated How to Rotate Videos With Media Player Classic for 2024
- Spooky Halloween Best 15+ Halloween Countdown Video Clips for 2024
- Modern Silence Detection Tools Are Changing the Face of Video Editing. Use Them to Improve the Quality of Your Video Clips. Learn How These Tools Let You Detect Silence with Pinpoint Accuracy for 2024
- In 2024, Tips for Choosing Location and Scheduling Music Video
- Updated Ways to Make Sure Your Recording Slideshow in Powerpoint Is Not Wrong for 2024
- New In 2024, A Guide to Speed up a Video on Splice
- New How Can You Deny These Top 10 Free Speech to Text Software for 2024
- Best 9 Amv Makers for Computer for 2024
- Updated 2024 Approved Every Compositor Should Know The Trick of Color Match in After Effects
- Updated Are You Looking to Make Subscribe Channel Graphics? Here Is a Complete Guide on How to Make One on Your Own
- New A Vacation Slideshow Is a Great Way to Relive the Vacation Memories and Also Share Them with Your Loved Ones. If You Are Looking for Ways to Create a Slideshow in Just a Few Minutes, We Will Help You with the Best Tool for 2024
- New In 2024, How to Rotate Videos With Media Player Classic
- Updated How to Add Customized Transitions to OBS for 2024
- New Difference Between Time Lapse and Hyperlapse
- New 2024 Approved How to Combine Several Xvid Files Into One Windows, Mac,Android, iPhone & Online
- Updated 2024 Approved 100 Working Methods to Learn How to Rotate TikTok Video
- Updated 2024 Approved 2 Methods to Crop Video in VLC
- New Every Compositor Should Know The Tips of Color Match in After Effects for 2024
- How to Change Video Resolution in Filmora for 2024
- 2024 Approved End Your Struggles with Choppy Playback on DaVinci Resolve. Read This Guide to Find Effective Fixes and Reliable DaVinci Resolve Slow Playback Alternatives
- New In 2024, How to Create Sony Vegas Freeze Frame
- Updated In 2024, 6 Instant Ways to Create Windows 10 Slideshow
- Create Photoshop GIFs with Zero Hustle
- Updated 2024 Approved How to Do Velocity Edits on PC
- In 2024, Do You Want to Enable the Motion Blur Effect While Playing Dying Light 2? Read This Article to Find Out How to Use Dying Light 2 Motion Blur for a Great Gaming Experience
- New Keyframes Interval Everything You Need To Know for 2024
- New Final Cut Pro for iPad- Is It Available, In 2024
- New Top Fixes to Resolve Issues with Premiere Pro Slow Playback
- Sim Unlock Motorola Razr 40 Phones without Code 2 Ways to Remove Android Sim Lock
- Is Mega Mewtwo The Strongest Pokémon On Apple iPhone 13 mini? | Dr.fone
- The way to get back lost messages from Oppo A78
- In 2024, How to Cast Poco M6 Pro 4G to Computer for iPhone and Android? | Dr.fone
- How to Spy on Text Messages from Computer & OnePlus Nord N30 SE | Dr.fone
- In 2024, How to Transfer Apps from Xiaomi Redmi 12 5G to Another | Dr.fone
- Life360 Learn How Everything Works On Apple iPhone 13 Pro | Dr.fone
- How To Fix Auto Lock Greyed Out on iPhone 13
- In 2024, 10 Fake GPS Location Apps on Android Of your Tecno Spark 10 5G | Dr.fone
- Methods to Change GPS Location On Samsung Galaxy F34 5G | Dr.fone
- In 2024, Here are Some of the Best Pokemon Discord Servers to Join On Lava Blaze 2 | Dr.fone
- Full guide to iPhone SE (2020) iCloud Bypass
- A Detailed VPNa Fake GPS Location Free Review On Samsung Galaxy M34 5G | Dr.fone
- New 2024 Approved Diverse Template
- Factory Reset on iPhone 6 | Dr.fone
- How do I reset my Vivo Y56 5G Phone without technical knowledge? | Dr.fone
- In 2024, How Can I Catch the Regional Pokémon without Traveling On Oppo K11x | Dr.fone
- Nokia XR21 Screen Unresponsive? Heres How to Fix It | Dr.fone
- How to Unlock Your Apple iPhone 14 Plus Passcode 4 Easy Methods (With or Without iTunes) | Dr.fone
- Home Button Not Working on Xiaomi 14 Pro? Here Are Real Fixes | Dr.fone
- In 2024, Where Is the Best Place to Catch Dratini On Apple iPhone SE (2020) | Dr.fone
- In 2024, What Does Enter PUK Code Mean And Why Did The Sim Get PUK Blocked On Samsung Galaxy A25 5G Device
- How to Fix My Motorola Moto G23 Location Is Wrong | Dr.fone
- Why Apple Account Disabled On your Apple iPhone XS Max? How to Fix
- In 2024, 10 Fake GPS Location Apps on Android Of your Sony Xperia 10 V | Dr.fone
- In 2024, How to Check Distance and Radius on Google Maps For your Xiaomi Mix Fold 3 | Dr.fone
- Best Free iPhone 8 Plus IMEI Checker
- How to share/fake gps on Uber for Motorola G54 5G | Dr.fone
- A Comprehensive Guide to iCloud Unlock From iPhone 11 Pro Max Online
- In 2024, Guide to Mirror Your Oppo A38 to Other Android devices | Dr.fone
- The Ultimate Guide How to Bypass Swipe Screen to Unlock on Infinix Hot 30 5G Device
- Is your Oppo Find X7 working too slow? Heres how you can hard reset it | Dr.fone
- How to Get and Use Pokemon Go Promo Codes On Oppo Reno 9A | Dr.fone
- How To Track IMEI Number Of Samsung Galaxy XCover 7 Through Google Earth?
- The Magnificent Art of Pokemon Go Streaming On Tecno Pop 8? | Dr.fone
- In 2024, How to Transfer Data After Switching From Vivo Y27s to Latest Samsung | Dr.fone
- Title: You Can Splice Video on the iPhone Using Various Applications. This Article Will Guide You Through the Steps Necessary to Splice Your Videos for 2024
- Author: Chloe
- Created at : 2024-04-24 07:08:25
- Updated at : 2024-04-25 07:08:25
- Link: https://ai-editing-video.techidaily.com/you-can-splice-video-on-the-iphone-using-various-applications-this-article-will-guide-you-through-the-steps-necessary-to-splice-your-videos-for-2024/
- License: This work is licensed under CC BY-NC-SA 4.0.
