
:max_bytes(150000):strip_icc():format(webp)/GettyImages-944229088-5bd1f61e46e0fb0026fdf2f0.jpg)
6 Free Tools To Radial Blur Photos Online
6 Free Tools To Radial Blur Photos Online
Radial blur is commonly used in photography and graphics to create a sense of movement or dynamism and help you simulate several different effects, such as a spinning wheel or a moving car. It’s also often used to create a dream-like or ethereal effect. Regardless of how you add it, radial blur can give a lot of visual interest to your otherwise static photos.
Therefore, if you’re looking for a way to add some dynamics to your photos, read on to learn about 6 free tools to create radial blur effects online!
What Is Radial Blur?
Radial blur is a blurring effect that starts from one point in an image and blurs outwards (or inwards) from (or to) that point. The word ‘radial’ means “arranged like rays that come from or go to a common center,” which is precisely how radial blur works.
Here are some common uses of the Radial motion blur effect:
- Create a sense of movement
- Add depth to a photo
- Simulate camera movement
- Create an interesting background
Best 6 Free Online Radial Blur Image Tools
If you want to create a radial blur effect on your photos but don’t have the required resources like storage space, budget, or the right software, we recommend you try using the following tools:
1.Pine Tools
Pine Tools is a terrific online program with many image editing features, such as invert color, blur, special filters, effects, crop images, and more.
Using its radial blur feature, you can quickly add depth to your images and apply the motion blur effect. To do so, visit the Pine Tools website, choose “Blur” from the left panel, and upload your image. Then, under the “Options” header, select “Radial Blur” and click “Apply.” The best thing about this online tool is that you can set different parameters before creating the effect.

Key Features:
- Numerous image editing tools
- Various parameters for creating radial blur effects, such as size, strongness, and axis (x, y)
- No editing knowledge is required to use the program
Pros
- Drag and drop interface
- Free to use
- No sign up required
Cons
- Takes time to finish the process
- UI is a bit old
2.Mass-images.pro
With Mass-images.pro tool, you can crop your images, do batch processing, or create memes in no time. Moreover, the program offers multiple image editing features to help you quickly apply basic changes to your pictures. These include Change BG, Auto Improve, Overlay image, Rotate, Swirl, Radial Blur, Text, Pixelization, and many more filters.
To create the radial motion blur effect on your images using the Mass-images.pro tool, you have to simply upload your file, set the radius and strength, and click “Download.” You can also configure the format and quality of your picture before downloading it.

Key features:
- Offers multiple format options for uploading and downloading your images
- Can change the radius of blur and intensity effects
- Can process multiple photos at once
Pros
- Free to use
- Many input and output formats
- Simple and straightforward to use
- Image quality option
Cons
- No advanced image editing features
3. Font Meme
Font Meme is an online resource for fonts and typography. Still, it offers other image editing features, such as 3D Rotation, Bevel Effect, Glow Effect, Invert Colors, Blend Images, and Add Background, to help you create memes instantly.
You can also use the Font Meme to create a radial blur image by uploading the image and selecting the “Blur Type” from the drop-down menu. Next, set the blur amount and click “Generate.”

Key Features:
- Instantly creates the radial blur effect on images
- Offers multiple image editing options
- A Complete resource for font and typography
Pros
- Available for free
- Quick and easy to use
- Intuitive UI
Cons
- No advanced image editing features
4.IMGonline.com.ua
IMGonline is another free online tool that offers image resizing, converting, compression, EXIF editor, effects, and other tools.
IMGonline can also help you create beautiful radial blur images in the nick of time. It’s a great and easy platform to add an extra effect to your photos. Simply upload your picture, choose the amount of blur you want, click “OK,” and download the results.

Key Features:
- Also has circular blur, usual blur, and linear blur features
- Does not change the original image during the process
- Multiple radial blur settings
- Offers JPEG and PNG as output formats
Pros
- Simple user interface
- Quick processing time
- Free
- Multiple image input formats
Cons
- Cannot process large image files
5.Pop Art Studio
Pop Art Studio is an effective online tool that allows you to create pop art images and offers numerous options for users to choose from, including different colors, fonts, and layouts. You can also upload your photos to the tool to convert them into pop art.
To use Pop Art Studio, simply upload an image to the website or paste the URL and then adjust the opacity and radius of the radial blur. Once you’re happy with the results, download the image.

Key Features:
- Lets you paste the URL of the image
- Can configure the opacity and radius of the blur
- Instant process of the image
Pros
- Useful for creating and editing artwork
- Available for free
- Available as software
Cons
- Applies watermark to your images
6.Photokako
Photokako is a Japanese photo editor that creates radial motion blur effects in your images with just a few clicks by uploading them from your system or pulling the image from a URL.
Besides that, this tool offers several other advanced image editing features, including Transform, Illustrate, Reduce Colors, Parallel Universe, Retro, Ilusion, Frame, and Mood.

Key Features:
- Option to adjust blur smoothness and opacity
- Comes with Basic Settings to edit the image further
- Multiple output formats, including JPG, PNG-24, BMP, TIFF-24, TIFF-48, GIF, PNG-8, and PNG-32.
Pros
- Sophisticated online tool
- Multiple ways to upload a picture
- Free and easy to use
Cons
- The user interface is less intuitive
Bonus Tips – How To Add Radial Blur Effect To Images In Filmora
The programs mentioned above work only online and do not offer advanced features to add more customization options to the level of radial blurring or change its position on the images. Therefore, we recommend using the desktop software - Filmora.
Free Download For Win 7 or later(64-bit)
Free Download For macOS 10.14 or later
Filmora is a free and premium video editing software recommended by many content creators and professionals. With this software, you can create stunning radial effects on your images or memes with more customization options available.
Here’s how you can add the radial blur effect to images in Filmora by following three simple steps:
Step1 In the first step, go to the Filmora website, download the file, and install the software. Launch it and click the “Create New Project” option. Then drag & drop your file or click the “Click here to add Media file” to import it.

Step2 In the second step, go to the “Effects” tab, choose the Tilt-shift Circle for the radial blur effect, and add it to the timeline.

Step3 Finally, configure the size, X-axis, Y-axis, and intensity of the effect by double-clicking it in the timeline. You’re all set! Export your file by clicking on the “Export” button.
Last Words
In this article, we’ve provided the 6 best tools to create radial blur effects online for free and discussed their key features, pros, and cons to help you choose the right program.
In the end, we’ve provided a bonus tip to show you how to add the radial blur effect to images using the Wondershare Filmora software.
Hopefully, you’ve found this article helpful and can now quickly apply the radial motion effect to your pictures.
What Is Radial Blur?
Radial blur is a blurring effect that starts from one point in an image and blurs outwards (or inwards) from (or to) that point. The word ‘radial’ means “arranged like rays that come from or go to a common center,” which is precisely how radial blur works.
Here are some common uses of the Radial motion blur effect:
- Create a sense of movement
- Add depth to a photo
- Simulate camera movement
- Create an interesting background
Best 6 Free Online Radial Blur Image Tools
If you want to create a radial blur effect on your photos but don’t have the required resources like storage space, budget, or the right software, we recommend you try using the following tools:
1.Pine Tools
Pine Tools is a terrific online program with many image editing features, such as invert color, blur, special filters, effects, crop images, and more.
Using its radial blur feature, you can quickly add depth to your images and apply the motion blur effect. To do so, visit the Pine Tools website, choose “Blur” from the left panel, and upload your image. Then, under the “Options” header, select “Radial Blur” and click “Apply.” The best thing about this online tool is that you can set different parameters before creating the effect.
Key Features:
- Numerous image editing tools
- Various parameters for creating radial blur effects, such as size, strongness, and axis (x, y)
- No editing knowledge is required to use the program
Pros
- Drag and drop interface
- Free to use
- No sign up required
Cons
- Takes time to finish the process
- UI is a bit old
2.Mass-images.pro
With Mass-images.pro tool, you can crop your images, do batch processing, or create memes in no time. Moreover, the program offers multiple image editing features to help you quickly apply basic changes to your pictures. These include Change BG, Auto Improve, Overlay image, Rotate, Swirl, Radial Blur, Text, Pixelization, and many more filters.
To create the radial motion blur effect on your images using the Mass-images.pro tool, you have to simply upload your file, set the radius and strength, and click “Download.” You can also configure the format and quality of your picture before downloading it.
Key features:
- Offers multiple format options for uploading and downloading your images
- Can change the radius of blur and intensity effects
- Can process multiple photos at once
Pros
- Free to use
- Many input and output formats
- Simple and straightforward to use
- Image quality option
Cons
- No advanced image editing features
3. Font Meme
Font Meme is an online resource for fonts and typography. Still, it offers other image editing features, such as 3D Rotation, Bevel Effect, Glow Effect, Invert Colors, Blend Images, and Add Background, to help you create memes instantly.
You can also use the Font Meme to create a radial blur image by uploading the image and selecting the “Blur Type” from the drop-down menu. Next, set the blur amount and click “Generate.”
Key Features:
- Instantly creates the radial blur effect on images
- Offers multiple image editing options
- A Complete resource for font and typography
Pros
- Available for free
- Quick and easy to use
- Intuitive UI
Cons
- No advanced image editing features
4.IMGonline.com.ua
IMGonline is another free online tool that offers image resizing, converting, compression, EXIF editor, effects, and other tools.
IMGonline can also help you create beautiful radial blur images in the nick of time. It’s a great and easy platform to add an extra effect to your photos. Simply upload your picture, choose the amount of blur you want, click “OK,” and download the results.
Key Features:
- Also has circular blur, usual blur, and linear blur features
- Does not change the original image during the process
- Multiple radial blur settings
- Offers JPEG and PNG as output formats
Pros
- Simple user interface
- Quick processing time
- Free
- Multiple image input formats
Cons
- Cannot process large image files
5.Pop Art Studio
Pop Art Studio is an effective online tool that allows you to create pop art images and offers numerous options for users to choose from, including different colors, fonts, and layouts. You can also upload your photos to the tool to convert them into pop art.
To use Pop Art Studio, simply upload an image to the website or paste the URL and then adjust the opacity and radius of the radial blur. Once you’re happy with the results, download the image.
Key Features:
- Lets you paste the URL of the image
- Can configure the opacity and radius of the blur
- Instant process of the image
Pros
- Useful for creating and editing artwork
- Available for free
- Available as software
Cons
- Applies watermark to your images
6.Photokako
Photokako is a Japanese photo editor that creates radial motion blur effects in your images with just a few clicks by uploading them from your system or pulling the image from a URL.
Besides that, this tool offers several other advanced image editing features, including Transform, Illustrate, Reduce Colors, Parallel Universe, Retro, Ilusion, Frame, and Mood.
Key Features:
- Option to adjust blur smoothness and opacity
- Comes with Basic Settings to edit the image further
- Multiple output formats, including JPG, PNG-24, BMP, TIFF-24, TIFF-48, GIF, PNG-8, and PNG-32.
Pros
- Sophisticated online tool
- Multiple ways to upload a picture
- Free and easy to use
Cons
- The user interface is less intuitive
Bonus Tips – How To Add Radial Blur Effect To Images In Filmora
The programs mentioned above work only online and do not offer advanced features to add more customization options to the level of radial blurring or change its position on the images. Therefore, we recommend using the desktop software - Filmora.
Free Download For Win 7 or later(64-bit)
Free Download For macOS 10.14 or later
Filmora is a free and premium video editing software recommended by many content creators and professionals. With this software, you can create stunning radial effects on your images or memes with more customization options available.
Here’s how you can add the radial blur effect to images in Filmora by following three simple steps:
Step1 In the first step, go to the Filmora website, download the file, and install the software. Launch it and click the “Create New Project” option. Then drag & drop your file or click the “Click here to add Media file” to import it.
Step2 In the second step, go to the “Effects” tab, choose the Tilt-shift Circle for the radial blur effect, and add it to the timeline.
Step3 Finally, configure the size, X-axis, Y-axis, and intensity of the effect by double-clicking it in the timeline. You’re all set! Export your file by clicking on the “Export” button.
Last Words
In this article, we’ve provided the 6 best tools to create radial blur effects online for free and discussed their key features, pros, and cons to help you choose the right program.
In the end, we’ve provided a bonus tip to show you how to add the radial blur effect to images using the Wondershare Filmora software.
Hopefully, you’ve found this article helpful and can now quickly apply the radial motion effect to your pictures.
Facts About GIF Background You Didn’t Know
Some Facts About GIF Background You Didn’t Know
An easy yet powerful editor
Numerous effects to choose from
Detailed tutorials provided by the official channel
Once you start using GIFs in your everyday conversations, there’s no going back. GIFs make the conversation more immersive and enjoyable and add a sense of emotion that is not possible with ordinary text. You probably loved some gifs more than others, or there were moments when you wanted to turn them into gifs and wished you could use them as a gif background on your device or presentation but couldn’t figure out how to do it. But, now you don’t have to bury your wish any longer. During this article, you will learn everything there is to know about all the different ways you can use gifs as your background and many more. In addition, you will learn how to use them as your background and how to create them.
In this article
01 [How to Use a GIF as Your Desktop Background on Windows](#Part 1)
02 [How to Make GIF Background on Windows/Mac/Android/iPhone](#Part 2)
03 [How to Make GIF Powerpoint Background](#Part 3)
04 [How to Make GIF Without Background - Free & Efficiently?](#Part 4)
Part 1 How to Use a GIF as Your Desktop Background on Windows?
Although Windows doesn’t have native support to keep animated gif backgrounds, you can use third-party services to keep gifs as background images.
Using Plastuer or BioniX wallpaper changer as a 3rd party software is the best way to use animated gifs for your desktop.
As a starting point, we’ll cover plastuer, which uses WebGL and chromium-browser to make gifs as your background.

The software includes selecting different screens where you want the wallpaper to appear, making it possible to apply it to different screens at once.
To select the gif you want:
● You can paste the URL of the gif you want to use.
● You can also use the “create playlist” field to add multiple gifs as your background.
● You can select a file from your device using the “select file” option.
● Or you can choose from hundreds of gifs present in the plastuer library.
● You can disable the wallpaper whenever you wish by clicking on the “disable wallpaper” option.

How to use the bioniX wallpaper changer?
BioniX comes with several options that one may need to apply to their Windows device’s background, and animated gif backgrounds are one of them.

You will need to download the software and once it is installed, launch it on your PC to apply cool gif backgrounds. To choose files from the device itself, you will have to use the shortcut command “CTRL+F”, or you can also choose to insert the URL of the gif you want to use as your background.
Once your image gets uploaded into the software, double click on it to set it as your windows wallpaper. You can also choose a launch of gifs, create a playlist, and select the timer to change wallpaper regularly.
Part 2 How to Make GIF Background on Windows/Mac/Android/iPhone?
So, how can you create moving background gifs on your different devices like Windows/Mac/Android/iPhone?
In case you thought that was hard, you were entirely mistaken. Now, you can easily create or customize cool background gifs for your computer, tablet, phone, or other devices that you own. The best part is that you don’t need any technical skills to use different tools.
You can create gifs with the help of many tools such as Giphy and share them with your family, friends, and coworkers.
01Giphy
Giphy is a one-stop destination for all of your gifs needs. You can create or choose from thousands of gifs present in their library. Furthermore, one can make personalized gifs with all the tools they provide and add custom stickers, texts or different filters. There is also a live wallpaper section present in giphy, from where you can download hundreds of cool gif backgrounds and make your old machine look fabulous again.

02Pinterest
It’s no secret that Pinterest has a lot of great images, but did you know you can also find gif backgrounds here in various genres that you like and then download them?
It’s straightforward to use, and you can also find anime gif backgrounds on Pinterest if you are an anime fan.

03Tenor
This site offers online gif backgrounds. One may choose from a wide selection of wallpapers and backgrounds available on this site. Online Library is filled up with all sorts of aesthetic gif backgrounds and other types of background that people like.
A few more tools fit the need, but most of them are not reliable, and the tools mentioned above are currently the best ones available for you to use.

Part 3 How to Make a GIF Powerpoint Background?
If you make PowerPoint presentations, you can use various tools to modify your presentation. But did you know that you can also include an aesthetic gif background as part of your presentation?
The steps to creating a gif PowerPoint background are very simple, and below you will find all the steps you need to follow:
● You’ll need to choose the PPTx file that you want to use the GIF background on to get started. Then you can choose the specific slide.
● Navigate to the “design” tab, then to the “background” section. You will see a “background styles” option where you will have to select “format background” to complete the process.
● Select “fill” in the left-hand side panel of the appeared window. Now, select “picture or texture fill” and choose the “file” button, which will lead to another window.
● In the “look in” menu, find the folder or file where the required gif is present. Go on to select the “ok” option. You can either select “close” to apply the gif to a particular slide or “apply to all” to use the gif background in the whole presentation.
Part 4 How to Make GIF Without Background - Free & Efficiently?
One may also look for transparent gif maker websites that will help them make gifs without background and use them on different devices they own.
Here are a few websites that are best for this job; they won’t only help you make transparent gifs but also edit various features like delay time, animation speed etc.
01Using EzGif
Using EzGif is probably one of the best options available in the market at the moment. You can go to their website and create a transparent gif background of high resolution.
Doing that is easy; you need to upload PNG type images that don’t have a background or combine transparent background to form a gif. You can choose up to 2000 images with a maximum file size of 100 MB for all images combined.
To create a gif, go on their site, then to the “gif maker” section to upload the images, and click on “make a gif” to make a transparent gif from the selected images. Once the gif is created, you can use it as a moving gif background and share it with friends or family.
02Use animizer.net to create a gif without background
It is effortless to use software to create transparent gifs by uploading multiple transparent PNG images and combining them to form a gif.
You can use unlimited images for your gif and animated gif background. It also lets you adjust various settings for your transparent gifs like loops, animation speed and much more.
03Use filmora for making gifs without background easily
Wondershare Filmora Video Editor is an all in one tool that will help you create all sorts of gifs, including transparent gifs. You can take advantage of their easy to use tools that are fir for people who have no technical skills at all.
You can easily upload the images and remove their background in the software itself and later use it in the gif you are willing to create.

Wondershare Filmora - Best Video Editor for Mac/Windows
5,481,435 people have downloaded it.
Build unique custom animations without breaking a sweat.
Focus on creating epic stories and leave the details to Filmora’s auto features.
Start a creative adventure with drag & drop effects and endless possibilities.
Filmora simplifies advanced features to save you time and effort.
Filmora cuts out repetition so you can move on to your next creative breakthrough.
This is probably one of the best options if you are looking for an all in one tool for all your needs.
● Ending Thoughts →
● The techniques that we have talked about in this guide may help you discover things about gif backgrounds you have not known before.
● They are incredible and can help you utilize gifs in ways you hadn’t even considered.
● Create a moving gif background and apply it to any device easily.
● Of course, a simple background won’t provide the same type of effect as a moving gif. With this guide, you’ll learn about every tool that you may use and how to apply or create a cool gif background on your own.
Once you start using GIFs in your everyday conversations, there’s no going back. GIFs make the conversation more immersive and enjoyable and add a sense of emotion that is not possible with ordinary text. You probably loved some gifs more than others, or there were moments when you wanted to turn them into gifs and wished you could use them as a gif background on your device or presentation but couldn’t figure out how to do it. But, now you don’t have to bury your wish any longer. During this article, you will learn everything there is to know about all the different ways you can use gifs as your background and many more. In addition, you will learn how to use them as your background and how to create them.
In this article
01 [How to Use a GIF as Your Desktop Background on Windows](#Part 1)
02 [How to Make GIF Background on Windows/Mac/Android/iPhone](#Part 2)
03 [How to Make GIF Powerpoint Background](#Part 3)
04 [How to Make GIF Without Background - Free & Efficiently?](#Part 4)
Part 1 How to Use a GIF as Your Desktop Background on Windows?
Although Windows doesn’t have native support to keep animated gif backgrounds, you can use third-party services to keep gifs as background images.
Using Plastuer or BioniX wallpaper changer as a 3rd party software is the best way to use animated gifs for your desktop.
As a starting point, we’ll cover plastuer, which uses WebGL and chromium-browser to make gifs as your background.
The software includes selecting different screens where you want the wallpaper to appear, making it possible to apply it to different screens at once.
To select the gif you want:
● You can paste the URL of the gif you want to use.
● You can also use the “create playlist” field to add multiple gifs as your background.
● You can select a file from your device using the “select file” option.
● Or you can choose from hundreds of gifs present in the plastuer library.
● You can disable the wallpaper whenever you wish by clicking on the “disable wallpaper” option.
How to use the bioniX wallpaper changer?
BioniX comes with several options that one may need to apply to their Windows device’s background, and animated gif backgrounds are one of them.
You will need to download the software and once it is installed, launch it on your PC to apply cool gif backgrounds. To choose files from the device itself, you will have to use the shortcut command “CTRL+F”, or you can also choose to insert the URL of the gif you want to use as your background.
Once your image gets uploaded into the software, double click on it to set it as your windows wallpaper. You can also choose a launch of gifs, create a playlist, and select the timer to change wallpaper regularly.
Part 2 How to Make GIF Background on Windows/Mac/Android/iPhone?
So, how can you create moving background gifs on your different devices like Windows/Mac/Android/iPhone?
In case you thought that was hard, you were entirely mistaken. Now, you can easily create or customize cool background gifs for your computer, tablet, phone, or other devices that you own. The best part is that you don’t need any technical skills to use different tools.
You can create gifs with the help of many tools such as Giphy and share them with your family, friends, and coworkers.
01Giphy
Giphy is a one-stop destination for all of your gifs needs. You can create or choose from thousands of gifs present in their library. Furthermore, one can make personalized gifs with all the tools they provide and add custom stickers, texts or different filters. There is also a live wallpaper section present in giphy, from where you can download hundreds of cool gif backgrounds and make your old machine look fabulous again.
02Pinterest
It’s no secret that Pinterest has a lot of great images, but did you know you can also find gif backgrounds here in various genres that you like and then download them?
It’s straightforward to use, and you can also find anime gif backgrounds on Pinterest if you are an anime fan.
03Tenor
This site offers online gif backgrounds. One may choose from a wide selection of wallpapers and backgrounds available on this site. Online Library is filled up with all sorts of aesthetic gif backgrounds and other types of background that people like.
A few more tools fit the need, but most of them are not reliable, and the tools mentioned above are currently the best ones available for you to use.
Part 3 How to Make a GIF Powerpoint Background?
If you make PowerPoint presentations, you can use various tools to modify your presentation. But did you know that you can also include an aesthetic gif background as part of your presentation?
The steps to creating a gif PowerPoint background are very simple, and below you will find all the steps you need to follow:
● You’ll need to choose the PPTx file that you want to use the GIF background on to get started. Then you can choose the specific slide.
● Navigate to the “design” tab, then to the “background” section. You will see a “background styles” option where you will have to select “format background” to complete the process.
● Select “fill” in the left-hand side panel of the appeared window. Now, select “picture or texture fill” and choose the “file” button, which will lead to another window.
● In the “look in” menu, find the folder or file where the required gif is present. Go on to select the “ok” option. You can either select “close” to apply the gif to a particular slide or “apply to all” to use the gif background in the whole presentation.
Part 4 How to Make GIF Without Background - Free & Efficiently?
One may also look for transparent gif maker websites that will help them make gifs without background and use them on different devices they own.
Here are a few websites that are best for this job; they won’t only help you make transparent gifs but also edit various features like delay time, animation speed etc.
01Using EzGif
Using EzGif is probably one of the best options available in the market at the moment. You can go to their website and create a transparent gif background of high resolution.
Doing that is easy; you need to upload PNG type images that don’t have a background or combine transparent background to form a gif. You can choose up to 2000 images with a maximum file size of 100 MB for all images combined.
To create a gif, go on their site, then to the “gif maker” section to upload the images, and click on “make a gif” to make a transparent gif from the selected images. Once the gif is created, you can use it as a moving gif background and share it with friends or family.
02Use animizer.net to create a gif without background
It is effortless to use software to create transparent gifs by uploading multiple transparent PNG images and combining them to form a gif.
You can use unlimited images for your gif and animated gif background. It also lets you adjust various settings for your transparent gifs like loops, animation speed and much more.
03Use filmora for making gifs without background easily
Wondershare Filmora Video Editor is an all in one tool that will help you create all sorts of gifs, including transparent gifs. You can take advantage of their easy to use tools that are fir for people who have no technical skills at all.
You can easily upload the images and remove their background in the software itself and later use it in the gif you are willing to create.
Wondershare Filmora - Best Video Editor for Mac/Windows
5,481,435 people have downloaded it.
Build unique custom animations without breaking a sweat.
Focus on creating epic stories and leave the details to Filmora’s auto features.
Start a creative adventure with drag & drop effects and endless possibilities.
Filmora simplifies advanced features to save you time and effort.
Filmora cuts out repetition so you can move on to your next creative breakthrough.
This is probably one of the best options if you are looking for an all in one tool for all your needs.
● Ending Thoughts →
● The techniques that we have talked about in this guide may help you discover things about gif backgrounds you have not known before.
● They are incredible and can help you utilize gifs in ways you hadn’t even considered.
● Create a moving gif background and apply it to any device easily.
● Of course, a simple background won’t provide the same type of effect as a moving gif. With this guide, you’ll learn about every tool that you may use and how to apply or create a cool gif background on your own.
How Did AI Video Games Act More Human Than Human?
How Did AI Video Games Act More Human Than Human?
An easy yet powerful editor
Numerous effects to choose from
Detailed tutorials provided by the official channel
The gaming world is ever-changing, with developers looking to create innovative ways to immerse players into their digital worlds. One such technology that has begun to sweep is AI in the game industry.
AI is a powerful tool in many ways to improve the gaming experience. It can make artificial intelligence in computer games more believable and add replayability and immersion to games, and we can expect to see even more impressive applications in the future.
In this article
01 [What Is AI in Gaming?](#Part 1)
02 [Why Does AI in Gaming Matter?](#Part 2)
03 [How AI Will Completely Change Video Games](#Part 3)
04 [8 Games with Incredible Artificial Intelligence](#Part 4)
05 [What AI Video Games Assets Do Filmora Have?](#Part 5)
Part 1 What Is AI in Gaming?
In simple terms, AI is a set of algorithms that allow a computer to learn and improve from experience. Although you can apply it in many ways, artificial intelligence in video games is usually helpful to create more intelligent and more believable non-player characters (NPCs).
For example, an AI system might be helpful to determine how an NPC reacts to the player’s actions. If the player tries to steal from an NPC, the AI might make the NPC angry and more likely to attack the player. Alternatively, if the player is friendly to an NPC, the AI game playing might make the NPC more likely to help the player in future interactions.
Part 2 Why Does AI in Gaming Matter?
One of the most vital aspects of AI in video games is that it can make games more believable and immersive for players. When games can convincingly simulate human-like behavior, it can be a much more enjoyable experience for gamers. AI can make NPCs seem more lifelike and make the game world feel more believable.
AI is also becoming increasingly important for creating procedural content. This is where the game generates content on its own, rather than relying on pre-made assets. For example, a game might use procedural generation to create random dungeons or quests that the player can explore. This can add a lot of replayability to a game, as the player never knows what they will encounter next.
Part 3 How AI Will Completely Change Video Games
It is not a secret that AI is changing the world as we know it. With its ability to enable computers to learn and improve from experience, AI is paving the way for a future where machines can handle more complex tasks. And nowhere is this more apparent than in the world of video gaming.
In the past, developers brought in AI primarily for simple things like making certain NPCs (non-player characters) move and act realistically. But now, artificial intelligence in video games is being used for much more complex tasks like generating procedural content and creating believable human-like behavior. This results in a new generation of AI game playing that are more immersive and playable.
Part 4 Games with Incredible Artificial Intelligence
Now, we will look into eight video games that signify why we need the best ai in video games.
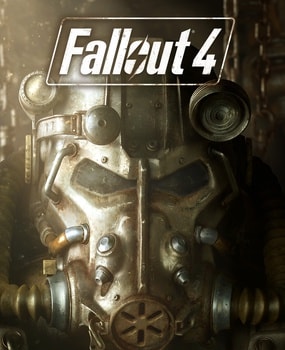
01Fallout 4
One of the most attractive examples of AI in video gaming is Fallout 4. This post-apocalyptic RPG features some of the most believable NPCs ever seen in a game. Each character is fully voiced, and they all have their unique personalities and backstories. The AI generates procedural content, meaning that the game world is always different each time you play.
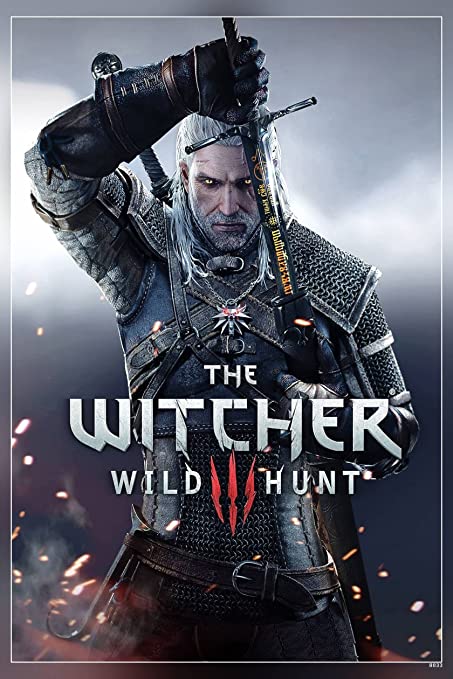
02The Witcher 3: Wild Hunt
The Witcher 3: Wild Hunt is one more great example of an AI video game. This open-world RPG features a vast array of believable NPCs, each with unique personality traits and motivations. The AI is also used to generate procedural content, resulting in a different game world every time you play.
03Grand Theft Auto V
Grand Theft Auto V is yet another example of AI being used to create believable human-like behavior. The NPCs in this play are some of the most lifelike and realistic ever seen. They react to the player’s actions in believable ways, and the AI is used to generate procedural content, resulting in a game world that is always different.

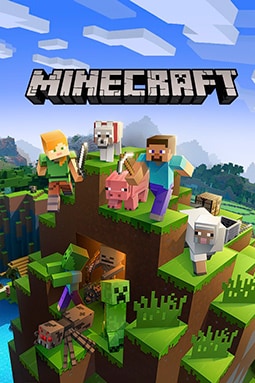
04Minecraft
Minecraft is a game that heavily uses procedural generation to create its content. The terrain and structures in the game are all generated on the fly by the AI, resulting in a different game world every time you play. What’s more, AI is also used to generate the behaviors of mobs (hostile creatures), making them more believable and lifelike.
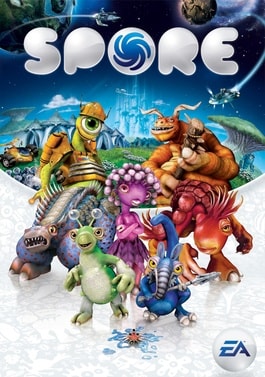
05Spore
Spore is an AI game play that is all about procedural generation. Every creature in the game is generated by AI, meaning that there are many possible creature designs. What’s more, AI is used to create creatures’ behaviors, making them more believable and lifelike.
06Mirror’s Edge Catalyst
Mirror’s Edge Catalyst is a game that heavily uses AI to create its content. The levels in the game are all procedurally generated, meaning that they are different every time you play. This is made possible by the game’s AI, which produces the level layouts and obstacles on the fly.

07Civilization VI
One of the most incredible examples of AI in video gaming is Civilization VI. This turn-based strategy game features some of the most believable NPCs ever seen in a game. Each character has its voice fully, and they all have unique personalities and backstories.
08Elite Dangerous
Elite Dangerous is a space simulation game that uses advanced AI to create believable and realistic human-like behavior. The NPCs in the game are some of the most lifelike and realistic ever seen. They react to the player’s actions in believable ways, and the AI is used to generate procedural content, resulting in a game world that is always different.

Part 5 What AI Video Games Assets Do Wondershare Filmora Video Editor Have?
With the increased use of AI in video games, most gamers have found gaming more enjoyable. However, an outstanding video editor has some assets that can significantly make AI video games better and more human. This video editor is one of the most sorted for and is called Filmora. Filmora is a great video editing software for creating stunning videos. It’s effortless to use and has various features to create professional-looking videos. It’s perfect for making videos for social media, YouTube, and other online platforms.
Its many features have a touch of artificial intelligence, making this program stand out from the other video editors and valuable for editing during ai video games creation.
Screen Recording
The Filmora screen recorder allows the user to concurrently record the screen and camera and the system and microphone audio. You can quickly record games, tutorials, YouTube videos, and other videos and then export them to YouTube, Vimeo, and other devices.
AI Portrait
The AI portrait function in Filmora video editor allows you to locate the human in your movie effortlessly and erase the background with a simple drag and click. There are also several portrait effects and AR stickers to add to your video editing enjoyment.
For Win 7 or later (64-bit)
For macOS 10.12 or later
Video Effects
Filmora customers can choose from various effects to utilize in their video editing software. It’s simple to create whatever effect you want with over 900 free effects, including drag-and-drop transitions, titles, filters, and motion components.
Do visit Wondershare Filmora exclusive website to know more about its latest upgrade and new features launch.
● Ending Thoughts →
● Thus, that was about what an ai video game is and why the characters act more like humans.
● So, as a video game lover, you can now explore the best of ai playing video games to have a personal experience of this new video gaming trend. Also, do try the Filmora software to see how you can change the looks and feel of your video game creation.
The gaming world is ever-changing, with developers looking to create innovative ways to immerse players into their digital worlds. One such technology that has begun to sweep is AI in the game industry.
AI is a powerful tool in many ways to improve the gaming experience. It can make artificial intelligence in computer games more believable and add replayability and immersion to games, and we can expect to see even more impressive applications in the future.
In this article
01 [What Is AI in Gaming?](#Part 1)
02 [Why Does AI in Gaming Matter?](#Part 2)
03 [How AI Will Completely Change Video Games](#Part 3)
04 [8 Games with Incredible Artificial Intelligence](#Part 4)
05 [What AI Video Games Assets Do Filmora Have?](#Part 5)
Part 1 What Is AI in Gaming?
In simple terms, AI is a set of algorithms that allow a computer to learn and improve from experience. Although you can apply it in many ways, artificial intelligence in video games is usually helpful to create more intelligent and more believable non-player characters (NPCs).
For example, an AI system might be helpful to determine how an NPC reacts to the player’s actions. If the player tries to steal from an NPC, the AI might make the NPC angry and more likely to attack the player. Alternatively, if the player is friendly to an NPC, the AI game playing might make the NPC more likely to help the player in future interactions.
Part 2 Why Does AI in Gaming Matter?
One of the most vital aspects of AI in video games is that it can make games more believable and immersive for players. When games can convincingly simulate human-like behavior, it can be a much more enjoyable experience for gamers. AI can make NPCs seem more lifelike and make the game world feel more believable.
AI is also becoming increasingly important for creating procedural content. This is where the game generates content on its own, rather than relying on pre-made assets. For example, a game might use procedural generation to create random dungeons or quests that the player can explore. This can add a lot of replayability to a game, as the player never knows what they will encounter next.
Part 3 How AI Will Completely Change Video Games
It is not a secret that AI is changing the world as we know it. With its ability to enable computers to learn and improve from experience, AI is paving the way for a future where machines can handle more complex tasks. And nowhere is this more apparent than in the world of video gaming.
In the past, developers brought in AI primarily for simple things like making certain NPCs (non-player characters) move and act realistically. But now, artificial intelligence in video games is being used for much more complex tasks like generating procedural content and creating believable human-like behavior. This results in a new generation of AI game playing that are more immersive and playable.
Part 4 Games with Incredible Artificial Intelligence
Now, we will look into eight video games that signify why we need the best ai in video games.
01Fallout 4
One of the most attractive examples of AI in video gaming is Fallout 4. This post-apocalyptic RPG features some of the most believable NPCs ever seen in a game. Each character is fully voiced, and they all have their unique personalities and backstories. The AI generates procedural content, meaning that the game world is always different each time you play.
02The Witcher 3: Wild Hunt
The Witcher 3: Wild Hunt is one more great example of an AI video game. This open-world RPG features a vast array of believable NPCs, each with unique personality traits and motivations. The AI is also used to generate procedural content, resulting in a different game world every time you play.
03Grand Theft Auto V
Grand Theft Auto V is yet another example of AI being used to create believable human-like behavior. The NPCs in this play are some of the most lifelike and realistic ever seen. They react to the player’s actions in believable ways, and the AI is used to generate procedural content, resulting in a game world that is always different.
04Minecraft
Minecraft is a game that heavily uses procedural generation to create its content. The terrain and structures in the game are all generated on the fly by the AI, resulting in a different game world every time you play. What’s more, AI is also used to generate the behaviors of mobs (hostile creatures), making them more believable and lifelike.
05Spore
Spore is an AI game play that is all about procedural generation. Every creature in the game is generated by AI, meaning that there are many possible creature designs. What’s more, AI is used to create creatures’ behaviors, making them more believable and lifelike.
06Mirror’s Edge Catalyst
Mirror’s Edge Catalyst is a game that heavily uses AI to create its content. The levels in the game are all procedurally generated, meaning that they are different every time you play. This is made possible by the game’s AI, which produces the level layouts and obstacles on the fly.
07Civilization VI
One of the most incredible examples of AI in video gaming is Civilization VI. This turn-based strategy game features some of the most believable NPCs ever seen in a game. Each character has its voice fully, and they all have unique personalities and backstories.
08Elite Dangerous
Elite Dangerous is a space simulation game that uses advanced AI to create believable and realistic human-like behavior. The NPCs in the game are some of the most lifelike and realistic ever seen. They react to the player’s actions in believable ways, and the AI is used to generate procedural content, resulting in a game world that is always different.
Part 5 What AI Video Games Assets Do Wondershare Filmora Video Editor Have?
With the increased use of AI in video games, most gamers have found gaming more enjoyable. However, an outstanding video editor has some assets that can significantly make AI video games better and more human. This video editor is one of the most sorted for and is called Filmora. Filmora is a great video editing software for creating stunning videos. It’s effortless to use and has various features to create professional-looking videos. It’s perfect for making videos for social media, YouTube, and other online platforms.
Its many features have a touch of artificial intelligence, making this program stand out from the other video editors and valuable for editing during ai video games creation.
Screen Recording
The Filmora screen recorder allows the user to concurrently record the screen and camera and the system and microphone audio. You can quickly record games, tutorials, YouTube videos, and other videos and then export them to YouTube, Vimeo, and other devices.
AI Portrait
The AI portrait function in Filmora video editor allows you to locate the human in your movie effortlessly and erase the background with a simple drag and click. There are also several portrait effects and AR stickers to add to your video editing enjoyment.
For Win 7 or later (64-bit)
For macOS 10.12 or later
Video Effects
Filmora customers can choose from various effects to utilize in their video editing software. It’s simple to create whatever effect you want with over 900 free effects, including drag-and-drop transitions, titles, filters, and motion components.
Do visit Wondershare Filmora exclusive website to know more about its latest upgrade and new features launch.
● Ending Thoughts →
● Thus, that was about what an ai video game is and why the characters act more like humans.
● So, as a video game lover, you can now explore the best of ai playing video games to have a personal experience of this new video gaming trend. Also, do try the Filmora software to see how you can change the looks and feel of your video game creation.
The gaming world is ever-changing, with developers looking to create innovative ways to immerse players into their digital worlds. One such technology that has begun to sweep is AI in the game industry.
AI is a powerful tool in many ways to improve the gaming experience. It can make artificial intelligence in computer games more believable and add replayability and immersion to games, and we can expect to see even more impressive applications in the future.
In this article
01 [What Is AI in Gaming?](#Part 1)
02 [Why Does AI in Gaming Matter?](#Part 2)
03 [How AI Will Completely Change Video Games](#Part 3)
04 [8 Games with Incredible Artificial Intelligence](#Part 4)
05 [What AI Video Games Assets Do Filmora Have?](#Part 5)
Part 1 What Is AI in Gaming?
In simple terms, AI is a set of algorithms that allow a computer to learn and improve from experience. Although you can apply it in many ways, artificial intelligence in video games is usually helpful to create more intelligent and more believable non-player characters (NPCs).
For example, an AI system might be helpful to determine how an NPC reacts to the player’s actions. If the player tries to steal from an NPC, the AI might make the NPC angry and more likely to attack the player. Alternatively, if the player is friendly to an NPC, the AI game playing might make the NPC more likely to help the player in future interactions.
Part 2 Why Does AI in Gaming Matter?
One of the most vital aspects of AI in video games is that it can make games more believable and immersive for players. When games can convincingly simulate human-like behavior, it can be a much more enjoyable experience for gamers. AI can make NPCs seem more lifelike and make the game world feel more believable.
AI is also becoming increasingly important for creating procedural content. This is where the game generates content on its own, rather than relying on pre-made assets. For example, a game might use procedural generation to create random dungeons or quests that the player can explore. This can add a lot of replayability to a game, as the player never knows what they will encounter next.
Part 3 How AI Will Completely Change Video Games
It is not a secret that AI is changing the world as we know it. With its ability to enable computers to learn and improve from experience, AI is paving the way for a future where machines can handle more complex tasks. And nowhere is this more apparent than in the world of video gaming.
In the past, developers brought in AI primarily for simple things like making certain NPCs (non-player characters) move and act realistically. But now, artificial intelligence in video games is being used for much more complex tasks like generating procedural content and creating believable human-like behavior. This results in a new generation of AI game playing that are more immersive and playable.
Part 4 Games with Incredible Artificial Intelligence
Now, we will look into eight video games that signify why we need the best ai in video games.
01Fallout 4
One of the most attractive examples of AI in video gaming is Fallout 4. This post-apocalyptic RPG features some of the most believable NPCs ever seen in a game. Each character is fully voiced, and they all have their unique personalities and backstories. The AI generates procedural content, meaning that the game world is always different each time you play.
02The Witcher 3: Wild Hunt
The Witcher 3: Wild Hunt is one more great example of an AI video game. This open-world RPG features a vast array of believable NPCs, each with unique personality traits and motivations. The AI is also used to generate procedural content, resulting in a different game world every time you play.
03Grand Theft Auto V
Grand Theft Auto V is yet another example of AI being used to create believable human-like behavior. The NPCs in this play are some of the most lifelike and realistic ever seen. They react to the player’s actions in believable ways, and the AI is used to generate procedural content, resulting in a game world that is always different.
04Minecraft
Minecraft is a game that heavily uses procedural generation to create its content. The terrain and structures in the game are all generated on the fly by the AI, resulting in a different game world every time you play. What’s more, AI is also used to generate the behaviors of mobs (hostile creatures), making them more believable and lifelike.
05Spore
Spore is an AI game play that is all about procedural generation. Every creature in the game is generated by AI, meaning that there are many possible creature designs. What’s more, AI is used to create creatures’ behaviors, making them more believable and lifelike.
06Mirror’s Edge Catalyst
Mirror’s Edge Catalyst is a game that heavily uses AI to create its content. The levels in the game are all procedurally generated, meaning that they are different every time you play. This is made possible by the game’s AI, which produces the level layouts and obstacles on the fly.
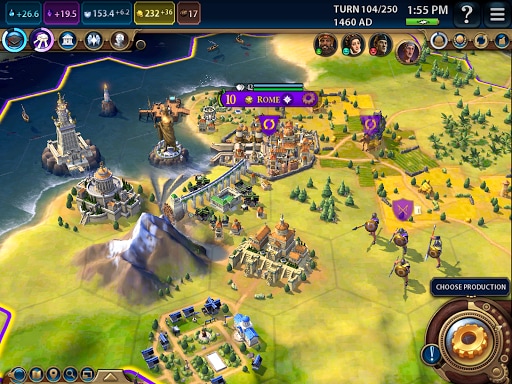
07Civilization VI
One of the most incredible examples of AI in video gaming is Civilization VI. This turn-based strategy game features some of the most believable NPCs ever seen in a game. Each character has its voice fully, and they all have unique personalities and backstories.
08Elite Dangerous
Elite Dangerous is a space simulation game that uses advanced AI to create believable and realistic human-like behavior. The NPCs in the game are some of the most lifelike and realistic ever seen. They react to the player’s actions in believable ways, and the AI is used to generate procedural content, resulting in a game world that is always different.
Part 5 What AI Video Games Assets Do Wondershare Filmora Video Editor Have?
With the increased use of AI in video games, most gamers have found gaming more enjoyable. However, an outstanding video editor has some assets that can significantly make AI video games better and more human. This video editor is one of the most sorted for and is called Filmora. Filmora is a great video editing software for creating stunning videos. It’s effortless to use and has various features to create professional-looking videos. It’s perfect for making videos for social media, YouTube, and other online platforms.
Its many features have a touch of artificial intelligence, making this program stand out from the other video editors and valuable for editing during ai video games creation.
Screen Recording
The Filmora screen recorder allows the user to concurrently record the screen and camera and the system and microphone audio. You can quickly record games, tutorials, YouTube videos, and other videos and then export them to YouTube, Vimeo, and other devices.
AI Portrait
The AI portrait function in Filmora video editor allows you to locate the human in your movie effortlessly and erase the background with a simple drag and click. There are also several portrait effects and AR stickers to add to your video editing enjoyment.
For Win 7 or later (64-bit)
For macOS 10.12 or later
Video Effects
Filmora customers can choose from various effects to utilize in their video editing software. It’s simple to create whatever effect you want with over 900 free effects, including drag-and-drop transitions, titles, filters, and motion components.
Do visit Wondershare Filmora exclusive website to know more about its latest upgrade and new features launch.
● Ending Thoughts →
● Thus, that was about what an ai video game is and why the characters act more like humans.
● So, as a video game lover, you can now explore the best of ai playing video games to have a personal experience of this new video gaming trend. Also, do try the Filmora software to see how you can change the looks and feel of your video game creation.
What Is the Best MP4 Cutter for YouTuber on Mac?
Most times, Youtubers need to cut out unnecessary parts from their videos while customizing intros and outros. A common reason is to ensure that videos are engaging and interactive while preventing any lagging. In addition, an aesthetically pleasing video keeps its viewers hooked throughout the video. That’s why cutting MP4 videos are essential for being a Youtuber. However, the question becomes, which is the best MP4 cutter for Youtubers on Mac? This article answers that question succinctly; let’s take a look.
What You Should Know About YouTube Video

YouTubers upload over 300 hours of video content to the platform every second. These videos cut across every niche and topic. There’s scarcely a topic you’re looking for that you won’t find a video or two discussing on YouTube. So as a YouTuber, you have to find ways to keep up and stand out from the crowd. You’ll need engaging videos that will hold your target audience’s attention so much that they will subscribe for more.
However, if the video is too long or your car doesn’t hit the right frame, it will disengage your audience. Additionally, you want a video seamlessly woven together to form a polished video. This makes MP4 cutting an essential part of the YouTube video creation process. There’s no need to purchase pricey editing equipment anymore; you can simply cut your MP4 videos from the comfort of your home. This article explores the best MP4 cutters for YouTubers on Mac; let’s take a look.
Best MP4 Cutter for YouTubers on Mac - Filmroa Video Editor

Supported System: Mac and Windows
Filmora Video Editor makes it relatively easy to cut and edit your videos like a professional. This MP4 cutter is a great option, even if you don’t have video editing skills. It offers an intuitive user interface that makes it an excellent choice for experts and novices. It also provides you with the crucial editing tools to create amazing YouTube videos after cutting your MP4 video files. With this editing tool, you’re sure to produce videos your subscribers enjoy.
With Filmora, you can add effects, color grades, and texts to your videos. There’s also a library filled with royalty-free audio you can explore. After cutting your MP4, you can use templates from this MP4 cutter to create an intro for your YouTube videos. Filmora has many features that will save you a lot of time, and using it to cut MP4 is relatively easy.
For Win 7 or later (64-bit)
For macOS 10.14 or later
Pros
- It offers an intuitive user interface
- There are several effects and overlays to utilize
- Fast rendering of videos
- Offers varying output formats
- Ideal for beginners and experts
Cons
- No DVD Menu
Steps to Cut MP4 Video for YouTubers on Mac Using Filmora
Cutting videos on Filmora is relatively easy. You have to first download and install Filmora on your device. Below are the steps to cut MP4 videos to your preference using Wondershare Filmora.
Step 1: Import MP4 Files
There are two ways you can add MP4 files to this MP4 cutter. You can either click the ‘import’ button and choose the file from your media library or drag the mp4 file to your album. After dragging to the album, drag from the album to the timeline.

Step 2: Cut MP4 Files

After importing your file, you’re ready to cut. First, simply move the indicator to the ideal position you want by dragging the top of the indicator and slider bar. Then, click the scissor button to cut once you move to your preferred time.
You can also delete any part of the MP4 file you don’t want by hitting the ‘delete’ option. If you cut various clips out of the MP4 file, you can rearrange them with the ‘drag and drop tool.
Step 3: Save and Share Cut MP4 File

Now, you can save your newly cut video file by clicking the ‘file’ button at the left corner of the Filmora software and selecting ‘save as’ from the options. The output window will appear, and you can choose the format and if you want to share directly to YouTube. Pick the option that meets your need, and you’re good to go.
More Free MP4 Cutter for YouTubers on Mac to Cut MP4 Videos
Although Wondershare Filmora is the best video cutter for YouTubers on Mac, there are free MP4 cutters you can utilize to cut your videos from the comfort of your home easily. Below, we’ve reviewed the top three options you should consider.
PowerDirector Essential

Supported System: Windows and Mac
If you’re looking for a free MP4 video cutter that ensures fast processing of videos, you should try PowerDirector Essential. This MP4 cutter allows you easily cut your YouTube videos irrespective of your experience level. You’ll be able to cut and edit your YouTube videos within a couple of minutes. In addition, PowerDirector Essential is versatile and allows you to either use the storyboard mode or timeline editor for your cutting needs.
Apart from splitting and cutting tools, you can also explore its library of stylized transitions if you want to significantly upgrade the appearance of your YouTube video professionally. YouTubers want a video cutter that offers video editing features to create your visual effects. This MP4 cutter is excellent for beginners because of its intuitive interface that you can master in minutes. You can also ensure your video has amazing audio and clear video before sharing it on YouTube. If you want high-quality, Hollywood-style videos, this is the best free MP4 cutter to achieve that.
Pros
- It supports several input and output video formats
- Easy cutting and exporting process
- Intuitive and user-friendly interface
- Ideal for beginners
- It offers various video editing tools to enhance your video
Cons
- Some features are only available on the Windows version
How to Cut Video for YouTube on Mac Using PowerDirector Essential
If you want to learn how to easily cut MP4 files using PowerDirector on a Mac computer, follow the steps below.
- Step 1: You have to download PowerDirector software on your Mac and install it. After installation, launch the software, and you’re ready to begin the cutting process.
- Step 2: Now, import the video into PowerDirector by clicking ‘import media file’ and choosing the ideal video file from your media library.

- Step 3: Add the video to your timeline and hover over the right or left edge of the video track. This would make an adjustment arrow appear on both sides of the video file.

- Step 4: Drag the arrows to the point you would like to cut and choose the ‘scissors’ button.

- Step 5: After cutting, go to the ‘produce’ tab and choose ‘online’ if you want to upload a video directly to YouTube. You can also choose to save to your Mac. Choose the output format and location and click ‘start’ to save your newly cut video.
iMovie

Supported System: Mac
iMovie is a free MP4 cutter that’s built into Mac. Therefore, there’s no need to carry out downloads or installation to utilize this editing software. Although it only offers basic editing features, it is excellent if you only want to cut MP4 video files. iMovie is great for beginners as it features a user-friendly interface that’s easy to navigate.
It is the best option for YouTubers because it allows you to crop, trim and arrange video clips in just a few minutes. Additionally, you can add visual effects to your video while also editing the audio file to enhance your video. It also allows you to link your YouTube account to share directly. Therefore, if you’re looking for an MP4 cutter to carry out quick trimming on your videos, iMovie is amongst the best free MP4 cutters.
Pros
- Easy to use and ideal for beginners
- It supports major video formats and allows you to change the output format
- Allows you to store videos in iCloud or share them directly to YouTube
- Free on Mac device
- It offers essential editing tools to enhance your video
Cons
- Editing features are limited
Steps to Cut MP4 Video for YouTube on Mac Using iMovie
This section will explain how you can cut a clip in iMovie within a few minutes. Below are the easy steps you have to follow.
- Step 1: Launch iMovie on Mac and choose ‘import file’ to select the video you want to cut.
- Step 2: To enter full-editing windows, double-click the project. At the end of the video editor, you’ll see the video editor.

- Step 3: Drag the playhead to the position you would like to cut from, and then click on it. Do this for both sides of the video.

- Step 4: Now, click ‘modify’ and choose the ‘split clip’ option to cut the selected part out.

You can delete the rest of the video by selecting it and hitting ‘delete’ on your keyboard.

- Step 5: Finally, save your newly cut video or export it to YouTube directly by clicking ‘export’ under the ‘file’ section.
OpenShot

Supported System: Windows, Mac, and Linux
OpenShot is another free, open-source MP4 cutter that you can easily use on your Mac device. It offers an intuitive interface that makes it easy to drag videos to the interface. Apart from cutting videos, other features are available like scaling, resizing, rotation, trimming, and many more. This YouTube video cutter also provides hundreds of transitions and effects to enhance your YouTube video and make it stand out amongst other Youtube videos. However, this video cutter is only an excellent choice for beginners because it lacks many advanced features.
Pros
- It is easy to use and ideal for beginners
- It offers a sleek interface for easy navigation
- Offers basic editing features
- Versatile and a cross-platform MP4 cutter
Cons
- No advanced features
- It crashes easily
Steps to Cut MP4 for YouTube on Mac Using OpenShot
OpenShot is relatively easy to use and only requires a few steps to cut your MP4 file and upload it to YouTube. Below are the easy steps to follow to cut MP4 for YouTube on Openshot.
- Step 1: First, download the MP4 cutter on your Mac and install it to begin.
- Step 2: Afterward, launch the app and add the video to cut by clicking’ import.’ Alternatively, you can simply drag the video into the app to begin.
- Step 3: Once you get the video on the timeline, drag the red line on both sides of the video to the position you want the video to start and begin.

- Step 4: Right-click on the marker and choose what you want to keep. Next, isolate the fragments from the clip you would like to keep.
- Step 5: Click the fragment you want to delete and press delete on your keyboard. You have to remove the fragments manually until your preferred result remains.
- Step 6: Choose ‘export video’ from the File tab to save your MP4 file. You can change the output format or save it as an MP4.

- Step 7: you can also share videos to your YouTube account; you have to link the YouTube account first.
More Paid MP4 Cutter for YouTubers on Mac to Cut MP4 Videos
Most times, free MP4 cutters offer limited features to enhance your YouTube video. However, there are paid MP4 cutters that will efficiently cut your MP4 files and provide advanced editing tools.
Adobe Premiere Pro

Supported System: Mac and Windows
Advanced editing software that supports different file types, including MP4, is Adobe Premier Pro. This MP4 cutter allows you to quickly trim, split, and cut your MP4. Its intuitive and fast-responding interface ensures that your video is ready within a few minutes. Beyond cutting, there are several other advanced editing features that the editing software offers you. Some include filters, chroma-key, VR editing, color adjustment, and audio editing tools to take your YouTube video to the next level.
Adobe Premiere Pro is not the best option for beginners because of its steep learning curve. However, if you have ample experience with video editing tools and want to professionally cut and edit your YouTube video, this paid MP4 cutter is worth the cost and effort. ‘
Pros
- Advanced video editing features
- Intuitive user interface
- Responsive speed
- Ideal for professional editing
Cons
- Steep learning curve
- Quite pricey
Step to Cut MP4 for YouTube on Mac Using Adobe Premiere Pro
Although Adobe Premiere Pro has an interface that’s quite intimidating to non-professionals, the steps below help simplify cutting your MP4 files for YouTube.
- Firstly, download Adobe Premiere Pro on your Mac and install it.
- After installation, launch the app and select ‘new project’ on the homepage. It will require you to name the new project and choose where you want to save it. Afterward, click ‘ok’ to begin.

- Next, go to ‘file’ and select ‘import from media’ to import the MP4 file you would like to cut. Alternatively, you can simply drag the file to the timeline.

- Next, pick the ripple edit tool and go to the beginning of the video. Drag the handle with the arrow to your desired point. Repeat this at the end of the video.

- Finally, press Q to cut the MP4 clip to the left of the blade. Next, press W to cut the clip to the right.

- Now you can save your file to your preferred file location.
Movavi Video Editor

Supported System: Mac and Windows
This is an efficient MP4 cutter that helps you remove unnecessary scenes from your YouTube videos. The timeline offers you markers that allow you easily locate the start and end scene of the video you would like to remove. Apart from cutting videos, this tool provides several premium features you can use to make your video look professional. Movavi offers a free trial you can use to determine if this editor is the best option for you. However, it comes with a Movavi watermark that you can only eliminate with the paid option.
Movavi Video Editor can add transitions, music tracks, chroma-key effects, special effects, and many more exciting features to ensure a top-quality result. Furthermore, its intuitive interface makes it relatively easy for beginners and professionals to use. Therefore, you don’t have to worry about a stiff learning curve. With Movavi, you can also change the output format to switch from MP4 to another commonly supported format.
Pros
- Simple and easy to use
- Supports various input and output formats
- Provides YouTubers with basic and advanced features
- Ideal for beginners and professionals
Cons
- Video rendering is slow for large files
- The trial version comes with a Movavi watermark
Steps to Cut MP4 for YouTube on Mac Using Movavi Video Editor
For cutting your video on Mac using Movavi video editor, you can follow the steps outlined below.
- First, download and install Movavi Video Editor on your Mac.
- After installing Movavi, launch the editor and click the ‘add files’ button to add your MP4 file.

- Once the file shows up in the media bin, drag it to the timeline to start editing your video.
- To cut your MP4 video, move the red marker at the beginning of the video to where you would like to cut. Repeat this process at the end of the video by moving to where you prefer your video to end.
- Next, click the split button to cut this clip from the rest of the video.

- Now, select the fragments you don’t want and hit the delete button to remove them immediately.

- You can also add several filters to your video if you would like to enhance your video.
- You can now save your video by hitting the ‘export’ button. You can choose different formats and video quality for your newly cut video. Select the folder to save to and click the ‘save’ button.

Davinci Resolve

Supported System: Windows and Mac
Davinci Resolve is a favorite for YouTubers who want their videos to look like Hollywood videos. However, this MP4 cutter is aimed at the professional market and supports different input and output formats for your video. Davinci Resolve offers you a variety of professional features and also supports 8k videos. In addition, it provides advanced video cutting features to ensure your video looks excellent even after cutting. You can also combine video clips after cutting without it looking unprofessional.
Although this video cutter software isn’t the best option for beginners, professional editors are sure to be satisfied with the features this editor offers. It also allows you to export directly to various social media platforms, including YouTube, to save space and time.
Pros
- Basic and advanced editing tools
- Fast rendering of videos
- Supports major video formats and video resolutions
- It offers several special effects to make your video more engaging
Cons
- Not the right option for amateurs
Steps to Cut MP4 for YouTube on Mac Using Davinci Resolve
Cutting your MP4 file on Davinci Resolve is relatively easy. The cut tool helps you cut your YouTube video within seconds. Simply follow the steps outlined below.
- First, download and install the Davinci Resolve on your Mac. After installation, launch the MP4 cutter to begin.
- Next, create a new timeline and choose the ‘edit’ mode to begin.

- Import your video by pressing ‘Command+I’ on your keyboard. Alternatively, you can simply drag the video on the timeline.
- Now, select the cut tool and drag the marker from the beginning to where you would like to cut. Repeat this process at the end of the video.
- Afterward, click the blade button to cut your file to your desired size.

- You can now save your file by hitting the ‘export’ button and choosing your preferred file location.
Which Should I Choose, Free or Paid MP4 Cutter?
You need to consider several factors when you’re choosing the right MP4 cutter. First, you have to consider the type of video you would be editing. For YouTube, you need an MP4 cutter that also offers several video editing features you can use to enhance your video. There’s also a need to consider the available formats and quality you can export in and if the MP4 cutter allows you to add visual effects to make your video stand out on YouTube.
Another factor to consider when choosing between a paid or free MP4 cutter for YouTubers on Mac is your experience level. Are you a professional, or you’re looking for some basic app to simply cut your video? Some paid options take you step-by-step through the process of cutting your MP4 file. This type of MP4 cutter helps you advance your skill. This feature is essential because the more you know, the more you’re willing to learn.
Note that most free MP4 cutters offer limited features. Alternatively, some paid MP4 cutters are only suitable for professionals or have a steep subscription to consider. Consider your budget and if any of the editors offer you the tools you need while being affordable. You need to carefully consider if a free tool is what you’re looking for or if you don’t mind paying for more functionality.
FAQs about cutting MP4 video
- What tools should I look for in an MP4 cutter? You should look for basic cutting tools like trimming, slicing and joining. However, you also want an MP4 cutter that offers several editing features to enhance your YouTube video.
- What do most YouTubers use in cutting their videos? From our experience, most YouTubers use the MP4 cutters provided below. You need to note that some are free while some are paid. Simply pick the cutter that fits your needs.
- How can I improve my video cutting and editing skills? You need a lot of practice to learn how to cut and edit videos professionally. It’s also vital to pick software that allows you to develop your editing and cutting skills with time.
- What is the best video cutting and editing software for YouTube novices? If you’re a novice on YouTube, you can start with any basic MP4 cutter on your device. However, we recommend Wondershare Filmora if you want to develop your cutting and editing skills.
Final Thoughts
Cutting MP4 for your YouTube content is a part of becoming a professional YouTuber. When looking for an MP4 cutter that’s reliable and versatile, the goal is to get the job done without any issue. We’ve reviewed the best MP4 cutters for YouTubers on Mac in this guide. You can choose between free or paid software, depending on your needs. However, the best MP4 cutter for YouTubers on Mac is Wondershare Filmore because it is ideal for beginners and professionals. It also offers you a variety of editing features at an affordable cost.
YouTubers upload over 300 hours of video content to the platform every second. These videos cut across every niche and topic. There’s scarcely a topic you’re looking for that you won’t find a video or two discussing on YouTube. So as a YouTuber, you have to find ways to keep up and stand out from the crowd. You’ll need engaging videos that will hold your target audience’s attention so much that they will subscribe for more.
However, if the video is too long or your car doesn’t hit the right frame, it will disengage your audience. Additionally, you want a video seamlessly woven together to form a polished video. This makes MP4 cutting an essential part of the YouTube video creation process. There’s no need to purchase pricey editing equipment anymore; you can simply cut your MP4 videos from the comfort of your home. This article explores the best MP4 cutters for YouTubers on Mac; let’s take a look.
Best MP4 Cutter for YouTubers on Mac - Filmroa Video Editor
Supported System: Mac and Windows
Filmora Video Editor makes it relatively easy to cut and edit your videos like a professional. This MP4 cutter is a great option, even if you don’t have video editing skills. It offers an intuitive user interface that makes it an excellent choice for experts and novices. It also provides you with the crucial editing tools to create amazing YouTube videos after cutting your MP4 video files. With this editing tool, you’re sure to produce videos your subscribers enjoy.
With Filmora, you can add effects, color grades, and texts to your videos. There’s also a library filled with royalty-free audio you can explore. After cutting your MP4, you can use templates from this MP4 cutter to create an intro for your YouTube videos. Filmora has many features that will save you a lot of time, and using it to cut MP4 is relatively easy.
For Win 7 or later (64-bit)
For macOS 10.14 or later
Pros
- It offers an intuitive user interface
- There are several effects and overlays to utilize
- Fast rendering of videos
- Offers varying output formats
- Ideal for beginners and experts
Cons
- No DVD Menu
Steps to Cut MP4 Video for YouTubers on Mac Using Filmora
Cutting videos on Filmora is relatively easy. You have to first download and install Filmora on your device. Below are the steps to cut MP4 videos to your preference using Wondershare Filmora.
Step 1: Import MP4 Files
There are two ways you can add MP4 files to this MP4 cutter. You can either click the ‘import’ button and choose the file from your media library or drag the mp4 file to your album. After dragging to the album, drag from the album to the timeline.
Step 2: Cut MP4 Files
After importing your file, you’re ready to cut. First, simply move the indicator to the ideal position you want by dragging the top of the indicator and slider bar. Then, click the scissor button to cut once you move to your preferred time.
You can also delete any part of the MP4 file you don’t want by hitting the ‘delete’ option. If you cut various clips out of the MP4 file, you can rearrange them with the ‘drag and drop tool.
Step 3: Save and Share Cut MP4 File
Now, you can save your newly cut video file by clicking the ‘file’ button at the left corner of the Filmora software and selecting ‘save as’ from the options. The output window will appear, and you can choose the format and if you want to share directly to YouTube. Pick the option that meets your need, and you’re good to go.
More Free MP4 Cutter for YouTubers on Mac to Cut MP4 Videos
Although Wondershare Filmora is the best video cutter for YouTubers on Mac, there are free MP4 cutters you can utilize to cut your videos from the comfort of your home easily. Below, we’ve reviewed the top three options you should consider.
PowerDirector Essential
Supported System: Windows and Mac
If you’re looking for a free MP4 video cutter that ensures fast processing of videos, you should try PowerDirector Essential. This MP4 cutter allows you easily cut your YouTube videos irrespective of your experience level. You’ll be able to cut and edit your YouTube videos within a couple of minutes. In addition, PowerDirector Essential is versatile and allows you to either use the storyboard mode or timeline editor for your cutting needs.
Apart from splitting and cutting tools, you can also explore its library of stylized transitions if you want to significantly upgrade the appearance of your YouTube video professionally. YouTubers want a video cutter that offers video editing features to create your visual effects. This MP4 cutter is excellent for beginners because of its intuitive interface that you can master in minutes. You can also ensure your video has amazing audio and clear video before sharing it on YouTube. If you want high-quality, Hollywood-style videos, this is the best free MP4 cutter to achieve that.
Pros
- It supports several input and output video formats
- Easy cutting and exporting process
- Intuitive and user-friendly interface
- Ideal for beginners
- It offers various video editing tools to enhance your video
Cons
- Some features are only available on the Windows version
How to Cut Video for YouTube on Mac Using PowerDirector Essential
If you want to learn how to easily cut MP4 files using PowerDirector on a Mac computer, follow the steps below.
- Step 1: You have to download PowerDirector software on your Mac and install it. After installation, launch the software, and you’re ready to begin the cutting process.
- Step 2: Now, import the video into PowerDirector by clicking ‘import media file’ and choosing the ideal video file from your media library.
- Step 3: Add the video to your timeline and hover over the right or left edge of the video track. This would make an adjustment arrow appear on both sides of the video file.
- Step 4: Drag the arrows to the point you would like to cut and choose the ‘scissors’ button.
- Step 5: After cutting, go to the ‘produce’ tab and choose ‘online’ if you want to upload a video directly to YouTube. You can also choose to save to your Mac. Choose the output format and location and click ‘start’ to save your newly cut video.
iMovie
Supported System: Mac
iMovie is a free MP4 cutter that’s built into Mac. Therefore, there’s no need to carry out downloads or installation to utilize this editing software. Although it only offers basic editing features, it is excellent if you only want to cut MP4 video files. iMovie is great for beginners as it features a user-friendly interface that’s easy to navigate.
It is the best option for YouTubers because it allows you to crop, trim and arrange video clips in just a few minutes. Additionally, you can add visual effects to your video while also editing the audio file to enhance your video. It also allows you to link your YouTube account to share directly. Therefore, if you’re looking for an MP4 cutter to carry out quick trimming on your videos, iMovie is amongst the best free MP4 cutters.
Pros
- Easy to use and ideal for beginners
- It supports major video formats and allows you to change the output format
- Allows you to store videos in iCloud or share them directly to YouTube
- Free on Mac device
- It offers essential editing tools to enhance your video
Cons
- Editing features are limited
Steps to Cut MP4 Video for YouTube on Mac Using iMovie
This section will explain how you can cut a clip in iMovie within a few minutes. Below are the easy steps you have to follow.
- Step 1: Launch iMovie on Mac and choose ‘import file’ to select the video you want to cut.
- Step 2: To enter full-editing windows, double-click the project. At the end of the video editor, you’ll see the video editor.
- Step 3: Drag the playhead to the position you would like to cut from, and then click on it. Do this for both sides of the video.
- Step 4: Now, click ‘modify’ and choose the ‘split clip’ option to cut the selected part out.
You can delete the rest of the video by selecting it and hitting ‘delete’ on your keyboard.
- Step 5: Finally, save your newly cut video or export it to YouTube directly by clicking ‘export’ under the ‘file’ section.
OpenShot
Supported System: Windows, Mac, and Linux
OpenShot is another free, open-source MP4 cutter that you can easily use on your Mac device. It offers an intuitive interface that makes it easy to drag videos to the interface. Apart from cutting videos, other features are available like scaling, resizing, rotation, trimming, and many more. This YouTube video cutter also provides hundreds of transitions and effects to enhance your YouTube video and make it stand out amongst other Youtube videos. However, this video cutter is only an excellent choice for beginners because it lacks many advanced features.
Pros
- It is easy to use and ideal for beginners
- It offers a sleek interface for easy navigation
- Offers basic editing features
- Versatile and a cross-platform MP4 cutter
Cons
- No advanced features
- It crashes easily
Steps to Cut MP4 for YouTube on Mac Using OpenShot
OpenShot is relatively easy to use and only requires a few steps to cut your MP4 file and upload it to YouTube. Below are the easy steps to follow to cut MP4 for YouTube on Openshot.
- Step 1: First, download the MP4 cutter on your Mac and install it to begin.
- Step 2: Afterward, launch the app and add the video to cut by clicking’ import.’ Alternatively, you can simply drag the video into the app to begin.
- Step 3: Once you get the video on the timeline, drag the red line on both sides of the video to the position you want the video to start and begin.
- Step 4: Right-click on the marker and choose what you want to keep. Next, isolate the fragments from the clip you would like to keep.
- Step 5: Click the fragment you want to delete and press delete on your keyboard. You have to remove the fragments manually until your preferred result remains.
- Step 6: Choose ‘export video’ from the File tab to save your MP4 file. You can change the output format or save it as an MP4.
- Step 7: you can also share videos to your YouTube account; you have to link the YouTube account first.
More Paid MP4 Cutter for YouTubers on Mac to Cut MP4 Videos
Most times, free MP4 cutters offer limited features to enhance your YouTube video. However, there are paid MP4 cutters that will efficiently cut your MP4 files and provide advanced editing tools.
Adobe Premiere Pro
Supported System: Mac and Windows
Advanced editing software that supports different file types, including MP4, is Adobe Premier Pro. This MP4 cutter allows you to quickly trim, split, and cut your MP4. Its intuitive and fast-responding interface ensures that your video is ready within a few minutes. Beyond cutting, there are several other advanced editing features that the editing software offers you. Some include filters, chroma-key, VR editing, color adjustment, and audio editing tools to take your YouTube video to the next level.
Adobe Premiere Pro is not the best option for beginners because of its steep learning curve. However, if you have ample experience with video editing tools and want to professionally cut and edit your YouTube video, this paid MP4 cutter is worth the cost and effort. ‘
Pros
- Advanced video editing features
- Intuitive user interface
- Responsive speed
- Ideal for professional editing
Cons
- Steep learning curve
- Quite pricey
Step to Cut MP4 for YouTube on Mac Using Adobe Premiere Pro
Although Adobe Premiere Pro has an interface that’s quite intimidating to non-professionals, the steps below help simplify cutting your MP4 files for YouTube.
- Firstly, download Adobe Premiere Pro on your Mac and install it.
- After installation, launch the app and select ‘new project’ on the homepage. It will require you to name the new project and choose where you want to save it. Afterward, click ‘ok’ to begin.
- Next, go to ‘file’ and select ‘import from media’ to import the MP4 file you would like to cut. Alternatively, you can simply drag the file to the timeline.
- Next, pick the ripple edit tool and go to the beginning of the video. Drag the handle with the arrow to your desired point. Repeat this at the end of the video.
- Finally, press Q to cut the MP4 clip to the left of the blade. Next, press W to cut the clip to the right.
- Now you can save your file to your preferred file location.
Movavi Video Editor
Supported System: Mac and Windows
This is an efficient MP4 cutter that helps you remove unnecessary scenes from your YouTube videos. The timeline offers you markers that allow you easily locate the start and end scene of the video you would like to remove. Apart from cutting videos, this tool provides several premium features you can use to make your video look professional. Movavi offers a free trial you can use to determine if this editor is the best option for you. However, it comes with a Movavi watermark that you can only eliminate with the paid option.
Movavi Video Editor can add transitions, music tracks, chroma-key effects, special effects, and many more exciting features to ensure a top-quality result. Furthermore, its intuitive interface makes it relatively easy for beginners and professionals to use. Therefore, you don’t have to worry about a stiff learning curve. With Movavi, you can also change the output format to switch from MP4 to another commonly supported format.
Pros
- Simple and easy to use
- Supports various input and output formats
- Provides YouTubers with basic and advanced features
- Ideal for beginners and professionals
Cons
- Video rendering is slow for large files
- The trial version comes with a Movavi watermark
Steps to Cut MP4 for YouTube on Mac Using Movavi Video Editor
For cutting your video on Mac using Movavi video editor, you can follow the steps outlined below.
- First, download and install Movavi Video Editor on your Mac.
- After installing Movavi, launch the editor and click the ‘add files’ button to add your MP4 file.
- Once the file shows up in the media bin, drag it to the timeline to start editing your video.
- To cut your MP4 video, move the red marker at the beginning of the video to where you would like to cut. Repeat this process at the end of the video by moving to where you prefer your video to end.
- Next, click the split button to cut this clip from the rest of the video.
- Now, select the fragments you don’t want and hit the delete button to remove them immediately.
- You can also add several filters to your video if you would like to enhance your video.
- You can now save your video by hitting the ‘export’ button. You can choose different formats and video quality for your newly cut video. Select the folder to save to and click the ‘save’ button.
Davinci Resolve
Supported System: Windows and Mac
Davinci Resolve is a favorite for YouTubers who want their videos to look like Hollywood videos. However, this MP4 cutter is aimed at the professional market and supports different input and output formats for your video. Davinci Resolve offers you a variety of professional features and also supports 8k videos. In addition, it provides advanced video cutting features to ensure your video looks excellent even after cutting. You can also combine video clips after cutting without it looking unprofessional.
Although this video cutter software isn’t the best option for beginners, professional editors are sure to be satisfied with the features this editor offers. It also allows you to export directly to various social media platforms, including YouTube, to save space and time.
Pros
- Basic and advanced editing tools
- Fast rendering of videos
- Supports major video formats and video resolutions
- It offers several special effects to make your video more engaging
Cons
- Not the right option for amateurs
Steps to Cut MP4 for YouTube on Mac Using Davinci Resolve
Cutting your MP4 file on Davinci Resolve is relatively easy. The cut tool helps you cut your YouTube video within seconds. Simply follow the steps outlined below.
- First, download and install the Davinci Resolve on your Mac. After installation, launch the MP4 cutter to begin.
- Next, create a new timeline and choose the ‘edit’ mode to begin.
- Import your video by pressing ‘Command+I’ on your keyboard. Alternatively, you can simply drag the video on the timeline.
- Now, select the cut tool and drag the marker from the beginning to where you would like to cut. Repeat this process at the end of the video.
- Afterward, click the blade button to cut your file to your desired size.
- You can now save your file by hitting the ‘export’ button and choosing your preferred file location.
Which Should I Choose, Free or Paid MP4 Cutter?
You need to consider several factors when you’re choosing the right MP4 cutter. First, you have to consider the type of video you would be editing. For YouTube, you need an MP4 cutter that also offers several video editing features you can use to enhance your video. There’s also a need to consider the available formats and quality you can export in and if the MP4 cutter allows you to add visual effects to make your video stand out on YouTube.
Another factor to consider when choosing between a paid or free MP4 cutter for YouTubers on Mac is your experience level. Are you a professional, or you’re looking for some basic app to simply cut your video? Some paid options take you step-by-step through the process of cutting your MP4 file. This type of MP4 cutter helps you advance your skill. This feature is essential because the more you know, the more you’re willing to learn.
Note that most free MP4 cutters offer limited features. Alternatively, some paid MP4 cutters are only suitable for professionals or have a steep subscription to consider. Consider your budget and if any of the editors offer you the tools you need while being affordable. You need to carefully consider if a free tool is what you’re looking for or if you don’t mind paying for more functionality.
FAQs about cutting MP4 video
- What tools should I look for in an MP4 cutter? You should look for basic cutting tools like trimming, slicing and joining. However, you also want an MP4 cutter that offers several editing features to enhance your YouTube video.
- What do most YouTubers use in cutting their videos? From our experience, most YouTubers use the MP4 cutters provided below. You need to note that some are free while some are paid. Simply pick the cutter that fits your needs.
- How can I improve my video cutting and editing skills? You need a lot of practice to learn how to cut and edit videos professionally. It’s also vital to pick software that allows you to develop your editing and cutting skills with time.
- What is the best video cutting and editing software for YouTube novices? If you’re a novice on YouTube, you can start with any basic MP4 cutter on your device. However, we recommend Wondershare Filmora if you want to develop your cutting and editing skills.
Final Thoughts
Cutting MP4 for your YouTube content is a part of becoming a professional YouTuber. When looking for an MP4 cutter that’s reliable and versatile, the goal is to get the job done without any issue. We’ve reviewed the best MP4 cutters for YouTubers on Mac in this guide. You can choose between free or paid software, depending on your needs. However, the best MP4 cutter for YouTubers on Mac is Wondershare Filmore because it is ideal for beginners and professionals. It also offers you a variety of editing features at an affordable cost.
Also read:
- Updated Control Playback Speed in Premiere Pro
- Updated In 2024, How to Color-Correct an S-Log Footage
- Updated 2024 Approved 10 Catchy Pixel Art Wallpapers and How to Custom Your Own with Ease
- New Best Image (JPG/PNG) to GIF Converters for 2024
- Updated In 2024, How To Create A Green Screen Video In After Effects
- In 2024, Learn Everything About Leeming LUT Pro
- Whatsapp Video converterKeywords Convert Video for Whatsapp 6600; Video Converter for Whatsapp 6600; Reduce Video Size for Whatsapp 1600; Whatsapp Supported Video Formats 720; Convert Video to Whatsapp Format 590 for 2024
- Updated Adobe Premiere Pro Download and Use Guide
- In 2024, There Are 10 Slideshow Makers Coming with Beautiful Music for Creating a Stunning Slideshow
- In 2024, How to Add a Green Screen to Zoom
- In 2024, Do You Want to Make TikTok Videos More Elemental by Using Countdown but Dont Know How to Do This? Here We Will Thoroughly Guide You About This
- Camtasia Vs Captivate - Which to Choose, In 2024
- Updated In 2024, Want to Immediately Know All About Discord GIF?
- New In 2024, Best Ways to Merge FLV Files Windows, Mac,Android, iPhone & Online
- 4 Methods How To Make a Recap Video
- How to Slow Down Time-Lapse Videos on iPhone
- New Ultimate Guide on How to Film Better in Public for 2024
- Best 5 Tools to Help You Know More Freeze-Frame Video Editing Skills for 2024
- New SRT File Translation Could Be a Tedious Task if You Dont Know the Right Steps. Lets Discuss Few Effective Ways to Do It Like a Pro
- New Convert MP4 to 60 FPS GIF A Step-by-Step Guide
- In 2024, REVIEW Whats Top 10 Software to Make AI Upscaling Video
- In 2024, Use The Best LUTs for Lightroom
- New In 2024, Detailed Tutorial to Crop a Video in KineMaster
- In 2024, Learning Unique Ways to Slow Down Time Lapse on iPhone
- In 2024, Learn How to Make a Gaming Montage - Guide & Tips
- In 2024, Ultimate Guide to Catch the Regional-Located Pokemon For Apple iPhone 14 Pro | Dr.fone
- In 2024, Can I use iTools gpx file to catch the rare Pokemon On Oppo Reno 9A | Dr.fone
- In 2024, Top 5 Car Locator Apps for Samsung Galaxy A15 4G | Dr.fone
- 3 Ways to Change Location on Facebook Marketplace for Nokia G310 | Dr.fone
- How To Use Allshare Cast To Turn On Screen Mirroring On Honor Magic 5 Lite | Dr.fone
- Pokemon Go Error 12 Failed to Detect Location On Realme Narzo N55? | Dr.fone
- Top 10 AirPlay Apps in Xiaomi Redmi K70 for Streaming | Dr.fone
- 6 Solutions to Fix Error 505 in Google Play Store on Nokia G310 | Dr.fone
- How to Unlock iPhone 6 Plus Without Passcode? | Dr.fone
- How To Unlock Apple iPhone SE (2022) Official Method to Unlock Your Apple iPhone SE (2022)
- 7 Ways to Unlock a Locked Vivo S18e Phone
- How to Unlock Apple iPhone XS Max Without Passcode? | Dr.fone
- Title: 6 Free Tools To Radial Blur Photos Online
- Author: Chloe
- Created at : 2024-05-20 03:37:18
- Updated at : 2024-05-21 03:37:18
- Link: https://ai-editing-video.techidaily.com/6-free-tools-to-radial-blur-photos-online/
- License: This work is licensed under CC BY-NC-SA 4.0.
