
:max_bytes(150000):strip_icc():format(webp)/GettyImages-541365354-5c8ad42246e0fb00014a9687.jpg)
In 2024, How to Overlay Video in Premiere Pro
How to Overlay Video in Premiere Pro
In order to make it simple to combine the shot’s components into a sequence, video overlays are pieces of film that are often recorded in a dark studio. Using image overlays on a video production is fairly frequent. However, adding pictures to every video you export might be tiresome and time-consuming if you have several films to send. For instance, an overlay video in Premiere Pro might be preferred by you rather than a manual addition of the overlay media.
There is a quick and easy method to know how to overlay a video on a video in Premiere Pro and we’ve got it covered. However, depending on the kind of element, there may be some color blending that affects the components themselves. Overlays may be filmed on either a green screen or a blue screen. Snow components photographed against a green screen may have a green hue shift, necessitating further color grading before the footage might be used.
Part 1. How to Overlay Video in Premiere Pro
Videos sometimes need a splash of color to elevate them. With the built-in color effects in Adobe Premiere Pro, you can apply overlays to any video, whether you want to add a little drama to a clip or a splash of color to a social media post. We’ll demonstrate how to overlay videos in this article. To liven up your intros, make your outros stand out, and spruce up your summer social media posts, add a gradient video overlay effect. Adobe Premiere Pro and gorgeous video clips are all you need.
Steps to Overlay Video in Premiere Pro
Step1Activate Premiere Pro
To build a new sequence, start a new project in Premiere, import your footage, then drag your clip onto the timeline. The clip’s parameters will be reflected in the sequence.

Step2Select Overlay Effect
Secondly, choose the Effects workspace (located near the top of your window). This will guarantee that the tools we need are accessible. Alternately, you may go to Window > Workspaces > Effects.

Step3Create a layer of adjustments
Go to File > New > Adjustment Layer to begin. Make sure your Project panel is chosen if the option is not accessible. Your clip and sequence will show up in your Project panel with the adjustment layer. Add the timeline with the adjustment layer selected.

Step4Create the Video Overlay
Transitions, generators, audio effects, and video effects are all included under the Effects panel. We’ll begin by selecting the 4-Color Gradient from the “Generate” folder, which contains generators for patterns and gradients, to produce the video overlay effect. Right-click on the adjustment layer in the timeline and drag the appropriate effect there.

Step5Change the Effect Control
In the Effect Controls panel, you may manage and adjust effects. You may change the default effect settings for each element in your timeline, such as size and opacity, under the Effect Controls panel along with any additional effects you’ve added. To access an item’s effect controls, click on it in the timeline.

By selecting the ‘Show all properties’ next to the adjustment layer in your timeline, you can get a before-and-after comparison. Increase the value by selecting “blend with original.” To change the effect’s strength, move this up and down.
Step6Save the Project
Try switching the linear mode to radial. You can make a color transition for circles by doing this. You will be able to highlight various things with color after this transition. The circle’s starting point may be animated to follow a certain item in the scene.

To the right of the Presets drop-down menu, choose the Auto Save button. Check the Save Effects Settings box when the Choose a Name dialog box appears. Future exports made with this preset will automatically take into account any Image Overlay settings you’ve configured.
Part 2. Premiere Pro Easy Alternative to Overlay Video [Filmora ]
Any professional video editor may be interested in it since it offers the strength, complexity, and adaptability they need. Users need to be well-versed in a variety of editing techniques in order to use the tools properly. Therefore, it’s not really the best option for a novice or someone who hasn’t mastered video editing. We advise using Filmora as a substitute because of this. It is user-friendly for all users and is crammed with numerous theme effects shops to spruce up your video effects, such as transitions, filters, overlays, titles, etc.
Filmora is a powerful and creative video editing program that is really simple to use. With a wide variety of sophisticated video editing tools, Filmora boasts a highly user-friendly interface. Both novice and experienced video editors may utilize the many creative features that Filmora offers. Filmora is the best option if you’re looking for a video editing program that’s not only inexpensive but also offers a variety of features and functions. The program not only has a fantastic user interface, but it also offers strong capabilities that let video editors create precisely the films they desire.
Free Download For Win 7 or later(64-bit)
Free Download For macOS 10.14 or later
Steps to Use Filmora to Overlay Videos:
Step1Launch Filmora
Run the software and switch to Video editor mode. Next, add the image or movie to the media library. Now drag and drop the primary video into the video track or click the “Import Media” button to add it.

Step2Import Media to Overlay
Find the image or video in the media library that you want to overlay over the backdrop video and right-click on it. The image or video overlay may be resized and positioned here as desired.

Step3Spice up with Effects
There are several choices available for adding extra effects to the video. By selecting the effect tab, you may look for more effects as well. The decision to switch to a green screen or include other components into the film is entirely up to you.

Step4Customize Effects and Save
Inside the Effects window, press Ok and once you have applied the required effects to see the modifications appear on the screen. You may also add element movements to make the video seem more entertaining. Once the editing and effect adding are complete, you may export the video on the go.
Conclusion
An image or animation that you contribute to your movies as a video overlay will display below the video and cover the video. Overlay editing is the kind of editing that is most often utilized. It just covers over whatever is in the timeline at the location where you wish to add that clip. If necessary, you may also review the comprehensive instructions for adding images or movies as an overlay to a video, which helps in improving the video quality. With Filmora , video overlays allow for the sharing of additional information without interfering with the viewing of the video.
Free Download For macOS 10.14 or later
Steps to Use Filmora to Overlay Videos:
Step1Launch Filmora
Run the software and switch to Video editor mode. Next, add the image or movie to the media library. Now drag and drop the primary video into the video track or click the “Import Media” button to add it.
Step2Import Media to Overlay
Find the image or video in the media library that you want to overlay over the backdrop video and right-click on it. The image or video overlay may be resized and positioned here as desired.
Step3Spice up with Effects
There are several choices available for adding extra effects to the video. By selecting the effect tab, you may look for more effects as well. The decision to switch to a green screen or include other components into the film is entirely up to you.
Step4Customize Effects and Save
Inside the Effects window, press Ok and once you have applied the required effects to see the modifications appear on the screen. You may also add element movements to make the video seem more entertaining. Once the editing and effect adding are complete, you may export the video on the go.
Conclusion
An image or animation that you contribute to your movies as a video overlay will display below the video and cover the video. Overlay editing is the kind of editing that is most often utilized. It just covers over whatever is in the timeline at the location where you wish to add that clip. If necessary, you may also review the comprehensive instructions for adding images or movies as an overlay to a video, which helps in improving the video quality. With Filmora , video overlays allow for the sharing of additional information without interfering with the viewing of the video.
How to Windows Online Movie Maker [Complete Guide]
The likelihood is that video will soon play a significant role in your content marketing approach, if it hasn’t already – and for that using windows online movie maker is inevitable. You are an emerging brand, a sole proprietor, or even a podcaster. Knowing the importance of video marketing to content producers and agencies is second nature if you’re an astute digital marketer It may be costly and challenging to utilize video editing software. Fortunately, there are free online video editors available.
Before very recently, video editing needed highly specialized skills and was done manually using different tools. Windows Movie Maker used to be a standard component of every Windows user’s toolbox and was a highly recommended video editing product for novices. With the windows movie maker online, the application was well-liked for its ease of use and entertaining special effects, but most significantly - it was free. It came pre-installed on all Windows machines. You may do that with the help of our handy list of the top three online video creators.
Part 1. How to Make a Video Online [Use Movie Maker Windows Online]
Using the help of Movie Maker, you may create videos online with your browser. It enables you to create professional-caliber videos without having to purchase video editing tools at professional-caliber costs. For every genre and need, this web program includes stock video, animated text, audio tracks, and on-screen effects. Your own video clips are uploaded. Then, use the simple drag-and-drop online video editor in Movie Maker to edit footage and add special effects and music to make your movie shine.
Making fantastic compilation films from your already-existing photographs and videos doesn’t need you to be a skilled editor. Even for amateur video makers, the platform’s UI is simple to use and straightforward to navigate. The customizing choices in Movie Maker are many. You have the option of uploading your own fonts and logos. You may also watermark your films and alter the text’s color. Additionally, there are a ton of very unique components like stickers, vector shapes, and masks that may enhance the visual appeal of your video productions and widen your creative boundaries.
Steps to Make Video with Movie Maker Online
Step1 Go to Movie Maker Online
Using Movie Maker Online, you can quickly and easily make incredibly interesting compilation films using your already-posted photographs and videos. You’ll immediately be sent to the editor, where you can begin organizing your films. Here’s the official link to the toolkit:
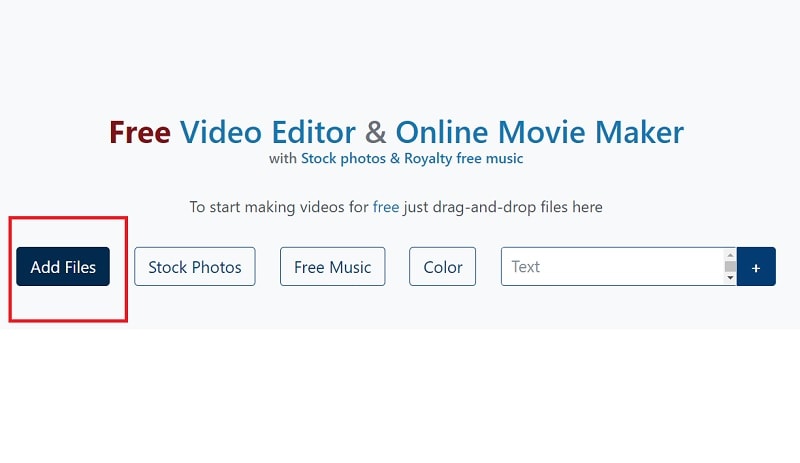
Step2 Upload Files to Web
Your photographs, videos, and text may all be uploaded. If you like the default music, you may skip the step to change it; otherwise, you can choose another song from our library or upload your own MP3 file. Files from a variety of sources and devices may be added. Click the Import Media button to start importing your own media. Click Open after locating the video you wish to modify.
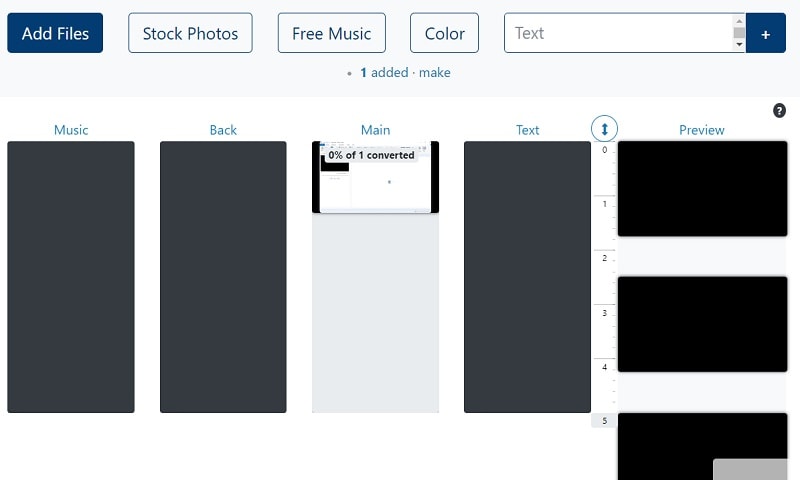
Step3 Create an online video
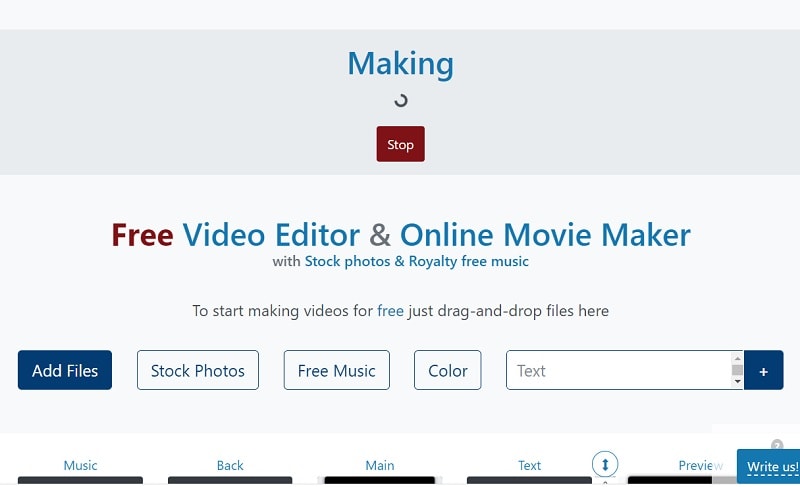
Add your music to your video compilation after all of your clips have been placed on the timeline. To accomplish that, choose a song depending on the genre or mood you want by clicking on the Music option on the left menu panel. To listen to the music track, click the little icon to the left of it. Text, colors, pictures, and video may all be customized to your heart’s delight. Add effects, drag, cut, etc. Press the Make Video button.
Step4 Save and Share with Others
Sharing your films on Facebook, Instagram, YouTube, and other platforms is made effortless. You may also send your loved ones the URLs to your videos. When you are happy with the changes, click the Save & Share option in the upper right corner, choose the quality you want to download your movie in, and then click the Export button. Download the updated video, then post it.
Part 2. Other Windows Online Movie Makers to Use [Top 3]
1. Kizoa
Link: Kizoa
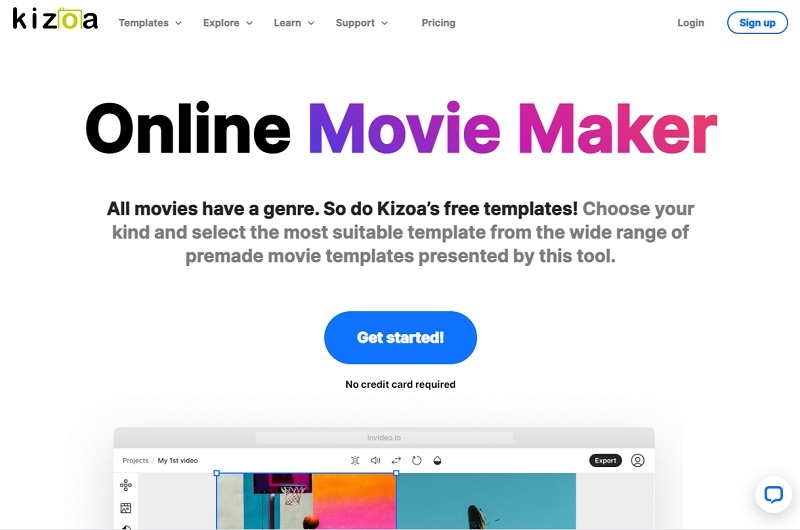
Customizing the appearance of your film is one of the finest ways to make it seem like it is your own. With the Kizoa tool, you may trim, apply a crossfade effect, choose the required resolution, and format for an output video in addition to merging files. Utilize Kizoa’s online video creator to produce eye-catching videos that will hold your audience’s attention. Create any kind of video, from personal family video slideshows to expert films to advertise your company. With the drag-and-drop movie production tool from Kizoa, you can create your very own video in a matter of minutes.
Use a video template as your starting point if you need inspiration. Key framing, animated overlays, noise reduction, transitions, and titles are just a few of the features it provides to help you produce excellent footage. For rapid video editing, there is a video production wizard. Windows Movie Maker’s auto movie themes pale in comparison to those provided by this program. Its extensive collection of stock footage and audio tracks helps you to concentrate on the crucial elements without having to drastically decrease the length of your film or the number of scenes.
2. FlexClip
Link: FlexClip
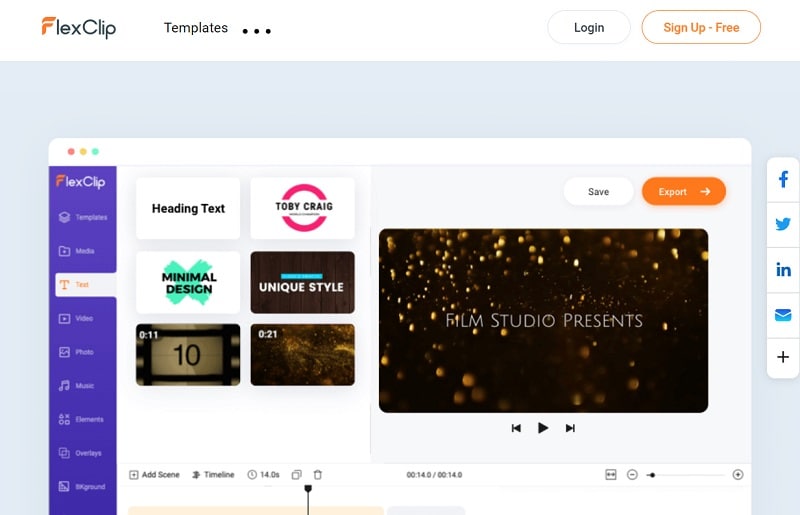
With the aid of the online video effects tool FlexClip, you may quickly and easily make entertaining short films. It has a ton of video editing features that you may use without logging in or creating an account, like merging, compressing, compiling, adding text, creating memes, etc. For those that are muted, you may use FlexClip to add animated text that blends in with the style of your film. Additionally, you may add your logo so that everyone is aware of who created the masterpiece they just saw.
An online video editor called FlexClip is mainly focused on producing high-quality marketing, advertising, and promotional films for companies. Recording a single video that will function on all social networking and video-sharing websites is almost impossible. Instagram, YouTube, and Facebook Marketing are among the partners of FlexClip that have received expert approval. It is used by marketers and enthusiasts to quickly create looping movies and stop motion animation. But as it only provides very basic functionality, it may not be the greatest choice for more intricate, demanding editing.
3. Veed.Io
Link: Veed.Io
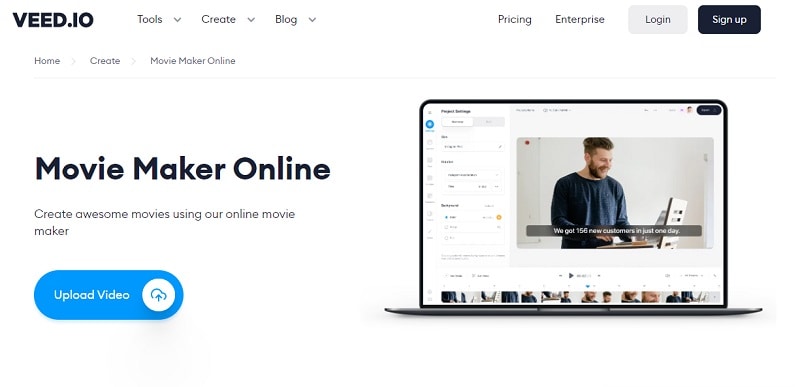
With only a few mouse clicks, users of the browser-based video editing program VEED may create professional-caliber movies. The greatest movie-making tools, including filters, effects, and stickers, are available on VEED. There are no intricate timelines, layers, or intricacy since it is a simple program that runs in your web browser. Simple drag-and-drop functionality is all you need to convey your tales. You may modify your video using its features. Using the video track below, you may combine, divide, or cut your files. Visit our website to see all of our filters, stickers, add-ons, and other tools.
Any device, whether an iPhone or Android phone, a MacBook, a Windows or Linux computer, may use VEED’s online video editor. You have access to all the resources you need to make amazing videos using VEED’s online video editor. Our user-friendly interface is very simple to use and is contemporary and intuitive. The native video sizes on each of the publishing sites, including Facebook, YouTube, and Vimeo, may all be altered using Veed. Finally, click “Export” in the editor’s upper-right corner, and your video will render quickly. Share some!
Conclusion
Use this editing list to produce more compelling video mashups for YouTube and other social media platforms in order to expand your audience, cultivate real connections with them, and eventually increase conversion rates. Because they combine the complex capabilities of the expensive, professional video suites with the user-friendliness and cost that appeal to novices, these online makers are a popular among editors of all skill levels. Make an investment in one of these video editing tools and own it.
Free Download For Win 7 or later(64-bit)
Free Download For macOS 10.14 or later
Part 1. How to Make a Video Online [Use Movie Maker Windows Online]
Using the help of Movie Maker, you may create videos online with your browser. It enables you to create professional-caliber videos without having to purchase video editing tools at professional-caliber costs. For every genre and need, this web program includes stock video, animated text, audio tracks, and on-screen effects. Your own video clips are uploaded. Then, use the simple drag-and-drop online video editor in Movie Maker to edit footage and add special effects and music to make your movie shine.
Making fantastic compilation films from your already-existing photographs and videos doesn’t need you to be a skilled editor. Even for amateur video makers, the platform’s UI is simple to use and straightforward to navigate. The customizing choices in Movie Maker are many. You have the option of uploading your own fonts and logos. You may also watermark your films and alter the text’s color. Additionally, there are a ton of very unique components like stickers, vector shapes, and masks that may enhance the visual appeal of your video productions and widen your creative boundaries.
Steps to Make Video with Movie Maker Online
Step1 Go to Movie Maker Online
Using Movie Maker Online, you can quickly and easily make incredibly interesting compilation films using your already-posted photographs and videos. You’ll immediately be sent to the editor, where you can begin organizing your films. Here’s the official link to the toolkit:
Step2 Upload Files to Web
Your photographs, videos, and text may all be uploaded. If you like the default music, you may skip the step to change it; otherwise, you can choose another song from our library or upload your own MP3 file. Files from a variety of sources and devices may be added. Click the Import Media button to start importing your own media. Click Open after locating the video you wish to modify.
Step3 Create an online video
Add your music to your video compilation after all of your clips have been placed on the timeline. To accomplish that, choose a song depending on the genre or mood you want by clicking on the Music option on the left menu panel. To listen to the music track, click the little icon to the left of it. Text, colors, pictures, and video may all be customized to your heart’s delight. Add effects, drag, cut, etc. Press the Make Video button.
Step4 Save and Share with Others
Sharing your films on Facebook, Instagram, YouTube, and other platforms is made effortless. You may also send your loved ones the URLs to your videos. When you are happy with the changes, click the Save & Share option in the upper right corner, choose the quality you want to download your movie in, and then click the Export button. Download the updated video, then post it.
Part 2. Other Windows Online Movie Makers to Use [Top 3]
1. Kizoa
Link: Kizoa
Customizing the appearance of your film is one of the finest ways to make it seem like it is your own. With the Kizoa tool, you may trim, apply a crossfade effect, choose the required resolution, and format for an output video in addition to merging files. Utilize Kizoa’s online video creator to produce eye-catching videos that will hold your audience’s attention. Create any kind of video, from personal family video slideshows to expert films to advertise your company. With the drag-and-drop movie production tool from Kizoa, you can create your very own video in a matter of minutes.
Use a video template as your starting point if you need inspiration. Key framing, animated overlays, noise reduction, transitions, and titles are just a few of the features it provides to help you produce excellent footage. For rapid video editing, there is a video production wizard. Windows Movie Maker’s auto movie themes pale in comparison to those provided by this program. Its extensive collection of stock footage and audio tracks helps you to concentrate on the crucial elements without having to drastically decrease the length of your film or the number of scenes.
2. FlexClip
Link: FlexClip
With the aid of the online video effects tool FlexClip, you may quickly and easily make entertaining short films. It has a ton of video editing features that you may use without logging in or creating an account, like merging, compressing, compiling, adding text, creating memes, etc. For those that are muted, you may use FlexClip to add animated text that blends in with the style of your film. Additionally, you may add your logo so that everyone is aware of who created the masterpiece they just saw.
An online video editor called FlexClip is mainly focused on producing high-quality marketing, advertising, and promotional films for companies. Recording a single video that will function on all social networking and video-sharing websites is almost impossible. Instagram, YouTube, and Facebook Marketing are among the partners of FlexClip that have received expert approval. It is used by marketers and enthusiasts to quickly create looping movies and stop motion animation. But as it only provides very basic functionality, it may not be the greatest choice for more intricate, demanding editing.
3. Veed.Io
Link: Veed.Io
With only a few mouse clicks, users of the browser-based video editing program VEED may create professional-caliber movies. The greatest movie-making tools, including filters, effects, and stickers, are available on VEED. There are no intricate timelines, layers, or intricacy since it is a simple program that runs in your web browser. Simple drag-and-drop functionality is all you need to convey your tales. You may modify your video using its features. Using the video track below, you may combine, divide, or cut your files. Visit our website to see all of our filters, stickers, add-ons, and other tools.
Any device, whether an iPhone or Android phone, a MacBook, a Windows or Linux computer, may use VEED’s online video editor. You have access to all the resources you need to make amazing videos using VEED’s online video editor. Our user-friendly interface is very simple to use and is contemporary and intuitive. The native video sizes on each of the publishing sites, including Facebook, YouTube, and Vimeo, may all be altered using Veed. Finally, click “Export” in the editor’s upper-right corner, and your video will render quickly. Share some!
Conclusion
Use this editing list to produce more compelling video mashups for YouTube and other social media platforms in order to expand your audience, cultivate real connections with them, and eventually increase conversion rates. Because they combine the complex capabilities of the expensive, professional video suites with the user-friendliness and cost that appeal to novices, these online makers are a popular among editors of all skill levels. Make an investment in one of these video editing tools and own it.
Free Download For Win 7 or later(64-bit)
Free Download For macOS 10.14 or later
Top 7 Easy Ways to Convert a Video to a GIF Online
Looking for the best video to gif online conversion tools? No worries, as we have done all the research work and have shortlisted the best tools that can assist you with the task. GIF is short and cute animated files that help in interestingly conveying a message. These short-animated visuals help in reaching and creating an impact on the target audience. So, if you have some videos, GIF animations can be created from them using a good converter tool which can be an online program or system software.
Online programs are preferred by the users owing to their simple and hassle-free use, support for basic features, and cost-saving options. So, here in this topic, we will discuss the top and easy ways to convert video to GIF online.

Part 1: Top 7 Easy Ways to Convert a Video to a GIF Online
Several online tools can be used for converting a video file into GIF, but all do not stand up to the tall claims it makes. So, if you are in search of an easy yet effective tool, shortlisted below are the top 7 tools for video into GIF online conversion.
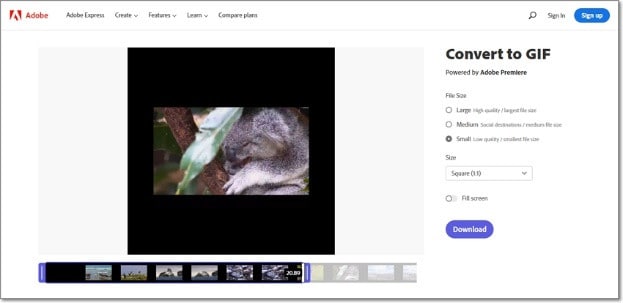
1. Adobe Express
Powered by Adobe Premiere, this is an excellent online tool that allows converting videos in all key formats in GIF format. The free version allows adding videos for up to 1 hour and the processed files can be downloaded to the local system.
Key features
- Video files in all key formats can be converted to GIF.
- Allows selecting the aspect ratio and the file size of the target file.
- This video to GIF converter online tool support drag and drop feature.
- Allows trimming the video so that the file portion can be selected.
Pros:
- Simple and clean interface.
- Quick file processing.
- Allows selecting aspect ratio and file size.
Cons:
- Only one file at a time can be processed.
- Only desktop files can be added.
- To download the file, you need to free sign-up.
User Review:
A good online multi-platform service that works with interesting features. -TechRadar
This is one of the best programs that comes packed with wide range of features that can assist you in getting the target customized files.
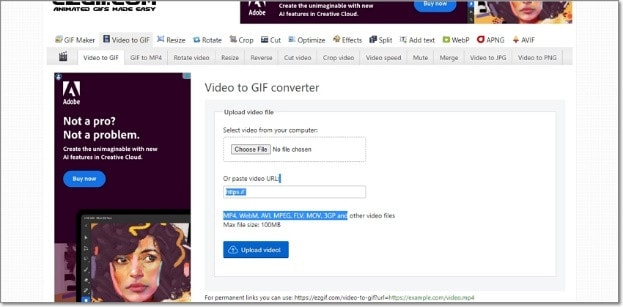
2. Ezgif
Using this browser-based tool, local as well as online videos in key formats can be converted to GIFs. The interface is simple where you just need to add the file and the conversion will be done automatically.
Key features
- GIF can be created from the local and online video files in all key formats.
- Choose the video part for creating the GIF file else by default, the first 5 seconds of the video are used.
Pros:
- All popular video formats like MP4, MPEG, FLV, MOV, and others are supported for conversion to GIF.
- Local, as well as file links in case of online files, can be added.
- Allows selecting the video part for which the GIF has to be created.
- Allows choosing the frame rate, and the size of the video.
This online GIF converter has an option to set static background.
Cons:
- File size limitation of 100 MB.
- Internet dependency.
User Review
“A website with many important and good tools that facilitates making your task easier. You get all features in one place. -Sasa011, Mywot.
This simple online tool is a pocket friendly option for converting your videos into GIF with added option for editing them. Supporting all key formats, the program supports additional tools as well.
3. Img2Go
Your videos on the system, cloud storage, as well as using URLs can be added to this online tool for conversion to GIF format. The look and the quality of GIFs can be adjusted by making changes in the file parameters.

Key features
- Convert all key video files like MP4, MOV, MPEG, and others to GIF.
- Customize the GIF look by editing the file size and applying the color filter.
- This online video to GIF converter allows to choose to enhance, sharpen, equalize, and edit files in other ways.
- Files to be converted can be added from the desktop, Google Drive, Dropbox, as well as URL.
- Processed files can be saved to the cloud storage in addition to the local system.
Pros:
- Multiple sources to add the video file.
- Customize the file parameters and enhance its look.
- Converted file is downloaded automatically to the local system.
Cons:
- Free version allows converting only 3 files at a time.
- Dependency on internet connectivity.
User review:
“This is the best online converter app I have discovered. It is really easy and fast to use. I absolutely recommend it and it really works.”-Maria Ancil, ChromeStats
When you need to convert only a few files at a time in a hassle-free manner consider this simple online tool. After the conversion is done, you would not have any hassles of file downloading as it is automatically saved to the system.
4. CloudConvert
Convert your videos in MP4, FLV, WebM, and other key formats to GIF using this browser-based tool that is simple and free to use. Multiple file parameters can be changed using the tool to get the desired file.

Key Features:
- Allows converting all key video formats.
- Files to be converted can be added from the desktop, URL, Dropbox, Google Drive, and OneDrive.
- Allows adjusting the fit, codec, resolution, aspect ratio, and fps.
- Option to trim the file and also add a watermark.
Pros:
- Files to be converted can be added from multiple sources.
- All key video formats supported.
- Option to control the video size, quality, and aspect ratio.
Cons:
- Free version allows only 25 conversions per day.
- Converted files need to be downloaded.
User Review
“Instant way of converting small-sized files online in many different formats.”
-Sushil, SoftwareAdvice
When conversion of cloud-based files is needed, this works a good online tool that also allows you to edit and change the key file parameters.
5. io
This is a free browser-based tool that allows creating of animated GIF files from videos. There are several video editing options also supported by the tool like split, cut, adding text, and more. You can even add a YouTube video or its link to create a GIF.

Key features:
- Free online tool for creating a GIF file.
- Support all key video formats like MP4, MOV, FLV, and others.
- Local, YouTube as well as videos from Dropbox can be added.
- Option to record the video and create its GIF.
- ‘Allows choosing the size, duration, background color, and several other file parameters.
Pros:
- Videos from multiple sources can be added.
- YouTube videos can also be converted to GIFs.
- Option to record the video and create its GIF.
- Support multiple video editing options.
Cons:
- Slow processing speed.
- Files processed through the free version have a watermark.
- Free version allows processing files under 10 minutes and of 250Mb in size.
User Review:
“It is just a perfect tool and easy to use. It supports a wide variety of media files.” - Koi, Trustpilot.
Option to convert the YouTube videos as well as the recorded videos make this tool different from the others. All popular file formats are supported and you can even customize and change the file parameters as per your requirements.
6. VistaCreate
This is another simple-to-use tool that allows converting all key video formats to a GIF file. The program allows setting various parameters as needed.
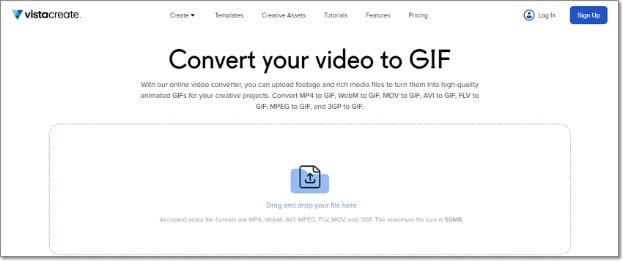
Key Features
- Convert MP4, WebM, AVI, MPEG, FLV, MOV, and 3GP to GIF.
- Support Drag and Drop feature.
- Videos up to 50MB can be processed.
- Allows choosing the video start and the end time for which GIF is to be created. If no time is selected, the first 5 seconds of the video are used.
Pros:
- Simple user interface.
- Allows selecting the video part for which GIF is to be created.
- Choose the frame rate and the speed.
Cons:
- Limited format support.
- Free version has a limitation of 50Mb file size.
- Processing speed is slow.
User Review:
“It is a simple and fast online tool that works. The program allows creating eye-catchy visuals and is free to use.”-Kshitij T, G2. Com
Simple to use, this online tool is apt when you need selected parts of the video for creating a GIF. Though it is compatible with a few selected formats, the process of conversion is simple.
7. XConvert
This online tool support conversion of wide range of file types and formats including videos to GIF. The supported video formats are MP4, WebM, MOV, and MKV. The tool also allows changing the target file parameters.

Key Features
- Free to use online tool with a simple interface.
- Allows converting MO4, MOV, WebM, and MKV videos to GIF.
- Frame Rate and resolution of the target GIF file can be selected.
- Allows adding local as well as files saved to the cloud storage.
Pros:
- Add videos from the desktop, Google Drive, and Dropbox.
- Choose the desired frame rate and resolution.
- Option to save the processed file to the system or Dropbox. Option to get the converted file download link.
Cons:
- Limited file support.
- Converted files need to be downloaded.
- Internet dependency.
User Review:
Portable, nice UI, cross-platform tool and has a lot of actions and run fast. -Roflpancake, Alternativeto
When simple conversion with basic file editing is needed, consider this online tool for your task. In addition to the local system, you can even save the files to your cloud storage.
Part 2: Comparison Table of the Best Video to GIF Converters
The table below compares the above 7 listed tools based on the formats supports, speed of file processing, and the watermark on the processed files.
| Features/Tool | Supported Format | Free Version with watermark or not | Speed of conversion |
|---|---|---|---|
| Adobe Express | All key video formats | No watermark | 2 (Fast) |
| Ezgif | All key formats including MP4, MPEG, FLV, MOV, and others. | No watermark. | 4 (Slow) |
| Img2Go | MP4, FLV, MOV, and all key video formats. | No Watermark | 2 (Fast) |
| CloudConvert | All popular video formats including MP4, MOV, FLV, MPEG, and more. | No Watermark | 2(Fast) |
| Veed.io | All key formats | Yes, free version has a watermark. | 5 (very Slow) |
| VistaCreate | MP4, WebM, AVI, MPEG, FLV, MOV, and 3GP. | No watermark | 5 (Very Slow) |
| XConvert | MP4, WebM, MOV, MKV. | No watermark | 3 (Average) |
Part 3: Best Solution to Convert Video to GIF on Windows/Mac
To convert videos to GIF on your Windows and Mac without worrying about any limitations or internet dependency, desktop software works as the best option. If you too have been looking for one such desktop program, we recommend Filmora Video Editor as the best choice. Though the software is used majorly for advanced video editing options, it is capable of performing a variety of other tasks as well including video to GIF conversion. The software allows file conversion through its export feature.
For Win 7 or later (64-bit)
For macOS 10.14 or later
Key Features
- Almost all video formats like MOV, MP4, MKV, FLV, and others can be converted to GIF.
- High-quality conversion at a fast speed.
- Support batch processing so that multiple files can be processed at a time.
- Allows editing and customizing videos using the built-in features of the software like effects, subtitles, crop, cut, and more.
Pros:
- The interface is simple which makes the software suitable even for beginners.
- Almost all popular video formats are supported.
- High-quality conversion in a hassle-free manner.
- Windows and Mac support.
Cons:
- Being a desktop software, it needs download and installation.
- Need to purchase the software subscription.
Steps to convert videos to GIF using Wondershare Filmora
Step 1. Launch the installed software on your system and the main interface select Create Project > New Project.

Step 2. Click on Import Media Files Here option under the Media tab to browse and add the local video file. Multiple files for batch processing can be added here.

Step 3. After the files are added, now it’s time to move them to the time and for this, you can simply drag and drop them to the bottom. Now at the timeline, using the built-in editing features, customization can be done as required.

Step 4. Finally, tap on the Export button and then choose GIF as the desired target format and also the location to save the converted files.

Conclusion
If one of the above-listed online tools serves your videos for GIF conversion purposes, it’s great. If not, you can use the Wondershare Filmora software. Once downloaded, the software can be used for several editing and other video-related tasks.
For macOS 10.14 or later
Key Features
- Almost all video formats like MOV, MP4, MKV, FLV, and others can be converted to GIF.
- High-quality conversion at a fast speed.
- Support batch processing so that multiple files can be processed at a time.
- Allows editing and customizing videos using the built-in features of the software like effects, subtitles, crop, cut, and more.
Pros:
- The interface is simple which makes the software suitable even for beginners.
- Almost all popular video formats are supported.
- High-quality conversion in a hassle-free manner.
- Windows and Mac support.
Cons:
- Being a desktop software, it needs download and installation.
- Need to purchase the software subscription.
Steps to convert videos to GIF using Wondershare Filmora
Step 1. Launch the installed software on your system and the main interface select Create Project > New Project.
Step 2. Click on Import Media Files Here option under the Media tab to browse and add the local video file. Multiple files for batch processing can be added here.
Step 3. After the files are added, now it’s time to move them to the time and for this, you can simply drag and drop them to the bottom. Now at the timeline, using the built-in editing features, customization can be done as required.
Step 4. Finally, tap on the Export button and then choose GIF as the desired target format and also the location to save the converted files.
Conclusion
If one of the above-listed online tools serves your videos for GIF conversion purposes, it’s great. If not, you can use the Wondershare Filmora software. Once downloaded, the software can be used for several editing and other video-related tasks.
Boost Your Spirit: Creating Motivational Status Videos
The rise in social media’s popularity has brought about a fresh era of creating and enjoying content. Among this plethora of content, one category has managed to stand out prominently - motivational videos. These snippets of inspiration, often not more than a few minutes long, have become a staple of many users’ daily feeds. But what makes them so universally loved?
To begin with, let’s consider the times we live in. The modern world is fast-paced and filled with challenges and hurdles. This is where “motivational video status” or “motivation status video” comes into play. They serve as a brief pause, a moment of reflection, and a powerful jolt of motivation for many. They remind people of their worth, potential, and the strength they possess to overcome adversities. Plus, given their short length, they’re easily digestible, making them perfect for quick breaks.
Moreover, these videos are often shared during specific times of the year, such as the Republic Day. “Republic Day status videos,” for instance, fuse motivation with patriotism, making them a hit among the masses.
For content creators and marketers, the appeal lies in the sheer virality of these videos. A compelling “motivational status video download” can quickly gain traction, garnering thousands, if not millions, of views in a short span. With the right mix of powerful imagery, stirring words, and evocative music, these videos can resonate with a vast audience, driving engagement and shares.
Part 1: 6 Websites to Free Download Motivational Video Footage
Finding the right footage for crafting that perfect motivational video is crucial. The imagery must align with the message, ensuring it’s impactful. For those on the lookout, here are six renowned platforms where one can source high-quality footage for free or at a cost:
Adobe Stock
Adobe Stock is a treasure trove of high-quality videos. While it’s primarily a paid platform, the range and quality of clips available make it a top choice for professionals.
iStock
Another premium platform, iStock by Getty Images, offers a diverse collection of video clips. From breathtaking landscapes to poignant human moments, you’ll find a plethora of options here.
Shutterstock
Shutterstock is a household name in the world of digital media. With an extensive library, this platform provides clips that can cater to virtually any theme or mood you’re aiming for.
Videezy
For those on a budget, Videezy offers a mix of free and premium video clips. It’s a community-driven platform, so you’ll find a unique array of footage not available elsewhere.
Pixabay
Pixabay is an entirely free platform, making it perfect for beginners or those not looking to invest heavily. The site hosts a variety of footage, from nature scenes to urban landscapes.
Pexels
Similar to Pixabay, Pexels offers a rich collection of free video clips. With its user-friendly interface and diverse catalog, it’s a favorite among many content creators.
In essence, whether you’re crafting a “motivation status video download” for a broad audience or a personalized “motivational status video” for a niche group, these platforms have got you covered. Dive in, explore, and let your creativity flow!
Part 2: Using Filmora to Edit Motivational Video Footage
Filmora has steadily risen in popularity, becoming a go-to choice for many when it comes to video editing. Whether you have tons of experience or you’re just starting out in the world of video creation, Filmora provides a user-friendly interface along with a wide range of useful tools. Let’s delve into how you can use Filmora to craft that perfect “motivation status video.”
Step1 Importing Your Footage
Start by importing your selected motivational video footage from platforms like Pixabay, Pexels, or any of the previously mentioned sites. Exactly! Just click on the ‘Import’ button and choose the clips you’d like.
Step2 Trimming and Merging
Once imported, you may want to trim the videos or merge multiple clips to make your motivational status video coherent. Use Filmora’s easy drag-and-drop timeline for this purpose.
Step3 Adding Music
**”motivational video status”**without inspiring music is like a cake without frosting. Filmora boasts an extensive library of music tracks. Alternatively, import your own to perfectly match the tone of your video.
Step4 Text and Titles
If you’re aiming for a “Republic Day status videos”theme or any other, adding text or titles can amplify your message. Filmora offers a range of customizable text options, from sleek and professional to fun and quirky.
Create AI Captions For Win 7 or later(64-bit)
Create AI Captions For macOS 10.14 or later
Step5 Transitions and Effects
Give your**”motivation status video download”**a polished feel with smooth transitions between clips. Add effects like slow motion or color grading to enhance the visual appeal further.
Step6 Export and Share
Once satisfied, export your video in the desired format. With Filmora, you can also directly share your **”motivational status video download”**to various social media platforms, amplifying its reach.
Filmora’s versatility ensures that you not only create a compelling “motivation status video” but also enjoy the process. Its user-friendly tools are perfect for crafting videos that resonate and inspire.
Part 3: Summary
In the age of social media, where content is consumed voraciously, motivational videos have carved a unique niche. They inspire, uplift, and connect with audiences, offering solace in trying times or propelling one towards their goals. Platforms like Adobe Stock, iStock, and Shutterstock, among others, offer a goldmine of footage for crafting these videos. But the magic truly comes alive in the editing room.
Filmora, with its rich array of tools and features, stands out as an excellent choice for editing. Whether you’re crafting a poignant “Republic Day status video” or a general “motivation status video,” Filmora’s capabilities can help bring your vision to fruition.
While sourcing the right footage lays the foundation, it’s the editing that breathes life into a “motivational status video.” So, dive in, explore the world of video creation, and let your stories inspire the world.
Also read:
- New In 2024, 12 Top Picks of Video Enhancer Software
- In 2024, How to Create a Slideshow on iPhone
- New 2024 Approved 4 Solutions to Add White Border to Video on Mobile and Desktop
- How to Use GIMP GREEN SCREEN for 2024
- Make Super Easy Coin Magic With Filmora
- New Here We Are Going to Show You the Best Effects to Appear on Camera Made with Filmora
- Updated Detailed Guide to Resize Your Video in VLC for 2024
- New In 2024, How to Resize FLV Videos Efficiently Windows, Mac,Android, iPhone & Online
- Detailed Tutorial to Crop Video in KineMaster
- In 2024, Want an Insight Into Designing High-End, Instant Slideshow Creation on Your Mac-Compatible Devices? Dive in to Have an Understanding of Everything Related to Instant Mac Slideshows
- Top 10 Audio Visualizers Windows, Mac, Android, iPhone & Online
- In 2024, How to Slow Down Time-Lapse Videos on iPhone
- In 2024, Creating Video Testimonials
- In 2024, Now, You Can Also Apply the Stranger Things Upside Down Effect to Your Video! This Effect Combines Camera Tricks and Video Editing Within Filmora to Transition From the Normal World Into the Upside Down
- How to Loop a Video in Canva Editor
- How to unlock iPhone 14 Plus screen lock without password?
- In 2024, How to Change your Apple iPhone 15 Location on Twitter | Dr.fone
- How to Spy on Text Messages from Computer & Motorola Defy 2 | Dr.fone
- New In 2024, Voice Translation English to Bangla Online and Offline Apps
- Why Apple Account Disabled From your Apple iPhone 14 Pro Max? How to Fix
- How to Downgrade Apple iPhone 12 Pro without Losing Anything? | Dr.fone
- How to Show Wi-Fi Password on Oppo A2
- In 2024, How to Unlock Verizon iPhone 11 Pro Max
- How to Soft Reset Honor Magic 6 phone? | Dr.fone
- In 2024, How to Unlock Apple iPhone 8 Plus Passcode without Computer? | Dr.fone
- In 2024, The Best Android Unlock Software For Oppo A1x 5G Device Top 5 Picks to Remove Android Locks
- In 2024, How to Transfer Data from Oppo Reno 10 5G to BlackBerry | Dr.fone
- Title: In 2024, How to Overlay Video in Premiere Pro
- Author: Chloe
- Created at : 2024-04-24 07:08:12
- Updated at : 2024-04-25 07:08:12
- Link: https://ai-editing-video.techidaily.com/in-2024-how-to-overlay-video-in-premiere-pro/
- License: This work is licensed under CC BY-NC-SA 4.0.
