
:max_bytes(150000):strip_icc():format(webp)/homepod-hero-5a79bc226bf06900378a7e1a.jpg)
New How to Livestream Zoom on Facebook?
How to Livestream Zoom on Facebook?
Abundant Video Effects - Wondershare Filmora
Provide abundant video effects - A creative video editor
Powerful color correction and grading
Detailed tutorials provided by the official channel
There are numerous ways to connect with viewers across the globe through online platforms. One such platform is Facebook live stream videos through which a single person can connect with the whole world and can talk to the people live. Through live stream videos on Facebook, people can show cooking or makeup tutorials that millions of people can join to watch easily.
Also, through such videos, many teachers prefer to demonstrate a particular concept so that students can respond instantly. However, if you want a clearer vision for better understanding, you can zoom on Facebook live stream videos by reading instructions from this article.
In this article
Part 1: Zoom in Facebook Livestream from Browser
Part 2: How to Zoom in Facebook Livestream on Android
Part 3: How to Zoom in Facebook Livestream on iPhone
Part 1: Zoom in Facebook Livestream from Browser
The easiest way to zoom in on Facebook Livestream videos is via browser. In this part, we will describe two methods for zooming in on Facebook Livestream videos that are manual and through a browser extension.
Method 1: Manual Method
In this first method, you can zoom on Facebook videos through your desktop manually. Read the following steps to perform this method:
Step 1: Open your Facebook account by entering your username and password. Now play the livestream video on which you want to zoom in.
Step 2: For Windows users, press the “CTRL” and “+” buttons simultaneously to zoom on the Facebook video. Whereas, for Mac users, press the “COMMAND” and “+” buttons at the same time to zoom in. A small pop-up window will display at the top right corner from where you can control the zoom value.

Method 2: Browser Extension
In this particular method, we will use a browser extension called “Zoom,” through which you can quickly enjoy the zoom experience on the Facebook live stream videos. This special browser extension is a lightweight extension that can assist you in browsing the web pages by zooming in and out conveniently. By using this extension, you can change the zoom value through its slider up to 400 easily.
Step 1: First, you need to install the browser extension of Zoom on your PC. Click on the “Add to Chrome” option to download and install this extension on your Chrome browser.

Step 2: Open your Facebook account and play your live stream video. On the top right corner, you can see the “Extension” icon where all your added extensions are pinned. Select Zoom extension, and through its displayed slider, you can increase the zoom value easily. You can also press the “+” button from your keyboard to zoom in on the Facebook video through this extension.

Part 2: How to Zoom in Facebook Livestream on Android
If you are watching live stream videos of Facebook on an Android device, you can also zoom in by modifying your phone’s settings. To do so, here are basic steps:
Step 1: From your Android phone, reach out to the “Settings” to open its menu. From this menu, find the option of “Accessibility” from “Additional Settings” and click on it.

Step 2: On the accessibility screen, tap on the option of “Vision” and then locate the section called “Display.”

Step 3: Now, find the option of “Magnification” and tap on it. Afterward, select the “Magnification Shortcut” and turn on the toggle of magnification.

Step 4: Now, go back to your Facebook account to use your accessibility feature. You have to first tap on the icon of the small person at the bottom right corner of your screen. Now you can tap anywhere on your screen to zoom in.

Step 5: To zoom in on a live stream video of Facebook, expand your two fingers by placing them on the screen. Thus you can easily zoom in on any specific part of the Facebook video easily. For zooming out, move your fingers in an inward direction to pinch the screen. Also, to zoom back into a default mode, click on the accessibility feature.

Part 3: How to Zoom in Facebook Livestream on iPhone
As Android devices give options to zoom in and out easily, iPhone users can also change their settings to use the accessibility feature quickly. To use the accessibility button on iPhone devices, use the following steps:
Step 1: On your iPhone, go to the “Settings” and scroll down its menu. Here you can find the option of “Accessibility,” so tap on it to open its menu.

Step 2: From the accessibility menu, locate the option of “Zoom” and click on it. Now tap on its toggle to turn it on.

Step 3: Afterward, click on “Zoom Region” and then tap the option of “Full Screen Zoom.” Now leave your settings and go back to your Facebook account.

Step 4: To zoom on Facebook portal, double-tap from your three fingers on any specific part of your screen that will activate the accessibility feature.
Step 5: To change the zoom value, you have to triple-tap the screen with your three fingers. Options will pop up from where you can use the magnifying slider to change the zoom level by either moving it to the right or left.

Step 6: If you want to navigate to any part of the screen while zoomed in, use your three fingers and move them around. Also, to return to the default value of the zoom, double-tap on any part of your screen using three fingers.
Conclusion
Facebook is the most popular app across the globe that offers a single and enhanced platform for sharing and posting various kinds of information. Through Facebook live stream videos, users can get details and related information instantly through a live video.
However, if you are struggling to catch a clear vision in live stream videos, you can zoom on Facebook app by using our provided guidelines in this article. Thus, you can have a clear and focused vision by zooming in on live stream videos on Facebook.
There are numerous ways to connect with viewers across the globe through online platforms. One such platform is Facebook live stream videos through which a single person can connect with the whole world and can talk to the people live. Through live stream videos on Facebook, people can show cooking or makeup tutorials that millions of people can join to watch easily.
Also, through such videos, many teachers prefer to demonstrate a particular concept so that students can respond instantly. However, if you want a clearer vision for better understanding, you can zoom on Facebook live stream videos by reading instructions from this article.
In this article
Part 1: Zoom in Facebook Livestream from Browser
Part 2: How to Zoom in Facebook Livestream on Android
Part 3: How to Zoom in Facebook Livestream on iPhone
Part 1: Zoom in Facebook Livestream from Browser
The easiest way to zoom in on Facebook Livestream videos is via browser. In this part, we will describe two methods for zooming in on Facebook Livestream videos that are manual and through a browser extension.
Method 1: Manual Method
In this first method, you can zoom on Facebook videos through your desktop manually. Read the following steps to perform this method:
Step 1: Open your Facebook account by entering your username and password. Now play the livestream video on which you want to zoom in.
Step 2: For Windows users, press the “CTRL” and “+” buttons simultaneously to zoom on the Facebook video. Whereas, for Mac users, press the “COMMAND” and “+” buttons at the same time to zoom in. A small pop-up window will display at the top right corner from where you can control the zoom value.
Method 2: Browser Extension
In this particular method, we will use a browser extension called “Zoom,” through which you can quickly enjoy the zoom experience on the Facebook live stream videos. This special browser extension is a lightweight extension that can assist you in browsing the web pages by zooming in and out conveniently. By using this extension, you can change the zoom value through its slider up to 400 easily.
Step 1: First, you need to install the browser extension of Zoom on your PC. Click on the “Add to Chrome” option to download and install this extension on your Chrome browser.
Step 2: Open your Facebook account and play your live stream video. On the top right corner, you can see the “Extension” icon where all your added extensions are pinned. Select Zoom extension, and through its displayed slider, you can increase the zoom value easily. You can also press the “+” button from your keyboard to zoom in on the Facebook video through this extension.
Part 2: How to Zoom in Facebook Livestream on Android
If you are watching live stream videos of Facebook on an Android device, you can also zoom in by modifying your phone’s settings. To do so, here are basic steps:
Step 1: From your Android phone, reach out to the “Settings” to open its menu. From this menu, find the option of “Accessibility” from “Additional Settings” and click on it.
Step 2: On the accessibility screen, tap on the option of “Vision” and then locate the section called “Display.”
Step 3: Now, find the option of “Magnification” and tap on it. Afterward, select the “Magnification Shortcut” and turn on the toggle of magnification.
Step 4: Now, go back to your Facebook account to use your accessibility feature. You have to first tap on the icon of the small person at the bottom right corner of your screen. Now you can tap anywhere on your screen to zoom in.
Step 5: To zoom in on a live stream video of Facebook, expand your two fingers by placing them on the screen. Thus you can easily zoom in on any specific part of the Facebook video easily. For zooming out, move your fingers in an inward direction to pinch the screen. Also, to zoom back into a default mode, click on the accessibility feature.
Part 3: How to Zoom in Facebook Livestream on iPhone
As Android devices give options to zoom in and out easily, iPhone users can also change their settings to use the accessibility feature quickly. To use the accessibility button on iPhone devices, use the following steps:
Step 1: On your iPhone, go to the “Settings” and scroll down its menu. Here you can find the option of “Accessibility,” so tap on it to open its menu.
Step 2: From the accessibility menu, locate the option of “Zoom” and click on it. Now tap on its toggle to turn it on.
Step 3: Afterward, click on “Zoom Region” and then tap the option of “Full Screen Zoom.” Now leave your settings and go back to your Facebook account.
Step 4: To zoom on Facebook portal, double-tap from your three fingers on any specific part of your screen that will activate the accessibility feature.
Step 5: To change the zoom value, you have to triple-tap the screen with your three fingers. Options will pop up from where you can use the magnifying slider to change the zoom level by either moving it to the right or left.
Step 6: If you want to navigate to any part of the screen while zoomed in, use your three fingers and move them around. Also, to return to the default value of the zoom, double-tap on any part of your screen using three fingers.
Conclusion
Facebook is the most popular app across the globe that offers a single and enhanced platform for sharing and posting various kinds of information. Through Facebook live stream videos, users can get details and related information instantly through a live video.
However, if you are struggling to catch a clear vision in live stream videos, you can zoom on Facebook app by using our provided guidelines in this article. Thus, you can have a clear and focused vision by zooming in on live stream videos on Facebook.
Detailed Guide to the Best Convertors for Turning GIF Into PDF Files. Know Their Features, Pros, Cons, and More
Professionals are always on the lookout to create engaging and interesting presentations and documents. For this, many choose to convert GIF into PDF since they are animated images that can express the emotions of the brand or sender efficiently. GIF to PDF converter options is available to add these in-motion images into presentations.
They are small in size, can add a humorous tone, hold viewers’ attention, and even highlight specific points in the content. If you are interested in using GIFs in your PDF documents but do not know how- worry not. This guide details all usable GIF to PDF converters available.
- Adobe Acrobat
- Online2Pdf
- Soda PDF
- Ezgif.com
- FreeConvert.com
- CloudConvert
- JPG to PDF
- PDFelement
- OnlineConvert
- Smallpdf.com
Top 10GIF to PDF converters [Including Free Software]
There are multiple top-notch software options available when it comes to choosing the best GIF to PDF converter. We took the time to check out many of these tools to narrow down our favorite ones with the best performance. Here, we present them to you, listing their features, benefits, and uses.
1. Adobe Acrobat
Adobe Acrobat is one of the best PDF to GIF converter software and vice versa. It supports the editing and creation of new PDFs and allows users to convert files. You need to subscribe to the software to get a premium experience.

How to Download: Website , Chrome extension
Rating: 3.7 stars of 5 (Chrome WebStore)
Supported OS: Windows, Mac, Linux.
Price: Standard- USD 13.14/month, Pro- USD 15.16/month
Features:
- The alignment and formattingdo not alter during conversion.
- Share across platforms and devices.
- Store files in the cloud.
- Edit and compress files easily.
Pros
- Supports multiple format types for conversion.
- Add comments or feedback for engagement.
- Quick conversion speed.
Cons
- Complex to use for total beginners.
- No plans are free to use.
Best for Users: Businesses and home users want an all-in-one conversion/editing/compressing software.
2. Online2Pdf
Online2Pdf allows users to convert files like GIF into PDF format. Other uses here include merging, unlocking, and editing the files. You can make changes like splitting and rotating the pages and editing password-protected PDFs.

How to Download: Online .
Rating: 100 out of 100 (Scam Detector)
Supported OS: Web-based.
Price: Free
Features:
- Select around 20 files at a time.
- Maximum 100 MB allowed as file size limitation of GIFs.
- Define elements like layout, header/footer, and compression.
- 150 MB size is supported for batch GIF conversion in total.
Pros
- Press Ctrl on the keyboard to select multiple files.
- Export in multiple formats.
- Easy drag-and-drop function is available.
Cons
- You have to change settings to “Convert files separately” to avoid all files merging.
- All form fields get deleted after each conversion.
Best for Users: Professionals who want to convert multiple small files at a time or all in one file can use this.
3. Soda PDF
One can use this simple online converter to create interesting PDF presentations or files from image files, like GIFs. Multiple tools are available for specific functions on this tool, like a convert, compress, etc.

How to Download: Online , website
Rating: 3.4 stars of 5 (Capterra)
Supported OS: Web-based, Windows, Linux, Mac, etc.
Price:Standard- USD 6.73/month, Pro- USD 8.23/month, Business- USD 16.63/month
Features:
- Edit and merge files into PDF format.
- Access files from an online, blank file, or a device.
- Remote e-signing is available.
- Quick availability of new updates.
Pros
- Easy to convert or create any file into PDF.
- Only 3 devices can use one paid plan.
- Batch processing is available.
Cons
- Software-based usage is not available for Standard subscribers.
- Multiple cookies are created.
Best for Users: Professionals and teams who want an all-in-one PDF-based editing and conversion software can use this.
4. Ezgif.com
Ezgif is one of the best GIF-centric editor and converter tools available online. Users can make many adjustments to their files and even customize them with speed, reverse, compress, and other settings.

How to Download: Online
Rating: 100 out of 100 (Scam Detector)
Supported OS: Web-based.
Price: Free.
Features:
- Decide the number of frames per page.
- Do customizations like adding effects, censors, split, etc.
- Reverse the animated GIF.
- Change the speed.
Pros
- Also works with WebP, APNG, and MNG files.
- Choose the output style of the PDF.
- Quick conversion.
Cons
- Only supports files with 50 MB size or lower.
- Convert one file at a time.
Best for Users: People who want a simple online PDF to GIF converterand vice versa.
5. FreeConvert.com
It is a simple tool for converting GIF files into PDF or any other format style you prefer. The app allows the insertion of small to huge files and offers strong priority customer support to users.

How to Download: Online , Chrome extension
Rating: 58.40 out of 100 (Scam Detector)
Supported OS: Windows, Mac, Linux
Price: 24-hour Pass- USD 12.99, Pro- USD 25.99/month, Basic- USD 9.99/month, Standard- USD 14.99/month.
Features:
- Drag and drop the file or add it from the device/cloud.
- Choose the preferred format to convert.
- Add files upto 1.5 GB in size or higher.
- Free users get 25 conversions each day in an online converter.
Pros
- Protected with 256-bit SSL encryption.
- Easy to add files and choose conversion format.
- Ticketing-based customer support is available.
Cons
- Free conversion allows a 1 GB maximum size limit only.
- Not many customizations are allowed.
Best for Users: People who want the simple and quick conversion of big files can use this.
6. CloudConvert
CloudConvert is the best GIF to PDF converterfor online-based users. Using this, one can also convert other types of files, like ebooks, images, spreadsheets, archives, videos, and audio files. You can also directly convert the files into presentation format using this.

How to Download: Online
Rating: 4.5 stars of 5 (Capterra)
Supported OS: Web-based.
Price: Subscriptions- USD 8- 2314 per month, Packages- USD 8- 3283 per month
Features:
- Filters are available to make conversion adjustments.
- Over 200 file format types are supported.
- Add a file from your Dropbox, Google Drive, URL, device, or OneDrive.
- Convert files of any size.
Pros
- Comes with Amazon S3 and other API integrations.
- Open-source benefits.
- No installation is needed.
Cons
- You have to pay for doing over 25 conversions daily.
- Cost based on conversion numbers per minute.
Best for Users: People who want to do a huge volume of file conversions together.
7. JPG to PDF
The GIF to PDF converter allows the alteration of different image formats in the JPG to PDF tool. You can add the file and make certain configurations about the conversion. The process takes some seconds to complete.

How to Download: Online , Microsoft Store , Google PlayStore , Apple AppStore
Rating: 4.7 stars of 5 (Google)
Supported OS: Windows, Mac, Linux, Android, iOS
Price:Pro- USD 9 per month, Team- USD 7 per user + month, Business- Custom
Features:
- Directly add image files, like GIF, JPG, PNG, etc., to convert into PDF.
- Save the file in the device/cloud.
- Choose between Portrait/Landscape orientation.
- Choose paper type- A4, Letter, etc.
Pros
- SSL protection is available.
- All-in-one tool for converting different image types into PDF.
- Adjust the margin of the document for conversion.
Cons
- Maximum benefits and filters require payment first.
- Users can convert 1 file per day with a free online converter.
Best for Users: People who want to choose the specifications of the image/download can benefit from this.
8. PDFelement
Companies who want an all-in-one converter that works on different operating systems can benefit from PDFelement. The app can easily convert multiple GIFs into PDF format, highlight elements, add notes, and more.

How to Download: Microsoft Store , Mac AppStore , Google PlayStore , Apple AppStore
Rating: 4.6 stars of 5 (iOS)
Supported OS: Windows, Mac, iOS, Android
Price: Standard- USD 6.99/month, Professional- USD 9.99/month
Features:
- Convert images in formats like GIF into PDF.
- Insert links and watermark in the files.
- Comment, highlight, underline, draw, add shapes, etc., on this software.
- Batch conversion is available.
Pros
- 100 GB of cloud storage is available for the Cloud version.
- E-signature-based access is allowed.
- Edit the font style, size, and color.
Cons
- No cloud support for mobile apps.
- Editing not allowed in the Cloud version.
Best for Users: Professionals and regular users can operate this on different devices for multiple conversions.
9. OnlineConvert
This is one of the best apps for GIF into PDF conversion, among other format-to-format methods. You can easily add different files into the conversion tool online or in the native app version and get quick results.

How to Download: Online tool , Firefox extension , Chrome extension , Apple AppStore , Google PlayStore
Rating: 3.7stars of 5 (Google)
Supported OS: Online, Android, iOS, Chromebook
Price: Free, 24-hour Pass- USD 8.99, Monthly- USD 8, Annual- USD 77
Features:
- You can expect a limit of 250 conversions per day.
- Batch convert 200 files per conversion maximum.
- Subscribers get priority speed for their work.
- A money-back guarantee is provided.
Pros
- Allows file sizes upto 8 GB.
- The speed of conversion is not extremely long.
- The free option allows all-time validity.
Cons
- Many ads would come up in the free version.
- Only 3 conversions are allowed each day when using the free plan.
Best for Users:People who want to conduct conversion of huge files can use this.
10. Smallpdf.com
This software is a suitable PDF to GIF converter, and vice versa, allowing users to manage, create, and edit various documents. You can directly work on the files and add elements like shapes, texts, and freehand annotations.

How to Download: Google PlayStore , Apple AppStore
Rating: 4.9 stars of 5 (iOS)
Supported OS: Windows, Android, iOS
Price: Pro- USD 9 per month, Team- USD 7 per user and month
Features:
- Share across different devices.
- Manage all documents and PDFs in one location.
- Split/merge the files easily.
- Remove extra pages.
Pros
- Highly secure app with CCPA compliance.
- Data security is guaranteed with 256-bit TLS encryption.
- Customer support is 24x7.
Cons
- There is a minimum age limit of 16 years.
- The free trial period lasts only for 7 days.
Best for Users: Professionals who want strong and secure PDF conversion/editing software.
How to Convert GIF Files (Images) to PDF?
Now that you know the best tools to convert GIF into PDF, you should learn the process behind it. Here are the steps you should take to turn the format using SmallPDF.
Step1Drag the GIF file to the editor or click on the Choose File button to add it from the device

Step2Make changes like the alignment, page type, and margin

Step3Click on the Convert button at the top right

Step4Open the “Export as” setting and choose PDF format. Then, press the Download button
Final Words
In the end, you should make your preferred choice based on your particular needs. If usability is a concern for you, EZGif is the best option. Online2PDF, on the other hand, is usable on different devices completely for free. Adobe Acrobat has rich additional features like PDF-editing, while SmallPDF is a comprehensive converter with the best of all benefits, in our opinion.
Choose your final option after trying them all out at least once each.
Top 10GIF to PDF converters [Including Free Software]
There are multiple top-notch software options available when it comes to choosing the best GIF to PDF converter. We took the time to check out many of these tools to narrow down our favorite ones with the best performance. Here, we present them to you, listing their features, benefits, and uses.
1. Adobe Acrobat
Adobe Acrobat is one of the best PDF to GIF converter software and vice versa. It supports the editing and creation of new PDFs and allows users to convert files. You need to subscribe to the software to get a premium experience.
How to Download: Website , Chrome extension
Rating: 3.7 stars of 5 (Chrome WebStore)
Supported OS: Windows, Mac, Linux.
Price: Standard- USD 13.14/month, Pro- USD 15.16/month
Features:
- The alignment and formattingdo not alter during conversion.
- Share across platforms and devices.
- Store files in the cloud.
- Edit and compress files easily.
Pros
- Supports multiple format types for conversion.
- Add comments or feedback for engagement.
- Quick conversion speed.
Cons
- Complex to use for total beginners.
- No plans are free to use.
Best for Users: Businesses and home users want an all-in-one conversion/editing/compressing software.
2. Online2Pdf
Online2Pdf allows users to convert files like GIF into PDF format. Other uses here include merging, unlocking, and editing the files. You can make changes like splitting and rotating the pages and editing password-protected PDFs.
How to Download: Online .
Rating: 100 out of 100 (Scam Detector)
Supported OS: Web-based.
Price: Free
Features:
- Select around 20 files at a time.
- Maximum 100 MB allowed as file size limitation of GIFs.
- Define elements like layout, header/footer, and compression.
- 150 MB size is supported for batch GIF conversion in total.
Pros
- Press Ctrl on the keyboard to select multiple files.
- Export in multiple formats.
- Easy drag-and-drop function is available.
Cons
- You have to change settings to “Convert files separately” to avoid all files merging.
- All form fields get deleted after each conversion.
Best for Users: Professionals who want to convert multiple small files at a time or all in one file can use this.
3. Soda PDF
One can use this simple online converter to create interesting PDF presentations or files from image files, like GIFs. Multiple tools are available for specific functions on this tool, like a convert, compress, etc.
How to Download: Online , website
Rating: 3.4 stars of 5 (Capterra)
Supported OS: Web-based, Windows, Linux, Mac, etc.
Price:Standard- USD 6.73/month, Pro- USD 8.23/month, Business- USD 16.63/month
Features:
- Edit and merge files into PDF format.
- Access files from an online, blank file, or a device.
- Remote e-signing is available.
- Quick availability of new updates.
Pros
- Easy to convert or create any file into PDF.
- Only 3 devices can use one paid plan.
- Batch processing is available.
Cons
- Software-based usage is not available for Standard subscribers.
- Multiple cookies are created.
Best for Users: Professionals and teams who want an all-in-one PDF-based editing and conversion software can use this.
4. Ezgif.com
Ezgif is one of the best GIF-centric editor and converter tools available online. Users can make many adjustments to their files and even customize them with speed, reverse, compress, and other settings.
How to Download: Online
Rating: 100 out of 100 (Scam Detector)
Supported OS: Web-based.
Price: Free.
Features:
- Decide the number of frames per page.
- Do customizations like adding effects, censors, split, etc.
- Reverse the animated GIF.
- Change the speed.
Pros
- Also works with WebP, APNG, and MNG files.
- Choose the output style of the PDF.
- Quick conversion.
Cons
- Only supports files with 50 MB size or lower.
- Convert one file at a time.
Best for Users: People who want a simple online PDF to GIF converterand vice versa.
5. FreeConvert.com
It is a simple tool for converting GIF files into PDF or any other format style you prefer. The app allows the insertion of small to huge files and offers strong priority customer support to users.
How to Download: Online , Chrome extension
Rating: 58.40 out of 100 (Scam Detector)
Supported OS: Windows, Mac, Linux
Price: 24-hour Pass- USD 12.99, Pro- USD 25.99/month, Basic- USD 9.99/month, Standard- USD 14.99/month.
Features:
- Drag and drop the file or add it from the device/cloud.
- Choose the preferred format to convert.
- Add files upto 1.5 GB in size or higher.
- Free users get 25 conversions each day in an online converter.
Pros
- Protected with 256-bit SSL encryption.
- Easy to add files and choose conversion format.
- Ticketing-based customer support is available.
Cons
- Free conversion allows a 1 GB maximum size limit only.
- Not many customizations are allowed.
Best for Users: People who want the simple and quick conversion of big files can use this.
6. CloudConvert
CloudConvert is the best GIF to PDF converterfor online-based users. Using this, one can also convert other types of files, like ebooks, images, spreadsheets, archives, videos, and audio files. You can also directly convert the files into presentation format using this.
How to Download: Online
Rating: 4.5 stars of 5 (Capterra)
Supported OS: Web-based.
Price: Subscriptions- USD 8- 2314 per month, Packages- USD 8- 3283 per month
Features:
- Filters are available to make conversion adjustments.
- Over 200 file format types are supported.
- Add a file from your Dropbox, Google Drive, URL, device, or OneDrive.
- Convert files of any size.
Pros
- Comes with Amazon S3 and other API integrations.
- Open-source benefits.
- No installation is needed.
Cons
- You have to pay for doing over 25 conversions daily.
- Cost based on conversion numbers per minute.
Best for Users: People who want to do a huge volume of file conversions together.
7. JPG to PDF
The GIF to PDF converter allows the alteration of different image formats in the JPG to PDF tool. You can add the file and make certain configurations about the conversion. The process takes some seconds to complete.
How to Download: Online , Microsoft Store , Google PlayStore , Apple AppStore
Rating: 4.7 stars of 5 (Google)
Supported OS: Windows, Mac, Linux, Android, iOS
Price:Pro- USD 9 per month, Team- USD 7 per user + month, Business- Custom
Features:
- Directly add image files, like GIF, JPG, PNG, etc., to convert into PDF.
- Save the file in the device/cloud.
- Choose between Portrait/Landscape orientation.
- Choose paper type- A4, Letter, etc.
Pros
- SSL protection is available.
- All-in-one tool for converting different image types into PDF.
- Adjust the margin of the document for conversion.
Cons
- Maximum benefits and filters require payment first.
- Users can convert 1 file per day with a free online converter.
Best for Users: People who want to choose the specifications of the image/download can benefit from this.
8. PDFelement
Companies who want an all-in-one converter that works on different operating systems can benefit from PDFelement. The app can easily convert multiple GIFs into PDF format, highlight elements, add notes, and more.
How to Download: Microsoft Store , Mac AppStore , Google PlayStore , Apple AppStore
Rating: 4.6 stars of 5 (iOS)
Supported OS: Windows, Mac, iOS, Android
Price: Standard- USD 6.99/month, Professional- USD 9.99/month
Features:
- Convert images in formats like GIF into PDF.
- Insert links and watermark in the files.
- Comment, highlight, underline, draw, add shapes, etc., on this software.
- Batch conversion is available.
Pros
- 100 GB of cloud storage is available for the Cloud version.
- E-signature-based access is allowed.
- Edit the font style, size, and color.
Cons
- No cloud support for mobile apps.
- Editing not allowed in the Cloud version.
Best for Users: Professionals and regular users can operate this on different devices for multiple conversions.
9. OnlineConvert
This is one of the best apps for GIF into PDF conversion, among other format-to-format methods. You can easily add different files into the conversion tool online or in the native app version and get quick results.
How to Download: Online tool , Firefox extension , Chrome extension , Apple AppStore , Google PlayStore
Rating: 3.7stars of 5 (Google)
Supported OS: Online, Android, iOS, Chromebook
Price: Free, 24-hour Pass- USD 8.99, Monthly- USD 8, Annual- USD 77
Features:
- You can expect a limit of 250 conversions per day.
- Batch convert 200 files per conversion maximum.
- Subscribers get priority speed for their work.
- A money-back guarantee is provided.
Pros
- Allows file sizes upto 8 GB.
- The speed of conversion is not extremely long.
- The free option allows all-time validity.
Cons
- Many ads would come up in the free version.
- Only 3 conversions are allowed each day when using the free plan.
Best for Users:People who want to conduct conversion of huge files can use this.
10. Smallpdf.com
This software is a suitable PDF to GIF converter, and vice versa, allowing users to manage, create, and edit various documents. You can directly work on the files and add elements like shapes, texts, and freehand annotations.
How to Download: Google PlayStore , Apple AppStore
Rating: 4.9 stars of 5 (iOS)
Supported OS: Windows, Android, iOS
Price: Pro- USD 9 per month, Team- USD 7 per user and month
Features:
- Share across different devices.
- Manage all documents and PDFs in one location.
- Split/merge the files easily.
- Remove extra pages.
Pros
- Highly secure app with CCPA compliance.
- Data security is guaranteed with 256-bit TLS encryption.
- Customer support is 24x7.
Cons
- There is a minimum age limit of 16 years.
- The free trial period lasts only for 7 days.
Best for Users: Professionals who want strong and secure PDF conversion/editing software.
How to Convert GIF Files (Images) to PDF?
Now that you know the best tools to convert GIF into PDF, you should learn the process behind it. Here are the steps you should take to turn the format using SmallPDF.
Step1Drag the GIF file to the editor or click on the Choose File button to add it from the device
Step2Make changes like the alignment, page type, and margin
Step3Click on the Convert button at the top right
Step4Open the “Export as” setting and choose PDF format. Then, press the Download button
Final Words
In the end, you should make your preferred choice based on your particular needs. If usability is a concern for you, EZGif is the best option. Online2PDF, on the other hand, is usable on different devices completely for free. Adobe Acrobat has rich additional features like PDF-editing, while SmallPDF is a comprehensive converter with the best of all benefits, in our opinion.
Choose your final option after trying them all out at least once each.
How to Achieve GoPro Slow Motion With Quality
Slow-motion videos are a new phenomenon in engaging audiences. In this decade, such effects add a dramatic feel to empathize movie clips. Slow motion is an effective way to keep viewers hooked to the content. Now, the question arises of which could be the best way to make a perfect GoPro slow-mo. To find an answer, read this guide and achieve high-quality slow-mo videos with GoPro.
Let us tell you first that GoPro is primarily a company for camera accessories. Besides, there is GoPro Quik, which is responsible for dedicated video editing. Many professionals rely on GoPro slow-motion to change video speed with a single tap. Thus, without wasting time, delve into the details given and learn to make GoPro 11 slow motion with the best available accessories.
Slow Motion Video Maker Slow your video’s speed with better control of your keyframes to create unique cinematic effects!
Make A Slow Motion Video Make A Slow Motion Video More Features

Part 1: Slowing Down Videos on Your GoPro: A Guide
GoPro offers Sony Vegas Pro Slow Motion to record videos in slow motion. Does using such technical equipment seem challenging for you as a new user? Follow this step-by-step guide and set the camera before recording to make a perfect slow-mo shot.
Step 1
Set the resolution to 2.7k for a slow-motion video and a frame rate of 240fps. Afterward, keep the “Color” natural if you don’t want to color grade it. Moreover, adjust the “Sharping” low by using its respective options.

Step 2
Reset the “Hyper Smooth” to high and later turn ISO to a minimum of 100 and a maximum of 800. Then, head to set the “Shutter Speed” and “White Balance” to auto.

Step 3
Moving ahead, choose Lens to “Linear” and keep the “Bitrate” high. Finally, select the “Exposure Value Compensation” to -0.5 using its slider. Your camera is ready to capture your desired and captivating slow-motion shots.

Part 2: Slow Down Videos on GoPro Quik After Recording
After recording the required clip, post-editing is important to polish the digital content. GoPro also offers GoPro Quik to edit slow-motion videos to your desired extent. Unfortunately, not everyone can quickly discover Go Pro slow motion in their first use. That’s why it’s necessary to follow the given steps so you can easily discover and edit slow motion.
Step 1
Access the GoPro Quick on your device and launch it. Choose the “Media” icon in the bottom bar and select the video you want to edit. After importing the required media files, start working on a project.

Step 2
Select the “Pen” icon in the bottom bar and scroll the menu to the left side. Here, choose the “Speed” option and tap the “+” icon to drag the slider to the point where you want to apply the slow motion. Hit the end mark and get a preview of smooth speed ramping in slow motion.

Part 3: Make Better Slow-Motion Videos with Wondershare Filmora
Making a slow motion means spending cognitive effort and time on a project. Thus, video editors seek a reliable platform like GoPro Hero 11, which is slow motion. Unfortunately, this editing app is outdated, and other better platforms are being developed. In search of the latest and easy-to-use video editor, use Wondershare Filmora .
It is a video editing software with various powerful editing features compared with GoPro Quik. This platform can perform more tasks than trimming, merging, and splitting clips. Filmora is equipped with AI technology to provide maximum ease to users. You can use this tool to ensure a smooth workflow and boost your productivity.
Why Filmora is Better Than GoPro Quik?
Filmora provides many features that GoPro Quik does not offer. Everyone needs solid arguments and valid reasons to reconsider their choices. Thus, here we have highlighted some proven and logical reasons to use Filmora instead of GoPro:
- The first and foremost thing you can see is Filmora’s intuitive interface. Anyone without any video editing background can use this tool effectively for their projects.
- Video editors need assistance while editing perfect shots. Filmora offers an AI Copilot Editing system as your editing assistant, which GoPro does not provide. It directs users to create high-quality videos.
Free Download For Win 7 or later(64-bit)
Free Download For macOS 10.14 or later
- GoPro Quik allows you to edit up to 1-minute videos. In contrast, Filmora doesn’t restrict you from editing videos of a certain length.
- With Filmora AI, you can generate a customized script and turn it into a video. AI integration for unique content makes this tool better than GoPro Quik.
- Unlike GoPro Quik, getting personalized music tracks is possible with Filmora. It can create soundtracks that align with your project’s needs.
- Slow-motion GoPro can assist in speed-ramping videos for a smooth transition. Conversely, Filmora also offers an optical flow option to automate the speed ramping .
- Even GoPro Quik cannot remove vocals from the audio files. Using Filmora, this option is just a click away. It can automatically separate vocals from music tracks so you can dub high-quality videos.
- Using GoPro, users can share their videos on social media or export them anywhere. In comparison, Filmora allows you to adjust resolution, quality, project name, and destination.
- AI in Filmora can generate images with your prompts that will not claim legal rights. This service is unavailable in GoPro; it is just limited to video editing.
- Last but not least, Filmora can transform your text into engaging videos. By doing so, you can save the budget for actors, video editors, and other crew.
Step-by-Step Guide to Slow Down Video With Filmora
After learning the exceptional functionalities of Filmora, you might be considering using it. To put you at ease, we have explained stepwise usage of achieving slow motion with Filmora. It’s quite easier and more automatic than GoPro slow motion:
Free Download For Win 7 or later(64-bit)
Free Download For macOS 10.14 or later
Step 1: Install Filmora V13 and Import Your Media
Go to the official site of Wondershare Filmora and download its latest version, V13. Launch it in your system and access its intuitive main interface. Choose “New Project” from its home screen and enter in the editing screen. Press your keyboard’s “Ctrl + I” keys and import your desired file in Filmora.

Step 2: Use the Optical Flow Option and Slow Down the Video Speed
Drag and drop the imported video in the timeline section. Place your cursor on that video and right-click on it. Hit the “Uniform Speed” option from the displayed list and direct toward the right-side editing panel. There, use the “Speed” slider and slow down the video as required. Move downward and extend the “AI Frame Interpolation” menu to pick the “Optical Flow.”

Step 3: Preview the Results to Export or Continue to Edit
Finally, get a preview of a slower but high-quality video by pressing the “Space” key. Afterward, if you are satisfied with the results, move to the “Export” option at the top right. Now, set the output settings based on how you want to save the video. Finally, press the “Export” button to save the results on your system.

Conclusion
To summarize, the GoPro camera is available in the market to capture slow-motion shots. On the other hand, GoPro Quik is an editing tool that has been popular for a decade. Many users are unaware of the latest video editing software, Wondershare Filmora. It is an AI-powered platform that has proven to be better than GoPro slow-motion, as discussed above.
Make A Slow Motion Video Make A Slow Motion Video More Features
Part 1: Slowing Down Videos on Your GoPro: A Guide
GoPro offers Sony Vegas Pro Slow Motion to record videos in slow motion. Does using such technical equipment seem challenging for you as a new user? Follow this step-by-step guide and set the camera before recording to make a perfect slow-mo shot.
Step 1
Set the resolution to 2.7k for a slow-motion video and a frame rate of 240fps. Afterward, keep the “Color” natural if you don’t want to color grade it. Moreover, adjust the “Sharping” low by using its respective options.
Step 2
Reset the “Hyper Smooth” to high and later turn ISO to a minimum of 100 and a maximum of 800. Then, head to set the “Shutter Speed” and “White Balance” to auto.
Step 3
Moving ahead, choose Lens to “Linear” and keep the “Bitrate” high. Finally, select the “Exposure Value Compensation” to -0.5 using its slider. Your camera is ready to capture your desired and captivating slow-motion shots.
Part 2: Slow Down Videos on GoPro Quik After Recording
After recording the required clip, post-editing is important to polish the digital content. GoPro also offers GoPro Quik to edit slow-motion videos to your desired extent. Unfortunately, not everyone can quickly discover Go Pro slow motion in their first use. That’s why it’s necessary to follow the given steps so you can easily discover and edit slow motion.
Step 1
Access the GoPro Quick on your device and launch it. Choose the “Media” icon in the bottom bar and select the video you want to edit. After importing the required media files, start working on a project.
Step 2
Select the “Pen” icon in the bottom bar and scroll the menu to the left side. Here, choose the “Speed” option and tap the “+” icon to drag the slider to the point where you want to apply the slow motion. Hit the end mark and get a preview of smooth speed ramping in slow motion.
Part 3: Make Better Slow-Motion Videos with Wondershare Filmora
Making a slow motion means spending cognitive effort and time on a project. Thus, video editors seek a reliable platform like GoPro Hero 11, which is slow motion. Unfortunately, this editing app is outdated, and other better platforms are being developed. In search of the latest and easy-to-use video editor, use Wondershare Filmora .
It is a video editing software with various powerful editing features compared with GoPro Quik. This platform can perform more tasks than trimming, merging, and splitting clips. Filmora is equipped with AI technology to provide maximum ease to users. You can use this tool to ensure a smooth workflow and boost your productivity.
Why Filmora is Better Than GoPro Quik?
Filmora provides many features that GoPro Quik does not offer. Everyone needs solid arguments and valid reasons to reconsider their choices. Thus, here we have highlighted some proven and logical reasons to use Filmora instead of GoPro:
- The first and foremost thing you can see is Filmora’s intuitive interface. Anyone without any video editing background can use this tool effectively for their projects.
- Video editors need assistance while editing perfect shots. Filmora offers an AI Copilot Editing system as your editing assistant, which GoPro does not provide. It directs users to create high-quality videos.
Free Download For Win 7 or later(64-bit)
Free Download For macOS 10.14 or later
- GoPro Quik allows you to edit up to 1-minute videos. In contrast, Filmora doesn’t restrict you from editing videos of a certain length.
- With Filmora AI, you can generate a customized script and turn it into a video. AI integration for unique content makes this tool better than GoPro Quik.
- Unlike GoPro Quik, getting personalized music tracks is possible with Filmora. It can create soundtracks that align with your project’s needs.
- Slow-motion GoPro can assist in speed-ramping videos for a smooth transition. Conversely, Filmora also offers an optical flow option to automate the speed ramping .
- Even GoPro Quik cannot remove vocals from the audio files. Using Filmora, this option is just a click away. It can automatically separate vocals from music tracks so you can dub high-quality videos.
- Using GoPro, users can share their videos on social media or export them anywhere. In comparison, Filmora allows you to adjust resolution, quality, project name, and destination.
- AI in Filmora can generate images with your prompts that will not claim legal rights. This service is unavailable in GoPro; it is just limited to video editing.
- Last but not least, Filmora can transform your text into engaging videos. By doing so, you can save the budget for actors, video editors, and other crew.
Step-by-Step Guide to Slow Down Video With Filmora
After learning the exceptional functionalities of Filmora, you might be considering using it. To put you at ease, we have explained stepwise usage of achieving slow motion with Filmora. It’s quite easier and more automatic than GoPro slow motion:
Free Download For Win 7 or later(64-bit)
Free Download For macOS 10.14 or later
Step 1: Install Filmora V13 and Import Your Media
Go to the official site of Wondershare Filmora and download its latest version, V13. Launch it in your system and access its intuitive main interface. Choose “New Project” from its home screen and enter in the editing screen. Press your keyboard’s “Ctrl + I” keys and import your desired file in Filmora.
Step 2: Use the Optical Flow Option and Slow Down the Video Speed
Drag and drop the imported video in the timeline section. Place your cursor on that video and right-click on it. Hit the “Uniform Speed” option from the displayed list and direct toward the right-side editing panel. There, use the “Speed” slider and slow down the video as required. Move downward and extend the “AI Frame Interpolation” menu to pick the “Optical Flow.”
Step 3: Preview the Results to Export or Continue to Edit
Finally, get a preview of a slower but high-quality video by pressing the “Space” key. Afterward, if you are satisfied with the results, move to the “Export” option at the top right. Now, set the output settings based on how you want to save the video. Finally, press the “Export” button to save the results on your system.
Conclusion
To summarize, the GoPro camera is available in the market to capture slow-motion shots. On the other hand, GoPro Quik is an editing tool that has been popular for a decade. Many users are unaware of the latest video editing software, Wondershare Filmora. It is an AI-powered platform that has proven to be better than GoPro slow-motion, as discussed above.
33 Best Video Splitter Recommended
A video splitter is necessary when you need to extract a crucial or particular portion of a video file. Many users trim or reduce video segments by deleting superfluous or undesired elements. While splitting a video into smaller clips is a challenging task in and of itself, don’t overlook the importance of keeping the quality of the video clip you plan to obtain. While there are various online video splitter software available today, most of them do not achieve what they claim. We’ve put together a compelling list of the best video splitters in this post, including full-featured software and lightweight editing solutions. Continue reading to learn more about them and choose the one that most appeals to you.
- Filmora
- Boilsoft Video Splitter
- Solveigmm Video Splitter
- BandiCut
- Free Video Cutter
- Easy Video Splitter
- Avidemux
- Ultra Video Splitter
- VideoPad Video Editor
- Windows Movie Maker
- Windows Photos
- VLC
- iMovie
- Format Factory
- 7 Best Free Video Splitter Online
- 10 Best Video Splitter for Mobile Phone
- Filmora
- AndroVid Video Editor
- Easy Video Cutter
- Video Editor
- VideoShow – Video Editor
- Trim Video
- Video Splitter
- Crop video
- Video Crop
- Video Trim & Cut
Part 1: Backup Your Original Video
Making several backups is perhaps the most critical thing you can do for your project. Whether your computer dies suddenly or your editing application crashes, you’ll have a point to fall back on if you have a backup. Making this a habit will save you a lot of time and work in the long term. How many copies of your data should you make? You should create at least three project duplicates in the best-case scenario. Also, make sure they’re preserved in various formats and places—one on an SD card, another on a hard drive, or a USB drive.
14 Best Video Splitter for Windows/Mac
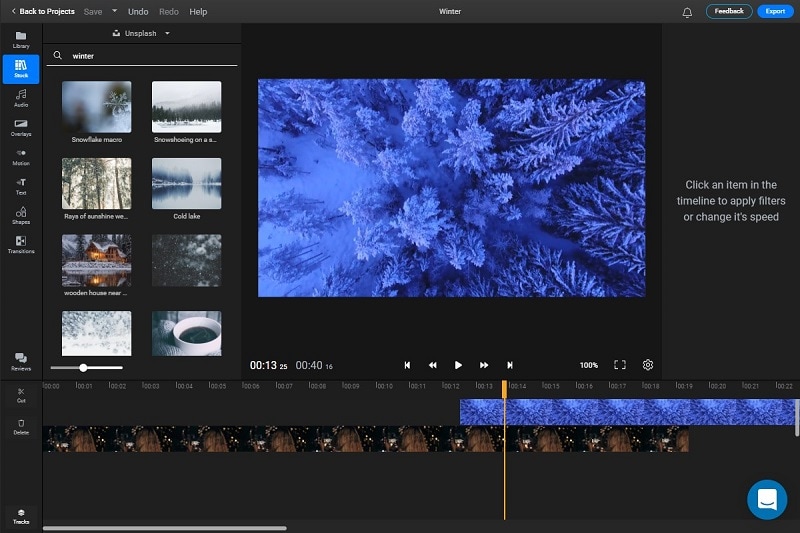
1. Filmora
Wondershare Filmora Video Editor is a superb video editor for those seeking software that can split videos and has a lot of functions. It was originally only accessible for Windows, but thanks to the developers, Mac users may now use this high-quality video splitter. Using this program to split and join videos is pretty basic and straightforward. It’s an intriguing tool since it allows users to produce high-quality films using filters, effects, and other features in an easier method than employing professional editors. This program also lets you export video at a breakneck speed, up to 4k quality.
![]()
Platform: Windows/Mac
Price: Free Trial
Features
- Editing is intuitive and quick.
- Export video in 4k quality.
- There are several graphic effects and transitions.
- Footage from the internet.
- Regularly upgraded features.
Pros
- Large films can be easily cut, trimmed, and combined without compromising quality.
- On the exported video, there is no watermark.
- Both Windows and Mac computers are supported.
- Splitting a video is such a breeze.
- For novices, it has a lot of handy options that will help you create a stunning film.
Cons
- Large-scale content editing might be slow at times.
2. Boilsoft Video Splitter
Boilsoft Video Splitter can divide, edit, or trim a big AVI, MPEG, RM, ASF, WMV, 3GP, MKV, FLV, or MP4 video file without re-encoding smaller video segments. It has a built-in player that allows you to effortlessly split/cut video files according to time or selection.
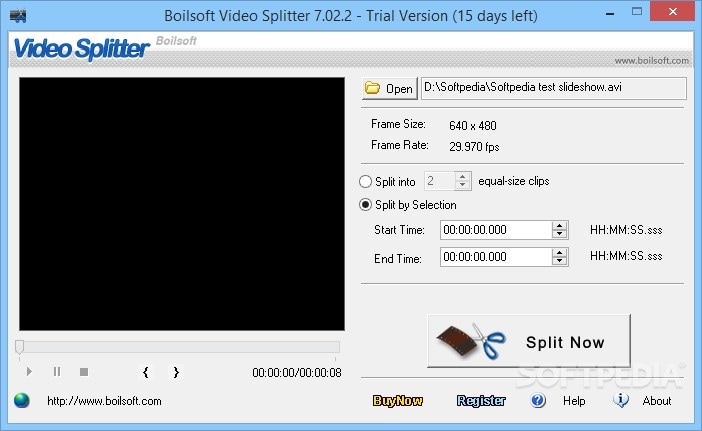
Platform: Windows/Mac
Price:$34.95 one-time payment
Features
- Split Video
- Cut video
- Built-in player
Pros
- It supports lots of video format.
- User-friendly software.
Cons
- Because you can’t adjust the program window, using the slider for selection becomes increasingly difficult as your video becomes longer.
3. Solveigmm Video Splitter
SolveigMM Video Splitter is suitable for simple editing processes such as removing an extra section from a video, removing an advertisement from a movie, muting the sound on a selected video fragment, saving only a video or audio track from a file, cutting a video into parts, saving segments into separate files, and so on. The editing procedure takes just a few seconds.
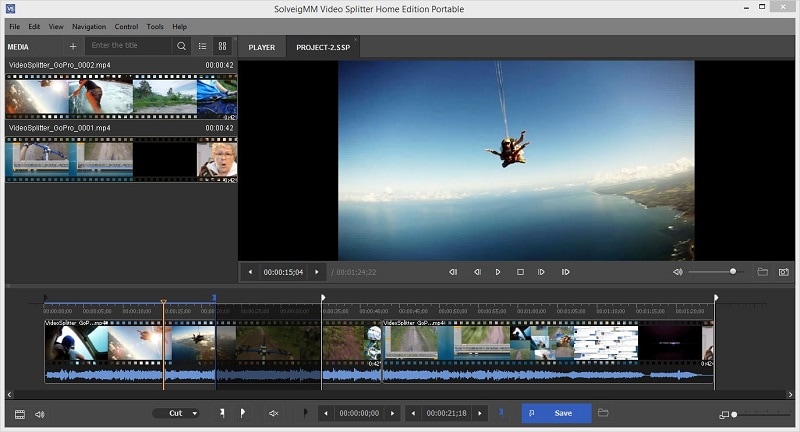
Platform: Windows/Mac
Price:$7.99 per month
Features
- Video cutter
- Video editor
- Video Joiner
Pros
- No previous training or knowledge is necessary to understand how to use the software.
- All major file formats are supported.
- The output file quality is unaffected.
Cons
- It sometimes crashes depending on the file size.
4. BandiCut
Bandicut is a video splitting and joining program for Windows systems only. It has a straightforward UI and simple settings. It may also be used as a video converter, allowing you to modify the format of the output clips. The tool is useful for both newcomers and seasoned users.
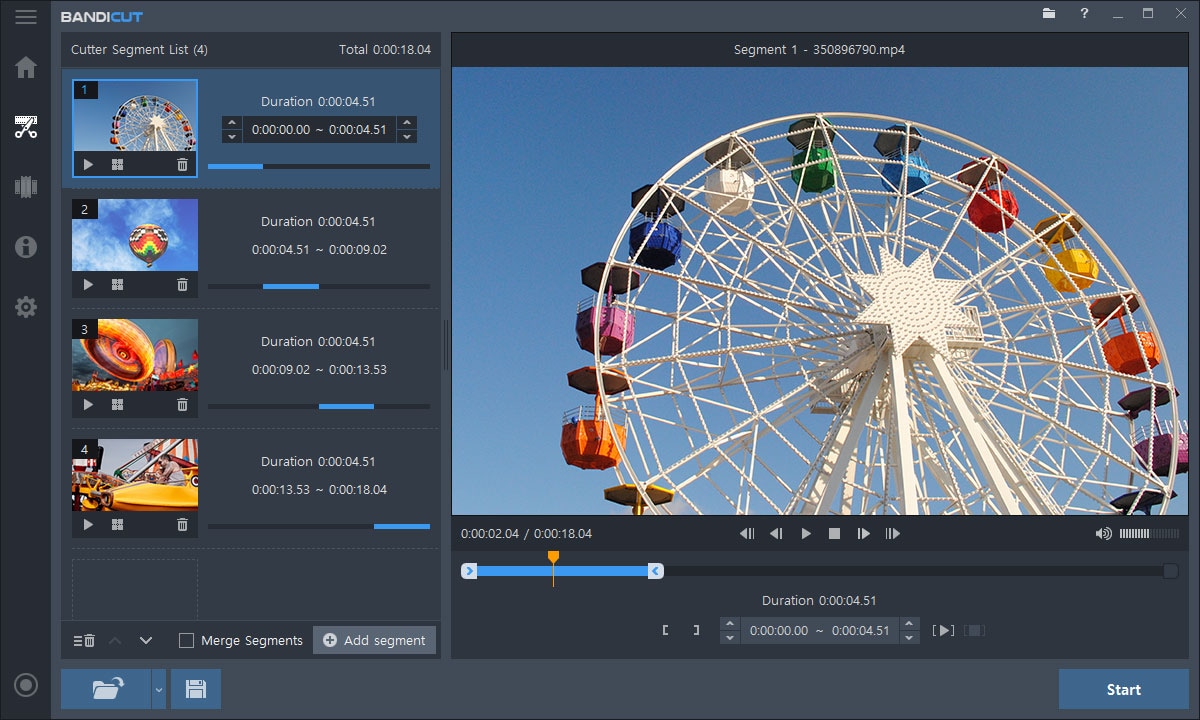
Platform: Windows
Price:$29.95 per user per month
Features
- Easy and fast video cutter
- Video splitter
Pros
- The interface is pleasing to the eye, and the functions are simple.
- High-capacity mode
Cons
- There isn’t a fully working free version available.
5. Free Video Cutter
This is a basic tool for reducing the size of large video files. It allows you to cut a clip from a movie or video in various formats and save it in four other formats. The hand-drawn interface, by the way, is incredibly charming.
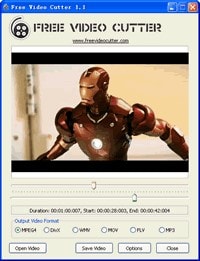
Platform: Windows
**Price:**a free version and premium version ($17.99 per month)
Features
- An irregularly shaped hand-drawn art style interface.
- Videos in a variety of formats are accepted.
- The control panel is small, with just three major buttons.
Pros
- Save as new videos in a variety of formats without compromising quality.
- It may be used to trim lengthy movies, mobile videos, and camera recordings, among other things.
Cons
- For huge files, there are a lot of crashes.
- For Mac users, this tool is not accessible.
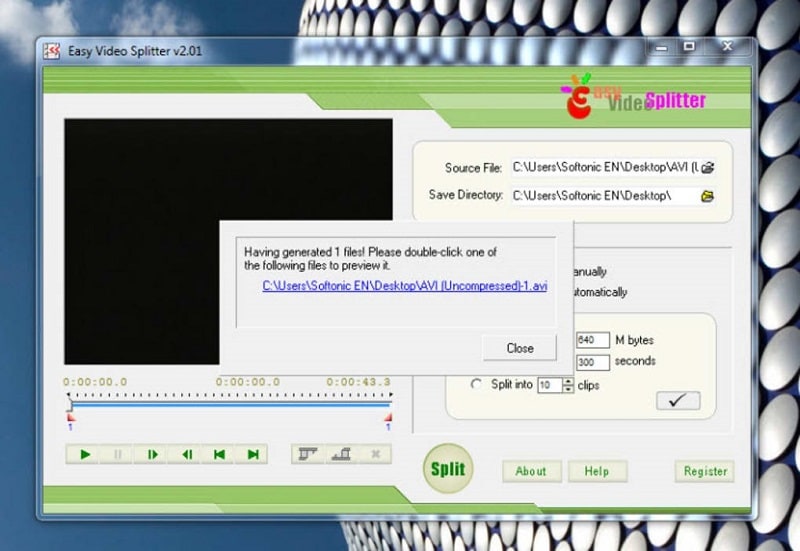
6. Easy Video Splitter
Easy Video Splitter is a simple video editing application that allows you to divide your video into many segments. It can play AVI, MPEG, WMV, and ASF files. The scroll bats may be used to cut the movie precisely where you want it to be cut or to divide the film at certain intervals.
**Platform:**Windows/Mac
**Price:**free with ads
Features
- Has a batch processor
- Multiple file support
- Easy to use
Pros
- Batch processing is supported.
Cons
- Only one frame at a time may be fine-tuned.
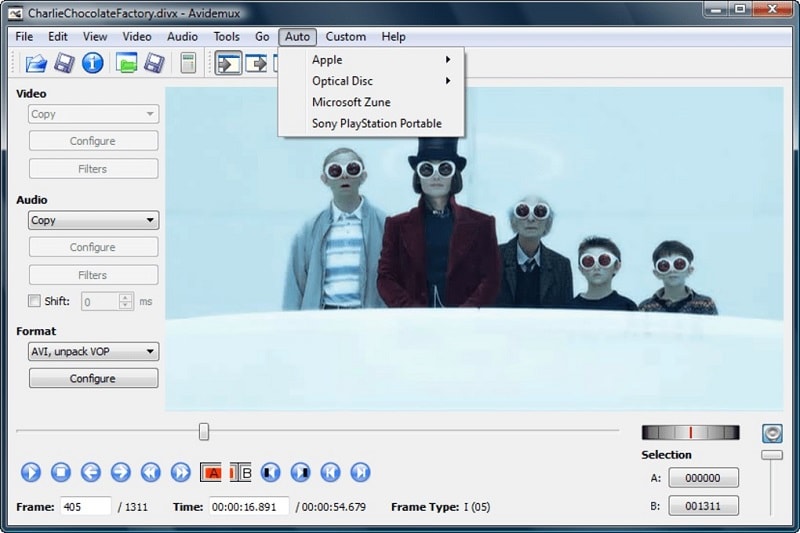
7. Avidemux
Avidemux is perfect if you have a video to encode or arrange for a certain speaker system. It’s also an ideal choice if you just require a basic video editor, although there are many more extensive applications available that may be better appropriate.
**Platform:**Windows/Mac
**Price:**free
Features
- This program can handle a variety of subtitle formats, including SUB and SRT.
- They also provide a variety of filtering options.
- You may export videos in various formats, including MKV, MPEG, and MP4.
Pros
- A user-friendly interface
- Excellent alternatives for encoding
- Filters for sharpening and de-noising
Cons
- There is no timeline.
- There are no innovative transitions or effects.
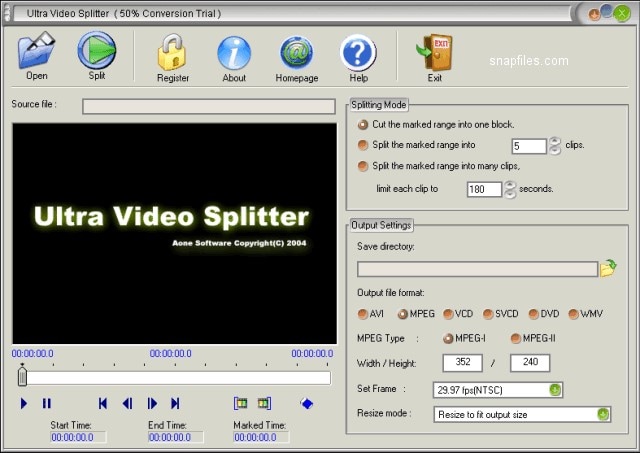
8. Ultra Video Splitter
Ultra Video Splitter is an excellent solution for people who just need to complete this one operation and hence do not need the usage of sophisticated video editing software. The tool enables you to choose from a variety of parameters for the final file or files, such as file size, final format, and bitrate.
**Platform:**Windows/Mac
Price:$25.00 one-time payment
Features
- Supports videos in WMV, XviD, MPEG, ASF, AVI, RM, MOV, 3GP, Divx, and MP4 format.
- Can export the final video in VCD, SVCD, DVD, AVI, DivX, MPEG, or WMV format.
Pros
- Video trimming and exporting are both quick.
- Multiple video formats are supported.
Cons
- Has just a few video editing options.
9. VideoPad Video Editor
On Mac and Windows, the VideoPad video editor allows you to edit clips and produce professional-quality films. Its divide and merge functions are also straightforward to utilize. VideoPad editing software can be used to create visually appealing videos. As a result, the video splitter software for Mac can rapidly and efficiently manipulate video streams.
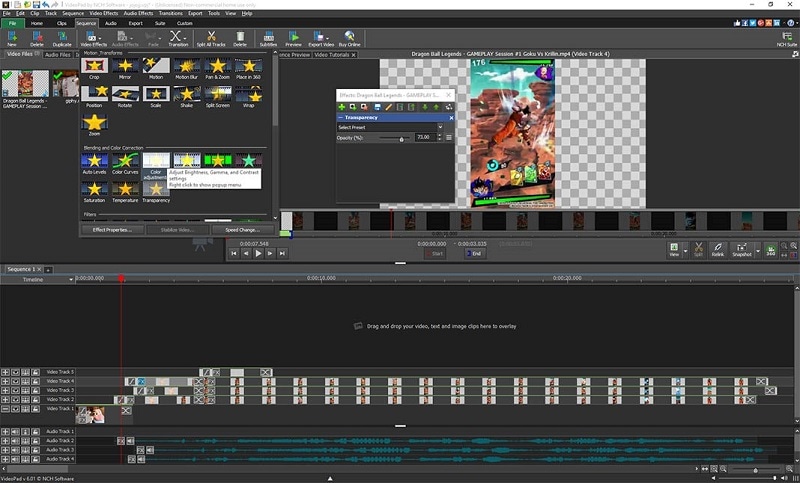
**Platform:**Windows/Mac
Price:$60.00 one-time payment
Features
- It supports a variety of file formats, offering users additional choices for how to utilize the tool with different file kinds.
Pros
- The cost of a professional business video is surprisingly low.
- Importing video is as simple as dragging and dropping.
Cons
- The free edition offers a restricted number of functions.
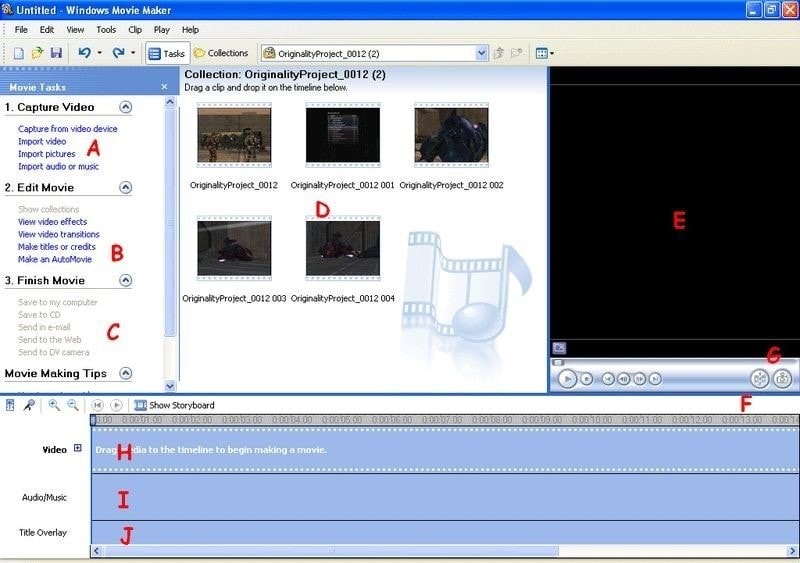
10. Windows Movie Maker
This video editing software comes with Windows OS and is focused on simplicity: There’s no easier method to split videos and save into lossless codecs with titles, transitions, background music, and effects than this. Earlier versions of the application were so basic that they couldn’t accomplish what most people required. Still, over time, features like voiceover recording and even anti-shake have crept into what is today a highly useful free video splitter.
**Platform:**Windows
**Price:**free
Features
- Cool transitions
- Effects on video
- Voiceovers are some of the audio features
Pros
- Effects are automatically previewed.
- Audio features such as voiceovers and other audio enhancements.
- Excellent choices for sharing.
- Simple to use
- Stabilization.
Cons
- There are no modifications to the contrast or saturation.
- The effects aren’t flexible.
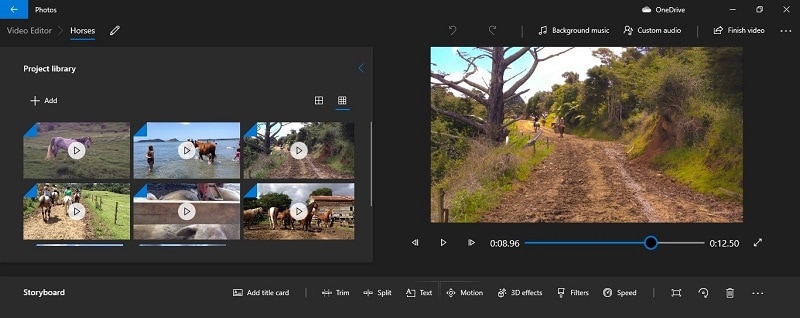
11. Windows Photos
Many users will never require more than Windows 10’s built-in picture and video editor . It is an automatic video splitter with sophisticated effects like 3D overlays and animated titles are among the extras.
**Platform:**Windows
**Price:**free
Features
- Face recognition
- Video cutter
- 3D overlays
Pros
- A simple interface.
- Detecting faces and objects.
- Album creation is done automatically.
- It works with OneDrive.
- Soundtracks, text, and transitions are all used in video editing.
Cons
- There isn’t a before-and-after comparison.
- Panorama stitching and selective focus are not supported.
- There is no geometry correction or chromatic aberration correction.
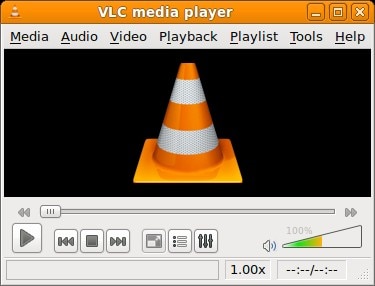
12. VLC
VLC Media Player , for good reasons, is a hugely popular video splitter. It is completely free, supports almost everything without the need to download additional codecs, supports streaming, can enhance video and audio playback for your chosen device, and can be extended almost infinitely with plugins downloadable from the internet.
**Platform:**Windows/Mac
**Price:**free
Features
- Allows streaming of MPEG and DivX files
- Excellent video and audio playback modifying tools
Pros
- It can play all kinds of music and video formats, even compressed ones.
Cons
- It is GPU-dependent and may crash at random moments.
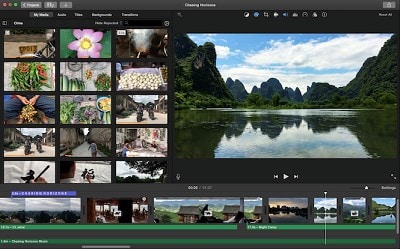
13. iMovie
If you’re using a Mac,iMovie video editing program can help you split videos. Mac users will find this to be one of the finest video splitters available. It contains a wide range of capabilities that may improve the quality of your video in a variety of ways. The video may be trimmed and enhanced with many features, such as text, special effects, and audio. Video quality may be improved with this software’s special effects and video upgrades. In addition, the interface is so user-friendly that even novices may generate stunning results. On the other hand, iMovie is capable of storing 4K films.
**Platform:**Mac
**Price:**free
Features
- An easy-to-use video splitter that is already built-in
- It’s simple to use
Pros
- An easy-to-use video splitter that is already built-in
- It’s simple to use
Cons
- Uploading and exporting videos takes a long time.
14. Format Factory
Multifunctional document and multimedia processing software -Format Factory - is only available for Windows. It’s meticulously designed to keep you from getting lost in the weeds when working on any project. It is designed to be a stand-alone file management application, and judging by the wealth of options available, it has done an excellent job.

**Platform:**Windows
**Price:**free
Features
- Video joining and muxing are available.
- It has a screen recorder built right in.
- A built-in video player and downloader are included.
- Allows for hardware acceleration.
- Disk ripping options are provided.
- Processing may be done in a batch.
Pros
- Removes watermarks and logos.
- File formats supported include video, audio, images, and documents.
Cons
- Unnecessary software is installed when installing the program.
7 Best Free Video Splitter Online
2. VEED.IO
Veed.io is a free online video editing tool that allows anybody to make powerful movies and expand their audiences. It has several useful features, such as cutting and filtering films based on their appearance. Users may cut, add text, and draw on the videos. Veed may also be used to generate videos on social media channels.

**Price:**free
Features
- Video splitter and joiner
Pros
- Simple and quick.
- A preview of the cutting result is available.
Cons
- The maximum file size is 50 MB.
3. Flixier
Flixier is a web-based video editor that offers 1-minute exports to any device, easy collaboration, and lots of cloud storage. Flixier enables customers to export whatever video they want, independent of their technology. It keeps all stakeholders in the loop by allowing each team member and contributor to remain in sync across all platforms. Teams may interact in real time without fear of losing track of the project. Cloud storage, version history, feedback comments, sophisticated exports, and email alerts are all available. The tool supports Windows, Mac, Linux, and Chromebooks.
**Price:**free
Features
- Video splitter and joiner
Pros
- iPhone version is available.
- Automatic sound amplification.
Cons
- May seem too overloaded with functions.
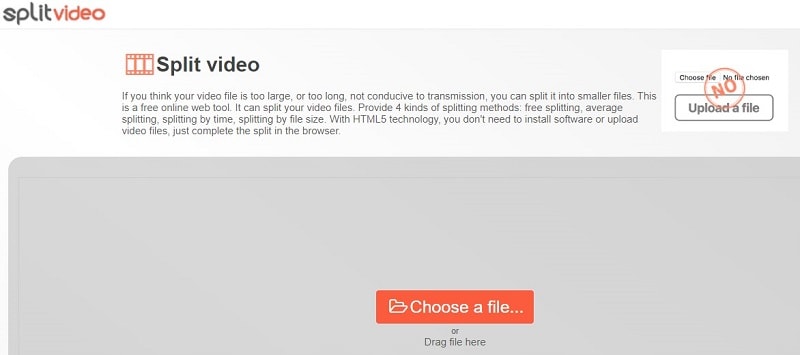
4. Split Video
Split Video program may also be used to edit and split huge videos into smaller segments. It’s quite simple to work with. All you have to do now is choose the video to divide. Tell the app how you’d want the video to be divided. Choose how many parts you want in your video. You may watch the app-split clips before sharing them.
**Price:**free
Features
- Video splitter and joiner
Pros
- Interface that is easy to use.
Cons
- The maximum file size is 200 MB.
5. Kapwing
This application primarily advertises itself as a video trimmer. It lets you edit films by removing unwanted bits and trimming them to the appropriate length. It also has some basic settings, such as utilizing it as a free online MP4 splitter. The user interface is simple, and uploading a movie takes just a few moments. The primary drawback is that your film may only be 300 MB in size and must be under 30 minutes in length.
**Price:**free
Features
- Video splitter and joiner
Pros
- Interface that is simple to use.
Cons
- A little watermark appears in the corner of your video with the free version.
- Only supports films up to 300 MB in size and up to half an hour in length.
6. Typito
Typito is a video collaboration tool that allows you and your team to work together to make better films for your business. Typito allows you to make and utilize professionally created graphic overlays for free, as well as generate full-length HR movies in both square and portrait formats. It enables you to produce movies consistent with your brand, allowing you to change and customize elements like font, color, and logo with a few mouse clicks. You may save time for your organization by producing videos quicker and working with your team to publish professional-looking films while previewing them on the move. Inviting team members to the project and assigning responsibilities for editing and reviewing videos are just a few collaboration tools.
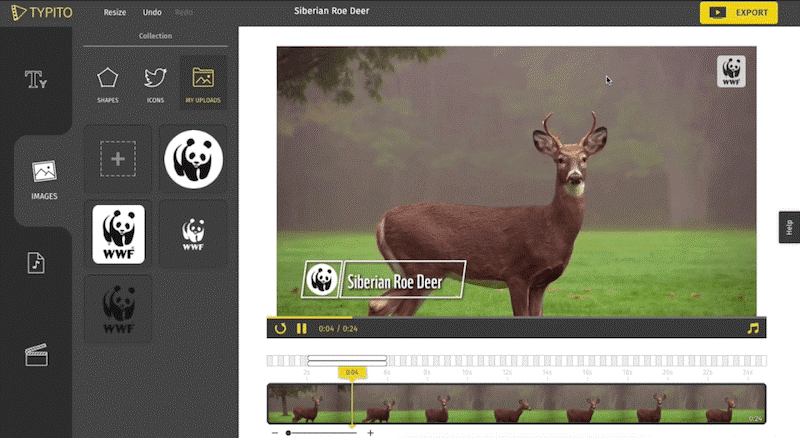
**Price:**free
Features
- Video splitter and joiner
Pros
- Simple features to use
Cons
- Few transition templates.
7. Clideo
Clideo is a one-of-a-kind platform that allows you to easily produce and modify any video, GIFS, and picture files in one spot. Merging, compressing, resizing, slideshow, cropping, rotation, and other video editing tools are included in the program. Users may add music or text to videos to help them stand out and draw in the right audience. The video editing platform supports various video formats such as MP4, AVI, MPG, VOB, WMV, MOV, and others. There is no need to download or install any applications since everything may be done entirely online. The premium security encryption that comes with it ensures that all video files are always well-protected.
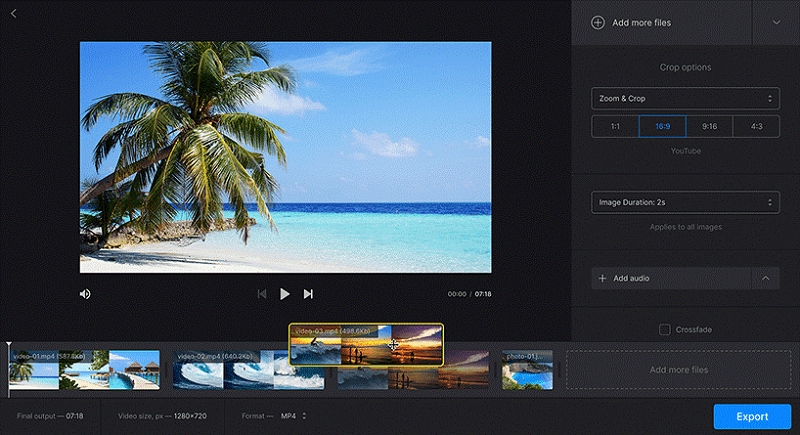
**Price:**free
Features
- Video splitter and joiner
Pros
- Much easier to use than other video editing software.
- Projects are stored on the cloud, so they don’t take up any computer resources.
- There is no need to download any program.
Cons
- The feature set is limited in comparison to other video editing suites.
- Visual artistry is required.
- Some undertakings need a significant amount of time to complete.
10 Best Video Splitter for Mobile Phone
1. Filmora
A good video editor is required to split a video qualitatively.Filmora Video Editor & Maker might be the answer. It works with high-definition videos. It comes with all of the necessary editing tools. As a result, you will not be sorry for installing this software. Not only will you be able to edit and divide films effortlessly, but you’ll also be able to add fun filters.
The sticker library in Filmora Video Editor & Maker is extensive. The number is in the thousands. You’ll be able to apply both realistic and humorous animated stickers. Use video transitions such as Flash, Page Cut, Cross Zoom, Blurry Roll, and Cube. You have complete control over the speed of your edited video.
**Price:**free
Features
- Video splitter and joiner
- Video editor
Pros
- Files may be readily exported and imported.
Cons
- Compatibility of exported videos is limited.
2. AndroVid Video Editor
AndroVid is a video-splitting program with all the tools you’ll ever need. This program is jam-packed with editing tools, allowing you to create a polished video quickly. The program is also quite user-friendly, so even if this is your first time splitting a video, you will be able to handle it.
**Platform:**Android
**Price:**free
Features
- Video splitter and joiner
- Video editor
Pros
- Simple video cutting tool; can extract single-frame pictures from videos.
Cons
- There are no sophisticated editing choices, and the audio options are quite restricted.
- There is no tool for full-screen graphics, and the user interface is a little complicated.
- The ad-free version is nearly as expensive as KineMaster Pro, which is more sophisticated.
3. Easy Video Cutter
Becausethis program is only devoted to video editing, it can handle a wide range of tasks. The program, for example, may clip videos, combine them, rotate them, and so on. You may also adjust the pace of the videos as needed. It should be noted that trimming the video in this program is quite simple — just pick the range with the slider instrument, and that’s it. Because this program is only devoted to video editing, it can handle a wide range of tasks. The program, for example, may clip videos, combine them, rotate them, and so on. You may also adjust the pace of the videos as needed. It should be noted that trimming the video in this program is quite simple — just pick the range with the slider instrument and that’s it.

**Platform:**Android
**Price:**free
Features
- Video splitter and joiner
- Video editor
Pros
- It’s quite simple to use.
- It’s ideal for simple video cutting tasks.
Cons
- There are no additional editing options available.
4. Video Editor
Video Editor is a fantastic app for Android users who want to edit and enhance their videos. It can break a video into segments, combine several films, crop videos, and adjust the video’s size. You may also add audio to the video of your choosing.
**Platform:**Android
**Price:**free
Features
- Video splitter and joiner
- Video editor
Pros
- You may rearrange your clips in any order you choose.
- Many older file types are supported by the program.
Cons
- The video scroll bar might be a little tricky to use.
- It’s quite basic.
5. VideoShow – Video Editor
On the Google Play market,VideoShow is one of the most popular video editing applications. There are several themes, filters, music, and audio to choose from while creating great videos. It’s a fantastic video trimming software.
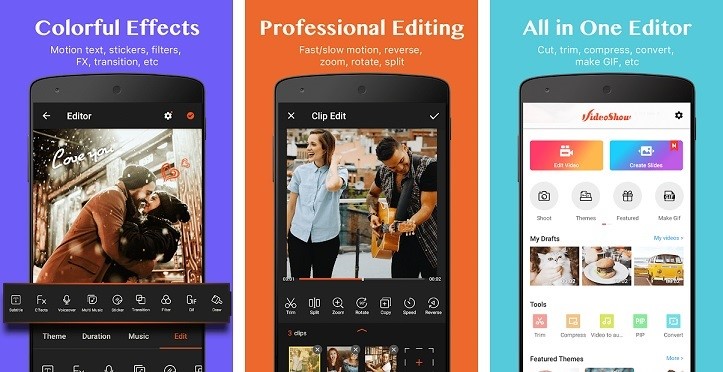
**Platform:**Android/iPhone
**Price:**free
Features
- Video splitter and joiner
- Video editor
Pros
- It has the ability to both connect and cut clips.
- It’ll run on almost any android phone.
Cons
- Video Scissors has taken the place of the iPhone version.
- Cutting is fast, but re-encoding might take a long time.
6. Trim Video
Trim Video is the greatest app for iPhone video editing and cutting of huge videos. From the huge file, you may easily crop a video clip. Although the program is highly useful and entertaining for video makers, it is not free and costs $0.99.
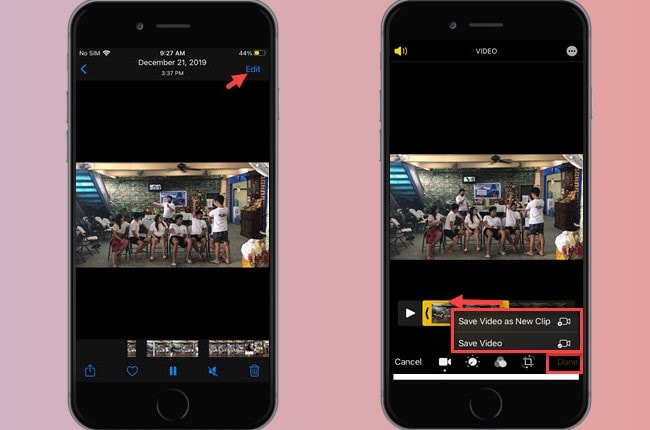
**Platform:**iPhone
Price:$0.99 per month
Features
- Video splitter
Pros
- All major video and audio formats are supported.
- When you’re finished, there’s no need to re-render the video.
- There are no watermarks.
Cons
- This software does not include video joining; it must be downloaded separately.
- This app’s main purpose is to cut.
7. Video Splitter
Video Splitter is an iPhone software that allows you to edit and divide videos into segments. It’s a free program that combines all of your editing tools into one application. The tool successfully splits a huge video into little chunks, which can be quickly texted or uploaded to social media.
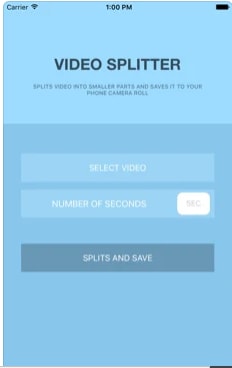
**Platform:**iPhone
**Price:**free
Features
- Video splitter and joiner
- Video editor
Pros
- A broad number of formats, including audio, are supported.
- It’s a breeze to use.
Cons
- There are no choices for video converting.
- It’s been a long time since it’s been updated.
8. Crop video
Crop Video is another handy iPhone app if you wish to cut your movie to a lesser size. It is one of the most popular tools for cutting videos and altering them for a better impact. It contains several features that boost the app’s versatility. It’ll set you back $2.99.
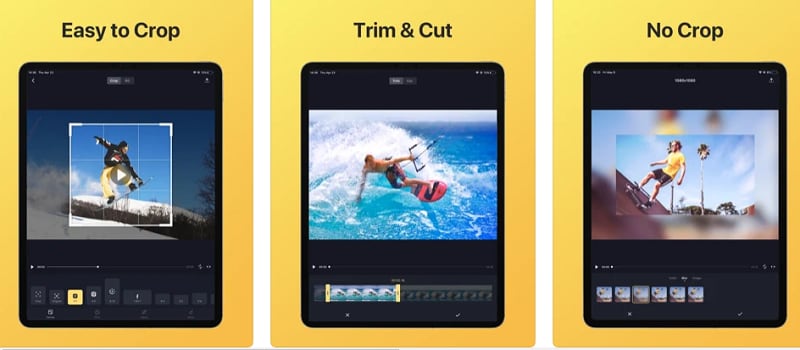
**Platform:**iPhone
Price:$2.99 per month
Features
- Video splitter and joiner
- Video editor
Pros
- The video cutter is helpful for novices.
- It works with every iPhone version.
Cons
- The free version has a lot of limitations.
- The videos of free users are watermarked.
9. Video Crop
Video Crop is a free iPhone software that allows you to crop videos. There are many more options in the software that may be used to modify and improve a video. This program has a lot of flexibility when it comes to video editing and other video settings. This program may also be used to split videos.
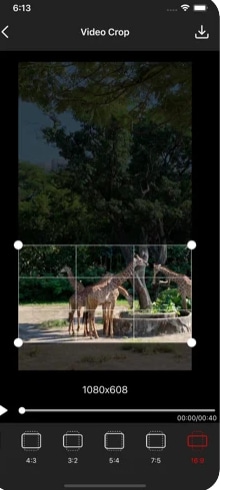
**Platform:**iPhone
**Price:**free
Features
- Video splitter and joiner
- Video editor
Pros
- Splitting and joining MP4 files is simple and effective.
Cons
- It’s only compatible with MP4 files.
- The UI is really sluggish.
10. Video Trim & Cut
Video Trim & Cut is an iPhone software that allows you to divide or trim videos. Adding effects, cropping, altering color, and changing themes are just a few things you can do with the app.
**Platform:**iPhone
**Price:**free
Features
- Video splitter and joiner
- Video editor
Pros
- Excellent templates.
- It has the appearance and functionality of a more costly app.
Cons
- It’s only available on iPhone.
- It might take a long time for a video to render.
Part 5: How to Split Video with Filmora
Step1Import your videos to Filmora Video Cutter
Launch the video cutter once it has been installed and click New Project to access the video editing interface. Now you must import the video, which must be divided into numerous portions.
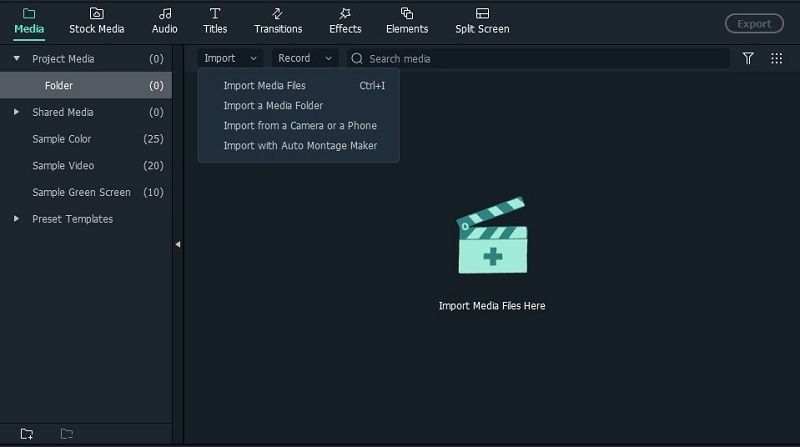
Upload files
You can either drag and drop files to the media library before adding them to the timeline for editing, or you can click “Import” on the main interface and choose files from your computer.
VOB, 3GP, 3G2, MP4, FLV, AVI, MOV, F4V, M4V, TRP, M2TS, MTS, TP, DAT, WMV, MPG, MPEG, TS, MKV, ASF, DV, EVO, MOD, NSV, and TOD files are all supported by Filmora video cutter.
If your video contains a lot of distinct sequences, Filmora can help you discover the clip you want to trim. The “Scene Detection” tool will assist you in rapidly locating the part you wish to clip. To open the Scene Detection window, choose the video in the media library (not the timeline), right-click it, and select “Scene Detection.”

Detect video
When you click Detect, Filmora will automatically split your films into multiple segments depending on scene changes.
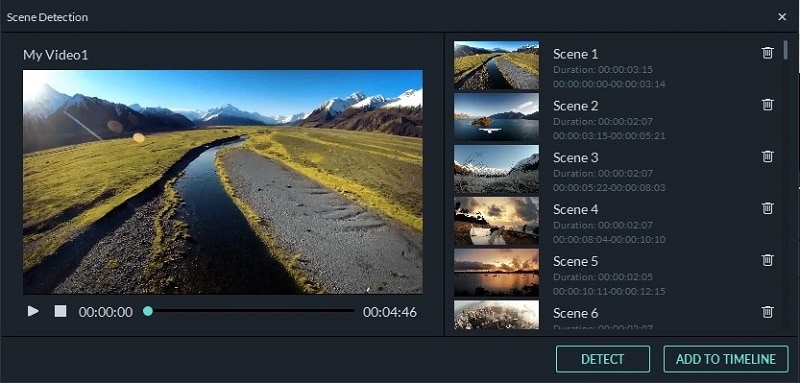
Scenes detected automatically
By clicking the Delete symbol next to the clip, you may delete the undesired sequences and quickly get to the section you want. When you click the Add to Timeline button, all of the segmented video sections will be instantly imported into the timeline, which you can then modify.
Step2Manually trim/split/cut/delete videos
To trim video files, drag clips from the media library to the video track on the timeline and follow these steps. You may use the trim option to chop off the beginning or conclusion of a video swiftly.
Trim video using filmora
- i.Zoom in on the frames you wish to remove from the timeline. Drag the trim symbol to the right to remove the video’s beginning segments from the timeline or to the left to remove the video’s undesired ending segments. You may use the trim tool to cut the beginning and end parts of a sentence with a single drag.
- ii.You may edit a movie into portions, eliminate unnecessary aspects, and combine them into a new film, in addition to chopping off segments at the beginning or conclusion.
- iii.Move the play head to the beginning of the video part you want to cut, then click the Split icon (scissor icon) on the toolbar or the Split button on the play head to split the video. You will get the starting frame, then move the play head to the ending frame and click the Split button again to get the ending part.
- iv.To cut a video into many sections, repeat the procedure. You will get multiple clipped portions, which you may either remove or re-order and alter further.
- v.You may edit out an undesirable cut video by hitting the Delete symbol on the toolbar.
Add trim start and end
Step3Export your video
Click the Export button on the screen after you’ve completed cutting and basic editing. By choosing “Format” and specifying the essential options such as frame rate and resolution, you may save the video in different formats on your local computer.
If you wish to see your video production on your iPod, iPhone, or iPad, go to “Device” and choose your device’s thumbnail. You may also instantly post your films on YouTube or Vimeo, or burn them to DVDs for long-term storage.
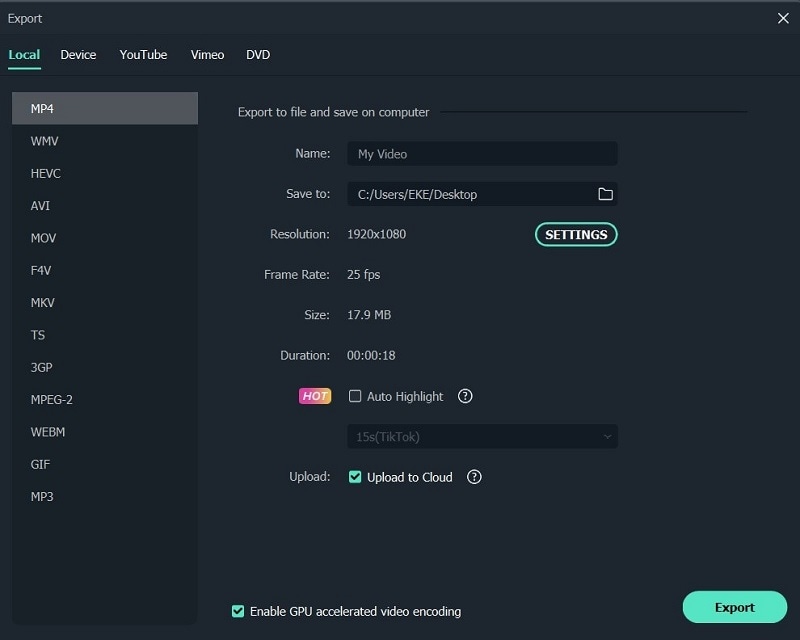
Export video after splitting
Bottom Line
Video splitting can be a daunting task when you don’t have the right tools to help you. If you are a Windows or a Mac user then Wondershare Filmora will help you split videos in just few clicks. The software is completely free with an option to go pro for a cheaper price compared to other premium apps. If you prefer splitting your video online then still Filmora online editor will help you in this. Moreover, some good news for android and iPhone users as Filmora comes with all features to split and join videos. With all these tools you can take your video creation process to the next level.
- Filmora
- AndroVid Video Editor
- Easy Video Cutter
- Video Editor
- VideoShow – Video Editor
- Trim Video
- Video Splitter
- Crop video
- Video Crop
- Video Trim & Cut
Part 1: Backup Your Original Video
Making several backups is perhaps the most critical thing you can do for your project. Whether your computer dies suddenly or your editing application crashes, you’ll have a point to fall back on if you have a backup. Making this a habit will save you a lot of time and work in the long term. How many copies of your data should you make? You should create at least three project duplicates in the best-case scenario. Also, make sure they’re preserved in various formats and places—one on an SD card, another on a hard drive, or a USB drive.
14 Best Video Splitter for Windows/Mac
1. Filmora
Wondershare Filmora Video Editor is a superb video editor for those seeking software that can split videos and has a lot of functions. It was originally only accessible for Windows, but thanks to the developers, Mac users may now use this high-quality video splitter. Using this program to split and join videos is pretty basic and straightforward. It’s an intriguing tool since it allows users to produce high-quality films using filters, effects, and other features in an easier method than employing professional editors. This program also lets you export video at a breakneck speed, up to 4k quality.
![]()
Platform: Windows/Mac
Price: Free Trial
Features
- Editing is intuitive and quick.
- Export video in 4k quality.
- There are several graphic effects and transitions.
- Footage from the internet.
- Regularly upgraded features.
Pros
- Large films can be easily cut, trimmed, and combined without compromising quality.
- On the exported video, there is no watermark.
- Both Windows and Mac computers are supported.
- Splitting a video is such a breeze.
- For novices, it has a lot of handy options that will help you create a stunning film.
Cons
- Large-scale content editing might be slow at times.
2. Boilsoft Video Splitter
Boilsoft Video Splitter can divide, edit, or trim a big AVI, MPEG, RM, ASF, WMV, 3GP, MKV, FLV, or MP4 video file without re-encoding smaller video segments. It has a built-in player that allows you to effortlessly split/cut video files according to time or selection.
Platform: Windows/Mac
Price:$34.95 one-time payment
Features
- Split Video
- Cut video
- Built-in player
Pros
- It supports lots of video format.
- User-friendly software.
Cons
- Because you can’t adjust the program window, using the slider for selection becomes increasingly difficult as your video becomes longer.
3. Solveigmm Video Splitter
SolveigMM Video Splitter is suitable for simple editing processes such as removing an extra section from a video, removing an advertisement from a movie, muting the sound on a selected video fragment, saving only a video or audio track from a file, cutting a video into parts, saving segments into separate files, and so on. The editing procedure takes just a few seconds.
Platform: Windows/Mac
Price:$7.99 per month
Features
- Video cutter
- Video editor
- Video Joiner
Pros
- No previous training or knowledge is necessary to understand how to use the software.
- All major file formats are supported.
- The output file quality is unaffected.
Cons
- It sometimes crashes depending on the file size.
4. BandiCut
Bandicut is a video splitting and joining program for Windows systems only. It has a straightforward UI and simple settings. It may also be used as a video converter, allowing you to modify the format of the output clips. The tool is useful for both newcomers and seasoned users.
Platform: Windows
Price:$29.95 per user per month
Features
- Easy and fast video cutter
- Video splitter
Pros
- The interface is pleasing to the eye, and the functions are simple.
- High-capacity mode
Cons
- There isn’t a fully working free version available.
5. Free Video Cutter
This is a basic tool for reducing the size of large video files. It allows you to cut a clip from a movie or video in various formats and save it in four other formats. The hand-drawn interface, by the way, is incredibly charming.
Platform: Windows
**Price:**a free version and premium version ($17.99 per month)
Features
- An irregularly shaped hand-drawn art style interface.
- Videos in a variety of formats are accepted.
- The control panel is small, with just three major buttons.
Pros
- Save as new videos in a variety of formats without compromising quality.
- It may be used to trim lengthy movies, mobile videos, and camera recordings, among other things.
Cons
- For huge files, there are a lot of crashes.
- For Mac users, this tool is not accessible.
6. Easy Video Splitter
Easy Video Splitter is a simple video editing application that allows you to divide your video into many segments. It can play AVI, MPEG, WMV, and ASF files. The scroll bats may be used to cut the movie precisely where you want it to be cut or to divide the film at certain intervals.
**Platform:**Windows/Mac
**Price:**free with ads
Features
- Has a batch processor
- Multiple file support
- Easy to use
Pros
- Batch processing is supported.
Cons
- Only one frame at a time may be fine-tuned.
7. Avidemux
Avidemux is perfect if you have a video to encode or arrange for a certain speaker system. It’s also an ideal choice if you just require a basic video editor, although there are many more extensive applications available that may be better appropriate.
**Platform:**Windows/Mac
**Price:**free
Features
- This program can handle a variety of subtitle formats, including SUB and SRT.
- They also provide a variety of filtering options.
- You may export videos in various formats, including MKV, MPEG, and MP4.
Pros
- A user-friendly interface
- Excellent alternatives for encoding
- Filters for sharpening and de-noising
Cons
- There is no timeline.
- There are no innovative transitions or effects.
8. Ultra Video Splitter
Ultra Video Splitter is an excellent solution for people who just need to complete this one operation and hence do not need the usage of sophisticated video editing software. The tool enables you to choose from a variety of parameters for the final file or files, such as file size, final format, and bitrate.
**Platform:**Windows/Mac
Price:$25.00 one-time payment
Features
- Supports videos in WMV, XviD, MPEG, ASF, AVI, RM, MOV, 3GP, Divx, and MP4 format.
- Can export the final video in VCD, SVCD, DVD, AVI, DivX, MPEG, or WMV format.
Pros
- Video trimming and exporting are both quick.
- Multiple video formats are supported.
Cons
- Has just a few video editing options.
9. VideoPad Video Editor
On Mac and Windows, the VideoPad video editor allows you to edit clips and produce professional-quality films. Its divide and merge functions are also straightforward to utilize. VideoPad editing software can be used to create visually appealing videos. As a result, the video splitter software for Mac can rapidly and efficiently manipulate video streams.
**Platform:**Windows/Mac
Price:$60.00 one-time payment
Features
- It supports a variety of file formats, offering users additional choices for how to utilize the tool with different file kinds.
Pros
- The cost of a professional business video is surprisingly low.
- Importing video is as simple as dragging and dropping.
Cons
- The free edition offers a restricted number of functions.
10. Windows Movie Maker
This video editing software comes with Windows OS and is focused on simplicity: There’s no easier method to split videos and save into lossless codecs with titles, transitions, background music, and effects than this. Earlier versions of the application were so basic that they couldn’t accomplish what most people required. Still, over time, features like voiceover recording and even anti-shake have crept into what is today a highly useful free video splitter.
**Platform:**Windows
**Price:**free
Features
- Cool transitions
- Effects on video
- Voiceovers are some of the audio features
Pros
- Effects are automatically previewed.
- Audio features such as voiceovers and other audio enhancements.
- Excellent choices for sharing.
- Simple to use
- Stabilization.
Cons
- There are no modifications to the contrast or saturation.
- The effects aren’t flexible.
11. Windows Photos
Many users will never require more than Windows 10’s built-in picture and video editor . It is an automatic video splitter with sophisticated effects like 3D overlays and animated titles are among the extras.
**Platform:**Windows
**Price:**free
Features
- Face recognition
- Video cutter
- 3D overlays
Pros
- A simple interface.
- Detecting faces and objects.
- Album creation is done automatically.
- It works with OneDrive.
- Soundtracks, text, and transitions are all used in video editing.
Cons
- There isn’t a before-and-after comparison.
- Panorama stitching and selective focus are not supported.
- There is no geometry correction or chromatic aberration correction.
12. VLC
VLC Media Player , for good reasons, is a hugely popular video splitter. It is completely free, supports almost everything without the need to download additional codecs, supports streaming, can enhance video and audio playback for your chosen device, and can be extended almost infinitely with plugins downloadable from the internet.
**Platform:**Windows/Mac
**Price:**free
Features
- Allows streaming of MPEG and DivX files
- Excellent video and audio playback modifying tools
Pros
- It can play all kinds of music and video formats, even compressed ones.
Cons
- It is GPU-dependent and may crash at random moments.
13. iMovie
If you’re using a Mac,iMovie video editing program can help you split videos. Mac users will find this to be one of the finest video splitters available. It contains a wide range of capabilities that may improve the quality of your video in a variety of ways. The video may be trimmed and enhanced with many features, such as text, special effects, and audio. Video quality may be improved with this software’s special effects and video upgrades. In addition, the interface is so user-friendly that even novices may generate stunning results. On the other hand, iMovie is capable of storing 4K films.
**Platform:**Mac
**Price:**free
Features
- An easy-to-use video splitter that is already built-in
- It’s simple to use
Pros
- An easy-to-use video splitter that is already built-in
- It’s simple to use
Cons
- Uploading and exporting videos takes a long time.
14. Format Factory
Multifunctional document and multimedia processing software -Format Factory - is only available for Windows. It’s meticulously designed to keep you from getting lost in the weeds when working on any project. It is designed to be a stand-alone file management application, and judging by the wealth of options available, it has done an excellent job.
**Platform:**Windows
**Price:**free
Features
- Video joining and muxing are available.
- It has a screen recorder built right in.
- A built-in video player and downloader are included.
- Allows for hardware acceleration.
- Disk ripping options are provided.
- Processing may be done in a batch.
Pros
- Removes watermarks and logos.
- File formats supported include video, audio, images, and documents.
Cons
- Unnecessary software is installed when installing the program.
7 Best Free Video Splitter Online
2. VEED.IO
Veed.io is a free online video editing tool that allows anybody to make powerful movies and expand their audiences. It has several useful features, such as cutting and filtering films based on their appearance. Users may cut, add text, and draw on the videos. Veed may also be used to generate videos on social media channels.
**Price:**free
Features
- Video splitter and joiner
Pros
- Simple and quick.
- A preview of the cutting result is available.
Cons
- The maximum file size is 50 MB.
3. Flixier
Flixier is a web-based video editor that offers 1-minute exports to any device, easy collaboration, and lots of cloud storage. Flixier enables customers to export whatever video they want, independent of their technology. It keeps all stakeholders in the loop by allowing each team member and contributor to remain in sync across all platforms. Teams may interact in real time without fear of losing track of the project. Cloud storage, version history, feedback comments, sophisticated exports, and email alerts are all available. The tool supports Windows, Mac, Linux, and Chromebooks.
**Price:**free
Features
- Video splitter and joiner
Pros
- iPhone version is available.
- Automatic sound amplification.
Cons
- May seem too overloaded with functions.
4. Split Video
Split Video program may also be used to edit and split huge videos into smaller segments. It’s quite simple to work with. All you have to do now is choose the video to divide. Tell the app how you’d want the video to be divided. Choose how many parts you want in your video. You may watch the app-split clips before sharing them.
**Price:**free
Features
- Video splitter and joiner
Pros
- Interface that is easy to use.
Cons
- The maximum file size is 200 MB.
5. Kapwing
This application primarily advertises itself as a video trimmer. It lets you edit films by removing unwanted bits and trimming them to the appropriate length. It also has some basic settings, such as utilizing it as a free online MP4 splitter. The user interface is simple, and uploading a movie takes just a few moments. The primary drawback is that your film may only be 300 MB in size and must be under 30 minutes in length.
**Price:**free
Features
- Video splitter and joiner
Pros
- Interface that is simple to use.
Cons
- A little watermark appears in the corner of your video with the free version.
- Only supports films up to 300 MB in size and up to half an hour in length.
6. Typito
Typito is a video collaboration tool that allows you and your team to work together to make better films for your business. Typito allows you to make and utilize professionally created graphic overlays for free, as well as generate full-length HR movies in both square and portrait formats. It enables you to produce movies consistent with your brand, allowing you to change and customize elements like font, color, and logo with a few mouse clicks. You may save time for your organization by producing videos quicker and working with your team to publish professional-looking films while previewing them on the move. Inviting team members to the project and assigning responsibilities for editing and reviewing videos are just a few collaboration tools.
**Price:**free
Features
- Video splitter and joiner
Pros
- Simple features to use
Cons
- Few transition templates.
7. Clideo
Clideo is a one-of-a-kind platform that allows you to easily produce and modify any video, GIFS, and picture files in one spot. Merging, compressing, resizing, slideshow, cropping, rotation, and other video editing tools are included in the program. Users may add music or text to videos to help them stand out and draw in the right audience. The video editing platform supports various video formats such as MP4, AVI, MPG, VOB, WMV, MOV, and others. There is no need to download or install any applications since everything may be done entirely online. The premium security encryption that comes with it ensures that all video files are always well-protected.
**Price:**free
Features
- Video splitter and joiner
Pros
- Much easier to use than other video editing software.
- Projects are stored on the cloud, so they don’t take up any computer resources.
- There is no need to download any program.
Cons
- The feature set is limited in comparison to other video editing suites.
- Visual artistry is required.
- Some undertakings need a significant amount of time to complete.
10 Best Video Splitter for Mobile Phone
1. Filmora
A good video editor is required to split a video qualitatively.Filmora Video Editor & Maker might be the answer. It works with high-definition videos. It comes with all of the necessary editing tools. As a result, you will not be sorry for installing this software. Not only will you be able to edit and divide films effortlessly, but you’ll also be able to add fun filters.
The sticker library in Filmora Video Editor & Maker is extensive. The number is in the thousands. You’ll be able to apply both realistic and humorous animated stickers. Use video transitions such as Flash, Page Cut, Cross Zoom, Blurry Roll, and Cube. You have complete control over the speed of your edited video.
**Price:**free
Features
- Video splitter and joiner
- Video editor
Pros
- Files may be readily exported and imported.
Cons
- Compatibility of exported videos is limited.
2. AndroVid Video Editor
AndroVid is a video-splitting program with all the tools you’ll ever need. This program is jam-packed with editing tools, allowing you to create a polished video quickly. The program is also quite user-friendly, so even if this is your first time splitting a video, you will be able to handle it.
**Platform:**Android
**Price:**free
Features
- Video splitter and joiner
- Video editor
Pros
- Simple video cutting tool; can extract single-frame pictures from videos.
Cons
- There are no sophisticated editing choices, and the audio options are quite restricted.
- There is no tool for full-screen graphics, and the user interface is a little complicated.
- The ad-free version is nearly as expensive as KineMaster Pro, which is more sophisticated.
3. Easy Video Cutter
Becausethis program is only devoted to video editing, it can handle a wide range of tasks. The program, for example, may clip videos, combine them, rotate them, and so on. You may also adjust the pace of the videos as needed. It should be noted that trimming the video in this program is quite simple — just pick the range with the slider instrument, and that’s it. Because this program is only devoted to video editing, it can handle a wide range of tasks. The program, for example, may clip videos, combine them, rotate them, and so on. You may also adjust the pace of the videos as needed. It should be noted that trimming the video in this program is quite simple — just pick the range with the slider instrument and that’s it.
**Platform:**Android
**Price:**free
Features
- Video splitter and joiner
- Video editor
Pros
- It’s quite simple to use.
- It’s ideal for simple video cutting tasks.
Cons
- There are no additional editing options available.
4. Video Editor
Video Editor is a fantastic app for Android users who want to edit and enhance their videos. It can break a video into segments, combine several films, crop videos, and adjust the video’s size. You may also add audio to the video of your choosing.
**Platform:**Android
**Price:**free
Features
- Video splitter and joiner
- Video editor
Pros
- You may rearrange your clips in any order you choose.
- Many older file types are supported by the program.
Cons
- The video scroll bar might be a little tricky to use.
- It’s quite basic.
5. VideoShow – Video Editor
On the Google Play market,VideoShow is one of the most popular video editing applications. There are several themes, filters, music, and audio to choose from while creating great videos. It’s a fantastic video trimming software.
**Platform:**Android/iPhone
**Price:**free
Features
- Video splitter and joiner
- Video editor
Pros
- It has the ability to both connect and cut clips.
- It’ll run on almost any android phone.
Cons
- Video Scissors has taken the place of the iPhone version.
- Cutting is fast, but re-encoding might take a long time.
6. Trim Video
Trim Video is the greatest app for iPhone video editing and cutting of huge videos. From the huge file, you may easily crop a video clip. Although the program is highly useful and entertaining for video makers, it is not free and costs $0.99.
**Platform:**iPhone
Price:$0.99 per month
Features
- Video splitter
Pros
- All major video and audio formats are supported.
- When you’re finished, there’s no need to re-render the video.
- There are no watermarks.
Cons
- This software does not include video joining; it must be downloaded separately.
- This app’s main purpose is to cut.
7. Video Splitter
Video Splitter is an iPhone software that allows you to edit and divide videos into segments. It’s a free program that combines all of your editing tools into one application. The tool successfully splits a huge video into little chunks, which can be quickly texted or uploaded to social media.
**Platform:**iPhone
**Price:**free
Features
- Video splitter and joiner
- Video editor
Pros
- A broad number of formats, including audio, are supported.
- It’s a breeze to use.
Cons
- There are no choices for video converting.
- It’s been a long time since it’s been updated.
8. Crop video
Crop Video is another handy iPhone app if you wish to cut your movie to a lesser size. It is one of the most popular tools for cutting videos and altering them for a better impact. It contains several features that boost the app’s versatility. It’ll set you back $2.99.
**Platform:**iPhone
Price:$2.99 per month
Features
- Video splitter and joiner
- Video editor
Pros
- The video cutter is helpful for novices.
- It works with every iPhone version.
Cons
- The free version has a lot of limitations.
- The videos of free users are watermarked.
9. Video Crop
Video Crop is a free iPhone software that allows you to crop videos. There are many more options in the software that may be used to modify and improve a video. This program has a lot of flexibility when it comes to video editing and other video settings. This program may also be used to split videos.
**Platform:**iPhone
**Price:**free
Features
- Video splitter and joiner
- Video editor
Pros
- Splitting and joining MP4 files is simple and effective.
Cons
- It’s only compatible with MP4 files.
- The UI is really sluggish.
10. Video Trim & Cut
Video Trim & Cut is an iPhone software that allows you to divide or trim videos. Adding effects, cropping, altering color, and changing themes are just a few things you can do with the app.
**Platform:**iPhone
**Price:**free
Features
- Video splitter and joiner
- Video editor
Pros
- Excellent templates.
- It has the appearance and functionality of a more costly app.
Cons
- It’s only available on iPhone.
- It might take a long time for a video to render.
Part 5: How to Split Video with Filmora
Step1Import your videos to Filmora Video Cutter
Launch the video cutter once it has been installed and click New Project to access the video editing interface. Now you must import the video, which must be divided into numerous portions.
Upload files
You can either drag and drop files to the media library before adding them to the timeline for editing, or you can click “Import” on the main interface and choose files from your computer.
VOB, 3GP, 3G2, MP4, FLV, AVI, MOV, F4V, M4V, TRP, M2TS, MTS, TP, DAT, WMV, MPG, MPEG, TS, MKV, ASF, DV, EVO, MOD, NSV, and TOD files are all supported by Filmora video cutter.
If your video contains a lot of distinct sequences, Filmora can help you discover the clip you want to trim. The “Scene Detection” tool will assist you in rapidly locating the part you wish to clip. To open the Scene Detection window, choose the video in the media library (not the timeline), right-click it, and select “Scene Detection.”
Detect video
When you click Detect, Filmora will automatically split your films into multiple segments depending on scene changes.
Scenes detected automatically
By clicking the Delete symbol next to the clip, you may delete the undesired sequences and quickly get to the section you want. When you click the Add to Timeline button, all of the segmented video sections will be instantly imported into the timeline, which you can then modify.
Step2Manually trim/split/cut/delete videos
To trim video files, drag clips from the media library to the video track on the timeline and follow these steps. You may use the trim option to chop off the beginning or conclusion of a video swiftly.
Trim video using filmora
- i.Zoom in on the frames you wish to remove from the timeline. Drag the trim symbol to the right to remove the video’s beginning segments from the timeline or to the left to remove the video’s undesired ending segments. You may use the trim tool to cut the beginning and end parts of a sentence with a single drag.
- ii.You may edit a movie into portions, eliminate unnecessary aspects, and combine them into a new film, in addition to chopping off segments at the beginning or conclusion.
- iii.Move the play head to the beginning of the video part you want to cut, then click the Split icon (scissor icon) on the toolbar or the Split button on the play head to split the video. You will get the starting frame, then move the play head to the ending frame and click the Split button again to get the ending part.
- iv.To cut a video into many sections, repeat the procedure. You will get multiple clipped portions, which you may either remove or re-order and alter further.
- v.You may edit out an undesirable cut video by hitting the Delete symbol on the toolbar.
Add trim start and end
Step3Export your video
Click the Export button on the screen after you’ve completed cutting and basic editing. By choosing “Format” and specifying the essential options such as frame rate and resolution, you may save the video in different formats on your local computer.
If you wish to see your video production on your iPod, iPhone, or iPad, go to “Device” and choose your device’s thumbnail. You may also instantly post your films on YouTube or Vimeo, or burn them to DVDs for long-term storage.
Export video after splitting
Bottom Line
Video splitting can be a daunting task when you don’t have the right tools to help you. If you are a Windows or a Mac user then Wondershare Filmora will help you split videos in just few clicks. The software is completely free with an option to go pro for a cheaper price compared to other premium apps. If you prefer splitting your video online then still Filmora online editor will help you in this. Moreover, some good news for android and iPhone users as Filmora comes with all features to split and join videos. With all these tools you can take your video creation process to the next level.
Also read:
- New Looking For the Best VHS Video Effect Makers? Get To Know the Top List for 2024
- Want to Imbibe Your Graphic Expertise with Designing Classic iMovie Presentations? Be Here to Work Through the Process Within the Quickest Possible Time Span for 2024
- New Want to Immediately Know All About Discord GIF?
- How to Loop a Video with iMovie on Mac and iPhone for 2024
- New How to Create a Dynamic Text Animation in Filmora — Step-By-Step for 2024
- New Easy Ways to Remove Motion Blur In Photoshop for 2024
- AR Is a Trend These Days. Here, You Can Browse the List of Top 10 Picks for AR Video Editing Apps
- Confused as to How to Add Subtitles to a Video on iPhone? No Worries as We Bring You the Best Solution to Get the Task Done for 2024
- New In 2024, How to Combine Videos Into One on Instagram
- New Quickly Turn Any Video Into a Paper Rip Effect
- New In 2024, Find The Best LUTs for Lightroom
- 2024 Approved Convert Time-Lapse to Normal Video
- How to Resize FLV Videos Efficiently Windows, Mac,Android, iPhone & Online
- 2024 Approved How To Unlink Audio and Video in DaVinci Resolve
- In 2024, Top Photo Video Maker Apps with Song
- Easy Ways to Create Procreate GIFs for 2024
- New 7 Best Green Screen Software for Beginners on Mac for 2024
- 2024 Approved How to Make Boring Videos Look Cool By B Rolls
- What Are the 10 Best GIF Creator, In 2024
- New Top List Best VHS Sound Effect That You Can Use in Video Making for 2024
- New What You Should Know About Speech-to-Text Technology for 2024
- New Every Compositor Should Know The Trick of Color Match in After Effects for 2024
- New Convert Time-Lapse to Normal Video for 2024
- AVI Editor for Windows 11/10/8.1/8/7 Easily Edit AVI Files on PC
- New Mastering OpenCV Object Tracking A Comprehensive Guide for Beginners and Experts
- The Best Way to Remove Audio From Your Videos for 2024
- New Add Text Animation to A Video Online for 2024
- Updated 2024 Approved Updated 8 Ways to Merge SRT with MP4
- Boost the Pace of Your Instagram Reels Videos with These Simple Tricks
- In 2024, As an Online Marketer, It Is Important to Know the Algorithm of YouTube Platform. Ill Share You the History of Algorithm of YouTube and the New Changes in This Year
- Updated How Can You Deny These Top 10 Free Speech to Text Software for 2024
- In 2024, Slow Motion Videos Are Taking over Social Media and Becoming a New Trend. Read This Article if You Want to Learn How to Slow Down Video in After Effects
- Updated Deleting White Background in Photoshop Is Hard?
- New 2024 Approved How to Add Motion Blur in After Effects
- New Premiere Pro Slow Playback Issues Finding The Best Solutions
- Cropping Videos in VLC Step by Step for 2024
- Updated 2024 Approved How to Cut Videos on Mac without Using FFmpeg?
- 2024 Approved Step by Step to Crop Videos Using Lightworks
- In 2024, Best Photo Video Maker Apps with Song PC, Mobile, Online
- Want to Play a Video on Loop on Vimeo so that It Plays Again and Again? Here Are All the Different Ways to Loop a Video on Vimeo in Simple Steps
- New Change Video Speed with FFmpeg for 2024
- Updated Creating Testimonial Videos For Health And Wellness Business Industry for 2024
- Ideas to Make A Perfect Café Vlog
- 2024 Approved Slideshow Makers Are On-Demand as They Come with Multiple Possibilities for Both Professional and Personal Uses. Gradually, the Best Software to Make Slideshows Is Always Welcomed to Save Time and Effort without Compromising the Quality
- New How To Brighten Video In Premiere Pro | Step By Step Guide
- In 2024, 6 Tips for Your First Facebook Ads
- Updated How to Add Subtitles in QuickTime Player, In 2024
- Updated What Is the Best FPS for YouTube Videos, In 2024
- Fast Method to Match Color in Photoshop
- In 2024, How to Convert Videos to Slow Motion?
- How to Retrieve Deleted Calendar Events iPhone SE (2022)? | Stellar
- 3 Effective Methods to Fake GPS location on Android For your Tecno Camon 20 | Dr.fone
- Sim Unlock Samsung Galaxy S23 Tactical Edition Phones without Code 2 Ways to Remove Android Sim Lock
- How to Reset a Nubia Phone that is Locked?
- How To Change Your SIM PIN Code on Your OnePlus Nord CE 3 Lite 5G Phone
- How to convert AVCHD MTS to MP4 for Samsung Galaxy S24+?
- How Can I Unlock My iPhone 11 Pro Max After Forgetting my PIN Code?
- Updated How To Easily Use Korean to English Video Translators for 2024
- What is Fake GPS Location Pro and Is It Good On Lenovo ThinkPhone? | Dr.fone
- How Can I Recover Corrupted PDF v1.4 File
- How to Upgrade iPhone 7 to the Latest iOS/iPadOS Version? | Dr.fone
- How to Lock Apps on Xiaomi Redmi Note 12T Pro to Protect Your Individual Information
- In 2024, How to Bypass Google FRP Lock on Huawei Devices
- In 2024, 5 Easy Ways to Copy Contacts from Samsung Galaxy S23+ to iPhone 14 and 15 | Dr.fone
- Google Play Services Wont Update? 12 Fixes are Here on Itel P55+ | Dr.fone
- In 2024, How to Fake Snapchat Location on Vivo X90S | Dr.fone
- Things You Dont Know About Infinix Note 30 5G Reset Code | Dr.fone
- A Step-by-Step Guide on Using ADB and Fastboot to Remove FRP Lock from your Xiaomi Redmi Note 12 Pro 5G
- Best Pokemons for PVP Matches in Pokemon Go For Samsung Galaxy Z Flip 5 | Dr.fone
- How to Change Your Honor 70 Lite 5G Location on life360 Without Anyone Knowing? | Dr.fone
- In 2024, How To Change Country on App Store for Apple iPhone 14 Pro With 7 Methods
- How to Track WhatsApp Messages on Motorola Edge 40 Pro Without Them Knowing? | Dr.fone
- Best Motorola Moto G13 Pattern Lock Removal Tools Remove Android Pattern Lock Without Losing Data
- Here Are Some Reliable Ways to Get Pokemon Go Friend Codes For Honor Play 40C | Dr.fone
- In 2024, Easy Ways to Manage Your Samsung Galaxy A54 5G Location Settings | Dr.fone
- In 2024, Change Location on Yik Yak For your OnePlus Open to Enjoy More Fun | Dr.fone
- In 2024, How To Bypass Vivo Y100t FRP In 3 Different Ways
- Simple and Effective Ways to Change Your Country on YouTube App Of your Realme 12 Pro+ 5G | Dr.fone
- Solved Warning Camera Failed on Vivo Y100i Power 5G | Dr.fone
- How to rescue lost call logs from Oppo
- Fixed Excel 2007 VBA Runtime Error 9 Subscript Out of Range
- In 2024, How to Track a Lost OnePlus Nord CE 3 Lite 5G for Free? | Dr.fone
- New In 2024, Adobe Animate Riggings PROPER Tutorial for You
- AddROM Bypass An Android Tool to Unlock FRP Lock Screen For your Itel S23
- 2024 Approved Revolutionizing Communication Real-Time AI Voice Changer
- In 2024, How to Unlock iCloud lock on your Apple iPhone 13 and iPad?
- Title: New How to Livestream Zoom on Facebook?
- Author: Chloe
- Created at : 2024-05-20 03:37:52
- Updated at : 2024-05-21 03:37:52
- Link: https://ai-editing-video.techidaily.com/new-how-to-livestream-zoom-on-facebook/
- License: This work is licensed under CC BY-NC-SA 4.0.
