
:max_bytes(150000):strip_icc():format(webp)/ArtificalIntelligenceChatbotConcept-c0e491e36fae46ef84b670334af5095f.jpg)
Updated In 2024, AVI Editors for Windows 11/10/8.1/8/7 Easily Edit AVI Files on PC
AVI Editors for Windows 11/10/8.1/8/7: Easily Edit AVI Files on PC
Video is continually changing the way we express and communicate with the world. Several people record vlogs and share them with their family and friends. The same goes for YouTubers and business owners who create videos to boost their business online. Due to this, different video editors are available for various video formats. A common video format is AVI, and if you’re wondering what the best AVI editor for different Window versions is, you’re in luck.
If you’re new to the video editing space, you might be wondering which is the best choice for your Windows format. This article explores the best AVI editors available. We cover both paid and free editors that you can use to edit AVI files on PC easily. So without further ado, let’s begin.
Best AVI Editor to Edit AVI Video on Windows - Filmroa Video Editor

Supported System: Windows and Mac
Most free editing software is usually too simple to meet your immediate demands, or they’re too challenging for you to understand the workflow. Some AVI editors for Windows lack crucial editing features like audio editing and color correction features. An AVI editor that successfully bridges the gap to become the best AVI editor for Windows on our list is Filmora Video Editor .
This editor offers excellent performance and a fast editing process that takes user experience to a new level. It is ideal for beginners because of its intuitive interface. Additionally, intermediate and professional AVI editors can also use this video editor to create stylish videos and utilize its built-in professional effects.
For Win 7 or later (64-bit)
For macOS 10.14 or later
Wondershare Filmora Features
- It is versatile and supports other video formats like MKV, MP4, MOV, etc.
- Users can crop, cut, trim, split, and combine with just a few clicks.
- Access to advanced video effects like motion elements, royalty-free music, transition, animated titles, and more
- Footage can look like Hollywood videos with Filmora color tuning features.
- With background noise removal, audio keyframing, and the audio equalizer tool, you can edit sounds.
- It provides you with real-time rending to ensure a smooth editing experience.
- You can burn videos to DVD, transfer them to various devices or upload them on YouTube or other video streaming platforms.
How to Edit Videos on Windows 11/10/8/7 Using Wondershare Filmora
Editing your videos on Filmora is relatively easy and takes just a few minutes. Keep reading to learn how to edit AVI videos on Windows 11/10/8/7 using Wondershare Filmora.
Step 1: Import AVI Video
The first step you have to take is adding the AVI video you would like to edit with Filmora. You can do this by creating a new project. Then, click on New Project on the homepage.

Once it opens a new page, click the + icon to browse the files on your device or import them from an external device.

Step 2: Edit AVI Videos
After importing your videos, you can start editing and arranging elements in your video timeline. You can overwrite, append, and carry out other editing options.

You can also add effects, titles, filters, and music using Filmora.

Step 3: Save and Share Edited AVI Video Files

Once you’re done editing your video using Filmora Video Editor, you’re ready to save your file. You can choose to save your video in a new format. There are different video formats available to choose from. You can either save it to a select location on your PC or export it to any preferred device. Filmora Video Editor also allows you to upload directly to a video streaming platform or burn to a DVD.
More Free AVI Editor for Windows to Edit AVI Videos
This section will list some of the best free AVI editors for Windows to successfully edit your AVI editors. You would have to download these programs as they offer you more editing tools than an online AVI editor.
Microsoft Windows 10/11 Photos App

Supported System: Windows
This free AVI video editor is compatible with Windows 10/11 and comes prebuilt into your Windows 10 PC. If you’re looking for free AVI editing software, this is one of the best options you would find. One of the benefits of using this AVI video editor is that it eliminates the need for additional downloads. It comes pre-installed. However, if you can’t find this Photos App on your Windows 10/11, you can download it from Microsoft Store.
It is lightweight and allows you easily edit your AVI videos. You can also convert images into an AVI video under the Automatic Video mode. This helps save time if you don’t want to do much editing. However, if there are features you would like to edit in your video, you can use the custom video mode to trim, change audio volume, resize video, and include filters, motion, text, and several 3D effects in your AVI video.
However, you should note that there’s no timeline, and there are some advanced features like video stabilization, split tools, and much more missing on this free AVI editor for Windows. However, it is versatile and supports several other video formats.
Pros
- It supports several video formats, including AVI, MPE, MPG, ASF, MP2, and many more
- It is entirely free
- Ideal for beginners with few editing needs
- There’s no need for a new download as it comes built-in
Cons
- It doesn’t support several modern file formats
- The output formats are limited
- It lacks advanced video editing features
How to Edit Using Microsoft Windows 10/11 Photos App
Editing your AVI video with Microsoft Photos App is relatively easy; follow the steps below.
- First, click the ‘add’ button in the left corner of the page and select the video you want to edit

- Next, check the media elements necessary for your video and then tap on ‘place in storyboard.’

- Now you can start editing your video. One of the ways to edit your video is to extend the duration of your video by clicking the duration button.

- You can also add motion to the video under the ‘storyboard’ section. Select the media element you would like to edit and hit the ‘motions’ button. You can then select different motion effects.

- Additionally, you can add filters under the storyboard section.

- Editors can also trim and split AVI video on this Photos app.

- Once you’re done editing, click on ‘save as’ to save your edited AVI video.
OpenShot – Open Source Video Editor

Supported System: Windows, Mac and Linus
If you want an AVI editor compatible with Windows 10/11/8/7, you should try OpenShot – Open Source Video Editor. It is ideal for carrying out basic video editing like trimming and slicing. This video editor also offers several transitions and audio effects to help you make simple videos.
There are unlimited video tracks available on OpenShot; this means you can add as many audio and video clips.
It also offers you tile templates and video formats. If you want to add more touches to your video, this free AVI editor for Windows will help you achieve that. Other impressive editing features are available on this AVI editor, like slow-motion effects, blending modes, 3D animations, and many more. Additionally, the frame and keyframes accuracy feature helps you create detailed edits. You’ll easily customize your AVI video to your preference with this platform.
When exporting your file, you can export it in varying formats. You can also upload your AVI video directly to YouTube or your social media accounts. Despite the professional-level tool, the user interface is intuitive, which simplifies the editing process. However, you might find that it lacks some of the advanced editing features you would find in other AVI editors.
Pros
- It features an intuitive user interface
- It offers several editing tools for beginners and intermediate users
- It allows you to add as many audio and video tracks as you would prefer
- It is entirely free
- There are varying output formats for your selection
Cons
- Limited advanced editing tools
- OpenShot can be slow and laggy sometimes
How to Edit AVI Video With OpenShot
Using OpenShot to edit your AVI videos is relatively easy. The steps below will explain the basics and how you can edit within minutes.
- First, you have to import your media file into OpenShot.

- Next, arrange the videos on the timeline. If two or more clips overlap, this AVI editor automatically creates a smooth fade between them.

- You can then edit using the different available tools. OpenShot also allows you to add music to the timeline.

- After editing, preview the video project and export. You can also share directly to streaming platforms like YouTube, Vimeo, and more.

VSDC Video Editor – Free Movie Editor

Supported System: Windows and Mac
This AVI video editor is designed to ensure an excelling editing process for users on Windows 10. Therefore, even beginners can utilize this video editor to edit their media projects. Although it is free, it offers powerful editing features to take your AVI video to the next level. There are many features like filters, transition effects, overlays, color correction, and many more you can use.
Although it supports AVI video files, it also supports several popular media file formats. You can also save your AVI video in a new format after editing due to its effective video converter tools. Additionally, VSDC Video Editor is a non-linear tool that allows you to easily place video clips in the timeline.
You can save your edited AVI videos to your PC or upload them directly to different video streaming platforms like YouTube, Instagram, Vimeo, etc. We also love that it allows you to edit HD and 4k videos without compromising the quality. This isn’t a common feature with most free AVI video editing software.
Pros
- It is a free video editing software for Windows 10
- It is versatile and supports different video and audio formats
- There is an excellent selection of filters, effects, and transitions
- You can convert AVI videos to a new format with its built-in video converter
- It features an intuitive interface that’s friendly to beginners
Cons
- Technical support isn’t free
- It doesn’t offer professional video editing tools
Steps to Edit AVI Videos Using VSDC Video Editor
This is a simple AVI editor to use, and the steps below simplify the process for you even further; let’s take a look.
- Firstly, import your video into the VSDC Video editor by clicking the ‘import content’ button.

- Once you choose a file on your Windows PC, the app will ask if you would like to change the resolution and several more parameters.
- You can start editing your videos with the different tools available, like cutting and splitting.

- You can also crop the video if necessary.

- Another option is to apply different effects and transitions to your AVI video.

- Once you’re done editing your video, you can then export it. VSDC allows you to choose the output format. This is the best time to select a different format if that’s the goal.

- Alternatively, you can share your video directly to YouTube and other video streaming platforms.
More Paid AVI Editor for Windows to Edit AVI Videos
Although there are free AVI editors, they usually come with limited editing features. If you want an AVI editor that offers more editing features for professionals, you should try paid AVI editor for Windows. This section explores the top three paid AVI editors you can use to edit AVI videos on Windows.
Movavi Video Editor Plus

Supported System: Windows and Mac
This paid AVI video editor is compatible with Windows 10 and higher. It is an AVI editing tool that offers a user-friendly interface and advanced editing features for professionals. This video editor is compatible with Windows and Mac and supports all the popular video codecs to provide more options. It is pretty easy to navigate and master, so beginners can also utilize this AVI editor to improve their editing skills.
The best part is that you don’t need it offers all you need for basic editing and advanced video enhancement. You can expect a professional quality when you utilize this editing tool. It is great for all experience levels. You can integrate various visual and audio effects in your video using Movavi Video Editor Plus. It also allows you easily edit, trim, crop, and rotate your videos. Additionally, you can include subtitles, headings, and titles in your AVI video.
If you want to take your video to the next level, you can explore the different media options like filters, animations, music, transitions, and many more from its library. You can also save your AVI video to your PC or share it directly to YouTube to save space on your PC.
Pros
- It offers you an easy to use and intuitive interface
- Ideal for beginners and professionals
- Ensures professional and top-quality results
- It supports various file formats
- Allows direct sharing to video streaming platforms
Cons
- The free trial is relatively limited
- It doesn’t allow more than one project at a time
Steps to Edit AVI Video Using Movavi Video Editor Plus
Using this AVI editor for Windows is quite easy. However, the step-by-step guide below will help you get through the editing process within minutes.
- First, install the Movavi Video Editor Plus software on your PC
- Next, click ‘add files’ to add your AVI video files. Afterward, drag the selected video into the video editor timeline.

- You can then start editing your video by applying filters, enhancing the quality, adding filters and transitions, etc.

- After editing, save your video by hitting the ‘export’ button. Choose how you would like to save your video and hit ‘start.

This will save your video to your chosen location.
PowerDirector 365

Supported System: Windows and Mac
An AVI editor compatible with Windows 11/10/8/8.1 or 7 is PowerDirector 365. It offers an intuitive user interface and advanced video editing features. Using this editing software is quite easy, making it ideal for beginners, intermediates, and professionals. In addition, it is compatible with Windows and Mac OS, making it a versatile choice. You can easily create Hollywood-level videos from your Windows computer using PowerDirector 365.
Some of the editing features on this AVI editor include green-screen, royalty-free music, and many more advanced visual filters. It also offers thousands of templates, overlay effects, and built-in transitions to speed up the editing process. It is an excellent option if you’re looking to enhance your raw footage using cool filters and graphics. Additionally, PowerDirector 365 offers users a dual-screen and customizable editing workspace for streamlining your AVI video editing process.
While it preserves the quality of your AVI video, it allows you to save the output in other high-resolution formats like Ultra HD 4K and many more. You can also share your video directly to various streaming platforms to save you time and space on your device.
Pros
- User-friendly interface and ideal for professionals, intermediate, and beginners
- Access to built-in transitions and overlay effects
- Compatible with Windows and Mac
- Allows users to save output AVI files in higher resolution video formats
- Access to royalty-free iStock and Shutterstock library
Cons
- Limited free version
- It can be complex for beginners to understand
Steps to Edit Using PowerDirector 365
- Firstly, launch the app and choose ‘full mode’ to begin the editing process.

- Next, select ‘import media folder’ to import the media files you want to edit.

- Browse the folders on your PC and choose the folder with the videos you want; click ‘select folder’ to import them into the editor’s media library.

- Now you can select the video you want to edit from the media library and drag it into the video timeline.

- The editing process can begin. PowerDirector 365 allows you to split and trim your video clips.

- You can also add transitions between the clips by selecting the transition room.

- You can also add title texts to your AVI video if you prefer.

- After editing, select the ‘produce’ tab to export your video.

- You can choose to change the video format before exporting.

- Once you choose your preferred format, it will save your edited AVI video file.
Which Should I Choose: Free or Paid AVI Editor?
Many AVI editors for Windows (free and paid) are available on the internet. Therefore, it can be pretty challenging to determine the right AVI editor for Windows to choose. You need to consider many factors to make your choice, and below are some of them.
- Experience Level: One of the most crucial features you need to consider is your experience level. If you’re a beginner, you don’t want an AVI editor that offers complex features you can use. The same goes for professionals; you don’t want an editor without comprehensive editing tools to meet your editing needs. You should lookout for an editor that supports beginners and professionals. This will eliminate the need to look for a new editor once your skills improve.
- Interface: You also need to consider the user interface of your video editor before choosing between paid and free AVI editors for Windows. A friendly user interface can save you a lot of time getting familiar with the editing software. Check out the user interface to determine how easy it would be to navigate when editing your AVI videos.
- Formats: Ensure that the software you choose doesn’t limit you to specific video formats. You want an AVI editor that also supports the common and modern video formats. This allows you to convert your AVI videos when you need to share your video to streaming platforms that don’t support AVI file formats.
Most free AVI editors offer limited features to users, limiting your editing process. Additionally, some paid AVI editors focuses on professional and makes it difficult for beginners to use. Always opt for an AVI editor that succinctly supports all your editing needs and allows you to develop your skills.
Conclusion
Although AVI is an old video format, it is quite popular. Therefore, it’s crucial to have an AVI video editor if you prefer this file format. This article covered the best free and paid AVI editor for Windows. Most of the reviewed editing software offers you unique features to fulfill your editing needs. We also mentioned the pros and cons of each AVI editor for Windows to help you determine which option suits you best. If you want a video editor that will help you take your videos to the next level, you will need an editor that provides you with access to many special effects and unique editing tools. Filmora Video Editor provides you with an intuitive interface and a feature-packed library to start editing your AVI videos.
FAQs About Editing AVI Video
- How can I edit AVI videos like a pro? To edit an AVI video like a pro, you need to learn to use advanced editing features. One of the ideal ways is to pick an AVI editor with an intuitive interface that allows you to master professional concepts.
- What is the best AVI video editor for Windows 10? The best AVI editor for Windows 10 depends on your experience and if you’re looking for free or paid software.
- Can I edit an AVI file? Yes, you can. You need to find an AVI editing software compatible with your operating system and version. Also, you need to ensure it is ideal for your level of experience.
Supported System: Windows and Mac
Most free editing software is usually too simple to meet your immediate demands, or they’re too challenging for you to understand the workflow. Some AVI editors for Windows lack crucial editing features like audio editing and color correction features. An AVI editor that successfully bridges the gap to become the best AVI editor for Windows on our list is Filmora Video Editor .
This editor offers excellent performance and a fast editing process that takes user experience to a new level. It is ideal for beginners because of its intuitive interface. Additionally, intermediate and professional AVI editors can also use this video editor to create stylish videos and utilize its built-in professional effects.
For Win 7 or later (64-bit)
For macOS 10.14 or later
Wondershare Filmora Features
- It is versatile and supports other video formats like MKV, MP4, MOV, etc.
- Users can crop, cut, trim, split, and combine with just a few clicks.
- Access to advanced video effects like motion elements, royalty-free music, transition, animated titles, and more
- Footage can look like Hollywood videos with Filmora color tuning features.
- With background noise removal, audio keyframing, and the audio equalizer tool, you can edit sounds.
- It provides you with real-time rending to ensure a smooth editing experience.
- You can burn videos to DVD, transfer them to various devices or upload them on YouTube or other video streaming platforms.
How to Edit Videos on Windows 11/10/8/7 Using Wondershare Filmora
Editing your videos on Filmora is relatively easy and takes just a few minutes. Keep reading to learn how to edit AVI videos on Windows 11/10/8/7 using Wondershare Filmora.
Step 1: Import AVI Video
The first step you have to take is adding the AVI video you would like to edit with Filmora. You can do this by creating a new project. Then, click on New Project on the homepage.
Once it opens a new page, click the + icon to browse the files on your device or import them from an external device.
Step 2: Edit AVI Videos
After importing your videos, you can start editing and arranging elements in your video timeline. You can overwrite, append, and carry out other editing options.
You can also add effects, titles, filters, and music using Filmora.
Step 3: Save and Share Edited AVI Video Files
Once you’re done editing your video using Filmora Video Editor, you’re ready to save your file. You can choose to save your video in a new format. There are different video formats available to choose from. You can either save it to a select location on your PC or export it to any preferred device. Filmora Video Editor also allows you to upload directly to a video streaming platform or burn to a DVD.
More Free AVI Editor for Windows to Edit AVI Videos
This section will list some of the best free AVI editors for Windows to successfully edit your AVI editors. You would have to download these programs as they offer you more editing tools than an online AVI editor.
Microsoft Windows 10/11 Photos App
Supported System: Windows
This free AVI video editor is compatible with Windows 10/11 and comes prebuilt into your Windows 10 PC. If you’re looking for free AVI editing software, this is one of the best options you would find. One of the benefits of using this AVI video editor is that it eliminates the need for additional downloads. It comes pre-installed. However, if you can’t find this Photos App on your Windows 10/11, you can download it from Microsoft Store.
It is lightweight and allows you easily edit your AVI videos. You can also convert images into an AVI video under the Automatic Video mode. This helps save time if you don’t want to do much editing. However, if there are features you would like to edit in your video, you can use the custom video mode to trim, change audio volume, resize video, and include filters, motion, text, and several 3D effects in your AVI video.
However, you should note that there’s no timeline, and there are some advanced features like video stabilization, split tools, and much more missing on this free AVI editor for Windows. However, it is versatile and supports several other video formats.
Pros
- It supports several video formats, including AVI, MPE, MPG, ASF, MP2, and many more
- It is entirely free
- Ideal for beginners with few editing needs
- There’s no need for a new download as it comes built-in
Cons
- It doesn’t support several modern file formats
- The output formats are limited
- It lacks advanced video editing features
How to Edit Using Microsoft Windows 10/11 Photos App
Editing your AVI video with Microsoft Photos App is relatively easy; follow the steps below.
- First, click the ‘add’ button in the left corner of the page and select the video you want to edit
- Next, check the media elements necessary for your video and then tap on ‘place in storyboard.’
- Now you can start editing your video. One of the ways to edit your video is to extend the duration of your video by clicking the duration button.
- You can also add motion to the video under the ‘storyboard’ section. Select the media element you would like to edit and hit the ‘motions’ button. You can then select different motion effects.
- Additionally, you can add filters under the storyboard section.
- Editors can also trim and split AVI video on this Photos app.
- Once you’re done editing, click on ‘save as’ to save your edited AVI video.
OpenShot – Open Source Video Editor
Supported System: Windows, Mac and Linus
If you want an AVI editor compatible with Windows 10/11/8/7, you should try OpenShot – Open Source Video Editor. It is ideal for carrying out basic video editing like trimming and slicing. This video editor also offers several transitions and audio effects to help you make simple videos.
There are unlimited video tracks available on OpenShot; this means you can add as many audio and video clips.
It also offers you tile templates and video formats. If you want to add more touches to your video, this free AVI editor for Windows will help you achieve that. Other impressive editing features are available on this AVI editor, like slow-motion effects, blending modes, 3D animations, and many more. Additionally, the frame and keyframes accuracy feature helps you create detailed edits. You’ll easily customize your AVI video to your preference with this platform.
When exporting your file, you can export it in varying formats. You can also upload your AVI video directly to YouTube or your social media accounts. Despite the professional-level tool, the user interface is intuitive, which simplifies the editing process. However, you might find that it lacks some of the advanced editing features you would find in other AVI editors.
Pros
- It features an intuitive user interface
- It offers several editing tools for beginners and intermediate users
- It allows you to add as many audio and video tracks as you would prefer
- It is entirely free
- There are varying output formats for your selection
Cons
- Limited advanced editing tools
- OpenShot can be slow and laggy sometimes
How to Edit AVI Video With OpenShot
Using OpenShot to edit your AVI videos is relatively easy. The steps below will explain the basics and how you can edit within minutes.
- First, you have to import your media file into OpenShot.
- Next, arrange the videos on the timeline. If two or more clips overlap, this AVI editor automatically creates a smooth fade between them.
- You can then edit using the different available tools. OpenShot also allows you to add music to the timeline.
- After editing, preview the video project and export. You can also share directly to streaming platforms like YouTube, Vimeo, and more.
VSDC Video Editor – Free Movie Editor
Supported System: Windows and Mac
This AVI video editor is designed to ensure an excelling editing process for users on Windows 10. Therefore, even beginners can utilize this video editor to edit their media projects. Although it is free, it offers powerful editing features to take your AVI video to the next level. There are many features like filters, transition effects, overlays, color correction, and many more you can use.
Although it supports AVI video files, it also supports several popular media file formats. You can also save your AVI video in a new format after editing due to its effective video converter tools. Additionally, VSDC Video Editor is a non-linear tool that allows you to easily place video clips in the timeline.
You can save your edited AVI videos to your PC or upload them directly to different video streaming platforms like YouTube, Instagram, Vimeo, etc. We also love that it allows you to edit HD and 4k videos without compromising the quality. This isn’t a common feature with most free AVI video editing software.
Pros
- It is a free video editing software for Windows 10
- It is versatile and supports different video and audio formats
- There is an excellent selection of filters, effects, and transitions
- You can convert AVI videos to a new format with its built-in video converter
- It features an intuitive interface that’s friendly to beginners
Cons
- Technical support isn’t free
- It doesn’t offer professional video editing tools
Steps to Edit AVI Videos Using VSDC Video Editor
This is a simple AVI editor to use, and the steps below simplify the process for you even further; let’s take a look.
- Firstly, import your video into the VSDC Video editor by clicking the ‘import content’ button.
- Once you choose a file on your Windows PC, the app will ask if you would like to change the resolution and several more parameters.
- You can start editing your videos with the different tools available, like cutting and splitting.
- You can also crop the video if necessary.
- Another option is to apply different effects and transitions to your AVI video.
- Once you’re done editing your video, you can then export it. VSDC allows you to choose the output format. This is the best time to select a different format if that’s the goal.
- Alternatively, you can share your video directly to YouTube and other video streaming platforms.
More Paid AVI Editor for Windows to Edit AVI Videos
Although there are free AVI editors, they usually come with limited editing features. If you want an AVI editor that offers more editing features for professionals, you should try paid AVI editor for Windows. This section explores the top three paid AVI editors you can use to edit AVI videos on Windows.
Movavi Video Editor Plus
Supported System: Windows and Mac
This paid AVI video editor is compatible with Windows 10 and higher. It is an AVI editing tool that offers a user-friendly interface and advanced editing features for professionals. This video editor is compatible with Windows and Mac and supports all the popular video codecs to provide more options. It is pretty easy to navigate and master, so beginners can also utilize this AVI editor to improve their editing skills.
The best part is that you don’t need it offers all you need for basic editing and advanced video enhancement. You can expect a professional quality when you utilize this editing tool. It is great for all experience levels. You can integrate various visual and audio effects in your video using Movavi Video Editor Plus. It also allows you easily edit, trim, crop, and rotate your videos. Additionally, you can include subtitles, headings, and titles in your AVI video.
If you want to take your video to the next level, you can explore the different media options like filters, animations, music, transitions, and many more from its library. You can also save your AVI video to your PC or share it directly to YouTube to save space on your PC.
Pros
- It offers you an easy to use and intuitive interface
- Ideal for beginners and professionals
- Ensures professional and top-quality results
- It supports various file formats
- Allows direct sharing to video streaming platforms
Cons
- The free trial is relatively limited
- It doesn’t allow more than one project at a time
Steps to Edit AVI Video Using Movavi Video Editor Plus
Using this AVI editor for Windows is quite easy. However, the step-by-step guide below will help you get through the editing process within minutes.
- First, install the Movavi Video Editor Plus software on your PC
- Next, click ‘add files’ to add your AVI video files. Afterward, drag the selected video into the video editor timeline.
- You can then start editing your video by applying filters, enhancing the quality, adding filters and transitions, etc.
- After editing, save your video by hitting the ‘export’ button. Choose how you would like to save your video and hit ‘start.
This will save your video to your chosen location.
PowerDirector 365
Supported System: Windows and Mac
An AVI editor compatible with Windows 11/10/8/8.1 or 7 is PowerDirector 365. It offers an intuitive user interface and advanced video editing features. Using this editing software is quite easy, making it ideal for beginners, intermediates, and professionals. In addition, it is compatible with Windows and Mac OS, making it a versatile choice. You can easily create Hollywood-level videos from your Windows computer using PowerDirector 365.
Some of the editing features on this AVI editor include green-screen, royalty-free music, and many more advanced visual filters. It also offers thousands of templates, overlay effects, and built-in transitions to speed up the editing process. It is an excellent option if you’re looking to enhance your raw footage using cool filters and graphics. Additionally, PowerDirector 365 offers users a dual-screen and customizable editing workspace for streamlining your AVI video editing process.
While it preserves the quality of your AVI video, it allows you to save the output in other high-resolution formats like Ultra HD 4K and many more. You can also share your video directly to various streaming platforms to save you time and space on your device.
Pros
- User-friendly interface and ideal for professionals, intermediate, and beginners
- Access to built-in transitions and overlay effects
- Compatible with Windows and Mac
- Allows users to save output AVI files in higher resolution video formats
- Access to royalty-free iStock and Shutterstock library
Cons
- Limited free version
- It can be complex for beginners to understand
Steps to Edit Using PowerDirector 365
- Firstly, launch the app and choose ‘full mode’ to begin the editing process.
- Next, select ‘import media folder’ to import the media files you want to edit.
- Browse the folders on your PC and choose the folder with the videos you want; click ‘select folder’ to import them into the editor’s media library.
- Now you can select the video you want to edit from the media library and drag it into the video timeline.
- The editing process can begin. PowerDirector 365 allows you to split and trim your video clips.
- You can also add transitions between the clips by selecting the transition room.
- You can also add title texts to your AVI video if you prefer.
- After editing, select the ‘produce’ tab to export your video.
- You can choose to change the video format before exporting.
- Once you choose your preferred format, it will save your edited AVI video file.
Which Should I Choose: Free or Paid AVI Editor?
Many AVI editors for Windows (free and paid) are available on the internet. Therefore, it can be pretty challenging to determine the right AVI editor for Windows to choose. You need to consider many factors to make your choice, and below are some of them.
- Experience Level: One of the most crucial features you need to consider is your experience level. If you’re a beginner, you don’t want an AVI editor that offers complex features you can use. The same goes for professionals; you don’t want an editor without comprehensive editing tools to meet your editing needs. You should lookout for an editor that supports beginners and professionals. This will eliminate the need to look for a new editor once your skills improve.
- Interface: You also need to consider the user interface of your video editor before choosing between paid and free AVI editors for Windows. A friendly user interface can save you a lot of time getting familiar with the editing software. Check out the user interface to determine how easy it would be to navigate when editing your AVI videos.
- Formats: Ensure that the software you choose doesn’t limit you to specific video formats. You want an AVI editor that also supports the common and modern video formats. This allows you to convert your AVI videos when you need to share your video to streaming platforms that don’t support AVI file formats.
Most free AVI editors offer limited features to users, limiting your editing process. Additionally, some paid AVI editors focuses on professional and makes it difficult for beginners to use. Always opt for an AVI editor that succinctly supports all your editing needs and allows you to develop your skills.
Conclusion
Although AVI is an old video format, it is quite popular. Therefore, it’s crucial to have an AVI video editor if you prefer this file format. This article covered the best free and paid AVI editor for Windows. Most of the reviewed editing software offers you unique features to fulfill your editing needs. We also mentioned the pros and cons of each AVI editor for Windows to help you determine which option suits you best. If you want a video editor that will help you take your videos to the next level, you will need an editor that provides you with access to many special effects and unique editing tools. Filmora Video Editor provides you with an intuitive interface and a feature-packed library to start editing your AVI videos.
FAQs About Editing AVI Video
- How can I edit AVI videos like a pro? To edit an AVI video like a pro, you need to learn to use advanced editing features. One of the ideal ways is to pick an AVI editor with an intuitive interface that allows you to master professional concepts.
- What is the best AVI video editor for Windows 10? The best AVI editor for Windows 10 depends on your experience and if you’re looking for free or paid software.
- Can I edit an AVI file? Yes, you can. You need to find an AVI editing software compatible with your operating system and version. Also, you need to ensure it is ideal for your level of experience.
The Definite Guide to Craig Bot Discord
The Definite Guide to Craig Bot Discord
An easy yet powerful editor
Numerous effects to choose from
Detailed tutorials provided by the official channel
Discord is a free text and audio communication tool for gamers and other communities. The voice channel in the Discord server allows users to speak with many people. On the other hand, Discord does not have a voice recording feature. Users can use third-party solutions to capture their discord audio when speaking via voice chat. When recording someone else’s discussion, be sure you have their permission. We’ll show you how to record discord audio with the Craig Discord bot and record discord audio using Craig in this article. Craig can record discord calls also. Let’s get started!
In this article
01 [What is Craig Bot Discord?](#Part 1)
02 [Is Craig Discord Bot Safe?](#Part 2)
03 [How Do I Enable Craig in Discord?](#Part 3)
04 [How to Record Discord Audio Using Craig](#Part 4)
05 [Craig Bot Discord Q&A](#Part 5)
Part 1 What is Craig Bot Discord?
Craig is a “Discord voice channel recording bot” with multi-track/multi-channel recording capabilities. In short, that means each speaker gets their audio file when Craig records your Discord voice channel.
Craig Recorder keeps track of all your recordings. You may use Craig Bot to record your calls in high-quality audio and video as a server owner.
Craig will record continuously for up to six hours. You can download a copy of the audio to examine the status of a recording until you download the file. The Craig website has a complete set of Craig bot commands, which you may immediately access by typing: Craig, help in a Discord channel.
Part 2 Is Craig Discord Bot Safe?
All Craig web services, like most websites, log all users’ IP addresses to identify and prevent criminal activity. Craig does not keep track of anyone who does not speak in a recorded channel, use any Craig bot commands, or participate in an EnnuiCastr recording.
Part 3 How Do I Enable Craig in Discord?
All Craig web services, like most websites, log all users’ IP addresses to identify and prevent criminal activity. Anyone who does not talk in a recorded channel, use any Discord Craig commands, or engage in a recording using the Craig web app is anonymous to Craig.
Part 4 How to Record Discord Audio Using Craig
Craig will not record without a visible label indicating that it is getting recorded. It records your conversation with others, but it also records each user as a unique audio track, making it much easier to edit or remove specific speakers if necessary.
Follow these simple steps to use a Discord recording bot.
Step 1: Invite Craig
You must first invite Craig to your server to use him. Visit Craig’s website and click the “Invite Craig to Your Discord Server” option to get started.
Now, begin the joining procedure by pressing Invite Craig to your Discord Server. This action will take you to the authorization page for the Discord server. However, before using your server, you must first grant Craig permission to join it.

Step 2: Go to “Add Bot To”
Go to the “Add Bot To” section and select your server, then click “Authorize” to allow the bot to join. Select your Discord server, then click Authorize to enable the Craig bot to join.

Step 3: Join Craig
You should notice a join notification for “Craig” in your server if the process is successful. That’s it! You don’t have to do more; you may start recording your audio channels right away with Craig.
Enter an audio channel and type: Craig:; join to get started.

Step 4: Begin Your Recording
Craig will join the channel and start recording the audio instantly and the bot’s username will update to confirm this. Besides, you’ll also hear an voice from the bot saying, “now recording.”

Step 5: Exit to End Recording
Type: Craig, exit to end a Craig recording. It will force Craig to quit the current channel and stop recording. However, recordings in other channels will continue.

Step 6: Type “: Craig:, Stop”
If you wish to compel Craig to cease recording on all channels, type: Craig:, stop.
You can use this instead of the leave command to end a Craig recording if you’re only recording in one channel.

Step 7: Download or Delete Link
The Craig bot will send you a private message with links to download or delete your talks when you start recording.

Craig will record continuously for up to six hours. You can download a copy of the audio to examine the status of a recording until you download the file.
Part 5 Craig Bot Discord Q&A
Here are some frequently asked questions you need to go through to explore Craig discord bot:
Q: Is Craig bot capable of recording video?
A: Craig recorder keeps track of all your recordings. You may use Craig bot to record your calls in high-quality audio and video as a server owner.
Q: On Discord, how can I record my calls?
A: Select ‘Start Recording’ from the ‘Controls’ area. Discord now allows you to record calls.
Q: How do I make Craig active?
A: Enter an audio channel and type: Craig:, join to get started. Craig will join the channel and begin recording right away; update the bot’s username to reflect this. To confirm, you’ll hear an audio notice from the bot saying, “now recording.” Type: Craig:, exit to end a Craig recording.
Q: Is Craig safe?
A: Craig is in the 17th percentile for safety, which means that 83 percent of cities are safer while 17 percent are riskier. Only Craig’s appropriate borders are considered in this analysis. For a list of adjacent towns, see the table below. During a particular year, the crime rate in Craig is 48.61 per 1,000 residents.
Q: What is the best option to stop a Craig bot?
A: First, type in the audio channel and type: Craig:, join to begin. Craig will join the channel and start recording the bot immediately. You must see the updated bot’s username. After that, you’ll hear an audio note from the bot saying, “now recording.” Type: Craig:, leave to stop a Craig recording bot from all channels**.**

Wondershare Filmora Video Editor doesn’t feature multi-cam support or the latest VR technologies. However, its friendly UI and many effects can help you edit your Discord videos.
For Win 7 or later (64-bit)
For macOS 10.12 or later
PROS
● User-friendly interface
● Inexpensive
● There are numerous effects and overlays.
● Good text and title tools
● In the test, the rendering is quick.
● Regular updates with new effects for video-making and tweaking tools.
● Try it for free option before purchasing.
CONS
● The user interface is not touch-friendly.
● There is no DVD menu authoring or chapter authoring.
● Ending Thoughts →
● What Craig bot is, is it safe to use, and how you can activate it.
● Besides, you also went through the steps to use the Craig bot on Discord and some FAQs.
● Finally, we introduced Filmora, the best video editing software to get excellent results for the Discord platform.
● Thus, now with Discord Craig bot you can make recordings easily using the simple laud down steps. Ensure that you get familiar with the Craig bot commands for a seamless process. Also, get a fantastic video editor by Wondershare; this video editor helps you create amazing videos with effects giving your video that professional touch.
Discord is a free text and audio communication tool for gamers and other communities. The voice channel in the Discord server allows users to speak with many people. On the other hand, Discord does not have a voice recording feature. Users can use third-party solutions to capture their discord audio when speaking via voice chat. When recording someone else’s discussion, be sure you have their permission. We’ll show you how to record discord audio with the Craig Discord bot and record discord audio using Craig in this article. Craig can record discord calls also. Let’s get started!
In this article
01 [What is Craig Bot Discord?](#Part 1)
02 [Is Craig Discord Bot Safe?](#Part 2)
03 [How Do I Enable Craig in Discord?](#Part 3)
04 [How to Record Discord Audio Using Craig](#Part 4)
05 [Craig Bot Discord Q&A](#Part 5)
Part 1 What is Craig Bot Discord?
Craig is a “Discord voice channel recording bot” with multi-track/multi-channel recording capabilities. In short, that means each speaker gets their audio file when Craig records your Discord voice channel.
Craig Recorder keeps track of all your recordings. You may use Craig Bot to record your calls in high-quality audio and video as a server owner.
Craig will record continuously for up to six hours. You can download a copy of the audio to examine the status of a recording until you download the file. The Craig website has a complete set of Craig bot commands, which you may immediately access by typing: Craig, help in a Discord channel.
Part 2 Is Craig Discord Bot Safe?
All Craig web services, like most websites, log all users’ IP addresses to identify and prevent criminal activity. Craig does not keep track of anyone who does not speak in a recorded channel, use any Craig bot commands, or participate in an EnnuiCastr recording.
Part 3 How Do I Enable Craig in Discord?
All Craig web services, like most websites, log all users’ IP addresses to identify and prevent criminal activity. Anyone who does not talk in a recorded channel, use any Discord Craig commands, or engage in a recording using the Craig web app is anonymous to Craig.
Part 4 How to Record Discord Audio Using Craig
Craig will not record without a visible label indicating that it is getting recorded. It records your conversation with others, but it also records each user as a unique audio track, making it much easier to edit or remove specific speakers if necessary.
Follow these simple steps to use a Discord recording bot.
Step 1: Invite Craig
You must first invite Craig to your server to use him. Visit Craig’s website and click the “Invite Craig to Your Discord Server” option to get started.
Now, begin the joining procedure by pressing Invite Craig to your Discord Server. This action will take you to the authorization page for the Discord server. However, before using your server, you must first grant Craig permission to join it.
Step 2: Go to “Add Bot To”
Go to the “Add Bot To” section and select your server, then click “Authorize” to allow the bot to join. Select your Discord server, then click Authorize to enable the Craig bot to join.
Step 3: Join Craig
You should notice a join notification for “Craig” in your server if the process is successful. That’s it! You don’t have to do more; you may start recording your audio channels right away with Craig.
Enter an audio channel and type: Craig:; join to get started.
Step 4: Begin Your Recording
Craig will join the channel and start recording the audio instantly and the bot’s username will update to confirm this. Besides, you’ll also hear an voice from the bot saying, “now recording.”
Step 5: Exit to End Recording
Type: Craig, exit to end a Craig recording. It will force Craig to quit the current channel and stop recording. However, recordings in other channels will continue.
Step 6: Type “: Craig:, Stop”
If you wish to compel Craig to cease recording on all channels, type: Craig:, stop.
You can use this instead of the leave command to end a Craig recording if you’re only recording in one channel.
Step 7: Download or Delete Link
The Craig bot will send you a private message with links to download or delete your talks when you start recording.
Craig will record continuously for up to six hours. You can download a copy of the audio to examine the status of a recording until you download the file.
Part 5 Craig Bot Discord Q&A
Here are some frequently asked questions you need to go through to explore Craig discord bot:
Q: Is Craig bot capable of recording video?
A: Craig recorder keeps track of all your recordings. You may use Craig bot to record your calls in high-quality audio and video as a server owner.
Q: On Discord, how can I record my calls?
A: Select ‘Start Recording’ from the ‘Controls’ area. Discord now allows you to record calls.
Q: How do I make Craig active?
A: Enter an audio channel and type: Craig:, join to get started. Craig will join the channel and begin recording right away; update the bot’s username to reflect this. To confirm, you’ll hear an audio notice from the bot saying, “now recording.” Type: Craig:, exit to end a Craig recording.
Q: Is Craig safe?
A: Craig is in the 17th percentile for safety, which means that 83 percent of cities are safer while 17 percent are riskier. Only Craig’s appropriate borders are considered in this analysis. For a list of adjacent towns, see the table below. During a particular year, the crime rate in Craig is 48.61 per 1,000 residents.
Q: What is the best option to stop a Craig bot?
A: First, type in the audio channel and type: Craig:, join to begin. Craig will join the channel and start recording the bot immediately. You must see the updated bot’s username. After that, you’ll hear an audio note from the bot saying, “now recording.” Type: Craig:, leave to stop a Craig recording bot from all channels**.**
Wondershare Filmora Video Editor doesn’t feature multi-cam support or the latest VR technologies. However, its friendly UI and many effects can help you edit your Discord videos.
For Win 7 or later (64-bit)
For macOS 10.12 or later
PROS
● User-friendly interface
● Inexpensive
● There are numerous effects and overlays.
● Good text and title tools
● In the test, the rendering is quick.
● Regular updates with new effects for video-making and tweaking tools.
● Try it for free option before purchasing.
CONS
● The user interface is not touch-friendly.
● There is no DVD menu authoring or chapter authoring.
● Ending Thoughts →
● What Craig bot is, is it safe to use, and how you can activate it.
● Besides, you also went through the steps to use the Craig bot on Discord and some FAQs.
● Finally, we introduced Filmora, the best video editing software to get excellent results for the Discord platform.
● Thus, now with Discord Craig bot you can make recordings easily using the simple laud down steps. Ensure that you get familiar with the Craig bot commands for a seamless process. Also, get a fantastic video editor by Wondershare; this video editor helps you create amazing videos with effects giving your video that professional touch.
Art of Time Manipulation: A Guide to After Effects Slow Motion Mastery
The discovery of manipulating various aspects of video is advancing in every era. One such advancement is manipulating time duration to create slow-mo. Slowing down a video has advantages in many industries and multiple contexts. For instance, it focuses the audience’s attention on a video shot or during a sports match. They also help in comprehending scientific processes during research.
If you also want to experiment with this video aspect, then you’re at the right place. This article will provide you with a detailed guide on how to slow down video in After Effects. Along with slow down footage After Effects, you can learn about an alternative. Both video editors are professional when it comes to making a slow-mo. Keep reading the article to learn more about the slow-down clip After Effects.
Slow Motion Video Maker Slow your video’s speed with better control of your keyframes to create unique cinematic effects!
Make A Slow Motion Video Make A Slow Motion Video More Features

Part 1: A Complete Overview of Adobe After Effects
Before learning how to slow mo in After Effects, we want to introduce you to the software. Adobe After Effects is a professional software designed to assist in post-production. Those unrealistic scenes you see in a sci-fi movie are its creation. Users can work with multiple effects categories to create animated scenes and titles.
The software has undergone multiple updates since its creation. With each version more advanced than the previous, users can perform multiple tasks with it. They can add and customize visual effects, 2D vectors, and 3D animations. Following are some of the functions to find along with slow-down footage After Effects:
- Text Animations: Adding text and titles is important for emphasizing a video’s key parts. In After Effects, you can personalize titles and introduce animations. You can also create animated logos in this editor for personal branding.
- VFX/Visual Effects: You can add multiple visual effects and presets from its asset’s library. The tool also allows users to customize and add an effect to preset. This helps with increasing productivity during video editing tasks.
- Motion Tracking: Do you want to blur out or remove a person or scene throughout a video? With this feature, doing that is a piece of cake. Select the object-to-motion track and play the video from start to end. The tracker will detect the object’s motion and add a specific effect throughout.
- Masking: Many video editors offer masking options, but a few offer precision. Precision is very important during masking, and After Effects is a master of that. Along with different masking options, it offers custom settings to bring accuracy.
- Timeline Editing: To see how professional software is, see if it has a timeline panel. Timeline editing is one of the functions that bring accuracy and professionalism. You can cut, align, apply effects, transitions, and much more on it.
Part 2: A Guide to Slow Down Video in Adobe After Effects During Editing
Upon learning about After Effects and its functionalities, let’s move forward. This section highlights the step-by-step procedure of creating a video slow mo. This is a quick and simple method to slow down a video using After Effects. Keep reading the below section for a seamless slow-down clip After Effects:
Step 1: After importing a video, navigate towards the timeline video layer and right-click on it. From the dropdown menu, select “Time” and then select the “Time Stretch” option.

Step 2: In the Time Stretch window, increase the default value of “Stretch Factor.” Then click “OK,” and this will slow down your clip.

Step 3: To bring precision to your slow-mo, you need to adjust the frame rate of the video. For this, right-click on the timeline and go to “Frame Blending > Pixel Motion” option. Afterward, play your video from start to end and observe the changes.

Part 3: Alternative: Slowing Down Video in Wondershare Filmora with Clarity
Even though slow-down footage After Effects retains video quality, there are certain drawbacks. It is a professional video editing platform used by filmmakers. This means the software must have some technicalities and costs a fortune. Hence, we provide you with a simpler yet professional alternative called Wondershare Filmora . It is a video editing software that offers multiple editing functions and effects.
Wondershare Filmora is an AI-driven software that makes task achievement accessible. Along with multiple features, there are different methods for slowing down a video in it. You can use its Super Slow-Motion feature, Speed Ramping, or a Preset for it. In this guide, we will discuss all these methods with their step-by-step guides.
Free Download For Win 7 or later(64-bit)
Free Download For macOS 10.14 or later
Methods to Slow Down Video in Filmora
In this section, we will discuss alternative methods of slowing video in After Effects. All the mentioned methods are carried out in Wondershare Filmora. Here is the step-by-step guide to creating a slow-motion video using Filmora:
- Method 1. Step-by-Step Guide to Slow Down a Video Manually
- Method 2. Step-by-Step Guide to Slow a Video Using Optical Flow Option
Method 1. Step-by-Step Guide to Slow Down a Video Manually
Users can employ the manual speed adjustment option along with the automated slow-motion option. The method of accessing this option is straightforward, and here is its guide:
Step 1Initiate Filmora and Import Media
Once you have downloaded Filmora, start it and click the “New Project” tab. After accessing the editing interface, click the “Import” button to download media. From the Project Media panel, drag and drop media to the timeline.

Step 2Access Uniform Speed Option
Once the media is in the timeline, select it and right-click on it. From the options panel, locate and click the “Uniform Speed” option. From

Step 3Adjust the Speed and Preview
A settings panel will appear on the right side of the screen; navigate towards it. Under the “Uniform Speed” tab, adjust the “Speed” slider to slow down your video. If its value decreases, your video will become slow motion. Further, hit the play button to preview and export your slow-mo video.

Method 2. Step-by-Step Guide to Slow a Video Using Optical Flow Option
If you prefer the automated creation of slow-mo, then Filmora offers an AI Frame Interpolation feature. Find the detailed instruction manual for accessing this feature below:
Step 1Look For Speed Ramping Option
After importing media and bringing it to the timeline panel, select it. Then, navigate towards the top toolbar and select the “Tools” tab. From the expansion menu, click on the “Speed Ramping” option.

Step 2Access the AI Frame Interpolation
Continue to select a specific preset for speed ramping. As you select one, locate and expand the “AI Frame Interpolation” section. From the appearing option, select the “Optical Flow” option.

Step 3Render Preview for Results
Once you have enabled this option, navigate towards the timeline toolbar. Search and select the “Render Preview” option from the given icons. Play the video to see the results, adjust, and click the “Export” button to download.

Edit Beyond Basic with AI Video Editing Features of Filmora
This part of the article will highlight some of the prominent video editing features of Filmora. The uniqueness of these features lies in their AI-backed algorithms. You can give directions according to your video, and AI will operate accordingly. Here are some of its video editing features that you’ll come across upon entering:
1. Remove Background
With this feature of Filmora, you can remove the background of your videos and images. The AI-integrated technology preserves the object while removing the background. In addition, you can add a solid color, gradient, or custom background for it.
2. Auto Reframe
Creating reels for Instagram or crafting YouTube shorts has some requirements. To preserve the integrity and visuals of content, it is important to fit a video. With this AI, you can set the required frame resolution. Along with that, it preserves the pixel quality of the video while resizing the frame.
3. AI Smart Masking
Filmora offers multiple mask options to infuse effects and filters to specific parts. However, the V13 upgrade introduced an AI masking feature for improved results. By enabling this feature, you can choose to mask objects or backgrounds.
4. AI Thumbnail Creator
Thumbnails increase video views by evoking the audience’s interest in seeing a video. In Filmora, you can employ the AI Thumbnail creator to auto-create thumbnails. It analyzes the best frame out of your video and chooses it as a thumbnail. You can further apply many templates to this thumbnail according to context.
Conclusion
This article has expanded your knowledge and expertise about two powerful video editors. With how to slow down video in After Effects, we introduced you to the software. There is no limitation of features in either software as both bring out the best in videos.
However, we recommend Wondershare Filmora as it is a more accessible alternative. Creating a slow-mo in this software is easier and requires no effort. In addition, you can also access its built-in effects and presets for task productivity.
Make A Slow Motion Video Make A Slow Motion Video More Features
Part 1: A Complete Overview of Adobe After Effects
Before learning how to slow mo in After Effects, we want to introduce you to the software. Adobe After Effects is a professional software designed to assist in post-production. Those unrealistic scenes you see in a sci-fi movie are its creation. Users can work with multiple effects categories to create animated scenes and titles.
The software has undergone multiple updates since its creation. With each version more advanced than the previous, users can perform multiple tasks with it. They can add and customize visual effects, 2D vectors, and 3D animations. Following are some of the functions to find along with slow-down footage After Effects:
- Text Animations: Adding text and titles is important for emphasizing a video’s key parts. In After Effects, you can personalize titles and introduce animations. You can also create animated logos in this editor for personal branding.
- VFX/Visual Effects: You can add multiple visual effects and presets from its asset’s library. The tool also allows users to customize and add an effect to preset. This helps with increasing productivity during video editing tasks.
- Motion Tracking: Do you want to blur out or remove a person or scene throughout a video? With this feature, doing that is a piece of cake. Select the object-to-motion track and play the video from start to end. The tracker will detect the object’s motion and add a specific effect throughout.
- Masking: Many video editors offer masking options, but a few offer precision. Precision is very important during masking, and After Effects is a master of that. Along with different masking options, it offers custom settings to bring accuracy.
- Timeline Editing: To see how professional software is, see if it has a timeline panel. Timeline editing is one of the functions that bring accuracy and professionalism. You can cut, align, apply effects, transitions, and much more on it.
Part 2: A Guide to Slow Down Video in Adobe After Effects During Editing
Upon learning about After Effects and its functionalities, let’s move forward. This section highlights the step-by-step procedure of creating a video slow mo. This is a quick and simple method to slow down a video using After Effects. Keep reading the below section for a seamless slow-down clip After Effects:
Step 1: After importing a video, navigate towards the timeline video layer and right-click on it. From the dropdown menu, select “Time” and then select the “Time Stretch” option.
Step 2: In the Time Stretch window, increase the default value of “Stretch Factor.” Then click “OK,” and this will slow down your clip.
Step 3: To bring precision to your slow-mo, you need to adjust the frame rate of the video. For this, right-click on the timeline and go to “Frame Blending > Pixel Motion” option. Afterward, play your video from start to end and observe the changes.
Part 3: Alternative: Slowing Down Video in Wondershare Filmora with Clarity
Even though slow-down footage After Effects retains video quality, there are certain drawbacks. It is a professional video editing platform used by filmmakers. This means the software must have some technicalities and costs a fortune. Hence, we provide you with a simpler yet professional alternative called Wondershare Filmora . It is a video editing software that offers multiple editing functions and effects.
Wondershare Filmora is an AI-driven software that makes task achievement accessible. Along with multiple features, there are different methods for slowing down a video in it. You can use its Super Slow-Motion feature, Speed Ramping, or a Preset for it. In this guide, we will discuss all these methods with their step-by-step guides.
Free Download For Win 7 or later(64-bit)
Free Download For macOS 10.14 or later
Methods to Slow Down Video in Filmora
In this section, we will discuss alternative methods of slowing video in After Effects. All the mentioned methods are carried out in Wondershare Filmora. Here is the step-by-step guide to creating a slow-motion video using Filmora:
- Method 1. Step-by-Step Guide to Slow Down a Video Manually
- Method 2. Step-by-Step Guide to Slow a Video Using Optical Flow Option
Method 1. Step-by-Step Guide to Slow Down a Video Manually
Users can employ the manual speed adjustment option along with the automated slow-motion option. The method of accessing this option is straightforward, and here is its guide:
Step 1Initiate Filmora and Import Media
Once you have downloaded Filmora, start it and click the “New Project” tab. After accessing the editing interface, click the “Import” button to download media. From the Project Media panel, drag and drop media to the timeline.
Step 2Access Uniform Speed Option
Once the media is in the timeline, select it and right-click on it. From the options panel, locate and click the “Uniform Speed” option. From
Step 3Adjust the Speed and Preview
A settings panel will appear on the right side of the screen; navigate towards it. Under the “Uniform Speed” tab, adjust the “Speed” slider to slow down your video. If its value decreases, your video will become slow motion. Further, hit the play button to preview and export your slow-mo video.
Method 2. Step-by-Step Guide to Slow a Video Using Optical Flow Option
If you prefer the automated creation of slow-mo, then Filmora offers an AI Frame Interpolation feature. Find the detailed instruction manual for accessing this feature below:
Step 1Look For Speed Ramping Option
After importing media and bringing it to the timeline panel, select it. Then, navigate towards the top toolbar and select the “Tools” tab. From the expansion menu, click on the “Speed Ramping” option.
Step 2Access the AI Frame Interpolation
Continue to select a specific preset for speed ramping. As you select one, locate and expand the “AI Frame Interpolation” section. From the appearing option, select the “Optical Flow” option.
Step 3Render Preview for Results
Once you have enabled this option, navigate towards the timeline toolbar. Search and select the “Render Preview” option from the given icons. Play the video to see the results, adjust, and click the “Export” button to download.
Edit Beyond Basic with AI Video Editing Features of Filmora
This part of the article will highlight some of the prominent video editing features of Filmora. The uniqueness of these features lies in their AI-backed algorithms. You can give directions according to your video, and AI will operate accordingly. Here are some of its video editing features that you’ll come across upon entering:
1. Remove Background
With this feature of Filmora, you can remove the background of your videos and images. The AI-integrated technology preserves the object while removing the background. In addition, you can add a solid color, gradient, or custom background for it.
2. Auto Reframe
Creating reels for Instagram or crafting YouTube shorts has some requirements. To preserve the integrity and visuals of content, it is important to fit a video. With this AI, you can set the required frame resolution. Along with that, it preserves the pixel quality of the video while resizing the frame.
3. AI Smart Masking
Filmora offers multiple mask options to infuse effects and filters to specific parts. However, the V13 upgrade introduced an AI masking feature for improved results. By enabling this feature, you can choose to mask objects or backgrounds.
4. AI Thumbnail Creator
Thumbnails increase video views by evoking the audience’s interest in seeing a video. In Filmora, you can employ the AI Thumbnail creator to auto-create thumbnails. It analyzes the best frame out of your video and chooses it as a thumbnail. You can further apply many templates to this thumbnail according to context.
Conclusion
This article has expanded your knowledge and expertise about two powerful video editors. With how to slow down video in After Effects, we introduced you to the software. There is no limitation of features in either software as both bring out the best in videos.
However, we recommend Wondershare Filmora as it is a more accessible alternative. Creating a slow-mo in this software is easier and requires no effort. In addition, you can also access its built-in effects and presets for task productivity.
How To Add Text In After Effects
In almost every video you come across, you will see text added to the video in different parts. There are various reasons why adding text to videos becomes a necessity. First of all, you can highlight the underlying message or key points in your video. Along with audio and video, the viewers will have another cue point in the form of text that they can retain in their memory for longer. You add animated texts to video to make the video interesting to watch and break the monotony of visual cues only.
Besides, you may have to want credits and add intro as well as outro to your video where adding text is almost a necessity. Text can help your viewer get the context of your video and make sense of the content. After Effects is a popular video editor thanks to its visual effects, text animation animations, and instant video enhancement tools. We will illustrate the different ways of adding text in After Effects in simple steps.
Part 1. Add Text in After Effects with Horizontal Type Tool
Once you have imported your video clip into the Timeline, there are several ways you can add text to your video. First of all, you can right-click on the Timeline and select New> Text to create an empty text layer and add any text you want. Similarly, you can go to Layer> New> Text option to do the same. But the easiest way of adding text in After Effects is by using Horizontal Type Tool. Here are the steps on how you can add text in AE with the type tool.
Step1Once you have imported your video into the Timeline, click on Horizontal Type Tool located in the top bar to add any text. You can press Ctrl+T(Windows) or Command+H(Mac) to get it instantly.
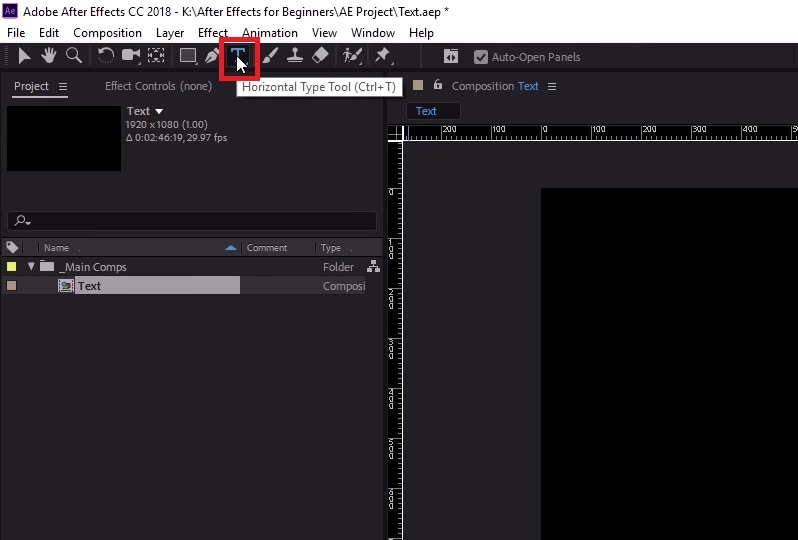
Step2Click on the video where you want to place the text and type your desired text there. After you are done adding your text, press Enter key in Num pad to exit out of the text field in the video.
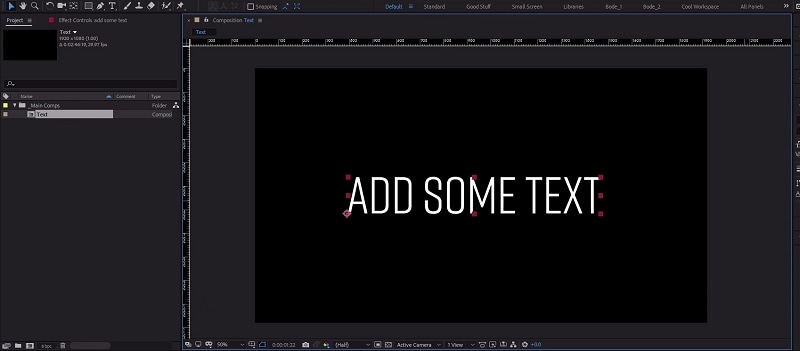
Step3This will automatically create a text layer on Timeline. You can now move the text and place it anywhere you want. You can also modify the text style and add animation which we will illustrate in the next section.
Part 2. Use the Character Panel to Edit Text in AE
When you select Type tool and add your desired text, you get a default style for the text. It is most likely that you have to modify the text style such as changing color, font, and size to fit in your video seamlessly. That is when you have to visit the Character Panel. Character Panel is where you get to edit the font of the text you have typed, increase or decrease the font size, change the font color, and much more. Apart from that, you can increase the spacing between lines when your text is a paragraph instead of a few words. Here are the steps to use Character Panel to edit text in AE.
Step1Once you have typed your text using Horizontal Type tool on the video, click on the text.
Step2Go to Character panel located in the right side of the screen. If it is minimized, click on the panel to expand it.
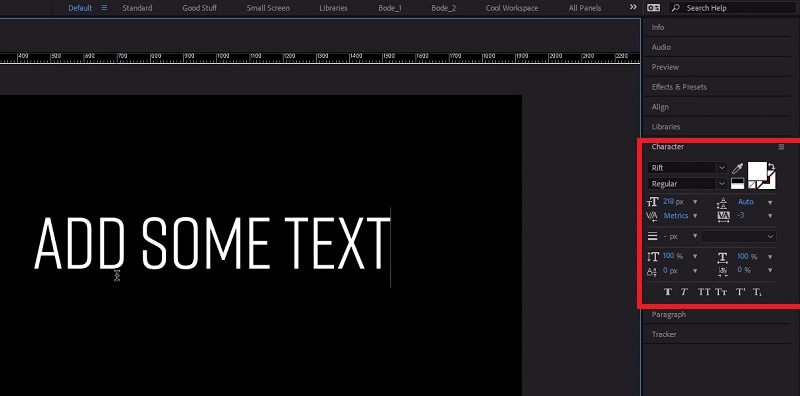
Step3The first option in the panel is the font of the text. By the side of the font is the text color. You can use the color picker tool to choose any color as per your preference.
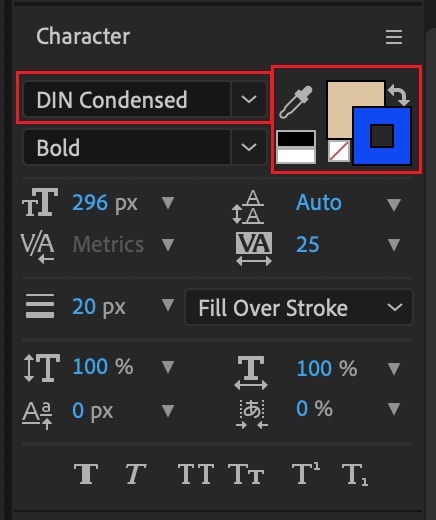
Step4Below the font, you can select the font style such as regular, bold, italics, and likewise. The subsequent part is to change the font size and adjust vertical spacing between lines and horizontal spacing between characters.
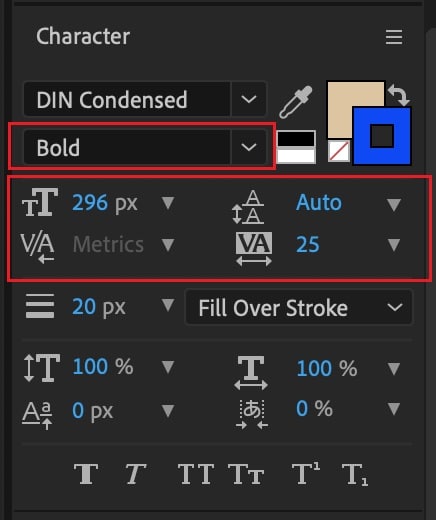
Step5The next section deals with Stroke option as well as fill the text option. You can fill the background of the text with any desired color.
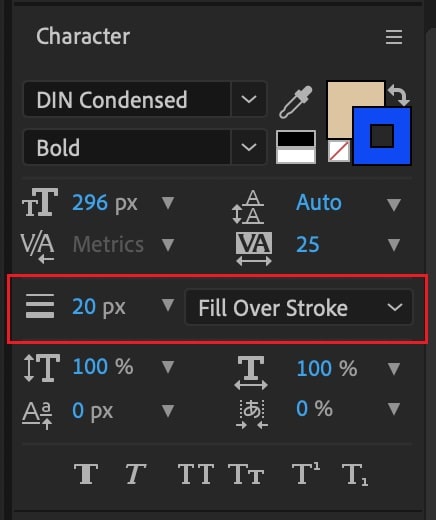
Part 3. Add Animated Text to Video with Animation Presets
Now that you have added a static text and set the text format as per your preference, it is time to animate the text. A static text in a video does not look appealing, and animated texts make the video eye-catching instantly. You can use text animation presets in After Effects to add animated text to video. Here are the steps to add animated text to video with animation presets and effects.
Step1Click on the text on your video that you want to animate. Go to Effects and Presets panel located on the right side.
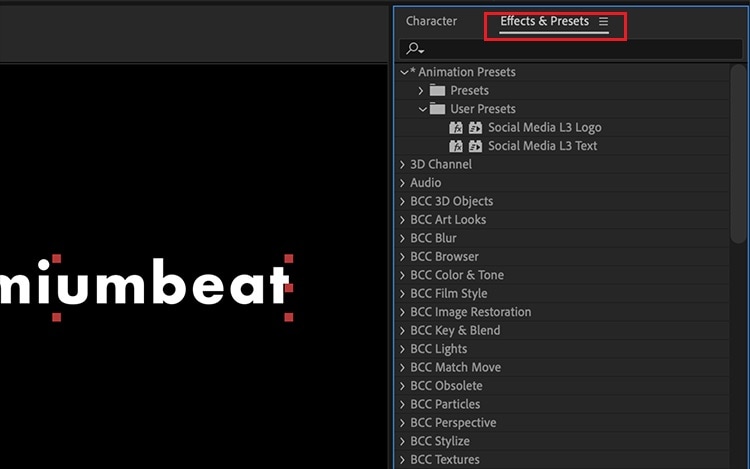
Step2Under Effects and Presets panel, Click on Text option. This will open all the different categories of animation presets available that you can apply to the text on your video.
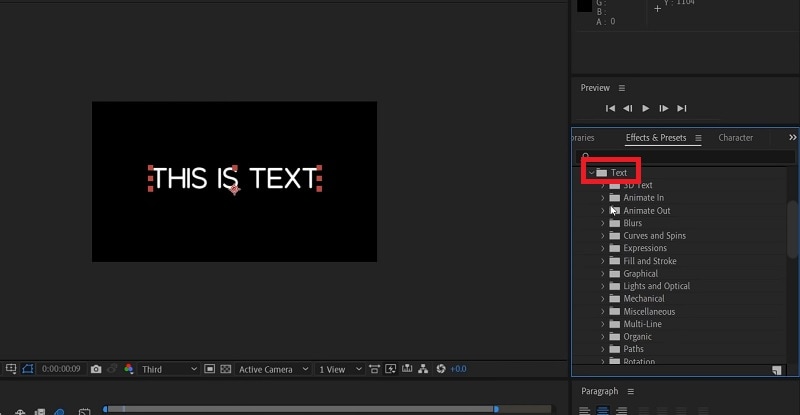
Step3Select any desired animation that you want to apply to the text and drag and drop the animation on the text in the composition window. Play the video and watch the applied animation on the text.
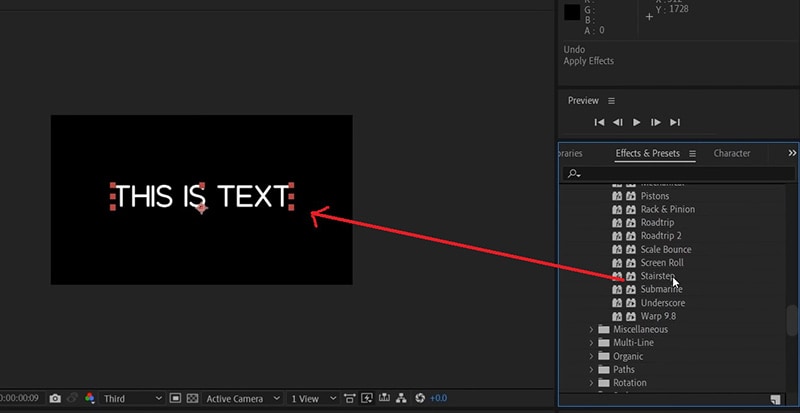
Part 4. Alternative Way to Add Text to Videos
If you are not comfortable with After Effects as a video editor, we recommend Wondershare as the best AE alternative. This is because the user interface of Filmora is super simple and there are loads of text effects and animations available to enhance your video content. Filmora is a professional video editor that is extremely popular among amateur and professional video editors. The application is available for both Windows and Mac users. Here are the steps for adding animated text to video using Filmora.
Step1Install Wondershare Filmora on your computer and launch the application. Click on New Project option on the welcome screen. Otherwise, you can go to File> New Project option.

Step2Go to File> Import Media> Import Media Files to import your video file. You can also drop the video file directly into Project Media folder.

Step3Drag and drop the video file from Project Media folder into the Timeline. If you have multiple video clips, you need to arrange them sequentially on the Timeline.
Step4To add text to your video, go to Titles located at the top bar. Check the left panel where you can see different categories of text effects. Select any desired text effect and drop into the Timeline. Make sure that the text layer is above the video layer on Timeline. You can shift the text layer on Timeline to place it where you want it to appear. You can also stretch the duration of the text effect as per your requirements.
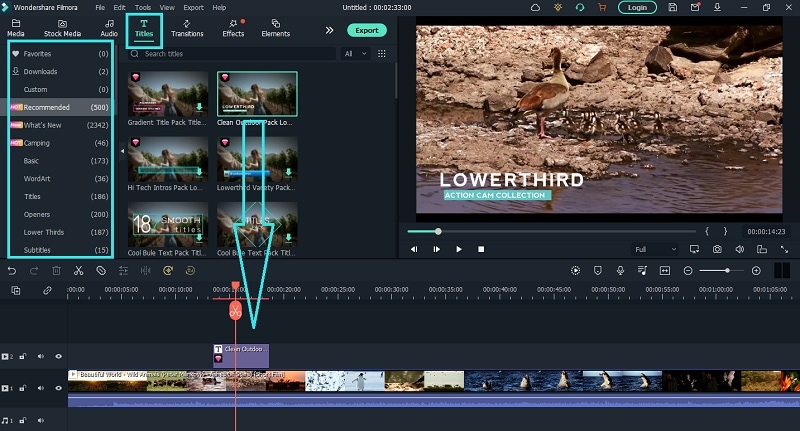
Step5You can edit the text effect by double clicking on the text layer on Timeline. Under Preset tab, you can change the text, font type and size, text color and much more. For further customization, you can click on Advanced button. At last, click on OK button to save the edits done.
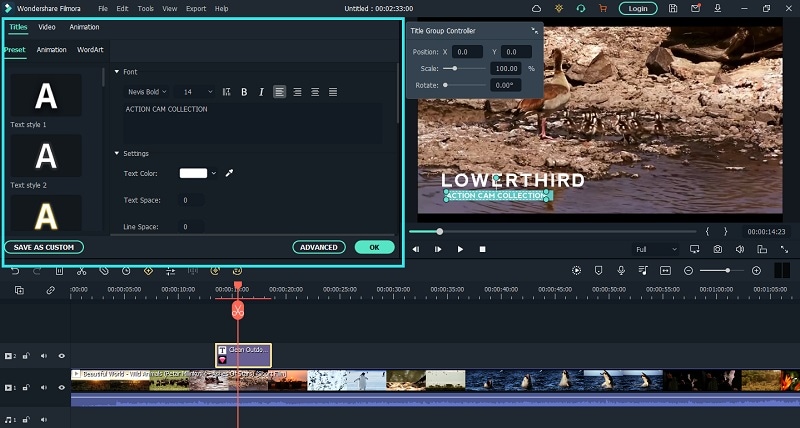
The Bottom Line
If you want to add animated text to photo and video, After Effects is a great editor you can use. We have illustrated how you can add text and customize the text and finally, animate it as per your preference. However, if you are looking for AE alternative, we recommend Wondershare Filmora where you can add text to video instantly and choose from a wide range of text effects and animations.
Free Download For Win 7 or later(64-bit)
Free Download For macOS 10.14 or later
Also read:
- Updated 2024 Approved Guide of 8 Photo Collage Apps for PC
- Want to Learn How to Make Gaming Montage Videos? You Have Come to the Right Place. This Guide Will Teach You All You Need to Know to Create Montages of Video Games and Share Them with Other Players
- New Have You Ever Applied the Gaussian Blur Effect to Your Videos? Read This Article to Find a Reliable and Convenient Tool to Generate the Gaussian Blur Effect
- In 2024, Top 8 AI Video Denoise Software
- Motion Blur Photo With GIMP Step-By-Step Guide
- 2024 Approved Detailed Tutorial to Rotate a Video in Cyberlink PowerDirector
- How To Add Motion Blur On CapCut? (IPhone & Android) for 2024
- Updated The Craziest 10 AI Editors Youve Seen
- Updated How I Got Free After Effects Templates Slideshow with Simple Trick for 2024
- Updated 2024 Approved Where To Find The Best Free Canon LUTs? Learn More
- Updated How To Make Transparent Background On Picsart for 2024
- New In 2024, 10 Best Video Editing Apps With Templates
- New How to Make a Countdown Video
- Updated How to Create Intro Video with Filmora for 2024
- Updated 2024 Approved Want to Immediately Know All About Discord GIF?
- Updated 8 Best Free Photo Collage with Music Video Maker
- In 2024, Top 10 Online And PC Cartoon Video Maker 2022 For Beginner
- Easy Steps to Add Miniature Effect to Videos for 2024
- Is GSM Flasher ADB Legit? Full Review To Bypass Your Samsung Galaxy A14 5G Phone FRP Lock
- Two Ways to Track My Boyfriends OnePlus Ace 2V without Him Knowing | Dr.fone
- 4 Ways to Fix Android Blue Screen of Death On Motorola G24 Power | Dr.fone
- In 2024, Dose Life360 Notify Me When Someone Checks My Location On Poco F5 5G? | Dr.fone
- Edit and Send Fake Location on Telegram For your Motorola Moto E13 in 3 Ways | Dr.fone
- In 2024, 5 Ways To Teach You To Transfer Files from Xiaomi Redmi K70 Pro to Other Android Devices Easily | Dr.fone
- Easy Ways to Manage Your Poco C51 Location Settings | Dr.fone
- Android Screen Stuck General Poco X5 Partly Screen Unresponsive | Dr.fone
- In 2024, 3 Ways to Erase Apple iPhone 6 Plus When Its Locked Within Seconds
- Full Guide to Bypass ZTE Axon 40 Lite FRP
- In 2024, A Working Guide For Pachirisu Pokemon Go Map On Motorola Moto G73 5G | Dr.fone
- In 2024, Android to Apple How To Transfer Photos From Samsung Galaxy Z Flip 5 to iPad Easily | Dr.fone
- 7 Solutions to Fix Error Code 963 on Google Play Of Realme 11X 5G | Dr.fone
- Title: Updated In 2024, AVI Editors for Windows 11/10/8.1/8/7 Easily Edit AVI Files on PC
- Author: Chloe
- Created at : 2024-04-24 07:08:40
- Updated at : 2024-04-25 07:08:40
- Link: https://ai-editing-video.techidaily.com/updated-in-2024-avi-editors-for-windows-11108187-easily-edit-avi-files-on-pc/
- License: This work is licensed under CC BY-NC-SA 4.0.
